

Hyundai IT IR Touch screen User Manual

Last update: 2011.08.11
HYUNDAI IT I R T o u c h screen
User Guide
[Note s ]
The information in this manual is subject to change without prior notice, and images used in this
manual may differ from the actual image
.
1

Contents
Chapter 1 Introduction of HYUNDAI IT Touch Software ..................................................................................... 4
1.1 Introduction/Main Function ............................................................................................................................. 4
1.2 Specification ............................................................................................................................................................ 5
Chapter 2 Installation & Running Program ............................................................................................................... 6
2.1 Cautions on Installation ..................................................................................................................................... 6
2.2 Recommended Specification ........................................................................................................................... 6
2.3 Program Installation ............................................................................................................................................ 7
2.4 Hardware Setup ................................................................................................................................................... 15
2.5 Uninstall Program ............................................................................................................................................... 15
2.6 Program Start ....................................................................................................................................................... 17
Chapter 3 Touch Screen Info & Activity Setting ................................................................................................... 23
3.1 Browsing Information of Touch Screen .................................................................................................... 23
3.2 Activity Mode Setup .......................................................................................................................................... 24
3.3 Multipoint Touch ................................................................................................................................................ 27
3.4 Option/Tools ......................................................................................................................................................... 28
3.5 Popup control ...................................................................................................................................................... 35
3.6 Popup control ...................................................................................................................................................... 36
3.7 Multi Monitor Display ....................................................................................................................................... 37
3.8 Cautions on Multi Monitor Setting ............................................................................................................ 43
- APPENDIX - ......................................................................................................................................................................... 44
APPENDIX 1 Caution on Windows 2000 .................................................................................................................. 44
APPENDIX 2 Cautions after Driver Installation ....................................................................................................... 44
APPENDIX 3 Basic Gestures on Windows 7 ............................................................................................................ 45
APPENDIX 4 Gesture Supporting Programs ............................................................................................................ 46
APPENDIX 5 Trouble Shooting ...................................................................................................................................... 47
5.1 Touch does not operation after installing the hardware drivers .................................................. 47
5.2 Hardware driver uninstall and manual installs ...................................................................................... 50
2

5.3 Caution when install driver ............................................................................................................................ 55
3

Chapter 1 Introduction of HYUNDAI IT Touch S o f t w a r e
1.1 Introduction/Main Function
H Y U N D A I I T Touch Driver is the software for the Infrared Touch Screen of H Y U N D A I I T Co., Ltd. It
provides full touch screen functionality for all software applications running under Microsoft Windows.
This version of HYUNDAI IT Touch Driver software for your HYUNDAI IT touch screen supports Serial,
USB controllers.
Once you install HYUNDAI IT Touch Driver, you can select, launch, and drag objects using the touch
screen. To make a selection, you simply touch the screen. It’s that easy and natural – just touch to
select.
H Y U N D A I I T Touch Driver Includes :
1.1.1 HYUNDAI IT T o u c h D r i v e r
H Y U N D A I I T Touch Driver is the software that the system uses to communicate with the touch
screen. The driver enables you to use the HYUNDAI IT touch screen with applications running in
Windows environments. You can run Windows programs and use touch (finger or pen) input without
any program modifications.
1.1.2 Touch screen Control Panel
For example, you can define the following preferences:
• Whether the touch action occurs when you touch the screen or when you lift your finger (or pen)
of f the s c reen
• Whether you hear a sound when you touch the screen
• How fast you need to touch to produce a double-click
• You can also use the control panel to calibrate the touch screen, to stabilize the cursor, and define
where the cursor appears relative to your touch (an offset)
1.1.3 Touch Click Control
Touch Click Control has the same function of Windows right mouse button. Any touch on the
monitor on which Right Button is running will produce a right button click.
1.1.4 Uninstalling HYUNDAI IT T o u c h D r i v e r
The Uninstall utility automatically deletes all H Y U N D A I I T Touch Driver components from your
computer and removes all HYUNDAI IT entries from the system files.
4

1.2 Specification
1.2.1 OS Support
• Serial Touch
Windows 98, Windows NT, Windows 2000, Windows XP
[Note s ] Serial Touch is supports Ver. 3.3.0.0 software only.
• U S B T o u c h
- 32 Bit
Windows 2000, Windows XP, Windows Vista, Windows 7
- 64 Bit
Windows XP, Windows Vista, Windows 7
1.2.2 Number of Monitor Supported
• 2 m onitors
1.2.3 Tablet PC and Windows 7 Compatibility
• T h e ‘Tablet PC Input Panel’ i s no t compatible with o ur T o u c h s c r e e n , but ‘On-screen keyboard’ is
working well.
• Panning with Inertia of t he basic features on the Windows 7 gesture is working on the Internet
Explorer only.
5

Chapter 2 Installation & Running Program
2.1 Cautions on Installation
2.1.1 Keeping in storage
• Keep within the specified temperature and humidity range.
• Keep inside the packing box.
• Do not place under direct sun light.
2.1.2 Handling
• Do not put any objects on the products.
• Cables should not be folded.
• Use soft cloth when cleaning.
• Be careful not to let any liquid go inside the products.
2.1.3 Assembly
• Do not force in excess when assembling. Distortion might cause malfunction.
• In case of using extension cable, electric power hub or repeater should be used at every
connection of 5M.
• Do not use screw that is longer than 4mm on the mounting hole of rear cover. Or it might
damage PCB inside.
2.2 Recommended Specification
2.2.1 PC Specification
• I BM PC Compatible
• Intel Celeron 1.6 GHz CPU
(For Mult i -p oint Touc h sc ree n - Core2 Duo 1.7 GHz CPU are recommended)
• Minim um 1 GB memo r y
• Microsoft Windows 2000, Windows XP, Windows Vista, Windows 7
• 6 MB free disk space
2.2.2 Installation
• The Installation way is based on Windows XP.
• Driver version is changeable.
6
2.3 Program Installation
Follow the below installation way, and connect (Plug-In) USB or Serial cable to PC.
2.3.1 Running program
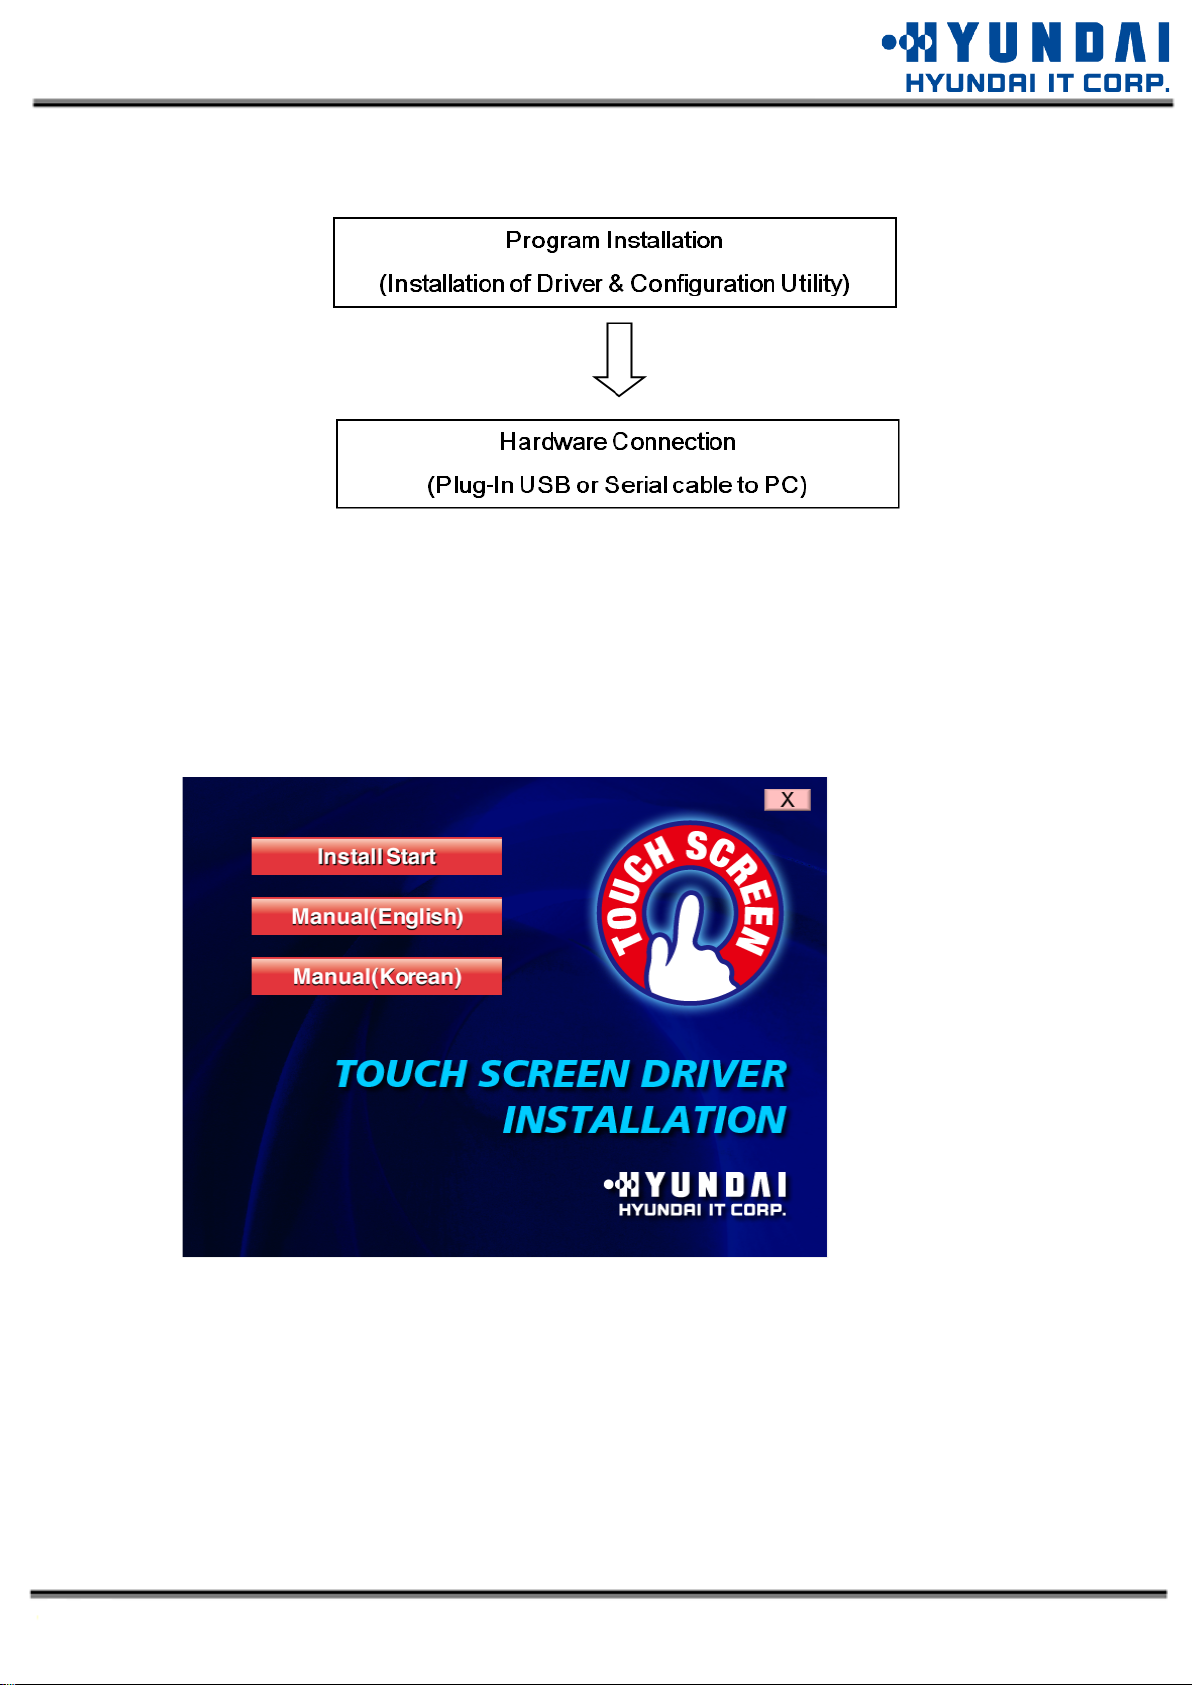
2.3.1.1 Auto Execution
• Will open below window when inserted setup CD then select [Install] to start installation.
7

[Note s ] Windows Vista
• Select “Ru n n x T C o n A u to Run.ex e ” in the AutoPlay window after inserting CD.
• Select proper OS version. Click [Continue] in “User Account Control” windo w.
[Note s ] Windows 7
• Select “Ru n n x T C o n A u to Run.ex e ” in the AutoPlay window after inserting CD.
• Select proper OS version. Click [Y e s ] i n “User Account Control” window.
8
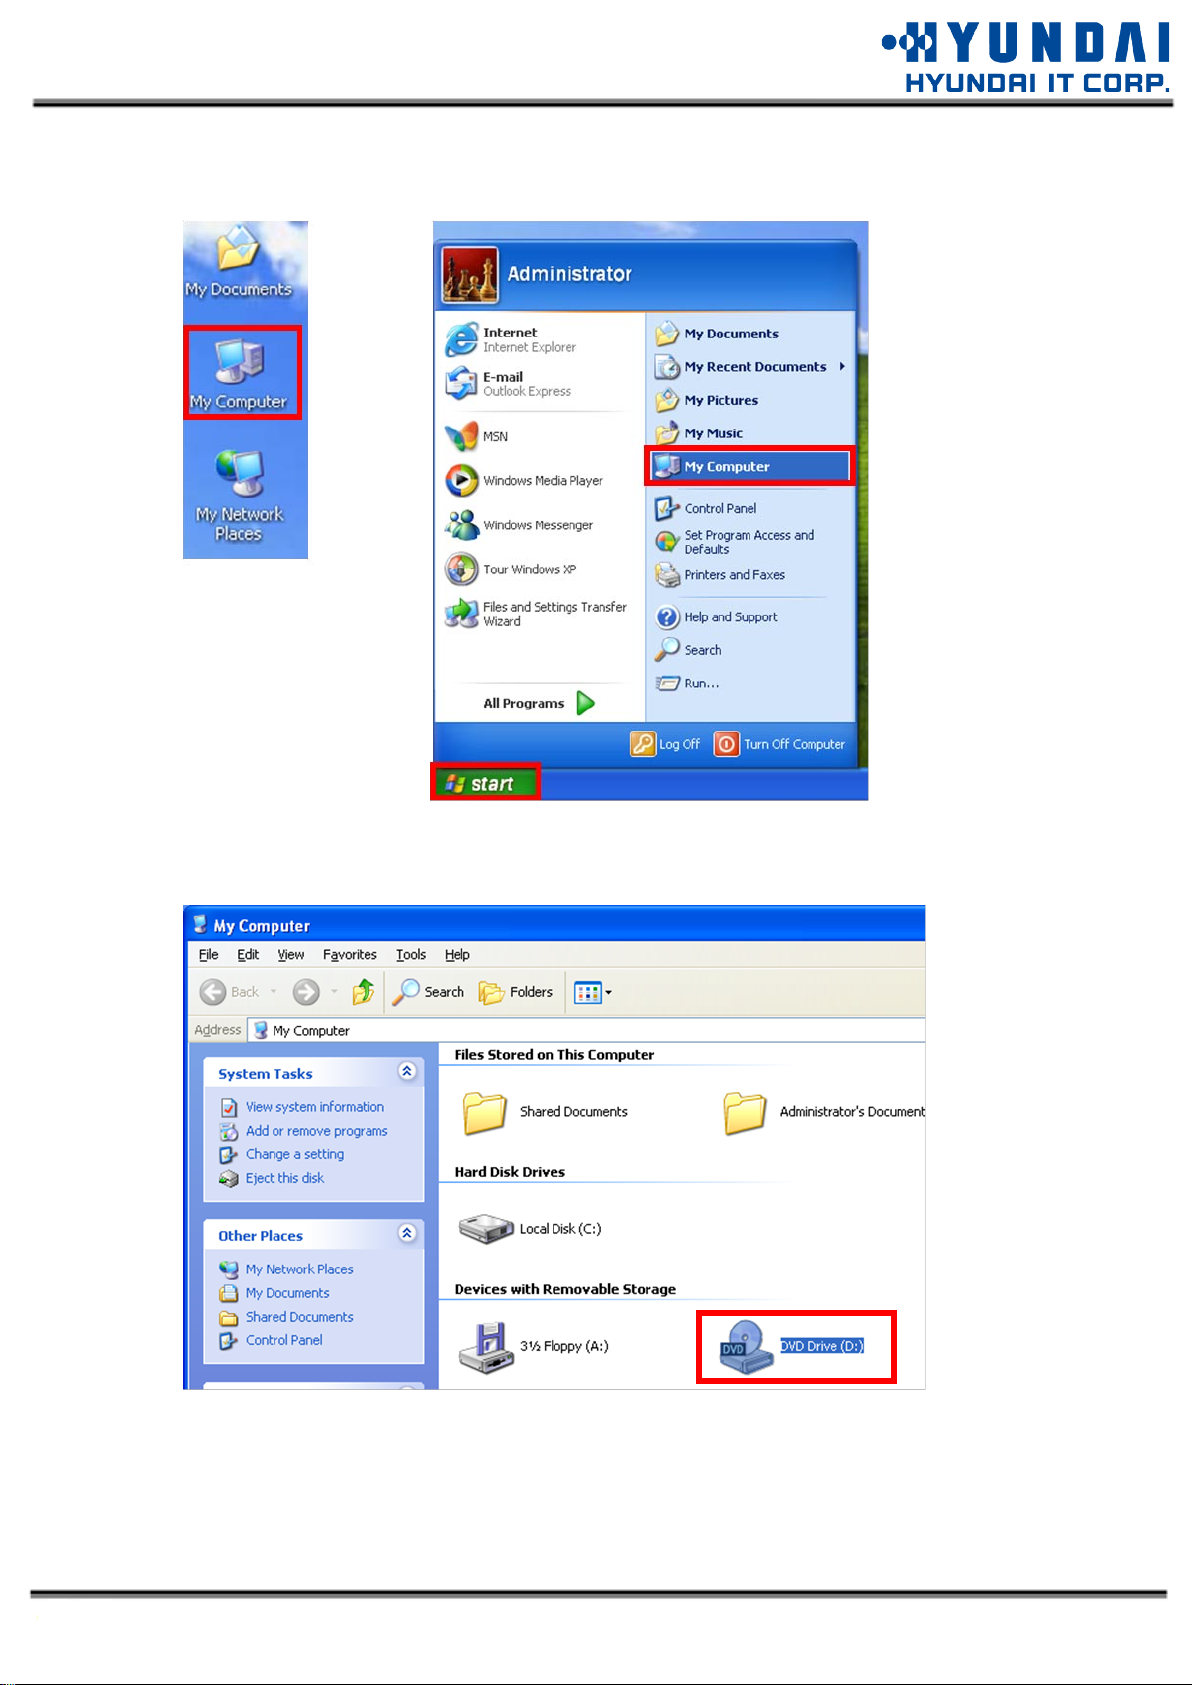
2.3.1.2 Manual Execution
1. Select [My Computer] i con at Desktop or Start menu.
2. Select “DVD or CD-R O M ” Driver on “My C omput e r ” w i ndow by inserted HYUNDAI IT D r iver
s e t u p C D .
9
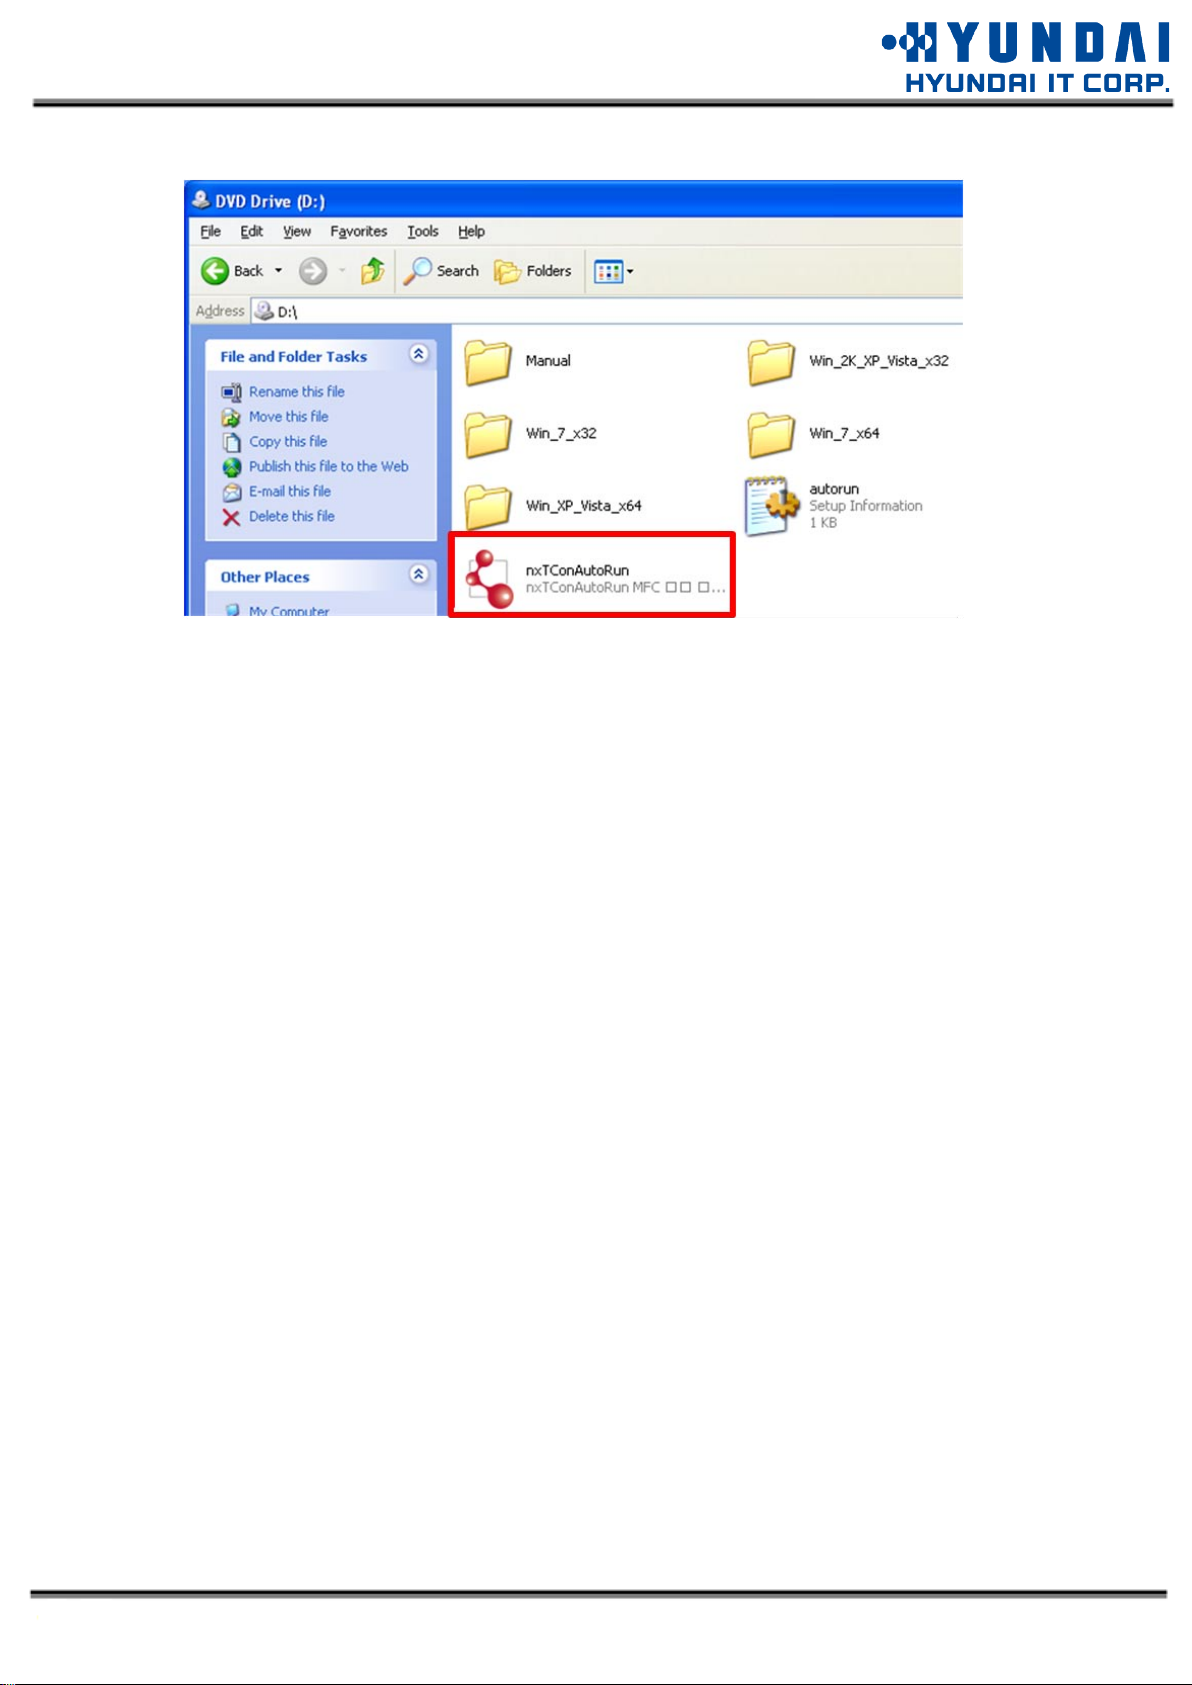
3. Execute [n x T C o n A utoRu n.ex e ] on “DVD or CD-R O M ” D r i v e r .
10
2.3.2 Installation
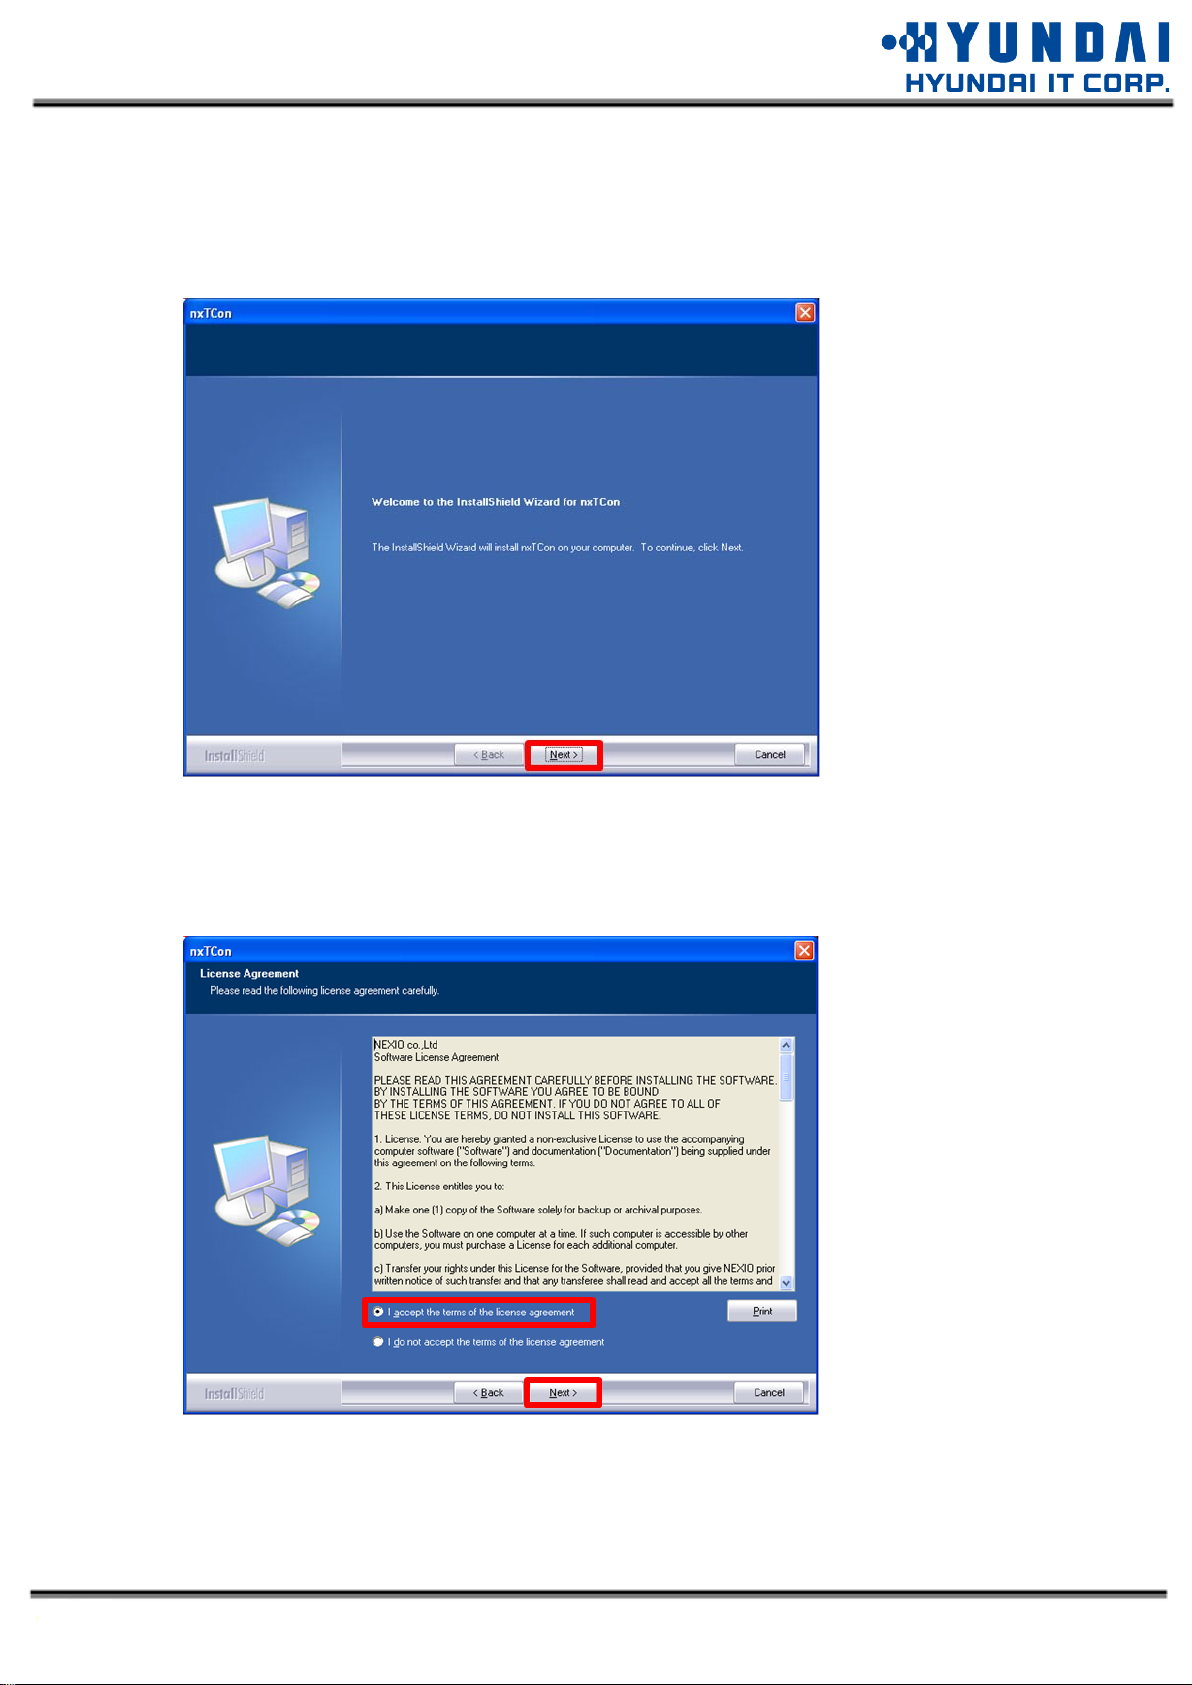
2.3.2.1 Start Installation
Click [ Nex t ]
2.3.2.2 License Agreement
If you want to keep progress after reading the License Agreement, Select “I accept the terms of
license agreement”, click [Next].
11

2.3.2.3 Selecting Destination Folder
Click [Browse] to designate the folder, Click [ N e xt]
2.3.2.4 Selecting Program Folder
After selecting the program folder, click [Next]
12
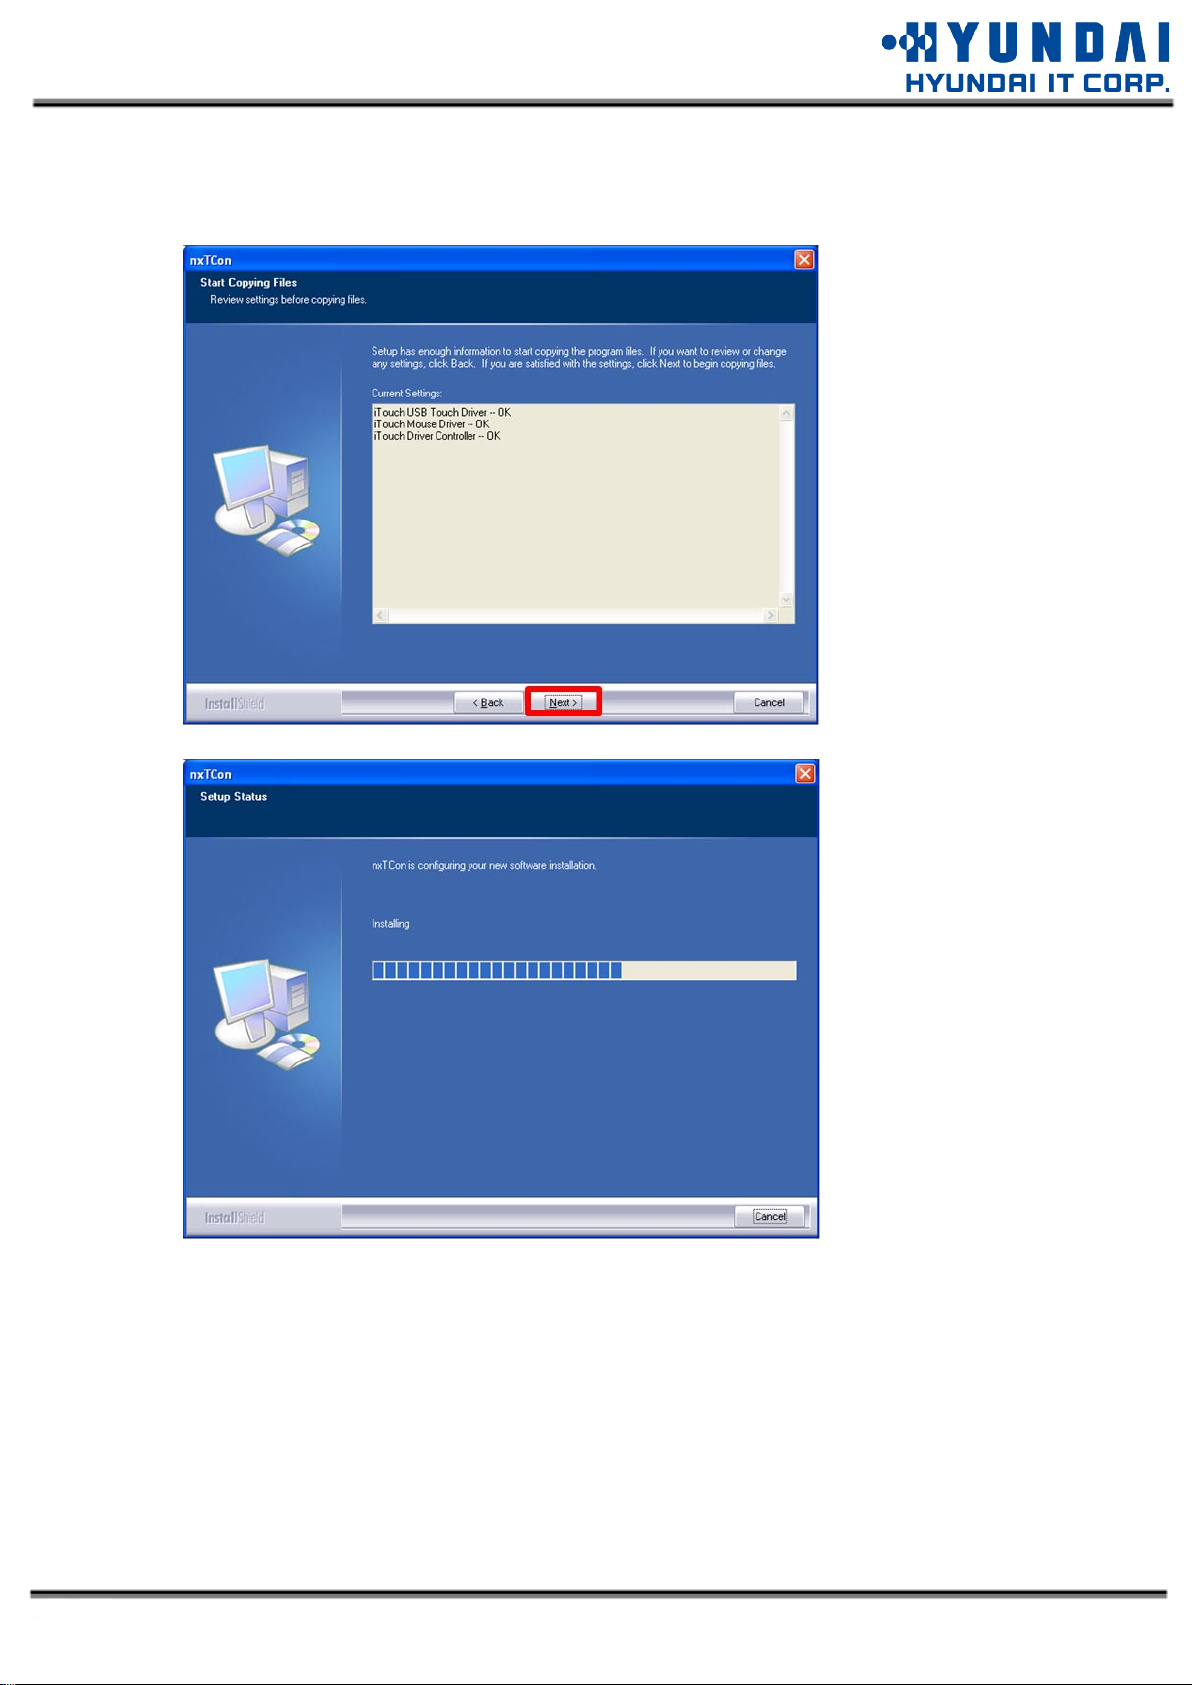
2.3.2.5 Files Copy
Click [Next] and files copy starts.
13
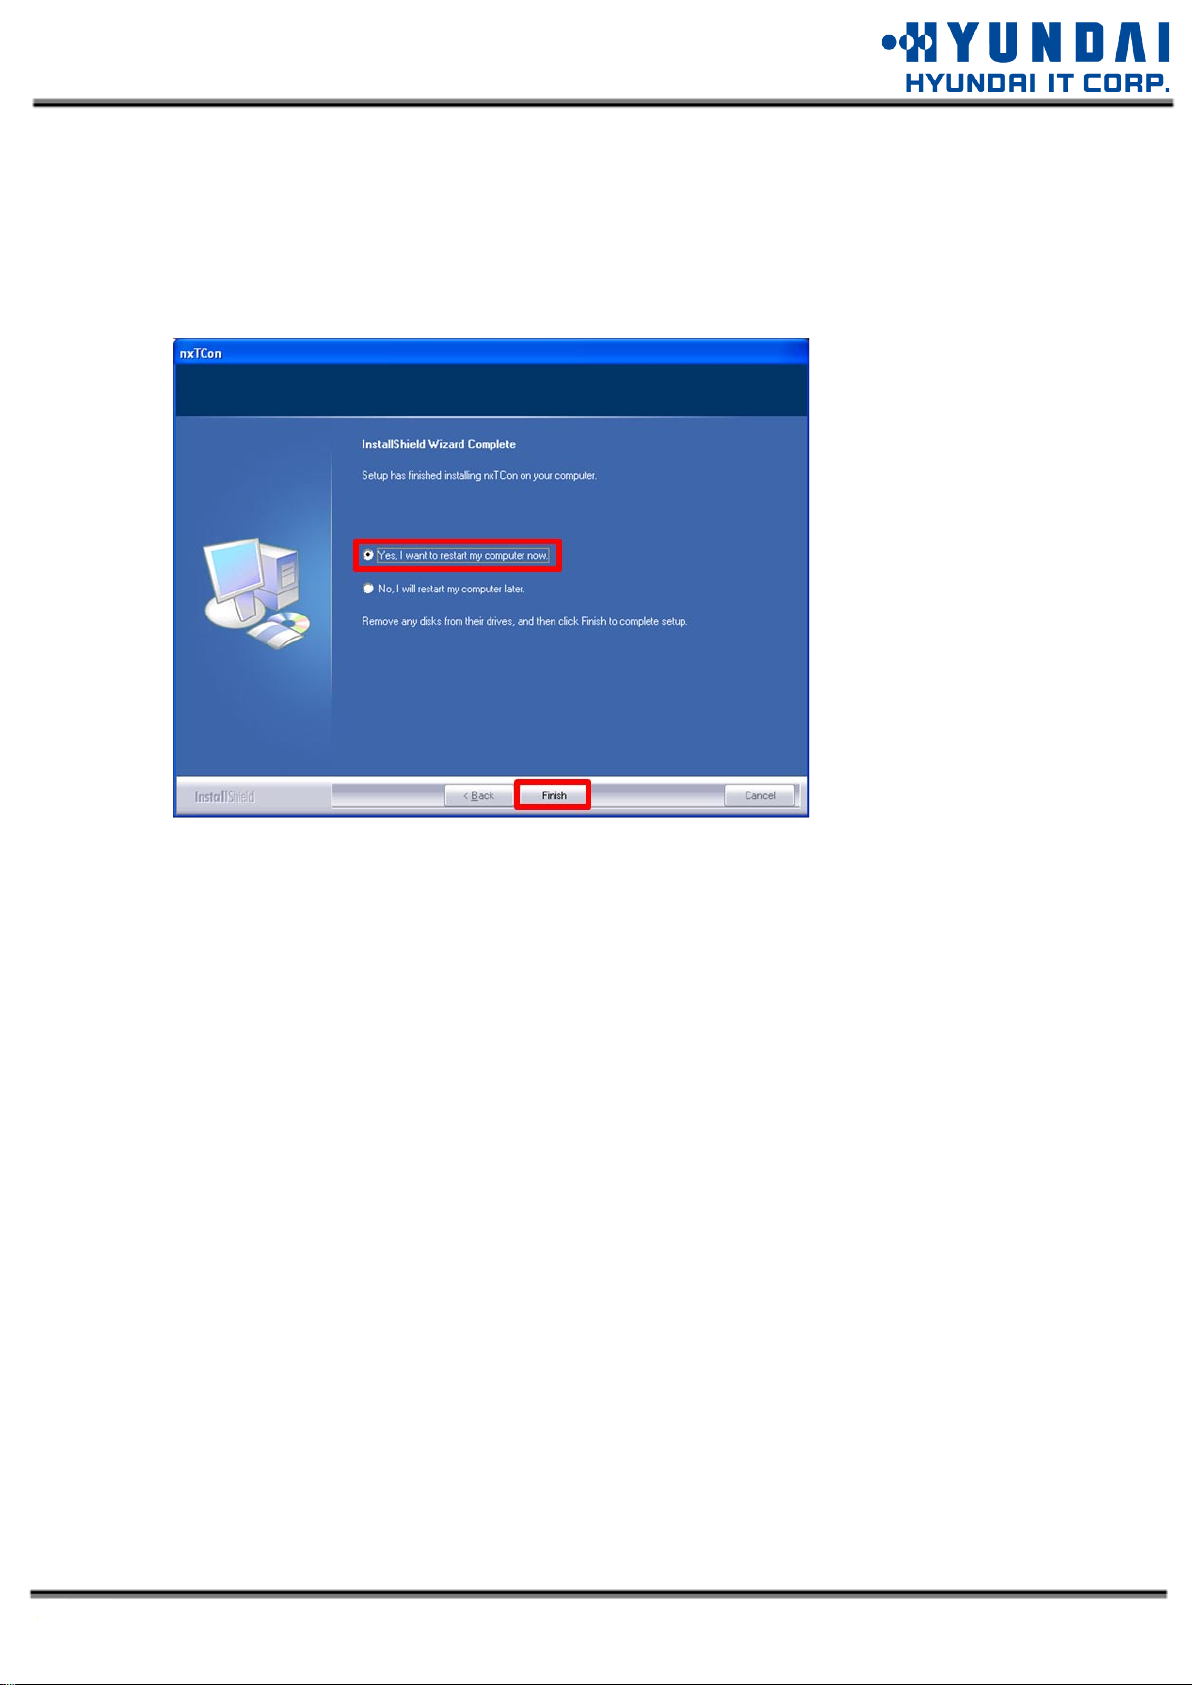
2.3.2.6 Complete Installation
1. Remove ‘H Y U N D A I I T setup CD-R O M ’ from drive, when the below window appears.
2. Select “Yes, I want to restart my computer now.
3. Click [Finish] to restart PC. (Recommended)
14

2.4 Hardware Setup
2.4.1 Hardware Auto Installation
2.4.1.1 Hardware Connection
Plug-in Touch Screen to PC ports after restart your system.
H a r d w a r e installations will automatically w hen notifications on taskbar as below appear.
2.5 Uninstall Program
1. Click “Uninstall n x T C o n ” at start menu
15
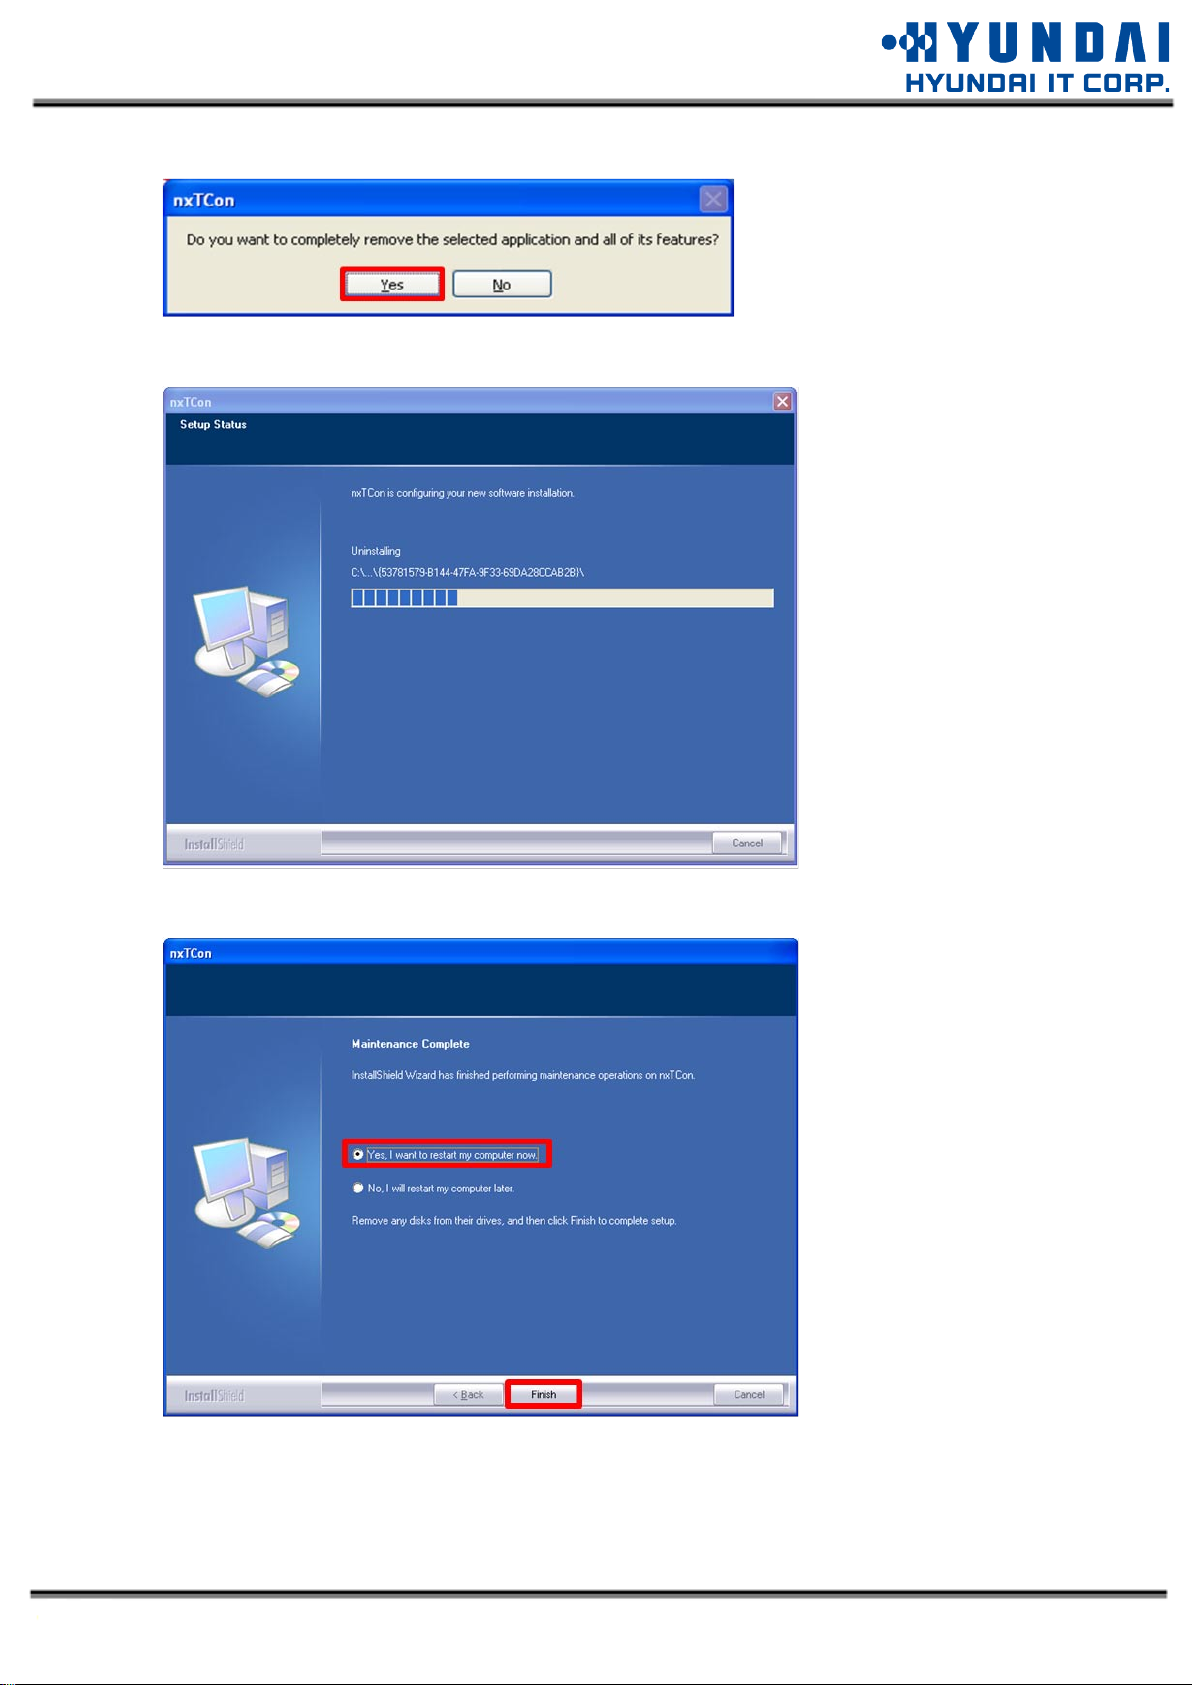
2. C l i c k [ Y e s ]
3. Uninstall in progress
4. Select “Yes, I want to restar t my computer now.” Click [Finish] to restart PC (Recommended)
16
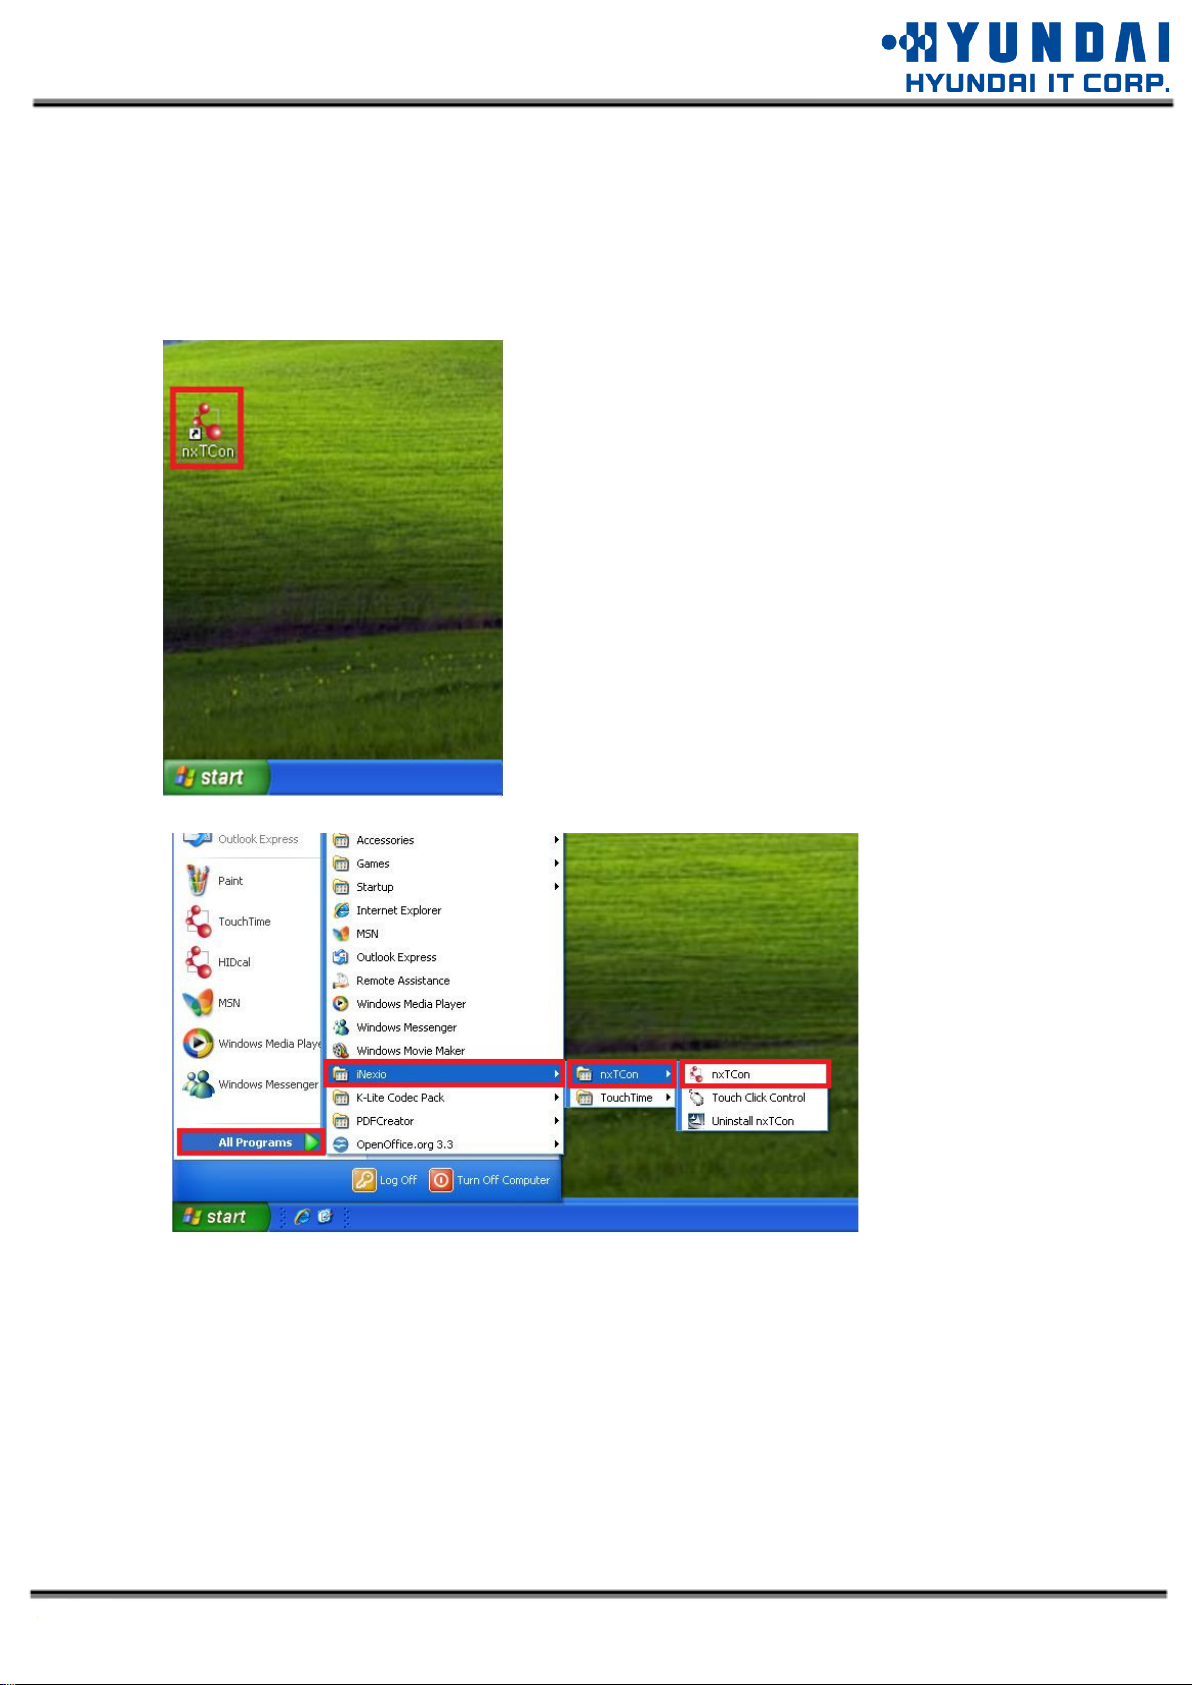
2.6 Program Start
2.6.1 Execute on Windows XP
Click “n x T C o n ” icon on screen or “n x T C o n ” at star t menu to run the driver program
17
 Loading...