

Model # 3360VR, 3360VR-333, 4034, *4034A, 6560
Recommended Installation, Maintenance
and Inspection Instructions
Vapor Recovery Reconnectable Safe-T-Break
Important safety InstructIons - save these InstructIons In a readIly accessIble locatIon.
®
WARNING This device separates at less than 200 lbf / 889.6 N pull force!
INSTALLATION INSTRUCTIONS
NOTE: Prior to installation, it shall be determined that such pull force will not damage the hose assembly or dispensing device. The
dispensing device must be securely bolted to dispensing island.
1. Turn off dispenser and relieve line pressure.
2. Attach scale to where the Safe-T-Break® will be installed. Apply 200 lbf / 889.6 N pull force at
various angles then check dispenser and hose for damage. Refer to UL 567 for details. If no
damage occurred, release pull and complete installation.
3. Install Safe-T-Break® in the direction of the ow arrows.
4. Do not use pipe sealant (Teon tape, anti-seize, or any other kind of sealant).
5. Tighten rmly, approximately 15 - 20 lbf•ft / 20.3 - 27 N•m, but do not overtighten.
6. High hose dispenser – Install the Safe-T-Break® between the hose sections. Verify that the whip
hose is the correct length.
7. Low hose dispenser – Install the Safe-T-Break® down stream of any hose retractor cable coupling.
DO NOT OVERTIGHTEN. DO NOT WRENCH ACROSS COUPLING.
DO NOT INSTALL DIRECTLY TO THE DISPENSER.
IF SEPARATION OCCURS
• Turn off dispenser and relieve line pressure.
• Before Reconnecting:
▪ Inspect entire dispensing system and Safe-T-Break® for damage.
▪ Conduct pull test for dispenser integrity (see step 2 of installation instructions above).
▪ Lubricate seal and valve halves with light weight motor oil.
• Reconnecting
▪ Align hexes and push the two halves together applying pressure until the two halves snap back together.
▪ Replace Safe-T-Break® if doesn't readily reconnect.
• After Reconnected:
▪ Check Safe-T-Break® for proper engagement.
▪ Check for electrical conductivity.
▪ Check for leaks at Safe-T-Break®.
▪ Check for meter creep leakage per California Department of Food and Agriculture Device Enforcement
Manual, EPO #26-A-4 thru #26-A-5 Section 1.
▪ Check for proper ow of fuel.
▪ Conduct vapor leak test.
• Refer to city, state and federal requirements for vapor integrity testing requirements.
ONLY PROPERLY TRAINED PERSONNEL SHOULD RECONNECT SAFE-T-BREAKS®.
TESTING / MAINTENANCE / INSPECTION
Daily
• Check for leaks / stains.
• Check for damage.
Monthly
• Check "remove after" date.
Annually
• Conduct pull test – disconnect, inspect
interior for debris, discoloration, and
foreign matter.
• Conduct vapor leak test.
Husky Corporation • 2325 Husky Way • Pacic, MO 63069 • Phone: (800) 325-3558 • Fax: (636) 825-7300 • www.husky.com
• All drive aways, maintenance and inspection
activities must be logged using the serial
number of the individual product.
• Apply city, state, or federal testing
regulations as appropriate.
ANY TEST / INSPECTION FAILURE
REQUIRES IMMEDIATE EQUIPMENT
REPLACEMENT OR REMOVAL FROM
SERVICE.
MADE IN THE USA
Page 1 009054-7 4/2012
Vapor STB
ALWAYS ADHERE TO INSTALLATION / USAGE INSTRUCTIONS AND WARNINGS.
Improper use may result in injury, damage, or hazardous spill.
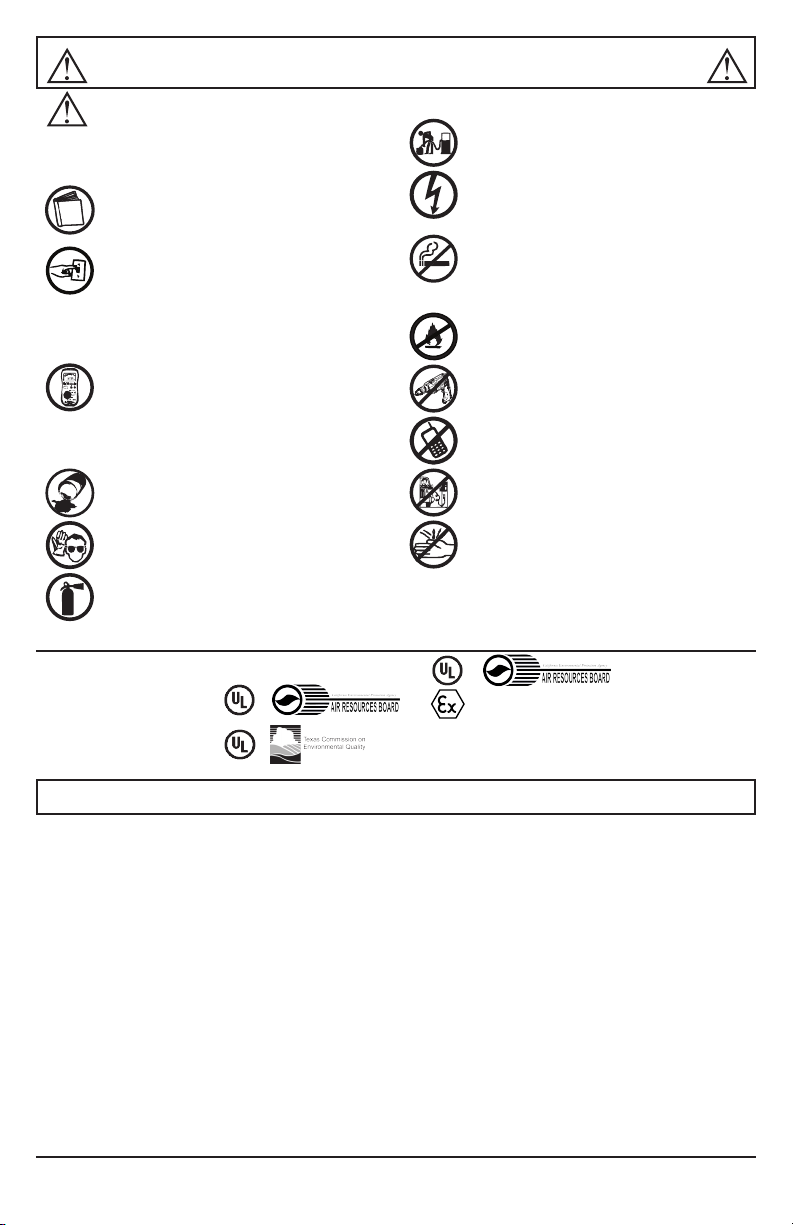
GENERAL WARNINGS / INSTRUCTIONS PERTAINING TO A RISK OF FIRE, ELECTRIC
SHOCK OR INJURY TO PERSONS:
• Use of equipment is at individuals’ own risk.
• Always abide and adhere to city, state, and federal
regulations regarding use and
installation of dispensing equipment.
• Always follow the product manufacturer’s
installation and maintenance instructions.
• Always turn off all power to dispenser
during maintenance and inspection activities.
• Always close the shear valves during
maintenance and inspection activities.
• Always relieve pressure from system prior
to performing maintenance activities.
• Always check continuity after installation
using a megohmeter (Refer to PEI RP 400
for details).
• Always replace or remove from service
damaged or leaking dispensing equipment
immediately.
• Always report leaks / spills / accidents
to appropriate authorities.
• Always wear appropriate safety equipment
during maintenance activities.
• Always have appropriate re extinguishing
equipment within 5 ft / 1.5 m of dispensers.
• Never use pipe sealant (Teon tape, anti-seize or
any other kind of sealant).
• Always place containers on the ground
before lling.
• Always discharge static electricity before
using or servicing equipment by touching
a metal part of the dispenser before and
after fueling vehicle.
• Never smoke within 20 ft / 6.1 m of dispensers.
• Never keep in service past recommended life.
• Never leave the nozzle unattended while
dispensing fuel.
• Never use sparking or aming devices within
20 ft / 6.1 m of dispensers.
• Never use power tools near dispensers or
to aid in the installation process.
• Never use cell phone within 20 ft / 6.1 m of
dispensers.
• Never reenter car when fueling vehicle.
• Never allow gasoline to touch eyes or skin.
• Never use at ow rates in excess of
regulatory guidelines.
• Never use at ow rates less than 5 gpm /
18.9 Lpm.
• Never dispense ammable material into
unapproved containers.
• Never dispense fuel without a valid
driver’s license.
Listings: 4034, 3360VR & 3360VR-333 =
MODEL: *4034A =
6560 =
*II 1 G
EN 13617-2
TYPE 2
Important safety InstructIons - save these InstructIons In a readIly accessIble locatIon.
WARRANTY
VAPOR PRODUCTS – Husky Corporation will, at its option, repair, replace, or credit the purchase price of any Husky
manufactured product which proves upon examination by Husky, to be defective in material and/or workmanship for a period of one (1)
year of installation or fteen (15) months from the manufacture date of shipment by Husky, whichever occurs rst. The warranty period on
repaired or replacement vapor recovery products is only for the remainder of the warranty period of the defective product.
CONVENTIONAL PRODUCTS – Husky Corporation will, at its option, repair, replace, or credit the purchase price of any Husky
manufactured product which proves upon examination by Husky, to be defective in material and/or workmanship for a period of one (1)
year from the manufacture date of shipment by Husky.
Buyer must return the products to Husky, transportation charges prepaid. This Warranty excludes the replaceable bellows,
bellows spring assembly, spout assembly and scuff guard, unless (i) damage is obvious when the product is removed from shipping carton
and (ii) the defective product is returned to Husky prior to use. This Warranty does not apply to equipment or parts which have been installed
improperly, damaged by misuse, improper operation or maintenance, or which are altered or repaired in any way.
The Warranty provisions contained herein apply only to original purchasers who use the equipment for commercial or
industrial purposes. There are no other warranties of merchantability, tness for a particular purpose, or otherwise, and any other such
warranties are hereby specically disclaimed.
Husky assumes no liability for labor charges or other costs incurred by Buyer incidental to the service, adjustment, repair, return,
removal or replacement of products. Husky assumes no liability for any incidental, consequential, or other damages under any warranty,
express or implied, and all such liability is hereby expressly excluded.
Husky reserves the right to change or improve the design of any Husky fuel dispensing equipment without assuming any
obligations to modify any fuel dispensing equipment previously manufactured.
Husky Corporation • 2325 Husky Way • Pacic, MO 63069 • Phone: (800) 325-3558 • Fax: (636) 825-7300 • www.husky.com
Page 2 009054-7 4/2012

MODEL #*5134A & 6210
Recommended Installation, Maintenance
and Inspection Instructions
VacAssist Single-Use Safe-T-Break
Important safety InstructIons - save these InstructIons In a readIly accessIble locatIon.
®
*5134A
WARNING This device separates at less than 200 lbf / 889.6 N pull force!
INSTALLATION INSTRUCTIONS
NOTE: Prior to installation, it shall be determined that such pull force will not damage the hose assembly or
dispensing device. The dispensing device must be securely bolted to dispensing island.
1. Turn off dispenser and relieve line pressure.
2. Attach scale to where the Safe-T-Break® will be installed. Apply 200 lbf /
889.6 N pull force using the approved 6 angle pull test then check dispenser and
hose for damage. Refer to UL 567 for details. If no damage occurred, release pull and
complete installation.
3. Install Safe-T-Break® in the direction of the ow arrows.
4. Do not use thread sealant (Teon tape, anti-seize or any other kind of sealant).
5. Tighten rmly but do not overtighten. Refer to UL 567 for details.
6. High hose dispenser – Install the Safe-T-Break® between the hose sections. Verify that
the whip hose is the correct length.
7. Low hose dispenser – Install the Safe-T-Break® down stream of any hose retractor
cable coupling.
DO NOT OVERTIGHTEN. DO NOT WRENCH ACROSS COUPLING.
DO NOT INSTALL DIRECTLY TO THE DISPENSER.
IF SEPARATION OCCURS
• Turn off dispenser and relieve line pressure.
• Conduct pull test for dispenser integrity (see Step 2 of Installation Instructions
above).
• Replace Safe-T-Break
• Refer to city, state and federal requirements for vapor integrity testing requirements.
• Check for electrical conductivity.
• Check for meter creep leakage per California Department of Food and Agriculture
Device Enforcement Manual, EPO #26-A-4 thru #26-A-5 Section 1.
• Check for proper ow of fuel.
®
-- do not reinstall.
& 6210
TESTING / MAINTENANCE / INSPECTION
Daily
• Check for leaks / stains.
• Check for damage.
Monthly
• Check "remove after" date.
Annually
• Never keep in service past
recommended life.
Husky Corporation • 2325 Husky Way • Pacic, MO 63069 • Phone: (800) 325-3558 • Fax: (636) 825-7300 • www.husky.com
• All drive aways, maintenance and
inspection activities must be logged
using the serial number of the
individual product
• Apply city, state, or federal testing
regulations as appropriate.
ANY TEST / INSPECTION FAILURE
REQUIRES IMMEDIATE
EQUIPMENT REPLACEMENT OR
REMOVAL FROM SERVICE.
MADE IN THE USA
Page 1 009198-4 4/2012

ALWAYS ADHERE TO INSTALLATION / USAGE INSTRUCTIONS AND WARNINGS.
Improper use may result in injury, damage, or hazardous spill.
GENERAL WARNINGS / INSTRUCTIONS PERTAINING TO A RISK OF FIRE, ELECTRIC
SHOCK OR INJURY TO PERSONS:
• Use of equipment is at individuals’ own risk.
• Always abide and adhere to city, state,
and federal regulations regarding use and
installation of dispensing equipment.
• Always follow the product manufacturer’s
installation and maintenance instructions.
• Always turn off all power to dispenser
during maintenance and inspection
activities.
• Always close the shear valves during
maintenance and inspection activities.
• Always relieve pressure from system prior to
performing maintenance activities.
• Always check continuity after installation
using a megohmeter (Refer to PEI RP 400
for details).
• Always replace or remove from service
damaged or leaking dispensing equipment
immediately.
• Always report leaks / spills / accidents
to appropriate authorities.
• Always wear appropriate safety equipment
during maintenance activities.
• Always have appropriate re extinguishing
equipment within 5 ft / 1.5 m of dispensers.
• Never use thread sealant (Teon tape, antiseize or any other kine of sealant).
• Always place containers on the ground
before lling.
• Always discharge static electricity before
using or servicing equipment by touching
a metal part of the dispenser before and
after fueling vehicle.
• Never smoke within 20 ft / 6.1 m of
dispensers.
• Never keep in service past recommended
life.
• Never leave the nozzle unattended while
dispensing fuel.
• Never use sparking or aming devices
within 20 ft / 6.1 m of dispensers.
• Never use power tools near dispensers or
to aid in the installation process.
• Never use cell phone within 20 ft / 6.1 m of
dispensers.
• Never reenter car when fueling vehicle.
• Never allow gasoline to touch eyes or skin.
• Never use at ow rates in excess of
regulatory guidelines.
• Never use at ow rates less than 5 gpm /
18.9 Lpm.
• Never dispense ammable material into
unapproved containers.
• Never dispense fuel without a valid
driver’s license.
Listings Model #*5134A: Model #6210:
*II 1 G
EN 13617-2
TYPE 2
Important safety InstructIons - save these InstructIons In a readIly accessIble locatIon.
WARRANTY
VAPOR PRODUCTS – Husky Corporation will, at its option, repair, replace, or credit the purchase price of any Husky
manufactured product which proves upon examination by Husky, to be defective in material and/or workmanship for a period of one (1)
year of installation or fteen (15) months from the manufacture date of shipment by Husky, whichever occurs rst. The warranty period on
repaired or replacement vapor recovery products is only for the remainder of the warranty period of the defective product.
CONVENTIONAL PRODUCTS – Husky Corporation will, at its option, repair, replace, or credit the purchase price of any Husky
manufactured product which proves upon examination by Husky, to be defective in material and/or workmanship for a period of one (1)
year from the manufacture date of shipment by Husky.
Buyer must return the products to Husky, transportation charges prepaid. This Warranty excludes the replaceable bellows,
bellows spring assembly, spout assembly and scuff guard, unless (i) damage is obvious when the product is removed from shipping carton
and (ii) the defective product is returned to Husky prior to use. This Warranty does not apply to equipment or parts which have been installed
improperly, damaged by misuse, improper operation or maintenance, or which are altered or repaired in any way.
The Warranty provisions contained herein apply only to original purchasers who use the equipment for commercial or
industrial purposes. There are no other warranties of merchantability, tness for a particular purpose, or otherwise, and any other such
warranties are hereby specically disclaimed.
Husky assumes no liability for labor charges or other costs incurred by Buyer incidental to the service, adjustment, repair, return,
removal or replacement of products. Husky assumes no liability for any incidental, consequential, or other damages under any warranty,
express or implied, and all such liability is hereby expressly excluded.
Husky reserves the right to change or improve the design of any Husky fuel dispensing equipment without assuming any
obligations to modify any fuel dispensing equipment previously manufactured.
Husky Corporation • 2325 Husky Way • Pacic, MO 63069 • Phone: (800) 325-3558 • Fax: (636) 825-7300 • www.husky.com
Page 2 009198-4 4/2012
 Loading...