

Humanscale Cinto Dolly User Manual

www.humanscale.com
Cinto Dolly Assembly Instructions
HSCDI1109
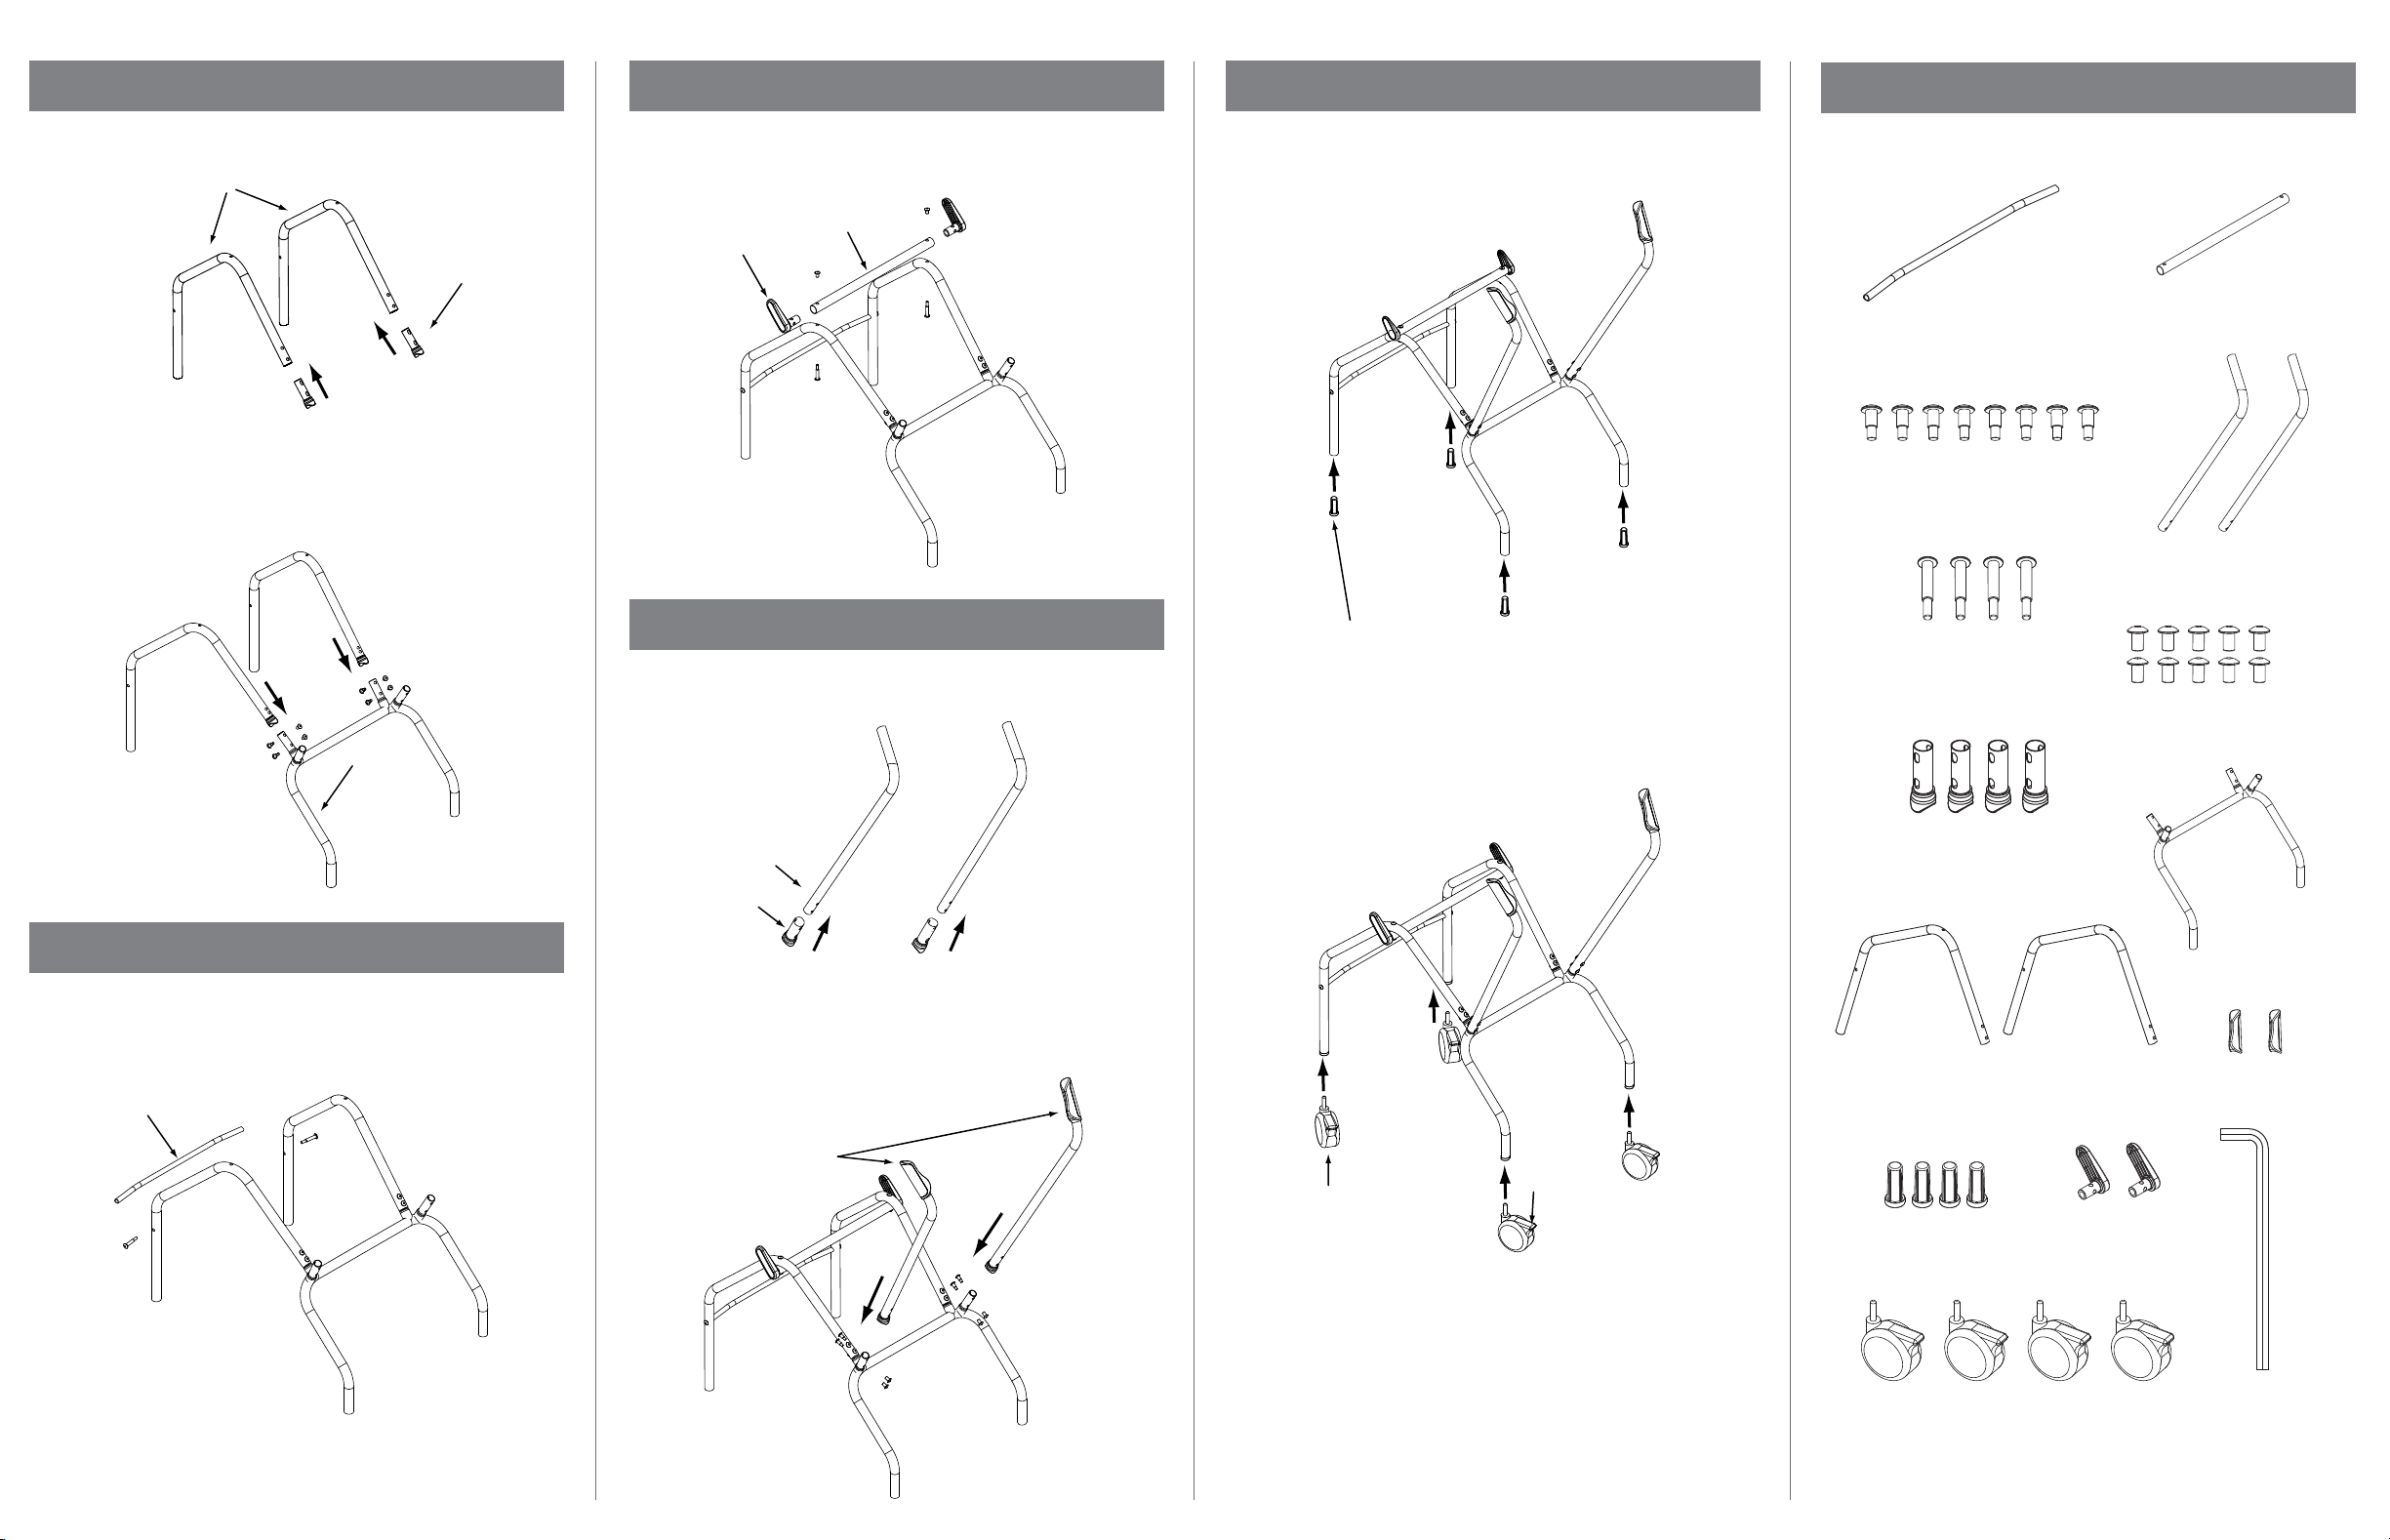
STEP 1: ATTACH FRONT LEGS TO BACK FRAME
STEP 3: ATTACH CHAIR GUIDES
STEP 5: ATTACH CASTERS
ASSEMBLY HARDWARE
Insert 2 Plastic Bushings (A) into Front Legs (B). Align holes.
B
A
Slide Front Legs onto Back Frame (C). Fasten using 4 Small
Assembly Screws and Fasteners.
Note: Be sure holes are perfectly aligned before inserting
screws and fasteners.
Insert Chair Guides (A) into the ends of Top Crossbar (B). Align
holes, then fasten Top Crossbar to Front Legs using 2 Large
Assembly Screws and Fasteners.
B
A
STEP 4: ATTACH HANDLES
Insert 2 Plastic Bushings (A) into Handles (B). Align holes.
Insert Caster Stems (A) into the ends of Cinto Dolly legs. This
may take some force. Use a hammer or mallet if necessary.
A
Insert Casters (B) into Caster Stems. Be sure Casters with
locking mechanisms (C) are in the back.
Front Crossbar Top Crossbar
8 Small Assembly Screws
2 Handles
4 Large Assembly Screws
10 Fasteners
C
STEP 2: ATTACH FRONT CROSSBAR TO FRONT LEGS
Fasten Front Crossbar (A) to Front Legs with 2 Large
Assembly Screws.
A
B
A
Slide Handles onto Back Frame and fasten with 4 Small
Assembly Screws and Fasteners. Slip Grips (C) onto Handles.
Note: Be sure holes are perfectly aligned before inserting
screws and fasteners.
C
4 Plastic Bushings
Back Frame
2 Front Legs
B
C
4 Caster Stems
2 Chair Guides
2 Grips
4 Casters
2 Hex Keys (4mm)
 Loading...