

Huawei H3CSOHOXDR8X4G Users Manual

HUAWEI
Aolynk VDR824 ADSL2+ VoIP Broadband Router/
Aolynk VDR824g ADSL2+ VoIP Wireless Broadband Router
User Manual

FCC Caution:
1. This device complies with Part 15 of the FCC rules. Operation is subject to the
following two conditions:
(1) This device may not cause harmful interference, and
(2) This device must accept any interference received, including interference that may
cause undesired operation.
2. This device and its antenna(s) must not be co-located or operating in conjunction
with any other antenna or transmitter.
3. Changes or modifications to this unit not expressly approved by the party responsible
for compliance could void the user authority to operate the equipment.
4. This equipment has been tested and found to comply with the limits for a Class B
digital device, pursuant to Part 15 of the FCC Rules. These limits are designed to
provide reasonable protection against harmful interference in a residential installation.
This equipment generates, uses and can radiate radio frequency energy and, if not
installed and used in accordance with the instructions, may cause harmful interference
to radio communications. However, there is no guarantee that interference will not
occur in a particular installation. If this equipment does cause harmful interference to
radio or television reception, which can be determined by turning the equipment off and
on, the user is encouraged to try to correct the interference by one or more of the
following measures:
-- Reorient or relocate the receiving antenna.
-- Increase the separation between the equipment and receiver.
-- Connect the equipment into an outlet on a circuit different from that to which the
receiver is connected.
-- Consult the dealer or an experienced radio/TV technician for help.
5. This equipment complies with FCC RF radiation exposure limits set forth for an
uncontrolled environment. This equipment should be installed and operated with a
minimum distance of 20 centimeters between the radiator and your body.

Aolynk VDR824 ADSL2+ VoIP Broadband Router/
Aolynk VDR824g ADSL2+ VoIP Wireless Broadband Router
User Manual
Manual Version
BOM
Huawei Technologies Co., Ltd. provides customers with comprehensive technical support
and service. If you purchase the products from the sales agent of Huawei Te chnologies Co.,
Ltd., please contact our sales agent. If you purchase the products from Huawei
Technologies Co., Ltd. directly, please feel free to contact our local office, customer care
center or company headquarters.
Huawei Technologies Co., Ltd.
Technical Support:
Address: Hangzhou Base of Huawei Technologies Co., Ltd.
T2-08011X-20050730-C-3.00
3101A01X
East of Liuhe Road, Zhijiang Science Park,
Hangzhou, Zhejiang Province, P. R. China
Postal Code: 310053
Website: http://www.huawei-3com.com
E-mail: soho@huawei-3com.com

Copyright © 2005 Huawei Technologies Co., Ltd.
All Rights Reserved
No part of this manual may be reproduced or transmitted in any form or by any
means without prior written consent of Huawei Technologies Co., Ltd.
Trademarks
Aolynk is a trademark of Hangzhou Huawei-3Com Technology Co., Ltd.
, HUAWEI, C&C08, EAST8000, HONET, , ViewPoint, INtess, ETS, DMC,
TELLIN, InfoLink, Netkey, Quidway, SYNLOCK, Radium,
TELESIGHT, Quidview, Musa, Airbridge, Tellwin, Inmedia, VRP, DOPRA, iTELLIN,
HUAWEI OptiX, C&C08
Lansway, SmartAX, infoX, TopEng are trademarks of Huawei Technologies Co.,
Ltd.
All other trademarks mentioned in this manual are the property of their respective
holders.
iNET, NETENGINE, OptiX, iSite, U-SYS, iMUSE, OpenEye,
M900/M1800,
Notice
The information in this manual is subject to change without notice. Every effort has
been made in the preparation of this manual to ensure accuracy of the contents, but
all statements, information, and recommendations in this manual do not constitute
the warranty of any kind, express or implied.
Environmental Protection
This product has been designed to comply with the requirements on envi ronme ntal
protection. For the proper storage, use and disposal of this product, national laws
and regulations must be observed.

User Manual
Aolynk VDR824 ADSL2+ VoIP Broadband Router/
Aolynk VDR824g ADSL2+ VoIP Wireless Broadband Router Table of Contents
Table of Contents
1 Product Overview.......................................................................................................................... 1
1.1 Introduction........................................................................................................................... 1
1.2 Appearance........................................................................................................................... 1
1.2.1 Front Panel................................................................................................................. 2
1.2.2 Rear Panel ................................................................................................................. 3
1.3 Features................................................................................................................................ 4
2 Installation...................................................................................................................................... 6
2.1 Packing List........................................................................................................................... 6
2.2 Precautions........................................................................................................................... 6
2.3 Device Connection................................................................................................................ 7
3 Getting Started............................................................................................................................. 10
3.1 Prerequisite Tasks for Configuration.................................................................................. 10
3.2 Login................................................................................................................................... 10
3.3 Description of the Factory Default Settings........................................................................ 12
4 Web-based Basic Configuration................................................................................................ 14
4.1 Quick Setup ........................................................................................................................ 14
4.2 WAN Setup......................................................................................................................... 15
4.2.1 WAN.........................................................................................................................15
4.2.2 DNS Relay................................................................................................................ 22
4.2.3 DDNS....................................................................................................................... 24
4.3 LAN Setup........................................................................................................................... 26
4.3.1 LAN ..........................................................................................................................26
4.3.2 DHCP Server............................................................................................................ 29
4.3.3 DHCP Relay............................................................................................................. 30
4.4 Voice...................................................................................................................................34
4.4.1 Phone Port Setting................................................................................................... 34
4.4.2 SpeedDial.................................................................................................................35
4.5 Wireless.............................................................................................................................. 36
4.5.1 Wireless Basic Setting ............................................................................................. 36
4.5.2 Wireless Security Setting......................................................................................... 37
4.5.3 Wireless Access Control .......................................................................................... 40
4.5.4 Wireless Advanced Setting...................................................................................... 42
4.6 Device.................................................................................................................................43
4.6.1 Password..................................................................................................................43
4.6.2 Remote Access........................................................................................................ 43
4.6.3 Restarting/Restoring Factory Default Settings......................................................... 45
i

User Manual
Aolynk VDR824 ADSL2+ VoIP Broadband Router/
Aolynk VDR824g ADSL2+ VoIP Wireless Broadband Router Table of Contents
4.6.4 Backing Up/Restoring Configuration........................................................................ 45
4.6.5 Upgrade.................................................................................................................... 48
4.7 Status.................................................................................................................................. 50
4.7.1 Status....................................................................................................................... 50
4.7.2 Log ........................................................................................................................... 50
4.7.3 PVC Search.............................................................................................................. 51
4.8 Save the Configuration....................................................................................................... 53
5 Advanced Configuration............................................................................................................. 54
5.1 Binding LAN Ports to PVCs................................................................................................ 54
5.2 Security............................................................................................................................... 60
5.2.1 Interface ................................................................................................................... 61
5.2.2 Policy........................................................................................................................ 68
5.2.3 Trigger......................................................................................................................75
5.2.4 IDS ...........................................................................................................................78
5.3 DMZ Configuration.............................................................................................................. 81
5.4 Route Configuration............................................................................................................ 84
5.5 Service................................................................................................................................ 87
5.5.1 SNTP........................................................................................................................ 87
5.5.2 ZIPB .........................................................................................................................88
5.5.3 SNMP....................................................................................................................... 90
6 Troubleshooting.......................................................................................................................... 92
6.1 VDR824/824g Troubleshooting .......................................................................................... 92
6.2 Diagnosis Tools .................................................................................................................. 95
6.2.1 Ping.......................................................................................................................... 95
6.2.2 Nslookup ..................................................................................................................96
7 Appendix - TCP/IP Protocol........................................................................................................ 97
7.1 Installing TCP/IP................................................................................................................. 97
7.2 Configuring TCP/IP........................................................................................................... 100
7.2.1 Specifying to Obtain an IP Address Automatically................................................. 100
7.2.2 Specifying a Fixed IP Address............................................................................... 102
8 Appendix - USB Configuration................................................................................................. 103
8.1 Installing USB Driver......................................................................................................... 103
8.2 Configuring IP Properties.................................................................................................. 105
9 Appendix - IP Address and Subnet Mask ............................................................................... 107
9.1 IP Address ........................................................................................................................ 107
9.1.1 Structure of the IP Address.................................................................................... 107
9.1.2 Classes of IP Addresses........................................................................................ 108
9.2 Subnet Mask..................................................................................................................... 109
ii

User Manual
Aolynk VDR824 ADSL2+ VoIP Broadband Router/
Aolynk VDR824g ADSL2+ VoIP Wireless Broadband Router Table of Contents
10 Appendix - Technical Specifications..................................................................................... 111
11 Appendix - Glossary ...............................................................................................................112
iii

User Manual
Aolynk VDR824 ADSL2+ VoIP Broadband Router/
Aolynk VDR824g ADSL2+ VoIP Wireless Broadband Router 1 Product Overview
1 Product Overview
This chapter focuses on the appearance and functionality of Aolynk VDR824/824g
ADSL2+ VoIP R
outer for you to get familiar with this product.
1.1 Intro
duction
Aolynk VDR824 ADSL2+ VoIP Broadband Router and VDR824g ADSL2+ VoIP
Wireless Broadband Router (hereinafter referred to as the VDR824/824g), developed
by Huawei Technologies, a re the latest VoIP routers that support
all the VDR824 features, the VDR824g owns the built-in 802.11b/g wireless access
point (AP), enabling you to easily establish a wireless network.
The VDR824/824g features built-in ADSL2+ technology, high-speed Internet access,
and remote connectivity. It enables LAN users to share high speed broadband
connection through the built-in NAT and DHCP server and provides complete network
security solutions to prevent the hackers and invasions from the outside. In addition, it
has the high network flexibility and meets the network requirements as it supports
multiple connect
feature, and you can place IP calls by connecting a common telephone to the
VDR824/824g.
The VDR824/824g offers the Web
common Web browsers. Friendly built-in graphical user interface eases the
configuration and management.
This user manual introduces how to install and configure the VDR824/824
guiding you throu
on the advance
ions such as PPPoE, PPPoA, IPoA, and bridging; it provides the voice
configuration pages as the way to configure it via
gh the device connection and basic configuration, the manual focuses
d configuration for you to operate the VDR824/824g optimally.
SIP protocol. Besides
g.After
1.2 App
earance
The VDR824 is very similar to the VDR
the VDR824 has no antenna and the Wireless LED on the front panel. This manual
describes t
he VDR824g appearance.
824g in appearance. The difference lies in that
1

User Manual
Aolynk VDR824 ADSL2+ VoIP Broadband Router/
Aolynk VDR824g ADSL2+ VoIP Wireless Broadband Router 1 Product Overview
1.2.1 Front Panel
The LEDs on the front panel indicate the state of the VDR824/824g.
Figure 1- t view
1 Fron
Table 1-1 LED state description of the VDR
LED State Description
ON
Power
OFF The power is off or fault occurs.
ON The Ethernet link is established.
LAN1/2/3/4
Blinking
OFF No link is present.
ON
ADSL2+ Link
Blinking
OFF The ADSL link is down.
Blinking
ADSL2+ Act
OFF
824/824g
The power is ON and the oper
normal.
ted and received on Data is being transmit
the Ethernet port.
The ADSL link is up.
The ADSL link is starting up.
s being transmitted and received on Data i
the ADSL link.
No data transmission is present
link.
ation is
on the
available on the
VDR824.)
Phone 1/2
ON The wireless function is enabled. Wireless (This is not
OFF The wireless function is di
ON
2
The telephone is off-hook or in
conversation.
sabled
User Manual
Aolynk VDR824 ADSL2+ VoIP Broadband Router/
Aolynk VDR824g ADSL2+ VoIP Wireless Broadband Router 1 Product Overview
LED State Description
Blinking The telephone is ringing.
USB
Diag
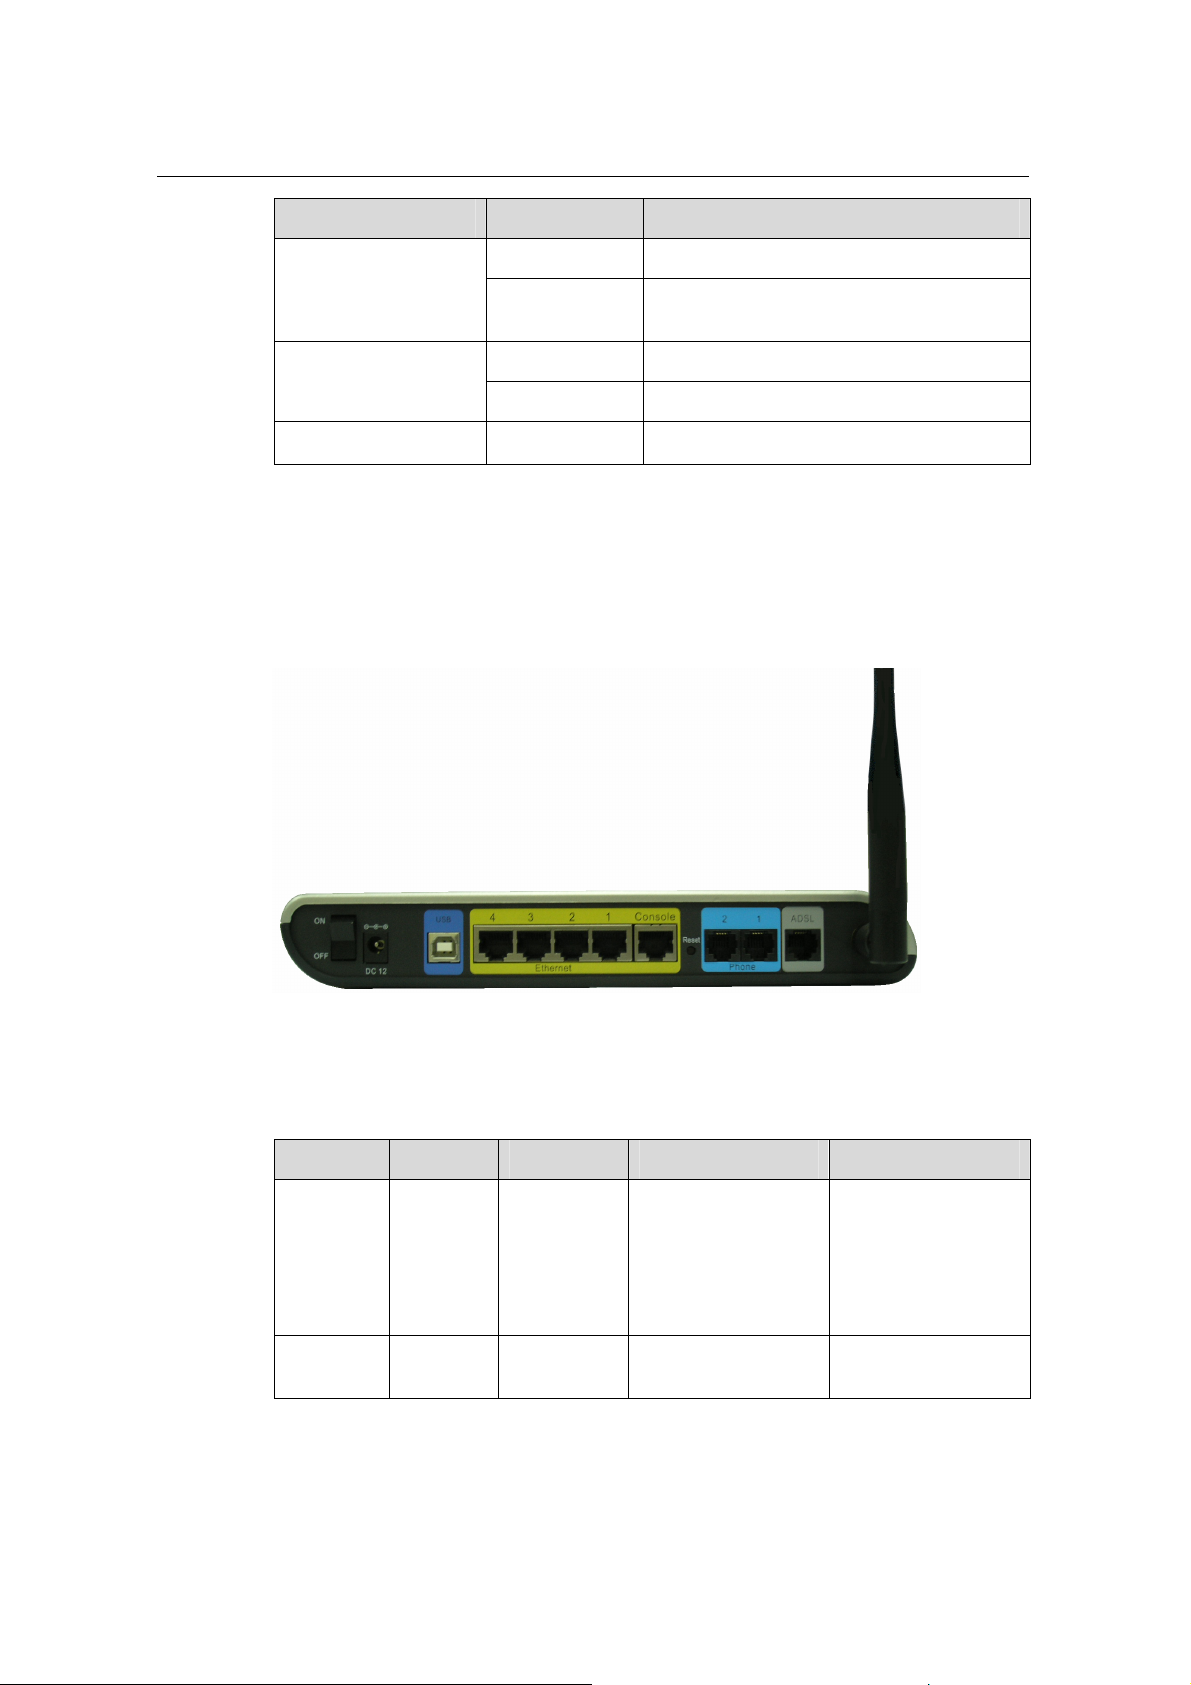
1.2.2 Rear Panel
panel.
OFF
The port is not connected
telephone or the telephone is on-hook.
to the
ON The USB connection is established.
OFF No USB connection is present.
—
For manufactory test only .
d on the rear All ports of the VDR824/824g, a power port, and a reset button are locate
Figure 1-2 Rear view
Table 1-2 Description of the ports and re ear panel of the
set button on the r
VDR824/824g
Item Quantity Port Description Usage
10/100Base-TX
Ethernet
port
4 RJ45
10/100 Mbps
auto-negotiation
auto-MDI/MDIX
Connect with the
Ethernet port of a
PC, Hub or switch.
IEEE802.3/802.3u
USB port 1
Series-B
Receptacle
3
USB 1.1
Connect with the
USB port of a PC.

User Manual
Aolynk VDR824 ADSL2+ VoIP Broadband Router/
Aolynk VDR824g ADSL2+ VoIP Wireless Broadband Router 1 Product Overview
Item Quantity Port Description Usage
ANSI T1.413 Issue
2
ADSL port 1 RJ11
ITU G.992.1
AnnexA G.dmt
ITU G.992.2 G.lite
ITU G.992.3 ADSL2
Connect with the
telephone jack on
the wall or the ADSL
port of a splitter.
ITU G.992.5
ADSL2+
Phone
port
Power
port
Reset
button
1.3 Features
Both VDR824 and VDR824g perform excellent network connection. Both have the
following features:
z Asymmetrical data transmission technology with downstream speed of 20 Mbps
and upstream speed of 1 Mbps.
z SIP protocol that enables you to place IP calls by connecting the common
telephone to the phone port of the VDR824/824g.
z Binding of an Ethernet port to a PVC, which enables you to access Internet
services through different LAN ports.
z NAT (network address translation) technology that allows all PCs on a network to
access the Internet sharing a single IP address.
z PPPoE dialup connection to the ISP.
z Capability of a DHCP (dynamic host configuration protocol) client to obtain a fixed
IP address from an ISP or a dynamically assi gned IP address.
z Capability of a DHCP server to assign IP addresses to host s in a LAN or configure
clients through the DHCP server.
z DNS relay that allows you to specify the IP address of an Ethernet port on the
VDR824/824g as a DNS server IP address of a PC.
z DHCP relay that allows one DHCP server available for multiple DHCP clients in
different network segments.
2 RJ11
1
1
—
—
—
—
—
Connect with the
common telephone
to place IP calls.
Connect with the
power adapter.
Restore factory
default settings
(press and hold
down the button for
at least five
seconds).
4

User Manual
Aolynk VDR824 ADSL2+ VoIP Broadband Router/
Aolynk VDR824g ADSL2+ VoIP Wireless Broadband Router 1 Product Overview
z ZIPB (zero installation PPP bridge), NAT, firewall, and IP filtering that secure your
LAN.
z UPnP (Universal plug-and-play) for LAN users to use all the functions provid ed by
UPnP-supported software (such as MSN) without any further configuration.
z IP routing, DNS (domain name system) configuration, and the services such as
the IP and DSL performance monitoring.
z Friendly built-in Web-based graphical user interface for ease of configuration and
management through common Web browsers.
Besides, the VDR824g also has the following wireless features:
z The bridge from wireless to wired enabling Ethernet LAN and wireless LAN users
to transmit data from each other.
z 64/128 bit WEP encryption to ensure the security of the wireless communication.
z Full support of 802.11 public and shared key authe ntication.
5
User Manual
Aolynk VDR824 ADSL2+ VoIP Broadband Router/
Aolynk VDR824g ADSL2+ VoIP Wireless Broadband Router 2 Installation
2 Installation
On the assumption that you have acquired DSL services from your ISP, the following
sections describ
e how to set up the VDR824/824g and configure your PC.
2.1 Pac
king List
Unpack the shipping ca
Table 2-1 Packing list
Aolynk VDR824/824g ADSL2+ VoIP Router 1
Power adapter
Telephone cable
Straight-through cable
USB cable
Set of screw and anchor
Aolynk VDR824/824g ADSL2+ VoIP Router Quick Start 1
CD including the user manual and driver
Warranty Card
Certificate of Quality
rton carefully and check the following items listed in Table 2-1.
Item Quantity
1
1
1
1
2
1
1
1
2.2 Prec
If anything is b
roken or missing, contact your agent for help.
autions
g
To uarantee normal operation and longevity of the VDR824/824g, its installation site
shou quirements described below:
ld meet the re
z Use the VDR824/824g indoors and keep it far away from the heat sources and
water/liquid.
6

User Manual
Aolynk VDR824 ADSL2+ VoIP Broadband Router/
Aolynk VDR824g ADSL2+ VoIP Wireless Broadband Router 2 Installation
z Keep the cabinet or desk stable enough to hold the VDR824/824g. Fix the
VDR824/824g and po
z Reserve more than 10 cm (4 in.) of clearance around the VDR824/824g chassis
wer adapter well on the wall when wall-mounting it.
for heat dissipation.
z Keep the operation environment clean. Dust buildup on the chassis may result in
static absorption, reducing the life span and causing comm u
z Use an earthing system or lightning protection grounding different from that for the
nication failure.
power supply equipment and keep them as far as possible.
z Keep the VDR824/824g far away from high-power radio launchers, radar
launchers, and equipment with high-frequency and high-current.
z ble indoors. Outdoor cabling is prohibited, to prevent the signal
Wire the port ca
port from damages that may be caused by overvoltage and overcurrent from
lightning strike.
2.3 Device Connection
Telephone jack
Phone
Phone
ADSL
LAN
USB
USB
PC
PC
Notebook
Notebook
Figure 2-1 Connect the VDR
I.
Connect to an ADSL line
To c
onnect the VDR824/824g to an ADSL line, two options are available:
LAN
VDR824g
VDR824g
824/824g
ADSL
Line
Line
ADSL Phone
ADSL Phone
Telephone
Telephone
Telephone jack
Splitter
Splitter
Telephone
Telephone
z phone cable to the ADSL port (similar to a common
Connect one end of the tele
telephone port) on the VDR824/824g rear panel, and the other end to the
telephone jack on the wall.
7
User Manual
Aolynk VDR824 ADSL2+ VoIP Broadband Router/
Aolynk VDR824g ADSL2+ VoIP Wireless Broadband Router 2 Installation
z As shown in Figure 2-1, conn
ect both the ADSL po rt on the VDR824/824g and the
telephone to a splitter, and then connect the splitter to the telephone jack on th
wall. It allows you to use the telephone when you access the network.
e
II. Con
nect to a PC or Ethernet
To c :
onnect the VDR824/824g to a PC or Ethernet, two options are available
z
The Ethernet ports of the VDR824/824g are auto-MDI/MDIX, so you can use the
crossover or straight-through cable to connect your PC, Hub, or switch to the
Ethernet port (one among LAN1 through LAN4) of the VDR824/824g.
Connect your PC to the VDR824/824g through the USB ports with a USB cable. It
z
is suitable f
or the PC without NIC to access the Internet.
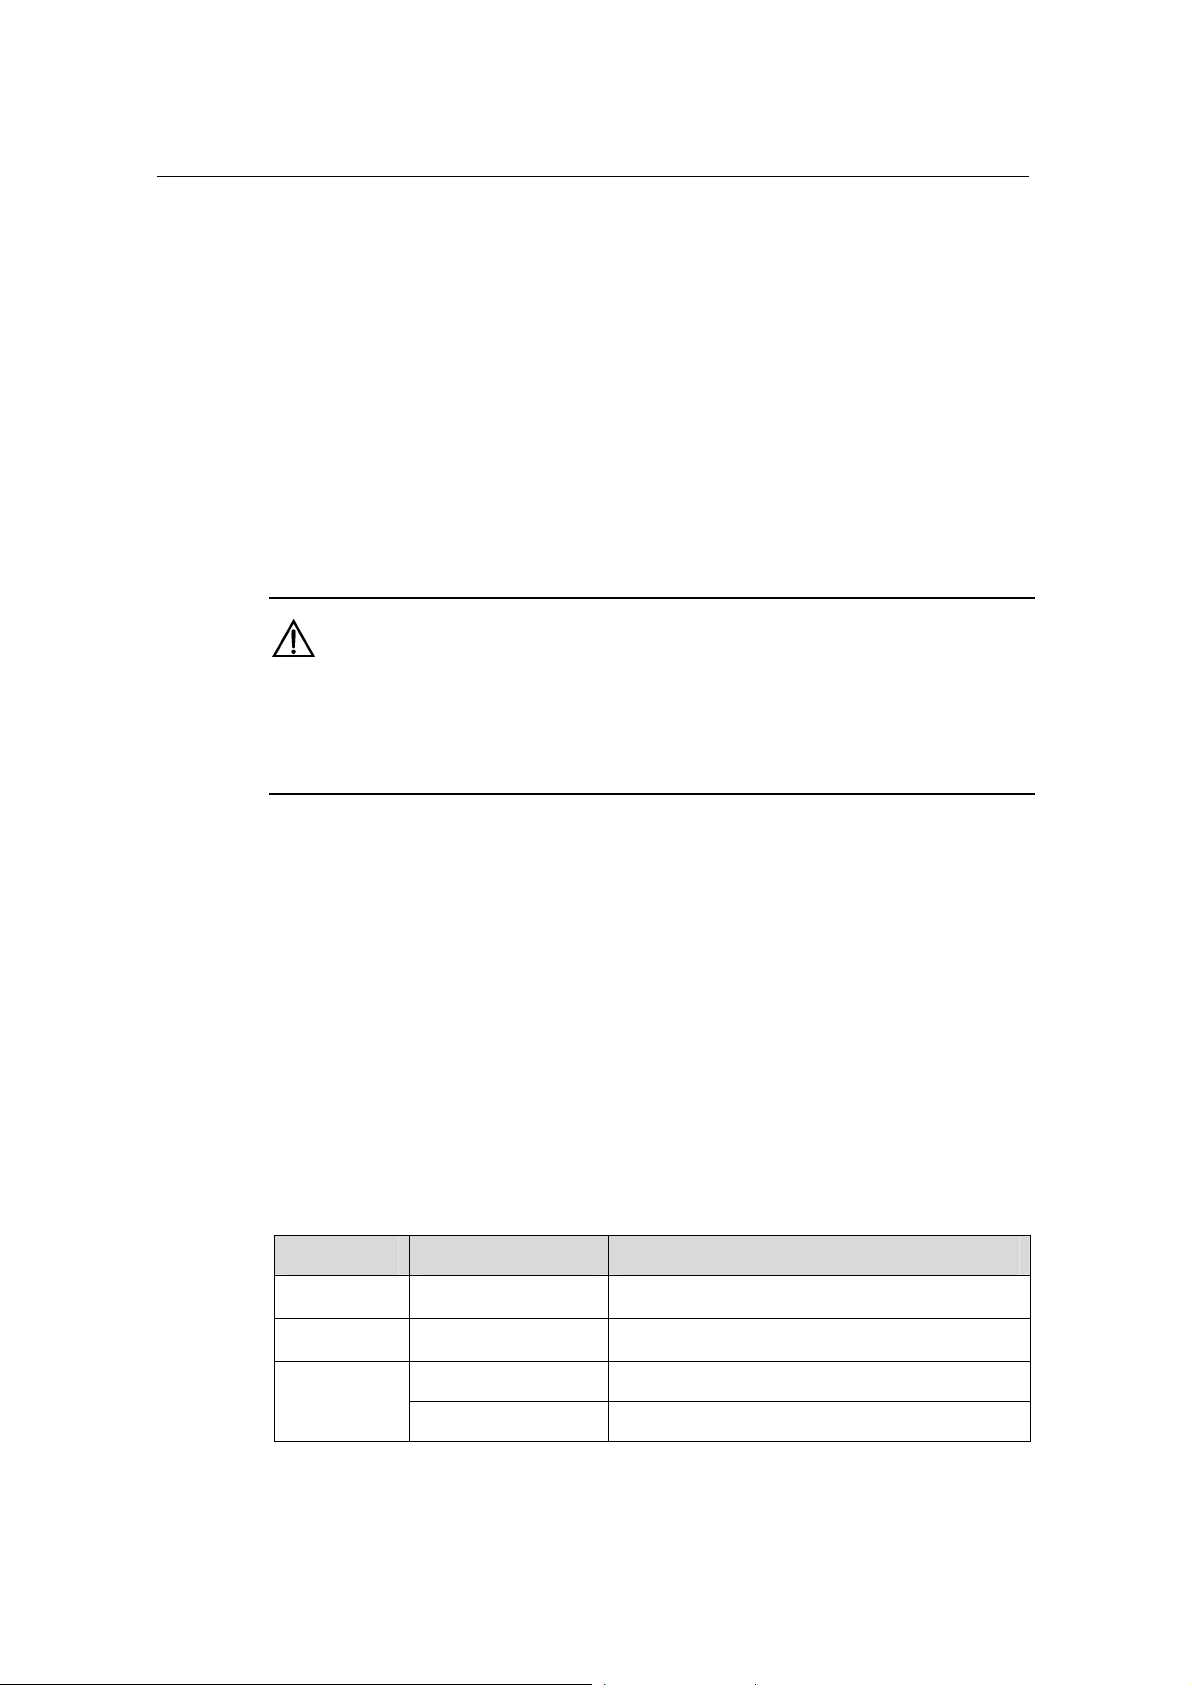
Caution:
T
o use the USB port on the VDR824/824g, you must install the USB driver and
config
ure your PC (refer to section 8 “Appendix - USB Configuration” for detailed
information).
I. Connect to the telephone II
Use the telephone cable to connect th
e telephone with Phone 1 on the rear panel of the
VDR824/824g. If both Phone 1 and Phone 2 are assigned with the registration
accounts, connect another telephone with Phone 2.
IV
. Connect to the power adapter
Attach one e
power outlet. Then turn on the power of
after wer-on, the f the LEDs on the front e those listed in
the po states o panel should b
nd of the power adapter to the VDR824/824g and the other end to the
the VDR824/824g.Approximately one minute
Table 2-2.
Table 2-2 Description of the LED states
LED State Description
Power Green
Link Green
Blinking Data is being transmitted and received.
—
—
Act
OFF No data transm
ission is present.
8

User Manual
Aolynk VDR824 ADSL2+ VoIP Broadband Router/
Aolynk VDR824g ADSL2+ VoIP Wireless Broadband Router 2 Installation
LED State Description
LAN
Green The Ethernet link is established.
Blinking
Data is being transmitted and received on the
E
thernet port.
9

User Manual
Aolynk VDR824 ADSL2+ VoIP Broadband Router/
Aolynk VDR824g ADSL2+ VoIP Wireless Broadband Router 3 Getting Started
3.1 Prer
I. System requirements
II. IP address of your PC
3
The VDR824/824g offers a series of W eb co
Y ou can configure the VDR824/824g a s need
with the Web configuration
pages.
Getting Started
nfiguration pages as the way to manage it.
ed. This chapter guides you to be familiar
equisite Tasks for Configuration
To configure the VDR824/824g through its built-in W
PC as the following.
z An Ethernet NIC (10Base-T or 10/100Base-T/TX) or a USB port
z A Web browser (Microsoft Internet Explorer 5.5, Netscape 6.0 or
z TCP/IP protocol employed
eb pages, you must configure your
later)
III. No proxy server
3.2 Log
You must assign an IP address to your PC to make it in the same netwo
the VDR824/824g before accessing the configuratio
the VDR824/824g Ethernet port is 192.168.1.1. Refer to section 7 “Appendix - TCP/IP
Protocol”.
If your PC uses the proxy server to access the Internet, you must disable the proxy
service.
1) Choose [Tool/Internet options] to open the [Internet options] window.
2) Select the [Connections] tab and click <LAN settings…>.
3) Make sure the Use a proxy server option is not selected.
n page. The default IP address of
rk segment as
in
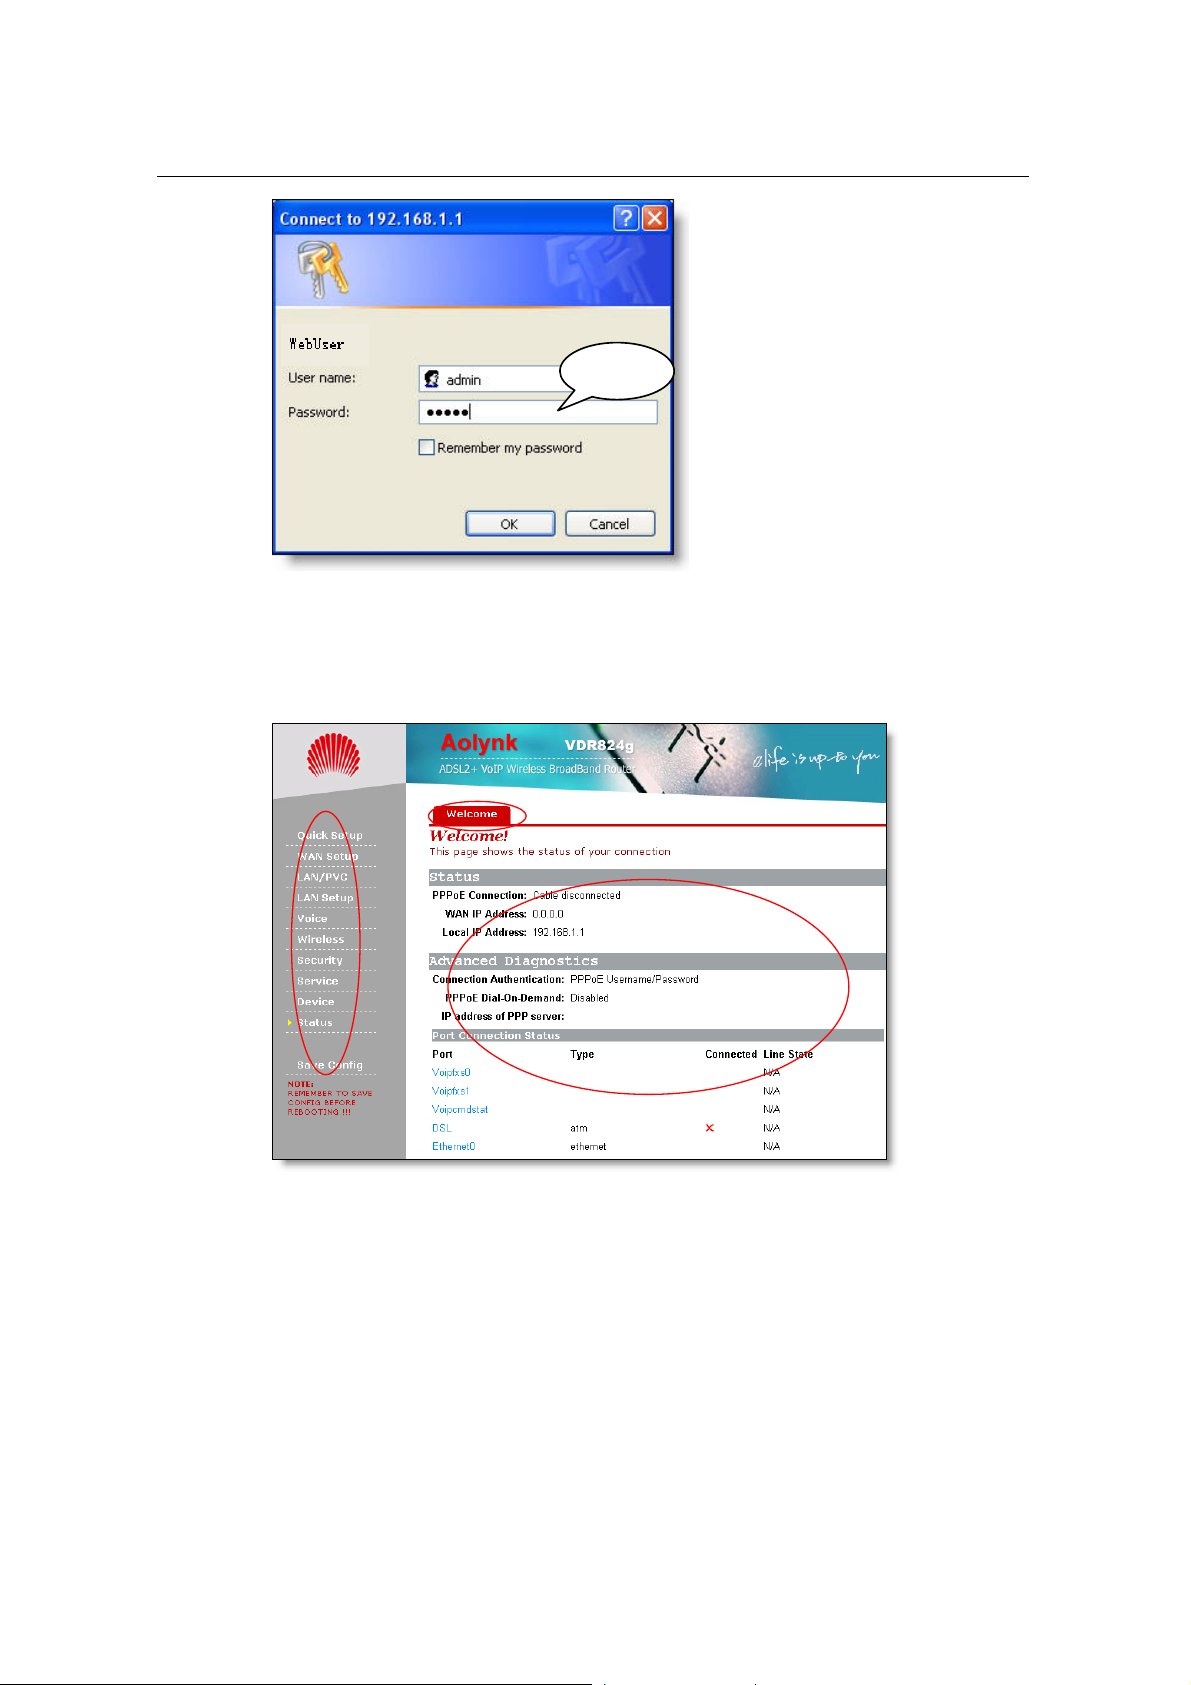
un your Web browser and enter http://192.168.1.1 in the address bar. A login dialog
R
box appears as shown in Figure 3-1.
10
User Manual
Aolynk VDR824 ADSL2+ VoIP Broadband Router/
Aolynk VDR824g ADSL2+ VoIP Wireless Broadband Router 3 Getting Started
adminadmin
Figure 3-1 Login dialog box
For the first login, type in the default user name admin and password admin, and then
click <OK> to enter the Web configuratio
n page.
Navi
gation bar
Navi
gation bar
Title
Title
Setup
Setup
section
section
F
igure 3-2 Welcome pa
T nfiguration
he Web co
bar, Title, and Setup section. Navigation bar p and
management part is on the right pane where y
st vigation bar or
atus. Click a link in the na
c e p sectio
onfiguration page app ars in the setu
ge
page of the VDR824/8
24g consists of three parts: Navigation
is on the left pane, and the setu
ou can configure and display the device
a tab from the title, the corresponding
n.
11
 Loading...