


Dream User Guide
PRE-RELEASE DRAFT

August 1, 2008 5:06 PM
Android release 1.0. Document revision 03
Copyright 2008 © Google, Inc. All rights reserved.
Please Read Before Proceeding
THIS DEVICE IS NOT CHARGED WHEN YOU TAKE IT OUT OF THE BOX.
DO NOT REMOVE THE BATTERY PACK WHEN THE DEVICE IS CHARGING.
YOUR WARRANTY IS INVALIDATED IF YOU OPEN OR TAMPER WITH THE DEVICE’S OUTER
CASING.
PRIVACY RESTRICTIONS
Some countries require full disclosure of recorded telephone conversations, and stipulate that you must
inform the person with whom you are speaking that the conversation is being recorded. Always obey the
relevant laws and regulations of your country when using the recording feature of your Pocket PC Phone.
Kila - R1.0
1

Important Health Information and Safety Precautions
When using this product, the safety precautions below must be taken to avoid possible legal liabilities and
damages.
Retain and follow all product safety and operating instructions. Observe all warnings in the operating instructions on the product.
To reduce the risk of bodily injury, electric shock, fire and damage to the equipment, observe the following
precautions.
ELECTRICAL SAFETY
This product is intended for use when supplied with power from the designated battery or power supply
unit. Other usage may be dangerous and will invalidate any approval given to this product.
SAFETY PRECAUTIONS FOR PROPER GROUNDING INSTALLATION
CAUTION – Connecting to an improperly grounded equipment can result in an electric shock to your
device.
This product equipped with a USB Cable for connecting with desk-top or notebook computer. Be sure your
computer is properly grounded (earthed) before connecting this product to the computer. The power sup-
ply cord of a desktop or notebook computer has an equipment-grounding conductor and a grounding plug.
The plug must be plugged into an appropriate outlet which is properly installed and grounded in accordance with all local codes and ordinances.
SAFETY PRECAUTIONS FOR POWER SUPPLY UNIT
• Use the correct external power source
A product should be operated only from the type of power source indicated on the electrical ratings
label. If you are not sure of the type of power source required, consult your authorized service provider or local power company. For a product that operates from battery power or other sources, refer
to the operating instructions that are included with the product.
This product should be operated only with the following designated power supply unit(s).
AC Adapter
1. Phihong, Models PSAA05X-050
Car Adapter
1. Phihong, Model CLM05D-050
• Handle battery packs carefully
This product contains a Li-ion or Li-ion Polymer battery. There is a risk of fire and burns if the battery
pack is handled improperly. Do not attempt to open or service the battery pack. Do not disassemble,
crush, puncture, short external contacts or circuits, dispose of in fire or water, or expose a battery
pack to temperatures higher than 60˚C (140˚F).
WARNING! Danger of explosion if battery is incorrectly
replaced. To reduce risk of fire or burns, do not disassemble,
Kila - R1.0
2
crush, puncture, short external contacts, expose to temperature
above 60°C (140°F), or dispose of in fire or water. Replace only with
specified batteries. Recycle or dispose of used batteries according to
the local regulations or reference guide supplied with your product.
NOTE: This product should be operated only with the following designated Battery Pack(s).
1. Dynapack, Model DREA160
2. TWS, Model DREA160
• Take extra precautions
• Keep the battery or device dry and away from water or any liquid as it may cause a short circuit.
• Keep metal objects away so they don’t come in contact with the battery or its connectors as it may
lead to short circuit during operation.
• Do not use a battery that appears damaged, deformed, or discolored, or the one that has any rust
on its casing, overheats, or emits a foul odor.
• Always keep the battery out of the reach of babies and small children, to avoid swallowing of the
battery. Consult the doctor immediately if the battery is swallowed.
If the battery leaks:
• Do not allow the leaking fluid to come in contact with skin or clothing. If already in contact, flush the
affected area immediately with clean water and seek medical advice.
• Do not allow the leaking fluid to come in contact with eyes. If already in contact, DO NOT rub; rinse
with clean water immediately and seek medical advice.
• Take extra precautions to keep a leaking battery away from fire as there is a danger of ignition or
explosion.
• Communicate the appropriate steps immediately in case a hazard occurs.
SAFETY PRECAUTIONS FOR DIRECT SUNLIGHT
Keep this product away from excessive moisture and extreme temperatures. Do not leave the product or
its battery inside a vehicle or in places where the temperature may exceed 60°C (140°F), such as on a car
dashboard, window sill, or behind a glass that is exposed to direct sunlight or strong ultraviolet light for
extended periods of time. This may damage the product, overheat the battery, or pose a risk to the vehicle.
PREVENTION OF HEARING LOSS
CAUTION – Permanent hearing loss may occur if earphones or headphones are used
at high volume for prolonged periods of time.
NOTE: For France, Headphones, Earphones, and Wired Remote Controller (listed below)
for this device have been tested to comply with the Sound Pressure Level requirement
laid down in the applicable NF EN 50332-1:2000 and/or NF EN 50332-2:2003 standards
as required by French Article L. 5232-1.
1. Earphone, manufactured by Cotron, Models CHM-311STV08001
Kila - R1.0
3

SAFETY IN AIRCRAFTS
Due to the possible interference caused by this product to an aircraft’s navigation system and its communications network, using this device’s phone function on board an airplane is against the law in most countries. If you want to use this device when on board an aircraft, remember to turn off your phone by switching to Flight Mode.
ENVIRONMENT RESTRICTIONS
Do not use this product in gas stations, fuel depots, chemical plants or where blasting operations are in
progress, or in potentially explosive atmospheres such as fuelling areas, fuel storehouses, below deck on
boats, chemical plants, fuel or chemical transfer or storage facilities, and areas where the air contains
chemicals or particles, such as grain, dust, or metal powders. Please be aware that sparks in such areas
could cause an explosion or fire resulting in bodily injury or even death.
EXPLOSIVE ATMOSPHERES
When in any area with a potentially explosive atmosphere or where flammable materials exist, the product
should be turned off and the user should obey all signs and instructions. Sparks in such areas could cause
an explosion or fire resulting in bodily injury or even death. Users are advised not to use the equipment at
refueling points such as service or gas stations, and are reminded of the need to observe restrictions on
the use of radio equipment in fuel depots, chemical plants, or where blasting operations are in progress.
Areas with a potentially explosive atmosphere are often, but not always, clearly marked. These include fueling areas, below deck on boats, fuel or chemical transfer or storage facilities, and areas where the air
contains chemicals or particles, such as grain, dust, or metal powders.
ROAD SAFETY
Vehicle drivers in motion are not permitted to use telephony services with handheld devices, except in the
case of emergency. In some countries, using hands-free devices as an alternative is allowed.
SAFETY PRECAUTIONS FOR RF EXPOSURE
• Avoid using your phone near metal structures (for example, the steel frame of a building).
• Avoid using your phone near strong electromagnetic sources, such as microwave ovens, sound
speakers, TV and radio.
• Use only original manufacturer-approved accessories, or accessories that do not contain any metal.
• Use of non-original manufacturer-approved accessories may violate your local RF exposure guidelines
and should be avoided.
INTERFERENCE WITH MEDICAL EQUIPMENT FUNCTIONS
This product may cause medical equipment to malfunction. The use of this device is forbidden in most
hospitals and medical clinics.
If you use any other personal medical device, consult the manufacturer of your device to determine if they
are adequately shielded from external RF energy. Your physician may be able to assist you in obtaining
this information.
Turn your phone OFF in health care facilities when any regulations posted in these areas instruct you to
do so. Hospitals or health care facilities may be using equipment that could be sensitive to external RF
energy.
HEAR ING AIDS
Some digital wireless phones may interfere with some hearing aids. In the event of such interference, you
may want to consult your service provider, or call the customer service line to discuss alternatives.
NONIONIZING RADIATION
Your device has an internal antenna. This product should be operated in its normal-use position to ensure
the radiative performance and safety of the interference. As with other mobile radio transmitting equipment,
users are advised that for satisfactory operation of the equipment and for the safety of personnel, it is
recommended that no part of the human body be allowed to come too close to the antenna during operation of the equipment.
Use only the supplied integral antenna. Use of unauthorized or modified antennas may impair call quality
Kila - R1.0
4

and damage the phone, causing loss of performance and SAR levels exceeding the recommended limits
as well as result in non-compliance with local regulatory requirements in your country.
To assure optimal phone performance and ensure human exposure to RF energy is within the guidelines
set forth in the relevant standards, always use your device only in its normal-use position. Do not touch or
hold the antenna area unnecessarily when placing or receiving a phone call. Contact with the antenna
area may impair call quality and cause your device to operate at a higher power level than needed. Avoiding contact with the antenna area when the phone is IN USE optimizes the antenna performance and the
battery life.
General Precautions
• Heed service markings
Except as explained elsewhere in the Operating or Service documentation, do not service any product yourself. Service needed on components inside the device should be done by an authorized service technician or provider.
• Damage requiring service
Unplug the product from the electrical outlet and refer servicing to an authorized service technician
or provider under the following conditions:
• Liquid has been spilled or an object has fallen into the product.
• The product has been exposed to rain or water.
• The product has been dropped or damaged.
• There are noticeable signs of overheating.
• The product does not operate normally when you follow the operating instructions.
• Avoid hot areas
The product should be placed away from heat sources such as radiators, heat registers, stoves, or
other products (including amplifiers) that produce heat.
• Avoid wet areas
Never use the product in a wet location.
• Avoid using your phone after a dramatic change in temperature
When you move your device between environments with very different temperature and/or humidity
ranges, condensation may form on or within the device. To avoid damaging the device, allow sufficient time for the moisture to evaporate before using the device.
NOTICE: When taking the device from low-temperature conditions into a warmer environment or
Kila - R1.0
5

from high-temperature conditions into a cooler environment, allow the device to acclimate to room
temperature before turning on power.
• Avoid pushing objects into product
Never push objects of any kind into cabinet slots or other openings in the product. Slots and openings are provided for ventilation. These openings must not be blocked or covered.
• Mounting Accessories
Do not use the product on an unstable table, cart, stand, tripod, or bracket. Any mounting of the
product should follow the manufacturer’s instructions, and should use a mounting accessory recommended by the manufacturer.
• Avoid unstable mounting
Do not place the product with an unstable base.
• Use product with approved equipment
This product should be used only with personal computers and options identified as suitable for use
with your equipment.
• Adjust the volume
Turn down the volume before using headphones or other audio devices.
• Cleaning
Unplug the product from the wall outlet before cleaning. Do not use liquid cleaners or aerosol cleaners. Use a damp cloth for cleaning, but NEVER use water to clean the LCD screen.
Kila - R1.0
6

Contents
Device essentials................................................................ 13
The Home screen........................................................................................13
Extended Home screens........................................................................14
Create Home screen shortcuts .............................................................14
Move objects on the screen .................................................................15
Create & delete folders ........................................................................15
Customize Home screen wallpaper........................................................15
Customize the dock ..............................................................................16
Notification & connection status icons...................................................16
Read your notifications .........................................................................16
Wireless operator ..................................................................................17
Status light indicators.................................................................................17
Device controls .........................................................................................18
Global shortcuts ........................................................................................20
Application keyboard shortcuts.............................................................20
Keyboard....................................................................................................21
SEARCH key ..........................................................................................21
MENU
key………………………………………………………………………………...21
ALT key ................................................................................................21
SHIFT key..............................................................................................21
@ key....................................................................................................22
Kila - R1.0
7

Typing tips ..........................................................................................22
Touch screen & trackball ............................................................................22
Selection...............................................................................................22
Context menus .....................................................................................23
Scroll ....................................................................................................23
Resize pictures .....................................................................................23
Drag items............................................................................................23
Zoom in or out ....................................................................................23
Scale & scroll .......................................................................................24
Silent mode ...............................................................................................24
Screen off...................................................................................................24
Keylock ......................................................................................................25
Wireless off ................................................................................................25
Making phone calls.....................................................................................26
Power on/off .............................................................................................26
Bluetooth....................................................................................................26
Turn on Bluetooth services....................................................................27
Visibility................................................................................................27
Name your Bluetooth device ................................................................27
Pair & connect with Bluetooth devices ...................................................27
About data synchronization ........................................................................28
Sync by application ...............................................................................28
Sync by Gmail label ...............................................................................29
System settings ..........................................................................................29
Radio con-
trols…………………………………………………………………………….29
Net-
works…………………………………………………………………………………30
Wi-Fi ...................................................................................................31
Mobile network .....................................................................................32
Bluetooth ..............................................................................................32
Device basics ........................................................................................32
Kila - R1.0
8

Security & Data .....................................................................................34
Contacts ............................................................................ 35
The contact list...........................................................................................35
Add a contact .............................................................................................36
Assign favorites..........................................................................................37
Edit contact details .....................................................................................37
Communicate with a contact.......................................................................38
Contact details screen...........................................................................38
Call a contact........................................................................................38
Send a text or multimedia message to a contact....................................38
Send email to a contact.........................................................................38
Map a contact’s address........................................................................38
Contacts settings........................................................................................39
About the My Contacts group .....................................................................39
Contacts shortcuts ....................................................................................40
Email, IM, and Messaging ................................................... 41
Gmail .........................................................................................................41
About messages ...................................................................................41
Inbox message list................................................................................41
Labeled message lists ...........................................................................42
Read email............................................................................................43
Compose email ...................................................................................45
Search for messages .............................................................................46
Add signature to messages ...................................................................46
Select labels to synchronize ..................................................................46
Set new email notifications....................................................................46
Gmail shortcuts ...................................................................................46
Add external email accountss .....................................................................47
Google Talk ................................................................................................50
Your Google Talk Friends list ................................................................50
Kila - R1.0
9

Chat......................................................................................................52
Sign in automatically.............................................................................53
Set new message notifications...............................................................53
Sign out ................................................................................................53
Add other IM accounts ..........................................................................54
IM shortcuts..........................................................................................54
SMS and MMS messaging............................................................................55
About text and multimedia messages ..................................................55
The message list...................................................................................55
The Read view.......................................................................................55
Compose text and multimedia messages .............................................58
Save message as draft...........................................................................58
Text and multimedia message settings .................................................58
Text & multimedia messaging shortcuts ..............................................60
Browser ............................................................................. 61
About the Browser ......................................................................................61
Zoom and navigation in Web pages .......................................................61
The browse screen......................................................................................62
Open pages in landscape or portrait orientation..........................................63
Open pages in separate windows................................................................63
Manage bookmarks ....................................................................................64
Set your home page....................................................................................66
Links in Web pages.....................................................................................67
Browser history...........................................................................................68
Download Web applications ........................................................................68
View your downloads ............................................................................68
Browser settings .........................................................................................68
Browser shortcuts .....................................................................................71
Maps .................................................................................73
About Maps ................................................................................................73
Kila - R1.0
10

Zoom and navigation in maps ...............................................................73
Find your location.......................................................................................74
Find any location ........................................................................................74
Get directions.............................................................................................76
Select map mode ........................................................................................77
Map view ..............................................................................................78
Satellite view.........................................................................................78
Traffic view ...........................................................................................78
Street view ............................................................................................79
Map history ................................................................................................79
Map shortcuts.............................................................................................79
Dialer & Voice Dialer .......................................................... 81
About the dialers ........................................................................................81
Bluetooth devices..................................................................................81
Make a call by dialing .................................................................................82
Make a call by speaking ........................................................................82
Answer a call ..............................................................................................83
In-call options............................................................................................84
Multiple calls ..............................................................................................85
Incoming call during current call ...........................................................85
End all calls...........................................................................................85
Conference calling ................................................................................86
Call log.......................................................................................................87
Call settings ...............................................................................................88
Planning ............................................................................ 90
Calendar.....................................................................................................90
About the Calendar views ....................................................................90
Calendar views......................................................................................90
Create an event.....................................................................................93
Edit an event.........................................................................................94
Kila - R1.0
11

Go to today...........................................................................................94
View calendars......................................................................................94
Calendar settings..................................................................................94
Calendar shortcuts ..............................................................................95
Alarm Clock................................................................................................97
Set an alarm..........................................................................................97
Change clock display ............................................................................98
Change date & time display...................................................................98
Calculator...................................................................................................99
Calculator panels ..................................................................................99
Operation history..................................................................................99
Camera & Pictures............................................................ 100
Before you begin ......................................................................................100
Load pictures onto your microSD™ card ..............................................100
Take a picture...........................................................................................100
Capture settings .................................................................................101
View your pictures ....................................................................................101
Screen orientation...............................................................................102
Zoom and navigate .............................................................................102
Picture options....................................................................................103
Play slideshow ....................................................................................104
Picture settings ...................................................................................104
Pictures shortcuts ...............................................................................105
Music............................................................................... 106
Your Library of music ...............................................................................106
Play back music ........................................................................................106
Playlists ....................................................................................................109
Create a playlist ..................................................................................109
Manage your playlists .........................................................................109
Create ringtones from songs ....................................................................109
Kila - R1.0
12

Delete music from microSD™ memory card...............................................110
Music shortcuts ........................................................................................110
Android Market ................................................................ 111
About Android Market ..............................................................................111
Browse items to download ........................................................................111
Download an item.....................................................................................111
Manage your downloads ...........................................................................111
View My Downloads ............................................................................111
Uninstall a downloaded item ...............................................................112
Give feedback on your downloaded items .................................................112
Write a comment.................................................................................112
Rate a downloaded item......................................................................112
Flag content........................................................................................112
YouTube .......................................................................... 113
Getting started with YouTube ...................................................................113
Watch videos ............................................................................................113
Search for videos ......................................................................................114
Filter videos by time .................................................................................114
View video details.....................................................................................115
Video favorites, ratings, and comments ....................................................115
Share videos ............................................................................................. 116
Your YouTube account..............................................................................116
YouTube shortcuts ...................................................................................117
Apendix........................................................................... 118
Index ............................................................................... 123
Kila - R1.0
13

Kila - R1.0
14

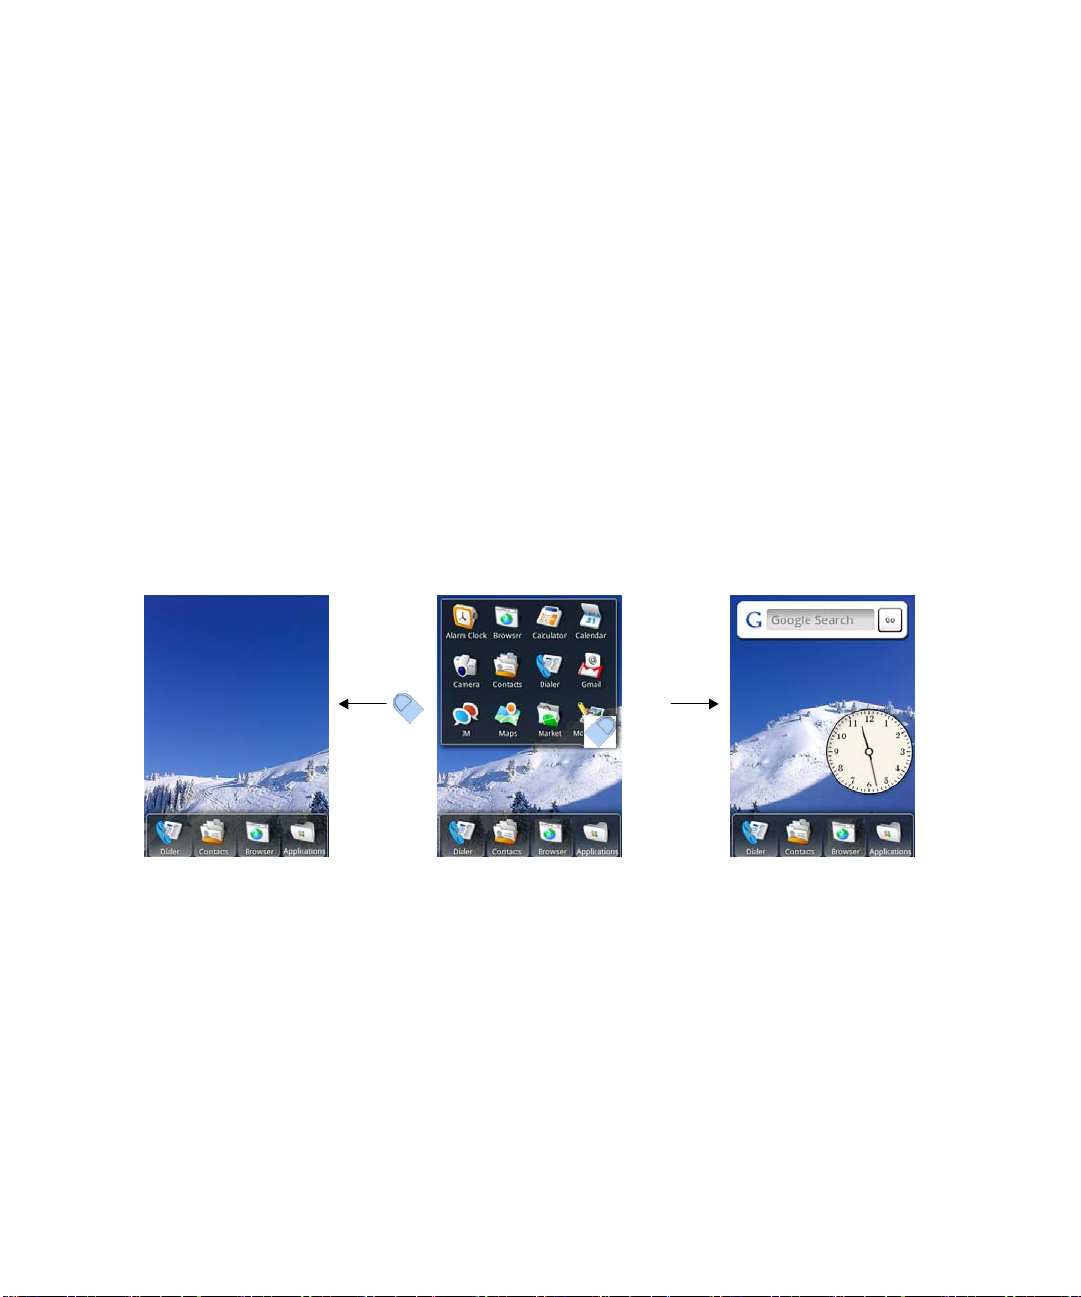
Device essentials
The Home screen
The Home screen is your starting point for using the applications on your device.
The Home screen is actually three screens in one. The default, or “main” Home
screen contains icon links to all the applications on your device. You can
customize the Home screens to display applications and shortcuts that suit
you.
Sta tus bar
Notific ations
Slide your f ingertip
down the screen to
read details
Toda y da te
is revealed when you
tap notifications
Tap any icon
to start using the
application
Favorite
applications dock
(alw a ys vis ible)
Kila - R1.0
15
Connection status
For horizontal orientation,
rotate your device, or open the
display to reveal the keyboard
Recent applications
window
opens when you press
& hold theHOME button
Tap Applications
with your fingertip to
reveal/ hide the
application icons
Wherever you are, whatever you’re doing on your device, simply press the
HOME
button to return to the main Home screen.
Extended Home screens
In addition to the Home screen that displays after pressing HOME, by sliding
your fingertip left and right along the screen, you’ll see the extended Home
screens. These screens give you more room to customize with shortcuts and
folders and offer a Google search bar and a clock. Each screen contains the
favorites dock, the left and right Home screens display the Google search
bar.
Left Home screen Main Home screen Right Home screen
Slide left
Slide right
Kila - R1.0
16
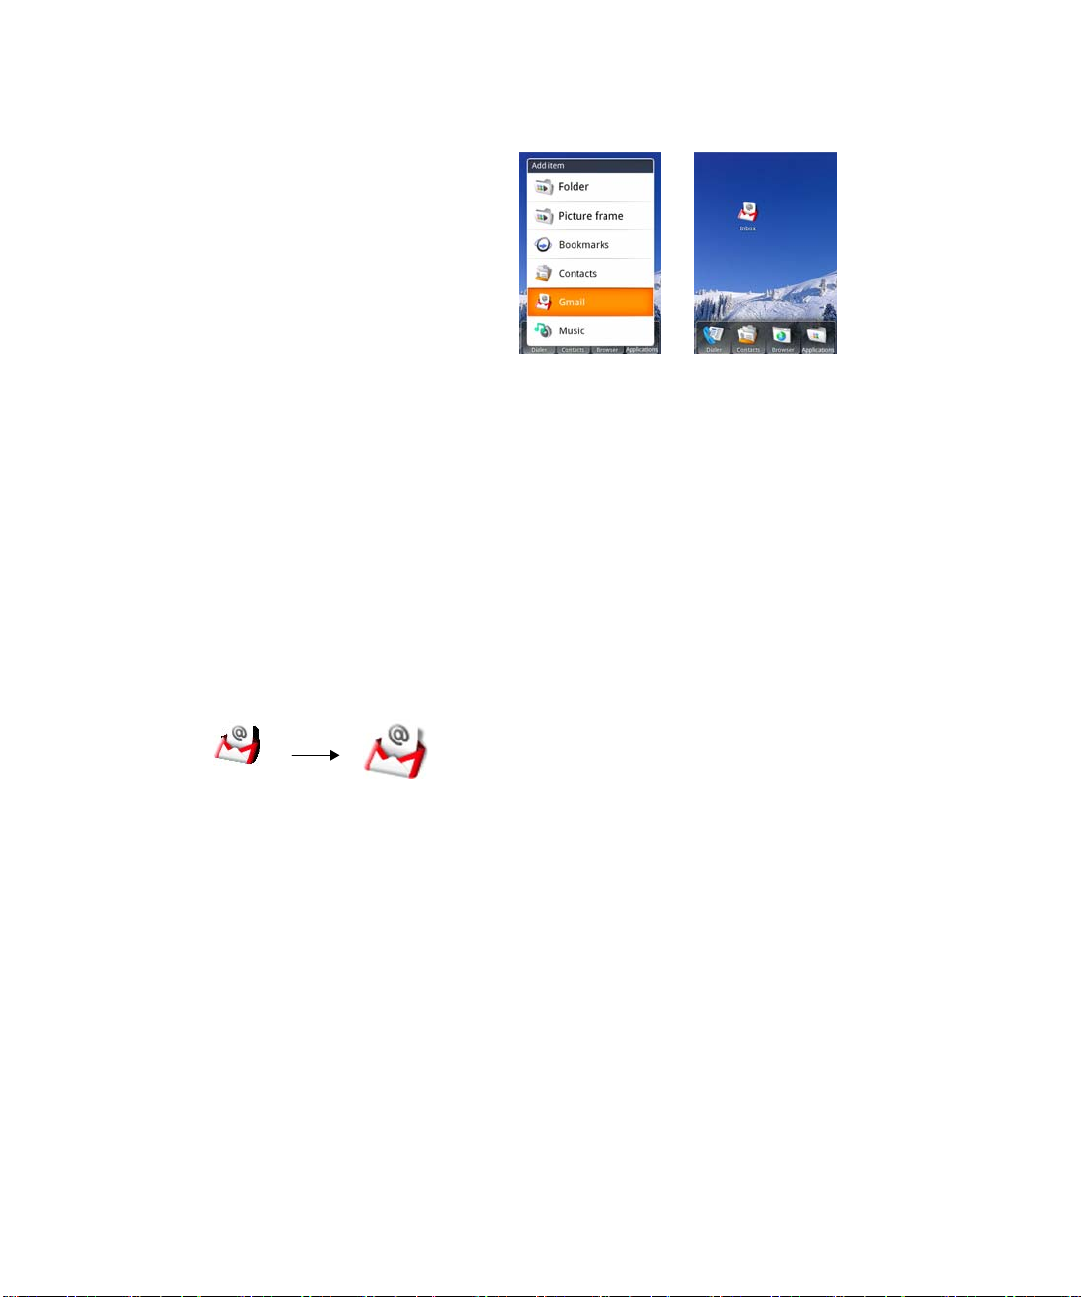
Create Home screen shortcuts
1 Start from a Home screen (press the
& hold the screen with your fingertip, or press & hold the
HOME button to get oriented). Then press
TRACKBALL. The
Add item menu opens.
2 Select a folder or application (for example, Gmail).
3 If applicable, navigate to the point in the application you would like to shortcut
and select it (for example, your Gmail Inbox).
4 The shortcut appears on the screen.
Move objects on the screen
1 To move an icon or other s on the screen, you must first press & hold it to
enter “move mode”. The object will magnify when it’s ready to be moved.
Press & hold
2 Without lifting your finger (or you’ll drop out of move mode), drag the object
to the position you like. Note that you can only move an object within the
screen you’re currently viewing.
Icon magnifies.
Drag it to reposition!
Create & delete folders
Add folders to hold application icons or shortcuts.
1 From any of the Home screens, press
the screen to open the add item menu.
2 A new folder appears on the screen.
3 Press & hold any of the application icons or shortcuts to enter “move mode”
(the icon will magnify), then drag the item on top of the new folder.
Kila - R1.0
MENU and select Add, or press & hold
17

4 Tap the folder once to open it; tap the folder’s title bar to close it.
5 To rename a folder, first open the display. Then press & hold the folder name
to open the context menu. Select
6 To delete a folder, press & hold the folder to enter “move mode”. Drag the
Rename.
folder to the
(When applicable, the Applications button in the dock changes to
Delete button in the dock.
Delete.)
Customize Home screen wallpaper
Wallpaper your home screens with pictures you have purchased or with pictures
stored on your SD card:
1 From any of the Home screens, press
2 Select a category: Android, Downloads, or Pictures. If you select Pictures,
your picture album opens. (Note that if this is the first time you have viewed
the pictures stored on your SD card from your device, it may take a while for
the pictures to load.)
3 Navigate to find the picture you want to use, then tap it.
4 Unless you’ve selected an Android wallpaper, the wallpaper cropper appears.
Size the cropper by pinching your thumb and forefinger together or pulling
them apart on the screen. Move the cropper around the picture by dragging
it with your finger.
5 When you’re happy with the framing, press the
is applied.
6 Repeat for the alternate orientation (portrait or landscape).
MENU and select Wallpaper.
BACK button. The wallpaper
Customize the dock
1 If there are no empty slots in the dock, you must remove an icon first.
• Press & hold the icon to enter “move mode” (the icon will magnify).
• Drag the icon into the All folder.
• An empty position on the dock appears.
Kila - R1.0
18

2 Press & hold the icon you want to dock (it can be an application or folder
you’ve created), then drag it to the empty slot in the dock.
Notification & connection status icons
Along the top of your device screen is the status bar. On the left side, icons will
appear, notifying you of a new message, upcoming calendar event, alarm set, or
something else you should notice. On the right side of the status bar, you’ll see
connection status icons.
New email
message
New text
message
New multimedia
message
New instant
message
New voicemail
Upcoming event
Alarm is set
Call in progress
Missed call
Call on hold
Call forwarding ON
Ringer is OFF
(Silent mode)
Ringer on vibrate
only
Phone on MUTE
GSM signal | roaming |
no signal
GPRS service connected|
data flowing|not
connected
Edge service connected|
data flowing|not
connected
3G service connected|
data flowing|not
connected
Wi-Fi service connected
|
not available | available
Battery charge indicator:
full|half-full|low|very
low!
Battery is charging
Data is syncing
Song is playing
Kila - R1.0
GPS is ON
Uploading/downloa
ding
19
Wireless is OFF
Bluetooth is ON |
Bluetooth device

connected
Read your notifications
When you see a notification in the status bar, slide your finger down the screen
to open the list of notifications.
• Ongoing notifications report activities such as data syncing, call forwarding
ON, current call status.
• Notifications report the arrival of new messages, calendar events, alarms set.
You can clear notifications list by selecting
the notification window.
To jump to the message, reminder, or other “event” notification, tap the item. To
close the notification list, slide your finger up the screen. You can also open the
notifications list by pressing
MENU and selecting Notifications.
Clear notifications at the top of
Wireless operator
To view the network your device is currently using, slide open the notifications
panel. The name of the wireless operator’s network appears at the top of the list
in bold.
Status light indicators
There is an LED light in the speaker that provides a status or activity
Sta tus li ght
indication.
Kila - R1.0
20

• Solid green - Battery is fully charged (while connected to power adapter)
• Solid red - Battery is charging
• Flashing red - Battery is low
• Flashing blue - Device is connected to a Bluetooth device
• Flashing green - You have a pending notification
The indicators are listed in order of priority. This means, for example, that if
your device is connected to a power adapter, the LED will be solid red and not
switch to a flashing green light even if there is a pending notification.
Device controls
Volume buttons
Menu
Call
Home
Use the Control buttons on your device to do the following:
Home button
Kila - R1.0
• Press
on your device.
• Press & hold
window.
Back
Trackball
HOME to return to the Home screen from anywhere
HOME to bring up the recent applications
Capture
End call / Power
21

Menu button
Back button
Call button
• Press
• Press & hold
• Press
• Press & hold
• Press
• Press & hold
MENU to open a list of actions you can take on the
current screen or dialog box.
MENU when using in combination with a
keyboard shortcut.
BACK to go back to the previous screen, or to dismiss
a dialog box or menu.
BACK to go back to the start screen of the
current application.
CALL to do one of the following, depending on
context:
- Bring up log of recent calls
- Call contact (when a contact/contact
- number is highlighted)
- Add another call (while in a call)
- Display ongoing call on the screen (if you had navigated
to another application during the call
- )
- Call number (when a phone
- number is highlighted, e.g., in Browser)
CALL to open the voice dialer.
End call button
Kila - R1.0
• While on a call, press
• While not on a call, press and hold
Global actions menu, from which you can Lock the screen,
Power off, or Silence your device.
END CALL to hang up.
END CALL to open the
22

Trackball
• Roll the
selectable items on the screen. Click the
select a highlighted item or action.
• Press & hold the
item’s context menu (if applicable).
TRACKBALL up/down and left/right to navigate
TRACKBALL to bring up the selected
TRACKBALL to
On a Web page, click the TRACKBALL twice to enter
“scale & scroll” mode. (Read more in Scale & scroll
• .)
Capture button
Volume controls • Press either + or - to bring up the sound volume controls.
• When in the Camera application, press the
half-way down to focus, then complete the press to take a
picture.
Volume is controlled separately for the ringer and
audio/video files.
CAPTURE button
Global shortcuts
Use these controll button and keyboard shortcuts from anywhere on your device:
Search
Kila - R1.0
Press
MENU + s
23

Turn off screen
Lock device
controls
Open dialer
Open voice dialer
END CALL
Press
Press & hold
Press
CALL
Press & hold
END CALL, then release and select Lock
CALL
Application keyboard shortcuts
You can set keyboard shortcuts that open individual applications when used
together with the
application is “b”, then from anywhere on the device, you could press
b to jump to the Browser application.
You can customize the shortcut keys from the quick launch settings screen:
1 Press
2 Scroll down to the
3 The quick launch screen is organized first by letter, a-z, then by number,
4 To change or add a new shortcut, select the letter or number slot to open the
HOME, then press MENU and select Settings.
1-9. Some shortcuts have been defined by default (such as “b” for Browser).
You can change these default shortcuts as well as add shortcuts to letters or
numbers that are unassigned.
list of applications. Select the application you want to shortcut, and it’s
assigned.
SEARCH key. For example, if the shortcut to the Browser
SEARCH +
Basic settings section and select Quick launch.
Keyboard
To use the keyboard, hold your device horizontally, with the control buttons on
the right. Push the display up and slightly to the left to reveal the keyboard. Your
Kila - R1.0
24

display will always use the horizontal screen orientation when your keyboard is
open (except in Browser and Pictures, where you can set the orientation
explicitly).
SEARCH key
There is a SEARCH key (just to the left of @), which you can use when the
keyboard is open. Pressing the
Type the information you’re seeking and select
SEARCH key launches the Google Search window.
GO.
MENU key
There is a MENU key (just to the left of Z), which you can use when the keyboard
is open instead of
pressing the
can open the menu using your
left hand (press the
and click the
MENU control button. This means, with the keyboard open, you
MENU key) and select a menu option with your right (roll
TRACKBALL).
ALT key
To type the characters shown in light green on some of the keys, first press the
ALT key, then the key showing the special character. For example, if you need to
type a double quote (“), you would first press the
• Lock the
• Unlock the
ALT key to type a series of characters by pressing the key twice.
ALT key by pressing it once again.
ALT key, then the key [ALT, k].
Kila - R1.0
25

J
SHIFT key
There are two SHIFT keys on your device; one on the far left of the lower row
and one on the far right of the lower row. Press the
letter to type the letter's capital. On number or symbol keys, pressing the
key causes the special character to appear.
SHIFT key while typing a
SHIFT
• Lock the
• Unlock the
SHIFT key to type a series of characters by pressing the key twice.
SHIFT key by pressing it once again.
@ key
When you type an email address, the “at” symbol (@) separates the username
from the domain; for example, username@domain.com. Use the @ key (located
in the bottom row of keys, just to the left of the
symbol in an email address.
SPACEBAR) to insert the @
Typing tips
Insert special character
Delete character to left
Delete character to right
Delete entire line
Persistent CAPS
ALT + SPACEBAR opens special character
selector
DEL
SHIFT + DEL
ALT + DEL
Press SHIFT twice; press SHIFT again to escape
ump cursor to beginning/end
of line
Create tab character
Highlight text
Cut text
Kila - R1.0
ALT + roll TRACKBALL left/right
ALT + q
SHIFT + roll TRACKBALL
MENU + x, or
Highlight text, press & hold TRACKBALL, select
26

Cut
Copy text to clipboard
MENU + c, or
Highlight text, press & hold TRACKBALL, select
Copy
Paste text in clipboard
MENU + v, or
Highlight text, press & hold TRACKBALL, select
Paste
Undo change
Select all text in field
MENU + z
MENU + s, or
Highlight text, press & hold TRACKBALL, select
Select all
Touch screen & trackball
Selection
To select an item or button on the screen, you can either:
• Roll the
lect the item; or
• Tap the item with your fingertip.
TRACKBALL to highlight the item, then click the TRACKBALL to se-
Context menus
To open the context menu for an item on the screen, you can either:
• Roll the
BALL
Kila - R1.0
TRACKBALL to highlight the item, then press & hold the TRACK-
; or
27

• Press & hold the item on the screen with your fingertip.
Scroll
To scroll up or down in a list or page on the screen, you can either:
• Roll the
• Slide your finger up/down on the screen. With repeated short, quick brushing
gestures, you can accelerate the scroll. Tap your finger to stop the scrolling.
TRACKBALL up/down; or
Resize pictures
When creating wallpaper or an icon from a picture, you can control how the
picture is cropped by pinching or pulling apart the cropper boundaries with your
thumb and forefinger.
Drag items
In some contexts you can drag items on the screen with your fingertip. Moving
the cropper frame within a picture is one example.
Zoom in or out
Zoom in on a picture (when viewed full-screen), Web page, or map:
• Touch the screen to open the zoom-in and zoom-out controls
the + control to zoom in. With each tap you zoom in closer.
• Tap the screen twice in a pattern: first tap near the bottom of the screen and
then tap again near the top of the screen. The zoom point is the mid-point of
your two taps.
. Tap
Zoom out on a picture (when viewed full-screen), Web page or map:
• Touch the screen to open the zoom-in and zoom-out controls
the – control to zoom out. With each tap you zoom out further.
Kila - R1.0
28
. Tap
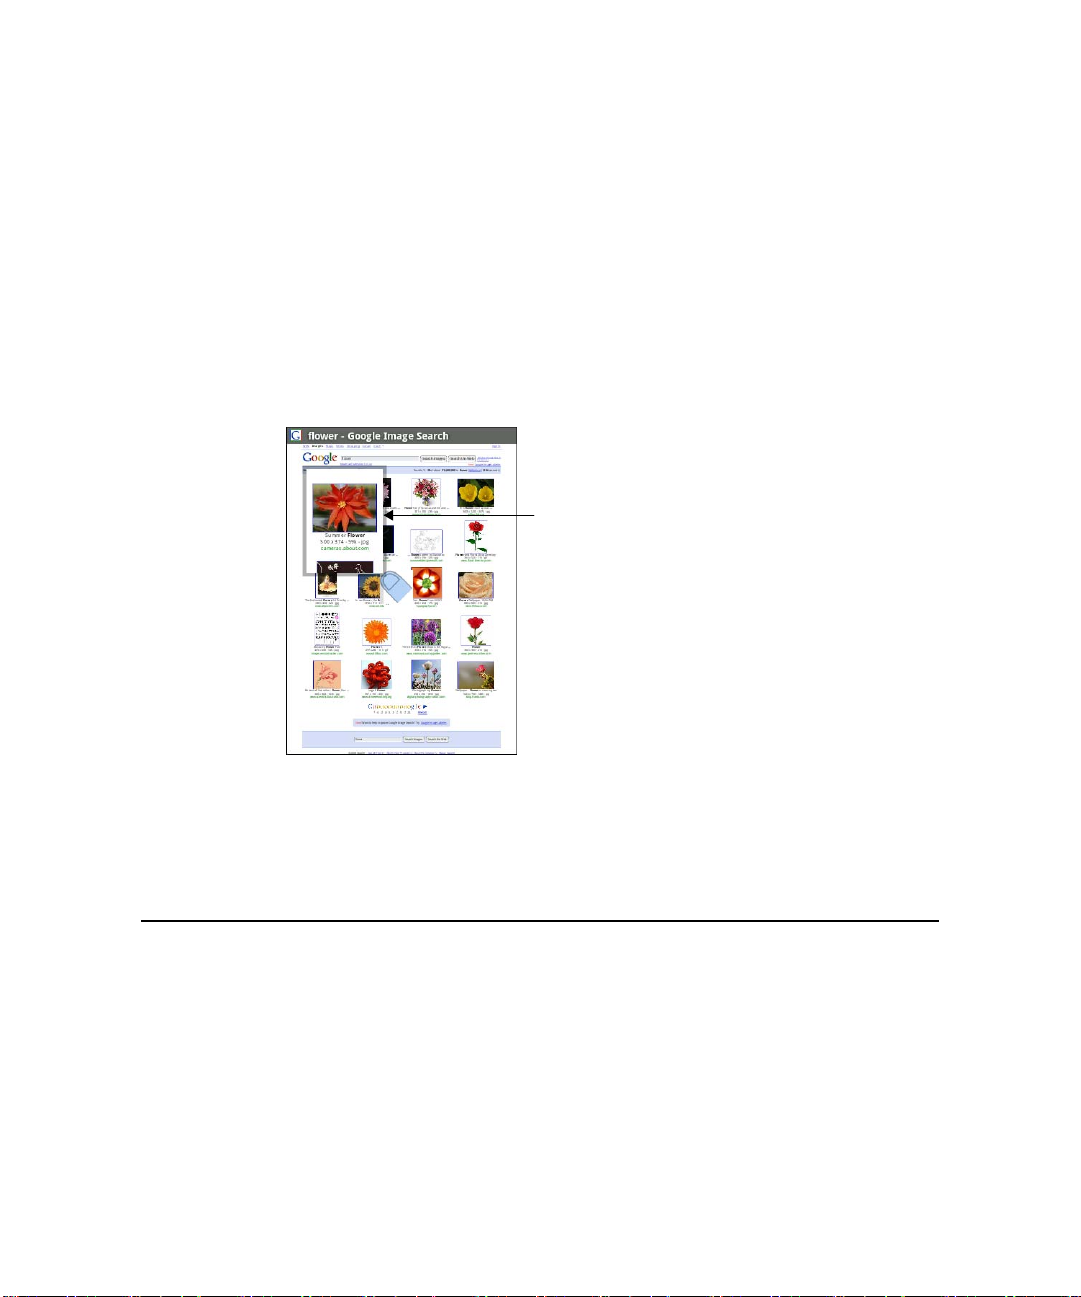
• Tap the screen twice in a pattern: first tap near the top of the screen and
then tap again near the bottom of the screen. The zoom point is the
mid-point of your two taps.
Scale & scroll
To navigate quickly to a section of a Web page, use the “scale & scroll” interface:
1 Double-tap the screen or click the
“magnifying window”. The Web page reduces to fit the width of the
screen.
2 Move the magnifying window around the screen with your fingertip or by
rolling the
3 When you find the area of the page you want to view more closely, tap the
center of the magnifying box, or click the
TRACKBALL.
TRACKBALL twice to open the
Magnif ying window
TRACKBALL.
Silent mode
To silence your device quickly, press and hold END CALL (two seconds). The
Global actions menu opens. Select
volume button to zero volume.
Kila - R1.0
Silent mode. You can also press & hold the –
29

Screen off
After a period of inactivity, your screen will go black to conserve battery power.
You can set the inactive period:
1 Press
2 Scroll down to Basic settings and select
3 Select
Tip: Turn the screen off quickly by pressing
HOME, then press MENU and select Settings.
Display.
Screen timeout and choose a time or “never timeout” from the menu.
END CALL.
Keylock
To lock your control buttons and screen from accidental touch activation, press
and hold
To unlock your screen, press
You can increase the security of your device but setting a key lock gesture. Once
set, in order to unlock your screen, you’ll have to match a key lock gesture. You
can set your key lock gesture as follows:
1 Press
2 Scroll down to the Security section and select
3 Require a lock gesture by turning Lock gesture
4 Set or change your lock gesture by selecting
END CALL. On release, the Global actions menu opens. Select Lock.
MENU.
HOME, then press MENU and select Settingss.
Lock gesture.
ON.
Change gesture lock pattern.
Kila - R1.0
30

5 Follow the prompts to define your gesture. Note: You must slide your finger
along the screen to create the pattern, not select individual
circles.
6 When you unlock your screen, if you want your lock gesture to not show, turn
Use visible pattern OFF.
Wireless off
When you need to turn your device radios off, switch to “airplane” mode:
1 Press
2 In the
3 To turn wireless back on (which means turn airplane mode off), return to this
HOME, then press MENU and select Settings.
Mobile network section of the screen, select Airplane mode to turn
the button
bar.
settings screen and select the on/off button so the button displays
ON. When on, the airplane mode icon will display in the status
OFF.
Making phone calls
To dial a call press the CALL button. To call using the voice dialer, press & hold
CALL. To answer an incoming call, press CALL or slide the in-call panel up. To
end a call, press
END CALL or slide the in-call panel down.
Kila - R1.0
31

While in a call, press
Dial pad Displays the on-screen dial pad so you can respond to in-call
menu prompts.
Add call Puts current call on hold and displays the on-screen dial pad
so you can dial another number.
Speaker Turns on the device speakerphone.
Mute Mutes your side of the conversation.
Hold Puts ongoing call on hold.
MENU to reveal the in-call options:
Power on/off
To power off your device, press and hold the END CALL button. On release, the
Global actions menu opens. Select
Power off.
To power on again, press the
END CALL button.
Bluetooth
Your device is equipped with Bluetooth® wireless technology Specification 2.0.
You can use Bluetooth to send and receive calls using a hands-free headset or
hands-free car kit.
Turn on Bluetooth services
1 Press HOME, then press MENU and select Settings.
Kila - R1.0
32

2 Scroll to the
Bluetooth section. The Bluetooth on/off button should read
OFF. Select the button to turn on Bluetooth services.
3 The Bluetooth
icon should appear in the status bar.
Visibility
If you don’t want other Bluetooth devices to see your device, turn off visibility.
Once you turn it on, your device will be visible (discoverable) to other Bluetooth
devices for 60 seconds.
1 Make sure you have turned Bluetooth ON, as described in Turn on Bluetooth
services.
2 From the
3 By default, visibility is off. Select
for 60 seconds.
4 Select
Home settings screen, select
Visibility again to turn it off.
Bluetooth settings.
Visibility to turn it on. Your device is visible
Name your Bluetooth device
1 Make sure you have turned Bluetooth ON, as described in Turn on Bluetooth
services.
2 From the Home settings screen, select
then type the name for your device in the dialog box.
3 Select
4 Your new device name appears on the Bluetooth settings screen.
OK.
Bluetooth settings > Device name,
Pair & connect with Bluetooth devices
Before your device can communicate with a Bluetooth hands-free headset or
hands-free car kit, the devices must “pair”:
1 Make sure you have turned Bluetooth ON, as described in Turn on Bluetooth
services.
2 From the
Kila - R1.0
Home settings screen, select
Bluetooth settings.
33

3 Your device starts scanning for Bluetooth devices within range. As they are
found, these devices appear in the list of Bluetooth devices.
4 To pair with a device in the list, select it.
5 Type the device’s PIN, then select
documentation if you don’t know the PIN.)
6 Pairing and connection status appears in the Bluetooth devices list.
7 Once the other Bluetooth device shows “connected” status, you can start
using it to make and receive phone calls.
Note: If you pair with a second headset while connected to the first, the first
headset will remain connected. To switch connection to the second headset you
must manually select that headset again after pairing.
OK. (Read the manufacturer’s
About data synchronization
Some Google applications on your device (Gmail, Calendar, and Contacts) give
you access to the same personal information that you can add, view, and edit on
your computer using Google Web applications. This means that when you add,
change, or delete your information in any of these applications on the Web, the
updated information also appears on your device, and vice versa. Also, if you
lose your device or if your device is destroyed, your personal information is not
lost and will appear, as before, on a replacement device.
This “mirroring” of information happens through over-the-air data
synchronization, or data “syncing”. Data syncing occurs in the background and
shouldn’t ever get in your way. You’ll know your data is being synchronized
when you see this icon in the notifications bar:
Because sending large amounts of data back and forth over the air can take time
and require considerable bandwidth, there are some settings on the device that
allow you to control data sync.
Kila - R1.0
34
.

Sync by application
To control synchronization for Gmail, Calendar, and Contacts, do the following:
1 Press
2 Scroll down to the
3 By default, the personal information in Gmail, Calendar, and Contacts will
HOME, then press MENU and select Settings.
Basic settings section and select Data synchronization.
When any of the applications are synchronizing, you will see the “sync” icon:
. You will also see the last time your data was
Date & time
of la st sy nc
synchronized.
sync whenever you make a change or receive a new message. You can
change this behavior:
Auto-sync When ON, Auto-sync will sync Gmail, Calendar, and
Contacts automatically, as you make changes or receive new
messages. When OFF, information will not be sync’d
automatically, although you can force a sync by using the
individual application ON/OFF switches described below.
Gmail Turn OFF to exclude from auto-sync. To force a sync, either
turn OFF then ON, or press
control sync by Gmail label, read "Select labels to
synchronize" on page 38.
Data is syncing
MENU and select Sync now. To
Calendar Turn OFF to exclude from auto-sync. To force a sync, either
turn OFF then ON, or press
Contacts Turn OFF to exclude from auto-sync. To force a sync, either
turn OFF then ON, or press
Kila - R1.0
35
MENU and select Sync now.
MENU and select Sync now.

Cancel sync
Sync problems If you see an exclamation point to the left of the sync
3
During a sync you can stop it by pressing
selecting
ON/OFF switch, then there was a temporary problem with
the data synchronization. Check your data connection and
try again later.
Cancel sync.
MENU and
Sync by Gmail label
You can select to sync only Gmail messages with certain labels. Do this from the
Gmail settings screen, as described in "Select labels to synchronize" on page 38.
System settings
Control device-wide settings from the Home settings screen: Press HOME, then
MENU and select Settings.
press
Radio controls
Airplane mode
on/off
Wi-Fi on/off Check this check box if you prefer to use this method for
Bluetooth on/off Use this check box to turn Bluetooth services on or off.
Kila - R1.0
When airplane mode is checked, all wireless connectivity is
off. This icon
mode is checked.
your data connection.
will display in the status bar when airplane
36

Networks
Wi-Fi settings
screen
Call settings Note that when you open Call settings, your current
Open the Wi-Fi settings screen to:
• View and scan for available networks - Press
select
• Connect to a network - Select it from the network list.
Provide your username or password if required.
settings are fetched. This could take a few moments.
• Manage your Fixed Dialing Number list - This feature
allows you to restrict outgoing calls to a fixed set of
numbers. To enable this feature you must know the SIM
PIN2 code for your device. You can get this number from
your wireless operator, assuming this feature is
supported.
• Set your voicemail number.
• Set call forwarding options.
• Additional call settings:
- Turn on/off Caller ID.
- Turn on/off call waiting.
Read more in "Call settings" on page 75.
Scan.
MENU and
Mobile network
settings
Kila - R1.0
• Turn on/off data roaming capability.
• Select a wireless operator network - Scan for all available
networks, or select a network automatically.
• Set the network access point (APN) - Do not change this
setting unless advised to do so by your wireless operator!
37

•
Bluetooth settings With Bluetooth services on, you can open the Bluetooth
settings screen to:
• Rename your device.
• Select to be visible for 60 seconds or not discoverable.
• Pair or unpair with one of the Bluetooth devices in range -
You will be asked to type a PIN before pairing. Refer to
the manufacturer’s documentation for the PIN code.
• To rescan for devices, press
MENU and select Scan.
Wi-Fi
Wi-Fi on/off Turn on Wi-Fi if you prefer to use this method for your data
connection.
Wi-Fi settings
screen
Kila - R1.0
Open the Wi-Fi settings screen to:
• View and scan for available networks - Press
select
• Connect to a network - Select it from the network list.
Provide your username or password if required.
Scan.
38
MENU and

Mobile network
Bluetooth
Device basics
Sound & display • Silence your device.
• Set vibration - Select to have your device vibrate always,
never, or only when device is silenced.
• Set ringer volume - Slide your finger along the volume
bar to set an incoming call ring volume.
• Select Phone ringtone - Select a ringtone to use for an
incoming call.
• Select Notification ringtone - Select a ringtone to use
when you receive a notification (new message, upcoming
event). Note that you can override this setting for new
Calendar event notifications and new Gmail, IM, text, and
multimedia message notifications.
• Set display brightness level - Slide your finger along the
brightness bar to set brightness level.
• Set screen timeout - Select how long your device must be
inactive before the screen turns off. You can select a time
value or to never have the screen time out.
•
Date & time • Set time, time zone, and date - Use Automatic unless you
need to override the network values.
• Select time format - Select from 12- or 24-hour formats.
• Select date format - Select from a variety of formats.
Kila - R1.0
39

My Location Select a source for determining your location:
• Wireless networks, or
• GPS satellites
Typically GPS will be more accurate (to street level) but it
consumes more battery power.
Applications Unknown sources - Turn this setting on if you want the
ability to download applications from the Web. With the
setting turned off, you will only be able to download
applications from Android Market.
To make sure your personal data and device remain secure,
it is recommended you keep this setting turned off.
Assign shortcuts (a-b, 1-9) to applications. Some
applications have been assigned shortcuts by default. You
can change these, plus add shortcuts.
Quick launch
1 Select the letter or number you want to use as a shortcut.
2 Select the application from the list that appears.
3 The shortcut is assigned.
Locale & text • Select from available locales.
• Turn Auto-replace feature on/off - This feature is not a
spell-checker, but automatically corrects
commonly-mistyped words when ON.
• Turn Auto-cap on/off - When ON, automatically
capitalizes the first letter in a text field, or the first letter
after a period (.), question mark (?), or exclamation point
(!).
Kila - R1.0
40

• Turn Auto-punctuate on/off - When ON, automatically
inserts a period (.) when you type two spaces in
succession.
• Visible passwords - Select to have your password display
as you type it.
About device • Select to go to the google.com Web site to read Terms of
Use.
• View the software version installed on your device.
• View your device “status”. This screen lists a variety of
information, including your phone number, the network
you are currently using, the type of network, signal
strength, whether you are roaming or not, any Wi-Fi
addresses you’re connected to, and more.
Security & data
Security Lock gesture - Create a pattern you will be asked to draw
before your screen will unlock. The pattern can be visible or
invisible as you draw it.
SIM lock settings - Lock your SIM card for extra security.
You can also change your SIM card PIN from this screen. If
you don’t know your SIM PIN, you can obtain it from your
wireless operator.
Kila - R1.0
41

Data Data synchronization
• Turn on/off synchronization for all services.
• Select individual services to synchronize with data on the
Web. The last time the service synchronized is reported
under the service name.
• To start an unscheduled sync, press
Sync now. If a sync is in progress, cancel it by pressing
MENU and selecting Cancel sync.
SD card & device storage
View and manage the data storage on your device:
- microSD™ card - View how much space you are using
on your memory card; select to use your memory card
as USB mass storage when your device is connected to
your computer; unmount/eject your memory card from
your device. (Note that when your device is connected
to your computer via USB, you cannot view pictures or
play any media stored on the card from your device.)
- Internal device storage - Reports how much internal
storage is free. (The device has a total of 256 MB flash
memory.) You can also select to reset your device to
factory settings. This will erase all your data from your
device!
MENU and select
Kila - R1.0
42

Contacts
The contact list
View and create contacts that sync with your Google Web contacts. Similar to an
online address book, the Contacts application gives you easy access to the
people you want to reach.
To view your contact list press
HOME and select Contacts .
All your contacts with phone numbers are listed in the
Contacts tab; only those contacts you star as “favorites”
are shown in the Favorites tab. (Read Contacts settings
to learn how to change which contacts display.) If your contact is online, their
online status as well as their first-labeled number will appear under their
Kila - R1.0
43

name.
Online status
Co ntacts tab
Favorites tab
The quick scroll tab appears when you
begin scrolling with your fingertip.
Drag the tab, then release to jump to
names beginn ing with the letter
displayed.
Browse through your contacts by rolling the
TRACKBALL, or by sliding your
fingertip up and down on the screen. Rapid brush movements in either direction
accelerates the scrolling. Tap the screen to stop the scrolling.
Another way to find a contact quickly is to use the “quick scroll” tab. As soon as
you start scrolling with your fingertip, the quick scroll tab appears on the right,
connected to the scroll bar. Select then drag the tab up or down to scroll through
the alphabet rapidly. Release your fingertip when the first letter of the name
you’re looking for appears. You’ll jump to that point in the names.
From the contact list, you can:
Take action on a
contact
Press & hold the contact’s name to open the context
menu. From the menu you can select to view the contact
details screen, call the contact’s number, send a text
message, add or remove a star, edit the contact details, or
delete the contact.
Kila - R1.0
44

See contact’s online
status
Go to contact details
screen
To the immediate left of a contact’s name you can view
their online status:
- Available
- Idle
- Away
- Invisible
- Offline
Select the contact’s name to open the contact details
screen, where all the information you’ve saved for this
contact is displayed. Note that the number with this icon
is the default number for that contact.
To edit a contact’s details, press
contact
.
Add a contact
MENU and select Edit
1 Press HOME and select Contacts . Your contact list appears.
2 Press
3 Add all the information you want to store for this contact in the appropriate
MENU and select New contact, or press MENU + n.
fields. You must add a name to save a contact.
To change a default label, select the label name to open the label menu.
Select a different label or create a custom label. To add more fields, select
Add more.
4 If you have an SD card inserted with pictures on it, you can assign a Caller ID
icon to your contact by selecting the placeholder icon
album opens. Navigate to a picture and select it, size the cropper with your
fingertips, then select
Kila - R1.0
Save. The picture is associated with your contact.
45
. Your picture

5 To assign a custom ringtone for incoming calls from the contact, select
Ringtone. The ringtone menu opens. Check a ringtone, then select OK. Note
that when you check a ringtone, it plays briefly.
6 If you want all calls from this contact to go directly to voicemail, select the
end calls directly to voicemail check box.
S
7 To save your contact, either press
Note: Email addresses are automatically added to your contact list each time you
use the Reply, Reply to all, or Forward functions to send messages to addresses
not previously stored in Contacts.
BACK or press MENU and select Save.
Assign favorites
Use the Favorites tab as a way to filter your contact list.
To add a contact to your Favorites tab, from the contact list, tap the
right of the contact’s name. Your favorite contact will now display with a colored
star:
. (Tap the star again to remove from Favorites.)
to the
Edit contact details
You can always make changes to the information you’ve stored for a contact:
1 From your contact list, press & hold the contact whose information you want
to edit. The context menu opens.
2 Select
3 Make your edits, then select
Kila - R1.0
Edit contact. The edit contact screen appears.
Save. To cancel, select Discard changes.
46

Once you’ve edited a contact’s details, the contact
Note:
will automatically become part of the My Contacts group.
Read more in About the My Contacts group
.
Communicate with a contact
Contact details screen
From the contact list you can quickly call or text a contact’s default number, as
displayed below their name on the screen. However, to view all the information
you’ve stored for a contact, and to initiate other types of communication with
that contact, open the contact details screen.
To open a contact’s details screen, simply select their name from the contact list.
Call a contact
1 From your contact list, highlight the contact you want to call.
2 Press
3 To call a different number for the contact, select the contact’s name, then
CALL to call that contact’s primary number (first in the list on their
details screen).
select the number on their details screen.
Send a text or multimedia message to a contact
To send a text or multimedia message to a contact, you must have a mobile
number stored for them in contact details.
1 From your contact list, highlight a contact who has a mobile number.
Kila - R1.0
47

2 Press & hold the contact’s name to open the context menu.
3 Select
4 Complete your message and select
Send text. A compose screen opens for your new message.
Send or press ENTER.
Send email to a contact
To send an email message to a contact, you must have an email address stored
for them in their contact details.
1 From your contact list, select the contact you want to email to open their
details screen.
2 Select the email address to open a compose screen.
3 Complete your message, press
MENU, and select Send or press ENTER.
Map a contact’s address
To map a contact’s address, you must have a postal or physical address stored
for them in their contact details.
1 From your contact list, select the contact whose address you want to map.
2 On the contact’s details page, select the address.
3 The Maps application opens and locates the address. Press
options. Read more in "Maps" on page 61.
MENU to see your
Contacts settings
To set Contacts preferences, from the Contacts screen, press MENU and select
Settings.
Kila - R1.0
48

Display contacts Select to display:
• Default - Contacts with phone numbers plus
contacts you created on your device. This is
called the “Android group” if you view your
contacts from the Web client.
• All contacts - Every contact you’ve created or
that has been added automatically.
My Contacts - A group created
automatically based on those
contacts you communicate with
most frequently. Read more in
About the My Contacts group
• .
• Phone numbers only - Only contacts with
phone numbers, regardless of whether you've
created them on the device or Web.
Import from SIM card If you have stored names and phone numbers on
your SIM card, you can add these to the
Csontacts stored on your device by selecting this
settings option. Once the list of names and
numbers appears, press
MENU and select
Import all.
Kila - R1.0
49

J
About the My Contacts group
“My Contacts” is a special group of contacts that displays by default in your
contact list. It includes the contacts that you communicate with frequently. To
display all your contacts and not just those in My Contacts, press
Settings, then select the Show all contacts checkbox.
To move a regular contact into the My Contacts group on your device, simply
edit that contact’s details. (Read more in Edit contact details
.)
All email addresses you’ve sent messages to are added automatically to the
“Suggested Contacts” group. You can move contacts from Suggested Contacts
into My Contacts at any time from the Web Contacts client. Note that you can
create additional contact groups from the Web client as well.
MENU, select
Contacts shortcuts
Add new contact
View contact
Edit contact
Call contact
Delete contact
Star contact
Go to Settings
ump to top/bottom
Kila - R1.0
MENU + n
ENTER
MENU + e
END CALL
DEL
MENU + t
MENU + p
ALT + roll
50

of list
TRACKBALL
Kila - R1.0
51

Email, IM, and Messaging
Gmail
To open Gmail, press HOME and select the Gmail icon .
About messages
With Gmail, each message you send is grouped with all the responses you
receive. This “conversation view” continues to grow as new replies arrive, so you
can always see your messages in context. Conversations are also referred to as
“message threads” or simply “threads”. A new message or a change to the
subject of a current message will begin a new thread.
Inbox message list
All the email that you fetch to your device is delivered to your Inbox, and the
Inbox is your default Gmail view. (Read more in Gmail shortcuts .) Unread
messages di
Kila - R1.0
splayss in bold. If you have labeled a message, its label appears in a
52

colored rectangle to the left of the date.
Number of
unread messages
Unrea d messages
display in bold
Labeled message lists
Number of messages
in thread
Label
Draf t message saved
Starred message
Organize your email by labeling your message threads. You can filter the
message list in view to show only messages with a specific label and you can
apply as many labels to a message thread as you wish. A “star” is a special
system-provided label:
=starred message; =unstarred message. Use
colored stars to mark important message threads, or anyway that you wish.
Other system “labels” include: Inbox, Sent, Outbox, Drafts, and All Mail.
Here are some specific instructions on using labels:
Label a message
thread
1 From a message list, press & hold a message to open
the context menu.
2 Select
Change labels.
3 The Labels menu appears. Labels already applied are
marked with a - sign; unapplied labels are marked with
a + sign.
4 Select the label to either apply it or remove it from the
Kila - R1.0
53

thread.
5 Press
BACK to return to the message list.
Star a message
thread
Filter messages by
label
Select labels to sync You can select to synchronize specific labels:
1 From a message list, press & hold a message to open
the context menu.
2 Select
want to remove it, select
1 From a message list, press
labels
2 Select the label you want to view. Notice that you can
also select to view message in Sent, Outbox, Drafts, and
All mail categories.
3 A message list appears, showing just the threads
marked with that label.
4 To return to the Inbox, press
1 From a message list, press
2 Select
Add star. If the thread already is starred and you
Remove star.
MENU and select View
.
BACK.
MENU and select Settings.
Labels.
All your labels appear in a list. Select the labels
you want synchronized on a regular basis. Read
more in Select labels to synchronize
Kila - R1.0
54

3 .
Refresh 1 From a message list, press & hold a message to open
the context menu.
2 Select
Refresh.
Your email is synchronized per settings. Read
more in Select labels to synchronize
3 .
Read email
When you open a message thread for reading, the subject will appear in a box at
the top of the screen and the latest message will appear at the bottom of the
thread.
Scroll through messages Slide your finger up or down on the screen; quickly
brush your finger up or down to scroll faster.
You can also roll the
through messages.
Kila - R1.0
55
TRACKBALL down to scroll

Open/collapse messages Each message in a thread has a selectable header. Tap
the header to open/collapse the message body.
All messages are collapsed
to show just the headers.
Select a header to expand
that message.
Open/collapse message
header
To open or collapse message header details, first
open that message, then press & hold the selectable
header.
Mark thread as spam 1 From a message list, press & hold the message to
open the context menu.
2 Select
Report spam.
Mark message as
read/unread
(Unread messages are
shown
1 From a message list, press & hold the message to
open the context menu.
2 Select
Mark read/Mark unread as appropriate.
in bold.)
Archive message thread 1 From a message list, press & hold the message to
open the context menu.
2 Select Archive.
3 To undo, press
MENU and select Undo. To view
your archived messages, from the list of labels,
Kila - R1.0
56

Compose email
Compose new
select
1 Press
2 Add recipients by typing a name or address in the
To field. Matching contacts will appear. Select the
recipient or continue typing the address. Add as
many as you wish.
3 Type a subject and message.
4 To add an attachment, press
All mail.
You can star individual
messages in a thread
Latest message in thread
Actions you can
take on the entire
thre ad
MENU and select Compose.
MENU and select
Attach. Select an audio, picture, or video file. To
remove an attachment, select the attachment’s
Remove button.
5 Select
Send or Save as draft when ready. (Pressing
BACK will also save as draft.)
Kila - R1.0
57

Reply, Reply all, Forward 1 With a message highlighted or open for reading,
scroll to the end of the message thread.
2 Select
double-check that you’ve made the right selection!
3 Compose your message and
when ready. (Pressing
Reply, Reply all, or Forward. Tip: Always
Send or Save as draft
BACK will also save as draft.)
Search for messages
In Gmail, you can search for a specific message by sender, word in subject, or
label.
1 From a message list, press
2 Type your search string into the box, then select
MENU and select Search.
GO.
Add signature to messages
You can append a signature to every message you send:
1 From a message list, press
2 Select
3 Type your signature in the box, then select
Signature.
MENU and select Settings.
OK.
Select labels to synchronize
You can choose to synchronize messages based on the labels you’ve assigned to
them. Limiting the amount of email that is regularly synchronized will cut down
on network data exchange
1 From a message list, press
MENU and select Settings.
Kila - R1.0
58

2 Select
created, all the system labels (Inbox, Starred, Chats, Sent, Spam, and Trash)
are listed.
3 Select a label name to cycle through the sync options:
or
except through the Home Data synchronization settings. Read more in "Sync
by application" on page 22.
Labels to open the labels screen. In addition to the labels you’ve
Sync recent, Sync all,
never (no sync option displays). Note: You cannot turn off sync for Inbox
Set new email notifications
You can receive a notification each time you receive a new email message:
1 From a message list, press
2 Select the
status bar when a new message arrives.
3 If you want your device to ring when a new message arrives, select that check
box as well. Select
ringtone specific to new email notifications. Note that when you check a
ringtone, it plays briefly.
Email notifications check box to receive a notification in the
Ringtone to open the ringtone menu and select a
MENU and select Settings.
Gmail shortcuts
Message list screen
Compose new
Open conversation to read
Archive conversation
Mark read/unread
Label conversation
Delete conversation
Star conversation
Mark conversation as spam
Kila - R1.0
MENU + c
ENTER
MENU + y
MENU + r
MENU + l
DEL
MENU + 8 (*)
MENU + 1
59

J
Go to Settings
ump to top of list
Page up
Page down
MENU + p
MENU + t
SPACEBAR
SHIFT +
SPACEBAR
Add external email accountss
Note: These instructions will be changing!!
You can fetch messages up to five external POP3 accounts. Follow these steps:
1 From a message list, press
2 Select
3 Select
4 Type your email address in the box, then select
5 On the screen that appears, type your password and edit the server and port
information if necessary. At the bottom of the screen, select to:
• Leave a copy of retrieved message on server
• Use a secure connection (SSL) when retrieving email
• Label incoming messages with your external account email address (e.g.,
• Send all incoming messages from this account directly to the archive (skip
6 Select
7 Once the account is verified, all the email stored in that account’s Inbox will
be delivered to your Gmail Inbox. You can identify the external account
messages by the label (the email address) that is automatically applied to
them, assuming you’ve selected to label incoming messages with your email
Email accounts. The accounts screen opens.
Add email account.
gloria@example.com)
the Inbox)
Add account.
MENU and select Settings.
Add account.
Kila - R1.0
60

address in step On the screen that appears, type
server and port information if ne above.
Read message/conversation screen
Compose new
Go to previous
conversation
Go to next conversation
Reply
Reply all
Forward
Archive conversation
Mark as read/unread
Label conversation
Delete conversation
Star conversation
MENU + c
MENU + j
MENU + k
MENU + r
MENU + a
MENU + f
MENU + y
MENU + u
MENU + l
DEL
MENU + 8
your password and edit the
Report as spam
Page up
Page down
MENU + 1
SPACEBAR
SHIFT +
SPACEBAR
Kila - R1.0
61

Compose screen
Send message
Edit subject
Add attachment
MENU + ENTER
MENU + e
MENU + n
Kila - R1.0
62

Google Talk
You can use Google Talk to send instant messages to your friends. All you need
is a Gmail account and you’re set up. To open Google Talk, press
HOME and
select the IM icon
conversations as you wish.
. The IM accounts screen opens. You can hold as many
Your Google Talk Friends list
On the IM accounts screen, select GTalk account. Your Friends list appears. You
can see and do the following from this screen:
Change your status Select your name (at the top of the list) to reveal the
status menu. Type a custom status or select one of the
defaults, then select
View your friends In the list, friends are sorted first by their status:
• active chats
• online
• away
• invisible
• offline
Within the status groupings, friends are listed in
alphabetical order, A-Z.
Set.
Show all or just
“most popular”
Kila - R1.0
By default, only the friends that you communicate with
most often – the “most popular” – are on the Friends list.
If you want to display all your friends, press
select
All friends. To switch back to the most popular
MENU and
63

view, press
View friend status To the left of a friend’s name, you can see their online
status in the upper-right corner of their icon:
- Available
- Idle
- Away
- Invisible
- Offline
Find a friend From the Friends list, start typing to filter your list to
show only friends with names that match what you type.
Block a friend 1 From the Friends list, press & hold the friend’s name to
open the context menu.
2 Select
3 Now the friend cannot send you messages and they are
removed from your Friends list. They appear on the
blocked friends screen.
4 To unblock, from the Friends list, press
select
you want to unblock and then confirm.
MENU and select Most popular.
Block friend.
MENU and
Blocked friends. Select the name of the friend
Pin/unpin a friend To pin a friend is to make sure that friend always appears
in your "most popular" list.
1 From the Friends list, press & hold the friend’s name to
open the context menu.
Kila - R1.0
64

2 Select
Show/hide a friend To hide a friend is to never show the friend on the "most
popular" list.
1 From the Friends list, press & hold the friend’s name to
open the context menu.
2 Select
View chat status From the Friends list:
• If you have a new instant message, you will see
the left of the friend’s name. Select the friend’s name
to open the chat.
• If you have an active chat but no new message, you will
see
Pin friend or Unpin friend, as appropriate.
Show friend or Hide friend, as appropriate.
to
to the left of the friend’s name.
Switch between
active chats
Close a chat From your Friends list, press & hold a friend with an
Kila - R1.0
If you have more than one chat going, you can switch
between them by sliding your fingertip horizontally on
the screen. Your chats all appear in a menu; select the
chat you want to join. You can also press
select
active chat to open the context menu. Select
Switch chats.
65
MENU and
Close chat.

Add a friend to your
Friends list
View invites
1 From the Friends list, press
friend
2 You can add a friend stored in your Contacts
application, or invite a new friend.
• If you add from your Contacts, select a contact from
the list.
• If you add a new friend, complete the information
required on the Invite screen and select
1 From the Friends list, press
2 All chat invitations you’ve sent or have received are
listed on the pending invitations screen.
3 To accept a pending invitation, select it. Choose to
.
MENU and select Add
Invite.
MENU and select Invites.
Accept or Decline.
4 When someone you invite to chat accepts, the pending
invitation disappears from the list.
Chat
To start a chat, select a friend from the Friends list. The chat window opens.
From here you can:
Start a chat 1 Type your message using the keyboard.
Kila - R1.0
2 To insert a smiley:
• Press
• Select a smiley from the list.
• When ready, select
MENU and select Insert smiley. The
character smiley appears.
Send or press ENTER. (You
can also just type the characters rather than
selecting from the menu.)
66

3 When ready, select
Note: In the chat window, after every 1 minute of
inactivity, a timestamp appears.
Start a group chat You can invite more friends to chat from an existing
chat window:
MENU and select Add friend to chat.
the chat is now a “group chat” appears in the chat
window for all participants to see.
Close chat
1 Press
2 Select the additional friend to invite.
3 When the additional friend joins, a notification that
To close the current chat, press
Send or press ENTER.
MENU and select
Close chat.
Start a group chat While in a chat with a friend, if you want to block
them from contacting in the future, press
select
Block friend.
MENU and
Sign in automatically
If you want to sign in to your Google Talk account automatically every time you
power on your device, make this setting:
Kila - R1.0
67

1 From the Friends list, press
from the menu that opens.
2 Select the
3 Press
Automatically sign in check box.
BACK to save your setting.
MENU and select More, then select Settings
Set new message notifications
You can receive a notification each time you receive a new instant message:
1 From a Friends list, press
2 Select the
status bar when a new message arrives.
3 If you want your device to ring when a new message arrives, select that check
box as well. Select
ringtone specific to new IM notifications. Note that when you check a
ringtone, it plays briefly.
IM notifications check box to receive a notification in the
Ringtone to open the ringtone menu and select a
MENU and select Settings.
Sign out
To sign out, from the Friends list, press MENU and select More > Sign out.
Add other IM accounts
If you have another instant messaging account and if it is available on your
device, you can add it to your list of accounts and use your device to chat with
those friends as well:
1 Go to the IM accounts screen. Tip: If you are viewing your
screen, or another screen in the IM application, simply press & hold
return to the IM accounts screen.
2 Select the account type you want to add. The sign-in screen appears.
3 Type your username and password. Select the
if you want.
4 Select
Kila - R1.0
Sign in.
68
Keep me signed in check box
Friends list, a chat
BACK to

5 Your Friends list appears.
Note: If your IM account displays
collapsible group “header”. Select the header to open the list within; select again
to close.
friends in groups, each group will appear in a
IM shortcuts
Start chat
Remove friend from
list
Edit online status
Add new friend
End current chat
Go to Settings
Switch between chats Slide finger horizontally across screen to open active
ENTER
DEL
MENU + e
MENU + n
MENU + q
MENU + p
chat menu
Kila - R1.0
69

SMS and MMS messaging
To open the SMS & MMS Messaging application, press HOME and select the
Messaging icon
.
About text and multimedia messages
SMS messages are also know as “text” messages and can each be around 160
characters. If you continue to type after the limit is reached, your message will
be delivered as one, but count as more than one message. (These are called
“concatenated” messages.)
MMS messages are also known as “multimedia” or “picture” messages and can
contain text, picture, audio, and video files.
When you compose a message, the device will automatically convert a text
message into a multimedia message as soon as you add a second recipient, a
subject, or an attachment.
The message list
Like Gmail, text and multimedia messages are grouped with the replies you
receive into “conversations” or message threads. Message threads are listed in
order of when you received them (newest at the top). To open a thread for
reading, select it. Read more below. Unread messages appear with a green band
on the left.
Kila - R1.0
70

The Read view
Select a message thread in the list to open it for reading. When open, the
individual messages appear stacked on the screen, much like with instant
messaging conversations (or chats). Note that messages you send are also listed
in the Read view.
Reply to a message 1 Simply start typing your message in the text box
Links in messages If a message contains a link to a Web page, it will be
at the bottom of the screen to reply to a message.
2 You can always press
more recipients, a subject, or an attachment to
convert it to a multimedia message.
3 Select
selectable. To view the Web page in the Browser,
simply select it.
Send or press ENTER when ready.
MENU and select to add
Mark message as
read/unread
(Unread messages are
shown with a green band
on the left.)
Kila - R1.0
1 From the message list, press & hold the message
to open the context menu.
2 Select
Mark read/Mark unread as appropriate.
71

Delete messages Your messages will be saved until you explicitly
delete them.
• Delete one message in a thread - With the
message thread open in Read view, press & hold
the individual message you want to delete to open
Delete message.
MENU
Delete.
the context menu. Select
• Delete all messages in a thread - With the
message thread open in Read view, press
and select
also delete an entire thread from the message list
by pressing & holding the thread to open the
context menu, then selecting
• Delete all message threads - From the message
list, press
More > Delete entire thread. You can
MENU and select Delete all threads.
Delivery problems If a message you sent appears with this icon
the right, there was a delivery problem. Press & hold
the message to open the context menu. You can
edit, retry sending, or delete the message.
To see all your undelivered messages (assuming
there is at least one), from the message list, press
on
MENU and select Undelivered messages.
View message details To view details about a particular message, in the
Read view, press & hold the message to open the
context menu. Select
Kila - R1.0
72
View message details.

View message delivery
report
If a message contains a delivery report (you
would have requested it in Settings) you
can read it in the Read view. Press & hold
the message to open the context menu.
Select View delivery report. Read more about
delivery reports in Text and multimedia
message settings
.
Kila - R1.0
73

Compose text and multimedia messages
1 Press MENU and select New message. The compose screen opens.
2 Add recipients by typing a name or address in the To field. Matching contacts
will appear. Select the recipient or continue typing the address. (If you add
more than one recipient, the message will convert to a multimedia message.)
Add as many recipients as you wish.
3 To add a subject, press
the message will convert to a multimedia message.)
4 To add an attachment, press
picture, or video file. You can also select to take a new picture to attach or
record a “voice note”. To remove an attachment, select the attachment’s
Remove button. (Adding an attachment will convert the message to a
multimedia message.)
5 Type your message. As you type, you’ll be able to track how many
characters/messages you’re creating. Remember that text messages have a
limit around 160 characters. Once you go over that limit, a new message is
actually created but automatically joined into one when received.
6 Select
more below.
7 As your message sends, progress displays in the title bar.
Send or press ENTER when ready. You can also save a draft. Read
MENU and select Add subject. (If you add a subject,
MENU and select Attach. Select an audio,
Save message as draft
1 While composing, press BACK.
2 Your message automatically saves as a draft.
3 To resume composing, in the message list, press & hold the message and
select
Edit.
Text and multimedia message settings
To set text and multimedia message preferences, from the message list, press
MENU and select Settings. You can set the following from this screen:
Kila - R1.0
74

Notification settings
New message
notifications
You can receive a notification each time you receive
a new message:
1 From a message list, press
MENU and select
Settings.
2 Select the
notification
for text, for multimedia) in the status bar
(
when a new message arrives.
3 If you want your device to ring when a new
message arrives, select that check box as well.
Select
select a ringtone specific to new text and
multimedia message notifications. Note that
when you check a ringtone, it plays briefly.
Text message settings
Delivery reports To receive a report on the delivery status of your
message, turn this setting
• Successful delivery
• Temporary delivery failure; an attempt to deliver
will be made again
• Unsuccessful delivery; no attempt to re-deliver
will be made
Notifications check box to receive a
Ringtone to open the ringtone menu and
ON. Status can be:
Manage messages on
SIM card
Kila - R1.0
Text messages can also be stored on your SIM card.
The exact number depends on your card, but it is
usually around 25-50. To view messages on your
SIM card, delete them, and copy them to your
device memory, select this setting.
75

Multimedia message
settings
Delivery reports To receive a report on the delivery status of your
Read reports To receive a report on whether each recipient has
message, turn this setting
• Successful delivery
• Temporary delivery failure; an attempt to deliver
will be made again
• Unsuccessful delivery, where no attempt to
re-deliver will be made
read or deleted the message without reading it,
turn this setting ON.
ON. Status can be:
Text & multimedia messaging shortcuts
Message list
Compose new
Search
Go to settings
Read & reply highlighted
Open previous message
Open next message
MENU + n
MENU + s
MENU + p
ENTER
MENU + j
MENU + k
Compose view
Edit recipients
Kila - R1.0
MENU + e
76

Discard message
Read view
Mark as read/unread
Undelivered message
view
Retry sending all
Edit highlighted
Delete highlighted
MENU + q
MENU + u
MENU + r
MENU + e
DEL
Kila - R1.0
77

Browser
About the Browser
To open the Browser, press HOME and select the Browser icon .
The Browser always opens to your home page. You can change your home page
by pressing
home from any Web site, press
Zoom and navigation in Web pages
MENU and selecting More > Settings > Set home page. To go
MENU + ENTER key.
While viewing a Web page, take advantage of the following zoom and navigation
techniques:
Zoom in There are a couple ways you can zoom in:
Kila - R1.0
• Touch the screen to open the zoom-in and zoom-out
controls
you zoom in closer. (You can also open the zoom controls
from the menu: Press
Zoom
• Tap the screen twice in a pattern: first tap near the bottom
of the screen and then tap again near the top of the screen.
The zoom point is the mid-point of your two taps.
.)
. Tap the + control to zoom in. With each tap
MENU and select More > Settings >
78

Zoom out There are a couple ways you can zoom out:
• Touch the screen to open the zoom-in and zoom-out
Navigate
controls
tap you zoom out further. (You can also open the zoom
controls from the menu: Press
Settings > Zoom
• Tap the screen twice in a pattern: first tap near the top of
the screen and then tap again near the bottom of the
screen. The zoom point is the mid-point of your two taps.
• Roll the
view.
• Slide your fingertip in any direction to shift your page view.
TRACKBALL in any direction to shift your page
. Tap the – control to zoom out. With each
MENU and select More >
.)
The browse screen
From the browse screen you can do the following:
Go to a Web page 1 Make sure the focus is not on a text box and then start
typing the URL.
2 The Go to window opens. Possible matches appear in
the drop-down menu. Select a match or continue typing
the URL.
3 Press
ENTER to go to the page.
Kila - R1.0
79

Navigate within
pages
Zoom in/out You can zoom in/out on a Web page in a variety of ways:
You can navigate on a Web page in a variety of ways:
• To navigate on a Web page, slide your fingertip on the
screen, generally in the opposite direction that you want
to view.
• To traverse a Web page by jumping from link to link,
roll the
• To enter “scale & scroll” mode, tap the screen twice or
click the
to the part of the page you want to view, then tap the
box or click the
scroll" on page 18.)
• Press
open the zoom controls:
to zoom in; press the - magnifier to zoom out.
• If you’re on a page with contents that don’t fit
completely within the screen, the zoom controls will
appear when you touch the screen.
• Zoom in by tapping twice on the screen in a pattern:
first tap the bottom of the screen, then tap the top.
• Zoom out by tapping twice on the screen in a pattern:
first tap toward the top of the screen, then tap the
bottom.
TRACKBALL to navigate.
TRACKBALL twice. Move the magnifying box
TRACKBALL. (Read more in "Scale &
MENU and select More > Settings > Zoom to
. Press the + magnifier
Kila - R1.0
80

Add a bookmark Bookmark the Web page you are currently viewing:
1 Press
2 From the bookmarks screen, select
3 Confirm the URL and name, then select
Bookmark a highlighted link on a Web page:
1 Press & hold the
2 Select
To view all your bookmarks, press
MENU and select Bookmarks.
New bookmark.
OK.
TRACKBALL to open the context
menu.
Bookmark link.
MENU and select
Bookmarks.
Find text on a Web
page
Refresh a Web page
1 Press
2 Type the word(s) you want to find in the text box, then
3 The number of matches appears in the window and all
4 To step through the matches, use the Prev and Next
5 To dismiss the Find window, press
To refresh the contents of the current page, press
and select
MENU and select More > Find to open the Find
window. You can also press
select
matches are highlighted in yellow.
buttons in the Find window.
OK.
Refresh.
MENU + f as a shortcut.
BACK.
MENU
Kila - R1.0
81

Open pages in landscape or portrait orientation
To set a persistent landscape orientation of your screen when viewing Web pages,
MENU and select More > Flip orientation. The orientation is set to the
press
that opposite your current view. When set to landscape, the orientation will
remain even when you reveal the keyboard.
Open pages in separate windows
You can keep more than one Web page open by using multiple windows to
display the pages. You can open up to eight windows.
Open a new window
Close a window
Bookmark the page
displayed in a
window
1 From a Web page, press
The current windows screen opens, showing the Web
page you started from, plus a “new window”.
2 Select
3 Your home page opens in a new window. From here you
can navigate to any page you want and it will display in
this window, until you explicitly close it.
1 Press
2 Press & hold the window you want to close. The context
menu opens.
3 Select
1 Press
2 Press & hold the window whose page you want to
bookmark. The context menu opens.
3 Select
New window.
MENU and select Windows.
Close.
MENU and select Windows.
Bookmark.
MENU and select Windows.
Kila - R1.0
82

4 Confirm the URL and name, then select
Manage bookmarks
You can store as many bookmarks as you want on your device.
Bookmark any page
Send bookmarked page’s
URL
1 Press
2 Select
3 Type a name and location (URL) in the dialog box.
4 Select
1 Press
2 Press & hold the bookmark you want to send. The
3 Select
4 An email compose screen opens with the URL as
5 Address your message and finish composing.
6 Select
MENU and select Bookmarks. The
bookmarks screen opens.
New bookmark.
OK.
MENU and select Bookmarks. The
bookmarks screen opens.
context menu opens.
Send URL.
the message.
Send or press ENTER.
OK.
Kila - R1.0
83

Set bookmarked page as
Home
View bookmarked page
Edit bookmark
1 Press
2 Press & hold the bookmark you want to save as
3 Select
4 Your home page is updated immediately.
1 Press
2 Press & hold the bookmark you want to open. The
3 Select
1 Press
2 Press & hold the bookmark you want to edit. The
3 Select
4 Type your change and select
MENU and select Bookmarks. The
bookmarks screen opens.
your home page. The context menu opens.
Set as home page.
MENU and select Bookmarks. The
bookmarks screen opens.
context menu opens.
View page or Open in new window.
MENU and select Bookmarks. The
bookmarks screen opens.
context menu opens.
Edit bookmark. The edit bookmark dialog
box opens.
OK.
Delete a bookmark
Kila - R1.0
1 Press
2 Press & hold the bookmark you want to send. The
3 Select
MENU and select Bookmarks. The
bookmarks screen opens.
context menu opens.
Delete bookmark. You will be asked to
confirm.
84

Delete all bookmarks
1 Press
2 Press
MENU and select Bookmarks. The
bookmarks screen opens.
MENU and select Delete all. You will be
asked to confirm.
Set your home page
You can set your home page from a couple of places in the Browser:
From settings 1 If you want, first go to the Web page you want to set as
your home page.
2 Press
3 In the
4 If you are already on the page you want to be your new
MENU and select More > Settings. The settings
screen opens.
Page content section, select Set as home page to
open the dialog box.
home, the URL is already entered so simply select
Otherwise, type the URL of the page you want to set as
home, then select
OK.
OK.
From your
bookmarks
screen
1 Press
2 Press & hold the bookmarked page you want to set as
3 Select
MENU and select Bookmarks. The bookmarks
screen opens.
home. The context menu opens.
Set as home page.
Kila - R1.0
85

The shortcut to go to your home page is
MENU + ENTER. You can also press
MENU and select More > Home page.
Links in Web pages
Navigate the links on a page using the TRACKBALL. Links are outlined in yellow
Highlighted link
when highlighted.
To go to a link, highlight the link using the
screen, then select the link by clicking the
with your fingertip.
TRACKBALL or by touching the
TRACKBALL or by touching it again
Tip: When links are too small to press directly on the screen, highlight the link
with the
press & hold the
URLs • Select a link to jump to the URL.
Kila - R1.0
TRACKBALL, then either click the TRACKBALL to open the link, or
TRACKBALL to open the link’s context menu.
• Press & hold a link to open the context menu and:
- Open link in new window
- Bookmark the link
- Copy the link to the clipboard
- Share link via email
86

Phone numbers Select a linked phone number to:
• Call the number - The Dialer opens, ready for you to send
the call.
• Add the number to your contact list - Opens new contact
screen for you to complete and save.
Email addresses Select a linked email address to:
• Send an email - Opens an email compose screen with the
email address added for you to complete and send.
• Add the email to your contacts list - Opens a new contact
screen for you to complete and save.
• Map the address.
Browser history
The history screen lists the last 250 sites you’ve visited on the Web. To view your
Web site history:
• From the browser screen, press
• Press
Select a Web site from the list that appears to go to the site.
MENU + h.
MENU and select More > History, or
Download Web applications
To download Web applications, you must first enable downloading from the
Home settings screen:
1 Press
Kila - R1.0
HOME, then press MENU and select Settings.
87

J
2 Scroll to the Application section and select
setting
3 You will now be able to download to your device applications from the Web.
Warning! Applications downloaded from the Web can be from unknown sources.
To protect your device and personal data, only download applications from
sources you trust, such as "Android Market" on page 97.
ON.
Unknown sources to turn the
View your downloads
To see which applications you’ve downloaded:
1 From the browse screen, press
2 The Download history screen appears with the list of downloads. If you have
no downloads, nothing will be shown on this screen.
MENU and select More > View downloads.
Browser settings
To set Browser preferences, from the Browser screen, press MENU and select
More > Settings.
Page content settings
Load images Select this check box if you want images on Web pages
to load. For faster page loading, clear this check box.
Block pop-up
windows
Enable JavaScript Select to enable JavaScript on pages. Disabling
Kila - R1.0
Select this check box if you want pop-up windows to be
blocked.
avaScript may cause some Web pages to not work
properly.
88

Open in background Select if you want links to new pages to open in a new
window in the background.
Text size
Select to open the
Text size menu. Default setting is
Normal, but you can increase the size to Larger or
Largest, or decrease to Smaller or Smallest. Note that
this text size setting only affects pages you view
through the Browser.
Set home page Your currently-set home page is shown on the settings
screen. To change your home, select
type the URL for your home page, then select
Privacy settings Select one of the privacy settings to clear the following:
• browser cache
• stored cookies
• Browser page-visited history
• saved form data
• saved passwords
Set home page,
OK.
Security settings
Remember
passwords
Remember form data Select this check box if you want the Browser to
Kila - R1.0
Select this check box to save usernames and passwords
to various
Web sites.
remember text you have typed in forms, so that you
89

can select the same text later rather than retyping it.
Show security
warning
Select this check box if you want a warning to be
displayed when you are going to an insecure Web site.
Accept cookies Select this check box if you want the Browser to save
cookies. Some Web sites might not work properly with
cookies disabled.
Extras
Plugins Select to enable browser plugins and view any plugins
that are installed.
Reset settings Select if you want to reset all Browser settings to factory
default values, except for your home page.
Kila - R1.0
90

Browser shortcuts
Browse screen
Open Go to window
Open Bookmarks
Open Windows
View history
Refresh or stop page
Go back a page
Go forward a page
Find on page
Go to home page
Zoom in
Zoom out
Go to Settings
Page down
Page up
MENU + s
MENU + b
MENU + w
MENU + h
MENU + r
MENU + j
MENU + k
MENU + f
MENU + ENTER
MENU + i
MENU + o
MENU + p
SPACEBAR
SHIFT + SPACEBAR
Kila - R1.0
91

Windows screen
New window
History
View highlighted
bookmark
Open Bookmarks
Close highlighted window
MENU + n
MENU + h
ENTER
MENU + b
MENU + q
Kila - R1.0
92

Maps
About Maps
To open Maps, press HOME and select the Maps icon .
Maps opens by default in “Map mode”. To read more
about the different map modes, read Select map mode
.
Zoom and navigation in maps
While viewing a map, take advantage of the following zoom and navigation
techniques:
Kila - R1.0
93

Zoom in • Touch the screen to open the zoom-in and zoom-out
controls
you zoom in closer.
• Tap the screen twice in a pattern: first tap near the bottom
of the screen and then tap again near the top of the screen.
The zoom point is the mid-point of your two taps.
Zoom out • Touch the screen to open the zoom-in and zoom-out
controls
tap you zoom out further.
• Tap the screen twice in a pattern: first tap near the top of
the screen and then tap again near the bottom of the
screen. The zoom point is the mid-point of your two taps.
Navigate
• Roll the
view.
• Slide your fingertip in any direction to shift your map view.
TRACKBALL in any direction to shift your map
. Tap the + control to zoom in. With each tap
. Tap the – control to zoom out. With each
Find your location
1 Make sure you have enabled a “location source” in global Settings by doing
the following:
• Press
• Scroll to Basic settings and select
• Select either
2 From the main map screen, press
Kila - R1.0
HOME, then press MENU and select Settings.
My Location.
Wireless networks or GPS satellites, or both.
MENU and select My Location.
94

3 Your location is shown on the map as a blue circle.
You are here
Tap low, then high to zoom in
Tap high, then low to zoom out
Touch the screen to open zoom controls
Find any location
1 From the main map screen, press MENU and select Search.
2 You can use a variety of search criteria in the search box:
• Type an address.
• Type a city and type of business (e.g., port angeles bus lines).
• Select an address you’ve visited before in Maps from the drop-down menu
(stored in History).
Kila - R1.0
95

3 Select
4 Select
GO when ready. Your search results display.
Show map to see the highlighted result on a
map.
Select the right/left arrow, or roll the
location of the previous/next result. The previously-mapped result displays
as well.
Kila - R1.0
TRACKBALL left/right to display the
96

5 Tap the result balloon to open the location’s details.
In addition to seeing details about the location, from this screen you can:
• See the location on the map
• Get directions to the address
• Get directions from this address to another location
• Add location to your Contacts
• Dial the number
Get directions
To get detailed directions to a location, do the following:
1 From the main map screen, press
2 Enter the starting point in the first box. You can type an address, or select
to open the location source menu. Select from:
MENU and select Directions.
My current location - Remember to have GPS enabled. (Read
how in Find your location
• .)
Kila - R1.0
97

Contacts - Opens a list of the contacts you’ve stored with a physical
•
address.
History - Opens a menu of places you’ve visited.
•
3 Enter your destination in the second box. You can type an address or select
to select from the location source menu.
4 Select
you can select Show map, to view the same directions overlaid on a
Show directions. You can choose to view your directions in a list, or
Kila - R1.0
98

map.
Directions
appear in a
list
Select Show map
to display directions
in map view
Start point
End point
Tur n p o i nt
Select the arrows to step
through or repeat directions
5 When finished reading or following the directions, select
destination is saved in History.
Kila - R1.0
99
Clear map. Your
 Loading...