

Page 1
Controllers
For certification only
About the VIVE controllers
Use the controllers to interact with objects in the VR world.
The button labels on the controllers that you received with your developer kit may vary. Please
check the hardware for the matching label.
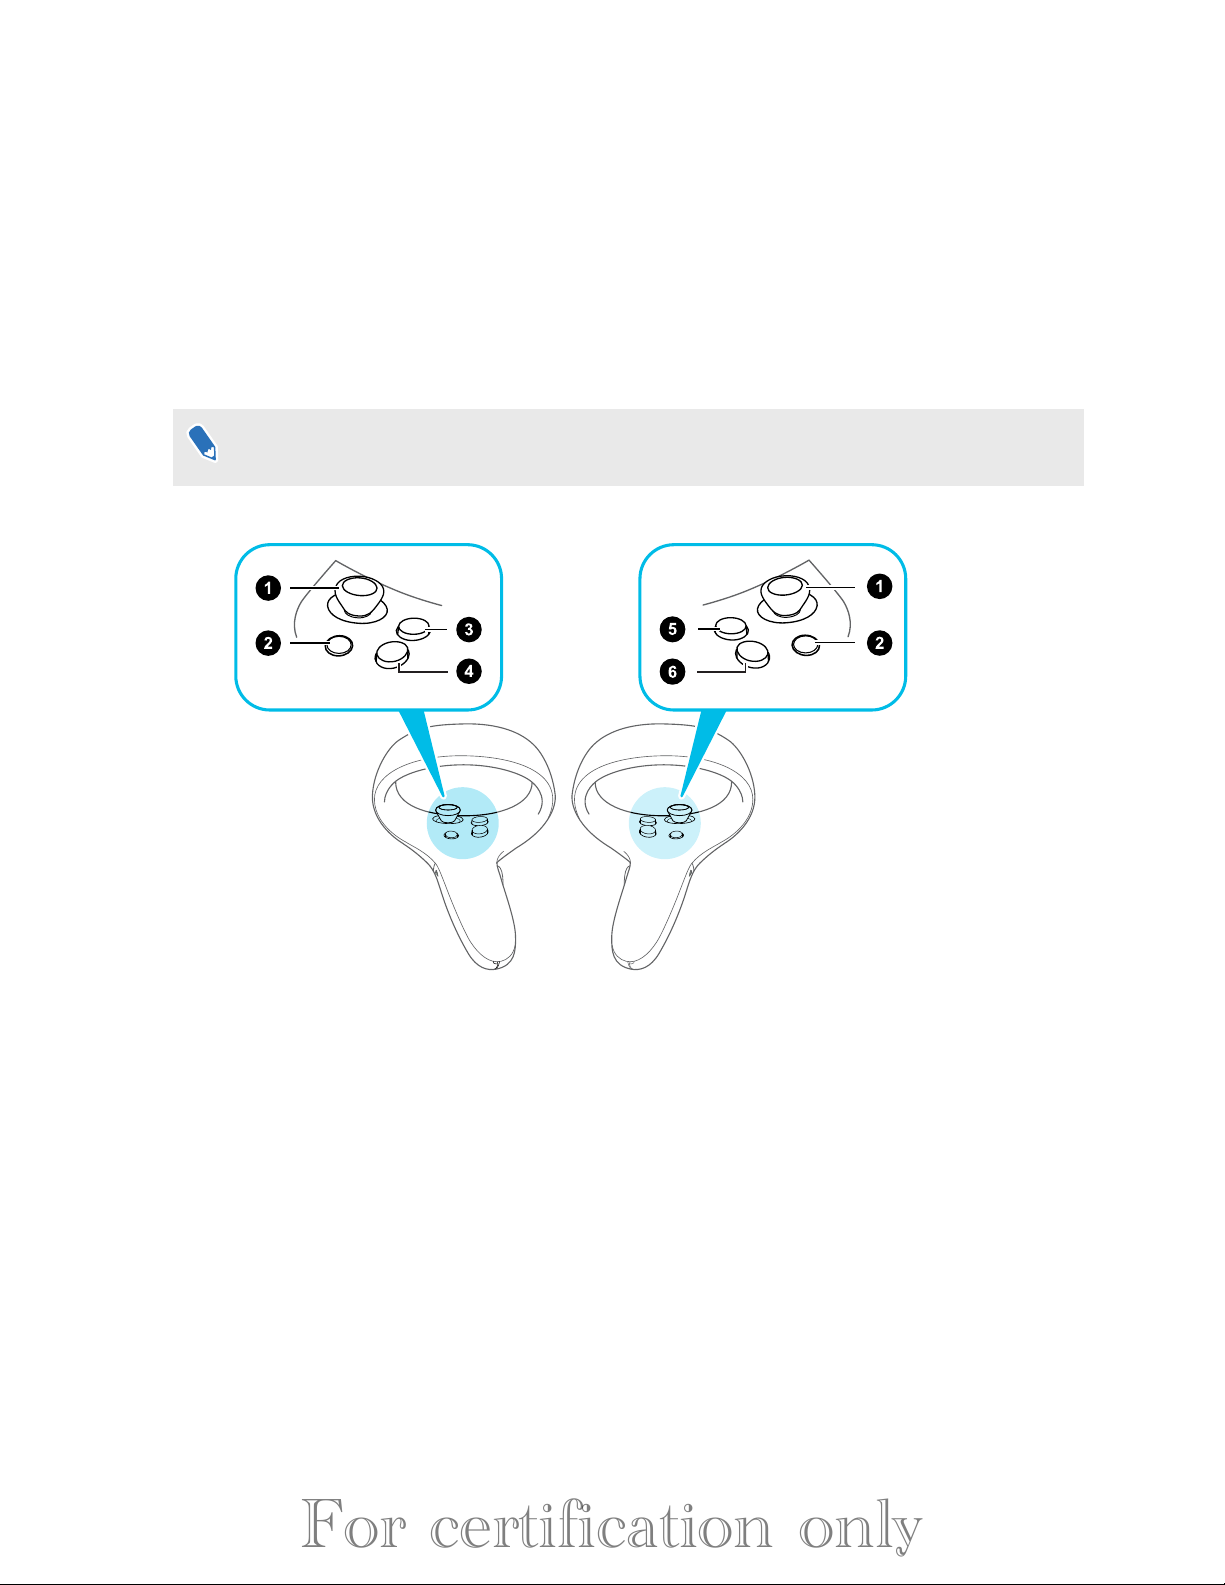
Front view
1. Joystick
2. System/Menu button
3. B/Y button
4. A/X button
5. B button
6. A button
Page 2
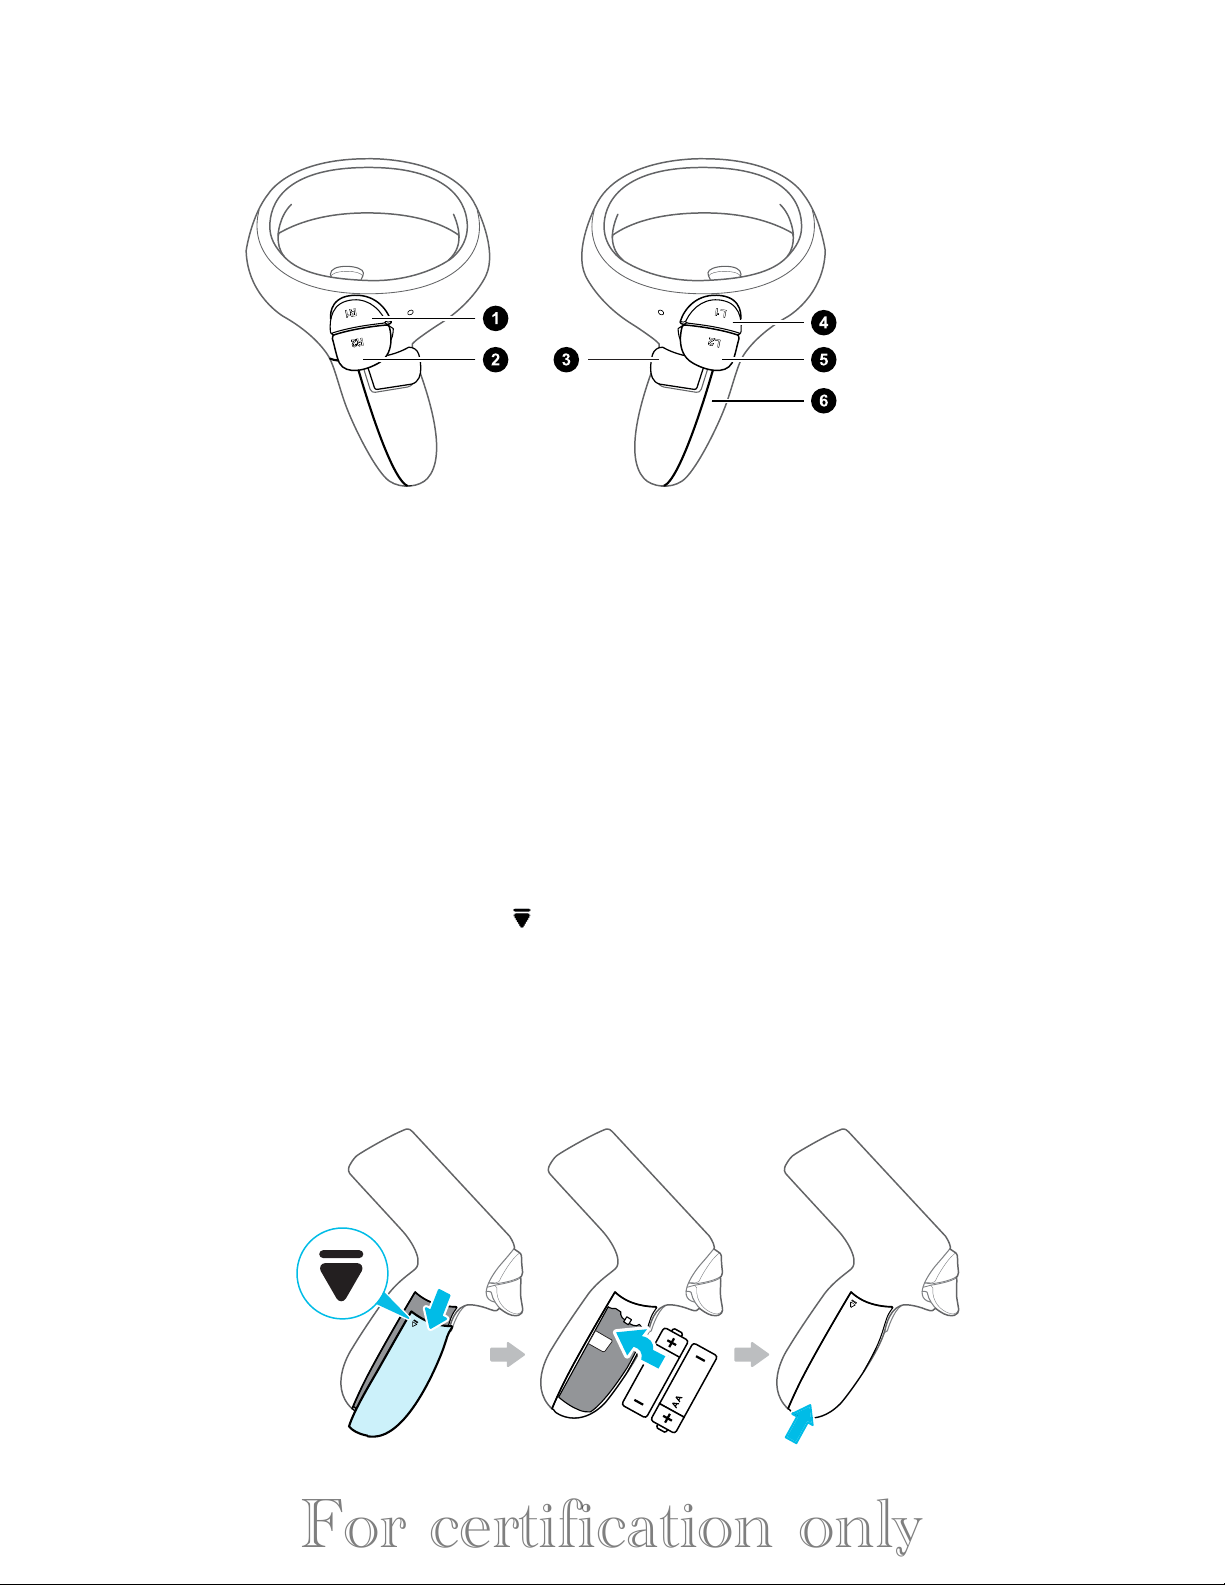
Back view
For certification only
1. Right bumper
2. Right trigger
3. Grip button
4. Left bumper
5. Left trigger
6. Battery cover
Inserting the batteries into the controller
Make sure that the included batteries have been inserted before turning on the controllers.
1. Gently push down on the icon near the top of the battery cover, then slide and lift to
remove it.
2. Insert 2 alkaline AA batteries into the compartment. Make sure that the positive and
negative ends are facing the correct direction, and that the batteries are put over the thin
film in the battery compartment.
3. Replace the battery cover.
Page 3

Removing the batteries from the controller
For certification only
1. Gently push down on the icon near the top of the battery cover, then slide and lift to
remove it.
2. Pull up the thin film in the battery compartment to remove the batteries.
3. Replace the battery cover.
Page 4

Attaching the lanyards to the controllers
For certification only
Using the lanyards may help prevent the controllers from accidentally being dropped; however,
please do not fling or violently throw the controller as the lanyard may break.
1. Gently push down on the top of the battery cover, then slide and lift to remove it.
2. Insert the lanyard loop on the corresponding hole at the bottom of the controller. Make
sure that the loop is hooked around the post.
3. After replacing the battery cover, slide the lanyard over your wrist, and then slide the lock
to tighten the lanyard comfortably around your wrist.
 Loading...