

Page 1

Administrator's Guide
HP ThinConnect, build S2ST0070
Page 2

© Copyright 2007–2008 Hewlett-Packard
Development Company, L.P. The
information contained herein is subject to
change without notice.
Windows is a trademark of Microsoft
Corporation in the U.S. and other countries.
The only warranties for HP products and
services are set forth in the express warranty
statements accompanying such products
and services. Nothing herein should be
construed as constituting an additional
warranty. HP shall not be liable for technical
or editorial errors or omissions contained
herein.
This document contains proprietary
information that is protected by copyright. No
part of this document may be photocopied,
reproduced, or translated to another
language without the prior written consent of
Hewlett-Packard Company.
Administrator's Guide
HP ThinConnect, build S2ST0070
Third Edition (September 2008)
Second Edition (September 2007)
First Edition (June 2007)
Document Part Number: 455674-003
Page 3

About This Book
WARNING! Text set off in this manner indicates that failure to follow directions could result in bodily
harm or loss of life.
CAUTION: Text set off in this manner indicates that failure to follow directions could result in damage
to equipment or loss of information.
NOTE: Text set off in this manner provides important supplemental information.
ENWW iii
Page 4

iv About This Book ENWW
Page 5

Table of contents
1 Introduction
Using HP ThinConnect ......................................................................................................................... 2
Connections ......................................................................................................................... 2
Buttons ................................................................................................................................. 4
2 Installation
Selecting a Usage Mode ...................................................................................................................... 5
About Usage Modes ............................................................................................................ 5
Setting the Usage Mode ...................................................................................................... 6
Selecting a Broker ................................................................................................................................ 6
About Brokers ...................................................................................................................... 6
Setting the Broker ................................................................................................................ 7
Settings ................................................................................................................................................ 8
Connections ......................................................................................................................... 8
Global Citrix Settings ......................................................................................................... 15
Thin Client .......................................................................................................................... 20
Experience ......................................................................................................................... 22
Network Connectivity ......................................................................................................... 27
Management Settings ........................................................................................................ 34
Printers .............................................................................................................................. 52
About the Computer ........................................................................................................... 58
Configuring the Network Environment ................................................................................................ 59
About Global.xml and User Profile.xml .............................................................................. 59
FTP Image Updates ........................................................................................................... 60
Prerequisites ...................................................................................................................... 61
Procedural Overview ......................................................................................................... 61
Configuring a Network Environment .................................................................................. 61
Accessing Global and User Profile .xml Files Using Domain Authentication ..................... 67
Changing User-defined DHCP Scope Options .................................................................. 67
3 Support
Hardware Warranty ............................................................................................................................ 69
Software Warranty .............................................................................................................................. 69
Image Updates and Add-ons .............................................................................................................. 69
Custom Image Requests .................................................................................................................... 69
4 Frequently Asked Questions
ENWW v
Page 6

Index ................................................................................................................................................................... 71
vi ENWW
Page 7
1 Introduction
This guide provides the network administrator with instructions for configuring the thin client and explains
the various configuration utilities.
HP ThinConnect is a straightforward network access solution. The HP ThinConnect operating system
is a custom embedded operating system designed to manage and support efficient ICA and RDP
network connections. Once you configure the thin client, users can quickly and easily establish a
connection to the network resources.
You can use the Altiris client to provide remote management of thin clients and to upgrade images. An
FTP server feature is also available for upgrading images.
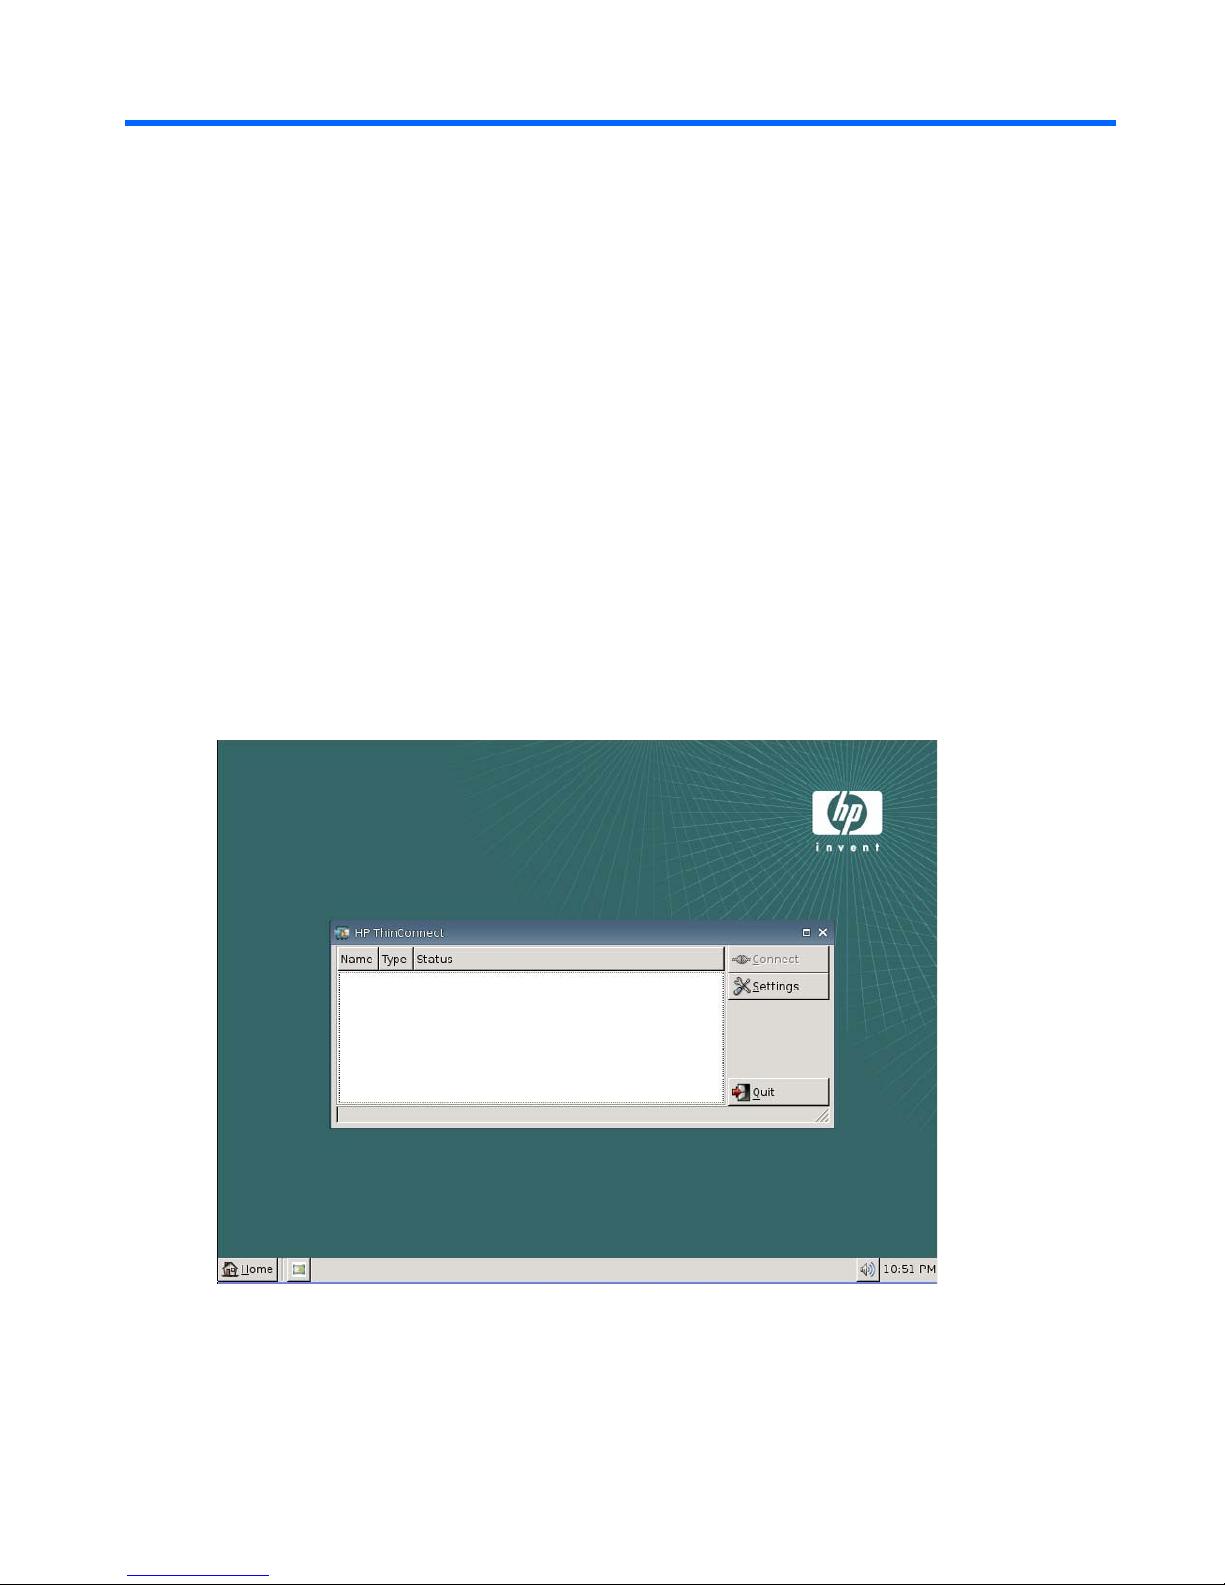
The desktop has a simplified look and feel. HP ThinConnect interface is displayed by default when you
turn on the thin client. The desktop includes a taskbar that provides access to open applications, a
volume icon, and a clock.
ENWW 1
Page 8
Using HP ThinConnect
HP ThinConnect allows you to manage server and application connections by setting up RDP and ICA
connections and assigning them to users. To access all HP ThinConnect functionality, you must log in
as an Administrator. As a User, you can run connections and have limited access to HP ThinConnect
functionality.
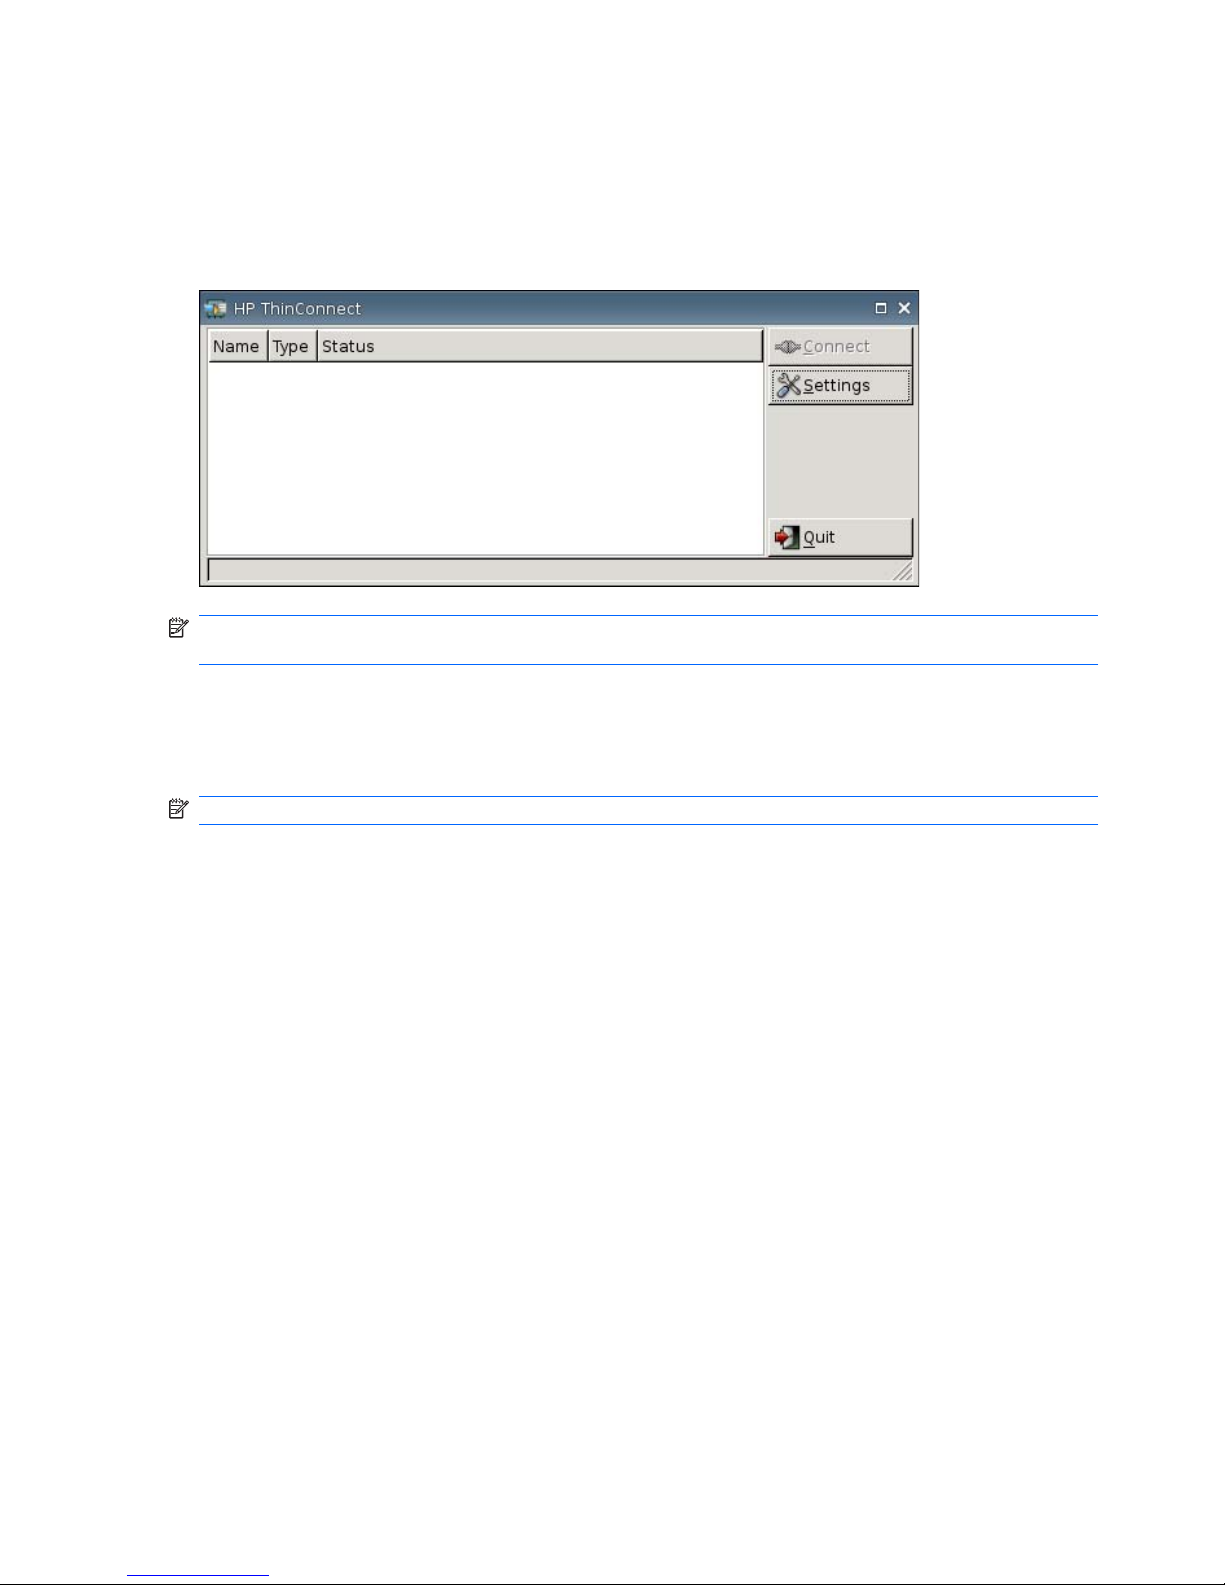
NOTE: You must log in with administrator permissions to access all components of the HP
ThinConnect window.
The HP ThinConnect display, when configured, lists all server and/or application connections assigned
to the user currently logged on to the terminal. For each connection, the display shows the name, type,
and status of the connection. If you have primary and secondary connections, you can expand primary
connections by clicking ►, or collapse them by clicking ▼.
NOTE: Double-click any displayed connection to activate that connection.
●
Connect: Click to activate a selected connection.
●
Settings: Click to access the Settings applications, which provide access to a Control Panel-type
interface. Use this interface to configure the thin client.
●
Quit: Click to quit the current session, turn off the thin client, or reboot the thin client.
Connections
You can configure and assign connections using the Connections tab.
▲
Go to Settings > Connections.
2 Chapter 1 Introduction ENWW
Page 9
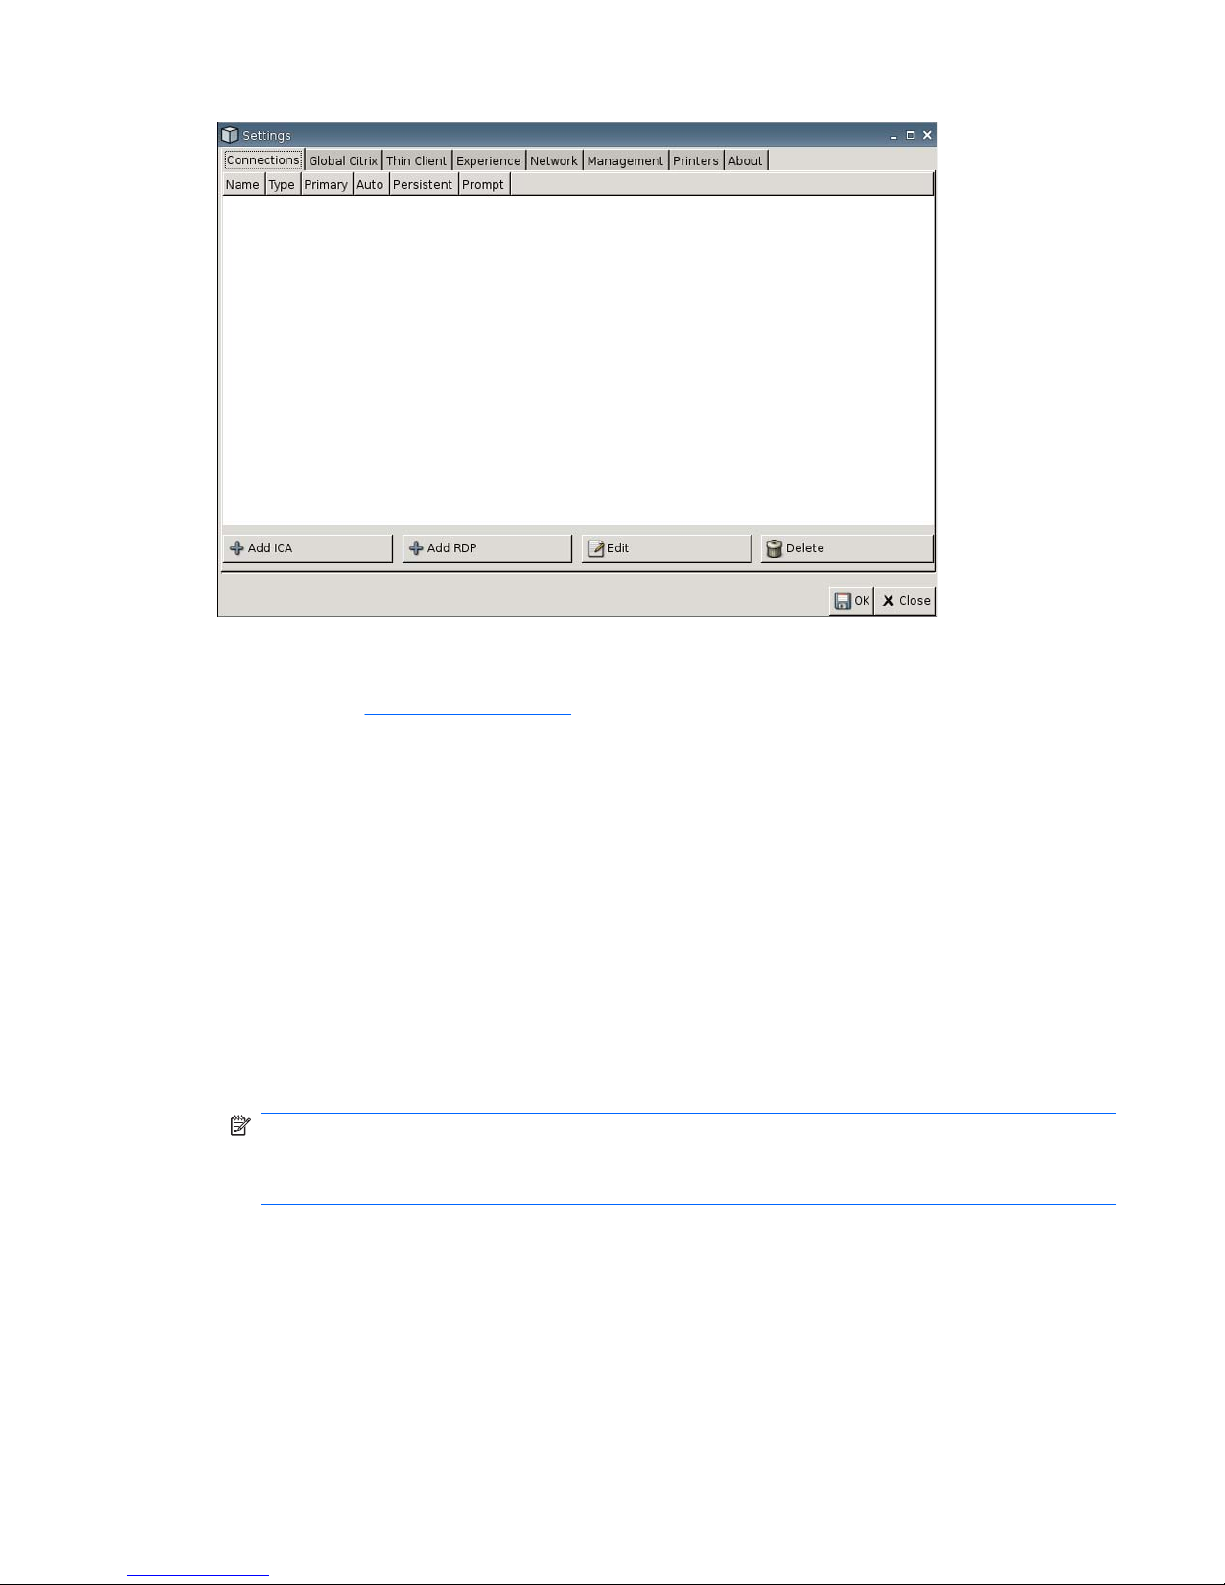
The area on the left side of the window lists all connections that you can assign to users. You can drag
and drop to change the order of connections. You can also add, edit, and delete connections. For more
information, see
Connections on page 8.
●
Name: Displays the name of the connection. You cannot change the connection name from this
column.
●
Type: Displays the type of connection (ICA or RDP). You cannot change the connection type from
this column.
●
Primary: Select to designate a connection as primary. The thin client attempts secondary
connections if the primary connection fails. If more than one secondary connection is associated
with a primary connection, the thin client prioritizes the secondary connections starting with the first
connection in a group.
●
Auto: Select to designate whether a user is automatically logged on when HP ThinConnect starts
up. You must log in using the administrator account to enable or disable automatic connections.
●
Persistent: Select to designate whether or not the system attempts to reconnect when a
connection fails. You can make only primary connections persistent.
NOTE: To disable an automatic connection, the user must quit the current session using Ctrl +
Alt + Backspace, and then log in as Administrator and edit the connection.
The Persistent feature setting is active only when in user mode.
●
Prompt: Select to configure the system to determine whether a user is still using the thin client
after a group of connections fails. Clear this check box to allow the system to continue to cycle
through the connections in the group.
ENWW Using HP ThinConnect 3
Page 10

Buttons
●
Add ICA: Click to create a new ICA connection and add it to the list of available connections in the
current user's connection list. For more information, see
Adding an ICA Connection
on page 8.
●
Add RDP: Click to create a new RDP connection and add it to the list of available connections in
the current user's connection list. For more information, see
Adding an RDP Connection
on page 11.
●
Edit: Click to edit the selected connection.
●
Delete: Click to delete the selected connection. The connection is deleted from the lists of
connections assigned to all users, not just the user currently logged on to the terminal.
NOTE: Clicking the Delete button immediately deletes the connection. There is no confirmation
message.
●
OK: Click to save all changes. You must click OK and Restart Session for the thin client to save
changes.
●
Close: Click to exit the Connections tab without saving changes.
4 Chapter 1 Introduction ENWW
Page 11

2 Installation
CAUTION: Thin clients are designed for remote data storage. Excessive writes to flash may damage
the flash memory.
Typically, to configure multiple terminals, you can configure a terminal locally and then use it as a
template for other terminals, which you can then configure using remote administration tools.
NOTE: The thin client automatically boots into the Administrator account with HP ThinConnect open.
Users cannot add connections; therefore, the Administrator must add all needed connections and then
deploy the image.
To interrupt an auto login, press the left Shift key while the thin client is starting up or when restarting a
session.
Selecting a Usage Mode
About Usage Modes
The thin client operates in two modes:
●
Local mode
●
Stateless mode
NOTE: The Stateless mode was previously known as the Network mode.
The image is the same in each mode, only the settings file changes.
Local Usage Mode
Local usage mode includes two types of accounts — Administrator and User. The default password for
Administrator is admin. There is no default password for User.
In Local usage mode, all settings are stored locally on the thin client — when you reboot the unit, the
settings remain. There are only accounts named “Administrator” and “User”. Only the administrator can
make changes to the thin client.
Log in as Administrator to create the thin client settings and connections for users in User mode, and
then save the settings. When users log in, they are not able to make any changes to the settings.
Administrators can capture the settings and deploy them to other thin clients.
ENWW Selecting a Usage Mode 5
Page 12

Stateless Usage Mode
In Stateless usage mode, most settings are stored remotely in a global profile .xml file and in a user
profile .xml file that both reside on the FTP server. These .xml files are loaded onto the thin client each
time a new user logs on. You can use the global profile .xml file to apply the same settings to all network
users. In addition, you can use a user profile .xml file to apply different settings to each unique user.
You can use any name for the user profile .xml file, such as scott.xml, beth.xml, etc., so that each user
has specific settings, and connections.
Configure the settings as in
Local Usage Mode on page 5, and then use HP ThinState to extract the
settings file and place the .xml file on an FTP server as a user profile .xml file.
Setting the Usage Mode
After choosing a usage mode, simply go to Settings > Thin Client, and select the usage mode using
the Thin Client State menu. For more details, see
Thin Client on page 20.
Selecting a Broker
About Brokers
The thin client can access five brokers:
●
Citrix Program Neighborhood
●
Leostream
●
Provision Networks
●
VDM
●
HP SAM
NOTE: Some brokers may have limited functionality.
Citrix Program Neighborhood
Program Neighborhood broker, or PNAgent broker, is for use in Citrix environments in which there is a
PNAgent Web site. In PNAgent broker, a user’s application set is pre-populated based on the application
access that has been assigned to each individual user on the Presentation Server by their administrator.
Leostream
For more information about Leostream products, visit http://www.leostream.com.
Provision Networks
For more information about Provision Networks products, visit http://www.provisionnetworks.com.
VDM
For more information about VDM (Virtual Desktop Manager, visit http://www.microsoft.com/
systemcenter/virtualmachinemanager/en/us/default.aspx.
6 Chapter 2 Installation ENWW
Page 13

HP SAM
For more information about HP SAM, visit http://h71028.www7.hp.com/enterprise/cache/.
Setting the Broker
After choosing a broker, simply go to Settings > Thin Client, and select the broker using the Thin Client
State menu. For more details, see
Thin Client on page 20.
ENWW Selecting a Broker 7
Page 14
Settings
Connections
About Setting Connections
By default, the thin client comes ready to use the following connection types:
●
ICA
●
RDP (rdesktop)
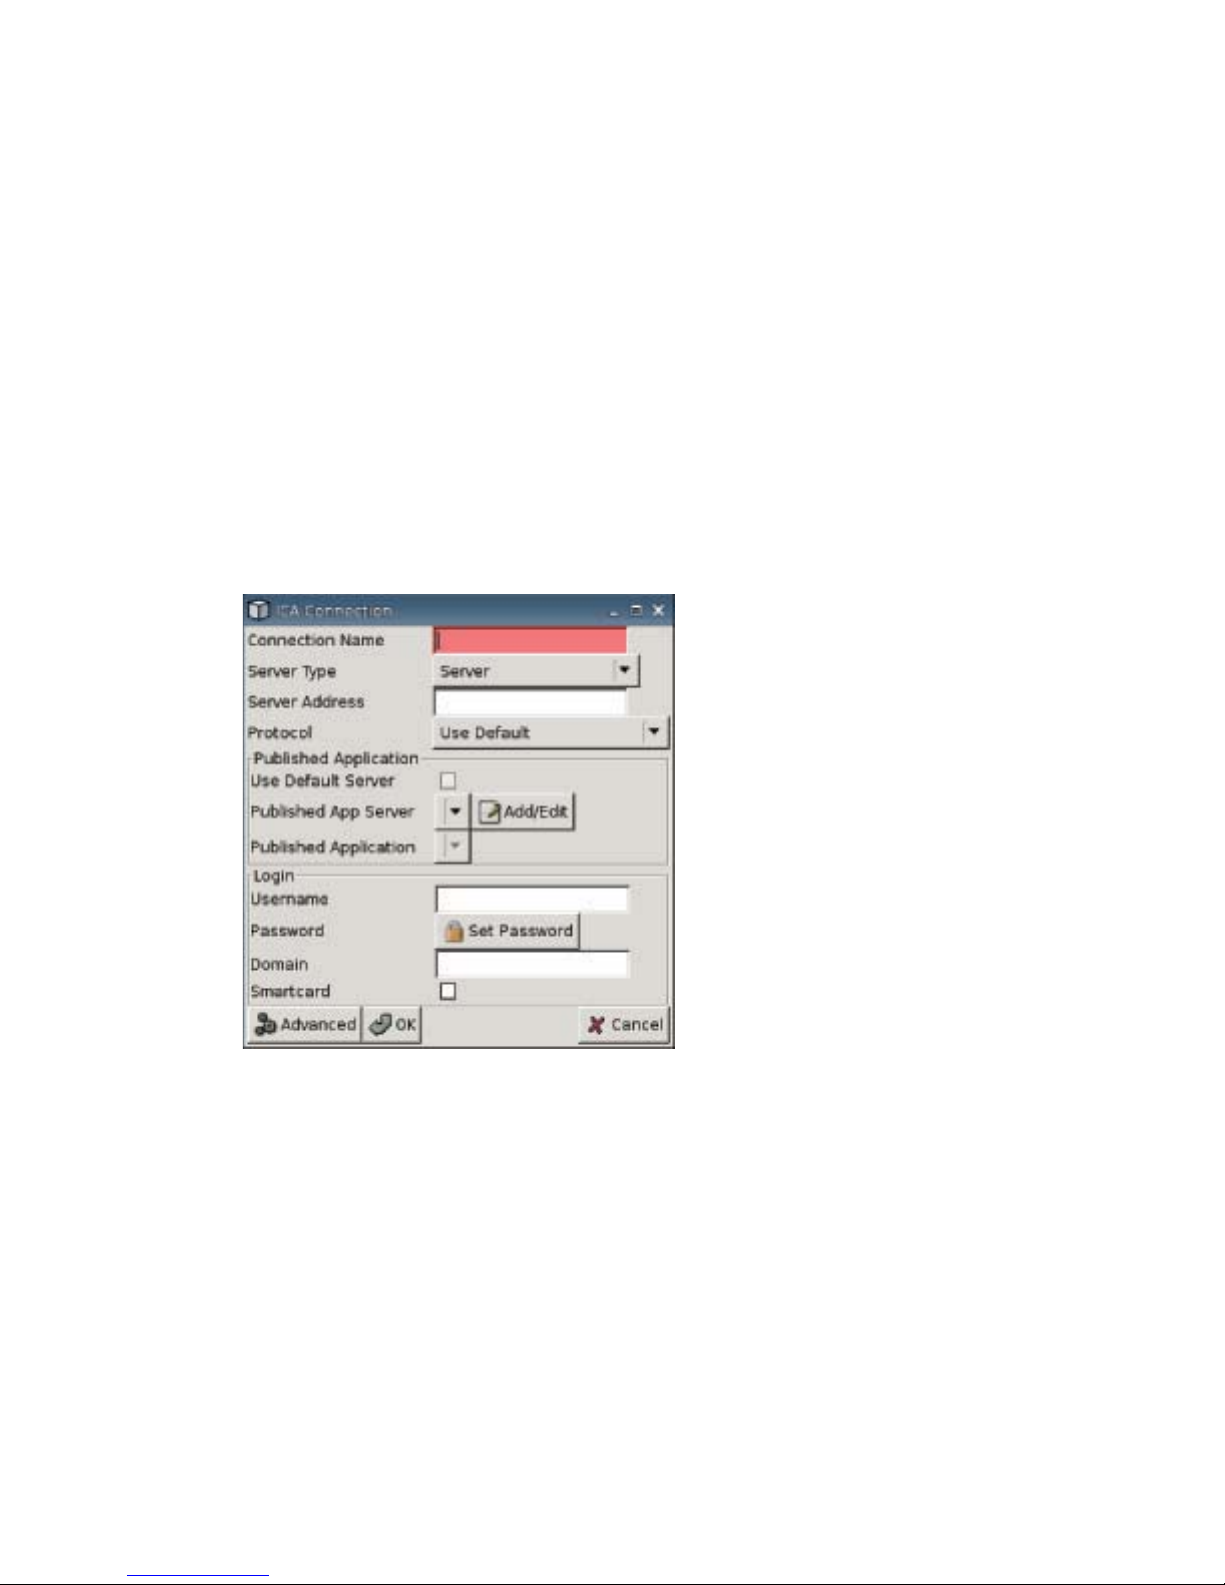
Adding an ICA Connection
Configuring an ICA Connection
To configure an ICA connection:
▲
Go to Settings > Connections, then click Add ICA to set the following options:
●
Connection Name: Specify the name of the connection.
●
Server Type: Allows you to choose to connect to a Citrix Presentation server directly or a specific
Published Application.
●
Server Name: Type the Citrix server name, or IP address to which you are connecting.
●
Protocol: Select the protocol used to locate the Citrix farm for the connection.
◦
TCP + HTTP Browser
◦
TCP Browser
◦
SSL/TLS + HTTPS Browser
●
Use Default Server: Select to use default server for published applications.
8 Chapter 2 Installation ENWW
Page 15
●
Published App Server: Select a Published Application server from the list. If no Published
Application server is available to select, click the Add/Edit button to define an ICA connection to
a Published Application server. If one or more Published Application servers are defined, select
the server to populate this field.
●
Published Application: After selecting the Published Application server, this field automatically
populates with the application names pulled from the defined Published Application server.
●
Username: Specify the username for the account to use to connect to a remote computer.
●
Password: Click Set Password to define a password for the account to use to connect to a remote
computer.
●
Domain: Specify the domain of the remote computer.
●
Smartcard: Select to allow smart card logon to an ICA server.
Configuring Advanced Properties
To configure ICA connection advanced properties:
ENWW Settings 9
Page 16
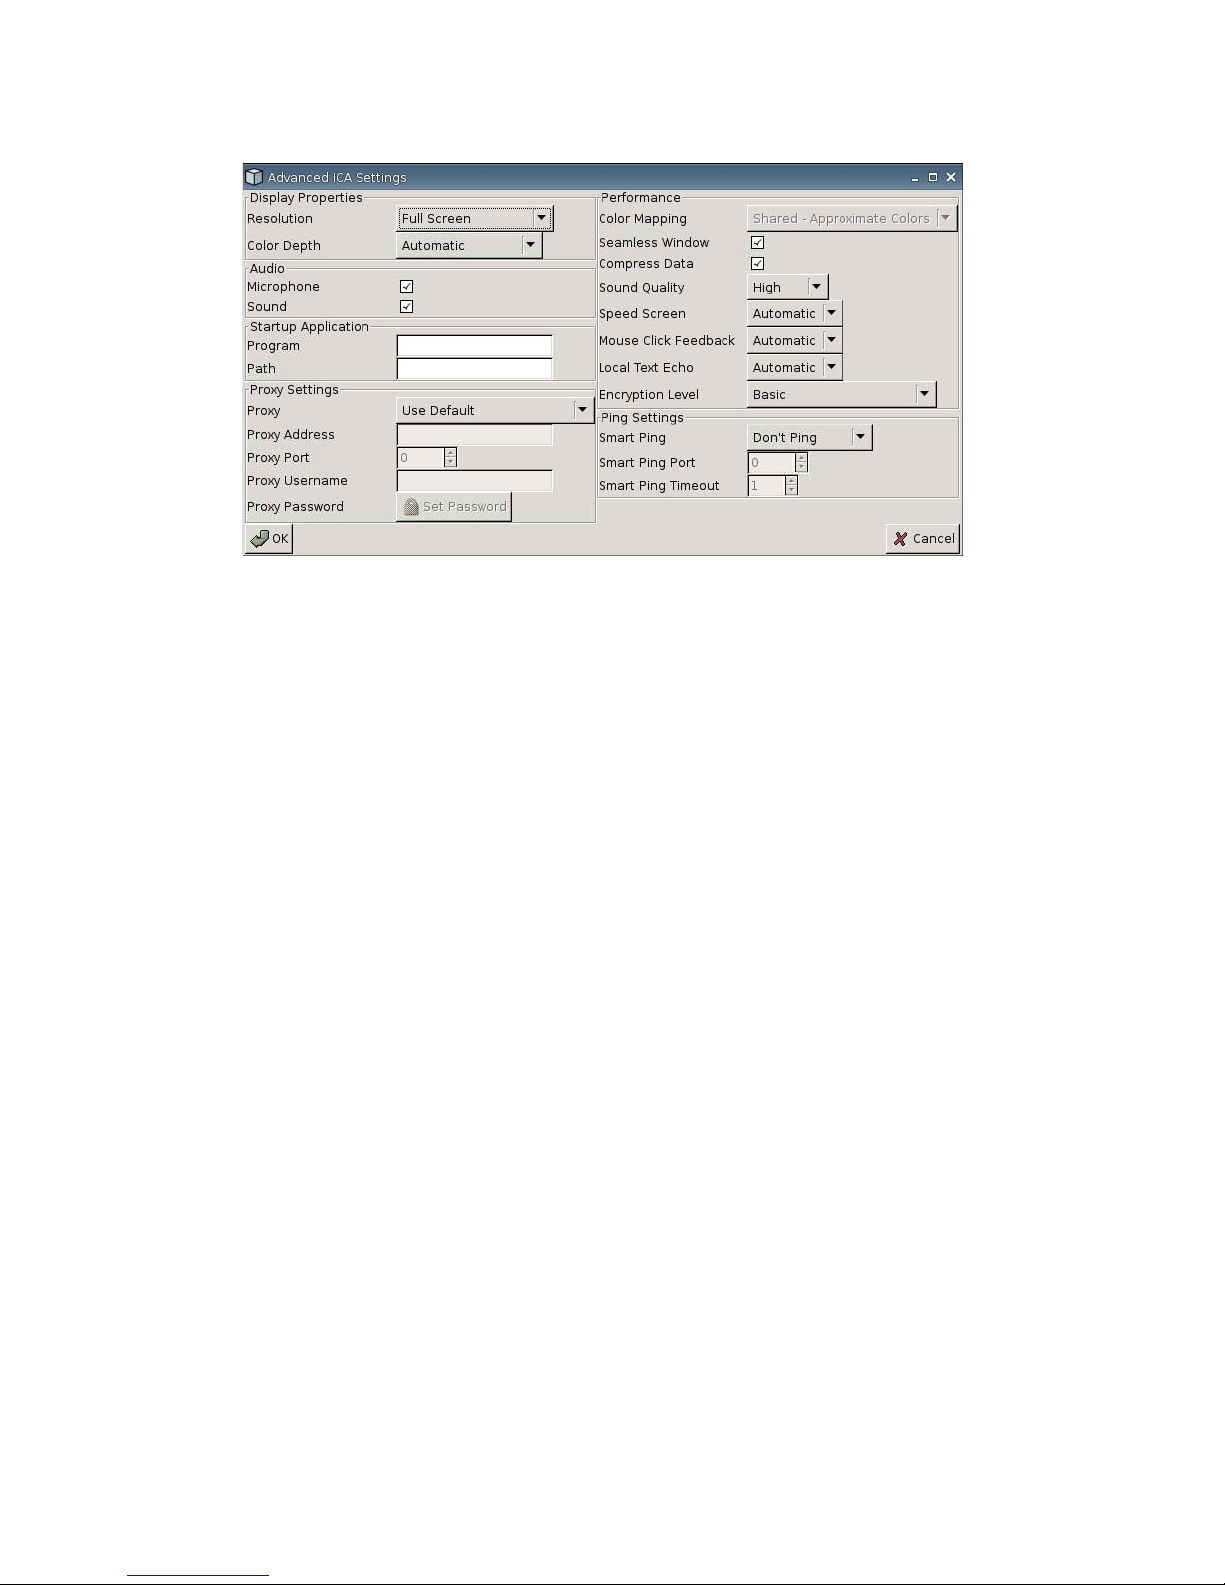
▲
Go to Settings > Connections > Add ICA, and then click Advanced to set the following options:
Display Properties
●
Resolution: Select the connection window size for the remote desktop.
●
Color Depth: Select the color quality of the connection window for the remote desktop.
Audio
●
Microphone: Select to enable audio input for a connection.
●
Sound: Select to enable thin client audio playback.
Startup Application
●
Program:
●
Path:
Proxy Settings
●
Proxy: Select a proxy type:
◦
None (direct)
◦
SOCKS
◦
Secure (HTTPS)
◦
Automatically detect proxy
◦
Use Default
●
Proxy Address: Type the proxy host name.
●
Proxy Port: Type the proxy host port.
10 Chapter 2 Installation ENWW
Page 17

●
Proxy Username: Specify the proxy username for the account to use to connect to a remote
computer.
●
Proxy Password: Click Set Password to define a password for the account to use to connect to
a remote computer.
Performance
●
Color Mapping: Use only when Color Depth is set to 256 colors. Select:
◦
Shared—Approximate Colors
◦
Private—Exact Colors
◦
Default
●
Seamless Window: Select to control seamless mode for Published Applications.
●
Compress Data: Select to enable or disable data compression. HP recommends enabling this
option for better display quality.
●
Sound Quality: Select sound playback quality.
●
Speed Screen: Select to Speed Screen Browser Accelerator image.
●
Mouse Click Feedback: Allows you to control mouse latency reduction.
●
Local text echo: Allows to you control keyboard latency reduction.
●
Encryption level: Allows you to specify the encryption protocol for each level of encryption.
Ping Settings
●
Smart Ping: Allows you to enable HP ThinConnect to ping the server before attempting a
connection. If the server name fails to resolve or the server fails to respond to the ping, the thin
client aborts the connection attempt.
●
Smart Ping Port: Specific a port for Smart Ping.
●
Smart Ping Timeout: Specify a time period for Smart Ping to keep pinging.
Adding an RDP Connection
Configuring an RDP Connection
This procedure allows you to set up a remote desktop (RDP) connection. RDP is an open source client
capable of speaking Remote Desktop Protocol. Unlike ICA, RDP requires no server extensions.
To configure an RDP connection:
ENWW Settings 11
Page 18
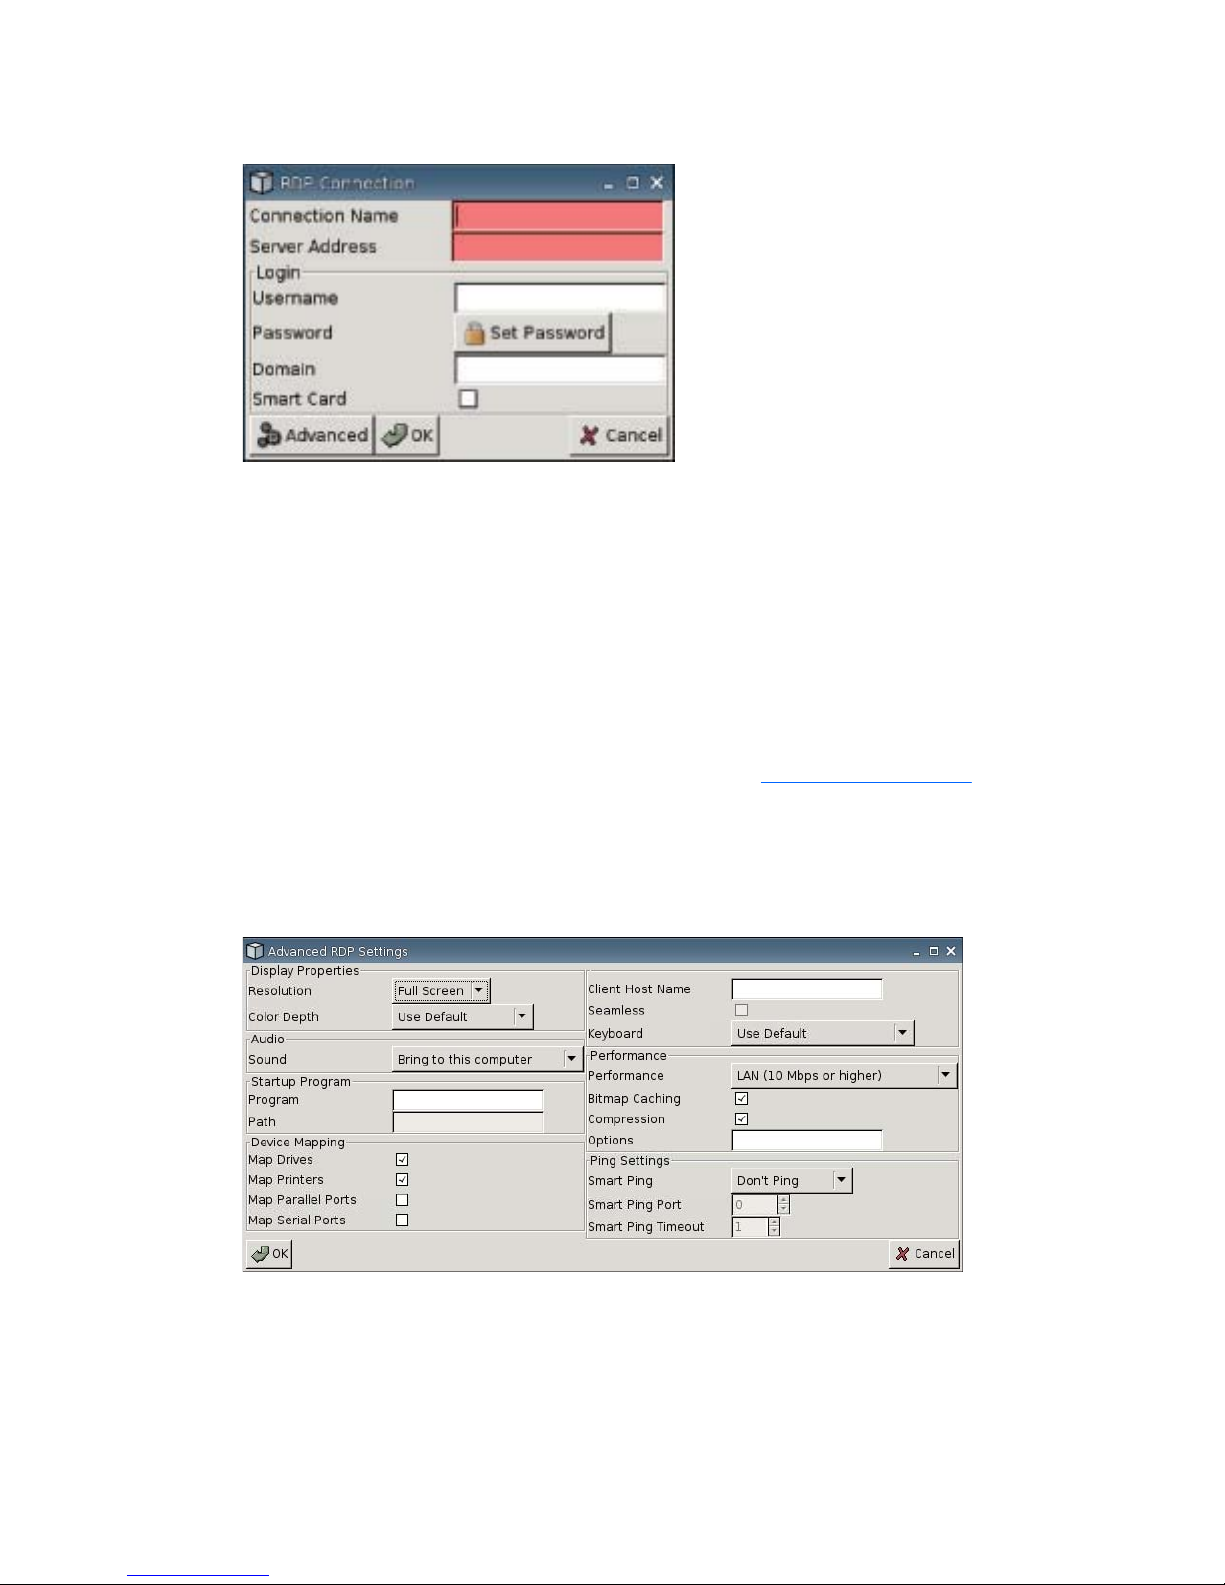
▲
Go to Settings > Connections; click Add RDP to set the following options:
●
Connection Name: Specify the name of the connection.
●
Server Name: Type the name of the server to connect to.
●
Username: Type the user name for the account to use to connect to a remote computer.
●
Password: Click Set Password to define a password for the account to use to connect to a remote
computer.
●
Domain: (Optional) Type the domain of the remote computer.
●
Smart Card
For additional information, please visit the rdesktop Web site at
http://www.rdesktop.org.
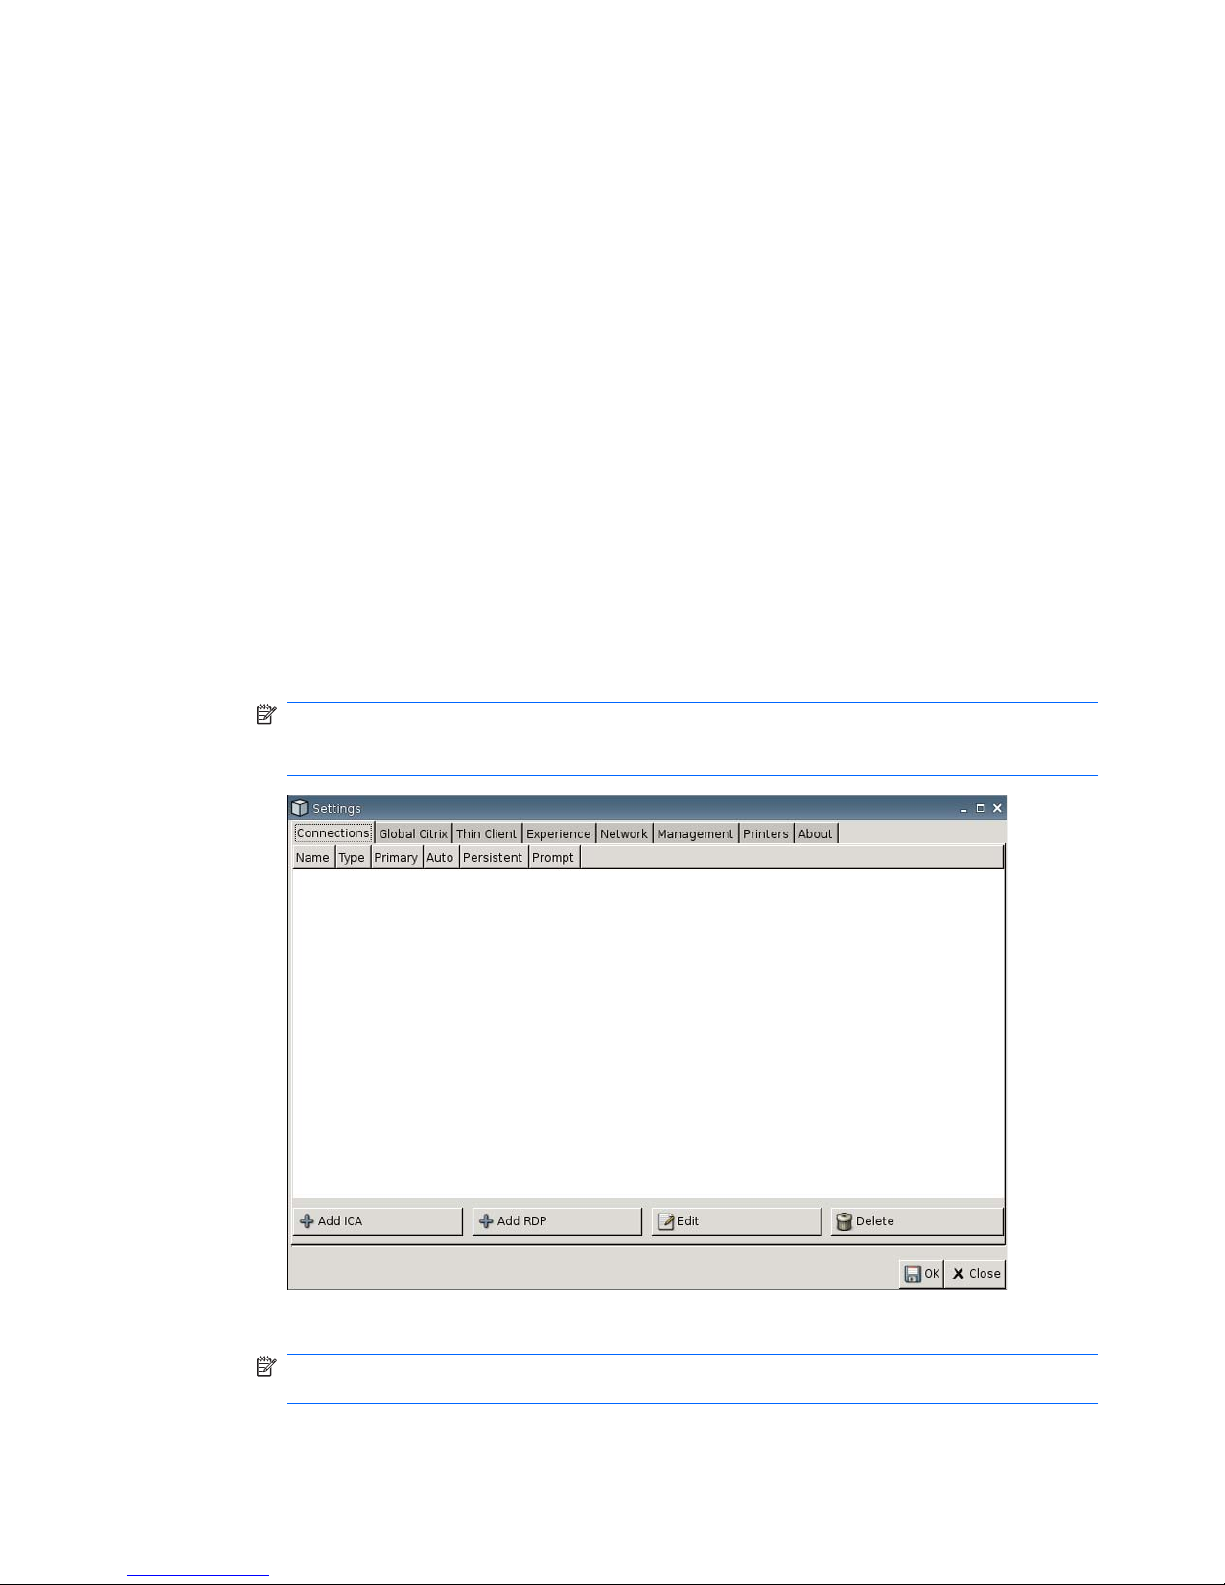
Configuring Advanced Properties
To configure RDP connection advanced properties:
▲
Go to Settings > Connections > Add RDP, and then click Advanced to set the following options:
Display Properties
●
Resolution: Select the connection window size for the remote desktop.
●
Color Depth: Select the color quality of the connection window for the remote desktop.
12 Chapter 2 Installation ENWW
Page 19

Audio
●
Sound: Select to enable thin client audio playback.
Startup Application
●
Program:
●
Path:
Device Mapping
●
Map Drives: Select to enable USB drives.
●
Map Printers: Select to enable locally-defined printers.
●
Map Parallel Ports: Select to enable parallel port.
●
Map Serial Ports: Select to enable serial port.
Other Settings
●
Client Host Name: (Optional) Type the host name for the terminal services session. This entry
allows you to dictate what is displayed when viewing shared resources.
●
Seamless: Select to control seamless mode for Published Applications.
●
Keyboard: Select the desired keyboard language.
Performance
●
Performance: Select the type of connection for the thin client to use to connect to the remote
computer.
●
Bitmap caching: Select to allow bitmap caching, which places commonly used bitmaps in a file
on the thin client. This process improves performance by minimizing the amount of display
information that must be passed over a connection.
NOTE: Depending upon connection configuration, selecting Bitmap caching may or may not
improve performance.
●
Compression: Select to enable protocol compression, which makes communication between
computers faster.
●
Options: Populate to use additional RDP options
Ping Settings
●
Smart Ping: Allows you to enable HP ThinConnect to ping the server before attempting a
connection. If the server name fails to resolve or the server fails to respond to the ping, the thin
client aborts the connection attempt.
●
Smart Ping Port: Specific a port for Smart Ping.
●
Smart Ping Timeout: Specify a time period for Smart Ping to keep pinging.
ENWW Settings 13
Page 20
Configuring Primary, Secondary, and Automatic Connections
You can designate connections as primary or secondary. A primary connection is the first attempted in
a group of connections. Secondary connections are attempted if the primary connection fails, and
attempt to connect in their listed order. You can assign several primary connections, each with several
associated secondary connections. By default, any new connection is designated as primary.
If you have primary and secondary connections, you can expand primary connections by clicking ►, or
collapse them by clicking ▼.
You can set primary connections to automatically connect when HP ThinConnect starts up.
You can set primary connections to automatically reconnect if the connection is lost.
Use the following procedures to configure primary and secondary connections.
To configure primary and secondary connections:
▲
Go to Settings > Connections.
●
To make a connection a secondary connection:
1. Simply drag and drop a primary connection on top of another primary connection.
The connection is then indented in the connection list and is secondary to the primary
connection directly above it.
NOTE: If a primary connection has one or more secondary connections, and you are making
it a secondary connection by dragging and dropping it on top of another primary connection,
the primary and all secondary connections become secondary under the destination primary.
2. Click Save and Restart Session to save your changes.
NOTE: Since each secondary connection must have an associated primary connection
listed above it, the connection at the top of the list must be a primary connection.
14 Chapter 2 Installation ENWW
Page 21

To remove a connection as a secondary connection, drag the secondary connection to an empty
spot in the list. After you release the connection, it becomes a primary connection.
●
To set automatic connections:
1. In the Auto column, select the check box.
NOTE: You can set only primary connections to automatically connect when HP
ThinConnect is launched.
2. Click Save and Restart Session to save your changes.
●
To set automatic reconnections:
1. In the Persistent column, select the check box.
NOTE: You cannot disable an automatic connection unless the user quits the current
session.
You can set only primary connections to automatically reconnect.
2. Click Save and Restart Session to save your changes.
Global Citrix Settings
The Global Citrix tab allows you to configure Citrix settings across all Citrix connections.
To configure Citrix settings:
ENWW Settings 15
Page 22
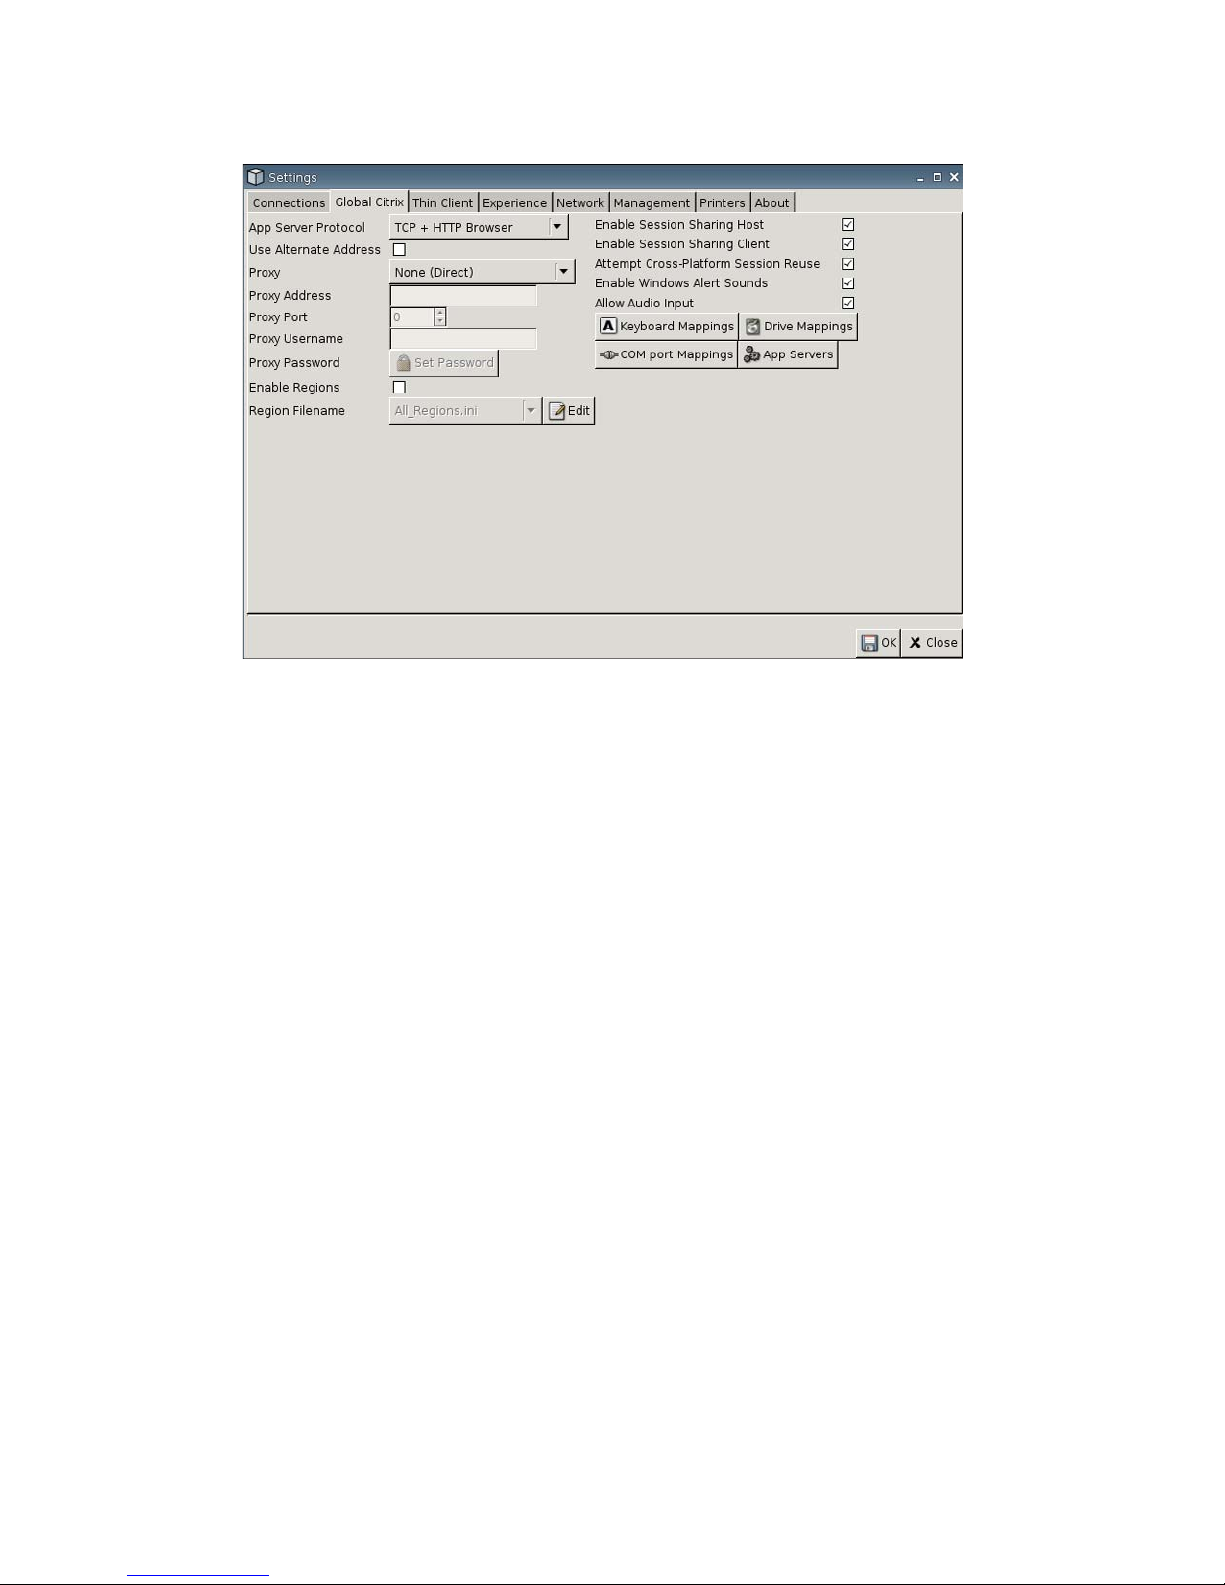
▲
Click Settings > Global Citrix and set the following options:
●
AppServerProtocol: Select one of the following:
◦
TCP+HTTP Browser
◦
TCP Browser
◦
SSL/TLS + HTTPS Browser
●
Use Alternate Address: Select to support accessing a Citrix server across a firewall.
●
Proxy: Select a proxy type.
◦
None (direct)
◦
SOCKS
◦
Secure (HTTPS)
◦
Automatically detect proxy
●
Proxy Address: Type the proxy host name.
●
Proxy Port: Type the proxy host port.
●
Proxy Username: Specify the proxy username for the account to use to connect to a remote
computer.
●
Proxy Password: Click Set Password to define a password for the account to use to connect to
a remote computer.
●
Region Filename: Select a file and click Edit to modify.
◦
All_Regions.xml
◦
Trusted_Region.xml
16 Chapter 2 Installation ENWW
Page 23

◦
Untrusted_Region.xml
◦
Unknown_Region.xml
◦
Regions.xml
●
Enable Session Sharing Host: Select to enable.
●
Enable Session Sharing Client: Select to enable.
●
Attempt Cross-Platform Session Reuse: Select to enable.
●
Enable Windows Alert Sound: Select to enable.
●
Allow Audio Input: Select to enable.
●
Keyboard Mappings button: Use these Alt + Function components to configure thin client hot
keys. For example, in Microsoft Windows, the standard key combination ALT + TAB cycles through
all applications. The same key combination works on the local desktop. When you want to use
an ALT + TAB key combination during a session, you can use the mapped hot key instead, such
as CTRL + TAB.
●
Drive Mappings button: Use to add Local Drives to Forward to an ICA Server.
●
COM port Mappings button: Use these components to map devices to COM ports.
●
App Servers button: Use to define the Published Application server to use to create ICA Published
Application connections.
Mapping ICA Drives
1. Go to Settings > Global Citrix > Drive Mappings.
ENWW Settings 17
Page 24

2. Click Add ICA drive.
3. Drive: Select the drive letter to assign from the list.
4. Enable: Select to enable this ICA drive.
5. Write: Select to enable writing on this ICA mapped drive.
6. Path: Select to assign the path name to the mapped drive.
7. Click OK to add the drive.
To make changes to an ICA drive:
▲
Select the drive and click Edit.
To delete a drive:
▲
Select the drive and click Delete.
18 Chapter 2 Installation ENWW
Page 25

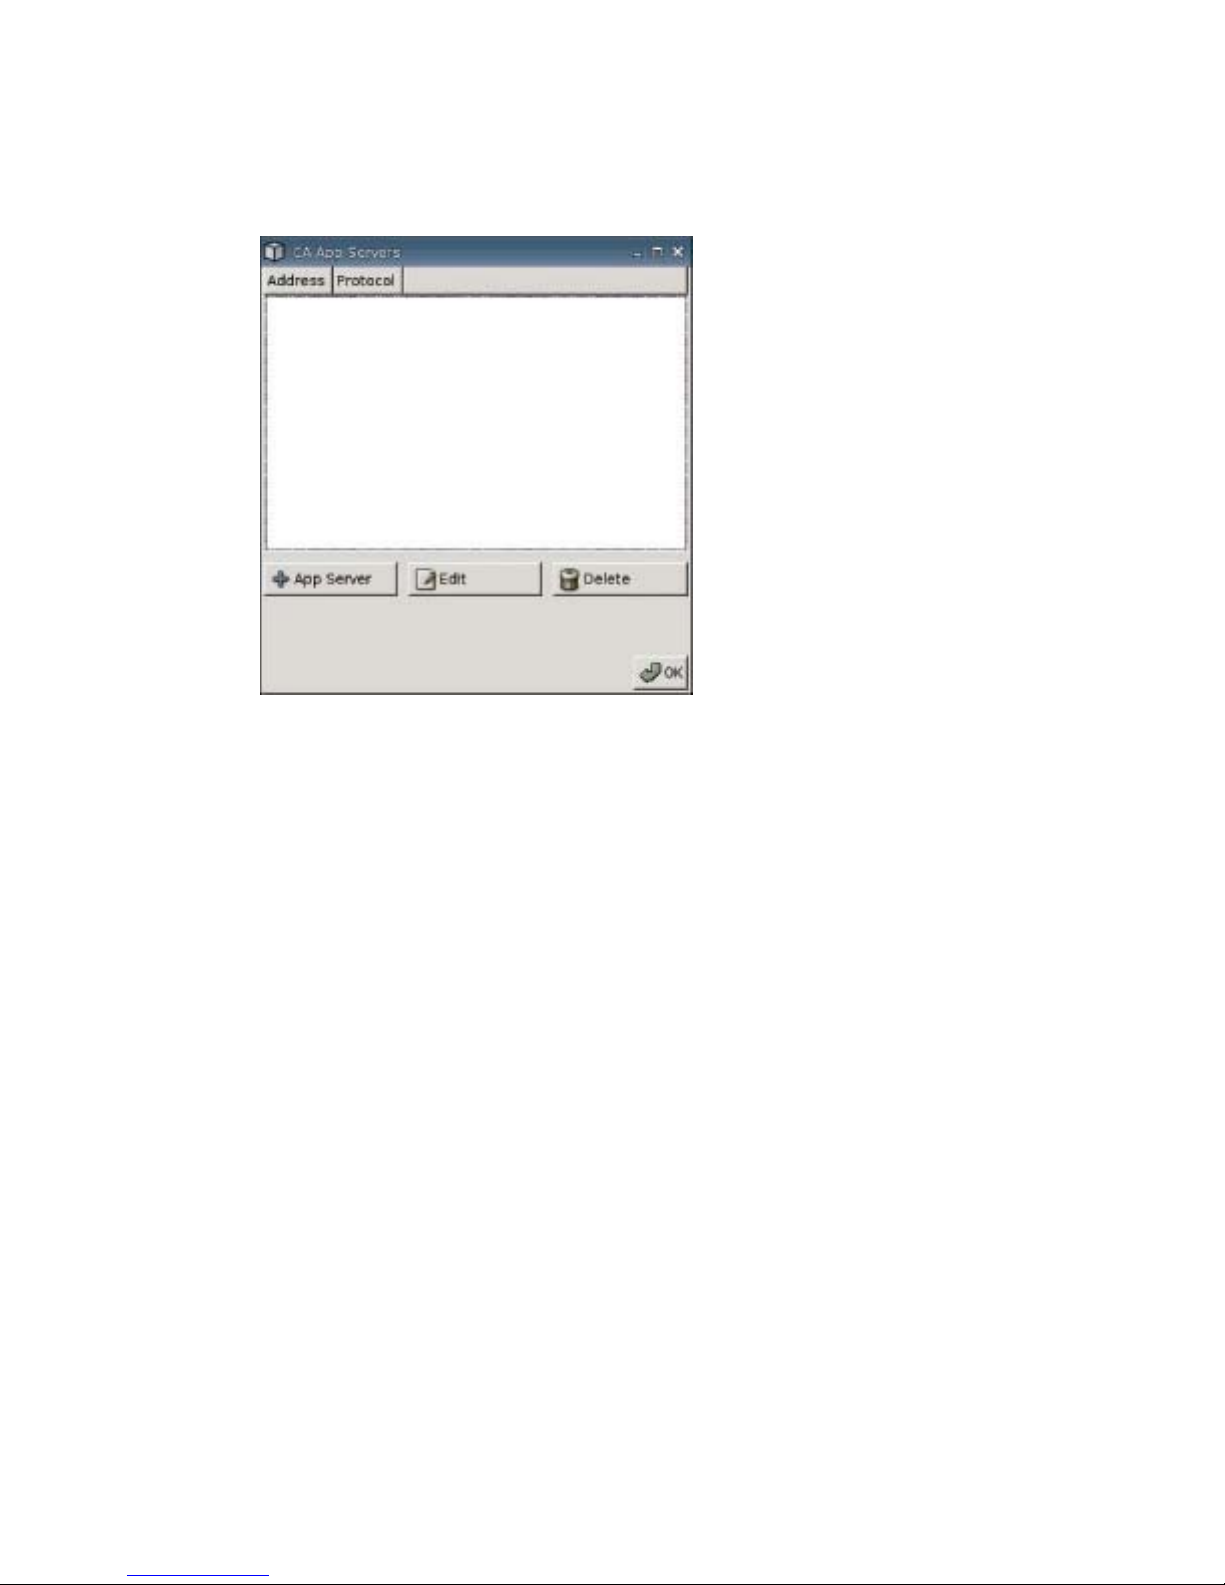
Mapping an Application Server
1. Go to Settings > Global Citrix > App Servers.
2. Click + App Server.
3. In the Address Port field, type the Citrix Publish App server name, a colon, and the Port.
An address (IP or hostname) is required to connect to an App Server. The Port is optional. If a Port
is not entered, Citrix defaults to port 80. If connecting to a specific Port, enter both the Address and
Port.
Examples: 192.168.0.1:8080, or Citrix-server1:8080, or Citrix-server2 (Citrix uses default port 80).
4. Click OK.
To make changes to an App Server:
▲
Select the server and click Edit.
To delete a server:
▲
Select the server and click Delete.
For more detailed help about configuring the Citrix client, go to the Clients for UNIX Administrator’s
Guide at
http://support.citrix.com/docs/.
ENWW Settings 19
Page 26

Thin Client
Use the Thin Client tab to change the Thin Client State.
▲
Go to Settings > Thin Client to set the following options:
●
Initial Thin Client State: From this menu you can select Local or Stateless mode. By default, the
thin client is in Local mode.
You can change this setting if you want to operate the unit in Stateless mode, which pulls the
user .xml profiles from an ftp server. In Stateless mode, all of the settings are stored on the network
and not locally.
●
Auto Detect Stateless Environment: Select to auto detect the stateless environment.
Local Login Options
●
Local Auto-Login: Select the option you want. By default, the unit automatically logs in as
Administrator.
NOTE: To interrupt an auto login during boot up: when the GUI has started and the HP logo has
appeared in the center of the screen, press and hold the left Shift key.
●
Administrator Password: Click Set Password to change the current administrator password.
●
User Password: Click Set Password to change the current user's password.
20 Chapter 2 Installation ENWW
Page 27

Stateless Options
●
Skip User: Select and thin client does not prompt for username and password on boot and uses
only global .xml settings. This only applies when in Stateless mode.
●
Retain Stateless Settings: Select to enable this setting. If you enable this setting in Stateless
mode, the thin client retains the last successful settings file used.
NOTE: Using this feature could create a security risk because the previous user's settings remain
on the thin client until a different user successfully logs in.
●
Ignore Legacy Stateless Passwords: Select if you want the log in manager to ignore accessspecific passwords that may exist inside a user profile and allow that user profile to be loaded. If
this setting is not enabled, you cannot use profiles that have access passwords.
●
Keep Local Connections: Select to retain local connections.
●
Keep Local Printers: Select to retain local printers.
Startup Application
●
Default Username: You can specify a default user in this field.
●
Default Password: Click Set Password to define a default password.
●
Default Domain: You can specify a default domain in this field.
●
Auto Login: Select to enable auto login.
Brokers
●
Program Neighborhood: Select to enable access to the Citrix Program Neighborhood broker.
●
Server: You can specify the Program Neighborhood server name or IP address in this field.
●
Leostream: Select to enable access to the Leostream connection broker.
●
Server: You can specify the Leostream server name or IP address in this field.
●
Provision: Select to enable access to the Provision Networks connection broker.
●
Server: To configure the Provision setup, specify the full URL and port in this field.
◦
Example: http://MyProvisionServer:8080
◦
or https://OtherProvisionServer:8383
●
VDM2: Select to enable the VDM2 broker.
●
Server: To configure the VDM2 setup, specify the full URL and port in this field.
◦
Example: http://MyVDMServer
◦
or https://VDMSrv:443
●
HP SAM: Select to enable the HP SAM broker.
●
Server: You can specify the HP SAM server name or IP address in this field.
ENWW Settings 21
Page 28

Experience
Use the Experience tab to change the following settings:
●
Video
●
Desktop
●
Screensaver
●
Boot Splash
●
Login Prompt
●
Volume
●
Input
●
Time & Date
▲
Go to Settings > Experience to set the following options:
Video
●
Resolution: Select the appropriate resolution for your monitor.
●
Color Depth: Select color depth. The higher the number, the more memory and bandwidth the
client requires.
●
Refresh Rate: Select the appropriate refresh rate.
●
Test Video button: Click to test the display settings. If the settings do not provide the desired results,
you can cancel them to revert to the previous settings.
22 Chapter 2 Installation ENWW
Page 29

NOTE: When changing resolution settings, it is strongly recommended that you use the Test
Video feature prior to saving and rebooting the thin client. Some resolutions may not be supported.
If using diverse monitor types, consideration should be given before using the HP ThinState Utility
to deploy resolution setting changes.
Desktop
●
HP ThinConnect Mode: Select the ThinConnect mode:
◦
Connection Dialog Only
◦
Connection Dialog with Taskbar
◦
Home Menu
◦
Desktop Icons with Taskbar
◦
No ThinClient UI
●
Background Color: Allows you to select the background color.
●
Background Image: Allows you to navigate to the background image you want to use.
NOTE: You can change the background image to any .jpg or .png image.
To change the background image:
1. Next to Background Image, click the Import button.
2. Navigate to the location of the image file you want to use.
3. Double-click the image file. The main Experience tab window is displayed.
4. Click Save.
●
Style: Allows you to select the pattern of the background image.
Screen Saver
●
Use Screensaver: Select to enable screen saver.
●
Inactivity timeout: Select or type the amount of time.
●
Screensaver Type: Select a screen saver type:
◦
Turn Monitor Off
◦
EcoMode
◦
Power Off
◦
Logout
◦
Reboot
ENWW Settings 23
Page 30

Boot Splash
●
Boot splash image: Allows you to navigate to the boot splash image you want to use.
NOTE: You can change the boot splash image to any .png image.
To change the boot splash image:
1. Next to Boot splash image, click the Import button.
2. Navigate to the location of the image file you want to use.
3. Double-click the image file. The main Experience tab window is displayed.
4. Click Save.
●
X Position: Allows you to specify the position of your boot splash image on the x-axis.
●
Y Position: Allows you to specify the position of your boot splash image on the y-axis.
●
Width: Allows you to specify the width of your boot splash image.
●
Height: Allows you to specify the height of your boot splash image.
24 Chapter 2 Installation ENWW
Page 31

Login Prompt
●
Login screen image: Allows you to navigate to the login screen image you want to use.
NOTE: You can change the login screen image to any .jpg, .png, or .gif image.
To change the login screen image:
1. Next to Login screen image, click the Import button.
2. Navigate to the location of the image file you want to use.
3. Double-click the image file. The main Experience tab window is displayed.
4. Click Save.
●
Login Screen Text: Allows you to specify the text to appear on the login screen.
ENWW Settings 25
Page 32

Volume
Use the sliding control to set the Master Volume level.
Input
●
Touch screen Monitor: Select to enable a touch screen monitor.
●
Keyboard Language: Allows you to select the keyboard language. Changes to the keyboard
language apply locally. Remote settings are determined by the applications (rdesktop, Citrix, etc.)
and server, but may be affected by local settings.
●
Numlock on Boot: Select to turn on Numlock when the thin client is booted.
●
Typing Repeat Delay: Type or select the value for the typing delay.
●
Typing Repeat Speed: Type or select the value for the typing speed.
●
Mouse Speed: Select the mouse speed.
Time & Date
●
Date: Click Set Date to display a calendar from which you can select the current date.
●
Time: Click Set Time to display a dialog box that allows you to set the current time.
●
Enable NTP: Select to enable Network Time Protocol (NTP).
26 Chapter 2 Installation ENWW
Page 33

●
NTP Server: Type the URL of the NTP server to which you want the thin client to sync. To use the
default, pool.ntp.org, simply select enable Network Time Protocol (NTP).
●
Time Format: Select a 12 hour or 24 hour format
●
Region Name: Select the region in which the thin client resides.
●
Timezone: Select the time zone in which the thin client resides.
Network Connectivity
The Network tab allows you to configure connectivity between the terminal and the Internet, a network,
or a computer.
Use the Network tab to:
●
Configure Network Settings
●
Configure DSL Settings
●
Set Wireless Settings
▲
Go to Settings > Network to set the following options:
Network
●
Connection Type: Select Ethernet, Wireless, or DSL to view and configure the respective
settings.
●
DHCP: Select for the DHCP server to automatically assign the IP address settings.
●
IP Address: Assign a static IP address for the unit (i.e., 150.0.0.249).
●
Gateway: Set the IP address of the gateway (i.e., 150.0.0.5).
●
Subnet Mask: Set the subnet mask (i.e., 255.255.0.0.).
ENWW Settings 27
Page 34

●
Default Domain: Set the domain (i.e., local-ad.server.net).
●
DNS Server: Set the IP address of the first Domain Name Server (DNS) server (i.e., 150.0.0.1).
●
DNS Server 2: Set the IP address of the second DNS server (i.e., 150.0.0.2).
●
DNS Server 3: Set the IP address of the third DNS server (i.e., 150.0.0.3).
●
Network Timeout: Select or type the amount of time. Network Timeout is only used when the thin
client is in Stateless Mode.
If the thin client is set to Local mode or Program Neighborhood broker, this value is ignored.
If the thin client is set to Stateless mode, this setting controls the amount of time the thin client waits
for login credentials before continuing through the boot process. If Retain Network Settings is
selected (Security tab), once the time out value is reached, the system assumes the FTP server
is down and loads the settings of the last successful user login. If Retain Network Settings is not
selected, the thin client boots to the HP ThinConnect desktop but with no connections available.
Users must restart the session and log in to access their specific connections.
●
Network Tools button: Click to view network-related information for the thin client. Use the Ping
tab in the HP Network Tool window to ping a URL.
◦
General: Set the Device (lo or eth0), Speed, and click to Renew.
28 Chapter 2 Installation ENWW
Page 35

◦
DNS info: This screen shows the IP addresses for the Domain Name Servers in use.
◦
Ping: To ping a URL, type the URL in the Host/IP field.
Ethernet
●
Ethernet Speed: If the connection type is Ethernet, select the speed of the network that connects
the thin client.
ENWW Settings 29
Page 36

Wireless
Set Connection Type to Wireless to turn on the following settings:
●
SSID: Type the SSID name.
●
Hidden AP: Select to enable hidden AP.
●
Authentication Type: Select the authentication type.
◦
NONE
◦
WEP
◦
PSK
◦
EAP
●
Configuration
If the authentication type is WEP, supply the following configuration settings:
30 Chapter 2 Installation ENWW
Page 37

◦
Network Type: Select either Infrastructure or Adhoc.
◦
Authentication Mode: Set the wireless authentication mode to Auto, Open, or Share.
◦
Encryption Mode: Set the encryption mode to WEP 64bit or WEP 128bit.
◦
Wep Key: Type or select to use from 1 - 4 of the available keys.
◦
Wep Key 1–4: Type the WEP key as established by the networks wireless administrator.
NOTE: The Wep key must be entered as a hexadecimal value.
If the authentication type is PSK, supply the following configuration settings:
◦
Network Type: Select either Infrastructure or Adhoc.
◦
Authentication Mode: Set the wireless authentication mode to either WPA-PSK or WPA2PSK.
◦
Encryption Mode: Set the encryption mode to TKIP, AES, or TKIP + AES.
◦
PSK Key/Passphrase: Set to Hex or ASCII and type the key or phrase in the field.
If the authentication type is EAP, supply the following configuration settings:
ENWW Settings 31
Page 38

◦
Network Type: Select either Infrastructure or Adhoc.
◦
Authentication Mode: Set the wireless authentication mode to either WPA-Enterprise or
WPA2-Enterprise.
◦
Encryption Mode: Set the encryption mode to TKIP, AES, or TKIP + AES.
◦
EAP Method: Select TLS.
◦
Identity: Type the name the certificate was created with in the field.
◦
Private Key Password: Allows you to set a password.
◦
Import Certificate: Click and browse to select a certificate.
●
Wireless Power: Select to enable wireless capability.
●
Wireless Mode: Select the wireless mode:
◦
Infra
◦
Adhoc
●
Auth Mode: Select the wireless authentication mode.
◦
WEPAUTO
◦
WPAPSK
◦
OPEN
◦
SHARED
◦
WPANONE
◦
WPA2PSK
● ◦
TKIP
◦
AES
◦
NONE
●
WPA Passphrase: Type the pass phrase if you selected WPA encryption mode.
●
Wireless Statistics button: Click to see information about your wireless connection.
32 Chapter 2 Installation ENWW
Page 39

DSL Configuration
Configure DSL settings for connections using a DSL high speed connection where the thin client may
require a DSL account username/password and other settings related to DSL.
●
DSL Username: Type the DSL user name.
●
DSL Password: Click Set Password and type the DSL password.
●
DSL Provider: Type the DSL Provider name.
●
DSL Connect on Demand: Select to enable Connect on Demand functionality.
●
DSL Demand Timeout: Type or select the timeout for DSL Connect on Demand.
ENWW Settings 33
Page 40

Management Settings
Use the Management tab to:
●
Record system identification
●
Set DHCP advanced options
●
Configure FTP settings
●
Use the HP ThinState utility to replicate thin client settings
●
Set up the VNC Viewer functions
●
Configure ports
●
Configure BIOS settings
●
Configure Altiris
●
Enable the HP Device Manager
▲
Go to Settings > Management to set the following options:
System Identification
●
Computer Name: Displays the computer name. Highlight and type over the entry to change the
name.
●
Computer Description: Displays the computer description. Highlight and type over the entry to
change the description.
●
Asset Tag Number: Displays the asset tag number. Highlight and type over the entry to change
the number.
34 Chapter 2 Installation ENWW
Page 41

DHCP Advanced Options
If you want to use DHCP image update, the thin client requires no configuration or setup because the
DHCP options provide all the necessary configuration information and direct the thin client to begin the
update process. By default, thin clients that support this feature use the following options that you must
configure on the DHCP server:
▲
Go to Settings > Management, and click DHCP Advanced Options to view or update the
following:
●
Force: Default port 180
●
Server: Default port 161
●
Server Type: Set to IP or String. Default type = String.
Select server type IP if the DHCP server is setup to use an IP address only.
Select type String if the DHCP server is setup to use hostname/dns and an IP address.
(example: myftpserver.com or 192.168.1.1)
NOTE: The DHCP client type must match the DHCP server type.
●
Path: Default port 162
●
Username: Default port 184.
●
Password: Default port 185
ENWW Settings 35
Page 42

●
Altiris Server: Default port 190
●
Altiris Server Type: Set to IP or String. Default type = IP.
Select server type IP if the DHCP server is setup to use an IP address only.
Select type String if the DHCP server is setup to use hostname/dns and an IP address.
(example: myftpserver.com or 192.168.1.1)
NOTE: The DHCP client type must match the DHCP server type.
●
Device Manager Groups: Default port 202
●
Device Manager Groups: Default port 203
NOTE: You must create a shared folder on the FTP server.
Upon rebooting, the unit automatically looks for the FTP server, log in, go to the path, and update itself
with the newer image using the information provided by the DHCP options.
FTP
Use this window to configure automatic FTP updates as an alternative to Altiris Deployment Solution,
as follows.
●
Enable Automatic Update: Select to enable the thin client to check a specific FTP location for a
newer image or package upon reboot.
●
FTP Address: Type the IP address of the FTP server that houses the operating system image file
(i.e., 150.0.0.5).
●
FTP Location: Type the FTP server path.
●
FTP Port: By default, FTP uses port 21. HP recommends that you do not change this setting.
●
FTP Username: Type a valid user name on the server to authenticate the FTP process.
●
FTP Password: Click Set Password and type a valid password on the server to authenticate the
FTP process.
●
Click Close, and then Reboot on the Save Warning message.
After rebooting, using the information provided in the previous fields, the unit automatically looks for the
FTP server, logs in, goes to the specified path, and updates with the newer image.
HP ThinState Utility
HP ThinState allows you to copy and deploy thin client settings to another HP thin client of identical
model and hardware.
NOTE: HP ThinState is not a standalone tool and can only be accessed by the administrator from
within the thin client image.
What do I need to have?
●
An HP thin client unit that contains the latest HP provided image.
●
An HP-approved USB flash drive.
36 Chapter 2 Installation ENWW
Page 43

Capture Thin Client Settings to USB Drive
To use HP ThinState to capture thin client settings to a USB drive:
NOTE: If using a USB flash drive to capture settings and the flash drive contains previously captures
settings, you must format the USB flash drive prior to using the ThinState utility.
1. Attach a USB flash drive to the thin client.
2. Go to Settings > Management, and click Replicate Settings by using HP ThinState.
3. Click OK on the notification message. The following window is displayed:
ENWW Settings 37
Page 44

4. Select Capture Settings, and then click Next. The following window is displayed:
5. By default, all settings are captured. You can select only the settings you want to capture by using
the Customize Captured Settings window.
To use Customized Captured Settings:
a. Click Customized Captured Settings. The following window is displayed:
38 Chapter 2 Installation ENWW
Page 45

b. Deselect a feature by clearing the feature’s checkbox. This eliminates all settings of the feature
from the captured settings file
Click the + symbol to expand a feature’s capture options. You can select or deselect individual
feature settings.
c. Click Generate.
d. Click OK on the information message.
e. Close the hpthinstate customized settings dialog box.
ENWW Settings 39
Page 46

6. Select the target USB flash drive from the list.
(Optional Destination) Select Capture the settings and save it on FTP server to save settings
to a FTP server and type the FTP Server Address, File Path, Username, Password, and New
Filename.
7. Click Capture.
8. At the Network User Password window, select Yes to apply a network password to the captured
settings file or select No to ignore network password while logging on in Stateless mode.
The Network user password is used for network user login authentication and is only available in
Stateless mode.
9. Click OK on the information message.
Settings capture is complete. Remove the USB flash drive.
NOTE: You must remove the USB drive prior to system reboot.
10. Close the window.
Use the capture settings on the USB drive to replicate (deploy) on different systems or to restore the
current capture back to its original setting after settings are altered.
40 Chapter 2 Installation ENWW
Page 47

Deploy Captured Settings from a USB Drive
To Use HP ThinState to Deploy Captured Settings from a USB drive:
1. Attach the USB flash drive on which you captured settings.
2. On the thin client to which you want to deploy captured settings, click Settings > Management,
and click Replicate Settings by using HP ThinState.
3. Click OK on the warning message. The following window is displayed.
4. Select Deploy Settings.
5. Click Next.
6. Select the target USB flash drive from the list.
7. Click Deploy.
After image setting settings have been deployed successfully, you may remove the USB flash drive.
8. Click OK on the information message.
The thin client immediately reboots deploying settings.
NOTE: If you do not remove the USB flash drive, during reboot, you are prompted to press any
key. Simply remove the flash drive and press any key to continue reboot.
ENWW Settings 41
Page 48

Capture a Thin Client Full Image to a USB Drive
To use HP ThinState to capture a thin client full image to a USB drive:
1. Attach a USB flash drive to the thin client.
NOTE: HP ThinState, when capturing a full image, automatically formats the USB flash drive and
makes the flash drive bootable.
2. Go to Settings > Management, and click Replicate Settings by using HP ThinState.
3. Click OK on the notification message. The following window is displayed:
42 Chapter 2 Installation ENWW
Page 49

4. Select Capture Full Image, and then click Next. The following window is displayed:
5. By default, all settings are captured. Click Customize Captured Settings to select only settings
you want captured.
6. Click Capture.
7. Click OK on the warning message.
When full image capture is complete, you are instructed to remove the USB drive.
8. Remove the USB flash drive and click OK.
9. Close the HP ThinState window.
Use the capture full image on the USB drive to replicate on different systems or to restore the current
thin client back to its original image.
To install a full image from a USB drive, simply attach a USB drive to the target thin client, reboot the
unit, and follow the onscreen instructions.
Deploy a Full Image to an FTP Site
To use HP ThinState to deploy a full image to an FTP site:
1. On the thin client from which you want to deploy a captured full image, click Settings >
Management, and click Replicate Settings by using HP ThinState.
ENWW Settings 43
Page 50

2. Click OK on the warning message. The following window is displayed.
3. Select Capture Full Image.
4. Click Next.
5. Select Capture the image and save it on FTP server. The following window is displayed.
44 Chapter 2 Installation ENWW
Page 51

By default, all settings are captured when deploying a full image. You can select only the settings
you want to capture by using the Customize Captured Settings window.
To use Customized Captured Settings:
a. Click Customized Captured Settings. The following window is displayed:
b. Deselect a feature by clicking the feature’s checkbox. This eliminates all settings of the feature
from the captured settings file.
Click the + symbol to expand a feature’s capture options. You can select or deselect individual
feature settings.
ENWW Settings 45
Page 52

c. Click Generate.
d. Click OK on the information message.
e. Close the hpthinstate customized settings dialog box.
6. Click Capture.
7. Click OK on the notification message.
8. Close the hpthinstate customized settings dialog box.
Deploy a Full Image from a Thin Client
To use HP ThinState to deploy a full image from a Thin Client:
1. On the thin client from which you want to deploy a captured full image, click Settings >
Management, and click Replicate Settings by using HP ThinState.
2. Click OK on the warning message. The following window is displayed.
3. Select Capture Full Image.
46 Chapter 2 Installation ENWW
Page 53

4. Click Next. The following window is displayed.
5. Select Serve the image from this HP thin client. The following window is displayed.
By default, all settings are captured when deploying a full image. You can select only the settings
you want to capture by using the Customize Captured Settings window.
ENWW Settings 47
Page 54

To use Customized Captured Settings:
a. Click Customized Captured Settings. The following window is displayed:
b. Deselect a feature by clicking the feature’s checkbox. This eliminates all settings of the feature
from the captured settings file.
Click the + symbol to expand a feature’s capture options. You can select or deselect individual
feature settings.
c. Click Generate.
48 Chapter 2 Installation ENWW
Page 55

d. Click OK on the information message.
e. Close the hpthinstate customized settings dialog box.
6. Click Capture.
7. Click OK on the notification message.
8. Close the HP ThinState window.
A window opens displaying the Hostname and IP address a thin client connects to when updating
to the new image.
9. Click the checkbox for Serve the image to all units whose image is S1ST00xx or S2ST00xx to
serve the image. All HP thin clients connected with an image of S1ST00xx or S2ST00xx are
automatically updated to the deployed image when restarted.
10. Click Reboot to return to normal thin client mode.
VNC Viewer button:
Click to view active remote control program (Virtual Network Computing).
VNC
Virtual Network Computing (VNC) is a remote control program that allows you to see the desktop of a
remote machine and control it with your local mouse and keyboard, just as if you were sitting in the front
of that computer.
●
Enable VNC Shadow: Select to enable the thin client to be accessed using VNC.
●
VNC Read Only: Select to make the VNC session read only.
●
User Notify Monitoring: Select to display a message when someone uses VNC to access the
thin client.
●
User Notify Message: Type the message to display when someone uses VNC to access the thin
client. This field is valid only when User Notify Monitoring is selected.
●
VNC Require Password: Select to require a password to access the thin client using VNC.
●
VNC Password: Click Set Password to enter the password required to access the thin client using
VNC. This field is valid only when VNC Require Password is selected.
ENWW Settings 49
Page 56

Configure Ports
●
Serial Port: Select a different address, interrupt line, or disable this port.
●
Parallel Port: Select a different address, interrupt line, or disable this port.
●
Parallel Port Mode: Select the port mode.
●
ECP Mode DMA: Select the DMA options.
●
EPP Type: Select the Enhanced Parallel Port (EPP) type.
BIOS Settings
50 Chapter 2 Installation ENWW
Page 57

Boot Order
●
First Boot Device: Select the first device for the thin client to boot to.
●
Second Boot Device: Select the second device for the thin client to boot to.
●
Third Boot Device: Select the third device for the thin client to boot to.
Wake-up Settings
●
Wake On Lan: Select to enable wake on LAN.
●
PWRON After PWR-Fail: Select whether power is to be on/off or defaults to its former state after
a power failure. HP recommends setting to Former state.
●
Wake Up [Sunday — Saturday]: Select to choose the day on which the thin client wakes up.
●
Wake Up Time: Click Set Time to set the time of day the thin client wakes up. You must first reboot
and then shut down the unit for this feature to work.
Configure Altiris
By default, the Altiris client is disabled. The Altiris client is automatically enabled if an Altiris server is
set up, DHCP is enabled on the Network tab, and the DHCP Altiris Server port set to 190 (or to your
unique port ID) at Settings > Management > DHCP Advanced Options. Visit
http://www.hp.com/
support/; in software downloads for the specific HP thin client, you can find Altiris scripts to manage the
thin client via Altiris.
Startup
●
Enable Altiris: Select to start Altiris on boot.
●
Altiris Time Sync: Select to enable time synchronization with an Altiris server, if available.
Altiris Settings
●
Use Multicast: Select if you want to use the default Altiris server address.
●
Multicast Address: The default address is displayed. Type your installation address if necessary.
●
Multicast Port: Type or select the Altiris server port.
●
TCP Address: If Use Multicast is not selected, type the specific Altiris server address.
●
TCP Port: Type or select the Altiris server port.
ENWW Settings 51
Page 58

Device Manager
●
Startup
◦
Enable HP Device Manager: Select to start Altiris on boot.
Printers
Use the Printer tab to add, modify, and delete printers from the thin client.
To add a printer, simply choose the type of printer connection you want to add.
The following Add Printer options are available:
●
Add Parallel
●
Add USB
●
Add LPD
●
Add Thinprint
●
Add Samba
▲
Go to Settings > Printers. The following window is displayed.
52 Chapter 2 Installation ENWW
Page 59

Parallel Printer
To add a Parallel printer:
1. Click the Add LPT button. The following window is displayed:
2. In the Printer Name field, type a name for the printer.
For example: < myprinter ==>, where “myprinter” is the printer name.
3. (Optional). In the Alias Name field, type an alias for the printer.
4. (Optional). In the Printer Description field, type a description for the printer.
5. From the Spooler Size list, select how large you want the print spooler to be, in KB.
6. From the Printer Port list, select the port used for the printer.
7. (Optional) In the Windows Driver field, type a driver name.
Citrix ICA and rdesktop use this field to set the printer driver for the session. You must type the
Windows driver name exactly as it is on the server.
8. If desired, click Test Printer to send a sample job to the printer.
9. Select Enable Form Feed, to use form feed.
10. Click OK to save changes.
To make this printer the default printer, go to Settings > Printer and simply drag and drop the printer
to the top of the list.
ENWW Settings 53
Page 60

USB Printer
To add a USB printer:
1. Click the Add USB button, and the following window is displayed:
2. In the Printer Name field, type a name for the printer.
For example: < myprinter ==>, where “myprinter” is the printer name.
3. (Optional). In the Alias Name field, type an alias for the printer.
4. (Optional). In the Printer Description field, type a description for the printer.
5. From the Spooler Size list, select how large you want the print spooler to be, in KB.
6. From the Printer Port list, select the port used for the printer.
7. (Optional) In the Windows Driver field, type a driver name.
Citrix ICA and rdesktop use this field to set the printer driver for the session. You must type the
Windows driver name exactly as it is on the server.
8. If desired, click Test Printer to send a sample job to the printer.
9. Select Enable Form Feed, to use form feed.
10. Click OK to save changes.
To make this printer the default printer, go to Settings > Printer and simply drag and drop the printer
to the top of the list.
54 Chapter 2 Installation ENWW
Page 61

LPD Printer
To add a LPD printer:
1. Click the Add LPD button, and the following window is displayed:
2. In the Printer Name field, type a name for the printer.
For example: < myprinter ==>, where “myprinter” is the printer name.
3. (Optional). In the Printer Description field, type a description for the printer.
4. From the Spooler Size list, select how large you want the print spooler to be, in KB.
5. From the Printer Port list, select the port used for the printer.
6. (Optional) In the Windows Driver field, type a driver name.
Citrix ICA and rdesktop use this field to set the printer driver for the session. You must type the
Windows driver name exactly as it is on the server.
7. If desired, click Test Printer to send a sample job to the printer.
8. Select Enable Form Feed, to use form feed.
9. In the Address field, type the print server IP address.
NOTE: For an LPD printer, you must populate the Address field.
10. In the Username field, type the user name for the account you want the printer to use to log into
the remote computer.
11. Click OK to save changes.
To make this printer the default printer, go to Settings > Printer and simply drag and drop the printer
to the top of the list.
ENWW Settings 55
Page 62

Thinprint Printer
To add a Thinprint printer:
1. Click the Add Thinprint button, and the following window is displayed:
2. In the Printer Name field, type a name for the printer.
For example: < myprinter ==>, where “myprinter” is the printer name.
3. In the Device field:
If adding a parallel printer type /dev/lp0.
If adding a USB printer type /dev/usb/lp0 or /dev/usb/lp1, where 0 indicates the first USB
printer attached and 1 indicates a second USB printer.
If adding an LPD printer, you must first add the LPD printer using the Settings > Printers > Add
LPD function, then type the LPD printer name in the device field.
NOTE: if you want to share a locally attached printer through ThinPrint, you must add the printer.
Additionally, the locally defined printer name has to match the print server printer name.
4. Click OK to save changes.
To make this printer the default printer, go to Settings > Printer and simply drag and drop the printer
to the top of the list.
56 Chapter 2 Installation ENWW
Page 63

Samba Printer
To add a Samba printer:
1. Click the Add Samba button, and the following window is displayed:
2. In the Printer Name field, type a name for the printer.
For a Samba printer, the printer name should be the name of the shared printer of the samba
printer.
For example: < myprinter ==>, where “myprinter” is the printer name.
3. (Optional). In the Printer Description field, type a description for the printer.
4. From the Spooler Size list, select how large you want the print spooler to be, in KB.
5. (Optional) In the Windows Driver field, type a driver name.
Citrix ICA and rdesktop use this field to set the printer driver for the session. You must type the
Windows driver name exactly as it is on the server.
6. Select Enable Form Feed, to use form feed.
7. In the Address field, type the print server IP address.
NOTE: For a Samba printer, you must populate the Address, Username, and Password fields.
8. In the Shared Printer field, type a name for the printer.
For a Samba printer, the printer name should be the name of the shared printer of the samba
printer.
For example: < myprinter ==>, where “myprinter” is the printer name.
9. In the Username field, type the user name for the account you want the printer to use to log into
the remote computer.
10. Next to Password field, click Set Password, and then type the password for the account you want
the printer to use to log into the remote computer.
11. If desired, click Test Printer to send a sample job to the printer.
12. (Optional) In the Workgroup field, type the Windows domain workgroup.
13. Select Translate if you want to translate carriage returns and line feeds from Windows to Linux or
Linux to Windows.
14. Click OK to save changes.
ENWW Settings 57
Page 64

To make this printer the default printer, go to Settings > Printer and simply drag and drop the printer
to the top of the list.
About the Computer
You can view information about the thin client and its software using the About tab.
▲
Go to Settings > About.
Information includes:
●
Product Name
●
Board Info
●
Image Version
●
Kernel Version
●
Processor
●
Memory
●
Serial Number
●
BIOS Version Number
●
Copyright
58 Chapter 2 Installation ENWW
Page 65

Configuring the Network Environment
This section provides basic instruction for how to configure a network environment so HP thin clients
can access the HP-format global profile “global.xml” file and the user profile .xml files on an FTP server,
using DHCP scope options.
By default, upon booting up and successfully logging in at the group logon window with a specific user
name (i.e., john), any HP thin client connected to the network environment as configured in the following
sections is automatically configured with the settings captured in the HP-format “global.xml” file and the
settings in the user profile “john.xml” file.
About Global.xml and User Profile.xml
To create a global.xml file, start the thin client and make the desired changes through the ThinConnect
Settings button. Once all of the desired settings are selected, capture the settings file using HP
ThinState from within the thin client image (see
Management Settings on page 34 for more information
about HP ThinState).
HP ThinState will capture a file named HPsettings.xml and save that file onto a USB storage device or
to an FTP folder. Access the USB storage device or FTP folder (HPThinstate <imageid>) and change
the name of the HPsettings.xml file to global.xml. After renaming the file, place in the ftproot/HP folder
on your Microsoft Windows Server or Linux FTP server. The global.xml file contains the settings that
will be propagated onto all thin clients connected to the FTP server. Every setting on the thin client can
be configured with this file, including screen size, application to connect to (such as RDP/ICA
connections), security, keyboard settings, Altiris server information, WOL and VNC settings, etc. A
global.xml file must be created when operating in Stateless mode.
User profile.xml files are created exactly the same way as global.xml files. After capturing the
HPsettings.xml using HP ThinState, rename the HPsettings.xml to the specific name for each specific
user. User profile.xml files are used to override specific global.xml settings or add different settings for
an individual user. The <user>.xml file is required when a user signs in at the network prompt. See the
following for instructions for where to place the global.xml and user profile.xml files.
Shared folders must be created on the FTP server to store global.xml and user profile.xml files. Use the
following example to create the FTP folders.
ENWW Configuring the Network Environment 59
Page 66

FTP Image Updates
You can configure the DHCP server to upgrade all thin clients on a DHCP network using an FTP server.
Shared folders must be created on the FTP server. Use the following example and definitions to create
the FTP folders.
Definitions of the fields in these paths are as follows:
●
<FTP root>: Shared directory on the FTP server where you can find the new image files
●
<linux>: System-defined directory that must be present below the FTP directory on the FTP server
●
<FTP root>/linux/<imageid>/image: For flashing images
●
<imageid>: Directory with the same name as the image version from which you wish to upgrade
that you can find in the About tab (for example, S2ST0045, S2ST0045_1, etc.)
●
<image_name>.DD: System-defined directory that contains the image to which you want to
upgrade
NOTE: The image_name.DD files are case-sensitive.
When a thin client boots up, it looks in the FTP image ID path on the FTP server for the matching
<imageid>. It then looks in the image folder for the <image_name>.DD image. If the client discovers a
new valid .DD image, the thin client downloads and installs the image on the thin client. If the thin client
does not discover a valid .DD image, the thin client continues a normal boot up using the current image.
To upgrade all thin clients in your DHCP network:
1. On the FTP server, create a new folder referencing the new image ID.
(example: <ftproot>/linux/<S2ST0045>)
2. Create a new folder called “image” within the new image ID folder.
(example: <ftproot>/linux/<S2ST0045>/image/)
3. Add the new image file to the new "image" folder.
4. On the DHCP server, add a new scope option 180 called FTP_FORCE_OPTION with a value of
TRUE.
When a thin client boots up, it validates whether the FTP FORCE option is set to TRUE or FALSE.
60 Chapter 2 Installation ENWW
Page 67

If the FTP FORCE option is set to TRUE, the thin client validates that the new image exists and installs
it on the user's thin client.
Setting the FTP FORCE option on the DHCP server to TRUE forces all thin clients in the network to
perform FTP updates during every reboot. Changing the FTP FORCE option to FALSE prevents forcing
an FTP update during every reboot.
NOTE: Directory names and values are case-sensitive.
Prerequisites
●
Windows Server 2000, Windows Server 2003, or Linux Server system up and running.
●
DHCP server up and running.
●
Domain Controller/Active Directory.
Domain Controller/Active Directory is only required if accessing the global and user profile .xml
files on the FTP server requires domain authentication instead of anonymous access. For more
information, see the Note section. HP recommends for future use with ICA and RDP.
Procedural Overview
NOTE: The following procedure is for Windows 2003 Server. The steps for Windows 2000 Server and
Windows 2003 Server may vary slightly.
This section provides a quick overview of the steps required to complete the configuration.
1. Set up an FTP Server in Windows Server 2003
a. Install Internet Information Services (IIS) and the FTP Service
b. Configure the FTP service to allow only anonymous connections
2. Set up shared directories to access the HP-format global profile .xml file & user profile .xml files
a. Obtain an HP-format global profile .xml file
b. Configure shared directories.
3. Configure a DHCP server
Configuring a Network Environment
1. Set up an FTP server in Windows Server 2003.
Because FTP depends on Microsoft Internet Information Services (IIS), IIS and the FTP service
must be installed on the computer. To install IIS and the FTP Service:
a. Install Internet Information Services and the FTP service:
1. Click Start > Control Panel > Add or Remove Programs.
2. Click Add/Remove Windows Components.
3. In the Components list, click Application Server, click Internet Information
Services (do not select or clear the check box), and then click Details.
4. Select the following check boxes:
ENWW Configuring the Network Environment 61
Page 68

- Common Files
- File Transfer Protocol (FTP) Service
- Internet Information Services Manager
5. Select the check boxes next to any other IIS-related service or subcomponent that you
want to install, and then click OK.
6. Click Next.
7. When prompted, insert the Windows Server 2003 CD-ROM into the computer’s optical
drive, or provide a path to the location of the files, and then click OK.
8. Click Finish.
IIS and the FTP service are now installed. You must configure the FTP service before
you can use it.
NOTE: Write Permissions must be allowed on the FTP server’s default site properties.
b. Configure the FTP service to allow only anonymous connections:
1. Start Internet Information Services Manager or open the IIS snap-in.
2. Expand Server_name, where Server_name is the name of the server.
3. Expand FTP Sites.
4. Right-click Default FTP Site, and then click Properties.
5. Click the Security Accounts tab.
6. Select the Allow Anonymous Connections check box, and then select the Allow only
anonymous connections check box. Selecting the Allow only anonymous
connections check box configures the FTP service to allow only anonymous
connections. Users cannot log on with user names and passwords.
7. Click the Home Directory tab.
8. Select the Read and Log visits check boxes, and then clear the Write check box.
9. Click OK.
10. Quit Internet Information Services Manager or close the IIS snap-in.
c. Establishing FTP server on Linux.
NOTE: Please follow the FTP server package guidelines for more details.
General guidelines for Linux FTP Servers:
1. Enable FTP Service by adding the following line into /etc/inetd.conf:ftp stream tcp
nowait root /usr/bin/tcpd in.proftpd
2. Verify that ftp entry is present in the /etc/services.
3. Configure the FTP Server to allow anonymous login by modifying the /etc/passwd.
4. Verify that the entry DefaultRoot ~ exists in the proftpd.conf.
62 Chapter 2 Installation ENWW
Page 69

2. Set up shared directories for global profile .xml file and user profile .xml files:
a. Obtain an HP-formatted global profile .xml file:
1. Capture the configuration of an HP thin client to a USB storage device by using the
preinstalled HP ThinState.
2. A file named HPsettings.xml is created upon successfully capturing the configuration of
the thin client.
3. Rename this new file: global.xml.
b. Configure the shared directories:
NOTE: The FTP server was configured to accept incoming FTP requests in step 1.b. The
default folder is C:\Inetpub\ftproot\
1. Create a directory under the C:\Inetpub\ftproot\ directory.
For example: C:\Inetpub\ftproot\HP\
2. Create a directory called ini under the hp directory:
For example: C:\Inetpub\ftproot\HP\ini\
3. Copy the global.xml file to the FTP server under the hp directory:
For example: C:\Inetpub\ftproot\HP\global.xml
4. Place all the user profile .xml files under the ini directory. For example:
C:\Inetpub\ftproot\HP\ini\john.xml
C:\Inetpub\ftproot\HP\ini\paul.xml
C:\Inetpub\ftproot\HP\ini\susan.xml
ENWW Configuring the Network Environment 63
Page 70

3. Configure a DHCP server:
Assign four scope-based options and set their values to match the configuration of the FTP server
configured in Step 1. For example:
●
FTP Server IP Address: 161 = 10.0.0.2
●
FTP Server Path: 162 = /
●
FTP Server User Name: 184 = anonymous
●
FTP Server Password: 185 = anonymous
Follow these steps:
1. Open DHCP.
2. In the console tree, click the applicable DHCP server.
3. On the Action menu, click Set Predefined Options.
64 Chapter 2 Installation ENWW
Page 71

4. In Predefined Options and Values, click Add.
5. In Option Type, type the required information to define the new option, and then click OK.
For example:
◦
In the Name field, type FTP Server IP Address.
◦
In the Data Type field, select String.
◦
In the Code field, type 161.
◦
In the Description field, type any description. For example: “This is an FTP server for
HP-format global profile .xml file and user profile .xml files”.
6. Repeat Steps 1 through Step 5. Make sure to select String instead of IP in the Data Type
field for:
◦
Code 162 to define FTP Server Path
◦
Code 184 to define FTP Server User Name
ENWW Configuring the Network Environment 65
Page 72

◦
Code 185 to define FTP Server Password
7. Click Scope Options.
8. On the Action menu, click Configure Options.
9. Scroll down to select option 161.
Select the check box beside that number.
In the String Value field, type in the IP address of the FTP server, i.e., 10.0.0.2.
10. Scroll down to select option 162.
Select the check box beside that number.
In the String Value field, type in the name of the FTP Server Path, i.e., /.
11. Scroll down to select option 184.
Select the check box beside that number.
In the String Value field, type in the FTP Server User Name, i.e., anonymous.
12. Scroll down to select option 185.
Select the check box beside that number.
In the String Value field, type in the FTP Server User Name, i.e., anonymous.
13. Click Apply and OK to save and exit out of the applet.
66 Chapter 2 Installation ENWW
Page 73

Accessing Global and User Profile .xml Files Using Domain
Authentication
To access the global and user profile .xml files using domain authentication, set the domain user name
and password to the values of scope options 184 and 185. For example:
●
FTP Server User Name: 184 = americas\harry
●
FTP Server Password: 185 = cookies
●
americas is the domain name
●
harry is the domain user name
●
cookies is the domain password
Changing User-defined DHCP Scope Options
By default, the following DHCP scope options are preset:
●
FTP Server IP Address: 161
●
FTP Server Path: 162
●
FTP Server User Name: 184
●
FTP Server Password: 185
See the following window:
ENWW Configuring the Network Environment 67
Page 74

These DHCP scope option settings can be changed to match with the FTP scope options on the DHCP
server if the scope options on the DHCP server are different.
●
FTP Server IP Address: 201
●
FTP Server Path: 202
●
FTP Server User Name: 203
●
FTP Server Password: 204
See the following illustrations.
68 Chapter 2 Installation ENWW
Page 75

3 Support
If you require support for your thin client, contact your region’s HP Technical Support Center.
Support contact information is available at the Contact HP link on the HP home page or at
http://welcome.hp.com/country/us/en/contact_us.html.
Hardware Warranty
The hardware warranty is three years limited coverage and is upgradeable through the purchase of an
optional HP Care Pack.
Software Warranty
The software warranty covers several features, including:
●
Altiris Remote Management Client
●
Citrix Client
Note that Altiris is supported directly by Altiris, Inc. All other services and features are from open source
community packages and are not supported by HP.
For ThinPrint Warranty and support information contact your ThinPrint service representative.
Image Updates and Add-ons
HP provides periodic updates to the image. Check the HP support site for important documentation that
provides specific information for your image version. You can find support documentation at:
http://www.hp.com/support/
To search for support documentation, type your country and product name, and then click Manuals.
Custom Image Requests
To obtain a custom image from HP, contact your HP Account Team, which will work through the HP
Specials Process to understand the opportunity, image requirements, schedule, and costs involved.
ENWW Hardware Warranty 69
Page 76

4 Frequently Asked Questions
Question Answer
What characters are valid when creating a password? Passwords can contain any character except the following
characters: #, \, |, ", and `. These characters should never be
used in a password.
Why does my system not log off instantly with an RDP
connection?
When using smartcard in an RDP session, it takes
approximately sixty seconds to log off.
Why does my RDP session not connect if the client host name
includes a blank space?
To connect to a RDP session that has a blank space in the
name, you must capture the host name with quotation marks.
It is recommended that host names not include blanks.
Why does my RDP connection fail when using a long printer
mapping entry?
The printer mapping entry is limited to 40 characters.
Why are resolution settings not always available when logging
on to a remote thin client using RDP?
When logging in to a remote thin client using RDP, the user
can only select a resolution at or below the resolution setting
of the remote unit.
Why are BIOS changes made locally using the BIOS settings
utility overwritten during system boot up?
You should always use the HP ThinConnect OS Settings tab
to configure settings. Settings made using the BIOS utility are
over-written by HP ThinConnect OS settings when your HP
thin client boots.
Why are BIOS changes made remotely using Altiris (Repset)
overwritten during system boot up?
You should always use the HP ThinConnect OS Settings tab
to configure settings. Settings made using Altiris (Repset) are
over-written by HP ThinConnect OS settings when your HP
thin client boots.
When adding a Thinprint printer, what is entered in the Device
field when connecting to a USB or Parallel printer?
A Thinprint server must be up and running local and Windows.
If connecting to a USB device, you should type /dev/usb/
lp0 in the Device field. If connecting to a Parallel device, you
should type /dev/lp0 in the Device field.
Why does the wakeup utility not work when I use the power
button to turn off my thin client?
After the thin client has been turned off with the power button,
the thin client cannot be awakened with a Wake Up signal
(wakeup utility) via the network. Using the power button does
not allow the proper value to be set. If you execute a normal
shutdown (via shutdown menu), the unit can be awakened with
a remote wakeup signal.
Why is my computer name incorrect when I am deploying an
image captured from a thin client operating wirelessly?
Settings should not be captured from a thin client with wireless
device settings activated unless the wireless information is
excluded from the settings image. Use the Customize
Captured Settings utility when creating the settings image to
exclude the wireless feature settings.
70 Chapter 4 Frequently Asked Questions ENWW
Page 77

Index
A
About tab 58
add-ons 69
adding
automatic connections 14
ICA connection 8
primary connections 14
printers 52
RDP connection 11
secondary connections 14
administrator password 20
App server mapping 19
authentication 30
authentication, domain 67
auto-login 20
automatic connection, adding 14
B
background
image types 23, 24
image, changing 23
bitmap caching 13
boot order, setting 51
boot splash image, changing 24
C
Citrix, global settings 15
color depth 22
compression 13
configuring
automatic connection 14
background image 23, 24,
25
boot order 51
connections 2
connectivity 27
display settings 22
DSL 33
ICA connection 8
network environment 59
primary connection 14
printers 52
profile, global 59
profile, user 59
RDP connection 11
secondary connection 14
Thin Client network
settings 20
wake-up settings 51
connection types 8
connections
automatic 14
ICA 8
primary 14
RDP 11
secondary 14
Connections tab 8
connectivity, configuring 27
custom image requests 69
D
Date & Time tab 22
DHCP
advanced options 35
scope options, user-
defined 67
DNS 28
domain authentication 67
DSL configuration 33
E
Experience tab 22
F
FAQ 70
FTP settings 36
G
Global Citrix settings 15
Global Citrix tab 15
global.xml 59
H
hardware warranty 69
HP ThinConnect 1, 2
HP ThinConnect, features 2
HP ThinState 36
I
ICA connection, adding 8
ICA drives, mapping 17
image
thin client 1
updates 69
information
software 58
system 58
thin client 58
Initial Thin Client State 20
installation 5
K
keyboard 22
L
Local usage mode 5
login screen image types 25
login screen image, changing 25
LPD printer, adding 55
M
Management tab 34
mapping
App server 19
ICA drives 17
mouse 22
Multicast 51
ENWW Index 71
Page 78

N
network environment,
configuring 59
network settings 27
Network tab 27
P
parallel printer, adding 53
password
administrator 20
user 20
persistent connection 15
primary connection, adding 14
printer
adding 52
LPD 55
parallel 53
Samba 57
Thinprint 56
USB 54
Printer tab 52
profile
global 59
user 59
R
RDP connection, adding 11
RDP Web site 12
resolution 22
S
Samba printer, adding 57
secondary connection, adding 14
setting, usage modes 6
settings
boot order 51
Citrix, Global 15
DHCP 35
FTP 36
Global Citrix 15
network 27
wake-up 51
wireless 30
software warranty 69
sound 22
Stateless 20
Stateless usage mode 6
support 69
T
tabs
About 58
Connections 8
Date & Time 22
Experience 22
Global Citrix 15
Management 34
Network 27
Printer 52
Thin Client 20
TCP 51
thin client
image 2
installation 5
thin client image 1
Thin Client, tab 20
ThinConnect 1
Thinprint printer, adding 56
ThinState, HP 36
U
usage modes
local 5
setting 6
Stateless 6
USB printer, adding 54
user
interface, HP ThinConnect 1
password 20
profile.xml 59
user-defined DHCP scope
options 67
V
volume 22
W
wake up times 51
wake-up settings, configuring 51
warranty
hardware 69
software 69
wireless settings 30
72 Index ENWW
 Loading...