

Page 1
User Manual for Neoware Thin Clients
®
with Microsoft
Windows®
XP Embedded Operating System
Release 1.4
i
Page 2

© 2006 by Neoware, Inc.
3200 Horizon Drive,
King of Prussia, PA 19406 USA
Tel.: +1-610-277-8300
Fax: +1-610-771-4200
Email: info@neoware.com
Web: http://www.neoware.com
This manual is copyrighted by Neoware, Inc. All rights are reserved. This document may not, in
whole or in part, be copied, photocopied, reproduced, translated, or reduced to any electronic
medium or machine-readable form without prior consent, in writing, from Neoware, Inc.
Neoware, Capio, Eon, ThinSTAR, TeemTalk and ezRemote Manager are trademarks or registered
trademarks of Neoware, Inc. Microsoft and Windows are registered trademarks of Microsoft Cor poration. MetaFrame, WinFrame, and ICA are registered trademarks of Citrix Systems, Inc. Other
trademarks used in this manual are the property of their respective owners.
Disclaimer: The information provided in this manual is intended for instructional purposes only
and is subject to change without notice. Neoware, Inc., accepts no responsibility or liability for
errors, omissions, or misleading information that may be contained in this manual.
April 2006
ii
Page 3

FCC Regulatory & Safety Information
FCC regulatory and safety information can be found in the Quick-Start Guide that came with your thin client, and on the
Support section of the Neoware website which can be found at:
http://www.neoware.com/support.html
CANADA ICES/NMB-003 Class/Classe (B)
This Class B digital apparatus complies with Canadian ICES-003.
Cet appareil numérique de la classe B est conform à la norme NMB-003 du Canada.
Neoware Hardware Warranty
Neoware hardware warranties can be found in the Quick-Start Guide that came with your thin client, and on the Support section of the Neoware website which can be found at:
http://www.neoware.com/support.html
Microsoft End User License Agreement (“EULA”)
END USER LICENSE AGREEMENT FOR MICROSOFT EMBEDDED SYSTEMS
Y ou have acquir ed a device (“DEVICE”) that includes software licensed by NEOWARE, INC. (“NEOWARE”)
from Microsoft Licensing Inc. or its affiliates (“MS”). Those installed software products of MS origin, as well
as associated media, printed materials, and “online” or electronic documentation (“SOFTWARE”) are protected by international intellectual property laws and tr eatie s. The SOFTWARE is licensed, not sold. All rights
reserved.
IF YOU DO NOT AGREE TO THIS END USER LICENSE AGREEMENT (“EULA”), DO NOT USE THE
DEVICE OR COPY THE SOFTWARE. INSTEAD, PROMPTLY CONTACT NEOWARE FOR INSTRUCTIONS ON RETURN OF THE UNUSED DEVICE(S) FOR A REFUND. ANY USE OF THE SOFTWARE,
INCLUDING BUT NOT LIMITED TO USE ON THE DEVICE, WILL CONSTITUTE YOUR
AGREEMENT TO THIS EULA (OR RATIFICATION OF ANY PREVIOUS CONSENT).
GRANT OF SOFTWARE LICENSE. This EULA grants you the following license:
· You may use the SOFTWARE only on the DEVICE.
· NOT FAULT TOLERANT. THE SOFTWARE IS NOT FAULT TOLERANT. NEOWARE HAS INDE-
PENDENTL Y DETERMINED HOW T O USE THE SOFTWARE IN THE DEVICE, AND MS HAS RELIED
UPON NEOWARE TO CONDUCT SUFFICIENT TESTING TO DETERMINE THAT THE SOFTWARE IS
SUIT ABLE FOR SUCH USE.
FCC Regulatory & Safety Information iii
Page 4

· NO WARRANTIES FOR THE SOFTWARE. THE SOFTWARE is provided “AS IS” and with all
faults. THE ENTIRE RISK AS TO SATISFACTORY QUALITY, PERFORMANCE, ACCURACY,
AND EFFORT (INCLUDING LACK OF NEGLIGENCE) IS WITH YOU. ALSO, THERE IS NO
WARRANTY AGAINST INTERFERENCE WITH YOUR ENJOYMENT OF THE SOFTWARE OR
AGAINST INFRINGEMENT. IF YOU HAVE RECEIVED ANY WARRANTIES REGARDING THE
DEVICE OR THE SOFTWARE, THOSE WARRANTIES DO NOT ORIGINATE FROM, AND ARE NOT
BINDING ON, MS.
· Note on Java Support. The SOFTWARE may contain support for programs written in Java. Java technol-
ogy is not fault tolerant and is not designed, manufactured, or intended for use or resale as online control equipment in hazardous environments requiring fail-safe performance, such as in the operation of nuclear facilities,
aircraft navigation or communication systems, air traffic control, direct life support machines, or weapons systems, in which the failure of Java technology could lead directly to death, personal injury, or severe physical or
environmental damage. Sun Microsystems, Inc. has contractually obligated MS to make this discla imer.
· No Liability for Certain Damages. EXCEP T AS PROHIBITED BY LAW , MS SHALL HAVE NO LIA-
BILITY FOR ANY INDIRECT, SPECIAL, CONSEQUENTIAL OR INCIDENTAL DAMAGES ARISING FROM OR IN CONNECTION WITH THE USE OR PERFORMANCE OF THE SOFTWARE.
THIS LIMITATION SHALL APPLY EVEN IF ANY REMEDY FAILS OF ITS ESSENTIAL PURPOSE. IN NO EVENT SHALL MS BE LIABLE FOR ANY AMOUNT IN EXCESS OF U.S. TWO
HUNDRED FIFTY DOLLARS (U.S.$250.00).
· Limitations on Reverse Engineering, Decompilation, and Disassembly. You may not reverse engineer,
decompile, or disassemble the SOFTWARE, except and only to the extent that such activity is expressly permitted by applicable law notwithstanding this limitation.
· SOFTWARE TRANSFER ALLOWED BUT WITH RESTRICTIONS. You may permanently transfer
rights under this EULA only as part of a permanent sale or transfer of the Device, and only if the recipient
agrees to this EULA.
· EXPORT RESTRICTIONS. You acknowledge that SOFTWARE is subject to U.S. export jurisdiction.
You agree to comply with all applicable international and national laws that apply to the SOFTWARE, including the U.S. Export Administration Regulations, as well as end-user, end-use and destination restrictions issued
by U.S. and other governments. For additional information see http://www.microsoft.com/exporting/.
Lead-Content Warning
Many PC products and accessories contain cords, cables or wires, such as power cords or
cords to connect the accessory to a PC. If this product has such a cord, cable or wire, then
the following warning applies:
WARNING: Handling the cord on this product will expose you to lead, a chemical known
to the State of California to cause cancer, and birth defects or other reproductive harm.
Wash hands after handling.
iv Lead-Content Warning
Page 5

Safety Instructions
Please read these safety instruction carefully and keep this user’s manual for later reference.
1. Before removing the outer case from the thin client, always disconnect the AC power cord
to prevent the possibility of dangerous electrical shock.
2. Before cleaning, disconnect the thin client from AC power. Do not use liquid or spra yed
cleaning products to clean the unit. Instead, use a moistened sheet or cloth for cleaning.
3. Do not expose the thin client to excessive humidity.
4. Be sure to install the thin client on a secure surface. A falling device could cause injury.
5. Place the power cord in such a way to avoid people stepping on it. Do not place anything
over the power cord.
6. Be sure to note all cautions and warnings on the thin client.
7. If the thin client is not used for a long period of time, disconnect the AC power to avoid
damage caused by voltage transients.
8. Never pour any liquid into any thin client openings: This could cause fire or electrical
shock.
9. If one of the following situation occurs, be sure to get the thin client checked by a qualified
service technician:
a. The power cord or plug is damaged.
b. Liquid penetrates the thin client case.
c. The thin client is exposed to moisture.
d. The thin client does not work well or you cannot get it to work according to the user’s
manual.
e. The thin client has been dropped or damaged.
f. If the thin client has obvious signs of breakage.
10.The thin client should be stored and used only in temperature and humidity controlled
environments. Storing thin clients below -20°C (-4°F) or above 60°C (140°F) may cause
damage.
11.The sound pressure level at the operators position according to IEC 704-1:1982 is equal or
less to 70dB(A).
12.The input power cord shall be minimum H05VV-F, 3G, 0.75mm², rate minimum 6A.
13.The thin client should be used only where ambient air temperatures ar e maintained below
40°C.
Safety Instructions v
Page 6

vi Safety Instructions
Page 7

Neoware Image Manager User Manual
Table of Content s
FCC Regulatory & Safety Information iii
CANADA ICES/NMB-003 Class/Classe (B) iii
Neoware Hardware Warranty iii
Microsoft End User License Agreement (“EULA”) iii
Lead-Content Warning iv
Safety Instructions v
CHAPTER 1
Table of Contents vii
Introduction 1
Overview 1
Purpose & Intended Readers 1
Organization 1
What is a Neoware XPe Thin Client? 2
Getting More Information 3
The Internet 3
Technical Support 3
Setting Up Your Neoware Thin Client 5
Unpacking Your Neoware Thin Client 5
Packaging Contents 5
Connecting the Components 6
vii
Page 8

Tabl e of Con ten ts
Back Panel Connectors 6
Connecting the Cables 7
Connecting Parallel & Serial Peripheral Devices 7
Shutting Down Your Thin Client 8
Arranging Your Work Area 8
CHAPTER 2
CHAPTER 3
Logging On 9
Preconfigured Logon Accounts 9
Neoware Default Logon Accounts 9
Logging On Using Default Logon Accounts 9
Automatic Logon 10
Enabling Auto Logon 10
Disabling Auto Logon 11
Domain Logon 12
Enabling Domain Logon 12
Applications 15
Overview 15
Pre-installed Applications & Available Snap-ins 15
Citrix Program Neighborhood 16
Microsoft Remote Desktop Connection 17
Microsoft Internet Explorer 6.0 18
Neoware TeemTalk XPe 18
Supported Emulations 18
Setting Up TeemTalk XPe Connections 19
Sun Java 20
Adobe® Acrobat® Reader Plug-In 21
Macromedia Flash™ Plug-In 21
Microsoft Windows Media Player 21
viii
CHAPTER 4
Technical Notes 23
File Storage Configuration 23
Flash Disk 23
Page 9

Table of Contents
Temporary RAM Drive 23
Mapping Network Drives 25
Roaming Profiles 25
Task Manager 25
USB Device Support 26
Remote Management & Configuration 26
ezRemote Manager 26
Downloading ezRemote Manager 27
Neoware Language Pack Installer 27
Installing or Deleting Language Packs 28
CHAPTER 5
CHAPTER 6
The Enhanced Write Filter 31
Enhanced Write Filter Operations 31
Overview 31
Accessing Enhanced Write Filter 32
Enhanced Write Filter Options 32
Using Neoware Firewall 35
Introduction 35
What is Neoware Firewall? 35
Neoware Firewall & Windows Firewall 35
Configuring Neoware Firewall 36
Introduction 36
Starting the Configuration Utility 36
Currently Defined Firewall Filters 37
Changing the Filter Assignment 38
Editing a Filter 38
Removing a Filter 39
Adding a New Filter 39
Defining Filter Rules 40
Saving & Applying the Firewall Configuration 41
Exporting the Firewall Configuration File 42
Exporting Displayed Data 43
Default Neoware Firewall Rules 44
ix
Page 10

Tabl e of Con ten ts
CHAPTER 7
ezUpdate for XPe 53
ezUpdate Control Panel 53
FTP Server Setup 56
Obtaining the Windows XPe ezUpdate FTP Server
Package 56
Installing the ezUpdate FTP Server Package 56
ezUpdate FTP Server Package Contents 56
Adding Additional Profiles 57
ezUpdate Process Flow Notes 58
Index 61
x
Page 11

Overview
Windows XPe Thin Client User Manual
Introduction
This introduction describes the purpose and structure of this
manual, as well as other sources of information.
Purpose & Intended Readers
This manual explains how to use Neoware thin clients that are
®
powered by Neoware software, incorporating the Microsoft
®
Windows
XP Embedded (XPe) operating system. The intended
audience is system administrators and end users.
Organization Neoware recommends that you read the chapters of this manual in
order. The main topics covered are:
• Unpacking and setting up your thin client.
• Logging on to your thin client and configuring Logon accounts.
• Details of the pre-installed software applications on your thin
client.
• Technical notes
• Setting up an automatic software and configuration update
(“ezUpdate”) server
This manual does not explain how to use the Windows desktop or
Windows-based applications. For information concerning Windows, read the documentation provided with the applications.
1
Page 12

Introduction
What is a Neoware XPe Thin Client?
The Neoware XPe thin client harnesses the power of Microsoft’s
Windows XP Embedded in an intelligent, customizable, and easily
manageable computing device without hard drive, fan, or other moving parts for completely silent, long-lasting operation.
Neoware’s XPe thin clients run Microsoft's industry-standard XPe
operating system. Neoware’s open approach to XPe allows you to
customize our XPe thin clients to fit virtually any computing environment. In addition, Neoware has added its ezFeatures which
include:
• ezManage – Full remote management capabilities built into every
version of Neoware software. With Neoware’s remote management
software suite — ezRemote Manager — customers can update and
configure Neoware thin clients without ever visiting the desktop.
ezRemote Manager software provides administrators with complete
central management including: device discovery, asset management,
remote configuration, remote software updates, and installation of
additional software components (via Neoware’s ezSnap technology). Also, by using ezRemote Manager, administrators can copy a
customized configuration from one XPe thin client to another, or to
thousands of others.
• ezSecure – ezSecure enables system administrators to completely
lock down Neoware software from unauthorized user intervention.
• ezSnap – ezSnap permits you to add new functionality, update exist-
ing software, or modify configurations in your Neoware thin clients,
without having to upload or download an entire software image.
2 Overview
Neoware XPe thin clients can connect to servers running Microsoft®
Windows
®
Server 2003, Microsoft Windows 2000 Server (as well as
Advanced Server and Datacenter Server versions), Microsoft Windows NT 4.0 Server, Terminal Server Edition (TSE), and to servers
that are running Citrix MetaFrame
®
and WinFrame®. Neoware XPe
thin clients can also connect to XP Professional desktops. Using
Neoware’s TeemTalk terminal emulation suite (optional), you can
also connect to mainframes and midrange computers. Your XPe thin
client also comes fully configured to communicate with USB, serial,
and parallel devices, and (depending on the hardware series) may
include a PCI/ISA or PCMCIA slot for expandability. These features
Page 13

Introduction
allow you to connect printers, modems, bar code scanners, and other
peripheral devices to your thin client.
Neoware thin clients aren’t difficult to use. If you know how to use a
personal computer, or even if you don’t, you can use a Neoware thin
client.
Getting More Information
The Internet Current and archival information about Neoware products, including
the latest software updates, is available at:
http://www.neoware.com
In addition, this user manual and other Neoware documentation are
available at the Neoware Web site for browsing or downloading.
Technical Support For technical support regarding Neoware products, call Neoware at
+1.610.277.8300 or request support using the form at:
http://www.neoware.com/support/support_request.html
Getting More Information 3
Page 14

Introduction
4 Getting More Information
Page 15

Windows XPe Thin Client User Manual
CHAPTER 1 Setting Up Your
Neoware Thin Client
This chapter describes how to set up your thin client.
Unpacking Your Neoware Thin Client
Packaging Contents Your Neoware-powered thin client typically is shipped in cartons
containing the items listed below. Depending on the shipping configuration, one or more of the items may be contained in separate
shipping cartons (such as a monitor, keyboard, and mouse):
Thin Client
• A keyboard with cable attached.
• A mouse with cable attached.
• A power cable.
• Stabilizing feet or stand for using the thin client in a vertical
orientation.
Monitor
• A monitor power cable (attached to some monitors).
• A monitor video cable (attached to most monitors).
• A tilt/swivel base, attached or unattached.
To unpack your Neoware thin client, open the cartons and remove
the components carefully. Save the packing materials in case you
need to repack them.
5
Page 16
Setting Up Your Neoware Thin Client
Connecting the Components
Back Panel Connectors
FYI
The serial and parallel
ports can be used with
ICA, RDP (Windows
Server 2003), and
terminal emulation
connections.
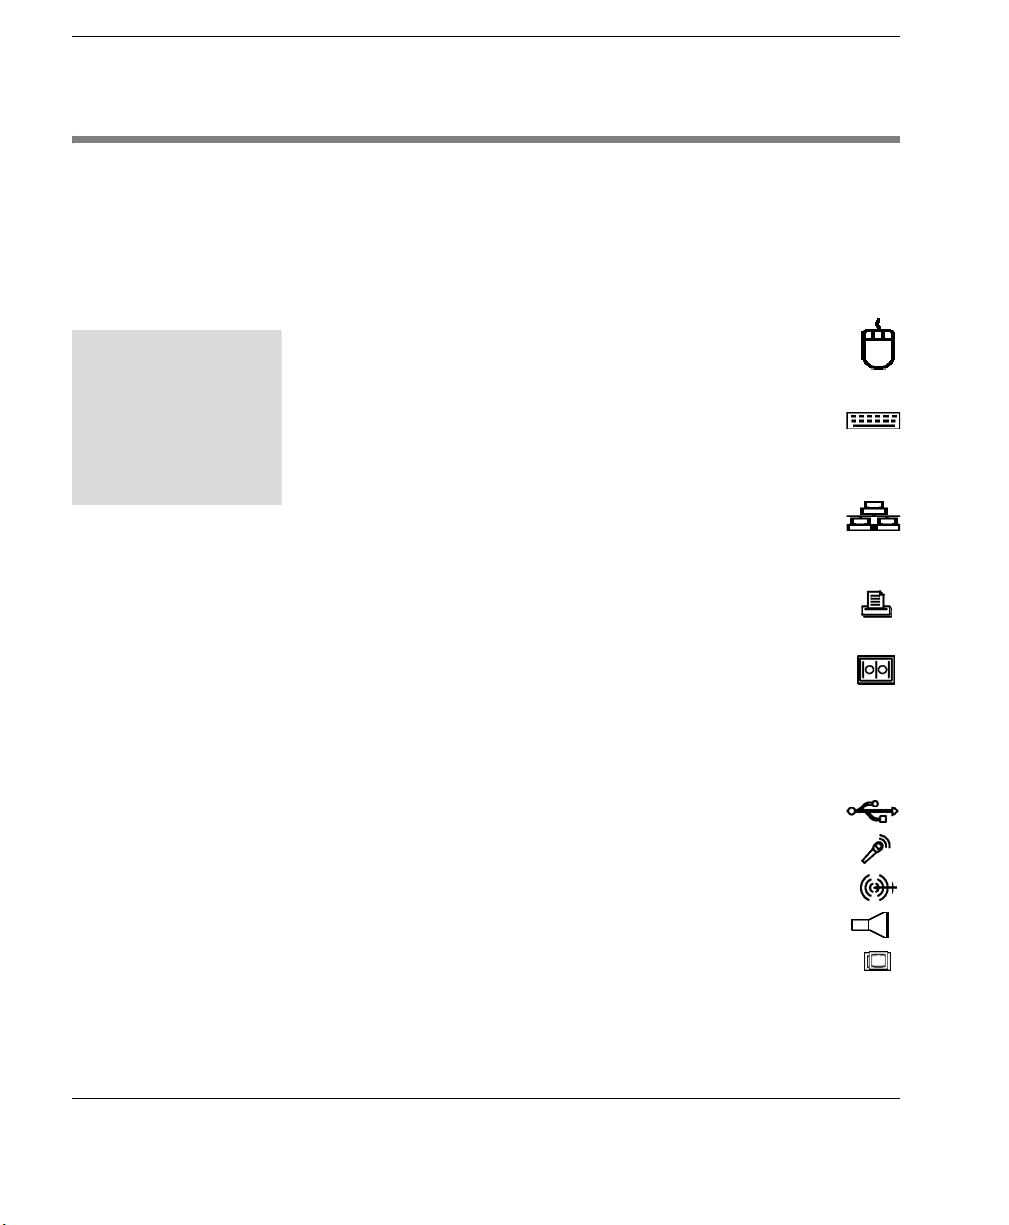
The following is an explanation of the different connections that can
be found on Neoware thin clients. (Not all hardware platforms have
the same number or type of back panel connectors. This listing is
provided for general information about potential uses of these connectors.)
• MOUSE is a PS/2-type mouse port (green-colored
connector marked with the word “MOUSE” or with the
icon displayed here).
• KEYBOARD is a PS/2-type keyboard port (purple-col-
ored connector marked with the word “KEYBOARD” or
with the icon displayed here).
• LAN is an RJ-45 jack. The thin client automatically
detects and connects to either 10BaseT or 100BaseT
(twisted-pair) Ethernet.
• PARALLEL is a standard DB-25 parallel port for local
printers.
• COM 1 and COM 2 are DB-9, RS-232 serial ports.
Depending on which software version is loaded in the thin
client, serial ports may be used for peripheral devices such as
modems, personal digital assistants (PDAs), and bar code
scanners.
• USB ports (two Type A USB ports).
• MIC is a 3.5 mm microphone jack.
• LINE IN is a 3.5 mm line audio input jack.
• LINE OUT is a 3.5 mm audio output jack.
• MONITOR is a standard DB-15, high-density, VGA-type
monitor connector.
6 Connecting the Components
Page 17

Setting Up Your Neoware Thin Client
• The power supply connects through the supplied power cable. It
automatically detects and accepts either 120 VAC or 240 VAC
line voltage.
Connecting the Cables
Power must not be applied until all connections have been made.
Power cables should be connected last.
1 Arrange the thin client and monitor in your work area.
2 Connect the monitor video cable to the MONITOR port.
Do not overtighten the screws. The video cable connection to the
monitor varies. Some monitors have attached video cables.
3 Connect the keyboard cable to the KEYBOARD (purple)
port.
4 Connect the mouse cable to the MOUSE (green) port.
5 Connect a twisted-pair, 10BaseT or 100BaseT Ethernet cable
into the LAN jack.
6 Connect any other peripheral devices that you require, such
as a printer (see the following section for details).
7 Connect the monitor power cable to a power outlet.
8 Connect the power cable from the thin client to a power
outlet.
9 Turn on your thin client and the monitor, then any
peripheral devices.
Connecting Parallel & Serial Peripheral Devices
You can connect a modem, printer, bar code scanner, and other
peripheral devices to your thin client.
1 If your thin client is turned on, log off all its open connec-
tions, and then turn off the thin client.
2 If you have a local printer, connect its cable to the PARAL-
LEL port. You can also attach local serial printers to either serial
port: COM 1 or COM 2.
Connecting the Components 7
Page 18

Setting Up Your Neoware Thin Client
3 If you have an external modem, bar code scanner, or other
serial device, connect its cable to a serial port (COM 1 or
COM 2). Which serial port devices will work with your thin
client depends on the software version loaded in the device. Not
all software versions support all serial devices.
4 Turn on your thin client and then the peripheral device.
Shutting Down Your Thin Client
Pressing and releasing the power button will shut down the
Windows operating system then power-off the unit.
Arranging Your Work Area
These tips will help reduce eye strain and body fatigue when using
your Neoware thin client:
• Adjust your chair seat level so that your feet are flat on the floor,
your legs form a right angle with the floor, your knees are free of
the chair seat, and your lower back is fully supported.
• Adjust the chair height the keyboard and mouse are at elbow
height so your wrists are straight and supported.
• Maintain a neutral neck posture with the top of the monitor no
higher than your eye level.
• Adjust the monitor and lighting to reduce glare on the screen and
to place the monitor at a correct distance for your vision.
• Take periodic breaks to stretch your arms and wrists and rest your
eyes.
8 Shutting Down Your Thin Client
Page 19

Windows XPe Thin Client User Manual
CHAPTER 2
This chapter describes how to initially log on to your Neoware XPe
thin client, and how to set up user accounts.
Preconfigured Logon Accounts
Neoware Default Logon Accounts
Neoware ships XPe thin clients with two preconfigured logon
accounts: Administrator and User.
Logging on using the default Administrator logon account allows
the user to configure every aspect of the XPe thin client.
Logging on using the default User logon account allows the user to
use the pre-installed software but not to make configuration
changes to the XPe thin client. The User account is also configured
with constraints designed to improve overall security. These User
account limitations lock down the operating system so as to prevent
unauthorized changes that could impair the function of the thin client, and reduce the exposure to viruses and other unintentional
software installations.
Logging On
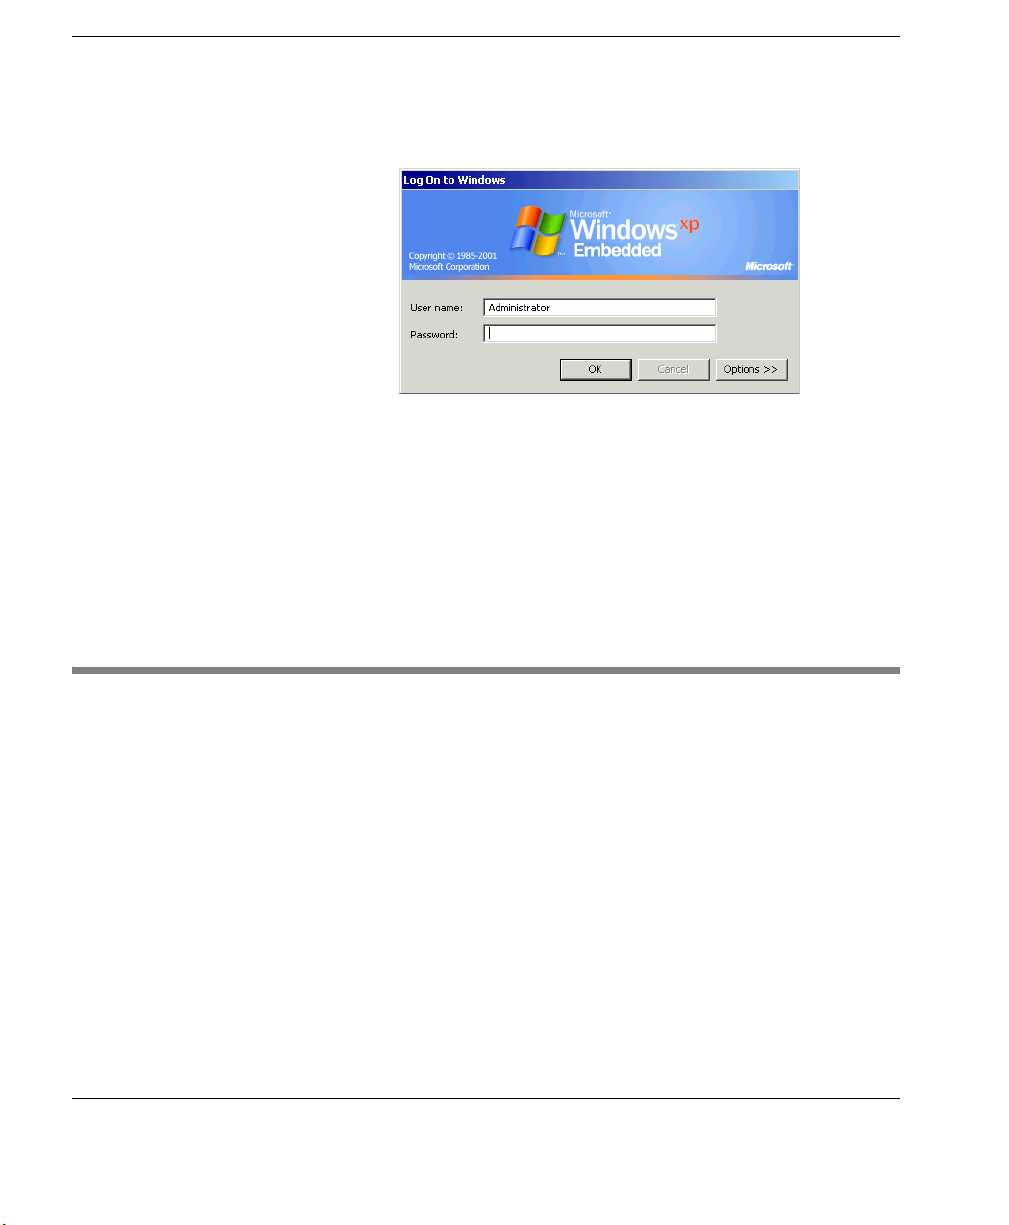
Logging On Using Default Logon Accounts
After powering up your XPe thin client for the first time, you can
logon to the thin client using one of the two preconfigured logon
accounts. The logon information for these two accounts is (the
passwords are case-sensitive):
Account User Name Password
Administrator Administrator Administrator
User User User
9
Page 20
Logging On
In the Log On dialog, enter a user name and password to logon to
your thin client.
Note: The preconfigured logon account user names and passwords
are case sensitive. In addition, network administrators should immediately change the password for the default Administrator account as
a security precaution. To work best with Neoware’s ezRemote Manager thin client remote administration suite, Neoware recommends
that all thin clients (or at least all those in a group or location) be
assigned the same Administrator password.
Automatic Logon
Enabling Auto Logon
10 Automatic Logon
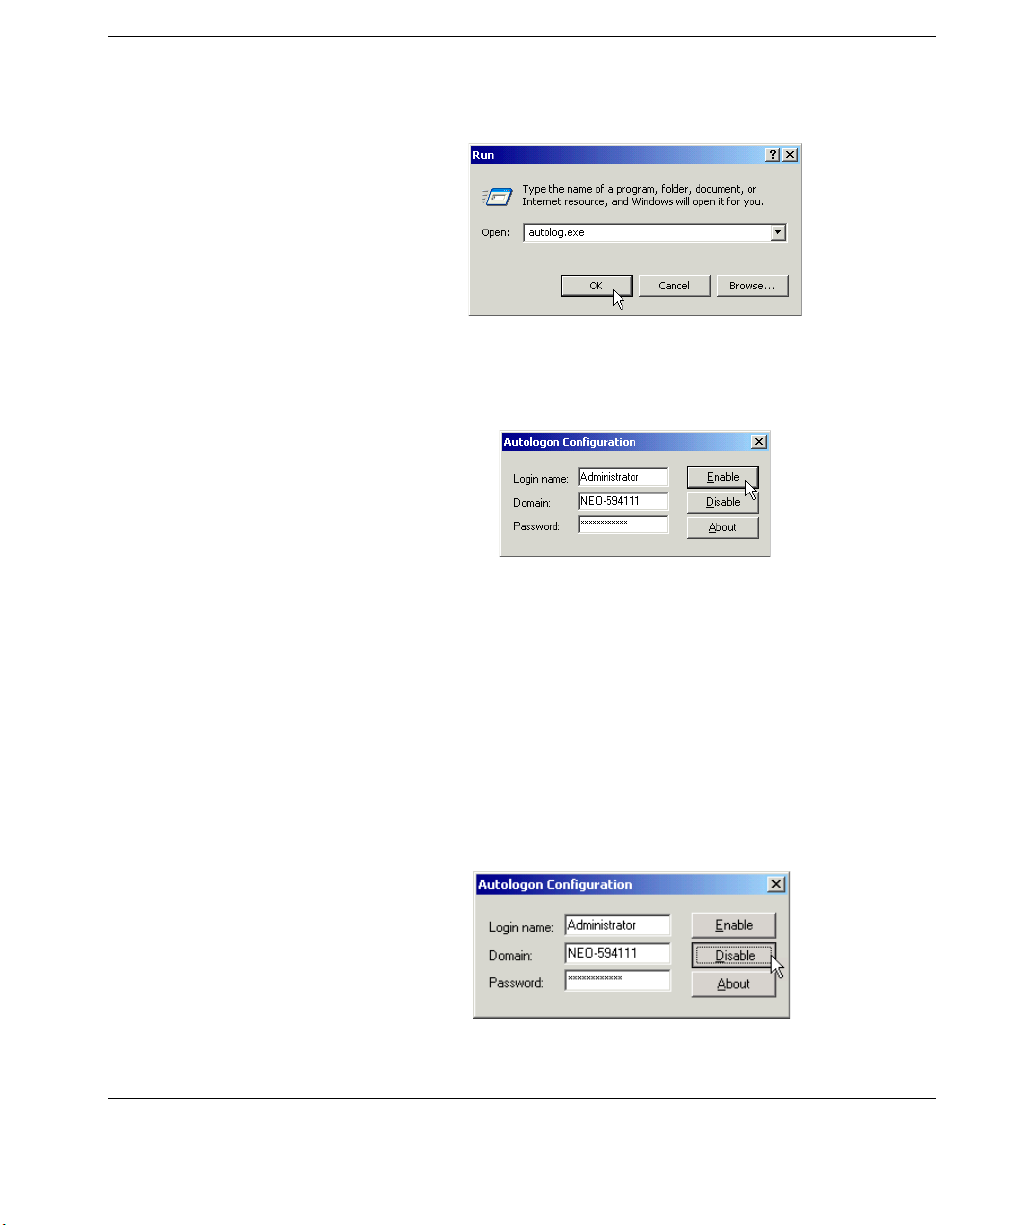
Enabling automatic logon causes your thin client to logon using a
specified (thin client) user account following a power cycle (i.e.,
when powered on or after a restart).
1 Logon to the thin client as Administrator.
2 Click the Start button.
3 Click Run.
4 In the Run dialog box type autolog.exe in the Open field. When
finished, click OK.
Page 21
Logging On
5 When the Autologon Configuration dialog opens, specify the
logon account to be used by entering the Login Name, Password, and Domain (if applicable).
6 Click the Enable button.
Disabling Auto Logon
1 Logon to the thin client as Administrator.
2 Click the Start button.
3 Click Run.
4 In the Run dialog box, type autolog.exe in the Open field. When
finished, click OK.
5 When the Autologon Configuration dialog opens click the
Disable button.
Automatic Logon 11
Page 22
Logging On
Domain Logon
Note: If you have Auto Logon configured to log in as a user account
without administrator privileges, you may need to hold down the
Shift key during the bootup cycle to force the appearance of the
logon screen.
Enabling domain logon allows the user to logon to their XPe thin
client using their network credentials. If you do not have network
administrator rights, then have your administrator create a machine
account in the domain before proceeding with the following
instructions.
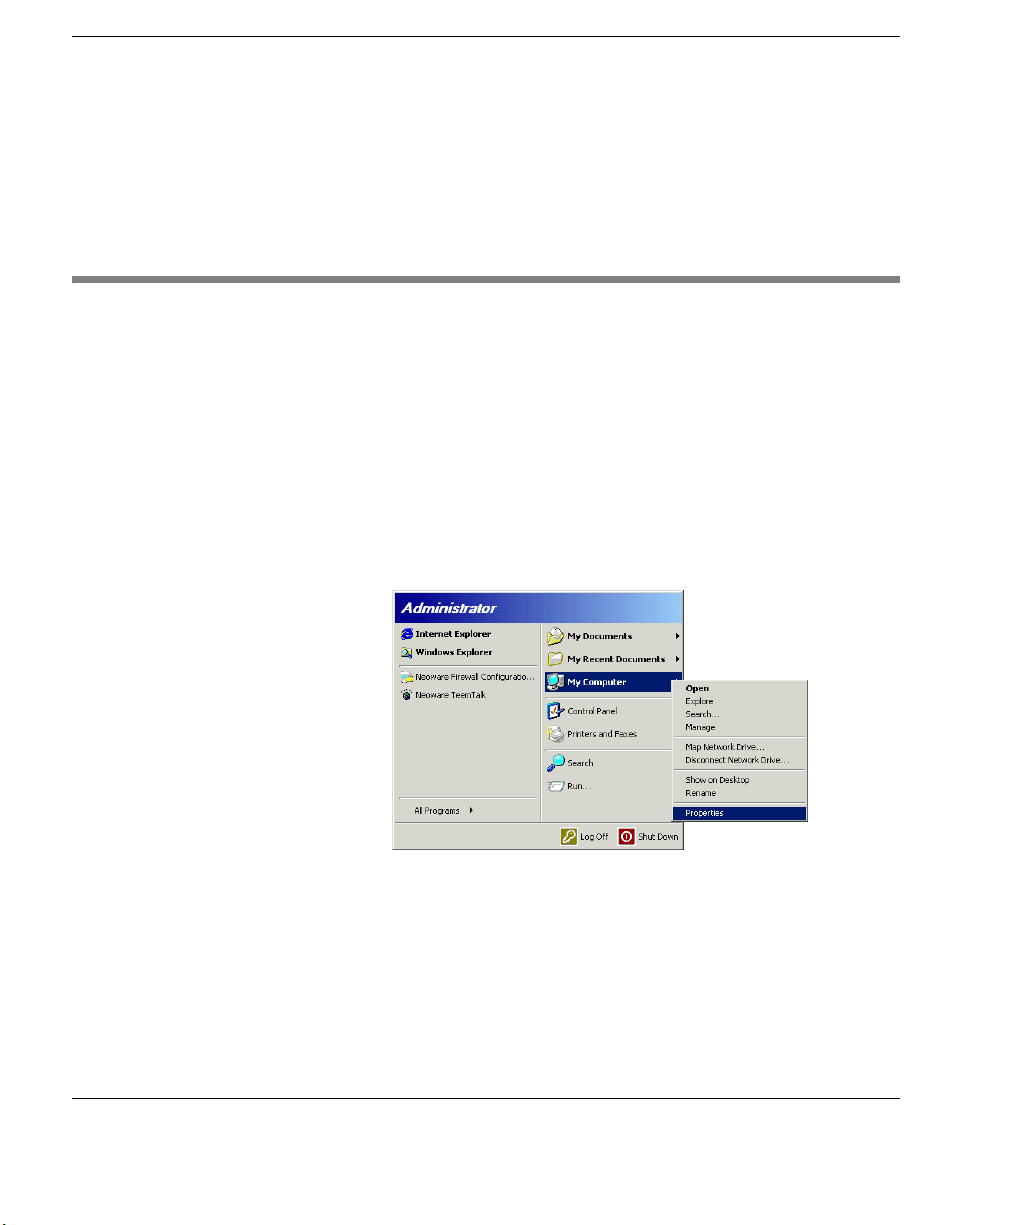
Enabling Domain Logon
1 Logon to the thin client as Administrator.
2 Click the Start menu on your taskbar.
3 Right click on the My Computer menu item.
4 Select Properties from the drop-down menu.
12 Domain Logon
Page 23
Logging On
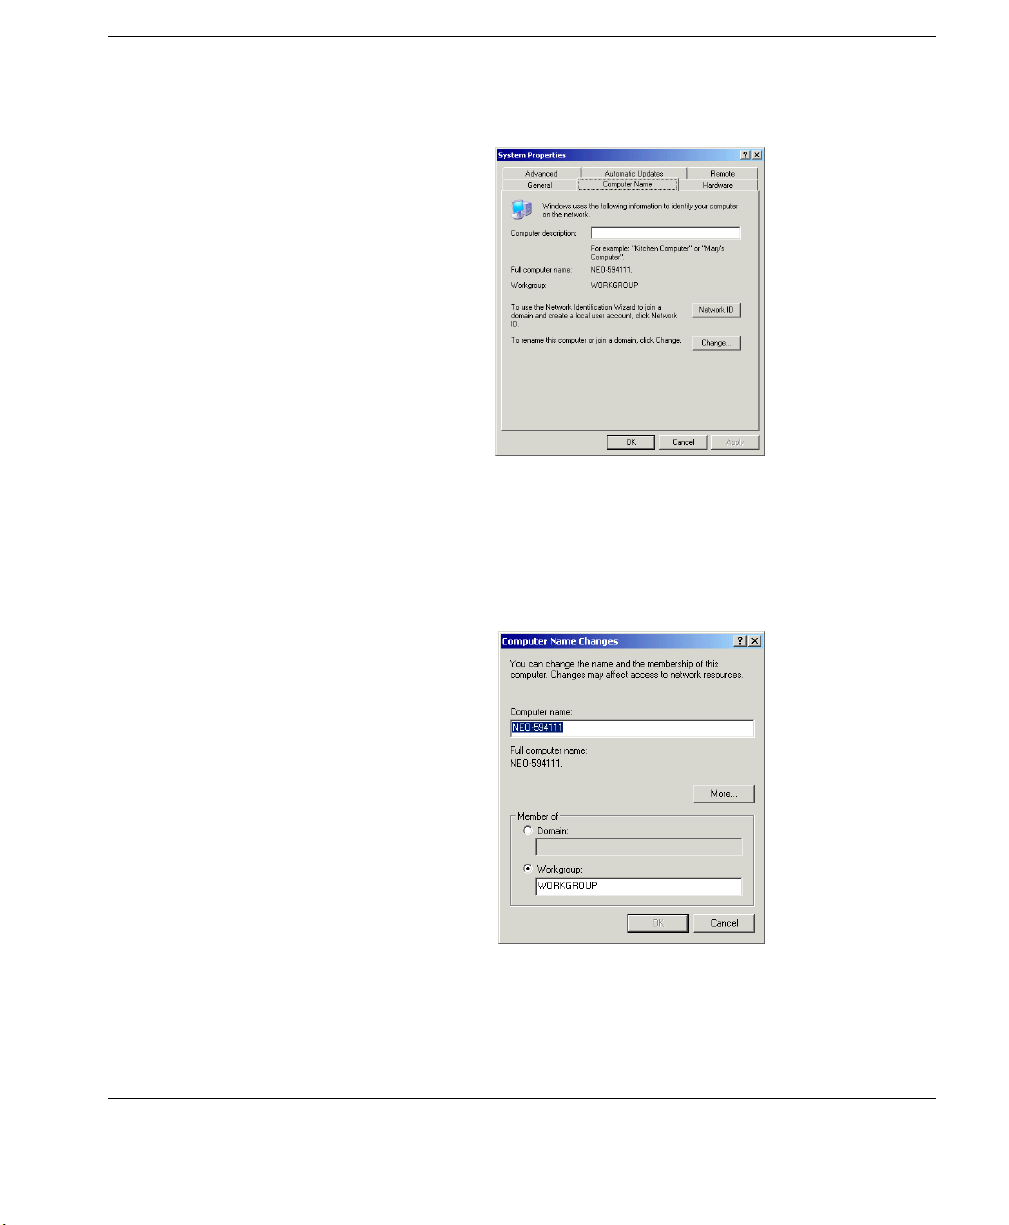
5 In the System Properties dialog, click the Computer Name tab.
6 Click the Change button.
7 Enter the information in the Computer Name Changes dialog
box. Also, when the domain membership changes, you can
change the primary Domain Name System (DNS) suffix by
clicking More.
Note: If you are unfamiliar or uncertain about performing these
tasks, you can use the Network Identification (ID) Wizard to
help you.
8 Click OK.
Domain Logon 13
Page 24

Logging On
9 When the Domain Welcome dialog appears, click OK.
10 Click Ye s when asked to reboot your thin client.
NOTE: If you configure Domain logon and use roaming profiles,
you need to ensure that the local copy of the profile is not written to
the Flash disk. For more information about roaming profiles, See
“Roaming Profiles” on page 25.
14 Domain Logon
Page 25

Overview
Windows XPe Thin Client User Manual
CHAPTER 3 Applications
This chapter introduces the software applications that are preinstalled and configured on your Neoware XPe thin client.
Pre-installed Applications & Available Snap-ins
Neoware ships Windows XPe thin clients with a host of software
applications. These applications expand the functionality of your
thin client and allow users to access software on servers. Depending on the model you have, the following applications are preinstalled:
Microsoft RDP v5.2
Citrix ICA v9.150
Internet Explorer v6
Neoware TeemTalk v5.0.1 Secure
Windows Media Player v10
Acrobat Reader v7
Macromedia Flash v7
Sun Java2RE v1.4.1_05
Neoware USB Wireless Adaptor Support
WMI
Neoware Firewall
Windows Firewall
LPD Printing Service
.NET Framework v1.1
SMS
Dual-Head PCI Video Card
15
Page 26

Applications
The following snap-ins are available:
Adobe Acrobat Reader v7 (English, French or German)
Media Player v10
ThinPrint v5.5
Sun J2SE Runtime Environment 5.0
Linksys Wireless Adaptor WMP54G Support
Allied Telesys AT-2700FTX Fiber Adaptor Support
User Interface in English, French, German, Spanish or Japanese
East Asian Language Support
Locales: Arabic, Czech, Greek, Hebrew,
Hungarian, Polish, Russian, Thai and Turkish
Security Updates
Citrix Program Neighborhood
Citrix Program Neighborhood is a utility that allows administrators
and users to create server connections using the Citrix ICA Client.
Citrix Independent Computing Architecture (ICA®) is a network
protocol that allows the remote display of and interaction with applications running on Microsoft Windows Server 2003, Microsoft Windows 2000 Server (as well as Advanced Server and Datacenter
Server versions), Microsoft Windows NT 4 Server, Terminal Server
Edition (TSE), and to servers that are running Citrix MetaFrame®,
or WinFrame®. Neoware’s XPe thin clients contain version 9 of the
Citrix ICA® client.
16 Citrix Program Neighborhood
Page 27

Microsoft Remote Desktop Connection
Microsoft’s Remote Desktop Connection software enables you to
access applications or data stored on a remote computer over a network connection using Microsoft’s Remote Desktop Protocol
(RDP).
Neoware’s XPe thin clients contain version 5.2 of the Microsoft
RDP client.
To access the Remote Desktop Connection software, click on the
Start taskbar button and select All Programs | Accessories | Communications | Remote Desktop Connection. The default dialog
contains a field for entering the name of the Windows server to
which you wish to connect.
Applications
Click on Options for an extended choice of settings.
Microsoft Remote Desktop Connection 17
Page 28
Applications
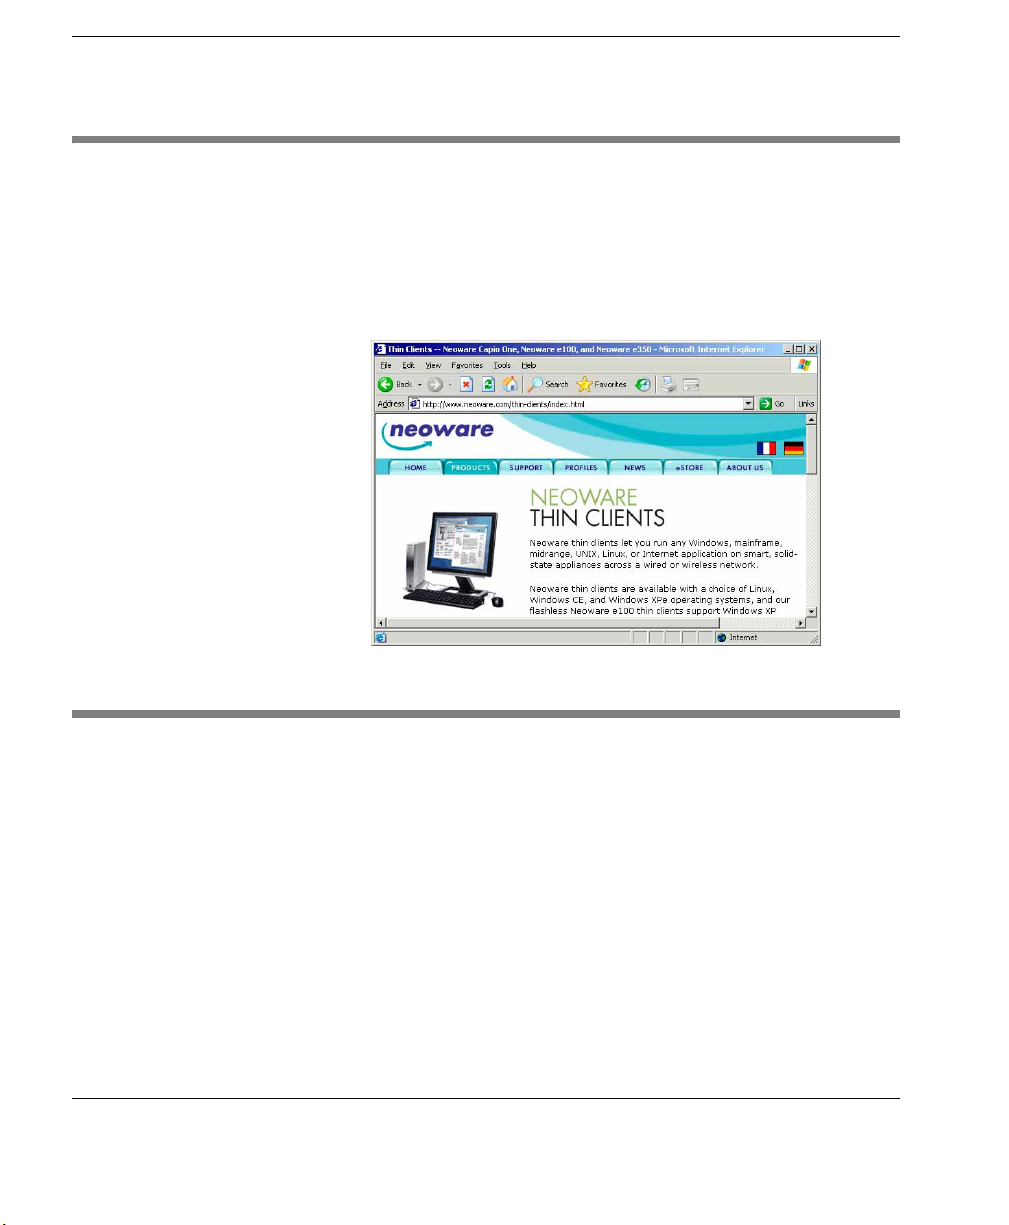
Microsoft Internet Explorer 6.0
Microsoft Windows XPe includes Internet Explorer Web browser,
version 6.0. By default, this program is available to be used by both
the Administrator and the User accounts. Administrator has full,
unrestricted access to IE 6.0 menus and functionality. User has
restricted access to IE 6.0, without access to File menu functions,
and restricted access to configurations.
Neoware TeemTalk XPe
Neoware’s TeemTalk XPe terminal emulation suite provides access
to applications running on UNIX and LINUX servers as well as on
mainframes and midrange computers.
Supported Emulations
18 Microsoft Internet Explorer 6.0
• ADDS A2
• AIX Term
• ANSI BBS
• AT 386
• BQ 3107
• DG 410
• HP 700-92/96
Page 29

• HZ 1500
• IBM 3151
• IBM 3270
• IBM 5250
• MDI P12/P8
• MDI Prism-9
• SCO Console
• Stratus V102
• Siemens 97801
• TA 6530
• TVI 910, 920, 925, 950, 955
• Unisys T27
• Viewdata 40, 80, Split
• VT 52, 100, 500 7-bit, 500 8-bit, PC Term
• Wyse 50, 50+, 60, PC Term
Applications
Setting Up TeemTalk X P e Connections
To set up Neoware TeemTalk XPe connections:
As Administrator: From the Start taskbar button, select All Programs | Neoware TeemTalk | TE Client Connection Wizard.
Neoware TeemTalk XPe 19
Page 30

Applications
The TE Client Connection Wizard allows the Administrator to create shortcuts to networked computers. The resulting desktop icon
can be copied to Start menus for users.
As User: Either click on the Neoware TeemTalk icon on the Start
menu, or click on icons for pre-configured connections created by
your Administrator (such as the highlighted menu item in the following illustration).
Sun Java
20 Sun Java
Neoware TeemTalk
connection (created
with TE Client Configuration Wizard)
Sun Java provides the ability to execute Java applets that are embedded on HTML pages.
Page 31

Adobe® Acrobat® Reader Plug-In
Adobe® Acrobat® Reader™ software lets you view and print
Adobe Portable Document Format (PDF) files, as well as fill in and
submit Adobe PDF forms online.
Macromedia Flash™ Plug-In
The Macromedia Flash Plug-In allows users to seamlessly view and
interact with vector-based animated content created with Macromedia Flash software.
Microsoft Windows Media Player
Microsoft Windows Media Player is installed as both a freestanding
application, and also as a plug-in for Internet Explorer 6.0. Media
Player allows you to play audio and video files and data streams
from Web sites.
Applications
Adobe® Acrobat® Reader Plug-In 21
Page 32

Applications
22 Microsoft Windows Media Player
Page 33

Windows XPe Thin Client User Manual
CHAPTER 4 Technical Notes
This chapter provides information about the configuration of
Neoware Windows XPe thin clients.
File Storage Configuration
Flash Disk Neoware Windows XPe thin clients contain a Flash memory-based
file system where the operating system and local application files
are stored. The Flash disk is divided into two partitions. These
partitions are drive C:, where the main operating system software is
stored, and drive D:, where files necessary to update your thin
client are stored. The D: drive always contains the boot files ntldir,
boot.ini and ntdetect.com. The unit will not boot without these
files, so do NOT delete them. The D: drive is also used to store
temporary files during a system update.
Temporary RAM Drive
Note: It is recommended that you save files on a server and not on
the flash storage in your thin client. If the unused space on drive C:
is reduced to 3 megabytes or less the thin client may become unstable. If the unused space on drive C: is reduced to 2MB or less the
thin client may become inoperable. In addition, do not delete,
remove, or alter any files in drive D: or your thin client may not
perform properly.
Neoware Windows XPe thin clients use a virtual disk which utilizes a portion of the system memory. This virtual drive is labeled
Z: and is used to store temporary data. However, this storage is vol-
23
Page 34

Technical Notes
atile and will be erased when the thin client is shut down or rebooted. Therefore, any files that you want to keep and use again should
not be stored on drive Z:.
Drive Z: is a good location for storing session-specific files that
should not be permanently stored in the Flash disk. These types of
files include: software temp files, temporary Internet cache, spooled
print jobs, and roaming user profile files.
The RAM drive can be resized if necessary through the Control
Panel | RAMDrive applet.
The size of the RAM drive is determined by the amount of free
physical RAM in the unit, the maximum is 64MB. The default size
is 16 MB. The thin client must reboot before the RAM drive size
change takes place. You will be prompted to reboot now or later
when you click OK after changing the RAM drive size.
Changes made to the RAM drive size are among the configuration
items cloned to other Neoware XPe thin clients when using ezRemote Manager.
24 File Storage Configuration
Page 35

Mapping Network Drives
To map network drives, it is necessary to be logged in using the
Administrator account or any account with administrator privileges.
Drive mappings will stay on the thin client if they are defined as persistent.
Roaming Profiles
To avoid corrupting the Flash disk, roaming profiles should be written to drive Z:. Due to the limited size of drive Z:, the roaming profiles should be kept to a minimum size.
Task Manager
To access and use the Task Manager, it is necessary to be logged in
using the Administrator account or any account with Administrator
privileges. For greater detail concerning the Task Manager and its
use, please consult the Microsoft Windows XP documentation.
Technical Notes
Mapping Network Drives 25
Page 36

Technical Notes
USB Device Support
Neoware’s version of Microsoft Windows XP Embedded includes
USB support for a number of common external devices such as keyboards, mice, and printers, as well as external drives (Zip, CD-ROM,
Floppy, and SuperDisk). Following is a list of devices tested and
known to work with Neoware XPe thin clients, as an example:
• Logitech USB wheel mouse
• IBM USB keyboard
• Iomega 100 MB & 250 MB USB external Zip drives
• Archos USB MiniCD CD-ROM external drive
• Epson USB printer
• TEAC 1.44 MB USB external floppy drive
• Imation 120 MB USB external SuperDisk drive
• Iomega external 40GB hard drive
Remote Management & Configuration
ezRemote Manager Neoware’s remote management software, ezRemote Manager, is a
server-based application that provides sophisticated centralized
administration capabilities for the full line of Neoware thin clients.
Note that for XPe 1.3 the minimum version of ezRemote Manager
that is required is 3.0.3. This version is not supported by the
Neoware hardware platforms G200, WN3, WN6 and WN6b.
With ezRemote Manager, you can:
• Locate and view the specifications of Windows XPe thin clients
on your network.
• Select, group, and print lists of your Windows XPe thin clients
for easy management.
• Centrally update the Windows XPe system software of your thin
clients.
26 USB Device Support
Page 37

Technical Notes
• Copy and save as a configuration file, or "clone" the system soft-
ware and its entire configuration including server connections,
security settings, and installed software from one thin client to
other thin clients.
• View the progress of your updates as they occur, and schedule
your updates for the most convenient date and time.
• Remotely control and configure XPe thin clients using ezAny-
where shadowing. ezAnywhere can also be used for help desk
functions.
• Apply Snap-In upgrades to the XPe software (for example,
Adobe Acrobat Reader plug-in, Macromedia Flash plug-in, etc.).
For more information about available Snap-In upgrades, see
“Pre-installed Applications & Available Snap-ins” on page 15.
Downloading ezRemote Manager
ezRemote Manager may be downloaded from
http://www.neoware.com/downloads/ in two versions: ezRemote
Manager Enterprise Edition, and ezRemote Manager Limited Edition. Most Neoware XPe thin clients are sold with the Enterprise
Edition license (as part of Full Advantage support), and customers
are entitled to download the software and install it.
The ezRemote Manager User Manual is downloadable (in Adobe
Acrobat PDF format) from the same location.
Neoware Language Pack Installer
The Neoware Language Pack Installer enables you to install a different language to that displayed by default on XPe thin clients containing a software image size of 512 MB. The Installer also enables you
to delete a language, thus freeing up Flash disk space.
Note that if there are no languages available, a snap-in can be
obtained to provide the required language(s). Languages provided as
a snap-in do not require installation using the Neoware Language
Pack Installer.
Neoware Language Pack Installer 27
Page 38

Technical Notes
Be advised that when changing the default language, the best practice is to use the Neoware Language Pack Installer to effect the
change. By using this control panel applet, the Administrator, User,
and any other accounts will change the user interface to the selected
language. Note that the default keyboard, locale, and standards and
formats need to be set using the Regional and Language Options
control panel applet. Those settings are per user and are locale specific.
Installing or Deleting Language Packs
To install or delete a language pack:
1 Logon as Administrator.
2 If the Enhanced Write Filter is ON, it must be disabled before
continuing.
3 Click on the Start taskbar button and select Control Panel |
Neoware Language Pack Installer.
A list of available language packs should appear. Thin clients
with 512 MB or larger flash are supplied with French and German user interface language packs for installation. By default
these are disabled and the English user interface is used.
28 Neoware Language Pack Installer
Page 39

Technical Notes
4 Select the language to install or delete from the list, then click on
Action and select Install or Delete from the drop-down menu.
5 If deleting, the language pack directory will be completely
removed from the Flash, returning that disk space for other
applications to use.
When installing a language pack, you will be prompted sequentially for each snapin that has to be installed to complete the language pack. The MUI (Multi-language User Interface) snapin is
the one that actually changes the displayed language. You could
choose not to install other snapins (i.e. If Citrix ICA is not
needed, then just skip it).
Be aware that there could be other MUI snapins already installed
taking up space. You should first use the Add/Remove Pro-
grams Control Panel applet to check for and remove them
before continuing. The Add/Remove Programs, Regional and
Language Options, and Enhanced Write Filter Control Panel
applets are included in the Neoware Language Pack Installer
Action menu to facilitate making other system changes.
6 When installation has been completed the thin client will need to
be rebooted in order for the changes to take effect. You will be
prompted to reboot now or later.
Neoware Language Pack Installer 29
Page 40

Technical Notes
30 Neoware Language Pack Installer
Page 41

Windows XPe Thin Client User Manual
CHAPTER 5 The Enhanced Write
Filter
This chapter describes how to use the Enhanced Write Filter security features to protect your Neoware XPe thin client.
Enhanced Write Filter Operations
Overview Microsoft's Enhanced Write Filter is a file system utility that can be
set to take all disk write activity that would normally go to the C:
drive (a Flash disk in Neoware thin clients) and redirect them to a
RAM cache, instead. Disk reads come from the Flash disk and
RAM cache.
When an Enhanced Write Filter protected thin client restarts, the
original contents of the disk reappear, unchanged. With Enhanced
Write Filter engaged, the integrity of the original disk's contents is
protected. Enhanced Write Filter is ideal for point-of-sale, kiosk, or
any application that could be adversely effected by inadvertently
installed software (such as Internet Explorer plug-ins or cookies),
as well as making a protected thin client less susceptible to virus
infection.
Note that the Registry Filter enables Microsoft Licensing and
Domain Machine password synchronization to be saved even when
Enhanced Write Filter is enabled.
31
Page 42

The Enhanced Write Filter
Accessing Enhanced Write Filter
Enhanced Write Filter Options
The Control Panel | Enhanced Write Filter applet controls the
behaviour of the Enhanced Write Filter. By default, this applet is
available only to the Administrator account.
The Enhanced Write Filter contains an indication of the current status of the utility.
Only a single selection may be made on the Enhanced Write Filter
dialog. The available setting selections vary depending on the current state of the Enhanced Write Filter (on or off).
Enable Write Filter
This radio button is inactive if Enhanced Write Filter is currently
operating.
Select this radio button and click OK to turn on Enhanced Write Filter. The thin client will reboot in order to turn write filtering on.
Commit Changes to Disk and enable Write Filter
This radio button is inactive if Enhanced Write Filter is currently
disabled.
Select this radio button and click OK to save the current operational
state of the thin client (all registry and file writes that have been
cached in memory) onto the Flash disk. This choice allows the
administrator to save a snapshot of the current operating configuration from the temporary memory cache to the thin client permanent
32 Enhanced Write Filter Operations
Page 43

The Enhanced Write Filter
memory. The thin client will reboot. The enhanced write filter will
continue to function after the reboot, since it was not turned off.
Commit changes to disk and disable Write filter
This radio button is inactive if Enhanced Write Filter is currently
disabled.
Select this radio button and click OK to disable (turn off) Enhanced
Write Filter.
Changes made to the configuration of the thin client before turning
off the Enhanced Write Filter will be committed (saved) to the Flash
disk. After the thin client reboots, the Enhance Write Filter will be
off. Subsequent changes to the thin client’s configuration and file
system will go directly to the Flash disk.
Disable Write Filter, discard changes
This radio button is inactive if Enhanced Write Filter is currently
disabled. Changes made to the configuration of the thin client before
turning off the Enhanced Write Filter will be not be saved to the
Flash disk. After the thin client reboots, the Enhance Write Filter
will be off. Subsequent changes to the thin client’s configuration and
file system will go directly to the Flash disk.
This option initiates a two-step process:
1 The thin client will reboot. After Windows starts, all changes
previously made will have been cleared (by rebooting).
2 The thin client will reboot again. The Enhanced Write Filter is
now turned off.
Enhanced Write Filter Operations 33
Page 44

The Enhanced Write Filter
34 Enhanced Write Filter Operations
Page 45

Introduction
Windows XPe Thin Client User Manual
CHAPTER 6 Using Neoware
Firewall
This chapter describes how to configure Neoware Firewall to
provide the level of protection required for your thin client.
What is Neoware Firewall?
Neoware Firewall & Windows Firewall
Neoware Firewall is a utility to assist in the configuration of IP
security policies to protect your thin client by establishing a local
firewall. This powerful utility can be used to create static ingress
and egress rules by port, protocol, source, and destination.
Neoware Firewall provides a user-friendly interface for easy configuration of the firewall. It also provides a set of predefined security rules and an export option to clone a customized configuration
to other thin clients.
Microsoft Windows Firewall may also be included with XPe thin
clients in addition to Neoware Firewall. Note that Microsoft Windows Firewall only handles inbound traffic, whereas Neoware
Firewall handles both inbound and outbound traffic.
If Microsoft Windows Firewall is included, it may be enabled by
default. The Administrator can decide whether the Windows Firewall should be left turned on, or to only rely on Neoware Firewall
once it is configured and enabled. Note that Neoware Firewall does
not require the Windows Firewall, and Neoware Firewall can functionally replace the Windows Firewall for incoming traffic.
35
Page 46

Using Neoware Firewall
Configuring Neoware Firewall
Introduction Neoware Firewall is disabled by default. If you are using ezUpdate
and have configured your FTP server to use passive data connections, you will need to configure Neoware Firewall for passive FTP
before enabling it. Since passive FTP servers may be configured to
use a range of ports anywhere between 1024 and 65535, there is no
way of pre-configuring these ports in Neoware Firewall without
making the firewall essentially ineffective. Enabling Neoware Firewall without configuring it for passive FTP will make ezUpdate fail
for those networks using passive FTP.
Starting the Configuration Utility
Neoware Firewall is configured using a utility that is accessed from
the Start menu. To run the utility, select Start > All Programs >
Neoware Firewall Configuration Utility.
The utility will display an introductory screen then a dialog listing
all the currently defined firewall filters.
36 Configuring Neoware Firewall
Page 47

Currently Defined Firewall Filters
Using Neoware Firewall
The main dialog of the Neoware Firewall configuration utility shows
a list of all the currently defined firewall filters, together with some
descriptive information.
Neoware Firewall provides a default set of predefined firewall filters
so that you can use the firewall immediately. For a list of all the predefined filters and their functions, refer to the section “Default
Neoware Firewall Rules” on page 44.
The list of firewall filters includes the following information:
Configuring Neoware Firewall 37
Page 48

Using Neoware Firewall
Assign A check box indicating the status of the filter
(assigned or unassigned).
Filter Name The name of the firewall filter.
Action Indicates whether the filter Blocks or Permits data
flow.
Description Provides a description of what the filter does.
Changing the Filter Assignment
To change the assignment of a filter:
1 Click the check box next to any of the listed filters to change its
status (assigned or unassigned).
2 Click the Save button to make the changed setting take immedi-
ate effect.
Editing a Filter To edit a currently defined filter:
1 Select the filter to edit by clicking on the filter line in the list of
defined filters.
2 Click the Edit button to display the Filter Properties dialog.
This is almost the same as the Add a Filter dialog (which is
described in the section “Adding a New Filter” on page 39),
except that you cannot change the filter’s name or description.
38 Configuring Neoware Firewall
Page 49

Removing a Filter To remove a filter:
1 Select the filter to remove by clicking on the filter line in the list
of defined filters.
2 Click the Remove button.
3 Click the Save button to make the change take effect.
Using Neoware Firewall
Adding a New Filter
To add a new firewall filter, click the Add button to display the Add
a Filter dialog.
This dialog enables you to enter all the necessary information for
your filter.
You must enter a name for your filter in the Filter Name field, and
specify the Filter Action by selecting either Permit traffic or Block
traffic.
You can enter a Description for this new filter so that you can
quickly discover what it does.
Configuring Neoware Firewall 39
Page 50

Using Neoware Firewall
Defining Filter Rules You must define the Rules used by the filter. Rules include proto-
cols, ports, and source/destination addresses.
Important: Rules are applied from most specific to least specific.
For example, a rule to "permit TCP port 21" would be applied over
a rule to "block all TCP packets". For the firewall to function properly, the first rules written should block all inbound and outbound
traffic, then individual rules should be written to permit necessary
traffic.
To add a rule, click the Add button (in the Add a Filter dialog) to
display the Add a Rule dialog.
In this dialog, enter a Rule Name, provide a Description, and spec-
ify the rule details.
40 Configuring Neoware Firewall
Page 51

Using Neoware Firewall
After adding a rule, click OK to save the current settings to that rule.
Saving & Applying the Firewall Configuration
When you have finished making changes to the firewall configuration, click the Save button in the main Neoware Firewall Configu-
ration Utility dialog to save the settings and make the new security
policy take effect. A message will be displayed indicating that the
firewall policy has been assigned.
Your configuration is now active.
Configuring Neoware Firewall 41
Page 52

Using Neoware Firewall
Exporting the Firewall Configuration File
Once you have defined and saved your security policy configuration,
you may also want to apply the same configuration to other thin clients. This can be achieved very easily and quickly.
To export your current firewall configuration, simply click the
Export button in the main Neoware Firewall Configuration Utility dialog.
A dialog will be displayed asking you to specify a name and destination directory for the export (IP Security Template) file.
42 Exporting the Firewall Configuration File
Page 53

Using Neoware Firewall
Clicking Save will create an executable batch file which you can
send to other thin clients, either manually or by using Neoware’s
ezRemote Manager.
Exporting Displayed Data
The Neoware Firewall Configuration Utility saves the display data
and export configuration separately. If you want to copy the display
data to other thin clients as well as the export file, you need to do the
following:
1 In the Neoware Firewall Configuration Utility dialog, click
the Save button to save the current configuration.
2 Click Export to save the firewall configuration as a batch file.
3 Locate the file MFWC.DAT in the Neoware Firewall program
directory (default: C:\Program Files\Neoware Firewall Configuration Utility).
4 Apply the exported template batch file on the target thin client.
5 Overwrite the MFWC.DAT file on the target thin client with
the MFWC.DAT file from the source of the exported batch file.
Exporting the Firewall Configuration File 43
Page 54

Using Neoware Firewall
Default Neoware Firewall Rules
This section describes all the standard filters provided with Neoware
Firewall, and their default settings. Each filter description includes
the rules and settings associated with them.
All Inbound Traffic
Assigned: No
Action: Block
Blocks all inbound traffic.
Rule Name: Inbound
Any protocol, any source port, any destination port, source address
any IP address, destination address my IP address, not mirrored.
All Outbound Traffic
Assigned: No
Action: Block
Blocks all outbound traffic.
Rule Name: Outbound
Any protocol, any source port, any destination port, source address
my IP address, destination address any IP address, not mirrored.
Applications \ System
Assigned: Yes
Action: Permit
Ports required for specific applications and services.
Rule Name: BootPS\DHCP
Allows DHCP requests/renewals. UDP protocol, any source port,
destination port 67, source address my IP address, destination
address any IP address, mirrored.
44 Default Neoware Firewall Rules
Page 55

Using Neoware Firewall
Rule Name: DNS (TCP)
Allows connections to DNS servers via TCP. TCP protocol, any
source port, destination port 53, source address my IP address, destination address any IP address, mirrored.
Rule Name: DNS (UDP)
Allows connections to DNS servers via UDP. UDP protocol, any
source port, destination port 53, source address my IP address, destination address any IP address, mirrored.
Rule Name: FTP
Allows connections to FTP servers. TCP protocol, any source port,
destination port 21, source address my IP address, destination
address any IP address, mirrored.
Rule Name: FTP Data
Allows file transfers with FTP servers. TCP protocol, any source
port, destination port 20, source address my IP address, destination
address any IP address, mirrored.
Rule Name: HTTP
Allows connections to Web servers. TCP protocol, any source port,
destination port 80, source address my IP address, destination
address any IP address, mirrored.
Rule Name: HTTPS
Allows secure connections to Web servers. TCP protocol, any
source port, destination port 443, source address my IP address, destination address any IP address, mirrored.
Rule Name: ICA
Allows connections to Terminal Servers via ICA. TCP protocol, any
source port, destination port 1494, source address my IP address,
destination address any IP address, mirrored.
Rule Name: ICA Browser
Allows locating Citrix ICA servers. UDP protocol, any source port,
destination port 1604, source address my IP address, destination
address any IP address, mirrored.
Default Neoware Firewall Rules 45
Page 56

Using Neoware Firewall
Rule Name: IP Print (0)
Allows printing via IP Print servers. TCP protocol, any source port,
destination port 9100, source address my IP address, destination
address any IP address, mirrored.
Rule Name: IP Print (1)
Allows printing via multiport IP Print servers. TCP protocol, any
source port, destination port 9101, source address my IP address,
destination address any IP address, mirrored.
Rule Name: IP Print (2)
Allows printing via multiport IP Print servers. TCP protocol, any
source port, destination port 9102, source address my IP address,
destination address any IP address, mirrored.
Rule Name: LPD (TCP)
Allows printing to LPD servers via TCP. TCP protocol, any source
port, destination port 515, source address my IP address, destination
address any IP address, mirrored.
Rule Name: LPD (UDP)
Allows printing to LPD servers via UDP. UDP protocol, any source
port, destination port 515, source address my IP address, destination
address any IP address, mirrored.
Rule Name: NTP
Allows local time synchronization with time servers. UDP protocol,
any source port, destination port 123, source address my IP address,
destination address any IP address, mirrored.
Rule Name: RDP
Allows connections to terminal servers via RDP. TCP protocol, any
source port, destination port 3389, source address my IP address,
destination address any IP address, mirrored.
Rule Name: SSH
Allows Secure Shell remote logons to hosts. TCP protocol, any
source port, destination port 22, source address my IP address, destination address any IP address, mirrored.
46 Default Neoware Firewall Rules
Page 57

Using Neoware Firewall
Rule Name: Teln et
Allows Telnet connections to hosts. TCP protocol, any source port,
destination port 23, source address my IP address, destination
address any IP address, mirrored.
Rule Name: ThinPrint
Allows printing via ThinPrint. TCP protocol, source port 4000, any
destination port, source address my IP address, destination address
any IP address, mirrored.
Rule Name: WINS (TCP)
Allows connections to WINS servers via TCP. TCP protocol, any
source port, destination port 42, source address my IP address, destination address any IP address, mirrored.
Rule Name: WINS (UDP)
Allows connections to WINS servers via UDP. UDP protocol, any
source port, destination port 42, source address my IP address, destination address any IP address, mirrored.
Rule Name: WINS (TCP)
Allows connections to WINS servers via TCP on an alternate port.
TCP protocol, any source port, destination port 1512, source address
my IP address, destination address any IP address, mirrored.
Rule Name: WINS (UDP)
Allows connections to WINS servers via UDP on an alternate port.
UDP protocol, any source port, destination port 1512, source address
my IP address, destination address any IP address, mirrored.
File Sharing
Assigned: Yes
Action: Permit
Ports required to allow sharing files across the network.
Rule Name: Epmap Inbound
DCE Endpoint Resolution. TCP protocol, any source port, destination port 135, source address any IP address, destination address my
IP address, mirrored.
Default Neoware Firewall Rules 47
Page 58

Using Neoware Firewall
Rule Name: Epmap Outbound
DCE Endpoint Resolution. TCP protocol, any source port, destination port 135, source address my IP address, destination address any
IP address, mirrored.
Rule Name: Microsoft-ds Inbound
Microsoft Directory Services. TCP protocol, any source port, destination port 445, source address any IP address, destination address
my IP address, mirrored.
Rule Name: Microsoft-ds Outbound
Microsoft Directory Services. TCP protocol, any source port, destination port 445, source address my IP address, destination address
any IP address, mirrored.
Rule Name: Netbios-dgm Inbound
Netbios Datagram Service. UDP protocol, any source port, destination port 138, source address any IP address, destination address my
IP address, mirrored.
Rule Name: Netbios-dgm Outbound
Netbios Datagram Service. UDP protocol, any source port, destination port 138, source address my IP address, destination address any
IP address, mirrored.
Rule Name: Netbios-ns Inbound
Netbios Name Service. UDP protocol, any source port, destination
port 137, source address any IP address, destination address my IP
address, mirrored.
Rule Name: Netbios-ns Outbound
Netbios Name Service. UDP protocol, any source port, destination
port 137, source address my IP address, destination address any IP
address, mirrored.
Rule Name: Netbios-ssn Inbound
Netbios Session Service. TCP protocol, any source port, destination
port 139, source address any IP address, destination address my IP
address, mirrored.
48 Default Neoware Firewall Rules
Page 59

Using Neoware Firewall
Rule Name: Netbios-ssn Outbound
Netbios Session Service. TCP protocol, any source port, destination
port 139, source address my IP address, destination address any IP
address, mirrored.
Grid Center
Assigned: No
Action: Permit
Ports required by CCT Grid Center.
Rule Name: 137
Grid Center. TCP protocol, any source port, destination port 137,
source address any IP address, destination address my IP address,
mirrored.
Rule Name: 4001
Grid Center. UDP protocol, any source port, destination port 4001,
source address any IP address, destination address my IP address,
mirrored.
Rule Name: 9000
Grid Center. TCP protocol, any source port, destination port 9000,
source address any IP address, destination address my IP address,
mirrored.
ICMP
Assigned: Yes
Action: Permit
Allows Inbound and Outbound ICMP traffic.
Rule Name: ICMP Inbound
Allows Inbound ICMP traffic. ICMP protocol, any source port, any
destination port, source address any IP address, destination address
my IP address, not mirrored.
Default Neoware Firewall Rules 49
Page 60

Using Neoware Firewall
Rule Name: ICMP Outbound
Allows Outbound ICMP traffic. ICMP protocol, any source port,
any destination port, source address my IP address, destination
address any IP address, not mirrored.
MMS
Assigned: No
Action: Permit
Ports required by MMS.
Rule Name: 40000
MMS Agent. UDP protocol, any source port, destination port 40000,
source address my IP address, destination address any IP address,
mirrored.
Rule Name: 40001
MMS Gateway. TCP protocol, any source port, destination port
40000, source address any IP address, destination address my IP
address, mirrored.
Rule Name: 40002
MMS Gateway. TCP protocol, any source port, destination port
40000, source address any IP address, destination address my IP
address, mirrored.
Rule Name: 40003
MMS Agent. TCP protocol, any source port, destination port 40000,
source address my IP address, destination address any IP address,
mirrored.
50 Default Neoware Firewall Rules
Page 61

Using Neoware Firewall
Neoware Management
Assigned: Yes
Action: Permit
Ports required by Neoware ezRemote Manager.
Rule Name: ezRM Locate
Allus units to be located with ezRemote Manager. UDP protocol,
any source port, destination port 161, source address any IP address,
destination address my IP address, mirrored.
Rule Name: ezRM Manage
Allus units to be managed with ezRemote Manager. TCP protocol,
any source port, destination port 512, source address any IP address,
destination address my IP address, mirrored.
Rule Name: ezRM Shadow
Allus units to be shadowed with ezRemote Manager. TCP protocol,
any source port, destination port 5900, source address any IP
address, destination address my IP address, mirrored.
Default Neoware Firewall Rules 51
Page 62

Using Neoware Firewall
52 Default Neoware Firewall Rules
Page 63

CHAPTER 7 ezUpdate for XPe
This chapter describes Neoware’s ezUpdate automatic configuration and software update tool for Windows XPe thin clients.
ezUpdate Settings in the Thin Client
ezUpdate for XPe provides a mechanism for distributing full image
and modular software updates, as well as standardized configurations from FTP servers (ezUpdate servers). By strategic placement
of ezUpdate servers, ezUpdate can provide bandwidth-friendly thin
client management that is completely scalable.
Windows XPe Thin Client User Manual
ezUpdate Control Panel
Client settings affecting ezUpdate can be modified or viewed
through the Control Panel | ezUpdate applet.
53
Page 64

ezUpdate for XPe
Download Path
A non-editable box displaying the path (fully-qualified path) that the
thin client will use to find its ezUpdate image on the server. The
download path is dynamically constructed from:
• The FTP Server Path (see description below)
• A path structure pre-set for the thin client’s specific software
build (for example: “/neoware/xpe/256P640/”)
• And the Appliance Profile name (see description below)
FTP Server Path
The fully-qualified path (not a name relative to another folder) to the
location of your ezUpdate server. It must begin with
ftp:// and can be configured using the server name or its IP
address. This field is disabled if the ‘Get Server Path URL from
DHCP server (tag #)’ checkbox (see description below) is checked.
Examples:
ftp://ftp.mycompany.com
ftp://198.168.5.1
54
Appliance Profile field
The Appliance Profile field identifies which image on the server to
use in the event an update is necessary. The default profile name is
“factory.”
Examples:
factory
sales
support
Update Version
The Update Version field identifies the software image version currently running on the local thin client. This value is used to check the
version for the configured profile on your ezUpdate server. If the
local and server versions match, no update is performed. A value of
Page 65

ezUpdate for XPe
“0” will force an update. The XPe 1.3 factory images provided by
Neoware have a version of “010300”.
Checkbox: Enable automatic configuration and software
updates
The Enable automatic configuration and software updates (ezUpdate) checkbox toggles the Neoware ezUpdate service between
Automatic and Disabled. If you do not intend to use ezUpdate,
uncheck this box.
Checkbox: Get Server Path URL from DHCP server (tag #)
The Get Server Path URL from DHCP server (tag #) checkbox
determines whether ezUpdate should use the information provided
by your DHCP server for the FTP Server Path, or use the value in
the registry (see FTP Server Path, above).
DHCP Tag field
The DHCP tag field determines which DHCP Option tag to query the default is 137. This field is disabled if the ‘Get Server Path URL
from DHCP server (tag #)’ checkbox is unchecked.
View Log button
The View Log button will open Z:\ezupdate.log in Notepad.
This log gives details on the client, networking details, the starting/
stopping of the service, success/failure in loading images/snap-ins,
etc.
Test button
The Test button causes the local thin client to attempt to contact the
full server/path displayed in the Download Path field. This tests that
the local thin client can access the server/path displayed in the
Download Path field.
Update button
The Update button will execute the script used by the ezUpdate service. It will first ensure successful communication with the Download Path. If that is successful, it will ask for confirmation before
beginning the update check.
55
Page 66

ezUpdate for XPe
FTP Server Setup
Save button
The Save button commits the values in the applet to the registry.
Cancel button
The Cancel button discards changes to the applet and exits.
Obtaining the Windows XPe ezUpdate FTP Server Package
Installing the ezUpdate FTP Server Package
ezUpdate FTP Server Package Contents
The ezUpdate FTP server package can be downloaded from
http://www.neoware.com/downloads/
The server package is contained in a self-extracting InstallShield file
and requires a license key for installation. You will be e-mailed a
license key after registering for the software download.
Install the ezUpdate FTP server package in the root directory of your
FTP server. The InstallShield installation package installs by default
to C:\Inetpub\ftproot\.
The FTP server package contains the following directories and files:
\neoware\xpe\256P640\factory\
The “256” in this example refers to the size (in MB) of Flash disk
installed on the Windows XPe thin client. "P640" indicates the thin
client model. This allows different models to be configured differently. The same directory and file structure is replicated for each
Flash disk size. Simply replace “256P640” in the example above
with “256FP” for the Neoware e350 XPe, ‘512’, etc.
103000
This file is the version file. Just the name is important – it can be
a 0K (empty) file. Do not use “0” as your version filename, since
the ezUpdate client software uses “0” to force an image update.
56 FTP Server Setup
Page 67

ezUpdate for XPe
snapins.txt
This file contains the directory name of the snap-in(s) you wish
to install. For example “Citrix ICA Client v9” (no quotes). This
entry in the snapins.txt file would require the existence of
“\neoware\xpe\shared\snapins\Citrix ICA Client v9” on your
FTP server.
Snap-ins should be named one-per-line.
image.dd (not included in ezUpdate server package)
This is the image to be used for this profile when a full image
update is requested. The image.dd file is not included as part of
the ezUpdate server setup package. Download the operating system update package(s) needed from
http://www.neoware.com/downloads/
, install the update package(s) on your ezRemote Manager server, and then copy the correct image.dd file to the appropriate ezUpdate directory.
Note: When copying the image file to the ezUpdate directory,
make sure that you place it into the correct Flash disk size location.
Adding Additional Profiles
\neoware\xpe\shared\
d_drive\
This directory contains the scripts used when performing full
image updates.
snapins\
This directory contains the snap-ins, each in their own directory.
No snap-ins are included as part of the server setup package.
Simply download the package(s) needed from
http://www.neoware.com/downloads
, install on your server, and
copy the appropriate directories to the ezUpdate
\shared\snapins directory.
Additional profiles can be added by creating additional subdirectories, such as \Neoware\xpe\256P640\sales\. The same
FTP Server Setup 57
Page 68

ezUpdate for XPe
files discussed above must be included in each new profile directory
(103000, snapins.txt, image.dd).
Snap-ins can be downloaded from http://www.neoware.com/down-
loads, and installed in \neoware\xpe\shared\snapins. If
developing your own snap-ins, it is crucial the Uninstall DisplayName is set and matches the snap-in directory, or you may put
your client(s) in an infinite snap-in install loop. For ezUpdate, commas are illegal characters in the Uninstall DisplayName field.
ezUpdate Process Flow Notes
• When an ezUpdate-enabled Windows XPe thin client boots, the
ezUpdate service runs. No user interaction is required. No user is
required to log in.
• If ezUpdate is configured to do so, the ezUpdate server name is
retrieved from DHCP.
• Temporary environment variables are setup with ezUpdate infor-
mation. These variables are released when ezUpdate is complete.
• The local ezUpdate image version string is compared to the ver-
sion filename on the server. If they do not match, a full image
update is initiated. If they do match, snap-in versions are
checked.
• When checking to see if any snap-ins need to be installed/
updated, the server’s snapins.txt file is compared to the thin client’s registry containing Uninstall information, specifically the
DisplayName key. If snapins.txt contains new or updated
items, ezUpdate will install the required snap-in(s). If any of the
snap-ins require a reboot, ezUpdate will wait until all requested
snap-ins are installed before rebooting. If Enhanced Write Filter
is enabled on the thin client(s), the changes will be committed
prior to rebooting.
• When ezUpdate determines the image and snap-ins are up-to-
date, the service turns itself off to conserve resources. The service
can be started manually or the unit can be rebooted to check for
additional updates.
58 ezUpdate Process Flow Notes
Page 69

ezUpdate for XPe
• When installing images on the ezUpdate server, make sure that
the filename is image.dd and it is placed in the appropriate
size/profile directory. It is also critical to ensure the ezUpdate
version string in the registry of image.dd matches the version
filename in the same directory – otherwise the unit(s) will continue to update on each running of the ezUpdate service.
ezUpdate Process Flow Notes 59
Page 70

ezUpdate for XPe
60 ezUpdate Process Flow Notes
Page 71

Index
Windows XPe Thin Client User Manual
Numerics
10BaseT Ethernet 7
A
adding a filter 39
Administrator account 9
Adobe Acrobat Reader Plug-In 21
applications
Adobe Acrobat Reader Plug-In
available as snap-ins 15, 16
Citrix Program Neighborhood 16
installed 15
Microsoft Internet Explorer 18
Microsoft Remote Desktop Connection 17
Microsoft Windows Media Player 21
Neoware TeemTalk 18
Sun Java 20
auto logon 10
autolog.exe 10
B
backpanel connectors 6
bar code scanners 6, 7
C
case, outer, before removing v
Citrix MetaFrame 2
Citrix Program Neighborhood 16
Citrix WinFra me 2
21
COM ports 6
configuration utility
adding a filter
connecting
cables
7
modems 7
monitor 7
monitors 7
network cables 7
peripherals 7
printers 6, 7
D
domain logon 12
Drive C 23
Drive D 23
drives
mapping
E
Enhanced Write Filter 31
Ethernet connection 6
Ethernet connector 7
ezFeatures 2
ezManage 2
ezSecure 2
ezSnap 2
ezManage 2
ezRemote Manager 26
39
25
61
Page 72

Index
ezRemote Manager User Manual 27
ezSecure 2
ezSnap 2
ezUpdate 53
Neoware Firewall configuration 36
F
filter
adding
39
firewall 35
Flash disk 23
I
ICA (Independent Computing Architecture)
protocol
overview
16
Internet help pages 3
K
keyboard
connecting
6
KB port
location
L
6
LAN 6
Language Pack Installer 27
logon accounts
Administrator
9
default 9
default passwords 9
User 9
logon, automatic 10
M
Macromedia Flash Plug-In 21
mapping drives 25
mapping network drives 25
Microsoft Internet Explorer 18
Microsoft Remote Desktop Connectio n 17
Microsoft Windows Media Player 21
Microsoft Windows XP Embedded 1
modems 6
connecting 7
monitor
connecting
7
Monitor port 6
mouse devices
connecting
6
PS/2 type 6
N
Neoware Firewall 35
adding a filter 39
assigning a configuration 41
batch file 42
configuring 36
default filters provided 44
All Inbound Traffic 44
All Outbound Traffic 44
Applications System 44
File Sharing 47
Grid Center 49
ICMP 49
MMS 50
Neoware Management 51
defining filter rules 40
editing a filter 38
exporting a configuration 42
exporting displayed data 43
ezUpdate 36
filter assignment 38
filter list 37
FTP 36
IP security template file 42
MFWC.DAT file 43
passive FTP 36
removing a filter 39
saving a configuration 41
Windows Firewall 35
Neoware Language Pack Installer 27
P
password, default user accounts 9
peripheral devices
parallel and serial
7
personal digital assistants (PDAs) 6
62
Page 73

Index
power cable 7
power jack 7
printing
connecting printers 7
parallel port 6
serial port 6
protocols
ICA
16
PS/2 mouse 6
PWR connector 7
R
RAM Drive 23
Remote Configuration 26
Remote Management 26
RJ-45 Ethernet jack 6
roaming profiles 14
Roaming User Profiles 24
S
Safety Instructions v
Serial port
location
6
serial ports 6
shutting down your thin client 8
snap-ins 16
spooled print jobs 24
Sun Java 20
support 3
T
Task Manager 25
technical support 3
TeemTalk 18
temporary Internet cache 24
Temporary RAM Drive 23
U
unpacking 5
USB Device Support 26
USB ports, locating 6
User account 9
W
Windows Firewall 35
Windows Server 2003 2
WinFrame 16
Work Area, arranging to reduce eye strain and
body fatigue
8
63
Page 74

Index
64
 Loading...