

Page 1
HP UPS Battery Replacement
Important battery safety
Installation Instructions
information
WARNING: The unit contains sealed lead-acid battery
modules. To prevent fire or chemical burns:
Do not attempt to recharge batteries after removal from
the unit.
Do not disassemble, crush, or puncture the batteries.
Do not short the external contacts of the batteries.
Do not immerse the batteries in water.
Do not expose to temperatures higher than 60°C
(140°F).
WARNING: To prevent personal injury from hazardous
energy:
Remove watches, rings, or other metal objects.
Use tools with insulated handles.
Do not place tools or metal parts on top of batteries.
WARNING: To prevent personal injury, prepare the area
and observe all materials-handling procedures when
transporting a battery module. Battery modules weigh 20
kg (44 lb).
NOTE: Replace all battery modules at the same time.
© Copyright 2009 Hewlett-Packard Development Company, L.P.
The information contained herein is subject to change without notice. The only
warranties for HP products and services are set forth in the express warranty
statements accompanying such products and services. Nothing herein should
be construed as constituting an additional warranty. HP shall not be liable for
technical or editorial errors or omissions contained herein.
Part Number 533
513-002
August 2009 (Second Edition)
Printed in China
533513-00
2
UPS battery replacement overview
The battery modules are hot swappable and can be replaced without
powering down the UPS. To power down the UPS, see the UPS user
guide for instructions.
CAUTION: When hot-swapping batteries, the UPS is not
protected in the event of a utility power failure, unless at
least one ERM is installed.
IMPORTANT: Charge the batteries before supplying
backup power to devices. See the UPS user guide for
recommended charging times.
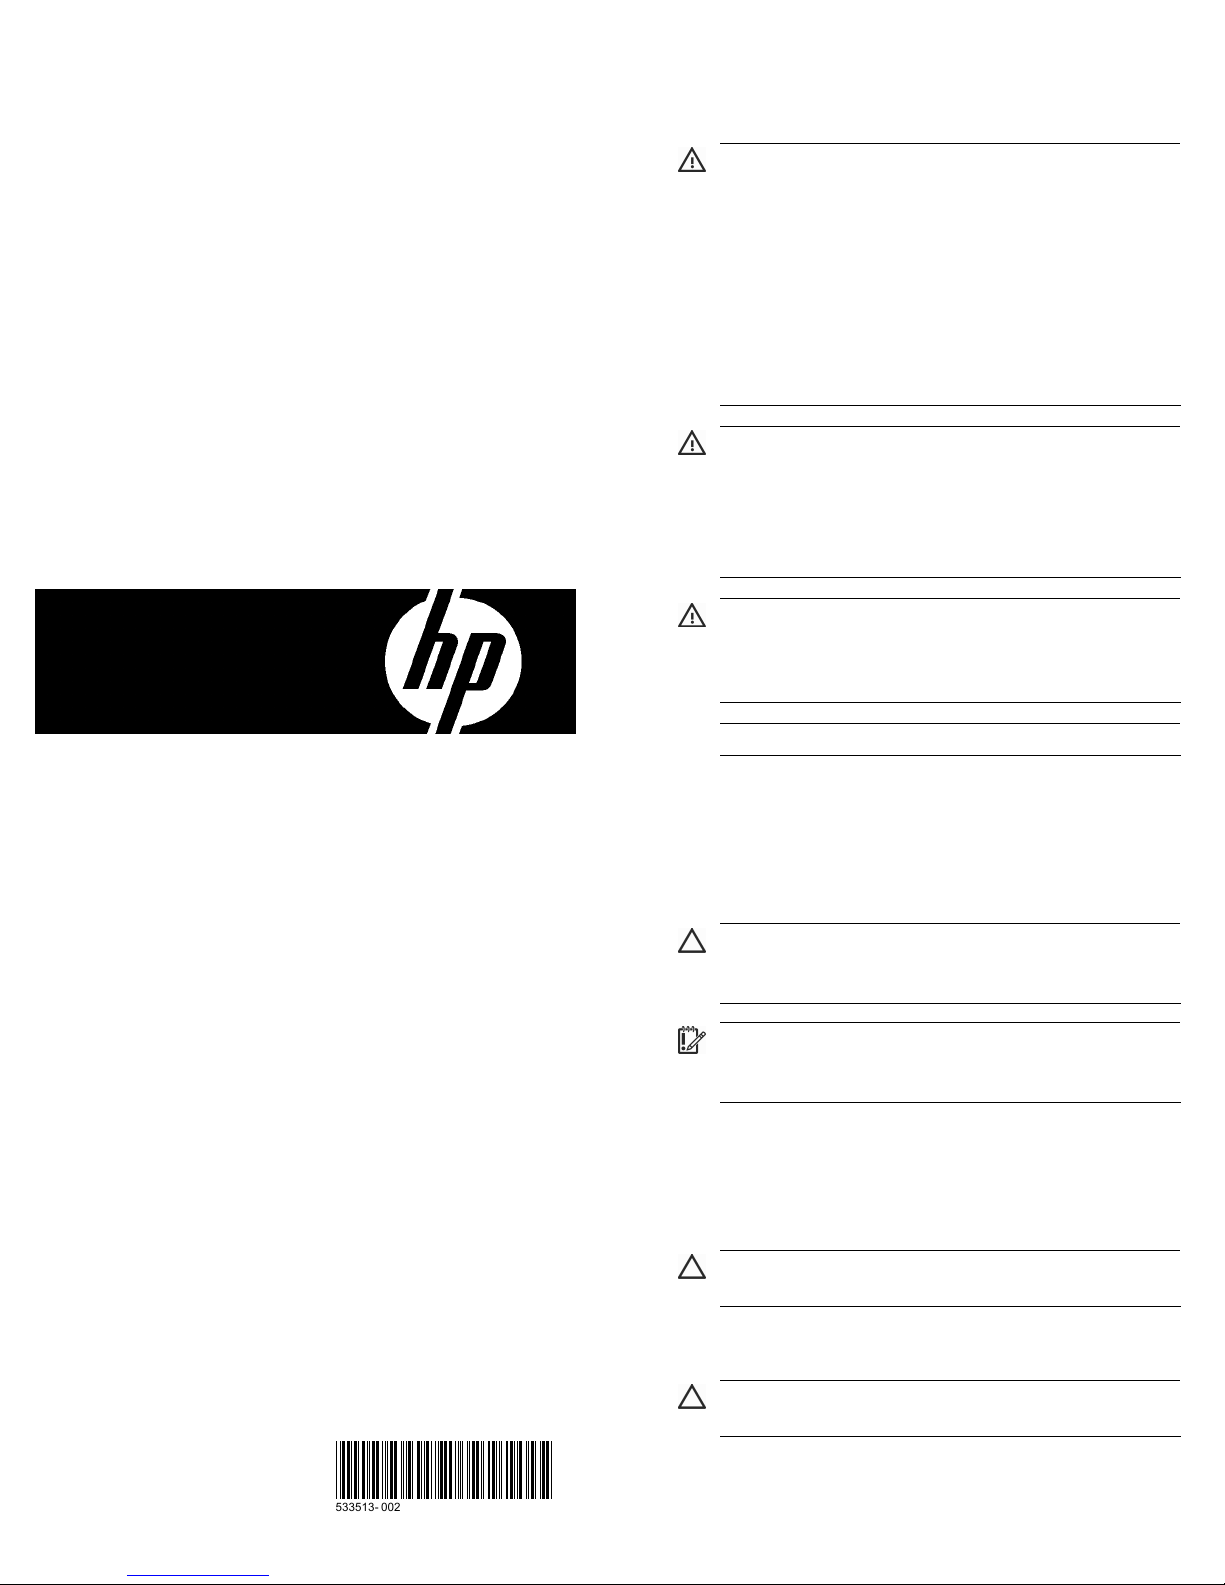
HP UPS T750 G2/T1000 G3
1. Remove the UPS front bezel.
2. Remove the UPS battery bracket.
CAUTION: Carefully remove the metal battery bracket to
avoid damaging the battery lead connectors.
3. Disconnect the red battery lead, and then pull the battery out
onto a flat, stable surface.
CAUTION: The battery is unsupported when you pull it out
of the UPS.
Page 2
4. Disconnect the black battery lead on the back of the battery.
To replace the components, reverse the removal procedure.
CAUTION: To avoid damage to the battery leads, be sure
that the cables do not bind against the guide rail while
reinstalling the battery.
HP UPS T1500 G3
HP UPS R1500 G2
1. Remove the UPS front bezel.
2. Disconnect the battery leads.
3. Remove the UPS battery bracket. Carefully pull the battery
leads through the hole in the battery bracket.
4. Remove the UPS battery modules.
IMPORTANT: Do not pull the battery leads when removing
or installing the batteries.
1. Remove the UPS front bezel.
2. Remove the UPS battery bracket.
3. Disconnect the red battery lead, and then slowly pull the
battery out just far enough to expose the cable retainer for the
black battery lead.
4. Carefully remove the black battery lead from the cable
retainer, and then completely pull the battery out onto a flat,
stable surface.
CAUTION: The battery is unsupported when you pull it out
of the UPS.
5. Disconnect the black battery lead.
To replace the components, reverse the removal procedure.
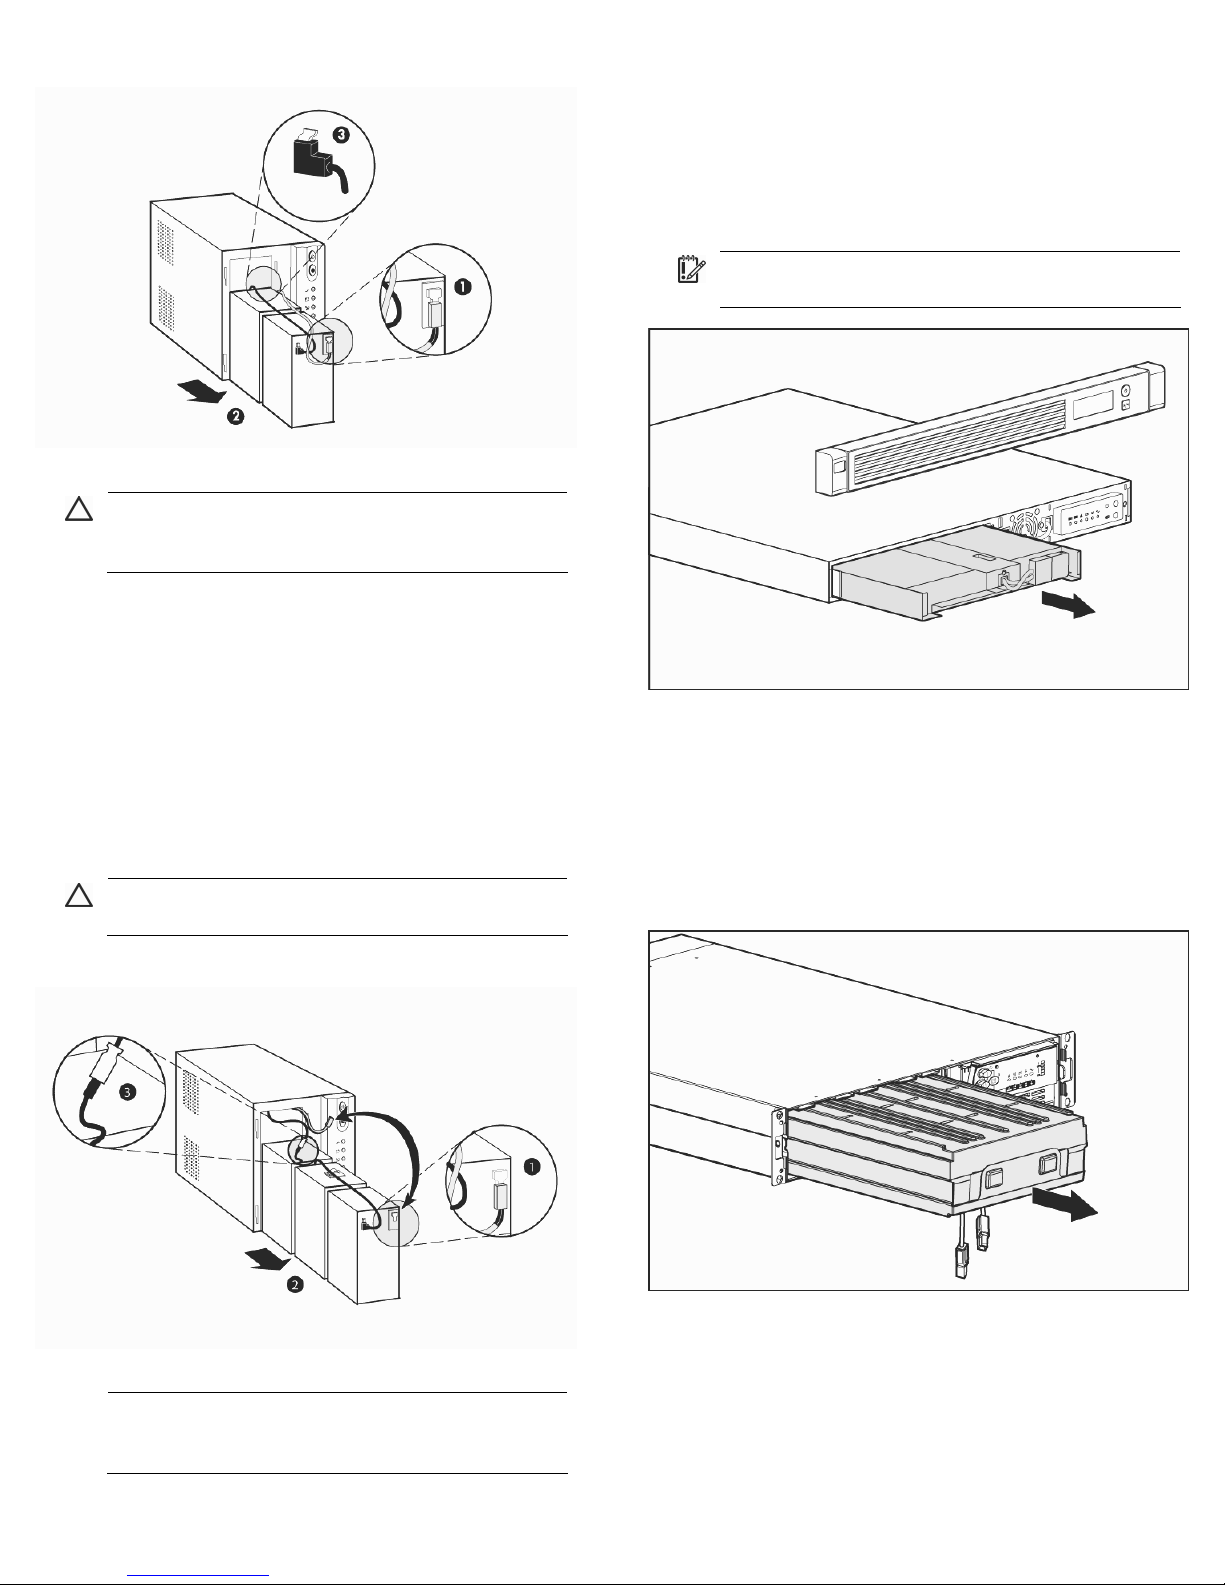
HP UPS R3000
1. Remove the UPS front bezel.
2. Disconnect the battery leads.
3. Remove the UPS battery bracket.
4. Remove the UPS battery modules.
To replace the components, reverse the removal procedure.
NOTE: A small amount of arcing may occur when
connecting the batteries. This is normal and does not
damage the unit or present any safety concern.
To replace the components, reverse the removal procedure.
Page 3

HP UPS R/T3000 HP 3 Phase UPS R8000/3 and
WARNING: To prevent personal injury from electric shock
or damage to the equipment, remove the battery lead
labels, and verify that the ERM circuit breakers are in the
Off position.
R12000/3
1. Remove the UPS front bezel.
2. Remove the UPS battery bracket.
3. Remove the UPS battery modules.
1. Remove the UPS front bezel.
2. Disconnect the battery leads.
3. Remove the UPS battery bracket.
4. Remove the UPS battery modules.
IMPORTANT: Do not pull the battery leads when removing
or installing the batteries.
To replace the components, reverse the removal procedure.
To replace the components,
reverse the removal procedure.
HP UPS R5500
1. Remove the UPS front bezel.
2. Remove the UPS battery bracket.
3. Remove the UPS battery modules.
Battery replacement notice
WARNING: Power products contain sealed lead-acid
battery modules. A risk of fire and burns exists if the
battery is not properly handled. To reduce the risk of
personal injury:
Do not attempt to recharge the battery.
Do not expose the battery to temperatures higher than
60°C (140°F).
Do not disassemble, crush, puncture, short external
contacts, or dispose of in fire or water. The battery
might explode.
Batteries, battery packs, and accumulators
should not be disposed of together with the
general household waste. To forward them to
recycling or proper disposal, use the public
collection system or return them to HP, an
authorized HP Partner, or their agents.
For more information about battery replacement or proper disposal,
contact an authorized reseller or an authorized service provider.
To replace the components, reverse the removal procedure.
 Loading...