

Page 1

hp StorageWorks
NAS 1500s and 500s
Product Version: 1
First Edition (September 2004)
Part Number: 372607-001
Administration Guide
This guide provides information on performing the administrative tasks necessary to manage the HP
StorageWorks NAS 1500s and 500s servers. Overview information as well as procedural instructions are
included in this guide.
Page 2

© Copyright 2004 Hewlett-Packard Development Company, L.P.
Hewlett-Packard Company makes no warranty of any kind with regard to this material, including, but not limited to, the implied
warranties of merchantability and fitness for a particular purpose. Hewlett-Packard shall not be liable for errors contained herein or for
incidental or consequential damages in connection with the furnishing, performance, or use of this material.
This document contains proprietary information, which is protected by copyright. No part of this document may be photocopied,
reproduced, or translated into another language without the prior written consent of Hewlett-Packard. The information contained in this
document is subject to change without notice. The only warranties for HP products and services are set forth in the express warranty
statements accompanying such products and services. Nothing herein should be construed as constituting an additional warranty. HP
shall not be liable for technical or editorial errors or omissions contained herein.
Microsoft®, MS Windows®, Windows®, and Windows NT® are U.S. registered trademarks of Microsoft Corporation.
UNIX® is a registered trademark of The Open Group.
Hewlett-Packard Company shall not be liable for technical or editorial errors or omissions contained herein. The information is provided
“as is” without warranty of any kind and is subject to change without notice. The warranties for Hewlett-Packard Company products are
set forth in the express limited warranty statements for such products. Nothing herein should be construed as constituting an additional
warranty.
NAS 1500s and 500s Administration Guide
First Edition (September 2004)
Part Number: 372607-001
Page 3

Contents
About this Guide. . . . . . . . . . . . . . . . . . . . . . . . . . . . . . . . . . . . . . . . . . . . . . . . . . . . . . . . . . . . . . . 9
Intended audience. . . . . . . . . . . . . . . . . . . . . . . . . . . . . . . . . . . . . . . . . . . . . . . . . . . . . . . . . . . . . . . . . . . . . . . . .9
Prerequisites . . . . . . . . . . . . . . . . . . . . . . . . . . . . . . . . . . . . . . . . . . . . . . . . . . . . . . . . . . . . . . . . . . . . . . . . . . . . .9
Conventions . . . . . . . . . . . . . . . . . . . . . . . . . . . . . . . . . . . . . . . . . . . . . . . . . . . . . . . . . . . . . . . . . . . . . . . . . . . . .9
Document conventions. . . . . . . . . . . . . . . . . . . . . . . . . . . . . . . . . . . . . . . . . . . . . . . . . . . . . . . . . . . . . . . . . .9
Text symbols . . . . . . . . . . . . . . . . . . . . . . . . . . . . . . . . . . . . . . . . . . . . . . . . . . . . . . . . . . . . . . . . . . . . . . . .10
Getting help . . . . . . . . . . . . . . . . . . . . . . . . . . . . . . . . . . . . . . . . . . . . . . . . . . . . . . . . . . . . . . . . . . . . . . . . . . . .11
HP technical support . . . . . . . . . . . . . . . . . . . . . . . . . . . . . . . . . . . . . . . . . . . . . . . . . . . . . . . . . . . . . . . . . .11
HP storage web site . . . . . . . . . . . . . . . . . . . . . . . . . . . . . . . . . . . . . . . . . . . . . . . . . . . . . . . . . . . . . . . . . . .11
HP authorized reseller . . . . . . . . . . . . . . . . . . . . . . . . . . . . . . . . . . . . . . . . . . . . . . . . . . . . . . . . . . . . . . . . .11
1 System Overview . . . . . . . . . . . . . . . . . . . . . . . . . . . . . . . . . . . . . . . . . . . . . . . . . . . . . . . . . . . . . 13
Product definition and information. . . . . . . . . . . . . . . . . . . . . . . . . . . . . . . . . . . . . . . . . . . . . . . . . . . . . . . . . . .13
Server hardware and software features . . . . . . . . . . . . . . . . . . . . . . . . . . . . . . . . . . . . . . . . . . . . . . . . . . . .13
Product information . . . . . . . . . . . . . . . . . . . . . . . . . . . . . . . . . . . . . . . . . . . . . . . . . . . . . . . . . . . . . . . . . . .13
Product manageability . . . . . . . . . . . . . . . . . . . . . . . . . . . . . . . . . . . . . . . . . . . . . . . . . . . . . . . . . . . . . . . . .14
Product redundancy . . . . . . . . . . . . . . . . . . . . . . . . . . . . . . . . . . . . . . . . . . . . . . . . . . . . . . . . . . . . . . . . . . .14
Deployment scenarios. . . . . . . . . . . . . . . . . . . . . . . . . . . . . . . . . . . . . . . . . . . . . . . . . . . . . . . . . . . . . . . . . . . . .16
Environment scenarios . . . . . . . . . . . . . . . . . . . . . . . . . . . . . . . . . . . . . . . . . . . . . . . . . . . . . . . . . . . . . . . . . . . .17
Workgroup . . . . . . . . . . . . . . . . . . . . . . . . . . . . . . . . . . . . . . . . . . . . . . . . . . . . . . . . . . . . . . . . . . . . . . . . . .17
Domain. . . . . . . . . . . . . . . . . . . . . . . . . . . . . . . . . . . . . . . . . . . . . . . . . . . . . . . . . . . . . . . . . . . . . . . . . . . . .17
User interfaces . . . . . . . . . . . . . . . . . . . . . . . . . . . . . . . . . . . . . . . . . . . . . . . . . . . . . . . . . . . . . . . . . . . . . . . . . .18
NAS server web-based user interface . . . . . . . . . . . . . . . . . . . . . . . . . . . . . . . . . . . . . . . . . . . . . . . . . . . . .18
Menu tabs . . . . . . . . . . . . . . . . . . . . . . . . . . . . . . . . . . . . . . . . . . . . . . . . . . . . . . . . . . . . . . . . . . . . . . .18
Status. . . . . . . . . . . . . . . . . . . . . . . . . . . . . . . . . . . . . . . . . . . . . . . . . . . . . . . . . . . . . . . . . . . . . . . .18
Network. . . . . . . . . . . . . . . . . . . . . . . . . . . . . . . . . . . . . . . . . . . . . . . . . . . . . . . . . . . . . . . . . . . . . .19
Disks . . . . . . . . . . . . . . . . . . . . . . . . . . . . . . . . . . . . . . . . . . . . . . . . . . . . . . . . . . . . . . . . . . . . . . . .19
Users . . . . . . . . . . . . . . . . . . . . . . . . . . . . . . . . . . . . . . . . . . . . . . . . . . . . . . . . . . . . . . . . . . . . . . . .19
Shares . . . . . . . . . . . . . . . . . . . . . . . . . . . . . . . . . . . . . . . . . . . . . . . . . . . . . . . . . . . . . . . . . . . . . . .19
Maintenance . . . . . . . . . . . . . . . . . . . . . . . . . . . . . . . . . . . . . . . . . . . . . . . . . . . . . . . . . . . . . . . . . .19
HP Utilities . . . . . . . . . . . . . . . . . . . . . . . . . . . . . . . . . . . . . . . . . . . . . . . . . . . . . . . . . . . . . . . . . . .19
Help. . . . . . . . . . . . . . . . . . . . . . . . . . . . . . . . . . . . . . . . . . . . . . . . . . . . . . . . . . . . . . . . . . . . . . . . .19
Contents
3NAS 1500s and 500s Administration Guide
Page 4

Contents
Welcome screen contents . . . . . . . . . . . . . . . . . . . . . . . . . . . . . . . . . . . . . . . . . . . . . . . . . . . . . . . . . . .19
Take a Tour . . . . . . . . . . . . . . . . . . . . . . . . . . . . . . . . . . . . . . . . . . . . . . . . . . . . . . . . . . . . . . . . . . .19
Rapid Startup Wizard . . . . . . . . . . . . . . . . . . . . . . . . . . . . . . . . . . . . . . . . . . . . . . . . . . . . . . . . . . .19
Set Administrator Password . . . . . . . . . . . . . . . . . . . . . . . . . . . . . . . . . . . . . . . . . . . . . . . . . . . . . .19
Set Server Name . . . . . . . . . . . . . . . . . . . . . . . . . . . . . . . . . . . . . . . . . . . . . . . . . . . . . . . . . . . . . . .19
Set Default Page . . . . . . . . . . . . . . . . . . . . . . . . . . . . . . . . . . . . . . . . . . . . . . . . . . . . . . . . . . . . . . .19
NAS server desktop . . . . . . . . . . . . . . . . . . . . . . . . . . . . . . . . . . . . . . . . . . . . . . . . . . . . . . . . . . . . . . . . . . .20
NAS Management Console . . . . . . . . . . . . . . . . . . . . . . . . . . . . . . . . . . . . . . . . . . . . . . . . . . . . . . . . . .20
2 Basic Administrative Procedures and Setup Completion . . . . . . . . . . . . . . . . . . . . . . . . . . . . . . . . . 21
Basic administrative procedures. . . . . . . . . . . . . . . . . . . . . . . . . . . . . . . . . . . . . . . . . . . . . . . . . . . . . . . . . . . . .21
Setting the system date and time . . . . . . . . . . . . . . . . . . . . . . . . . . . . . . . . . . . . . . . . . . . . . . . . . . . . . . . . .22
Shutting down or restarting the server. . . . . . . . . . . . . . . . . . . . . . . . . . . . . . . . . . . . . . . . . . . . . . . . . . . . .23
Viewing and maintaining audit logs . . . . . . . . . . . . . . . . . . . . . . . . . . . . . . . . . . . . . . . . . . . . . . . . . . . . . .24
Using Remote Desktop . . . . . . . . . . . . . . . . . . . . . . . . . . . . . . . . . . . . . . . . . . . . . . . . . . . . . . . . . . . . . . . .25
Improper closure of Remote Desktop . . . . . . . . . . . . . . . . . . . . . . . . . . . . . . . . . . . . . . . . . . . . . . . . . .25
Setting up E-mail alerts . . . . . . . . . . . . . . . . . . . . . . . . . . . . . . . . . . . . . . . . . . . . . . . . . . . . . . . . . . . . . . . .26
Changing system network settings. . . . . . . . . . . . . . . . . . . . . . . . . . . . . . . . . . . . . . . . . . . . . . . . . . . . . . . .27
Setup completion . . . . . . . . . . . . . . . . . . . . . . . . . . . . . . . . . . . . . . . . . . . . . . . . . . . . . . . . . . . . . . . . . . . . . . . .28
Managing system storage. . . . . . . . . . . . . . . . . . . . . . . . . . . . . . . . . . . . . . . . . . . . . . . . . . . . . . . . . . . . . . .28
Creating and managing users and groups. . . . . . . . . . . . . . . . . . . . . . . . . . . . . . . . . . . . . . . . . . . . . . . . . . .28
Creating and managing file shares. . . . . . . . . . . . . . . . . . . . . . . . . . . . . . . . . . . . . . . . . . . . . . . . . . . . . . . .28
3 Volume Management . . . . . . . . . . . . . . . . . . . . . . . . . . . . . . . . . . . . . . . . . . . . . . . . . . . . . . . . . . 29
WebUI Disks tab. . . . . . . . . . . . . . . . . . . . . . . . . . . . . . . . . . . . . . . . . . . . . . . . . . . . . . . . . . . . . . . . . . . . . . . . .29
Disk Management utility . . . . . . . . . . . . . . . . . . . . . . . . . . . . . . . . . . . . . . . . . . . . . . . . . . . . . . . . . . . . . . . . . .31
Disk Management guidelines. . . . . . . . . . . . . . . . . . . . . . . . . . . . . . . . . . . . . . . . . . . . . . . . . . . . . . . . . . . .32
Adaptec Storage Manager. . . . . . . . . . . . . . . . . . . . . . . . . . . . . . . . . . . . . . . . . . . . . . . . . . . . . . . . . . . . . . . . . .33
Volumes page . . . . . . . . . . . . . . . . . . . . . . . . . . . . . . . . . . . . . . . . . . . . . . . . . . . . . . . . . . . . . . . . . . . . . . . . . . .34
Scheduling defragmentation. . . . . . . . . . . . . . . . . . . . . . . . . . . . . . . . . . . . . . . . . . . . . . . . . . . . . . . . . . . . .35
Disk quotas . . . . . . . . . . . . . . . . . . . . . . . . . . . . . . . . . . . . . . . . . . . . . . . . . . . . . . . . . . . . . . . . . . . . . . . . . . . . .36
Enabling quota management . . . . . . . . . . . . . . . . . . . . . . . . . . . . . . . . . . . . . . . . . . . . . . . . . . . . . . . . . . . .36
Setting user quota entries . . . . . . . . . . . . . . . . . . . . . . . . . . . . . . . . . . . . . . . . . . . . . . . . . . . . . . . . . . . . . . .38
DiskPart . . . . . . . . . . . . . . . . . . . . . . . . . . . . . . . . . . . . . . . . . . . . . . . . . . . . . . . . . . . . . . . . . . . . . . . . . . . . . . .40
Example of using DiskPart . . . . . . . . . . . . . . . . . . . . . . . . . . . . . . . . . . . . . . . . . . . . . . . . . . . . . . . . . .41
4 Shadow Copies. . . . . . . . . . . . . . . . . . . . . . . . . . . . . . . . . . . . . . . . . . . . . . . . . . . . . . . . . . . . . . . 43
Overview. . . . . . . . . . . . . . . . . . . . . . . . . . . . . . . . . . . . . . . . . . . . . . . . . . . . . . . . . . . . . . . . . . . . . . . . . . . . . . .43
Shadow copy planning . . . . . . . . . . . . . . . . . . . . . . . . . . . . . . . . . . . . . . . . . . . . . . . . . . . . . . . . . . . . . . . . . . . .44
Identifying the volume. . . . . . . . . . . . . . . . . . . . . . . . . . . . . . . . . . . . . . . . . . . . . . . . . . . . . . . . . . . . . . . . .44
Allocating disk space . . . . . . . . . . . . . . . . . . . . . . . . . . . . . . . . . . . . . . . . . . . . . . . . . . . . . . . . . . . . . . . . . .44
Identifying the storage area . . . . . . . . . . . . . . . . . . . . . . . . . . . . . . . . . . . . . . . . . . . . . . . . . . . . . . . . . . . . .46
Determining creation frequency. . . . . . . . . . . . . . . . . . . . . . . . . . . . . . . . . . . . . . . . . . . . . . . . . . . . . . . . . .46
Shadow copies and drive defragmentation. . . . . . . . . . . . . . . . . . . . . . . . . . . . . . . . . . . . . . . . . . . . . . . . . . . . .47
Mounted drives . . . . . . . . . . . . . . . . . . . . . . . . . . . . . . . . . . . . . . . . . . . . . . . . . . . . . . . . . . . . . . . . . . . . . . . . . .47
4 NAS 1500s and 500s Administration Guide
Page 5

Contents
Managing shadow copies . . . . . . . . . . . . . . . . . . . . . . . . . . . . . . . . . . . . . . . . . . . . . . . . . . . . . . . . . . . . . . . . . .48
The shadow copy cache file. . . . . . . . . . . . . . . . . . . . . . . . . . . . . . . . . . . . . . . . . . . . . . . . . . . . . . . . . . . . .49
Enabling and creating shadow copies . . . . . . . . . . . . . . . . . . . . . . . . . . . . . . . . . . . . . . . . . . . . . . . . . . . . .51
Viewing a list of shadow copies. . . . . . . . . . . . . . . . . . . . . . . . . . . . . . . . . . . . . . . . . . . . . . . . . . . . . . . . . .51
Set schedules . . . . . . . . . . . . . . . . . . . . . . . . . . . . . . . . . . . . . . . . . . . . . . . . . . . . . . . . . . . . . . . . . . . . . . . .52
Scheduling shadow copies. . . . . . . . . . . . . . . . . . . . . . . . . . . . . . . . . . . . . . . . . . . . . . . . . . . . . . . . . . .52
Deleting a shadow copy schedule . . . . . . . . . . . . . . . . . . . . . . . . . . . . . . . . . . . . . . . . . . . . . . . . . . . . .52
Viewing shadow copy properties. . . . . . . . . . . . . . . . . . . . . . . . . . . . . . . . . . . . . . . . . . . . . . . . . . . . . . . . .52
Disabling shadow copies . . . . . . . . . . . . . . . . . . . . . . . . . . . . . . . . . . . . . . . . . . . . . . . . . . . . . . . . . . . . . . .54
Managing shadow copies from the NAS Desktop . . . . . . . . . . . . . . . . . . . . . . . . . . . . . . . . . . . . . . . . . . . . . . .55
Shadow copies for shared folders. . . . . . . . . . . . . . . . . . . . . . . . . . . . . . . . . . . . . . . . . . . . . . . . . . . . . . . . . . . .56
SMB shadow copies. . . . . . . . . . . . . . . . . . . . . . . . . . . . . . . . . . . . . . . . . . . . . . . . . . . . . . . . . . . . . . . . . . .56
NFS shadow copies . . . . . . . . . . . . . . . . . . . . . . . . . . . . . . . . . . . . . . . . . . . . . . . . . . . . . . . . . . . . . . . . . . .57
Recovery of files or folders . . . . . . . . . . . . . . . . . . . . . . . . . . . . . . . . . . . . . . . . . . . . . . . . . . . . . . . . . . . . .58
Recovering a deleted file or folder. . . . . . . . . . . . . . . . . . . . . . . . . . . . . . . . . . . . . . . . . . . . . . . . . . . . . . . .59
Recovering an overwritten or corrupted file . . . . . . . . . . . . . . . . . . . . . . . . . . . . . . . . . . . . . . . . . . . . . . . .59
Recovering a folder . . . . . . . . . . . . . . . . . . . . . . . . . . . . . . . . . . . . . . . . . . . . . . . . . . . . . . . . . . . . . . . . . . .60
Backup and shadow copies . . . . . . . . . . . . . . . . . . . . . . . . . . . . . . . . . . . . . . . . . . . . . . . . . . . . . . . . . . . . .60
5 User and Group Management . . . . . . . . . . . . . . . . . . . . . . . . . . . . . . . . . . . . . . . . . . . . . . . . . . . .61
Overview. . . . . . . . . . . . . . . . . . . . . . . . . . . . . . . . . . . . . . . . . . . . . . . . . . . . . . . . . . . . . . . . . . . . . . . . . . . . . . .61
Domain compared to workgroup environments . . . . . . . . . . . . . . . . . . . . . . . . . . . . . . . . . . . . . . . . . . . . . . . . .61
User and group name planning. . . . . . . . . . . . . . . . . . . . . . . . . . . . . . . . . . . . . . . . . . . . . . . . . . . . . . . . . . . . . .62
Managing user names. . . . . . . . . . . . . . . . . . . . . . . . . . . . . . . . . . . . . . . . . . . . . . . . . . . . . . . . . . . . . . . . . .62
Managing group names . . . . . . . . . . . . . . . . . . . . . . . . . . . . . . . . . . . . . . . . . . . . . . . . . . . . . . . . . . . . . . . .63
Workgroup user and group management . . . . . . . . . . . . . . . . . . . . . . . . . . . . . . . . . . . . . . . . . . . . . . . . . . . . . .63
Managing local users . . . . . . . . . . . . . . . . . . . . . . . . . . . . . . . . . . . . . . . . . . . . . . . . . . . . . . . . . . . . . . . . . .64
Adding a new user . . . . . . . . . . . . . . . . . . . . . . . . . . . . . . . . . . . . . . . . . . . . . . . . . . . . . . . . . . . . . . . . .65
Deleting a user. . . . . . . . . . . . . . . . . . . . . . . . . . . . . . . . . . . . . . . . . . . . . . . . . . . . . . . . . . . . . . . . . . . .65
Modifying a user password . . . . . . . . . . . . . . . . . . . . . . . . . . . . . . . . . . . . . . . . . . . . . . . . . . . . . . . . . .65
Modifying user properties . . . . . . . . . . . . . . . . . . . . . . . . . . . . . . . . . . . . . . . . . . . . . . . . . . . . . . . . . . .66
Managing local groups. . . . . . . . . . . . . . . . . . . . . . . . . . . . . . . . . . . . . . . . . . . . . . . . . . . . . . . . . . . . . . . . .67
Adding a new group . . . . . . . . . . . . . . . . . . . . . . . . . . . . . . . . . . . . . . . . . . . . . . . . . . . . . . . . . . . . . . .68
Deleting a group . . . . . . . . . . . . . . . . . . . . . . . . . . . . . . . . . . . . . . . . . . . . . . . . . . . . . . . . . . . . . . . . . .68
Modifying group properties. . . . . . . . . . . . . . . . . . . . . . . . . . . . . . . . . . . . . . . . . . . . . . . . . . . . . . . . . .69
General Tab. . . . . . . . . . . . . . . . . . . . . . . . . . . . . . . . . . . . . . . . . . . . . . . . . . . . . . . . . . . . . . . . . . .69
Members Tab . . . . . . . . . . . . . . . . . . . . . . . . . . . . . . . . . . . . . . . . . . . . . . . . . . . . . . . . . . . . . . . . .69
6 Folder, Printer, and Share Management. . . . . . . . . . . . . . . . . . . . . . . . . . . . . . . . . . . . . . . . . . . . . 71
Folder management . . . . . . . . . . . . . . . . . . . . . . . . . . . . . . . . . . . . . . . . . . . . . . . . . . . . . . . . . . . . . . . . . . . . . .71
Navigating to a specific volume or folder . . . . . . . . . . . . . . . . . . . . . . . . . . . . . . . . . . . . . . . . . . . . . . . . . .72
Creating a new folder. . . . . . . . . . . . . . . . . . . . . . . . . . . . . . . . . . . . . . . . . . . . . . . . . . . . . . . . . . . . . . . . . .74
Deleting a folder. . . . . . . . . . . . . . . . . . . . . . . . . . . . . . . . . . . . . . . . . . . . . . . . . . . . . . . . . . . . . . . . . . . . . .74
Modifying folder properties . . . . . . . . . . . . . . . . . . . . . . . . . . . . . . . . . . . . . . . . . . . . . . . . . . . . . . . . . . . . .75
Creating a new share for a volume or folder . . . . . . . . . . . . . . . . . . . . . . . . . . . . . . . . . . . . . . . . . . . . . . . .75
Managing shares for a volume or folder . . . . . . . . . . . . . . . . . . . . . . . . . . . . . . . . . . . . . . . . . . . . . . . . . . .77
Managing file level permissions . . . . . . . . . . . . . . . . . . . . . . . . . . . . . . . . . . . . . . . . . . . . . . . . . . . . . . . . .78
5NAS 1500s and 500s Administration Guide
Page 6

Contents
Share management . . . . . . . . . . . . . . . . . . . . . . . . . . . . . . . . . . . . . . . . . . . . . . . . . . . . . . . . . . . . . . . . . . . . . . .84
Share considerations. . . . . . . . . . . . . . . . . . . . . . . . . . . . . . . . . . . . . . . . . . . . . . . . . . . . . . . . . . . . . . . . . . .84
Defining Access Control Lists . . . . . . . . . . . . . . . . . . . . . . . . . . . . . . . . . . . . . . . . . . . . . . . . . . . . . . . . . . .84
Integrating local file system security into Windows domain environments . . . . . . . . . . . . . . . . . . . . . . . .85
Comparing administrative (hidden) and standard shares. . . . . . . . . . . . . . . . . . . . . . . . . . . . . . . . . . . . . . .85
Planning for compatibility between file sharing protocols . . . . . . . . . . . . . . . . . . . . . . . . . . . . . . . . . . . . .85
NFS compatibility issues. . . . . . . . . . . . . . . . . . . . . . . . . . . . . . . . . . . . . . . . . . . . . . . . . . . . . . . . . . . .86
Managing shares. . . . . . . . . . . . . . . . . . . . . . . . . . . . . . . . . . . . . . . . . . . . . . . . . . . . . . . . . . . . . . . . . . . . . .86
Creating a new share . . . . . . . . . . . . . . . . . . . . . . . . . . . . . . . . . . . . . . . . . . . . . . . . . . . . . . . . . . . . . . .87
Deleting a share . . . . . . . . . . . . . . . . . . . . . . . . . . . . . . . . . . . . . . . . . . . . . . . . . . . . . . . . . . . . . . . . . . .87
Modifying share properties . . . . . . . . . . . . . . . . . . . . . . . . . . . . . . . . . . . . . . . . . . . . . . . . . . . . . . . . . .88
Windows sharing. . . . . . . . . . . . . . . . . . . . . . . . . . . . . . . . . . . . . . . . . . . . . . . . . . . . . . . . . . . . . . .89
UNIX sharing . . . . . . . . . . . . . . . . . . . . . . . . . . . . . . . . . . . . . . . . . . . . . . . . . . . . . . . . . . . . . . . . .90
Web sharing (HTTP). . . . . . . . . . . . . . . . . . . . . . . . . . . . . . . . . . . . . . . . . . . . . . . . . . . . . . . . . . . .91
AFP (Appletalk) sharing. . . . . . . . . . . . . . . . . . . . . . . . . . . . . . . . . . . . . . . . . . . . . . . . . . . . . . . . .91
Installing the AppleTalk Protocol . . . . . . . . . . . . . . . . . . . . . . . . . . . . . . . . . . . . . . . . . . . . . .91
Installing File Services for Macintosh . . . . . . . . . . . . . . . . . . . . . . . . . . . . . . . . . . . . . . . . . . .91
Setting AppleTalk Protocol Properties. . . . . . . . . . . . . . . . . . . . . . . . . . . . . . . . . . . . . . . . . . .92
Protocol parameter settings. . . . . . . . . . . . . . . . . . . . . . . . . . . . . . . . . . . . . . . . . . . . . . . . . . . . . . . . . . . . . . . . .92
DFS protocol settings. . . . . . . . . . . . . . . . . . . . . . . . . . . . . . . . . . . . . . . . . . . . . . . . . . . . . . . . . . . . . . . . . .94
Deploying DFS . . . . . . . . . . . . . . . . . . . . . . . . . . . . . . . . . . . . . . . . . . . . . . . . . . . . . . . . . . . . . . . . . . .94
DFS Administration Tool. . . . . . . . . . . . . . . . . . . . . . . . . . . . . . . . . . . . . . . . . . . . . . . . . . . . . . . . . . . . . . .95
Accessing the DFS namespace from other computers. . . . . . . . . . . . . . . . . . . . . . . . . . . . . . . . . . . . . . . . .95
Setting DFS sharing defaults . . . . . . . . . . . . . . . . . . . . . . . . . . . . . . . . . . . . . . . . . . . . . . . . . . . . . . . . .96
Creating a local DFS root . . . . . . . . . . . . . . . . . . . . . . . . . . . . . . . . . . . . . . . . . . . . . . . . . . . . . . . . . . .96
Deleting a local DFS root . . . . . . . . . . . . . . . . . . . . . . . . . . . . . . . . . . . . . . . . . . . . . . . . . . . . . . . . . . .97
Publishing a new share in DFS . . . . . . . . . . . . . . . . . . . . . . . . . . . . . . . . . . . . . . . . . . . . . . . . . . . . . . . . . .98
Publishing an existing share in DFS . . . . . . . . . . . . . . . . . . . . . . . . . . . . . . . . . . . . . . . . . . . . . . . . . . . . . .99
Removing a published share from DFS . . . . . . . . . . . . . . . . . . . . . . . . . . . . . . . . . . . . . . . . . . . . . . . . . . . .99
Storage management. . . . . . . . . . . . . . . . . . . . . . . . . . . . . . . . . . . . . . . . . . . . . . . . . . . . . . . . . . . . . . . . . . . . .100
Directory quotas. . . . . . . . . . . . . . . . . . . . . . . . . . . . . . . . . . . . . . . . . . . . . . . . . . . . . . . . . . . . . . . . . . . . .100
Establishing directory quotas. . . . . . . . . . . . . . . . . . . . . . . . . . . . . . . . . . . . . . . . . . . . . . . . . . . . . . . . . . .101
File screening . . . . . . . . . . . . . . . . . . . . . . . . . . . . . . . . . . . . . . . . . . . . . . . . . . . . . . . . . . . . . . . . . . . . . . . . . .102
Storage reports . . . . . . . . . . . . . . . . . . . . . . . . . . . . . . . . . . . . . . . . . . . . . . . . . . . . . . . . . . . . . . . . . . . . . . . . .103
Print services (1500s Only). . . . . . . . . . . . . . . . . . . . . . . . . . . . . . . . . . . . . . . . . . . . . . . . . . . . . . . . . . . . . . .104
Configuring the print server. . . . . . . . . . . . . . . . . . . . . . . . . . . . . . . . . . . . . . . . . . . . . . . . . . . . . . . . . . . .104
Removing the print server role . . . . . . . . . . . . . . . . . . . . . . . . . . . . . . . . . . . . . . . . . . . . . . . . . . . . . .106
Adding an additional printer . . . . . . . . . . . . . . . . . . . . . . . . . . . . . . . . . . . . . . . . . . . . . . . . . . . . . . . . . . .106
Adding additional operating system support . . . . . . . . . . . . . . . . . . . . . . . . . . . . . . . . . . . . . . . . . . . . . . .107
Installing print services for UNIX . . . . . . . . . . . . . . . . . . . . . . . . . . . . . . . . . . . . . . . . . . . . . . . . . . . . . . .107
HP Web Jetadmin . . . . . . . . . . . . . . . . . . . . . . . . . . . . . . . . . . . . . . . . . . . . . . . . . . . . . . . . . . . . . . . . . . . . . . .108
6 NAS 1500s and 500s Administration Guide
Page 7

Contents
7 Microsoft Services for NFS. . . . . . . . . . . . . . . . . . . . . . . . . . . . . . . . . . . . . . . . . . . . . . . . . . . . . . 109
Server for NFS . . . . . . . . . . . . . . . . . . . . . . . . . . . . . . . . . . . . . . . . . . . . . . . . . . . . . . . . . . . . . . . . . . . . . . . . .109
Authenticating user access . . . . . . . . . . . . . . . . . . . . . . . . . . . . . . . . . . . . . . . . . . . . . . . . . . . . . . . . . . . . .109
S4U2 functionality . . . . . . . . . . . . . . . . . . . . . . . . . . . . . . . . . . . . . . . . . . . . . . . . . . . . . . . . . . . . . . . . . . .110
Indicating the computer to use for the NFS user mapping server . . . . . . . . . . . . . . . . . . . . . . . . . . . . . . .111
Logging events. . . . . . . . . . . . . . . . . . . . . . . . . . . . . . . . . . . . . . . . . . . . . . . . . . . . . . . . . . . . . . . . . . . . . .112
Server for NFS server settings . . . . . . . . . . . . . . . . . . . . . . . . . . . . . . . . . . . . . . . . . . . . . . . . . . . . . . . . . .113
Installing NFS Authentication software on the domain controllers and
Active Directory domain controllers . . . . . . . . . . . . . . . . . . . . . . . . . . . . . . . . . . . . . . . . . . . . . . . . . . . . .114
Understanding NTFS and UNIX permissions . . . . . . . . . . . . . . . . . . . . . . . . . . . . . . . . . . . . . . . . . . . . . . . . .116
NFS file shares . . . . . . . . . . . . . . . . . . . . . . . . . . . . . . . . . . . . . . . . . . . . . . . . . . . . . . . . . . . . . . . . . . . . . . . . .116
Creating a new share . . . . . . . . . . . . . . . . . . . . . . . . . . . . . . . . . . . . . . . . . . . . . . . . . . . . . . . . . . . . . . . . .117
Deleting a share . . . . . . . . . . . . . . . . . . . . . . . . . . . . . . . . . . . . . . . . . . . . . . . . . . . . . . . . . . . . . . . . . .118
Modifying share properties . . . . . . . . . . . . . . . . . . . . . . . . . . . . . . . . . . . . . . . . . . . . . . . . . . . . . . . . .118
Anonymous access to an NFS share . . . . . . . . . . . . . . . . . . . . . . . . . . . . . . . . . . . . . . . . . . . . . . . . . .120
Encoding Types. . . . . . . . . . . . . . . . . . . . . . . . . . . . . . . . . . . . . . . . . . . . . . . . . . . . . . . . . . . . . . .121
NFS only . . . . . . . . . . . . . . . . . . . . . . . . . . . . . . . . . . . . . . . . . . . . . . . . . . . . . . . . . . . . . . . . . . . . . . .121
NFS protocol properties settings . . . . . . . . . . . . . . . . . . . . . . . . . . . . . . . . . . . . . . . . . . . . . . . . . . . . . . . . . . .122
NFS async/sync settings. . . . . . . . . . . . . . . . . . . . . . . . . . . . . . . . . . . . . . . . . . . . . . . . . . . . . . . . . . . . . . .123
NFS locks . . . . . . . . . . . . . . . . . . . . . . . . . . . . . . . . . . . . . . . . . . . . . . . . . . . . . . . . . . . . . . . . . . . . . .123
NFS client groups . . . . . . . . . . . . . . . . . . . . . . . . . . . . . . . . . . . . . . . . . . . . . . . . . . . . . . . . . . . . . . . . . . . . . . .125
Adding a new client group . . . . . . . . . . . . . . . . . . . . . . . . . . . . . . . . . . . . . . . . . . . . . . . . . . . . . . . . . . . . .126
Deleting a client group. . . . . . . . . . . . . . . . . . . . . . . . . . . . . . . . . . . . . . . . . . . . . . . . . . . . . . . . . . . . . . . .126
Editing client group information . . . . . . . . . . . . . . . . . . . . . . . . . . . . . . . . . . . . . . . . . . . . . . . . . . . . . . . .127
NFS user and group mappings . . . . . . . . . . . . . . . . . . . . . . . . . . . . . . . . . . . . . . . . . . . . . . . . . . . . . . . . . . . . .128
Types of mappings . . . . . . . . . . . . . . . . . . . . . . . . . . . . . . . . . . . . . . . . . . . . . . . . . . . . . . . . . . . . . . . . . . .128
Explicit mappings . . . . . . . . . . . . . . . . . . . . . . . . . . . . . . . . . . . . . . . . . . . . . . . . . . . . . . . . . . . . . . . .128
Simple mappings . . . . . . . . . . . . . . . . . . . . . . . . . . . . . . . . . . . . . . . . . . . . . . . . . . . . . . . . . . . . . . . . .128
Squashed mappings . . . . . . . . . . . . . . . . . . . . . . . . . . . . . . . . . . . . . . . . . . . . . . . . . . . . . . . . . . . . . . .129
User name mapping best practices. . . . . . . . . . . . . . . . . . . . . . . . . . . . . . . . . . . . . . . . . . . . . . . . . . . . . . .129
Creating and managing user and group mappings. . . . . . . . . . . . . . . . . . . . . . . . . . . . . . . . . . . . . . . . . . .130
General tab. . . . . . . . . . . . . . . . . . . . . . . . . . . . . . . . . . . . . . . . . . . . . . . . . . . . . . . . . . . . . . . . . . . . . .131
Simple mapping tab. . . . . . . . . . . . . . . . . . . . . . . . . . . . . . . . . . . . . . . . . . . . . . . . . . . . . . . . . . . . . . .132
Explicit user mapping tab . . . . . . . . . . . . . . . . . . . . . . . . . . . . . . . . . . . . . . . . . . . . . . . . . . . . . . . . . .132
Explicit group mapping tab . . . . . . . . . . . . . . . . . . . . . . . . . . . . . . . . . . . . . . . . . . . . . . . . . . . . . . . . .134
Backing up and restoring mappings. . . . . . . . . . . . . . . . . . . . . . . . . . . . . . . . . . . . . . . . . . . . . . . . . . . . . .135
Backing up user mappings. . . . . . . . . . . . . . . . . . . . . . . . . . . . . . . . . . . . . . . . . . . . . . . . . . . . . . . . . .135
Restoring user mappings . . . . . . . . . . . . . . . . . . . . . . . . . . . . . . . . . . . . . . . . . . . . . . . . . . . . . . . . . . .136
Creating a sample NFS file share . . . . . . . . . . . . . . . . . . . . . . . . . . . . . . . . . . . . . . . . . . . . . . . . . . . . . . . . . . .136
Remote Desktop . . . . . . . . . . . . . . . . . . . . . . . . . . . . . . . . . . . . . . . . . . . . . . . . . . . . . . . . . . . . . . . . . . . . . . . .138
Using Remote Desktop . . . . . . . . . . . . . . . . . . . . . . . . . . . . . . . . . . . . . . . . . . . . . . . . . . . . . . . . . . . . . . .138
7NAS 1500s and 500s Administration Guide
Page 8

Contents
8 NetWare File System Management . . . . . . . . . . . . . . . . . . . . . . . . . . . . . . . . . . . . . . . . . . . . . . . 139
Installing Services for NetWare . . . . . . . . . . . . . . . . . . . . . . . . . . . . . . . . . . . . . . . . . . . . . . . . . . . . . . . . . . . .140
Managing file and print Services for NetWare. . . . . . . . . . . . . . . . . . . . . . . . . . . . . . . . . . . . . . . . . . . . . . . . .141
Creating and managing NetWare users . . . . . . . . . . . . . . . . . . . . . . . . . . . . . . . . . . . . . . . . . . . . . . . . . . . . . .142
Adding local NetWare users . . . . . . . . . . . . . . . . . . . . . . . . . . . . . . . . . . . . . . . . . . . . . . . . . . . . . . . . . . .142
Enabling local NetWare user accounts . . . . . . . . . . . . . . . . . . . . . . . . . . . . . . . . . . . . . . . . . . . . . . . . . . .143
Managing NCP volumes (shares). . . . . . . . . . . . . . . . . . . . . . . . . . . . . . . . . . . . . . . . . . . . . . . . . . . . . . . . . . .144
Creating a new NCP share . . . . . . . . . . . . . . . . . . . . . . . . . . . . . . . . . . . . . . . . . . . . . . . . . . . . . . . . . . . . .144
Modifying NCP share properties . . . . . . . . . . . . . . . . . . . . . . . . . . . . . . . . . . . . . . . . . . . . . . . . . . . . . . . .145
9 Remote Access Methods and Monitoring . . . . . . . . . . . . . . . . . . . . . . . . . . . . . . . . . . . . . . . . . . . 147
Web based user interface . . . . . . . . . . . . . . . . . . . . . . . . . . . . . . . . . . . . . . . . . . . . . . . . . . . . . . . . . . . . . . . . .147
Remote Desktop . . . . . . . . . . . . . . . . . . . . . . . . . . . . . . . . . . . . . . . . . . . . . . . . . . . . . . . . . . . . . . . . . . . . . . . .147
Telnet Server. . . . . . . . . . . . . . . . . . . . . . . . . . . . . . . . . . . . . . . . . . . . . . . . . . . . . . . . . . . . . . . . . . . . . . . . . . .148
Enabling Telnet Server. . . . . . . . . . . . . . . . . . . . . . . . . . . . . . . . . . . . . . . . . . . . . . . . . . . . . . . . . . . . . . . .148
Sessions information . . . . . . . . . . . . . . . . . . . . . . . . . . . . . . . . . . . . . . . . . . . . . . . . . . . . . . . . . . . . . .148
Index . . . . . . . . . . . . . . . . . . . . . . . . . . . . . . . . . . . . . . . . . . . . . . . . . . . . . . . . . . . . . . . . . . . . . 149
8 NAS 1500s and 500s Administration Guide
Page 9
About This Guide
Intended audience
This book is intended for use by system administrators who are experienced with setting up
and managing a network server.
Prerequisites
Before beginning, make sure you consider the items below.
■ Knowledge of the Microsoft® Windows® Storage Server 2003 operating system
■ Knowledge of HP hardware
■ Location of all documentation shipped with your server
Conventions
Conventions consist of the following:
■ Document conventions
■ Text symbols
Document conventions
This document follows the conventions in Tab le 1.
About this Guide
About this Guide
Table 1: Document conventions
Blue text: Figure 1 Cross-reference links
Bold Menu items, buttons, and key, tab, and box
Italics
Monospace font User input, commands, code, file and directory
Monospace, italic font Command-line and code variables
Blue underlined sans serif font text
(
http://www.hp.com
Convention Element
names
Text emphasis and document titles in body text
names, and system responses (output and
messages)
Web site addresses
)
9NAS 1500s and 500s Administration Guide
Page 10
About this Guide
Text symbols
The following symbols may be found in the text of this guide. They have the following
meanings:
WARNING: Text set off in this manner indicates that failure to follow directions in the
warning could result in bodily harm or death.
Caution: Text set off in this manner indicates that failure to follow directions could result in
damage to equipment or data.
Tip: Text in a tip provides additional help to readers by providing nonessential or optional
techniques, procedures, or shortcuts.
Note: Text set off in this manner presents commentary, sidelights, or interesting points of
information.
10 NAS 1500s and 500s Administration Guide
Page 11

Getting help
If you still have a question after reading this guide, contact an HP authorized service provider
or access our web site:
HP technical support
Telephone numbers for worldwide technical support are listed on the following HP web site:
http://www.hp.com/support/
Note: For continuous quality improvement, calls may be recorded or monitored.
Be sure to have the following information available before calling:
■ Technical support registration number (if applicable)
■ Product serial numbers
■ Product model names and numbers
■ Applicable error messages
http://www.hp.com
.
. From this web site, select the country of origin.
About this Guide
■ Operating system type and revision level
■ Detailed, specific questions
HP storage web site
The HP web site has the latest information on this product, as well as the latest drivers. Access
storage at:
select the appropriate product or solution.
HP authorized reseller
For the name of your nearest HP authorized reseller:
■ In the United States, call 1-800-282-6672
■ In Canada, call 1-800-863-6594
■ Elsewhere, see the HP web site for locations and telephone numbers:
http://www.hp.com/country/us/eng/prodserv/storage.html
. From this web site,
http://www.hp.com
.
11NAS 1500s and 500s Administration Guide
Page 12

About this Guide
12 NAS 1500s and 500s Administration Guide
Page 13

System Overview
The HP StorageWorks NAS 1500s and 500s servers can be used in many types of computing
environments, from basic Microsoft Windows workgroups to complicated multiprotocol
domains using DFS, NFS, FTP, HTTP, and Microsoft SMB. The corresponding varieties of
clients that can be serviced include any Windows, UNIX, Linux, Novell, or Macintosh variant.
This chapter provides an overview of these environments and deployments and includes a brief
descriptions of the available user interfaces.
Product definition and information
The NAS 1500s and 500s are remote office or small to medium business class NAS solutions
that provide reliable performance, manageability, and fault tolerance.
Server hardware and software features
Refer to the HP StorageWorks NAS 1500s Installation Guide or the HP StorageWorks NAS
500s Installation Guide for a listing of server hardware and software features.
1
For specific software product recommendations, go to the HP website:
http://h18000.www1.hp.com/products/s torageworks/nas/supportedsoftware.html
Product information
The NAS server provides performance gains over general purpose servers by integrating
optimized hardware components and specialized software. Integrating NAS devices into the
network improves the performance of existing servers because NAS devices are optimized for
file serving tasks.
Important: The NAS server has been specifically designed to function as a Network Attached
Storage server. Except as specifically authorized by HP, you may not use the server software to
support additional applications or significant functionality other than system utilities or server
resource management or similar software that you may install and use solely for system
administration, system performance enhancement, and/or preventative maintenance of the server.
13NAS 1500s and 500s Administration Guide
Page 14
System Overview
3
Product manageability
The NAS server ships with the following utilities and features that ease the administration
tasks associated with managing the system:
■ The Rapid Startup Wizard is a user friendly configuration utility that ensures easy
configuration.
■ The WebUI is a simple, graphical user interface (GUI) that helps with administration
tasks.
■ Ability to connect directly to the console.
Product redundancy
The NAS server is specifically designed to perform file serving tasks for networks, using
industry standard components to ensure reliability.
Other industry standard features, such as redundant array of independent drives (RAID) and
remote manageability, further enhance the overall dependability of the NAS server.
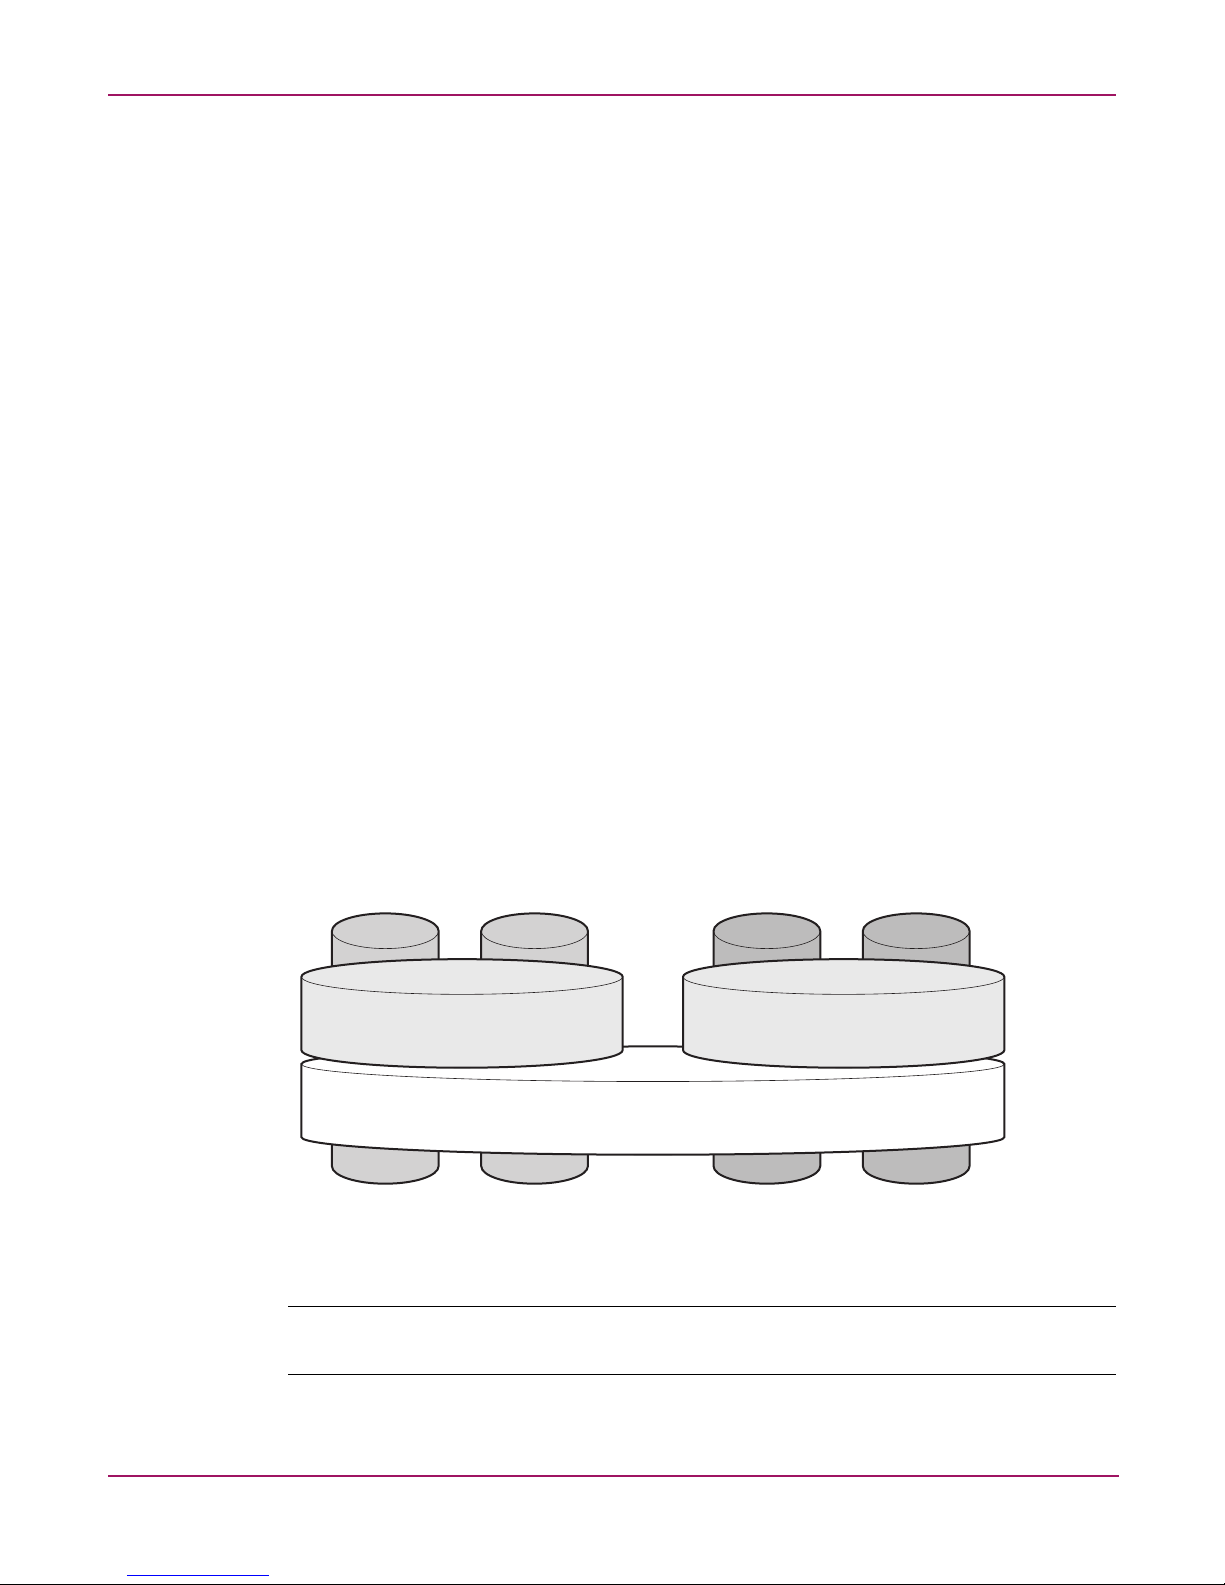
To ensure redundancy and reliability, the hard drives installed in the NAS server are configured
so that a single drive failure will not cause data loss or system failure. The NAS server is
configured with dual boot capability. When powered on, the NAS server can boot using a
primary OS or a secondary recovery OS.
The primary OS logical drive resides on disk 0 and is mirrored on disk 1 while the secondary
OS logical drive resides on disk 2 and is mirrored on disk 3. If a single disk failure occurs, the
system will still function off the mirrored disk. If the primary OS becomes corrupted and
un-bootable, the secondary OS is available for data backup prior to using the Quick Restore
DVD to restore the system to the factory default state.
The data volume is configured as a RAID 5 volume across all four drives. This ensures
redundancy in the event of a drive failure. The data volume is accessible by both the primary
OS and secondary OS.
Logical Disk 1
Primary Operating System Disk
RAID 1
Logical Disk 3
Data Volume
RAID 5
Physical Drive 0 Physical Drive 1 Physical Drive 2 Physical Drive 3
Figure 1: Hardware RAID
Note: In Adaptec Storage Manager, logical disks are labeled 1, 2, and 3. In Disk Manager, logical
disks are displayed as 0, 1, and 2.
Secondary Operating System Disk
Logical Disk 2
RAID 1
1513
14 NAS 1500s and 500s Administration Guide
Page 15

System Overview
The data volume will not be altered by Quick Restore, unless the configuration of the primary
and secondary OS logical drives has been altered. If Quick Restore can detect the original
primary and secondary OS logical drives, only these will be restored. If Quick Restore can not
detect the original primary and secondary OS logical drives, Quick Restore will completely
reconfigure all logical drives, including the data volume, and restore them to a factory default
state.
Note: After system restoration, data volume drive letters must be reassigned.
The secondary OS will need to be maintained in the same way as the primary OS. Hotfixes
installed on the primary OS are not mirrored to the secondary OS. Any installations that are
performed on the primary OS also need to be performed on the secondary OS. HP provides the
secondary OS installation as a recovery mechanism of the data volume for the remote chance
that the primary OS becomes corrupted and a current backup of the data volume is unavailable.
Note: Always keep a backup of your data volume.
15NAS 1500s and 500s Administration Guide
Page 16

System Overview
Deployment scenarios
Various deployment scenarios are possible. See the HP StorageWorks NAS server installation
guide for configurations. Typical application of NAS devices include:
■ File server consolidation
As businesses continue to expand their information technology (IT) infrastructures, they
must find ways to manage larger environments without a corresponding increase in IT
staff. Consolidating many servers into a single NAS device decreases the number of points
of administration and increases the availability and flexibility of storage space.
■ Multiprotocol environments
Some businesses require several types of computing systems to accomplish various tasks.
The multiprotocol support of the NAS server allows it to support many types of client
computers concurrently.
■ Protocol and platform transitions
When a transition between platforms is being planned, the ability of the NAS server to
support most file sharing protocols allows companies to continue to invest in file storage
space without concerns about obsolescence. For example, an administrator planning a
future transition from Windows to Linux can deploy the NAS server with confidence that
it can support both CIFS and NFS simultaneously, assuring not only a smooth transition,
but also a firm protection of their investment.
■ Remote office deployment
Frequently, branch offices and other remote locations lack dedicated IT staff members. An
administrator located in a central location can use the WebUI of the NAS server, Microsoft
Terminal Services, and other remote administration methods to configure and administer
all aspects of the NAS server.
■ Microsoft Windows Storage Server 2003 Feature Pack deployment
The Feature Pack allows Microsoft Exchange Server 2003 databases and transaction logs
to be stored on an HP StorageWorks NAS device running Microsoft Windows Storage
Server 2003. A single Windows Storage Server computer running the Feature Pack can
host the databases and transaction logs of up to two Exchange servers and up to 1,500
Exchange mailboxes.
The Feature Pack installs new components on both the Windows Storage Server computer
and Exchange Server 2003. These components provide tools and services that allow
Exchange databases and transaction logs to be moved to a Windows Storage Server
computer, and they perform the necessary configuration updates to give Exchange Server
2003 access to the remotely stored files.
16 NAS 1500s and 500s Administration Guide
Page 17

Environment scenarios
The NAS server is deployed in one of two security modes:
■ Wo rkg rou p
■ Domain (Windows NT® Domain or Active Directory Domain)
The NAS server uses standard Windows user and group administration methods in each of
these environments. For procedural instructions on managing users and groups, see Chapter 5
of this guide.
Regardless of the deployment, the NAS server integrates easily into multiprotocol
environments, supporting a wide variety of clients. The following protocols are supported:
■ Distributed File System (DFS)
■ Network File System (NFS)
■ Hypertext Transfer Protocol (HTTP)
■ File Transfer Protocol (FTP)
■ Microsoft Server Message Block (SMB)
Workgroup
System Overview
Domain
In a workgroup environment, users and groups are stored and managed separately, on each
member server of the workgroup. Workgroups are typical for very small deployments where
little or no computing environment planning is required.
When operating in a Windows NT or Active Directory domain environment, the NAS server is
a member of the domain and the domain controller is the repository of all account information.
Client machines are also members of the domain and users log on to the domain through their
Windows based client machines. The domain controller also administers user accounts and
appropriate access levels to resources that are a part of the domain. Additional information
about planning for domain environments can be found at:
http://www.microsoft.com/windowsse rver2003/technologies/directory/activedirectory/default .mspx
The NAS server obtains user account information from the domain controller when deployed
in a domain environment. The NAS server itself cannot act as a domain controller, backup
domain controller, or the root of an Active Directory tree as these functions are disabled in the
operating system.
17NAS 1500s and 500s Administration Guide
Page 18

System Overview
User interfaces
There are several user interfaces that administrators can use to access and manage the NAS
server. Two of these interfaces are:
■ NAS server WebUI
■ NAS server desktop
Each interface contains the same or similar capabilities, but presents them in a different
manner. Each of these interfaces are illustrated in the following sections.
NAS server web-based user interface
The WebUI provides for system administration, including user and group management, share
management, and local storage management.
Refer to the HP StorageWorks NAS server installation guide for detailed information on using
the Rapid Startup Wizard for initial setup.
To access the WebUI, launch a Web browser and enter the following in the address field:
https://<your NAS machine name or IP Address>:3202/
The default user name is Administrator. The default password is hpinvent. Online
help for the WebUI is available by clicking the Help tab on the primary WebUI screen.
The primary screen of the WebUI is shown in Figure 2.
Figure 2: Primary WebUI screen
As shown in Figure 2, the following areas are administered through this interface:
Menu tabs
Status
The Status option displays alerts generated by the WebUI.
18 NAS 1500s and 500s Administration Guide
Page 19

System Overview
Network
The Network option contains system settings, including system identification, global settings,
interfaces settings, administration settings, Telnet settings, and SNMP settings.
Disks
Use this option to manage disks, volumes, disk quotas, and shadow copies.
Users
Use this option to manage local users and groups.
Shares
The administrator creates folders and shares to control access to files. When a share is created,
the administrator indicates the protocols that can be supported by that share as well as the
users and groups of users that have access. Protocol parameters are entered in this Shares
option. See Chapter 6 for additional information.
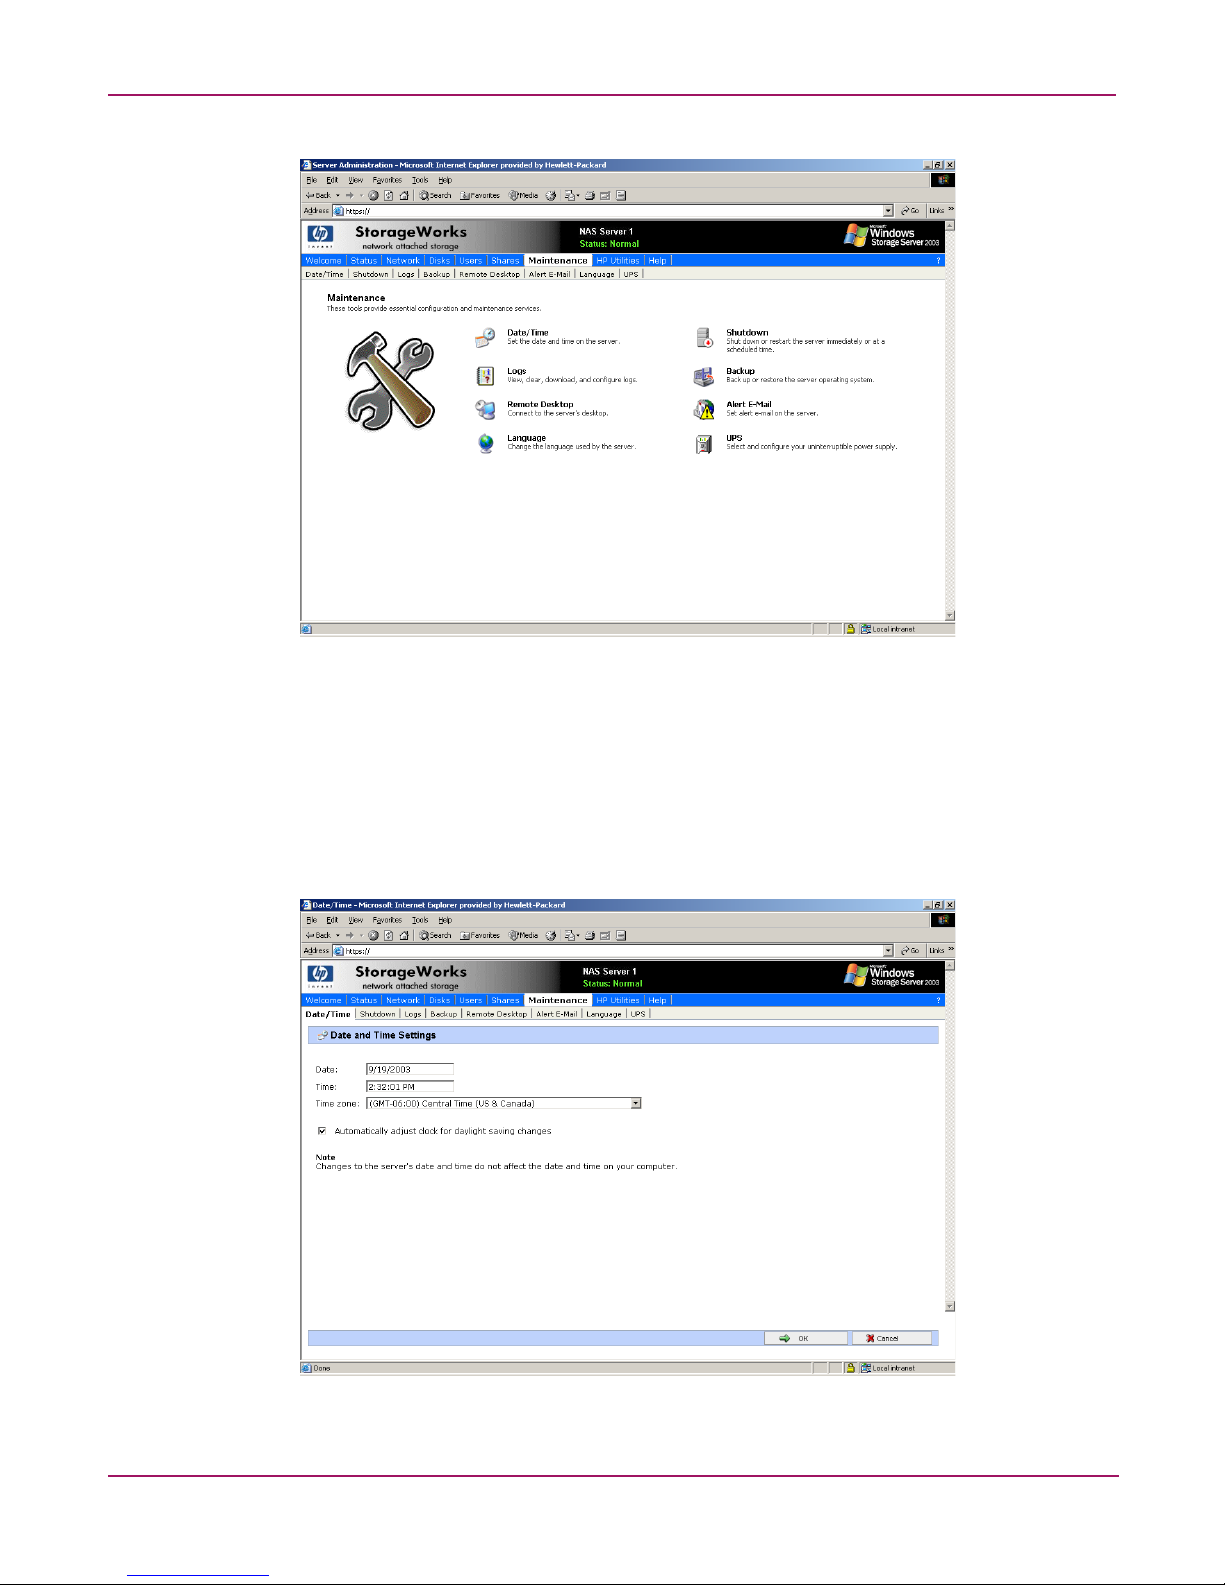
Maintenance
Maintenance tasks include setting date and time, performing system restarts and shutdowns,
viewing audit logs, setting up Email alerts, linking to remote management, and selecting and
configuring your UPS.
HP Utilities
Access File and Print Services for NetWare.
Help
This option contains help information for the WebUI.
Welcome screen contents
Take a Tour
Easily learn how to use the NAS server.
Rapid Startup Wizard
Use this utility to enter system setup and configuration information.
Set Administrator Password
Create a password for the server appliance administrator.
Set Server Name
Choose a name so that client computers can connect to the server.
Set Default Page
Choose which page the server appliance displays first.
19NAS 1500s and 500s Administration Guide
Page 20
System Overview
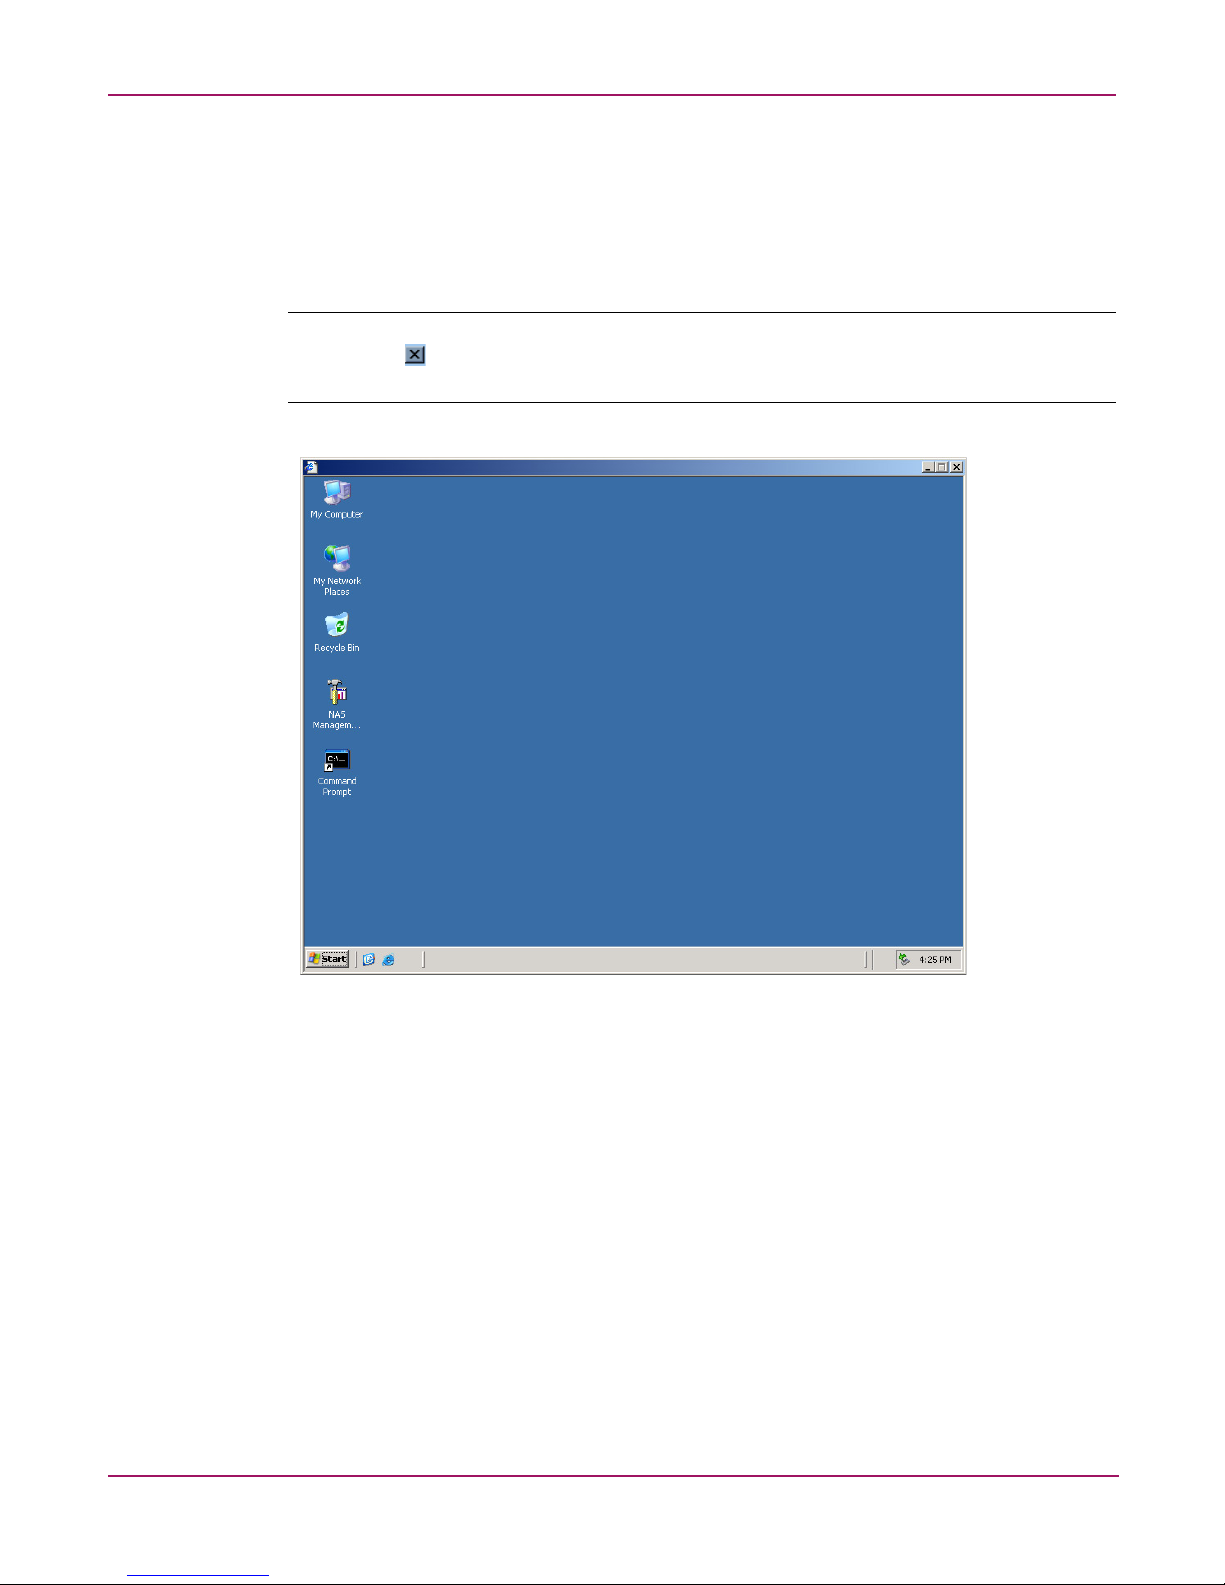
NAS server desktop
The NAS server desktop can be accessed by:
■ Directly connecting a keyboard, mouse, and monitor
■ Using the WebUI Maintenance tab and selecting Remote Desktop
Note: When using Remote Desktop to connect to the NAS server desktop do not use the window
close feature ( ). Click on Start/Log Off Administrator to exit Remote Desktop. See “Improper
Closure of Remote Desktop” in Chapter 2.
Figure 3: NAS server desktop
The NAS Management Console icon is available from the Desktop.
NAS Management Console
Click this icon to access the following folders:
■ Core Operating System is used to manage local users and groups, access performance
logs and alerts, and manage the event viewer.
■ Disk System contains access to local disk management, including a volume list and a
graphical view of the disks.
■ File Sharing contains modules for the configuration of file sharing exports. CIFS/SMB
(Windows) and NFS (UNIX) file shares are managed through this folder.
■ System contains system summary information.
20 NAS 1500s and 500s Administration Guide
Page 21

Basic Administrative Procedures
and Setup Completion
Basic system administration functions are discussed in this chapter.
This chapter also continues the process of setting up the system that was started using the HP
StorageWorks NAS server installation guide by discussing additional setup procedures and
options.
Unless otherwise instructed, all procedures are performed using the NAS Web Based User
Interface (WebUI).
Note: The NAS server desktop can be accessed via a directly connected keyboard, mouse, and
monitor or through Remote Desktop.
Basic administrative procedures
Basic administrative procedures include:
2
■ Setting the system date and time
■ Shutting down or restarting the server
■ Viewing and maintaining audit logs
■ Using Remote Desktop
■ Setting up e-mail alerts
■ Changing system network settings
These functions are performed in the Maintenance tab of the WebUI except for changing
system network settings, which is in the Network tab.
21NAS 1500s and 500s Administration Guide
Page 22
Basic Administrative Procedures and Setup Completion
Figure 4: Maintenance menu
Setting the system date and time
To change the system date or time:
1. From the WebUI, select Maintenance and Date/Time. The Date and Time Settings page
is displayed.
2. Enter the new values and then click OK. The Maintenance menu is displayed.
Figure 5: Date and Time page
22 NAS 1500s and 500s Administration Guide
Page 23
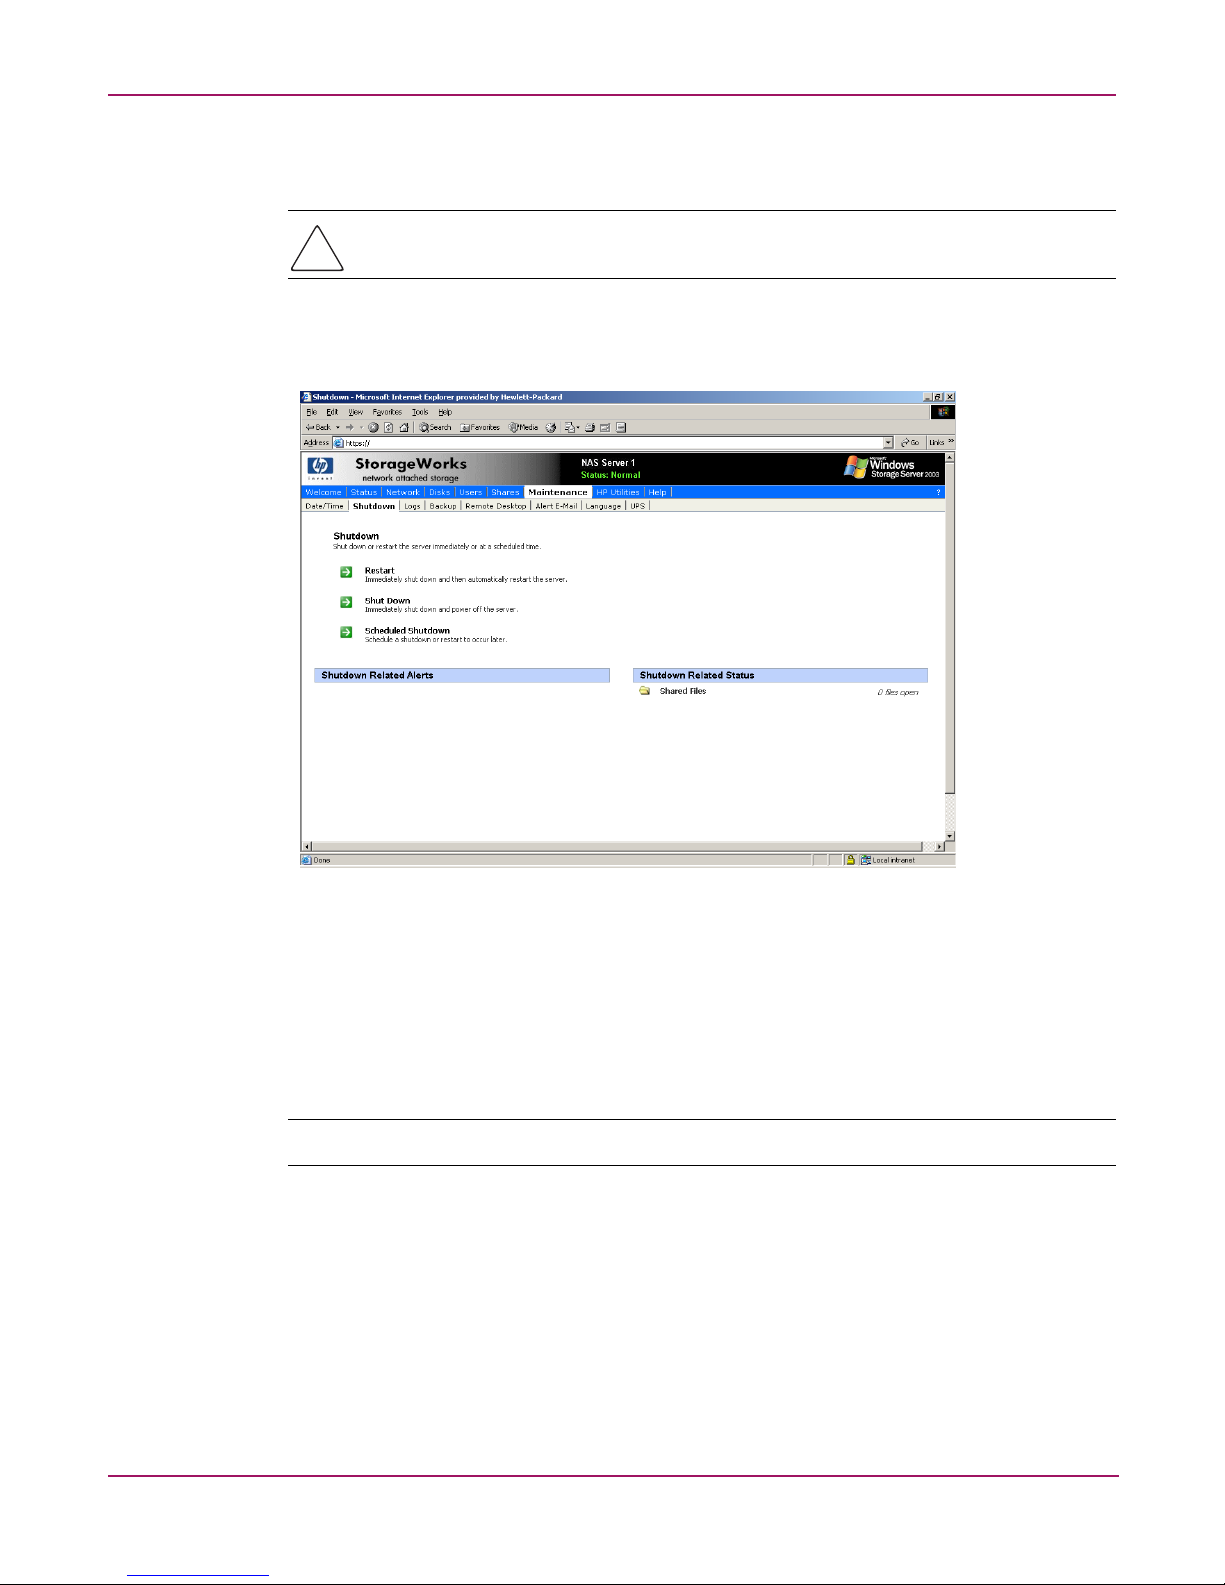
Shutting down or restarting the server
Caution: Notify users before powering down the system. Both UNIX and Windows NT users
can be drastically affected if they are not prepared for a system power-down.
1. From the NAS server WebUI, select Maintenance, Shutdown. Several options are
displayed: Restart, Shut Down, and Scheduled Shutdown.
Basic Administrative Procedures and Setup Completion
Figure 6: Shutdown menu
a. To shut down and automatically restart the server, click Restart.
b. To shut down and power off the server, click Shut Down.
c. To schedule a shutdown, click Scheduled Shutdown.
2. Regardless of the choice, a confirmation prompt is displayed. After verifying that this is
the desired action, click OK.
Note: Client computers will not receive a warning message prior to shutdown.
23NAS 1500s and 500s Administration Guide
Page 24
Basic Administrative Procedures and Setup Completion
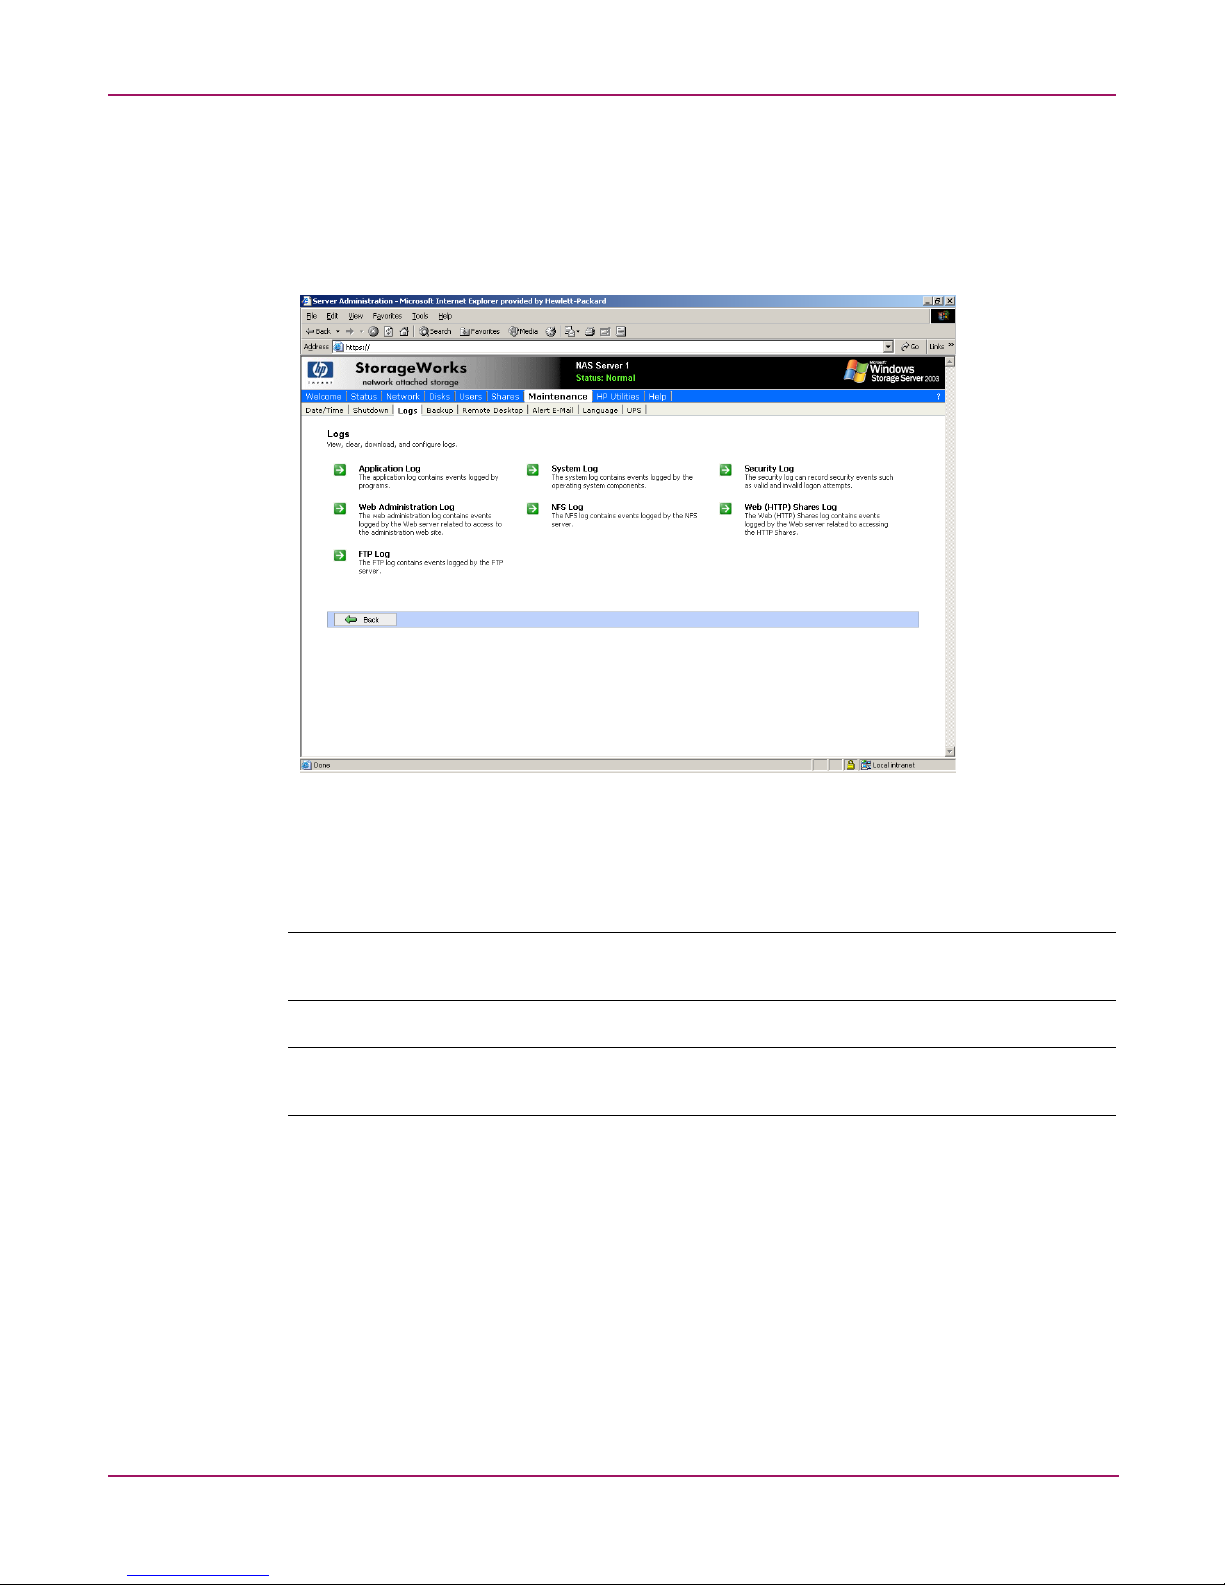
Viewing and maintaining audit logs
A variety of audit logs are provided on the NAS server. System events are grouped into similar
categories, representing the seven different logs.
To access the logs from the WebUI, select Maintenance, Logs. The Logs menu is displayed.
Figure 7: Logs menu
A variety of logs are available and are listed in Figure 7.
Each log has viewing, clearing, printing, and saving options.
Note: You should not use the WebUI to view log files greater than 2 MB. Select Log properties to
adjust the maximum file size, or download the file to view.
Note: NFS logging is disabled by default. Enable NFS logging using the NAS Management
Console. NFS stops logging when the log file is full.
24 NAS 1500s and 500s Administration Guide
Page 25

Using Remote Desktop
Remote Desktop is provided in the WebUI to allow for additional remote system
administration and the use of approved third-party applications. Backup software and antivirus
programs are examples of approved applications.
To open a Remote Desktop session from the WebUI, select Maintenance, Remote Desktop.
A Remote Desktop session is opened. Enter the appropriate password to log on to the server.
Basic Administrative Procedures and Setup Completion
Figure 8: Remote Desktop session
Caution: Two open sessions of Remote Desktop are allowed to operate at the same time.
After completing an application do not use the window close feature ( ) to close that
session of Remote Desktop. Click Start/Log Off Administrator to exit Remote Desktop.
Improper closure of Remote Desktop
Certain operations can leave the utilities running if the browser is closed versus exiting from
the program via the application menu or logging off the Remote Desktop session. A maximum
of two Remote Desktop sessions may be used at any given time. Improper exit from a session
can result in the sessions becoming consumed. Sessions and processes can be terminated using
the Terminal Services Manager via Start >Programs >Administrator Tools.
Note: The Terminal Services Manager must be accessed via the direct attached console.
25NAS 1500s and 500s Administration Guide
Page 26

Basic Administrative Procedures and Setup Completion
Setting up E-mail alerts
E-mail messages are limited to the alerts generated from the WebUI status bar or the WebUI
status page, as well as some event log messages. Some alerts, such as the restart of the server,
only occur if the WebUI was utilized to initiate the request. For example, a restart initiated
using the WebUI will generate an e-mail message indicating a restart has occurred. Initiating a
restart using the Windows Storage Server 2003 schedule or Desktop will not. Messaging in the
status bar and page is limited to the following areas:
■ WebUI Alerts
— NTBackup backup started
— NTBackup restore started
— Defrag started
— UPS power failure
— Restart pending
— Shutdown pending
— DFS not configured
— Date and time not configured
— No certificate
— Quota management alerts
■ Event Log Messages
— NTBackup Information
— UPS power failed
— UPS power restored
— UPS invalid config
— UPS system shutdown
— Quota management alerts
To activate this option:
1. From the WebUI, select Maintenance. Then select Alert E-mail. The Set Alert E-Mail
page is displayed.
2. Select Enable Alert E-mail.
3. Indicate the types of messages to be sent.
■ Critical alerts
■ Warning alerts
■ Informational alerts
4. Enter the desired e-mail address in the appropriate boxes.
5. After all settings have been entered, click OK.
26 NAS 1500s and 500s Administration Guide
Page 27
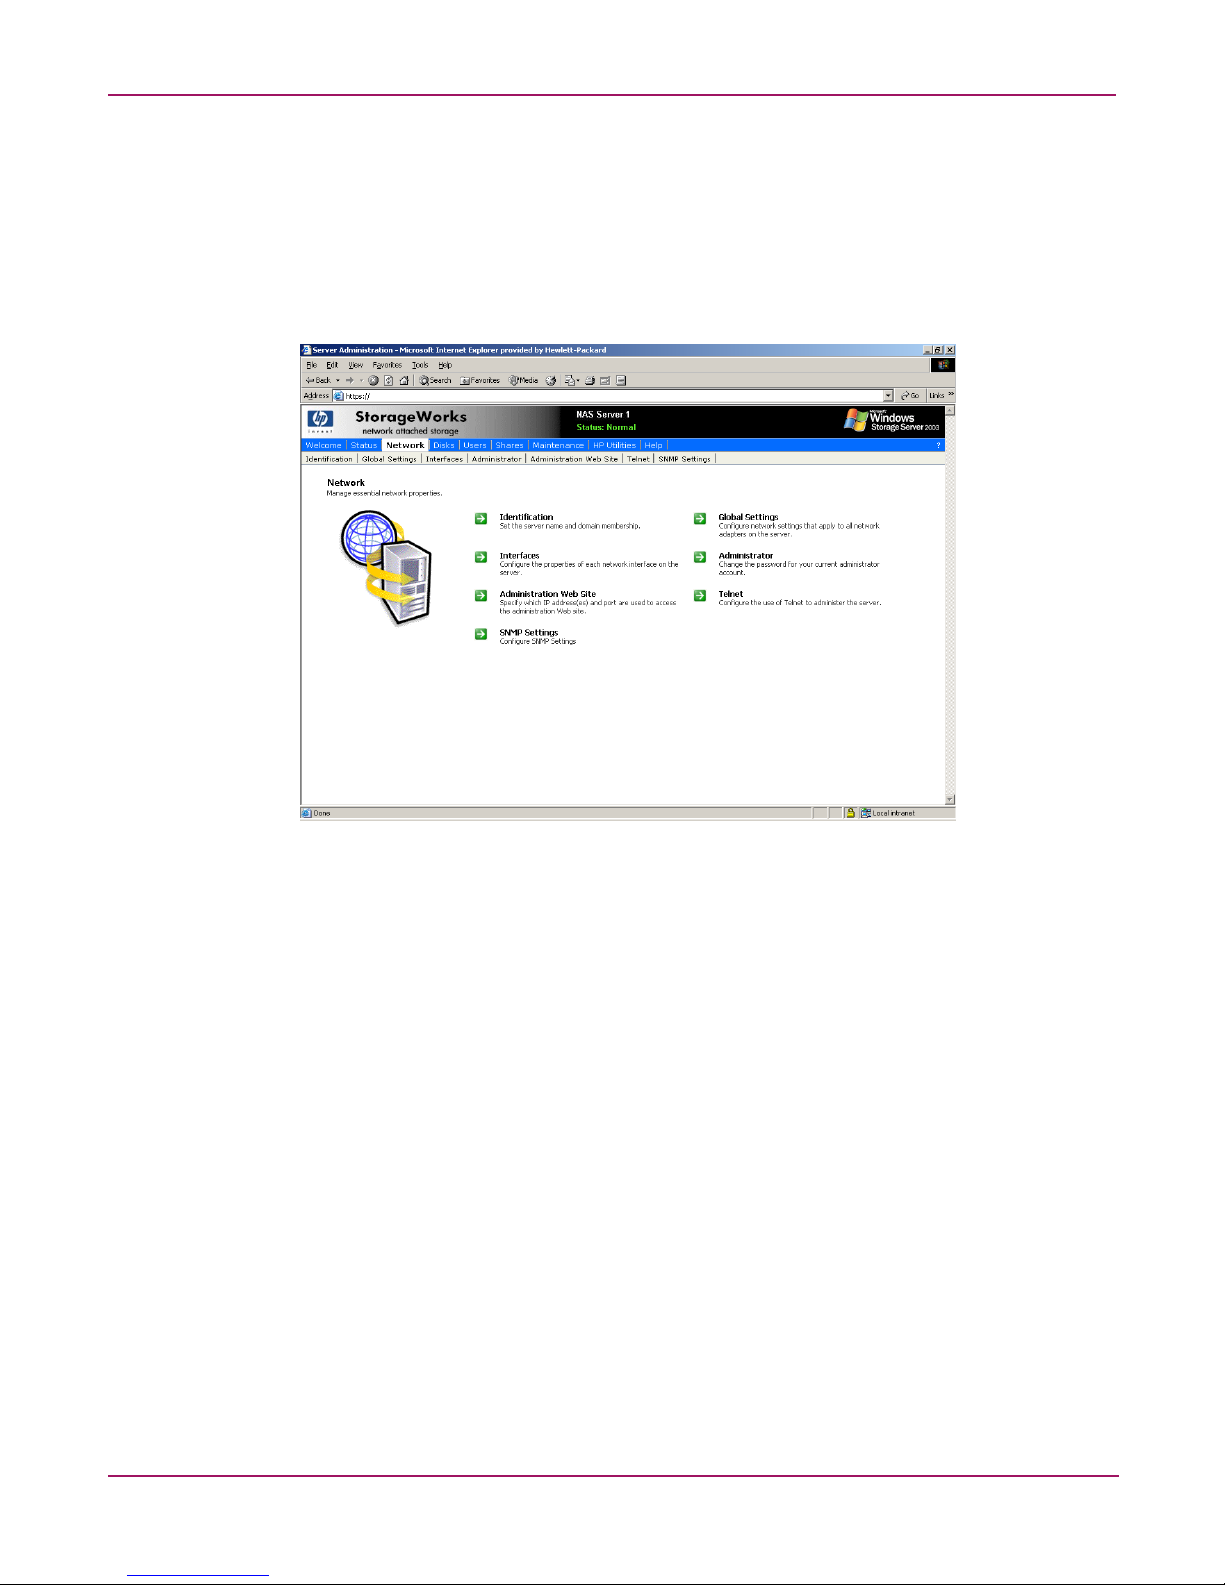
Changing system network settings
Network properties are entered and managed from the Network menu. Most of these settings
are entered as part of the Rapid Startup process. Settings made from this menu include adding
the NAS server to a domain.
Online help is available for these settings. Figure 9 is an illustration of the Network settings
menu.
Basic Administrative Procedures and Setup Completion
Figure 9: Network menu
27NAS 1500s and 500s Administration Guide
Page 28

Basic Administrative Procedures and Setup Completion
Setup completion
After the NAS device is physically set up and the basic configuration is established, additional
setup steps must be completed. Depending on the deployment scenario of the NAS device,
these steps may vary.
Additional setup steps may include:
■ Managing system storage
■ Creating and managing users and groups
■ Creating and managing file shares
Each of these setup steps is discussed in the following sections.
Managing system storage
The NAS administrator uses Disk Management to manage volumes, and Shadow Copies to
manage snapshots. See the following chapters for more detailed information on managing
system storage:
■ Chapter 3 discusses disk management procedures
■ Chapter 4 discusses snapshot (shadow copy) management procedures.
■ Chapter 6 discusses folder and share management procedures.
Creating and managing users and groups
User and group information and permissions determine whether a user can access files. If the
NAS device is deployed into a workgroup environment, this user and group information is
stored locally on the device. By contrast, if the NAS device is deployed into a domain
environment, user and group information is stored on the domain.
To enter local user and group information, see Chapter 5.
Creating and managing file shares
Files shares must be set up, granting and controlling file access to users and groups. See
Chapter 6 for complete information on managing file shares.
UNIX specific information is discussed in the “Microsoft Services for NFS” chapter.
28 NAS 1500s and 500s Administration Guide
Page 29
Volume Management
The process of creating storage elements and presenting them to the NAS OS is facilitated by
the use of the WebUI. This chapter documents the contents of the WebUI for volume
management.
WebUI Disks tab
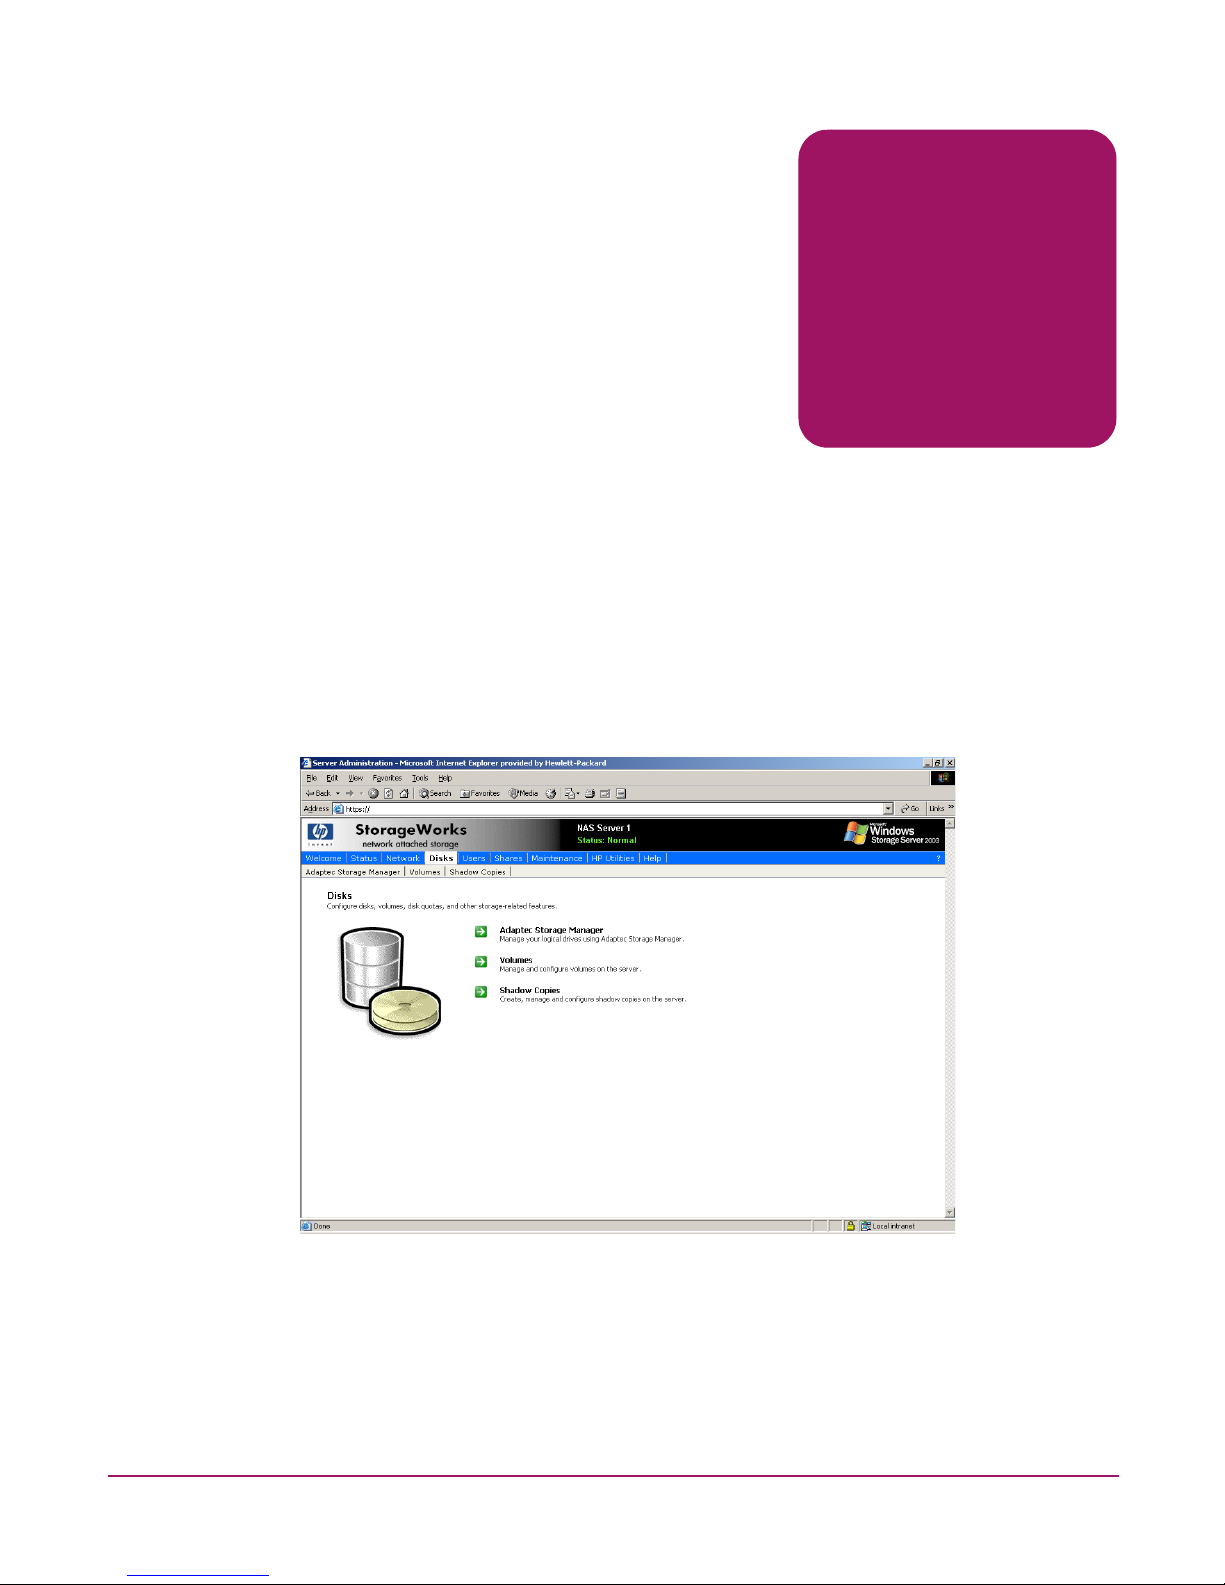
The primary web page for facilitating disks and volume creation is illustrated in Figure 10.
From this page the administrator can create and manage volumes via the WebUI.
To manage volumes via the WebUI, click on Disks.
3
Figure 10: Disks tab
29NAS 1500s and 500s Administration Guide
Page 30
Volume Management
The Disks tab contains the following task items for configuring the NAS device:
Table 2: Disks Tab Options
Option Task
Adaptec Storage Manager Manage logical drives and view information about
managed systems, controllers, disk groups, and so on.
Volumes Manage disk space usage by enabling quotas, scheduling
disk defragmentation, and performing detailed volume
management using the Manage item.
Shadow Copies Manage shadow copies of shared folders on the volume.
Shadow copies are read-only copies of shared data that
provide users with a way to view, and, if necessary, restore
to previous versions of files.
30 NAS 1500s and 500s Administration Guide
Page 31

Disk Management utility
When the Advanced Volume Management button on the Volumes screen is selected, the
Disk Management Utility is opened after administrator login.
The Disk Management tool is a system utility for managing hard disks and the volumes, or
partitions, that they contain. Disk Management is used to initialize disks, create volumes,
format volumes with the FAT, FAT32, or NTFS file systems, and create fault-tolerant disk
systems. Most disk-related tasks can be preformed in Disk Management without restarting the
system or interrupting users; most configuration changes take effect immediately. A complete
online help facility is provided with the Disk Management Utility for assistance in using the
product.
Volume Management
Figure 11: Disk Management utility
Note: When the Disk Management utility is accessed, the Remote Desktop connection assumes a
dedicated mode and can only be used to manage disks and volumes on the server. Navigating to
another page during an open session closes the session.
Note: It may take a few moments for the Remote Desktop Connection session to log off when closing
Disk Management.
31NAS 1500s and 500s Administration Guide
Page 32

Volume Management
Disk Management guidelines
When managing disks and volumes:
■ Read the online Disk Management Help found in the utility.
■ Do not alter the Operating System Disk labeled Primary OS C: and Secondary OS D:.
■ Use meaningful volume labels with the intended drive letter embedded in the volume
label, if possible. For example, volume F: might be named “Disk F:.” Volume labels often
serve as the only means of identification.
■ Record all volume labels and drive letters in case of system Quick Restore.
■ When managing basic disks, only the last partition on the disk can be extended unless the
disk is changed to dynamic.
■ Basic disks can be converted to dynamic without bringing the system offline or loss of
data, but the volume will be unavailable during the conversion.
■ Basic disks can contain up to four primary partitions (or three primary partitions and one
extended partition).
■ Format drives with a 16 K allocation size for best support of snapshots, performance, and
defragmentation.
■ NTFS formatted drives are recommended since they provide the greatest level of support
for snapshots, encryption, and compression.
■ Only basic disks can be formatted as FAT or FAT32.
Note: The Data Volume is configured by default as a hardware RAID-5 based basic partition across
all four disks and is formatted as NFTS with a 16K allocation unit size.
32 NAS 1500s and 500s Administration Guide
Page 33
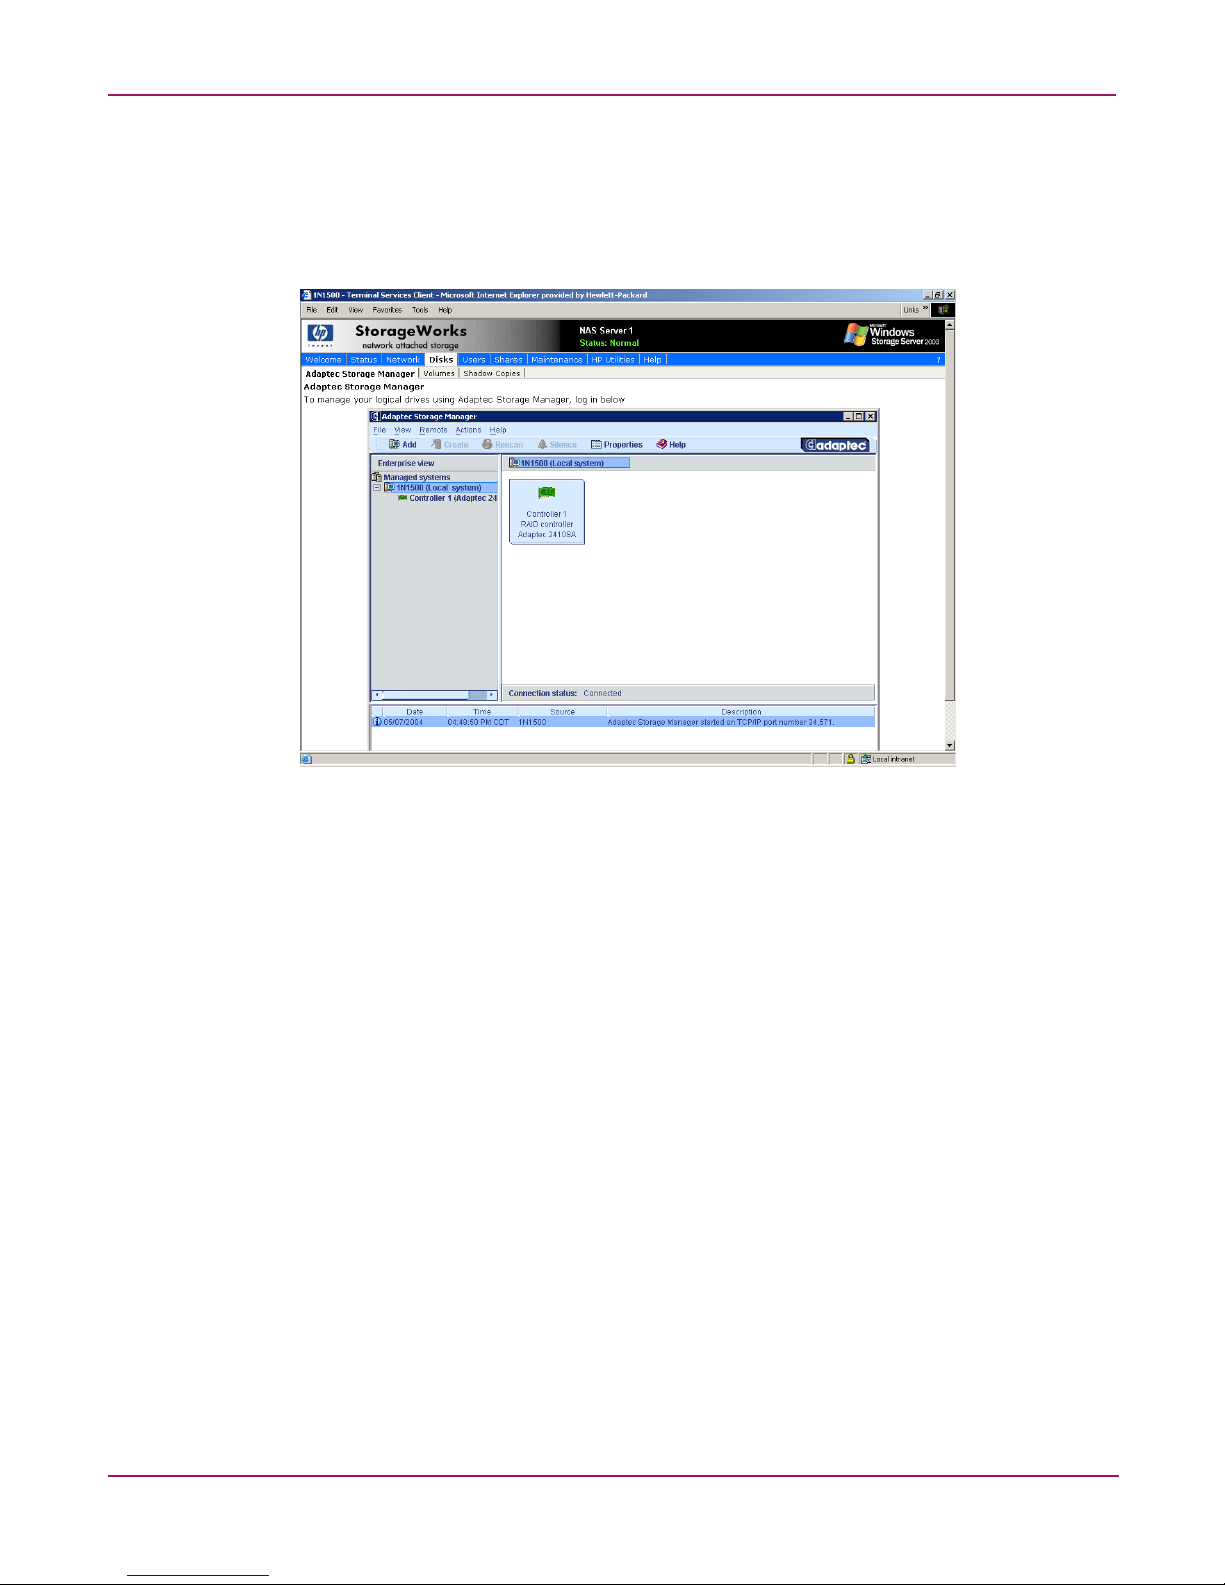
Adaptec Storage Manager
Use the Adaptec Storage Manager to configure, administer, and monitor controllers that are
installed locally or remotely in servers or storage enclosures. There is an extensive Help
system available in the application.
Volume Management
Figure 12: Adaptec Storage Manager
33NAS 1500s and 500s Administration Guide
Page 34

Volume Management
Volumes page
On the Volumes page, administrators can manage volumes, schedule defragmentation, and set
or manage quotas. The Volumes page displays all volumes that are formatted NTFS on the
system. It does not display the volume type (for example simple or spanned) nor volumes that
are FAT32 or FAT. To display these types of volumes, click the Manage button.
Figure 13: Volumes tab
Table 3: Volumes Page Object/Task Selector
Option Task
Advanced Volume
Management
Schedule Defrag Select to schedule defragmentation for the selected volume.
Set Default Quota Select to set quota limits to manage use of the volume. Settings on this
Set Quota Entries Select to show a list of user quota entries. Then create a new quota entry,
Select to display the Disk Management utility.
page apply to new users and any users for whom user quota entries
have not previously been set.
delete a quota entry, or view the properties of a quota entry.
34 NAS 1500s and 500s Administration Guide
Page 35

Scheduling defragmentation
Defragmentation is the process of analyzing local volumes and consolidating fragmented files
and folders so that each occupies a single, contiguous space on the volume. This improves file
system performance. Because defragmentation consolidates files and folders, it also
consolidates the free space on a volume. This reduces the likelihood that new files will be
fragmented.
Defragmentation for a volume can be scheduled to occur automatically at convenient times.
Defragmentation can also be done once, or on a recurring basis.
To schedule defragmentation for a volume:
1. On the primary navigation bar, choose Disks.
2. Click the Vo lu m es tab.
3. Select the volume to schedule defragmentation.
4. In the Tasks list, choose Schedule Defrag.
5. On the Manage the defragmentation schedule for [VolumeName] page, select the
Schedule defragmentation for this volume check box.
6. Select the frequency: Once, Weekly, or Monthly.
7. Use the remaining controls to specify when defragmentation will occur. The available
controls change according to the frequency that is selected.
8. Click OK.
Volume Management
To disable defragmentation for a volume:
1. On the primary navigation bar, click Disks.
2. Click Vo lu m es .
3. Select the volume to disable defragmentation.
4. In the Tasks list, choose Schedule Defrag.
5. On the Manage the defragmentation schedule for [VolumeName] page, clear the
Schedule defragmentation for this volume check box.
6. Click OK.
Note: Scheduling defragmentation to run no later than a specific time prevents the defragmentation
process from running later than that time. If the defragmentation process is running when the time is
reached, the process is stopped. This setting is useful to ensure that the defragmentation process ends
before the demand for server access is likely to increase.
35NAS 1500s and 500s Administration Guide
Page 36
Volume Management
Disk quotas
If defragmenting volumes on which shadow copies are enabled, use a cluster (or allocation
unit) size of 16 KB or larger during the format. Otherwise defragmentation registers as a
change by the Shadow Copy process. This increase in the number of changes forces Shadow
Copy to delete snapshots as the limit for the cache file is reached.
Caution: Allocation unit size cannot be altered without reformatting the drive. Data on a
reformatted drive cannot be recovered.
Note: NTFS compression is supported only if the cluster size is 4 KB or smaller.
Disk quotas track and control disk space use in volumes.
Note: To limit the size of a folder or share, see “Directory Quotas” in Chapter 6.
Configure the volumes on the server to perform the following tasks:
■ Prevent further disk space use and log an event when a user exceeds a specified disk space
limit.
■ Log an event when a user exceeds a specified disk space warning level.
When enabling disk quotas, it is possible to set both the disk quota limit and the disk quota
warning level. The disk quota limit specifies the amount of disk space a user is allowed to use.
The warning level specifies the point at which a user is nearing his or her quota limit. For
example, a user's disk quota limit can be set to 50 megabytes (MB), and the disk quota warning
level to 45 MB. In this case, the user can store no more than 50 MB on the volume. If the user
stores more than 45 MB on the volume, the disk quota system logs a system event.
In addition, it is possible to specify that users can exceed their quota limit. Enabling quotas
and not limiting disk space use is useful to still allow users access to a volume, but track disk
space use on a per-user basis. It is also possible to specify whether or not to log an event when
users exceed either their quota warning level or their quota limit.
When enabling disk quotas for a volume, volume usage is automatically tracked from that
point forward, but existing volume users have no disk quotas applied to them. Apply disk
quotas to existing volume users by adding new quota entries on the Quota Entries page.
Enabling quota management
When enabling disk quotas on a volume, every user’s disk volume usage is monitored and
treated differently, depending on the quota management settings for the specific user.
To enable quota management on a volume:
1. On the primary navigation bar, click Disks.
2. Click Vo lu m es .
3. Select the volume to manage.
4. In the Tasks list, click Set Default Quota.
36 NAS 1500s and 500s Administration Guide
Page 37

Volume Management
5. On the Default Quota for volume page, select Use quota limits to manage use of the
volume.
6. If desired, select Deny disk space to users exceeding quota limit to enable that
restriction.
7. Specify the default quota limit and warning level for new users on this volume.
8. Specify which quota events should be logged.
9. Click OK.
Note: When enabling disk quotas on a volume, any users with write access to the volume who have
not exceeded their quota limit can store data on the volume. The first time a user writes data to a
quota-enabled volume, default values for disk space limit and warning level are automatically
assigned by the quota system.
To disable quota management on a volume:
1. On the primary navigation bar, click Disks.
2. Click Vo lu m es .
3. Select the volume to manage.
4. In the Tasks list, click Set Default Quota.
5. On the Default Quota for (volume) page, clear the check box to Use quota limits to
manage use of the volume.
6. Click OK.
37NAS 1500s and 500s Administration Guide
Page 38
Volume Management
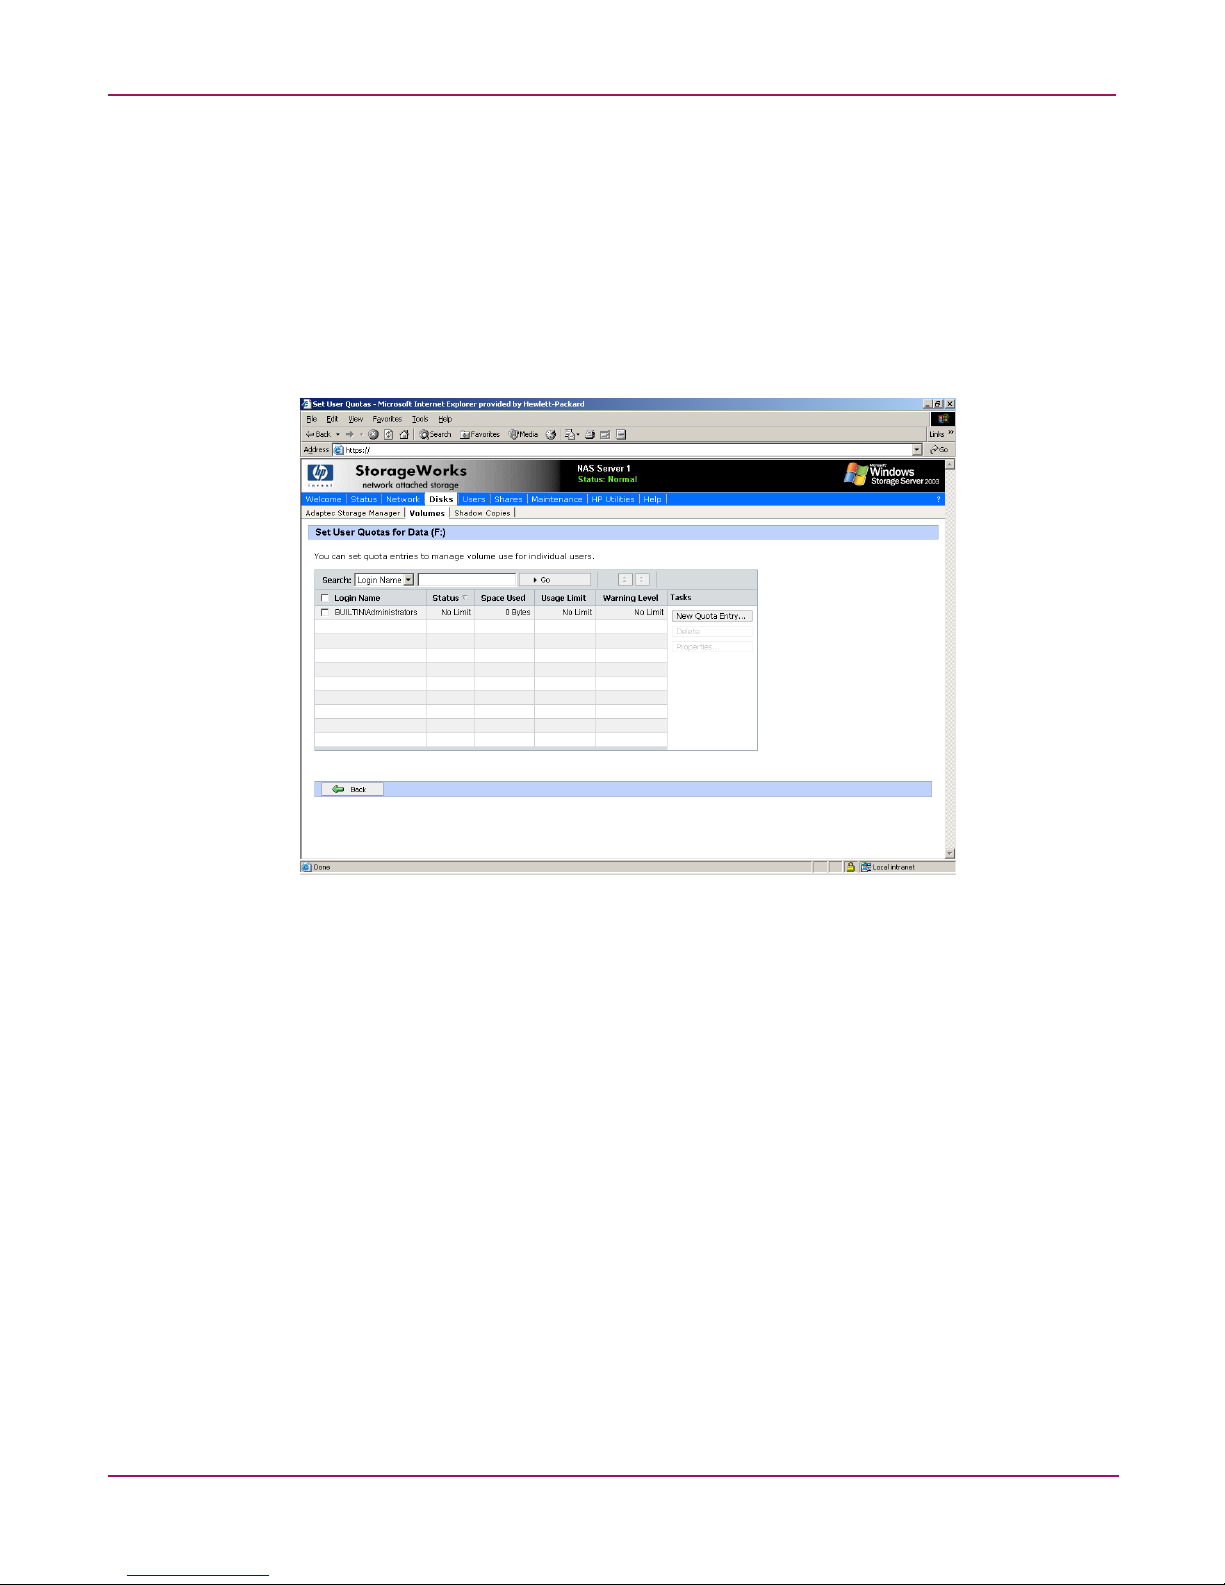
Setting user quota entries
The Set User Quotas page allows the administrator to set, delete, or change disk quotas for any
user on the server. To set or change quota entries on the server:
1. On the primary navigation bar, click Disks.
2. Click Vo lu m es .
3. Select the volume to manage.
4. From the Tasks list, click Set Quota Entries.
Figure 14: Setting user quotas
38 NAS 1500s and 500s Administration Guide
Page 39

To create a new user quota entry:
1. Click New Quota Entry.
2. Select a user.
3. Set the limit.
4. Set the warning level.
5. Click OK.
Volume Management
Figure 15: Add new quota entry
To change a quota entry:
1. Select the quota to change.
2. Click Properties.
3. Change the limit.
4. Change the warning level.
5. Click OK.
To delete a quota entry:
1. Select the quota to change.
2. Click Delete.
39NAS 1500s and 500s Administration Guide
Page 40

Volume Management
DiskPart
DiskPart.exe is a text-mode command interpreter that enables the administrator to manage
disks, partitions, or volumes.
When using the list commands, an asterisk (*) appears next to the object with focus. Select an
object by its number or drive letter, such as disk 0, partition 1, volume 3, or volume C.
When selecting an object, the focus remains on that object until a different object is selected.
For example, if the focus is set on disk 0 and volume 8 on disk 2 is selected, the focus shifts
from disk 0 to disk 2, volume 8. Some commands automatically change the focus. For
example, when creating a new partition, the focus automatically switches to the new partition.
Focus can only be given to a partition on the selected disk. When a partition has focus, the
related volume (if any) also has focus. When a volume has focus, the related disk and partition
also have focus if the volume maps to a single specific partition. If this is not the case, focus on
the disk and partition is lost.
Table 4: Common DiskPart Commands
Command Description
add disk
assign
convert basic
convert dynamic
create volume
simple
exit
help
list disk
list partition
list volume
rem
retain
select disk
Mirrors the simple volume with focus to the specified disk.
Assigns a drive letter or mount point to the volume with focus.
Converts an empty dynamic disk to a basic disk.
Converts a basic disk into a dynamic disk. Any existing partitions on
the disk become simple volumes.
Creates a simple volume. After creating the volume, the focus
automatically shifts to the new volume.
Exits the DiskPart command interpreter.
Displays a list of the available commands.
Displays a list of disks and information about them, such as their size,
amount of available free space, whether the disk is a basic or dynamic
disk, and whether the disk uses the master boot record (MBR) or GUID
partition table. The disk marked with an asterisk (*) has focus.
Displays the partitions listed in the partition table of the current disk.
On dynamic disks these partitions may not correspond to the dynamic
volumes on the disk. This discrepancy occurs because dynamic disks
contain entries in the partition table for the system volume or boot
volume (if present on the disk). They also contain a partition that
occupies the remainder of the disk in order to reserve the space for use
by dynamic volumes.
Displays a list of basic and dynamic volumes on all disks.
Provides a way to add comments to a script.
Prepares an existing dynamic simple volume to be used as a boot or
system volume.
Selects the specified disk and shifts the focus to it.
Note: The Data Volume is configured by default as a RAID-5 volume across all four disks and is
formatted as NFTS with a 16K allocation unit size.
40 NAS 1500s and 500s Administration Guide
Page 41

For a complete list of DiskPart commands, go to the Windows Storage Server 2003 Desktop
on the NAS device via Remote Desktop and select Start >Help and Support, search on
DiskPart.
Example of using DiskPart
The following example shows how to configure a volume on the NAS server.
In the cmd window, type:
c:\>diskpart
DISKPART>Rescan
DISKPART>select disk 2
DISKPART>convert dynamic
DISKPART>REM Create a simple volume
DISKPART>create volume simple size=4000
DISKPART> REM Assign drive letter F: to the volume
DISKPART>assign letter=F
DISKPART>list vol
DISKPART>Exit
Volume Management
41NAS 1500s and 500s Administration Guide
Page 42

Volume Management
42 NAS 1500s and 500s Administration Guide
Page 43

Shadow Copies
Overview
The Volume Shadow Copy Service provides an infrastructure for creating point-in-time
snapshots (shadow copies) of volumes. Shadow Copy supports 64 shadow copies per volume.
A shadow copy contains previous versions of the files or folders contained on a volume at a
specific point in time. While the Shadow Copy mechanism is managed at the server (see the
“Managing Shadow Copy” section in this chapter), previous versions of files and folders are
only available over the network from clients and are seen on a per folder or file level and not as
an entire volume.
The Shadow Copy feature works at the block level. As changes are made to the file system, the
Shadow Copy Service copies out the original blocks to a special cache file, to maintain a
consistent view of the file at a particular point in time. Since the snapshot only contains a
subset of the original blocks, the cache file is typically smaller than the original volume. In the
snapshot’s original form, it takes up no space since blocks are not moved until an update to the
disk occurs.
By using shadow copies, a NAS server can maintain a set of previous versions of all files on
the selected volumes. End users access the file or folder by using a separate client add-on
program, which enables them to view the file in Windows Explorer. Accessing previous
versions of files, or shadow copies, enables users to:
4
■ Recover files that were accidentally deleted. Previous versions can be opened and copied
to a safe location.
■ Recover from accidentally overwriting a file. A previous version of that file can be
accessed.
■ Compare several versions of a file while working. Use previous versions to compare
changes between two versions of a file.
Shadow copies cannot replace the current backup, archive, or business recovery system, but
they can help to simplify restore procedures. Since a snapshot only contains a portion of the
original data blocks, shadow copies can not protect against data loss due to media failures.
However the strength of snapshots is the ability to instantly recover data from shadow copies,
reducing the number of times needed to restore data from tape.
43NAS 1500s and 500s Administration Guide
Page 44

Shadow Copies
Shadow copy planning
Before setup is initiated on the server and the client interface is made available to end users,
consider the following:
■ From what volume will shadow copies be taken?
■ How much disk space should be allocated for shadow copies?
■ Will separate disks be used to store shadow copies?
■ How frequently will shadow copies be made?
Identifying the volume
Shadow copies are taken for a complete volume, but not for a specific directory. Shadow
copies work best when the server stores user files, such as documents, spreadsheets,
presentations, graphics, or database files.
Note: Shadow copies should not be used to provide access to previous versions of application or
e-mail databases.
Shadow copies are designed for volumes that store user data such as home directories and My
Documents folders that are redirected by using Group Policy or other shared folders in which
users store data.
Shadow copies work with compressed or encrypted files and retain whatever permissions were
set on the files when the shadow copies were taken. For example, if a user is denied permission
to read a file, that user would not be able to restore a previous version of the file, or be able to
read the file after it has been restored.
Although shadow copies are taken for an entire volume, users must use shared folders to
access shadow copies. Administrators on the local server must also specify the
\\servername\sharename path to access shadow copies. If administrators or end users want to
access a previous version of a file that does not reside in a shared folder, the administrator
must first share the folder.
Note: Shadow copies are available only on NTFS, not FAT or FAT32 volumes.
Files or folders that are recorded by using Shadow Copy appear static, even though the original
data is changing.
Allocating disk space
When shadow copies are enabled on a volume, the maximum amount of volume space to be
used for the shadow copies can be specified. The default limit is 10 percent of the source
volume (the volume being copied). The limit for volumes in which users frequently change
files should be increased. Also, note that setting the limit too low causes the oldest shadow
copies to be deleted frequently, which defeats the purpose of shadow copies and frustrates
users.
44 NAS 1500s and 500s Administration Guide
Page 45

Shadow Copies
If the frequency of changes to each file is greater than the amount of space allocated to storing
shadow copies, then no shadow copy is created. Therefore, administrators should carefully
consider the amount of disk space they want to set aside for shadow copies, and keep in mind
user expectations of how many versions they will want to have available. End users might
expect only a single shadow copy to be available, or they might expect three days or three
weeks worth of shadow copies. The more shadow copies users expect, the more storage space
administrators must allocate for storing them.
Setting the limit too low also affects Backup and other backup programs that use shadow copy
technology because these programs are also limited to using the amount of disk space
specified by administrators.
Note: Regardless of the volume space that is allocated for shadow copies, there is a maximum of
64 shadow copies for any volume. When the 65th shadow copy is taken, the oldest shadow copy is
purged.
The minimum amount of storage space that can be specified is 100 megabytes (MB). The
default storage size is 10% of the source volume (the volume being copied). If the shadow
copies are stored on a separate volume, change the default to reflect the space available on the
storage volume instead of the source volume. Remember that when the storage limit is
reached, older versions of the shadow copies are deleted and cannot be restored.
When determining the amount of space to allocate for storing shadow copies, consider both
the number and size of files that are being copied, as well as the frequency of changes between
copies. For example, 100 files that only change monthly require less storage space than 10
files that change daily.
To change the storage volume, shadow copies must be deleted. The existing file change history
that is kept on the original storage volume is lost. To avoid this problem, verify that the storage
volume that is initially selected is large enough.
When using a basic disk as a storage area for shadow copies and converting the disk into a
dynamic disk, it is important to take the following precaution to avoid data loss:
■ If the disk is a non-boot volume and is a different volume from where the original files
reside, first dismount and take offline the volume containing the original files before
converting the disk containing shadow copies to a dynamic disk.
■ The volume containing the original files must be brought back online within 20 minutes,
otherwise, the data stored in the existing shadow copies is lost.
■ If the shadow copies are located on a boot volume, the disk to can be converted to dynamic
without losing shadow copies.
Note: Use the mountvol command with the /p option to dismount the volume and take it offline.
Mount the volume and bring it online using the mountvol command or the Disk Management
snap-in.
45NAS 1500s and 500s Administration Guide
Page 46

Shadow Copies
Identifying the storage area
To store the shadow copies of another volume on the same file server, a volume can be
dedicated on separate disks. For example, if user files are stored on H:\, another volume such
as S:\ can be used to store the shadow copies. Using a separate volume on separate disks
provides better performance and is recommended for heavily used NAS devices.
If a separate volume will be used for the storage area (where shadow copies are stored), the
maximum size should be changed to No Limit to reflect the space available on the storage area
volume instead of the source volume (where the user files are stored).
Disk space for shadow copies can be allocated on either the same volume as the source files or
a different volume. There is, however, a trade-off between ease of use and maintenance versus
performance and reliability that the system administrator must consider.
For example, by keeping the shadow copy on the same volume, although there is a potential
gain in ease of setup and maintenance, there may be a reduction in performance and reliability.
Caution: If shadow copies are stored on the same volume as the user files, note that a burst
of disk input/output (I/O) can cause all shadow copies to be deleted. If the sudden deletion
of shadow copies is unacceptable to administrators or end users, it is best to use a separate
volume on separate disks to store shadow copies.
Determining creation frequency
The more frequently shadow copies are created, the more likely that end users will get the
version that they want. However, with a maximum of 64 shadow copies per volume, there is a
trade-off between the frequency of making shadow copies and the amount of time that the
earlier files will be available.
By default, the NAS server will create shadow copies at 0700 and 1200, Monday through
Friday when the feature is enabled for a volume. However, these settings are easily modified
by the administrator so that the shadow copy schedule can better accommodate end user needs.
To modify these schedules see the section on “Shadow Copy Schedules” documented later in
this chapter.
Note: The more shadow copies are created, the more disk space the shadow copies can consume,
especially if files change frequently.
46 NAS 1500s and 500s Administration Guide
Page 47

Shadow copies and drive defragmentation
When running Disk Defragmenter on a volume with shadow copies activated, all or some of
the shadow copies may be lost, starting with the oldest shadow copies.
If defragmenting volumes on which shadow copies are enabled, use a cluster (or allocation
unit) size of 16 KB or larger. Utilizing this allocation unit size reduces the number of copy outs
occurring on the snapshot. Otherwise the number of changes caused by the defragmentation
process can cause shadow copies to be deleted faster than expected. Note, however, that NTFS
compression is supported only if the cluster size is 4 KB or smaller.
Note: To check the cluster size of a volume, use the fsutil fsinfo ntfsinfo command. To
change the cluster size on a volume that contains data, backup the data on the volume, reformat it
using the new cluster size, and then restore the data.
Mounted drives
A mounted drive is a local volume attached to an empty folder (called a mount point) on an
NTFS volume. When enabling shadow copies on a volume that contains mounted drives, the
mounted drives are not included when shadow copies are taken. In addition, if a mounted drive
is shared and shadow copies are enabled on it, users cannot access the shadow copies if they
traverse from the host volume (where the mount point is stored) to the mounted drive.
For example, assume there is a folder F:\data\users, and the Users folder is a mount point for
G:\. If shadow copies are enabled on both F:\ and G:\, F:\data is shared as \\server1\data, and
G:\data\users is shared as \\server1\users. In this example, users can access previous versions
of \\server1\data and \\server1\users but not \\server1\data\users.
Shadow Copies
47NAS 1500s and 500s Administration Guide
Page 48

Shadow Copies
Managing shadow copies
From the WebUI Welcome screen, click Disks, then Shadow Copies to display the Shadow
Copies screen.
Figure 16: Shadow Copies screen
Table 5: Shadow Copies Fields
Field Description
Volume Lists all volumes of the server on which the Shadow Copies service can be
used. Only NTFS file system data volumes that are physically located on
the server can support shadow copies. To manage shadow copies on a
volume, select the check box next to the volume name, and then choose a
task from the Tasks list.
Copies Lists the number of shadow copies on the volume.
Used Space Lists the total disk space that is used by the shadow copies on the volume.
Shares Lists the number of shared folders that reside on the volume. This
information can help determine whether to enable shadow copies on a
volume. A greater number of shared folders on a volume increases the
likelihood that users might need access to previous versions of their data.
Next Run Time If the Shadow Copies service is enabled on the volume, this column lists
the time and date the next shadow copy will be created. Otherwise, it
displays Disabled.
48 NAS 1500s and 500s Administration Guide
Page 49

Table 6: Shadow Copies Tasks
Task Description
Enable Click to enable Shadow Copies on the selected volume.
Disable Click to enable Shadow Copies on the selected volume.
New Shadow Copy Click to immediately create a new shadow copy on the selected volume.
View Shadow
Copies
Set Schedule Click to set the time and frequency of shadow copies.
Properties... Click to view the shadow copy properties of the selected volume,
Manage Shares Click to go to the Shared Folders screen.
The shadow copy cache file
The default shadow copy settings allocate 10% of the source volume being copied (with a
minimum of 100 MB), and store the shadow copies on the same volume as the original
volume. See Figure 17. The cache file is located in a hidden protected directory entitled
“System Volume Information” off of the root of each volume for which Shadow Copy is
enabled.
Shadow Copies
Click to view a list of shadow copies on the selected volume.
including location and size of the cache file.
F:
cache file
G:
cache file
H:
cache file
Figure 17: Shadow copies stored on source volume
As mentioned previously, the cache file location can be altered to reside on a dedicated volume
separate from the volumes containing files shares. See Figure 18.
49NAS 1500s and 500s Administration Guide
Page 50

Shadow Copies
F:
G: H:
L:
cache file
cache file
cache file
Figure 18: Shadow copies stored on separate volume
The main advantage to storing shadow copies on a separate volume is ease of management and
performance. Shadow copies on a source volume must be continually monitored and can
consume space designated for file sharing. Setting the limit too high takes up valuable storage
space. Setting the limit too low can cause shadow copies to be purged too soon, or not created
at all. By storing shadow copies on a separate volume space for Shadow Copies may be
manage separately, limits can generally be set higher, or set to No Limit. See the properties tab
of the shadow copy page for a volume to alter the cache file location, covered later in this
chapter.
Caution: If the data on the separate volume L: is lost, the shadow copies cannot be
recovered.
50 NAS 1500s and 500s Administration Guide
Page 51

Enabling and creating shadow copies
Enabling the Shadow Copies service for a volume or creating a shadow copy can be done
directly from the Manage Shadow Copies page.
Enabling shadow copies on a volume automatically results in several actions:
■ Creates a shadow copy of the selected volume
■ Sets the maximum storage space for the shadow copies
■ Schedules shadow copies to be made at 7 A.M. and 12 noon on weekdays.
Note: Creating a shadow copy only makes one copy of the volume; it does not create a schedule.
To enable shadow copies on a volume:
1. On the primary navigation bar, click Disks.
2. Click the Shadow Copies tab.
3. On the Manage Shadow Copies page, select one or more volumes to enable the Shadow
Copies service on.
Shadow Copies
Note: After the first shadow copy is created, it cannot be relocated. Relocate the cache file by
altering the cache file location under Properties prior to enabling shadow copy. See “Viewing
Shadow Copy Properties” in this chapter.
4. Click Enable.
To create a shadow copy on a volume:
1. On the primary navigation bar, click Disks.
2. Click the Shadow Copies tab.
3. On the Manage Shadow Copies page, select one or more volumes to create the shadow
copies on.
4. Click New Shadow Copy.
Viewing a list of shadow copies
To view a list of shadow copies on a volume:
1. On the primary navigation bar, click Disks.
2. Click the Shadow Copies tab.
3. On the Manage Shadow Copies page, select the volume to view.
4. On the Tasks list, click View Shadow Copies.
All shadow copies are listed, sorted by the date and time they were created.
Note: It is also possible to create new shadow copies or delete shadow copies from this page.
51NAS 1500s and 500s Administration Guide
Page 52

Shadow Copies
Set schedules
Shadow Copy schedules control how frequently shadow copies of a volume are made. There
are a number of factors that can help determine the most effective shadow copy schedule for an
organization. These include the work habits and locations of the users. For example, if users do
not all live in the same time zone, or they work on different schedules, it is possible to adjust
the daily shadow-copy schedule to allow for these differences.
It is recommended that shadow copies be scheduled not more frequently than once per hour.
Scheduling shadow copies
When the Shadow Copies service is enabled on a volume, it automatically schedules shadow
copies to be made each weekday at 7 A.M. and 12 noon.
To add or change a shadow copy schedule for a volume:
1. On the primary navigation bar, click Disks.
2. Click Shadow Copies.
3. Select the volume.
4. In the Tasks list, click Set Schedule.
5. On the Shadow Copy Schedules page, click New.
6. Select a frequency: Once, Daily, Weekly, or Monthly.
7. Use the remaining controls to specify the recurrence pattern and the starting date and time.
The available controls change according to the frequency selected.
8. Click OK.
Deleting a shadow copy schedule
To delete a shadow copy schedule on a volume:
1. On the primary navigation bar, click Disks.
2. Click the Shadow Copies tab.
3. Select the volume on which to delete a shadow copy schedule.
4. In the Tasks list, click Set Schedule.
5. On the Manage Shadow Copy Schedules screen, select the schedule to be deleted, and
click Delete.
6. Click OK to confirm the deletion or Cancel to retain the copy.
Note: When deleting a shadow copy schedule, that action has no effect on existing shadow copies.
To remove schedules and all shadow copies in one action, from the Manage Shadow Copies page,
choose Disable from the Tasks list.
Viewing shadow copy properties
To view shadow copy properties on a volume:
1. On the primary navigation bar, click Disks.
2. Click the Shadow Copies tab.
52 NAS 1500s and 500s Administration Guide
Page 53

Shadow Copies
3. On the Manage Shadow Copies page, select the volume on which to view shadow copy
properties.
4. On the Tasks list, click Properties.
The Shadow Copy Properties screen, as shown in Figure 19, lists the number of copies, the
date and time the most recent shadow copy was made, and the maximum size setting.
Change the maximum size limit for all shadow copies, or choose No limit.
For volumes where shadow copies do not exist currently, it is possible to change the
location of the cache file. See “The Shadow Copy Cache File” earlier in this chapter. The
list of available disks and the space available on each is presented at the bottom of the
page. Managing the cache files on a separate disk is recommended.
Note: If shadow copies have already been enabled, the cache file location is grayed out. To change
this location after shadow copies have been enabled, all shadow copies must be deleted and cannot
be recovered. Remember enabling Shadow Copies creates a Shadow Copy by default.
5. Click OK to save changes, or click Cancel to discard changes.
Figure 19: Shadow Copies properties screen
Caution: Use caution when reducing the size limit for all shadow copies. When the size is
set to less than the total size currently used for all shadow copies, enough shadow copies
are deleted to reduce the total size to the new limit. A shadow copy cannot be recovered
after it has been deleted.
53NAS 1500s and 500s Administration Guide
Page 54

Shadow Copies
Disabling shadow copies
When shadow copies are disabled on a volume, all existing shadow copies on the volume are
deleted as well as the schedule for making new shadow copies.
To disable shadow copies on a volume:
1. On the primary navigation bar, click Disks.
2. Click the Shadow Copies tab.
3. On the Manage Shadow Copies page, select one or more volumes on which to disable
shadow copies.
4. In the Tasks list, click Disable.
The Disable Shadow Copies page identifies the volume for which shadow copies will be
disabled.
5. Click OK to delete all existing shadow copies and settings for the volume.
Caution: When the Shadow Copies service is disabled, all shadow copies on the selected
volumes are deleted. Once deleted, shadow copies cannot be restored.
54 NAS 1500s and 500s Administration Guide
Page 55

Managing shadow copies from the NAS Desktop
As an alternative to managing Shadow Copies via the WebUI, the NAS Desktop may be
accessed via Remote Desktop.
To access Shadow Copies from the NAS Desktop:
1. From the WebUI select Remote Desktop from the Maintenance tab.
2. Click on My Computer.
3. Select the volume.
4. Right-click on the volume name and select Properties.
5. Click the Shadow Copies tab.
The user interface provides the same functionality found in the WebUI but in Win32 form. See
Figure 20.
Shadow Copies
Figure 20: Accessing Shadow Copies from My Computer
55NAS 1500s and 500s Administration Guide
Page 56

Shadow Copies
Shadow copies for shared folders
Shadow Copies are accessed over the network by supported clients and protocols. There are
two sets of supported protocols, SMB and NFS. All other protocols are not supported; this
would include HTTP, FTP, AppleTalk, and NetWare Shares. For SMB support a client side
application denoted as Shadow Copies for Shared Folders is required. The client side
application is currently only available for Windows XP and Windows 2000 SP3+. The
application is included on the HP StorageWorks NAS device from the following directory:
C:\hpnas\Components\ShadowCopyClient\XP and 2000-SP3+
No additional software is required to enable UNIX users to independently retrieve previous
versions of files stored on NFS shares.
Note: Shadow Copies for Shared Folders supports retrieval only of shadow copies of network
shares. It does not support retrieval of shadow copies of local folders.
Note: Shadow Copies for Shared Folders clients are not available for HTTP, FTP, AppleTalk, or
NetWare shares. Consequently, users of these protocols cannot use Shadow Copies for Shared
Folders to independently retrieve previous versions of their files. However, administrators can take
advantage of Shadow Copies for Shared Folders to restore files on behalf of these users.
SMB shadow copies
Windows users can independently access previous versions of files stored on SMB shares via
the Shadow Copies for Shared Folders client. After the Shadow Copies for Shared Folders
client is installed on the user's computer, the user can access shadow copies for a share by
right-clicking on the share to open its Properties dialog, selecting the Previous Versions tab,
and then selecting the desired shadow copy. Users can view, copy, and restore all available
shadow copies.
Shadow Copies for Shared Folders preserves the permissions set in the access control list
(ACL) of the original folders and files. Consequently, users can only access shadow copies for
shares to which they have access. In other words, if a user does not have access to a share, he
also does not have access to the share's shadow copies.
The Shadow Copies of Shared Folders client pack installs a Previous Versions tab in the
Properties dialog box of files and folders on network shares.
56 NAS 1500s and 500s Administration Guide
Page 57

Shadow Copies
Users access shadow copies with Windows Explorer by selecting View, Copy, or Restore,
from the Previous Versions tab. See Figure 21. Both individual files and folders may be
restored.
Figure 21: Client GUI
When users view a network folder hosted on the NAS device for which shadow copies are
enabled, old versions (prior to the snapshot) of a file or directory are available. Viewing the
properties of the file or folder presents users with the folder or file history-a list of read-only,
point-in-time copies of the file or folder contents that users can then open and explore like any
other file or folder. Users can view files in the folder history, copy files from the folder history,
and so on.
NFS shadow copies
UNIX users can independently access previous versions of files stored on NFS shares via the
NFS client; no additional software is required. Server for NFS exposes each of a share's
available shadow copies as a pseudo-subdirectory of the share. Each of these
pseudo-subdirectories is displayed in exactly the same way as a regular subdirectory is
displayed.
The name of each pseudo-subdirectory reflects the creation time of the shadow copy, using the
format.@GMT-YYYY.MM.DD-HH:MM:SS. Note that, to prevent common tools from
needlessly enumerating the pseudo-subdirectories, the name of each pseudo-subdirectory
begins with the dot character, thus rendering it hidden.
The following example shows an NFS share named “NFSShare” with three shadow copies,
taken on April 27, 28, and 29 of 2003 at 4 a.m.
NFSShare
.@GMT-2003.04.27-04:00:00
.@GMT-2003.04.28-04:00:00
.@GMT-2003.04.29-04:00:00
57NAS 1500s and 500s Administration Guide
Page 58

Shadow Copies
Access to NFS shadow copy pseudo-subdirectories is governed by normal access-control
mechanisms using the permissions stored in the file system. Users can access only those
shadow copies to which they have read access at the time the shadow copy is taken. To prevent
users from modifying shadow copies, all pseudo-subdirectories are marked read-only,
regardless of the user's ownership or access rights, or the permissions set on the original files.
Server for NFS periodically polls the system for the arrival or removal of shadow copies and
updates the root directory view accordingly. Clients then capture the updated view the next
time they issue a directory read on the root of the share.
Recovery of files or folders
There are three common situations that may require recovery of files or folders:
■ Accidental file deletion, the most common situation.
■ Accidental file replacement, which may occur if a user selects Save instead of Save As.
■ File corruption.
It is possible to recover from all of these scenarios by accessing shadow copies. There are
separate steps for accessing a file compared to accessing a folder.
As documented previously, the use of the snapshots are from the network and are based on
shares created on the NAS server.
58 NAS 1500s and 500s Administration Guide
Page 59

Recovering a deleted file or folder
To recover a deleted file or folder within a folder:
1. Navigate to the folder where the deleted file was stored.
2. Position the cursor over a blank space in the folder. If the cursor hovers over a file, that file
will be selected.
3. Right-click the mouse and select Properties from the bottom of the menu. Select the
Previous Versions tab.
4. Select the version of the folder that contains the file before it was deleted, and then click
View.
5. View the folder and select the file or folder to recover. The view may be navigated
multiple folders deep.
6. Select restore to restore the file or folder to its original location. Selecting copy will allow
the placement of the file or folder to a new location.
Shadow Copies
Figure 22: Recovering a deleted file or folder
Recovering an overwritten or corrupted file
Recovering an overwritten or corrupted file is easier than recovering a deleted file because the
file itself can be right-clicked instead of the folder. To recover an overwritten or corrupted file
use the following procedure:
1. Right-click the overwritten or corrupted file and click Properties.
2. Select Previous Versions.
3. To view the old version, click View. To copy the old version to another location, click
Copy... to replace the current version with the older version, click Restore.
59NAS 1500s and 500s Administration Guide
Page 60

Shadow Copies
Recovering a folder
To recover a folder use the following procedure:
1. Position the cursor so that it is over a blank space in the folder that will be recovered. If the
cursor hovers over a file, that file will be selected.
2. Right-click the mouse, select Properties from the bottom of the menu, then click the
Previous Versions tab.
3. Choose either Copy or Restore.
4. Choosing Restore enables the user to recover everything in that folder as well as all
subfolders. Selecting Restore will not delete any files.
Backup and shadow copies
As mentioned previously, Shadow Copies are only available on the network via the client
application and only at a file or folder level as opposed to the entire volume. Hence the
standard backup associated with a volume backup will not work to back up the previous
versions of the file system. To answer this particular issue, Shadow Copies are available for
back up in two situations. If the backup software in question supports the use of Shadow
Copies and can communicate with underlying block device, it is supported and the previous
version of the file system will be listed in the backup application as a complete file system
snapshot. Lastly, if the built in backup application NTbackup is utilized, the backup software
forces a snapshot and then uses the snapshot as the means for backup. The user is unaware of
this activity and it is not self evident although it does address the issue of open files.
60 NAS 1500s and 500s Administration Guide
Page 61

User and Group Management
Overview
There are two system environments for users and groups: workgroup and domain. Because
users and groups in a domain environment are managed through standard Windows or Active
Directory domain administration methods, this document discusses only local users and
groups, which are stored and managed on the NAS device. For information on managing users
and groups on a domain, refer to the domain documentation available on the Microsoft
website.
Domain compared to workgroup environments
NAS server devices can be deployed in workgroup or domain environments. When in a
domain environment, the server is a member of the domain. The domain controller is a
repository of accounts and account access for the NAS server. Client machines are also
members of the domain, and users log on to the domain through their Windows clients. The
domain controller also administers user accounts and appropriate access levels to resources
that are a part of the domain.
In a CIFS/SMB environment, when mapping a network drive or a client machine, a user sends
a logon credential to the server. This credential includes the username, password, and if
appropriate, domain information. Using the credential, the server authenticates and provides
the corresponding access to the user.
When a NAS server is deployed into a workgroup environment, all user and group account
access permissions to file resources are stored locally on the server.
5
By contrast, when a NAS server is deployed into a domain environment it uses the account
database from the domain controller, with user and group accounts stored outside the server.
The server integrates with the domain controller infrastructure.
Note: The NAS server cannot act as a domain controller for other servers on the network. If user
and group account information is stored locally, those accounts may be used only to authenticate
logons to the NAS server, resulting in a workgroup configuration.
Administering users and groups in a domain environment is similar in a mechanical sense to
administering them in a workgroup environment. If using an Active Directory domain
controller, the Computer Management tool allows for adding, modifying, and removing users
in the same context as in a workgroup environment. The concepts, however, are very different.
61NAS 1500s and 500s Administration Guide
Page 62

User and Group Management
Additional information about planning for domain environments can be found at:
http://www.microsoft.com/windowsse rver2003/technologies/directory/activedirectory/default .mspx
The configuration of the domain controller is reflected on the NAS server because it obtains
user account information from the domain controller when deployed in a domain environment.
As mentioned previously, the server cannot act as a domain controller itself.
User and group name planning
Effective user and group management is dependent upon how well the user and group names
are organized. Administrators typically create a small number of groups on the network and
then assign users to the appropriate group or groups. File system and share permissions can
then be applied at the group level, rather than at the user level. If the number of groups is
small, assigning the appropriate permissions to selected group, or groups, is more efficient
than assigning permissions to each user.
Although each organization has specific conventions, following general guidelines makes
administration simpler and more efficient. Because CIFS/SMB is dependent on users and
groups to grant appropriate access levels to file shares, CIFS/SMB administration benefits
from a consistent user and group administration strategy.
Managing user names
Usernames should reflect a logical relationship between the username and the person who uses
the account. It is important that rules are established to ensure that usernames are:
■ Systematic
■ Easy to follow and implement
■ Easy to remember
Using a combination of the user's first name, middle initial, and last name results in systematic
usernames for every member of a particular organization. Common examples include:
■ First initial followed by last name (jdoe for John Doe)
■ First initial followed by middle initial and last name (jqpublic for John Q. Public)
■ First name followed by last name, separated by a period (john.smith for John Smith)
■ Last name followed by first initial (doej for Jane Doe)
Guidelines must be in place for instances when two users have the same initials or name. For
example, a number can be added to the end of the username (jdoe1 and jdoe2).
Other conventions can be applied. Just ensure that conventions are both systematic and
consistent.
62 NAS 1500s and 500s Administration Guide
Page 63
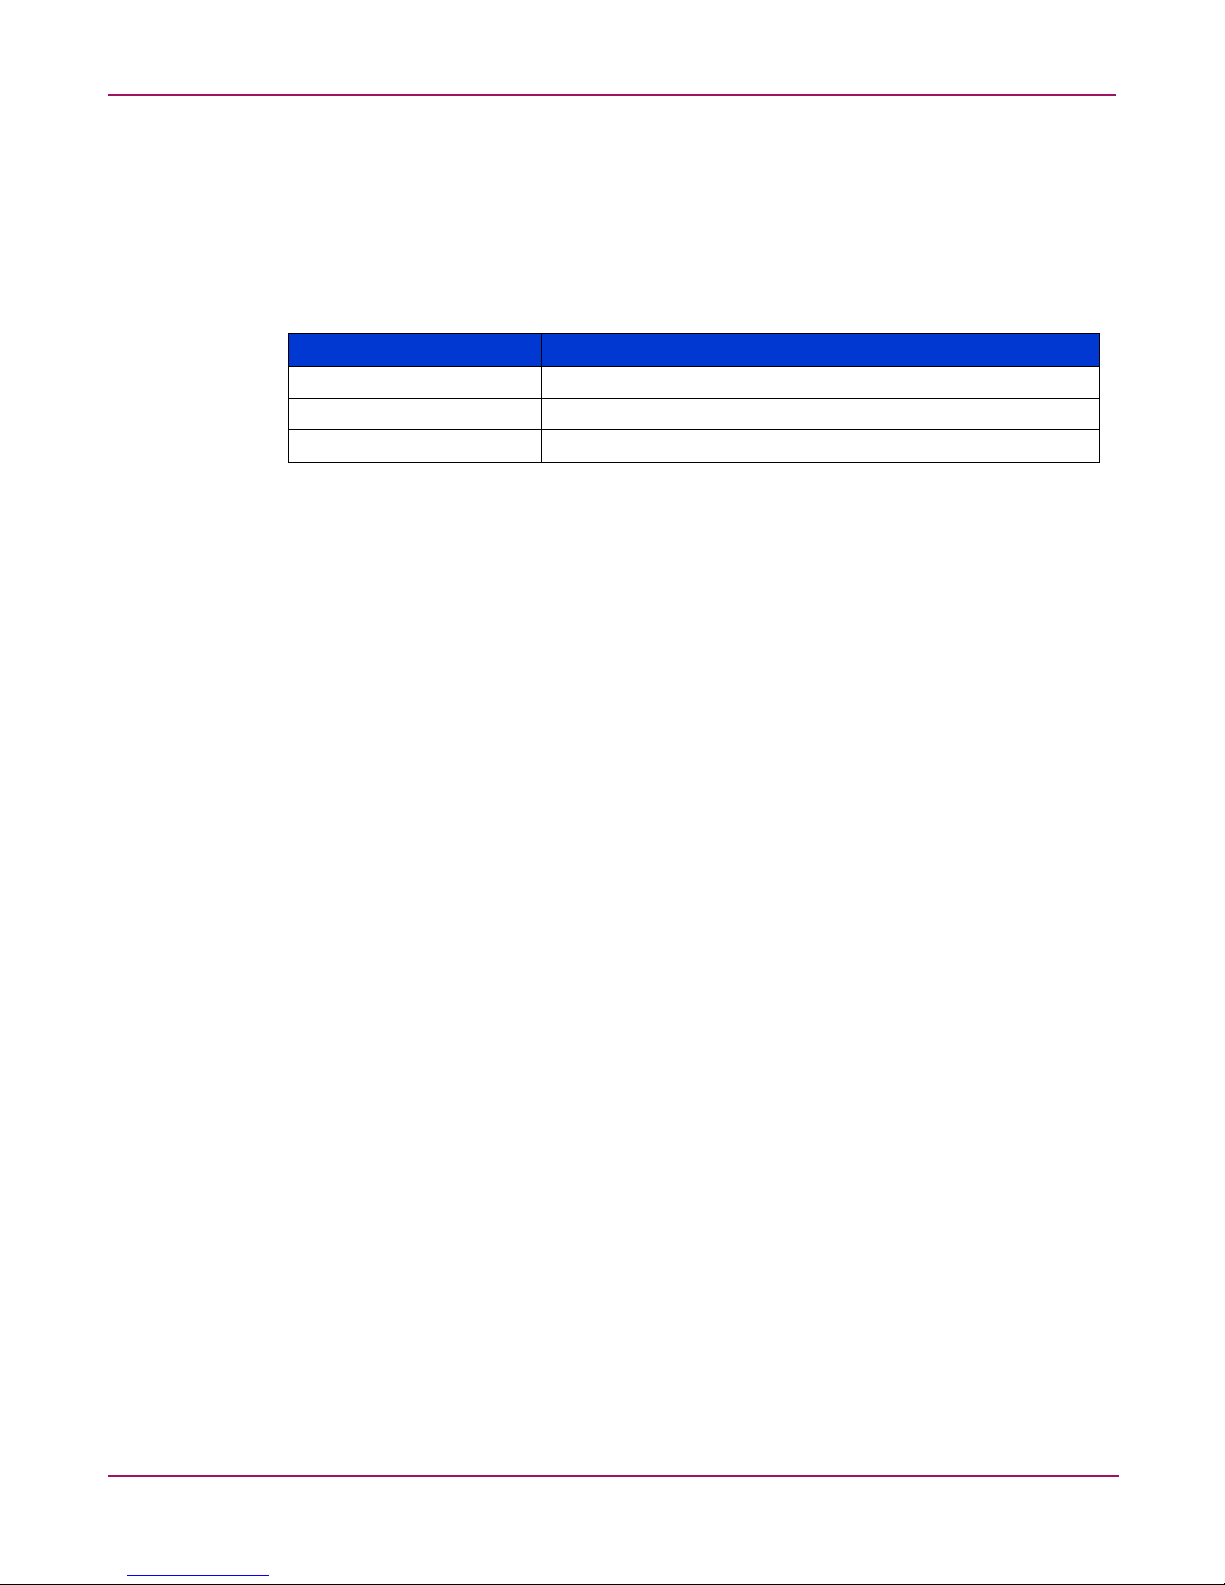
Managing group names
Group management follows many of the same principles as user management.
It is recommended that group naming conventions be systematic and easy to understand. Make
the group name convey some logical information about the function or purpose of the group.
Table 7 provides examples of group names.
Table 7: Group Name Examples
Group Name Description
Administrators All designated administrators on the server
Users All standard server users
Power users All standard server users requiring advanced access levels
Using tags is a helpful convention that indicates the specific access that a particular user has to
a network resource. For example, if there is a data share on the device, the network
administrator can create a “Data Users ROnly” group and a “Data Users RWrite” group to
contain users that have read only or read write access on the share, respectively.
Workgroup user and group management
User and Group Management
In a workgroup environment, users and groups are managed through the WebUI of the NAS
server. Within the Users option, there are two choices:
■ Managing local users
■ Managing local groups
User and group administrative tasks include adding, deleting, and modifying user and group
information. Managing local users and managing local groups are discussed in the following
paragraphs.
63NAS 1500s and 500s Administration Guide
Page 64

User and Group Management
Managing local users
Managing users includes the following tasks:
■ Adding a new user
■ Deleting a user
■ Setting a user password
■ Modifying user properties
In the WebUI, under Users, Local Users is the Local Users on Server page. All workgroup
user administration tasks are performed in the Local Users page.
Figure 23: Local Users page
All available options include: New, Delete, Set a Password, and Properties. When the Local
Users page is initially displayed, only the New option is available. After an existing user is
selected, the additional actions are displayed. Each of these options is discussed in the
following paragraphs.
Existing user records can be retrieved in one of two ways:
■ By entering the user's User Name or Full Name in the Search fields to retrieve a specific
user record. To redisplay the complete user list, space out the Search field.
■ By selecting the user from the list of displayed users in the page. The sort order of the
display is controlled by clicking the Name field heading. The names are displayed in
alphanumeric order or reverse alphanumeric order.
64 NAS 1500s and 500s Administration Guide
Page 65

Adding a new user
To add a user:
1. From the Local Users page, click New. The Create New User page is displayed.
User and Group Management
Figure 24: Create New User page
2. Enter the user information and then click OK. The user is added and the Local Users page
is displayed again.
Deleting a user
To delete a user:
1. In the Local Users page, select the user to delete, and then click Delete.
The Delete User page is displayed, including a warning note about deleting users.
2. To delete the user, click OK. The user is deleted and the Local Users page is displayed
again.
Modifying a user password
Follow these steps to modify a user password:
1. In the Local Users page, select the user whose password needs to be changed. Then, click
Set a Password.
The Set Password page is displayed.
2. Enter the password and click OK. The Local Users page is displayed again.
65NAS 1500s and 500s Administration Guide
Page 66

User and Group Management
Modifying user properties
To modify other user properties:
1. From the Local Users page, select the user whose record needs to be modified. Then, click
Properties.
The General information page of the Properties page is displayed. Figure 25 is an
illustration of the User Properties page.
Figure 25: User Properties page
2. The following information can be changed or set:
■ User name
■ Full name
■ Description
■ Home Directory
■ Disable this user account
■ Password expiration
3. After completing the changes, click OK. The Local Users page is displayed again.
66 NAS 1500s and 500s Administration Guide
Page 67

Managing local groups
Managing groups includes the following tasks:
■ Adding a new group
■ Deleting a group
■ Modifying group properties, including user memberships
Local groups in a workgroup environment are managed through the Users option in the
WebUI .
In the WebUI, under Users, Local Groups is the Local Groups on Server page. All
workgroup group administration tasks are performed in the Local Groups on Server
Appliance page.
User and Group Management
Figure 26: Local Groups page
67NAS 1500s and 500s Administration Guide
Page 68

User and Group Management
Adding a new group
To add a group:
1. In the Local Groups page, click New.
The Create New Group page is displayed.
Deleting a group
Figure 27: Create New Group page, General tab
2. Enter the group name and description.
3. To indicate the user members of this group, click Members. See “Modifying Group
Properties” for procedural instructions on entering group members.
4. After all group information is entered, click OK. The group is added, and the Local
Groups page is displayed again.
To delete a group:
1. From the Local Groups page, select the group to delete, and then click Delete.
2. The Delete Group page is displayed. Verify that this is the intended group and then click
OK. The Local Groups page is displayed again.
68 NAS 1500s and 500s Administration Guide
Page 69

Modifying group properties
To modify other group properties:
1. From the Local Groups page, select the desired group and then click Properties. The
Properties page is displayed.
User and Group Management
Figure 28: Group Properties page, General tab
Within the Properties page are two tabs:
■ General tab
■ Members tab
Each of these tabs is discussed in the following paragraphs.
2. Enter the desired changes in each of the tabs. Then, click OK. The Local Groups page is
displayed again.
General Tab
Within the General tab, basic group information can be changed, including:
■ Group name
■ Description
Members Tab
To indicate or change the members of a group, click the Members tab. Within this page, users
are added and removed from a group.
Two boxes are displayed: Members and Add user or group. Current members of that group
are listed in the Members box. All users are listed in the Add user or group box.
69NAS 1500s and 500s Administration Guide
Page 70

User and Group Management
■ To add an existing local user to a group:
■ To remove an existing local user from a group:
■ To add user or group from a domain to this group, the scroll bar at the right of the screen
Note: To add domain users and groups to a local group, the NAS device must be a member of the
domain.
1. Select the desired user from the Add user or group box
2. Click the Add button.
3. Click OK to save the changes.
1. Select the desired user from the Members box.
2. Click Remove.
3. Click OK to save the changes.
may need to be used to scroll up the screen display:
1. Enter the user or group name to include in the indicated format (domain/username).
2. Select Add.
3. Enter a domain/username and password.
4. Click OK to complete adding the domain user or group.
Figure 29 is an example of the Members tab.
Figure 29: Group Properties page, Members tab
70 NAS 1500s and 500s Administration Guide
Page 71

Folder, Printer, and Share
Management
The HP StorageWorks NAS server supports several file sharing protocols, including DFS,
NFS, FTP, HTTP, and Microsoft SMB. This chapter discusses overview information as well as
procedural instructions for the setup and management of the file shares for the supported
protocols. In addition, discussions on security at the file level and at the share level are
included in this chapter.
Abbreviated information on creating NFS file shares is included in this chapter; for detailed
information on setting up and managing NFS file shares, see the “UNIX File System
Management” chapter.
NCP shares must be set up and managed through the NAS Management Console user
interface. For information on managing NCP file shares, see the “NetWare File System
Management” chapter.
More information about Windows file system security is available on the Microsoft website:
www.mic rosoft.com/
All procedures in this chapter are documented using the WebUI. In addition to this guide, you
may use the WebUI online help.
6
Folder management
Volumes and folders on any system are used to organize data. Regardless of system size,
systematic structuring and naming conventions of volumes and folders eases the
administrative burden. Moving from volumes to folders to shares increases the level of
granularity of the types of data stored in the unit and the level of security access allowed.
Although a variety of methods can be used to create and manage file folders on the NAS
server, this document discusses using the NAS Web based user interface (WebUI.)
Managing system volumes and file folders includes the following tasks:
■ Navigating to a specific volume or folder
■ Creating a new folder
■ Deleting a folder
■ Modifying folder properties
■ Creating a new share for a volume or folder
■ Managing shares for a volume or folder
■ Managing file level permissions
71NAS 1500s and 500s Administration Guide
Page 72
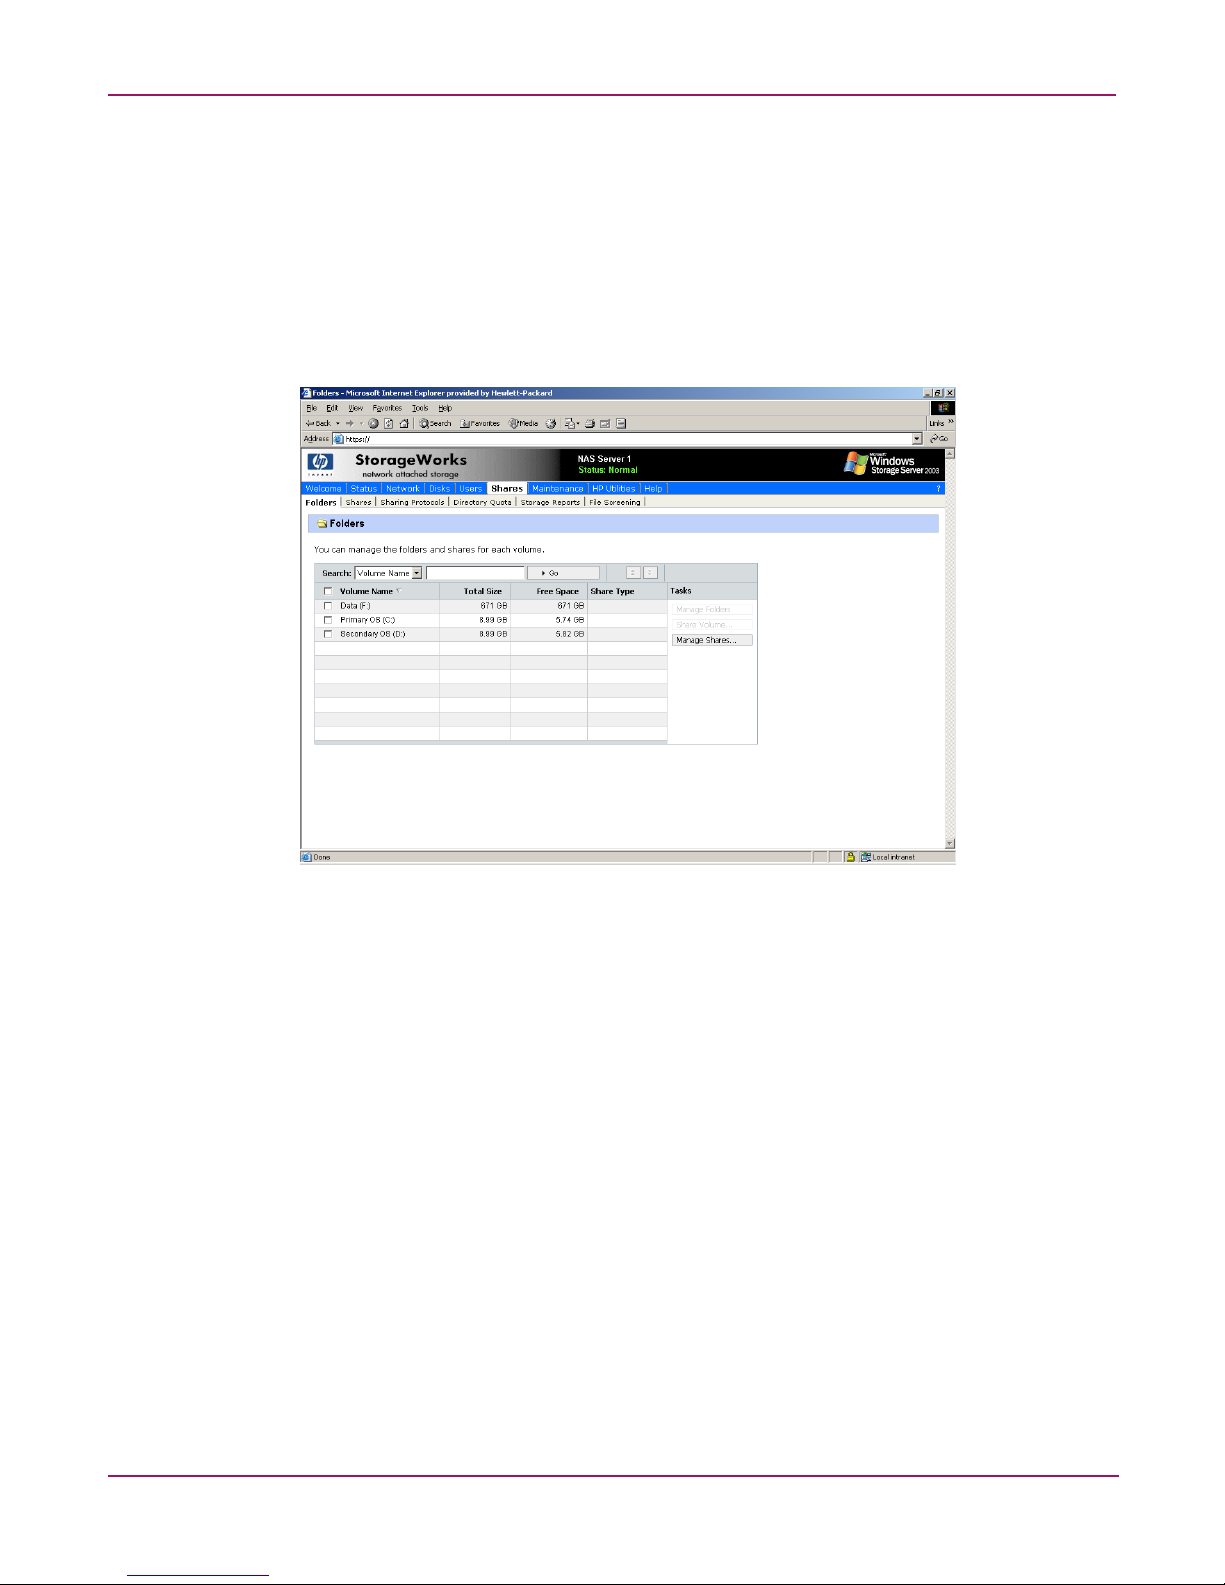
Folder, Printer, and Share Management
Navigating to a specific volume or folder
When you work with volumes and folders, the first task is to gain access to the desired volume
or folder.
The steps are the same, whether navigating to a volume or a folder:
1. To navigate to a specific volume or folder, from the WebUI, select Shares and then
Folders. Initially, the Vol u me s page is displayed.
This initial page displays all system volumes.
Figure 30: Volumes page
2. From this page, navigate to a specific folder by selecting the appropriate volume and then
clicking Manage Folders. The Folders page is displayed, with a list of all of the folders
within that volume.
72 NAS 1500s and 500s Administration Guide
Page 73

Folder, Printer, and Share Management
3. To navigate to a subfolder, select the folder in which the subfolder resides, and then click
Open. Repeat this searching and opening process until the desired folder is opened. See
Figure 31 for an example of Folders page.
Figure 31: Folders page
After accessing the desired folder, the following actions can be performed:
■ Creating a new folder
■ Deleting a folder
■ Modifying folder properties
■ Creating a new share for the volume or folder
■ Managing shares for the volume or folder
73NAS 1500s and 500s Administration Guide
Page 74

Folder, Printer, and Share Management
Creating a new folder
To create a new folder:
1. From the Shares directory, navigate to the Manage Folders menu and then select New.
The Create New Folder page is displayed.
Two tabs are displayed: General and Compress. Use these two tabs to enter the
parameters for the new folder.
2. In the General tab, enter a name for the folder and specify the folder attributes.
Figure 32: Create a New Folder page, General tab
3. In the Compress tab, indicate whether and how this folder and its contents are to be
4. After all information for the new folder is entered, click OK.
Deleting a folder
To delete a folder:
1. From the Shares directory, navigate to the folder to delete. Select the folder and then click
Note: View the summary information to confirm that this is the intended share.
2. Verify that the displayed folder is the folder to delete and then click OK.
compressed.
Delete. The Delete Folder page is displayed.
Summary information about the deletion is displayed.
The folder and all of its subfolders are deleted and the main page is displayed again.
74 NAS 1500s and 500s Administration Guide
Page 75

Modifying folder properties
To modify folder properties:
1. From the Shares directory, navigate to the folder whose properties need to be edited. Then
click Properties. The Properties page is displayed.
Folder, Printer, and Share Management
Figure 33: Folder Properties page, General tab
2. In the General tab, enter the new information for the folder, which may include:
■ Folder Name
■ Folder Attributes
3. In the Compress tab, indicate whether and how this folder and its contents are to be
compressed.
4. After all changes have been completed, click OK. The Folders page is displayed again.
Creating a new share for a volume or folder
Within the WebUI, there are two access points to the same screens used to create file shares:
■ A share can be created for a folder while working with that folder in the Folders screens.
■ A share can be created and, if necessary, new folders can be created, while working with
file shares in the Shares screens.
This section discusses creating shares from the Folders menu, and is an overview of the
procedures. Complete details on the process of creating shares are included in the discussion
that documents creating shares through the Shares menu. See the “Managing Shares” section
of this chapter for these details.
75NAS 1500s and 500s Administration Guide
Page 76

Folder, Printer, and Share Management
To create a new share for a specific volume or folder while in the Folders menu:
1. Navigate to the desired volume or folder and click Manage Shares.
2. Click New. The Create New Share page is displayed.
Figure 34: Create New Share page, General tab
3. Enter the information for the share, including the name of the share, the allowed protocols,
and corresponding permissions.
Note: The Share path is the path of the previously selected volume or folder. This field is
automatically completed by the system.
4. Select the appropriate tab to enter protocol specific information.
See the “Managing Shares” section for detailed information about these entries.
5. After entering all share information, click OK.
Note: The default permission settings for a new share are read-only.
76 NAS 1500s and 500s Administration Guide
Page 77

Managing shares for a volume or folder
Within the WebUI, there are two access points to the same screens used to manage file shares:
■ While working with a folder in the Folders pages, the administrator can create, delete, and
modify shares for that folder.
■ While working with file shares in the Shares pages, the administrator can create, delete,
and modify shares (and if necessary, create new folders).
Note: This section discusses managing shares from the Folders menu, and is an overview of the
procedures. Complete details on the process of managing shares are included in the discussion that
documents creating shares through the Shares menu. See the “Managing Shares” section later in
this chapter for these details.
To create, delete, and manage shares for a particular volume or folder while in the Folders
menu:
1. From the Folders directory, navigate to the target volume or folder and click Manage
Shares. The Shared Folders page is displayed.
All associated shares for that folder or volume are listed.
2. To create a new share, click New. The Create a New Share page is displayed.
Because the screens are the same whether shares are managed through the Folders menu
or the Shares menu, the procedures are only documented once. See “Creating a New
Share” in the “Share Management” section for detailed procedural instructions on creating
new file shares.
Folder, Printer, and Share Management
3. To delete a share, select the share to delete and click Delete. The Delete Share page is
displayed.
Because the screens are the same whether shares are managed through the Folders menu
or the Shares menu, the procedures are only documented once. See “Deleting a New
Share” in the “Share Management” section for detailed procedural instructions on deleting
file shares
4. To modify share properties, select the share to modify, and click Properties. The Share
Properties page is displayed.
Because the screens are the same whether shares are managed through the Folders menu
or the Shares menu, the procedures are only documented once. See “Modifying Share
Properties” in the “Share Management” section for detailed procedural instructions on
modifying shares.
77NAS 1500s and 500s Administration Guide
Page 78

Folder, Printer, and Share Management
Managing file level permissions
The WebUI of the NAS server provides security at the share level and is discussed later in this
chapter. Security at the file level is managed using Windows Explorer available from the
Desktop of the NAS server. To access the NAS server Desktop from the WebUI, go to the
Maintenance menu and select Remote Desktop.
File level security includes settings for permissions, ownership, and auditing for individual
files.
To enter file permissions:
1. Using Windows Explorer, navigate to the folder or file that needs to be changed and then
right-click the folder.
2. Select Properties, and then select the Security tab.
Figure 35: Security Properties dialog box
Several options are available in the Security tab dialog box:
■ To add users and groups to the permissions list, click Add. Then follow the dialog box
instructions.
■ To remove users and groups from the permissions list, highlight the desired user or group
and then click Remove.
■ The center section of the Security tab provides a listing of permission levels. When new
users or groups are added to the permissions list, select the appropriate boxes to configure
the common file access levels.
■ To modify ownership of files or to modify individual file access level permissions, click
Advanced.
78 NAS 1500s and 500s Administration Guide
Page 79

Folder, Printer, and Share Management
3. Click Advanced. Figure 36 illustrates the properties available on the Advanced Security
Settings page.
Figure 36: Advanced security settings
To modify specific permissions assigned to a particular user or group for a selected file or
folder in the Advanced screen:
1. Select the desired user or group.
2. Click Edit.
79NAS 1500s and 500s Administration Guide
Page 80
Folder, Printer, and Share Management
3. Check all the permissions that you want to enable, and clear the permissions that you want
to disable. Enable or disable permissions by selecting the Allow box to enable permission
or the Deny box to disable permission. If neither box is selected, permission is
automatically disabled. Figure 37 illustrates the Edit screen and some of the permissions.
Figure 37: User or Group Permission Entry dialog box
Other functionality available in the Advanced Security Settings tab is illustrated in Figure 36
and includes:
■ Add a new user or group. Click Add, and then follow the dialog box instructions.
■ Remove a user or group. Click Remove.
■ Replace permission entries on all child objects with entries shown here that apply to
child objects. This allows all child folders and files to inherit the current folder
permissions by default.
80 NAS 1500s and 500s Administration Guide
Page 81

Folder, Printer, and Share Management
Another area of the Advanced Security Settings is the Auditing tab. Auditing allows you to
set rules for the auditing of access, or attempted access, to files or folders. Users or groups can
be added, deleted, viewed, or modified through the advanced Advanced Security Settings
Auditing tab. The Auditing tab dialog box is illustrated in Figure 38.
Figure 38: Advanced Security Settings, Auditing tab dialog box
4. Click Add to display the Select User or Group dialog box.
Figure 39: Select User or Group dialog box
Note: Click Advanced to search for users or groups.
5. Select the user or group.
81NAS 1500s and 500s Administration Guide
Page 82

Folder, Printer, and Share Management
6. Click OK. Figure 40 illustrates the Auditing Entry screen that is displayed.
Figure 40: Auditing Entry dialog box for folder name NTSF Test
7. Select the desired Successful and Failed audits for the user or group as shown in
Figure 40.
8. Click OK.
Note: Auditing must be enabled to configure this information. Use the local Computer Policy Editor
to configure the audit policy on the NAS server.
82 NAS 1500s and 500s Administration Guide
Page 83

Folder, Printer, and Share Management
The Owner tab allows for taking ownership of files. Typically, administrators use this area to
take ownership of files when the file ACL is incomplete or corrupt. By taking ownership, you
gain access to the files and then manually apply the appropriate security configurations.
Figure 41 illustrates the Owner tab.
Figure 41: Advanced Security Settings, Owner tab dialog box
The current owner of the file or folder is listed at the top of the screen. To take ownership:
1. Select the appropriate user or group from the Change owner to list.
2. If it is also necessary to take ownership of subfolders and files, enable the Replace owner
on subcontainers and objects box.
3. Click OK to execute the commands.
83NAS 1500s and 500s Administration Guide
Page 84

Folder, Printer, and Share Management
Share management
There are several ways to set up and manage shares. The WebUI provides screens for setting
up and managing shares. Additional methods include using a command line interface,
Windows Explorer, or NAS Management Console. This guide demonstrates using the WebUI
to set up and manage shares.
As previously mentioned, the file sharing security model of the NAS device is based on the
NTFS file-level security model. Share security seamlessly integrates with file security. In
addition to discussing share management, this section discusses share security. See “Managing
File Level Permissions” earlier in this chapter for information on file security.
Shares management topics include:
■ Share Considerations
■ Defining Access Control Lists
■ Integrating Local File System Security into Windows Domain Environments
■ Comparing Administrative and Standard Shares
■ Planning for Compatibility between File-Sharing Protocols
■ Managing Shares
Share considerations
Planning the content, size, and distribution of shares on the NAS server can improve
performance, manageability, and ease of use.
The content of shares should be carefully chosen to avoid two common pitfalls: either having
too many shares of a very specific nature or of having very few shares of a generic nature. For
example, shares for general usage are easier to set up in the beginning, but can cause problems
later. Frequently, a better approach is to create separate shares with a specific purpose or group
of users in mind. However, creating too many shares also has its drawbacks. Take care to avoid
creating shares unnecessarily. For example, if it is sufficient to create a single share for user
home directories, create a “homes” share rather than creating separate shares for each user.
By keeping the number of shares and other resources low, the performance of the NAS server
is optimized. For example, instead of sharing out each individual user's home directory as its
own share, share out the top level directory and let the users map personal drives to their own
subdirectory.
Defining Access Control Lists
The Access Control List (ACL) contains the information that dictates which users and groups
have access to a share, as well as the type of access that is permitted. Each share on an NTFS
file system has one ACL with multiple associated user permissions. For example, an ACL can
define that User1 has read and write access to a share, User2 has read only access, and User3
has no access to the share. The ACL also includes group access information that applies to
every user in a configured group. ACLs are also referred to as permissions.
84 NAS 1500s and 500s Administration Guide
Page 85

Folder, Printer, and Share Management
Integrating local file system security into Windows domain environments
ACLs include properties specific to users and groups from a particular workgroup server or
domain environment. In a multidomain environment, user and group permissions from several
domains can apply to files stored on the same device. Users and groups local to the NAS server
can be given access permissions to shares managed by the device. The domain name of the
NAS server supplies the context in which the user or group is understood. Permission
configuration depends on the network and domain infrastructure where the server resides.
File-sharing protocols (except NFS) supply a user and group context for all connections over
the network. (NFS supplies a machine based context.) When new files are created by those
users or machines, the appropriate ACLs are applied.
Configuration tools provide the ability to share permissions out to clients. These shared
permissions are propagated into a file system ACL and when new files are created over the
network, the user creating the file becomes the file owner. In cases where a specific
subdirectory of a share has different permissions from the share itself, the NTFS permissions
on the subdirectory apply instead. This method results in a hierarchical security model where
the network protocol permissions and the file permissions work together to provide
appropriate security for shares on the device.
Note: Share permissions and file level permissions are implemented separately. It is possible for files
on a file system to have different permissions from those applied to a share. When this situation
occurs, the file level permissions override the share permissions.
Comparing administrative (hidden) and standard shares
CIFS supports both administrative shares and standard shares. Administrative shares are
shares with a last character of $. Administrative shares are not included in the list of shares
when a client browses for available shares on a CIFS server. Standard shares are shares that do
not end in a $ character. Standard shares are listed whenever a CIFS client browses for
available shares on a CIFS server.
The NAS server supports both administrative and standard CIFS shares. To create an
administrative share, end the share name with the $ character when setting up the share. Do not
type a $ character at the end of the share name when creating a standard share.
Planning for compatibility between file sharing protocols
When planning for cross-platform share management on the NAS server, it is important to
understand the different protocols and their associated constraints. Each additional protocol
that is supported adds another level of constraints and complexity.
85NAS 1500s and 500s Administration Guide
Page 86

Folder, Printer, and Share Management
NFS compatibility issues
When planning to manage CIFS and NFS shares, consider two specific requirements.
Note: Further information, including details about the NFS Service and the User Mapping service, is
available in the “UNIX File System Management” chapter.
■ NFS service does not support spaces in the names for NFS file shares.
NFS translates any spaces in an export into an underscore character. Additional
translations can be set up for files. See the “OEM Supplemental Help” chapter of the SFU
help, found on the NAS server. This feature is designed to ensure the greatest level of
compatibility with NFS clients, because some do not work with NFS exports that contain a
space in the export name.
If you plan to use the same name when sharing a folder through CIFS, and then exporting
it through NFS, do not put spaces in the CIFS share name.
■ NFS service does not support exporting a child folder when its parent folder has
already been exported.
An NFS client can access a child folder by selecting the parent folder and then navigating
to the child folder. If strict cross-platform compatibility is an administration goal, CIFS
must be managed in the same way. Do not share a folder through CIFS if the parent folder
is already shared.
Managing shares
Shares can be managed through the Shares menu option of the WebUI. Tasks include:
■ Creating a new share
■ Deleting a share
■ Modifying share properties
■ Publish in DFS (See “Publishing a new share in DFS”)
Each of these tasks is discussed in this section.
86 NAS 1500s and 500s Administration Guide
Page 87

Creating a new share
To create a new share:
1. From WebUI main menu, select the Shares directory and then select the Shares option.
Folder, Printer, and Share Management
The Shares page is displayed. From the Shares page, click New. The General tab of the
Create a New Share page is displayed.
Deleting a share
Figure 42: Create a New Share page, General tab
2. Enter the following information:
■ Share name
■ Share path
■ Client protocol types
To create a folder for the new share, check the indicated box and the system will create the
folder at the same time it creates the share.
Protocol specific tabs are available to enter sharing and permissions information for each
sharing type. See “Modifying Share Properties” for detailed information on these tabs.
3. After entering all share information, click OK.
Caution: Before deleting a share, warn all users to exit that share and confirm that no one
is using the share.
To delete a share:
1. From the Shares menu, click Delete.
2. Verify that this is the correct share, and then click OK.
87NAS 1500s and 500s Administration Guide
Page 88

Folder, Printer, and Share Management
Modifying share properties
To change share settings:
1. From the Shares menu, select the share to modify and then click Properties. The General
tab of the Share Properties page is displayed.
Figure 43: Share Properties page, General tab
The name and path of the selected share is displayed.
2. To enter or change client protocol information, check the appropriate boxes and then click
the corresponding tabs.
■ Windows Sharing
■ UNIX Sharing
■ Web Sharing (HTTP)
Each of these tabs is discussed in the following paragraphs.
3. After all share information has been entered, click OK. The Share menu is displayed
again.
88 NAS 1500s and 500s Administration Guide
Page 89

Folder, Printer, and Share Management
Windows sharing
From the Windows Sharing tab of the Share Properties page:
1. Enter a descriptive Comment, and the User limit (optional).
See Figure 44 for an example of the Windows Sharing tab screen display.
Figure 44: Share Properties page, Windows Sharing tab
2. Select Offline settings.
3. Set the permissions.
The Permissions box lists the currently approved users for this share.
■ To add a new user or group, either select a user or group from the box at the bottom
right of the screen or manually enter the user or group name in the Add a user or group
box and then click Add. That user or group is added to the Permissions box.
■ To remove access to a currently approved user or group, select the user or group from
the Permissions box and then click Remove.
■ To indicate the type of access allowed for each user, select the user and then expand
the Allow and Deny drop down boxes. Select the appropriate option.
4. After all Windows Sharing information is entered, either click the next Sharing tab or
click OK.
89NAS 1500s and 500s Administration Guide
Page 90

Folder, Printer, and Share Management
UNIX sharing
From the UNIX Sharing tab of the Create a New Share page:
1. Indicate the machines that will have access to this share.
Select the machine to include in the Select a group box or manually enter the NFS client
computer name or IP address. Then click Add.
Figure 45: Share Properties page, UNIX Sharing tab
2. Indicate the access permissions.
Select the machine from the main user display box and then select the appropriate access
method from the Access permissions drop down box.
The types of access are:
■ Read-only—Use this permission to restrict write access to the share.
■ Read-write—Use this permission to allow clients to read or write to the share.
■ No access—Use this permission to restrict all access to the share.
3. Select whether or not to allow root access.
■ Read-only + Root—Use this permission to restrict write access to the share. Use this
permission to assign administrative access to the share. This will allow the client
computer to have root access to the NFS share. Map the UNIX root user to the
Windows user Administrator. Also, map the group that this UNIX root belongs to, to
the Windows group Administrator.
■ Read-write + Root—Use this permission to allow clients to read or write to the share.
Use this permission to assign administrative access to the share. This will allow the
client computer to have root access to the NFS share. Map the UNIX root user to the
Windows user Administrator. Also, map the group that this UNIX root belongs to, to
the Windows group Administrator.
4. After all UNIX sharing information is entered, click OK.
90 NAS 1500s and 500s Administration Guide
Page 91

Folder, Printer, and Share Management
Web sharing (HTTP)
From the Web Sharing tab of the Create New Share page:
1. Select the read and write access permissions that are allowed.
2. Click OK.
AFP (Appletalk) sharing
AppleTalk shares can be set up only after AppleTalk Protocol and File Services for Macintosh
have been installed on the NAS server.
Note: AppleTalk shares should not be created on clustered resources as data loss can occur due to
local memory use.
Installing the AppleTalk Protocol
To install the AppleTalk Protocol:
1. From the desktop of the NAS server, click Start, navigate to Settings-Network
Connections. Right-click Local Area Connection, and then click Properties.
2. Click Install. The Select Network Component Type dialog box is displayed.
Figure 46 is an example of the Select Network Component Type dialog box.
Figure 46: Local Area Connection Properties page, Install option
3. Select Protocol and click Add.
4. Select AppleTalk Protocol and click OK.
Installing File Services for Macintosh
To install File Services for Macintosh:
1. Select Maintenance from the WebUI interface.
2. Select Remote Desktop.
3. Open Add/Remove Programs from the Control Panel.
4. Click Add/Remove Windows Components.
5. Double-click Other Network File and Print Services.
91NAS 1500s and 500s Administration Guide
Page 92

Folder, Printer, and Share Management
6. Select File Services for Macintosh then click OK.
7. Click Next.
8. Click Finish.
Setting AppleTalk Protocol Properties
To set AppleTalk Protocol properties:
1. From the WebUI, click the Shares tab.
2. Click Sharing Protocols.
3. Click the AppleTalk radio button, then choose Properties.
4. Insert login message, if desired.
5. Under Security, “Enable client authentication with,” choose Apple Clear Text or
Microsoft.
To set up AppleTalk shares, from the WebUI:
1. Click Shares.
2. Click Shares again.
3. Click New.
4. Type in the share name and share path.
5. Check Apple MacIntosh. Uncheck other file types if necessary.
6. Click AppleTalk Sharing.
7. Enter a user limit.
8. Enter password information.
9. Indicate whether the share has read only permission or read write permission.
10. After all AppleTalk Sharing information is entered, click OK.
Protocol parameter settings
As previously mentioned, the NAS server supports the following protocols:
■ DFS
■ NFS
■ FTP
■ HTTP
■ Microsoft SMB
This section discusses the parameter settings for each protocol type.
92 NAS 1500s and 500s Administration Guide
Page 93

Folder, Printer, and Share Management
To access and enter protocol parameter settings:
1. From the Shares menu, select Sharing Protocols. The File-Sharing Protocols page is
displayed.
Figure 47: File Sharing Protocols page
2. Protocols and their statuses are listed. The following options are available:
■ Enabling a protocol
■ Disabling a protocol
■ Modifying Protocol Settings
Because enabling and disabling a protocol are self explanatory, only modifying protocol
specific settings is described in this section.
93NAS 1500s and 500s Administration Guide
Page 94

Folder, Printer, and Share Management
DFS protocol settings
With Distributed File System (DFS) and the Windows SMB protocol, files can be distributed
across multiple servers and appear to users as if they reside in one place on the network. A
configuration containing multiple shares is known as a virtual namespace.
Using Distributed File System (DFS), system administrators can make it easy for users to
access and manage files that are physically distributed across a network. Users do not need to
know and specify the actual physical location of files in order to access them.
For example, if documents are scattered across multiple servers in a domain, DFS can make it
appear as though the documents all resides on a single server. This eliminates the need for
users to go to multiple locations on the network to find the information.
Each DFS namespace requires a root. A DFS root is a starting point of the DFS namespace.
The root is often used to refer to the namespace as a whole. A root maps to one or more root
targets, each of which corresponds to a shared folder on a server. A root is implemented as a
shared folder on the DFS server.
Deploying DFS
A distributed file system can be implemented as a stand-alone root distributed file system or as
a domain root distributed file system. The type of a distributed file system determines which
client computers can access the distributed file system.
A stand-alone DFS root:
■ Does not use Active Directory to manage DFS
■ Cannot have more than one root on a server
■ Does not support automatic file replication using the File Replication service (FRS)
■ Is not fault tolerant and if the root fails the entire namespace will collapse.
A domain DFS root:
■ Must be hosted on a domain member server
■ Has its DFS namespace automatically published to Active Directory
■ Can have more than one root on a server
■ Supports automatic file replication through FRS
■ Supports fault tolerance through FRS
Two points of management of the DFS namespace are provided with the NAS server. These
points of management are the WebUI and the Distributed File System Administration Tool
located on the local console of the NAS server under Start > Programs > Administrative
Too l. See Figure 48. The WebUI is designed to provide the following functions:
■ Stand alone root management (Add, Delete)
■ Share publishing to stand alone or domain DFS
■ Default behavior for DFS share publishing
All other functions must be performed via the DFS Administration Tool. The NAS server
administration guide only provides instructions on the WebUI portion of the product. The DFS
Administration Tool is complete with online help. In addition, general information on DFS
may be found at:
http://www.mic rosoft.com/windowsse rver2003/techinfo/overview/df s.mspx
94 NAS 1500s and 500s Administration Guide
Page 95

Figure 48: DFS Win32 GUI
Folder, Printer, and Share Management
DFS Administration Tool
The DFS Administration Tool provides extended functionality not found in the WebUI. These
functions include:
■ Management of multiple DFS Roots on multiple machines from a single interface
■ Domain based DFS management
■ Target and Link management
■ Status Checks of a DFS managed share link
■ Exporting of the DFS names space to a text file
The NAS server administration guide only provides instructions on the WebUI portion of the
product. The DFS Administration Tool is complete with online help. In addition, general
information on DFS may be found at:
http://www.mic rosoft.com/windowsse rver2003/techinfo/overview/df s.mspx
Accessing the DFS namespace from other computers
In addition to the server-based DFS component of the Windows Storage Server 2003 family,
there is a client-based DFS component. The DFS client caches a referral to a DFS root or a
DFS link for a specific length of time, defined by the administrator.
The DFS client component runs on a number of different Windows platforms. In the case of
older versions of Windows, the client software must be downloaded to run on that version of
Windows. Newer versions of Windows have client software built-in.
Non-Windows (such as Linux/UNIX) based clients can not access the DFS namespace as DFS
is dependent on a Windows component to function.
95NAS 1500s and 500s Administration Guide
Page 96

Folder, Printer, and Share Management
Setting DFS sharing defaults
The We UI can be used to set the default DFS settings provided when creating a shared folder.
When a new shared folder is create, the DFS defaults may be overridden.
To set DFS sharing defaults:
1. On the primary navigation bar, choose Shares.
2. Choose Sharing Protocols.
3. Select DFS, and then choose Properties.
Figure 49: DFS properties, general tab
4. On the General tab, choose the default settings that are desired when creating a shared
directory.
■ To set the default to publish the share to the local DFS root, select Publish new shares
■ To set the default to publish the share to another DFS root, select Publish new shares
■ To not publish the share to a DFS root, select Do not publish new shares to a DFS
5. Choose OK.
Creating a local DFS root
The WebUI can be only be used to create a single, local stand-alone DFS root on the server as
mentioned previous. To create a local domain DFS root use the DFS administrative tool. For
more information about DFS root types refer to the section above entitled “Deploying DFS”.
To create a local stand-alone DFS root:
1. On the primary navigation bar, choose Shares.
2. Choose Sharing Protocols.
to the local DFS root.
to a domain DFS root or a stand-alone DFS root on a different server. In the DFS
root box, type the path of the default DFS root.
root.
96 NAS 1500s and 500s Administration Guide
Page 97

3. Select DFS, and then choose Properties.
Folder, Printer, and Share Management
Figure 50: Local DFS Root tab
4. On the Local DFS Root tab, type the name of the DFS root in the Root name box.
5. In the Folder path box, type the path of the folder that corresponds to the root. Click
Create folder if the folder does not exist.
6. Choose Create DFS Root, and then choose OK.
Deleting a local DFS root
The WebUI enables the deletion of a local stand-alone DFS root on the server only. The
Distributed File System administrative tool must be used to manage Domain DFS Roots.
Hence, if there is more than one root on the server, the first root (in alphabetical order, with
local stand-alone roots grouped ahead of domain roots) will be available to be deleted. If only
domain roots exist on the server, the first domain root will be listed, but it cannot be deleted
using the WebUI. The WebUI can only be used to manage local stand-alone DFS roots.
To delete a local DFS root:
1. On the primary navigation bar, choose Shares.
2. Choose Sharing Protocols.
3. Select DFS, and then choose Properties. On the Local DFS Root tab, choose Delete
Root.
4. Choose OK.
97NAS 1500s and 500s Administration Guide
Page 98

Folder, Printer, and Share Management
Publishing a new share in DFS
Once a root has been established either on the local machine or one in the network, shares can
be published in order to extend the virtual name space. For example, several shares can be
created for a DFS root labeled “Engineering.” The shares might be titled “Documentation,”
“Technical Specs,” and “Project Info.” When mapping to \\computername\engineering, all
three of these shares would be found under the mapped drive even though they exist on
different NAS devices, drives or shares points. To publish a share in a DFS root:
Figure 51: DFS share example
1. Select Shares from the WebUI.
2. Type in a new share name
3. Type in a folder name (select the checkbox Create folder if appropriate)
4. Verify that the Windows checkbox is selected. (DFS is dependent on the SMB protocol)
5. Under DFS, check the box if unchecked.
Note: The default behavior can be set to publish all shares to DFS. In this case the box will be
checked. See the section above Setting DFS Sharing Defaults.
6. Enter in the name of the DFS root to publish the share (“Engineering” in this example).
The network name will be displayed below the entry.
7. Click OK.
A share name will be published in the namespace.
98 NAS 1500s and 500s Administration Guide
Page 99

Folder, Printer, and Share Management
To view the namespace, map a drive to the DFS root. All published shares will be seen in the
namespace. See the example in Figure 52.
Figure 52: DFS share example, mapped drive
In this case, Documentation exists on G:\documentation, Technical Specs exists on
G:\technical specs and Project Info exists on C:\project info on the local machine but they are
all accessible via \\DOCNASBOX\engineering.
Publishing an existing share in DFS
To enable an existing shares for DFS, perform the following steps:
1. Select Shares from the WebUI.
2. Select the target share from the table and select Publish in DFS.
3. Enter the name of the DFS root to publish the share too.
4. Click OK.
The share will appear in the DFS underneath the DFS root.
Removing a published share from DFS
Once a share is published in DFS, it may be removed from the virtual namespace via the
Shares Property page. To remove a share from DFS perform the following steps:
1. Select Shares from the WebUI.
2. Select the target share from the table and select properties.
3. Uncheck the box entitled
4. Click OK.
Publish to DFS root.
The share will no longer appear in the DFS.
99NAS 1500s and 500s Administration Guide
Page 100

Folder, Printer, and Share Management
Storage management
The storage management features built into the NAS server are composed of three main
features and are applicable at the directory level of a share. These features include:
■ Directory Quotas
■ File Screening
■ Storage Reports
Each of these feature sets are describe below. For procedures and methods, refer to the online
help available within the web UI via the ? in the right hand corner of each accompanying
feature management page.
Directory quotas
Directory quotas provide a way to limit and monitor space consumed by all files in a folder.
For information on setting quotas on volumes, see Chapter 5.
Directory quotas limit the size of the managed object regardless of who writes to or who owns
files in the managed object. For example, if a 50MB directory quota is set on the managed
object c:\users\JDoe, that directory and all its contents will be limited to 50MB regardless of
who owns the files in that directory or who writes files to that directory.
Directory quotas allow for the addition, deletion, monitoring, and changing of space limits for
selected directories on the NAS server. Directory quotas provide disk space monitoring and
control in real time, and support active and passive limits with two real-time space alarms.
The Directory Quota feature includes the following components:
■ Active and passive space limits on directories
■ Best practice storage resource management policies
■ A severe alarm threshold
■ A warning alarm threshold
■ Auto discovery of drives
■ Customized messages
■ Alarms sent to the event log
■ Alarms sent to the user
■ Storage reports that can be sent to an intranet Web site
■ Custom script support
The directory quota set on the system partition always has a passive limit and uses device size
(capacity). If the system does not have sufficient quota to write files, it may fail. Also, if the
system partition does not have enough space to write temporary files during boot, the system
may not restart. Avoid this by using caution when placing quotas on the system directories.
Directory quotas use each file's allocation size to determine how much space is used. The
allocation size is slightly larger than the actual space used as displayed by Windows Explorer
and other Windows programs for the data in a file. This discrepancy may cause some
confusion, but the Directory Quota feature is correctly charging the user for the amount of disk
space actually consumed to store a file. Large cluster sizes on file allocation table (FAT) file
systems may add to the confusion because the entire cluster is always allocated, regardless of
the file size. NTFS file systems store very small files in the index file and typically have more
reasonable cluster sizes.
100 NAS 1500s and 500s Administration Guide
 Loading...