

Page 1

English
HP Pavilion
MX50, MX70, and MX90
Multimedia Monitors
Page 2

The information in this document is subject to change without notice.
Hewlett-Packard® Company makes no warranty of any kind with
regard to this material, including, but not limited to, the implied
warranties of merchantability and fitness for a particular purpose.
HP shall not be liable for errors contained herein or for incidental or
consequential damages in conntion with the furnishing,
performance, or use of this material.
HP assumes no responsibility for the use or reliability of its software
on equipment that is not furnished by HP.
This document contains proprietary information that is protected by
copyright. All rights are reserved. No part of this document may be
photocopied, reproduced, or translated to another language without
the prior written consent of HP.
Hewlett-Packard Company
Home Products Division
P.O. Box 4010
Cupertino, CA 95015-4010
USA
© Copyright Hewlett-Packard Company, 2000. All rights reserved.
Hewlett-Packard is a registered trademark of Hewlett-Packard
Company in the United States of America and other countries.
Other brand or product names are trademarks of their respective
holders.
Page 3

English
Introduction ......................................... 1
For Your Safety ................................................. 1
Additional Safety Information ............................. 3
AC Power Safety Warning ................................. 3
Installation........................................... 3
Locating the Monitor ......................................... 3
Connecting the Power and Video Cables............. 4
Connecting the Speakers ................................... 5
Using the Monitor ................................6
Turning the Monitor On and Off ......................... 6
Degaussing the Display ..................................... 7
Setting the Screen Resolution.............................. 7
Selecting Refresh Rate ....................................... 8
Minimizing Energy Use ..................................... 8
Cleaning the Screen ......................................... 8
Adjusting the Viewing Angle.............................. 9
Changing Display Settings.................... 9
Using the Front Panel ........................................ 9
Pre-Set Contrast Modes ................................... 10
Setting a Pre-Set Contrast Mode ....................... 10
Changing Mode Settings................................. 11
Adjusting Brightness and Contrast Directly......... 12
Using the OSD Main Window ......................... 12
Using the Size & Position Window ................... 15
Using the Advanced Geometry Window ........... 16
Using the OSD Advanced Menu Window ......... 17
Choosing the Color Temperature ...................... 19
Contents
Page 4

Setting Red, Green, and Blue Values................. 20
Choosing a Language..................................... 21
Choosing the OSD Position.............................. 22
Adjusting the Moiré Filters ............................... 23
Using the Status Window ................................ 24
Restoring Factory Adjustments.......................... 24
Technical Information .........................25
Monitor Information ........................................ 25
Pre-Set Video Modes....................................... 27
Pin Assignments ............................................. 28
DPMS Power Management Features ................. 29
Regulatory Information ......................31
Declaration of Conformity ................................31
FCC Statement ................................................32
X-Ray Radiation Notice ....................................33
General Notice...............................................33
DOC Statement (Canada Only) ........................33
EMI Statement (European Union Only) ...............33
Declaration of VCCI Class B Compliance ...........33
Index .................................................34
Page 5

English
Introduction
The HP Pavilion MX50, MX70, and MX90
Multimedia Monitors (Models P1282A, P1283A,
and P1284A) are high-resolution color monitors
designed for use with HP Pavilion and other PCs.
Each monitor includes a built-in microphone and
mounts for speakers supplied by HP Pavilion. The
monitors comply with Environmental Protection
Agency (EPA) ENERGY STAR
®
standards and
include automatic power management features.
Other features include:
3
On-screen adjustment of display settings
3
Support for high refresh rates to reduce screen
flicker and eyestrain
3
Built-in tilt and swivel base
The following illustrates a front view of your
HP Pavilion monitor.
Control Panel
Panel Button
Microphone
For Your Safety
For your safety and the protection of your
monitor, follow these procedures:
3
Always connect the monitor to a grounded,
three-prong power outlet. Use only the factorysupplied power cord.
Page 6
Warning:
To completely disconnect
power from the monitor you must remove
the power cable
from the power socket.
3
To prevent electrical shock, do not remove the
back cover of the monitor. Only qualified
service personnel should remove the cover.
3
Do not place objects on top of the monitor that
could fall into the vents or block airflow.
3
To avoid the risk of damage to the monitor and
electrical shock to yourself, do not expose the
monitor to rain or moisture.
3
Adjust only those controls with operations that
are covered in this manual. Improperly
adjusting other controls can result in damage
and could require repair by a service
technician.
If any of the following conditions occur, unplug
the monitor and contact a qualified service
technician:
3
The power cord or plug is frayed or damaged.
3
You have spilled liquid into the monitor.
3
The monitor has been exposed to rain or
water.
3
The monitor does not operate correctly when
the operating instructions are followed.
3
The monitor has been dropped or the cabinet
has been damaged.
3
The performance of the monitor changes
abruptly.
Page 7
English
Additional Safety Information
These products have been evaluated for
connection to an “IT” power system (an AC
distribution system with no direct connection to
earth, according to IEC950).
AC Power Safety Warning
Warning:
Locate the monitor near an A
C
outlet. The AC power cord is your HP
monitor’s main AC disconnecting device
and must be easily accessible at all times.
For your safety, the power cord provided
with your system has a grounded plug.
Always use the power cord with a
properly grounded wall outlet to avoid
the risk of electrical shock.
Installation
Follow the instructions in this chapter to install
your HP Pavilion MX50, MX70, or MX90
Multimedia Monitor.
Warning:
The MX monitors are heavy
objects. Exercise caution, or get help
when lifting, to prevent back injury.
Note:
Before installing the monitor, refer to your PC and
video adapter documentation. You may need to
make changes to accommodate the monitor.
Locating the Monitor
Place the monitor on a flat, sturdy surface.
Choose an area that is free from excessive heat,
moisture, and sunlight. Locate the monitor as far
as possible from sources of electromagnetic
interference, such as transformers, motors,
fluorescent lighting, and other PC monitors.
Page 8
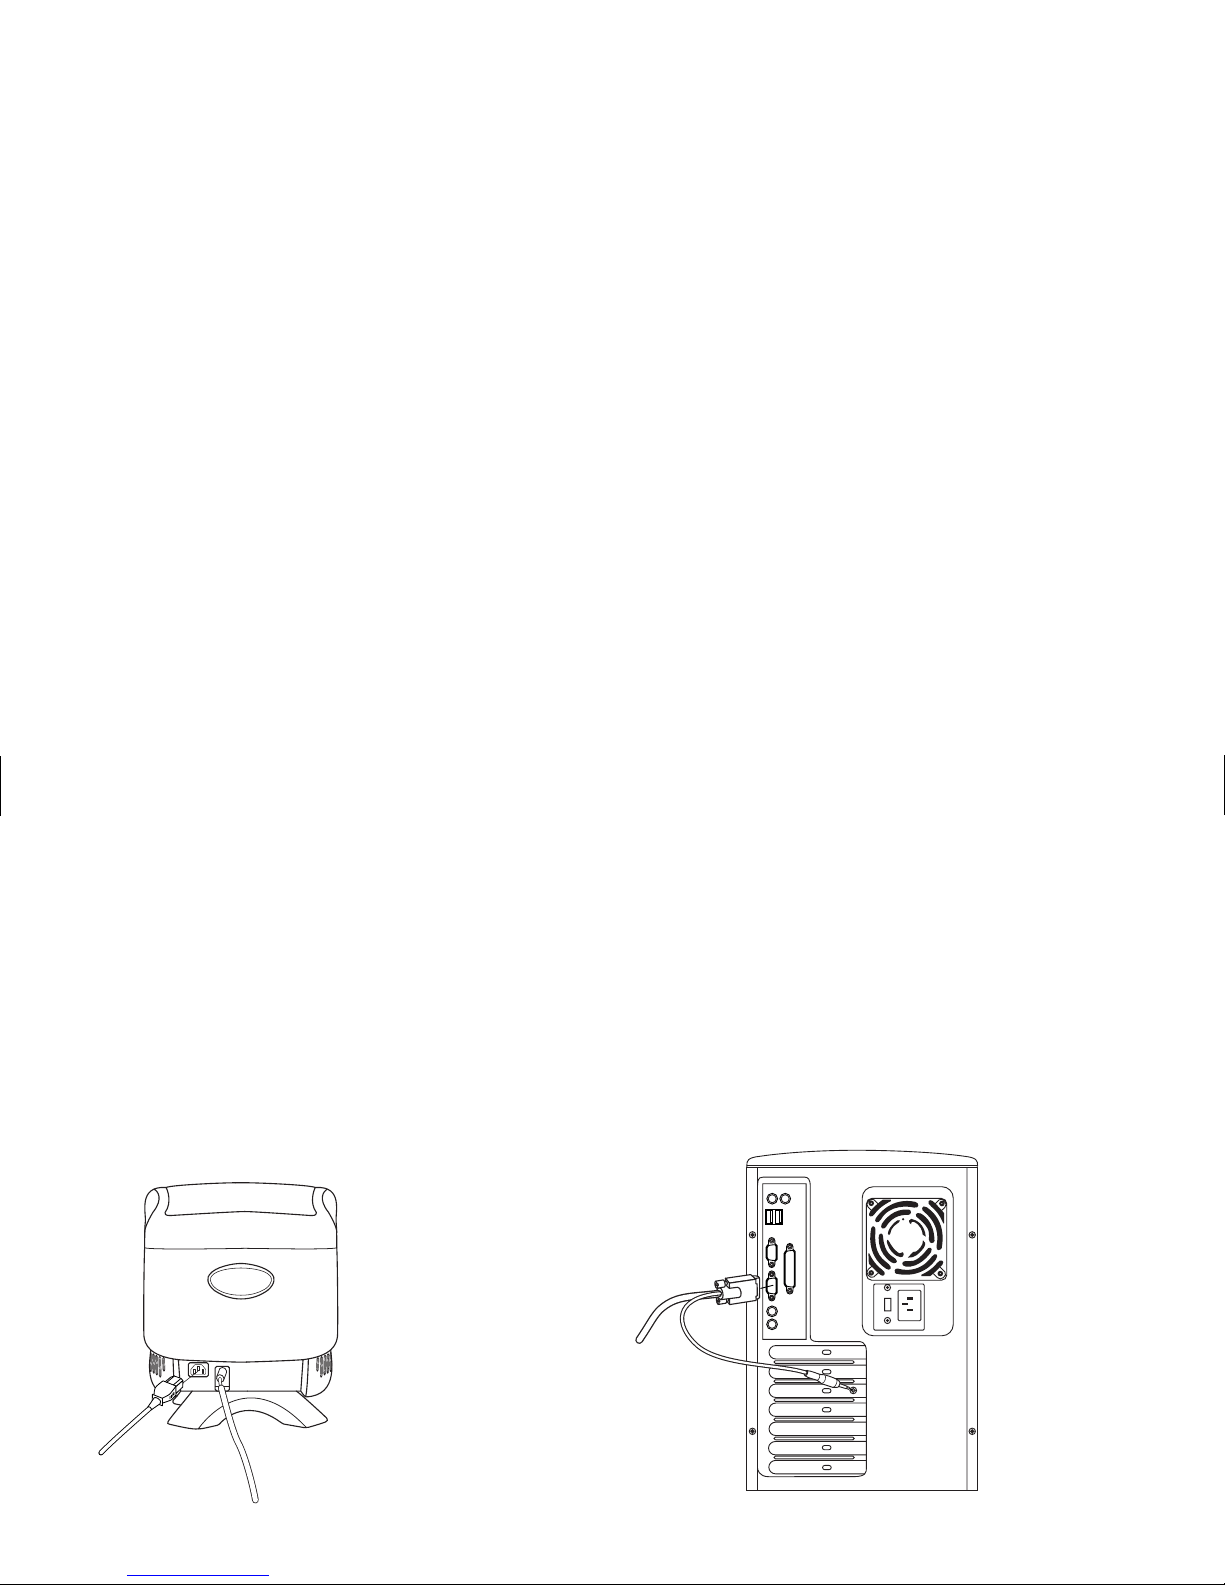
Connecting the Power and Video
Cables
Before connecting any cables, be sure to read
the safety instructions at the beginning of this
manual. The PC and monitor must be turned off.
To connect the power and video cables:
1
Connect the power cord to the back of the
monitor.
2
Plug the power cord into a power outlet.
3
Connect the blue plug on the video cable to
the video port of your PC. If you have an
HP Pavilion PC, this port is marked in blue.
However, on some Pavilion PCs, the port could
be marked in orange. (The illustration below is
for reference only. Check your PC user’s guide
for the video port location.)
Page 9

English
4
Insert the pink microphone cable plug into the
sound input connector on the back of your PC.
If you have an HP Pavilion PC, the connector is
marked in pink. However, on some
Pavilion PCs, the connection could be marked
in yellow.
Connecting the Speakers
The monitor is designed for use with the Polk
Audio speakers supplied by HP.
1
Extend the cables attached to the two
speakers.
2
Identify the left and right speakers. You can tell
which side of the monitor a speaker fits onto
by observing its curvature and mounting pegs.
Not all speakers have mounting pegs. If you
don't have mounting pegs, skip to step 5. The
side of the speaker with mounting pegs fits
flush against the side of the monitor.
3
Insert the pegs of the right speaker into the
corresponding slots on the right side of the
monitor. Push down, sliding the speaker pegs
completely into the slots.
4
Insert the pegs of the left speaker into the
corresponding slots on the left side of the
monitor. Push down, sliding the speaker pegs
completely into the slots.
5
Refer to your PC user’s guide for instructions on
how to connect your speakers to the PC.
Page 10

Using the Monitor
This chapter contains information about using the
HP Pavilion MX50, MX70, or MX90 Multimedia
Monitors.
Turning the Monitor On and Off
Use the Power button on the front panel to turn
the monitor on and off. When the monitor is on,
the light near the Power button is illuminated. The
light is green when the monitor and PC are active
and yellow/amber when the monitor is in one of
its reduced power modes.
The monitor’s power management features
reduce power consumption to low levels when
your PC has been inactive for a specified period
of time. See “Minimizing Energy Use” on page 8
for more information.
Because of the monitor’s power management
features, you don’t normally need to turn off the
monitor when it’s not in use. When turned off, the
monitor uses the same amount of power that it
uses in Sleep mode (less than 5 watts).
If your PC doesn’t support DPMS power
management, you can reduce power
consumption by turning off the monitor when it
won’t be used for an extended period. You can
turn the monitor off even if you leave the PC
running.
Warning:
To completely disconnect
power from the monitor, you must
remove the power cord from the AC
power outlet or surge protector.
Page 11

English
Degaussing the Display
Degaussing removes magnetism that causes
unwanted color variations. Degauss the display
any time you notice unusual color variations.
Note:
Do not degauss more frequently than once every
30 minutes, or the degauss will be incomplete. It is
not necessary to degauss unless you have moved
the monitor.
There are two degaussing methods. Each time
you turn on the monitor, it is automatically
degaussed. You can also use the Degauss option
in the on-screen display (OSD) main window to
degauss the display.
See “Using the OSD Main Window” on page 12
for instructions.
Setting the Screen Resolution
The screen resolution determines the amount of
information shown in the display. Screen
resolution refers to the number of dots or
pixels
used to make up an image. A low screen
resolution means that the display uses a relatively
small number of relatively large dots. A higher
resolution means that more dots of a smaller size
make up the image. With higher screen
resolutions, icons, windows, and text are smaller
on the screen, but more information can be
displayed.
Use the Window’s Control Panel to set the screen
resolution. The monitor supports many common
screen resolutions, as shown in the “Pre-Set Video
Modes.”
Page 12

Selecting Refresh Rate
To minimize eyestrain and maximize the
performance of your display, use the highest
possible image refresh rate or vertical frequency
for which you don’t perceive flicker (generally at
or above 75 Hz for most users). The image
refresh rate is the number of times per second
that the image is refreshed. The “Pre-Set Video
Modes” table shows the image refresh rates
supported by the monitors at different screen
resolutions.
Minimizing Energy Use
HP Pavilion PCs support VESA Display Power
Management Signaling (DPMS). Power
Management features reduce the monitor’s power
consumption after a period of keyboard
inactivity.
The monitor supports three different power-saving
modes — Standby, Suspend, and Sleep. See
“DPMS Power Management Features” for a
description of the characteristics of each mode.
When the monitor is in one of its power-saving
modes, the screen is blanked out and the front
panel power indicator is yellow/amber. Consult
your PC user’s guide for information about setting
the power-saving modes.
Cleaning the Screen
To clean the screen:
1
Turn off and unplug the monitor.
2
Spray a soft cotton cloth with regular
household glass cleaner, and then gently wipe
the screen.
Page 13
English
Warning:
Don’t use cleaning solutions
containing fluoride, acids, or alkalis.
Never use hard or abrasive cleaning
products to clean the screen.
3
Dry the screen with a soft cotton cloth.
4
Plug in the monitor and turn it on.
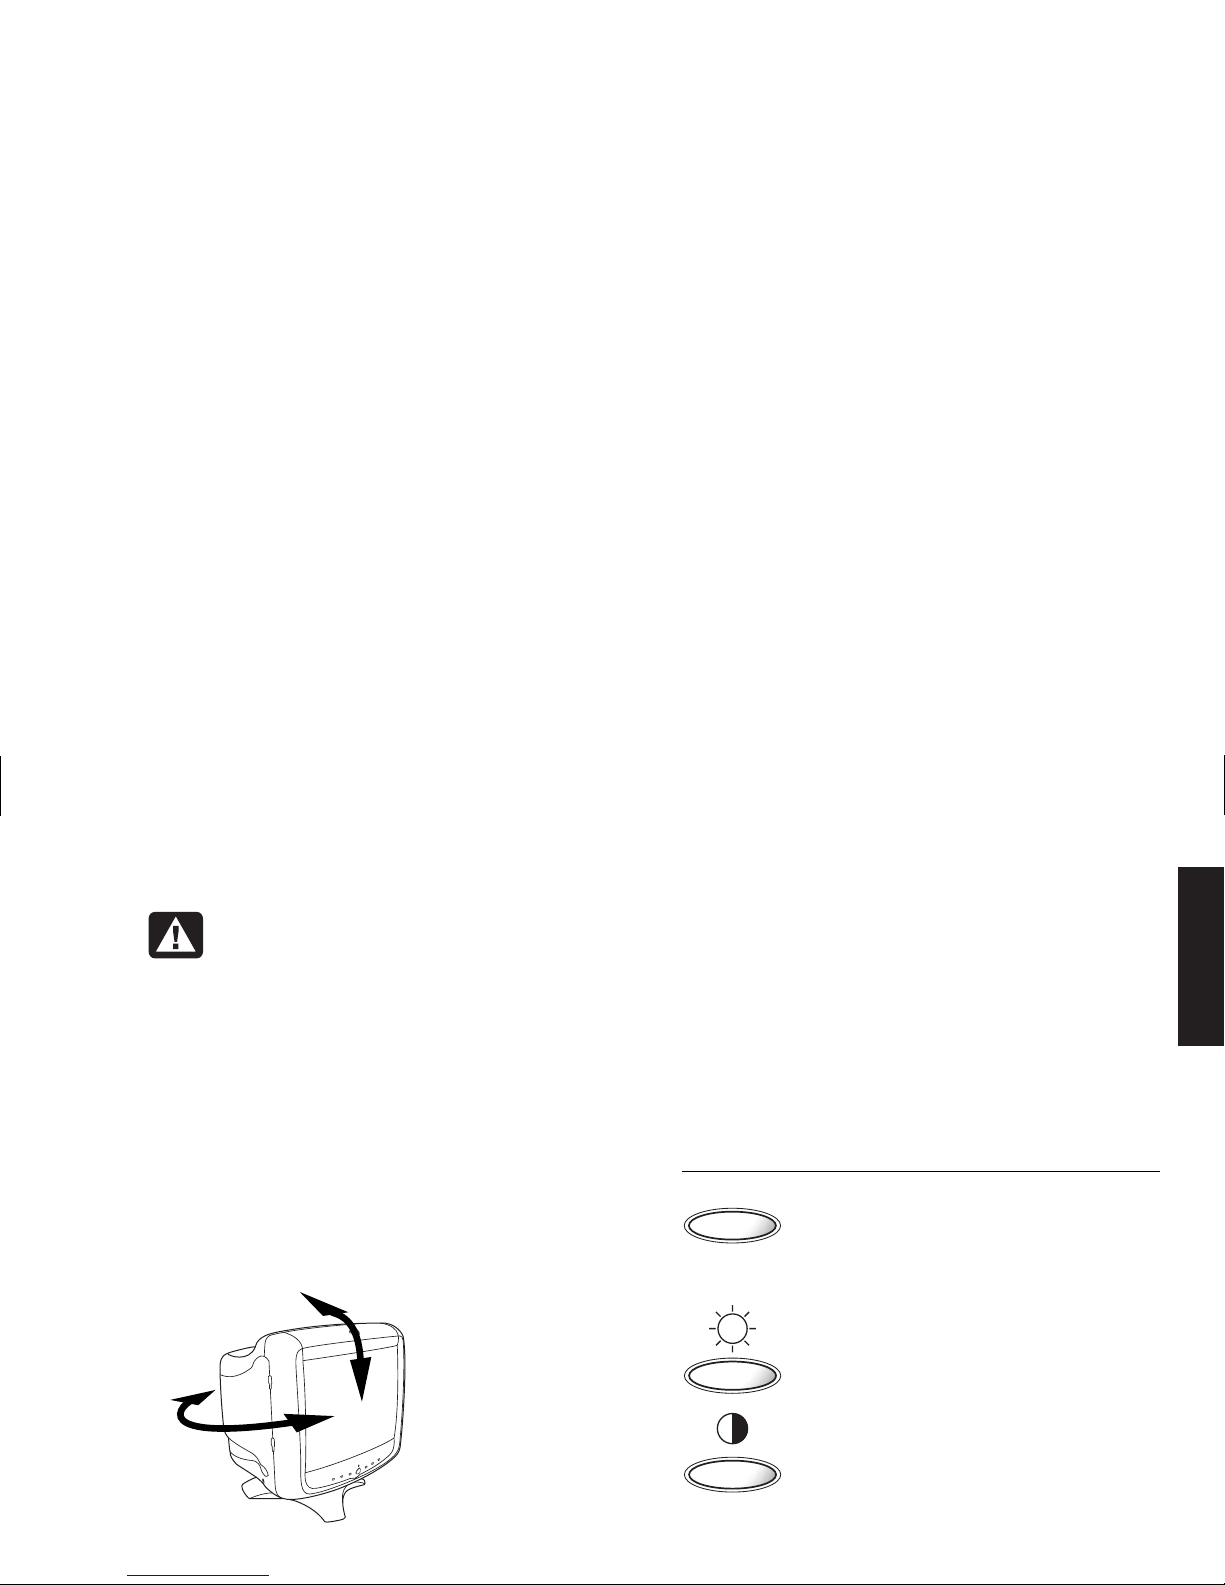
Adjusting the Viewing Angle
The monitor’s pedestal mounting enables you to
adjust the viewing angle. You can tilt and swivel
the monitor to find the most comfortable viewing
position.
Changing Display Settings
Use the on-screen display (OSD) features of the
monitor to change settings. The buttons on the
front panel control on-screen icons and windows.
Using the Front Panel
Use the six buttons on the front of the monitor to
control OSD functions.
MODE
The Mode button opens the Contrast Mode
window and allows you to choose from the
monitor’s pre-set modes. See “Pre-Set
Contrast Modes” on page 10, for
instructions.
The Brightness button opens and closes the
Brightness Adjustment window.
The Contrast button opens and closes the
Contrast Adjustment window.
Page 14
SELECT
The Select button opens the OSD Main
window if no other OSD windows are
displayed. In the OSD Main window, the
Select button opens the adjustment bar for
the selected icon, or the corresponding
window. When the Brightness or Contrast
Adjustment bar is on the screen, the Select
button closes the bar and saves the value.
The Minus button decreases a setting if an
adjustment window is open. In a window,
the button moves the pointer upward
through the icon menu.
The Plus button increases a setting if an
adjustment window is open. In a window,
the button moves the pointer downward
through the icon menu.
Pre-Set Contrast Modes
Pre-set contrast modes enable you to quickly
change contrast settings to match those
commonly used for various activities and viewing
conditions.
Two pre-set contrast modes are provided:
Text mode is designed for best results
in lower ambient lighting environments
and with applications like word
processors and spreadsheets. This is
a lower contrast setting.
Benefit:
Eye comfort, less fatigue,
and improved focus.
Video/Games mode offers higher
contrast appropriate for viewing fullmotion video, and for photographic
and pre-press applications.
Benefit:
Higher contrast for vibrant,
vivid images, and maximum visual
impact with games and video.
Setting a Pre-Set Contrast Mode
1
Press the Mode button on the front of the
monitor. The Contrast Mode window opens.
Page 15
English
TEXT
VIDEO/GAMES
CONTRAST MODE
2
To select a mode, press the Mode button
again, or press the Plus (+) or Minus (–) button.
3
When the icon for the monitor mode you want
is highlighted, press the Select button. The
Contrast Mode window closes.
Changing Mode Settings
The pre-set contrast modes are the overall, master
settings for brightness, contrast, and other image
settings. You may make further adjustments to the
image settings by using the OSD.
If you turn off the monitor, the last used mode is
active when you turn it back on.
Changes to color temperature are independent of
the contrast mode setting — the two modes will
function the same way with any color setting.
Page 16
Adjusting Brightness and Contrast
Directly
You can change the display’s brightness or
contrast quickly by pressing the Brightness or
Contrast button. Brightness adjusts the black
level, while contrast adjusts the difference
between the dark and light parts of the image.
Adjust the brightness level so that black items on
the screen appear black. Then adjust the contrast
for the most comfortable viewing.
To adjust the brightness or contrast:
1
Press the Brightness or Contrast button on the
front panel to open the Brightness Adjustment
window, or the Contrast Adjustment window.
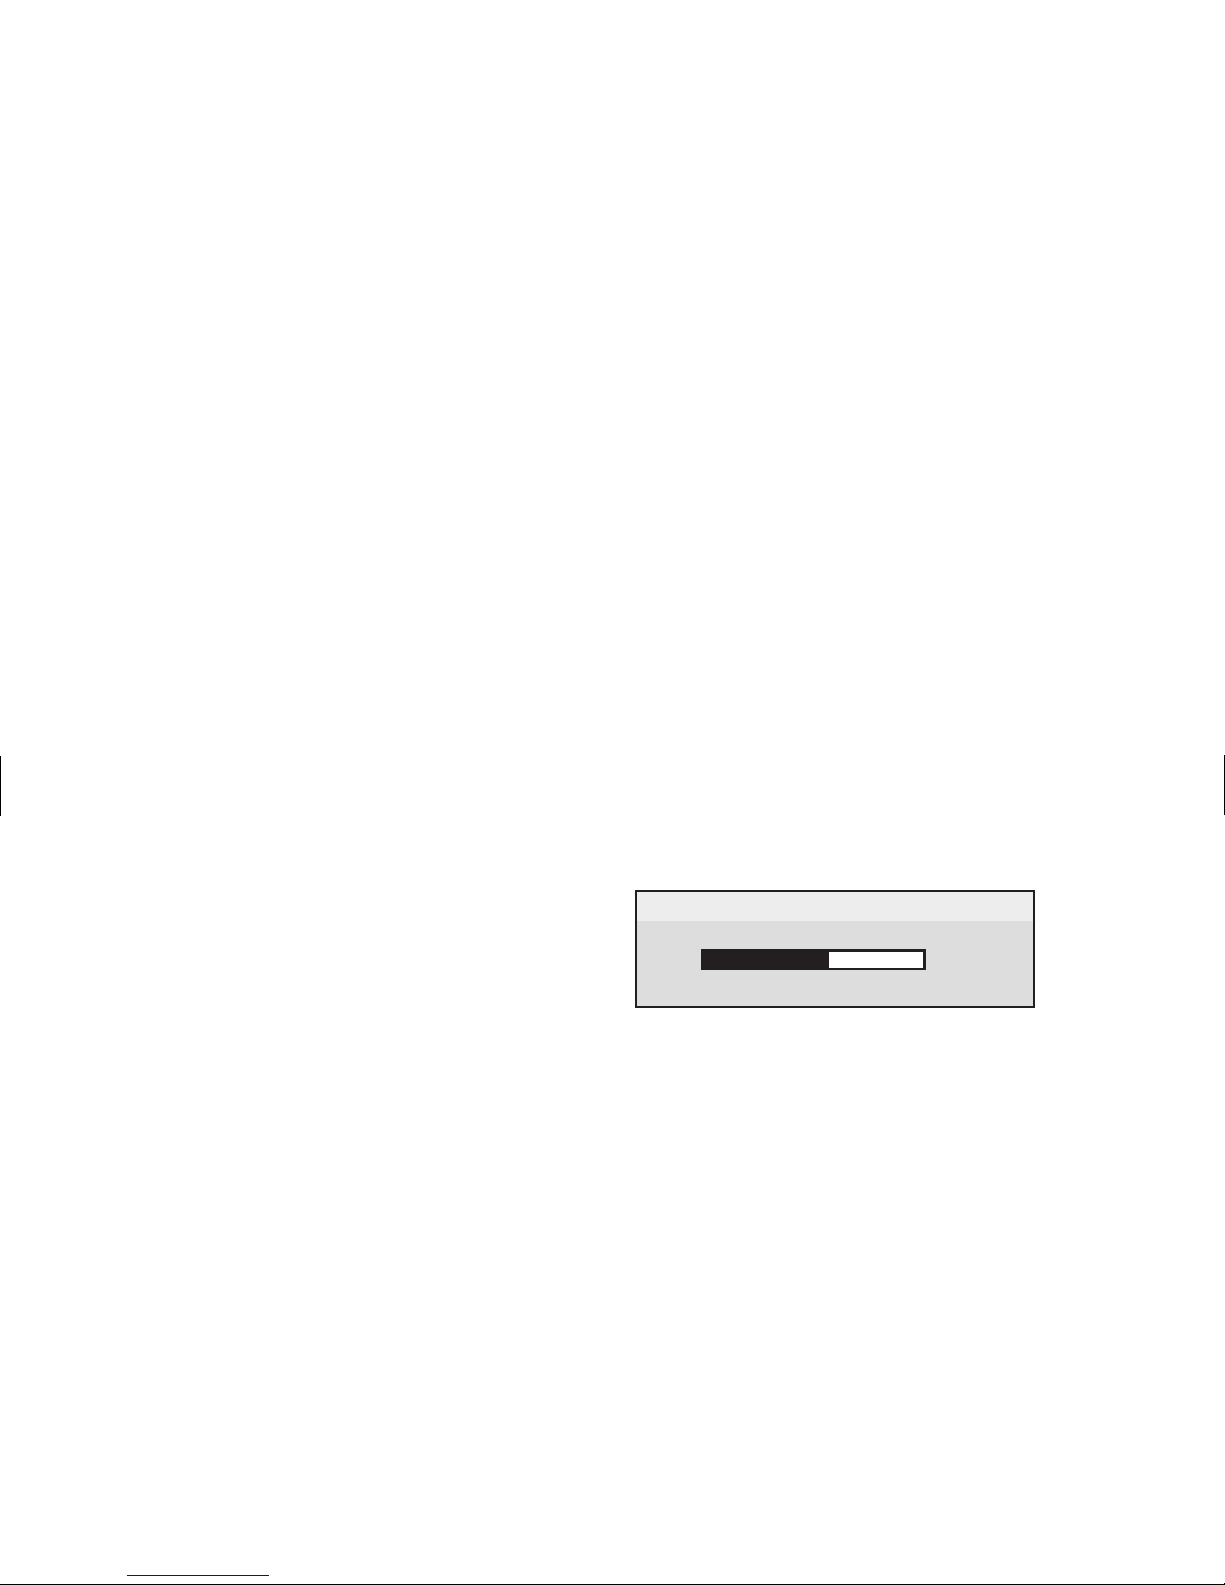
BRIGHTNESS
-
+
50
2
Press the Plus (+) or Minus (–) button to
increase or decrease the setting from its current
position.
3
When the brightness or contrast is at the
desired level, press the Brightness or Contrast
button again to close the adjustment window.
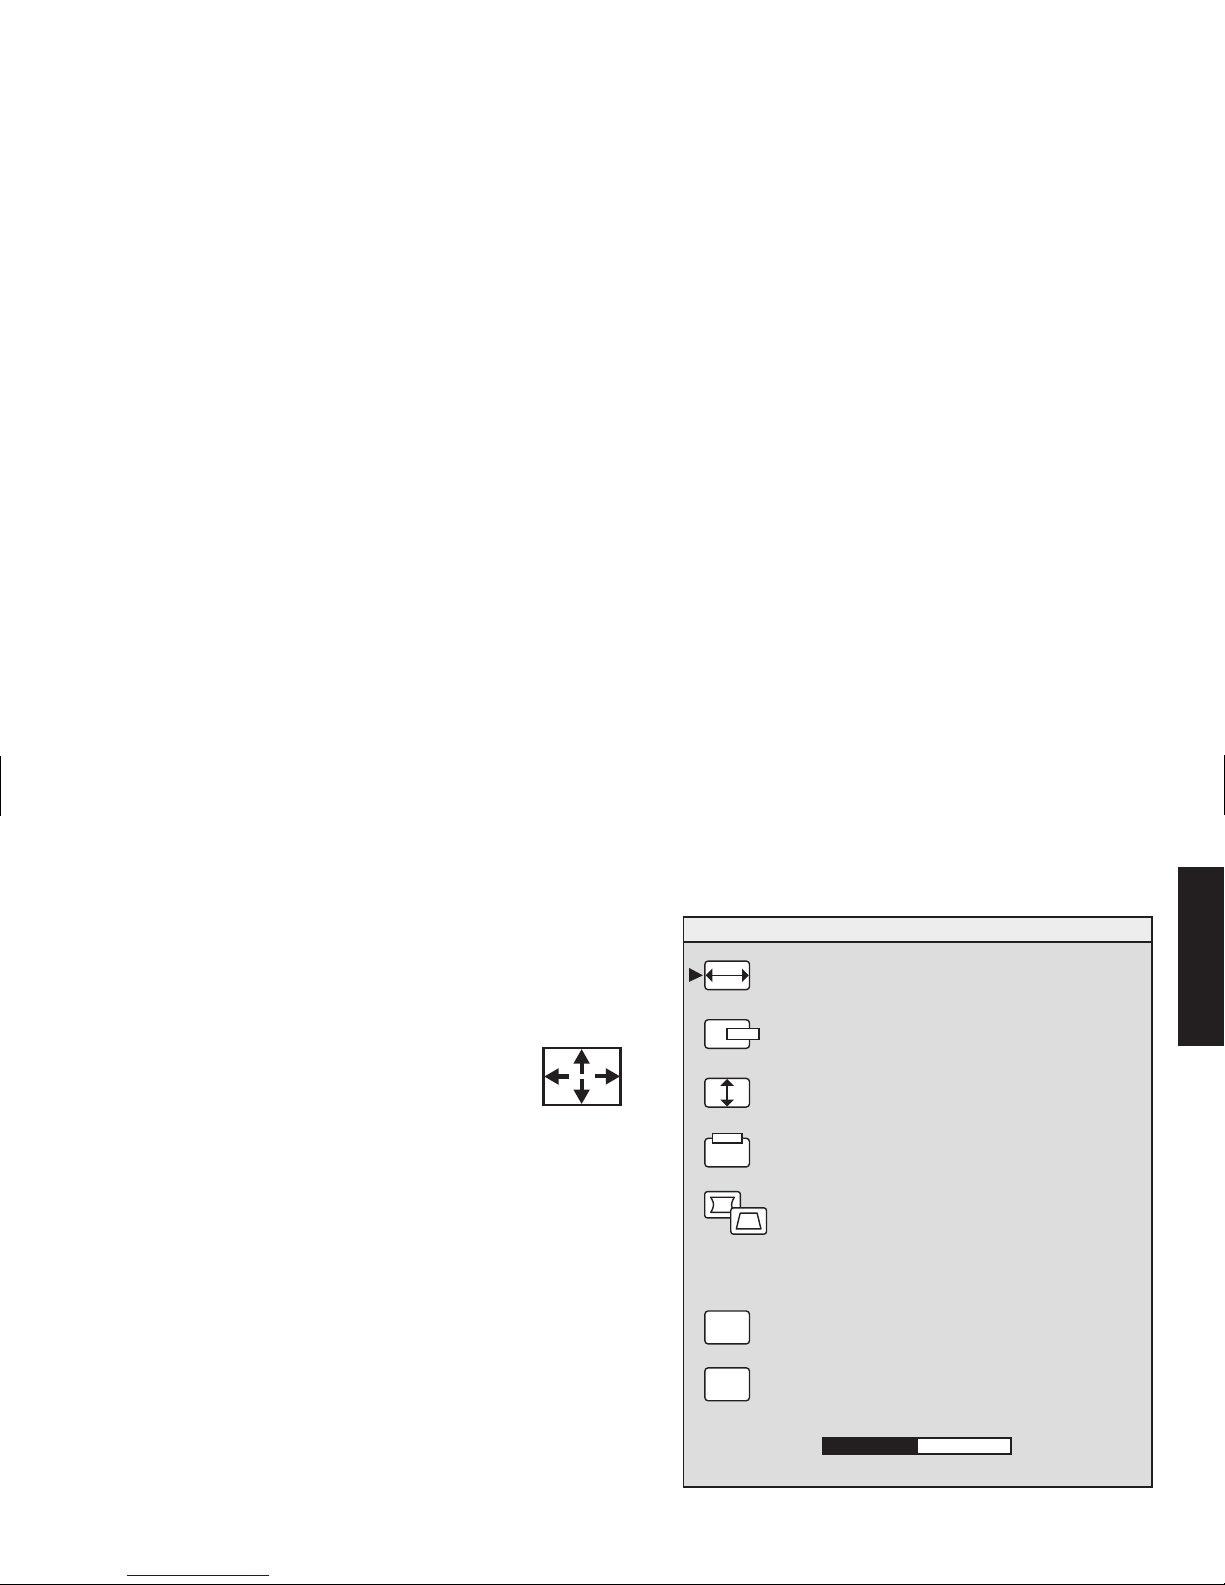
Using the OSD Main Window
The OSD Main window enables you to make
changes to a variety of display settings. You open
the window by pressing the Select button when
no other OSD windows are displayed on the
screen.
Page 17
English
BRIGHTNESS
CONTRAST
ZOOM
ADVANCED GEOMETRY
SIZE & POSITION
ADVANCED MENU
DEGAUSS
+
-
800 X 600 / 85 Hz
EXIT
EXIT
50
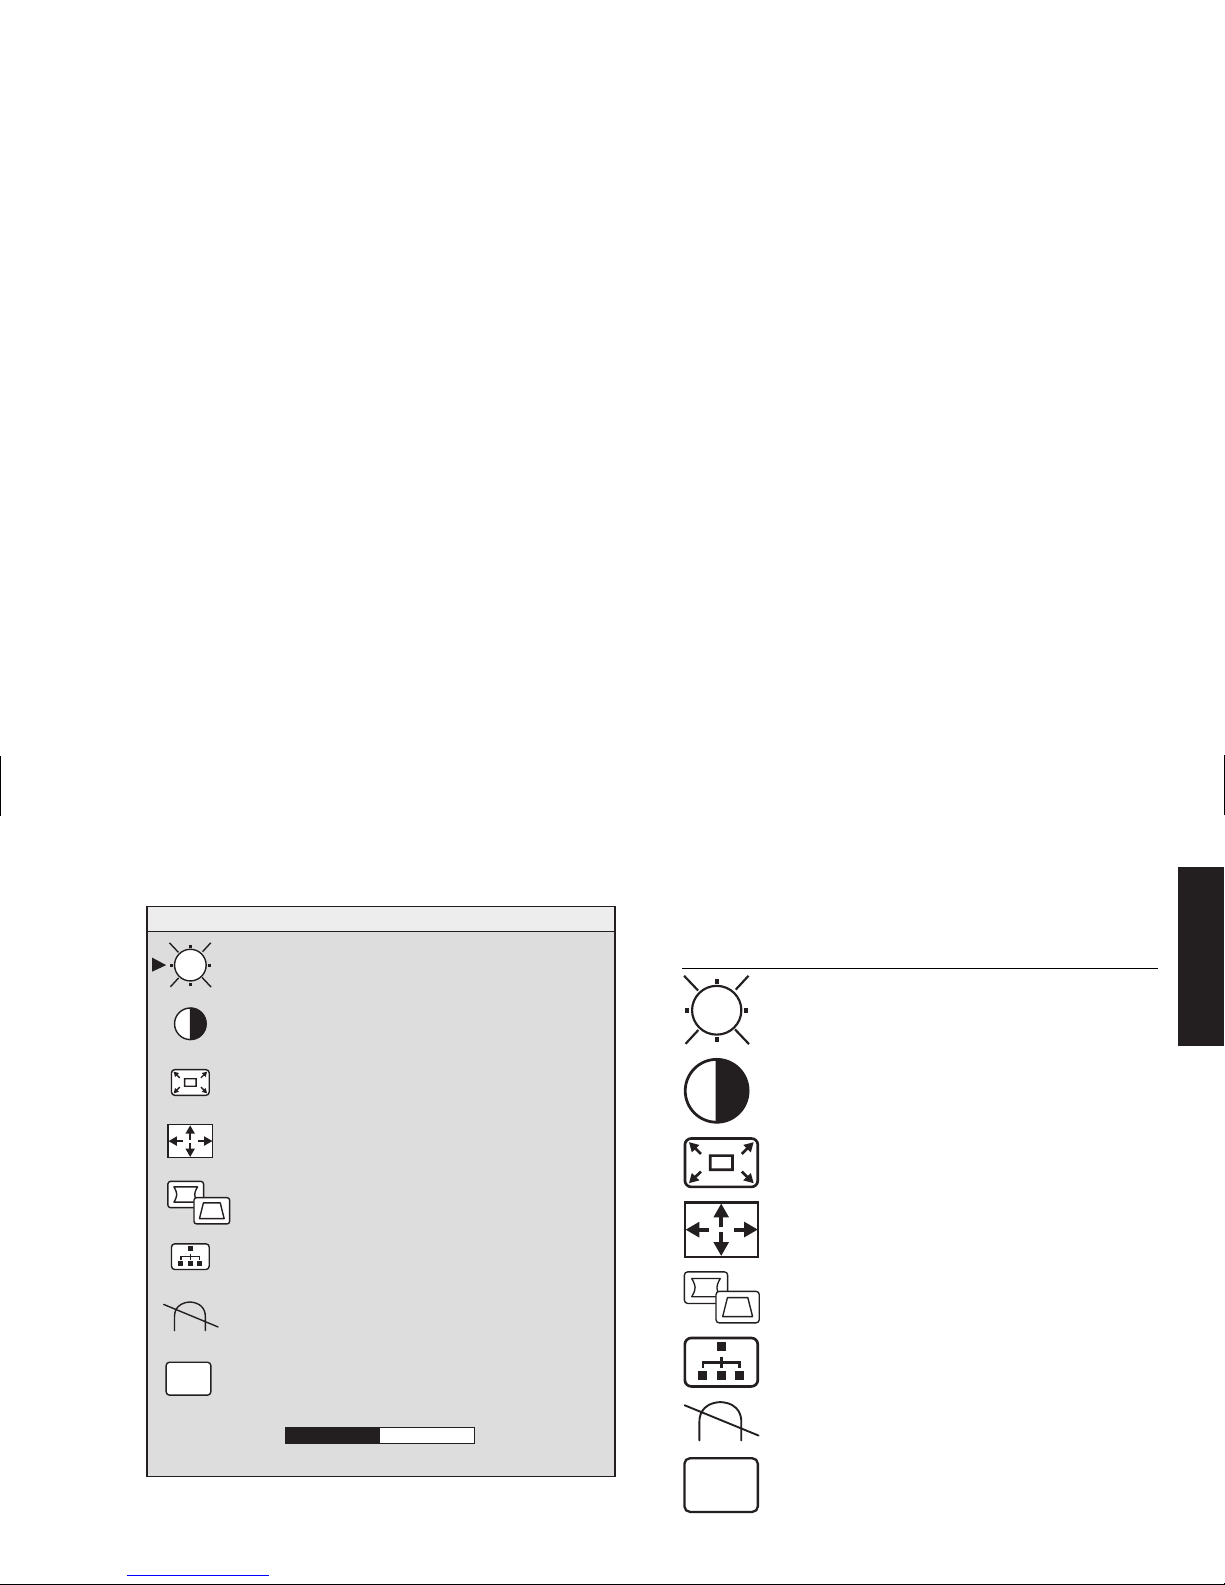
In the OSD Main window, the following functions
are available:
Brightness
Adjusts the luminance
level in the image.
Contrast
Adjusts the difference in
luminance between light and dark areas
of the image.
Zoom
Increases or decreases the size
of an image in both directions.
Size and Position
Opens the Size &
Position window.
Advanced Geometry
Opens the
Advanced Geometry window.
Advanced Menu
Opens the
Advanced Menu window.
Degauss
Degausses the display and
restores image quality.
EXIT
Exit
Closes the OSD Main window
and saves any changes you have made.
Page 18
If you select the icons for
Brightness
,
Contrast
, or
Zoom
, an adjustment bar appears
below the OSD window. You shorten or lengthen
the adjustment bar with the Plus (+) or Minus (–)
button. A number next to the control bar shows
the percentage of the current setting relative to its
maximum value.
To use the OSD Main window:
1
Press the Select button on the front of the
monitor to open the OSD Main window.
2
Press the Plus (+) or Minus (–) button to move
among the icons in the window.
3
When the icon for the function you want is
highlighted, press the Select button.
3
If you select the
Degauss
or
Exit
option,
the option takes effect immediately.
3
If you select the icons for
Brightness
,
Contrast
, or
Zoom
, an adjustment bar
appears.
3
If you select any other option, another
window appears.
4
If an adjustment bar appears, press the Plus (+)
or Minus (–) button to change the current
setting, and then press the Select button to
save your changes and close the
adjustment bar.
82
5
To close the OSD Main window,
select the
Exit
icon.
Note:
Only a highlighted icon, and the Reset
and Exit icons, will display a descriptive text.
EXIT
Page 19
English
Using the Size & Position Window
The Size & Position window allows you to adjust
the horizontal and vertical size and position of
an image.
To open the Size & Position window,
select the
Size & Position
icon in the
OSD Main window.
H-SIZE
H-POSITION
V-SIZE
ADVANCED GEOMETRY
V-POSITION
SIZE & POSITION
RESET
EXIT
+
-
RESET
EXIT
50
Page 20
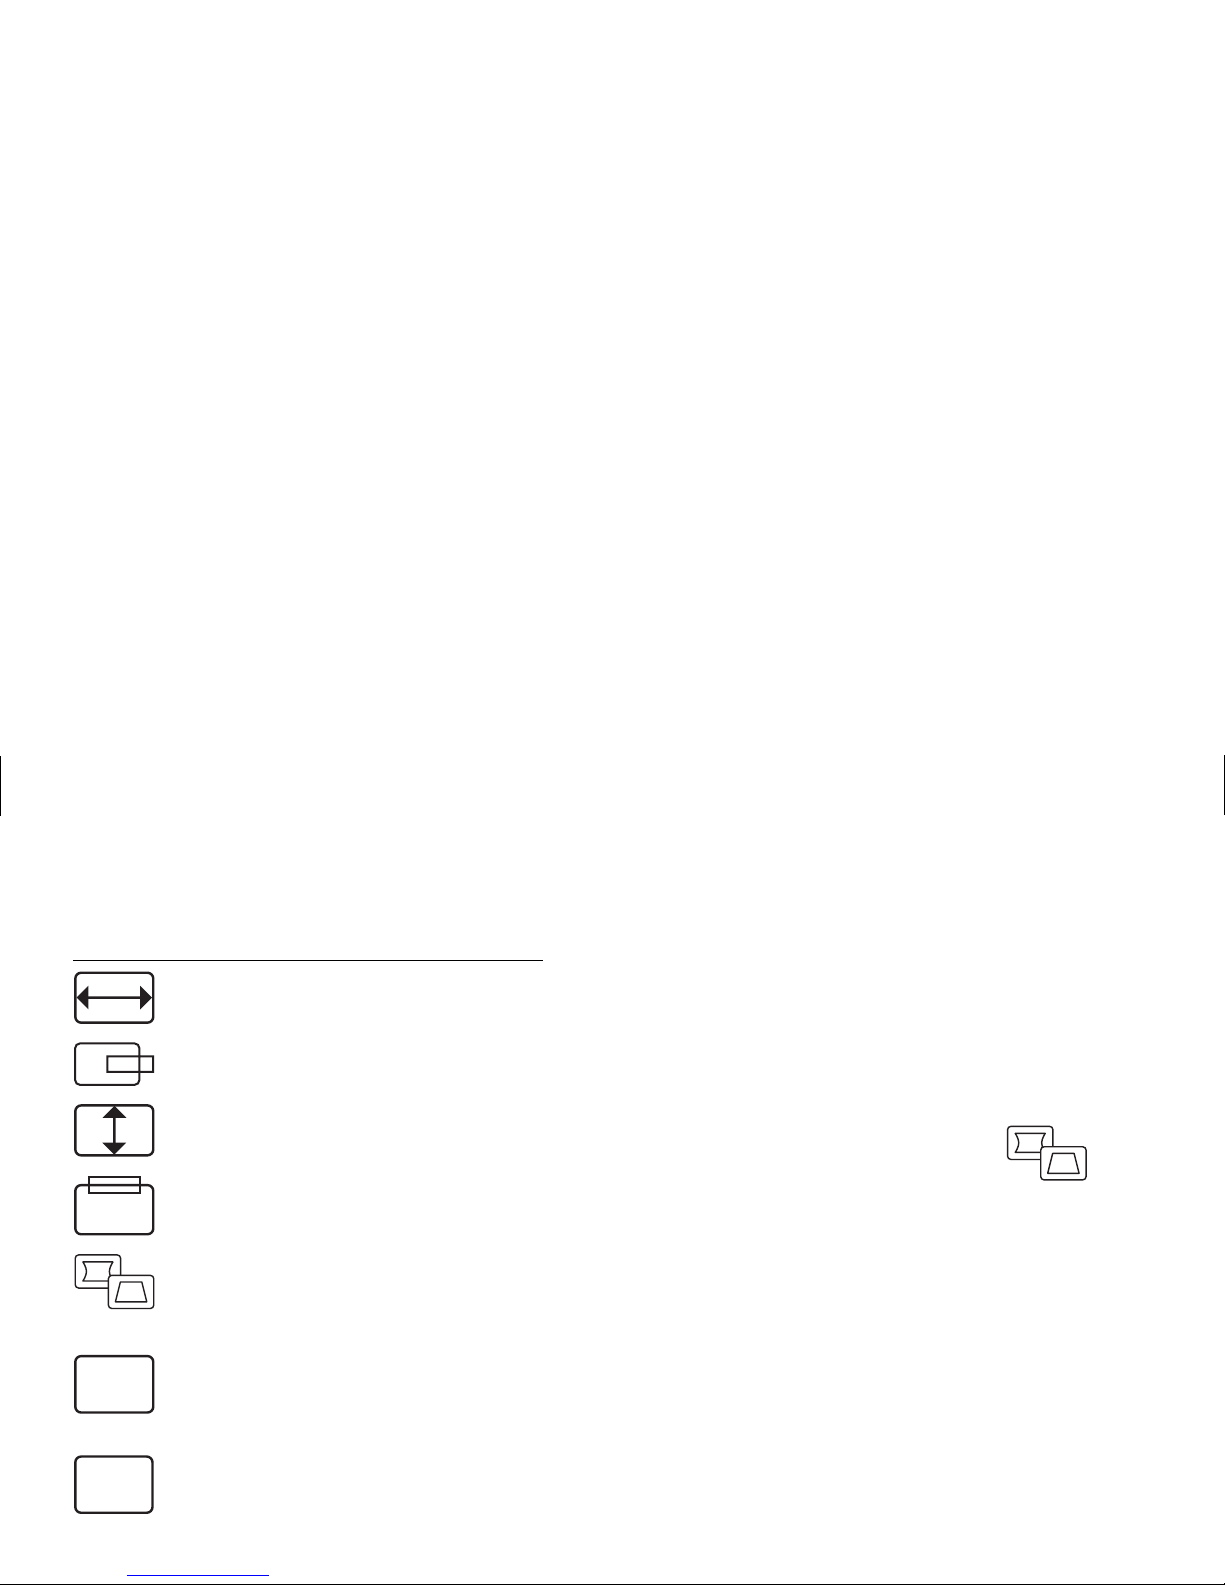
In the Size & Position window, the following
functions are available:
H-Size
Adjusts the horizontal size of
the image.
H-Position
Adjusts the horizontal
position of the image.
V-Size
Adjusts the vertical size of the
image.
V-Position
Adjusts the vertical
position of the image.
Advanced Geometry
Opens the
Advanced Geometry window. See
“Using the OSD Advanced Geometry
Window” on page 16.
RESET
Reset
Resets the values for the Size &
Position window and the Advanced
Geometry window (except rotation) to
factory settings.
EXIT
Exit
Closes the Size & Position
window, saves any changes you have
made, and opens the Main window.
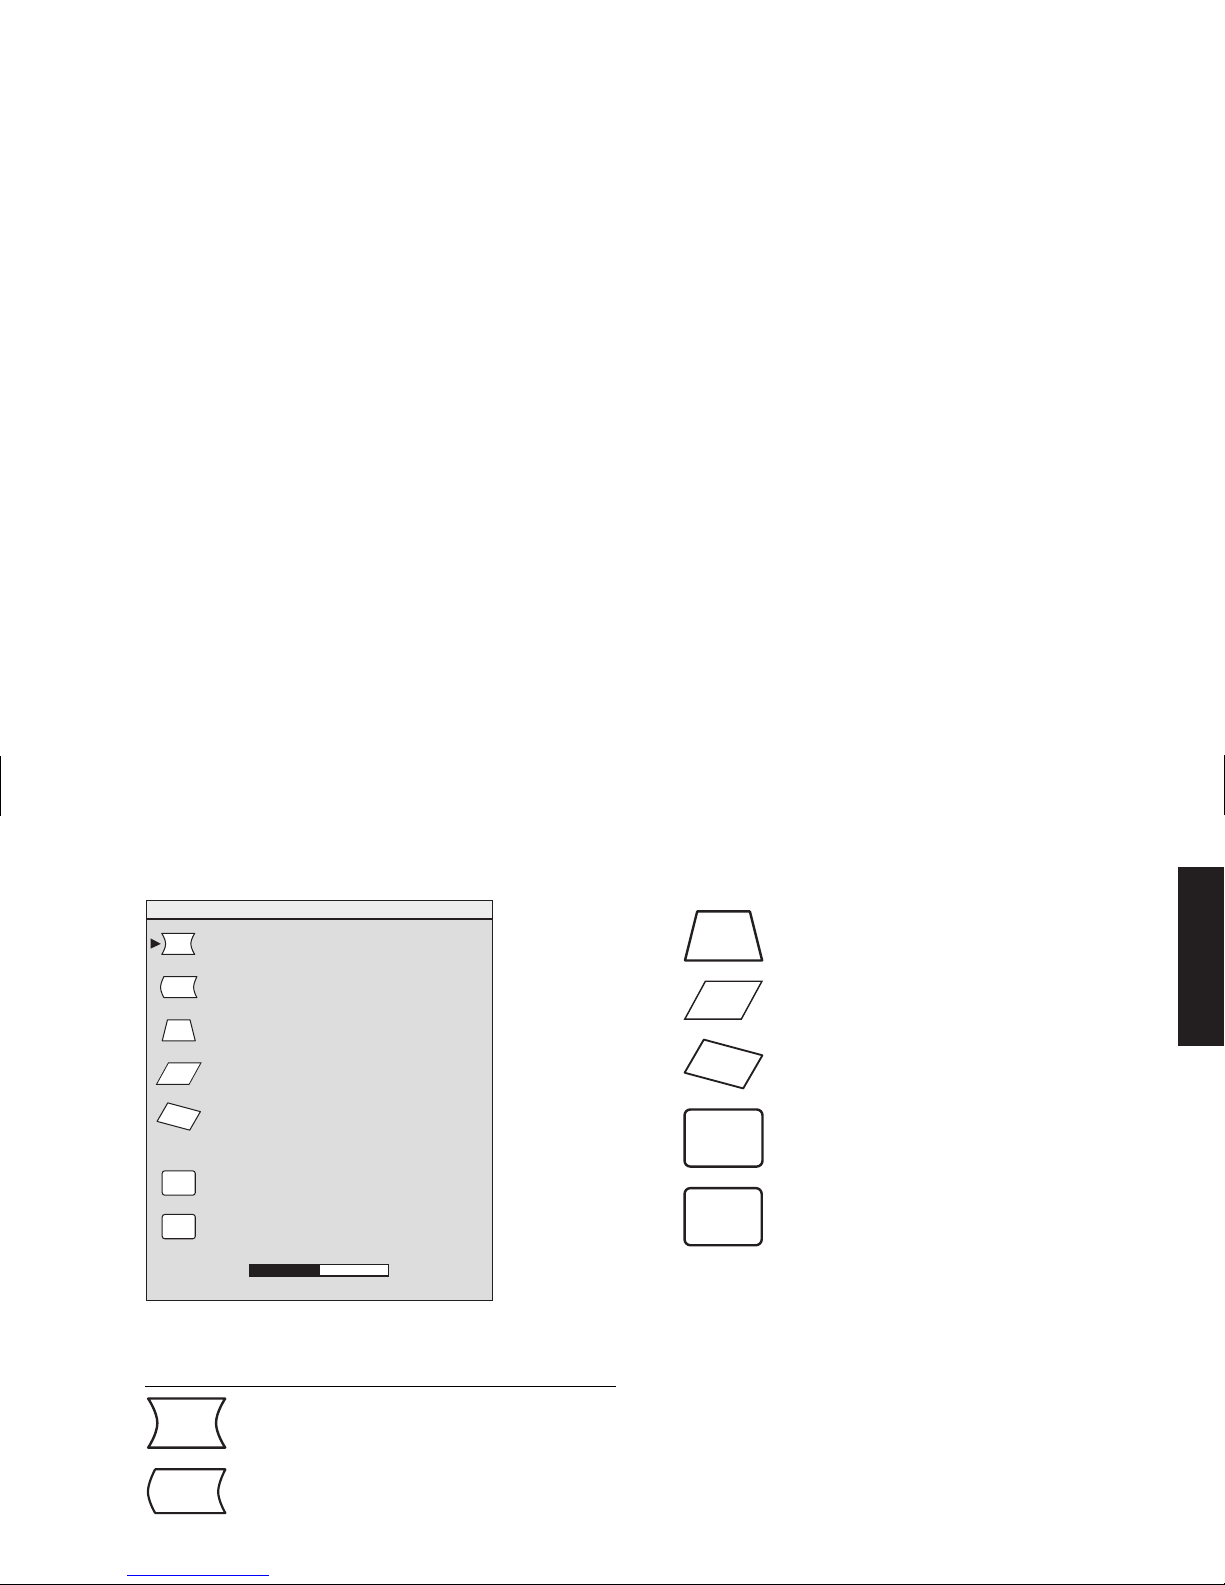
Using the Advanced Geometry
Window
The Advanced Geometry window allows you to
correct the shape and position of an image
beyond the basic vertical and horizontal sizing
and positioning that you can do in the Size &
Position window.
To open the Advanced Geometry
window, select the
Advanced
Geometry
icon in the OSD Main
window.
Page 21
English
SIDE PIN
PIN BALANCE
TRAPEZOID
PARALLELOGRAM
ROTATION
ADVANCED GEOMETRY
RESET
EXIT
+
-
RESET
EXIT
50
In the Advanced Geometry window, the
following functions are available:
Side-Pin
Adjusts any tapering or
bowing of both sides of the image.
Pin Balance
Straightens the left or
right side of the image when only one
side of the image is bowed.
Trapezoid
Makes the vertical sides
parallel to each other.
Parallelogram
Squares the image.
Rotation
Adjusts the angle of the
image (MX70 and MX90 only).
RESET
Reset
Returns all advanced geometry
settings, except rotation, to their original
factory values.
EXIT
Exit
Closes the Advanced Geometry
window, saves any changes you have
made, and opens the previous window.
Using the OSD Advanced
Menu Window
The OSD Advanced Menu window allows you to
make changes to a variety of advanced display
settings. Except in special circumstances, you will
not need to adjust these settings, but they are
available to you as added options.
Page 22
To open the Advanced Menu window,
select the
Advanced Menu
icon in
the OSD Main window.
COLOR
LANGUAGE
MOIRE
OSD POSITION
STATUS
EXIT
ADVANCED MENU
OSD
I
EXIT
In the OSD Advanced Menu window, the
following functions are available:
Color Adjusts the color temperature of
the image.
Language Sets the language of the
OSD window.
OSD
OSD Position Adjusts the position of
the OSD window.
Moiré Control Reduces wavy colored
lines or patterns in the background of
your image. Horizontal and vertical
controls are available.
I
Status Provides information about the
horizontal and vertical scan frequencies,
the resolution (for pre-set modes only),
and the serial number of the monitor.
EXIT
Exit Closes the OSD Advanced Menu
window.
Page 23

English
Choosing the Color Temperature
The default color settings in the Text and
Video/Games modes are optimized for best
results in those environments, but you can change
the color temperature temporarily when
necessary. (If you need to save color settings for
a particular application, use the USER COLOR
setting.)
You can choose between two settings: 9300K
and 6500K.
The 9300K setting is often used for office
environments or fluorescent lighting. The 6500K
setting is often used in environments with
incandescent lighting.
You can also choose to individually adjust the
red, green, and blue (RGB) values that make up
the screen image. See the section, “Setting Red,
Green, and Blue Values” on page 20 for
instructions. To choose the color temperature:
1
In the OSD Advanced window, press the Plus
(+) or Minus (–) button to move to the Color
icon.
2
Press the Select button to open the
Color Adjustment window.
9300K
6500K
USER color
COLOR
✓
EXIT
EXIT
Press the Plus (+) or Minus (–) button to move
to the color temperature option you want.
Page 24

3
Press the Select button to select the color
temperature.
4
Select the
Exit
icon to close the Color window.
Setting Red, Green, and Blue
Val ues
You may want to make very precise adjustments
to the screen color. For example, under unique
ambient lighting conditions, you may need to
adjust the screen color so that it more closely
matches the ambient lighting conditions. You can
make these adjustments by individually setting
red, green, and blue (RGB) values.
Make sure to let the monitor warm up fully before
trying to match colors precisely. It takes the
monitor up to 30 minutes to warm up completely
after being turned on or recovering from a
power-saving state.
To se t RG B val ues :
1
In the OSD Advanced Menu window, press the
Plus (+) or Minus (–) button to move to the
Color icon.
2
Press the Select button to open the Color
Adjustment window.
3
In the Color Adjustment window, press the Plus
(+) or Minus (–) button to move to the USER
COLOR setting.
4
Press the Select button to open the RGB
Adjustment window.
5
Press the Plus (+) or Minus (–) button to move
among the options, and then press Select to
choose an option.
Page 25
English
R
G
B
EXIT
USER COLOR
RESET
EXIT
RESET
50
50
50
-
+
-
+
-
+
6
When a color is selected, press the Plus (+) or
Minus (–) button to increase or decrease the
video gain for that color, and then press
Select.
7
Press Exit to close the USER COLOR window.
Note:
If you select the Reset icon, you reset the value of
the color to the previously set user value.
Choosing a Language
To choose a language for the text in the OSD
window:
1
In the OSD Advanced Menu window,
press the Plus (+) or Minus (–) button
to move to the Language icon.
2
Press the Select button to open the Language
Selection window.
EXIT
ENGLISH
DEUTSCH
ESPAÑOL
ITALIANO
FRANÇAIS
LANGUAGE
✓
EXIT
Page 26
3
Press the Plus (+) or Minus (–) button to move
to the language you want.
4
Press the Select button to select the language.
5
Press Exit to close the Language window.
Choosing the OSD Position
The default OSD window position for the
windows is the center of the screen, but you can
change the window position.
To adjust the OSD window position:
1
In the OSD Advanced Menu window,
press the Plus (+) or Minus (–) button
to move to the OSD Position icon.
2
Press the Select button to open the OSD
Position window.
EXIT
OSD POSITION
EXIT
+ 50
-
3
Press the Plus (+) or Minus (–) button to move
between options.
4
Press Select to choose a function. The pointers
change to arrows for the selected function.
5
With the vertical pointers selected, press the
Plus (+) or Minus (–) button to move the OSD
window up or down.
OSD
Page 27

English
6
With the horizontal pointers selected, press the
Plus (+) or Minus (–) button to move the OSD
window right or left.
7
When you complete the adjustment, press
Select.
8
Press Exit to close the OSD Position window.
Adjusting the Moiré Filters
Select the Moiré Control icon to reduce wavy
colored lines or patterns in the background of
your image. Separate adjustment of horizontal
and vertical moiré is available.
To adjust the moiré filter:
1
In the OSD Advanced Menu window,
press the Plus (+) or Minus (–) button
to move to the Moiré icon.
2
Press the Select button to open the Moiré
window.
3
Press the Plus (+) or Minus (–) button to move
among the options.
H-MOIRÉ: ON
H-MOIRÉ: OFF
V-MOIRÉ: ON
V-MOIRÉ: OFF
MOIRÉ
✓
✓
EXIT
EXIT
-
+
50
4
Press the Select button to select an option. An
adjustment bar will appear underneath the
Moiré window if you select
H-Moiré : On
or
V-Moiré : On
.
Note:
The “H” in H-Moiré means horizontal; the “V” in
V-Moiré means vertical.
Page 28

5
Press the Select button to save your changes
and close the adjustment bar.
6
Press Exit to close the Moiré window.
Using the Status Window
The Status window is an information window that
displays the horizontal and vertical scan
frequencies, the resolution (for pre-set modes
only), and the serial number of the monitor.
To display the Status window:
1
In the OSD Advanced Menu window,
press the Plus (+) or Minus (–) button
to move to the Status icon.
2
Press the Select button to open the Status
window.
3
Press Select to close the Status window.
EXIT
SERIAL NUMBER
AASDD12345
FV :70Hz
FH :31KHz
RESOLUTION:
640 X 480
STATUS
EXIT
Restoring Factory Adjustments
To restore all parameters to the original factory
values:
1
Turn the power off.
2
While pressing the Plus (+) button, turn the
power back on.
I
Page 29

English
Technical Information
This chapter contains technical information about the HP Pavilion MX50, MX70, and MX90 Multimedia
Monitors.
These monitors are compatible with IBM PC, PC-compatible, and PS/2 PCs. They are also compatible
with VESA power management standards. (See “DPMS Power Management Features” on page 29.)
Monitor Information
MX50 MX70 MX90
Picture tube
15 in (38.1 cm),
90° deflection,
black matrix,
phosphor P22 medium short,
0.28 mm dot pitch
17 in (43.1 cm),
90° deflection,
black matrix,
phosphor P22 medium short,
0.27 mm dot pitch
19 in (48.2 cm),
100° deflection,
44% light transmission,
0.26mm dot pitch,
semi-tint, anti-reflective/
anti-static coating (Arasc)
Maximum
viewable area
280 mm (H) x 210 mm (V)
11 in (H) x 8.25 in (V)
13.8 in (350 mm) diagonal
320 mm (H) x 240 mm (V)
12.6 in (H) x 9.5 in (V)
15.8 in (400 mm) diagonal
365 mm (H) x 274 mm (V
14.4 in (H) x 10.8 in (V)
18 in (457 mm) diagonal
Line (horizontal)
frequency
30–54 kHz 30–70 kHz 30–95 kHz
Page 30

MX50 MX70 MX90
Raster (vertical)
frequency
47–100 Hz 50–120 Hz 50–150 Hz
Power source
100–240 VAC, 50–60 Hz
(auto switching)
100–240 VAC, 50–60 Hz
(auto switching)
100–240 VAC, 50–60 Hz
(auto switching)
Power
consumption
70 W maximum 90 W maximum 130 W maximum
Dot rate
65 MHz 110 MHz 160 MHz
Pedestal
Tilt: 5° forward,
15° backward
Swivel: –45° left or right
Tilt: 5° forward,
15° backward
Swivel: –60° left or right
Tilt: 5° forward,
15° backward
Swivel: –60° left or right
Dimensions
(W x H x D)
366 x 396 x 412 mm
14.4 x 15.6 x 16.2 in
414 x 440 x 442 mm
16.3 x 17.3 x 17.4 in
465 x 487 x 422 mm
18.3 x 19.2 x 16.1 in
Net weight
12.0 kg (26.4 lb.) 19.0 kg (41.9 lb.) 25.0 kg (55.0 lb.)
Operating
Conditions
Temperature
Humidity
Altitude
5° to 35°C (41° to 95°F)
15% to 80%, non-condensing
5° to 35°C (41° to 95°F)
15% to 80%, non-condensing
5° to 35°C (41° to 95°F)
15% to 80%, non-condensin
g
0 to 10,000 feet
Storage
Conditions
Temperature
Humidity
–25° to 60°C
(
–13° to 140°F
)
20% to 80%, non-condensing
–25° to 60°C
(
–13° to 140°F
)
20% to 80%, non-condensing
–25° to 60°C
(
–13° to 140°F
)
20% to 80%, non-condensing
Page 31

English
Pre-Set Video Modes
The HP Pavilion MX50, MX70, and MX90 Multimedia Monitors support the following industry-standard
combinations of screen resolution and refresh rates. Other combinations are possible, but may require
adjustments to the image size and position. (See “Using the OSD Main Window” on page 12 for
information about making these adjustments.)
Resolution (dots x lines) 60 Hz 70 Hz 75 Hz 85 Hz
720 x 400
MX50
MX70
MX90
640 x 480
MX50
MX70
MX90
MX50
MX50
MX70
800 x 600 MX50 MX50
MX70
MX50
MX70
MX90
1024 x 768 MX50
MX70
MX70 MX70
MX90
1152 x 864 MX90
1280 x 960 MX90
1280 x 1024 MX70 MX90 MX90
1600 x 1200 MX90
Page 32

Pin Assignments
The following figure illustrates the 15-pin D-sub
male video connector used by the HP Pavilion
MX50, MX70, and MX90 Multimedia Monitors.
The table shows the pin assignments.
51
15
11
6
10
Note:
Because of a policy of continuous product
improvement, pin assignments are subject to
change without notice.
Pin Number Assignment
1
Red video input
2
Green video input
3
Blue video input
4
Ground
5
GGrroouunnd
d
6
Red video return
7
Green video return
8 Blue video return
9 Floating
10 Floating or Ground
11 Ground
12 Data
13 Horizontal sync
14
Ver tic al s ync
15
Data clock
Page 33

English
DPMS Power Management
Features
To maximize screen life:
3
Take advantage of your PC’s power
management system to control your monitor.
3
The HP Pavilion MX50, MX70, and MX90
Multimedia Monitors can recognize power
management signals from VESA Display Power
Management Signaling (DPMS) video
adapters, such as those in HP Pavilion and
many other PCs. When the monitor receives an
appropriate signal, it reduces its power but
remains ready for quick use. The power light
on the front panel turns yellow/amber when
the monitor is in a power-saving mode.
3
VESA DPMS video adapters reduce monitor
power consumption by setting the horizontal
and/or vertical synchronization signals to
inactive. The monitor will recover quickly when
the synchronization signals are reapplied.
3
Standby and Suspend modes offer low power
consumption with rapid recovery, while Sleep
mode offers the lowest power consumption
and a somewhat slower recovery.
Page 34

The following table shows the characteristics of the normal operating mode and the three power-saving
modes.
VESA Display Power Management Signaling (DPMS)
Mode Video
Horizontal
Sync
Ver tica l
Sync
Power Used
MX50
Power Used
MX70
Power Used
MX90
On Active Yes Yes
@
70 W
@
90 W
@
130 W
Standby Blank No Yes
@
15 W
@
15 W
@
15 W
Suspend Blank Yes No
@
15 W
@
15 W
@
15 W
Sleep Blank No No
@
5 W
@
5 W
@
5 W
Page 35

English
Regulatory Information
Declaration of Conformity
According to ISO/IEC Guide 22 and EN 45014
Manufacturer’s
Name:
Hewlett-Packard Company
Manufacturer’s
Address:
10500 Ridgeview Ct.
Cupertino, CA 95015-4010 USA
declares, that the product
Product Name:
HP Pavilion MX50, MX70, and MX90
Multimedia Monitors
Model Number(s):
P1282A, P1283A, P1284A
conforms to the following Product Specifications:
Safety:
IEC 60950:1991 + A1, A2, A3, A4/EN
60950:1992 + A1, A2, A3, A4, A11
Ergonomics:
MPRII 1990:10 (except MX50 and MX70 for
North America and Asia)
EMC:
CISPR 22:1993+
A1:1995+A2:1996/EN55022:1994+A1:1995+A2:1997,
Class B
1)
CISPR 24:1997/EN 55024 1998 – Immunity
FCC Title 47 CFR, Part 15 Class B
2)
/ICES-003, Issue 2
AS/NZS 3548:195 + A1: 1997 + A2: 1997, Class B
IEC 61000-3-2:1995/EN 61000-3-2:1995 — Harmonics
IEC-61000-3-3:1994/EN 61000-3-3:1995 — Flicker
Supplementary Information:
The product herewith complies with the requirements of the Low Voltage
Directive 73/23/EEC and the EMC Directive 89/336/EEC and carries
the CE-marking accordingly.
— the EMC Directive 89/336/EEC (including 93/68/EEC)
— the Low Voltage Directive 73/23/EEC (including 93/68/EEC)
1) The Product was tested in a typical configuration with HewlettPackard Personal Computer peripherals.
2) This Device complies with Part 15 of the FCC Rules. Operation is
subject to the following two conditions: (1) this device may not
cause harmful interference, and (2) this device must accept any
interference received, including interference that may cause
undesired operation.
Hardware Quality Engineering Manager
Cupertino, CA, USA, June 2000
For Regulatory Compliance Information ONLY, contact:
Australian
Contact
:
Product Regulations Manager
Hewlett-Packard Australia Ltd.
31-41 Joseph Street
Blackburn Victoria 3130, Australia
European
contact for
regulatory
topics only:
Your local Hewlett-Packard Sales and Service Office,
or Hewlett-Packard GmbH
Department HQ-TRE Standards Europe
Herrenberger Straße 130
D-71034 Boblingen Germany
(FAX: + 49-7031-14-3143)
North
American
Contact:
Hardware quality Engineering Manager
Hewlett-Packard, HPD 10500 Ridgeview Ct.
Cupertino, CA 95015-4010 USA
(Phone: 408-343-5000)
Page 36

FCC Statement
This equipment has been tested and found to comply with
the limits for a Class B digital device pursuant to Part 15 of
the FCC Rules. These limits are designed to provide
reasonable protection against harmful interference in a
residential installation. This equipment generates, uses, and
can radiate radio frequency energy. If not installed and used
in accordance with the instructions, it can cause harmful
interference to radio communications. However, there is no
guarantee that interference will not occur in a particular
installation. If this equipment does cause harmful
interference to radio or television reception, which can be
determined by turning the equipment off and on, the user is
encouraged to try to correct the interference by one or more
of the following measures:
3
Reorient or relocate the receiving antenna.
3
Move the monitor and the PC away from the radio or
television.
3
Plug the monitor and PC into a different electrical outlet so
that the monitor and PC and the radio or television are on
separate electrical circuits.
3
Make sure that all peripheral devices are also FCC Class
B-certified.
3
Consult a PC dealer, HP, or an experienced radio/TV
technician for help.
Note:
HP’s system verification tests were conducted with
HP-supported peripheral devices and HP-shielded
cables, such as those you received with your system.
Cables used with this monitor must be properly
shielded to comply with FCC requirements.
Changes or modifications not expressly approved by HP
could void the user’s authority to operate the equipment.
Page 37

English
X-Ray Radiation Notice
During operation, this product emits X-rays; however, it is
well shielded and meets the safety and health requirements
of various countries, such as the Radiation Act of Germany
and the Radiation Control for Health and Safety Act of the
United States.
Radiation emitted by this product is less than 0.1 mR/hr
(12Sv/hr) at a distance of 10 centimeters from the surface of
the cathode-ray tube. The x-ray radiation primarily depends
on the characteristics of the cathode ray tube and its
associated low-voltage and high-voltage circuitry. Internal
controls have been adjusted to ensure safe operation. Only
qualified personnel should perform any internal adjustments,
as specified in the service manual for this product.
Replace the cathode-ray tube with an identical CRT only.
General Notice
As an ENERGY STAR Partner, HP has determined that this
product meets the ENERGY STAR guidelines for energy
efficiency.
The ENERGY STAR name is a U.S. registered service mark
of the United States Environmental Protection Agency.
DOC Statement (Canada Only)
This Class B digital apparatus meets all requirements of the
Canadian Interference-Causing Equipment Regulations.
Cet appareil numerique de la classe B respecte toutes les
exigences du Reglement sur le materiel brouilleur du
Canada.
EMI Statement
(European Union Only)
This is a class B product in a domestic environment. This
product might cause radio interference. In which case, the
user might be required to take adequate measures.
Declaration of VCCI Class B
Compliance
Page 38

Index
A
adjustment windows, 9–10
Advanced Geometry icon, 16
Advanced Geometry
window, 16–17
Advanced Menu icon, 18
Advanced Menu window, 17–18
B
Brightness button, 9, 12
brightness, adjusting, 12
C
cables, connecting, 4
cleaning the screen, 8–9
Color icon, 18–20
color temperature,
choosing, 19–21
color, adjusting, 19–21
Contrast button, 9, 12
contrast, adjusting, 12–13
D
Degauss icon, 13
degaussing the display, 7
display
compatibility of, 27
power-management
features, 8, 29
resolution of, 7
technical information, 25–30
DPMS (Display Power Management
Signaling), 8, 29–30
E
eyestrain, minimizing, 8
F
factory adjustments,
restoring, 24
FCC statement, 32
front panel, using, 9–10
G
games.
See
Video/Games mode
H
H-Position icon, 16
H-Size icon, 16
I
image refresh rates, 8, 29
installing the monitor, 3–5
L
Language icon, 18, 21
language, choosing, 21–22
M
Minus button, 10
Mode button, 9, 11
mode settings, changing, 11
Moire Control
setting filters, 23
Page 39

English
moire filters, 23
Moire icon, 18, 23
monitor.
See also
screen
avoiding damage to, 1–3
cleaning, 8–9
features, 1
installing, 3
locating, 3
power-management features, 8,
29
safety procedures, 1–3
using, 6–9
viewing angle of, 9
monitor information, 27
O
OSD (on screen display)
features, 9–10
OSD Main window, 12–13
OSD Position icon, 18, 22
OSD window
setting position, 22–23
P
Parallelogram icon, 17
pin assignments, 28
Pin Balance icon, 17
Plus button, 10
position
of OSD window, 22–23
Power button, 6
power cables, connecting and
disconnecting, 4
power-management features, 6, 8,
29
power-saving modes, 30
pre-set contrast modes, 10–12
pre-set modes.
See
pre-set contrast
modes
problems.
See
troubleshooting
R
refresh rates, 27
resolution, screen, 7, 27
Rotation icon, 17
S
safety procedures, 1–3
screen.
See also
monitor
cleaning, 8–9
refresh rates, 27
resolution, 7, 27
Select button, 10
setting
position of OSD
window, 22–23
Side Pin icon, 17
Size & Position icon, 15
Size & Position window, 15–16
Sleep mode, 30
speakers, connecting, 5
specifications, 25–30
Standby mode, 30
Status icon, 18, 24
Status window, 24
Suspend mode, 30
Page 40

T
technical information, 25–30
Text mode, 11
Trapezoid icon, 17
troubleshooting
color problems, 7
damage to monitor, 1–4
degaussing and, 7
harmful interference, 32
V
vertical frequency, 8
VESA Display Power Management
Signaling (DPMS), 8, 30
video cables, connecting, 4
video modes, 30
Video/Games mode, 10
V-Position icon, 16
V-Size icon, 16
Z
Zoom icon, 13
Page 41

Français
Moniteurs
multimédias
HP Pavilion MX50,
MX70 et MX90
Page 42

Les informations apparaissant dans ce document sont sous réserve
de modification sans préavis.
La société Hewlett-Packard
®
n’offre aucune garantie concernant ce
matériel, notamment une éventuelle garantie implicite de
commercialisation ou de convenance à un usage quelconque.
La société HP ne peut être tenue responsable en cas d’erreurs dans
ce document ou en cas de dommages accidentels ou indirects liés à
la vente, aux performances ou à l’utilisation de ce matériel.
La société HP n’assume aucune responsabilité quant à l’utilisation
ou à la fiabilité de ses logiciels sur un matériel qui n’est pas fourni
par HP.
Ce document contient des informations en propriété exclusive
protégées par copyright. Tous les droits sont réservés. Aucune partie
de ce document ne peut être photocopiée, reproduite ou traduite
dans une autre langue sans l’autorisation écrite préalable de HP.
Hewlett-Packard Company
Home Products Division
P.O. Box 4010
Cupertino, CA 95015-4010
États-Unis
© Copyright Hewlett-Packard Company, 2000. Tous droits réservés.
Hewlett-Packard est une marque déposée de Hewlett-Packard
Company aux États-Unis et dans d’autres pays.
Les autres marques ou noms de produits sont des marques de
commerce appartenant à leurs propriétaires respectifs.
Page 43

Français
Introduction ......................................... 1
Pour votre sécurité ............................................ 1
Informations de sécurité supplémentaires ............. 3
Avertissement de sécurité sur l’alimentation c.a. ... 3
Installation........................................... 3
Positionnement du moniteur................................ 4
Connexion des câbles vidéo et d’alimentation...... 4
Branchement des haut-parleurs ........................... 5
Utilisation du moniteur......................... 6
Allumer ou éteindre le moniteur .......................... 6
Démagnétisation de l’écran ............................... 7
Paramétrage de la résolution de l’écran .............. 8
Sélection du taux de rafraîchissement.................. 8
Minimalisation de l’utilisation de l’énergie ........... 9
Nettoyage de l’écran ........................................ 9
Réglage de l’angle de vision............................ 10
Modification des paramètres
de l’affichage .................................... 10
Utilisation de la face avant .............................. 10
Modes de contraste préréglés .......................... 11
Paramétrage d’un mode de contraste préréglé .......12
Changement des paramètres du mode.............. 12
Réglage direct de la luminosité et du contraste.......13
Utilisation de la fenêtre principale OSD ............ 13
Utilisation de la fenêtre taille et position fenêtre......16
Utilisation de la fenêtre géométrie évoluée......... 17
Utilisation de la fenêtre avancée OSD............... 19
Choix de la température de couleur.................. 20
Paramétrage des valeurs rouge, verte et bleue .......22
Choix de la langue......................................... 23
Choix de la position OSD................................ 24
Réglage des filtres moirages ............................ 25
Utilisation de la fenêtre État ............................. 26
Restauration des réglages du fabricant.............. 26
Table des matières
Page 44

Informations techniques......................27
Informations sur le moniteur ............................. 27
Modes vidéo préréglés.................................... 29
Attribution des broches.................................... 31
Fonctions de gestion de l’énergie DPMS............ 32
Informations réglementaires...............34
Déclaration FCC............................................. 35
Notice sur les rayons X ................................... 35
Notice générale ............................................. 36
Index .................................................37
Page 45

Français
Introduction
Les moniteurs multimédias HP MX50, MX70 et
MX90 (modèles P1282A, P1283A et P1284A)
sont des moniteurs couleurs à haute résolution,
conçus pour être utilisés avec le HP Pavilion et
d’autres PC. Chaque moniteur comprend un
microphone intégré et des supports pour les
haut-parleurs fournis par le HP Pavilion. Les
moniteurs satisfont aux normes ENERGY STAR
®
de l’Environmental Protection Agency (EPA) et
intègrent des fonctions de gestion automatique
de la consommation.
Les autres caractéristiques comprennent :
3
Réglage à l’écran des paramètres
d’affichage.
3
Taux de rafraîchissement élevés pour réduire
l’effet de scintillement et la fatigue oculaire.
3
Base pivotante intégrée.
L’image suivante illustre la face avant de votre
moniteur HP Pavilion.
Panneau de configuration
Bouton de panneau
Microphone
Pour votre sécurité
Pour votre sécurité et pour protéger votre
moniteur, veuillez suivre les recommandations
suivantes :
3
Connectez toujours le moniteur à une fiche
bipolaire mise à la terre. Utilisez uniquement
le câble d’alimentation fourni par le fabricant.
Page 46

Avertissement :
Pour déconnecter
complètement le moniteur, vous devez
débrancher le câble d’alimentation de la
prise électrique.
3
Afin d’éviter tout choc électrique, n’enlevez
pas le boîtier de protection du moniteur. Seul
le personnel qualifié est habilité à enlever ce
boîtier.
3
Ne placez aucun objet sur le moniteur qui
pourrait tomber dans les trous d’aération ou
empêcher la circulation de l’air.
3
Afin d’éviter tout risque de détérioration du
moniteur et de choc électrique, n’exposez pas
le moniteur à la pluie ou à l’humidité.
3
Réglez uniquement les commandes dont le
mode d’emploi est traité dans ce manuel. Un
réglage inapproprié des autres commandes
pourrait causer des dommages et nécessiter
l’intervention d’un technicien.
Si une des situations suivantes se présentait,
débranchez le moniteur et contactez un
technicien qualifié.
3
Le câble d’alimentation ou la prise sont
effilochés ou abîmés.
3
Vous avez renversé du liquide dans le
moniteur.
3
Le moniteur a été exposé à la pluie ou à l’eau.
3
Le moniteur ne fonctionne pas correctement,
bien que vous suiviez les instructions
d’utilisation.
3
Le moniteur est tombé ou le boîtier a été
endommagé.
3
Les performances du moniteur changent
brusquement.
Page 47

Français
Informations de sécurité
supplémentaires
Ces produits ont été élaborés pour un
raccordement à un système électrique « IT »
(c’est-à-dire un système de distribution c.a. sans
connexion directe à la terre, selon la norme
IEC950).
Avertissement de sécurité sur
l’alimentation c.a.
Avertissement :
Placez le moniteur à
proximité d’une prise électrique. Le
câble d’alimentation est votre principal
outil de débranchement de votre
moniteur HP et doit toujours être
facilement accessible. Pour votre
sécurité, le câble d’alimentation fourni
avec votre système possède une prise
avec mise à la terre. Branchez toujours
le câble dans une prise murale avec
mise à la terre, afin d’éviter les risques
d’électrocution.
Installation
Suivez les instructions de ce chapitre pour
installer votre moniteur multimédia HP Pavilion
MX50, MX70 ou MX90 HP.
Avertissement :
Les moniteurs MX sont
des objets lourds. Prenez garde ou
demandez de l’aide lorsque vous le
soulevez afin d’éviter toute blessure
au dos.
Remarque :
Avant d’installer le moniteur, consultez la
documentation de votre PC et de votre carte vidéo.
Il se peut que vous deviez procéder à des
modifications afin d’installer le moniteur.
Page 48

Positionnement du moniteur
Placez le moniteur sur une surface plane et
solide. Choisissez un endroit à l’abri d’une
chaleur excessive, de l’humidité et de la lumière
du soleil. Placez le moniteur aussi loin que
possible des sources d’interférences
électromagnétiques, telles que des
transformateurs, des moteurs, des éclairages
fluorescents, ainsi que d’autres écrans.
Connexion des câbles vidéo et
d’alimentation
Avant de brancher les câbles, consultez les
consignes de sécurité présentées au début de ce
manuel. Le PC et le moniteur doivent être éteints.
Pour brancher les câbles vidéo et d’alimentation :
1
Branchez le câble d’alimentation au dos du
moniteur.
2
Branchez le câble d’alimentation à une prise
électrique.
3
Branchez la prise bleue du câble vidéo sur le
port vidéo de votre PC. Si vous possédez un
PC HP Pavilion, ce port est de couleur bleue.
Cependant, sur certains PC Pavilion, ce port
peut être de couleur orange. (L’illustration ci-
dessous est à titre indicatif seulement.
Consultez le manuel de l’utilisateur de votre PC
afin de déterminer l’emplacement du port
vidéo).
Page 49

Français
4
Introduisez la fiche rose du microphone dans
la prise d’entrée du son à l’arrière de votre
PC. Si vous possédez un PC HP Pavilion, cette
prise est de couleur rose. Cependant, sur
certains PC Pavilion, cette prise peut être de
couleur orange.
Branchement des haut-parleurs
Le moniteur est conçu pour l’utilisation des hautparleurs Polk Audio fournis par HP.
1
Déroulez les câbles attachés aux deux hautparleurs.
2
Identifiez le haut-parleur droit et le haut-parleur
gauche. Vous pouvez déterminer sur quel côté
du moniteur se fixe un haut-parleur en
observant sa courbure et ses pinces de
fixation. Passez à l’étape 5 si vos haut-parleurs
ne possèdent pas de pinces. Le côté du haut-
parleur avec les pinces de fixation s'adapte
parfaitement sur le côté du moniteur.
3
Introduisez les pinces du haut-parleur droit
dans les rainures correspondantes sur le côté
droit du moniteur. Enfoncez le haut-parleur en
glissant complètement ses pinces dans les
rainures.
Page 50

4
Introduisez les pinces du haut-parleur gauche
dans les rainures correspondantes sur le côté
gauche du moniteur. Enfoncez le haut-parleur
en glissant complètement ses pinces dans les
rainures.
5
Consultez le manuel de l’utilisateur de votre PC
pour savoir comment brancher les hautparleurs.
Utilisation du moniteur
Ce chapitre contient des informations sur
l’utilisation des moniteurs multimédias HP Pavilion
MX50, MX70 et MX90.
Allumer ou éteindre le moniteur
Utilisez le bouton Power sur la face avant pour
allumer ou éteindre le moniteur. Lorsque le
moniteur est allumé, le voyant près du bouton
Power l’est aussi. Le voyant est vert lorsque le
moniteur et le PC sont actifs et jaune/orange
lorsque le moniteur se trouve dans un de ses
modes de consommation réduite.
Les fonctions de gestion de l’énergie du moniteur
réduisent le niveau de consommation électrique
lorsque votre PC est inactif pendant une période
déterminée. Voir « Minimisation de l’utilisation de
l’énergie » à la page 9 pour plus d’informations.
Page 51

Français
Grâce aux fonctions de gestion de l’énergie,
vous n’avez, en général, pas besoin d’éteindre
votre moniteur lorsque vous ne l’utilisez pas.
Lorsqu’il est éteint, le moniteur utilise en effet la
même quantité d’énergie que lorsqu’il est en
mode sommeil (moins de 5 watts).
Si votre PC n’est pas compatible avec la gestion
de l’énergie DPMS, vous pouvez réduire la
consommation d’énergie en éteignant le moniteur
lorsqu’il ne sera pas utilisé pendant une longue
période. Vous pouvez éteindre le moniteur même
lorsque le PC fonctionne.
Avertissement :
Pour déconnecter
complètement le moniteur, vous devez
débrancher le câble d’alimentation de la
prise électrique ou du limiteur de
surtention.
Démagnétisation de l’écran
La démagnétisation élimine le magnétisme
responsable de variations de couleurs non
désirées. Démagnétisez l’écran chaque fois que
vous observez des variations de couleurs
inhabituelles
Remarque :
Ne démagnétisez pas plus d’une fois
toutes les 30 minutes ou la démagnétisation sera
incomplète. Il n’est pas nécessaire de démagnétiser
l’écran quand le moniteur n’a pas été déplacé.
Il existe deux méthodes de démagnétisation :
Chaque fois que vous allumez votre moniteur, il
est automatiquement démagnétisé. Vous pouvez
également utiliser l’option Démagnétiser dans la
fenêtre principale (OSD) affichée à l’écran.
Voi r « Utilisation de la fenêtre principale OSD » à
la page 13 pour les instructions.
Page 52

Paramétrage de la résolution de
l’écran
La résolution de l’écran détermine la quantité
d’informations montrées à l’affichage. La
résolution de l’écran fait référence au nombre de
points ou
pixels
utilisés pour faire une image.
Une faible résolution d’écran signifie que celui-ci
utilise un nombre relativement faible de points
relativement gros. Une plus haute résolution
signifie que plus de points d’une plus petite taille
forment l’image. Avec une résolution plus élevée,
les icônes, les fenêtres et le texte sont plus petits à
l’écran mais plus d’informations peuvent être
affichées.
Utilisez le panneau de configuration de
Windows pour paramétrer la résolution de
l’écran : Le moniteur accepte de nombreuses
résolutions communes (voir la section « Modes
vidéo préréglés ) ».
Sélection du taux de
rafraîchissement
Afin de minimiser la fatigue oculaire et de
maximiser les performances de l’affichage,
utilisez le taux de rafraîchissement le plus élevé
ou la fréquence verticale la plus élevée possibles.
L’important est de ne percevoir aucun
scintillement (généralement au-dessus de 75 Hz
pour la plupart des utilisateurs). Le taux de
rafraîchissement de l’image est le nombre de fois
par seconde au cours de laquelle l’image est
rafraîchie. Le tableau « Modes vidéo préréglés »
montre le taux de rafraîchissement de l’image
accepté par les moniteurs selon les différentes
résolutions de l’écran.
Page 53

Français
Minimalisation de l’utilisation
de l’énergie
Les PC HP Pavilion sont compatibles avec le
VESA Display Power Management Signaling
(DPMS). Les fonctions de gestion de l’énergie
réduisent la consommation électrique du moniteur
après une période d’inactivé du clavier.
Le moniteur fonctionne sous trois modes
d’économie d’énergie — Standby, Veille, et
Sommeil. Voir une description détaillée de
chaque mode au paragraphe « Fonctions de
gestion de l’énergie DPMS ».
Lorsque le moniteur est dans un de ses modes
d’économie, l’écran est vierge et le voyant du
panneau avant est jaune/orange. Consultez le
manuel de l’utilisateur de votre PC pour obtenir
des informations concernant le paramétrage des
modes d’économie.
Nettoyage de l’écran
Pour nettoyer l’écran :
1
Éteignez et déconnectez le moniteur.
2
Pulvérisez un produit nettoyant pour vitre sur
un chiffon doux en coton, puis essuyez l’écran
avec précaution.
Avertissement :
N’utilisez pas des
nettoyants au fluorure, des acides ou de
l’alcali. N’utilisez jamais des produits dur
s
ou abrasifs pour nettoyer l’écran.
3
Séchez l’écran avec un chiffon de coton doux.
4
Reconnectez le moniteur, puis allumez-le.
Page 54

Réglage de l’angle de vision
La base du moniteur vous permet de régler
l’angle de vision. Vous pouvez pivoter le
moniteur d’avant en arrière et de gauche à droite
afin de trouver la position la plus confortable.
Modification des
paramètres de l’affichage
Utilisez les fonctions OSD du moniteur pour
modifier les paramètres. Les boutons sur la face
avant commandent les icônes et les fenêtres à
l’écran.
Utilisation de la face avant
Utilisez les six boutons de la face avant
du moniteur pour commander les fonctions OSD.
MODE
Le bouton Mode ouvre la fenêtre du mode de
contraste et vous permet de choisir un des
modes préréglés du moniteur. Voir « Modes
de contraste préréglés » à la page 11 pour
les instructions.
Le bouton Luminosité ouvre et ferme la fenêtre
de réglage de la luminosité.
Page 55

Français
Le bouton Contraste ouvre et ferme la fenêtre
de réglage du contraste.
SELECT
Le bouton Select ouvre et ferme la fenêtre
principale OSD quand aucune autre fenêtre
OSD n’est ouverte. Dans la fenêtre principale
OSD, le bouton Select ouvre la barre de
réglage pour l’icône sélectionnée ou la
fenêtre correspondante. Lorsque la barre de
réglage de la luminosité ou du contraste se
trouve sur l’écran, le bouton Select ferme la
barre et enregistre les valeurs.
Le bouton Moins diminue un paramètre
quand une fenêtre de réglage est ouverte.
Dans une fenêtre, le bouton déplace le
pointeur vers le haut dans le menu des
icônes.
Le bouton Plus augmente un paramètre quand
une fenêtre de réglage est ouverte. Dans une
fenêtre, le bouton déplace le pointeur vers le
bas dans le menu des icônes.
Modes de contraste préréglés
Les modes de contraste préréglés vous permettent
de modifier rapidement les paramètres de
contraste pour obtenir ceux utilisés couramment
pour différentes activités et conditions de vision.
Deux modes de contraste préréglés sont fournis :
Le mode texte est conçu pour obtenir les
meilleurs résultats dans des
environnements peu éclairés et avec des
applications telles que les traitements de
texte et les tableurs. Ce réglage donne
moins de contraste.
Avantages :
Confort oculaire, moins de
fatigue et netteté améliorée.
Le mode vidéo/jeux offre un contraste
plus élevé, approprié pour les films
vidéo, pour les applications
photographiques et de pré-presse.
Avantages :
Contraste plus élevé pour
des images vives et un impact visuel
maximal pour les jeux et les vidéo.
Page 56

Paramétrage d’un mode de
contraste préréglé
1
Appuyez sur le bouton Mode sur la face avant
du moniteur. La fenêtre du Mode de contraste
apparaît.
TEXTE
VIDÉO/JEUX
MODE CONTRASTE
2
Pour sélectionner un mode, appuyez sur le
bouton Mode à nouveau ou appuyez sur le
Plus (+) ou le Moins (–).
3
Lorsque l’icône du mode de moniteur que vous
désirez est en relief, appuyez sur le bouton
Select. La fenêtre du mode de contraste
disparaît.
Changement des paramètres
du mode
Les modes de contraste préréglés sont les
paramètres de référence pour la luminosité, le
contraste et d’autres réglages de l’image. Vous
pouvez ensuite régler l’image de façon plus
poussée avec les fonctions OSD.
Si vous éteignez le moniteur, le dernier mode
utilisé sera actif lorsque vous le rallumerez.
Les changements de la température de couleur
sont indépendants du paramétrage du mode de
contraste — les deux modes fonctionneront de la
même manière avec n’importe quel paramétrage
de couleur.
Page 57

Français
Réglage direct de la luminosité et
du contraste
Vous pouvez changer rapidement le contraste ou
la luminosité de l’affichage en appuyant sur le
bouton Luminosité ou sur le bouton Contraste. La
luminosité règle le niveau de noir, le contraste
règle la différence entre les parties claires et les
parties sombres de l’image.
Réglez le niveau de luminosité pour que les
éléments noirs sur l’écran apparaissent en noir.
Réglez ensuite le contraste pour une utilisation la
plus confortable possible.
Pour régler la luminosité ou le contraste :
1
Appuyez sur le bouton Luminosité ou sur le
bouton Contraste sur la face avant pour ouvrir
la fenêtre de réglage de la luminosité ou la
fenêtre de réglage du contraste.
LUMINOSITÉ
-
+
50
2
Appuyez sur le bouton Plus (+) ou le bouton
Moins (–) pour augmenter ou diminuer le
paramètre par rapport à sa position actuelle.
3
Lorsque le niveau de luminosité ou de
contraste désiré est atteint, appuyez à nouveau
sur le bouton Luminosité ou le bouton
Contraste pour fermer la fenêtre de réglage.
Utilisation de la fenêtre
principale OSD
La fenêtre principale OSD vous permet de
modifier une série de paramètres d’affichage.
Vous ouvrez la fenêtre en appuyant sur le bouton
Select quand aucune autre fenêtre OSD n’est
affichée à l’écran.
Page 58

LUMINOSITÉ
CONTRASTE
ZOOM
GÉOMÉTRIE ÉVOLUÉE
TAILLE ET POSITION
MENU AVANCÉ
DÉMAGNÉTISATION
+
-
800 X 600 / 85 Hz
SORTIE
EXIT
50
Les fonctions suivantes sont disponibles dans la
fenêtre principale OSD :
Luminosité
règle le niveau de lumière
de l’image.
Contraste
règle la différence de
lumière entre les zones claires et les
zones sombres de l’image.
Zoom
augmente ou diminue la taille
d’une image dans les deux sens.
Taille et position
ouvre la fenêtre
taille et position.
Géométrie évoluée
ouvre la fenêtre
géométrie évoluée.
Menu avancé
ouvre la fenêtre menu
avancé.
Démagnétisation
démagnétise
l’écran et restaure la qualité de l’image.
EXIT
Sortie
ferme la fenêtre principale OSD
et enregistre les modifications apportées.
Page 59

Français
Lorsque vous sélectionnez les icônes
Luminosité, Contraste
ou
Zoom,
une barre
de réglage apparaît sous la fenêtre OSD. Vous
raccourcissez ou agrandissez la barre de
réglage avec les boutons Plus (+) et Moins (–). Un
chiffre à côté de la barre de commande montre
le pourcentage de l’actuel paramètre par rapport
à sa valeur maximum.
Pour utiliser la fenêtre principale OSD :
1
Appuyez sur le bouton Select sur la face avant
du moniteur pour ouvrir la fenêtre
principale OSD.
2
Appuyez sur le bouton Plus (+) ou le bouton
Moins (–) pour vous déplacer parmi les icônes
de la fenêtre.
3
Lorsque l’icône de la fonction que vous désirez
est en relief, appuyez sur le bouton Select.
3
Quand vous sélectionnez l’option
Démagnétiser
ou
Sortie,
l’option est
exécutée immédiatement.
3
Quand vous sélectionnez les icônes
Luminosité, Contraste
ou
Zoom,
une
barre de réglage apparaît.
3
Si vous sélectionnez une autre option, une
autre fenêtre apparaît.
4
Si une barre de réglage apparaît, appuyez sur
le bouton Plus (+) ou le bouton Moins (–) pour
modifier le paramètre actuel. Appuyez ensuite
sur le bouton Select pour enregistrer vos
changements et fermer la barre de réglage.
82
5
Pour fermer la fenêtre principale
OSD, sélectionnez l’icône
Sortie.
Remarque :
Seule une icône en relief ainsi
que les icônes Réinitialiser et Sortie, afficheront un
texte descriptif.
EXIT
Page 60

Utilisation de la fenêtre taille
et position
La fenêtre taille et position vous permet de régler
la taille et la position verticale et horizontale
d’une image.
Pour ouvrir la fenêtre taille et position,
sélectionnez l’icône
Taille et Position
dans la fenêtre principale OSD.
TAILLE-H
POSITION-H
TAILLE-V
GÉOMÉTRIE ÉVOLUÉE
POSITION-V
TAILLE & POSITION
RÉINITIALISER
SORTIE
+
-
RESET
EXIT
50
Page 61

Français
Les fonctions suivantes sont disponibles dans la
fenêtre taille et position :
Taille-H
règle la taille horizontale de
l’image.
Position-H
règle la position horizontale
de l’image.
Taille-V
règle la taille verticale de
l’image.
Position-V
règle la position verticale
de l’image.
Géométrie évoluée
ouvre la fenêtre
géométrie évoluée. Voir « Utilisation
de la fenêtre principale ».
RESET
Réinitialiser
réinitialise les valeurs de
la fenêtre taille et position et de la fenêtre
géométrie évoluée (excepté pour la
rotation) aux paramètres du fabricant.
EXIT
Sortie
ferme la fenêtre taille et
position, enregistre tout changement
apporté et ouvre la fenêtre principale.
Utilisation de la fenêtre géométrie
évoluée
La fenêtre géométrie évoluée vous permet de
corriger la forme et la position d’une image audelà des fonctions de base de taille et de
position verticale et horizontale fournies dans la
fenêtre taille et position.
Pour ouvrir la fenêtre géométrie
évoluée, sélectionnez l’icône
Géométrie évoluée
dans la
fenêtre principale OSD.
Page 62

COUSSIN LATÉRAL
COUSSIN ÉQUIL.
TRAPÉZOÏDAL
PARALLÉLOGRAMME
ROTATION
GÉOMÉTRIE ÉVOLUÉE
RÉINITIALISER
SORTIE
+
-
RESET
50
EXIT
Les fonctions suivantes sont disponibles dans la
fenêtre géométrie évoluée :
Coussin latéral
règle toute courbure
des deux côtés de l’image.
Coussin Équil.
redresse le côté droit
ou gauche de l’image lorsqu’un seul
côté de l’image est courbé.
Trapézoïdale
rend les deux côtés
verticaux parallèles.
Parallélogramme
ajuste l’image.
Rotation
ajuste l’angle de l’image
(MX70 et MX90 uniquement).
RESET
Réinitialiser
réinitialise tous les
paramètres de géométrie évoluée,
excepté celui de la rotation, aux valeurs
originales du fabricant.
EXIT
Sortie
ferme la fenêtre géométrie
évoluée, enregistre tout changement
apporté et ouvre la fenêtre précédente.
Page 63

Français
Utilisation de la fenêtre
avancée OSD
La fenêtre menu avancé OSD vous permet de
modifier une série de paramètres d’affichage.
Excepté dans des circonstances particulières,
vous n’aurez pas besoin de régler ces
paramètres, mais ces options supplémentaires
sont disponibles.
Pour ouvrir la fenêtre menu avancé,
sélectionnez l’icône
Menu avancé
dans la fenêtre principale OSD.
COULEUR
LANGUE
MOIRAGE
POSITION OSD
ÉTAT
SORTIE
MENU AVANCÉ
OSD
I
EXIT
Page 64

Les fonctions suivantes sont disponibles dans la
fenêtre menu avancé OSD :
Couleur
règle la température de
couleur de l’image.
Langue
détermine la langue de la
fenêtre OSD.
OSD
Position OSD
règle la position de la
fenêtre OSD.
Contrôle moirage
réduit les lignes
de couleur ondulées ou les motifs à
l’arrière de votre image. Des commandes
horizontales et verticales sont
disponibles.
I
État
fournit des informations sur les
fréquences de balayage, la résolution
(pour les modes préréglés uniquement),
et le numéro de série du moniteur.
EXIT
Sortie
ferme la fenêtre menu
avancé OSD.
Choix de la température de
couleur
Les paramètres de couleur par défaut dans les
modes texte et vidéo/jeux sont optimisés pour
obtenir les meilleurs résultats dans ces
environnements, mais vous pouvez modifier la
température de la couleur lorsque cela est
nécessaire. (Pour enregistrer les paramètres de
couleur d’une application particulière, utilisez le
paramètre COULEUR DE L’UTILISATEUR).
Vous pouvez choisir entre deux paramètres :
9300K et 6500K.
Le paramètre 9300K est souvent utilisé pour un
environnement de bureau ou un éclairage
fluorescent. Le paramètre 6500K est en général
utilisé pour un environnement avec un éclairage
incandescent.
Page 65

Français
Vous pouvez également choisir de régler
individuellement les valeurs rouge, verte et bleue
(RVB) qui forment l’image à l’écran. Voir la
section « Paramétrage des valeurs rouge, verte et
bleue » à la page 22 pour les instructions. Pour
choisir la température de couleur :
1
Appuyez sur le bouton Plus (+) ou le bouton
Moins (–) pour vous déplacer sur l’icône
Couleur dans la fenêtre avancée OSD.
2
Appuyez sur le bouton Select pour
ouvrir la fenêtre de réglage de la
couleur.
9300K
6500K
COULEUR DE L’UTILISATEUR
COULEUR
✓
SORTIE
EXIT
Appuyez sur le bouton Plus (+) ou le bouton
Moins (–) pour atteindre la température de
couleur que vous désirez.
3
Appuyez sur le bouton Select pour sélectionner
la température de la couleur.
4
Sélectionnez l’icône
Sortie
pour fermer la
fenêtre Couleur.
Page 66

Paramétrage des valeurs rouge,
verte et bleue
Vous pourriez vouloir faire des réglages très
précis de la couleur de votre écran. Par
exemple, dans des conditions d’éclairage
uniques, vous pourriez avoir besoin de régler
la couleur de l’écran afin qu’elle corresponde
mieux à ces conditions. Vous pouvez faire ces
réglages en paramétrant individuellement les
valeurs rouge, verte et bleue (RVB).
Assurez-vous que le moniteur est chaud avant
d’essayer de régler les couleurs avec précision.
Le moniteur prend environ 30 minutes pour se
réchauffer après avoir été allumé ou après un
mode d’économie.
Pour paramétrer les valeurs RVB :
1
Appuyez sur le bouton Plus (+) ou le bouton
Moins (–) pour vous déplacer sur l’icône
Couleur dans la fenêtre avancée OSD.
2
Appuyez sur le bouton Select pour ouvrir la
fenêtre de réglage de la couleur.
3
Appuyez sur le bouton Plus (+) ou le bouton
Moins (–) pour vous déplacer sur le
paramétrage COULEUR DE L’UTILISATEUR
dans la fenêtre réglage de la couleur.
R
G
B
SORTIE
COULEUR DE L’UTILISATEUR
RÉINITIALISER
EXIT
RESET
50
50
50
-
+
-
+
-
+
4
Appuyez sur le bouton Select pour ouvrir la
fenêtre de réglage RVB.
Page 67

Français
5
Appuyez sur le bouton Plus (+) ou le bouton
Moins (
–
) pour vous déplacer parmi les
options, puis appuyez sur Select pour choisir
une option.
6
Lorsqu’une couleur est sélectionnée, appuyez
sur le bouton Plus (+) ou le bouton Moins (
–
)
pour augmenter ou diminuer l’importance de
cette couleur ; appuyez ensuite sur Select.
7
Appuyez sur Sortie pour fermer la fenêtre
COULEUR DE L’UTILISATEUR.
Remarque :
Si vous sélectionnez l’icône Réinitialiser,
vous revenez à la valeur de couleur précédente.
Choix de la langue
Pour choisir une langue pour le texte de la
fenêtre OSD :
1
Appuyez sur le bouton Plus (+) ou le
bouton Moins (–) pour vous déplacer
sur l’icône Langue dans la fenêtre
avancée OSD.
2
Appuyez sur le bouton Select pour ouvrir la
fenêtre de sélection de la langue.
SORTIE
ENGLISH
DEUTSCH
ESPAÑOL
ITALIANO
FRANÇAIS
LANGUE
✓
EXIT
3
Appuyez sur le bouton Plus (+) ou le bouton
Moins (
–
) pour obtenir la langue que vous
désirez.
4
Appuyez sur le bouton Select pour sélectionner
la langue.
5
Appuyez sur Sortie pour fermer la fenêtre
Langue.
Page 68

Choix de la position OSD
La position de la fenêtre OSD par défaut est au
centre de l’écran, mais vous pouvez la modifier.
Pour régler la position de la fenêtre OSD :
1
Appuyez sur le bouton Plus (+) ou le
bouton Moins (–) pour vous déplacer
sur l’icône position OSD dans la fenêtre menu
avancé OSD.
2
Appuyez sur le bouton Select pour ouvrir la
fenêtre position OSD.
3
Appuyez sur le bouton Plus (+) ou le bouton
Moins (–) pour vous déplacer parmi les
options.
4
Appuyez sur Select pour choisir une fonction.
Les pointeurs se changent en flèches pour les
fonctions sélectionnées.
5
Lorsque les pointeurs verticaux sont
sélectionnés, appuyez sur le bouton Plus (+) ou
le bouton Moins (–) pour déplacer la fenêtre
OSD vers le haut ou vers le bas.
SORTIE
POSITION OSD
EXIT
+ 50
-
6
Lorsque les pointeurs horizontaux sont
sélectionnés, appuyez sur le bouton Plus (+) ou
le bouton Moins (–) pour déplacer la fenêtre
OSD vers la droite ou vers la gauche.
7
Lorsque vous avez terminé ce réglage,
appuyez sur Select.
8
Appuyez sur Sortie pour fermer la fenêtre
Position OSD.
OSD
Page 69

Français
Réglage des filtres moirages
Sélectionnez l’icône Contrôle moirage pour
réduire les lignes de couleur ondulées ou les
motifs à l’arrière de votre image. Il est possible
de régler séparément le moirage horizontal et
vertical.
Pour régler le filtre moirage :
1
Appuyez sur le bouton Plus (+) ou le
bouton Moins (–) pour vous déplacer
sur l’icône Moirage dans la fenêtre
menu avancé OSD.
2
Appuyez sur le bouton Select pour ouvrir la
fenêtre Moirage.
3
Appuyez sur le bouton Plus (+) ou le bouton
Moins (–) pour vous déplacer parmi les
options.
MOIRAGE-H: ACTIVÉ (E)
MOIRAGE-H: DÉSACTIVÉ (E)
MOIRAGE-V: ACTIVÉ (E)
MOIRAGE-V: DÉSACTIVÉ (E)
MOIRAGE
✓
✓
SORTIE
EXIT
-
+
50
4
Appuyez sur le bouton Select pour sélectionner
une option. Une barre de réglage apparaîtra
sous la fenêtre Moirage si vous sélectionnez
Moirage-H : Activé ou Moirage-V :
Activé
.
Remarque :
Le « H » dans Moirage-H signifie
horizontal, le « V » dans Moirage-V signifie
vertical.
5
Appuyez sur le bouton Select pour enregistrer
vos modifications et fermer la barre de
réglage.
6
Appuyez sur Sortie pour fermer la fenêtre
Moirage.
Page 70

Utilisation de la fenêtre État
La fenêtre État est une fenêtre d’information qui
affiche les fréquences de balayage horizontal et
vertical, la résolution (pour les modes préréglés
uniquement), et le numéro de série du moniteur.
Pour afficher la fenêtre État :
1
Appuyez sur le bouton Plus (+) ou le
bouton Moins (–) pour vous déplacer
sur l’icône État dans la fenêtre menu
avancé OSD.
2
Appuyez sur le bouton Select pour ouvrir la
fenêtre État.
3
Appuyez sur Select pour fermer la fenêtre État.
SORTIE
NÚMERO DE SÉRIE
AASDD12345
FV :70Hz
FH :31KHz
RÉSOLUCIÓN:
640 X 480
ÉTAT
EXIT
Restauration des réglages du
fabricant
Pour restaurer tous les paramètres d’origine :
1
Éteignez le moniteur.
2
Rallumez le moniteur en maintenant le bouton
Plus (+) enfoncé.
I
Page 71

Français
Informations techniques
Ce chapitre contient des informations techniques sur les moniteurs multimédias HP Pavilion MX50, MX70
et MX90.
Ces moniteurs sont compatibles avec les PC IBM, les PC compatibles et les PC PS/2. Ils sont également
compatibles avec les normes de gestion d’énergie VESA. (Voir « Fonctions de gestion de l’énergie
DPMS » à la page 32).
Informations sur le moniteur
MX50 MX70 MX90
Tube image
15 po (38,1 cm), déviation de
90°, matrice noire,
luminophore P22 moyen court,
pas de masque de 0,28 mm
17 po (43,1 cm), déviation de
90°, matrice noire,
luminophore P22 moyen court,
pas de masque de 0,27 mm
19 po (48,2 cm),
déviation de 100°, 44%
de transmission de la
lumière, pas de masque
de 0,26 mm, revêtement
semi-teinté, antireflets/anti-statique
(Arasc).
Surface de
vision
maximale
5,8po (40 cm) en diagonale 5,8 po (40 cm) en diagonale
365 mm
(H)
x 274 mm (V
)
14,4 po (H) x 10,8 po (V)
45,72 cm (457 mm) en
diagonale
Page 72

MX50 MX70 MX90
Fréquence de
balayage
(horizontale)
30–54 kHz 30–70 kHz 30–95 kHz
Fréquence de
trames
(verticale)
47–100 Hz 50–120 Hz 50–150 Hz
Alimentation
100–240 V.c.a., 50–60 Hz
(interrupteur automatique)
100–240 V.c.a., 50–60 Hz
(interrupteur automatique)
100–240 V.c.a., 50–60 Hz
(interrupteur automatique)
Consommation
d’énergie
70 W maximum 90 W maximum 130 W maximum
Fréquence de
points
65 MHz 110 MHz 160 MHz
Base
Basculement vertical : 5° vers
l’avant, 15° vers l’arrière
Basculement horizontal : –45°
vers la droite ou vers la
gauche
Basculement vertical : 5° vers
l’avant, 15° vers l’arrière
Basculement horizontal : –60°
vers la droite ou vers la gauche
Basculement vertical : 5°
vers l’avant, 15° vers
l’arrière Basculement
horizontal : –60° vers la
droite ou vers la gauche
Dimensions
(L x H x P)
366 x 396 x 412 mm
14,4 x 15,6 x 16,2 po
414 x 440 x 442 mm
16,3 x 17,3 x 17,4 po
465 x 487 x 422 mm
18,3 x 19,2 x 16,1 po
Poids net
12,0 kg 19,0 kg 25,0 kg
Page 73

Français
MX50 MX70 MX90
Conditions
d’utilisation
Tem
p
érature
Humidité
Altitude
Entre 5° et 35 °C
(entre 41° et 95 °F)
Entre 15% et 80%, sans
condensation
Entre 5° et 35 °C
(entre 41° et 95 °F)
Entre 15% et 80%, sans
condensation
Entre 5° et 35 °C
(entre 41° et 95 °F)
Entre 15% et 80%, sans
condensation
Entre 0 et 330 m
Conditions de
stockage
Tem
p
érature
Humidité
Entre –25° et 60 °C
(entre –13° et 140°F)
Entre 20% et 80%, sans
condensation
Entre –25° et 60 °C
(entre –13° et 140 °F)
Entre 20% et 80%, sans
condensation
Entre –25° et 60 °C
(entre –13° et 140 °F)
Entre 20% et 80%, sans
condensation
Modes vidéo préréglés
Les moniteurs multimédias HP Pavilion MX50, MX70 et MX90 fonctionnent sous les combinaisons
standard suivantes de résolution d’écran et de taux de rafraîchissement. D’autres combinaisons sont
possibles mais elles peuvent nécessiter des réglages de la taille et de la position de l’image. (Voir
« Utilisation de la fenêtre principale OSD » à la page 13 pour obtenir des informations sur ces réglages).
Page 74

Résolutions
(points x lignes)
60 Hz 70 Hz 75 Hz 85 Hz
720 x 400 MX50
MX70
MX90
640 x 480
MX50
MX70
MX90
MX50
MX50
MX70
800 x 600 MX50 MX50
MX70
MX50
MX70
MX90
1024 x 768 MX50
MX70
MX70 MX70
MX90
1152 x 864 MX90
1280 x 960 MX90
1280 x 1024 MX70 MX90 MX90
1600 x 1200 MX90
Page 75

Français
Attribution des broches
Le graphique suivant illustre la fiche mâle à 15
broches utilisée par les moniteurs multimédias
HP Pavilion MX50, MX70 et MX90. Le tableau
montre l’attribution des broches.
51
15
11
6
10
Remarque :
En raison d’une politique d’amélioration
constante, l’attribution des broches est sous réserve
de modification sans avis.
Numéro de broche Attribution
1
Entrée vidéo rouge
2
Entrée vidéo verte
3
Entrée vidéo bleue
4
Terre
5
TTeerrrre
e
6
Retour vidéo rouge
7
Retour vidéo vert
8 Retour vidéo bleu
9 Flottante
10 Flottante ou terre
11 Terre
12 Données
13 Sync. Horizontal
14
Sync. Vertical
15
Horloge des données
Page 76

Fonctions de gestion de l’énergie
DPMS
Pour optimiser la vie de l’écran :
3
Profitez du système de gestion de l’énergie de
votre PC pour commander votre moniteur.
3
Les moniteurs multimédias HP Pavilion MX50,
MX70 et MX90 reconnaissent les signaux de
gestion d’énergie des cartes vidéos VESA
Display Power Management Signaling
(DPMS), comme celles des HP Pavilion et bien
d’autres PC. Lorsque le moniteur reçoit un
signal approprié, il réduit sa consommation
d’énergie mais reste actif pour une utilisation
rapide. Le voyant sur la face avant du
moniteur devient jaune/orange lorsque celui-ci
est en mode d’économie d’énergie.
3
Les cartes vidéo VESA DPMS réduisent la
consommation électrique du moniteur en
paramétrant les signaux de synchronisation
horizontaux ou verticaux sur inactifs. Le
moniteur fonctionnera à nouveau rapidement
lorsque les signaux de synchronisation seront
réappliqués.
3
Les modes Standby et Veille offrent une
consommation faible avec une vitesse de
reprise rapide, alors que le mode Sommeil
offre le niveau de consommation le plus bas
avec une vitesse de reprise plus lente.
Page 77

Français
Le tableau suivant montre les caractéristiques du mode opérationnel normal et des trois modes
d’économie.
VESA Display Power Management Signaling (DPMS)
Mode Vidéo
Sync.
horizontale
Sync.
verticale
Énergie
utilisée
MX50
Énergie
utilisée
MX70
Énergie
utilisée
MX90
Activé Activé Oui Oui
@
70 W
@
90 W
@
130 W
Standby Vierge Non Oui
@
15 W
@
15 W
@
15 W
Veille Vierge Oui Non
@
15 W
@
15 W
@
15 W
Sommeil Vierge Non Non
@
5 W
@
5 W
@
5 W
Page 78

Informations
réglementaires
Déclaration de conformité
Conformément aux normes ISO/IEC Manuel 22 et EN 45014
Nom du fabricant :
Hewlett-Packard Company
Adresse du fabricant :
10500 Ridgeview Ct. Cupertino, CA
95015-4010, États-Unis
Déclare que le produit
Nom du produit :
Moniteurs multimédias HP Pavilion MX50,
MX70 et MX90
Modèle(s) :
P1282A, P1283A, P1284A
Respecte les spécifications suivantes :
Sécurité :
IEC 60950 + A1, A2, A3, A4
EN 60950:1992 + A1, A2, A3, A4, A11
Ergonomie :
MPRII 1990:10
(
excepté le MX50 et le MX70 pour l’Amérique du Nord
et l’Asie)
CEM :
CISPR 22:1993+
A1:1995+A2:1996/EN55022:1994+A1:1995+A2:1997,
Class B
1)
CISPR 24:1997/EN 55024 1998 - Immunity FCC Titre 47
CFR, Partie 15 Classe B
2)
/ICES-003, Édition 2
AS/NZS 3548:195 +A1 : 1997 + A2 : 1997, Class B
IEC 61000-3-2:1995/EN 61000-3-2:1995 — Harmonics
IEC-61000-3-3:1994/EN 61000-3-3:1995 — Scintillement
Informations supplémentaires :
Le produit ci-joint respecte les exigences de la Directive sur les tensions
faibles 73/23/CEE et la Directive CME 89/336/CEE et porte le sigle
CE.
— la directive EMC 89/336/EEC (incluant 93/68/EEC
— la directive sur les tensions faibles 73/23/EEC (incluant 93/68/EEC)
1) Le produit a été testé dans une configuration typique avec des
périphériques pour micro-ordinateurs Hewlett-Packard.
2)
Cet équipement respecte les dispositions de la partie 15 de la
réglementation FCC. Le fonctionnement est soumis aux deux
conditions suivantes : (1) cet équipement ne peut pas causer
d’interférences nuisibles et (2) cet équipement doit accepter toute
interférence reçue, y compris les interférences capables de causer
un mauvais fonctionnement.
Hardware Quality Engineering Manager
Cupertino, CA, États-Unis Juin 2000
Pour plus d’informations sur la réglementation et la sécurité
uniquement, contactez :
Contact
Australie :
Product Regulations Manager
Hewlett-Packard Australia Ltd.
31-41 Joseph Street
Blackburn, Victoria 3130, Australie
Questions
réglementaires
uniquement :
Department HQ-TRE Standards Europe
Herrenberger Straße 130
D-71034 Boblingen, Deutschland
(FAX: (+49)-7031-14-3143)
Amérique du
Nord
Hardware Quality Engineering Manager,
Hewlett-Packard, HPD, 10500 Ridgeview Ct.
Cupertino, CA 95015-4010, États-Unis
(Téléphone : 408-343-5000)
Page 79

Français
Déclaration FCC
Cet équipement a été testé et déclaré conforme aux limites
concernant les appareils numériques de classe B, selon les
dispositions de la partie 15 des règles de la FCC. Ces
limites sont conçues pour offrir une protection raisonnable
contre les interférences dans une installation résidentielle.
Cet équipement génère, utilise et peut émettre des
fréquences radio. S’il n’est pas installé et utilisé
conformément aux instructions, il peut causer des
interférences dans les communications radio. Cependant, il
n’existe aucune garantie assurant qu’il n’y aura pas
d’interférence dans une installation particulière. Si cet
équipement produit des interférences nuisibles à la réception
des ondes radio ou télévision, ce qui peut être déterminé en
allumant et éteignant l’équipement, l’utilisateur devrait
essayer de corriger les interférences en prenant l’une des
mesures suivantes :
3
Réorientez ou déplacez l’antenne de réception.
3
Déplacez le moniteur et le PC à l’écart de la radio ou de
la télévision.
3
Branchez le moniteur et le PC dans une prise électrique
différente de celle de la radio et la télévision afin qu’ils
soient sur des circuits électriques séparés.
3
Assurez-vous que tous les périphériques sont certifiés FCC
de classe B.
3
Consultez votre revendeur de PC, HP ou demandez l’aide
d’un technicien expérimenté en radiotélévision.
Remarque :
Des tests de vérification de système ont été
menés avec des périphériques HP et des câbles
blindés HP, identiques à ceux fournis avec votre
système. Les câbles utilisés avec ce moniteur doivent
être blindés afin de satisfaire aux exigences FCC.
Tout changement ou modification sans une autorisation
expresse en ce sens pourrait annuler le droit de l’utilisateur
de l’équipement.
Notice sur les rayons X
Pendant son utilisation, ce produit émet des rayons X ;
cependant, il est bien protégé et répond aux exigences de
sécurité et de santé de nombreux pays, telles que la Loi
allemande sur les radiations et la Loi sur le contrôle des
radiations pour la sécurité et la santé des États-Unis.
Page 80

Les radiations émises par ce produit représentent moins de
0,1mR/h (12Sv/hr) à une distance de dix centimètres de la
surface du tube cathodique. Les radiations des rayons X
dépendent essentiellement des caractéristiques du tube
cathodique et de ses circuits à bas et à haut voltage. Les
commandes internes ont été conçues pour garantir une
utilisation en toute sécurité. Seul le personnel qualifié est
habilité à procéder à des réglages internes comme cela est
spécifié dans le manuel de ce produit.
Ne remplacez le tube cathodique que par un tube
identique.
Notice générale
En tant que partenaire de ENERGY STAR, HP s’est assuré
que ce produit satisfait aux lignes directrices d’ENERGY
STAR en matière d’utilisation efficace de l’énergie.
Le nom ENERGY STAR est une marque américaine déposée
par la U.S. Environmental Protection Agency.
Déclaration du ministère des
Communications du Canada
(Canada uniquement)
This Class B digital apparatus meets all requirements of the
Canadian Interference-Causing Equipment Regulations.
Cet appareil numérique de la classe B respecte toutes les
exigences du Règlement sur le matériel brouilleur du
Canada.
Déclaration sur les interférences
électromagnétiques (Union Européenne
uniquement)
Ce produit est un produit de classe B dans un environnement
domestique. Ce produit peut causer des interférences radio.
Dans un tel cas, l’utilisateur devra prendre des mesures
adéquates.
Déclaration de conformité à la Classe B
VCCI
Page 81

Français
Index
A
affichage
compatibilité de l’, 33
fonctions de gestion de l’énergie,
9
résolution de l’, 8
Affichage
informations techniques, 27
attribution des broches, 31
B
bouton Luminosité, 10, 16
bouton Contraste, 11, 16
bouton Mode, 10, 12
bouton Moins, 11
bouton Plus, 11
bouton Power, 6
bouton Select, 11
C
câbles d’alimentation, connexion et
déconnexion, 2, 4
câbles vidéo, connexion, 4
câbles, connexion, 4
caractéristiques, 33
consignes de sécurité, 1
contraste, réglage, 12, 13
Contrôle moirage
paramétrage des filtres, 25
couleur, réglage, 21
D
Déclaration FCC, 35
démagnétisation de l’écran, 7, 15
dépannage
problèmes de couleur, 9
dépannage
démagnétisation, 9
interférences dommageables, 36
DPMS (Display Power Management
Signaling), 9, 32
E
écran.
Consultez
moniteur
écran
consignes de sécurité, 1
installation, 3
nettoyage, 9
résolution, 8, 30
F
face avant, utilisation, 10
fatigue oculaire, minimalisation, 8
Fenêtre État, 26
Fenêtre géométrie évoluée, 18
Page 82

Fenêtre menu avancé, 19
fenêtre OSD
paramétrage, 24
Fenêtre principale OSD, 13
Fenêtre taille & position, 16
filtres moirage, 25
fonctions de gestion de l’énergie, 9,
32, 33
fonctions OSD (on screen display),
10
fréquence verticale, 16
H
haut-parleurs, branchement, 5
I
Icône Couleur, 21, 21, 22
Icône coussin équil., 18
Icône coussin latéral, 18
Icône démagnétiser, 16
Icône géométrie évoluée, 16, 18
Icône langue, 20, 23
Icône menu avancé, 16
Icône moirage, 19, 25
Icône parallélogramme, 18
Icône position OSD, 20, 24
Icône position-H, 17
Icône position-V, 17
Icône rotation, 18
Icône État, 20, 26
Icône taille & position, 16
Icône taille-H, 17
Icône taille-V, 17
Icône trapézoïdale, 18
Icône zoom, 16
informations sur le moniteur, 27
Informations techniques, 34
installation du moniteur, 3
J
jeux.
Consultez
mode vidéo/jeex
L
langue, choix, 23
luminosité, réglage, 13, 14
M
mode sommeil, 9
Mode sommeil, 9, 33
mode standby, 9
Mode standby, 33
mode texte, 20
Mode texte, 11
mode veille, 9
Mode veille, 33
mode vidéo/jeux, 11, 20
modes de contraste préréglés, 11
modes d’économie de l’énergie, 33
modes d’économie d’énergie, 9
modes préréglés.
Consultez
modes
de contraste préréglés
modes vidéo, 29
moniteur.
Consultez
écran
Page 83

Français
moniteur
angle de vision du, 10
caractéristiques, 1
éviter les dommages, 1, 2
fonctions de gestion de l’énergie,
9, 33
nettoyage, 9
positionnement, 4
moniteur utilisation, 6
N
nettoyage de l’écran, 9
P
paramétrage
position de la fenêtre OSD, 19
paramètres de mode, changement,
12
position
de la fenêtre OSD, 24
problèmes.
Consultez
dépannage
R
réglages du fabricant, restauration,
26
résolution, écran, 8, 30
T
taux de rafraîchissement de l’image,
8
température de la couleur, choix, 20
V
VESA Display Power Management
Signaling (DPMS), 9, 33
Page 84

Page 85

Español
Monitores multimedia
MX50, MX70 y MX90 de
la HP Pavilion
Page 86

La información de este documento está sujeta a cambios sin previo
aviso.
Hewlett-Packard
®
Company no concede respecto a este material
garantías implícitas, ni de comerciabilidad o idoneidad para
ningún propósito concreto, ni ningún otro tipo de garantía.
HP no será responsable de los errores contenidos en este
documento, ni de los daños accidentales o consecuentes,
relacionados con la instalación, rendimiento o uso de este material.
HP no asume responsabilidad alguna sobre el uso o confiabilidad
de su software en un equipo no suministrado por HP.
La información incluida en este documento pertenece a su
propietario y está protegida por las leyes de los derechos de autor.
Todos los derechos son reservados. Ninguna parte de este
documento puede ser fotocopiada, reproducida o traducida a otro
idioma sin el consentimiento previo por escrito de HP.
Hewlett-Packard Company
Home Products Division
P.O. Box 4010
Cupertino, CA 95015-4010
EE.UU.
© Copyright Hewlett-Packard Company, 2000. Todos los derechos
reservados.
Hewlett-Packard es una marca registrada de Hewlett-Packard
Company en los Estados Unidos de América y otros países.
Otras marcas o nombres de productos son marcas comerciales de
sus respectivos propietarios.
Page 87

Español
Introducción......................................... 1
Por su seguridad............................................... 1
Información adicional de seguridad.................... 3
Advertencia de Seguridad de Energía de CA ...... 3
Instalación ........................................... 3
Colocación del monitor ..................................... 3
Conexión de los cables de alimentación
y de video ....................................................... 4
Conexión de las bocinas ................................... 5
Uso del monitor ................................... 6
Encendido y apagado del monitor...................... 6
Desmagnetización de la pantalla ....................... 7
Ajuste de la resolución de la pantalla ................. 7
Selección de la velocidad de actualización ......... 8
Minimización del uso de la energía.................... 9
Limpieza de la pantalla ..................................... 9
Ajuste del ángulo de visión .............................. 10
Cambio de la configuración de la
pantalla ............................................ 10
Uso del panel frontal....................................... 10
Modos de contraste preajustados ..................... 11
Establecimiento de un modo de contraste
preajustado ................................................... 12
Cambio de las opciones de modo .................... 12
Ajuste directo del brillo y del contraste.............. 13
Uso de la ventana principal OSD ..................... 13
Uso de la ventana Tamaño y posición............... 16
Uso de la ventana Geometría avanzada........... 17
Uso de la ventana OSD Menú avanzado .......... 19
Selección de la temperatura de color................ 20
Definición de los valores de rojo, verde y azul.......21
Selección de un idioma................................... 23
Selección de la posición de OSD ..................... 23
Ajuste de los filtros de moiré ............................ 24
Uso de la ventana Estado................................ 26
Restablecimiento de los ajustes de fábrica......... 26
Índice
Page 88

Información técnica ............................27
Información del monitor .................................. 27
Modos de video preajustados.......................... 29
Asignaciones de las patillas............................. 31
Funciones de administración de energía DPMS
..... 32
Información sobre cumplimiento
normativo ..........................................34
Declaración de Conformidad........................... 34
Declaración FCC............................................ 35
Aviso sobre la radiación de rayos X ................. 35
Avisos generales ............................................ 36
Declaración DOC (sólo Canadá) ..................... 36
Declaración EMI (sólo Unión Europea).............. 36
Declaración de la compatibilidad con
VCCI Clase B................................................. 36
Índice alfabético .................................37
Page 89

Español
Introducción
Los monitores multimedia MX50, MX70 y MX90
de la HP Pavilion (modelos P1282A, P1283A y
P1284A) son monitores en color de alta
resolución, diseñados para su uso con los
HP Pavilion y otras PC. Cada monitor incorpora
un micrófono y montajes para bocinas
suministrados por HP Pavilion. Los monitores
cumplen con las normas de ENERGY STAR
®
de la
Agencia de Protección del Medio Ambiente (EPA)
e incluyen funciones automáticas de
administración de la energía.
Entre otras funciones se incluyen:
3
Ajuste en pantalla de la configuración de la
pantalla.
3
Admiten altas velocidades de actualización
para reducir el parpadeo de la pantalla y la
fatiga visual.
3
Base de inclinación y giro incorporada.
La figura siguiente presenta una vista frontal de
su monitor HP Pavilion.
Panel de control
Botón del panel
Micrófono
Por su seguridad
Por su seguridad y la protección de su monitor,
siga estos procedimientos:
3
Conecte siempre el monitor a una toma de
corriente de tres vías con toma de tierra.
Utilice únicamente el cable de alimentación
suministrado de fábrica.
Page 90

Advertencia:
Para desconectar
completamente la energía del monitor,
debe retirar el cable de alimentación del
conector de alimentación.
3
Para evitar que se produzca una descarga
eléctrica, no retire la cubierta posterior del
monitor. La cubierta sólo debe ser retirada por
personal de servicio técnico competente.
3
No coloque encima del monitor objetos que
pudieran caerse por las rendijas u obstruir el
flujo de aire.
3
Para evitar el riesgo de que se produzcan
daños en el monitor o una descarga eléctrica,
no exponga el monitor a la lluvia ni a la
humedad.
3
Ajuste únicamente los controles con
operaciones que se tratan en este manual. Si
ajusta otros controles de forma incorrecta,
puede provocar un daño que posteriormente
requerirá la reparación por parte de un
técnico del departamento de servicio técnico.
Si se produce cualquiera de las condiciones
siguientes, desconecte el monitor y póngase en
contacto con un experto competente del
departamento de servicio técnico:
3
El cable o el conector de alimentación están
rotos o dañados.
3
Ha derramado algún líquido en el monitor.
3
El monitor ha estado expuesto a la lluvia o al
agua.
3
El monitor no funciona correctamente aun
siguiendo las instrucciones de uso.
3
El monitor se ha caído o el caparazón está
dañado.
3
El funcionamiento del monitor cambia de
forma repentina.
Page 91

Español
Información adicional de
seguridad
Estos productos han sido evaluados para
conexión a un sistema de energía “IT” (un
sistema de distribución de corriente alterna sin
conexión a tierra directa, de acuerdo con IEC
950).
Advertencia de Seguridad de
Energía de CA
Advertencia:
Coloque el monitor cerca
de una toma de corriente alterna. El cable
de alimentación de CA es el medio
principal de desconexión de su monitor
HP y debe estar siempre al alcance. Por
su seguridad, el cable de alimentación
que se le proporcionó con su sistema tien
e
una toma de tierra. Utilice siempre el
cable de alimentación con una toma de
corriente con instalación de tierra para
evitar el riesgo de descarga eléctrica.
Instalación
Siga las instrucciones facilitadas en este capítulo
para instalar el monitor multimedia MX50, MX70
o MX90 de la HP Pavilion.
Advertencia:
Los monitores MX son
objetos pesados. Tome las debidas
precauciones o pida ayuda cuando los
levante para evitar sufrir lesiones.
Nota:
Antes de instalar el monitor, consulte la
documentación de la PC y del adaptador de
video. Es posible que tenga que realizar cambios
para adaptar el monitor en su lugar.
Colocación del monitor
Coloque el monitor en una superficie plana y
estable. Elija una zona que no esté demasiado
expuesta al calor, la humedad o la luz solar
directa. Coloque el monitor lo más lejos posible
de fuentes de interferencia electromagnética,
tales como los transformadores, los motores, las
lámparas fluorescentes y otros monitores de PC.
Page 92

Conexión de los cables de
alimentación y de video
Antes de conectar cualquier cable, lea
atentamente las instrucciones de seguridad
incluidas al comienzo de este manual. La PC y el
monitor deben estar apagados.
Para conectar los cables de alimentación y
video, proceda tal como se indica a
continuación:
1
Conecte el cable de alimentación en la parte
posterior del monitor.
2
Conecte el cable de alimentación a una toma
de corriente.
3
Conecte el enchufe azul del cable de video al
puerto de video de la PC. Si tiene una PC
HP Pavilion, este puerto estará marcado en
azul. Sin embargo, en algunas PC Pavilion, el
puerto podría estar marcado en color naranja.
La ilustración siguiente se facilita sólo como
modo de referencia. Consulte el manual del
usuario de su PC para saber dónde está
ubicado el puerto de video.
Page 93

Español
4
Inserte el enchufe rosa del cable del micrófono
en el conector de entrada de sonido situado
en la parte posterior de la PC. Si tiene una PC
HP Pavilion, el conector estará marcado en
rosa. Sin embargo, en algunas PC Pavilion, la
conexión podría estar marcada en color
amarillo.
Conexión de las bocinas
El monitor está diseñado para utilizarlo con las
bocinas Polk Audio suministradas por HP.
1
Extienda los cables conectados hasta las dos
bocinas.
2
Identifique las bocinas izquierda y derecha.
Para saber qué parte del monitor corresponde
a una bocina, observe su curvatura y las
clavijas de montaje. Hay bocinas sin clavijas
de montaje. Si las bocinas no se suministran
con clavijas de montaje, vaya al paso 5. El
lado de la bocina con las clavijas de montaje
se inserta en el lateral del monitor.
3
Inserte las clavijas de la bocina derecha en las
ranuras correspondientes del lado derecho del
monitor. Presione, deslizando las clavijas de la
bocina completamente hacia el interior de las
ranuras.
4
Inserte las clavijas de la bocina izquierda en
las ranuras correspondientes del lado
izquierdo del monitor. Presione, deslizando las
clavijas de la bocina completamente hacia el
interior de las ranuras.
5
Consulte el manual del usuario de su PC para
obtener instrucciones sobre cómo conectar las
bocinas a la PC.
Page 94

Uso del monitor
Este capítulo contiene información sobre la
utilización de los monitores multimedia MX50,
MX70 o MX90 de la HP Pavilion.
Encendido y apagado del monitor
Utilice el botón de encendido situado en el panel
frontal para encender y apagar el monitor.
Cuando el monitor está encendido, la luz situada
junto al botón de encendido está iluminada. La
luz es verde cuando el monitor y la PC están
activos y amarilla/ámbar cuando el monitor se
encuentra en uno de los modos de ahorro de
energía.
Las funciones de administración de la energía
del monitor reducen el consumo de energía a
bajos niveles cuando la PC ha permanecido
inactiva durante un espacio concreto de tiempo.
Para obtener más información, consulte
“Minimización del uso de la energía” en la
página 9.
Gracias a las funciones de administración de
energía del monitor, por lo general no es
necesario apagar el monitor cuando no se está
utilizando. Cuando está apagado, el monitor
utiliza la misma cantidad de energía que utiliza
en el modo de inactividad (menos de 5 vatios).
Si su PC no admite la administración de energía
DPMS, puede reducir el consumo de energía
apagando el monitor cuando no lo vaya a
utilizar durante un período de tiempo
prolongado. Puede apagar el monitor incluso si
deja la PC funcionando.
Page 95

Español
Advertencia:
Para desconectar
completamente la energía del monitor,
retire el cable de alimentación de la toma
de corriente alterna o del protector de
picos de corriente.
Desmagnetización de la pantalla
La desmagnetización elimina el magnetismo que
causa variaciones de color no deseadas.
Desmagnetice la pantalla cada vez que advierta
variaciones anormales de los colores.
Nota:
No desmagnetice a intervalos menores de 30
minutos, pues, de lo contrario, la
desmagnetización estará incompleta. No es
necesario desmagnetizar a menos que haya
movido el monitor.
Existen dos métodos para realizar la
desmagnetización: Cada vez que enciende el
monitor, éste se desmagnetiza automáticamente.
También puede utilizar la opción Desmagnetizar
de la ventana principal de los menús en pantalla
(OSD) para desmagnetizar la pantalla.
Consulte “Uso de la ventana principal OSD” de
la página 13 para obtener instrucciones al
respecto.
Ajuste de la resolución de la
pantalla
La resolución determina la cantidad de
información que se muestra en la pantalla. La
resolución de la pantalla se refiere al número de
puntos o
píxeles
que se utilizan para componer
una imagen.
Page 96

Una resolución de pantalla baja significa que la
pantalla utiliza un número relativamente pequeño
de puntos relativamente grandes. Una resolución
más alta significa que la imagen está compuesta
de más puntos de un tamaño más pequeño.
Cuando se utilizan resoluciones más altas de la
pantalla, los iconos, las ventanas y los textos
aparecen más pequeños en la pantalla, pero se
muestra una cantidad mayor de información.
Utilice el Panel de control de Windows para
configurar la resolución de la pantalla. El monitor
admite muchas resoluciones comunes de la
pantalla, tal como se muestra en la sección
“Modos de video preajustados”.
Selección de la velocidad de
actualización
Para reducir al mínimo la fatiga visual y
optimizar el rendimiento de la pantalla, utilice la
velocidad de actualización más alta posible o de
frecuencia vertical para la que no perciba
parpadeos (normalmente a 75 Hz o más para la
mayoría de los usuarios). La velocidad de
actualización de la imagen es el número de
veces por segundo que se actualiza la imagen.
La tabla “Modos de video preajustados” en la
página 29 muestra las velocidades de
actualización de la imagen admitidos por la
imagen a diferentes resoluciones de la pantalla.
Page 97

Español
Minimización del uso de
la energía
Las PC HP Pavilion admiten VESA DPMS (Display
Power Management Signaling, Señalización de
administración de energía de la pantalla). Las
funciones de administración de energía reducen
el consumo de energía del monitor transcurrido
un período de inactividad del teclado.
El monitor admite tres modos distintos de ahorro
de energía: En espera, Suspender e Inactividad.
Consulte el apartado “Funciones de
administración de energía DPMS” para obtener
una descripción de las características de cada
modo.
Cuando el monitor se encuentra en uno de los
modos de ahorro de energía, la pantalla se
queda en blanco y el indicador del panel frontal
está amarillo/ámbar. Consulte el manual del
usuario de la PC para obtener información sobre
la forma de ajustar los modos de ahorro de
energía.
Limpieza de la pantalla
Para limpiar la pantalla, proceda tal como se
indica a continuación:
1
Apague el monitor y desconéctelo.
2
Humedezca un trapo de algodón con un
limpiacristales habitual y, a continuación,
limpie la pantalla.
Advertencia:
No utilice soluciones de
limpieza que contengan fluoruros, ácidos
o álcalis. No utilice productos de limpieza
fuertes o abrasivos para limpiar la
pantalla.
3
Seque la pantalla con un trapo suave de
algodón.
4
Conecte el monitor y enciéndalo.
Page 98

Ajuste del ángulo de visión
El montaje del pedestal del monitor le permite
ajustar el ángulo de visión. Puede inclinar y girar
el monitor a fin de buscar la posición de visión
que le resulte más cómoda.
Cambio de la configuración
de la pantalla
Utilice las funciones OSD en pantalla del
monitor. Los botones del panel frontal controlan
los iconos y las ventanas de la pantalla.
Uso del panel frontal
Utilice los seis botones de la parte frontal del
monitor para controlar las funciones OSD.
MODE
El botón Modo abre la ventana Modo
Contraste y le permite seleccionar entre los
modos preajustados del monitor. Consulte
“Modos de contraste preajustados” en la
página 11 para obtener instrucciones al
respecto.
El botón Brillo abre y cierra la ventana
Ajuste de brillo.
Page 99

Español
El botón Contraste abre y cierra la
ventana Ajuste de contraste.
SELECT
El botón Select abre la ventana principal
de OSD si no hay ninguna otra ventana
OSD mostrada. En la ventana principal
OSD, el botón Select abre la barra de
ajuste para el icono seleccionado, o la
ventana correspondiente. Cuando la
barra Ajuste de brillo o Ajuste de
contraste está en la pantalla, el botón
Select cierra la barra y guarda el valor.
El botón Menos disminuye un ajuste si
está abierta una ventana de ajuste. En
una ventana, el botón mueve el puntero
hacia arriba a través del menú de
iconos.
El botón Más aumenta un ajuste si está
abierta una ventana de ajuste. En una
ventana, el botón mueve el puntero
hacia abajo a través del menú de
iconos.
Modos de contraste preajustados
Los modos de contraste preajustados le permiten
cambiar rápidamente los ajustes de contraste
para adaptarse a los que se utilizan
normalmente para los diversas actividades y
condiciones de visión.
Existen dos modos de contraste preajustados:
El modo Texto está diseñado para obtener los
mejores resultados en entornos de baja luz
ambiental y con aplicaciones tales como
procesadores de texto u hojas de cálculo. Es
un ajuste de contraste más bajo.
Ventajas:
Bienestar visual, menos fatiga y
mejor enfoque.
Modo Video/Juegos ofrece un mayor
contraste, adecuado para ver video en
movimiento y aplicaciones de tratamiento de
imágenes y fotografías.
Ventajas:
Un mayor contraste para obtener
imágenes vibrantes e intensas, y un máximo
impacto visual con juegos y video.
Page 100

Establecimiento de un modo de
contraste preajustado
1
Oprima el botón Modo situado en la parte
frontal del monitor. Se abre la ventana Modo
Contraste.
TEXTO
VIDEO/JUEGOS
MODO CONTRASTE
2
Para seleccionar un modo, vuelva a pulsar
el botón Modo, o bien el botón Más (+) o
Menos (–).
3
Cuando aparezca resaltado el modo del
monitor que desee, oprima el botón Select. La
ventana Modo Contraste se cierra.
Cambio de las opciones de modo
Los modos de contraste preajustados son los
ajustes maestros globales relativos a la
configuración de brillo, contraste y otros ajustes
de la imagen. Puede realizar más ajustes en la
configuración de las imágenes utilizando las
funciones OSD.
Si apaga el monitor, al volverlo a encender se
activará el último modo utilizado.
Los cambios en la temperatura de color son
independientes de la configuración del modo de
contraste (los dos modos funcionarán de la
misma forma con cualquier ajuste de color).
 Loading...