

Page 1

contents
Customer Care Guide
HP OfficeJet R Series
Page 2

©Copyright He wlett -Pac kard C ompany 1 999
All rights are reserve d. No part of the
document may be photocopied, reproduced,
or translated to anoth er langua ge without the
prior written consent of Hewlett-Packard
Company.
Publication num ber: C6680-90176
First edition: January 1999
Printed in U.S.A., Germany, or Singapore
Acknowledgments
AGaramond, Garamond, Adobe™ and
PhotoDeluxe Busine ss Editi on are regi ste red
trademarks of Adobe System s, Incorpora ted,
which may be registered in certain
jurisdictions.
MS-DOS® and Windows® are registered
trademarks of Micr osoft Corporation.
Intel® and Pen t iu m® are reg i s t er ed
trademarks of Inte l Corporation.
Notice
The information co ntained in this document
is subject to cha nge without notice and
should not be construed as a commitment by
the Hewlett-Packard Company.
Hewlett-Packard assumes no
responsibility for any errors that may
appear in this document, nor does it
make expressed or implied warranty
of any kind with regard to this
material, including, b ut not limited to,
the implied warranties of
merchantability and fitne ss for a
particular purpose.
Company shall not be liable for incidental or
consequentia l damages in c onnection wit h, or
arising out of the fu rnishi ng, perform ance , or
use of this document and the program
mate r ial which it de scrib es.
The Hewlett-Packard
Note
: Regulatory informa tion can be found in
Chapter 6 of the
Customer Care Guide
HP OfficeJet R Series
.
It is not la wful in man y places to make copi es
of the followin g i tems. When i n d oubt , che ck
with a legal representative first.
◆
Governmental paper or documents:
- Passports
- Immigration papers
- Selective service papers
- Identification badges, cards, or i n signias
◆
Governmental stamps:
- Postage stamps
- Food stamps
◆
Checks or dr afts drawn on Governmental
agencies
◆
Paper currency, trav eler’s checks, or money
orders
◆
Certificates of deposit
◆
Copyrigh ted works
Page 3

contents
Chapter 1 — Getting Help
HP Multimedi a Product Tour . . . . . . . . . . . . . . . . . . . . . . . . . . . . . . . . . . . . . . . . . . . . . . . . 1-1
HP Scanning Coach . . . . . . . . . . . . . . . . . . . . . . . . . . . . . . . . . . . . . . . . . . . . . . . . . . . . . . . . 1-2
Online Help . . . . . . . . . . . . . . . . . . . . . . . . . . . . . . . . . . . . . . . . . . . . . . . . . . . . . . . . . . . . . . 1-3
HP OfficeJet R Series Toolbox . . . . . . . . . . . . . . . . . . . . . . . . . . . . . . . . . . . . . . . . . . . 1-3
HP OfficeJet Help . . . . . . . . . . . . . . . . . . . . . . . . . . . . . . . . . . . . . . . . . . . . . . . . . . . . . 1-4
HP PrecisionScan Help . . . . . . . . . . . . . . . . . . . . . . . . . . . . . . . . . . . . . . . . . . . . . . . . . 1-4
Read about ECP and Readme Files . . . . . . . . . . . . . . . . . . . . . . . . . . . . . . . . . . . . . . . . 1-4
Internet Help . . . . . . . . . . . . . . . . . . . . . . . . . . . . . . . . . . . . . . . . . . . . . . . . . . . . . . . . . 1-4
Adobe PhotoDeluxe Business Edition Help . . . . . . . . . . . . . . . . . . . . . . . . . . . . . . . . . 1-4
Chapter 2 — Support Services
Get Help from HP . . . . . . . . . . . . . . . . . . . . . . . . . . . . . . . . . . . . . . . . . . . . . . . . . . . . . . . . . 2-1
Online Services . . . . . . . . . . . . . . . . . . . . . . . . . . . . . . . . . . . . . . . . . . . . . . . . . . . . . . . 2-1
Internet . . . . . . . . . . . . . . . . . . . . . . . . . . . . . . . . . . . . . . . . . . . . . . . . . . . . . . . . . . 2-1
HP Distribution Center . . . . . . . . . . . . . . . . . . . . . . . . . . . . . . . . . . . . . . . . . . . . . 2-2
HP FIRST . . . . . . . . . . . . . . . . . . . . . . . . . . . . . . . . . . . . . . . . . . . . . . . . . . . . . . . 2-2
HP Customer Support . . . . . . . . . . . . . . . . . . . . . . . . . . . . . . . . . . . . . . . . . . . . . . . . . . 2-2
Prepare Your HP OfficeJet for Shipment . . . . . . . . . . . . . . . . . . . . . . . . . . . . . . . . . . . 2-3
Calling in the U.S. During Warranty . . . . . . . . . . . . . . . . . . . . . . . . . . . . . . . . . . . 2-4
Calling in the U.S. Post-Warranty . . . . . . . . . . . . . . . . . . . . . . . . . . . . . . . . . . . . . 2-4
Calling Elsewhere in the World . . . . . . . . . . . . . . . . . . . . . . . . . . . . . . . . . . . . . . . 2-5
Getting Help for Adobe PhotoDeluxe Business Edition . . . . . . . . . . . . . . . . . . . . . . . . . . . . 2-7
Chapter 3 — Troubleshooting and Maintaining Your HP O fficeJet
Cleaning the Exterior Case . . . . . . . . . . . . . . . . . . . . . . . . . . . . . . . . . . . . . . . . . . . . . . . . . . 3-1
Cleaning the Glass . . . . . . . . . . . . . . . . . . . . . . . . . . . . . . . . . . . . . . . . . . . . . . . . . . . . . . . . . 3-1
How to Clear a Paper Jam in the ADF . . . . . . . . . . . . . . . . . . . . . . . . . . . . . . . . . . . . . . . . . . 3-2
How to Clear a Paper Jam in the Main Unit . . . . . . . . . . . . . . . . . . . . . . . . . . . . . . . . . . . . . 3-2
Paper Jam with Front-Panel Message . . . . . . . . . . . . . . . . . . . . . . . . . . . . . . . . . . . . . . 3-2
Paper Jams in the Back of the Unit . . . . . . . . . . . . . . . . . . . . . . . . . . . . . . . . . . . . . . . . 3-2
How to Use the Self-Test Page . . . . . . . . . . . . . . . . . . . . . . . . . . . . . . . . . . . . . . . . . . . . . . . 3-3
How to Clean Cartridges . . . . . . . . . . . . . . . . . . . . . . . . . . . . . . . . . . . . . . . . . . . . . . . . . . . . 3-4
Front-Panel Messages . . . . . . . . . . . . . . . . . . . . . . . . . . . . . . . . . . . . . . . . . . . . . . . . . . . . . . 3-5
On-Screen Messages . . . . . . . . . . . . . . . . . . . . . . . . . . . . . . . . . . . . . . . . . . . . . . . . . . . . . . . 3-6
Additional Troubleshooting Tips . . . . . . . . . . . . . . . . . . . . . . . . . . . . . . . . . . . . . . . . . . . . . 3-7
Chapter 4 — Adding and Removing Software Programs
Removing Software . . . . . . . . . . . . . . . . . . . . . . . . . . . . . . . . . . . . . . . . . . . . . . . . . . . . . . . . 4-1
General Information . . . . . . . . . . . . . . . . . . . . . . . . . . . . . . . . . . . . . . . . . . . . . . . . . . . . 4-1
Removing HP OfficeJet R Series Software . . . . . . . . . . . . . . . . . . . . . . . . . . . . . . . . . . 4-1
Reinstalling Software . . . . . . . . . . . . . . . . . . . . . . . . . . . . . . . . . . . . . . . . . . . . . . . . . . . . . . . 4-2
Installing the Office 97 Utility . . . . . . . . . . . . . . . . . . . . . . . . . . . . . . . . . . . . . . . . . . . . . . . . 4-2
HP OfficeJet R Series Customer Care Guide
iii
Page 4

Chapter 5 — Hewlett-Packard Limited Warranty
HP Year 2000 (Y2K) Warranty . . . . . . . . . . . . . . . . . . . . . . . . . . . . . . . . . . . . . . . . . . . . . . . 5-1
For Consumer Products Distributed Through Resellers . . . . . . . . . . . . . . . . . . . . . . . . 5-1
Warranty Service . . . . . . . . . . . . . . . . . . . . . . . . . . . . . . . . . . . . . . . . . . . . . . . . . . . . . . . . . . 5-1
Express Service . . . . . . . . . . . . . . . . . . . . . . . . . . . . . . . . . . . . . . . . . . . . . . . . . . . . . . . 5-1
Warranty Upgrades . . . . . . . . . . . . . . . . . . . . . . . . . . . . . . . . . . . . . . . . . . . . . . . . . . . . . . . . 5-2
Returning Your HP OfficeJet for Service . . . . . . . . . . . . . . . . . . . . . . . . . . . . . . . . . . . . . . . 5-2
Chapter 6 — Technical Information
System Requirements . . . . . . . . . . . . . . . . . . . . . . . . . . . . . . . . . . . . . . . . . . . . . . . . . . . . . . 6-1
Hewlett-Packard Software Solution . . . . . . . . . . . . . . . . . . . . . . . . . . . . . . . . . . . . . . . . 6-1
Adobe PhotoDeluxe Business Edition . . . . . . . . . . . . . . . . . . . . . . . . . . . . . . . . . . . . . . 6-1
Print Specifications . . . . . . . . . . . . . . . . . . . . . . . . . . . . . . . . . . . . . . . . . . . . . . . . . . . . . . . . 6-2
Print Speed and Resolution . . . . . . . . . . . . . . . . . . . . . . . . . . . . . . . . . . . . . . . . . . . . . . 6-2
Print Margins . . . . . . . . . . . . . . . . . . . . . . . . . . . . . . . . . . . . . . . . . . . . . . . . . . . . . . . . . 6-2
Scan Specifications . . . . . . . . . . . . . . . . . . . . . . . . . . . . . . . . . . . . . . . . . . . . . . . . . . . . . . . . 6-2
Copy Specifications . . . . . . . . . . . . . . . . . . . . . . . . . . . . . . . . . . . . . . . . . . . . . . . . . . . . . . . . 6-3
Copy Speed and Resolution . . . . . . . . . . . . . . . . . . . . . . . . . . . . . . . . . . . . . . . . . . . . . . 6-3
Copy Margins . . . . . . . . . . . . . . . . . . . . . . . . . . . . . . . . . . . . . . . . . . . . . . . . . . . . . . . . 6-3
Paper Specifications . . . . . . . . . . . . . . . . . . . . . . . . . . . . . . . . . . . . . . . . . . . . . . . . . . . . . . . . 6-4
Paper-Tray Capacities . . . . . . . . . . . . . . . . . . . . . . . . . . . . . . . . . . . . . . . . . . . . . . . . . . 6-4
Paper Sizes . . . . . . . . . . . . . . . . . . . . . . . . . . . . . . . . . . . . . . . . . . . . . . . . . . . . . . . . . . . 6-4
Automatic Document Feeder . . . . . . . . . . . . . . . . . . . . . . . . . . . . . . . . . . . . . . . . . . . . . 6-4
Power Specifications . . . . . . . . . . . . . . . . . . . . . . . . . . . . . . . . . . . . . . . . . . . . . . . . . . . . . . . 6-5
Environmental Specifications . . . . . . . . . . . . . . . . . . . . . . . . . . . . . . . . . . . . . . . . . . . . . . . . 6-5
Physical Specifications . . . . . . . . . . . . . . . . . . . . . . . . . . . . . . . . . . . . . . . . . . . . . . . . . . . . . 6-5
Ordering Accessories and Supplies . . . . . . . . . . . . . . . . . . . . . . . . . . . . . . . . . . . . . . . . . . . . 6-5
Regulatory Notices . . . . . . . . . . . . . . . . . . . . . . . . . . . . . . . . . . . . . . . . . . . . . . . . . . . . . . . . 6-6
Declaration of Conformity . . . . . . . . . . . . . . . . . . . . . . . . . . . . . . . . . . . . . . . . . . . . . . . . . . . 6-7
iv Contents
Page 5
Getting Help
Your HP OfficeJet includes several resourc es to help you ge t started and use
the product to full advantage. This chapter describes the types of help
available.
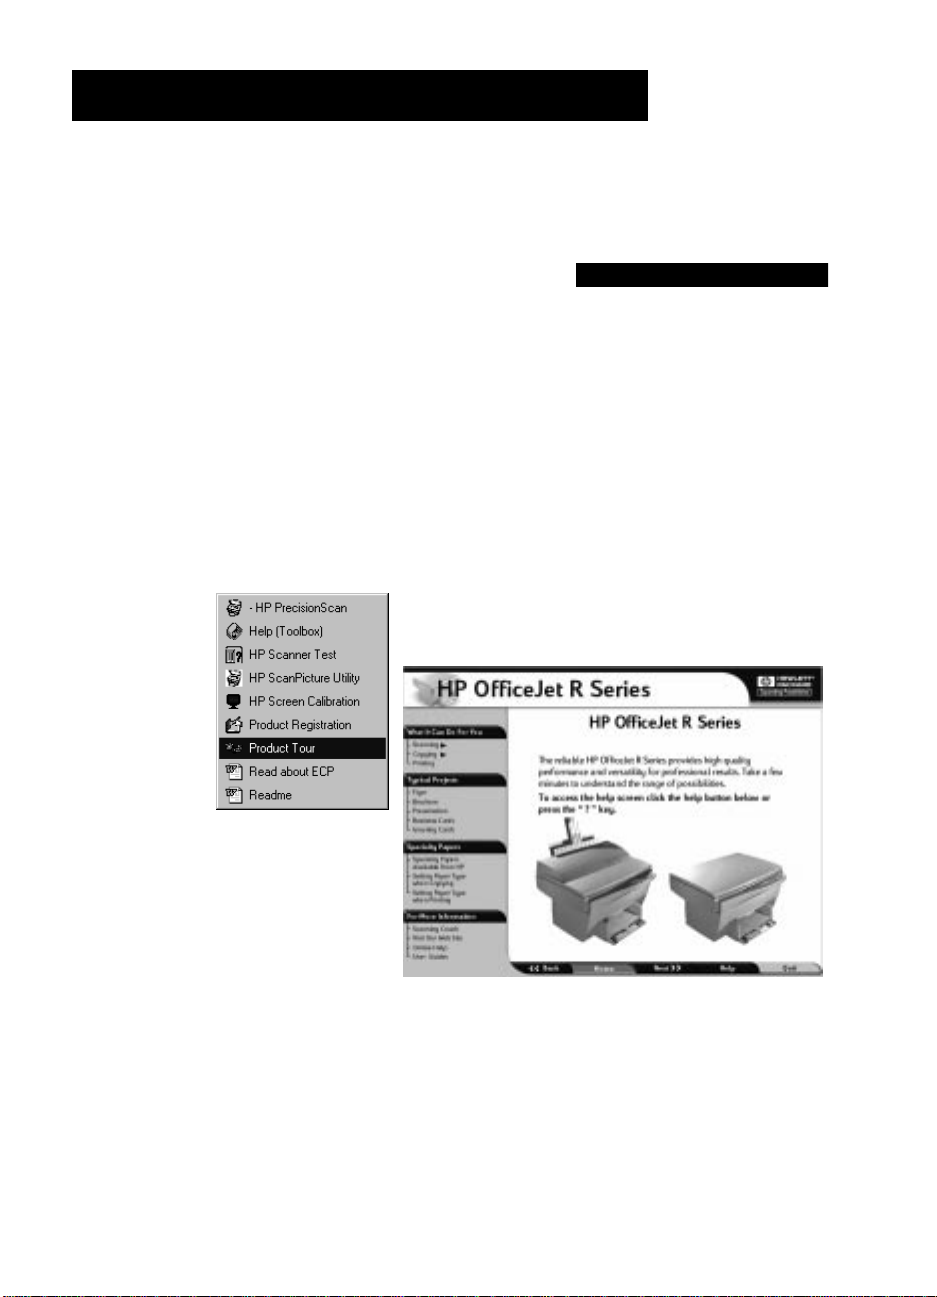
HP Multimedia Product Tour
The tour give s you a bri ef int roduction t o the pro duct and it s capabili ties. You
can run the tour from either t he HP OfficeJet R Series fol der or Toolbox . You
will need the CD-ROM. For more informati on, s ee the
Setup Guide.
1
HP OfficeJe t R Series
HP OfficeJet R Series Customer Care Guide 1-1
Page 6
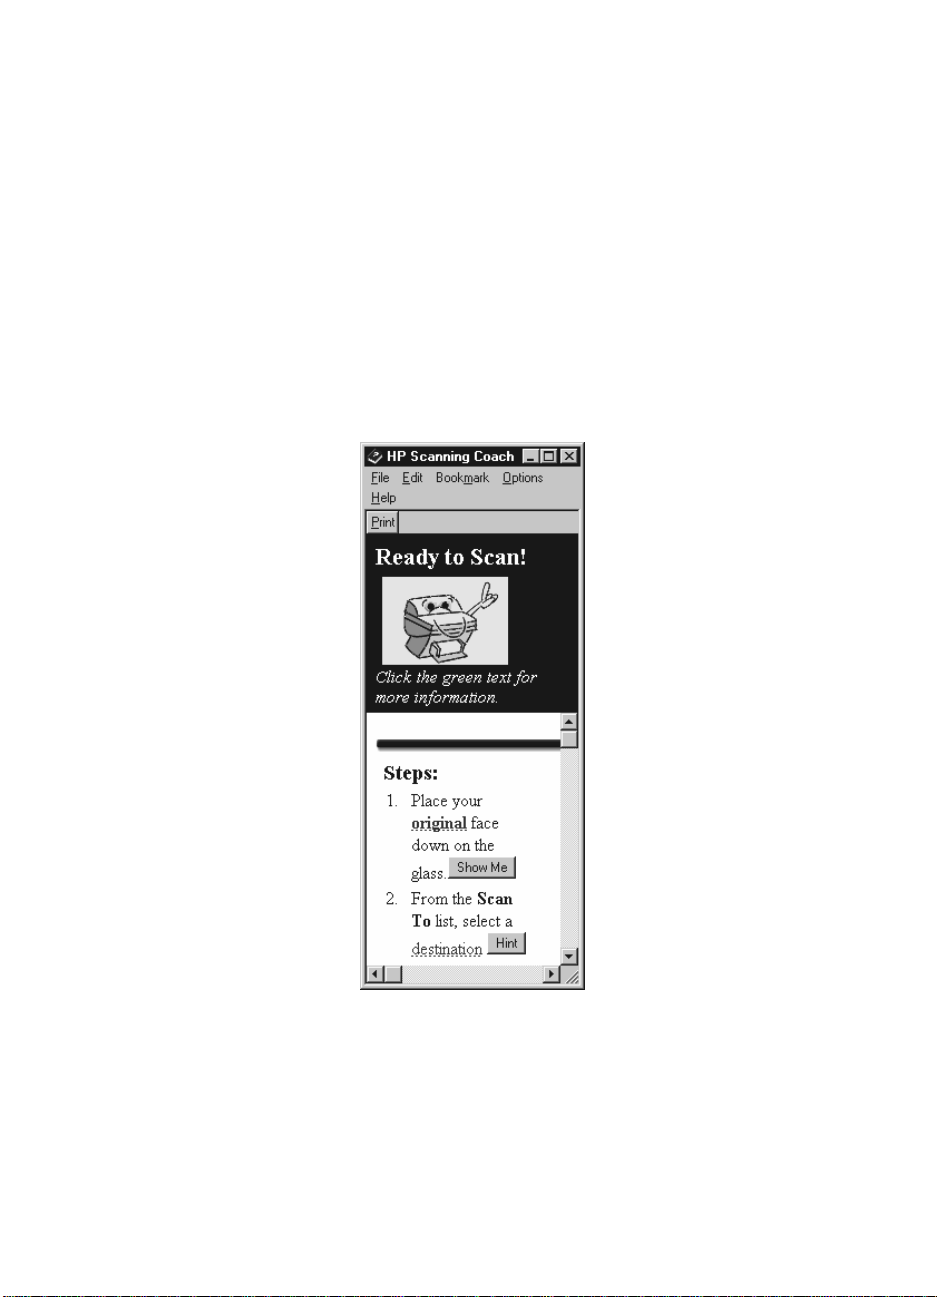
HP Scanning Coach
The HP OfficeJet Scanning Coach is an online guide that “coaches ” you
through your first scan. When you start a scan, the Scanning Coach appears
with step-by-step instructions to help you complete your first scan
successfully.
The Scanning Coach al so gives you:
◆ Hints and tips for imp r oving your scan.
◆ Answers to frequently asked questions.
◆ Definitions of scanning terms.
◆ Links to selecte d HP OfficeJet R Series online Help topics.
◆ General ove rview of how to create business cards, brochures, and flyers.
Once you learn how to scan, you can turn off the Scanning Coach from the
HP PrecisionScan Help menu. You can also run the Scanning Coach at any
time from the Help menu.
1-2 Getting Help
Page 7
Online Help
Your HP OfficeJet includes severa l types of online Help.
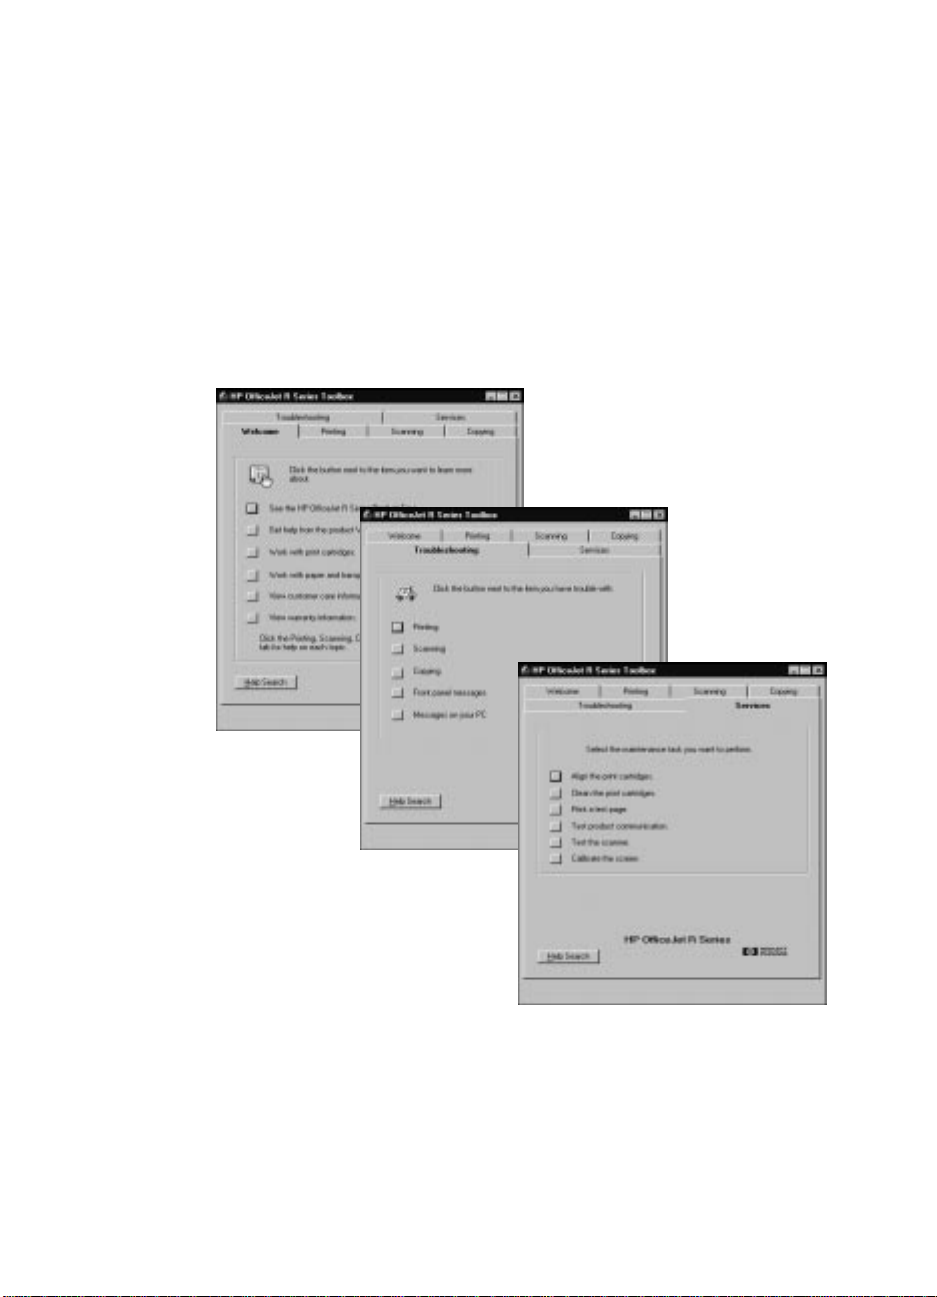
HP OfficeJet R Series Toolbox
The Toolbox provides general information about your HP OfficeJet. It
contains sections for printing, scanning and copying procedures. The
Welcome and Services tabs provi de basic suppor t and ope ration information .
The toolbox also includes a Trou bleshooting ta b. When problems occur, look
for a description of the particular symptoms you are experi enc ing, and you
will find details on how to fix it.
You can access the Toolbox fr om the HP OfficeJet R Series folder or by
double-clicking the OfficeJet R Series Tool box icon on your desktop.
HP OfficeJet R Series Customer Care Guide 1-3
Page 8

HP OfficeJet Help
You can access HP OfficeJet R Series Help from the Help menu of select ed
word processor, spreadsheet, and presentation programs.
HP PrecisionScan Help
The main HP PrecisionSca n dialog box includes a Help menu. Click it to
access detailed information about using HP PrecisionScan.
Read about ECP and Readme Files
After you install your s oftware, you can access the Read about ECP and
Readme files from either the HP OfficeJet R Series CD-ROM or the
HP OfficeJet R Series program folder
Internet Help
If you have Internet access, you can get help from the HP Web site at:
http://www.hp.com/go/all-in-one
This Web site also provides user forums and answers to frequently asked
questions.
Adobe PhotoDeluxe Business Edition Help
To access Adobe PhotoDelu xe Busine ss Editio n online Hel p, select an option
from the Help menu while working in the program.
1-4 Getting Help
Page 9

Supp ort Services
This chapter explains how to get support for your HP OfficeJet R Series a nd
the software programs included with it.
Get Help from HP
If you are unable to find the answer you need in the printed or online
documentation, you can contact one of the HP support ser v ices listed in the
following pages . Some support services are available only in the U.S. and
Canada, while othe rs ar e availa ble in many c ount ries worldwi de. If a s uppo rt
service numb er is not li sted for y our count ry, conta ct your near est aut hori zed
HP deal er for he lp .
Online Services
Internet
If you have Internet access, you can get help from the HP Web site at:
http://www.hp.com/go/all-in-one
Here you can find updated drivers, user forums, the latest product
information , answers to frequent ly asked question s, and produc tivity tips and
solutions to help you get the most from your HP OfficeJet.
2
HP OfficeJet R Series Customer Care Guide 2-1
Page 10

HP Distribution Center
To order current printe r and scanner drivers, dial one of the following
numbers:
Region Number
U.S. (888) HP DISKS (473-4757)
Argentina (541) 778-8380
Asia 65 740 4477
Australia/New Zealand 61 3 8877 8000
Brazil 011 829 6612
Chile 800 360999
Europe +49 180 5 290220
Europe +44 870 606 9081
South Africa +27 (0)11 8061030
Mexico 01 800 4726684
Venezuela 800 47 888
Venezuela (Caracas ) 207 8488
HP FIRST
Call HP FIRST to request inform ation to be faxed dir ectly to you. HP offers
this service free of charge. To use HP FIRST, you need a touch-tone phone
and a 9600-baud, Group 3 fax machine so you can receive the informat ion.
HP Customer Support
Your HP OfficeJet comes with several software programs. If you are
experiencing problems with any of the programs, you will receive the best
technical assistance by calling the experts at that company.
If you need to contact HP Customer Support, do the following before you
call:
1
2
3
4
5
2-2 Support Services
Make sure that the unit is plugged in and powered on, that the specified
inkjet print cartridges are installed correctly, and that the recommended
paper is p r op erly lo ad ed in the IN tray.
Review the HP Offi ceJet R Series Setup Guide and Chapter 3,
“Troubleshooting and Maintaining Your HP OfficeJet,” in this guide.
Try resetting the unit by powering it off and then on again, using the
white button located on the left side of the unit’ s front panel.
Call the HP FIRST toll-free number or check the HP Web site at
http://www.hp.com/go/all-in-one for more information that might help.
If you are still experiencing problems and need to sp eak with an
HP Customer Support Represe ntative, do the following:
Page 11

◆ Have your serial number and service ID ready. To display your
service ID, on the front panel, press the Select/Resume button and
the Color button at the same time, until the message “SERV ID:”
followed by the servic e ID number appear in the front -panel display .
◆ Print a test page. To do this, click Print a test page on the Services
tab of the HP OfficeJet R Series Toolbox.
◆ Make a color copy.
◆ Be prepared to describe your problem in detail.
Call HP Customer Support. Be near your HP OfficeJet when you call.
6
Prepare Your HP OfficeJet f or Shipment
If after contacting HP Customer Support you are requested to send your
HP OfficeJet in for service, do the f ollowing:
1
Turn on the HP OfficeJet.
Open the print-cartridge access door.
2
3
Remove both print cartridges, and leave the print-cartridge latches flipped back.
CAUTION
Print cartridges that remain inside may damage your HP OfficeJet.
4
Place the print cartridges in an airtight bag so they will not dry out, and
put them asi de (do not send them with th e HP OfficeJet, unle ss instruc ted
to by the HP cu stomer su p po r t cal l ag en t ) .
Turn off the HP OfficeJet. You will see the message “Shutting Down” on
5
the front-panel display.
6
Close the print-cartridge access door .
HP OfficeJet R Series Customer Care Guide 2-3
Page 12
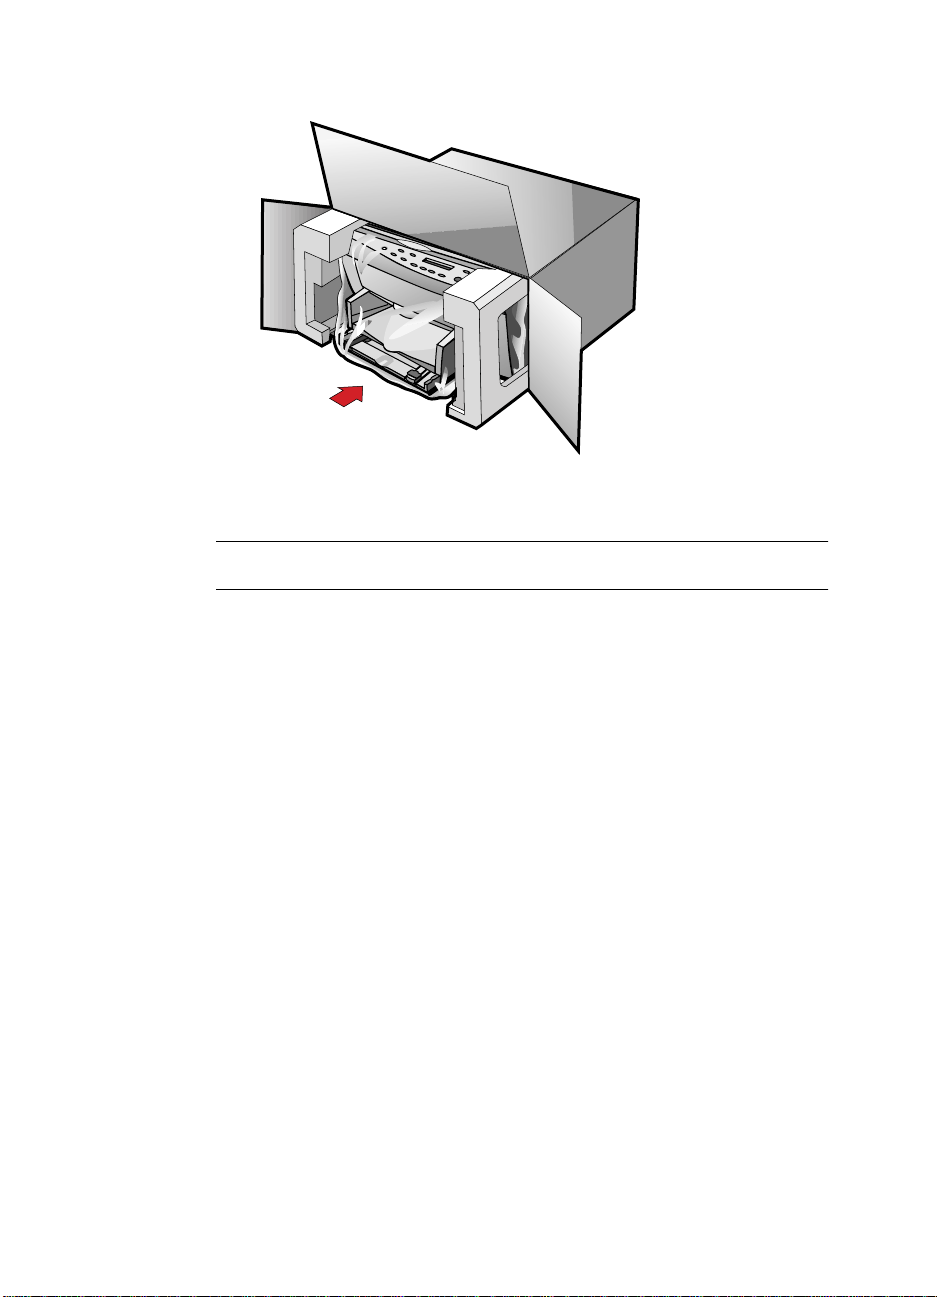
If available, pack the HP OfficeJet for shipment using the original
7
packing materials.
If you do not have the original packaging materials, you can request a
replac em e n t p a c ka g e s et fro m H P Cu st omer Supp o r t.
NOTE
Shipping damage caused by improper packaging is not covered under the warranty.
Include the following items in the box:
8
◆ A brief description of symptoms for service personnel (samples of
print quali ty problems are helpful).
◆ A copy of the sales slip or other proo f of purchase to establish the
warranty coverage period.
◆ Your name, addr ess , and a phone number wher e you c an be r eache d
during the day.
Calling in the U.S. During Warrant y
Call (208) 323-2551 Monday through Friday from 6:00 A.M. to 10:00P.M.
Mountain Standard Time (MST) and Saturdays from 9:00 A.M. to 4:00 P.M.
MST. This service is free during t he warranty period ; however, your standard
long-distance phone charges still apply.
Callin g in the U.S. Post - W arranty
If your product is not under warranty, you can call (800) 999-1148. A percall, out-of-wa rranty s upport fee wi ll be cha rged to your credit card. You ca n
also call (900) 555-1500 ($2.50 per minute) from 6:00 A.M. to 10:00 P.M.
MST and Saturdays from 9:00 A.M. to 4:00 P.M. MST. Charges begin only
when you are connected with a support technician. (P rices and hours are
subject to change without notice. )
2-4 Support Services
Page 13

Getting Help for Adobe PhotoDeluxe Business Edition
If you need help with Adobe Phot oDeluxe, call the following numbers:
Country Number
U.S. (206) 675-6371
Austria Int + 44-131-451-6882
Belgium Int + 44-131-451-6883
France Int + 44-131-451-6889
Germany Int + 44-131-451-6884
Italy Int + 44-131-451-6890
Netherlands Int + 44-131-451-6885
Sweden Int + 44-680-71678
Switzerland Int + 44-131-451-6887
UK and Ireland Int + 44-131-451-6888
You can also get help by vi si ting Adobe’s Web site at:
http://www.adobe.com
For support information on other programs, insert the HP OfficeJet
installation CD-ROM into your computer’ s CD-ROM dri ve a nd click the
name of the program you need hel p with.
HP OfficeJet R Series Customer Care Guide 2-7
Page 14

2-8 Support Services
Page 15

Troubleshooting and
Maintaining Your
HP OfficeJet
This chapter provi des instructions for keep ing your HP OfficeJet in top
working condition. Perform the maintenance procedu res as necessary.
This chapter also presents procedures for resolving paper jams in the paper
tray and automatic document feeder (ADF). It also lists some of the messages
that may appe ar on t he HP OfficeJet front-panel dis play o r on y our com puter
screen. For more help, see the Troubleshooting tab in the HP OfficeJet
R Series Toolbox. You can access the toolbox by double-clicking the
HP OfficeJet R Toolbox icon on your Windows desktop.
Cleaning the Exterior Case
Use a soft, damp, lint-free cloth to wipe dust, smudges, and stains off the case.
The interio r of the HP OfficeJet does
from th e interio r of the HP O f fi ceJet.
Cleaning the Glass
Dirty glass (fingerprints, smudges, and so on) slows down copy ing and
scanning perf orm anc e by as mu ch as half a minute! This is because the
scanner is act ually proc essing the s mudges on the glass . Keep t he gla ss cle an.
not
require cleaning.
3
Keep fluids away
WARNING
CAUTION
Turn off the HP OfficeJet and unplug the power cord before cleaning. Even though the
HP OfficeJet is off, power is still being supplied if the cord is plugged in.
To clea n t h e g lass:
1
Turn off the HP OfficeJet, unplug the power cord, and raise the lid.
2
Clean the glass with a soft cloth or sponge slightly moistened with a nonabrasive glass cleaner.
Do not use abrasives, acetone, benzene, or carbon tetrachloride on the glass; these
can damage it. Do not place liquids directly on the glass. They may seep under it and
damage your HP OfficeJet.
3
Dry the glass with a chamois or cel lulose sponge to prevent spo tting.
HP OfficeJet R Series Customer Care Guide 3-1
Page 16

How to Clear a Paper Jam in the ADF
If “Automatic Document Feeder Jam. Clear jam then press Resume.” appears
on the front-panel display, do the following:
Remove your originals from the ADF.
1
Lift the lid, and clear the paper path.
2
Lower the lid, and replace your originals in the ADF.
3
Press Select/Resume on the front panel to continu e.
4
How to Clear a Paper Jam in the Main Unit
Paper Jam with Front-Panel Message
If “Paper Jam” appears on the front-panel display, do the following:
Slide the IN tray out, remove any wr inkled and torn paper from the IN
1
tray, remove any paper coming out into the OUT tray, and relo ad new
paper in the IN tray.
Turn the HP OfficeJet off and then on again.
2
3
Process your job again.
NOTE
If you are printing a banner, make sure that the banner switch is raised up. For more
information, see the Printing tab in the HP OfficeJet R Series Toolbox.
Paper Jams in the Back of t he Unit
If paper jams in the rear of the HP OfficeJet, follow these steps:
Turn the knob on the rear acc ess door 1/4-turn counter clockwise to the
1
unlocked position, which releases the door.
2
Remove the door, and pul l the jammed paper out of the unit.
3-2 Troubleshooting and Maintaining Your HP OfficeJet
Page 17

Replace the door in the back of the unit, and turn the knob clockwise to
3
the locked position.
4
Turn the HP OfficeJet off and then on again.
Process your job again.
5
How to Use the Self-Test Page
The self-test page lets you know whether the HP OfficeJet is operating
properly. It lists current, default front-pane l settings, and tells whether the
ADF is attached properly.
To print a self-test page:
Press Menu until “Self -Test Page” appears on the display.
1
Press Select/Resume.
2
The test page has a s et of li nes t hat sh ould appe ar unbroke n, and colo red
bars that should appear solid. The intensi ty of the colors varies,
depending on the ty pe of paper you are using (that is, plain paper,
HP Premium Inkjet Paper, and so on).
HP OfficeJet R Series Customer Care Guide 3-3
Page 18

How to Clean Cartridges
Use the Clean Cartridges feature when the self-t es t page shows streaking or
white lines through any of the colored bars. Do not clean cartridges
unnecessarily. This wastes ink and shortens the life of your print cartridges.
To clea n t h e cartridges:
Press Menu until “Clean Cartridges” appears on the display.
1
Press Select/Resume.
2
The message “Cleaning” appears on the display, and a sample page is
printed.
NOTE
If copy or print quality still seems poor after you clean the cartridges, replace the one,
black or color, that is affected.
3-4 Troubleshooting and Maintaining Your HP OfficeJet
Page 19

Front-Pan el Mes sa ges
Message What You Should Do
Additional cleaning will be
ineffective.
Automatic Document
Feeder Jam. Clear jam then
press Resume.
Banner paper expected . If you are printing a banner, load the banner paper, raise the
Black ink low
Black ink out soo n.
Cannot connect to PC; see
Customer Care Guide.
Cartridge carriage blocked.
Close latches over print
cartridges, then turn power
off then on.
Replace the print cartridge.
See “How to Clear a Paper Jam in the ADF” earlier in this
chapter.
banner switch, which appears on the left side of the OUT
tray, an d press Select/Resume.
Replace the black ink cartridge at your earliest convenience.
Replace the black ink cartridge immediately.
Try the following:
First, make sure your comput er is turned on. If it is, check the
cable connecti on between your computer and the
HP OfficeJet. Be sure to use only the IEEE-1284 parallel
printer cable that came with your product. The connection
must be direct, not through any other parallel product.
After you have checked all connections, open the
HP OfficeJet R Series Toolbox. Click the Services tab, and
select Test product communication.
Try to print or scan again . If the probl em persi sts, one of the
programs the HP OfficeJet uses during scanning may not be
installed or may already be running.
Make sure the print ca rtridges are installed and the latches
are closed, and th en turn the pow er o ff and on.
__Error. Record number
then call for service.
Paper jam. Clear the paper jam, and then turn the power o ff and the n on
PC Busy. Your computer is busy handling another task (for example,
Power Save On. The HP OfficeJet has not been used for 12 hours or more.
Turn the power off and then on again. If this does not work,
try restarting your c omputer. If this does not work, reco rd the
error number and contact HP.
again.
printing a document). Wait until the computer is finished,
and then press Scan again.
Press any button on the front panel or load originals in the
ADF.
HP OfficeJet R Series Customer Care Guide 3-5
Page 20

Front-Pan el Mes sa ges (Cont inue d)
Message What You Should Do
Remove and check bl ack
cartridge. Verify Part
Number: 51645A or
51645G.
Remove and check (bl ack or
color) cartridge.
Remove and check color
cartridge. Verify Part
Number: C1823A, C1823D,
or C1823G.
Remove original from the
document glass.
Scanner system failure . The scanner bulb is becoming too dim to work properly, or
Single-shee t paper expected. If you are printi ng a document us ing singl e-sheet pa per, load
The wrong black cartridge may be installed, or it may be
installed incorrectly. Remove it and replace it with the
correct cartridge, or insert it correctly.
One of the print cartridges is either incorrectly installed, the
wrong type, or defective. Remove the applicable print
cartridge, and the n reinsert it. Make sure to remo ve the tape
from the print cartridge, and close the latch securely. If this
does not solve the pr oblem, replace the cartridge.
The wrong tri-col or cartridge may be instal led, or it may be
installed incorrectly. Remove it, and replace it with the
correct cartridge or insert it correctly.
Remove the origina l from the document glass, and then press
Select /Resume on the front panel. If there is no original on
the glass, turn the unit off and then on again.
the unit needs servicing. Turn the power off and then on
again. If the mess age continues and the light does not come
on, your HP OfficeJet needs to be serviced. See “HP
Customer Support” in Chapter 2 for more information.
the paper in the HP OfficeJet, lower the banner switch,
which appears on the left side of the OUT tray, and then
press Select/Resume.
On-Screen Messages
Message What You Should Do
An undefined pro gram error
has occurred (2117).
3-6 Troubleshooting and Maintaining Your HP OfficeJet
Try the following:
Make sure that the HP OfficeJet is turned on. Press the white
button on the left side of the front panel.
Close HP Pre cis ionScan an d turn HP OfficeJet off and on. If
this does not work, rest art your computer.
Verify that the IEEE-1284 parallel cable is securely
connected to your HP OfficeJet and directly to the parallel
port of your comput er. Do not use a swit ch box pass- through
device.
Use an IEEE-1284 cable. The cable that came with your
product meet s this requirement.
Page 21

On-Screen Messages (Continued)
Message What You Should Do
Can’t find installer
‘setup.exe.’
Disk full. The image you are scanning will create a file that is too large
Sorry, the application HP
PrecisionScan is already
running.
Unable to start HP
PrecisionSc an.
Your scan has been
cancelled due to
communication problems.
If you are installing on Windows NT 4.0, you need to have
Service Pack 3 or higher. (The service pack number is
displayed when you first start your computer.) To upgrade,
see the Microsof t Web si te at www.microsoft.com.
to fit on the designated disk.
Save the file on a diff erent disk.
Free up disk space, and try again.
Save the image in a differe n t f o r mat or resolution.
You tri ed to sca n w h ile anot her scan w as in prog r ess. Wai t
until th e p r io r sc an is compl et e d, and then try again.
Your compute r does not have enough m emory avai lable. Try
the following:
Close any programs that are currently running, including
programs that run in the background, such as screen savers.
Restart your c omputer. If this does not solve the problem,
defragment your hard drive.
Try accessing HP PrecisionScan in a different way.
If this error occurs frequently and you encounter memory
problems while using other programs, try adding more
memory to your computer.
Verify that the IEEE-1284 parallel cable is securely
connected to your HP OfficeJet and directly to the parallel
port of your comput er. Do not use a swit ch box pass- through
device. Rest art your computer and try again.
Additional Troubleshooting Tips
Issue What You Should Do
Auto Fit, Clone, or Poster is
not working.
Make sure to place the original in the correc t position (see
Chapter 5 of the HP OfficeJet R Series Basic Op erations
Guide), make sure that the glass, lid, and ADF are all clean
and free from s mudges an d dust, and make sure tha t the ADF
cable is plugged in.
HP OfficeJet R Series Customer Care Guide 3-7
Page 22

Additional Troubleshooting Tips (Continued)
Issue What You Should Do
I am having problems
scanning to e-mail or PC
fax.
Your e-mail or fax program must be set up and functioning
properly before you use it with HP PrecisionScan. See the
Scanning tab in the toolbox fo r m o r e in f ormat i on . Contact
your e-mail vendor if you have difficulty configuring your
e-mail pro g r am.
We strongly recomm end that you scan your origi nal to a file ,
and then att ach the file to an e- mail message or fax the
contents of the file to your recipient.
I cannot edit or see scanned
text in my word processor.
I cannot find my scanned
file.
I closed a third-party
program and it did not as k
me if I wanted to save the
scan.
Consider the following:
◆
If HP PrecisionScan identified the text as a drawing or
photograph, use the Viewer to change the region type to
and tran sfer the scan t o the destinat ion again. Make sure that
your destination accepts editable text.
◆
If your ori gin al contai ns graphi cs and t ext, i ni tiat e the sc an f ro m
HP PrecisionScan instead of from within a third-party program.
◆
If your pr ogram places the text in frames, try enla rging the
frames to display all the text.
◆
Make sure
Auto Detect
is enabled in HP PrecisionScan.
Text
If you did not use the Save As c ommand to spe cify wher e the
file should be sto red, HP PrecisionScan autom atically st ores
it in either your de fault or Windows/Te mp folder. The fil e in
the Temp fol der wi ll be na med “au toNN.rtf” ; make s ure yo u
rename the file and move it s o that another scan does not
overw r it e it .
I cannot print a docume nt. Make sure your HP OfficeJet is select ed as the current or
default printe r. On the Windows taskbar, click Start, poin t
to Settings, and then choose Printers. Right-c li ck th e
HP OfficeJet R Series icon, and choose Set as Default.
,
I hear a loud noise, and the
message “ Cartr idge car riage
blocked” appears on the
display.
The shipping insert was left inside the print-cartridge
carriage, or the latches were left open after the print
cartr idges were i n serted. Op en the print-cartridge access
door, and remove the in sert or close the latches. Turn the
HP OfficeJet off and then on again.
In HP Precisi o nScan, th e
Settings dialog box appears
scrambled or I get an
“assert” error message.
If you are using Wind ows 95, you may n ee d a n ewer ve rsion
of comctl32.dll. If you install PhotoDeluxe, which is
included with your HP OfficeJet, and its Internet Explorer
4.0 opti on, it upd ates t he .dll f ile. You c an als o obtain a patch
from the Microsoft Web site at www.microsoft.com.
3-8 Troubleshooting and Maintaining Your HP OfficeJet
Page 23

Additional Troubleshooting Tips (Continued)
Issue What You Should Do
I scanned a color origina l,
but it appears in black and
white.
I want to make an image
larger, but when I stretch it
in my imag e editor, it come s
out jagged.
My scan does not l ook right
in the destination.
Try the following:
◆
◆
◆
Scan in Color
In the
box, click
If a colo r graph ic appe ar s in b lack an d whi te , righ t- cl ic k it in t he
Viewer and change the region type to
Drawing
Scanned t e xt is automatically converted to black and white,
even if the origi nal is in color . If you do not need to edit th e text
and you want to retain the colors, turn off
manually change the region type to
Drawing
Yes
.
.
area of the main
.
HP PrecisionScan
Color Photo
Auto Detect
Color Ph oto
or
Color
or
Color
dialog
and
When scanning a photo or a color drawing, resize it using
HP PrecisionScan’s
Page Size
Region Size
or
features ,
rather tha n in the destination program.
Try the following:
◆
HP PrecisionScan det ected a mixture o f region types. If you
want to scan an original composed of text and images as a
single, uneditable image , manually select the entire original as a
single region or clear the automat ically detected regions in the
Viewer, change the region type to photograph or drawing, and
trans fe r th e sc an to the de sti nation.
◆
Turn off
scans.
Auto Detect
. Be sure to turn it back on for subsequent
My scan to e-ma il gives me
an error.
Progress Monitor bar stalls
at 100%.
Try the following:
◆
Make sure your e-mail and Internet service connection are
working. You may need to set your e-mail program as the
default MAPI client with MAPI enabled (see your e-mail
vendor for help on this).
◆
If you still have problems, scan the original to a file and attach
the file to an e-mail message. Note that if you recently installed
Microsoft Office 2000, you may need to restart your default email pro gram.
Turn HP OfficeJet off and then on again; the scanning
process shoul d contin ue. If this does not work, try rest art ing
your computer.
HP OfficeJet R Series Customer Care Guide 3-9
Page 24

Additional Troubleshooting Tips (Continued)
Issue What You Should Do
Scanning in Micros oft
Office 2000 programs.
HP ScanPicture is not available through Office 2000,
however, it is available with HP PrecisionSc an. We
recommend that you scan to an Office 2000 from withi n HP
PrecisionScan. If you choose to scan from within an Office
2000 program, go to its Insert menu, choose Picture, and th en
choose From Scanner. For more information on this
scanning method, see Microsoft’s documentation.
3-10 Troubleshooting and Maintaining Your HP OfficeJet
Page 25

Adding and Removing Software Programs
Removing Software
General Information
When you install a software program on your computer, many files on your
system are either added or shared because of the new program. When you
remove a pro gram, you ne ed t o r emove a ll file s ass ocia ted wi th that pro gram,
not just the fil es you s ee in a particular program folder.
not
Do
simply remove the executable file from your hard drive. Be sure to
“uninstall” it properly, using the Add/Remove Programs feature in the
Windows Control Panel.
NOTE
During the remove process, if you are asked whether you would like to remove shared
files, answer “No.” Other programs that use these files may not work properly if the
files are deleted.
Remov ing HP OfficeJet R Series Software
4
Use the Add/Remove Programs feature to remove the HP OfficeJet R Series
product software (printing and scanning software) and HP partner programs
such as Adobe PhotoDeluxe Business Edition.
1
On the Windows taskbar, clic k Sta r t, point t o Settings, and then ch oose Control Panel.
2
In Control Panel, double-click the Add/Remove Programs icon.
3
In the Add/Remove Prog rams Properties dialog box , click t he name of
the program you want to uninstall, and then click the Add/Remove
button.
4
Follow the direct ions on the screen until the Add/Remove program finishes.
5
In the Add/Remove Progr ams Properties dialog box, cl ick OK to close the dialog box.
6
Restart Windows.
HP OfficeJet R Series Customer Care Guide 4-1
Page 26

Reinstall ing Sof twa re
Before rei ns talling any software, first remove it properly us ing the Windows
Add/Remove Programs feature or following the vendor’s specific removal
instructions. Refer to the previous section for specific instructions on
properly removing the HP OfficeJet R Series software.
To reinstall the HP OfficeJet R Series software, see “” in the HP OfficeJet R
Series Setup Guide.
Installing the Office 97 Utility
If you install Office 97 after in stal ling your HP OfficeJet software, you must
run a specia l pr ogram b efore yo u can scan pictur es i nto these pr ogra ms usi ng
HP ScanPicture. The procedure below explains how to run the utility.
Insert the HP OfficeJet R Series CD-ROM into your computer’s CD-
1
ROM drive.
If the HP OfficeJet R Series software installation menu appears, cli ck
2
Quit.
On the Windows taskbar, click Start, point to Programs, and then
3
choose Windows Explorer.
4
Navigate to your CD-ROM dri ve, open the Utilities folder, and then
open the HP ScanPicture Office 97 Patch folder .
5
Double-click Setup.exe.
6
In the InstallShield dialog box, click Yes to install the Of f ic e 97 p at c h .
7
When the installation is complete, click OK.
8
Restart your c omputer.
You will now be able to sca n while worki ng in you r Office 97 prog rams.
4-2 Adding and Removing Software Programs
Page 27

Hewlett-Packard Limited Warranty
HP OfficeJet
Duration of Limited Warranty (Hardware): 1 Year
Duration of Limited Warranty (Software): 90 Days
Duration of Limited Warranty (Print Cartridges): 90 Days
To review a complete copy of your warranty, see “Vie w Warranty
Information” in your HP OfficeJet R Series Toolbox.
HP Year 2000 (Y2K) Warranty
For Consumer Products Distributed Through Resellers
Subject to all of the terms and limitations of th e HP Limited Warranty
Statement provided with this HP Product, HP warrants that this HP Product
will be able to accurately process date data (inc luding, but not limited to,
calculating, comparing, an d sequencing) from, into, and between the
twentieth and twenty-first cen turies, and the years 19 99 and 2000, including
leap year calculations, when used in accordance with the Product
documentation provided by HP (including any instructions for installing
patches or upgrades), provided that all other products (e.g. hardware,
software, firmware) used in combination with such HP Product(s) properly
exchange date data with it. The duration of the Year 2000 warra nty extends
through January 31, 2001.
5
Warranty Service
Express Service
To obtain HP express repair service, the customer must contact an HP service
office or an HP Customer Support Cent er for basic troubleshoo ting first.
If a customer unit needs a minor part replacement and these parts ca n
normally be repl aced by t he cus tomer, t he custo mer-re placeabl e compone nts
may be serviced through expedited part shipment. In this event, HP will
prepay shippi ng cha r ges, duty and taxes; provide telephone assistance on
replacement of the co mponent; a nd pa y shippi ng charg es, d uty, and taxes for
any part that HP asks to be returned.
HP OfficeJet R Series Customer Care Guide 5-1
Page 28

For some repairs, the HP Customer Support Center may direct customers to
designated Authorized Service Providers who are certified by HP to service
the HP OfficeJet.
Warranty Upgrades
Extended warranties and service option upgrades may be obtained through
your local HP authorized dealer or HP service centers.
In the U.S. and Can ada, exte nded warra nties may also be ob ta ined by ca lling
HP at 1-800-446-0522.
Returning Your HP OfficeJet for Service
Before returning your HP OfficeJet for serv ice, you must call HP Customer
Support. See Chapter 2, “Support Services,” for s teps to take before calling
Customer Support.
5-2 Hewlett-Packard Limited Warranty
Page 29

Technical Information
System Requirements
Hewlett-Packard Software Solution
Processor
Windows 95/98
Windows NT 4.0
RAM
Windows 95/98
Windows NT 4.0 wit h Se rvice Pac k 3 or l at er
Disk Sp a ce Ne eded for In st al l ati o n
Additional Disk Space Needed for
Scanned Images
Monitor
Media
I/O
Internet Access
6
Minimum Recommended
Pentium-90
Pentium-133
32 MB
32 MB
70 MB 210 MB U.S.
50 MB 50 MB
SVGA (256 colors) SVGA (256 colors)
CD-ROM drive CD-ROM drive
Bi-directional parallel port Bi-directional parallel port
Pentium-166
Pentium-166
32 MB
64 MB
180 MB Worldwide
with ECP enabled
Recommended
Adobe PhotoDeluxe Business Edition
◆ Processor: Intel Pentium processor
◆ Operating Syste m: Windows95/98 or
Windows NT 4.0 with Service Pack 3 or late r
◆ RAM: Minimum 16 MB for Windows 95/98 (32 MB recomme nded)
Minimum 32 MB for Windows NT 4.0 (64 MB recommended)
◆ Availa ble Hard Disk Space: 140 MB
◆ Monitor: Color monitor with 256 colors or more
HP OfficeJet R Series Customer Care Guide 6-1
Page 30

Print Specifications
Print speed may vary according to the complexity of the document.
Duty Cycle: 3000 prin ted pages per month (average):
Print Speed and Resolution
Best
Normal
Econofast
Print Margins
U.S. Letter
U.S. Legal
A4
Envelopes
Cards (3x5, 4x6, 5x8,A6)
Banners (8.5 x 11 in.)
.04 in. (1.0 mm) .46 in. (11.7 mm) .25 in. (6.4 mm) .25 in. (6.4 mm)
.04 in. (1.0 mm) .46 in. (11.7 mm) .25 in. (6.4 mm) .25 in. (6.4 mm)
.04 in. (1.0 mm) .46 in. (11.7 m m ) .125 in. (3.2 mm) .125 in. (3.2 mm)
.125 in. (3.2 mm) .125 in. (3.2 mm) .04 in. (1.0 mm) .46 in. (11.7 mm )
.04 in. (1.0 mm) .46 in. (11.7 m m ) .125 in. (3.2 mm) .125 in. (3.2 mm)
0.00 in. (0.0 mm) 0.00 in. (0.0 mm) .25 in. (6.4 mm) .25 in. (6.4 mm)
Resolution (dpi) Speed (ppm)
Mono 600 x 600 3.8 Color 600 x 600 1.0 Mono 600 x 300 5.0 Color 600 x 300 2.5 Mono 300 x 600 10.0 Color 300 x 300 6.0
Top Bottom Left Right
Scan Specif icat ion s
Scan specifications may vary according to the complexity of the document.
Resolution
Colors
Interface
6-2 Technical Information
600 x 2400 dpi, up to 9600 dpi enhanced
(600 dpi optical)
36-bit hardware image processing, /30 bit A/D
8-bit grayscale (256 levels of gray)
TWAIN-compliant
Page 31

Copy Specif icat ion s
Copy speed may vary according to the complexity of the document.
◆ Digital imag e pr o c e s sing
◆ Up to 99 copies from origina l (varies by model)
◆ Digital zoom from 25 - 400% (varies by model)
◆ Auto Fit, Poster, 2 on 1, Clone
Copy Speed and Resolution
Fast
Normal
Best
Copy Mar gin s
U.S. Letter
Copy at 100% and Clone
Reductions/
Enlargements
and Special Modes
2 on 1
A4
Copy at 100% and Clone
Reductions /
Enlargements
and Special Modes
2 on 1
.04 in. (1.0 mm) .46 in. (11.7 mm) .25 in. (6.4 mm) .25 in. (6.4 mm)
.46 in. (11. 7 m m) .46 in. (11.7 mm) .38 in. (9.65 mm ) .38 in. (9.65 mm )
.38 in. (9. 65 m m) .38 in. (9.65 mm) 1.05 in. (26.67 mm)1.05 in. (26.67 mm)
.04 in. (1.0 mm) .46 in. (11.7 m m ) .125 in. (3. 2 mm) . 125 in. (3.2 mm)
.04 in. (1.0 mm) .46 in. (11.7 m m ) .37 in. (9. 40 m m ) .37 in. (9.40 mm)
.38 in. (9. 65 m m) .38 in. (9.65 mm) .39 in. (9.91 mm ) .39 in. (9.91 mm )
Speed Maximum Resolution
Text Color Text Color
10 cpm 6 cpm 300 x 600 dpi 300 x 300 dpi
8 cpm 2 cpm 600 x 600 dpi 600 x 300 dpi
1.5 cpm 0.4 cpm 600 x 600 dpi 600 x 600 dpi
Top Bottom Left Right
HP OfficeJet R Series Customer Care Guide 6-3
Page 32

Paper Specifications
Paper-Tray Capacities
Plain Paper
Cards
Envelopes
Banners
Transparencies
* Maximum capacity
Weight Input Tray* Output Tray*
16-24 lb. 100 50 black
110 lb. Index,
up to 0.3 mm
20-24 lb. 15 10
20 lb. 20 20 or less
N/A 25 25 or less
30 10
20 color
NOTE
OUT tray capacity is affected by the type of paper and the amount of ink you are using.
HP recommends emptying the OUT tray frequently.
Paper Sizes
U.S. Letter
U.S. Legal
A4
Envelopes
Index Cards
Labels
Custom Sizes
8.5 in. x 11 in.
8.5 in. x 14 in.
210 x 297 mm
U.S. #10 (4.12 in. x 9.5 in.)
U.S. #9 (3.875 in. x 8.875 in.)
A2 (4.37 in. x 5.75 in.)
3 in. x 5 in.
4 in. x 6 in.
5 in. x 8 in.
Avery InkJet 8160, 8162, 8163
3 in. x 3 in. up to 8.5 in. x 14 in.
Automatic Document Feeder
Weight Quantity
U.S. Letter*
A4
* Support s plain pape r a nd most HP special paper s. Does not support photo pa pers, transparencies, envelope s or labels.
16 - 24 lbs. 30 16 - 24 lbs. 30
6-4 Technical Information
Page 33

Power Specifications
◆ Source (Input) Voltage:
◆ Input Frequency:
◆ Current:
1A maximum
100 – 240 VAC*
50 – 60 Hz
Environmental Specifications
◆ Operating Temperature Ranges:
◆ Recommended O perating Temperature Ranges:
◆ Humidity:
◆ Non-operating (Stor age) Temperat ure Ranges:
* Figures are based on using the AC adapter that came with your HP OfficeJet (HP part number 0950-2880).
15% – 80% RH non-condensing
0º – 45º C (32º – 113ºF)
5º – 40º C (41º – 104º F)
40º – 70º C (104º – 158º F)
Physical Specifications
◆ Height: Base: 12.63 in. (32.1 cm); ADF: 19.75 in. with tr a y ex tenders up (5 0. 2 cm)
◆ Width:
◆ Depth:
◆ Weight:Base: 26.2 lb (11.89 kg); Base/ADF: 31.71 lb (14.40 kg);
18.45 in. (46.9 cm)
17.25 in. (43.8 cm)
Base/Fax : 33.1 lb (15.0 3 kg)
Ordering Accessories and Supplies
In the U.S., you may order printer supplies by calling HP Direct (800) 538-8787 for the name
of your local author ized HP dealer. To order replaceable parts, call HP Direct for more
information. Outside the U.S., call your l ocal authorize d HP dealer.
Supplies/Accessories HP Reorder Number
Inkjet Print Cart ridges
HP Black Print Cartridge C51645A or C51645G
HP Color Print Cartridge C1823A, C1823D, or C1823G
HP OfficeJet R Series Customer Care Guide 6-5
Page 34

Regulatory Notices
FCC Sta tement (U .S.A.)
The United Stat es Fe deral Commun icati ons C ommiss ion (in 47 C FR 15. 105) has spec ified t ha t
the following notice be brought to the attention of users of this product.
Declaration of Confo rmity: Thi s equipment ha s been tested and found to c omply with the limits
for a Class B digital device, pursuant to part 15 of the FCC Rules. Operation is subjec t to the
following two condit ions: (1) this device may not cause harmful interferenc e, and (2) this device
must accept any interference received, includi ng interference that may cause undesired
operation. Class B limits are designed to provide reasonable protection against harmful
interference in a residential installation. This equipment generates, uses, and can radiate radio
frequency ener gy and, if not installed and us ed in accordance with the ins tructions, may cause
harmful interf erence to radio communic ations. However, th ere is no guarantee that int erference
will not occ ur i n a particular ins tallation. If this equipme n t does cause harmful interference to
radio or tel evision recept ion , which can be de te rmined by t urni ng the equipment off and on, the
user is encouraged to try to correct the interference by one or more of the following measures:
◆ reorient the receiving antenna
◆ increase the separation between the equipment and the receiver
◆ connect the equipment into an outlet on a circuit different from that to which the receiver
is connected
◆ consult the dealer or an experienced radio/TV technician for help
Product Regulations Manager, Hewlett-Packard Company, San Diego 619-655-4100.
The user may find the following booklet prepar ed by the Federal Communicat ions Commiss ion
helpful: How to Iden tify and R esolve R adio-TV Inter ference Problems. This book let i s availabl e
from the US Government P rinting Offic e, Washington DC, 20402. Stock No . 004-000-00345-4 .
CAUTION
equipment not expre ssly approved by the Hewlett-Packard Company, may cause harmful
interferenc e and void the FCC authoriza tion to operate this equipm ent.
Telecommunications General Approval (UK)
Pursuant to Section 22 of Telecommunication s Act of 1984, this product is approved for
secondary attachment to approved primar y attachment devices connecte d to the
telecommunications network under the General Approval (NS/G/1234/5/100003).
: Pursuant to Par t 15.21 of the FCC Rules, any change s or modifications to thi s
DOC Statement (Canada)
Le present appareil numerique n'emet pas de bruitis radioelectriqu es depassant les limits
applicables aux appareils numeriques de la class B prescrit es dans le Reglement sur le
brouillage radioelectrique edicte par le ministere des Communications du Canada.
This digital app aratus does not exce ed the Class B lim its for radio noise emis sions from digital
apparatus set out in the Radio Interference Regulations of the Canadian Department of
Communications.
Geräuschemission
LpA < 70 dB
am Arbeitsp latz
im Normalbetrieb
nach DIN 45635 T. 19
6-6 Technical Information
Page 35

Declaration of Conformity
according to ISO/IE C Guide 22 and EN45014
Manufacturer’s Name and Address:
Hewlett-Packard Company, 16399 We s t Berna rdo Drive, San Diego, California
92127-1899, USA.
declares, that the product
Product Names: OfficeJet R40 and R65 serie s
Model Number(s): C668xA, where x=0,1,2,3,4,7,8 or 9
Product Options: OfficeJet R65 Series inc ludes ADF HP part # C6681-60020
conforms to the following Product Specifications:
Safety: EN60950:1992 +A1, A2 & A3
C669yA, where y=2,3 or 4
IEC 950:1991 +A1, A2, A3 & A4
UL1950, 3rd Edn: 1995
CSA22.2 No. 950 3rd Edn: 1995
NOM-019-SCFI-1993
EMKO TSE(74-SEC)207/19 94
EMC: CISPR22:1993/EN55022:1994 - Class B
EN50082-1:1992
IEC 1000-3-2:1995 / EN61000-3-2:1995
IEC 1000-3-3:1994 / EN61000-3-3:1995
AS/NZS 3548
Taiwan CNS13438
FCC Part 15 - Class B / ICES-003, Issue 2 / VCCI-2
Supplementary Information
LED’S IN THIS PRODUCT ARE CLASS I IN ACCORDANCE TO IEC825-1
and EN60825-1.
The Product herewith complies with the requirements of the Low Volta g e D irective
73/23/EEC and EMC Direc tive 89/336/EE C, and carries the CE marking accordin gly.
HP OfficeJet R Series Customer Care Guide 6-7
Page 36

VCCI-2
printer will insert
6-8 Technical Information
Page 37

index
A
accessories , ordering 6-5
adding pro gr ams
Adobe Phot oD eluxe
automatic document feeder (ADF)
clearing a jam
requirements
C
cartridges, print
cleaning
ordering
cleaning
exterior case
glass
print cartridges
clearing paper jam
coach, scan ning
copy
margins
resolution
specifications
speed
customer support
D
declaration of conformity 6-7
duty cycle
E
environmental s pecifications 6-5
error messages
front panel
on-screen
express service
F
fax from HP FIRST 2-2
front-panel messages
G
glass, cleaning 3-1
H
help
faxed to you
online
product t our
Scanning Coach
support services
toolbox
HP Customer Support
HP Distribution Center
HP FIRST
I
installing
HP software
4-1
2-7, 6-1
3-2
6-4
3-4
6-5
3-1
3-1
3-4
3-2
1-2
6-3
6-3
6-3
6-3
2-2
6-2
3-5
3-6
5-1
3-5
2-2
1-3
1-1
1-2
1-3
2-1
2-2
2-2
4-2
2-2
Office 97 pa tch 4-2
Internet
2-1
J
jammed pape r 3-2
M
maintenance
cleaning cartridges
cleaning exterior case
cleaning gl as s
margins
messages
Microsoft O ffice 97 utilit y
multimedia product tour
N
notices, regulatory 6-6
O
Office 97 utility 4-2
online
ordering accessories and supplies
P
paper
paper-tray capacity
phone numbers
PhotoDeluxe
physical specifications
power specif ications
print
print cartridges
problems
product tour
copy
6-3
print
6-2
front panel
on-screen
help
1-3
messages
support
jam
sizes
specifications
2-1
3-2
6-4
2-7, 6-1
margins
6-2
resolution
specifications
speed
6-2
cleaning
ordering
clean cartr idges
front-panel messages
on-screen messages
paper jam
print self-test page
tips for resolving
3-4
6-5
1-1
3-5
3-6
3-6
2-4, 2-5
6-2
3-2
3-1
6-4
6-4
6-2
6-5
3-4
6-5
3-7
3-4
1-1
3-3
3-6
4-2
3-5
3-1
6-5
HP OfficeJet R Series Customer Care Guide I-1
Page 38

programs, adding and removing 4-1
R
regulatory information 6-6
reinstalling HP software
removing programs
requirements
resolution
returning HP OfficeJet for service
S
scan specifications 6-2
Scanning Coach
self-test page
service
shipping HP Of ficeJet
software
specifications, technical
suppl ie s , orderi n g
support
system requirements
ADF
6-4
system
6-1
print
6-2
scan
6-2
3-3
before you call
express warranty
HP Customer Support
returning HP OfficeJet
support
2-1
telephone numbers
adding and r emoving
installing HP
installing Office 97 patch
customer
HP Distribution Center
HP FIRST
Internet
2-1
online services
PhotoDeluxe
services
2-1
telephone numbers
2-2
1-2
2-2
6-5
4-2
2-7
4-1
4-2
2-2, 5-2
5-1
2-4, 2-5
2-3
6-1
2-1
2-4, 2-5
6-1
2-2
2-2, 5-2
4-1
2-2
4-2
2-2, 5- 2
W
warranty
before you call
service
upgrades
Year 2000
Web site
2-2, 5-2
5-1
5-2
5-1
2-1
T
technical s peci fications 6-1
telephone numbers
test, printing sel f-tes t pag e
tips
3-7
toolbox
1-3
tour
1-1
troubleshooting
clean cartridges
front-panel messages
on-screen messages
paper jam
print sel f-test page
tips
U
upgrades, warranty 5-2
3-7
3-2
2-4, 2-5
3-4
3-3
I-2 Index
3-3
3-5
3-6
 Loading...