

Page 1

HP Broadcom iSCSI Boot for NC382x Adapters User Guide
Part Number 512354-003
November 2009 (Third Edition)
Page 2

© Copyright 2009 Hewlett-Packard Development Company, L.P.
The information contained herein is subject to change without notice. The only warranties for HP products and services are set forth in the express
warranty statements accompanying such products and services. Nothing herein should be construed as constituting an additional warranty. HP
shall not be liable for technical or editorial errors or omissions contained herein.
Confidential computer software. Valid license from HP required for possession, use or copying. Consistent with FAR 12.211 and 12.212,
Commercial Computer Software, Computer Software Documentation, and Technical Data for Commercial Items are licensed to the U.S.
Government under vendor’s standard commercial license.
Microsoft, Windows, and Windows Server are U.S. registered trademarks of Microsoft Corporation.
Intended audience
This document is for the person who installs, administers, and troubleshoots servers and storage systems.
HP assumes you are qualified in the servicing of computer equipment and trained in recognizing hazards
in products with hazardous energy levels.
Page 3

Contents
Overview..................................................................................................................................... 4
Overview ................................................................................................................................................. 4
Limitations ................................................................................................................................................ 4
System requirements .................................................................................................................................. 4
Installation and configuration ......................................................................................................... 6
Downloading the SoftPaq........................................................................................................................... 6
Configure the server for iSCSI boot.............................................................................................................. 6
Enable iSCSI boot and set the boot order ...........................................................................................6
Configure iSCSI parameters.............................................................................................................. 7
Option ROM settings .......................................................................................................................8
Windows Server 2008 R2 installation.......................................................................................................... 9
Install Windows Server 2008 R2....................................................................................................... 9
Windows Server 2008 installation ..............................................................................................................9
Optionally add MF drivers to WIM image ..........................................................................................9
Installation using iSCSI driver.......................................................................................................... 10
Installation using the Microsoft iSCSI Software Initiator ....................................................................... 11
Windows Server 2003 installation ............................................................................................................ 11
Install Windows Server 2003 using F6............................................................................................. 11
Post installation procedures....................................................................................................................... 17
Set up crash dump support .............................................................................................................17
Install Microsoft iSCSI Software Initiator............................................................................................ 17
Troubleshooting ...................................................................................................................................... 19
Known issues ................................................................................................................................ 19
Using a diagnostic monitor for troubleshooting.................................................................................. 19
Target connection problems ............................................................................................................ 19
Target login problems .................................................................................................................... 19
Boot problems............................................................................................................................... 20
LUN access problems..................................................................................................................... 20
Operating system problems ............................................................................................................ 20
Technical support........................................................................................................................ 22
Before you contact HP.............................................................................................................................. 22
HP contact information............................................................................................................................. 22
Acronyms and abbreviations........................................................................................................ 23
Index......................................................................................................................................... 25
Page 4

Overview
Overview
The HP-BRCM iSCSI boot feature allows a server to boot from a remote disk that supports Microsoft iSCSI
Software Initiator (known as the iSCSI target) on a Storage Area Network (SAN) without having to
directly attach a boot disk.
Booting from a remote disk on a SAN allows the boot process to be centralized and consolidates
equipment resources. Unlike other implementations, iSCSI boot does not require a separate DHCP server
or a PXE server.
Accelerated iSCSI Boot for Windows
HP Accelerated iSCSI capability can be used with HP NC-Series Broadcom iSCSI Boot Package for
Windows. All accelerated iSCSI commands are handled by the adapter's HP iSCSI HBA driver. This
feature is applied to all HP Multifunction Gigabit Ethernet Server Adapters at no additional cost for
standup and mezzanine adapters; however, some embedded HP Multifunction Gigabit Ethernet Server
Adapters require a ProLiant Accelerated iSCSI Pack license. For more information see the HP ProLiant
Accelerated iSCSI for Windows User Guide.
Limitations
• A system crash may result if you bring down a network adapter that is iSCSI-boot enabled. The
Windows Server 2003 SP2 operating system prevents you from disabling iSCSI-booted adapters.
• File system access lapses (due to unplugging the cable) for time critical "keep alive" processes
(svchost) may cause reboots.
• Network adapter property changes (for example, Link Speed) can cause unrecoverable
configuration changes, which may prevent booting.
• iSCSI target configuration changes (for example, Adapter Name) causes boot failure if you do not
change the iSCSI boot configuration as well.
• Adapter failover during the software installation or the boot phase is not possible.
• Discovery protocols, such as Internet Storage Name Service, and Service Location Protocol are not
supported during iSCSI boot installs.
System requirements
The following system requirements support HP IPv4 iSCSI boot for Windows:
Supported operating systems
• Windows Server 2008 R2
• Windows Server 2008 SP2
• Windows Server 2008 x64 SP2
Overview 4
Page 5

• Windows Server 2008
• Windows Server 2008 x64
• Windows Server 2003 (SP2 or later)
• Windows Server 2003 x64 (SP2 or later)
Supported hardware
• Servers. ProLiant ML, DL, and BL p-Class or c-Class servers (Generation 6 and later) that include an
iLO (Integrated Lights Out) or RILOE (Remote Insight Lights-Out Edition) management device, with a
minimum of 512 MB of memory.
• Adapters. The following Multifunction Gigabit Server Adapters are supported.
o HP NC382T PCI Express Dual Port Multifunction Gigabit Server Adapter
o HP NC382i Integrated Quad Port PCI Express Gigabit Server Adapter
o HP NC382m Dual Port 1 GbE Multifunction BL-c Adapter
• Targets. All Microsoft certified iSCSI targets are supported, including the following HP controllers
and storage systems:
o HP StorageWorks 1510i Modular Smart Array
o HP StorageWorks MSA2000i Modular Smart Array
o HP StorageWorks All-in-One Storage System
Required software
The following software is included with Windows Server 2008 or later, but must be downloaded from
Microsoft's website for Windows Server 2003 operating systems:
• Microsoft iSCSI Software Initiator version 2.06 (http://www.microsoft.com/downloads) or later
• Microsoft Storport driver update KB957910 (http://support.microsoft.com/kb/957910) and
KB939875 (http://support.microsoft.com/default.aspx/kb/939875)
Overview 5
Page 6

Installation and configuration
Downloading the SoftPaq
1. Go to the HP website (http://www.hp.com/#Support).
2. Click Support & Drivers.
3. Select Download drivers and software (and firmware).
4. Type the adapter name in the For product box, and then click Go.
5. Select an operating system.
6. Click HP NC-Series Broadcom iSCSI Boot Package for Windows.
7. Click download and save the HP SoftPaq (sp#####.exe) file to a directory on your hard drive. The
SoftPaq file is a self-extracting executable with a file name based on the SoftPaq number.
8. Click the SoftPaq file to extract the files.
Configure the server for iSCSI boot
Enable iSCSI boot and set the boot order
Before iSCSI boot can be used, you must first enable iSCSI boot on the adapter and then modify the boot
order to select the iSCSI-enabled adapter as the boot device.
Enable iSCSI boot for HP network adapters
The iSCSI boot option ROM must be enabled before it can be used. Do not enable iSCSI boot on more
than two adapters because option ROM space is limited and it may cause the iSCSI boot to fail.
The following sections describe how to enable iSCSI boot on embedded, mezzanine, and standup
adapters.
Embedded adapters. The iSCSI boot option ROM is enabled on embedded adapters by using the RBSU
tool that is built into the system ROM.
a. During the initial boot phase, press <F9> to enter the RBSU.
b. At the RBSU menu, select System Options.
c. At the System Options menu, select the embedded adapter.
d. Select Network boot (for G6 and later servers) or iSCSI boot. HP recommends that PXE be
disabled on unused ports to conserve option ROM space.
e. Press <Esc> to exit the RBSU.
Mezzanine and Standup adapters. The iSCSI boot option ROM is enabled interactively at the console.
a. During the initial boot phase, press <Ctrl-S> when prompted to display the MBA Configuration
Menu.
b. Verify that iSCSI is selected for the Boot Protocol entry.
Installation and configuration 6
Page 7

c.
Press <F4> to save the changes and then press <Esc> to exit the MBA configuration menu.
Set the boot order to boot from the iSCSI adapter
The iSCSI-enabled adapter must be listed first in the Standard Boot Order (IPL) list.
1. During the initial boot phase, press <F9> to enter the RBSU.
2. At the RBSU menu, select Standard Boot Order (IPL).
3. Verify that the iSCSI boot adapter is listed first in the IPL list. Modify the boot order, if necessary.
4. Press <Esc> to exit the RBSU.
Configure iSCSI parameters
The iSCSI boot software must acquire its iSCSI target parameters either statically (by disabling DHCP) or
dynamically (by enabling DHCP). You can choose either of these methods.
Statically configure iSCSI parameters
In a static configuration, you must manually enter the system IP address, the system initiator IQN, and the
target IQN using the iSCSI Configuration Utility.
1. Power on the server and when prompted select <Ctrl-S> to launch the MBA Configuration menu.
2. At the MBA Configuration menu enter the function key combination, such as <Ctrl-K> to enter the
iSCSI Cfg menu. The key combination may vary. At the iSCSI Cfg menu, select General Parameters,
and then select Disabled for the TCP/IP parameters via DHCP and the iSCSI parameters via DHCP
parameters.
3. For the Boot to iSCSI target parameter, select Disabled if installing from a CD/DVD otherwise, select
Enabled.
4. For the Target as First HDD parameter, select Enabled.
5. For the Windows HBA Boot Mode parameter, select one of the following:
o Enabled for Windows Server 2003 or Windows Server 2008 if using the Offloaded iSCSI
method of OS installation.
o Disabled for Windows Server 2008 Non-offloaded iSCSI method of OS installation.
6. Press <Esc> to exit the General Parameters Configuration Screen and then select Initiator
Parameters.
7. At the iSCSI Initiator Parameters Configuration screen, enter values for the IP Address, Subnet Mask,
Default Gateway, Primary DNS, and Secondary DNS parameters as needed.
The iSCSI Name corresponds to the iSCSI initiator name to be used by the client system. If
authentication is required then enter the CHAP ID and CHAP Secret parameters.
8. Press <Esc> to return to the Main Menu.
9. Select 1st Target Parameters and then enter values for the Target IP Address, Target name, and
Login information. Press <Esc> to return to the Main Menu.
10. Select 2nd Target Parameters. This configuration screen allows a MPIO configuration to be
established. The adapter attempts to connect to this iSCSI target as a backup session to be passed to
the host operating system. The ISCSI driver components support MPIO as a standalone feature
without the need of the MPIO components when Target 2 is present.
Enter values for the Target IP Address, Target name, and login information as needed.
Installation and configuration 7
Page 8

11.
Enter values for the Subnet Mask, Default Gateway, Primary DNS, and Secondary DNS parameters
as needed. The iSCSI Name corresponds to the iSCSI initiator name to be used by the client system.
If authentication is required, enter the CHAP ID and CHAP Secret parameters.
12. Press <Esc> to return to the Main Menu and then press <Esc> again to display the Exit Configuration
screen and then select Exit and Save the Configurations.
Dynamically configure iSCSI parameters
In a dynamic configuration the IP address, initiator, and target information is provided by DHCP.
1. Power on the server, and press <Ctrl-S> to launch the MBA Configuration menu when prompted.
2. At the MBA Configuration menu, select the appropriate function key combination to enter the iSCSI
Cfg menu. The key combination varies based on your configuration.
3. At the iSCSI Cfg menu, select General Parameters and then select Enabled for the iSCSI parameters
via DHCP parameter.
4. For the Boot to iSCSI target parameter, select Disabled to install from a CD/DVD.
5. For the Target as First HDD parameter, select Enabled.
6. For the Windows HBA Boot Mode parameter, select Enabled.
7. Modify the iSCSI Name parameter based on the DHCP options that are used by the DHCP server.
o If DHCP Option 17 is used, the initiator name is retrieved from the value entered in the Initiator
Parameters screen. But if no value is entered, the controller defaults to the name:
iqn.1995-05.com.broadcom.<11.22.33.44.55.66>.iscsiboot
where 11.22.33.44.55.66 is the controller MAC address.
o If DHCP Option 43 is used, settings in the Inititator Parameters, 1st Target Parameters, or 2nd
Target Parameters fields are ignored and do not need to be cleared.
8. Press <Esc> to exit and save the settings when prompted. Continue pressing <Esc> to exit the MBA
Configuration Menu.
Option ROM settings
The following table shows the configuration options available from the General Parameters screen.
Variable name Description
TCP/IP parameters via
DHCP
iSCSI parameters via
DHCP
CHAP Authentication Determines if the iSCSI boot host software uses CHAP
Boot to iSCSI target Determines if the iSCSI boot host software attempts to boot from
Determines if the iSCSI boot host software acquires the IP
address information using DHCP (Enabled) or use a static IP
configuration (Disabled).
Determines if the iSCSI boot host software acquires its iSCSI
target parameters using DHCP (Enabled) or through a static
configuration (Disabled). The static information is entered
through the iSCSI Initiator Parameters Configuration screen.
authentication when connecting to the iSCSI target. If CHAP
Authentication is enabled, the CHAP ID and CHAP Secret are
entered through the iSCSI Initiator Parameters Configuration
screen.
the iSCSI target after successfully connecting to it. When the
option is enabled, the iSCSI boot host software immediately
attempts to boot from the iSCSI target. Otherwise, if it is
Installation and configuration 8
Page 9

Variable name Description
disabled, the iSCSI boot host software does not attempt to boot
from the iSCSI target and control returns to the system BIOS so
that the next boot device may be used. This option is generally
set to disabled when booting from a CD to install the iSCSI
target and then later set to enabled after the installation is
completed.
DHCP Vendor ID Determines if the iSCSI boot host software interprets the Vendor
Class ID field used during DHCP. If the Vendor Class ID field in
the DHCP Offer packet matches the value in the field, the iSCSI
boot host software looks into the DHCP Option 43 fields for the
required iSCSI boot extensions. If DHCP is disabled, this value
does not need to be set.
Link Up Delay Time Determines how long the iSCSI boot host software waits, in
seconds, after an Ethernet link is established before sending any
data over the network. The valid values are 0 to 255.
Use TCP Timestamp Determines if the TCP Timestamp option is enabled or disabled.
LUN Busy Retry Count Determines if the number of connection retries the iSCSI Boot
initiator attempts when the iSCSI target LUN is busy.
Windows HBA Boot Mode Set to disable when the host OS is configured for software
initiator mode and to enable for HBA mode.
About configuring the DHCP settings
If you configure the DHCP server for iSCSI network boot (see KB928496
(http://support.microsoft.com/kb/928496) to do this), then set the "iSCSI parameters via DHCP"
parameter to Enabled and the "TCP/IP parameters via DHCP" parameter to Enabled.
If you do NOT configure the DHCP server iSCSI network boot, then set the "iSCSI parameters via DHCP"
parameter to Disabled and the "TCP/IP parameters via DHCP" parameter to Enabled.
If you are not using the DHCPat all, then you must set both parameters to Disabled and manually enter all
configurations as needed.
Windows Server 2008 R2 installation
Install Windows Server 2008 R2
• For Windows Server 2008 Offloaded iSCSI method of OS installation, supply the bxvbd.inf,
bnxnd.inf, and bxios.inf files.
• For Windows Server 2008 Non-offloaded iSCSI method of OS installation, supply the bxvbd.inf and
bxnd.inf files.
Windows Server 2008 installation
Optionally add MF drivers to WIM image
You may optionally add the HP Multifunction Gigabit Server Adapters to the WIM image.
Installation and configuration 9
Page 10

1.
The Microsoft Windows Automated Installation Kit (AIK) file (6001.18000.080118-1840kb3aikl_en.iso) is designed to help perform unattended Windows installations. Select this link to
download the AIK "Automated Installation Kit for Windows 2008
(http://www.microsoft.com/downloads/details.aspx?FamilyID=94BB6E34-D890-4932-81A55B50C657DE08&displaylang=en)."
2. After downloading the AIK file, burn the ISO image to a DVD.
3. Insert the DVD into the CD/DVD drive, and then select Windows AIK Setup to install AIK from the
installation window.
4. Copy of the entire contents of the Windows 2008 DVD to a folder labeled W2K8 DVD.
5. From the Windows desktop, start the command prompt in the Windows AIK by selecting Start -> All
Programs -> Microsoft Windows AIK -> Windows PE Tools Command Prompt.
6. Create the following work folders using the Mkdir command.
Mkdir HPNicUpdate
Mkdir HPNicUpdate\drivers
Mkdir HPNicUpdate\wim
7. Use the following command to copy the boot WIM image from the Windows Server 2008 media
DVD folder to the WIM work folder.
copy <DVD Path>\sources\boot.wim HPNicUpdate\wim
8. Locate the HP CP00xxxx.exe Windows 2008 Multifunction Gigabit Server Adapter driver
component file that was obtained from "Downloading the SoftPaq (on page 6)."
<path>\HPNicUpdate\drivers
9. Create a folder as a share point and attach the WIM Image to it using the following MKDIR
command:
mkdir HPNicUpdate\MountPoint
10. From the Windows AIK command window, mount the boot WIM using the following command:
imagex /mountrw HPNicUpdate\Wim\boot.wim 2 HPNicUpdate\MountPoint
The WIM boot image appears under the MountPoint folder.
11. Add the HP Multifunction Gigabit Server Adapter drivers for your specific adapter to the boot image
using the following commands:
peimg /inf=.\HPNicUpdate\drivers\evbd.inf
/image=.\HPNicUpdate\MountPoint\Windows
peimg /inf=.\HPNicUpdate\drivers\bxois.inf
/image=.\HPNicUpdate\MountPoint\Windows
12. Save the changes to the WIM using the following command:
imagex/unmount/commit.\HPNicUpdate\MountPoint
13. Replace the original sources\boot.wim image (located in the W2K8 DVD folder you created in step
2) with the HPNicUpdate\Wim\boot.wim image and then create a new DVD image.
Installation using iSCSI driver
1. Locate the HP Windows Server 2008 Multifunction Gigabit Server Adapter component
CPxxxxxx.exe file obtained in "Downloading the SoftPaq File." Extract the contents to a USB memory
device.
2. Select Enable for the Windows HBA Boot Mode parameter. For more information, see "Configure
iSCSi parameters (on page 7)."
Installation and configuration 10
Page 11

3.
Boot the updated Windows Server 2008 DVD. Navigate to the setup screen and select the Load
Drivers option and then browse the USB device for the HP Windows Server 2008 Multifunction
Gigabit Server Adapter driver files for your specific adapter.
4. Select the bxvbd.inf driver file.
5. Select the Load Drivers option again and select the bxois.inf file.
6. Return to the Windows Server 2008 Setup screen. The iSCSI storage device identified in the boot
phase appears as an available iSCSI target for installing the Windows Server 2008 operating
system.
7. Continue with Windows Server 2008 installation.
Installation using the Microsoft iSCSI Software Initiator
1. Locate the HP Windows Server 2008 Multifunction Gigabit Server Adapter component
CPxxxxxx.exe file obtained in "Downloading the SoftPaq File." Extract the contents to a USB memory
device.
2. Select Disable for the Windows HBA Boot Mode parameter. For more information, see "Configure
iSCSi parameters (on page 7)."
3. Boot the Windows Server 2008 DVD. Navigate to the setup screen and select the Load Drivers
option and then browse the USB device for the HP Windows Server 2008 Multifunction Gigabit
Server Adapter driver files for your specific adapter.
4. Select the bxvbd.inf (NC382x) driver file.
5. Select the Load Drivers option again and select the bxnd.inf file.
6. Return to the Windows Server 2008 Setup screen. The iSCSI storage device identified in the boot
phase appears as an available iSCSI target for installing the Windows Server 2008 operating
system.
7. Continue with Windows Server 2008 installation.
Windows Server 2003 installation
Install Windows Server 2003 using F6
To install a Windows operating system directly to an iSCSI target from a Windows CD-ROM, create
standard DOS-formatted (FAT) diskettes with files from the SoftPaq located in the
apps\bcm_iscsi\nc382\x86 and apps\bcm_iscsi\nc382\x64 folders. To create F6 diskettes, navigate
to the appropriate folder and copy the contents to the top level folder of a formatted MS-DOS bootable
diskette.
When attempting to install Windows 2003, ensure that the iSCSI target contains no previously installed
operating system images and that the disk contains a zero Master Boot Record (MBR).
1. Create Windows_F6 Diskette 1:
o For a Windows 2003 x86 operating system, navigate to the apps\bcm_iscsi\nc382\x86\disk1
directory and copy the files to the root directory of disk 1.
o For a Windows 2003 x64 operating system, navigate to the apps\bcm_iscsi\nc382\x86\disk1
directory and copy the files to the root directory of disk 1.
2. Create Windows_F6 Diskette 2:
Installation and configuration 11
Page 12
o
For a Windows 2003 x86 operating system, navigate to the apps\bcm_iscsi\nc382\x86\disk2
directory and copy the files to the root directory of disk 2.
o For a Windows 2003 x64 operating system, navigate to the apps\bcm_iscsi\nc382\x64\disk2
directory and copy the files to the root directory of disk 2.
3. Customize the Windows 2003 SP2 installation CD by creating a slipstream version that includes the
Microsoft Storport hotfix KB943295 (http://support.microsoft.com/kb/943295).
a. See the Microsoft article KB814847 (http://support.microsoft.com/kb/814847) for details
about how to create a Microsoft slipstream CD.
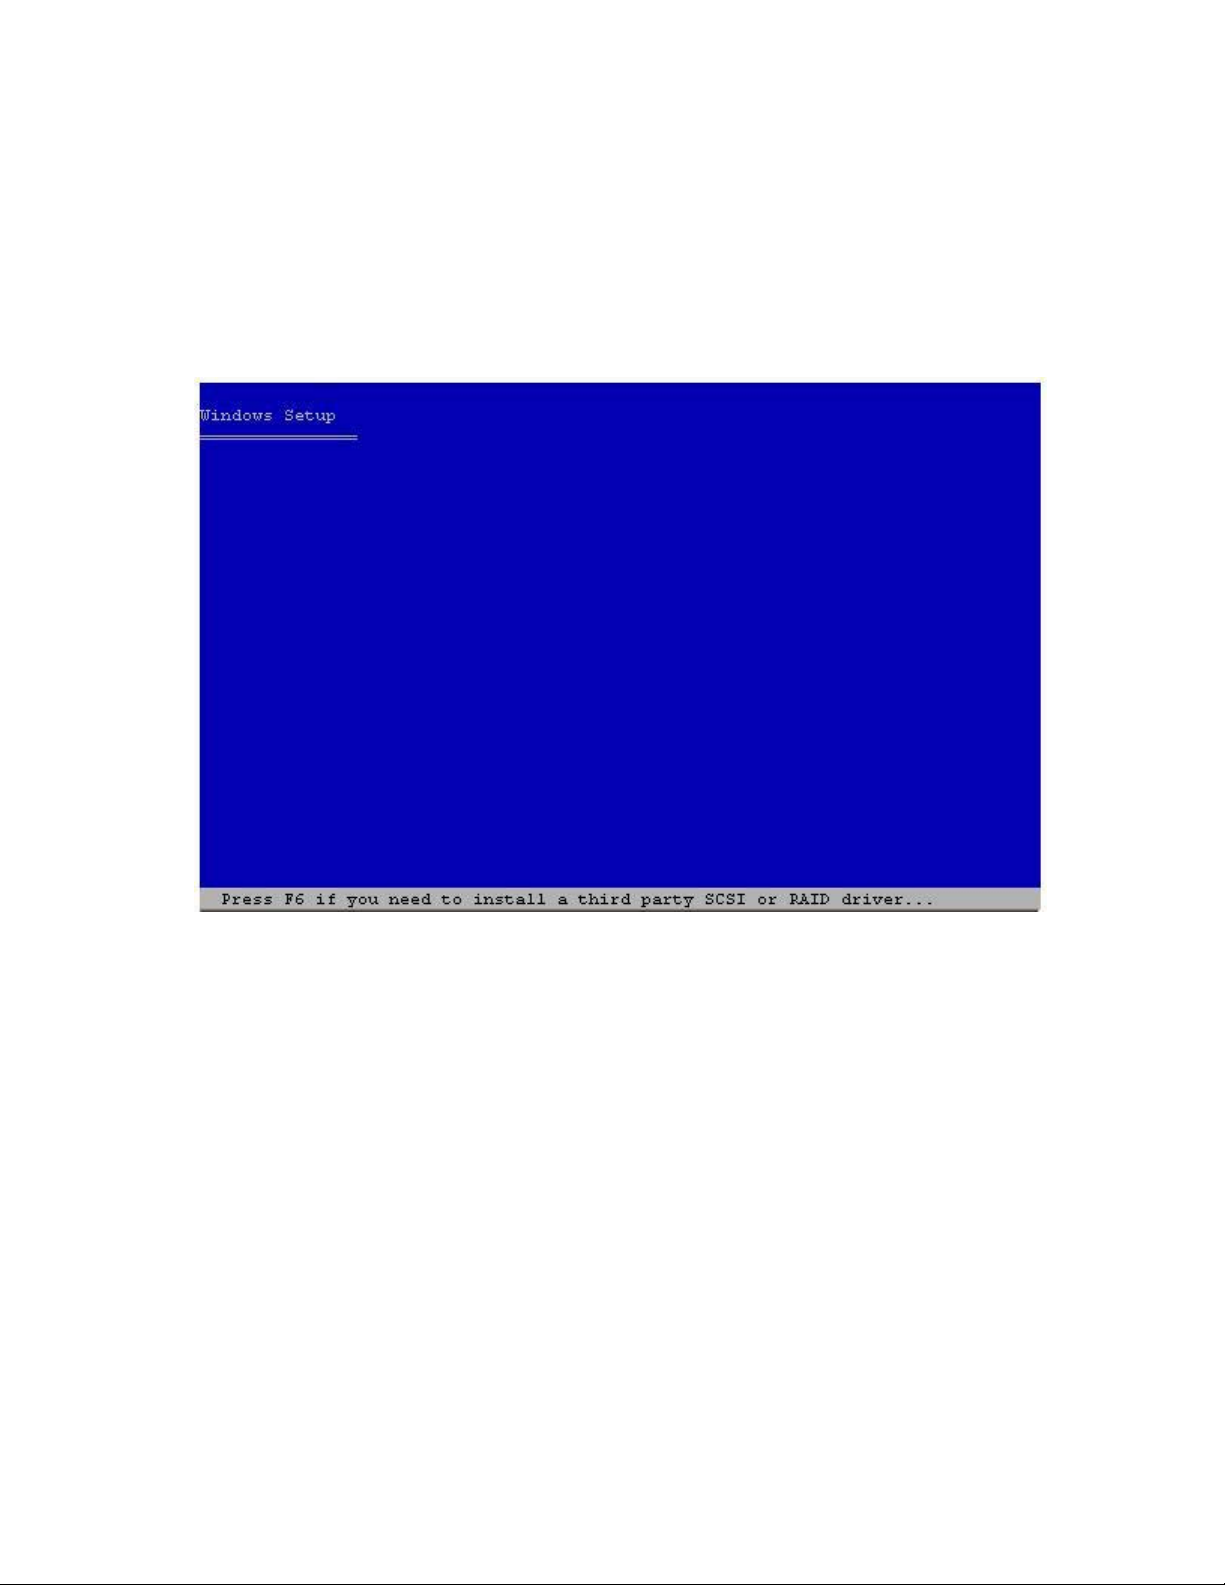
4. Insert the slipstream Microsoft Windows 2003 SP2 CD and press F6.
Installation and configuration 12
Page 13
5.
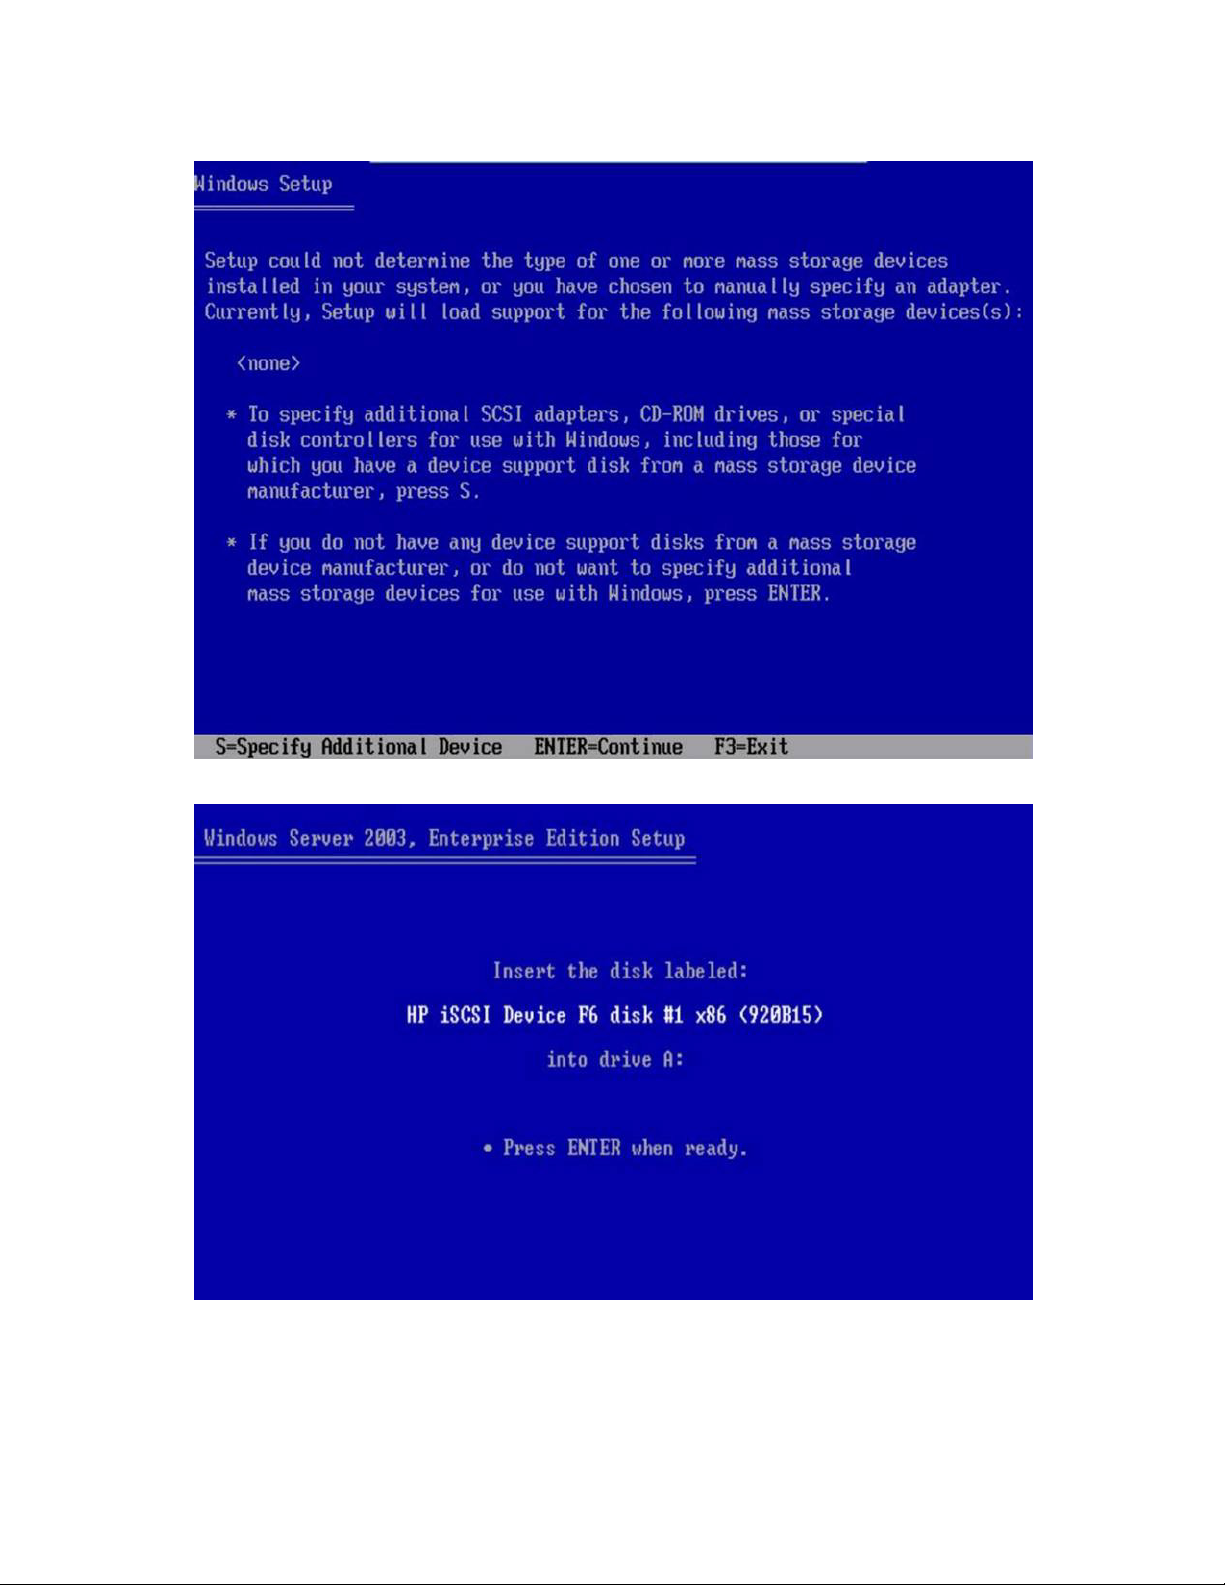
Select drivers from the disk 1 and disk 2 diskettes when prompted. DO NOT insert disk 1 into drive A
until prompted. After disk 1 is inserted, the following window appears.
6. Enter an S to select Specify Additional Device. The following window appears.
Installation and configuration 13
Page 14

7.
Press Enter to continue. The following window appears.
8. Complete the following steps to install the files.
a. Select Install 1st: MS Windows wdfldr and then press Enter.
b. Select Install 2nd: MS Windows wdf01000 and then press Enter.
c. Select Install 3rd: HP NCXXX Virtual Bus Driver and then press Enter.
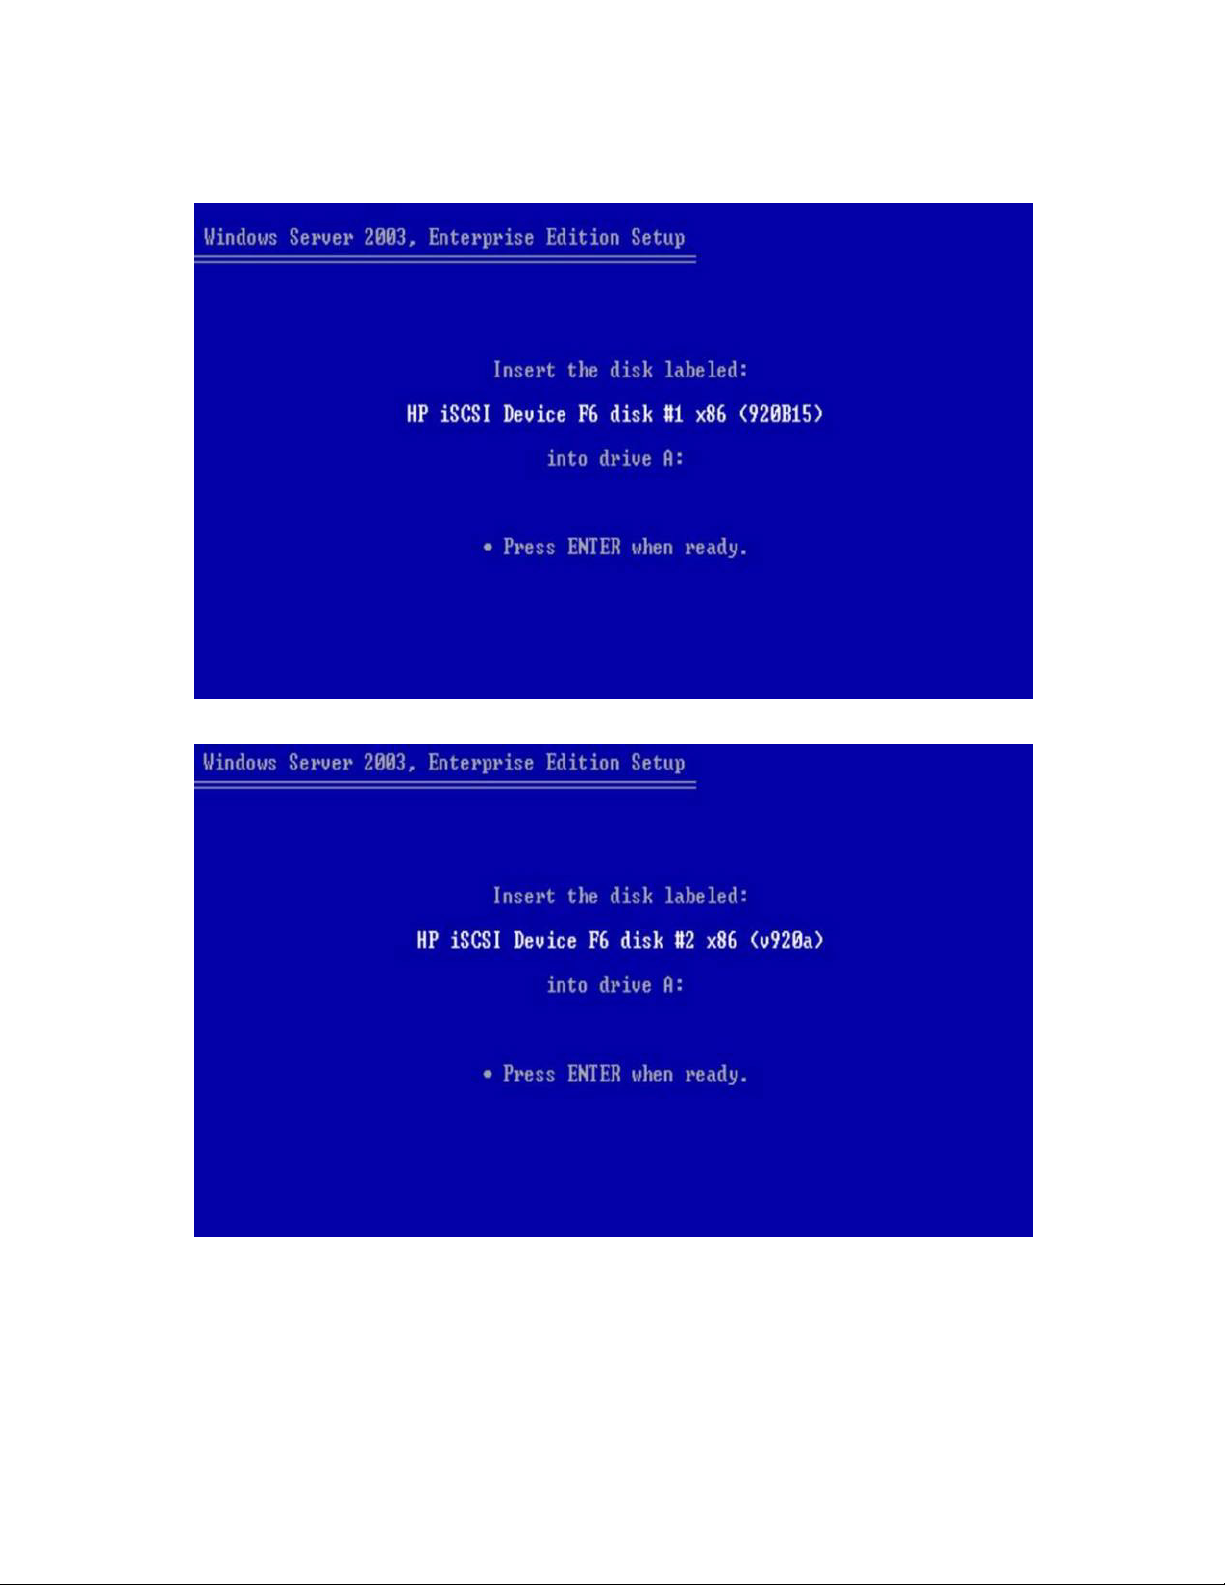
9. Insert disk 2 and press Enter when the following window appears.
Installation and configuration 14
Page 15

10.
Press Enter to load the HP iSCSI HBA Driver.
11. A Windows setup screen shows the iSCSI Target.
Installation and configuration 15
Page 16
12.
Windows formats the iSCSI target and then begins copying files to the iSCSI target.
During this phase a secondary setup may appear prompting for disk 1 and disk 2 again.
13. If the following window appears, insert disk 1 and press Enter.
14. If the following window appears, insert disk 2 and press Enter.
Windows Server 2003 continues installing on the iSCSI target.
Before the GUI installation begins, it may be necessary to configure the option ROM setting "BOOT TO
ISCSI" to Enabled.
Installation and configuration 16
Page 17

Post installation procedures
1. Boot the server over iSCSI from a target boot disk.
2. Install all HP software components for network adapters and configure HP licensed components, if
required.
3. Reboot the server.
4. For Windows Server 2003, install KB939875
(http://support.microsoft.com/default.aspx/kb/939875) to enable crash dump support. See "Set
up crash dump support (on page 17)."
OR
For Windows Server 2008, go to Step 6 below.
5. Install Microsoft iSCSI Software Initiator for Windows Server 2003. See "Install Microsoft iSCSI
Software Initiator (on page 17)." This is an optional step for deployments using offload iSCSI
(Broadcom's offload iSCSI driver) but it is required for all non-offload deployments (also known as
Microsoft Initiator).
6. Go to c:\cpqsystem\pnpdrvs\iscsiutils and execute the hpsetcrash*.cmd.
7. At this point in Windows Server 2008, iSCSI boot may be configured to boot with either non-offload
(Microsoft Initiator) or offload (offload iSCSI driver or HBA). To set the boot configuration, change
the Windows HBA Mode parameter on the General Parameters screen of the iSCSI Configuration
Utility. See "Configure iSCSI parameters (on page 7)."
Set up crash dump support
The HP iSCSI crash dump driver provides a mechanism for an HP iSCSI Booted system to capture data for
analysis when a Windows 2003 OS System Stop Event is encountered (BSOD). System data is generally
saved for analysis in a file located at %systemroot%\MEMORY.DMP (for example:
C:\windows\Memory.DMP).
Install Microsoft iSCSI Software Initiator
1. Launch the Microsoft iSCSI Software Initiator 2.06 or later installation wizard on the iSCSI booted
system.
Installation and configuration 17
Page 18

2.
Select all Installation Options as indicated below and please note that the MPIO option cannot be
added to a file system that is being used by an iSCSI Boot client after it has been created during the
deployment phase.
3. Complete the installation and reboot when prompted.
Installation and configuration 18
Page 19

Troubleshooting
Known issues
Known issues for Microsoft iSCSI Initiator boot installation
• If you do not select an Adapter Service Name by highlighting it during initial Microsoft Initiator boot
setup, the setup continues without an error but does not select an NDIS driver for booting. The
deployed system will display a stop error or Blue Screen of Death (BSoD) on boot prior to the first
splash screen.
• Multipath I/O (MPIO) is not supported for failover for boot filesystem because MPIO drivers cannot
be added during an install phase. MPIO can be used on devices created later.
• The iSCSI host name is derived from the InitiatorName that is set by the HP iSCSI BIOS and should
not be used in the GUI.
Known issues for F6 installation
The HP Windows_F6 Diskette 1 must not be inserted in the A:\ drive until after F6 prompts for the
diskette. Failure to wait for the prompt will cause the F6 installer to fail reading the second diskette.
Using a diagnostic monitor for troubleshooting
If the client is not able to boot from the target server and the problem is not discernable from the
immediately available information, you may need to use a network monitor that is capable of parsing the
iSCSI protocol to troubleshoot the information.
If the iSCSI target is software running on a server, you may be able to run a software network monitor
such as Ethereal directly on the target system. Otherwise, you may need to configure a network switch
with port mirroring and direct the mirrored packets to a port where either a hardware or software network
monitor can be attached.
Target connection problems
Symptoms:
The initiator is unable to make a connection to the target.
Possible causes:
• The initiator and target are not connected to the same network
• The initiator and target are not in the same VLAN (if any)
• The IP configurations for the initiator and target are not correct
• The initiator's boot path information is not correct
• The target service is not running on the target server
Target login problems
Symptoms:
Installation and configuration 19
Page 20

The iSCSI initiator is able to connect to the target but is unable to log in successfully.
Possible causes:
• The initiator is not configured with the right target name
• The initiator is not configured with the right target IP address
• The initiator is not configured with the right initiator name
• The initiator and target are not configured for the same authentication method
• The initiator and target are using CHAP or Mutual CHAP authentication so they may not be
configured with matching user name and secret(s)
• If the target implements some form of Access Control Lists (ACL), the target may not be configured to
allow it on the initiator
Boot problems
Symptoms:
The initiator is able to connect to and log in to the target, but the system does not attempt to boot from the
iSCSI disk.
Possible causes:
• Verify the Standard Boot Order (IPL) list and Boot Controller Order list is configured correctly in
RBSU according to the Configure the server for iSCSI boot (on page 6) section.
• Option ROM space is limited. If too many option ROMs are enabled the boot may fail due to lack of
space. In this case it is necessary to disable PXE on other adapters, disable the Smart Array
Controller, physically remove the hard drives, and so on.
• Verify the Option ROM configuration setting "Boot to iSCSI" is set to Enabled.
LUN access problems
Symptoms:
The initiator is able to connect to and log in to the target, but the system doesn't see a disk present (it
attempts to boot from an internal disk or PXE).
Possible causes:
• The initiator is not configured with the correct LUN from which to boot (Some targets start numbering
at 1 instead of 0)
• The target is not configured to allow access to the specified LUN by the initiator
Operating system problems
Symptoms:
The initiator is able to connect to and log in to the target and the system recognizes the disk but you are
unable to install the operating system.
Possible causes:
• There are multiple HP Multifunction Gigabit Server adapters enabled in the system.
Installation and configuration 20
Page 21

• The drivers are not being loaded in the right order during installation.
• The target disk provided is not large enough.
• The initiator is not configured with the correct LUN from which to boot (some targets start numbering
data devices at 1 not 0).
• The target is not configured to allow access to the specified LUN by the initiator.
• The Slipstream CD creation step contains an error causing F6 phase to fail. Check for the following
problems:
o Insure the folder and file pathnames are correct in the Dosnet.inf and Svcpack.inf files.
o Insure the text file changes have no hidden characters or tabs. Windows installer cannot tolerate
malformed text strings and will fail with no informative message.
o Insure that the original Storport.sy_ file is removed from the CDFolderPathName. Browse the new
ISO image to insure that the proper changes have been applied.
Installation and configuration 21
Page 22

Technical support
Before you contact HP
Be sure to have the following information available before you call HP:
• Technical support registration number (if applicable)
• Product serial number
• Product model name and number
• Product identification number
• Applicable error messages
• Add-on boards or hardware
• Third-party hardware or software
• Operating system type and revision level
HP contact information
For the name of the nearest HP authorized reseller:
• See the Contact HP worldwide (in English) webpage
(http://welcome.hp.com/country/us/en/wwcontact.html).
For HP technical support:
• In the United States, for contact options see the Contact HP United States webpage
(http://welcome.hp.com/country/us/en/contact_us.html). To contact HP by phone:
o Call 1-800-HP-INVENT (1-800-474-6836). This service is available 24 hours a day, 7 days a
week. For continuous quality improvement, calls may be recorded or monitored.
o If you have purchased a Care Pack (service upgrade), call 1-800-633-3600. For more
information about Care Packs, refer to the HP website (http://www.hp.com/hps).
• In other locations, see the Contact HP worldwide (in English) webpage
(http://welcome.hp.com/country/us/en/wwcontact.html).
Technical support 22
Page 23

Acronyms and abbreviations
BRCM
Broadcom
BSOD
blue screen of death
CHAP
Challenge Handshake Authentication Protocol
DHCP
Dynamic Host Configuration Protocol
HBA
host bus adapter
iLO
Integrated Lights-Out
iLO 2
Integrated Lights-Out 2
INF
setup information file
IPL
initial program load
iSCSI
Internet Small Computer System Interface
ISO
International Organization for Standardization
LAA
locally administered address
Acronyms and abbreviations 23
Page 24

LUN
logical unit number
MPIO
multipath I/O
PXE
Preboot Execution Environment
QFE
quick fix engineering
RBSU
ROM-Based Setup Utility
RILOE
Remote Insight Lights-Out Edition
SAN
storage area network
VLAN
virtual local-area network
WIM
Windows Imaging file format
Acronyms and abbreviations 24
Page 25

Index
A
adding drivers 9
B
booting problems 20
C
Configure iSCSI parameters 7
Configure server 6
contacting HP 22
crash dump 17
D
diagnostic tools 19
downloading files 6, 22, See files, downloading
drives, adding 9
F
files, downloading 6
P
Post installation 17
S
support 22
system requirements 4
T
target connection problems 19
target installs 11
target login problems 19
teaming limitations 4
troubleshooting 19
W
WIM image 9
Windows Server 2003 11
Windows Server 2008 9
Windows Server 2008 R2 9
H
HP contact information 22
I
Install Microsoft iSCSI Software Initiator 17
installation and configuration 6
iSCSI boot 4
iSCSI boot targets 4, 11, 19
L
LUN access problems 20
M
Microsoft Windows 2008 DVD 9, 10
O
OS problems 20
overview 4
Index 25
 Loading...