

Page 1

HP Media Center PC
Software Guide
Page 2

The information in this document is subject to change without notice.
Hewlett-Packard Company® makes no warranty of any kind with
regard to this material, including, but not limited to, the implied
warranties of merchantability and fitness for a particular purpose.
HP shall not be liable for errors contained herein or for incidental or
consequential damages in connection with the furnishing,
performance, or use of this material.
THE WARRANTY TERMS CONTAINED IN THIS STATEMENT,
EXCEPT TO THE EXTENT LAWFULLY PERMITTED, DO NOT
EXCLUDE, RESTRICT, OR MODIFY AND ARE IN ADDITION TO
ANY MANDATORY STATUTORY RIGHTS APPLICABLE TO THE SALE
OF THIS PRODUCT OR SERVICE TO YOU.
HP assumes no responsibility for the use or reliability of its software
on equipment that is not furnished by HP.
This document contains proprietary information that is protected by
copyright. All rights are reserved. No part of this document may be
photocopied, reproduced, or translated to another language
without the prior written consent of HP.
Hewlett-Packard Company
P.O. Box 4010
Cupertino, CA 95015-4010
USA
© 2002–2004 Hewlett-Packard Development Company, L.P.
All rights reserved.
Hewlett-Packard is a registered trademark of Hewlett-Packard
Company in the United States of America and other countries/
regions.
This product incorporates copyright protection technology that is
protected by method claims of certain U.S. patents and other
intellectual property rights owned by Macrovision Corporation and
other rights owners. Use of this copyright protection technology
must be authorized by Macrovision Corporation, and is intended
for home and other limited viewing uses only unless otherwise
authorized by Macrovision Corporation. Reverse engineering or
disassembly is prohibited. Apparatus Claims of U.S. Patent Nos.
4,631,603, 4,577,216, 4,819,098, and 4,907,093 licensed for
limited viewing uses only.
Other brand or product names are trademarks of their respective
holders.
HP supports lawful use of technology and does not endorse or
encourage the use of our products for purposes other than those
permitted by copyright law.
Page 3

Table of Contents
Using Media Center ...................................... 1
Getting Started with Media Center .........................................1
Media Center Features.......................................................... 1
Media Center Start Menu ...................................................... 4
Setting the PC Location for the Program Guide ......................... 5
Media Center Setup.............................................................. 5
Setting Up Media Center....................................................... 6
Media Center Menu Bars ......................................................9
Setting Media Center as the Automatic CD Player ..................10
Using Shortcut Buttons......................................................... 10
Using Media Center Help.................................................... 11
Changing Media Center Settings.......................................... 12
Using the Remote Control ........................... 13
Remote Control Buttons Overview......................................... 14
Remote Control Buttons .......................................................17
Using an HP Personal Media Drive ............. 23
Locating the Drive After Installation ....................................... 23
Assigning a Drive Letter to the HP Personal Media Drive.......... 24
Storing Files....................................................................... 24
Playing Media Files ............................................................24
Playing Music Files ............................................................. 25
Viewing Picture Files ........................................................... 25
Playing Video Files ............................................................. 26
Watching TV Programs Stored on the HP Personal Media Drive27
Recording TV to the HP Personal Media Drive ........................ 27
Recording TV Programs to the HP Personal Media Drive.......... 28
Disconnecting the HP Personal Media Drive Safely ................. 29
Watching and Recording TV Programs........ 33
Watching TV .....................................................................34
Using Remote Control in My TV............................................ 35
Watching Live TV Using the Digital Video Recorder ................36
Using the Television Program Guide .....................................37
Downloading the Television Program Guide ..........................39
Changing a Postal Code to Receive the Correct Television Program
Guide........................................................................... 40
Setting up an Internet Dial-Up Connection.............................. 40
Adding Missing Channels to the Guide ................................. 41
Removing Channels from the Guide...................................... 41
Searching for TV Programs .................................................. 42
Recording TV Programs....................................................... 44
Changing TV Settings.......................................................... 48
Playing Recorded TV Programs ............................................ 49
Locating Recorded TV Programs for Viewing on the Desktop.... 50
About Recording Errors ....................................................... 51
Resolving Recording Conflicts ..............................................52
Deleting a Scheduled Program or Series................................ 53
Deleting a Recorded Program or Series................................. 53
Blocking Unwanted TV Programs and Movies.........................54
Setting Movie/DVD or TV Ratings .........................................54
Setting Caption Display .......................................................55
Displaying Teletext..............................................................55
Safeguarding Recorded TV Programs ....................................56
Managing Hard Disk Drive Space ........................................60
Playing Music Files ..................................... 63
Using Windows Media Player..............................................64
Creating a Music Library .....................................................65
Searching the Computer for Music Files.................................66
Adding CD Tracks to the Music Library..................................67
Playing Digital Music Files ...................................................68
Finding Music Files in My Music ...........................................69
Playing a Song...................................................................70
Setting Up an Automatic Disc Jockey.....................................71
Finding and Playing an Album .............................................71
Creating a Playlist...............................................................72
Selecting a Visualization......................................................73
Working with Pictures................................ 75
Using My Pictures in Media Center .......................................76
Organizing Pictures in My Pictures........................................77
Viewing Pictures in My Pictures.............................................78
Editing Pictures in My Pictures ..............................................81
Printing Pictures in My Pictures .............................................82
Copying Pictures to CDs ......................................................83
Using HP Image Zone Plus in Media Center ...........................84
Organizing pictures in HP Image Zone Plus ...........................85
Viewing Pictures in HP Image Zone Plus ................................89
Editing Pictures in HP Image Zone Plus ..................................91
Printing Pictures in HP Image Zone Plus .................................92
Other Features of HP Image Zone Plus...................................92
Playing Videos........................................... 95
Organizing Videos .............................................................96
Playing Digital Videos in Media Center .................................97
Sorting Videos....................................................................99
Viewing Video Details .........................................................99
Recording Videos to DVD from a Digital Video Camera ..........99
Using Supported Video File Types.......................................100
Playing DVDs ........................................... 101
Changing the DVD Movie Language ...................................103
Changing DVD Audio Settings ...........................................103
Listening to FM Radio ............................... 105
Using the FM Radio and the TV Signal at the Same Time .......106
Playing FM Radio Stations .................................................106
Organizing Pre-set Radio Stations.......................................107
iii
Page 4

Recording TV Shows to DVDs ................... 109
About Copying Recorded TV Programs to DVD.....................109
Copying Recorded TV Programs to DVD or CD.....................110
Watching Recorded TV Programs on DVD ...........................111
Capturing Analog Home Video ..........................................112
Using Double-Layer Technology and Media .........................113
Copy Protection................................................................114
Playing CDs and DVDs ............................. 115
Playing Music CDs with iTunes ...........................................115
Playing CDs and DVDs with Windows Media Player.............115
Playing DVD Movies with InterVideo WinDVD......................116
Playing Video CDs (VCD) with InterVideo WinDVD...............118
Playing Video CDs (VCD) with Windows Media Player 9 ......118
Creating (Burning) CDs ............................. 119
Creating (Burning) Music CDs with iTunes............................119
Creating (Burning) Music CDs with Windows Media Player ...119
Creating (Burning) Data CDs Using Windows XP..................120
Creating (Burning) CDs with RecordNow!............................120
Storing Files on a DVD or CD.............................................122
Copying a DVD or CD ......................................................124
Erasing a DVD or CD ........................................................124
About Removing Files in RecordNow! .................................125
Removing Files from a Recorded Data Disc ..........................125
Archiving Files on a DVD or CD .........................................126
About Image Files.............................................................126
Saving an Image.............................................................. 126
Burning an Image ............................................................ 127
About Recording Video Files ............................................. 127
Disc Labels...................................................................... 127
Creating Recovery CD/DVDs for the PC.............................. 127
Compatibility Information.................................................. 129
Compatible File Formats ................................................... 130
Disc Quick Reference ....................................................... 130
Disc Feature and Compatibility .......................................... 132
Optical Drive Quick Reference........................................... 133
Creating DVD Movies ................................137
Getting Started ................................................................ 137
Requirements for Capturing Video...................................... 138
Capturing Digital Camcorder Video ................................... 139
Capturing Web Camera Video.......................................... 139
Capturing Video with a Capture Card ................................ 140
Capturing a Still Image..................................................... 140
Editing Video Files in WinDVD Creator............................... 140
Authoring Your DVD......................................................... 143
Recording VHS Video Files Direct to DVD............................ 146
Converting Recorded TV to VCD or DVD Format .................. 146
Troubleshooting ........................................147
Problems and Solutions..................................................... 147
Index........................................................153
iv HP Media Center PC Software Guide
Page 5
Getting Started with Media Center
Using Media Center
This guide can help you get started using Microsoft
Windows XP Media Center Edition and other
software programs. HP has combined the features
of the HP Pavilion home PC with the Microsoft
Windows® XP Media Center Edition operating
system to create a powerful entertainment center
for you.
®
Media Center Features
You can control the Media Center functions and
navigate Media Center windows by using the
remote control, the keyboard, or the mouse. You can
easily switch back and forth between them by
moving the mouse or by pressing a button on the
remote control or the keyboard.
When using the remote control and the Media
Center program, you can:
■ Watch, record, and play back television
programs.
■ Pause, rewind, and fast-forward TV programs.
■ Watch an instant replay.
■ Play back your digital videos.
■ View your digital pictures or play them as a
slide show with music. Easily print your
photos.
■ Browse, select, and play music CD files with
full-screen visualizations.
With Media Center you can play all kinds of audio,
video, and picture media by using a specially
designed remote control. Media Center allows you
to access an electronic Program Guide, which gets
updated over the Internet. Whether you are
recording TV programs or sharing a digital photo
album, you can do all your entertaining using the
powerful remote control.
You can run Media Center side by side with other
Windows software programs. It’s possible to browse
through your pictures, watch videos, play music,
and even record TV while using other Windows
programs.
■ Watch or listen to media while doing other
tasks on your computer.
■ Record your TV shows automatically while you
are doing something else.
■ Open specific windows in Media Center by
using the shortcut buttons on the remote
control or on the front of your computer.
■ Update the Program Guide from the Internet.
■ Listen to FM radio stations.
n
Some of the Media
Center features
listed are for select
models only.
■ Record CD tracks to your media library.
■ Play DVD movies. Resume playing your DVDs
where you left off.
■ Access streaming music and video
subscription services.
■ Navigate the Media Center program by using
either the remote control or the mouse and
keyboard.
n
The Television
Program Guide may
not be available in all
countries/regions.
Using Media Center 1
Page 6
Getting the most out of Media Center
It is best to have the following items completed
before trying to use Media Center; otherwise, many
of the program features won’t be available to you.
Before opening Media Center, make sure:
■ The HP Media Center PC is set up correctly.
For setup information, refer to the setup poster.
■ The remote control has two AA alkaline
batteries installed.
■ The remote sensor is properly plugged into a
USB connector on your PC and is placed
where you can point the remote control at it.
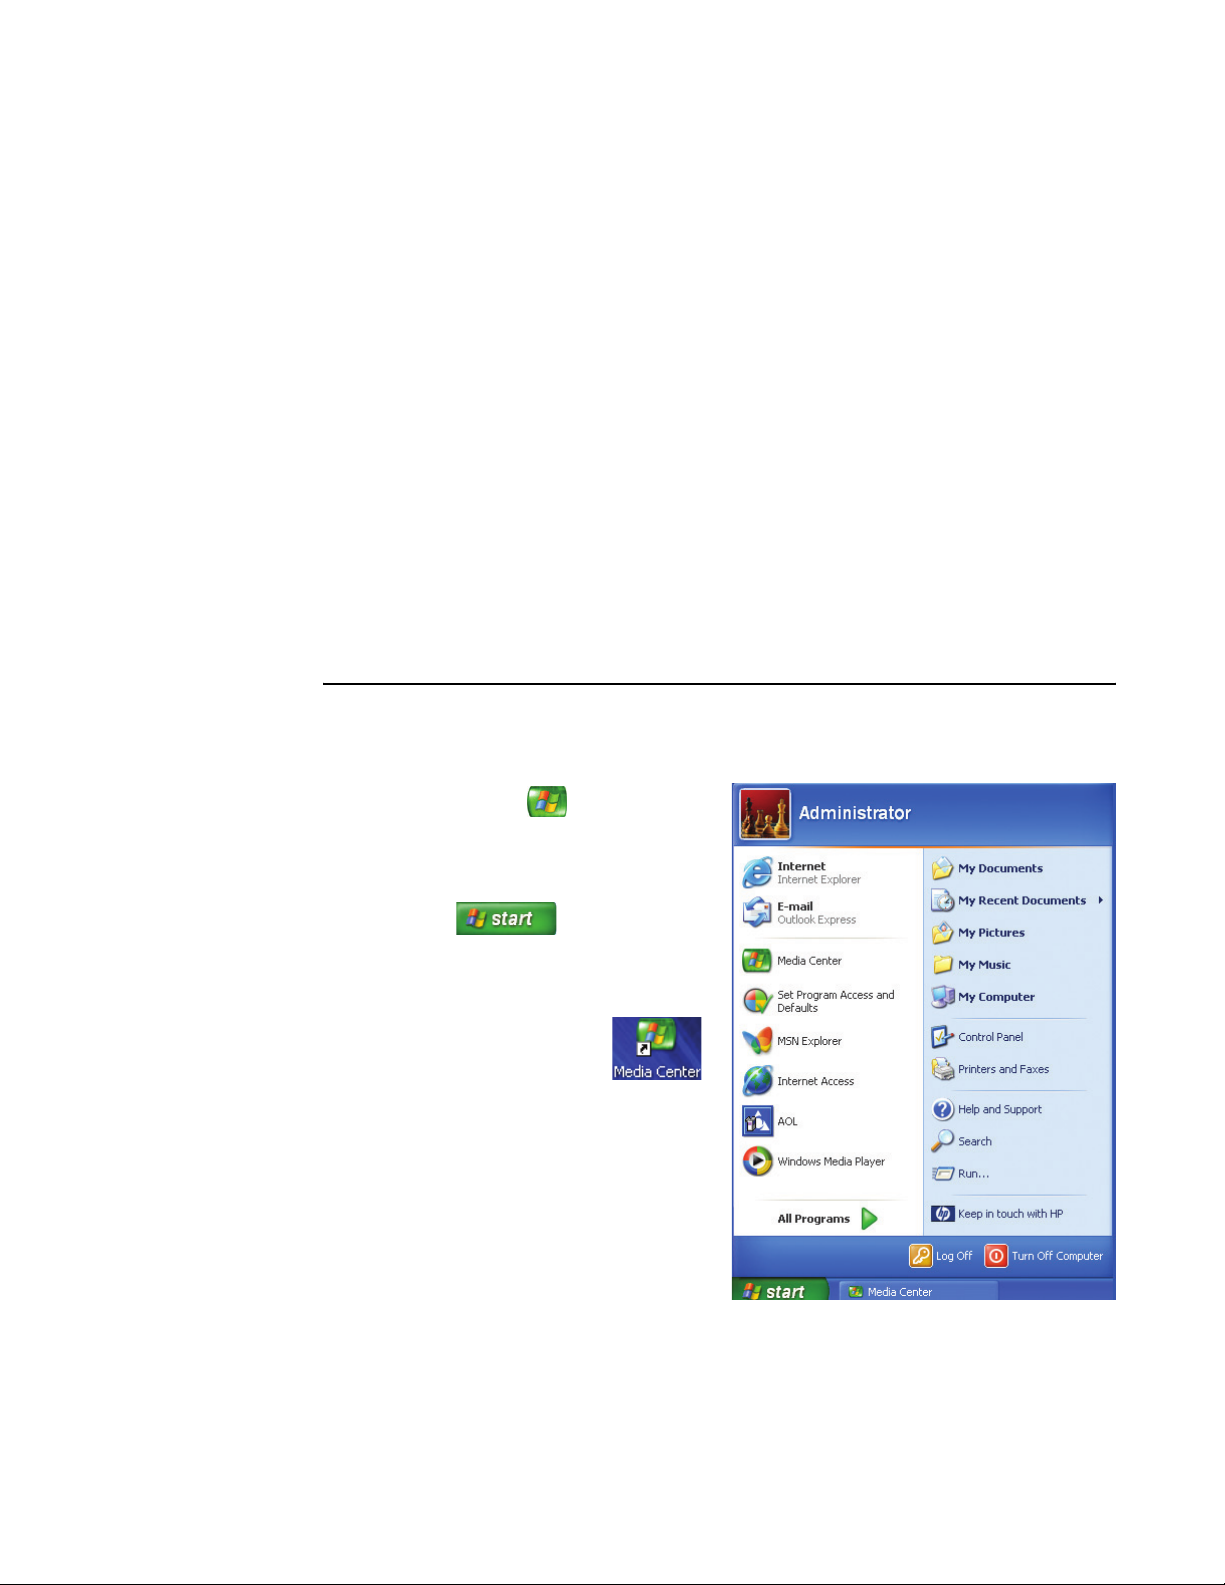
Opening Media Center
To open the Media Center program:
■ Press the Start button on your remote
control.
Or
■ Click Start on the taskbar, and
then click Media Center.
Or
■ Click the Media Center icon
on your desktop. You can create
a Media Center shortcut icon by
clicking and dragging the
Media Center icon in the Start
menu to your desktop.
■ The remote sensor control cable is securely
plugged into the remote sensor and attached
to your cable or satellite set-top box, if
present.
■ The PC has a properly configured and
working Internet connection.
■ The PC is properly connected to your TV
signal source.
2 HP Media Center PC Software Guide
Page 7
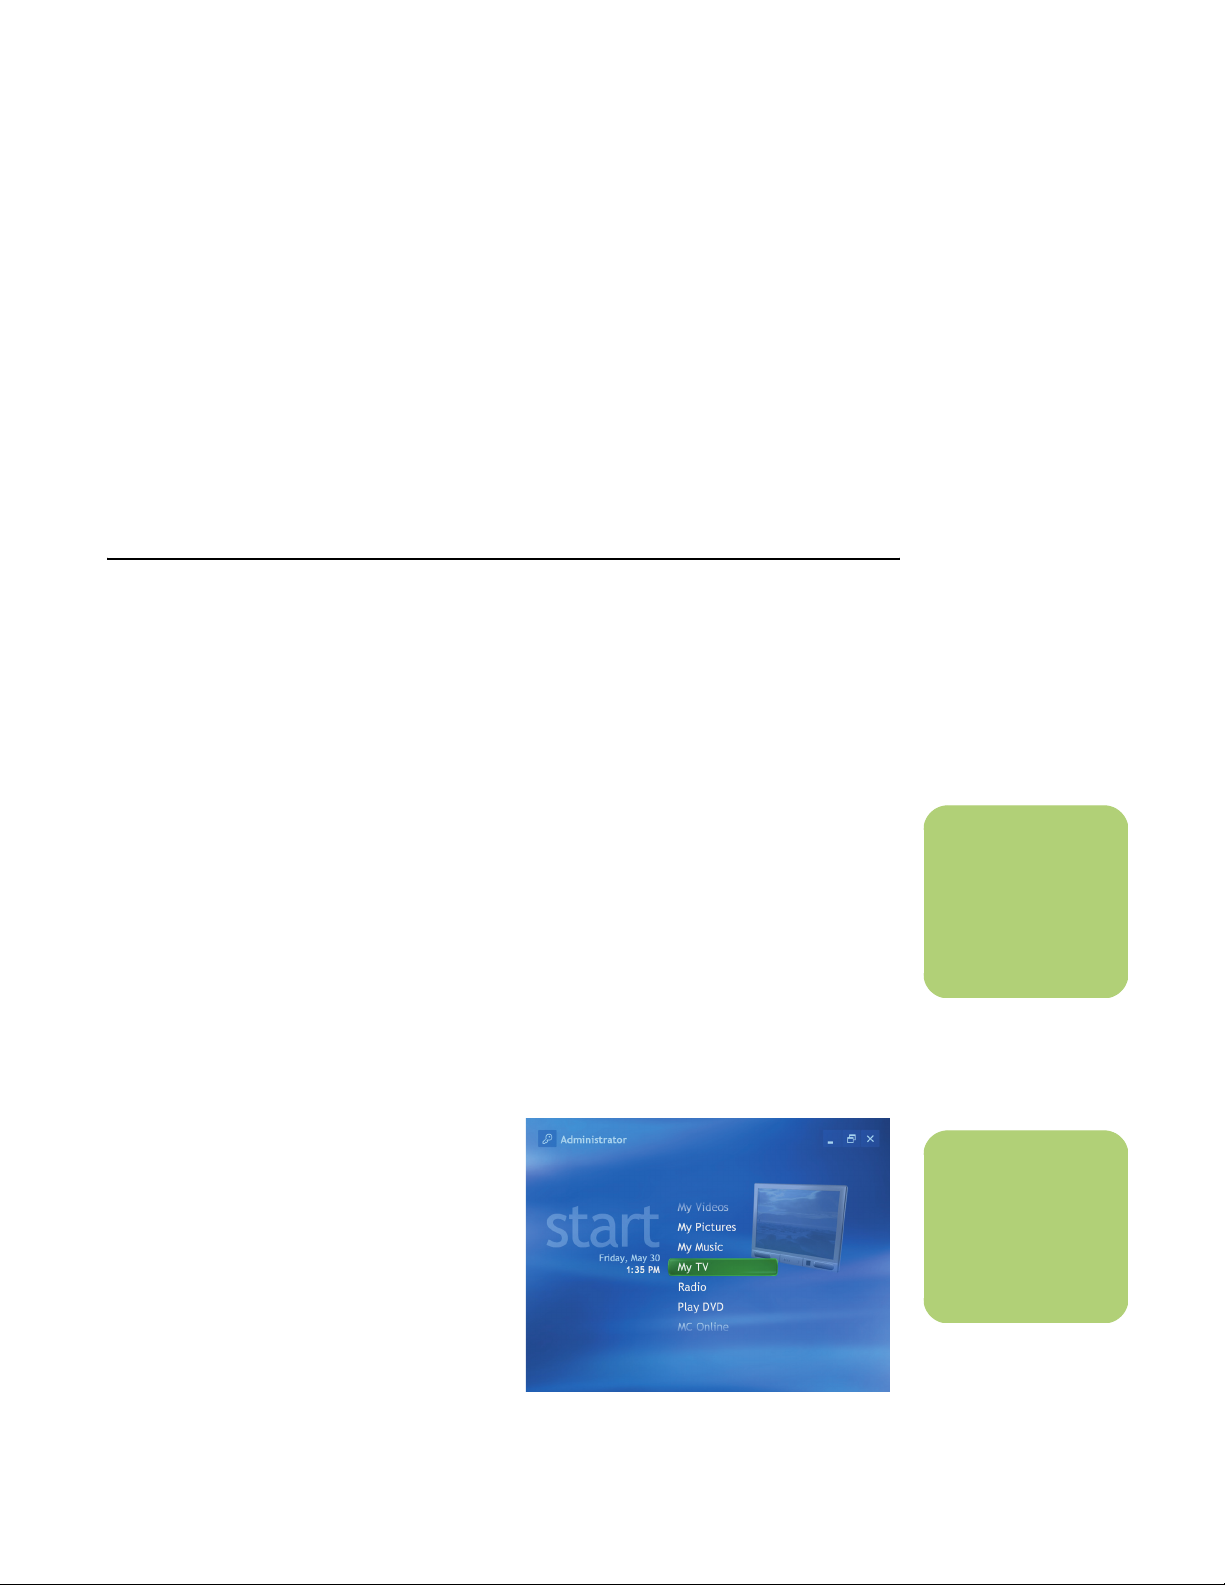
Navigating Media Center
In the Media Center windows, a selected item such
as a folder, file, or menu item is outlined with a
green border.
To select items in Media Center, use the arrow
buttons on the remote control, and then use the
OK button to enter your selection.
If you have media playing, such as music or
television, it appears in an inset window in the
lower-left corner. To switch from watching your
media in the inset window to watching it in fullscreen mode, use the arrows on the remote control
to select it and then press OK.
Using Media Center 3
Page 8
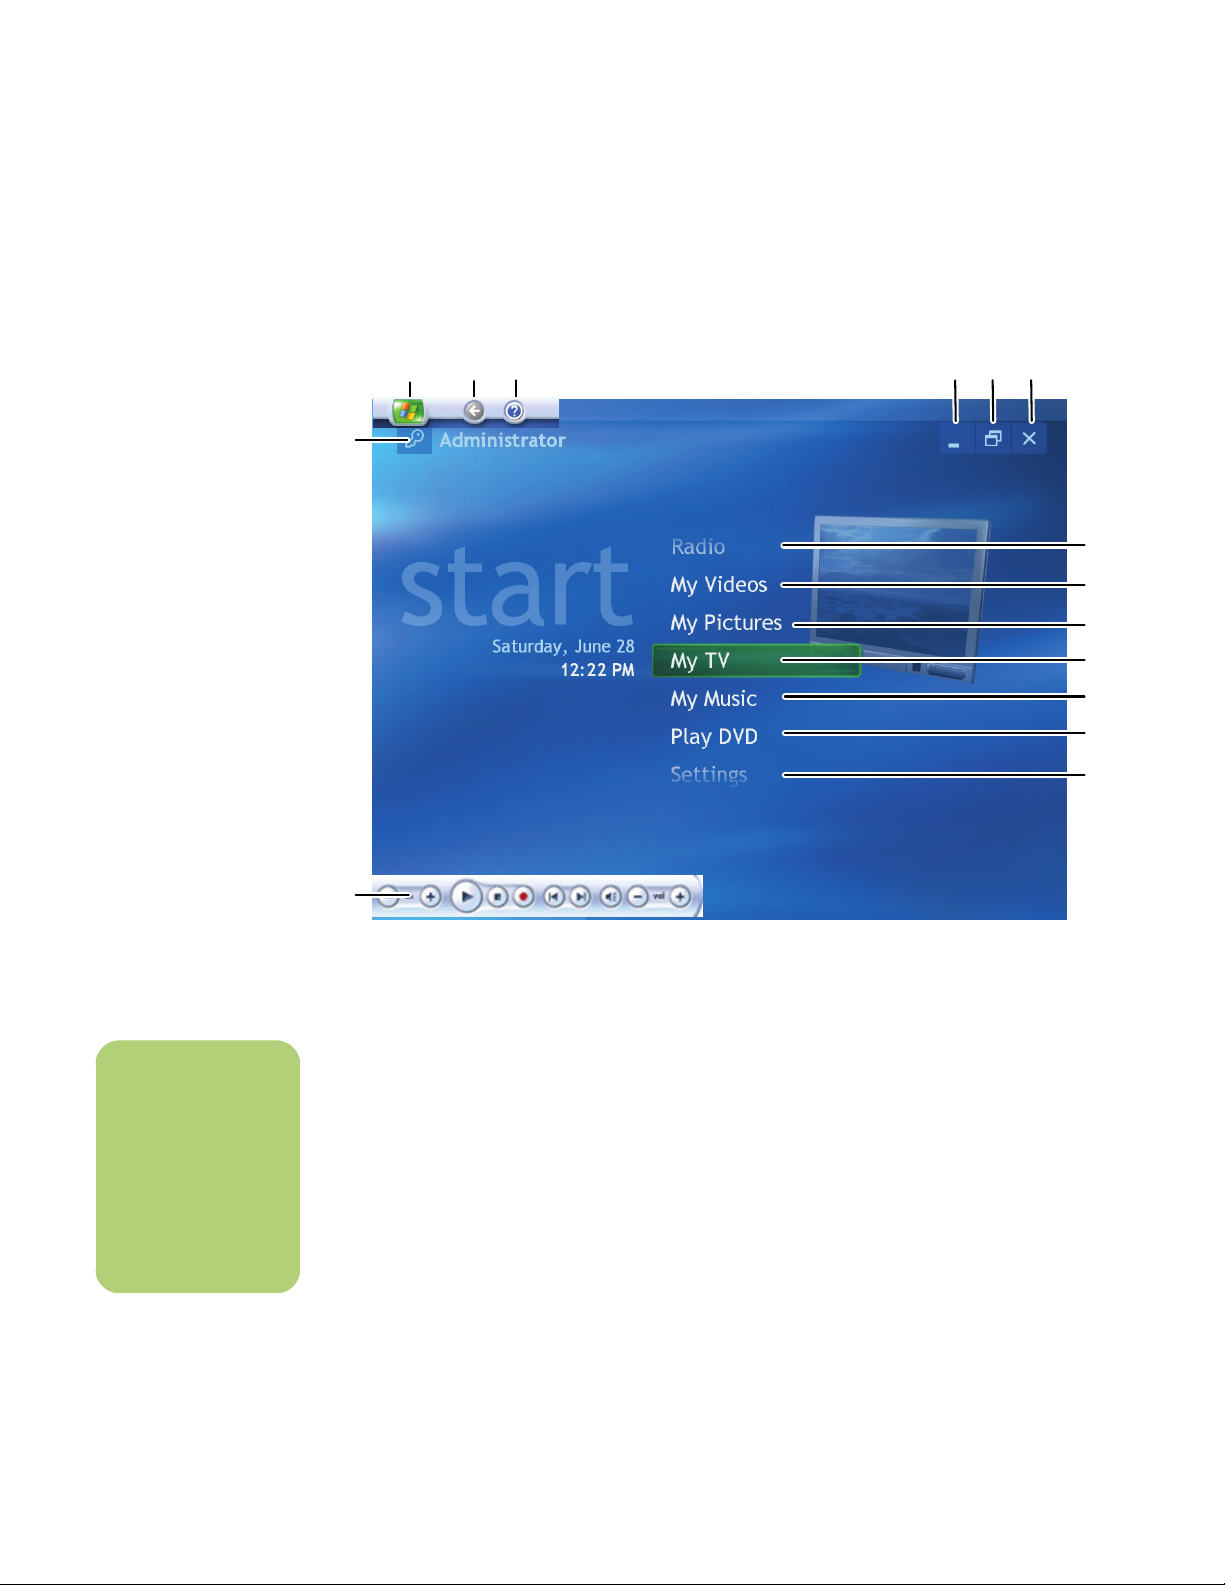
Media Center Start Menu
CDE FGH
A
B
J
K
L
M
N
O
P
A Log off to end your Media Center session or
to switch users
B Use media playback controls
C Open Media Center Start menu
D Go back one screen
E Open Media Center Help
n
You can use the
Minimize and Resize
buttons to run Media
Center side by side
with another
program from your
desktop.
F Minimize Media Center window
G Resize Media Center window
H Close Media Center window
J Play FM radio stations
K Watch your home videos
4 HP Media Center PC Software Guide
L View digital pictures or play a slide show,
print photos
M Watch, record, and play back live TV
programs
N Play music files or music CDs
O Watch DVD movies
P Change Media Center program settings
Other menus not shown:
■ Online Spotlight — link to the Media Center
Web site for the latest information about your
Media Center PC and software.
■ More Programs — link to other programs.
Once you open these programs, they appear
in your Media Center Start menu.
Page 9
Setting the PC Location for the Program Guide
During the initial setup of the PC, you specify your
PC country/region location. Media Center uses this
information to select the country/region for the
Program Guide.
The Media Center PC uses United States as the PC
location by default. If you did not select your correct
location, and if this location does not match the ZIP
code or postal code location you entered in the
To set the PC location
1 Click Start on the taskbar, and then click
Control Panel.
2 Click Date, Time, Language, and
Regional Options, if it is present.
3 Click Regional and Language Options.
4 Click the Regional Options tab.
Media Center Setup
Media Center Program Guide setting, an error
message may appear. You may also see No data
available in the Program Guide, or you may not be
able to get the correct Program Guide.
To resolve this problem, set the location for your PC
in the Control Panel first and then in the Media
Center Settings window.
5 In Standards and formats, select your
language and country/region; for example,
English (Canada), from the drop-down list.
6 Select your location from the drop-down list.
7 Click Apply, and then click OK.
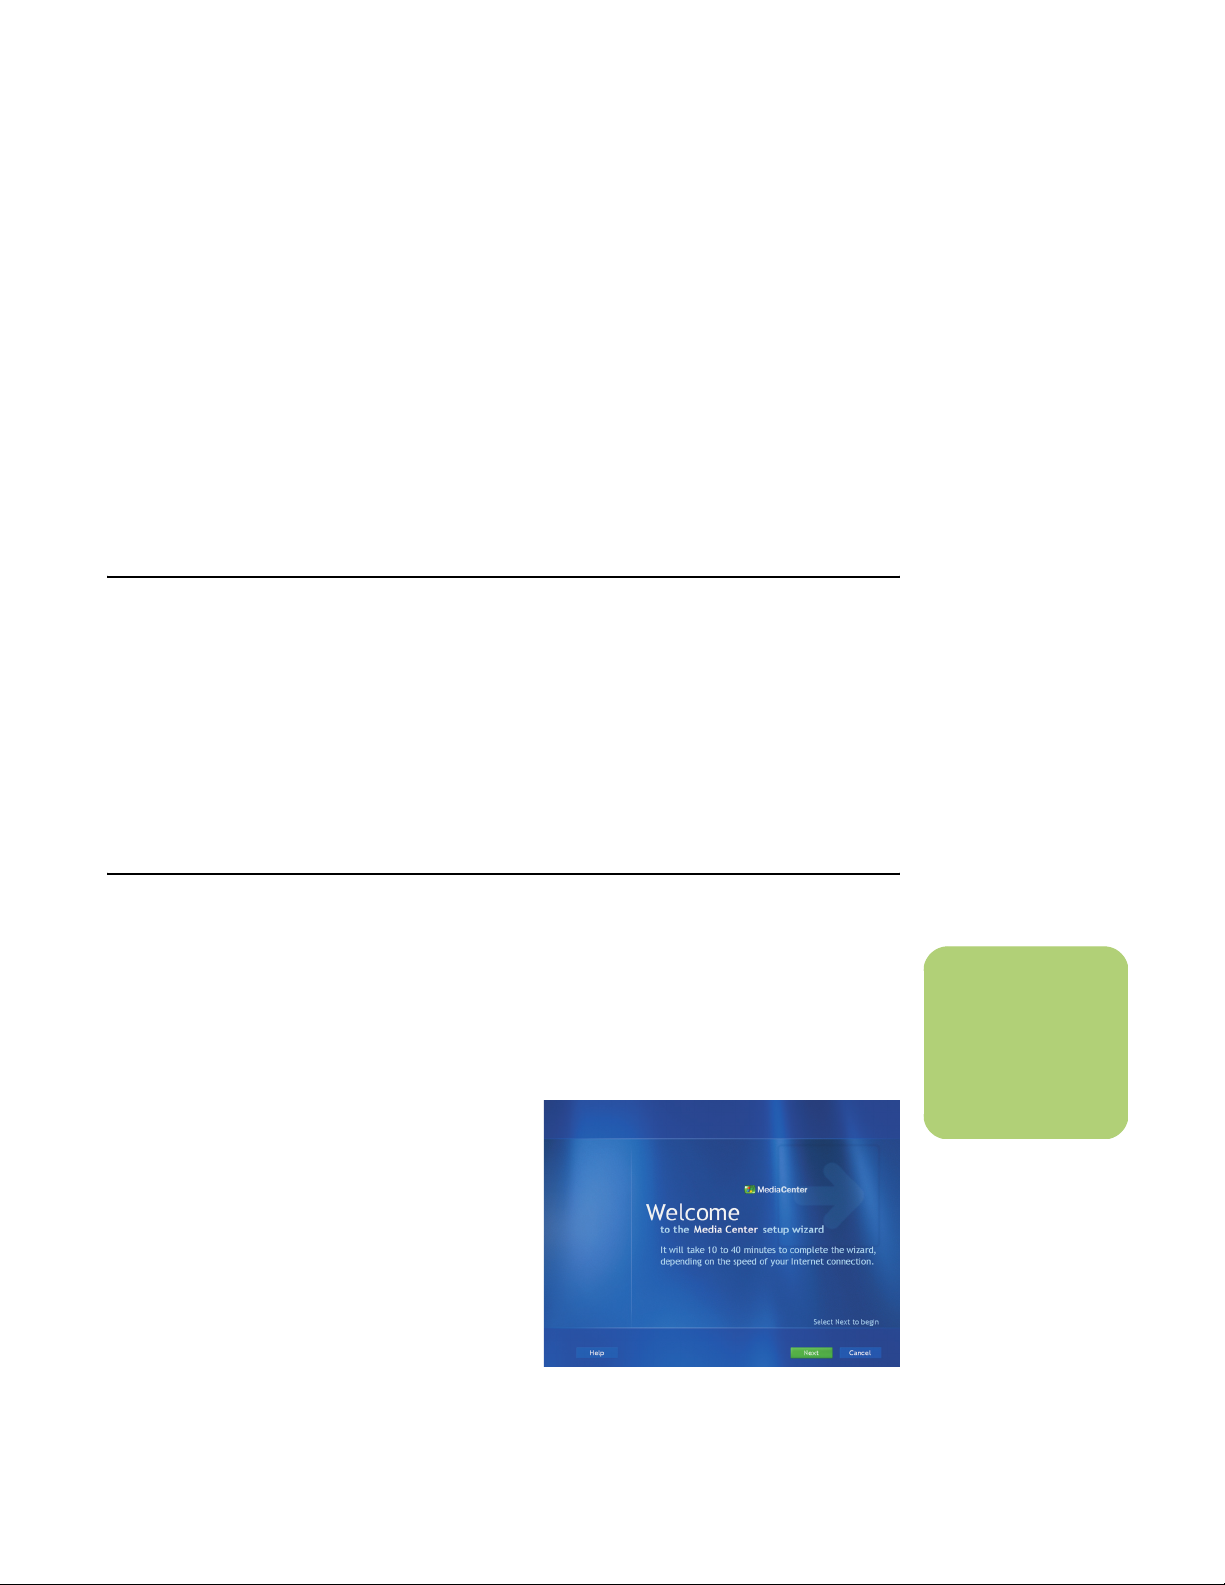
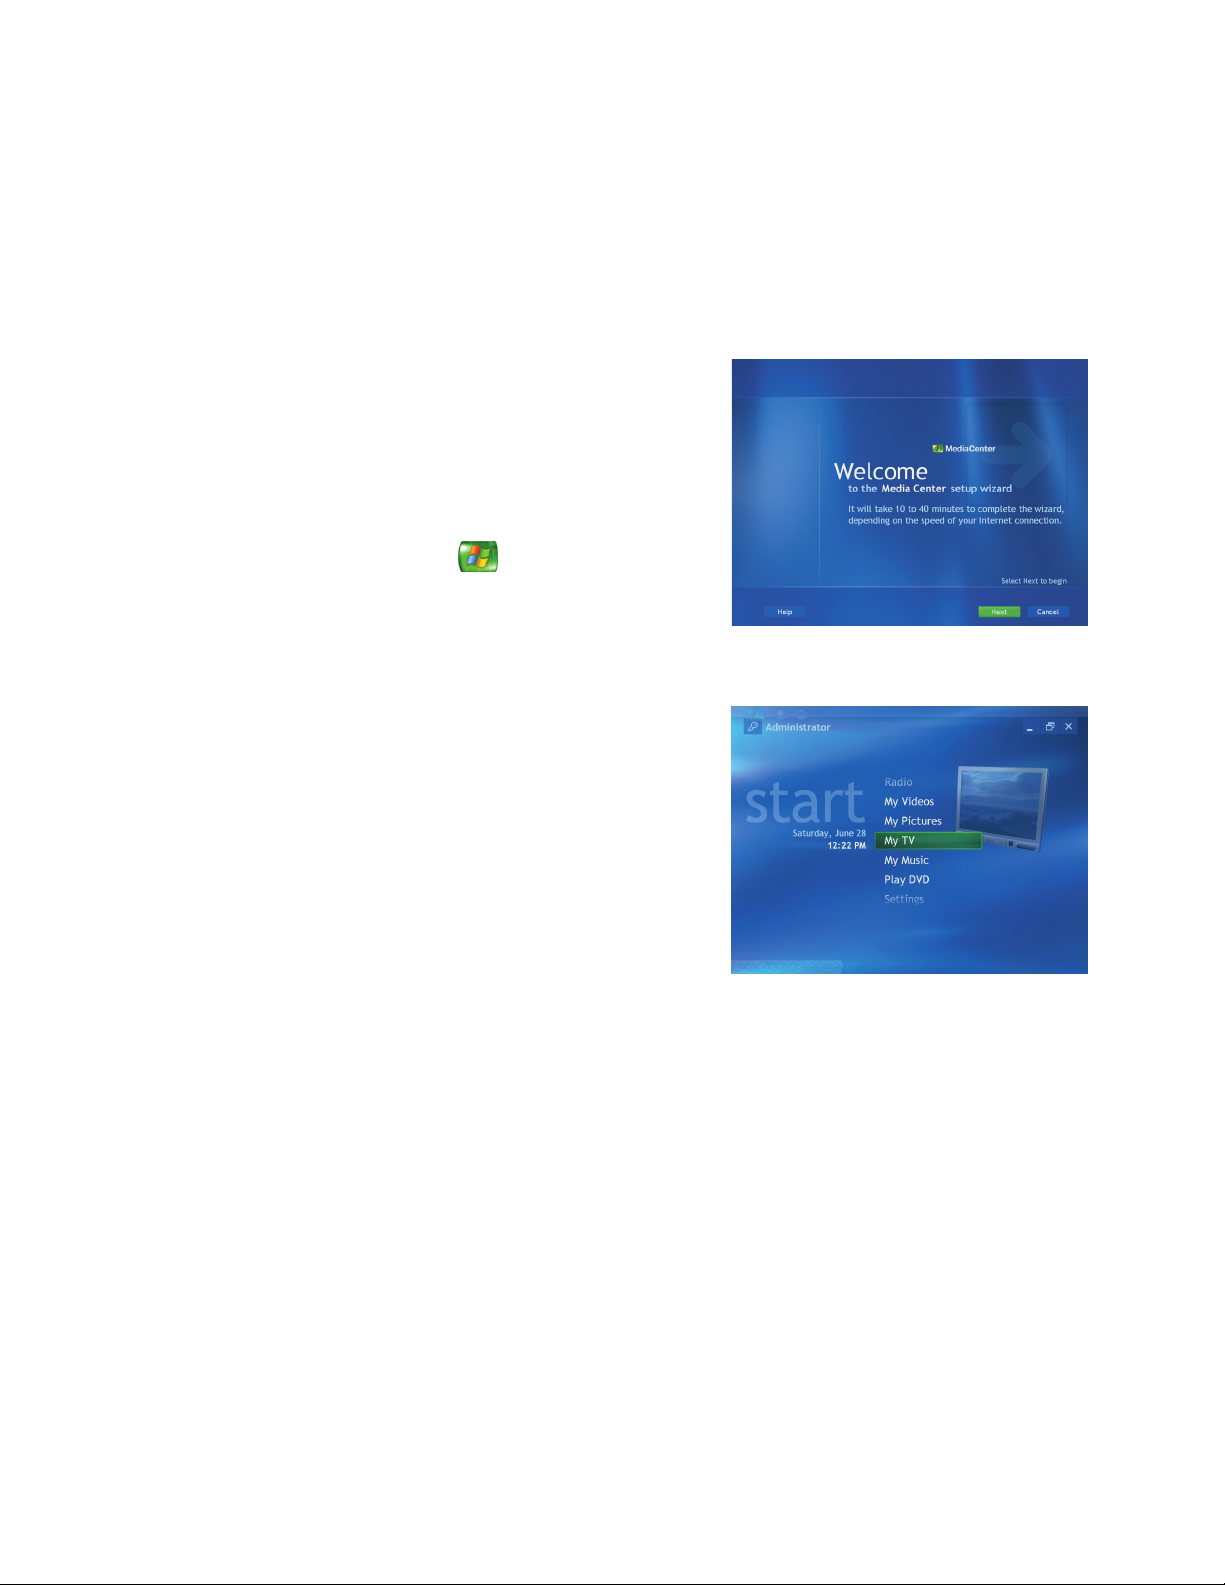
The first time you open Media Center, a setup
wizard opens. Use the setup wizard to test your
remote control and to configure your Internet
connection, TV signal, and Program Guide. The
Media Center setup wizard may take approximately
10 to 40 minutes to complete.
To complete the setup wizard you need to:
■ Be logged on as the administrator. For more
information, go to Microsoft Help.
■ Have an Internet connection already set up to
download your television service provider’s
program guide.
■ Provide your ZIP code or postal code.
■ Provide the name of your television service
provider, if you subscribe to either cable or
satellite TV.
■ Provide the brand of your set-top box, if you
use one.
n
You can click the Help
button anytime while
completing the setup
wizard.
Using Media Center 5
Page 10
n
Use Media Center
settings to:
■ Change settings for
your television
service provider.
■ Change settings for
your Internet
Service Provider.
■ Manually update
the My TV Program
Guide.
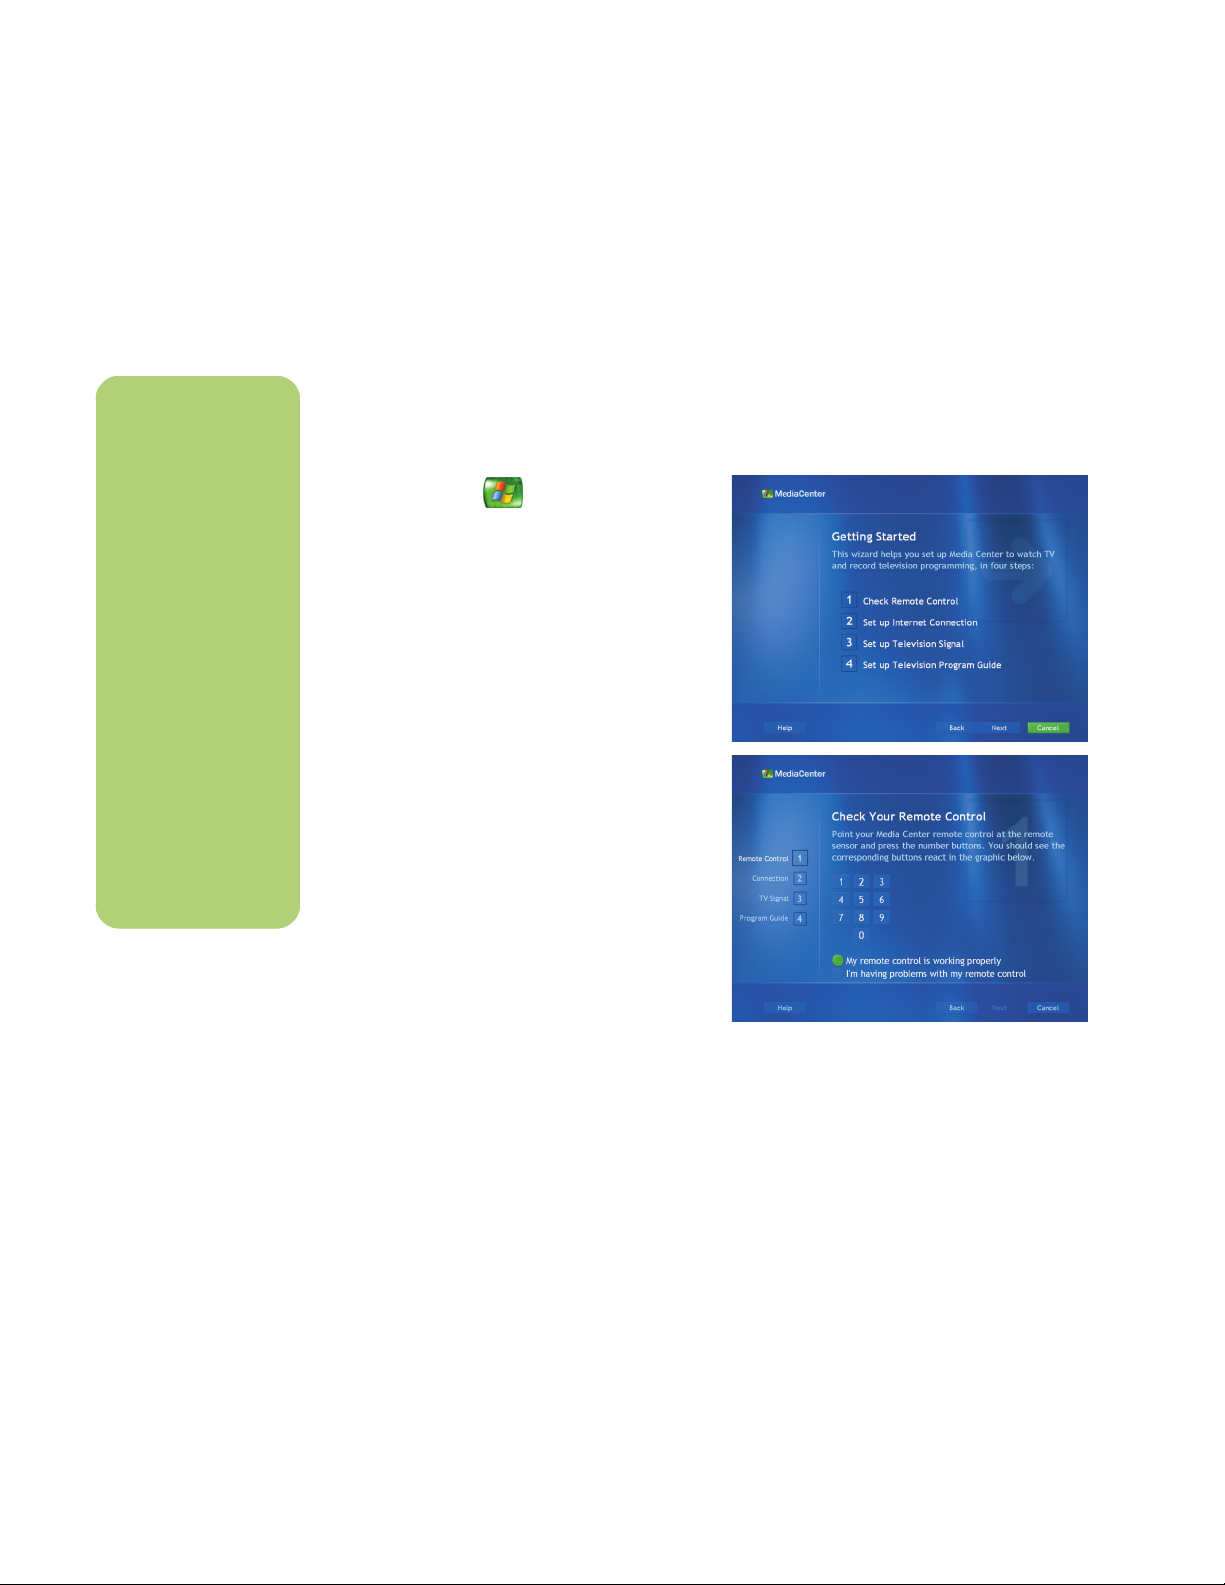
Setting Up Media Center
It is best to complete each step in the Media Center
setup wizard to be able to use all the features in
Media Center. You can select to bypass these steps
and complete them later in the Settings window in
Media Center.
Press the Start button on the remote control.
The Media Center setup wizard opens. Follow the
onscreen instructions to complete the following
four steps:
■ Check your remote
control.
■ Change your postal
code to receive the
correct Program
Guide for
your area.
1 Check the remote control
This step is an interactive test to make sure the
remote control is working with the remote
sensor. Before performing this test:
■ Make sure the remote control has two AA
alkaline batteries installed.
■ Make sure the remote control sensor is
plugged into a USB port on the PC.
■ Make sure you point the remote control at
the remote sensor.
■ Make sure the LED on the remote control
and the remote sensor blinks when a button
is pressed.
6 HP Media Center PC Software Guide
Page 11

2 Select the download method for your
Internet connection
In this step, you select options for your Internet
connection so that Media Center can
download and update your Program Guide
and display information about your music CDs
and other media.
a You can have Media Center automatically
download the Guide when connected, or
you can manually download the Guide
when you connect to the Internet. If you
manually download the Guide, you need
to connect to the Internet and then select
Settings from the Media Center Start
menu, select TV, Guide, and then select
Get Guide data.
b Test your connection to the Internet by
selecting the Test button.
To set this up later or change your settings,
you can select Settings from the Media
Center Start menu, select General, and
then select Set up Internet connection.
n
If you choose to
manually download
the Program Guide, it
is best that you
download it once
per day.
n
If you are unable to
identify which set-top
box you have, the
Media Center wizard
prompts you to
manually program
the remote control
buttons that control
the set-top box.
Using Media Center 7
Page 12

3 Set up television signal
This step makes sure your computer receives
the correct TV signal and the correct Program
Guide information. If you have a set-top box,
the setup wizard programs your remote
control to work with your set-top box so that
you can view premium channels. Make sure
the TV signal source is properly connected to
your PC and the correct TV provider is
selected.
a Select your TV service.
n
The Program Guide
may not be
available in all
countries/regions.
b Select if you have a set-top box. Sometimes
a set-top box receives a TV signal. If you
have a set-top box, the Media Center
remote control needs to work with it.
c Prepare for set-top box setup. Make sure:
■ The set-top box is turned on.
■ The TV signal is connected to your
set-top box.
■ The set-top box is connected to your
computer.
■ The remote sensor control cable is
connected properly.
4 Set up the Program Guide
An Internet connection is needed to complete
this step. If your computer isn’t connected to
the Internet or if Media Center hasn’t
configured your ISP information in step 2, you
will see No data available in the Program
Guide.
To set this up later, select Settings from the
Media Center Start menu, select TV, and then
select Guide, and then Reset Guide
lineup.
d Choose a working TV signal to use with
Media Center.
e Select how you change channels.
f Select your set-top box brand.
g Select a remote control code.
h Test channel changing.
i Set the IR signal speed.
j The Guide is automatically downloaded
when you complete all onscreen
instructions.
To set this up later, select Settings from the Media
Center Start menu, select TV, and then select Set
up TV signal.
8 HP Media Center PC Software Guide
Page 13
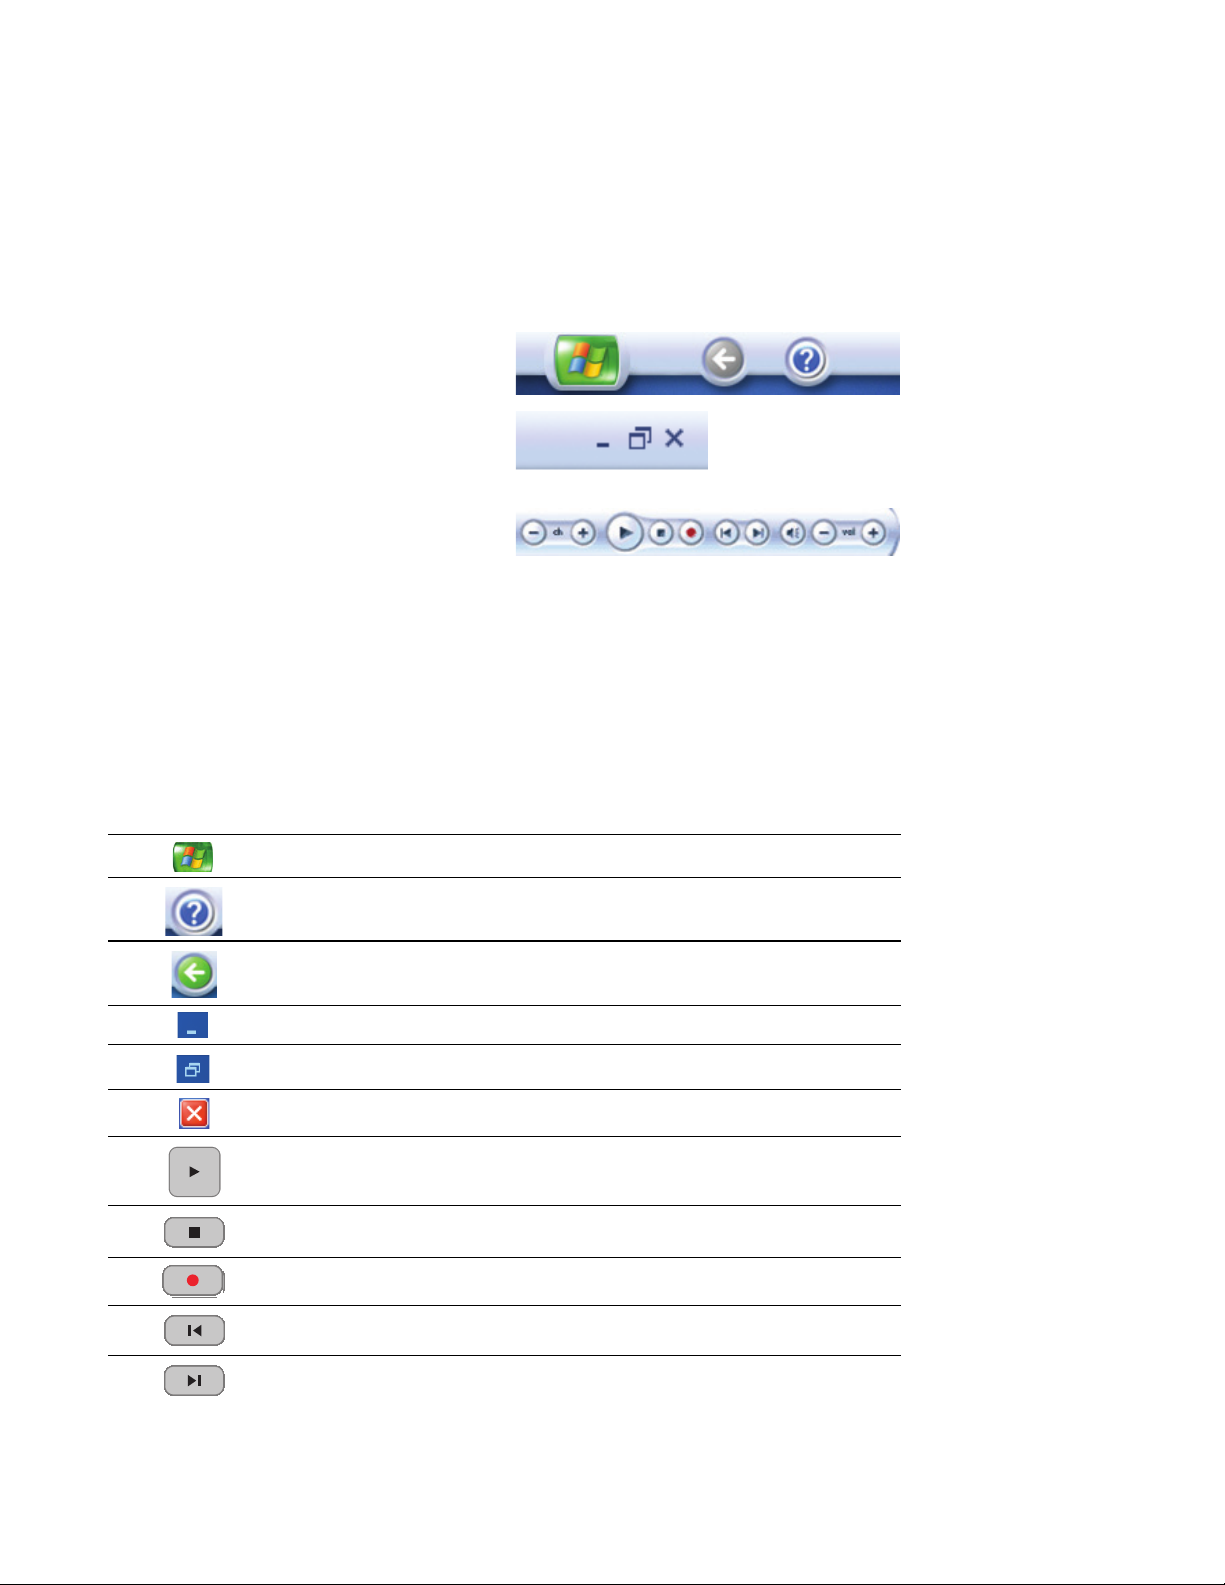
Media Center Menu Bars
When you move the mouse, the Media Center menu
bars appear. When you use the remote control, or
when you stop using the mouse (after 5 seconds),
the menu bars disappear.
You can switch to the desktop at any time without
closing or minimizing Media Center.
You don’t need to minimize the Media Center
window to open another program or go to a Web
site. You can just resize the Media Center window
and then open another program by using the
Start menu.
To display the desktop, select the Minimize icon by
using the arrow buttons on the remote control or by
using the mouse. You can also resize the window to
display Media Center and a part of the desktop.
To return to Media Center, use the mouse to click the
Media Center icon on the taskbar.
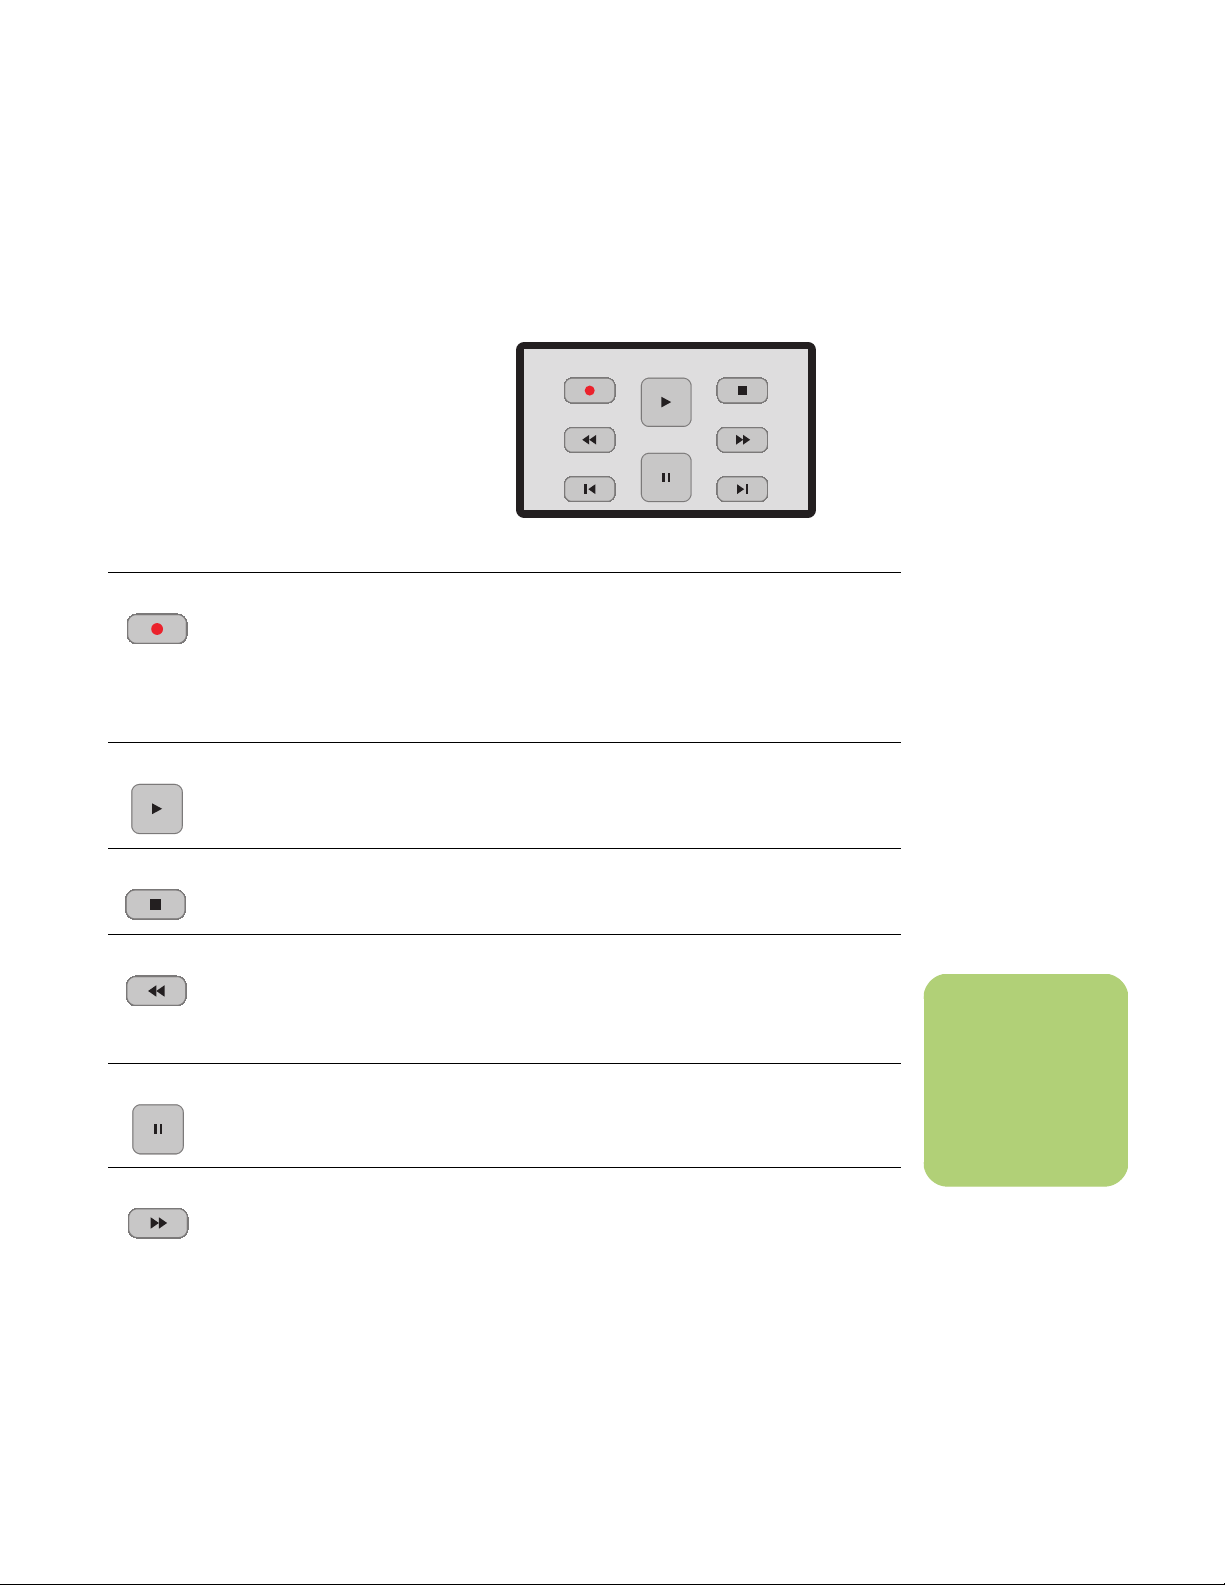
Menu bar icon Action
Open Media Center main menu
Open Media Center Help files in a separate window
Go back one screen
Minimize Media Center window and view the desktop
Resize Media Center window
Close Media Center
Play selected media
Stop selected media
Record selected media
Replay, rewind (previous) selected media
Skip, fast-forward (next) selected media
Using Media Center 9
Page 14

Setting Media Center as the Automatic CD Player
When you insert a CD while Media Center is active,
your CD plays automatically after a few seconds. If
you are not in Media Center, Windows asks you
what you want to do with the CD. To avoid this
message, you can select Media Center as the
primary program to play CDs.
To select Media Center as the primary CD playing
program:
1 Close Media Center.
2 Insert a CD into the drive. A message appears
asking you what you want Windows to do.
3 Select Play Audio CD using Media
Center.
4 Check the Always do the selected
action check box, and then click OK.
Using Shortcut Buttons
Remote control
You can use the remote control shortcut buttons, such
as TV (My TV), Music (My Music), Pictures (My
Pictures), and Videos (My Videos) to open specific
windows in Media Center. Refer to “Using the
Remote Control” on page 13 for more information
about the shortcut buttons on the remote control.
10 HP Media Center PC Software Guide
Page 15
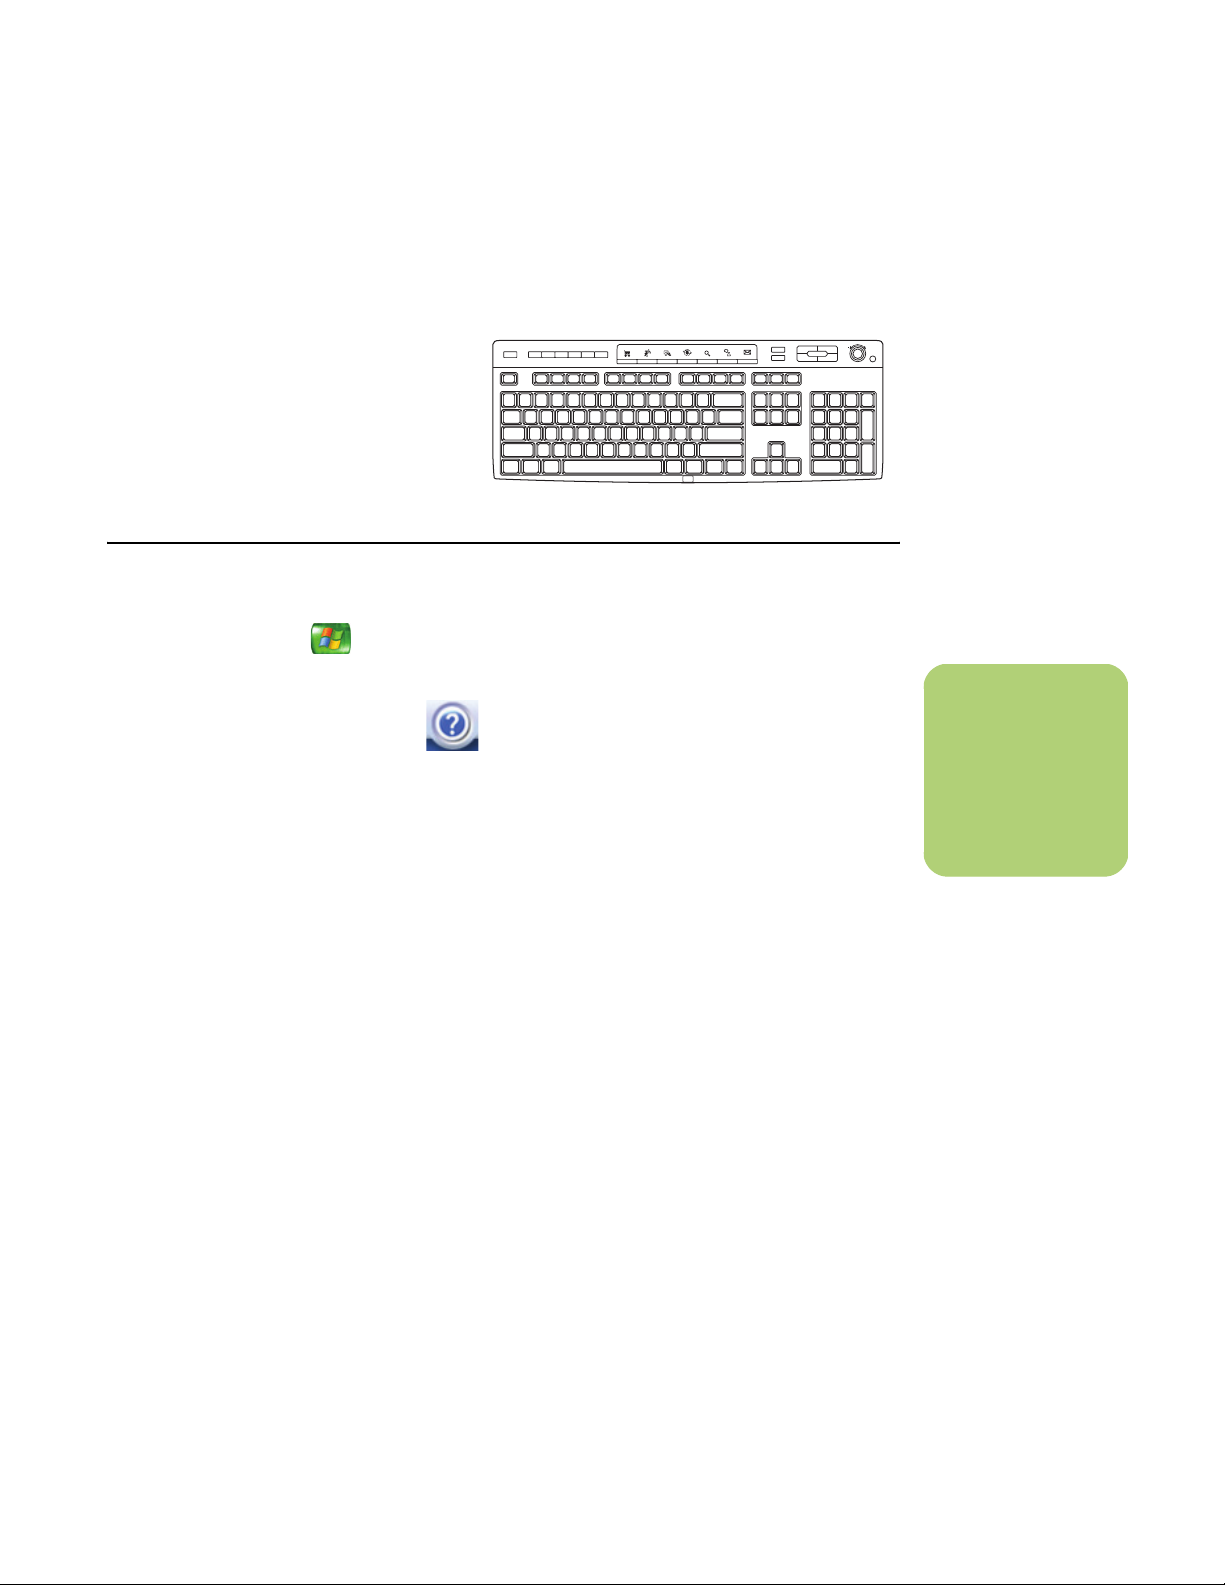
Keyboard
The keyboard shortcut buttons do not open the
Media Center program. Refer to “Using the
Keyboard” in the HP Media Center PC Getting
Started Guide for more information about your
keyboard shortcut keys.
Using Media Center Help
+
1 Press the Start button on the remote
control.
2 Move the mouse to show the Media
Center navigation bar, and then
select the Help (?) icon from any
window in Media Center.
3 When Media Center Help files appear:
■ To open available files, select the
Contents tab and then click the (+) next to
the topic. To view text about a topic, select
the topic. The text appears on the right side
of the window.
■ Select the Index tab and then scroll down
the list of topics, or type a descriptive word
and click the Display button. To view a
topic, double-click it.
■ Select the Search tab and then type a
descriptive word. Click the List Topics
button. To view a topic, double-click it.
4 To return to Media Center, close the Help files
by clicking the Close button on the taskbar of
the Help window.
n
When Media Center is
open, you can also
press F1 on the
keyboard to open
Media Center Help.
Using Media Center 11
Page 16

Changing Media Center Settings
In the Media Center Settings window, you can
change settings for watching television, for viewing
your pictures and slide shows, and for controlling
sound and the display of all the Media Center
windows.
To change your Media Center settings:
n
Some settings such as
parental control
and caption display
settings for TV and
DVDs are included
with select
models only.
1 Press the Start button on the remote
control.
2 Select Settings.
3 Select:
■ General to adjust the appearance of
Media Center window, adjust sounds, set
parental controls to block unwanted TV
channels or movie ratings, select caller ID
settings, set up an Internet connection, or
set up your remote control to work with
Media Center and other settings.
■ TV to set up TV signal, audio, closed
captioning. You can download or edit the
Television Program Guide, view recording
errors, set hard disk drive storage space,
and set recording defaults.
■ Music to select visualizations or song
information to display when playing
asong.
■ Radio to organize or delete pre-set radio
stations.
■ DVDs to select a language for subtitles,
audio tracks, and menus of your DVDs. You
can select audio settings for your speakers
and program remote buttons for DVD.
■ Pictures to show pictures in random
order, in subfolders, and show captions,
change transition time or background
shade for slide shows.
4 Select one of the settings listed. Then, use the
arrow buttons to select an option or follow the
onscreen instructions. If necessary, select
Save to save your changes.
For more information about changing Media Center
settings, refer to the Help menu in Media Center.
12 HP Media Center PC Software Guide
Page 17
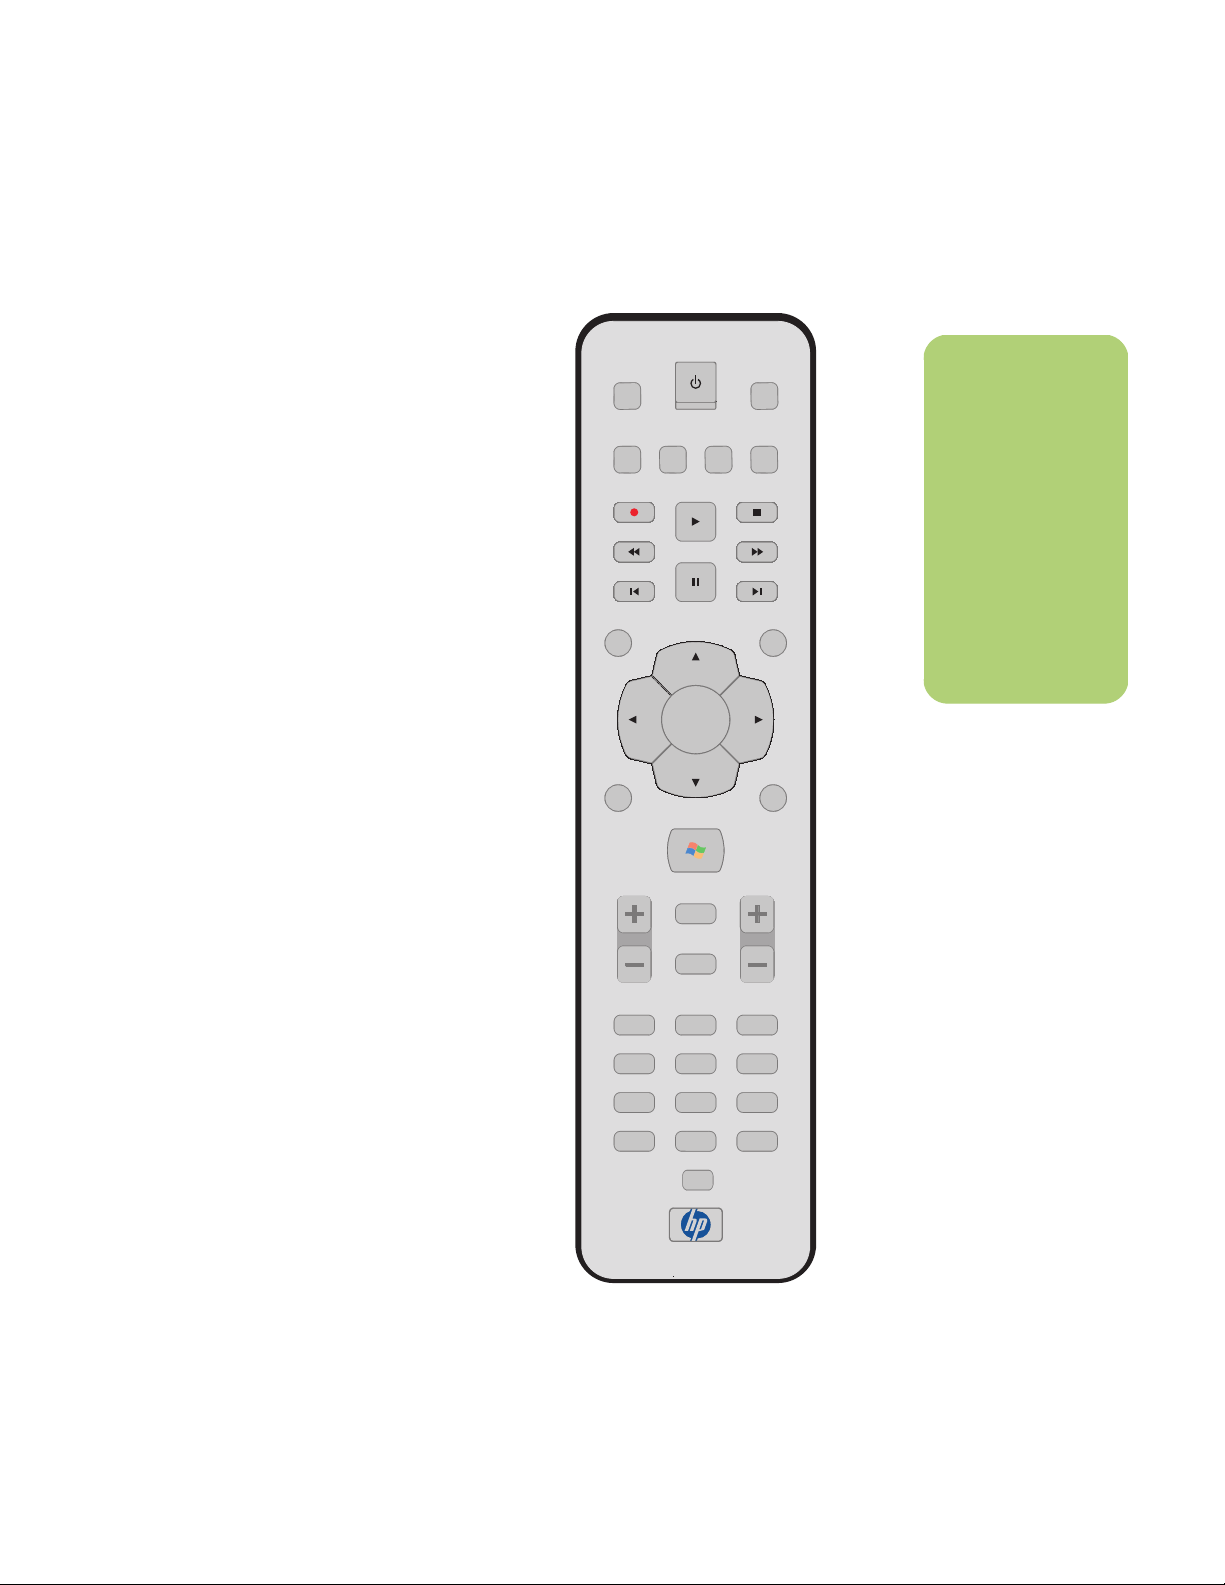
The remote control is designed to work with Media
Center. You can use your remote control with Media
Center to play CDs, DVDs, and videos, to view
pictures, and to watch and record television
programs.
This remote control helps you navigate the Media
Center windows on your computer just as a cable
TV remote control navigates cable TV options or
controls the playback of a movie in a VCR or DVD
player.
Remote control can:
■ Navigate and control all Media Center
windows.
■ Control the video or live TV display.
■ Place the computer in and out of
standby mode.
Remote control cannot:
■ Navigate the Windows desktop or control
other computer programs outside of Media
Center.
Using the Remote Control
DVD
MENU
TV
n
RADIO
RECORD
REPLAY
BACK
LIVE TV
REW
MUSIC
PICTURES
PLAY
PAUSE
OK
VIDEOS
STOP
FWD
SKIP
GUIDE
RECORDED
TV
The remote control
can send a strong
signal to the remote
sensor from within
a range of about
26 feet.
Make sure there is
nothing blocking the
pathway between
your remote control
and the remote
sensor.
■ Be used as a VCR, DVD player, or stereo
remote control.
■ Turn the computer on or off (shut down PC).
■ Turn a TV that is connected to your computer
on or off.
VOLUME
MORE INFO
MUTE
ABC
GHI
PQRS
CLEAR
JKL
TUV
[
0
PRINT
hp media center
CHANNEL/
PAGE
DEF
321
MNO
654
WXYZ
987
ENTER
Using the Remote Control 13
Page 18
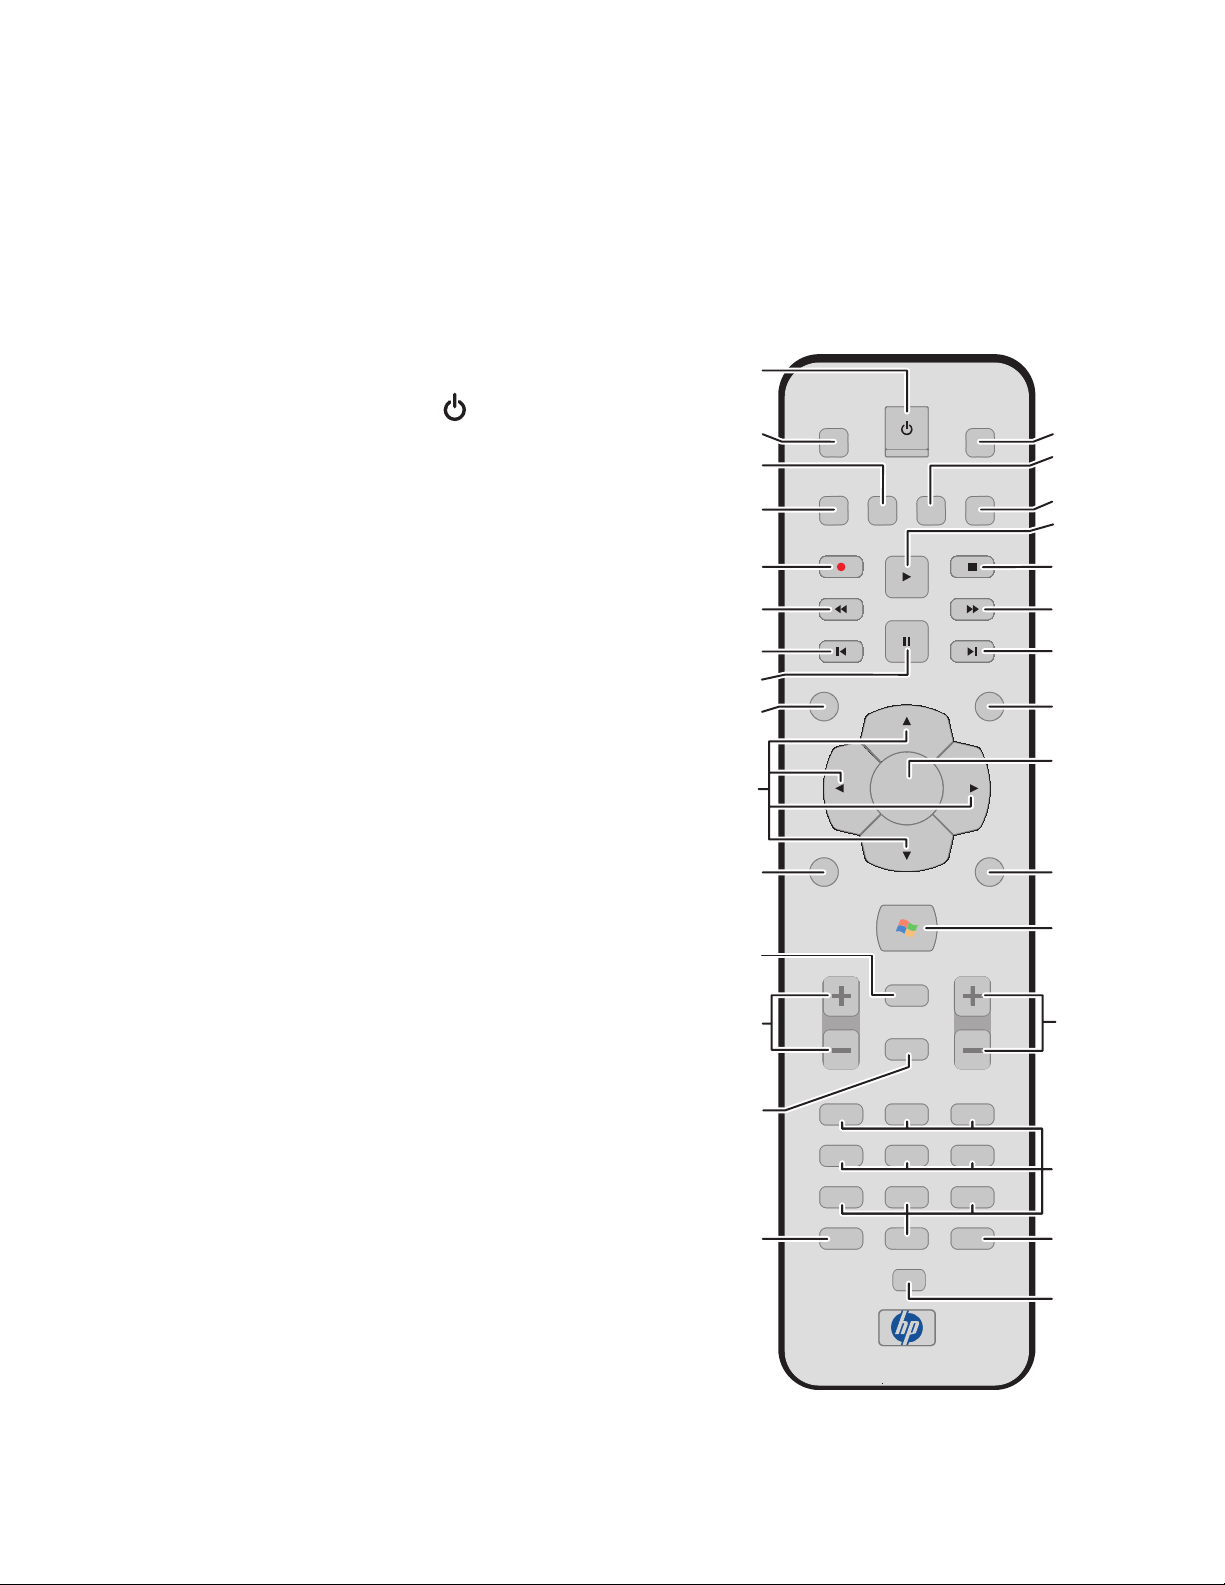
Remote Control Buttons Overview
Features and location may vary
A Standby puts the PC into and out of a
power-reduced state.
B DVD Menu opens main menu on a DVD
movie, if available.
CMusic opens the My Music window.
DRadio opens the FM Radio window.
ERecord records a selected television program
and stores it on the hard disk.
FREW (Rewind) moves the media backward at
two speeds.
GReplay moves media backward 7 seconds.
HPause pauses audio and video tracks, and
pauses live or recorded TV programs.
JBack returns PC to the previous window within
Media Center.
KArrow buttons move the cursor to navigate
within all Media Center windows. Advances to
the next picture in a slide show.
LLive TV is a shortcut to the full-screen view of
live TV. It also moves to the current point in a
live TV program after pausing live TV.
A
D
G
H
K
M
N
DVD
MENU
B
C
MUSIC
RADIO
PICTURES
TV
VIDEOS
Q
R
S
T
RECORD
PLAY
E
REW
F
REPLAY
PAUSE
STOP
U
FWD
V
SKIP
W
BACK
J
GUIDE
X
Y
OK
L
LIVE TV
RECORDED
TV
Z
AA
MUTE
CHANNEL/
PAGE
BB
VOLUME
MORE INFO
MMore Info displays available information
about a selected media file. Allows you to
rotate a picture in My Pictures.
NVolume increases (+) and decreases (–)
sound.
OMute turns computer sound off. The word
Mute is displayed on the screen when Mute
is turned on.
PClear deletes selection and works as the
backspace button does on a keyboard.
14 HP Media Center PC Software Guide
O
ABC
GHI
PQRS
CLEAR
JKL
TUV
P
PRINT
DEF
321
MNO
654
WXYZ
987
ENTER
[
0
CC
DD
EE
hp media center
Page 19

QTV opens the My TV window.
RPictures opens the My Pictures window.
SVideos opens the My Videos window.
TPlay plays selected media.
UStop stops media currently playing.
V FWD (Fast-forward) moves media forward
at three speeds.
WSkip moves media forward, for example,
30 seconds in videos and live TV, or one music
track.
XGuide opens Television Program Guide to
display available TV channels and programs to
watch and record.
YOK selects the desired action or window
option. It acts as the Enter key. If watching TV in
full-screen mode, pressing OK switches back to
the previous channel watched. Press again to
toggle back. It acts the same way as a Jump
button on some TV remote controls.
ZRecorded TV opens the Recorded TV window.
AA Start opens Media Center to the main
Start menu.
BB Channel/Page up (+) and down (–) changes
TV channel or moves page up and down,
depending on available options. It also moves
to next DVD chapter. The name of the TV show
and channel are displayed.
CC 0 to 9 changes channels or enters text into
Media Center search or text box.
DD Enter selects the desired action or window
option. In full-screen mode, press Enter to jump
to the last channel you were watching.
EE Print prints your pictures that you select in the
My Pictures window.
Using the Remote Control 15
Page 20
To begin using your remote control
1 Point the remote control at the remote sensor.
The remote sensor should be located near
your monitor or in a convenient place. Make
sure there is nothing blocking the pathway
between your remote control and the remote
sensor.
2 To start Media Center and to open the
Media Center Start menu, press the
Start button .
3 If this is your first time using the remote
control, the Media Center setup wizard
opens. Follow the onscreen instructions to
complete the remote control setup steps.
Or
If you have completed the Media Center
setup wizard, the Media Center Start menu
opens. Use the arrow keys on the remote
control to select an item, and then press OK
to select an option and to begin using
Media Center.
16 HP Media Center PC Software Guide
Page 21
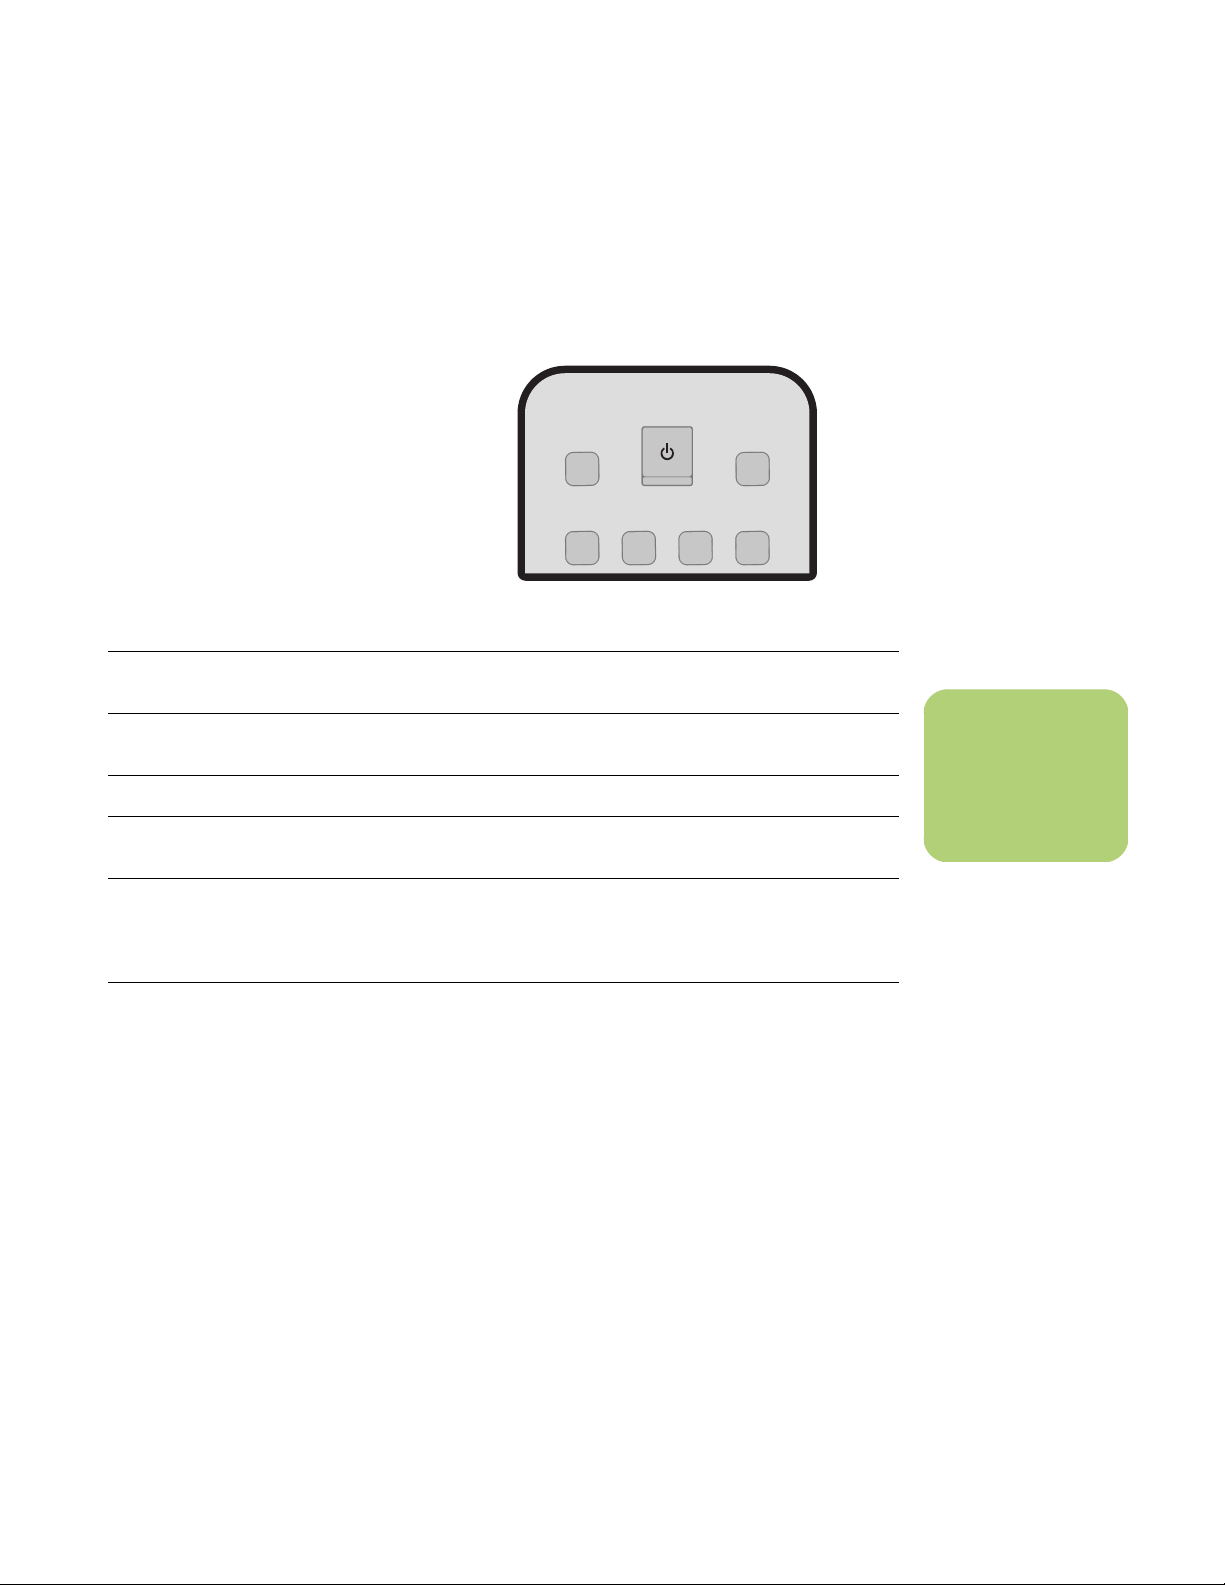
Remote Control Buttons
Direct access buttons
The direct access buttons open the main Media
Center windows.
DVD
MENU
TV
MUSIC
RADIO
Button Function
DVD
Menu
TV Opens the My TV window where you can watch and record TV, open your Television
Radio Opens the FM radio station window where you can select FM radio stations to listen to.
Music Opens the My Music window where you can browse and play music CDs and your
Pictures Opens the My Pictures window where you can search for, sort, and view pictures and
Videos Opens the My Videos window where you can search for, sort, and play back your video
Opens the Play DVD main menu where you can play your DVD movies.
Program Guide, schedule future TV recordings, and find your recorded TV programs.
music files.
slide shows that are stored in the My Pictures or the Shared Pictures folder in Windows
Explorer. You can also view your pictures on other media such as a digital camera or a
memory card.
files that are stored in the My Videos or the Shared Video folder in Windows Explorer.
You can also view your videos on other media such as a memory card.
PICTURES
VIDEOS
n
Some older DVDs
may not include a
DVD menu.
Using the Remote Control 17
Page 22

n
Make sure you turn
off the monitor and
turn down or mute
the volume, for
example, if you have
a scheduled recording
in the middle of the
night and don’t want
to be disturbed.
The PC will not
automatically go into
standby mode if
Media Center is open.
It is best to close
Media Center before
you manually
place the PC in
standby mode.
Standby button
The Standby button puts the computer in to
and out of a power-reduced state, called
standby, which runs the computer with
minimal power until you give it a command. To take
the computer out of standby, press the Standby
button for at least one to two seconds on the remote
control. It is recommended that you use this button
when Media Center is closed.
You must press Standby for one to two seconds.
An LED (light-emitting diode) located under the
Standby button blinks when the remote control is
transmitting a signal to the remote sensor.
Recording in standby mode
Media Center can take the PC out of standby mode
just before a scheduled show begins recording. The
PC returns to standby mode when the recording is
complete.
Media Center begins recording with the monitor
and sound turned on unless you manually turn them
off before the scheduled recording.
Media Center cannot record TV programs if the
computer is turned off.
Remote control LED and the remote sensor LED
Under the Standby button is an LED that blinks when
the remote control is sending a signal to the remote
sensor.
The remote sensor displays a red LED when you
press a button on the remote control (select models
only). Some kinds of lighting may cause the remote
sensor to blink without you pressing the remote
control.
w
If you turn off
(shut down) your PC,
Media Center will not
record a scheduled TV
program. The PC must
be turned on or in
standby mode to
record TV programs.
18 HP Media Center PC Software Guide
Page 23
Media playback buttons
These buttons allow you to play back picture slide
shows, music files, playlists, music CDs, DVD
RECORD
PLAY
STOP
movies, home videos, and live TV, from within the
Media Center program.
REW
PAUSE
REPLAY
FWD
SKIP
Button Function
Record Records TV programs. The Record button works only when My TV is used to play a TV
show. It is inactive when other media is playing.
■ Press Record once to record a TV show while watching live TV or while in the Guide.
■ Press Record twice to record a TV series while in the Guide.
■ Press Record repeatedly, until the record icon disappears from the Guide, to cancel a
recording.
Play Plays selected media.
Stop Stops selected media. When Stop is pressed while you are watching TV, the Media
Center pause buffer continues to record in the background.
REW
Rewinds selected media. Press REW again to increase the rewinding speed.
■ Moves the video backward.
■ Moves live TV program to the beginning of the 30-minute pause buffer.
■ Moves the Television Program Guide back 3 hours.
Pause Pauses selected media. Press Pause and then FWD repeatedly to play media frame by
frame in slow motion. To continue slow motion, you must press the FWD button more
than once.
FWD Moves selected video media forward. Press FWD up to three times to increase the
fast-forwarding speed.
■ Moves MP3 music files forward.
■ Moves a video forward.
■ Moves the Television Program Guide forward 3 hours.
n
Press the REW or the
Replay button and
then the Play button
to watch an instant
replay.
Using the Remote Control 19
Page 24
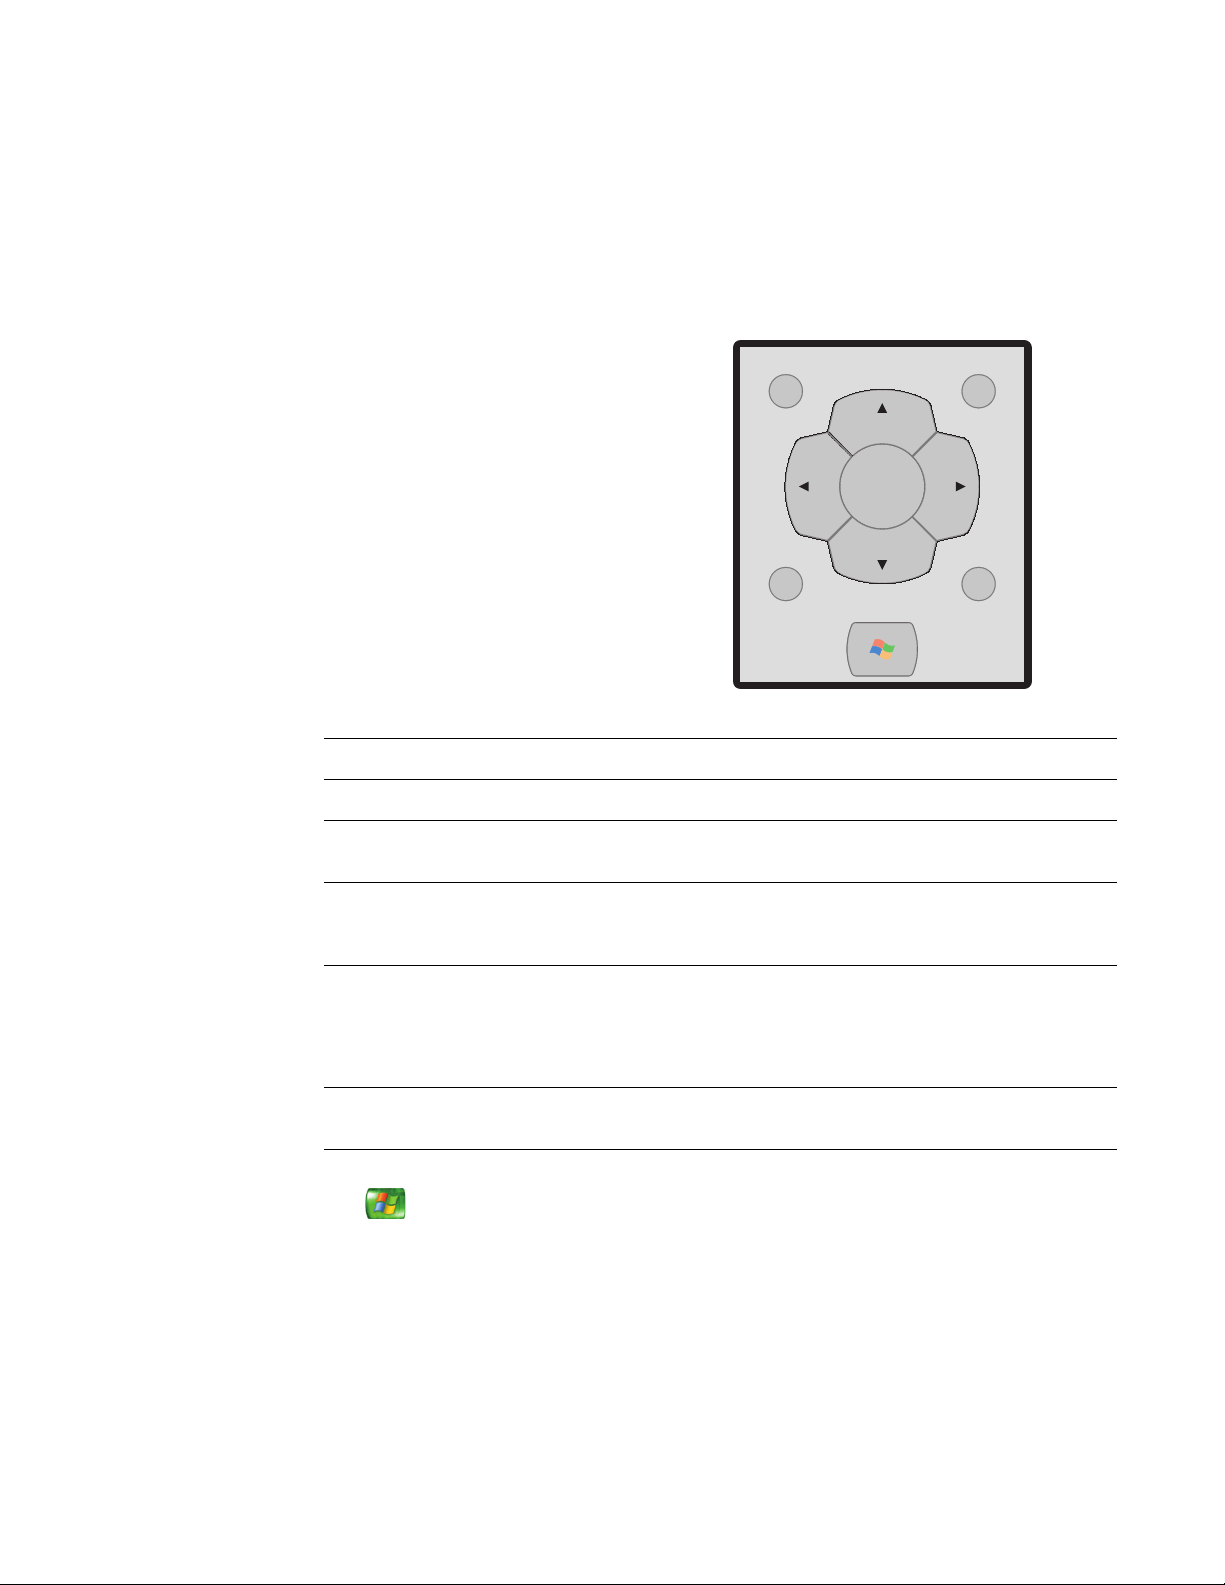
Navigation and other direct access buttons
These buttons allow you to move the cursor and to
select actions within the Media Center windows.
BACK
GUIDE
OK
LIVE TV
RECORDED
TV
Button Function
Back Returns to the previous window.
Guide Opens the electronic Television Program Guide.
Arrows Move between menus, windows, or activities. Move the cursor to select actions within
the Media Center windows.
OK Selects a desired action and works as an Enter button. If you are watching live TV,
press OK to go to the previous channel. Press OK again to toggle back to the original
channel you were watching.
Live TV Moves a TV program forward to the end of the pause buffer and resumes playing live
TV. When you pause a TV program, you can use the Live TV button to move forward to
live TV.
Opens Media Center and then begins playing live TV in full-screen mode.
Recorded TVOpens the Recorded TV window where all your recorded TV programs are stored.
From this window, you can search for and play back a recorded show.
Start Opens the Media Center Start menu if you are in Media Center or if you are at the
desktop.
20 HP Media Center PC Software Guide
Page 25
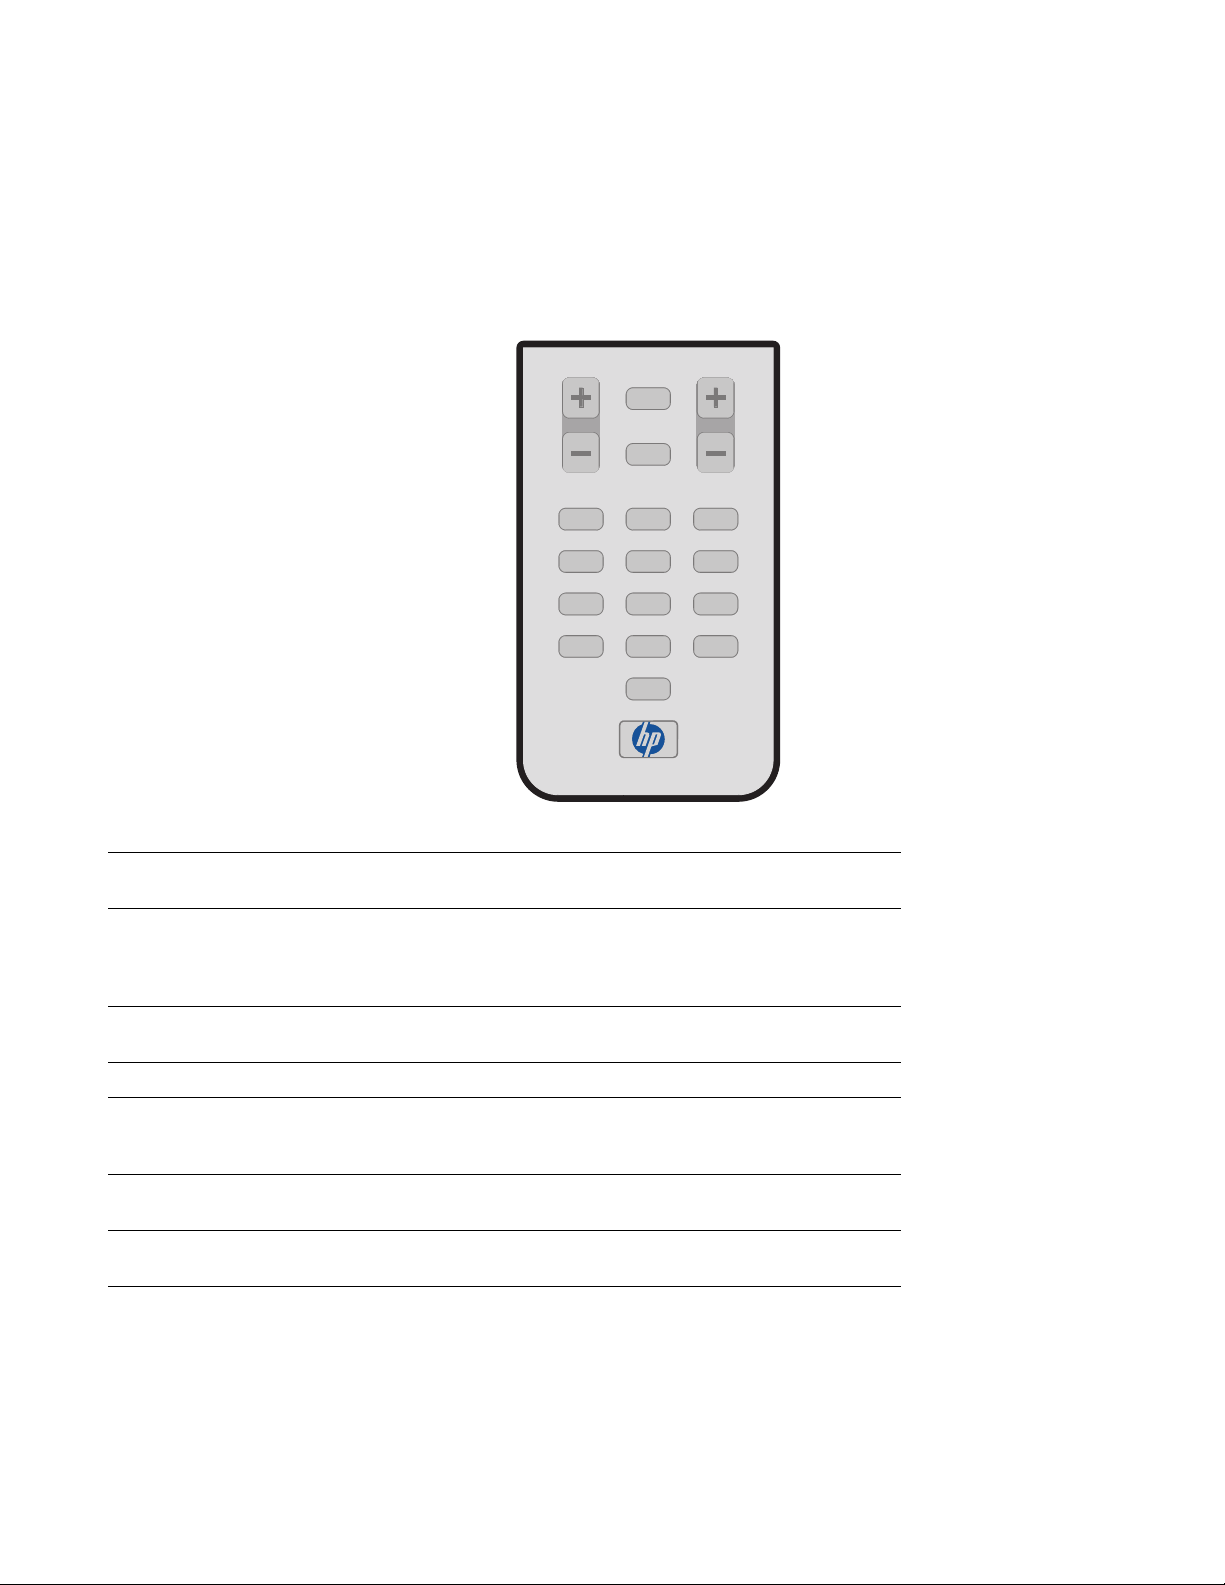
Audio and video buttons
The audio and video buttons change channels,
adjust volume, and show details of selected media.
VOLUME
MORE INFO
MUTE
CHANNEL/
PAGE
ABC
DEF
321
GHI
JKL
MNO
654
PQRS
TUV
WXYZ
987
CLEAR
ENTER
0
PRINT
hp media center
Button Function
Vol ume
(+ and –)
More Info Displays media information. Some media may not include this information. This
Channel/Page
(+ and –)
Increases or decreases PC volume.
button displays details such as TV program summary or music artist. You may need
to be connected to the Internet to receive TV programming or CD artist information.
Displays options to rotate or print your pictures.
Changes channels up and down or moves the cursor to the next or previous page of
options. Changes channels for live TV or moves to the next chapter of a DVD movie.
Mute Turns off the PC sound. The word Mute appears in the window when it is turned on.
Numeric
keypad
Changes channels and enters text. Enters text in the Media Center search feature.
Each time you press a number key, a different character appears. When you find the
character you want, press the Enter button or wait a few seconds.
Clear Deletes the last character entered. Clear works the same way as a backspace
command on a keyboard.
Enter Selects a desired action, menu, or window. Enter works the same way as the OK
button.
Print Prints picture files from the My Pictures window of Media Center. This button does
not print files from Windows Explorer.
Using the Remote Control 21
Page 26

22 HP Media Center PC Software Guide
Page 27
Using an HP Personal Media Drive
The HP Personal Media Drive is an internal and
external USB hard disk drive designed to quickly
and easily increase your storage capacity and to
transfer media files such as digital photos, music,
videos, and other important files. You can also use
the HP Personal Media Drive to back up other
drives on your PC.
The HP Personal Media drive is designed to:
■ Work with the Media Center PC and other
PCs that have a USB port.
■ Store large media files and personal files.
■ Transfer files between PCs.
■ Play media files.
■ Back up your files.
n
The HP Personal
Media Drive is sold
separately.
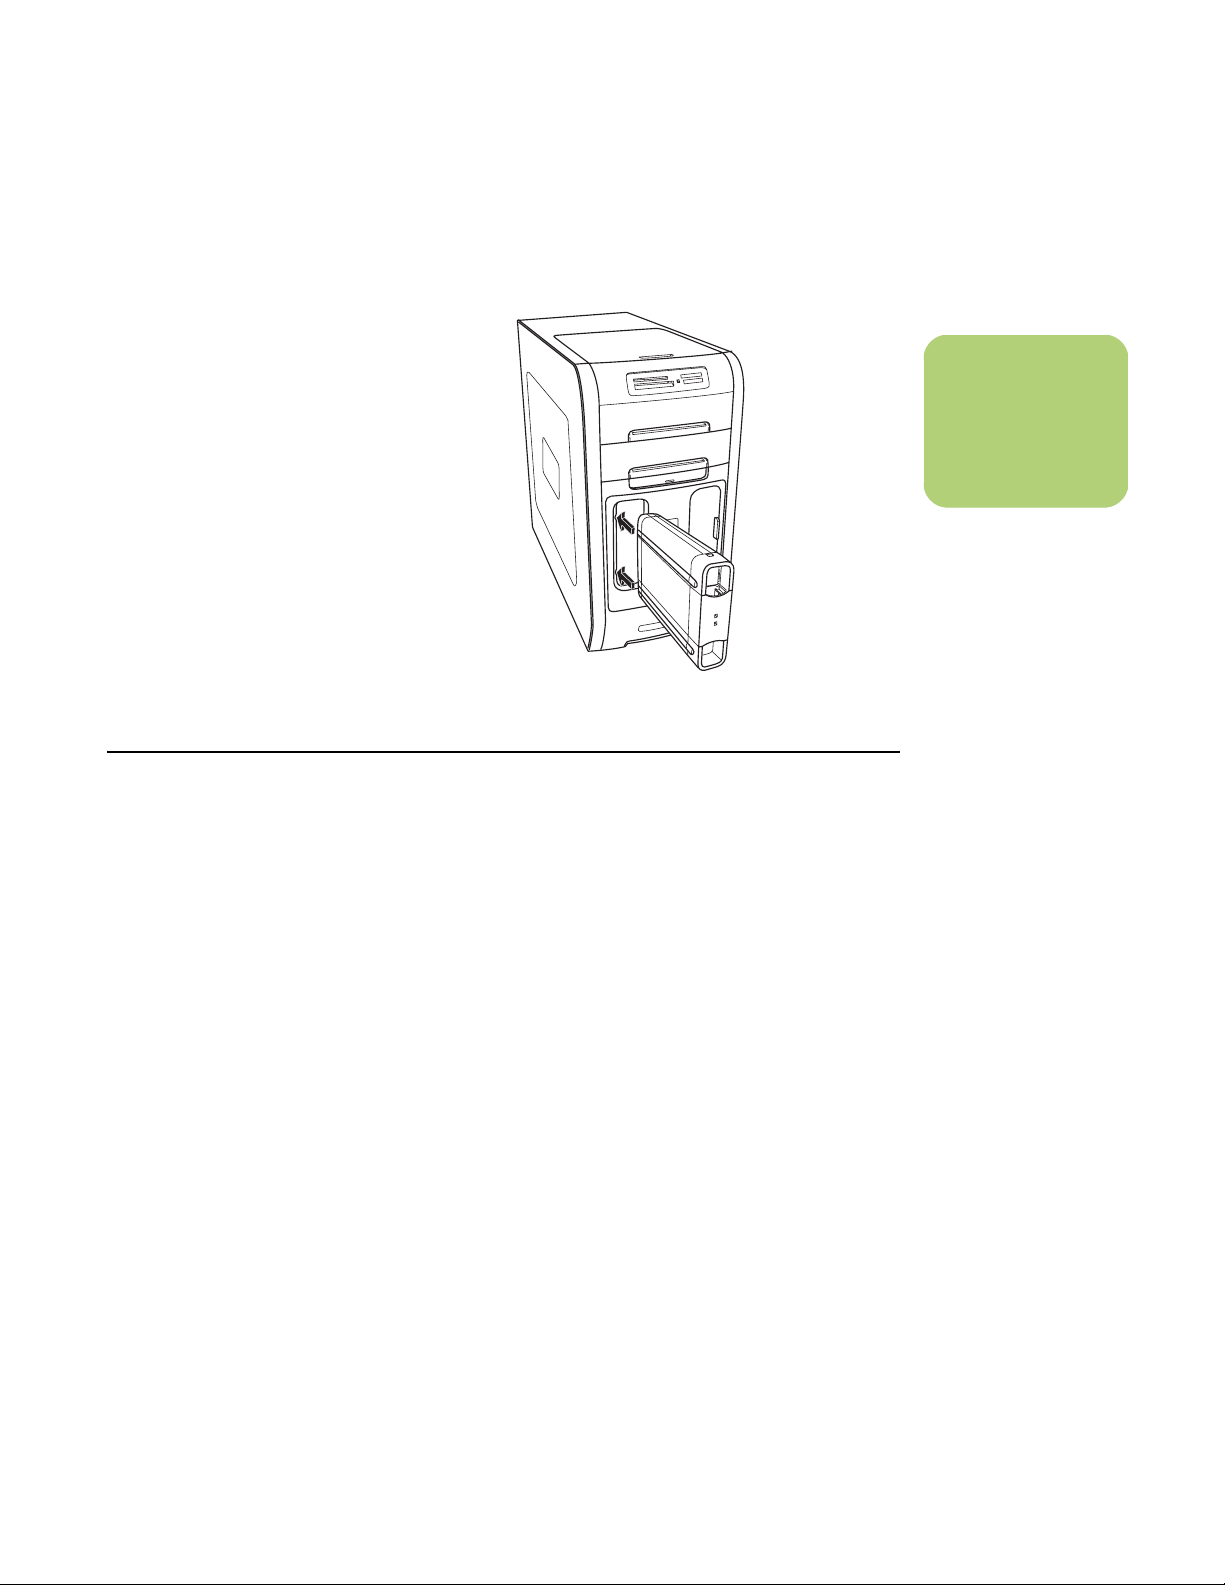
Locating the Drive After Installation
After you install the HP Personal Media Drive into
the PC, you can find the drive in My Computer. The
HP Media Center PC automatically assigns a drive
letter which may change unless you assign a drive
letter. See “Assigning a Drive Letter to the HP
Personal Media Drive” on page 24.
1 Click Start on the taskbar.
2 Click My Computer.
3 Select your drive under Hard Disk Drives. The
default name is HP Personal Media Drive.
Using an HP Personal Media Drive 23
Page 28

Assigning a Drive Letter to the HP Personal Media Drive
n
The installation CD
that came with your
HP Personal Media
Drive allows you to
assign a drive letter
to the HP Personal
Media Drive.
n
To avoid multiple
hard disk drives
using the same
drive letter when
connecting and
removing the drives,
assign the letter Z.
You can permanently assign a drive letter to avoid
the letter changing when you connect and
disconnect this drive and other devices. Also, it is
easier for a software program to locate files on the
HP Personal Media Drive if a drive letter is
assigned. Some programs may not be able to find
files if the drive has a new drive letter.
It is best to always remove your drive safely to avoid
errors. See “Disconnecting the HP Personal Media
Drive Safely” on page 29.
Storing Files
The best way to transfer files to the HP Personal
Media Drive is to drag them from your local hard
disk drive to your HP Personal Media Drive. This
allows you to place files in specific folders so that
they can be viewed in Media Center. Refer to the
following procedures for more detailed instructions
about creating these linked folders.
To assign a drive letter:
1 Click Start.
2 Right-click My Computer.
3 Select Manage and then click Disk
Management.
4 Right-click the HP Personal Media Drive.
5 Select Change Drive Letter and Paths.
HP recommends that you pick the drive
letter Z.
6 Click Change and select a letter, and then
apply the changes by clicking OK.
Playing Media Files
You can play all kinds of media from an HP Personal
Media Drive:
1 Click Start on the taskbar.
2 Click My Computer.
24 HP Media Center PC Software Guide
3 Double-click the HP Personal Media Drive icon
to locate your media file.
4 Double-click the file. Most media files open in
Windows Media Player.
Page 29

Playing Music Files
You can play all kinds of music that are stored on
HP Personal Media Drive. If you want the music files
that are stored on your HP Personal Media Drive to
appear in the Windows Media Player Library and
the Media Center My Music window, you must
create a link to this drive.
To do t h is:
1 Click Start on the taskbar, click My
Computer, and then double-click the
HP Personal Media Drive icon.
2 Create a personal music folder by right-
clicking in the folder and choosing New and
then Folder. Type a name for your personal
music folder.
3 Drag or copy your music files into this created
folder.
4 Open Windows Media Player by clicking
Start, All Programs, and then click
Windows Media Player.
5 In the Windows Media Player window, click
Too ls, select Options, and then select the
Media Library tab.
6 Click the Monitor Folders button.
7 Click Add to add a pathway to your
HP Personal Media Drive.
8 Browse to locate your created music file folder
on your HP Personal Media Drive, and then
click OK.
9 Click OK, and then OK again to close the
Options window. Now your music files on
your HP Personal Media Drive appear in the
Windows Media Player library and in the
Media Center My Music window when your
drive is connected to the PC.
When you disconnect the drive, your music files
may still appear in the Windows Media Player
Library and Media Center My Music window. To
refresh your PC, open and close Windows Media
Player or Media Center. If that doesn’t work, restart
the PC.
n
The installation CD
that came with your
HP Personal Media
Drive allows you to
set up folders so that
you can access your
music files with
Media Center.
Viewing Picture Files
You can view your pictures stored on an HP Personal
Media Drive. If you want the picture files that are
stored on your HP Personal Media Drive to appear
in the Media Center My Pictures window, you must
create a pathway to this drive.
To do t h is:
1 Click Start on the taskbar, click My
Computer, and then double-click the
HP Personal Media Drive icon.
2 Create a personal pictures folder by right-
clicking in the folder and choosing New and
then Folder. Type a name for your personal
pictures folder.
3 Drag or copy your picture files into this
created folder.
4 Open the My Pictures folder on your local
hard disk drive by clicking Start, and then
My Pictures.
Using an HP Personal Media Drive 25
n
The installation CD
that came with your
HP Personal Media
Drive allows you to
set up folders so that
you can access your
picture files with
Media Center.
Page 30

n
The installation CD
that came with your
HP Personal Media
Drive allows you to
set up folders so that
you can access your
video files with
Media Center.
5 Right-click anywhere in the My Pictures
window, select New, and then select the
Shortcut.
6 When the Create Shortcut wizard window
opens, click Browse and locate your
personal pictures folder, select the folder, and
then click OK.
7 Click Next and then click Finish. The
shortcut to your personal picture folder
appears in the My Pictures window.
Playing Video Files
You can view your videos stored on an HP Personal
Media Drive. If you want the video files that are
stored on your HP Personal Media Drive to appear
in the Media Center My Videos window, you must
create a pathway to this drive.
To do t h i s:
1 Click Start on the taskbar, click My
Computer, and then double-click the
HP Personal Media Drive icon.
2 Create a personal videos folder by
right-clicking in the folder and choosing
New and then Folder. Type a name for
your personal videos folder.
3 Drag or copy your video files into this created
folder.
4 Open the My Videos folder on your local hard
disk drive by clicking Start, My
Documents, and then double-clicking My
Videos.
5 Right-click anywhere in the My Videos
window, select New, and then select the
Shortcut.
8 Click Add to add a pathway to your
HP Personal Media Drive. Now your picture
files on your HP Personal Media Drive appear
in the Media Center My Pictures window
when your drive is connected to the PC.
When you disconnect the drive, your picture files
may still appear in the Media Center My Pictures
window. To refresh your PC, open and close Media
Center.
6 When the Create Shortcut folder opens, click
Browse and locate your personal videos
folder, select the folder, and then click OK.
7 Click Next and then click Finish. The
shortcut to your personal video folder appears
in the My Videos window.
8 Click Add to add a pathway to your
HP Personal Media Drive. Now your video
files on your HP Personal Media Drive appear
in the Media Center My Videos window when
your drive is connected to the PC.
When you disconnect the drive, your video files may
still appear in the Media Center My Videos window.
To refresh your PC, open and close Media Center.
26 HP Media Center PC Software Guide
Page 31

Watching TV Programs Stored on the HP Personal Media Drive
To play back recorded TV files stored on your
HP Personal Media Drive, you must:
1 Connect your HP Personal Media Drive to the
PC with the PC turned off.
2 Turn on the PC and open Media Center.
3 Click Settings, TV, Recorder, Recorder
storage.
4 Under Record on drive select the HP Personal
Media Drive, select Save, and then select
Yes. A Recorded TV folder is created and
placed in your HP Personal Media Drive.
Recorded TV shows must be placed in this
folder to access them with Media Center.
5 Under Record on drive, select your local hard
disk drive, select Save, and then select Yes.
6 Move or copy your recorded TV programs to
this Recorded TV folder on your HP Personal
Media Drive. Now you can view your stored
TV programs in Media Center, or you can
double-click the file and view the show in
Windows Media Player.
7 Close Media Center before disconnecting the
drive.
When you connect your drive, stored TV files
appear in a few seconds after you open
Media Center.
Recording TV to the HP Personal Media Drive
n
You need to close
Media Center before
removing or before
connecting your HP
Personal Media Drive
for the stored TV files
to update properly.
The HP Media Center PC was set up to record TV
shows to your local hard disk drive when using
Media Center. It is possible to change the recording
pathway to an HP Personal Media Drive, but several
errors can occur if the drive is unexpectedly or
improperly removed.
It is best to record TV shows to your local hard
disk drive and then copy the files over to your
HP Personal Media Drive.
If you decide to change your recording path to the
HP Personal Media Drive, listed below are some
important things to consider:
■ The TV recording path does not default
back to your local hard disk drive after the
HP Personal Media drive is disconnected.
This means scheduled recordings may not be
recorded. The recording error Low Disk Space
may occur, and then your program will not be
recorded. See “Changing disk allocation” on
page 30 for more information about fixing
this error.
■ When the drive is disconnected, the disk
allocation for Recorded TV shows reverts to
10% and your recorded programs can be lost
if you have selected the “Keep until space is
needed” setting in My TV. See “Changing disk
allocation” on page 30 for more information
about changing the allocation.
■ If you disconnect the drive while Live TV is
active, a video error can occur.
■ Recorded TV shows are not updated in Media
Center when the drive is removed.
■ The drive may be assigned a different drive
letter which prevents Media Center from
recognizing the recording path or the stored
Recorded TV files.
Using an HP Personal Media Drive 27
n
■ HP recommends
that you record TV
programs directly
to your local hard
disk drive and
then transfer the
programs to the
HP Personal Media
Drive.
■ If you have
problems recording
after you have
changed the
recording pathway,
close Media Center
and then open it,
and then restart
the PC.
Page 32

Recording TV Programs to the HP Personal Media Drive
When you set the TV recording pathway to your
HP Personal Media Drive, Media Center stores the
recording buffer data for pausing live TV on your
drive. This means that if live TV is playing, you won’t
be able to remove the drive safely. To avoid this
scenario, change the recording pathway back to
your local hard disk drive, and then restart the PC
before disconnecting the HP Personal Media Drive.
To record TV programs to the HP Personal Media
Drive:
n
HP recommends that
you record TV
programs directly to
your local hard disk
drive and then
transfer your
recorded programs
to the HP Personal
Media Drive, if
desired.
1 Change your recording pathway to your
HP Personal Media Drive. See “Changing the
TV recording path to the HP Personal Media
Drive” on page 28.
5 Close Media Center.
6 Restart your PC. You must perform this last
step or errors can result when recording to
your drive.
2 Open Media Center.
7 Disconnect your HP Personal Media Drive
3 Record TV programs to the HP Personal Media
Drive.
safely. See“Disconnecting the HP Personal
Media Drive Safely” on page 29.
4 Before disconnecting the drive:
■ Make sure there are no scheduled
recordings or recordings in progress to
avoid losing data.
■ Change the recording pathway back to
your local hard disk drive. See“Changing
the TV recording path to the local hard disk
drive” on page 29.
Changing the TV recording path to the HP Personal Media Drive
If you decide to change your recording path to
record directly to your HP Personal Media Drive,
Media Center creates a Recorded TV folder on your
drive.
To change the Media Center TV recording path to
your HP Personal Media Drive:
1 Assign a drive letter to your HP Personal
Media Drive. See “Assigning a Drive Letter to
the HP Personal Media Drive” on page 24.
2 Open Media Center.
3 Select Settings, TV, Recorder, and then
Recorder storage.
28 HP Media Center PC Software Guide
Page 33

4 Under Record on Drive, select “+” to select the
HP Personal Media Drive. You can also
set the disk allocation and recording quality
settings in this window.
HP recommends that you know the drive letter
assigned and the storage amount of your
HP Personal Media Drive.
Changing the TV recording path to the local hard disk drive
To change the Media Center TV recording path to
your local hard disk drive:
5 Click Save and then click Yes.
6 Close Media Center.
7 Restart the PC.
1 Open Media Center.
2 Select Settings, TV, Recorder, and then
Recorder storage. You can also set the disk
allocation and recording quality settings in
this window.
3 Select your local hard disk drive (C:).
4 Click Save and then click Yes.
5 Close Media Center.
6 Restart the PC.
Disconnecting the HP Personal Media Drive Safely
To disconnect your HP Personal Drive safely:
1 Close Media Center and all other programs
that may be accessing your HP Personal
Media Drive. Make sure the activity LED is off.
2 Double-click the Safely Remove
Hardware icon in the system tray
at the bottom of the desktop. If this
icon is hidden, click the arrows on the taskbar
to display it. The Safely Remove Hardware
window opens.
3 Double-click USB Mass Storage Device to
locate your HP Personal Media Drive. USB
Mass Storage Device may be listed twice.
One may contain a memory card reader or
other mass storage drives.
4 Select your device that is labeled HP Personal
Media Drive, and then click OK. This name of
the drive may appear as Generic Volume
followed by the assigned drive letter. A Safe
to Remove Hardware message appears in the
System tray at the bottom of your desktop
letting you know that your drive is safe to
disconnect.
5 Click Close.
6 Disconnect the drive from the PC.
n
If you attempt to
disconnect the drive
safely and a message
appears telling you
that you can’t, restart
the PC; a program
may still be using the
drive.
Using an HP Personal Media Drive 29
Page 34

Changing disk allocation
If you experience a Low Disk Space error message,
and you want to change the disk allocation to a
higher percentage for your HP Personal Media
Drive:
n
Some recorded TV
programs with the
broadcast flag turned
on are copy protected
and cannot be
viewed on other PCs.
1 Open Media Center.
3 Change the disk allocation percentage setting
by selecting the “+” or “–“ option.
2 Select Settings, TV, Recorder, and then
select Recorder storage.
Updating recorded TV list after removing the HP Personal Media Drive
If you want to update your Recorded TV list after
removing the drive:
1 Close Media Center.
3 If this does not update the files, restart the PC.
2 Open Media Center.
System requirements to view recorded TV programs on other PCs
To play back recorded TV files (.dvr-ms files) that
were recorded on your HP Media Center PC onto
another non-Media Center PC, the PC must have the
following items installed:
■ Windows XP Operating System
■ Windows XP Service Pack 1
■ Windows Media Player 9
■ Software to play DVDs
■ The audio and video codec file that allows
Windows Media Player to play recorded TV
programs (.dvr-ms files). You can find this file
in Windows Update. Click Start, choose All
Programs, and then click Windows
Update. You can also go to the Windows
Web site and search for this code file
(Q810243).
If you want more information about this file you can
go to:
http://www.microsoft.com
30 HP Media Center PC Software Guide
Page 35

Convenient media file locations
Most media files that you copy from CD or
download from the Internet can be placed in
specific folders on your local hard disk drive for
easy access. For example, you download a music
file from the iTunes Music Store, and place it into
your My Music folder in My Documents.
Media file types Location
You may want to go to these locations to move or
copy your files into your HP Personal Media Drive.
Below is a quick reference of your digital media file
locations on your local hard disk drive.
Folder
name
Picture files that you transfer from a digital
camera, copy from a CD, or download from the
Internet can be placed in your My Pictures
folder on your primary hard disk drive.
Music files that you download from the iTunes
Music Store or copy from a commercial CD by
using Windows Media Player can be placed in
the My Music folder on your primary hard disk
drive.
Video files that you transfer from a digital video
camera, copy from a DVD or CD, or download
from the Internet can be placed in the My
Videos folder on your primary hard disk drive.
Recorded TV files that you record from
Media Center are automatically placed in
the Recorded TV folder on your primary hard
disk drive, unless you manually change the
record path.
Click Start, My Documents,
and then double-click My
Pictures folder.
Click Start, My Documents,
and then double-click My
Music folder.
Click Start, My Documents,
and then double-click My
Videos folder.
Click Start, My Computer,
Shared Documents, and
then double-click the
Recorded TV folder.
My Pictures
My Music
My Videos
Recorded
TV
n
Some media devices
and software
programs default
to these locations
automatically.
Using an HP Personal Media Drive 31
Page 36

32 HP Media Center PC Software Guide
Page 37

Watching and Recording TV Programs
The Media Center PC acts as a digital video
recorder (DVR) which works with the Media Center
remote control so you can watch and record TV
programs at your own convenience and pace.
In My TV you can:
■ Watch your favorite television programs in
full-screen mode or in an inset window.
■ Check which TV programs you have
scheduled to record.
n
The digital video
recording features
are for select
models only.
■ Pause, stop, rewind, and fast-forward live TV.
■ Record a single TV program or an entire
series. My TV manages the recordings for you
and displays a message if there are any
recording conflicts.
■ Create a recorded TV library.
■ Search for TV programs to watch or record
using the Television Program Guide.
■ Check the details of TV programs in the
Guide.
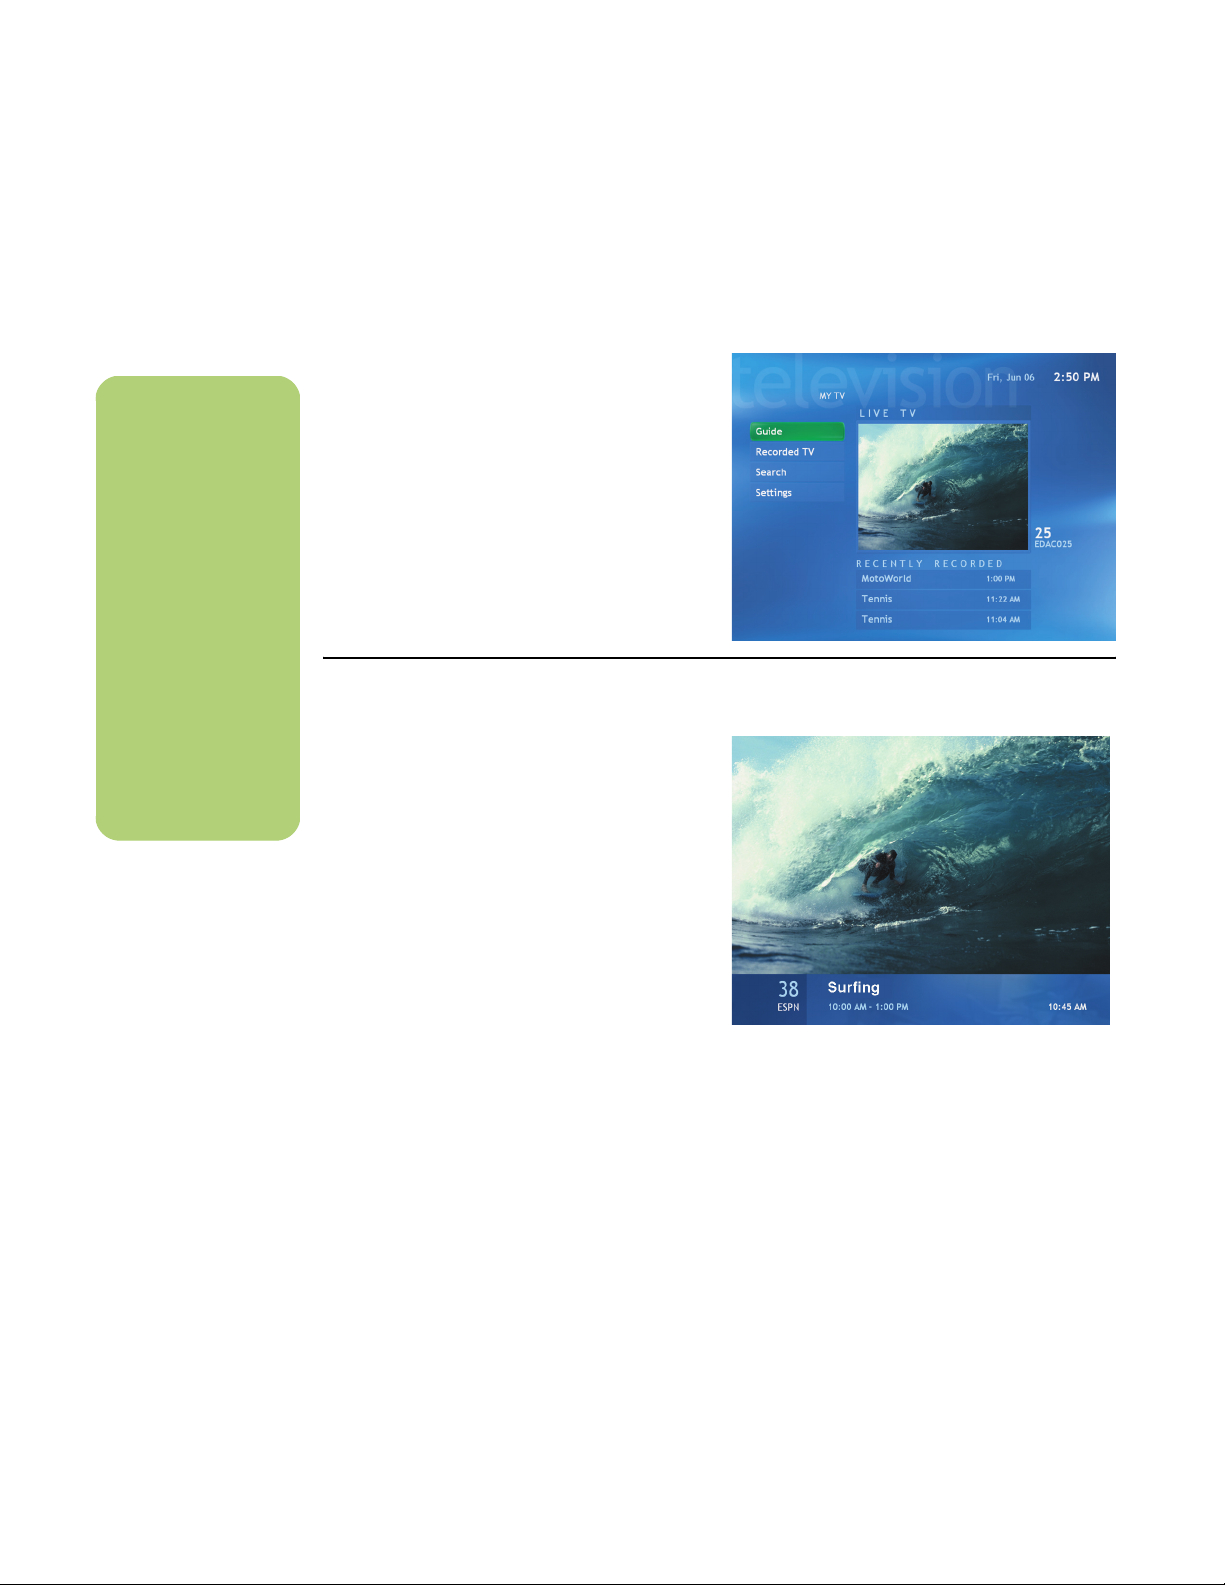
A
B
C
D
■ Browse for TV programs in Search by title,
keyword, or category.
■ Simultaneously watch a recorded program
and record a live program.
■ Set Media Center to block certain channels.
■ Find your favorite television programs by
organizing the Television Program Guide by
different categories, such as movies or sports.
Also, view a lineup for a specific channel.
E
A Scroll through the Television Program Guide
for programs to watch and record
B View a list of all your recorded programs or
find out why your program wasn’t recorded
C Quickly find a TV program or series to watch
or record using a descriptive word, program
title, or program category
D Change recording priorities, TV Guide
settings, and other settings
E TV channel currently playing
Watching and Recording TV Programs 33
Page 38
n
You can change the
channel by using the
remote control while
in full-screen mode or
when the inset
window is selected.
You c an g o t o li v e T V
from anywhere in
Windows Media
Center by pressing
Live TV on the remote
control.
You c an s el e ct a
channel to see
upcoming programs
for that channel.
Watching TV
Before you can watch TV by using Media Center,
make sure:
■ The computer is set up correctly for your TV
signal source. Refer to the setup poster for
more information.
■ You have completed the Media Center setup
wizard.
To watch a television program
1 Press the TV button on the remote control.
The last channel selected or the first channel
available begins playing next to the
My TV menu.
2 Select a channel by using the Channel/Page
(+) or (–) buttons or by using the numeric
keypad on the remote control, and then select
Enter. The channel number and program
information is displayed in the window.
3 To watch TV in full-screen mode, press the
Live TV button, or select the TV video screen,
and then press OK.
4 To exit full-screen mode and return to the
previous window, press Back on the remote
control.
5 Press the More Info button to display the
following information:
■ Channel number
■ Channel station identifier
■ Title of program
■ Time period of program
34 HP Media Center PC Software Guide
■ Actual time
■ Brief summary of the program
■ TV rating, if available
■ Type of program, such as sports
Page 39

Using Remote Control in My TV
Remote Control
button Action
To freeze the live TV image, press Pause. While paused, My TV continues to
record a pause buffer for up to 30 minutes. To resume watching TV where you
left off, press Play.
To stop live TV or a recorded program, press Stop once. To resume watching
the program, press Play.
To move forward in the live TV program that has been paused, or in a recorded
program, press Fast-Forward (FWD). To speed up the fast-forwarding, press
FWD two or three times. FWD allows you to skip 3 hours in the Television
Program Guide.
To resume watching the program after pressing the Pause, Fast-Forward,
Rewind, Replay, or Skip buttons, press Play.
To advance in live TV or in a recorded program by 30 seconds, press Skip
once. You can repeatedly skip forward but only to the end of the pause buffer
or the recorded program. Allows you to skip 12 hours in the Television Program
Guide.
To move backward in live TV or a recorded program, press Rewind (REW). To
speed up rewinding, press REW three times. To resume watching the program,
press Play. REW allows you to go back 3 hours in the Guide.
n
If you close Media
Center or leave the
Guide page, Media
Center defaults back
to displaying all
available channels.
To move backward in live TV by 7 seconds, press Replay. You can repeatedly
rewind with the instant replay option but only to the beginning of the pause
buffer or recorded program. Allows you to go back 12 hours in the Guide.
Live TV To maximize the TV viewing window to full-screen mode, press Live TV. Also, to
advance to the end of the pause buffer and resume watching the actual point in
the live TV program, press Live TV.
More Info To see channel number, station identifier, title of program, time slot, and
category of program, press the More Info button while in full-screen mode.
Channel/Page To move to the next channel in the Television Program Guide, press the
Channel/Page (+) and (–) buttons.
Guide To open the Television Program Guide, press Guide. When in the Guide
window, press Guide again to view a categories menu. To filter your Guide to
display only programs in a category, you can select a category, such as
drama.
Watching and Recording TV Programs 35
n
For some countries or
regions the Live TV
button is labeled TV
on the remote control.
Page 40

Watching Live TV Using the Digital Video Recorder
n
The 30-minute pause
buffer applies only
when pausing,
rewinding, and fastforwarding live TV.
Media Center allows
you to record a
program for longer
than 30 minutes.
n
When you select a
channel and then
press OK on the
remote control, you
can view two weeks
of programming. Use
the scroll arrows at
the bottom of the
window.
When you open the My TV window and begin
watching live TV, Media Center begins recording
the selected program in the background for up to
30 minutes.
This allows you to use your remote control to stop,
pause, rewind, and fast-forward live TV programs
within a 30-minute time range. Recording continues
in the background. When you pause a live TV
program while watching in full-screen mode, the
time-shifting window appears.
You can always move to the actual point in the live
broadcast by pressing the Live TV button on the
remote control.
When you change the channel, Media Center
deletes the previously recorded portion and begins
recording again after a short delay.
You cannot use time shifting when recording a TV
program. For example, you can’t pause a live TV
program and then rewind to the beginning of the
pause buffer and then begin recording. You can
record a TV program only from live TV.
In the illustration below, note that the pause buffer
time is highlighted in green. The pause buffer began
recording around 3:55 and has recorded until
4:16. The program was then rewound and paused
at 4:12.
n
The digital video
recording features
are for select
models only.
36 HP Media Center PC Software Guide
Page 41

Using the Television Program Guide
In the Guide, you can scroll through a list of the
current television programs and channels available
from your television service provider. The Guide
displays the channel and network, as well as the
program title, scheduled time block, and a brief
Important information about the Television Program Guide
Television Program Guide data may not be
available in your country or region. If there is no
Guide data available when you try to download or
search for Program Guide information, the following
messages may appear:
■ Download Incomplete: We were unable to
locate any Program Guide information for the
following reason: Guide data is not available
for the country or region setting you selected
in the Control Panel Settings.
■ Search in My TV is unavailable because there
is no Guide information.
Recording TV without a Television Program Guide
You do not need the Television Program Guide to
record TV. To record TV, set the recording manually:
description of the program. The number of days
displayed depends on your television service
provider. By selecting a program title, a detailed
description of the program appears at the bottom of
the window.
■ The current lineup and/or location selected for
the Guide is not supported.
■ The Guide information is either missing or
corrupt.
■ No data available.
■ Channel information is currently not available.
If you receive any of these messages, then the Guide
data is not available in your country or region, and
you cannot use Television Program Guide features.
Check back periodically to see if Guide data has
been provided.
n
The number of
channels and
calendar days of TV
listings depends on
your television
service provider
.
1 Press the Start button on the remote control,
select My TV, Recorded TV, and then select
Add Recording.
2 Select Channel and time.
3 Enter the channel number using the numeric
keypad on the remote control.
4 Select the (+) or (–) buttons and then press OK
on the remote control to scroll through choices
and enter the recording frequency, date, start
and stop times, and storage and quality
options.
5 To set the recording and return to the Settings
window, select Record in the window, and
then press OK on the remote control.
6 To return to the previous window, press Back
on the remote control.
Watching and Recording TV Programs 37
Page 42

w
Make sure the PC has
a connection to the
Internet and that you
have completed the
Media Center setup
wizard before you try
to download your
Television Program
Guide or change the
settings for your
Guide.
Viewing the Television Program Guide
1 Press the Start button on the remote control.
2 Select My TV, and then select Guide.
3 Select a channel, and then use the arrow
buttons to view up to two weeks of
programming for that channel.
4 Select a program, and then press OK to watch
or record the program.
38 HP Media Center PC Software Guide
Page 43

Downloading the Television Program Guide
You have three options to download the Television
Program Guide:
■ Automatically connect and download the
Guide at a specified time each day. Some
Internet Service Providers may not support this
option.
■ Manually connect to the Internet, and Media
Center automatically downloads the Guide.
■ Manually connect to the Internet and then
manually download the Guide in Media
Center TV Settings menu.
If the Guide has not been downloaded from the
Internet because there is no Internet connection, you
will see No data available next to each channel.
Manually downloading the Television Program Guide
1 Press the Start button on the remote
control.
2 Select My TV, Settings, Guide, and then
select Get Guide data.
n
Media Center can
be set up to
automatically connect
to the Internet and
update the Guide.
This option may
not be available,
depending on your
Internet Service
Provider. You can also
manually update the
Guide from the TV
Settings menu.
3 Select Yes. The Television Program Guide
starts downloading from the Internet. This can
take up to 30 minutes, depending on the
amount of data to download and the speed of
your Internet connection.
Watching and Recording TV Programs 39
Page 44

Changing a Postal Code to Receive the Correct Television
Program Guide
1 Press the Start button on the remote
control.
4 Enter your postal code, and then select Next.
5 To download your provider information and
2 Select Settings, TV, Guide, and then select
Reset Guide lineup.
then start downloading your Guide
information, follow the onscreen instructions.
3 Select Next, and follow the onscreen
instructions.
Setting up an Internet Dial-Up Connection
To set up your Internet connection to bypass the
Internet Service Provider interface, use this
procedure.
1 Click Start on the taskbar, and then click
Control Panel.
2 Click Network and Internet
Connections, if it is present.
3 Double-click Network Connections.
4 In the Network Tasks area, click Create a
new connection.
5 When the New Connection Wizard opens,
click Next.
6 Select Connect to the Internet, and then
click Next.
7 Follow the onscreen instructions.
To go online after establishing your connection, click
Start, choose Connect to, and then select your
Internet Dial-up connection.
40 HP Media Center PC Software Guide
Page 45

Adding Missing Channels to the Guide
Some program channels are seasonal and don’t
appear in the Guide all the time. To add the names
and numbers of the television channels you are
missing or to change the associations between
channel numbers and lineups:
1 Press the Start button on the remote
control.
4 Use the numeric keypad on your remote
2 Select My TV, Settings, Guide, and then
select Add missing channels to add the
names and numbers of the channels you are
missing.
5 Enter the correct channel number, and then
6 Repeat steps 3 through 5 to add additional
3 Select Add channel.
7 Click Done when you’ve added all the
Removing Channels from the Guide
You may want to remove some channels from your
Guide to prevent users from having access to them.
1 Press the Start button on the remote
control.
2 Select My TV, Settings, Guide, and then
select Edit Guide listings to remove the
names and numbers of the channels you don’t
want to appear in the Guide.
3 Select or clear a check box to add or remove
4 Select Save.
control or your keyboard to enter the name of
the missing channel, and then select Next.
select Add.
channels.
channels.
the channel.
Watching and Recording TV Programs 41
Page 46

n
■ Using Categories to
search can help
you find, for
example, all
football games. A
title or keyword
search displays
every program that
has “football” in
the title or
description.
■ The TV search
results do not
include previously
recorded TV
programs.
Searching for TV Programs
To find a TV program, you can enter a title,
keyword, or select a category in your Guide by
using your remote control.
To search for a TV program
1 Press the Start button on the remote
control (select models only), select My TV,
and then select Search.
2 Select Title. Use the numeric keypad on your
remote control or your keyboard to enter a
program title word, and then press OK on the
remote control.
Or
Select Keyword. Use the numeric keypad on
your remote control or your keyboard to enter
a descriptive word that would appear in a
program title or program description, and
n
Guide filtering
features, such as
searching by
keyword or category,
are available for
select models only.
then press OK on the remote control.
3 To scroll through search results, use the arrow
buttons to select a program, and then press
OK. If multiple times for the program are
displayed, select a time and press OK.
4 To begin watching the program in full-screen
mode, select the program and then press OK.
If the program is not currently playing, select
Record or Record Series, and then
press OK.
42 HP Media Center PC Software Guide
Page 47

Searching for TV programs using categories
You can search the Guide to find a TV program by
selecting a category using your remote control.
To search for a TV program
1 Press the Start button on the remote
control, select My TV, and then select
Search.
2 Select Categories. Select a category of
program types such as Movies or Sports, and
then press OK on the remote control. All items
that match the category are displayed in the
search results. You can sort them by date or
by name.
3 Use the arrow buttons to scroll through
search results and to select a program. Then
press OK.
4 Select the program in the window, and then
press OK on the remote control to begin
watching the program in full-screen mode. If
the program is not currently playing, you can
select Record or Record Series, and then
press OK.
n
Recorded TVs
Schedules window
displays a list of
programs scheduled
to record in the
future, beginning
with the current date.
Each program is listed
individually even if it
is a part of a series.
n
Record Series means
that you select to
record each episode
of that program from
one channel. Media
Center won’t record
duplicate episodes.
Media Center also
looks for alternative
times to record an
episode if a recording
conflict happens.
Watching and Recording TV Programs 43
Page 48

Recording TV Programs
w
If you turn off
(shut down) your PC,
Media Center will not
record a scheduled
program. The PC must
be turned on or in
standby mode to
record a TV program.
The PC will not
automatically go into
standby mode if
Media Center is open.
Make sure you turn
off the monitor and
turn down or mute
the volume if, for
example, you have a
scheduled recording
in the middle of the
night and don’t want
to be disturbed.
Media Center allows you to record TV programs so
that you can watch them when it is convenient. You
can record the program you are watching, or you
can record a future program or series from the
Guide, the Search, or the Recorded TV window in
My TV. After you have scheduled the recording of
several programs or series, you can change the
priority order in the My TV Settings window.
To record a TV program you are currently watching,
just press the Record button on the remote
control once.
If a recording error occurs, the program will not be
recorded unless the conflict is resolved. If you try to
schedule a recording and another is already
scheduled for the same time, a conflict window
appears and gives you the option to record the new
program or record the previously scheduled
program.
Media Center automatically records until the
program is scheduled to be over, as listed in the
Guide.
To make sure your program is being recorded,
select My TV, Recorded TV, and then select
Scheduled. The Record icon also appears next to
the program in the Guide while you are recording.
The Record icon disappears when the recording is
complete.
Recording icons
The Record icon appears in the
Television Program Guide next to
the program scheduled to record.
The Record Series icon appears in
the Television Program Guide next
to each occurrence of a program
in a series that is scheduled to be
recorded.
The Record Conflict/Error icon
appears in the Television Program
Guide and the taskbar if another
program is scheduled to be
recorded at the same time.
The Record icon in the taskbar
If a program is currently being recorded, the Record
icon also appears in the taskbar. If you move your
mouse over the icon, Media Center displays which
program is currently being recorded. You can rightclick the icon to open Media Center and stop
recording.
44 HP Media Center PC Software Guide
Page 49

Recording TV tips
■ If you are watching live TV during a scheduled
recording time, you can watch only the
program being recorded. If you change
channels, recording stops.
■ If you go to another area in Media Center, the
TV channel you last selected will be displayed
in the inset window at the bottom of the
window.
■ Some channels can be shared by two or more
networks, depending on the time of day. The
Guide may display only one network’s
programming. This may cause recording
options to be unavailable. You may need to
manually update the Guide before scheduling
a recording.
Important information about My TV and FM Radio
In Media Center, FM radio shares the use of the
single tuner card with My TV. In Media Center,
you are unable to watch or record TV and listen
to FM radio at the same time.
When Media Center is scheduled to start a
recording, a warning appears that says FM radio
stops when the TV recording starts. If you do not
select Cancel recording, Media Center
automatically stops radio and begins recording TV.
Standby mode and scheduled recordings
You should always close Media Center before you
manually place the PC in standby mode, to avoid
file corruption and other recording problems.
n
To copy a recorded TV
program to DVD to
view on a home DVD
player, see “Copying
Recorded TV
Programs to DVD or
CD” on page 110.
Recording TV from the Guide
To record a current or future program or series from
the Guide:
1 Press the Start button on the remote
control, select My TV, and then select
Guide.
2 To find the program you want to record, use
the arrow buttons on the remote control, and
then select the program. You can also press
the numeric keypad on the remote control to
go directly to a channel. Press the right arrow
button in the Guide to select a program that
will be broadcast in the future.
Watching and Recording TV Programs 45
Page 50

3 Press the Record button on the remote control.
The Record icon appears next to the
program in the Guide. Press Record twice to
record a series.
The Record Series icon is displayed to
indicate a series. Press Record again to cancel
the recording.
Recording TV from Search
You can find a program to record based on a
keyword such as an actor or director name,
program title, or a category (select models only).
To record a current or future program or series using
Search:
1 Press the Start button on the remote
control, select My TV, and then select
Search.
2 Select Title, Keyword, or Categories.
For Title and Keyword searches, enter your
descriptive search words. Media Center starts
searching from the first letter you type into the
text box. For a Categories search, select the
category you want and press OK.
4 To return to the previous window, press Back
on the remote control.
5 If there is a recording conflict, Media Center
displays a message and allows you to select
which program you want to record.
Title search
3 Use the arrow buttons to scroll through the
search results to select the program you want
to record, select the program, and then
press OK.
46 HP Media Center PC Software Guide
Keyword search
Page 51

4 Select Record or Record Series in the
window, and then press OK. The Record icon
for a single program or the Record Series icon
for a series appears next to the program in the
Guide. If there is a recording conflict, Media
Center displays a message and allows you to
select which program you want to record.
5 To return to the previous window, press Back
on the remote control.
Recording manually
Recording a program manually allows you to select
a specific date, channel, and recording time period.
For some programs, you may want to begin
recording before the scheduled beginning and after
the scheduled ending of the program.
To manually record a program or series from
Recorded TV:
1 Press the Start button on the remote
control, select My TV, Recorded TV, and
then select Add Recording.
2 Select Channel and time.
3 Enter the channel number using the numeric
keypad on the remote control.
4 Select the (+) or (–) buttons and then press
OK on the remote control to scroll through
choices and enter the recording frequency,
date, start and stop times, and storage and
quality options.
Category search
n
■ Recorded TV
programs that
have been copied
to a DVD can be
played on your PC
and on some DVD
players.
■ Recorded TV
programs can be
backed up as part
of a full system
backup and
restored to the
same PC, but not to
other PCs.
Watching and Recording TV Programs 47
Page 52

5 To set the recording and return to the Settings
window, select Record in the window, and
then press OK on the remote control.
6 To return to the previous window, press Back
on the remote control.
Changing TV Settings
In the My TV Settings window, you can change
several settings that control how Media Center
plays and records TV programs, as well as how
it plays DVDs.
The TV Recorder settings allow you to control your
recording priorities and options in Media Center.
To manually record a program or series from the
Guide:
1 Press the Start button on the remote
control, select My TV, and then select
Guide.
2 Select the program you want to record, and
then press the Record button.
n
Refer to Media
Center Help for
more information
about recording
errors, advanced
recording features,
and My TV settings
1 Press the Start button on the remote
control.
2 Select Settings.
3 Select TV.
6 Select Audio to select settings for sound,
captioning, and a preferred language.
7 Select Guide, and then select:
■ Edit channels to add or remove channels
from your Television Program Guide.
4 Select Recorder, and then select:
■ History to find out why programs weren’t
recorded. Media Center keeps a log of the
last two weeks.
.
■ Recorder storage to change the amount
of recording space on your hard disk drive
or change the settings that affect the
recording storage space.
■ Recording defaults to change the
general recording settings that affect how
and when your programs are recorded.
5 Select Set up TV signal to configure your
TV signal to work with Media Center.
■ Add missing channels to add the
names and numbers of channels.
■ Reset Guide lineup to set up your
Television Program Guide. You can change
your postal code or television provider.
■ Get Guide data to manually update the
Guide from the Internet.
8 Select Adjust display settings to adjust
your TV or monitor settings for optimum
picture quality.
9 Select My TV to select settings to start playing
TV automatically or only when you select
Live TV.
48 HP Media Center PC Software Guide
Page 53
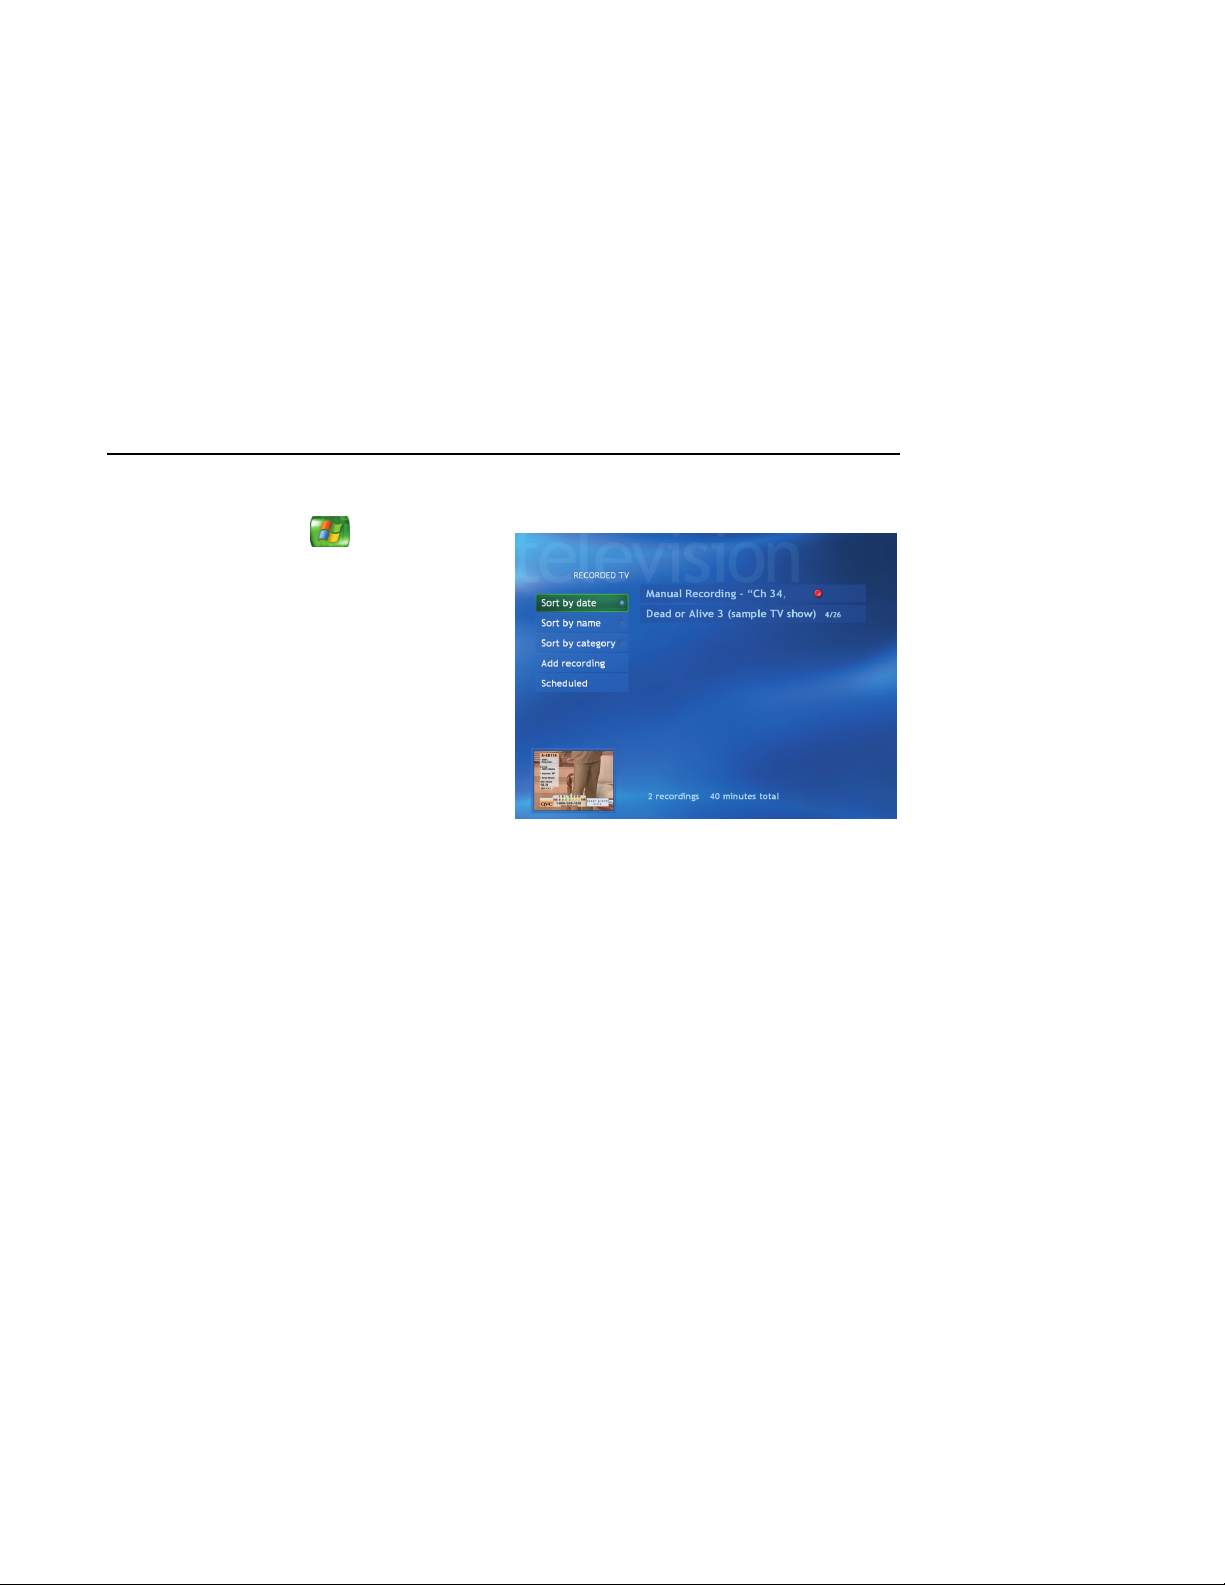
Playing Recorded TV Programs
Recorded TV is the storage place for all your
recorded programs. In the Recorded TV window,
you can sort your programs by name, date, or
To play a recorded program
1 Press the Start button on the remote
control, select My TV, and then select
Recorded TV.
2 To organize all of your previously recorded
programs, select Sort by date, Sort by
name, or Sort by category.
3 To begin watching the program, select the
recorded program you want to watch, and
then press the OK button on the remote
control.
category. You can also delete a recorded program
or series of programs and check for any recording
errors.
Watching and Recording TV Programs 49
Page 54
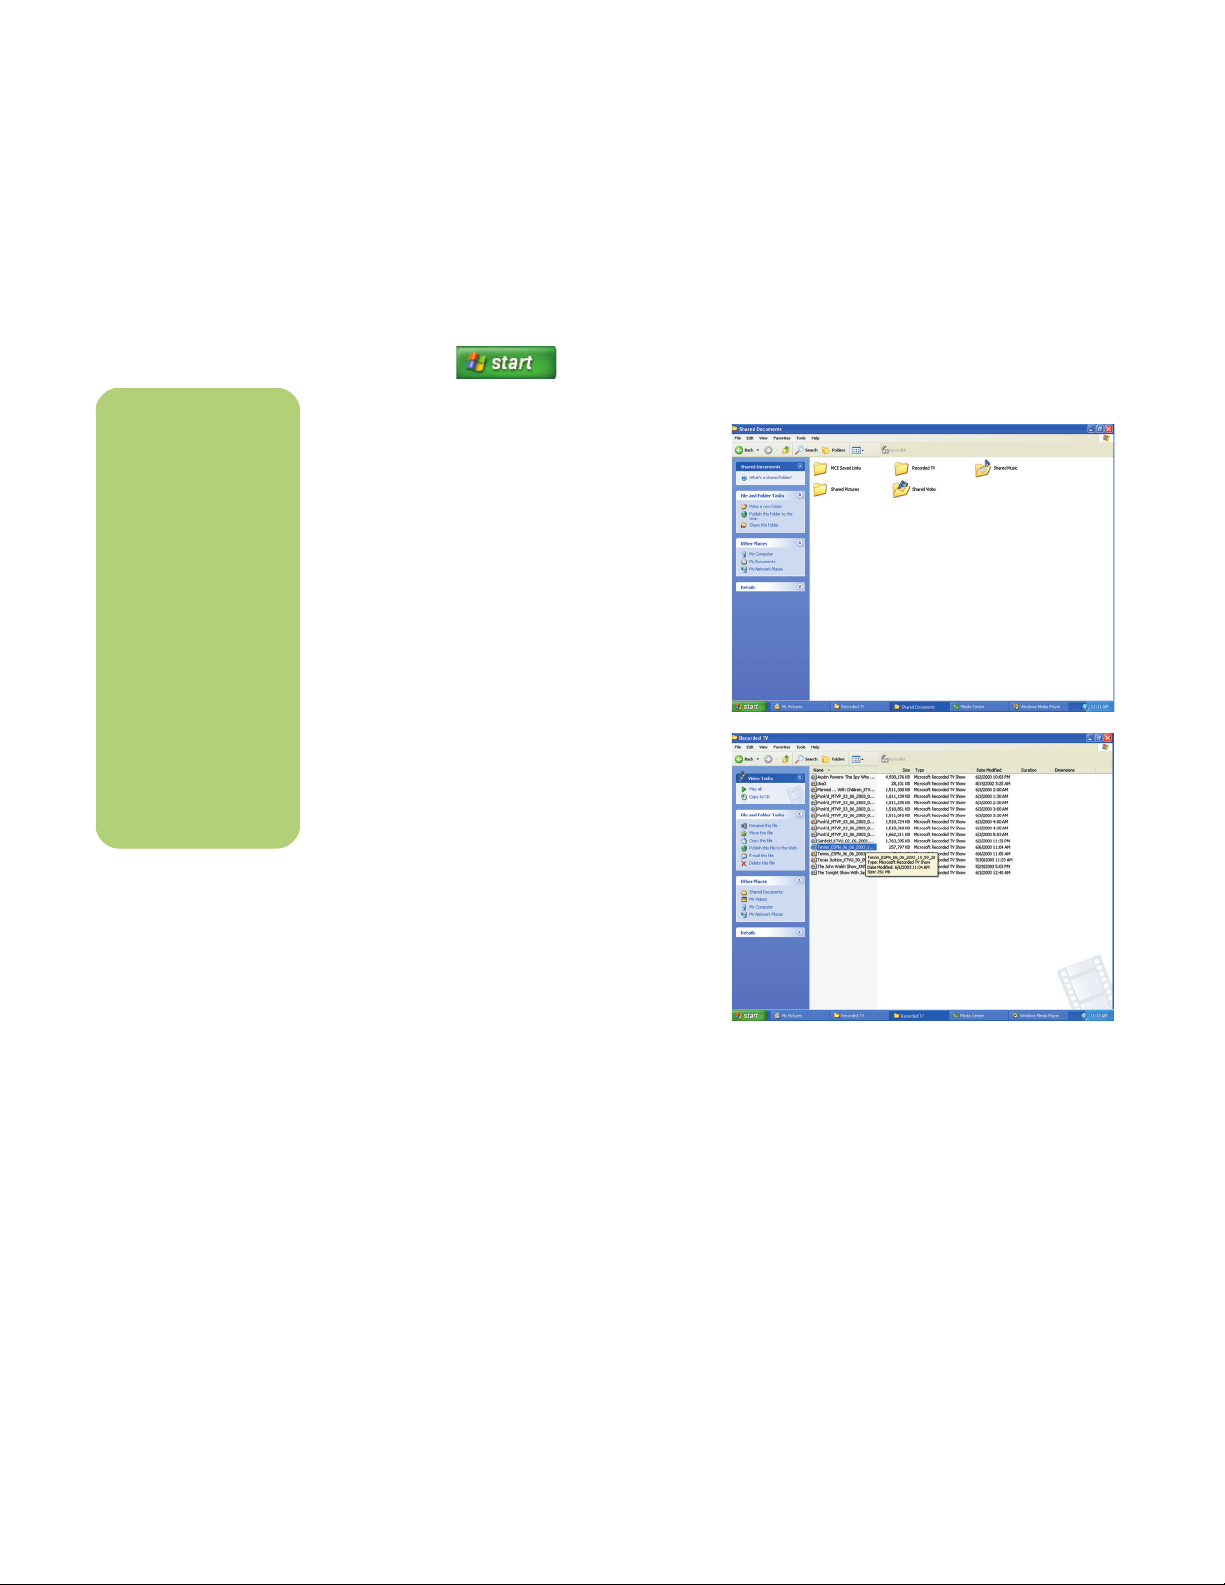
n
To play recorded TV
programs in
Windows Media
Player, a PC requires:
■ Windows XP
operating system.
■ Windows Media
Player 9.
■ A special Media
Center codec
file that may be
available through
Windows Update
(for select
models only).
Locating Recorded TV Programs for Viewing on the Desktop
1 Click Start on the taskbar, and
then click My Computer.
2 Double-click the Shared Documents folder.
3 Double-click the Recorded TV folder.
4 Double-click your Microsoft Recorded TV
program file. A thumbnail picture of your
recorded TV program is displayed by default.
5 To view your recorded TV program, use the
playback controls.
50 HP Media Center PC Software Guide
Page 55

About Recording Errors
A recording error means that a program scheduled
to record was not recorded. This can occur for
several reasons. If your PC was turned off and not in
standby mode during the time the program was
scheduled to record, or if there was a recording
Common recording errors
Recording error Description of error
Redundant Program already exists in Recorded TV library or has been recorded
and deleted in the past eight weeks.
Missed PC was turned off during scheduled recording time.
Conflict Another program was scheduled to record at the same time.
Canceled You se l e cted Don’t record on the Program Info menu and canceled the
recording.
Repeat In Advanced Record, you selected First Run only for a series recording
so any programs in a series that are not first run are not recorded.
Error Unknown technical error:
■ Media Center failed to start the recorder.
■ TV signal was lost.
conflict with another scheduled program, a
recording error occurs. If you were watching live TV
when the program was scheduled to record and
declined the prompt to change channels, a
recording error occurs.
n
For more
information about
troubleshooting the
recording conflicts,
refer to Media
Center Help.
■ Failed communication with the set-top box.
Not enough space Hard disk drive is full of recorded TV programs.
Deleted You deleted the program.
Partial Part of the program was recorded.
Viewing recording errors
1 Press the Start button on the remote
control, select My TV, Recorded TV, and
then select Scheduled.
2 Select History.
Watching and Recording TV Programs 51
Page 56

Resolving Recording Conflicts
n
If two recordings are
in conflict, but one is
scheduled to air at
another time, Media
Center displays a
message with the
option to record an
alternate recording of
one of the programs.
Media Center can record only one TV program at a
time. If you schedule two recordings for the same
time, a message appears telling you to resolve the
conflict. If you don’t resolve the conflict, Media
Center automatically makes the selection just before
the program begins recording. Before the program
records, a conflict icon (a red circle with an
exclamation point) is listed next to the program in
Recording priority rules
Media Center selects which program to record
based on the following priority rules:
1 A scheduled program that is not a rerun
2 The program that was scheduled first
3 Manual recordings
Often, Media Center is able to find an alternative
date and time for recording one of the programs so
that both programs can be recorded. If one
recording partially overlaps another, Media Center
records to the end of the first and then begins
recording the second.
the Guide. Press the Start button on the remote
control, select My TV, Settings, Recorded TV,
and then select Scheduled.
To enable Media Center to resolve recording
conflicts, you can set up how program recordings
are handled. When you try to record a program
and another is scheduled at the same time, Media
Center prompts you to choose a program to record.
After you resolve a recording conflict, the conflict
icon continues to appear for the program that is not
scheduled to record so you can return to the conflict
and reverse it, if needed.
If you are watching TV while recording a program,
you can watch only the channel being recorded. If a
recording is scheduled to begin and you are
watching a different channel, a message appears
giving you the choice to change the channel to
begin the recording. If no choice is made, the
channel changes automatically.
Resolving a recording conflict
1 Press the Start button on the remote
control, select My TV, Recorded TV, and
n
To s elect the
recording start and
stop times and other
recording priority
settings, select Record
settings or Series
settings, and then
select the option you
want.
52 HP Media Center PC Software Guide
then select Scheduled.
2 Select a program you want to change.
3 You have different options, depending on
what type of recording you have set.
■ Select Record or Don’t record in the
window and then press OK on the remote.
■ Select Record series or Cancel series.
Page 57

Deleting a Scheduled Program or Series
To prevent recording conflicts, you may need to
delete a program or series that is scheduled to be
recorded.
1 Press the Start button on the remote
control, select My TV, Recorded TV, and
then select Scheduled.
2 Use the arrow buttons to select the program
title you don’t want to record, and press OK.
3 To remove a single program, select Don’t
record in the window and press OK on the
remote control.
Or
To remove the entire series from the recording
schedule, select Series, Cancel Series, and
then press OK.
Deleting a Recorded Program or Series
To free up hard disk drive space, you may need to
delete a program or series that has been recorded.
1 Press the Start button on the remote
control, select My TV, and then select
Recorded TV. All the programs you have
recorded appear.
2 To select the program title you want to delete,
use the arrow buttons, and then press OK.
3 To remove that program from the hard disk
drive, select Delete in the window and
press OK on the remote control, and then
select Yes.
Watching and Recording TV Programs 53
Page 58

Blocking Unwanted TV Programs and Movies
(Select models only)
If you set Media Center to block unrated channels,
an error could occur. It is recommended that you
make sure this option is not selected.
To do t h i s:
n
Parental control and
caption display
settings for TV and
DVDs are included
with select
models only.
n
Some DVDs don’t
have ratings assigned
to them.
1 Press the Start button on the remote
control.
2 Select Settings, General, and then select
Parental control.
3 Enter your four-digit code number.
4 Select TV Ratings.
Setting Movie/DVD or TV Ratings
(Select models only)
1 Press the Start button on the remote
control.
2 Select Settings, General, and then select
Parental control.
3 Enter your four-digit code.
5 Click Tur n on TV blocking. Make sure that
Block unrated TV programs is not
selected.
6 If desired, you can select the Maximum
allowed TV rating setting, select a rating,
and then click OK. Selecting this setting does
not cause an error.
4 Select Movie/DVD ratings or
TV Ratings.
5 Select Turn on movie blocking or Turn
on TV blocking.
6 Select (+) or (–) to select a maximum allowed
movie rating.
54 HP Media Center PC Software Guide
Page 59

Setting Caption Display
(Select models only)
If you set Media Center to display captions while in
window mode (not full-screen mode), the window or
the caption text may flash as the text scrolls in the
window. To fix this problem, change the display to
full-screen mode or turn off the caption display
option.
To turn off the caption display option:
1 Press the Start button on the remote
control.
2 Select Settings, TV, and then select Audio.
Displaying Teletext
(Select models only)
To display the Teletext toolbar:
1 While watching TV in full-screen mode, press
the More Info button on the remote control to
display the information bar.
2 Select the Tele t ext button on the information
bar. The Teletext toolbar will also appear at
the bottom of the screen so that you can
navigate the Teletext pages.
3 Click (+) or (–) next to the Caption display to
select:
■ On to view speech as text in a TV program
containing the captioning signal.
■ On when muted to display speech in a
muted TV program.
■ Off to disable caption display.
For more information about the Teletext toolbar,
refer to the help menu in Media Center.
Watching and Recording TV Programs 55
Page 60

About Teletext
Teletext is additional information that is broadcast
within a TV signal. You can navigate the Teletext
main page and subpages to find information such
as the weather, sports scores, or community events.
You can turn on subtitles in a specific language for a
program you are watching. When a TV show is
Teletext may not be available for all the channels
you receive. The Teletext button will only display on
the information bar if Teletext is available for that
channel. If you would like more information about
which channels have Teletext available, contact your
TV service provider.
recorded, the Teletext subtitles are stored with the
recording so you can view the subtitles when you
play the recording later.
Safeguarding Recorded TV Programs
Most television broadcasters do not encrypt
programs, so a recording can be played on any
Media Center PC. A recording of a broadcasterencrypted TV program, though, can be played only
on the PC that recorded it.
When you record TV programs using Media Center,
the TV program broadcaster may have an
encryption code that Microsoft includes as a special
code in the recorded files. This code is keyed to
or replace the hard disk drive in your PC. If you do
not have the backup CD after you perform a system
recovery or replace the hard disk drive, you will not
be able to play any previously recorded TV
programs that are broadcaster encrypted.
The procedures that follow describe how to prepare
your PC, make the backup files you need, copy the
file to CD, and use the backup CD to restore the files
to your PC after a system recovery.
your PC and is required to play broadcasterencrypted TV programs previously recorded to your
hard disk drive, copied to DVD, or copied to other
media. When you perform a system recovery or
replace the hard disk drive in your PC, you lose the
special code.
You can safeguard your capability to play recorded
TV programs by making a backup CD and using it
as described in the procedures provided here. Make
the backup CD now, before you need it, so that you
can use the CD after you perform a system recovery
To safeguard your recorded TV programs you
need to:
■ Prepare the code key files.
■ Make a backup CD.
■ Perform a System Recovery, if necessary.
■ Use the code key backup CD after a system
recovery.
Important information about recorded TV programs
When you replace the hard disk drive, you lose any
files or software that you created, saved, or installed
on the PC. You also lose a special code that
Without the code, Media Center will not play the TV
programs previously recorded to disk or copied to
DVD or to other media.
Microsoft includes in the files of the recorded TV
programs.
56 HP Media Center PC Software Guide
Page 61

Preparing the code key files
1 After you set up your PC and turn it on,
complete the initial Microsoft Windows setup.
Open Media Center and complete its setup.
2 Record at least one TV program.
3 Close Media Center.
4 Open the Microsoft Backup utility: Click Start
on the taskbar, choose All Programs,
Accessories, System Tools, and then click
Backup. The Backup or Restore Wizard
opens.
5 Click the Advanced Mode link near the
middle of the window.
n
The code key files
and backup CD you
make can be used in
your PC only.
6 At the top of the Backup Utility window, click
Too ls and select Options.
7 Click the Exclude Files tab.
Watching and Recording TV Programs 57
Page 62
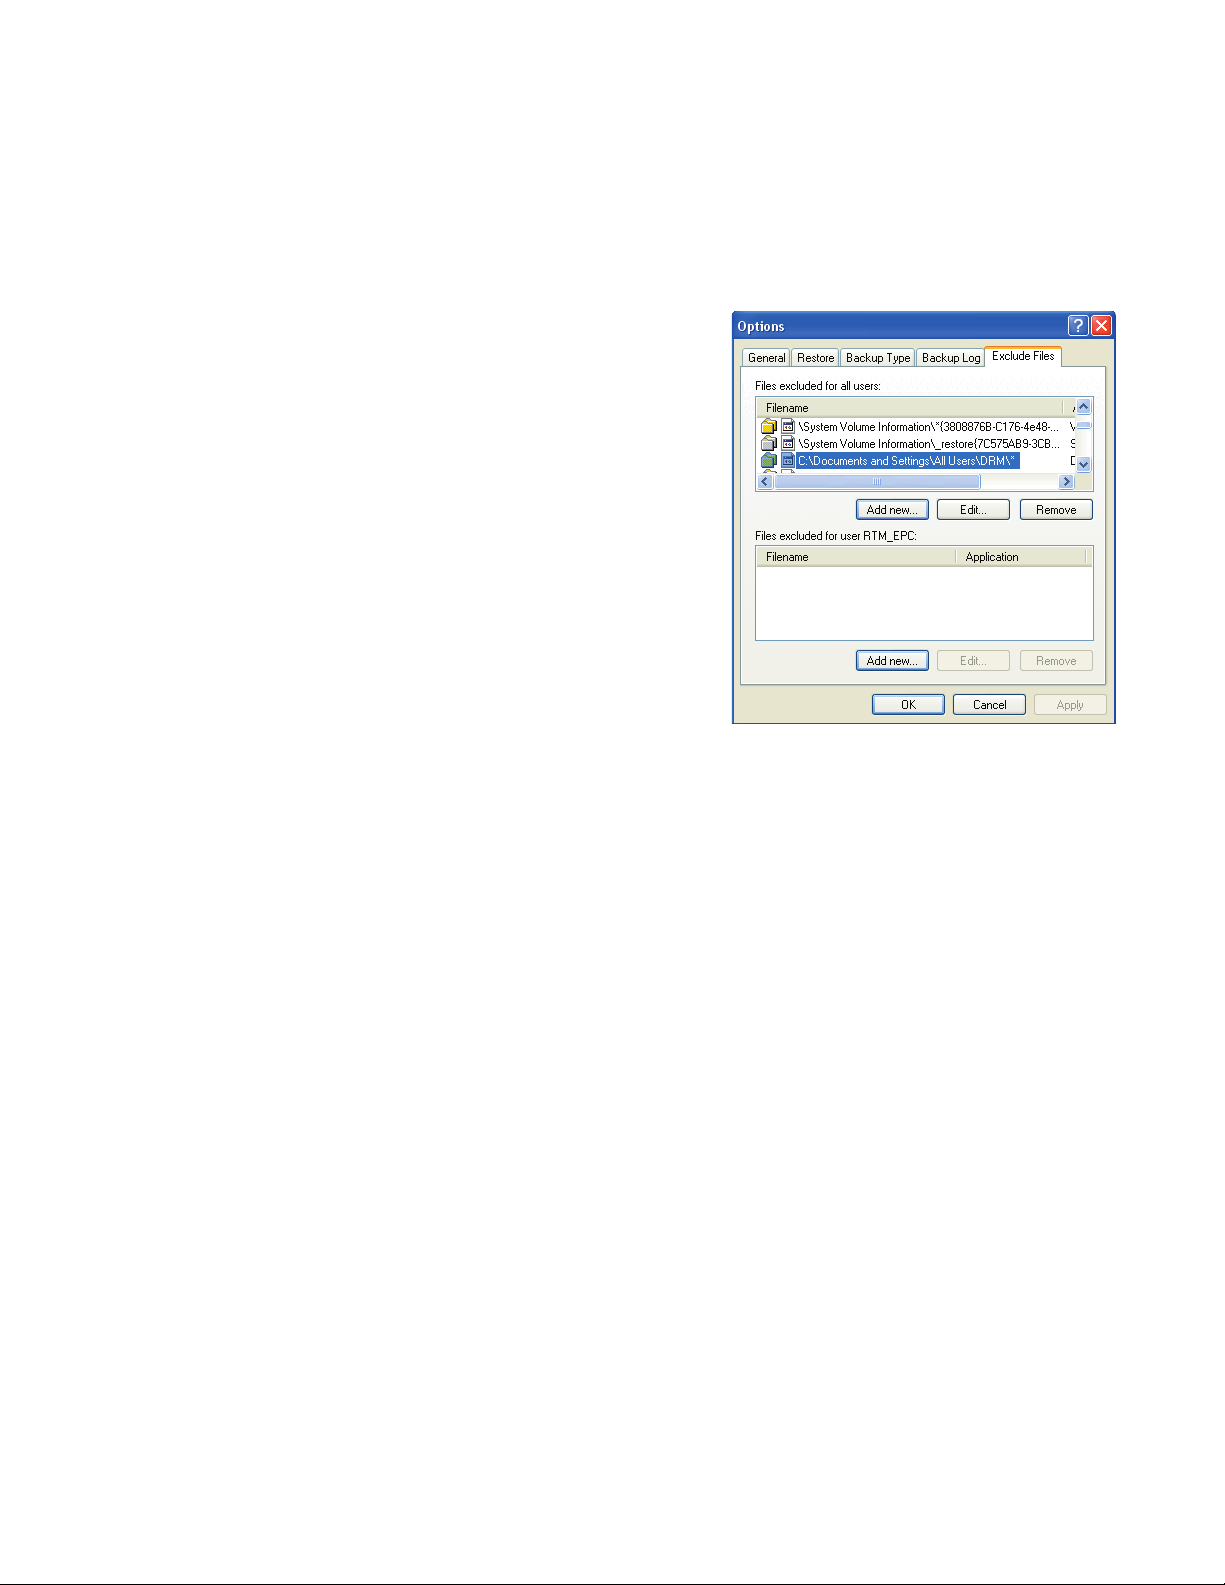
8 In the Files excluded for all users box, put your
cursor over the vertical line between Filename
and Application in the title bar, and then click
and drag the line to the right to see the full
entries.
9 Scroll down the list to see and then click the
entry: C:\Documents and Settings\All
Users\DRM\*
10 Click Remove, click Apply, and then click
OK. The Options window closes.
11 In the Backup Utility window, click the
Backup tab.
12 In the left box, click the plus sign (+) for Local
Disk (C:). The file tree expands. Click the plus
sign (+) for Documents and Settings, click the
plus sign (+) for All Users, and then click the
DRM box so a check mark appears.
13 Scroll down the list and click the System
State box so a check mark appears.
14 At the bottom of the window, beneath Backup
media or file name, click Browse. Because a
diskette is too small to save the backup file on,
you will need to save the file to the desktop
portion of the hard disk drive before writing
the file to CD. If the message Insert a disk into
drive A appears, click Cancel.
15 The Save as window opens. In the Save as
type box, select Desktop from the drop-down
list. In the Save as box, use the default name
(Backup.bkf) or type in a file name with the
extension .bkf and then click Save. The
window closes.
16 Click Start Backup in the Backup Utility
window. The Backup Job Information window
opens.
17 Click Start Backup. The Backup Progress
window opens. When the process finishes, the
window displays the message The backup is
complete.
18 Click Close.
19 Close the Backup Utility window. Continue
with the next procedure.
58 HP Media Center PC Software Guide
Page 63

Making the backup CD
1 Click Start on the taskbar, choose All
Programs, CD (DVD) Recorder, if
present, RecordNow!, and then click
RecordNow! again. The RecordNow!
window opens.
8 In the RecordNow! window, click the red
Burn icon. If a warning window opens,
click OK.
9 Wait while the program writes to the CD and
the disc tray ejects.
2 Insert a blank CD.
10 Remove the CD, label it, and store it in a
3 Select the Data Projects tab, and then click
Data Disc.
4 Click Continue.
5 Click Add Files and Folders. The Select
files and folders to add window opens.
6 In the Look in box, select Desktop from the
drop-down list.
safe place for use with the next procedure.
Click Done.
11 Close the RecordNow! window.
12 Because you do not need the backup file you
created, drag the file to the Recycle Bin on the
desktop. This deletes the copy of the file that
was on the hard disk drive.
7 Click the backup file (for example,
Backup.bkf) so it appears in the File name
box. Click Add. The window closes.
Using the code key backup CD after a system recovery
1 Insert the backup CD you made into a drive.
The drive window opens and shows the disc
contents.
5 When the What to restore window opens,
click Browse, and the Browse window shows
the A: drive.
Or
If the window doesn’t open automatically,
click Start, My Computer, and then rightclick the drive icon to view the contents of
your backup disc.
2 Double-click the backup file (for example,
Backup.bkf). The Backup or Restore Wizard
opens.
3 Click Next.
4 Choose Restore files and settings, and
then click Next.
6 Click Browse again, and the window shows
Select file to catalog.
7 Click the drop-down menu arrow and click the
optical drive with the backup CD.
8 Click the backup file name.
9 Click Open and then click OK.
10 In the Items to restore box, click the plus sign
(+) for the backup file name. The file tree
expands. Click the C box so a check mark
appears. Click the System State box so a
check mark appears.
11 Click Next.
Watching and Recording TV Programs 59
Page 64

12 The Backup or Restore Wizard window shows
the message You have created the following
restore settings. In the window, click the
Advanced button. Click Next.
13 A warning message window opens. Click OK
in the Warning window.
14 Select Replace existing files and then click
Next. Click Next again. Click Finish. The
Restore Progress window opens.
Managing Hard Disk Drive Space
15 Wait until the process completes, and then
click Close in the Restore Progress window.
16 A Backup Utility message window opens.
Click Yes to restart the PC. Wait until the
restart completes.
Open Media Center and complete the setup. You
can now play previously recorded TV programs that
are broadcaster encrypted.
n
The hard disk drive
space on your PC
may differ from the
space listed on this
page. The Windows
XP operating system,
large data files, and
software programs
require disk space.
The space available for recording TV programs
depends on your hard disk drive allocation, drive
size, and default recording quality selections. The
HP Media Center PC requires a certain amount of
space to run your Windows XP operating system,
run software programs, and store data files. If your
hard disk drive becomes full, it may affect the PC
speed and performance. You may need to free up
storage space to record more programs or to
Increasing hard disk drive space
■ Adjust TV recording settings.
■ Adjust Recorder storage settings.
■ Use the Disk Cleanup Utility.
■ Adjust the System Restore settings.
optimize the performance of your PC. There are
several things you can do to optimize and increase
your hard disk drive space.
The PC comes with a hard disk drive. Depending on
your model, the hard disk drive has 80 gigabytes
(GB) to more than 200 GB of total disk space. The
PC comes with preloaded software programs and a
backup partition within the hard disk drive that takes
up a certain amount of space on the hard disk drive.
■ Delete recorded TV programs from the
Recorded TV folder in Shared Documents.
■ Uninstall software programs.
■ Archive TV programs to a DVD if your PC has
a DVD Writer drive. See “Recording TV
Shows to DVDs” on page 109.
60 HP Media Center PC Software Guide
Page 65
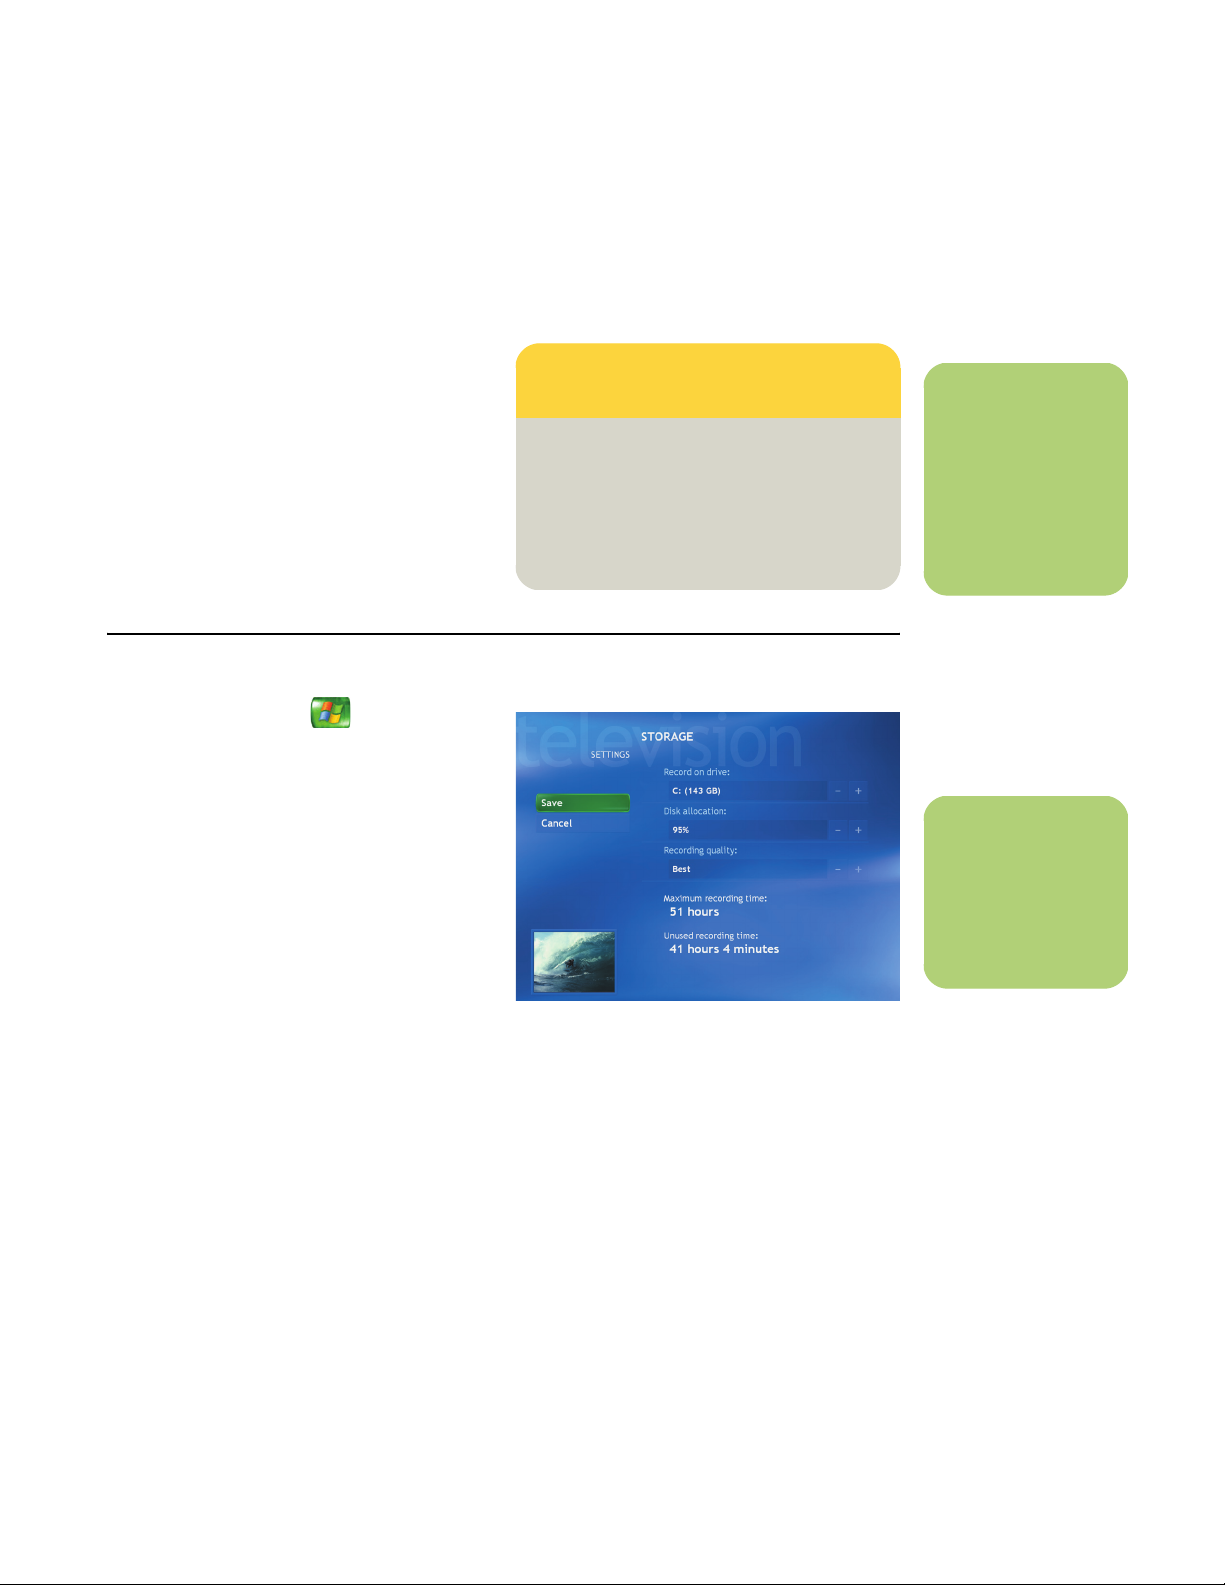
Recording quality and hard disk drive storage space
The space available for recording TV programs
depends on your hard disk drive size, the
percentage of hard disk drive space allocated to
recorded TV, and the recording quality setting.
To get the maximum recording time, change the
recording quality to Fair instead of the default
setting of Best.
Adjusting TV recording and storage settings
Quality of
recording
Best *3 GB/hour
Better *2.4 GB/hour
Good *2 GB/hour
Fair *1 GB/hour
*This table shows approximate sizes of recorded TV program
files. Some files may be smaller or larger.
1 Press the Start button on the remote
control.
2 Select My TV, Settings, and then select
Recorder.
3 Select Recorder storage to change your
Disk allocation and Recording quality settings.
Increase the percentage of hard disk drive
space available for recorded TV programs in
Default Settings. Select between 5 and 90
percent. The default is set at 75 percent.
Or
Hard disk drive space
used
n
To o ptimi ze sto rage
space on your hard
disk drive, you can
change recording and
storage settings in
My TV.
n
The storage space for
your PC may differ
from the amount
listed here.
Select Recording defaults to change your
recording storage settings; for example, you
can increase the available disk space. Select
Fair as the default recording quality. The
better the quality of the recording, the more
space the file takes. Select Until I watch as
the Keep setting for each recorded program.
4 Select (+) or (–) to select your options, and
then select Save.
Watching and Recording TV Programs 61
Page 66

Using the Disk Cleanup utility
1 Click Start on the taskbar.
2 Choose All Programs, Accessories,
System Too l s, and then Disk Cleanup.
Adjusting System Restore settings
1 Click Start on the taskbar.
2 Right-click My Computer.
3 Click Properties.
4 Select the System Restore tab.
Deleting recorded TV programs
1 Click Start on the taskbar, and then click My
Computer.
2 Double-click Shared Documents, and then
double-click Recorded TV.
3 Select HP Pavilion (C:), and then click OK.
4 Select the type of files you want to delete.
5 Click OK.
5 Select HP Pavilion (C:), and then click the
Settings button.
6 Move the Disk space to use slider to a lower
setting to save disk space.
7 Click OK.
3 Right-click recorded TV files, and then select
Delete.
Uninstalling software programs that are not needed
1 Click Start.
2 Click Control Panel.
3 Double-click Add or Remove Programs,
if it is present.
4 Click the program, and then click the
Change/Remove button.
62 HP Media Center PC Software Guide
5 Click OK when the confirmation window
opens.
6 Repeat steps 4 and 5 for each program you
want to remove.
7 Click Close.
Page 67

The My Music window in Media Center works with
Windows Media Player to find and play your music
files and CDs. You can use Windows Media Player
to create your music library and then use Media
Center to find and play your music using your
remote control.
In My Music you can:
■ Play music CDs. Skip, shuffle, or repeat songs
or albums.
■ Play digital music files from a music library
you create and organize using Windows
Media Player.
■ Search for music files by categories: album,
artist, playlist, song, or genre.
■ Download album information such as artist
name, song title, length of song, album name,
label, year, and cover art.
Playing Music Files
■ Play a music playlist with a slide show.
■ Copy music tracks from a CD to your
Windows Media Library.
■ Display visualizations when playing
music CDs.
■ Buy music online from the Now Playing page
in My Music. The Internet browser opens the
Windows Media Web site where you can
listen to and buy music by the artist or album
you are listening to at the time.
n
You can store your
music files in the My
Music folder or in
other folders on your
hard disk drive, but
you need to add
those files to the
Windows Media
Player Library for
Media Center to be
able to find and play
them.
n
The PC must be
connected to the
Internet to view
album information.
Playing Music Files 63
Page 68

Using Windows Media Player
Windows Media Player allows you to copy
digital music files and organize a music
library that you can access by using the My
Music window in Media Center. You can:
n
Media Center can find
and play only those
files that have been
added to the
Windows Media
Player Library.
■ Create playlists of your favorite songs.
■ Create a music library by copying tracks from
CDs or adding music files from the Internet.
■ Organize digital music files by album, artist,
playlist, or genre.
■ Edit information about music files, such as the
song title, music type, or artist name.
■ Share music files with others.
■ Listen to a radio station on the Internet.
■ Play DVD and VCD movies.
■ Delete files from your music library.
64 HP Media Center PC Software Guide
Page 69

Creating a Music Library
When you add music files to your music library, they
are placed into your My Music folder in Windows
Explorer and in the Media Library in Windows
Media Player. You can also find them in Media
Center.
Adding music files
1 Click Start on the
taskbar, choose All Programs, and
then click Windows Media
Player.
2 Click the Media Library tab on the side of
the window. The first time you select Media
Library, a message tells you that Windows
Media Player needs to search your computer
for your music files.
3 Click Yes. Windows Media Player searches
for all available audio media and places them
in the Media Library. If you choose No, you
can go to the Tools menu and search for
media to add later. Select drives, and then
click Search.
4 To add files from a CD to your Media Library:
a Insert the CD.
b Select Copy from CD from the tabs on
the left.
Deleting music files
c Select the tracks you want to copy by
placing a check in the box next to the
track.
d Select Copy Music in the menu bar.
You can select to copy your music files as
MP3 files or as Windows Media Audio
files (.wma).
5 Click the Media Library tab to see where
your new audio files have been placed. You
can rename files by right-clicking the file,
selecting Edit, and then typing a new name
or genre over the old one. The way you label
your music files determines the category in
which they are placed.
The added music files can immediately be found
and played back by using My Music in Media
Center.
For more information about adding music files to
the Media Library, use the Windows Media Player
Help menu.
1 Click Start on the taskbar,
choose All Programs, and then click
Windows Media Player.
2 Select the Media Library tab.
3 Select the file you want to delete.
4 Click the delete icon on the menu bar,
and then select Delete from Library.
5 Select the option to Delete from Media
Library only or Delete from Media
Library and my computer, and then
click OK.
Playing Music Files 65
Page 70

Searching the Computer for Music Files
You may have already copied and organized your
music files on your hard disk drive. If so, you need
to add them to the Windows Media Player Library
to access them with the Media Center.
To add music files that are stored in your My Music
or Shared Music folder on your hard disk drive:
n
For more information
about music file
formats, use
Windows Media
Player Help and
Media Center Help.
Only supported audio
file types are
displayed in the My
Music window.
Unsupported files
won’t play.
1 Click Start on the taskbar, and
then click Windows Media Player.
2 Click the Media Library tab.
3 Select + Add on the menu bar, and then
select By Searching Computer. Click the
arrow on the search or drop-down list to
search a specific drive.
4 Click Search. Windows Media Player
searches the selected drives for all supported
audio files and adds them to the Media
Library.
Using supported music file types
You can play the following types of digital audio
files in Media Center. You can also select Media
Center as the default player for any of the listed file
types. Refer to Windows Media Player Help for
more information about supported file types.
If Windows Media Player does not recognize all of
your audio files, try copying the files directly into
Windows Media Player. Refer to Windows Media
Player Help for more information.
The music files can now be found and played in the
My Music window in the Media Center. You may
need to close and open Media Center for the added
music files to appear in My Music.
File extension File type
.cda CD audio
.wav Windows audio file
.mp3, .m3u Audio files
.asf, .asx, .wax,
.wm, .wma,
.wmd, .wmv,
.wvx, .wmp,
.wmx
Windows Media
audio files
66 HP Media Center PC Software Guide
Page 71

Adding CD Tracks to the Music Library
To add the CD tracks to your Media Center music
library:
1 Press the Start button on the remote
control, and then select My Music.
2 Insert a CD into the CD drive.
3 Select the CD you want to copy from the My
Music main window.
4 Select Copy CD. The first time you copy a
music CD you must select your copy protection
option, and then follow any onscreen
instructions.
5 Select Yes to begin copying tracks to your
music library. This process may take several
minutes, depending on the length of your
music tracks.
6 Click OK.
n
Each time you add
music files outside of
Windows Media
Player, you must use
the Tools menu to add
music files to your
Windows Media
Player Library for
Media Center to
find them.
Playing Music Files 67
Page 72

n
You can place all your
music files into the
My Music folder or
into other folders on
your hard disk drive,
but you need to add
those files to the
Windows Media
Player Library for
Media Center to be
able to find and
play them.
Playing Digital Music Files
When you first open the Media Center and open the
My Music window, you may not find any music files
listed unless there is a music CD in your CD drive or
unless you have already added audio files to your
Windows Media Player Library.
If you don’t have any music files listed, you need to
add music files to the Windows Media Player
Library and then restart Media Center to play your
music files in Media Center.
When you copy music files using Windows Media
Player and your computer is connected to the
Internet, the CD information is copied and displayed
in Media Center and in the Windows Media Player
Library.
Playing a music CD using Media Center
If you insert a music CD when Media Center is not
open, a message appears asking what you want to
do. You can select Windows Media Player as your
default audio player. If you have another program
set as the default audio player, Windows opens this
program and begins playing the CD.
1 Press the Start button on the remote
control.
n
The PC must be
connected to the
Internet to view song
information.
68 HP Media Center PC Software Guide
2 Insert a music CD into the CD drive; the CD
plays automatically in Media Center. If you
have other media such as live TV already
playing when you insert the CD, Media
Center asks you if you want to play the CD.
Select Yes to begin playing the CD.
Page 73

Finding Music Files in My Music
After you have added and organized files in
Windows Media Player Library, you can browse
through your music files in the My Music window.
You can search for music files by album title, artist,
song title, or music genre. You can also use the
search feature to quickly find a specific song,
album, or artist.
To find a music file
1 In the My Music window, select Albums,
Artists, Playlists, Songs, or Genres to
display a list of all items in that category. In
these windows you will have other options,
depending on the category you select.
Or
n
To d ispla y CD
information such as
song titles and cover
art in Media Center or
in Windows Media
Player, your PC needs
to be connected to the
Internet. Without an
Internet connection,
the music files are
labeled unknown,
and only track
numbers and playing
times are displayed.
Select Search. Use the numeric keypad
buttons on the remote control or your
keyboard to enter a descriptive word, song
title, or artist name and display a list of all the
titles that match your entry.
Playing Music Files 69
Page 74
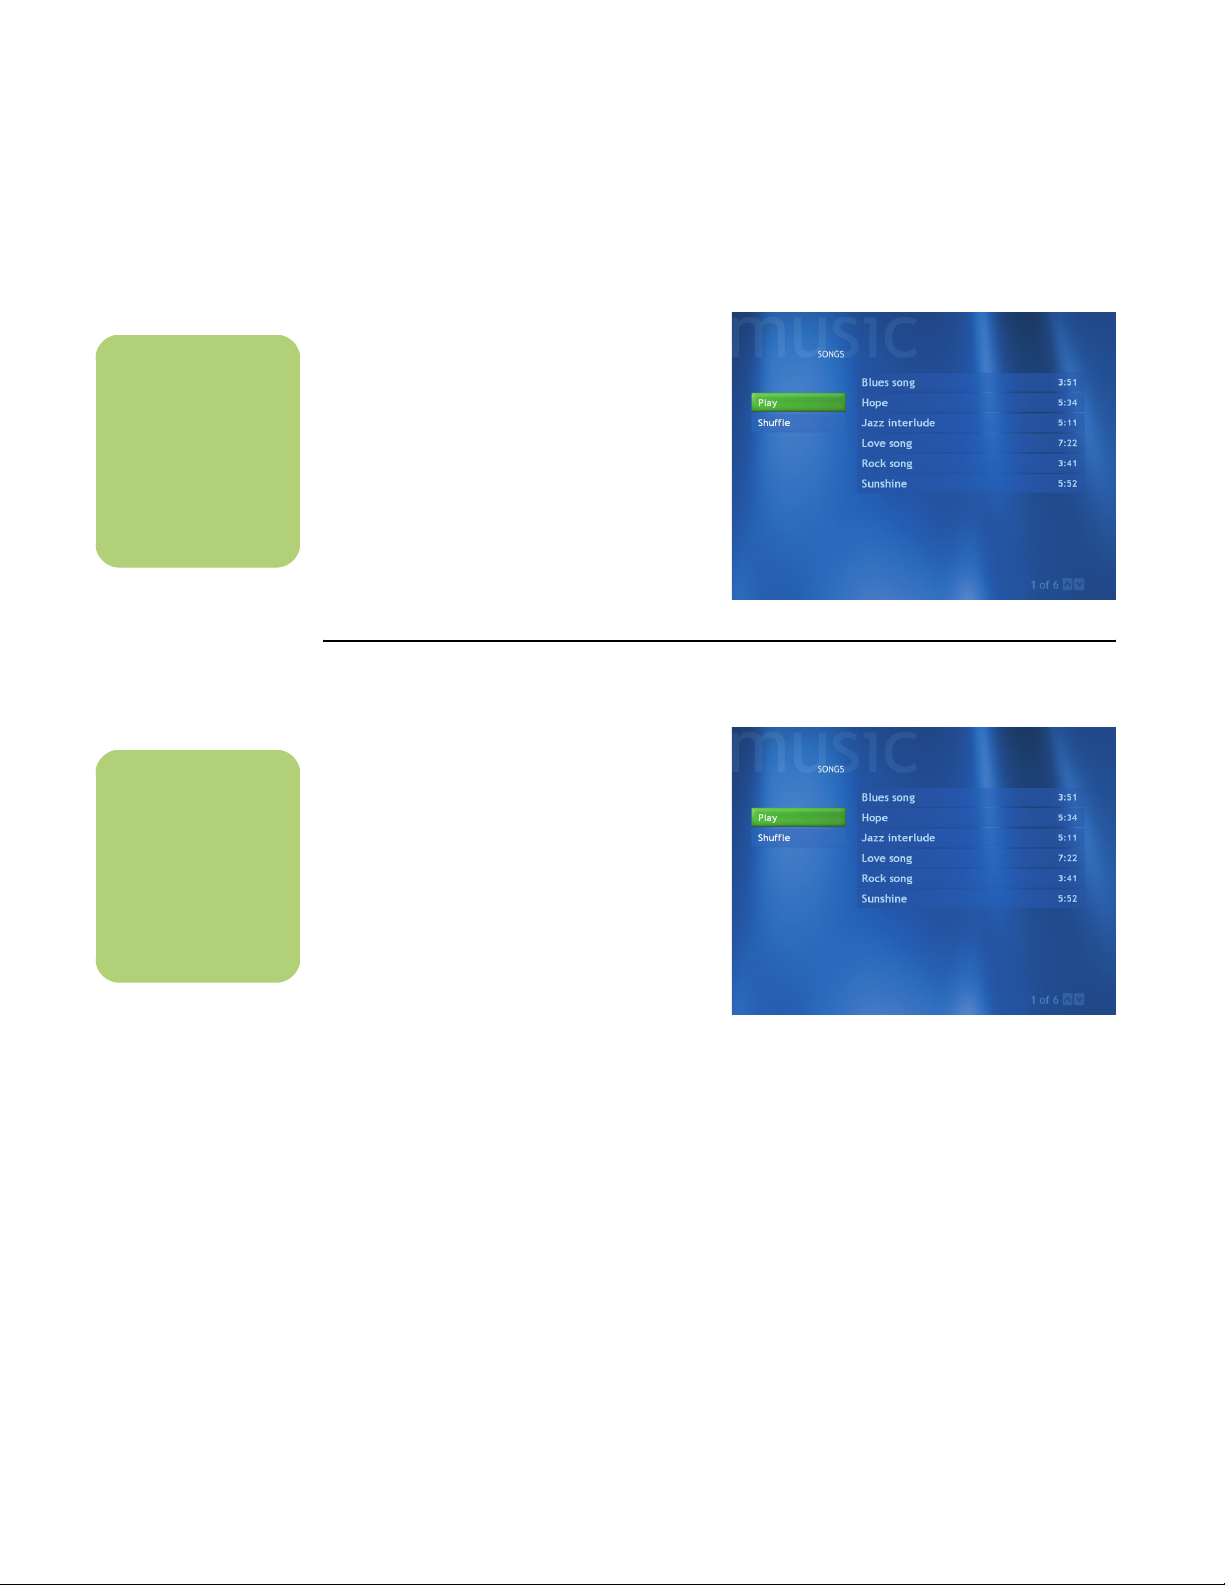
n
When copying music
tracks, a check mark
appears next to the
track after it has been
copied to the music
library.
n
You c an s el e ct
Visualize in the Now
Playing window to
see a visualization
while you play a
music track.
2 Use the arrow keys to select a music file, and
then press the Play button on the remote
control to begin playing that music file.
Playing a Song
You can play a song from anywhere in My Music.
You can select it from the View Song list, or from the
Album, Artist, and Genre lists. You can also play a
single song from a playlist:
1 In the My Music window, select Songs. The
list displays all the songs in your media
library.
2 Use the arrow buttons to select a song, and
then press OK or Play on the remote control to
play it.
70 HP Media Center PC Software Guide
Page 75
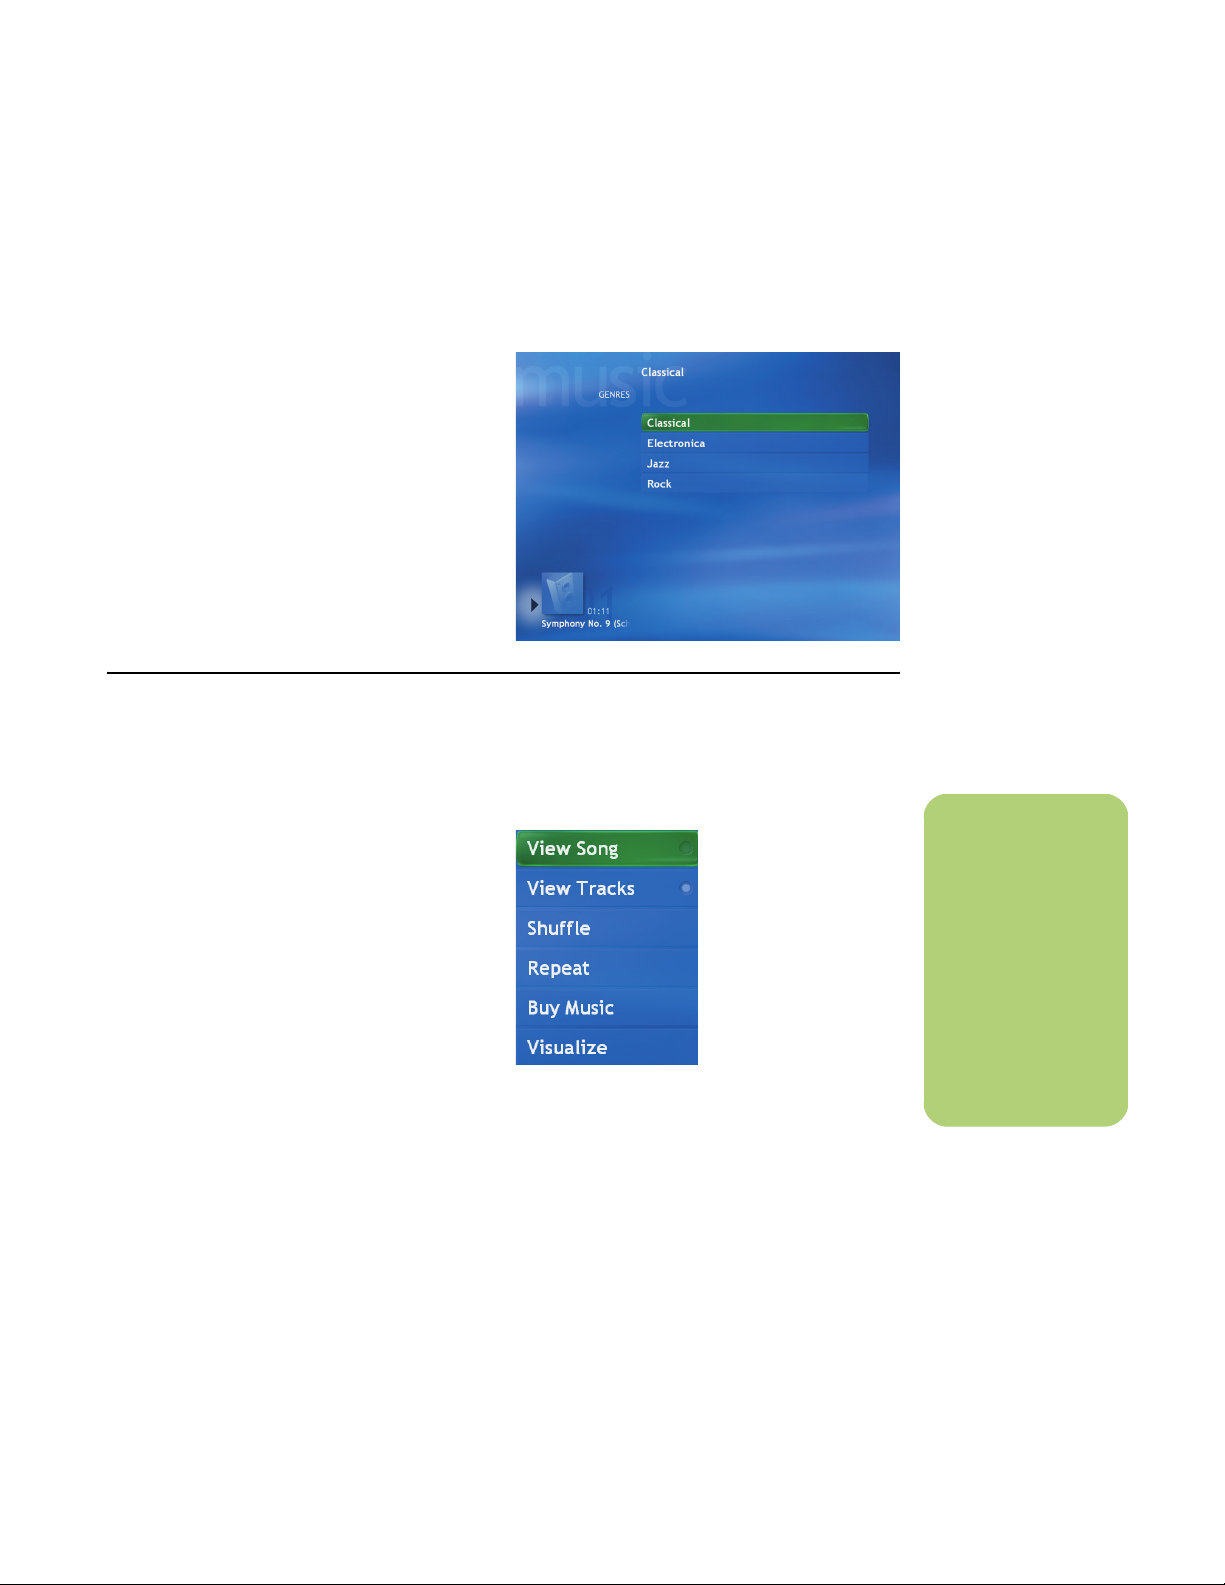
Setting Up an Automatic Disc Jockey
You can select to have Media Center randomly play
all the available songs in one genre:
1 In the My Music window, select Genres. The
list displays all the genres available in your
Media Library.
2 Use the arrow buttons to select a genre, and
then press OK on the remote control.
3 Use the arrow buttons to select Shuffle, and
then press OK on the remote control. All songs
in that genre are randomly played.
Finding and Playing an Album
1 In the Media Center Start menu, select My
Music, and then select Albums.
2 To organize all of the albums available, select
View by list or View by cover.
3 To select an album, use the arrow buttons, and
then press OK on the remote control. You can
also select:
■ Shuffle to rearrange the music tracks on
the album.
■ Play to play the album selected. The Now
Playing window opens, and the album
starts playing.
n
When you select Buy
Music, your Internet
browser opens the
Microsoft Web site.
Here you’ll find
information about the
artist or album you’re
currently listening to
or similar artists. You
have the option to
purchase CDs.
Playing Music Files 71
Page 76

n
When recording a
CD track, Windows
Media Player Library
automatically skips
over songs that are
already included in
the Library.
4 In the Play window, select a song and press
OK on the remote control. After play begins,
you can also select:
■ View Song to view cover art and play
one track.
■ View Tracks to view a list of all tracks on
the album.
■ Shuffle to rearrange the play order.
■ Repeat to play the album again.
■ Buy Music to connect to the Internet, find
CD information, and buy music CDs. To go
back to Media Center, press Start on the
remote control.
■ Visualize to view a picture while listening
to a song.
5 To return to the previous window, press Back
on the remote control.
Creating a Playlist
A playlist is a customized list of digital music files.
Using playlists, you can group various digital music
files together and determine the order in which you
want the files to play. You can create a playlist that
includes several tracks from various CDs or even a
playlist that contains background music for a
slide show.
Use Windows Media Player to create playlists and
then play them back using Media Center.
To create a playlist
1 Click Start on the taskbar,
choose All Programs, and select
Windows Media Player.
2 Select Media Library.
72 HP Media Center PC Software Guide
3 Click Playlists in the menu bar, and then
click New Playlist.
Page 77
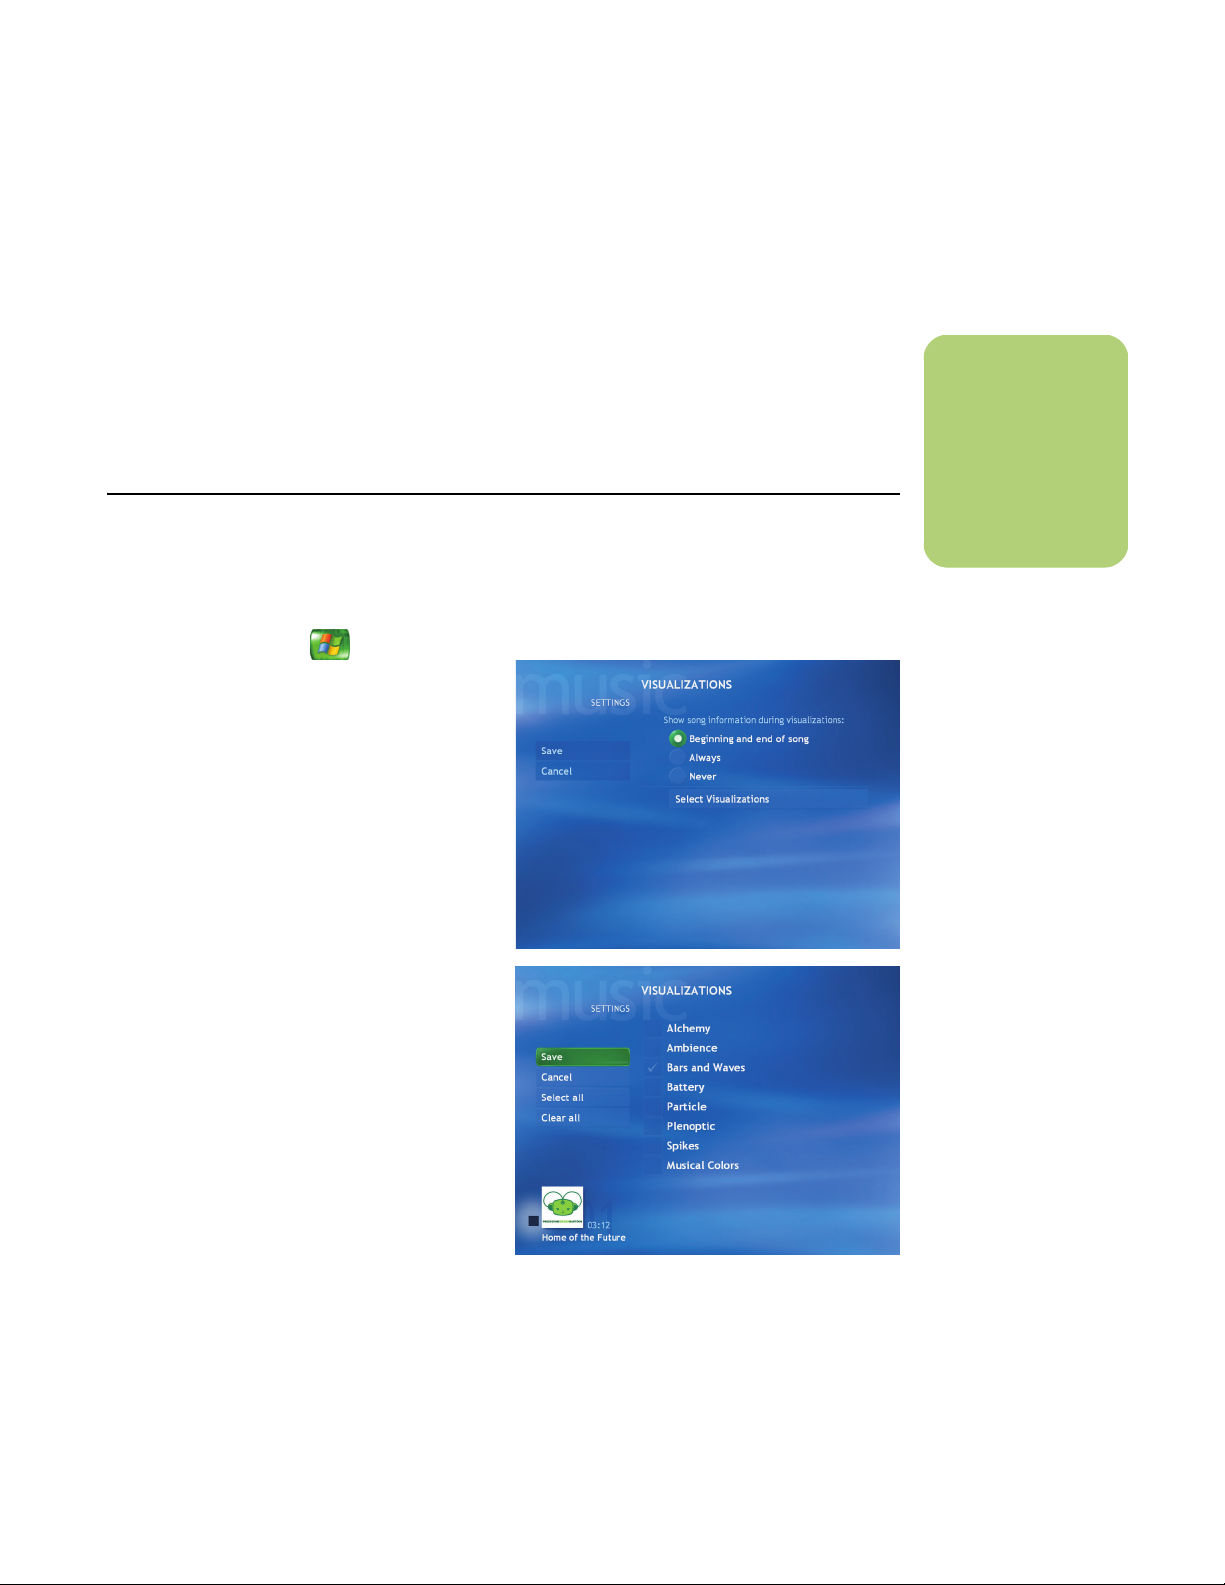
4 Type a name for your playlist, and then click
OK. The new playlist should appear under the
My Playlists area of the Media Player window.
5 In the Media Library, right-click the music file
that you want to add to your playlist, and then
click Add to Playlist.
Selecting a Visualization
To select which visualization to display when you
play a song:
1 Press the Start button on the remote
control, select My Music.
2 Select Settings.
3 Select Select Visualizations.
6 Select your playlist from the Add to Playlist
window, and then click OK. Repeat this step
until all of your files are added. You can now
play your playlist in Media Center.
n
If your PC is
connected to the
Internet, the CD track
titles and cover art
appear in Media
Center.
4 Select the visualizations you want by placing
a check mark next to each one.
5 Select Save.
6 Select a song visualization option and then
select Save.
Playing Music Files 73
Page 78

74 HP Media Center PC Software Guide
Page 79
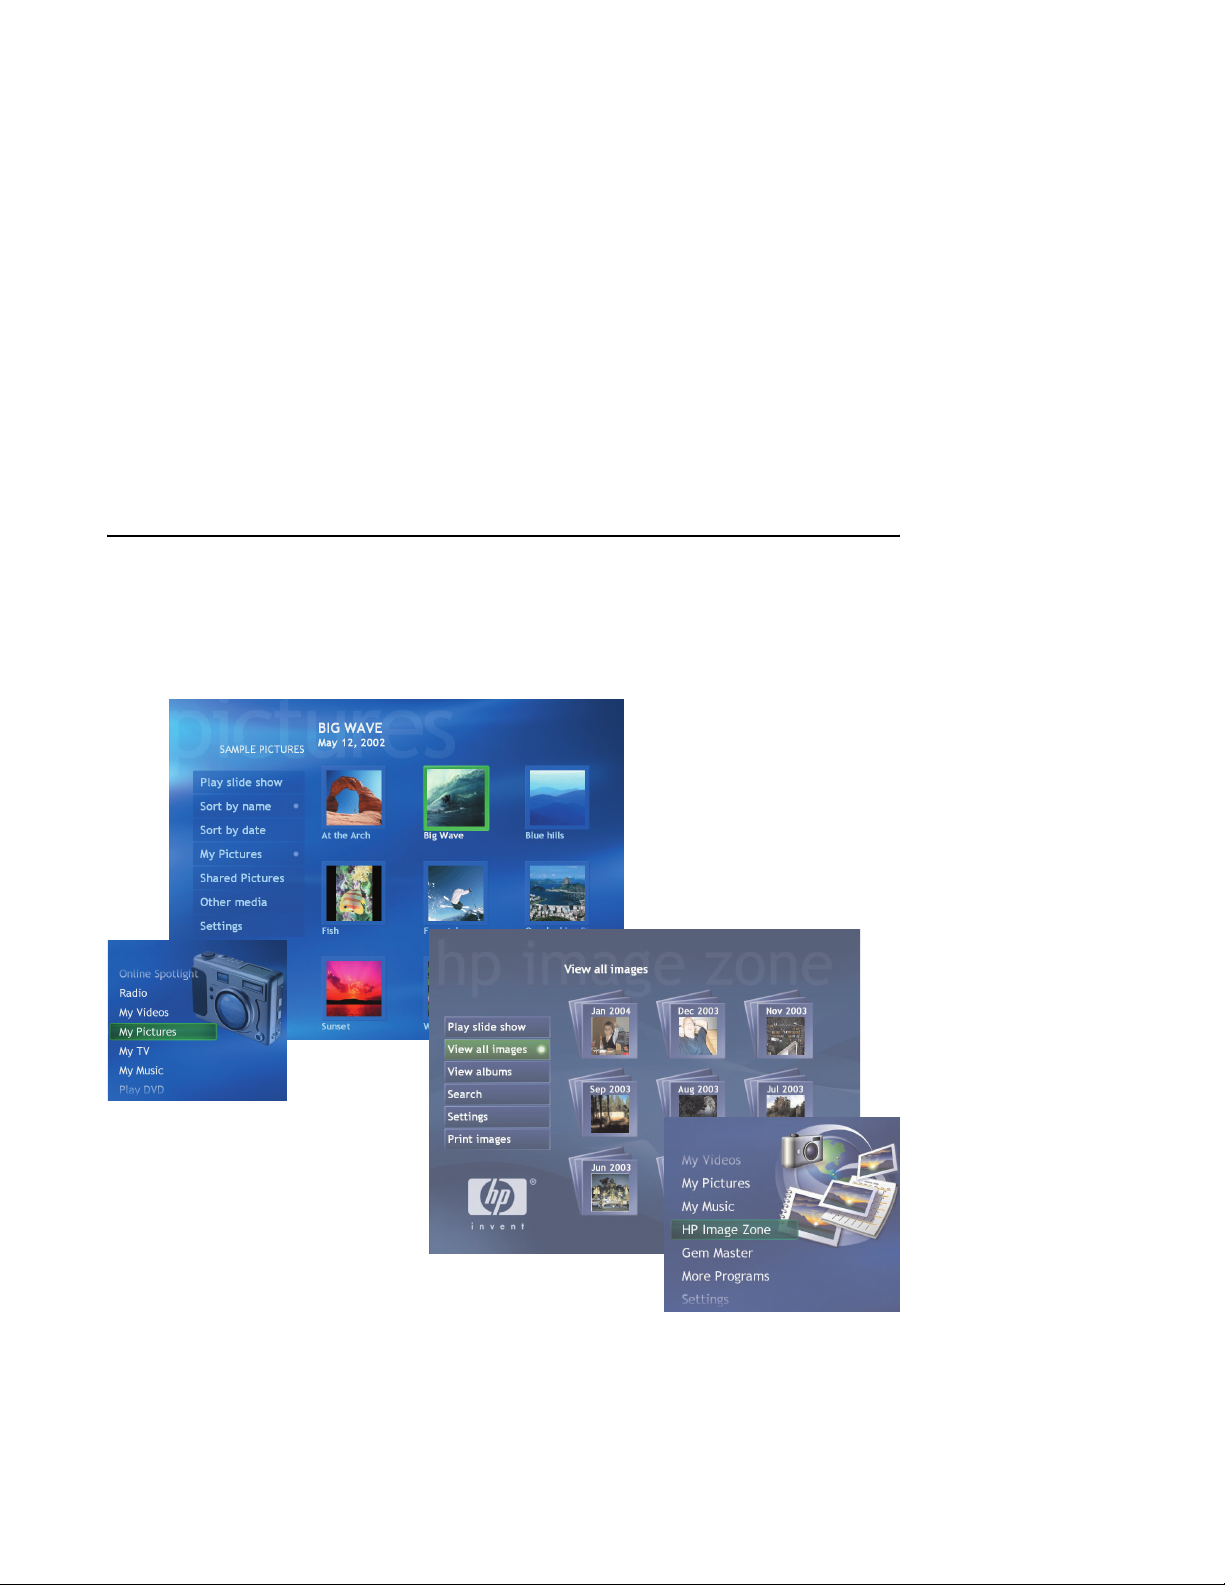
Working with Pictures
The My Pictures and HP Image Zone Plus areas in
Media Center are great ways to view, organize,
and print your pictures.
With My Pictures, you can organize your pictures
into folders you create in the My Pictures directory in
Windows Explorer. For more information about
using My Pictures, see “Using My Pictures in Media
Center” on page 76.
Working with digital images
You can connect a digital image source, such as a
digital camera or a digital video camera, directly to
the PC or through a docking station. Digital picture
files you copy or download from the device appear
With HP Image Zone Plus, you can organize your
pictures by assigning a date, keyword or place. For
more information about using HP Image Zone Plus,
see “Using HP Image Zone Plus in Media Center”
on page 84.
in the My Pictures folder. You can copy digital
picture files from the memory cards used by digital
cameras and other digital imaging devices by using
the memory card reader (select models only).
Worki n g wi t h Pic t ure s 75
Page 80

Using My Pictures in Media Center
My Pictures is a folder on your hard disk drive in the
My Documents folder, and it is a Media Center
menu item which allows you to view and search for
your digital images by using the remote control or
the keyboard and mouse.
It provides all the tools you need for viewing,
organizing, editing, printing, sharing, and
protecting your digital images.
My Pictures Menu in Media Center
My Pictures Folder in Windows Explorer
76 HP Media Center PC Software Guide
Page 81

Organizing Pictures in My Pictures
For Media Center to find and display your pictures,
they can be stored in several places:
■ The My Pictures folder on your
computer.
■ The Shared Pictures folder on your
computer, which allows you to share your
pictures with others.
■ On other removable media such as a memory
card, a DVD-ROM, or a CD-ROM.
Creating picture folders in My Pictures
1 Click Start on the taskbar, and
then click My Pictures to open the My
Pictures folder in Windows Explorer.
2 Select the File menu, select New, and then
click Folder. Type a name for your personal
picture folder.
3 Locate your picture files and move them to
the My Pictures folder in Windows Explorer:
When you save pictures from your digital camera or
scanner to your computer, Windows automatically
stores them in the My Pictures folder in Windows
Explorer unless you manually store them in another
place.
Before opening Media Center and viewing your
pictures, you may want to spend some time
organizing your pictures by creating picture folders
in the My Pictures folder in Windows Explorer.
n
■ Each user has a
separate My
Pictures folder that
can be opened only
by that person. You
can share pictures
by storing them in
the Shared Pictures
folder.
■ When you
download pictures
from the Internet,
you can use the
browser in
Windows Explorer
to place your
pictures in the My
Pictures folder.
a Click Start, My Computer, and then
select the drive or removable device
where your pictures are located.
b Click and drag your photos to your
My Pictures folder.
c You can add, delete, rename, and
organize your picture files into specific
folders within My Pictures, such as
Vacation or Birthday.
Working with Pictures 77
Page 82

n
From the My Pictures
menu, you can select
Settings to:
■ Select a slide
transition, slide
time delay, and a
background color.
■ Include picture
folders you have
created.
■ Show captions.
■ Display your
pictures randomly.
■ Show song
information during
slide show.
Viewing Pictures in My Pictures
After you organize your pictures in the My Pictures
folder in Windows Explorer, open Media Center to
view your pictures:
1 Press the Start button on the remote
control.
2 Select My Pictures. The right side of the
window shows a small picture image
(thumbnail) and, if you’ve organized your
pictures into folders, folder icons. The
pictures are displayed just as you organized
them in the My Pictures folder in Windows
Explorer.
3 Use the arrow buttons on the remote control
to move through your picture files and folder
files and select a picture.
4 Press OK to select a picture or folder to view.
The selected picture opens in full-screen
mode.
5 Press OK again to zoom in 150%; press OK
again to zoom in 225%. Press the arrow
buttons to pan across a picture. To return the
picture to the original size, press OK a third
time.
Using supported picture file types
n
If the message Image
cannot be displayed
appears, the file may
be corrupted or it
may be an
unsupported file
type. You may need
to edit your image
with a photo editor
and save it in a
supported file format.
You can view the following types of image files in
Media Center.
File
extension
.jpg, .jpeg Joint Photographic Experts
.tif, .tiff Tagged Image File Format
.gif Graphics Interchange Format
.bmp Bitmap
.wmf Windows MetaFile
.png Portable Network Graphics
78 HP Media Center PC Software Guide
File type
Group
■ Only supported image file types are displayed
in My Pictures. Unsupported files are skipped
in a slide show.
■ Folder icons appear even if the images inside
them cannot be displayed.
■ Corrupted and unsupported image file types
display a generic image icon but cannot be
displayed in Media Center.
■ Some file types are supported only if
appropriate filters and software are installed.
Page 83

Zooming in and panning across your pictures
1 Press the Start button on the remote
control.
2 Select My Pictures.
3 Select a picture you want to view.
4 Press OK on the remote control once to
magnify 150%.
Sorting pictures
To organize your pictures by date or by name:
1 Select My Pictures on the Media Center
Start menu.
2 Select the folder of pictures you want to sort. If
you want to sort all your pictures, do not select
a folder.
Viewing pictures as a slide show
1 Press the Start button on the remote
control.
5 Press OK again to magnify 225%.
6 Once you have zoomed in, you can use the
arrow buttons on the remote control to pan
around the image.
7 Press OK again to return the picture to the
original size.
3 Select Sort by date or select Sort
by name.
5 Press the More Info button to display picture
information.
2 Select My Pictures.
3 Select the folder of pictures you want to view
as a slide show, and then press OK.
4 Select Play slide show, and then press OK.
6 Press the Back button to go to a previous
picture. Use the arrow buttons to display the
next or previous pictures.
If you do not select the pictures you want to view as
a slide show, Media Center uses the first folder
listed. If you have picture files that are not stored in
folders you created, Media Center plays all files
stored in the My Pictures folder.
Working with Pictures 79
Page 84

Viewing a slide show with music
n
Use the scroll arrows
at the bottom of the
picture settings
window to view all of
the options.
1 Select My Music on the Media Center
Start menu.
2 Select the music you want, and then press OK
on the remote control. If the music doesn’t start
automatically, press the Play button on the
remote control.
3 To go back to the Media Center Start menu,
press Start on the remote control.
Changing picture settings
Each user can set his or her own picture settings.
1 Press the Start button on the remote
control.
2 Select Settings. You may need to select the
scroll arrows on the Start menu to view
Settings.
3 Select Pictures.
4 Select an option. Press the OK button on the
remote control to select a specific setting.
4 Select My Pictures.
5 Select the folder of pictures, and then
press OK.
6 Select Play slide show, and then press OK.
When Media Center switches to full-screen
mode, the inset window disappears but the
music continues to play.
5 When you have selected all of your picture
settings, select Save.
Turning on or off photo captions
A caption displays the file name or title and the date
the file was created or edited, whichever is first.
1 Press the Start button on the remote
control.
2 Select My Pictures.
3 Select Settings.
80 HP Media Center PC Software Guide
4 Select the Show caption check box and
then press OK.
5 Select Save, and then press OK.
Page 85

Editing Pictures in My Pictures
To fix red eye or contrast in your picture:
1 Press the Start button on the remote
control.
2 Select My Pictures.
3 Select the picture you want to edit.
4 Press the More Info button on the remote
control.
5 Select Touch up.
6 Select Red eye or Contrast and then
press OK.
7 After you select the options you want to fix,
select Save. The picture is displayed with the
new settings.
Rotating pictures
If your picture appears horizontally or vertically and
you want to change the orientation, you can change
it in Media Center:
1 Press the Start button on the remote
control.
2 Select My Pictures.
3 Select the picture you want to rotate.
4 Press the More Info button on the remote
control.
5 Select a Rotate button, and then press OK.
Working with Pictures 81
Page 86

Printing Pictures in My Pictures
1 Press the Start button on the remote
control.
2 Select My Pictures.
3 Select the picture you want to print.
4 Press the More Info button on the remote
control. Select Print, and then Print again.
Or
Press the Print button on the remote control.
You may need to set up your printer before you
can print from Media Center. Follow any onscreen
instructions.
Setting up your printer
n
Set up your printer
before you try to
print your pictures
with the remote
control.
1 Connect your printer to the PC and install the
printer drivers for your printer, if necessary.
Follow the instructions that came with your
printer.
2 Click Start on the taskbar, and
then click Printers and Faxes.
3 Right-click your printer icon and then click Set
as Default. A check mark appears next to
your printer.
82 HP Media Center PC Software Guide
Page 87

Copying Pictures to CDs
1 Click Start on the taskbar,
and then click My Pictures.
Or
Locate the files you want to copy. Click
Start, My Computer, and then select the
drive or removable device where your
pictures are located.
2 Select the files you want to copy by pressing
the Ctrl key and then selecting each picture.
3 Select Copy to CD from Windows Explorer
in the area Picture tasks. The CD recording
program opens.
4 Follow the onscreen instructions to complete
recording your pictures to CD.
For more information about creating picture CDs,
see “Creating (Burning) Data CDs Using Windows
XP” on page 120.
Working with Pictures 83
Page 88
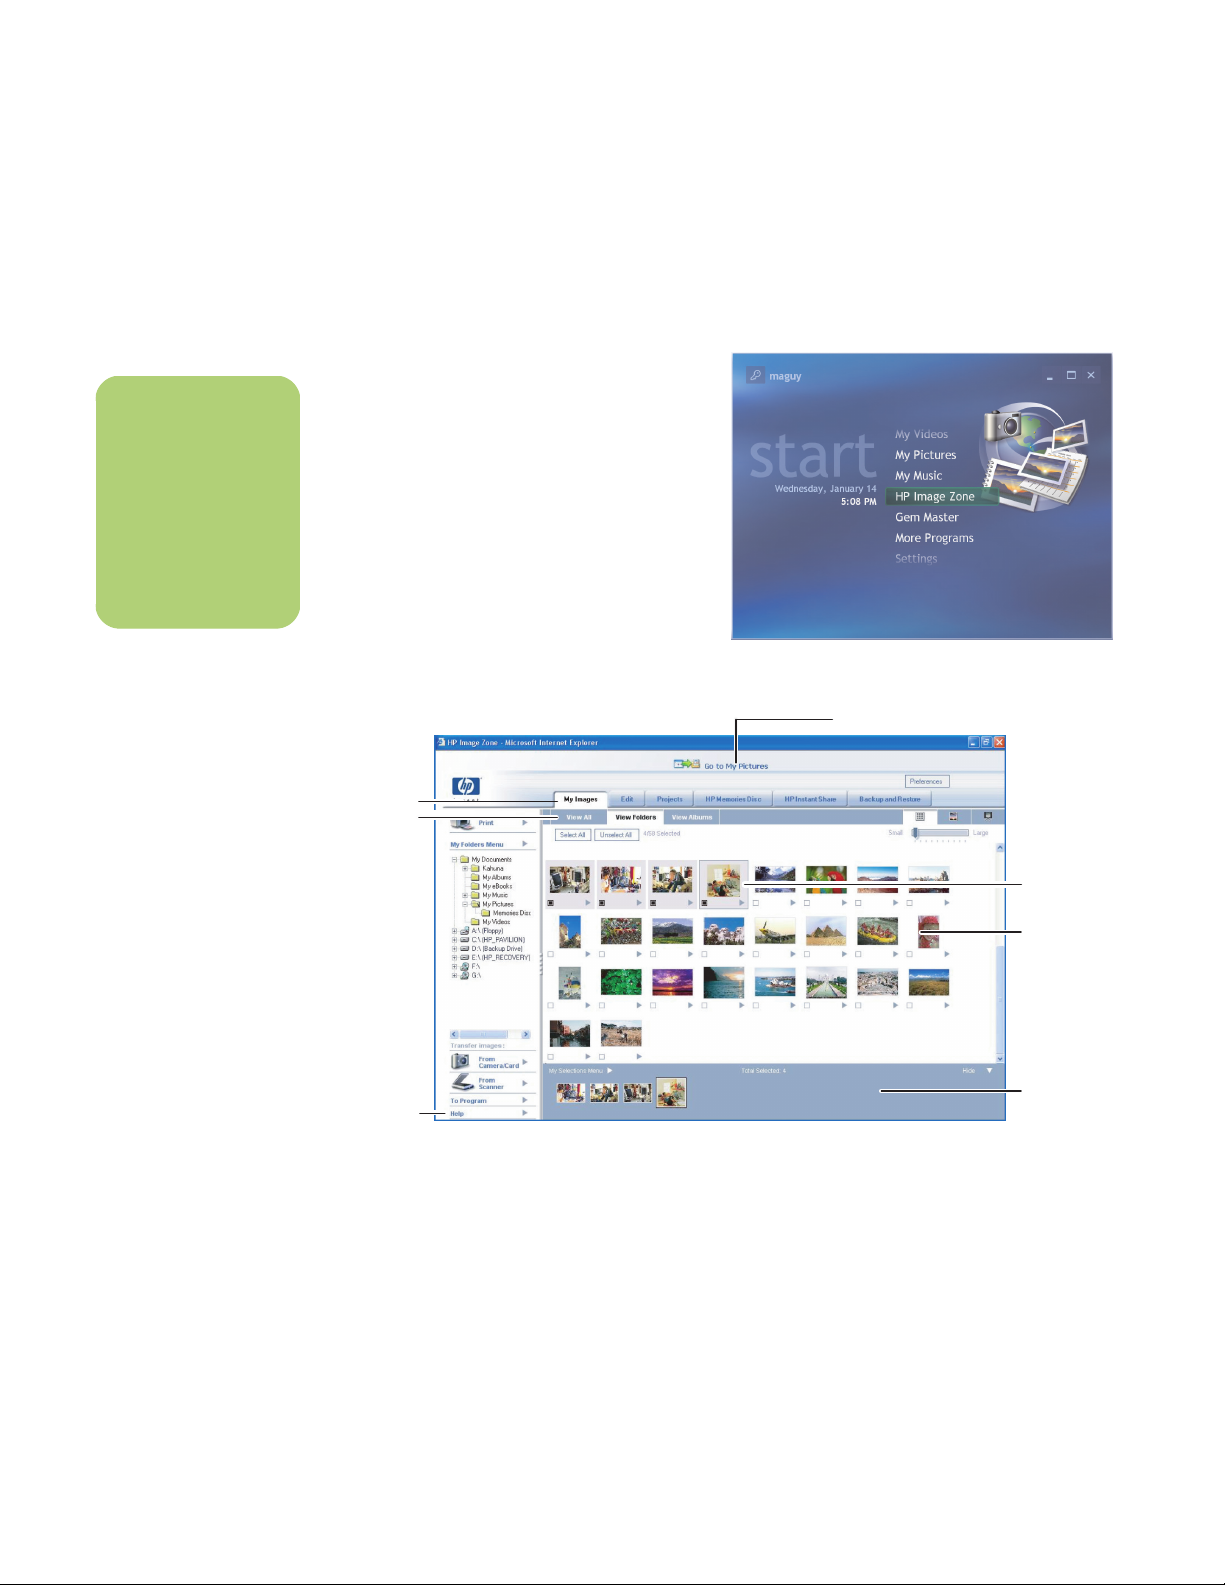
n
For more information
on using the HP
Image Zone Plus
program, click the
Help link in the
control area of the
program window.
Using HP Image Zone Plus in Media Center
HP Image Zone Plus is both a software program
and a Media Center menu item which allows you
to view and search for your digital images by
using the remote control or the keyboard and
mouse.
HP Image Zone Plus is a software program to
organize your photos, scanned images, and video
clips by date, keyword or place. It provides all the
tools you need for viewing, organizing, editing,
printing, sharing, and protecting your digital
images.
Below is the HP Image Zone Plus program window
with the features highlighted.
B
C
HP Image Zone Plus Menu in Media Center
A
E
D
HP Image Zone Plus Window
A Go to My Pictures is toggle switch to the My
Pictures directory in Windows Explorer.
B Mode tabs are used to view images, edit images,
and create projects with your images.
CView tab are used to view all images, folders, and
albums.
84 HP Media Center PC Software Guide
F
G
DHelp is a link to HP Image Zone Plus help topics.
E Work area, or Gallery, shows selected images
with a black box under them.
F Gallery shows unselected images with white boxes
under them.
G Selection tray displays selected images.
Page 89

Organizing pictures in HP Image Zone Plus
The HP Image Zone Plus program and Media Center
work together. Before you can view and search for
your pictures in Media Center, you have to set some
things up in HP Image Zone Plus program.
To start organizing your pictures in HP Image
Zone Plus:
1 Create your image catalog. This indexes all
of your pictures so you can assign dates,
keywords and places to your files. See
“Creating your picture catalog in HP Image
Zone Plus” on page 86.
2 Assign dates, keywords and places to your
pictures. See “Modifying a date assigned to
your pictures” on page 87, “Assigning a
keyword to your pictures” on page 88, and
“Assigning a place to your pictures” on
page 88.
HP Image Zone Plus Window
3 You can edit your images from this window
too. See “Editing Pictures in HP Image Zone
Plus” on page 91.
4 When you have finished organizing your
images, open Media Center to view, play a
slide show, and search for your photos by
the labels you have established. See
“Searching for pictures in HP Image Zone
Plus” on page 89.
For more information about changing picture
dates, assigning keywords and locations, and
performing searches of your pictures, go to the
help files inside the HP Image Zone Plus program.
HP Image Zone Plus Window in
Media Center
Worki n g wi t h Pic t ure s 85
Page 90

n
You can click Go to
My Pictures folder at
the top of the HP
Image Zone Plus
window to open the
My Pictures folder in
Windows Explorer.
Creating your picture catalog in HP Image Zone Plus
The first time you open the HP Image Zone Plus
program, a message appears asking you if you
want to create a catalog by indexing images in the
My Pictures folder and its subfolders. This catalog
allows you to search for your pictures by date,
keyword or place by using HP Image Zone Plus.
1 Double-click the HP Image Zone
Plus icon on your desktop.
Or
Click Start on the taskbar, choose All
Programs, Pictures (Photos), and then
click HP Image Zone Plus. The HP Image
Zone Plus window opens.
3 At the top of the gallery window, click the My
Images tab (B) and then click View All (C)
below it to see all of the images in the
catalog. You can also click View Folders or
View Albums to browse for images.
4 Click Help (D) for more information about
creating your picture catalog in HP Image
Zone Plus.
2 When the catalog message appears, click
OK to index the PC images and place them in
the HP Image Zone Plus catalog.
B
C
D
86 HP Media Center PC Software Guide
Page 91

Updating your catalog when you add new pictures
If you add new pictures to your My Pictures folder,
you need to open the HP Image Zone Plus program
and locate the new image to be able to view it in
Media Center. This action updates your HP Image
Zone Plus program to include the new image in the
catalog.
1 Double-click HP Image Zone Plus icon on
the desktop.
Creating albums
You can organize your pictures into albums by using
the HP Image Zone Plus program. After you create
your picture albums in the HP Image Zone Plus
program, you can then view them in Media Center.
To create an album:
1 Double-click HP Image Zone Plus icon on
the desktop.
2 Click the My Images tab.
3 Select View All and then select your pictures
which you want to place into an album.
4 Click the View Albums tab.
Modifying a date assigned to your pictures
Digital cameras assign a creation date to digital
images. HP Image Zone Plus automatically
recognizes this creation date and organizes your
pictures by date.
To change a date:
1 Double-click HP Image Zone Plus icon on
the desktop.
2 Click the My Images tab.
3 Select View All.
5 Select My Albums Menu and then select
New Album. Your album appears in the
View Albums tab.
6 To change the title of the album, just select it
and type in a title. You can now view your
albums in Media Center.
3 Right-click a picture, and then select Modify
Image Date.
n
After you create your
picture albums in HP
Image Zone Plus
program, you can
then view them in
Media Center.
n
Scanned images are
stamped with the
date they are
scanned.
2 Click the My Images tab and then click the
View All tab under the My Images tab.
4 Select a date, and then click Modify.
Working with Pictures 87
Page 92

Assigning a keyword to your pictures
n
You c an a ss i gn m or e
than one keyword.
You c an a ls o ed i t o r
delete assigned
keywords.
n
There are multiple
ways to move around
the HP Image Zone
Plus map: you can
click and drag, point
and click, click and
drag the small globe.
1 Double-click the HP Image Zone Plus icon
on the desktop.
2 Click the My Images tab and then click the
View All tab under the My Images tab.
3 Select your picture by clicking it. You can
select more than one picture, if desired.
4 Click By keyword, on the left side of the
window.
5 Click Assign.
Assigning a place to your pictures
1 Double-click the HP Image Zone Plus icon
on the desktop.
2 Click the My Images tab and then click the
View All tab under the My Images tab.
3 Select your picture by clicking it. You can
select more than one picture, if desired.
4 Click By place on the left side of the window.
6 Select a keyword from the available keywords
list, and then use the arrow button to add the
keyword to the Assign to all box. Click
Assign and then click OK.
Or
Click New, type in a keyword, and then click
OK. The new keyword is added to the
keyword list. Use the arrow button to add the
keyword to the Assign to all box.
5 Click Assign.
6 Click the map to find your location. Each time
you click the map, it zooms in closer. Use the
arrow buttons surrounding the map to move
around on the map. When your location is in
the center of the cross-hairs, click Assign.
7 Click OK.
8 Click Close.
88 HP Media Center PC Software Guide
Page 93

Searching for pictures in HP Image Zone Plus
You can search for pictures by date, keyword and
place by using your remote control or mouse in
Media Center. HP Image Zone Plus automatically
organizes your pictures by date, based on the date
assigned by the camera when the picture was
taken, or the date the picture was scanned.
1 Press the Start button on the remote
control.
2 Select HP Image Zone.
Select By keyword. Select a keyword and
then press OK on the remote control.
Or
n
You must open the
HP Image Zone Plus
program from the
desktop to assign
dates, keywords, and
places to your
pictures.
3 Select Search.
4 Select By date. Use the number keypad on
the remote to enter the start and end date
range. The date range of the pictures you
selected is displayed in this window.
Or
Select By place. Use the arrow buttons on
the remote control to rotate the globe and
numbers 1 through 5 to zoom in or out. When
you have picked a location, press OK.
Locations which have pictures assigned to
them will have a colored dot on the map.
Viewing Pictures in HP Image Zone Plus
Viewing a slide show
When viewing images, you can view a slide show
of all your images, individual albums or pictures
selected from a search.
1 Press the Start button on the remote
control.
4 Select Play slide show, and then press OK.
5 Use the media playback keys on the remote
2 Select HP Image Zone.
3 Select the date of the pictures you want to
view as a slide show, and then press OK. If
you do not select the pictures you want to
view as a slide show, Media Center displays
all pictures.
control or the controls that appear at the top
of the window to control the playback of your
slide show.
Working with Pictures 89
Page 94

Viewing a slide show with music
1 Select My Music on the Media Center
Start menu.
2 Select the music you want, and then press OK
on the remote control. If the music doesn’t start
automatically, press the Play button on the
remote control.
Changing view and slide show options
You can change the way pictures are displayed:
1 Press the Start button on the remote
control.
2 Select HP Image Zone.
3 Select Settings.
Using supported picture file types
HP Image Zone Plus supports the following types of
image files, video files and audio files.
3 To go back to the Media Center Start menu,
press Start on the remote control.
4 Select HP Image Zone.
5 Select the pictures, and then press OK.
4 Select your settings. Use the scroll arrows at
the bottom of the window to view all the
setting options.
5 Select OK.
■ Only supported image file types are displayed
in My Pictures. Unsupported files are skipped
in a slide show.
n
If the message Image
cannot be displayed
appears, the file
may be corrupted
or it may be an
unsupported file
type. You may need
to edit your image
with a photo editor
and save it in a
supported file format.
File
extension
.jpg Joint Photographic Experts
.tif Tagged Image File Format
.gif Graphics Interchange Format
.bmp Bitmap
.fpx FlashPix Bitmap
.pcx Bitmap Graphics (PC
.pdf Graphics file
.png Portable Network Graphics
90 HP Media Center PC Software Guide
File type
Group
Paintbrush)
■ Corrupted and unsupported image file types
display a generic image icon but cannot be
displayed in Media Center.
■ Some file types are supported only if
appropriate filters and software are installed.
Page 95

Editing Pictures in HP Image Zone Plus
You can make changes to your pictures and video
clips in HP Image Zone Plus. Some of the editing
features include: removing red eye, cropping or
resizing images, rotating images, and adjusting the
color, brightness, and sharpness of your images.
To edit your pictures:
1 Double-click HP Image Zone Plus icon on
the desktop.
2 Click the My Images tab.
3 Select View All.
4 Select the picture you want to edit.
5 Click the Edit tab.
Updating edited picture files in Media Center
After you make edits to your picture files, you need
to update the files before they can be displayed
correctly in Media Center. To update the files:
1 Press the Start button on the remote
control.
For more information about the editing tools, refer to
Help in the HP Image Zone Plus program.
6 Select an editing tool on the left side of the
window and make the edits to your picture.
For more information about the editing tools,
click Help and then select Edit Help.
7 When you have made your edits, click Save
to save the edits to the picture or click Save
As to create an edited version of the original
image.
4 Under Thumbnail options, select Refresh and
then select OK.
2 Select HP Image Zone.
3 Select Settings.
5 Select View all images. Your edited
pictures should now be displayed.
Working with Pictures 91
Page 96
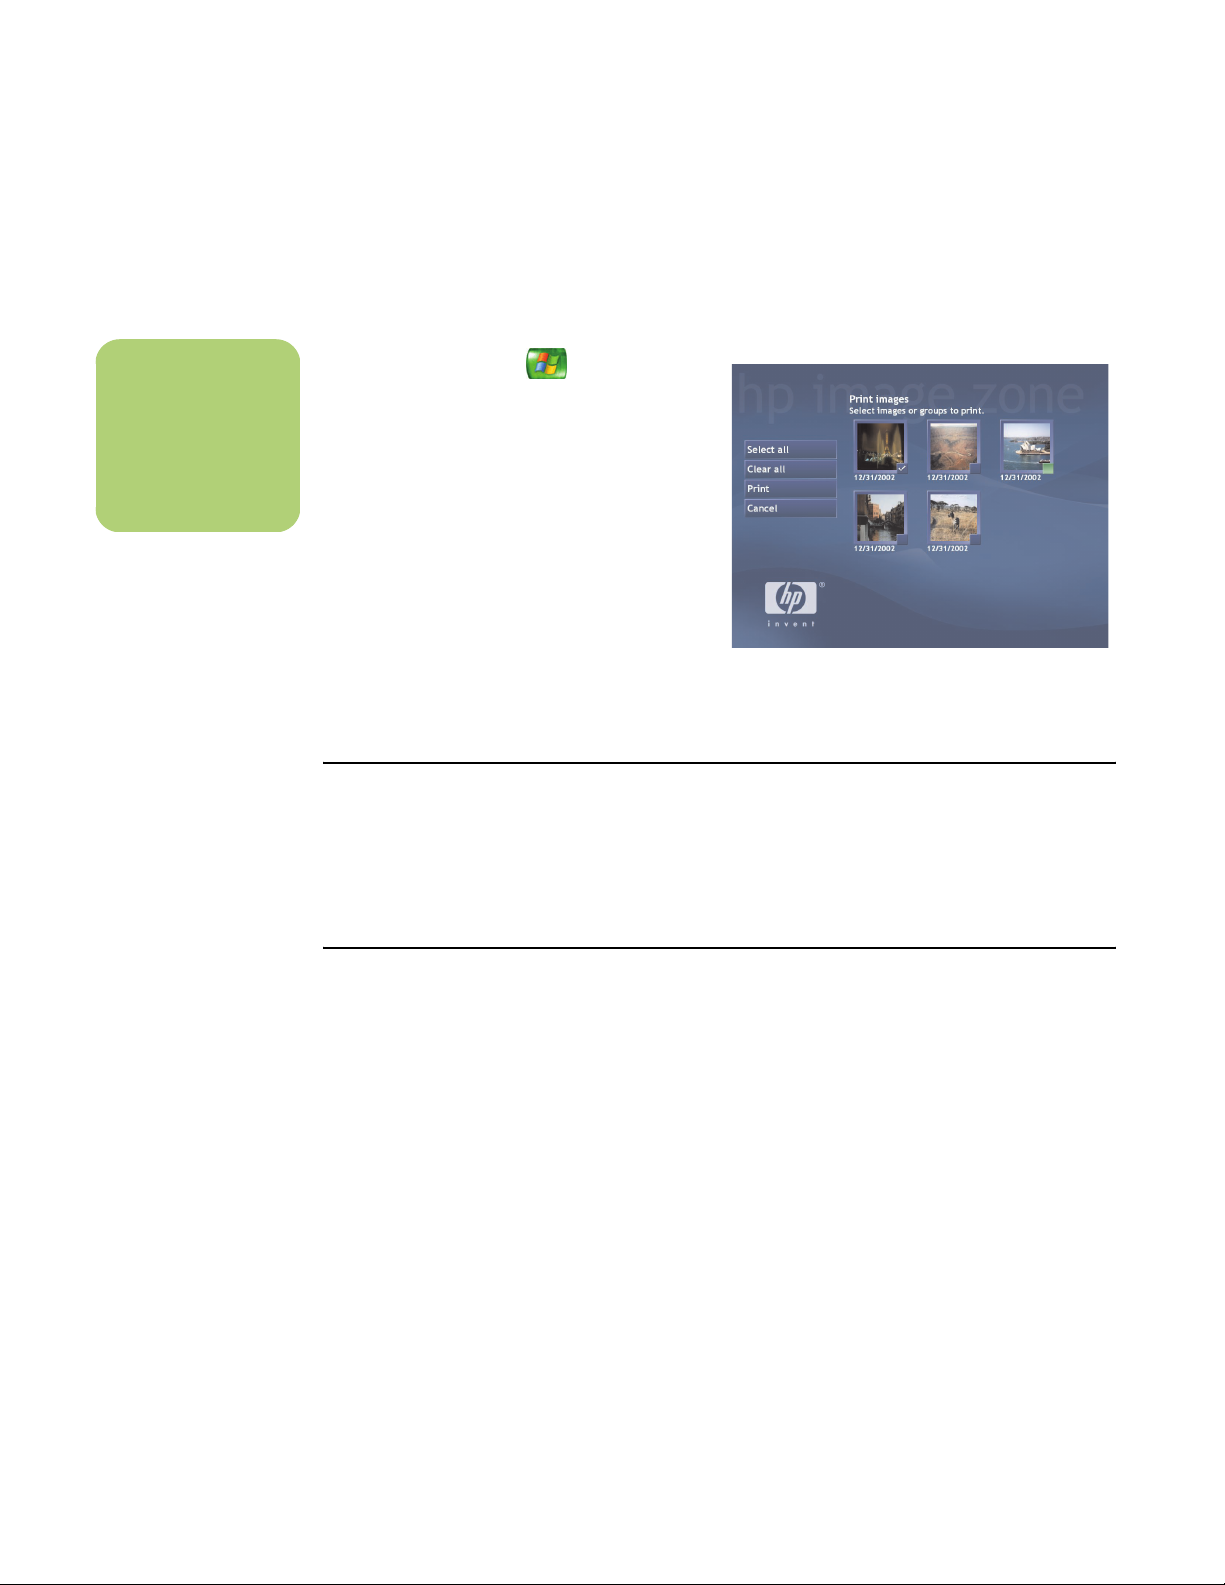
n
You cannot use the
Print button on the
remote control in
HP Image Zone Plus.
Printing Pictures in HP Image Zone Plus
1 Press the Start button on the remote
control.
2 Select HP Image Zone.
3 Select the picture group you want to
print from.
4 Select Print images.
5 Select the pictures you want to print.
6 Select Print. Follow any onscreen
instructions.
You may need to set up your printer before you
can print from Media Center. Refer to “Setting up
your printer” on page 82.
Other Features of HP Image Zone Plus
Copying Pictures to CD
Refer to “Copying Pictures to CDs” on page 83.
Creating projects
You can create and print projects such as photo
album pages, cards, and flyers with HP Image Zone
Plus. For more information, see make creative
projects in Help.
92 HP Media Center PC Software Guide
You can create multimedia CDs with your images.
You can add your own audio and text, or you can
allow the software to add default audio and text.
For more information, see make a multimedia cd
in Help.
Page 97

Using Backup and Restore
You can create backup discs of all the images on
your PC. You can also restore images either from a
backup disc or from a automatically created digital
negative.
HP Instant Share
You can share your images with friends and family.
After you select images on the My Images tab, you
can post the images to the HP Instant Share Web
site and send a link to the images on the Web site
by e-mail.
You can also create online albums if you want to
organize your images on the Web site. If available
in your region, you can order professional quality
prints from an online service. For more information,
see share your images in Help.
Working with Pictures 93
Page 98

94 HP Media Center PC Software Guide
Page 99

The My Videos window in Media Center makes it
easy to play home video files you created or video
files you downloaded from the Internet.
Playing Videos
In My Videos you can:
■ Play and scroll through videos that are in the
My Videos or Shared Video folders in
Windows Explorer by using your remote
control or your keyboard and mouse.
■ View your videos in full-screen mode or from
an inset window in Media Center.
■ Browse your videos straight from the device
on which they are stored. Media Center
recognizes removable media from a CD or
DVD drive or from a digital video camera.
■ Display your video details such as the name
and date your video file was modified.
■ Sort videos by date or name.
■ View small image (thumbnail) and title of
video file.
■ Scroll through your digital videos and folders
by clicking the page up and page down
buttons using the mouse.
n
Each user has a
separate My Videos
folder that can be
opened only by that
person. You can
share videos with
others by storing
them in the Shared
Video folder.
Playing Videos 95
Page 100

Organizing Videos
When you attach a digital video camera
to your PC, Windows asks you how you
want to capture your video. You can
choose from various software programs to
capture and then edit your video file.
Most programs automatically save your file to the
My Videos folder in Windows Explorer. If not, move
your videos into the My Videos or Shared Video
folder in Windows Explorer for Media Center to be
able to find and play them.
Once you have placed all your videos into the My
Videos or Shared Video folder, you can rename,
add, delete, and organize them into folders.
To organize and store your videos,
click Start on the taskbar, click My
Documents, and then double-click
the My Videos folder.
If you want to share your videos with others, place
them in the Shared Video folder. To do this, click
Start on the taskbar, click My Documents, click
the Shared Documents folder under Other
Places, and then double-click the Shared Video
folder.
You can add, delete, edit, rename, and organize
your video files into folders you create in the Shared
Video folder. The videos can now be played in
Media Center.
96 HP Media Center PC Software Guide
 Loading...