

Quick Reference Guide
/LQH-HW™
Printers


Table of Contents
1 English................................................17
Basic Operating Procedure s............................. 17
Powering On the Printer ............................. 17
Using the Control Panel ............................. 18
Loading Paper............................................ 32
Setting Top-Of-Form .................................. 38
Reloading Paper......................................... 42
Unloading Paper......................................... 52
Replacing the Ribbon ................................. 54
Cancelling a Print Job ................................ 57
Configuration..................................................... 58
Parameters................................................. 59
Control Codes ............................................ 59
Saving Configurations ...... .......................... 60
Printing Configurations ............................... 62
Loading Configurations .............................. 64
Deleting Configurations .............................. 66
The Power-Up Configuration......................68
Power Stacker Option....................................... 70
Power Stacker Component Locations........ 70
Setting Up the Power Stacker .................... 71
Loading and Starting the Paper Stack........ 73
Unloading Paper from Power Stacker........75
Troubleshooting ................................................ 77
Clearing Paper Jams.................................. 77
Cleaning The Printer .................................. 80
Solving Print Quality Problems................... 83
Fault Messages.......................................... 85
3

Table of Contents
2 Français...............................................95
Procedures-Cles D’Exploitation ........................ 95
Mise sous tension de l’imprimante .............95
Utilisation du panneau de commande ........ 96
Chargement du papier.............. ...... ....... ... 110
Définition du haut de page........................116
Rechargement du papier.......................... 120
Dechargement du papier.......................... 130
Remplacement du ruban .......................... 132
Annulation d’une tâche d’impression........ 135
Configuration................................................... 136
Paramètres ....................... .......................137
Codes de commande .............................. 137
Sauvegarde de la configuration................ 138
Impression de la configuration.................. 140
Chargement de la configuration ............... 142
Suppression de la configuration ............... 144
Configuration à la mise sous tension........ 146
Option Empileur Motorise ............................... 148
Emplacement des composants
de l’empileur ............................................. 148
Réglage de l’empileur motorisé................ 149
Chargement de l’empilage de papier........151
Déchargement du papier.......................... 153
Correction D’Erreurs ....................................... 155
Suppression des bourrages papier........... 155
Nettoyage de l’imprimante........................ 158
Problèmes de qualité d’impression........... 161
Messages d’erreur.................................... 163
4

Table of Contents
3 Deutsch.............................................173
Grundlegende Vorgehensweisen.................... 173
Drucker einschalten.................................. 173
Bedienerkonsole verwenden.................... 174
Papier einlegen ........................................ 188
Formularanfang einstellen........................ 194
Papier nachlegen ..................................... 198
Papier entfernen....................................... 208
Farbband austauschen............................. 210
Druckjob abbrechen ................................. 213
Konfigurationen............................................... 214
Parameter................................................. 215
Steuercodes ............................................. 215
Konfigurationen speichern........................ 216
Konfigurationen drucken .......................... 218
Konfigurationen laden .............................. 220
Konfigurationen löschen........................... 222
Konfiguration beim Einschalten................ 224
Optionales Stapelmagazin.............................. 226
Position der Komponenten
des Papiermagazins................................. 226
Stapelmagazin einrichten......................... 227
Papierstapel einleg en und
Druckvorgang beginnen ........................... 229
Papier aus dem Stapelmagazin
entnehmen ............................................... 231
Fehlerbehebung.............................................. 233
Papierstaus beheben ............................... 233
Drucker reinigen....................................... 236
Probleme der Druckqualität beheben....... 239
Fehlermeldungen ..................................... 241
5

Table of Contents
4 Italiano...............................................251
Procedure Operative di Base.......................... 251
Accensione della stampante..................... 251
Uso del pannello di controllo .................... 252
Caricamento della carta............................ 266
Impostazione dell’iniz io mod ulo................ 272
Ricaricamento della carta......................... 276
Rimozione della carta..................... ....... ... 286
Sostituzione del nastro............................. 288
Annullamento di un lavoro di stampa ....... 291
Configurazione................................................ 292
Parametri.................................................. 293
Codici di controllo .................................. ... 293
Salvataggio delle configurazioni............... 294
Configurazioni di stampa....................... ... 296
Caricamento delle configurazioni ............. 298
Eliminazione delle configurazioni .............300
Configurazione di accensione .................. 302
Raccoglitore Opzionale...................................304
Ubicazione dei componenti
del raccoglitore ......................................... 304
Impostazione del raccoglitor e................... 305
Come caricare e attivare il raccoglitore ....307
Come togliere la carta dal raccoglitore..... 309
Ricerca Guasti ................................................ 311
Eliminazione degli inceppamenti .............. 311
Pulizia della stampante............................. 314
Problemi di qualità di stampa ................... 317
Messaggi d’errore.....................................319
6

Table of Contents
5 Español .............................................329
Procedimientos Bási co s........ ....... ...... ....... ...... 329
Encendido de la impresora....................... 329
Uso del panel de control........................... 330
Carga del papel........................................ 344
Definición del borde superior
de impresión............................................. 350
Recarga del papel .................................... 354
Descarga del papel .................................. 364
Sustitución de la cinta .............................. 366
Anulación de trabajos de impresión ......... 369
Configuración.................................................. 370
Parámetros............................................... 371
Códigos de control ................................... 371
Memorización de configuraciones............ 372
Impresión de configuraciones .................. 374
Carga de configuraciones ........................ 376
Barrado de configuraciones ..................... 378
Configuración de encendido..................... 380
Opción de Recogedor Mecánico..................... 382
Ubicación de los componentes
del recogedor ........................................... 382
Instalación del recogedor mecánico......... 383
Carga e iniciación de la pila de papel....... 385
Descarga del papel del
recogedor mecánico. ...... ....... ...... ............. 387
Resolución de Problema s............................... 389
Eliminación de atascos de papel.............. 389
Limpieza de la impresor a ................... ...... 392
Problemas de calidad de impresión ......... 395
Mensajes de error .................................... 397
7

Table of Contents
8

LineJet™ Printers
Quick Reference Guide

Communication Notices
Federal Communications Commission (FCC) Statement:
This equipment has been tested an d f oun d to comply with th e limits
for a Class A digital device, pursuant to Part 15 of the FCC Rules.
These limits are designed to provide reasonable protection against
harmful interference when the equipment is operated in a
commercial environ ment. T his eq uipm ent gen erates, uses , and c an
radiate radio frequency energy and, if not installed and used in
accordance with the instruction manual, may cause harmful
interference to radio communications. Operation of this equipment
in a residential area is likely to cause harmful interference, in which
case the user will be required to correct the interference at his own
expense.
Properly shielded and grounded cables and connectors must be
used in order to meet FCC emission limits. Hewlett-Packard
responsible for any radio or television interference caused by using
other than recommended cabl es and connectors or by unauthori zed
changes or modifications to this equipment. Unauthorized changes
or modifications could void the user’s authority to operate the
equipment.
This device complies with Part 15 of the FCC Rules. Operation is
subject to the following two conditions: (1) this device may not
cause harmful interference, and (2) this device must accept any
interference received, including interference that may cause
undesired operation.
Canadian Department of Communications Compliance
Statement:
This Class A digital apparatus meets all requirements of the
Canadian Interference-Causing Equipment Regulations.
Avis de conformité aux normes du ministère des
Communications du Canada:
Cet appareil numérique de la classe A respecte toutes les exigences du Règlement sur le matériel brouilleur du Canada.
®
is not
10

European Union (EC) Electromagnetic Compatibility
Directives:
requirements of EC Council Directive 89/336/EEC on the
approximation of the laws of the Member States relating to
electromagnetic compatibility. Hewlett-Packard cannot accept
responsibility for any failure to satisfy the protection requirements
resulting from a non-recommended modification of the product,
including the fitting of non-Hewlett-Packard option cards.
Dieses Gerät ist bere cht igt in Ü be reinstimmung mit dem de uts ch en
EMVG vom 9.Nov.92 das EG-Konformitätszeichen zu furhren.
Properly shielded and grounded cables and connectors must be
used in order to reduce the potential for causing interference to
radio and TV communication and to other electrical or electronic
equipment.
This product has been tested and found to comply with limits for
Class A Information Te ch nol ogy Equ ipm en t ac cordi ng to CISPR 22/
European Standard EN 55022. The limits for Class A equipment
were derived for commercial and industrial environments to provide
reasonable protection against interference with licensed
communication equipment.
Warning: This is a Class A product. In a domestic environment this
product may cause radio interference in which case the user may
be required to take adequate measures.
This product is in conformity with the protection
Dieses Gerät erfüllt die Bedingungen der EN 55022 Klasse A. Für
diese Klasse von Geräten gilt folgende Bestimmung nach dem
EMVG:
Geräte dürfen an Orten, für die sie nicht ausreichend entstört sind,
nur mit besonderer Genehmigung des Bundesminesters für Post
und Telekommunikation oder des Bundesamtes für Post und
Telekommunikation betrieben werden. Die Genehmigung wird
erteilt, wenn keine elektromagnetischen Störungen zu erwarten
sind.
(Auszug aus dem EMVG vom 9.Nov.92, Para.3, Abs.4)
Hinweis: Dieses Genehmigungsverfahren ist von der Deutschen
Bundespost noch nicht veröffentlict worden.
11

Hewlett-Packard makes no representations or warranties of any
kind regarding this material, including, but not limited to, implied
warranties of merchantability and fitness for a particular purpose.
Hewlett-Packard shall not be held responsible for errors contained
herein or any omissions from this material or for any damages,
whether direct, indirect, incidental or consequential, in connection
with the furnishing, distribution, performance or use of this material.
The information in this manual is subject to change without notice.
This document contains proprietary information protected by
copyright. No part of this document may be reproduced, copied,
translated or incorporated in any other material in any form or by
any means, whether manual, graphic, electronic, mechanical or
otherwise, without the prior written consent of Hewlett-Packard.
COPYRIGHT © 2000, HEWLETT-PACKARD CO.
All rights reserved.
Trademarks
Hewlett-Packard, HP, HP in a circle, Hewlett Packard, PCL
and HP rounded rectangle are registered trademarks, and
LineJet is a trademark of Hewlett-Packard Company.
12

Taking Care Of Your Printer
Your printer will produce high quality jobs if it is well taken care of.
Periodic cleaning, handling the printer properly, and using the
correct consumables, such as paper and ribbons, will ensure
optimum performance.
Whenever it is necessary to service the printer, remember these
important concepts:
• Do not set the forms thickness lever too tightly
Incorrect closure of the forms thickness lever can cause paper
jams, ribbon jams with the potential for ribbon damage,
smeared ink, or wavy print.
• Do not print beyond the paper width
Excessive printing beyond the paper width will degrade the
print quality and can cause hammer bank damage.
• Use only authorized ribbons
Use of incorrect ribbons can lead to ink migration problems,
poor print quality, and extensive damage to the printer.
About This Quick Refer ence Guide
This
Quick Refere nce Guide
German, Italian, and Spanish). Turn to the appropriate language
and continue.
Hewlett-Packard wants you to feel comfortable using the LineJet
printer and this guide. This book has been designed to meet the
needs of all users, from beginners to those experienced with line
matrix printers.
Follow the directions in this guide and the
avoid injury to you and damage to the printer.
has five sections (English, Fr enc h,
User’s Guide
in order to
13
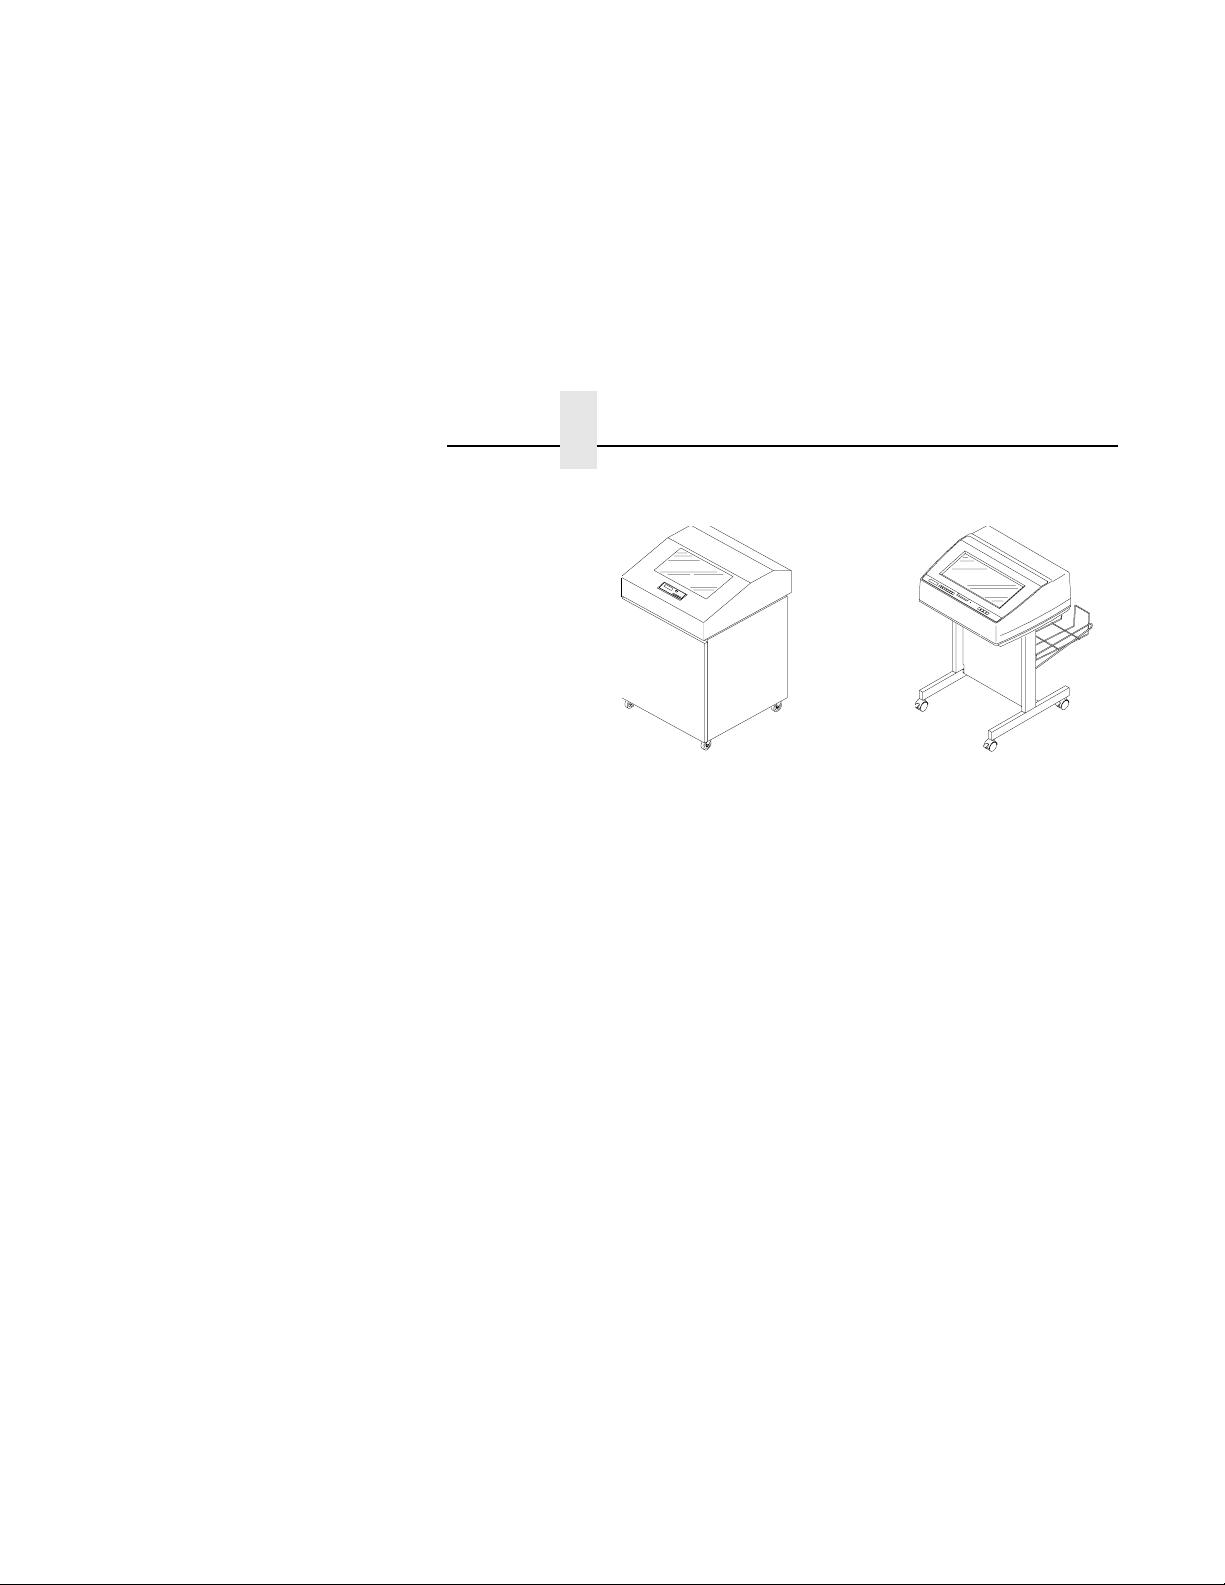
Cabinet Model Pedestal Model
This guide is divided into four sections:
Basic Operating Procedures. How to use the control panel and
load paper and ribbon.
Configuration. How to save, modify, and delete configurations.
Power Stacker Option. How to set up and use the Power Stacker
Option.
Troubleshooting. How to clear paper jams, clean components,
and troubleshoot.
14
Conventions
Warnings, Cautions, and Notes
Warning
Caution
Note
Warning messages call attention to situations that could
hurt you or damage the equipment.
Conditions that could damage the printer or related
equipment.
A note gives you helpful hints about printer operation and
maintenance.
Message Display
OFFLINE
CONFIG. CONTROL
These boxes show displa y me ss ag es as they appear on the printer.
15

16
1 English
Basic Operating Procedures
Warning
Before powering on the printer, make sure it is
plugged into the appropriate power source.
Refer to the “Select a Site” section in the
Guide
for information on proper power sources.
Installation
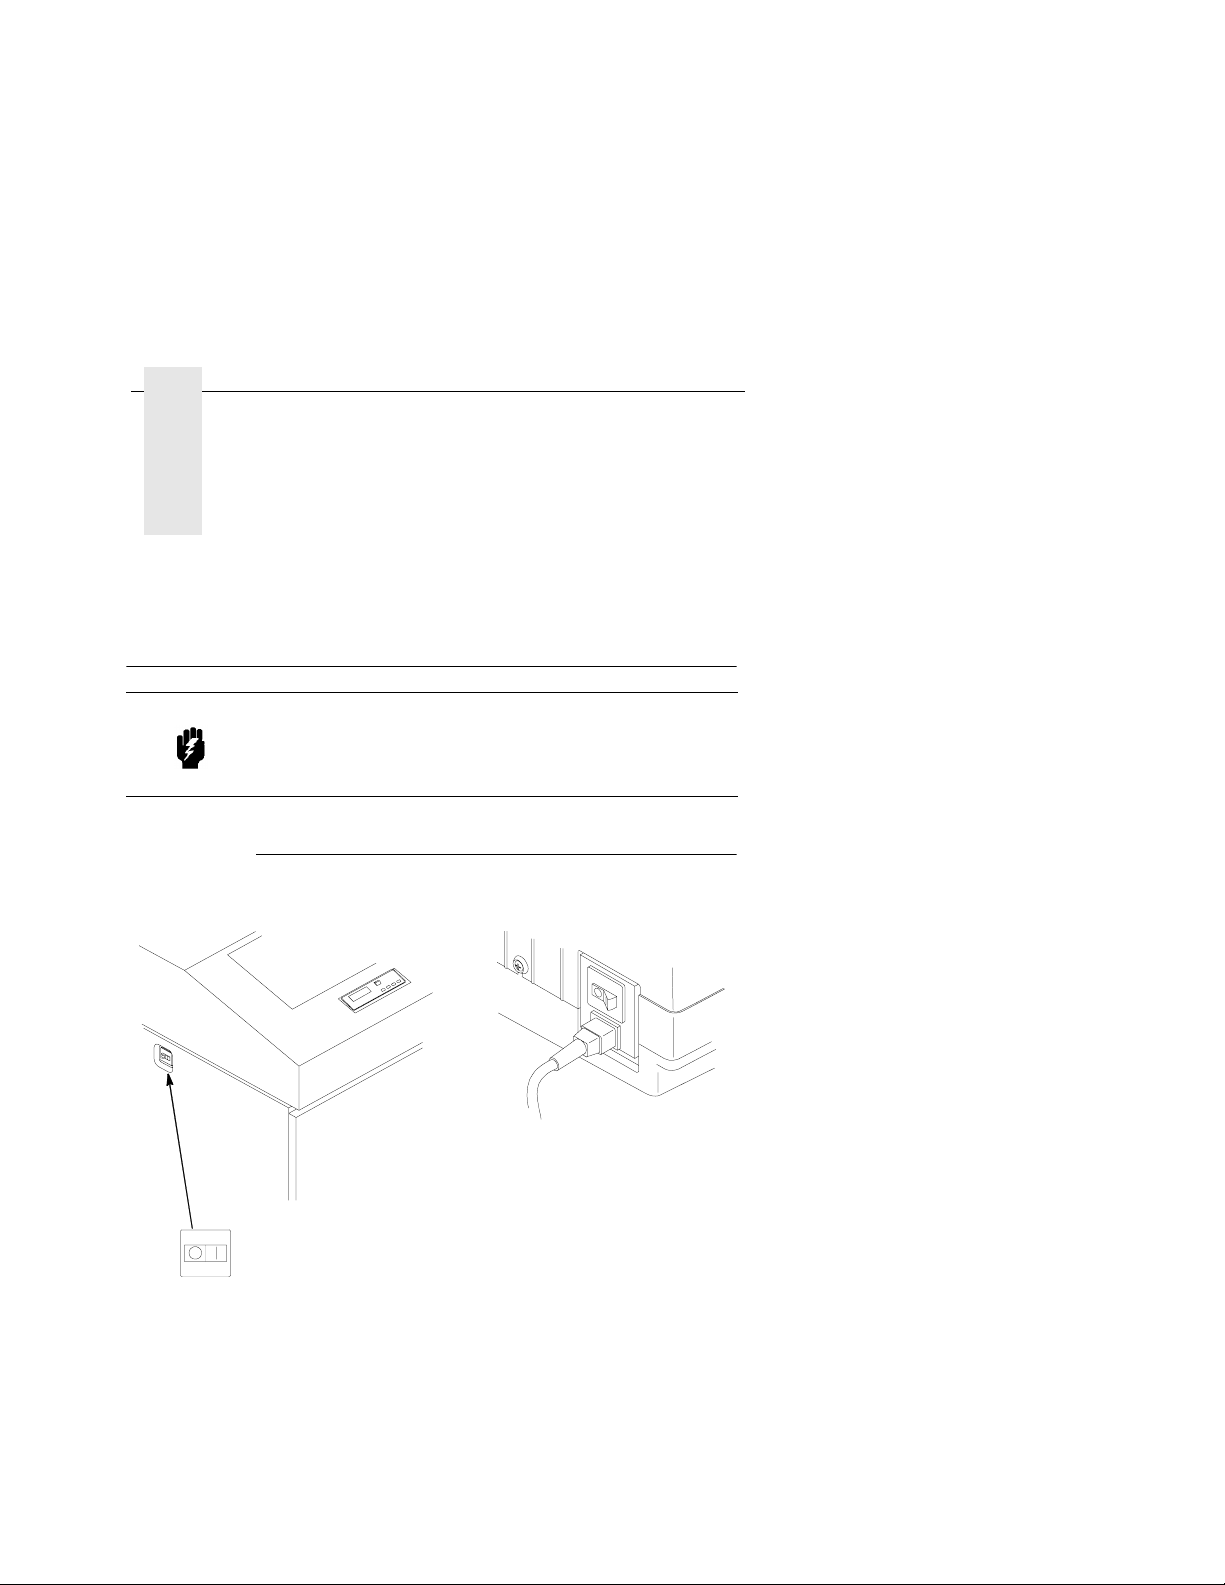
Powering On the Printer
Cabinet Model Pedestal Model
On the cabinet models, the power switch is located on the
top left side.
On the pedestal models, the power switch is located on the
back left corner.
Push the On (|) switch to power on the printer. Push the Off
(O) switch to power off the printer.
17

Chapter 1 Basic Operating Procedures
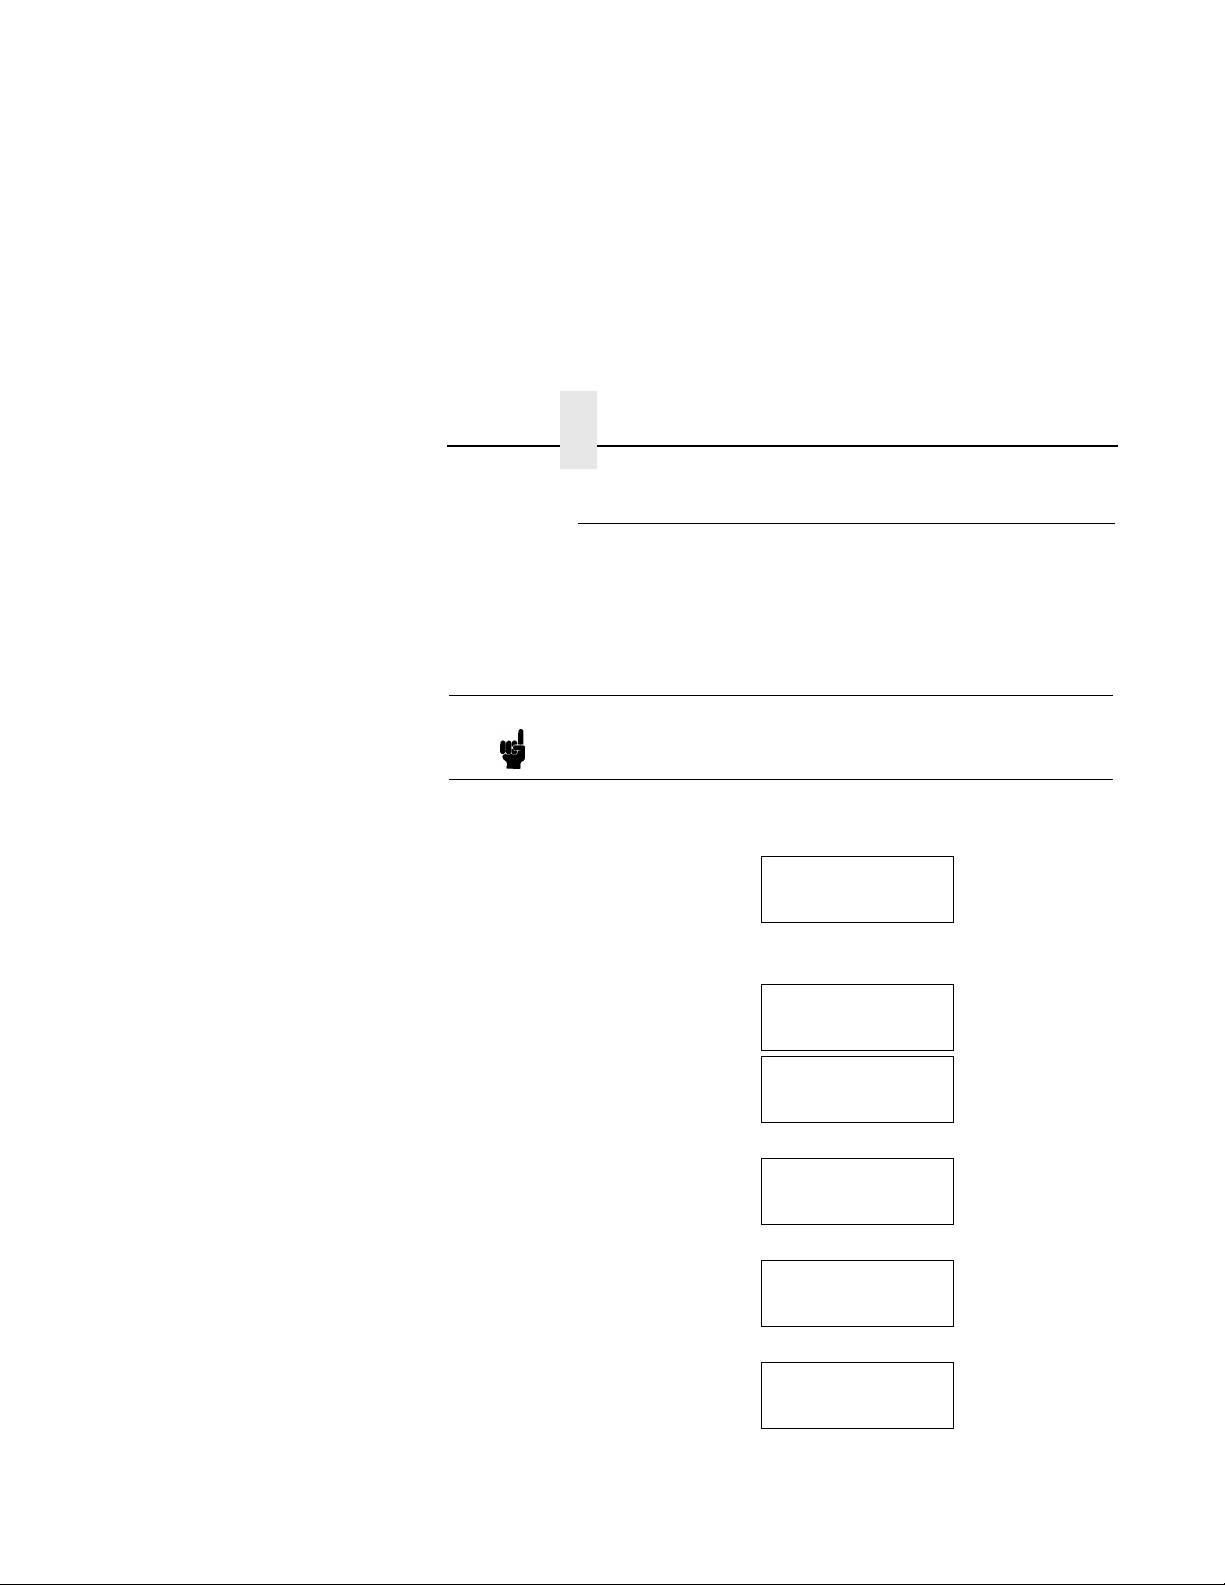
When you power on the printer, it runs a self-test. Depending on
how the power-up state is configured, the printer will either be
online or offline after the test. The default power-up state is offline.
When the self-test completes and the software has initialized
successfully “OFFLINE” appears in the display.
OFFLINE
CONFIG. CONTROL
If there is a fault du ring t he se lf-test, the s tatus indicato r flas hes an d
a specific fault message appears on the display (such as “LOAD
PAPER”), also the alarm sounds if it is configured to. See page 85
for information on fault messages.
LOAD PAPER
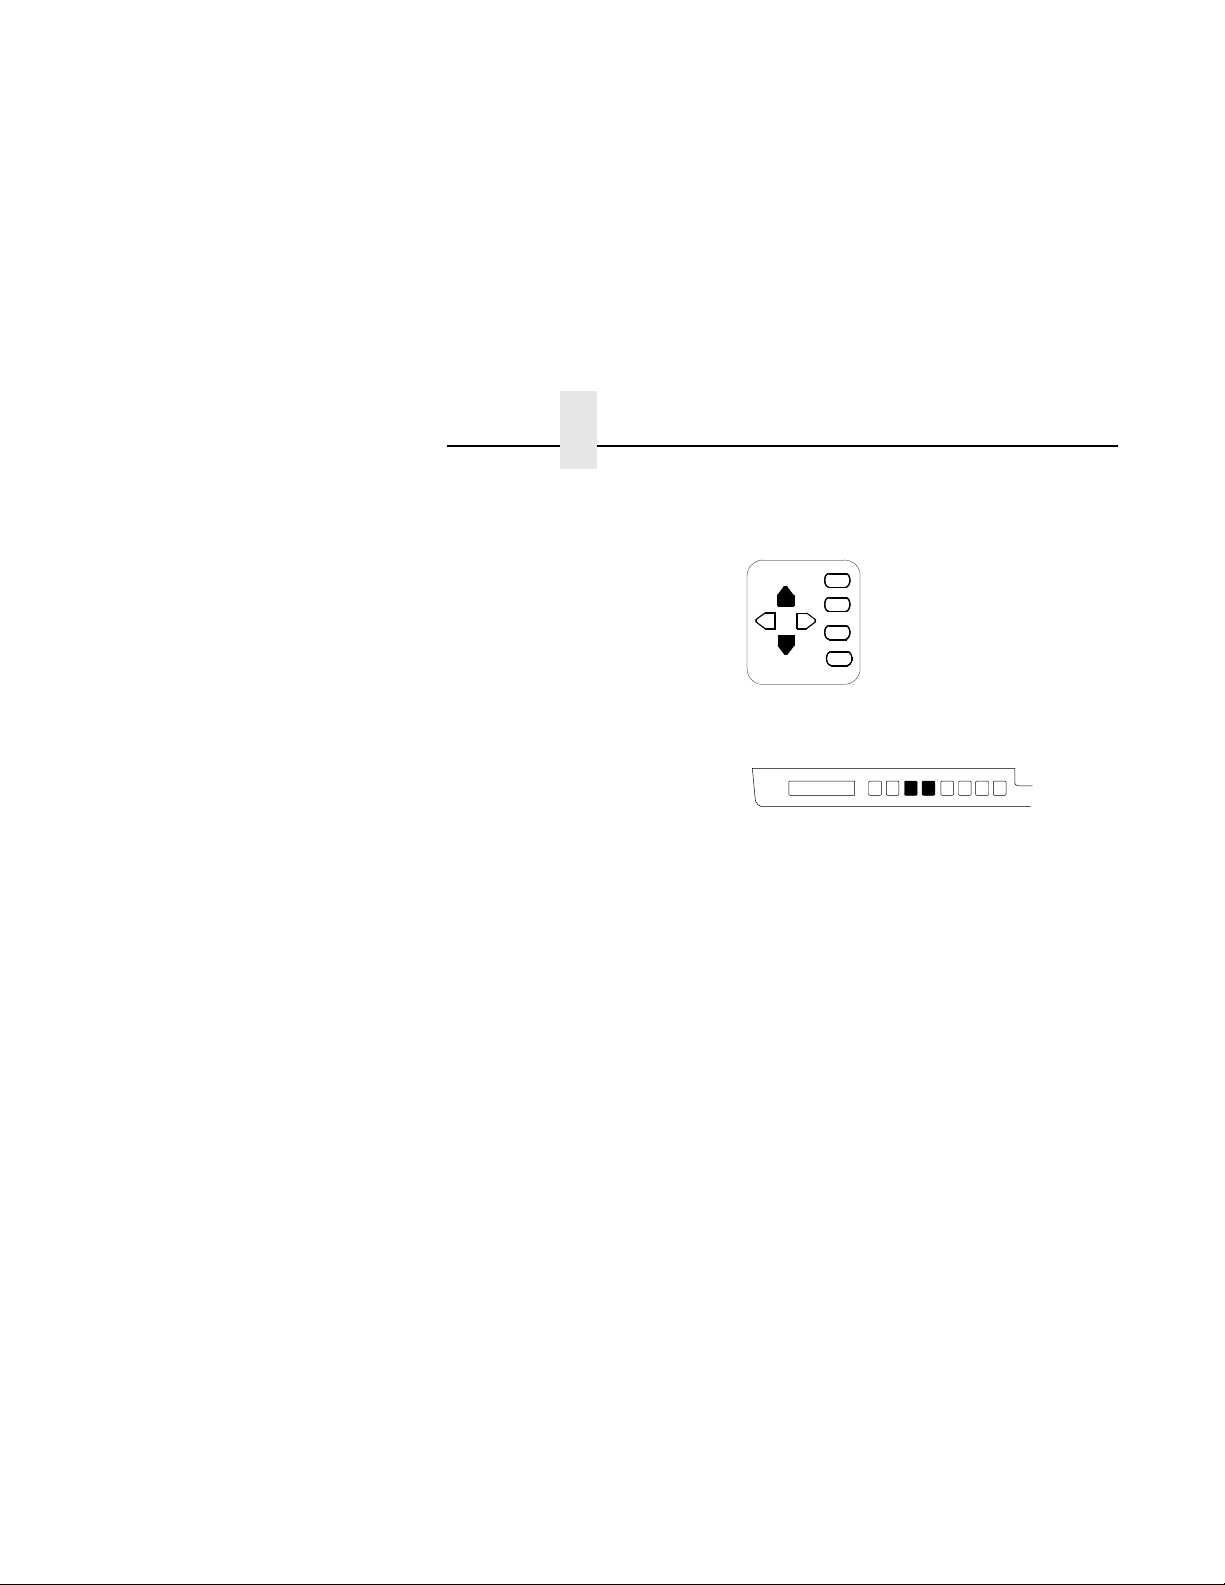
Using the Control Pan el
Use the control panel to perform routine operations:
• Placing the printer in the online or offline mode
• Advancing or retracting the paper, and setting the top-of-form
• Clearing fault conditions
• Configuring the printer
• Running printer self-tests
18
Control Panel Layout for Cabinet Models
CLEAR
UP
SHIFT
NEXT
PREV
DOWN
L.P.I. ADJ
PAGE L. ADJ.
RAISE PRINTER
COVER TO ACCESS
THESE SWITCHES
SET TOF
ENTER
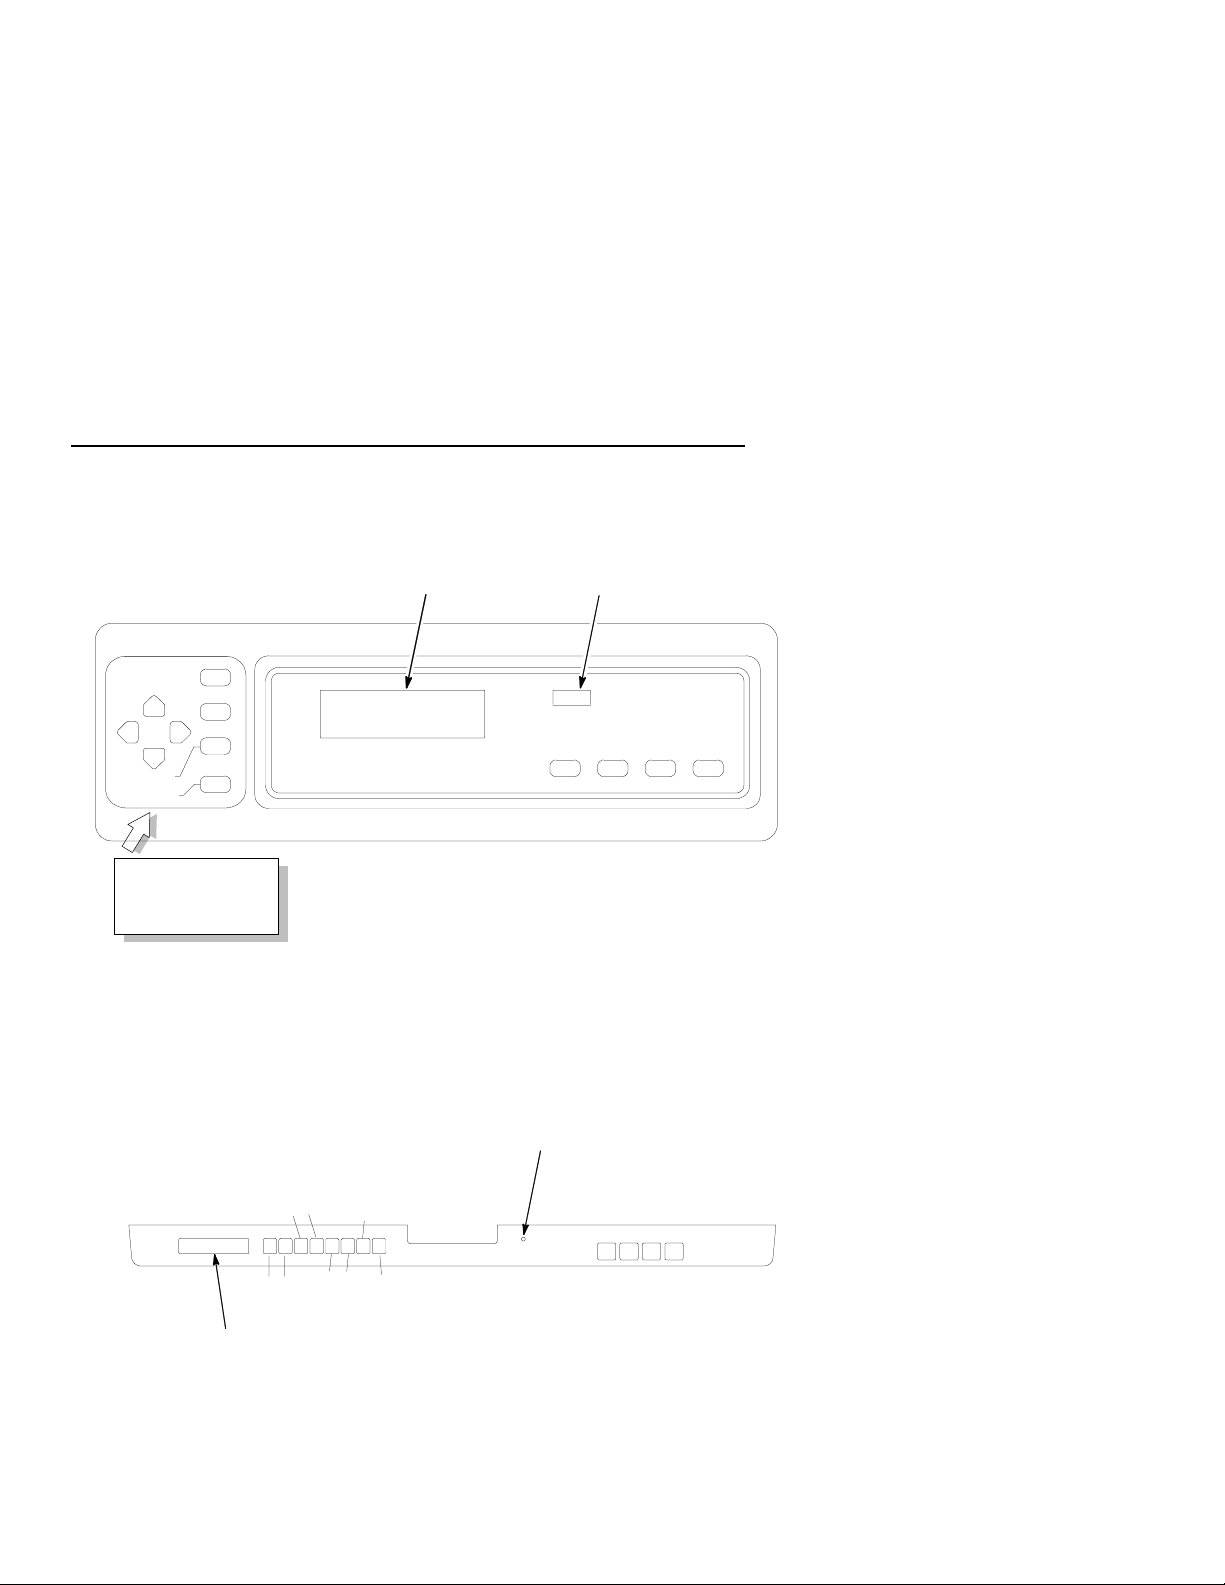
Using the Control Panel
Status IndicatorMessage Display
ONLINE
PCL-II
ON LINE FF VIEWLF
Control Panel Layout for Pedestal Models
Status Indicator
SET TOF
DOWNUP
LPI ADJ
ONLINE
PCL-II
CLEAR
SHIFT
NEXTPREV
ENTER
PAGE L. Adj
Message Display
The printer operating modes, message display, s tatus indicator, and
control panel keys are described on the following pages.
19
ON LINE FF VIEWLF

Chapter 1 Basic Operating Procedures
Operating Modes
The printer operates in one of three modes:
• Online Mode. In onlin e mode , th e p r int er can rec ei ve and pri nt
data sent from the host. Press in g the ON LINE key toggles the
printer from offline to online mode. The status indicator is lit in
online mode.
• Offline Mode. In offline mode, you may perform operator
functions, such as loading paper and setting top-of-form. You
may also move through the printer configuration menus.
Pressing the ON LINE key toggles the printer from online to
offline mode. The status indicator is off in offline mode.
• Fault Mode. In fault mode, a fault condition exi sts that must be
cleared before printing can continue. In fault mode, the status
indicator flashes, the alarm beeps (if configured to sound), and
a descriptive fault message displays.
The current operati ng mode m ay be s elected via co ntrol pan el keys ,
or may result from routine operations such as powering on the
printer. The current opera ting mode is f requently i ndicated as p art of
the printer display message.
20

Using the Control Panel
Format Conventions
Messages, keys, and indicators are shown as they appear on the
control panel. Key combinat ions are indi cated with the plus (+) sign.
For example, “Press
= + >” means to press the = (up) key and the
> (down) key at the same time .
Message Display
Function Displays operating modes, menu options, and fault
messages.
For the location of the Message Display, see the figures on
page 19.
Status I n d icator
The status indicator indicates the operating mode:
• On. Status indicator is on continuously when the printer is in
online mode.
• Off. Status indicator is off when the printer is in offline mode.
• Flashing. Status indic ator fla shes if a fault condi tion e xists an d
the printer is in Fault mode. An error message will generally
display that describes the error condition.
For the location of the Status Indicator, see the figures on page 19.
21
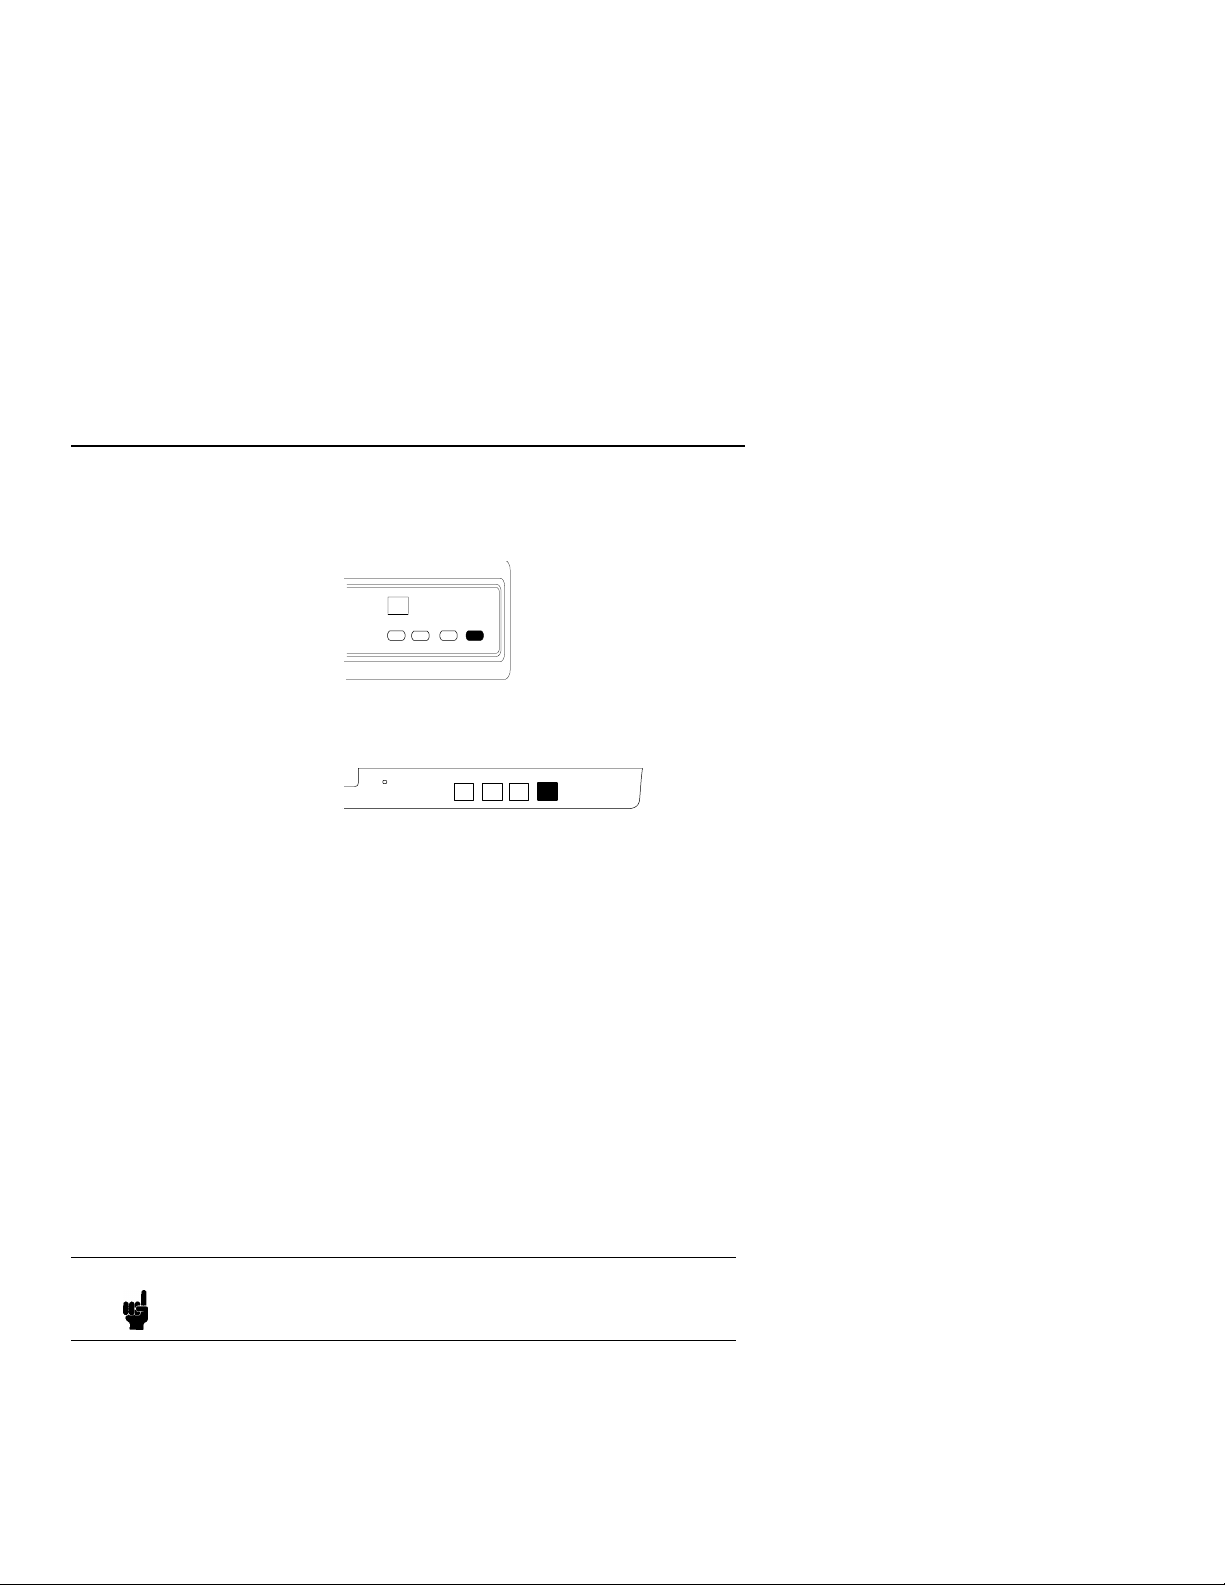
Chapter 1 Basic Operating Procedures
ONLINE
Cabinet Model:
Pedestal Model:
Function Toggles the printer between online and offline modes.
Action To place the printer in online mode, press once. The
status indicator remains continuously lit.
To place the printer in offline mode, press once. The
status indicator turns off.
Result When the printer is in online mode, it is ready to
receive data and control commands from the host
computer, and prints the data immediately.
When the printer is in offl ine mode , printing s tops after
the current line finishes printing. Communication with
the host stops, and you may perform operator
functions such as setting the top-of-form or
configuring the printer.
22
Using the Control Panel
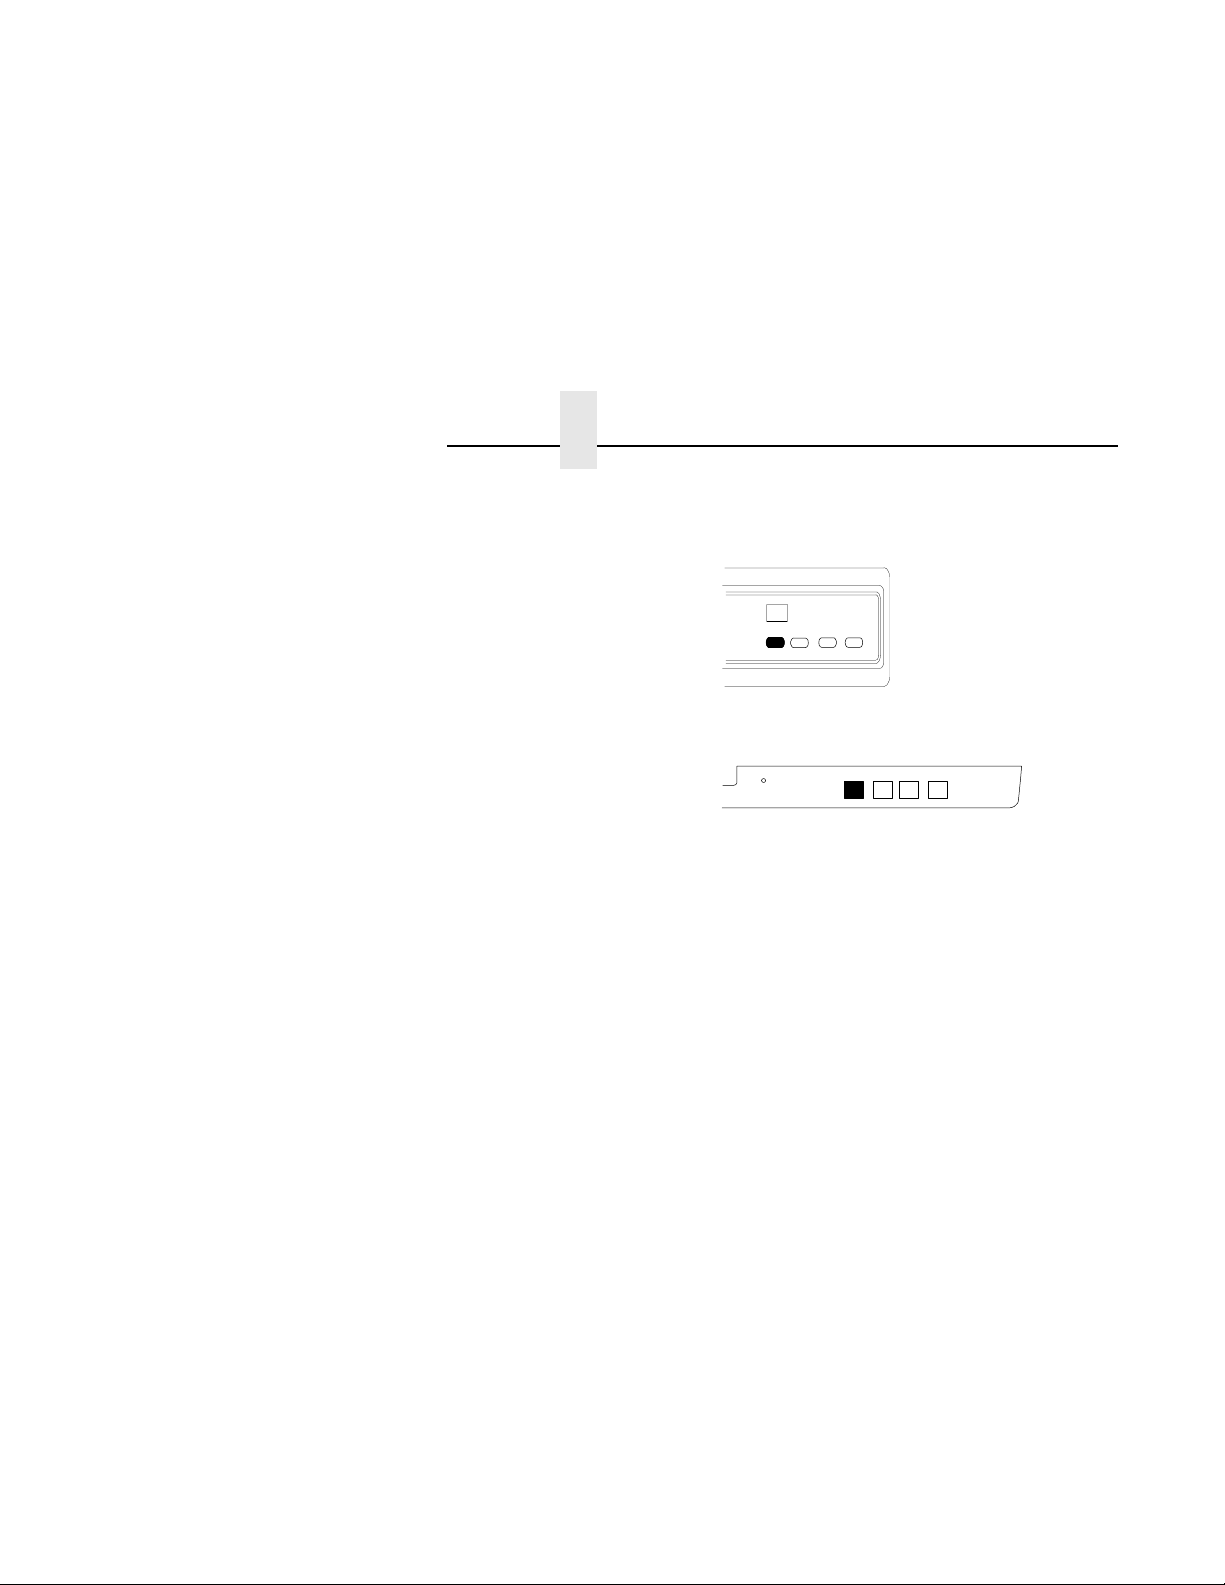
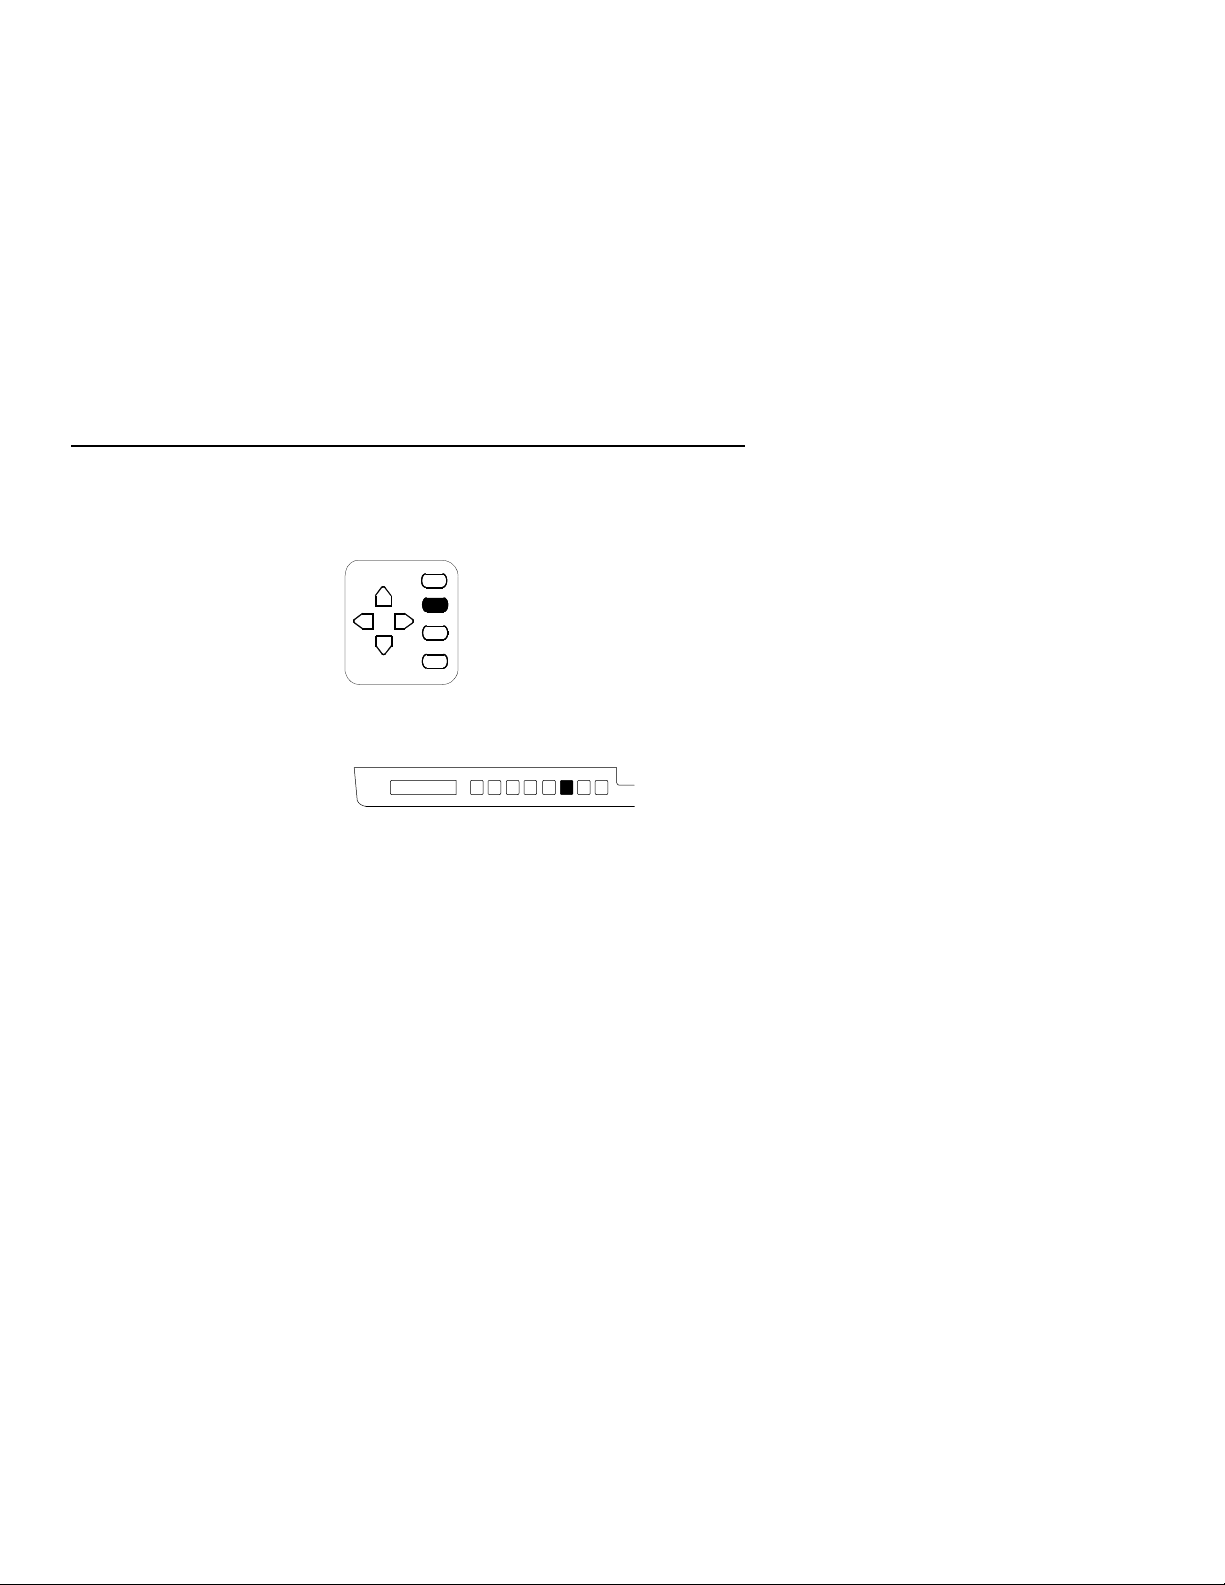
FF (Form Feed)
Cabinet Model:
Pedestal Model:
Function Ca uses the paper to a dvance to the to p-of-form on the
next page.
Action In online or offline mode, press and release to
advance the paper to top-of-form on the next page. If
there is data in the printer buffers, the data will print
and then the paper will move to the next top-of-form.
Other In the fault state, FF does not advance the paper to
the next top-of-form; instead, it will slew the paper 11
inches.
23
Chapter 1 Basic Operating Procedures
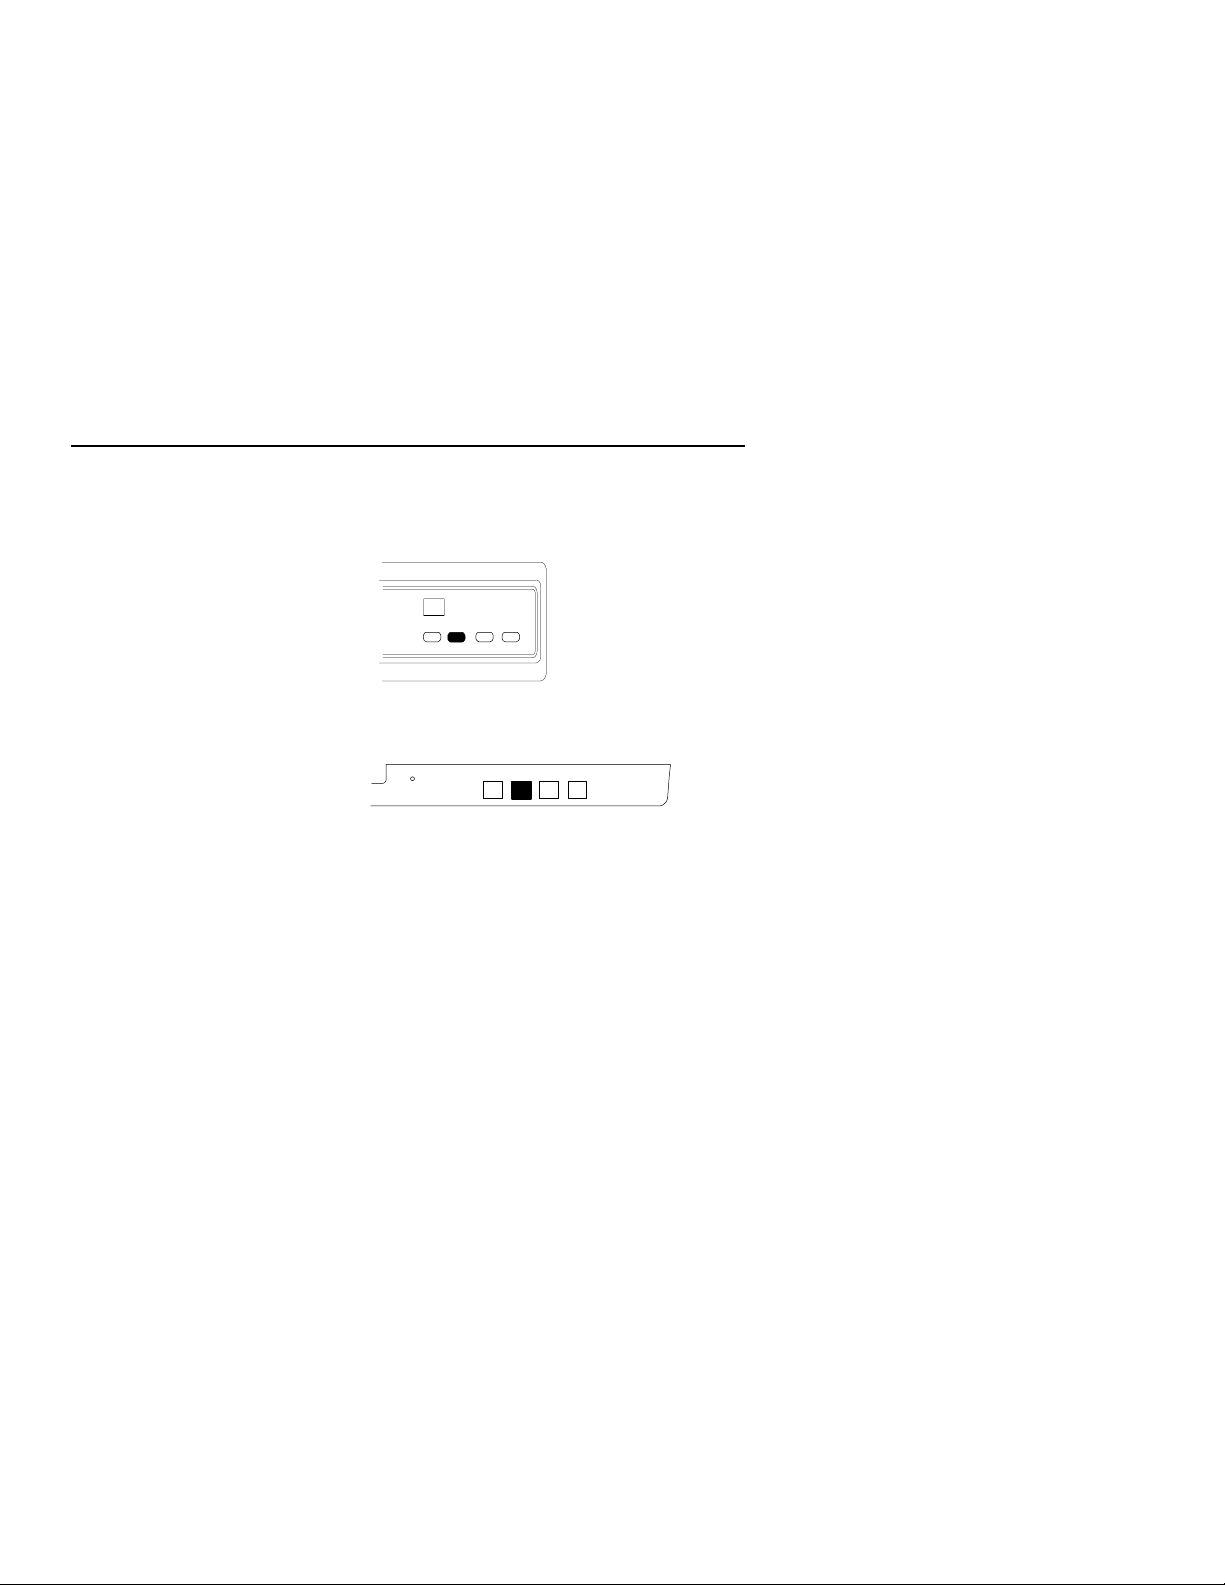
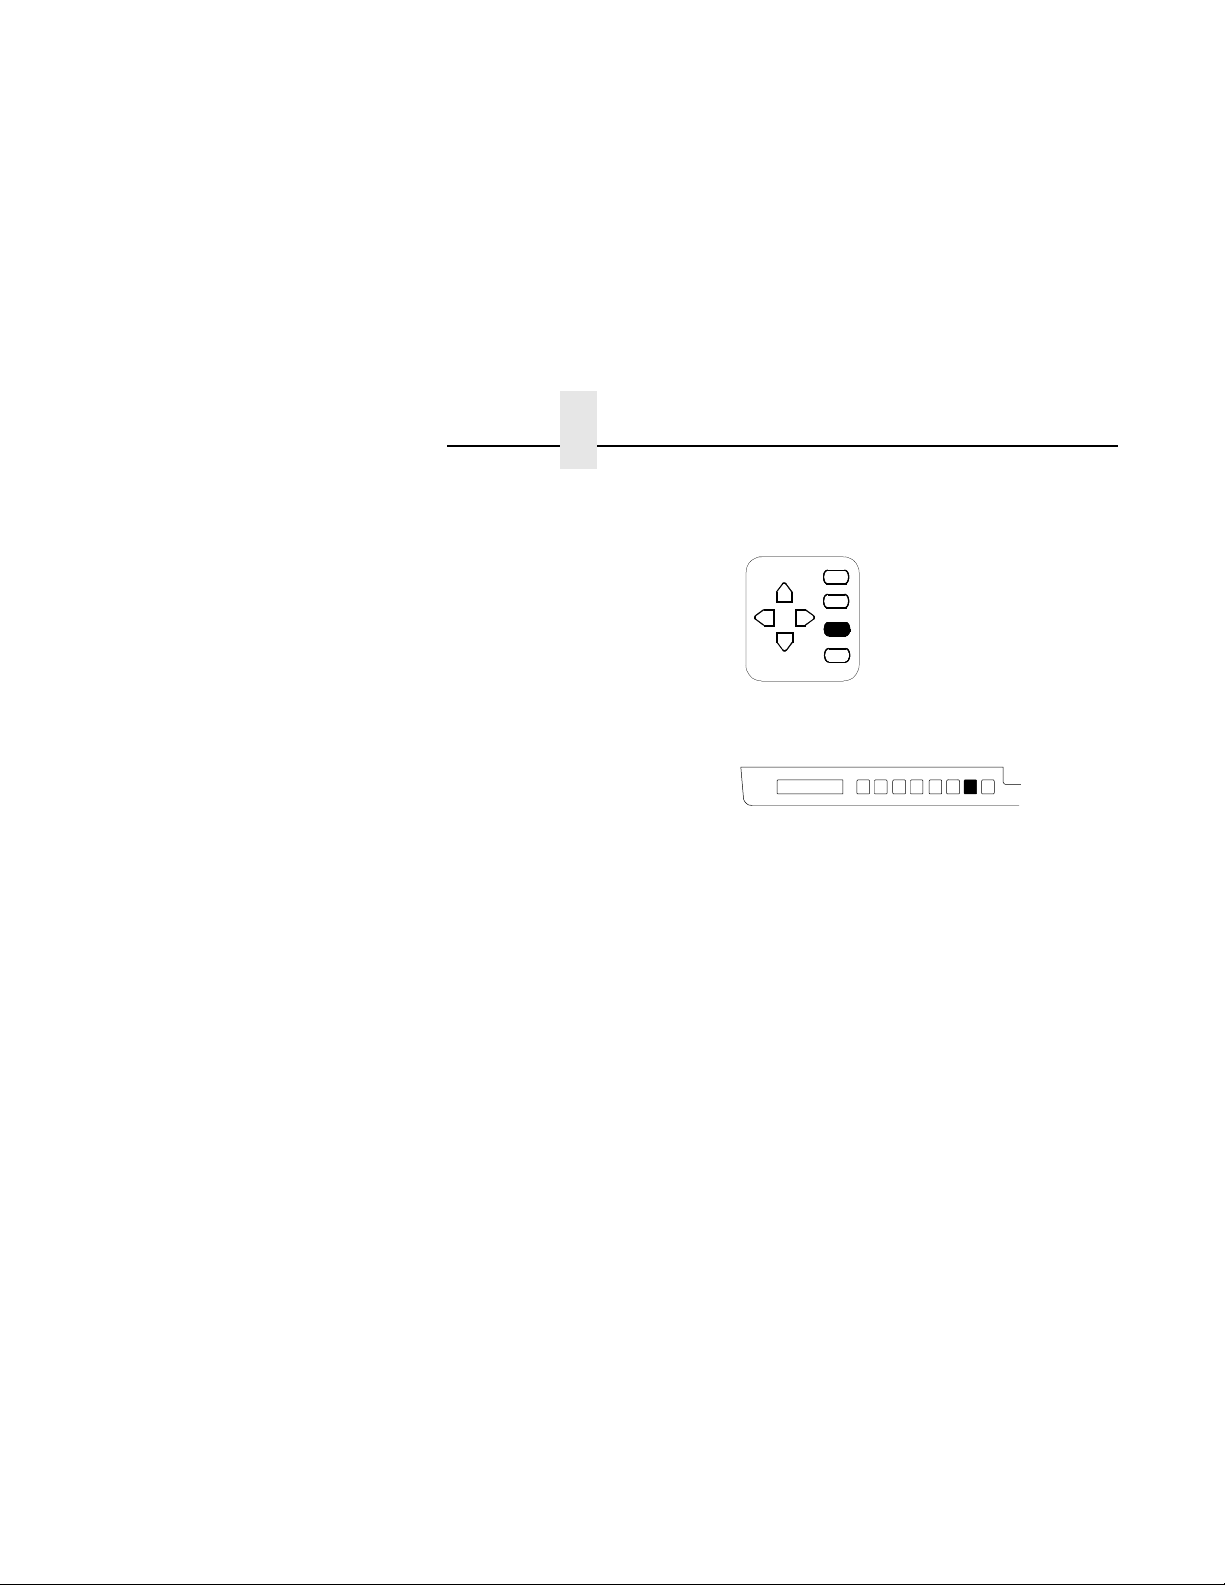
LF (Line Feed)
Cabinet Model:
Pedestal Model:
Function Advances the paper one line at a time. Data in the
print buffer will print before the line feed occurs.
Action With the printer offline, press and release to advance
the paper one line at a time.
If there is data in the printer buffer, the data will print
before the line feed occurs.
Press and hold to repeat forward paper movement.
Other LF does not operate in the fault or online states.
24
Using the Control Panel
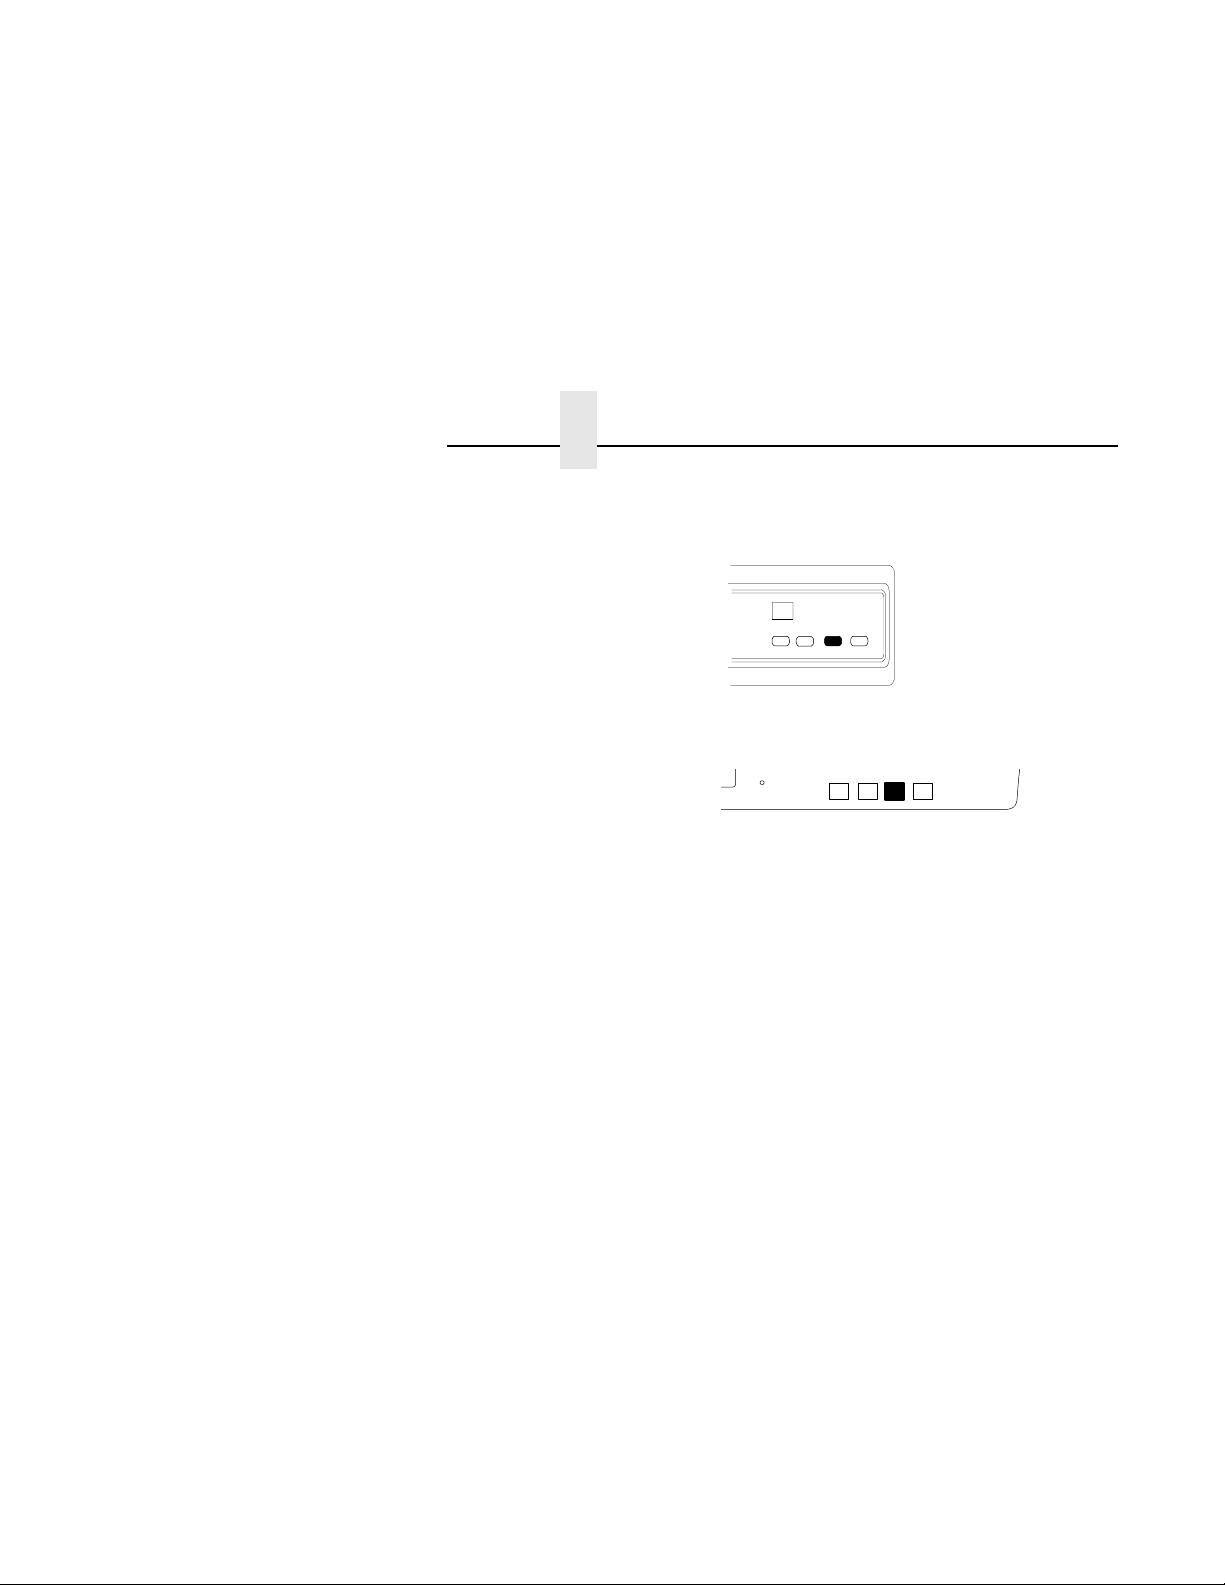
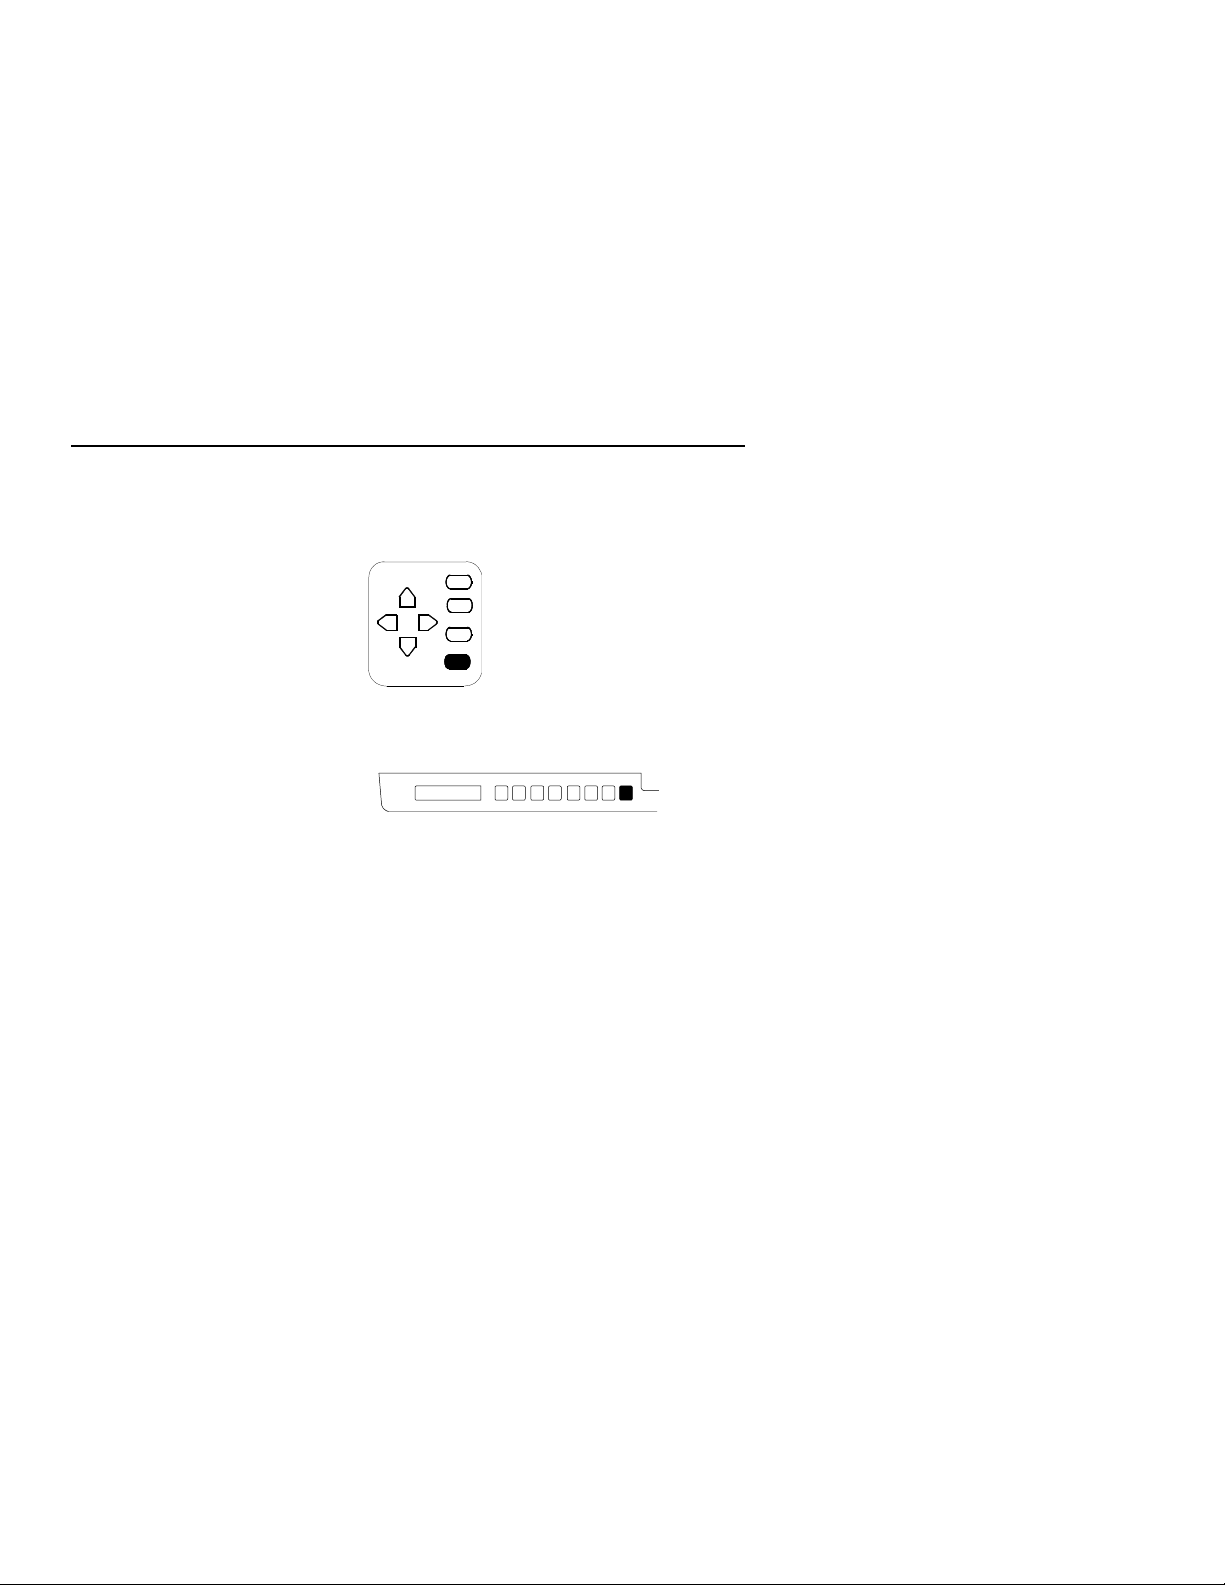
VIEW (Forms Alignment)
Cabinet Model:
Pedestal Model:
Function In offline or online mode, allows you to view and
adjust the placement of data on the page, or to
position the printed material for removal of peel-off
labels.
Action With the printer online or offline, press and release to
move paper forward for inspection. The last data
printed advances to the tractor area.
Press VIEW a second time to move the pap er back to
its previous print position.
If the printer is onli ne and printi ng, p ress VIEW to stop
printing. The paper advances. Press
1/72 inch vertically for fine vertical forms alignment.
Press VIEW. The paper moves back to the adjusted
print position and printing resumes.
= or > to move
Note
Pressing ON LINE a lso m oves the pap er back to its ori gin al prin t
position and returns the printer to online.
25

Chapter 1 Basic Operating Procedures
CLEAR
Cabinet Model:
Pedestal Model:
Function Clears a fault message and changes the printer from
fault mode to offline mode.
Action After correcting the fault, press and release.
Result The fault message is cleared, and the printer goes to
offline mode.
Other Moves to the top of the configuration menu when the
printer is in the configuration menus.
Cancels data in the buffer. Place the printer offline.
From the host system, stop the print job. Press
CLEAR+ENTER. Reset the top-of-form (page 38).
Press SHIFT+CLEAR to reset the PCL-II emulation.
26
Using the Control Panel
SHIFT
Cabinet Model:
Pedestal Model:
Function Used in conjunction with other keys.
Action The printer must be offline to perform the following
functions:
1) Press SHIFT+CLEAR to reset the PCL-II
emulation.
2) Press SHIFT+LPI ADJ to access the line spacing
menu. Press PREV or NEXT to scroll through the
options.
3) Press SHIFT+Page L. Adj to access the form
length menu in lines or inches. The page length is
selected by lines/page or inches/page, depending on
which option is chosen in the PCL-II submenu.
4) Press SHIFT+
1/72 inch increments.
5) Press SHIFT+
in 1/72 inch increments.
= to micro step the paper upward in
> to micro step the paper downward
27
Chapter 1 Basic Operating Procedures
SET TOF (Top-of-Form)
Cabinet Model:
Pedestal Model:
Function Sets the top-of-form on the printer. This key is active
only when the printer is offline. It will not operate if the
printer is in a fault condition.
Action Raise the forms thickness lever; align the top of the
first print line with the TOF indicator on the tractor;
close the forms thickne ss lev er; then pre ss SET TOF.
(See page 38 for a complete procedure.)
Result The paper moves down to the print po sition and aligns
to the top-of-form.
If there is any data in the input buffer, the paper will
move to the same relative position on the new page
corresponding to the last print position. The new topof-form setting is retained in printer memory.
28
Using the Control Panel
ENTER
Cabinet Model:
Pedestal Model:
Function In the menus, selects the currently displayed option
value as the active value.
Action When the display shows the desired conf iguration
value, press and release to select that value as th e
active value. An aste risk (*) appears ne xt to the active
value in the display.
The ENTER key must be unlocked before you can
use it to select option values. To unlock the ENTER
key, press
To relock the ENTER key, press = + > a second
time.
Other Starts and stops printer tests, and starts a
configuration or a Symbol Set printout. Press ENTER
to start a printer test (or configuration Symbol Set
printout). Press again to stop the printer test.
= + > at the same time from offline mo de.
29
Chapter 1 Basic Operating Procedures
UP and DOWN (
Cabinet Model:
Pedestal Model:
Function 1) When the printer is offline, it moves between the
Action 1) In the configuration menus, press
= and >
different levels in the configuration menu.
2) When the printer is on line and in view, i t m ove s t he
paper up or down in 1/72 inch increments for fine
vertical forms alignment.
)
= to move to a
higher level in the menu struc ture. Pre ss > to move to
a lower level in the menu structure.
2) When online, press VIEW. Press
up and down. When of fline, SHIFT+= or SHIFT+> wi ll
move up and down.
Other When the printer is offline, press
simultaneously to lock or unlock the ENTER key.
30
= or > to move
= and >

Using the Control Panel
PREV and NEXT (
Cabinet Model:
Pedestal Model:
Function 1) Moves between the options on the current level of
the configuration menu.
2) Performs a soft reset.
Action 1) In the configuration menu, press
backward or press < to scroll forward through menu
selections on the same level.
2) When the printer is offline, press
of the LP+ emulation is performed, and the printer
buffers are cleared.
; and <
)
; to scroll
; + <. A soft reset
31

Chapter 1 Basic Operating Procedures
Loading Paper
This procedure shows you how to load paper into an empty printer.
Make sure the printer is powered on.
1. Open the printer cover.
Tractor Door
Forms Thickness
Lever
2. Raise the forms thickness lever as far as it will go.
3. The display indicates “CLOSE PLATEN” and the printer may
beep if alarm is enabled.
4. Open both tractor doors.
5. Unload the current paper, if necessary (page 52).
6. Open the cabinet front door.
EDGE
OF
PAPER
BOX
7. Align the paper supply with the label on the floor. Ensure that
the paper pulls freely from the box.
32

Loading Paper
Cabinet Model Pedestal Model
Paper Slot is 8”
below printer base
Paper Slot
Feed the paper up through the paper slot inside the cabinet
8.
and behind the ribbon mask. The ribbon mask is shown on the
ribbon path diagram located on the shuttle cover on the printer.
Hold the paper to prevent it from slipping down through the
paper slot.
Tractor Door
Paper
Ribbon Path Diagram
9. Load the paper on the left tractor and close the tractor door.
33

Chapter 1 Basic Operating Procedures
Paper Scale
Normally, you should not need to adjust the position of the left
10.
tractor. If adjustment is necessary, unlock the left tractor. Slide
the tractor until it is directly to the left of the number “1” on the
paper scale and lock it. You can also use the paper scale to
count columns.
Caution
Note
To avoid damage to the printer caused by printing on the
platen, always position the le ft tractor unit directly to the left
of the “1” mark on the paper scale.
Paper Support
11. Move the paper supports as necessary to support the paper
through the tractor area.
The placement of the paper supports will help the movement of
the paper and reduce the possibility of paper jams.
34

Loading Paper
Tractor Door
Tractor Lock
Load the paper onto the right tractor sprockets and close the
12.
tractor door.
13. If necessary, unlock and slide the right trac tor to rem ov e pa per
slack or to adjust for various paper widths. Then, lock the
tractor.
Horizontal
Adjustment Knob
14. Af ter both tractors are secured, you may use the horizontal
adjustment knob to make fine horizontal paper adjustments.
35

Chapter 1 Basic Operating Procedures
Cabinet Model
Lower Paper
Guide
15.
• On pedestal models:
Pedestal Model
Lower Paper
Guide
Using the vertical position knob, feed the paper into the rear of
the printer.
Guide the paper over the lower paper guide and through the
slot in the top cover.
• On standard cabinet models:
Make sure the paper passes easily into the rear paper stack
area.
• On stacker equipped cabinet models:
Make sure the paper feeds through the stacker paper throat.
16. Press FF several times to make sure the paper feeds properly
beyond the tractors and over the lower paper guide. Feed
sufficient paper to ensure the paper stacks correctly.
17. Lower the forms thickness lever.
18. Close the cabinet front door.
19. Press the CLEAR key to clear the paper out fault.
20. Close the printer cover.
36

Loading Paper
Note
The display should now i ndicate “OFF LI NE”. If not, there ma y be
another fault requiring correction.
Start the paper stack.
21.
• On pedestal models:
Ensure paper folds in the paper bask et such that the paper lies
with its natural folds.
• On standard cabinet models:
Open the cabinet rear door and ensure that the paper rests on
the base and lies with its natural folds.
• On stacker equipped models:
Proceed to “Loading and Starting the Paper Stack” on pag e 73.
37

Chapter 1 Basic Operating Procedures
Setting Top-Of-Form
The top-of-form setting determines where the first line of print
appears on a page. Be sure to set the top-of-form under the
following condition s:
• Before each new print job
• After loading paper
• After clearing a paper jam
1. Make sure the printer is in offline mode. (Press ON LINE to
toggle from online to offline mode.)
Forms Thickness Lever
2. Open the printer cover and raise the forms thickness lever. (If
the cover and lever are already raised, go directly to Step 4.)
3. Press CLEAR to turn off the alarm.
You can set the top-of-form with the indicator on the tractor. If you
have a cabinet model, yo u can also use the lab el on the paper pat h.
See the following pages.
38

Setting Top-Of-Form
Using the TOF indicator on the Tractor:
Note
TOF Indicator
Vertical Position
Knob
Perforation
4. Locate the TOF indicator on the left or right tractor.
5. Turn the vertical position knob to align the top of the first print
line with the TOF indicator. The TOF indicator is the small tab
located on the left or right tractor gate. The TOF indicator
should point to the top of the designated first print line.
The first print line on the form should be 1/2 inch or more from
the perforation for maximum print quality.
39

Chapter 1 Basic Operating Procedures
Using the TOF label on the paper path:
TOF Label
Perforation
6. Align the perforation with one of the markers on the TOF label.
For example, if you have 16" forms, align the perforation with
the 16" mark on the label.
40

Setting Top-Of-Form
Thin Paper
A
Medium Paper
B
Thick Paper
C
Lower the forms thickness lever. Set it to match the paper
7.
thickness.
The A-B-C scale corresponds approximately to 1-, 3-, and 6part paper thickness. Adjust unti l you have the desire d print
quality.
Caution
Do not set the forms thickness lever too tightly; excessive
friction can cause paper jams, ribbon jam s with potential for
ribbon damage, smeared ink, or wavy print.
8. Press CLEAR to clear the fault condition.
9. Press SET TOF. The paper moves down to the print position
and aligns to the top-of-form.
If there is any data in the input buffer, the paper moves to the
same relative position on the new page corresponding to the
last print position. The ne w top- of-form s etting is ret ained in the
printer memory.
10. Press ON LINE and close the printer cover.
41

Chapter 1 Basic Operating Procedures
Reloading Paper
Follow this procedure when “LOAD PAPER” displays. (This
message occurs when the last sheet of paper passes through the
paper slot.) Use this procedure to reload paper without removing
the last sheet of the old paper supply.
Forms Thickness Lever
1. Raise the printer cover. Raise the forms thickness lever as far
as it will go. Press CLEAR to turn off the alarm. Do not open
the tractor doors or remove the existing paper.
EDGE
OF
PAPER
BOX
2. Open the cabinet front door. Align the paper supply with the
label on the floor. Ensure that the paper pulls freely from the
box.
42

Reloading Paper
Cabinet Model Pedestal Model
Paper Slot is 8”
below printer base
Paper Slot
Locate the paper slot inside the cabinet and feed the paper up
3.
through the slot.
Note
Note
It may be easier to feed one corner of the new paper up through
the slot first. When this corner can be grasped from the top,
rotate the paper back to the normal pos ition. If ne cessary , gently
press the existing paper back.
Hold the paper to prevent it from slippi ng down and throu gh the
paper slot.
If you are using multi-part paper and it is too thick for the new
paper to be loaded over the existing paper, go to step 12.
43

Chapter 1 Basic Operating Procedures
New Paper
Pull the new paper above and behind the ribbon mask, but in
4.
front of the existing paper. (The ribbon mask location is shown
on the ribbon path diagram.) If necessary, gently press the
existing paper back. Align the top edge of the new paper with
the top perforation of the existing paper.
5. Load the new pap er over the ex isting pa per. Open a nd load the
tractors one at a time to prevent the paper from slipping.
Existing Paper
Note
Ensure that the top edge of the new paper lines up with the top
perforation of the existing paper.
44

Reloading Paper
Thin Paper
A
Medium Paper
B
Thick Paper
C
Lower the forms thickness lever. Set it to match the paper
6.
thickness.
The A-B-C scale corresponds approximately to 1-, 3-, and 6part paper thickness. Adjust unti l you have the desire d print
quality.
Caution
Do not set the forms thickness lever too tightly; excessive
friction can cause paper jams, ribbon jam s with potential for
ribbon damage, smeared ink, or wavy print.
7. Press CLEAR to clear the “LOAD PAPER” fault message from
the Liquid Crystal Display.
8. Press FF several times to make sure the paper feeds properly
beyond the tractors and over the lower paper guide. Feed
sufficient paper to ensure the paper stacks correctly.
9. Close the printer cover. Close the cabinet front door.
10. Press ON LINE to place the printer in online mode a nd resum e
printing.
45

Chapter 1 Basic Operating Procedures
On cabinet models : O pe n th e c ab ine t rear door. Make su re t he
11.
paper is aligned with the label in the output area (inside the
cabinet). Close the front and rear doors. Close the platen and
printer cover.
Perform steps 12 through 28 only if you are unable to load the new
paper over the existing paper in step 3.
12. Open both tractor doors.
13. Remove the paper from the tractors. Allow the paper to fall in to
the paper supply area.
46

Reloading Paper
Cabinet Model Pedestal Model
Paper Slot is 8”
below printer base
Paper Slot
Feed the paper up through the paper slot inside the cabinet.
14.
Hold the paper to prevent it from slipping down through the
paper slot.
Tractor Door
Paper
15. Pull the paper above and behind the ribbon mask. (The ribbon
mask location is shown on the ribbon path diagram.)
16. Load the paper on the left tractor and close the tractor door.
47

Chapter 1 Basic Operating Procedures
Paper Scale
Normally, you should not need to adjust the position of the left
17.
tractor.
If adjustment is necessary, unlock the left tractor. Slide the
tractor until it is directly to the left of the number “1” on the
paper scale and lock it. (You can also use the paper scale to
count columns.)
Caution
To avoid damage to the printer caused by printing on the
platen, always position the le ft tractor unit directly to the left
of the “1” mark on the paper scale.
Paper Support
18. Move the paper supports as necessary to support the paper
through the tractor area.
48

Reloading Paper
Tractor Door
Tractor Lock
Unlock the right tractor. Load the paper onto the s proc k ets an d
19.
close the tractor door. If necessary, slide the right tractor to
remove paper slack or to adj ust for va rious pape r widths. Then,
lock the tractor.
Horizontal
Adjustment Knob
20. Af ter both tractors are secured, you may use the horizontal
adjustment knob to make fine horizontal paper adjustments.
49

Chapter 1 Basic Operating Procedures
Cabinet Model
Lower Paper
Guide
21.
22. Press FF several times to make sure the paper feeds properly
23. On cabinet models : O pe n th e c ab ine t rear door. Make su re t he
Pedestal Model
Lower Paper
Guide
On pedestal models:
Using the vertical position knob to move the paper up, guide
the paper over the lower paper guide and through the slot in th e
top cover.
beyond the tractors and over the lower paper guide. Feed
sufficient paper to ensure the paper stacks correctly.
paper is aligned with the label in the output area (inside the
cabinet). Close the front and rear doors.
50

Reloading Paper
TOF Indicator
Vertical Position
Knob
Align the top of the first print line with the TOF indicator on the
24.
tractor by rotating the vertical position knob.
Thin Paper
A
Medium Paper
B
Thick Paper
C
Perforation
25. Lower the forms thickness lever. Set it to match the paper
thickness.
(The A-B-C scale corresponds approximately to 1-, 3-, and 6part paper thickness. Adjust unti l you have the desire d print
quality.)
26. Press CLEAR to clear any fault messages (such as “LOAD
PAPER”) from the Liquid Crystal Display.
27. Press SET TOF. The top-of-form you have set moves down to
the print position. If there are data in the buffer, the paper
moves forward to the last print position on the next page.
28. Press ON LINE and close the printer cover.
51

Chapter 1 Basic Operating Procedures
Unloading Paper
1. Press ON LINE to place the printer in offline mode. Open the
printer cover.
Perforation
2. Open the cabinet front door.
3. Tear off the paper at the perforation if it is not at the end of the
paper.
4. Press FF several times to eject the paper.
5. Press the CLEAR key to silence the audible alarm, if
necessary.
Tractor Door
Caution
Forms Thickness
Lever
If you need to pull the paper down through the paper slot,
do not forget to raise the forms thickness lever as far as it
will go.
52

Unloading Paper
Caution
Cabinet Front
Door
Gently pull the paper through the paper slot, especially
when using label stock, because labels can detach and
adhere to the printer, where only a Hewlett-Packard
Customer Service Engineer can remove them.
Cabinet Model Pedestal Model
Remove the stacked paper from the cabinet floor.
6.
7. Close the cabinet front door.
8. Close the printer cover.
9. Continue on to page 32 to load new paper.
53

Chapter 1 Basic Operating Procedures
Replacing the Ribbon
Use only the following authorized ribbons.
Table 1. Printer Ribbons
Part
Number
Standard Ribbon Kit (60 yards) C3207A
Standard Ribbon Kit (100 yards) C3208A
OCR Ribbon Kit (60 yards) C3209A
OCR Ribbon Kit (100 yards) C3210A
1. Press ON LINE to place the printer in offline mode. Open the
printer cover.
Hub Latch
Cabinet
Models
ää
ä
ää
ä
Forms Thickness
Lever
Pedestal
Models
2. Remove the old ribbon:
a. Raise the forms thickness lever as far as it will go.
b. Press the hub latches inward and lift the ribbon spools off
the hubs. Lift the ri bbon o ut of the rib bon p ath. Ref er to th e
ribbon path diagram on the shuttle cover.
c. Discard the old ribbon.
54

Replacing the Ribbon
If necessary, clean the interior of the printer. (See page 80.)
3.
Caution
Hub Latch
Hammer Bank Cover
Ribbon
Mask
Ribbon Guide
4. Install the new ribbon:
a. With the ribbon to the outside, place the full spool on the
right hub. Press down on the spool until the hub latch
snaps in place.
b. Thread the ribbon around the ribbon guide and along the
ribbon path. Refer to the ribbon path diagram on the
shuttle cover. Be sure to thread the ribbon between the
hammer bank cover and the ribbon mask.
The ribbon must not be twisted. A twisted ribbon can lower
print quality, shorten ribbon life, or cause paper jams.
c. Place the empty spool on the left hub. Press down on the
spool until the hub latch snaps into plac e.
d. Hand-turn the left spool to make sure the ribbon tracks
correctly in the path and ribbon guides.
55

Chapter 1 Basic Operating Procedures
Thin Paper
A
Medium Paper
B
Thick Paper
C
Lower the forms thickness lever. Set it to match the paper
5.
thickness you are using.
The A-B-C scale corresponds approximately to 1-, 3-, and 6part paper thickness. Adjust until you have the desired print
quality.
Caution
Do not set the forms thickness lever too tightly; excessive
friction can cause paper jams, ribbon ja ms with poten tial for
ribbon damage, smeared ink, or wavy print.
6. Close the printer cover.
7. Press ON LINE to return the printer to online mode.
Ordering Ribbons
Ribbons for the LineJet printers can be ordered in the U.S.A. by
calling Hewlett-Packard at 1-800-538-8787.
Customers outside the U.S.A. should contact their local HewlettPackard sales and support office for ordering information.
56

Cancelling a Print Job
Cancelling a Print Job
The purpose of this function is to stop the printi ng of unwante d data
when print jobs are cancelled from the host system.
This first procedure only clears all the data in the buffer and does
not change the current configuration.
1. Place the printer offline.
2. From the host system, stop the print job.
3. Simultaneously press the ENTER + CLEAR keys.
This second procedure clears all data in the buffer and returns the
printer to the power-up configuration. The result is the same as
powering the printer off and then on.
1. Place the printer offline.
2. From the host system, stop the job.
3. Simultaneously press the PREV + NEXT keys to reboot the
printer.
Note
If the print job is not stopped from the host system before
cancelling data o r reboot ing th e pr inter, t he prin t job w ill conti nue
with data missing when the printer returns online. Exercise
caution to prevent unwanted data loss occurrences as this
function is active only in an offline condition and sets the current
paper position as the top-of-form. The purpose of this function is
to eliminate the necessity of printing unwanted data when print
jobs are cancelled.
57

Chapter 1 Configuration
Configuration
The following pages describe how to save, print, load and delete
entire configurations, as well as how to select a power-up
configuration.
A configuration is a group of parameter settings. For example:
• 8 lpi
• 10 cpi
• Data processing typeface, etc.
Nine configurations are available. Your printer has a preset factory
configuration which cannot be changed or deleted, configuration 0.
Configurations 1 through 8 are provided so you can store custom
configurations to meet specific print job requirements.
To create a custom configurat ion, mod ify any printer par ame ters as
needed from the default values, then save the modified
configuration (as number 1 through 8) using the “Save Config.”
menu option.
Once you have defined and saved a configuration to nonvolatile
memory, it will not be lost if you power off the printer. You can load
or delete configurations ; you can also modi fy and overwrite (res ave)
them.
However, to power-up in a partic ular conf igurati on, it must be s aved
as the power-up configuration.
58

Parameters
Parameters
Printer parameters are settings su ch as line spa ci ng (lpi ),
characters per inch (cpi), typeface, etc. You can change a
parameter by pressing keys on the control panel or by sending a
control code from the host computer.
A parameter such as 8 lpi is effective as long as the printer is on. To
save the 8 lpi par ameter, you must us e the con trol pa nel a nd save it
as part of a configuration.
To learn more about the configuration menus and how to change
individual parameters such as line spacing, typeface, etc., refer to
the
User’s Guide
emulation.
or the technical reference manual for each
Control Codes
Control codes override parameters that were set with the control
panel. For example, if you set line spacing to 6 lpi with the operator
panel, and application software later changed this to 8 lpi with a
control co de, then 8 lpi would be the new, active parameter.
59

Chapter 1 Configuration
Saving Configurations
You can save up to eight unique configurations. They are stored in
memory and will not be lost if you turn off the printer.
Configuration 0 is the factory-preset configuration and cannot be
modified or deleted.
Note
To overwrite an existing configuration, first set the “Protect
Configs.” to disable.
Do not change the configuration of your printer until you are
familiar with the procedures described in the
User’s Guide
.
1. Press ON LINE to place the printer offline. Raise the printer
cover.
OFF LINE
CONFIG. CONTROL
2. Press = + > simultaneously to unlock the control panel. The
message “UNLOCKED” displays briefly.
ENTER SWITCH
UNLOCKED
OFF LINE
CONFIG. CONTROL
3. Press >.
CONFIG. CONTROL
Load Config.
4. Press < repeatedly until you reach the Save Config.
parameter.
CONFIG. CONTROL
Save Config.
5. Press >.
Save Config.
1*
60

Saving Configurations
Press ; or < until the desired configuration number (1-8)
6.
displays.
Save Config.
2
7. Press ENTER to select the value. An asterisk (*) appears next
to the value in the display. Your active configuration is now
saved as configuration 2.
Save Config.
2*
8. Press = + > simultaneously to lock the control panel. The
message “LOCKED” displays briefly.
ENTER SWITCH
LOCKED
9. Press ON LINE . Clos e the printer cover. Th e p rin ter is ready to
resume printing.
ONLINE
61

Chapter 1 Configuration
Printing Configurations
The configuration printout lists the stored configuration parameters
(line spacing, forms length, etc.). You can print the following
configurations: current, factory, power-up, the customized
configurations (1-8), or all of the configurations.
Note
To print a configuration, it mu st be stored in memory . Otherw ise ,
the message “CONFIG. DOES NOT EXIST/Save First” displays.
1. Press ON LINE to place the printer offline. Raise the printer
cover.
OFFLINE
CONFIG. CONTROL
2. Press = + > simultaneously to unlock the control panel. The
message “UNLOCKED” displays briefly.
ENTER SWITCH
UNLOCKED
OFFLINE
CONFIG. CONTROL
3. Press >.
CONFIG. CONTROL
Load Config.
4. Press < repeatedly until you reach the Print Config. parameter.
CONFIG. CONTROL
Print Config.
5. Press >.
Print Config.
Current*
62

Printing Configurations
Press ; or < until the desired option displays.
6.
Print Config.
Factory*
7. Press ENTER. The configuration prints. Tear off the
configur ation printout.
OFFLINE
CONFIG. CONTROL
8. Press = + > simultaneously to lock the control panel. The
message “LOCKED” displays briefly.
ENTER SWITCH
LOCKED
9. Press ON LINE. Close the printer cover. Save the printout in a
safe place. The printer is ready to resume printing.
ONLINE
63
Chapter 1 Configuration
Loading Configurations
While the printer is on, you can load any of the eight customized
configurations or the factory default configuration.
The configuration you load will remain in ef fect as long as the printer
is on. When you turn the power off and then back on, the
designated power-up configuration loads. See page 68.
Note
In order to load a c onfigu ration, it m ust be saved first. Otherwi se,
the message “CONFIG. DOES NOT EXIST/Save First” displays.
1. Press ON LINE to place the printer in offline mode. Open the
printer cover.
OFFLINE
CONFIG. CONTROL
2. Press = + > simultaneously to unlock the control panel. The
message “UNLOCKED” displays briefly.
ENTER SWITCH
UNLOCKED
OFFLINE
CONFIG. CONTROL
3. Press >.
CONFIG. CONTROL
Load Config.
4. Press >.
LOAD CONFIG.
0*
5. Press ; or < until the configuration you want to load displays.
LOAD CONFIG.
2
64

Loading Configurations
Press ENTER.
6.
Loading Saved
Configuration
Load Config.
2*
7. Press = + > simultaneously to lock the control panel. The
message “LOCKED” displays briefly.
ENTER SWITCH
LOCKED
8. Press ON LINE and close the printer cover. The printer is
ready to resume printing.
ONLINE
65

Chapter 1 Configuration
Deleting Configurations
You can delete any of your customized configurations. The factory
preset configuration 0 cannot be deleted.
Note
In order to delete a configuration, it must be saved first.
Otherwise, the message “CONFIG. DOES NOT EXIST/Save
First” displays.
1. Press ON LINE to place the printer offline. Open the printer
cover.
OFFLINE
CONFIG. CONTROL
2. Press = + > simultaneously to unlock the control panel. The
message “UNLOCKED” displays briefly.
ENTER SWITCH
UNLOCKED
OFFLINE
Config. Control
3. Press >.
CONFIG. CONTROL
Load Config.
4. Press < repeatedly until you reach the Delete Config.
parameter.
CONFIG. CONTROL
Delete Config.
5. Press >.
Delete Config.
1*
6. Press ; or < until the configuration you want to delete
displays.
Delete Config.
3
66

Deleting Configurations
Press ENTER.
7.
Deleting
Configuration
Delete Config.
3*
8. Press = + > simultaneously to lock the control panel. The
message “LOCKED” displays briefly.
ENTER SWITCH
LOCKED
9. Press ON LINE and close the printer cover. The printer is ready
to resume printing.
ONLINE
67

Chapter 1 Configuration
The Power-Up Configuration
When you power on the printer for the first time, it loads
configuration 0, the factory default configuration.
If you save a configuration, such as configuration 1, and turn the
power off and then back on, the printer will load the designated
power-up configuration, not the last saved configuration.
For your convenience, you can specify which configuration (0-8)
should be the power-up configuration.
Note
In order to select a pow er-up con figuration , it must b e saved firs t.
Otherwise, the message “CONFIG. DOES NOT EXIST/Save
First” displays.
1. Press ON LINE to place the printer offline. Open the printer
cover.
OFFLINE
CONFIG. CONTROL
2. Press = + > simultaneously to unlock the control panel. The
message “UNLOCKED” displays briefly.
ENTER SWITCH
UNLOCKED
OFFLINE
CONFIG. CONTROL
3. Press >.
CONFIG. CONTROL
Load Config.
4. Press < repeatedly until you reach the Power-Up Config.
parameter.
CONFIG. CONTROL
Power-Up Config.
68

The Power-Up Configuration
Press >.
5.
Power-Up Config.
0*
6. Press ; or < until the configuration you want displays.
Power-Up Config.
4
7. Press ENTER.
Loading Saved
Configuration
Power-Up Config.
4*
Note
The selected power-up configuration does not replace the
current configuration.
8. Press = + > simultaneously to lock the control panel. The
message “LOCKED” displays briefly.
ENTER SWITCH
LOCKED
9. Press ON LINE and close the printer cover. The printer is
ready to resume printing.
ONLINE
69

Chapter 1 Power Stacker Option
Power Stacker Option
This section explains how to set up and use the power paper
stacker and applies to printers with the power stacker installed.
The power stacker is a verticall y movable paper guide which di rects
the paper from the printer to the paper stack.
Power Stacker Component Locations
Familiarize yourself with the names and locations of the
components shown in the following illustration before operating the
power stacker.
Paper Length
Indicator
Bearing Br acket
Pinch
Rollers
Throat
Rear Control Panel
Motor Bracket
Wire Paper
Tent
Paddle Shaft
Alignment Rod (2)
70

Setting Up the Power Stacker
Setting Up the Power Stacker
1. Turn the printer on.
2. On the rear control panel, press the ON LINE key to take the
printer offline. Then press the STACKER UP key and wait for
the stacker to reach its maximum travel point.
Rails
Wire Paper Tent
Alignment Rod (2)
3. Make sure the wire paper tent is in the base of the stacker with
the alignment rods against the paper stacker rails.
71

Chapter 1 Power Stacker Option
Set the desired paper length (5-12 inch range), as follows:
4.
Grasping the paddle shaft, push or pull toward the front or the
rear of the printer, setting the desired paper length by aligning
the indicator notch on the be aring bracket w ith the paper le ngth
indicator.
5. Continue with the “Loading and Starting Paper Stack” section.
72

Loading and Starting the Paper Stack
Loading and Starting the Paper St ack
1. If the pa per is not a lready locat ed in th e print mecha nism, go to
“Loading Paper” on page 32.
2. Make sure the printer is offline. If it is not, then press ON LINE
and take the printer offline.
3. Using the rear control panel, press the STACKER UP key and
wait for the paper guide to reach the top of its travel.
4. Press the PAPER ADVANCE key and hand feed the paper
until paper reaches the wire tent and there is an excess of 3-5
pages. Be certain the paper passes through the paper stacker
throat.
73

Chapter 1 Power Stacker Option
Stack the 3-5 sheets of paper on top of the wire paper tent,
5.
making sure the paper lies with the natural folds.
6. Press the ON LINE key, from either the front or rear panel, to
return the printer to its online state.
The stacker frame then returns to its proper position for printing.
7. Check that the paper is still centered between the paper
guides.
8. Close the cabinet rear door.
9. If necessary proceed to “Setting Top-Of-Form” on page 38.
10. You are now ready to print.
74

Unloading Paper from Power Stacker
Unloading Paper from Power Stacker
Removing All Paper from the Printer:
1. Unload paper from the print mechanism following the
procedure on page 52.
2. Open the cabinet rear door.
3. Using the rear panel, press STACKER UP and wait for the
stacker to reach the t op of its travel.
Note
4. Remove the paper from the rear of the printer.
5. Close the cabinet rear door.
If the paper is not to be removed from the print mechanism, use
the following procedure.
75

Chapter 1 Power Stacker Option
Removing Paper from the Power Stacker Only:
1. Open the cabinet rear door.
2. Using the rear co ntrol panel, press ON LINE to take the printer
offline.
3. Press STACKER UP and wait for the stacker to reach the top
of its travel.
4. Open the printer top cover.
5. Tear the pape r off at the firs t perfor ation a bove the tractor s and
let the paper fall back through the open power stacker throat.
6. From the rear of the printer, making sure the paper lies with its
natural folds, lay the paper on top of the paper stack.
7. Remove the paper from the rear of the printer.
8. Close the cabinet rear door and the top cover.
76

T rou blesho otin g
Clearing Paper Jams
Perform the following steps to clear a paper jam.
Clearing Paper Jams
Caution
Note
Be careful when pulling any paper backward through the
paper path, especially when using labe l stock. If you are not
careful, labels may detach and adhere to the printer within
the paper path, where only a Hewlett-Packard Customer
Service Engineer can remove them.
To clear a paper jam you will need to move the paper vertically
by hand. This will cause the printer to lose synchronization
between the physical top o f form of the pape r and the to p of fo rm
in the printer.
1. Open the prin ter cov er.
Tractor Door
Forms Thickness
Lever
2. Raise the forms thickness lever as far as it will go.
3. Open both tractor doors.
77

Chapter 1 Troubleshooting
Remove the paper from the tractors to check the paper path
4.
and tractors for jammed or torn paper. Remove any pieces of
paper by turning the vertical position knob.
5. Check that the ribbon mask has not been deformed in such a
way as to block the paper path. If the ribbon mask is damaged
or bent, contact a Hewlett-Packard Customer Service
Engineer.
6. Gently pull the paper up through the paper slot to get the
jammed paper above the tractors.
78

Clearing Paper Jams
TOF Indicator
Perforation
Vertical Position
Knob
Load the paper onto the sprockets and close the tractor doors.
7.
8. If you do not need to have your print job synchronized with the
top of form, continue to step 17.
9. Align the top of the first print line of the second clean form with
the TOF indicator on the tractor by rotating the vertical position
knob.
10. Lower the forms thickness lever. Set it to match the paper
thickness.
11. From the host system, stop the print job.
12. Press the CLEAR key to clear the fault.
13. Press the ENTER + CLEAR keys to cancel data in the printer
buffer.
14. Press the SET TOF key.
15. Close the printer cover.
16. Press the ON LINE key.
17. From the host system, restore your job from the page
incorrectly printed.
Caution
Check that the paper stacks correctly with the crumpled
paper.
79

Chapter 1 Troubleshooting
Cleaning The Printer
Periodic cleaning ensures efficient operation and clear print quality.
Warning
Caution
Caution
Disconnect the power source before cleaning the printer.
Cleaning Exterior of Cabinet
Clean the outside of the cabinet with a soft, lint-free cloth and mild
detergent. Dish washing liquid works well. Do not use abrasive
powders or chemical solvents. Clean the windows with plain water
or mild window cleaner.
Always apply the cleaning solution to the cloth; never pour
cleaning solution directly onto the printer.
Cleaning Inside the Cabinet
Over time, it is normal for particles of paper and ink to accumulate
inside the printer. Paper dust and ink build-up must be removed
periodically to avoid degraded print quality. To clean the interior of
the printer, perform the following steps.
To avoid damage to the printer, be extremely careful when
vacuuming and dusting around the hammer bank and
surrounding areas.
80

Power off the printer and unplug the power cord.
1.
2. Unload the paper supply (page 52).
3. Remove the ribbon (page54).
Ribbon Path Diagram
Cleaning The Printer
Splined Shaft
Hammer Bank
(hidden)
Ribbon Guide
Base Pan
4. Using a soft-bristled, non-metallic brush, remove dust particles
from the paper path, ribbon guides, and ribbon path. Refer to
the ribbon path diagram on the shuttle cover.
5. Brush and vacuum accumulated dust or residue, especially in
the tractor and base pan areas, and around the exterior of the
hammer bank.
6. Wipe the splined shaft with a soft cloth.
7. Using a cloth dampened with anhydrous alcohol (no water),
clean the ribbon guides. Do not let alcohol drip into the hammer
bank.
81

Chapter 1 Troubleshooting
Brush and vacuum inside the lower c abinet.
8.
Wipe the lower cabinet interior with a clean, lint-free cloth damp
(not wet) with water and mild detergent.
9. Dry the interior with a dry, clean, lint-free cloth.
10. Install the ribbon (page 54).
11. Load the paper (page32).
82
Solving Print Quality Problems
Solving P r int Q ua l ity Pr ob lems
If you are having print quality problems, locate your printer problem
in Table 2 and do the C o rrec tiv e Ac tio n. If more than one correc t iv e
action task is listed, test the printer after each task. If the problem
persists, contact your Hewlett-Packard Customer Service Engineer.
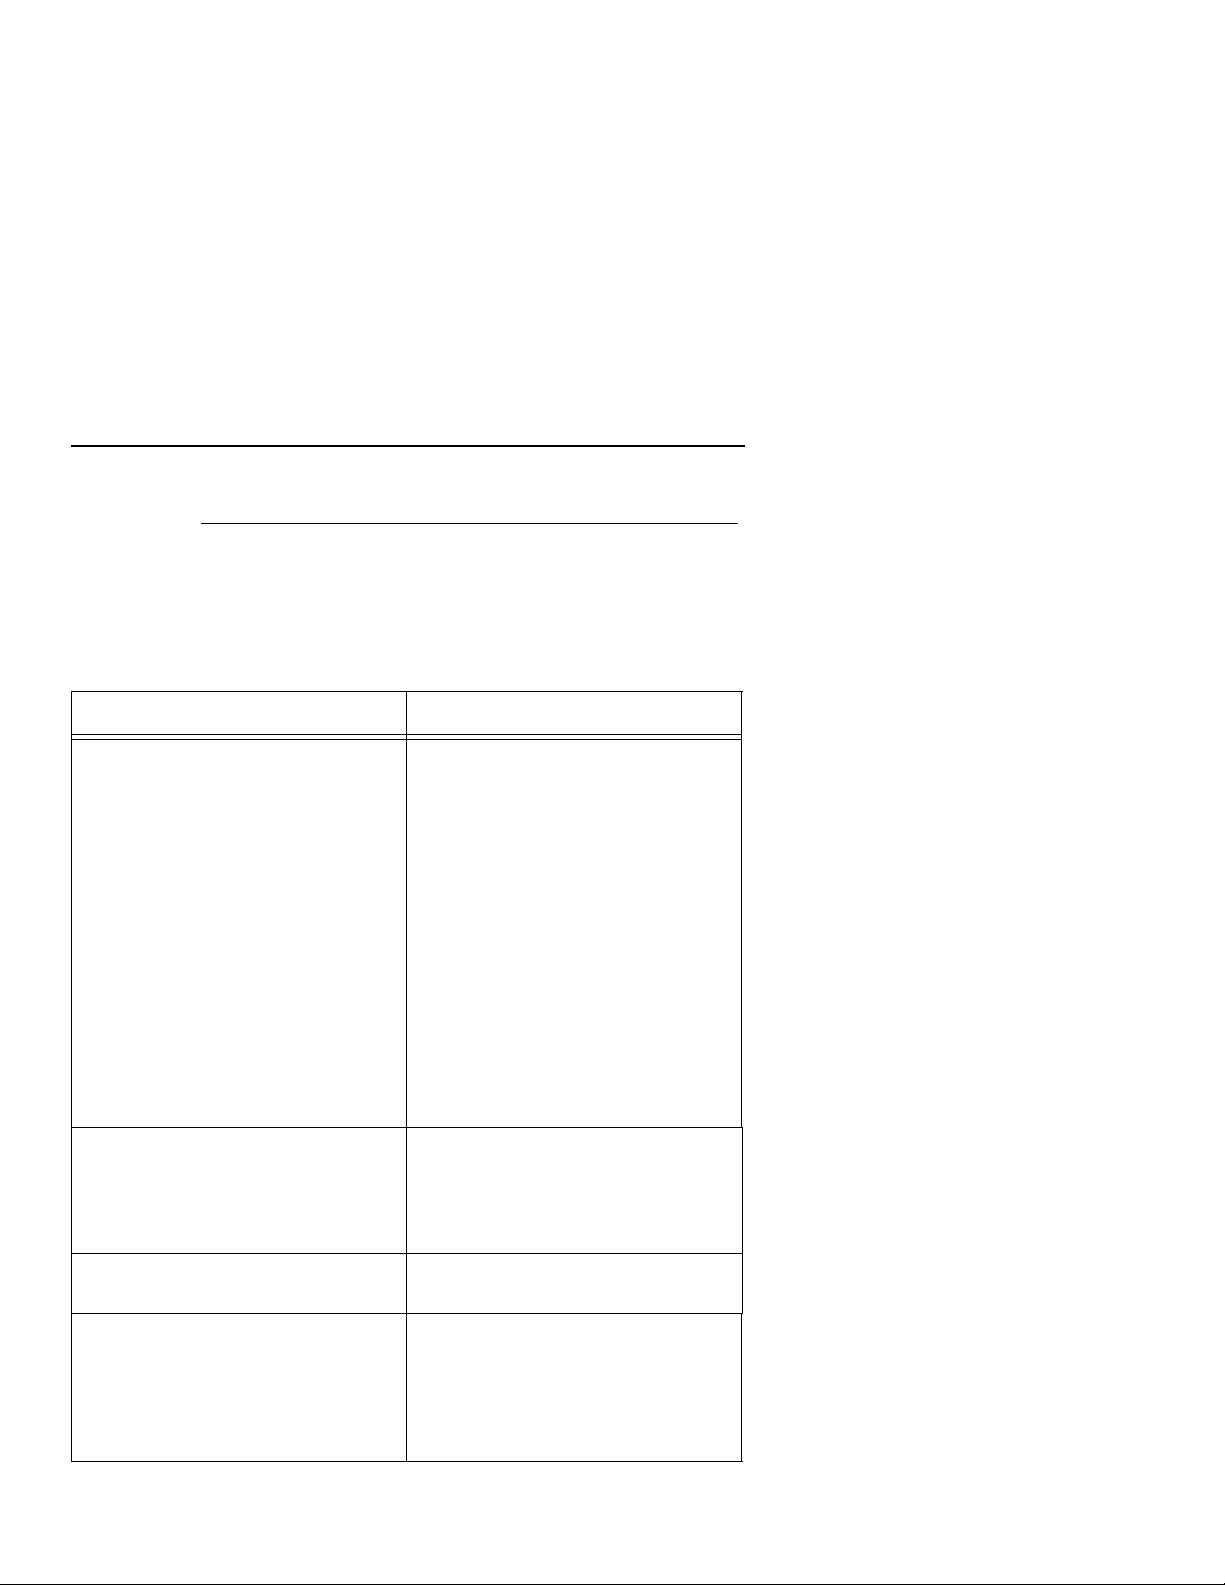
Table 2. Troubleshooting
Problem Corrective Action
Poor print quality:
dark print
light print
light print on half the page
missing dots or characters
smeared print
wavy vertical lines
Torn or damaged forms 1. Reset the forms thickness lever for
Loss of forms position Set the forms thickness lever for
Asterisk does not appear after you
change a con figuratio n parameter with
the ENTER key.
1. Adjust the forms thickness lever
setting. (Print quality can be affected if
it is too loose or too tight.)
2. Adjust the paper tension horiz ontally
by moving the right tractor. (Print
quality can be affected if it is too loose
or too tight.)
3. Make sure the ribbon threads
around the ribbon guides and between
the hammer bank cover and ribbon
mask, as shown on the ribbon path
diagram. Turn the ribbon spools to
ensure that the ribbon tracks correctly
in the ribbon path.
4. Clean the printer (page80).
5. Replace the ribbon (page 54) with
an approved ribbon.
thicker paper.
2. Check the paper slot for foreign
material.
3. Adjust the horizontal paper tension.
thicker paper.
With the printer off-line, press UP and
DOWN simultaneously so that the
display reads “UNLOCKED.” Display
the configuration option you want to
change. Press ENTER when the op tion
is on the message display.
83

Chapter 1 Troubleshooting
Table 2. Troubleshooting (continued)
Problem Corrective Action
The configuration printout does not
represent configuration parameters
selected and changed.
Lost dots (incompletely formed
characters)
Horizontally or vertically misaligned
character positions
Erratic character height
Vertically deformed print
Verify that you have saved the current
configuration (page60).
1. Lower the forms thickness lever.
2. Clear the paper path of any
obstructions.
3. If problems persist, contact your
Hewlett-Packard Customer Service
Engineer.
84

Fault Messages
Fault Messages
When a fault condition occurs, the status indicator flashes, the
alarm sounds, and a specific message appears in the display.
When this happens, correct the fault immediately.
You can correct most faul ts by performing a simple pro cedure, su ch
as clearing a paper jam o r relo ad ing paper. The following p ag es lis t
common fault messages and explain how to correct the fault
conditions.
For more serious faults, indicated by an asterisk (*) following the
fault message, a Hewlett-Packard Customer Service Engineer will
be needed. For error messages not covered in this guide, refer to
your
Maintenance Manual.
Note
Faults indicated by an asterisk (*) prevent further printer
operation, and the printer power must be turned off to clear the
fault.
Perform the following steps to clear a fault message after you have
corrected the fault condition:
1. Press CLEAR, then ON LINE to continue printing.
2. If the fault message reappears, turn the printer power off, wait
15 seconds, then turn the printer back on. Run your print job
again. If the message does not reappear during printing, no
further attention is required . If the fault message reap pea rs, go
to step 3.
3. Press ON LINE again and resume printing. If the message
does not appear, no further attention is required. If the
message reappears, call your Hewlett-Packard Customer
Service Engineer.
85

Chapter 1 Troubleshooting
8.5V PWR FAIL*
Internal power failure. Contact your Hewlett-Packard Customer
Service Engineer.
15V CTL FAIL*
Controller voltage failure. Contact your Hewlett-Packard Customer
Service Engineer.
23.5V CTL FAIL*
Controller voltage failure. Contact your Hewlett-Packard Customer
Service Engineer.
48V PWR FAIL*
Internal power failure. Contact your Hewlett-Packard Customer
Service Engineer.
BUFFER OVERFLOW
Host sends data after the printer buffer is full (serial interface).
Check your serial host interface parameter settings; if necessary,
adjust them so that they match the settings of the attached host.
86

Fault Messages
CLEAR PAPER JAM
Clear jam and reload paper (page 77). If this message recurs,
contact your Hewlett-Packard Customer Service Engineer.
CLOSE PLATEN
The forms thickness lever is open. Close the forms thickness lever.
FRAMING ERROR
Serial framing error (serial interface). Check your serial host
interface parameter settings; if necessary, adjust them so that they
match the settings of the attached host.
HAMMER COIL BAD
Coil # failed current test at power-up. Record message, clear to
continue printing, and contact your Hewlett-Packard Customer
Service Engineer.
LOAD PAPER
Printer is out of paper. Load paper.
87

Chapter 1 Troubleshooting
OFFLINE / DATA IN
BUFFER
Indicates the printer has unprinted data in the buffer. This can be
cleared by printing the data, cancelling the data, or resetting the
printer.
PARITY ERROR
Parity error (serial interface). Check your serial host interface
parameter settings; if necessa ry, adjus t them so that they m atch the
settings of the attached host.
RIBBON DRIVE
Controller does not det ect ribbon drive motor. Contac t yo ur HewlettPackard Customer Service Engineer.
SECURITY CODE
VIOLATION
Security code of PAL on controller board does not match code of
firmware on the controller board. Contact your Hewlett-Packard
Customer Service Engineer.
SHUTTLE JAM
No shuttle movement or shuttle moving at wrong speed. Check for
obstruction to shuttle, a twisted ribbon, or forms thickness lever
closed too tightly. If fault source is not apparent, contact your
Hewlett-Packard Customer Service Engineer.
88

Fault Messages
STACKER FULL
Paper stacker has reached full capacity. Check amount of paper in
stacker and remove paper to continue printing.
STACKER FAULT*
Failed motor circuit. Contact your Hewlett-Packard Customer
Service Engineer.
STACKER JAM
Jammed paper, or foreign object, in unit’s travel path.
89

Chapter 1 Troubleshooting
90

Imprimantes de la
gamme LineJet
Guide de référence rapide

Conseils d’utilisat ion de votre Impri mante
Votre imprimante accomplira des tâches de haute qualité à
condition qu'elle fasse l'ob jet d'u n entreti en soig neux. U n nettoy age
périodique, une manipulation correcte, et l'utilisation des
consommables adéquats, tels que le papier et les rubans,
garantiront des performances optimales.
A chaque intervention sur l'imprimante, rappelez-vous ces notions
essentielles :
• Ne serrez pas trop le levier de réglage d'épaisseur du
papier.
Une mauvaise fermeture du levier de réglage d'épaisseur du
papier est suscepti ble de prov oquer des b ourrages pa pier ain si
que des bourrages du ruban, pouvant entraîner une
détérioration du ruban, une impression défectueuse ou des
bavures.
• N'imprimez pas au-delà de la largeur du papier.
Une impression en dehors de la largeur du papier dégraderait
la qualité d'impression et pourrait détériorer la rangée de
marteaux.
• Utilisez exclusivement des rubans agréés.
L'utilisation de rubans inadéquats peut générer des traces
d'encre, donner une qua lit é d' im pre ss io n mé di ocre, et créer de
graves détériorations sur l'imprimante.
A propos du présent document
Le présent
(anglais, français, allemand, italien et espagnol). Choisissez celle
qui vous concerne et continuez la lecture de ce manuel.
Hewlett-Packard souhaite que vous soy ez parf aitement à l'aise lo rs
de l'utilisation de l 'imprimante LineJet et du présent manuel. Ce
dernier a été conçu dans le souci de répondre aux besoins de tous
les utilisateurs, que vous soyez novice ou utilisateur chevronné
d'imprimantes matricielles par ligne.
Guide de référence rapide
92
est rédigé en cinq langues

Veuillez suivre les dire ctives de ce manuel ainsi q ue c ell es déc rites
dans le
matériel.
Ce manuel est divisé en quatre chapitres :
Procédures-clés d'expl oitati on. Donne un aperç u du panneau de
commande et décrit les procédures de chargement du papier et du
ruban.
Configuration. Décrit les procédure s d'uti lis ati on du panneau de
commande en vue de la sauvegarde, de la modification et de la
suppression des caractéristiques de configuration.
Option empileur motorisé. Donne des instructions en ce qui
concerne le réglage et l'utilisation de l'option Empileur motorisé.
Correction d’erreurs. Fournit les instructions nécessaires à la
suppression des bourrages papier, nettoyage de l'imprimante et
réparations diverses.
User’s Guide
Modéle armoire Modéle console
afin d'éviter tout dommage corporel ou
93

Conventions
Avertissements, mises en garde et remarques
Avertissement
Mise en garde
Remarque
Conditions susceptibles d’occasionner des dommages
corporels ou une détérioration de l'imprimante.
Présence d'un risque pouvant entraîner la détérioration de
l'imprimante ou du matériel qui s'y rattache.
Les remarques vous donnent des conseils utiles concernant le
fonctionnement et la maintenance de l’imprimante.
Affichage des messages
HORS LIGNE
CONTROLE CONFIG.
Les messages tels qu’ils apparaissent sur l’imprimante sont
représentés dans un cadre.
94

2 Français
Procedures-Cles D’E xploi tati on
Mise sous tension de l’imprimante
Avertissement
Avant la mise sous tension de l'imprimante, vérifiez que
celle-ci est branchée sur la source d'alimentation
appropriée. Pour plus d'informations sur la source
d'alimentation correcte, reportez-vous à la section “Choix
de l'emplacement” du
Modèle armoire Modèle console
Installation Guide.
Sur les modèles armoire, l'interrupteur d'alimentation est
situé sur le côté supérieur gauche.
95

Chapter 2 Procedures-Cles D’Exploitation
Sur les modèles console, l'interrupteur d'alimentation est situé dans
le coin inférieur gauche.
Appuyez sur l'interrupteur Sous tension (| ) pou r me ttre l'i mprim ante
sous tension. Appuyez sur l'interrupteur Hors tension (O) pour
mettre l'imprimante hors tension.
A sa mise sous tension, l'imprimante exécute un auto-test. Selon sa
configuration, l'imprimante sera en ligne ou hors ligne après le test.
A la mise sous tension de l'imprimante, cette dernière exécute un
auto-test de mise sous tension. Selon la configuration de l'état de
mise sous tension , l 'i mp rim ante sera en ligne ou hors ligne après le
test. L'état de mise sous tension par défaut est hors ligne. Une fois
l'auto-test terminé et le logiciel initialisé avec succès, le message
“HORS LIGNE” apparaît sur l'écran d'affichage.
HORS LIGNE
Contrôle Config.
En cas d'erreur au cours de l'auto-test, le voyant d'état clignote et
un message d'erreur spécifique apparaît à l'écran (tel que
“CHARGER PAPIER”). Dans le même temps, l'alarme sonore
retentit, le cas échéant. Reportez-vous à la page 163 pour plus
d'informations sur les messages d'erreur.
CHARGER PAPIER
Utilisation du panneau de c ommande
Le panneau de commande permet d'effectuer les opérations de
routine telles que:
• Placer l’impr imante en mode en ligne ou hors ligne
• Avancer ou reculer le papier, et régler le haut de page
• Supprimer les conditions d’erreur
• Configurer l’imprimante
• Exécuter l es auto-tests de l'imprimante
96

Utilisation du panneau de commande
Schéma du panneau de commande sur les modèles
armoire
Voyant d'état
HAUT
PREC
BAS
REGL INTERL
REGL LONG P
SUIV
EFFAC
MAJ
REGL HT PG
ENTRER
Ecran d’affichage des messages
EN LIGNE
PCL-II
CONNECTE
SOULEVEZ LE COUVERCLE
DE L’IMPRIMANTE POUR
ACCEDER AUX TOUCHES
Schéma du panneau de commande sur les modèles
console
Voyant d'état
Régl Ht Pg
Bas
EN LIGNE
PCL-II
Préc
Haut
Suiv
Effac
Régl Int
SHIFT
Entrer
Régl Long P
FF
APConn
VueLF
AperçuAL
Ecran d’affichage des messages
Les modes d'exploitation, l'écran d'affichage des messages, les
voyants d'état et les touches du panneau de commande de
l'imprimante sont décrits dans les pages suivantes.
97

Chapter 2 Procedures-Cles D’Exploitation
Modes de fonctionnement
Les trois modes de fonctionnement de l'imprimante sont décrits cidessous :
• Mode En ligne. En mode en ligne, l’imprimante peut recevoir
et imprimer des données envoyées par le système hôte. En
appuyant sur la touche CONNECTE, l'imprimante bascule du
mode hors ligne au mode en li gn e. En mod e en l igne, le voya nt
d'état est allumé.
• Mode Hors ligne. En mode hors ligne, vous pouvez effectuer
des commandes opéra teur, tel les qu e le cha rge ment du papie r
et le réglage du haut de page. Vous pouvez également
parcourir les menus de configuration de l'imprimante. En
appuyant sur la touche CONNECTE, l'imprimante bascule du
mode en ligne au mode hors ligne. En mode hors ligne, le
voyant d'état est éteint.
• Mode Erreur. Dans ce mode, il existe une condition d’erreur
qui doit êt re supprim ée avant la reprise de l'impression. En
mode erreur, le voyant d'état clignote, l'alarme retentit (si
configurée comme tel), et un message descriptif de l'erreur
s'affiche.
Le mode de fonctionnement courant peut être sélectionné à l'aide
des touches du panneau de commande ou être le résultat des
opérations de routine telles que la mise sous tension de
l'imprimante. Le mode de fonctionnement courant apparaît dans le
message affiché.
98

Utilisation du panneau de commande
Conventions typographiques
Les messages, les touches et les voyants sont représentés tels
qu'ils apparaissent sur le panneau de commande. Les
combinaisons de tou ches sont i ndiqué es av ec le signe plus (+). Par
exemple, une pression sur
simultanément sur la touche = et sur la touche >.
= + > équivaut à appuyer
Ecran d’affichage des messages
Fonction L'écran affiche les modes de fonctionnement, les
options de menu et les messages d'erreur.
V oyant d'état
Le voyant d'état indiqu e le mode de fonctio nneme nt de l'imprima nte
de la manière suivante :
• Allumé. Le voyant d'état reste allumé lorsque l'imprimante est
en mode en ligne.
• Eteint. Le voyant d'état est éteint lorsque l'imprimante est en
mode hors ligne.
• Clignotant. Le voyant d'état clignote si une condition d'erreur
s'est produite et si l'imprimante est en mode erreur. L'écran
affiche en principe un message d'erreur descriptif de la
condition d'erreur.
99

Chapter 2 Procedures-Cles D’Exploitation
CONNECTE
Modèle armoire:
Modèle console:
Fonction Cette touche permet de basculer l'imprimante entre
l'état en ligne et hors ligne.
Action Pour mettre l'imprimante en mode en ligne, appuyez
une fois sur la touche. Le voyant d'état reste allumé.
Pour mettre l'imprim ante en mode h ors ligne, app uyez
une fois sur la touche. Le voyant d'état s'éteint.
Résultat Lorsque l’imprimante est en mode en ligne, elle est
prête à recevoir des données et des instructions de
commande du système hôte, et elle imprime les
données immédiatement.
Lorsque l'impriman te e st en mode hors ligne, la tâche
d'impression s'arrête une fois imprimée la ligne en
cours. La communication avec le système hôte
s'arrête, et vous pouvez effectuer les commandes
opérateur, telles que le réglag e du haut de page ou la
configur ation de l'imprimante.
100
 Loading...