


Product Update: HP Ne tserver LP 1000r User Guide
IMPORTANT Replace the information provided in the HP Netserver LP 1000r User Guide
with the updated information provided in this Product Update for each
section that is referred.
In Chapter 6, "Installing an Additional Processor," replace the section "Installing a Heatsink" in
the User Guide with the following section:
Installing a Heatsink
Once the processor is instal led, the hea tsink must be installed on top of the processor. A thermal pat ch on the bottom
of th e hea tsink pr ovides thermal bondin g bet ween the h eatsink and th e processor . The therma l pa tch must be r ep laced
if the heatsink is removed (even temporarily) from the processor. You will find extra thermal patches taped to the PCI
card cage inside the server.
1. Remove the heatsink from the shipping container. Do not touch the thermal patch on the bottom of the
heatsink.
2. Inspect the thermal patch. Replace the patch if it is damaged as follows:
a. Mak e s ure you are grounde d with a static-d issipatin g wrist s trap.
b. Remove the damaged patch. If you are reinstalling a heatsink on a processor, also scrape off any thermal
material remain ing on top of th e processor ch ip. You may use your fingern ail to scrap e the materi al off.
c. To insta ll a new therma l p atch, peel off the backin g, and pla ce the patch in th e area marked at the center of
the heatsink.
CAUTION Heatsinks are not re u s able unless the thermal pa tch is repl aced each time the heat sink is
removed, even if it is temporarily removed and reinstalled on the same processor.
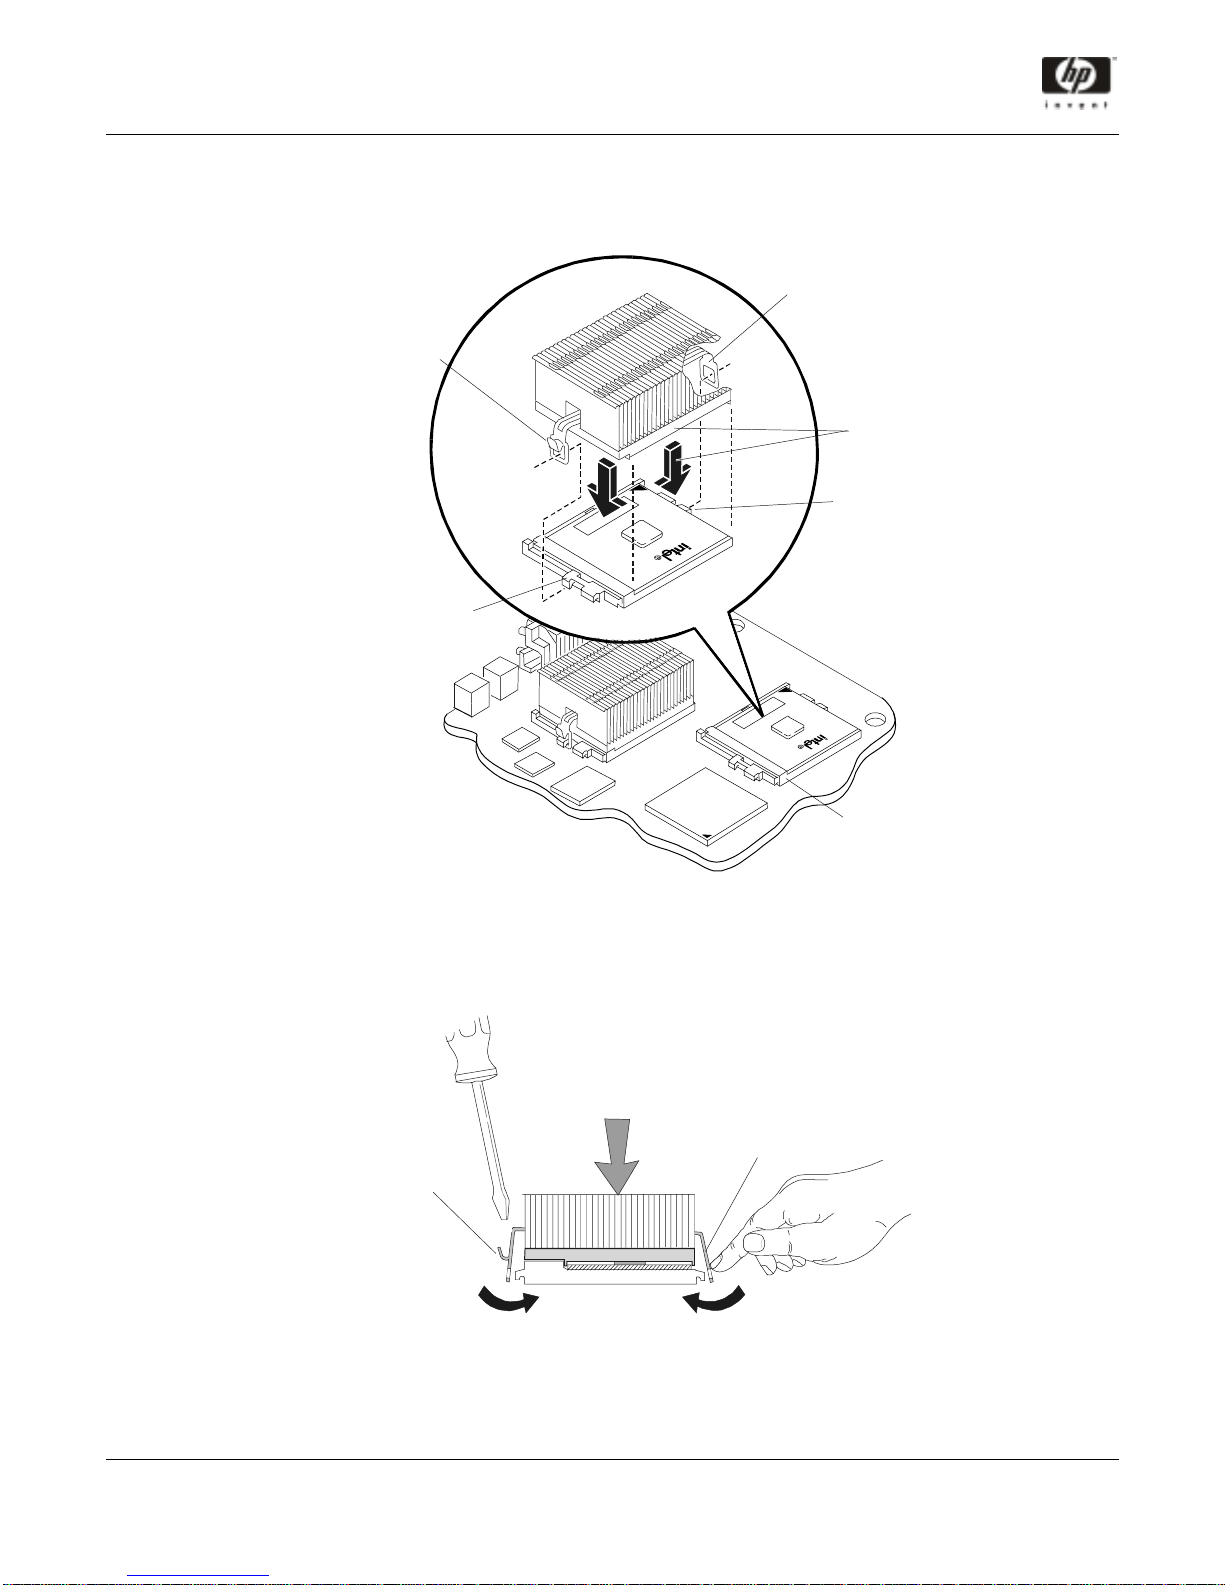
3. Install the heatsink:
a. Orient the heatsink with the tool latch facing left, as shown in Figure 6-5 following in this Product Update.
Lower th e h e atsink squarel y onto the proce s sor.
CAUTION Ensure the heat sink is seat ed properl y on the processor . If the heat sink is offset e ven slightly,
there will be insufficient thermal contact with the processor, which may resu lt in overheating,
data corruption, and permanent damage to the processor.
b. Hold the heatsink steady with one hand an d press the hook latch down to connect it to the tab. Then insert a
flat-head scr ewdriver into the tool latch and pr es s down to conn ect the latch to the tab. See Figure 6-6
following in this Product Update.
4. Repl ace the air duct. See Figure 6-7 in the User Guide. Also, refer to Chapt er 2, " O p ening and Closing the HP
Netserver."
HP Part Number P1810-90039 '%(& &'
Printed in December 2000
Product U pd a te: HP Net s er v er L P 10 00r User Guide
Hook
Latch
Thumb
Latch
Tab
Hook Latch
(hidden)
Step A
Tab
Figure 6-5. Placing the Heatsink on the Processor
Hold
Down
Tool
Latch
Figure 6-6. Setting the Latches
Processor
Socket
HP Part Number P1810-90039 '%(& &'
Printed in December 2000
 Loading...