

Page 1
,...,..,.
HP DOC
Back to Welcome
.
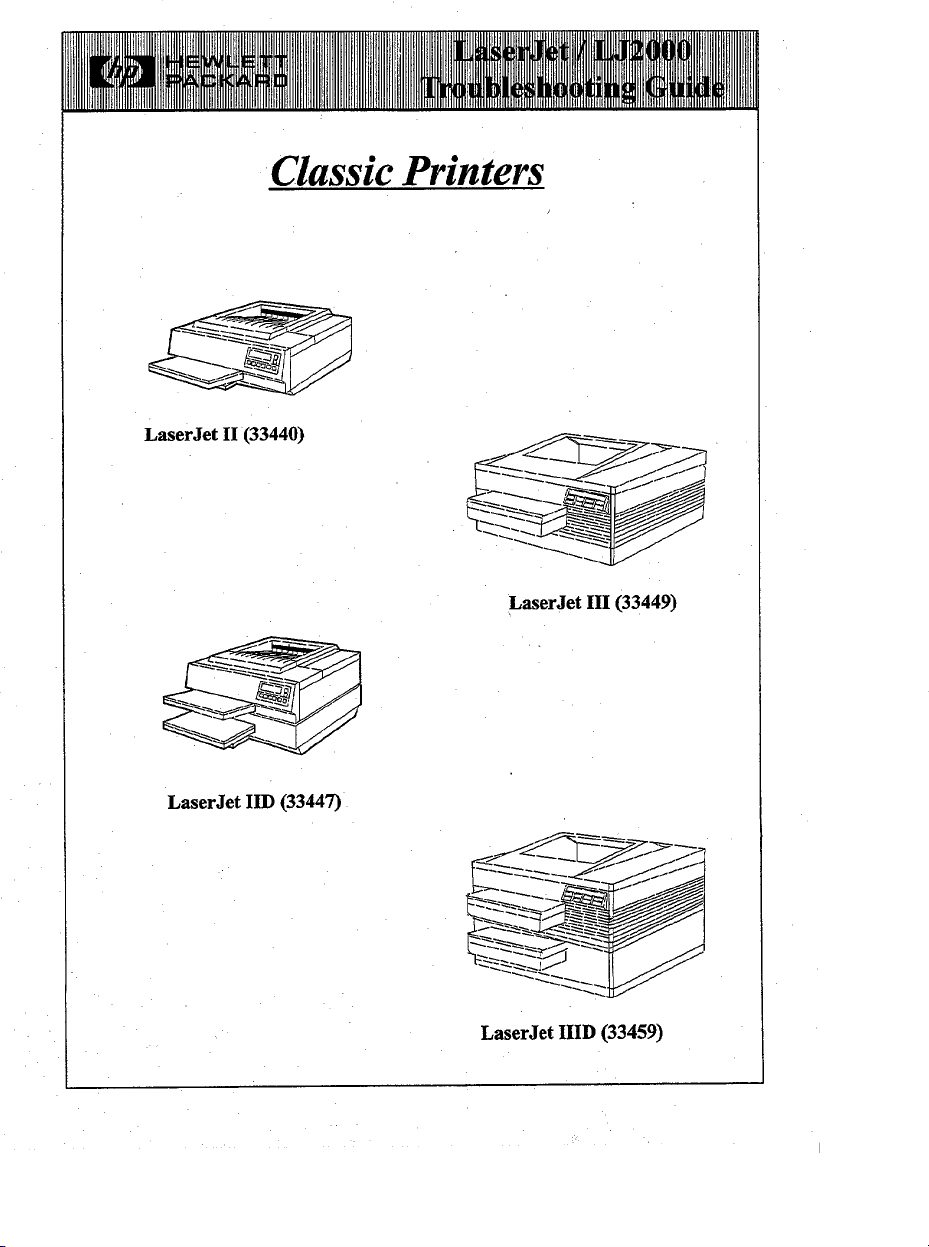
Classic Printers
La.er.kt II (33440)
LaserJet ILD(3344~
LaserJ@ IIID (33459)
La.wrJetIIMUIP (33471/33481)
LaserJd III (33449)
LaserJ& 2000 (2684)
Volume 1
April 1995
Revision 13
Page 2
Notice
Tbisdoeument SmIercedes allmeviousrevisions of the LaserJet/JumboJet
‘fkoubleshoothw Guide.
The information contained in this documentis subject to change without any
notice.
Nopsrtofthisdocumentmay bephotocopied,reproduced,ortramdatedtithout
the prior written consent of Hewlett-PackardCompany.
Editor
Bob Edwards, UK Response Centre
iipti 1995
Revision 13
Page 3
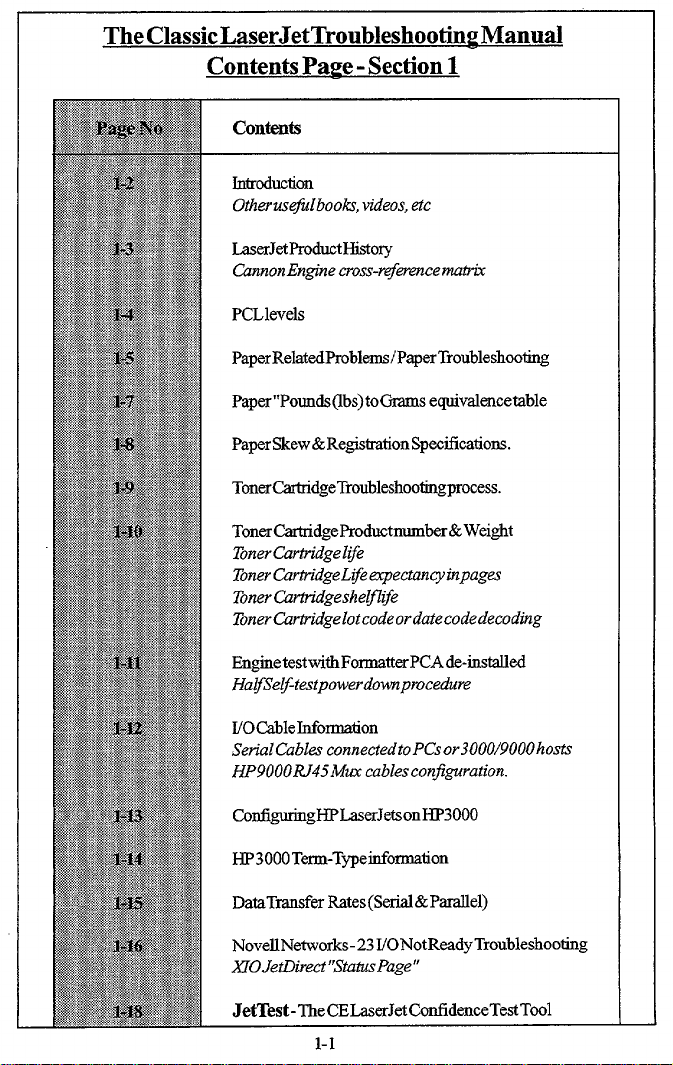
TheClassicLaserJetTroubleshootin~ Manual
Contents Pa~e-Section 1
Contents
Introduction
Othemsejidbooti, videos,etc
LaserJetProductHistory
Gmnom%sg”necross-r@rencemabix
PCLlevels
PaperRelatedPmblems/PaperTroubleshooting
Paper’’Pounds(lbs)toOrams equivalencetable
PaperSkew&Registration Specifications.
TonerCartridgeTroubleshootingProcess.
TonerCarhidgeProdnctnumber& Weight
TonerCurtridgelije
TonerCbrti”dgeLijeeqectamyinpages
Toner(lmtridgeshelfife
TonerCar&idgelotcodeordatecodedecoding
EnginetestwithFormatterPCA de-installed
Ha&e&testpowerdompmcedure
I/OCableMonnation
SerialCables connectedtoPCsor3000/9000hosfi
HP9000RJ45114Kxcablescon@wation.
Cor@qningHPLaserJetson HP3000
HP3000Tenn-T~e information
DataTfansfer Rates(Serial&Parallel)
NovellNetworks- 23I/ONotReadyTroubleshootig
XOJetDirect’’StatusPage”
Jet’Iest-TheCELaserJetConfidemceTestTool
1-1
—
Page 4
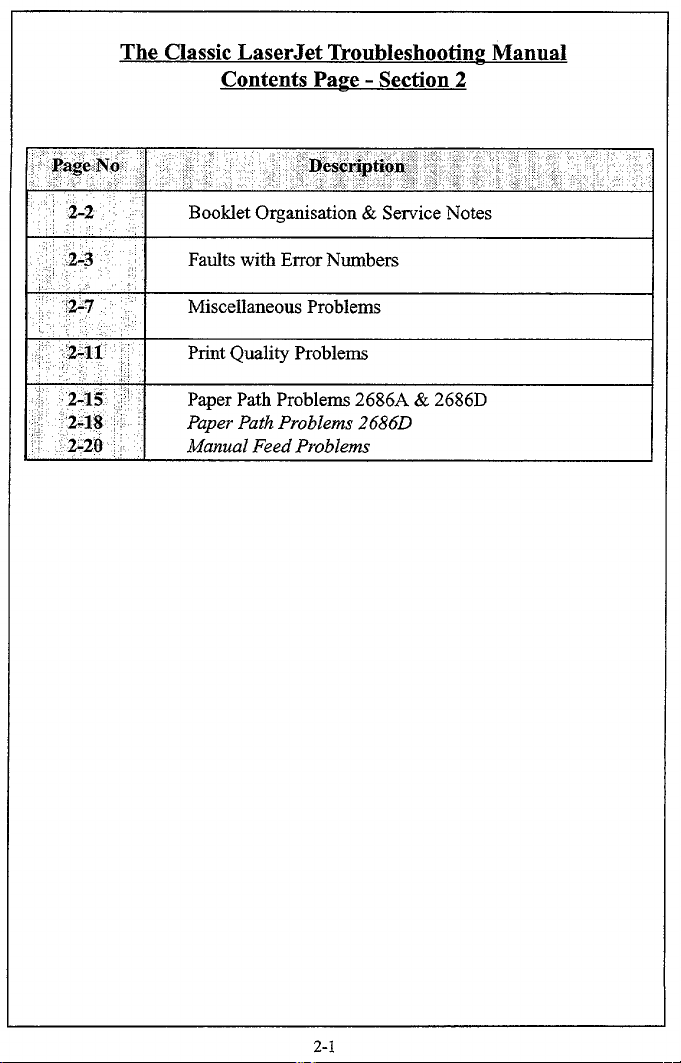
The Classic LaserJet TroubIeshootinp Manual
Contents Pave - Section 2
2-1
Page 5
The Classic LaserJet Troubleshooting Manual
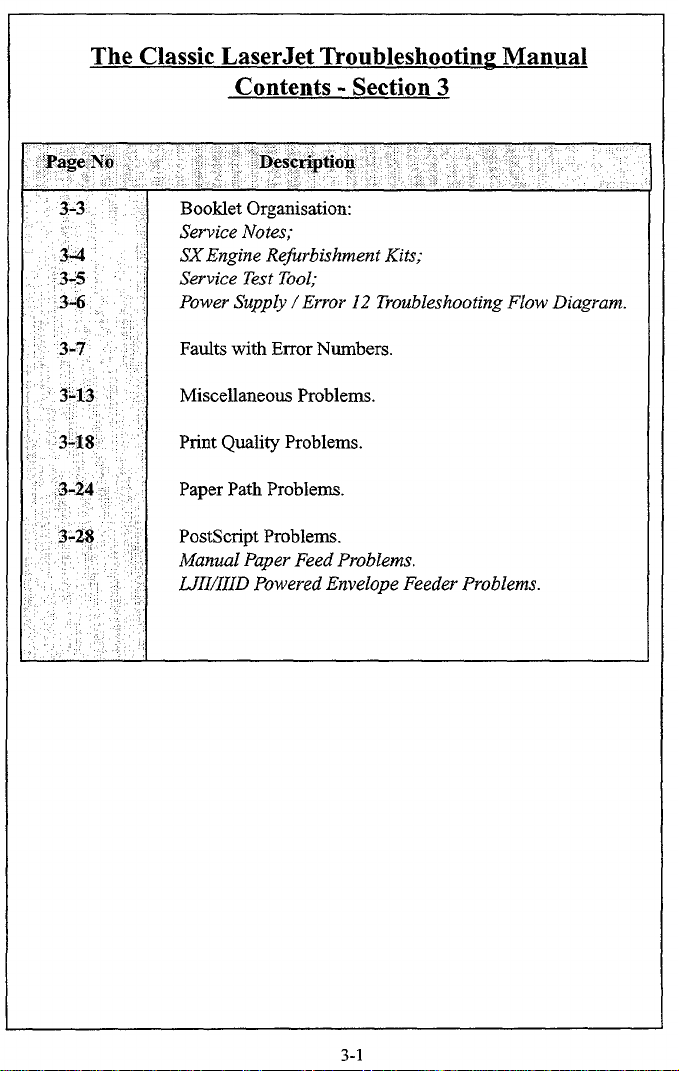
Contents - Section 3
Booklet Organisation
Service Notes;
SXEngine Re~rbishment Kits;
Service Test Tool;
Power Supply /Error 12 Troubleshooting Flow Diagram.
Faults with Error Nnmbers.
Miscellaneous Problems.
Print Quality Problems.
Paper Path Problem.
PostScript Problems.
Manual Paper Feed Problems.
LJIIIIIID Powered Envelope Feeder Problems.
3-1
!
Page 6
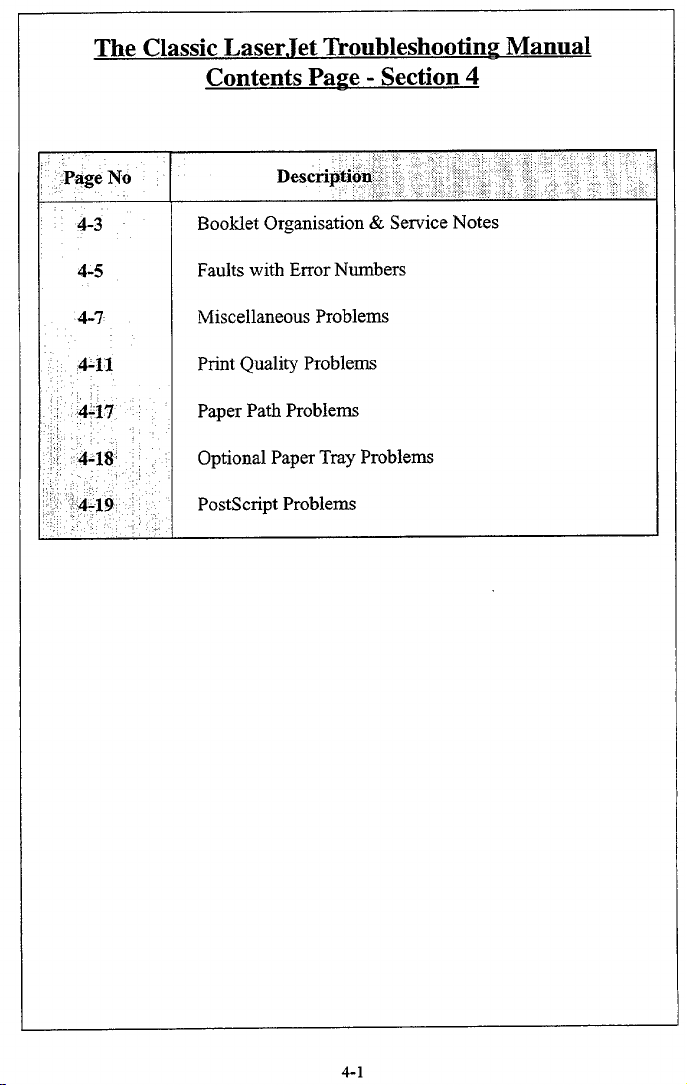
The Classic Laser.Tet Troubleshooting Manual
Contents Page - Section 4
4-3
4-5
4-7
4-11 Print Quality Problems
: 4-17 Paper Path Problems
,,
,,,
,: 4-18 Optional Paper Tray Problems
“ :’4-19
Booklet Organisation & Service Notes
Faults with Error Numbers
Miscellaneous Problems
PostScript Problems
4-1
Page 7
5-1
Page 8
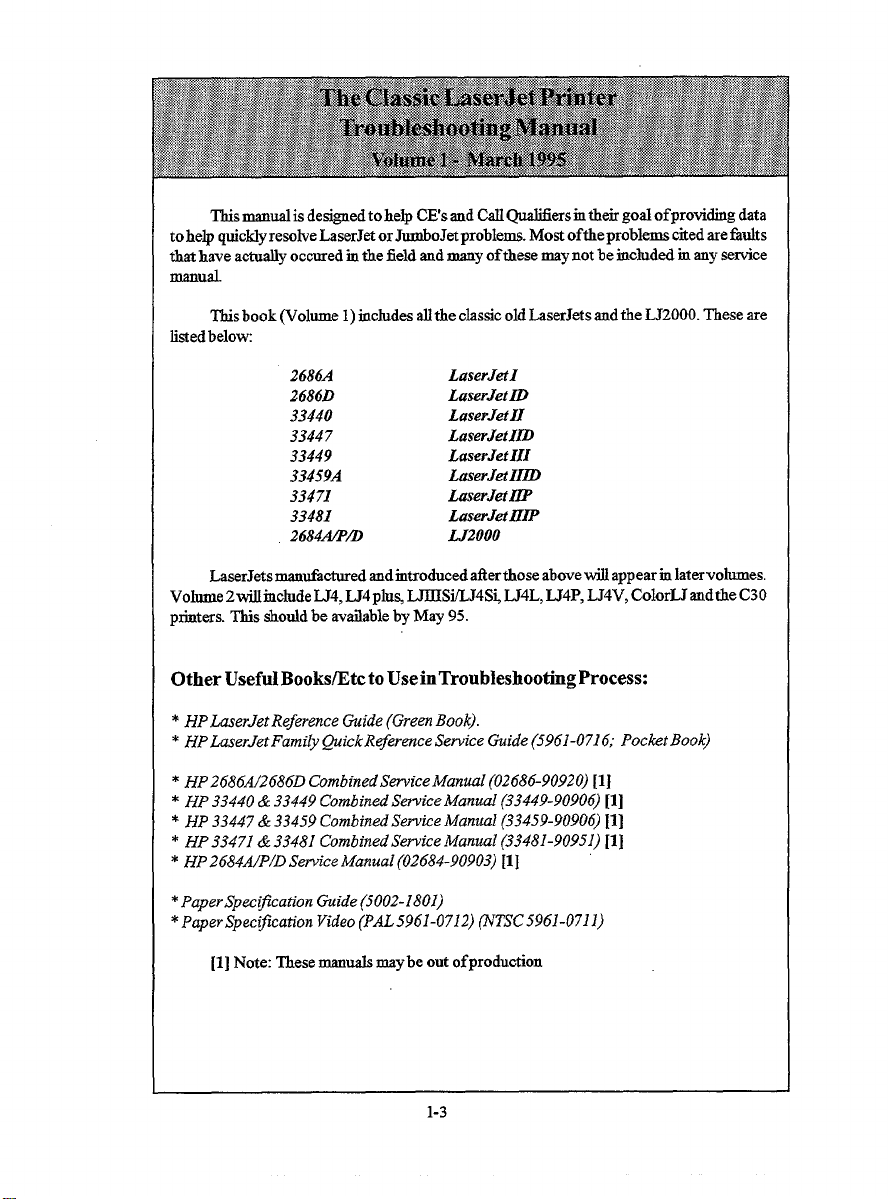
W mauurd is designed to help CE’Sand Cd @ersrntbeir gosl ofproviding data
to help quic~resolve LaserJet or JuruboJetproblems. Most oftheproblems cfied are tidts
that have actually occured in the field and many ofthese may not be included m any service
Lusnusl.
This book (Volume 1)ticludes allthe classic old LaserJets andthe LJ2000. These are
Iistedbelow
2686A
2686D
33440
33447
33449
33459A
33471
33481
2684~D
LaserJets manufactured and introduced afierthose above will appear m latervolumes.
Volume 2willrnclude LJ4, LJ4plu~ LJ131S~4S~ LJ4L, LJ4P, LJ4V, ColorLJ andthe C30
printers. This shodd be availableby May 95.
LaserJetI
LaserJetLV
LaserJetII
LaserJetILD
LaserJetIII
LaserJetIID
LaserJetIIP
LaserJetflLP
LJ2000
Other UsefulBooks/Etcto Usein~oubIeshooting Process:
* HP herJet Reference Guide (Green Book).
* HP LurerJetFamily Quick R#erence Service Guide (5961-071 6; Pocket Book)
* HP 2686A/2686D Combined Service Manwl (02686-90920) [1]
* HP 33440& 33449 Combined Service Manual (33449-90906) fl]
* HP 33447&33459 Combined Service Manual (33459-90906) 11]
* HP 33471&33481 Combined Service Manual (33481-90951) Ill
* HP 2684A/P/D Sewice Manual (02684-90903) II j
* Paper Specl~cation Guide (5002-1801)
*Paper Specification Video (PAL 5961-0712) @TSC 5961-071 1)
[1] Note: ~ese mti maybe out ofproduction
1-3
Page 9
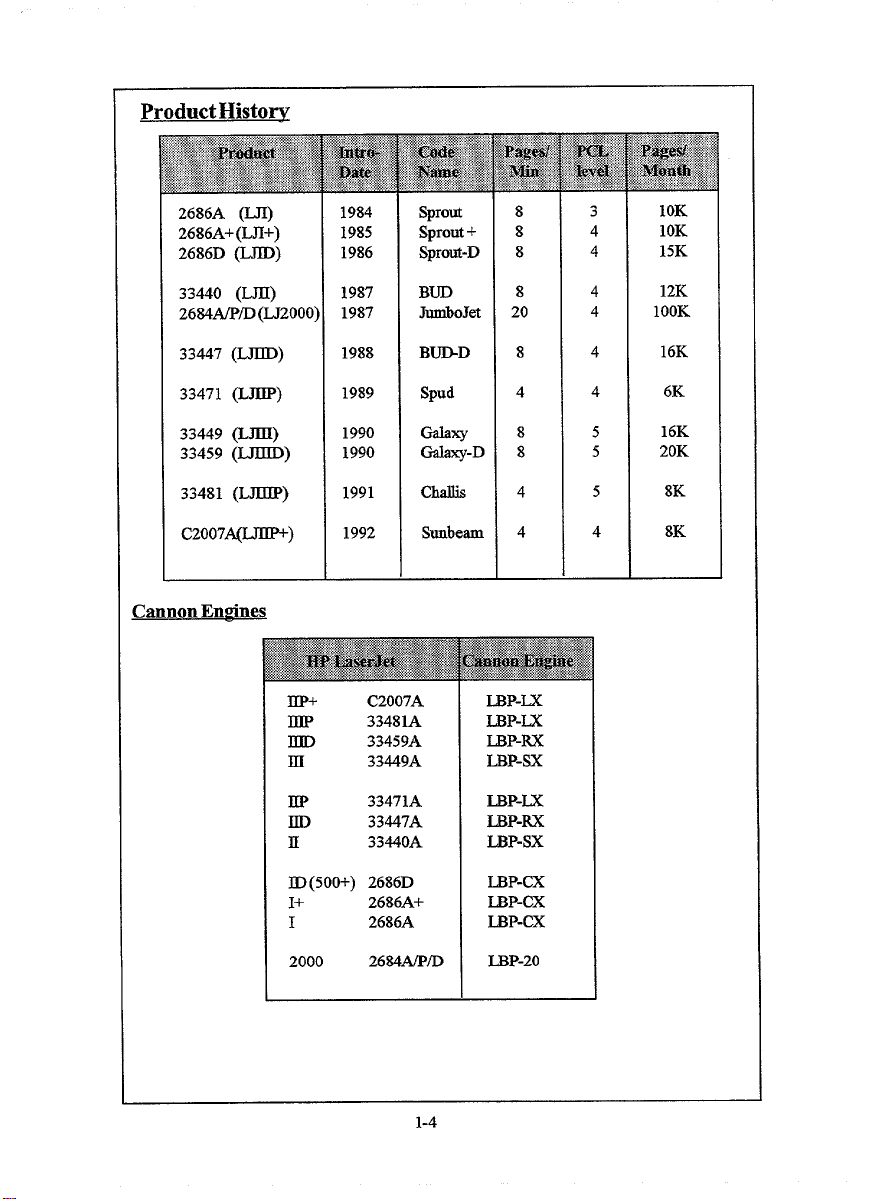
Product Histom
p
‘~
~;~,~...;::;;.,
~@y+:@::$w&&,,....,*,,,:,?,9::f,>
r. ,,,,.,LI
~%%&i:. EB*<“vi’%is~:wik:
2686A (LJI) 1984
2686A+ (LJI+) 1985
2686D ~)
1986 Sprout-D
Sprout
Sprout +
,y:$-<t;fi,f~,,;
) ?2<.t y:.?~i+$j?
%*y:
...........! ,,,,,,,,.!+,,,,, ,,.!
:$*&k %i!iil%:$w;
8
8
8
*
3
4
4
IOK
10K
15K
33440 (m) 1987 BUD
2684A/P/D (LJ2000)
33447 (LJllD)
33471 (LJIIP)
33449 (LJ131)
33459 (L.nllD) 1990
33481 (LJB3P)
C2007A(LJIIP+)
Cannon
En@nes
1987 JumboJet
1988
1989 Spud
m+
m 33481A
IaD 33459A
m 33449A
m 33471A LBP-LX
IID 33447A
E 33440A
BUD-D 8 4
1990 Galaxy
1991
1992
@w-D
Challis 4
Suabearn
C2007A mP-M
8
20
4
8
8
4
LBP-LX
LBP-RX
LBP-SX
DP-RX
mP-sx
4 12K
4
4
5 16K
5 20K
5
4 8K
lOOK
16K
6K
8K
ID(500+) 2686D LBP-CX
1+
I 2686A
2000 26 S4AtPfD
2686A+ LBP-CX
mP-cx
LBP-20
1-4
Page 10
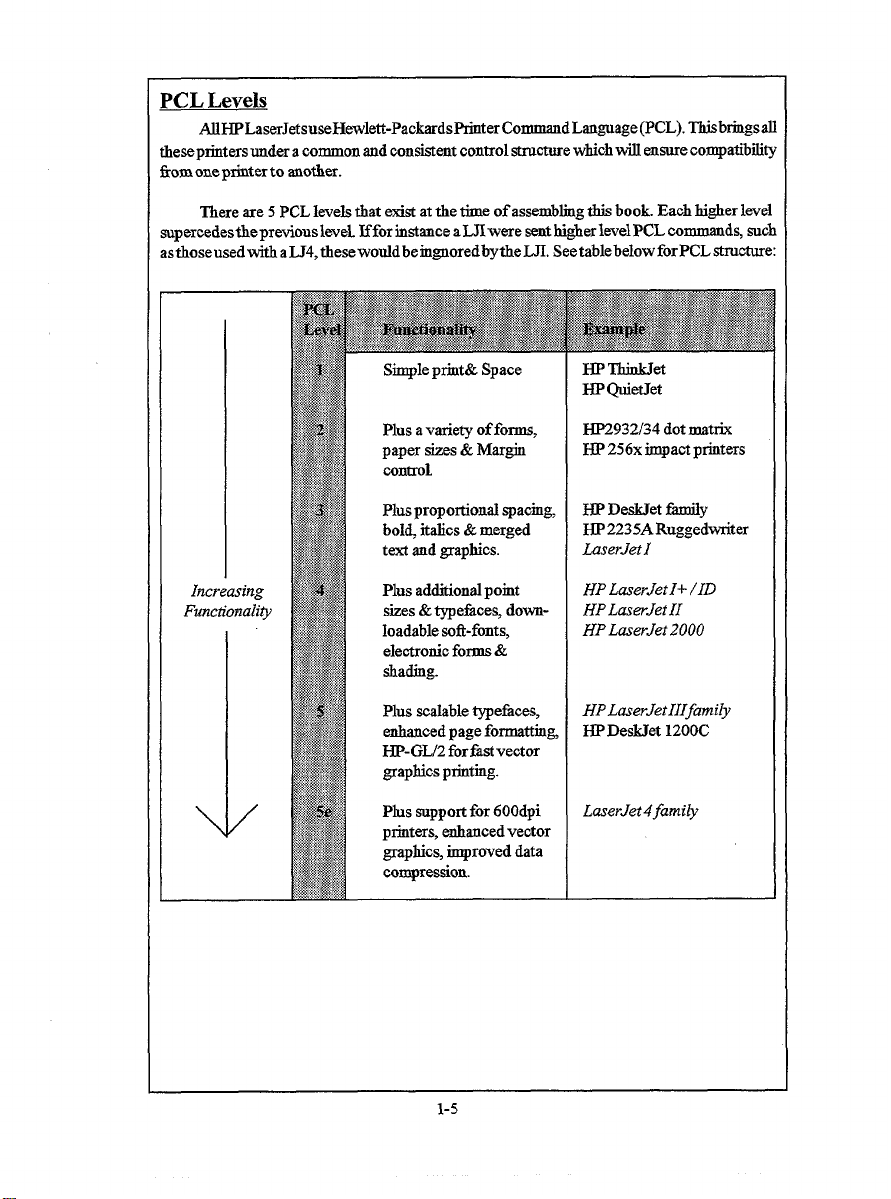
PCL Levels
AllHPLaserJetsuseHewlett-PacdcardsPrinterCommandLanguage(PCL). Wbringsall
tkeseprintersuuder a common and consiient control Stru-e whichti ensure compatibtity
tiomonepriuterto snother.
mere are 5 PCL levels that exi~ at the time of assembling this book. Each higher level
supercedesthe previous leveLIffor instance aLJI were sentkigherlevel PCL commands, such
astkoseused with a LJ4, tiese wotidbe ingnoredbytke LJI. Seetablebelow forPCL strutie:
I
HP
Simple print& Space
wet
HP@etJet
Plus avari~ of fore,
paper sizes &Margin
controL
Plus proportional spacing,
bolt italics &merged
text and ~apkics.
Plus additional pornt
sizes & ~efice~ downIoadable sofi-fonts,
electronic forma &
~ading.
Plus scalable typetices,
enhanced page formatting,
~-GL/2 forfkstvector
grapkics printing.
\
I
I
Plus support for 600dpi
ptiters, enhanced vector
graphics improved data
compression.
HP2932/34 dot matrix
HP 256x impact printers
HP DeWet fkmily
HP2235ARuggedwriter
hserJetI
HP LaserJetI+ /ID
HPLaserJetII
HP LaserJet 2000
HPLaserJetIIIfami~
HP DeskJet 1200C
LaserJet 4family
1-5
Page 11
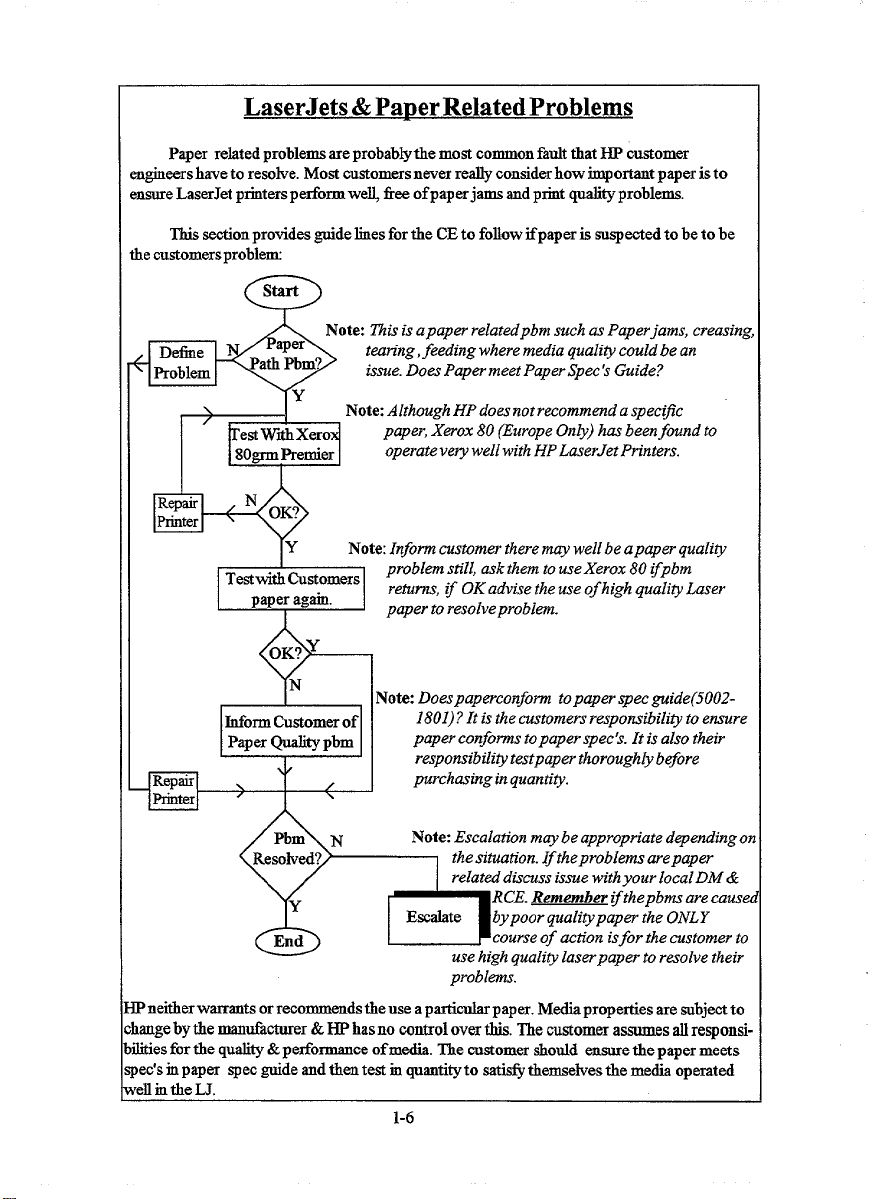
LaserJets & Paper Related Problems
Paper related problems are probably the most common fault that HP cuwomer
n@-s hiweto resolve. Most customers never really consider how important paper is to
nsureLaserJet printers perform we~ free of paper jams and print quality problems.
This section provides guide lines for the CE to follow ifpaper is suspected to be to be
le customers problem
-
Note This is apaper relatedpbm such as Paperjams, creasing,
, Define
‘ Problem
%
r
aper
ath Pbm?
Y
eti WhhXero
80grm Premier
t~n”ng, feeding where media quality could be an
issue. Does Paper meet Paper Spec ’sGuide?
Note: Although HP does not recommend a specl~c
paper, Xerox 80 (Europe Only) has beenfound to
operate very well with HP LaserJet Printers.
TY
OK? y
+
Pneither warrants or recommends the use a particular paper. Media properties are subject to
snge by tie msnticturer & HP has no control over this. me customer assumes allresponsities for the quality &performance of media. me customer should ensure the paper meets
cc’sin paper spec guide and then test m quantity to satisfy themsehes the media operated
>11m the LJ.
Note: Inform customer there w well be a p~er quality
p~oblem still, ask them to ~seXerox 80 ~pbrn -
returns, z~OK advise the use of high qualiy Laser
paper to resolveproblem.
N
~otc Doespaperconform topaper spec guide(5002-
1801)?It is the customers responsibili~ to ensure
paper confoms topaper spec’s. It is also their
responsibility testpaper thoroughly b~ore
purchasing inquanti~.
Note Escalation may be appropriate depending oz
the situation. If theproblems arepaper
related dismss isme with your local DM &
Etite
1-6
RCE. Remember z~thepbms are causel
bypoor quali~paper the ONLY
course of action isfor the customer to
use high quali~ laserpaper to resolve their
problems.
Page 12
CE ‘sActions if Paper Problems are Suspected:
1.Ensure aHigh QualityLaser paper istaken on site (Xerox 80 grm Premier); do NOT leave
m car ovemi@t.
2. Take a copy of the paper spec guide (5002-1801) to @e to customer. Ensure your local
office has a quan~ to use for this purpose. Does Paper meet Paper Spec’s Guide? Does
media come under the heading of “Papers likely to cause problems or papers to avoid”?
3, Ifpaper ia suspected use “HOWDiagram”to help isolate problem,
4. Keep customer involved at all times, explarnhow important paper is for correct operation
of their printer.
5. Use HP LaserJW Reference Ouide (Knowu as Oreen Book) paper section for fiuther media
information. There is a paper suppliers list in this section that customer maywisb to try.
6. Show Paper Video to customer, inappropriate, this will help them better appreciate the
importance of paper when used in ~ LaserJet printers. (596 1-0712 PAL formst) or
(5961-071 1NTSCformat)
Factors that Contribute to paDerPath & Print C)ualitvProbIems:
*Does the media meet the Paper Spec’s outlined m Paper Spec Gnide(5002- 1801)?
*Is the customers media m good contilon, damage~ bent, skew, wriukled or “Dog Eared”?
*Are media haadling practices beiag observed (loading paper, removing Paper Jams)?
*Has the media customer is having problem ever worked?
* Is media berng conditioned before use? Media WST stabliae m a normal office
enviroammt for a minimum of 24hr.
* Check the follotig mthe printer operating entionment
- Temperature (best between 20to 24C)
- Humi@ (Beat between 45% to 55%)
- SunJightExposure.
- Clearriness
Media Likelv to tive Paner Related Drob]ems:
HP cannot stop customers using anypartiti paper, but certain paper will give more
frequent paper jam or paper path problems. Some of these are:
*Paper too thin or too thick (see caliper inpaper spec ‘s)
*Extremely Shiney or Glossy media.
* Recycledpaper that has not be spec ‘edfor LaserJetpn”nters.
*Multi-patifom.
*Media tkat is damaged, curled, wrinkled, ot of an irregrdar shape.
*Papers that do not conform toA4, Letter, etc sues md may be loose or too tight in
paper trays.
*Interleaving dl~ment types of
*Paper withpevorations
*Some coatedpapers.
media.
1-7
Page 13
*Colouredpapers
*Papers too smooth or too rough (See She@eld inpaper spec ‘s)
*Papers too dry or too moist
*Paper with embossed headers
* Two-sided or Duplex printing on a Non-Duplexpn”nter.
*Paper that ha been refed into paper tray, could befrom aphoto-copier.
* Prepn”ntedPapers using low temperature inks or inti thatproduce hazardous
emissions.
*Labels, transparencies or envelopes that do not meet paper spec ‘s.
* tiels MUST cover entire backing sheet with NO gaps which expose adhesives to M.
*Envelopes with openjlaps with adhesive exposed.
*Envelopes with clasps, snaps, tie strings, windows or~nthetic maten”als
*Envelopes with baggy construction orfolds that are not sha~.
Pounds to Grams EauivalenceTable
161bs= 60grtisquare meter
201bs = 75gmma/squsre meter
241bs = 90gratisquare meter
281bs = 105grams/square meter
361bs = 135@square meter
1-8
Page 14
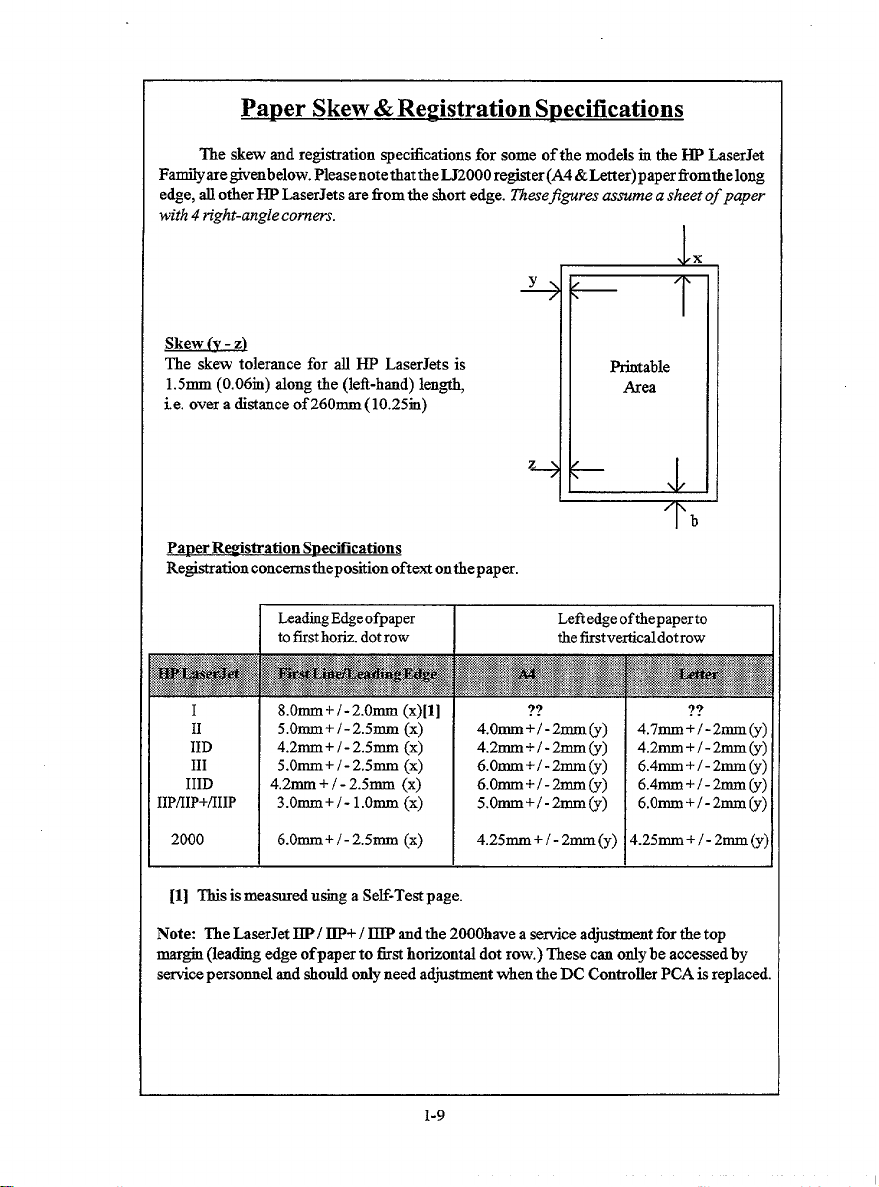
Paper Skew &Registration Specifications
The skew and registration specifications for some of the models in the HP LaserJet
Familyare@enbelow. Pleasenotethatthe LJ2000 regiater(A4 &Letter) paperfiomthelong
edge, all other W LaserJets are from the short edge. ~esefi~res assume a sheet of paper
with 4 right-angle corners.
J
Y
Skew (v- z)
The skew tolerance for all HP LaserJets is
1.5mm (0.06m) along the (lefi-hand) len@,
~e. over a distance of 260mm (10.25rn)
4
Printable
I
Area
2
PaDer RWstration Suetilcations
Re@strationconcemsthepostilon oftext ontiepaper.
LeadingEdgeofpaper
tofirst horiz. dot row thefirstverticaldot row
I
I 8.Omm+/- 2.Omm (x)[l]
II
IID
III 5.Omm+/-2.5mm
IIID
IIPflIP+/IIIP
2000 6.0mm+ /- 2.5mm
[1] This is measured using a Self-Test page.
Note: The LaserJet ItP / IIP+ / IIIP and the 2000have a setice adjustment for the top
-gin (leafig edge of paper to fiat hotiontal dot row.) These can only be accessed by
service personnel and ahotid only need adjustmmt when the DC Controller PCA is replaced.
5.0mm+/-2.5mm
4.2mm+ /- 2.5mm
4.2mm + / - 2.5mm
3.omm+/- l.omm (x) 5.Omm+/-2mm@)
I
(X)
(X)
(X)
(X) 6.Omm+/-2mm(y)
(X)
4.Omm+/-2mm(y)
4.2mm+/-2mm~)
6.Omm+/-2mm(y)
4.25rnm+ /- 2mm(y)
Lefiedgeofthepaperto
??
/~
lb
??
4.7mm+/-2mm(y)
4.2mm+/-2nnn(y)
6.4rmn+l - 2rmn(y)
6.4mm+/- 2mm (y)
6.Omm+/- 2mm (y)
4.25mm+ /- 2mm(y)
1-9
Page 15
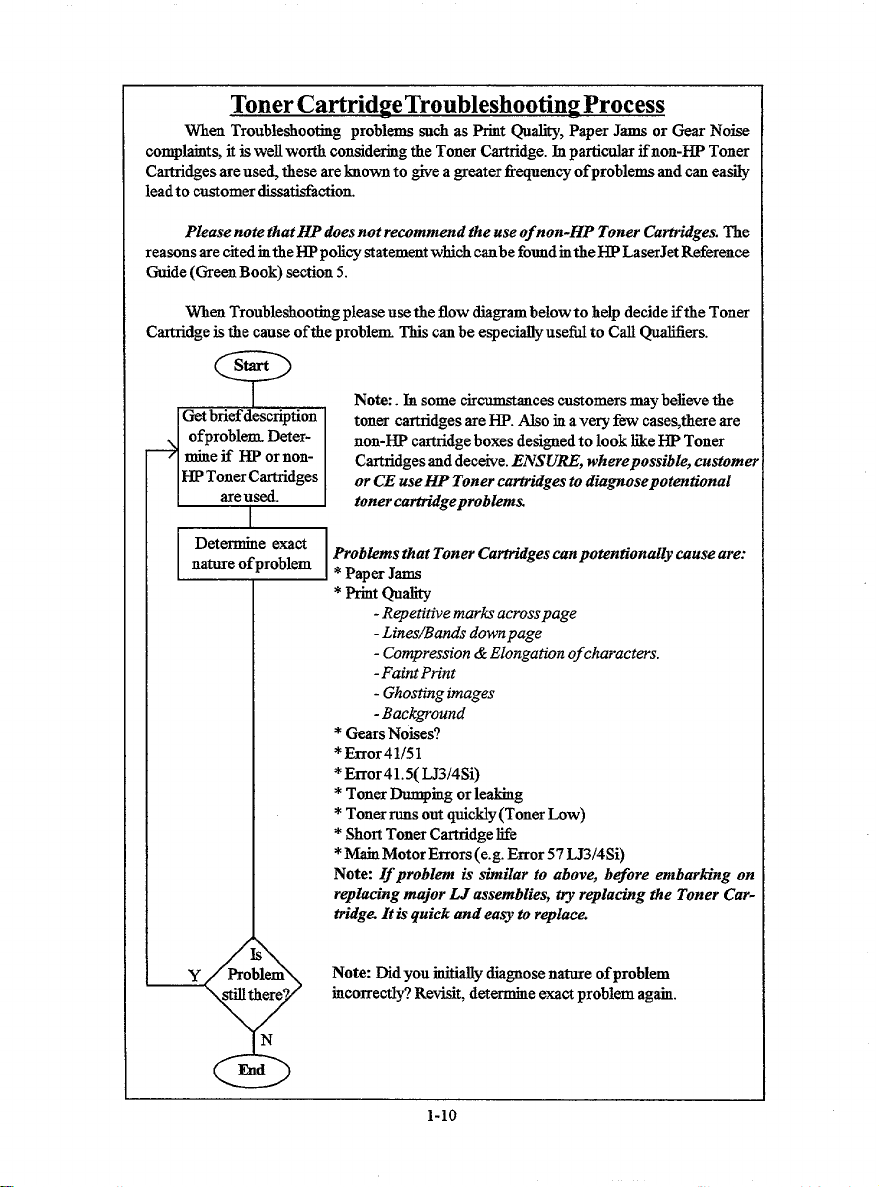
Toner Cartridge TroubIeshootin~ Process
When Troubleshooting problema such as Print Qu~, Paper Jams or Gear Noise
complaints, it is well worth considering the Toner Cartridge. In partidar ifnon-HP Toner
Cartridges are use~ tkese are kuown to give a greater frequency of problems and can easily
lead to c~omer dissatisfaction.
Please note thatHP does not recommend the use of
reasons are cited rnthe HP policy statement wkich canbe found in the HP LaserJet Reference
Guide (Green Book) section 5.
Wken Troubleakooting please use the flow diagram below to help decide ifthe Toner
Cartridge is the cause of the problem This can be especiallyuse~ to Call Qualifiers.
Get briefdescription
ofproblem. Deter-
mine if HP or non-
HPToner Cartridges
are used.
Determine exact
nature of problem
No*. In some circmnatauces customers may believe the
toner cartridges are HP. Also in a very fw case~there are
non-HP cartridge boxes designed to look like HP Toner
Cartridges and deceive. ENSU~, wherepossible, customer
or CE useHP Toner cartridges to diagnosepoten~”onal
toner cartridgeproblems.
Probkrms fiat Toner Cartn”dgescanpotentionally cause are:
*Paper Jams
*Print Quality
-Repetitive marks acrosspage
-LineslBmds downpage
- Compression &Elongation ofcharacters.
-FaintPnnt
- Ghosting images
-Background
* Gears Noises?
*Error4 1/5 1
*Error 41.5( LJ3/4Si)
* Toner Dumping or leaking
* Toner runs out quickly (Toner Low)
* Short Toner Cartridge life
*Main Motor Errors (e.g. Error 57LJ3/4Si)
Note: If problem is sbnilar to above, before embarking on
replaa”ngmajor LJ assemblies, try replacing tie Toner Cartridge. It is quick and ea~ to replace.
non-HP Toner Cartridges. The
Y
Note Did you itdtkdly dia~ose natnre of problem
incorrectly? Revisit, determine exact problem again.
1-1o
Page 16
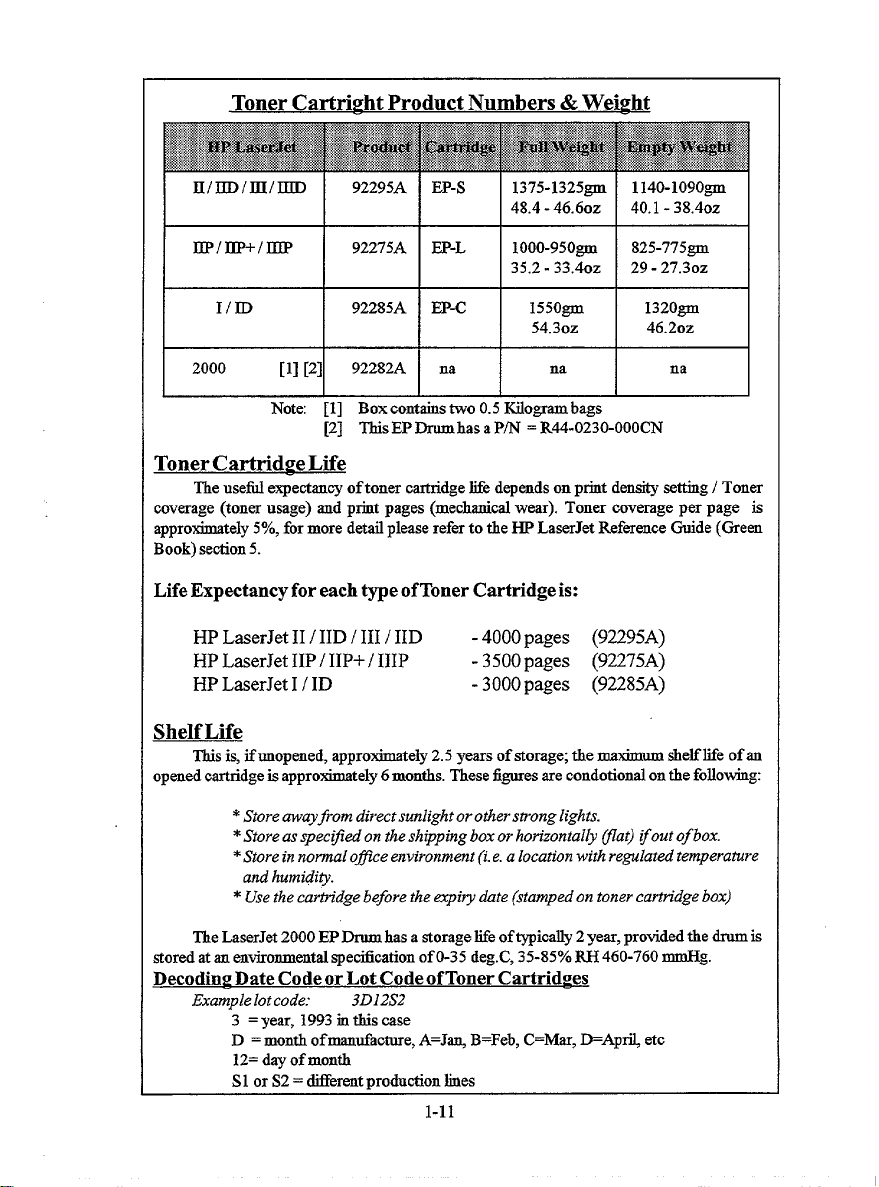
Toner Cartright Product Numbers& Weiyht
11/m) /m/lJJD
W/m+/m 92275A EP-L
I/lD 92285A EP-c
2000 [1] [2]
Note [1] Box contains WO 0.5 Kilogram bags
92295A EP-S
92282A na
[2] ThisEP Drnmhas a P/N = R44-0230-OOOCN
1375-1325gm l140-lo90gm
48.4- 46.60z 40.1- 38.40z
looo-950gm
35.2- 33.40z
1550gm 1320grn
54.30Z 46.20z
na na
825-775gro
29- 27.30z
TonerCartridge Life
Tke useti expectan~ of toner cartridge Me depends on print den~ setting / Toner
coverage (toner usage) imd print pages (mechanical wear). Toner coverage per page is
approximately
Book) section 5.
570, for more detail please refm to the HP LaserJet Refwence Guide (Green
Life Expectancy for each type ofToner Cartridge is:
HP LaserJet II / IID / III / IID
-4000 pages (92295A)
HP LaserJet 11P/ IIP+/ 111P -3500 pages (92275A)
HP LaserJet I / ID -3000 pages (92285A)
SheIfLife
Thisis,
if unopened, approximately 2.5 years of storage; tie maximum skelfMe of an
opened cartridge is approximately 6 montks. T’kesefigures are condotiond on tke following
*Store awayfrom direct surdight or other strong lights.
*Store as specl~d on the shipping box or horizontally fla~ l~out of box.
*Store in normal ofice environment (i.e. a location with regulated temperature
and humidi~.
* Use the carti”dge before the expiry date (stamped on toner cartn”dgebox)
The LaserJet 2000 EP Drum has a storage Me of typically 2 year, provided the dnun is
stored at an enviromnentd speci.tication of O-35deg.C, 35-85% RH 460-760 mrnHg.
Decodintr Date Code or Lot Code of Toner Cartrid~es
Example lot code: 3D12S2
3 =year, 1993 in this case
D = montk ofmantiacture, A=J~ B=Feb, C=Mar, D=Apfi etc
12= day of montk
S1 or S2 = different production lines
1-11
Page 17
I
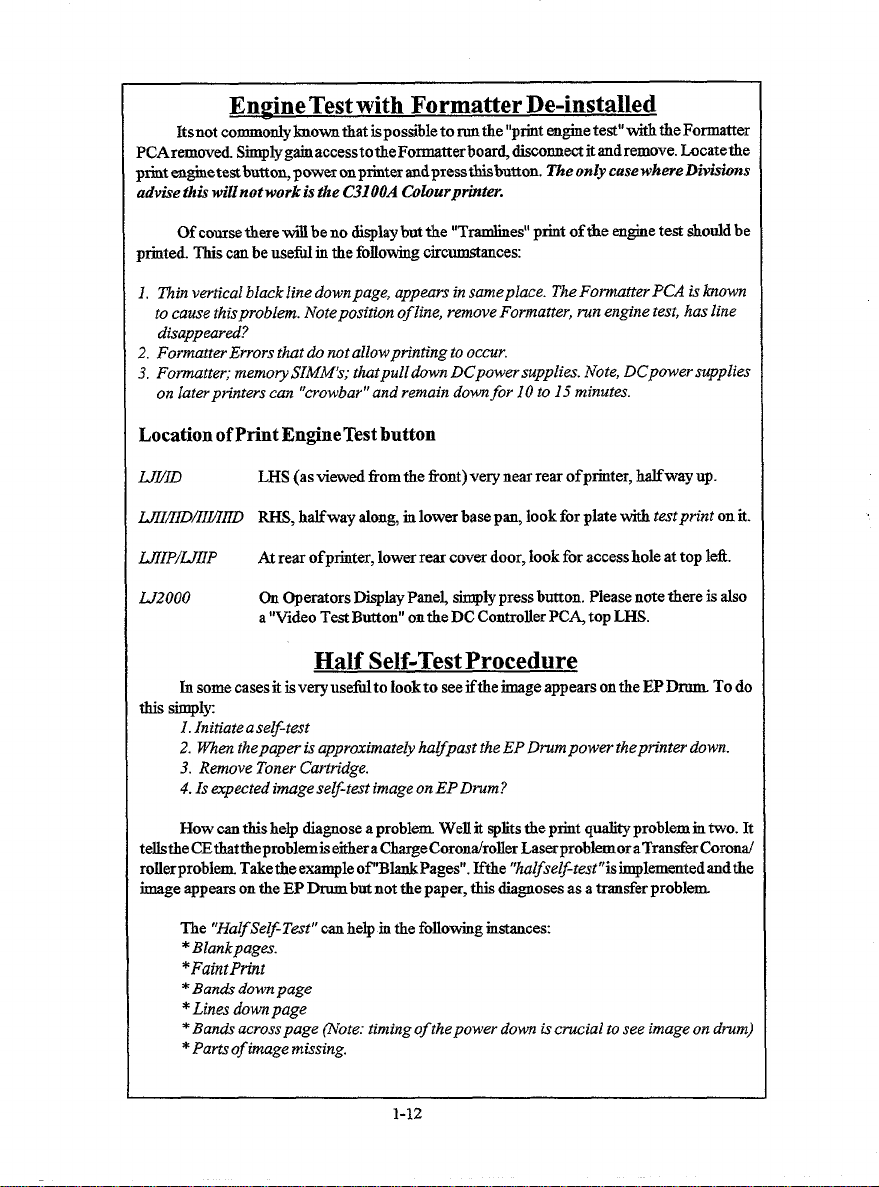
PCAremoved. S@lygain accesstothe Formatterboar~ disconnect it and remove. Locatethe
print enginetestbutton, power onprinter audpress~button. Tke only case whereDiviskms
advise this wiMnot work is the C3100A Coburprinter.
ptited. This can be usefi in the following circumstances
1, Thin vertical black line downpage, appurs in sameplace. The FormatterPCA is known
to cause thisproblem. Noteposition of line, remove Formatter, run engine test, has line
disappear?
Formatter Errors that do not allowprinting to occur.
2,
3, Formatter; memo~SIMWs; titpulldown DCpowersupplies. Note, DCpowersupplies
on later pn”nterscan “crowbar”and remain downfor 10 to 15 minutes.
Engine Test with Formatter De-installed
Itsnot commonly known tkat impossibleto ruu the “print engine test” with the Formatter
Of course there will be no displaybut the “Trsrrdines”print of the engine test shodd be
Location of Print Engine Test button
I
UYID
UIPID/IIIMIID RHS, halfway along, in lower base pan, look for plate witk testprint on it.
~IPIDIIP
LJ2000
LHS (as viewed fiomthe front) very near rear ofprinter, halfway up.
At rear ofprinter, lower rear cover door, look for access hole at top lefi.
Operators ~lay Panel @ly press button. Please note there is also
on
a“Video Test Button” onthe DC Controller PC~ top LHS.
Half Self-Test Procedure
In some casesit isveryuseflto Iookto see ifthe image appears on the EPDrum To do
this simply
I. Initiate ase~-test
2. ~en thepaper is approximately ka~past the EP Drum power thepn”ntw down.
3. Remove Toner Cmtndge.
4. Is expected image se~-test image on EPDrum?
How cantbishelp dis~ose a problem WeE it splits the ptit quality problem in two. It
tellsthe CEthattheproblemis eithera ChsrgeCorons/roller LaserproblemoraTrder tirona/
rollerproblem Tskethe example of “BlankPages”. Ifthe “kalfself-test”is implemented andtke
image aPPears on the EP Drum but not the paper, this diagoses as a transfer problem
The “HalfSelf Test” caa help m the following instances
*Blankpages.
*Fain tPtit
*Bands down page
*Lines down page
*Bands across page (Note: timing of the power down iscrucial lo see image on drum)
*Pam of image missing.
I
1-12
I
Page 18
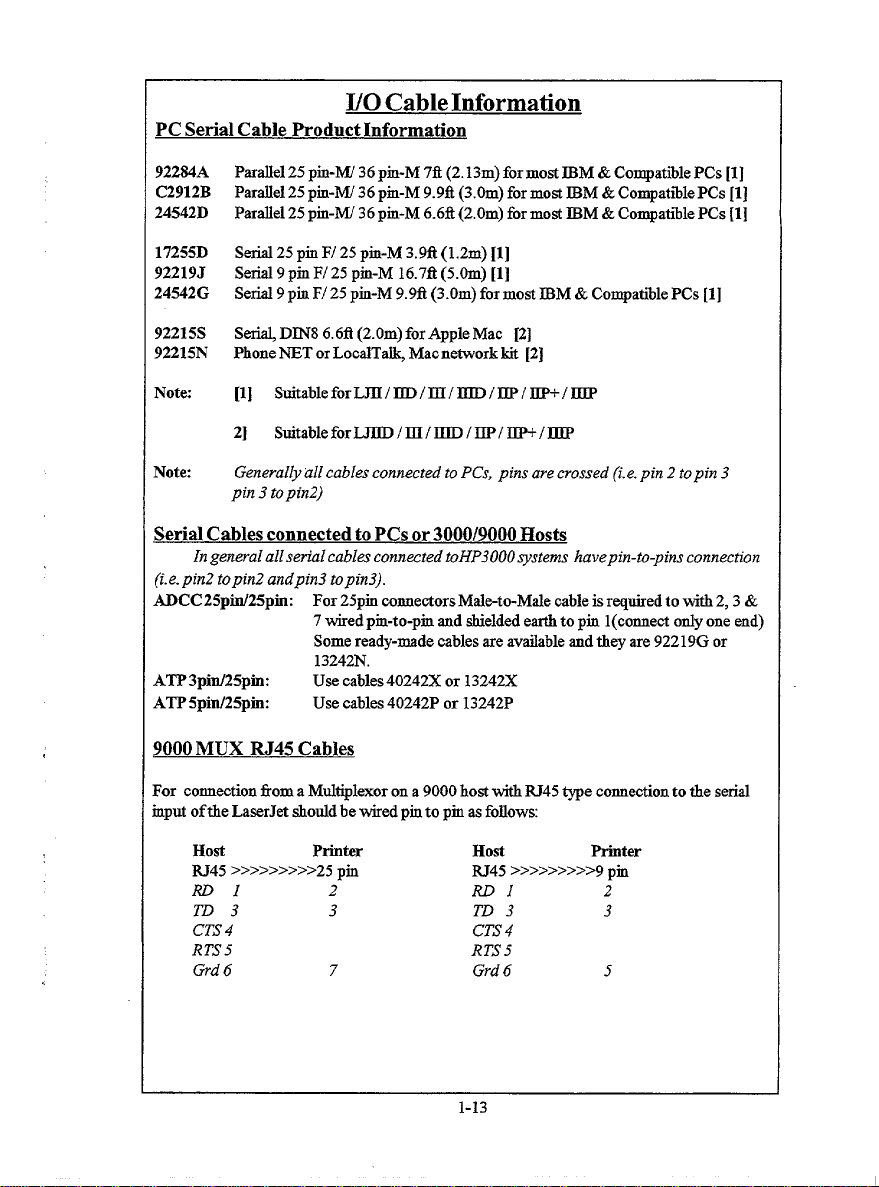
I/O Cable Information
PC Sefial Cable Product Information
922S4A Parallel 25 pin-~ 36pm-M 78 (2.13m) for moat IBM & Compatible PCs [1]
C2912B Parallel 25 piu-~ 36 pm-M 9.9fi (3.Om) for most IBM & Compatible PCs [1]
24542D ParMel 25 pin-M/ 36pin-M 6.6R (2.Om) for moat IBM & Compatible PCs [1]
17255D Serial 25 pin F/ 25 pin-M 3.9fi(l.2m) [1]
92219J
24W2G Serial 9 pin F/25 pin-M 9.9fi (3.Om)for most D3M& Compatible PCs [1]
Serial 9pm F/25 pin-M 16.7R(5.Om) [1]
92215S
92215N Phone NET or LocalTa~ Macnetwork kit [2]
Note:
Note Generally all cables connected to PCs, pins are crossed (i.e. pin 2 to pin 3
S@ DINS 6.6fi (2.Om)for Apple Mac [2]
[1] SuitableforLJH/~ /131/~ /~/ ILP+/llIP
2]
Suitable forLJIID/lll/~ /lIP/lTP+/133P
pin 3 topin2)
~
In general allserialcables connected toHP3000~stems havepin-to-pins connection
(i.e.pin2 topin2 andpin3 topin3).
ADCC25pird25pin:
ATP3pid25pin: Use cables 40242X or 13242X
ATP5pin/25pin: Use cables 40242P or 13242P
For 25pm connectors Male-to-Male cable is required to with 2,3&
7 wired prn-to-piu and shielded earth to pin l(connect only one end)
Some ready-made cables are available and they are 92219G or
13242N.
9000 MUX RJ45 Cables
For connection from a Mukiplexor on a 9000 host with RJ45 me connection to the serial
rnput of tie LaserJet shotid be wired pin to pm as follows
Hoat Printer
~45 >~>>~>>>Y25 piO RJ45 >>>>>>>>>9 pm
ml 2 RDl 2
TD 3 3
CTS 4 CTS 4
RTS5 RTS5
Grd 6 7 Grd 6 5
Host Printer
TD 3
3
1-13
Page 19
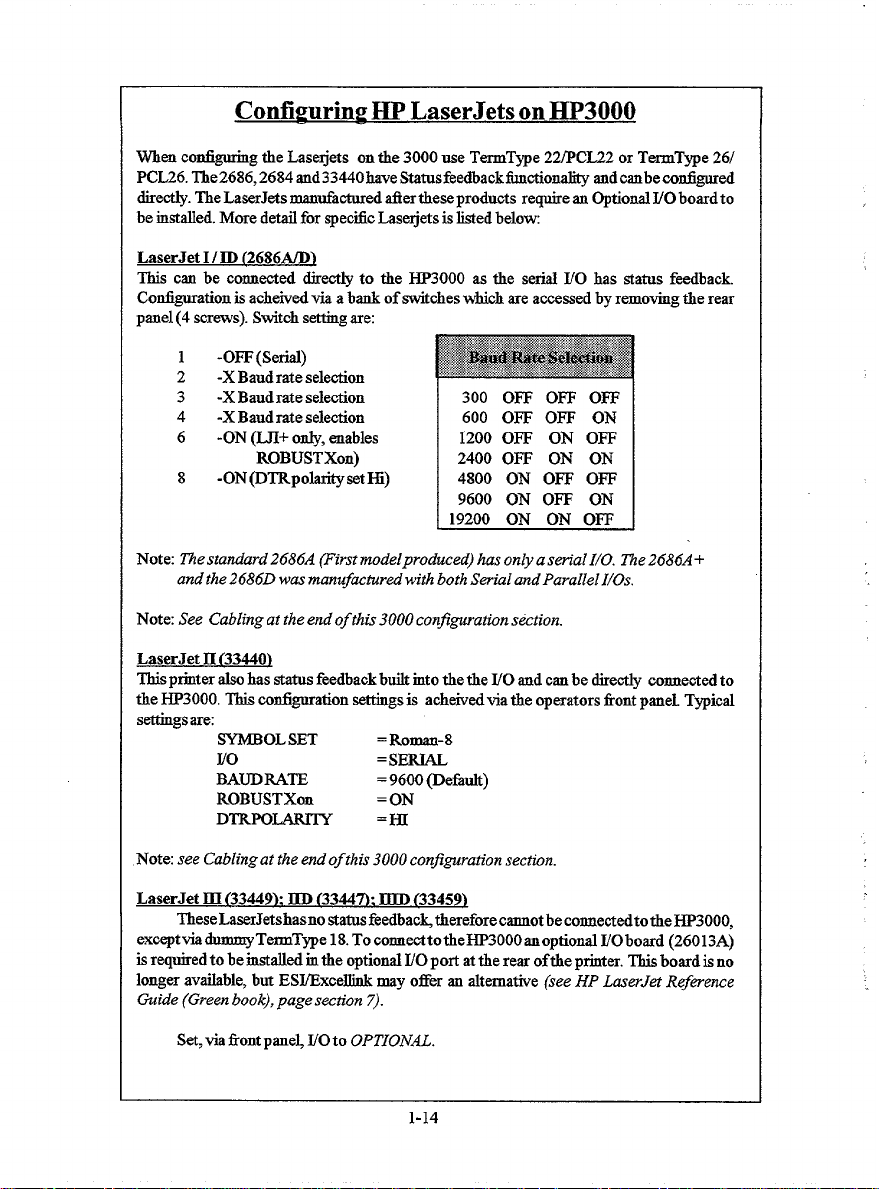
ConfigurinpHP LaserJets on HP3000
configuring the Laserjets on the 3000 use TerrnType 22@CL22 or TermType 26/
When
PCL26. The2686, 2684 and33440have Statusfeedbackfb.uction@ andcanbecotdigared
dire~. TheLaserJets mantiactured fiertkeseproducts require an Optional J/O bosrdto
be inst~ed. More dti for spectic Laserjets is listed below
LaserJet I/ID (26860)
This can be connected directly to the HP3000 as the serial I/O has status feedback.
Configuration is acheived via a bank of switches which are accessed by removing the rear
panel (4 scrws). Switch setting are:
1
-OFF(Serial)
2
-X Baud rate selection
3
-X Baud rate selection
4
-X Baud rate selection
6
-ON (L3i+ ordy, enables
ROBUSTXon)
8
-ON(DTRpolarityset Hi)
Note: Thestandard2686A First modelproduce~ has on@a sm”alI/O. ~e 2686A+
and the 2686D was ntanuf~tired with both Serial and Parallel I/Os.
Note: See Cabling at the end of this 3000 con$~ation section.
LaserJet II (33440\
Thisptiter ~ has status feedback built into the the I/O and can be directly connected to
the HP3000. This configuration settings is acheivedtia the operators front psneL Typical
settings are
SYMBOL SET = Roman-8
J/o
BAUDRA~ =9600 (Defati)
ROBUSTXon
DTRPO~ ‘m
=s=
= ON
~$,*.
,!$.>-,.*,>.?:~,f,*;:*<;:,,
,,.,,, ,.:;
,*$ ;y. x$ :V$#$~ .>
*# ,:
?~
,“$/j,,,,,
300 Om OFF OFF
600 OFF OFF ON
1200 OFF ON OFF
2400 OFF ON ON
4800 ON OFF OFF
9600 ON OFF ON
19200 ON ON OW
❑.
&
,~;, ~~~<:*@$~$j,;; 7:;~
.,.*,. ,.,
,?
Note see Cabling at the end of this 3000 con~guration section.
LaserJet III (33449): IID (3344n: DID {33459)
These LaserJetshasno statnsfeedbac~therefore cannot beconnectedtothe HP3000,
exceptvia dummyTenuT~e 18. To connecttotheHP3000 anoptional I/Oboard (260 13A)
is required to be installed iu the optional I/O port at the rear of the priuter. This board is no
longer available, but ESJ/ExcelJink may ofir an alternative (see HP tierJet Ref@ence
Guide (Green book), page section 7).
Set, via front pane~ I/Oto OPTIONAL.
1-14
Page 20
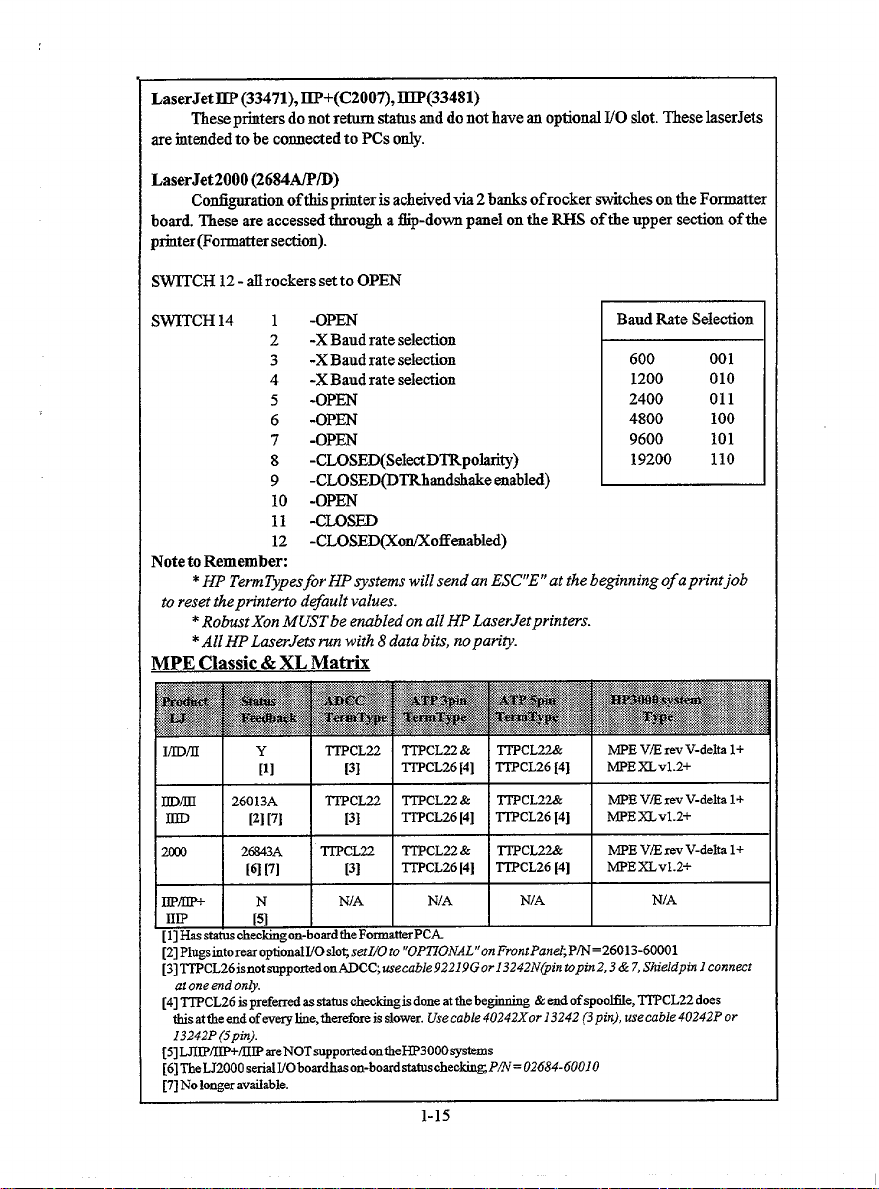
aserJetILP (33471), ~+(C2007), IIIP(33481)
These ptiters do not return status and do not have an optional I/O slot. ~ese laserJet,
rerntendedto be cotmected to PCs ordy.
,aserJet2000 (2684A/P/D)
Contignration ofthia printer is acheivedvia 2 banks of rocker *ches on the Formattf
~srd. ~ese are accessed throu~ a fip-down panel on the RHS of the upper section of th
rinter@omttersetion).
WITCH 12- all rockers set to OPEN
WITCH 14 1
-OPEN
Baud Rate Selection
2 -X Baud rate seletion
3 -X Baud rate selection
4 -X Baud rate selecdon
5 -OPEN
6 -OPEN
7 -OPEN
8 -CLOSED(SelectDTRpolarity)
-CLOSED(DTRhandahake enabled)
9
600
1200
2400 011
4800 100
9600 101
19200 110
10 -OPEN
-CLOSED
11
-CLOSED(Xotioffenabled)
12
‘oteto Remember:
*HP TerrnTypesfor HP ~stems will send an ESC”E” at the be~”nningof sprint job
to reset theprinterto defardt values.
*Robust Xon MUST be enabled on all HP LaserJetprinters.
*AllHP LaserJets run with 8 data bits, no pan”@.
IPE Classic&XL Matrix
001
010
[2] PhgsintoresrqrtionslVOslotsetI/Oto“OP170NAL’’onFrontPanzPJN=26013-60001
[3]~CL26isnot~potied .n~CC;wecable92219G orl3242N@inBpti2.3&7,Shieldpin 1 connct
atone end on@.
[4] TTPCL26
thissttheendofeveryIirre,therefareisslower.Use
13242P (5pin).
[5]LJItP/IR+/IIIPareNOTsuppartedontheHP3000~stems
ispreferredssstatuscheckingisdoneatthebeginning&endofspoofie,TI’PCL22does
cable 40242Xor 13242 (3pin), use cable 40242P or
[6]TheLJ2OOOserislVOboardheeon-bosrdsts@oheckiugPfi=02684-60010
[7]NoIonge.ravaiiable.
1-15
Page 21
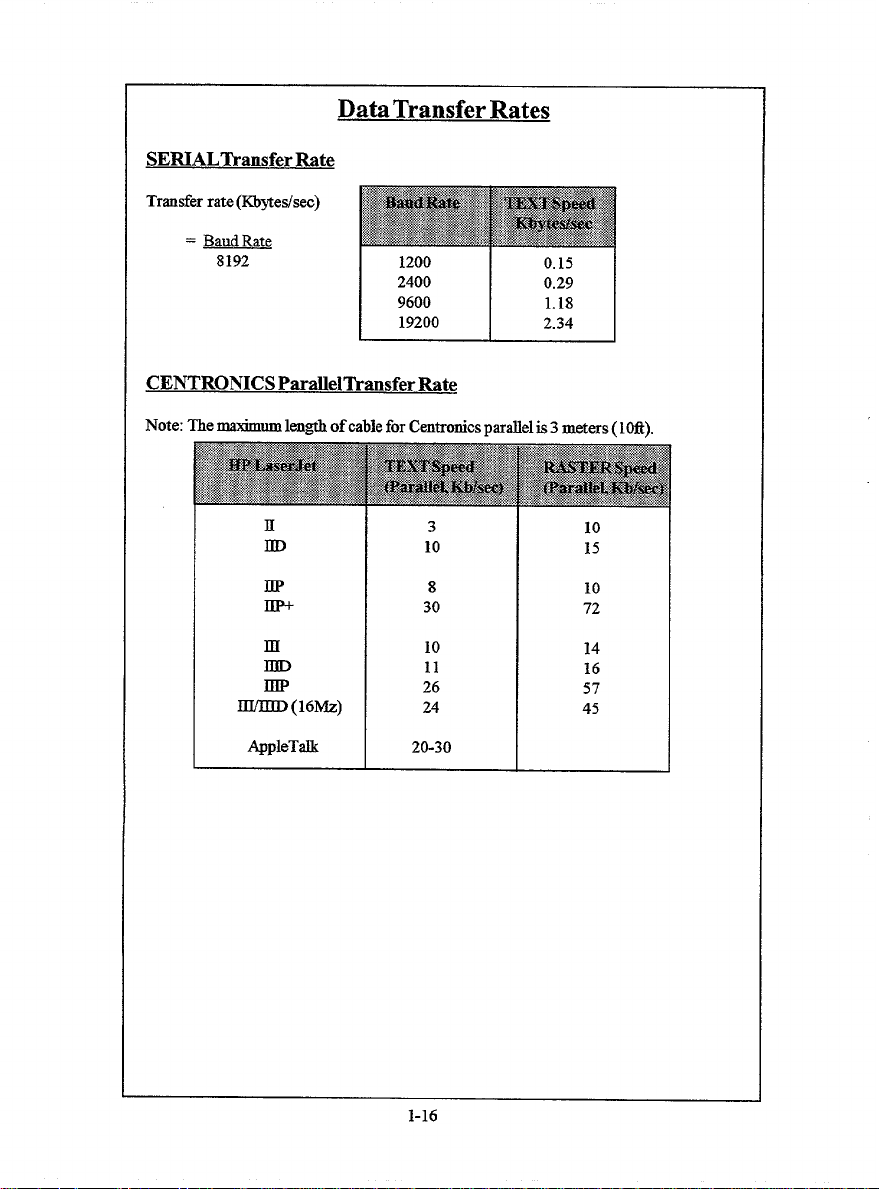
Data Transfer Rates
SERIALTransfer Rate
Transfer rate (Kbytes/see)
= Bad Rate
8192
CENTRONICS Parallel~ansfer Rate
Note: The matium length of cable for Centronics nardel is 3 meters ( lM).
1(
m
IIF
IIP+
m
IDD
m
~(16Mz)
AppleTalk
3
10
8
30
10
11
26
24
20-30
10
15
10
72
14
16
57
45
1-16
Page 22
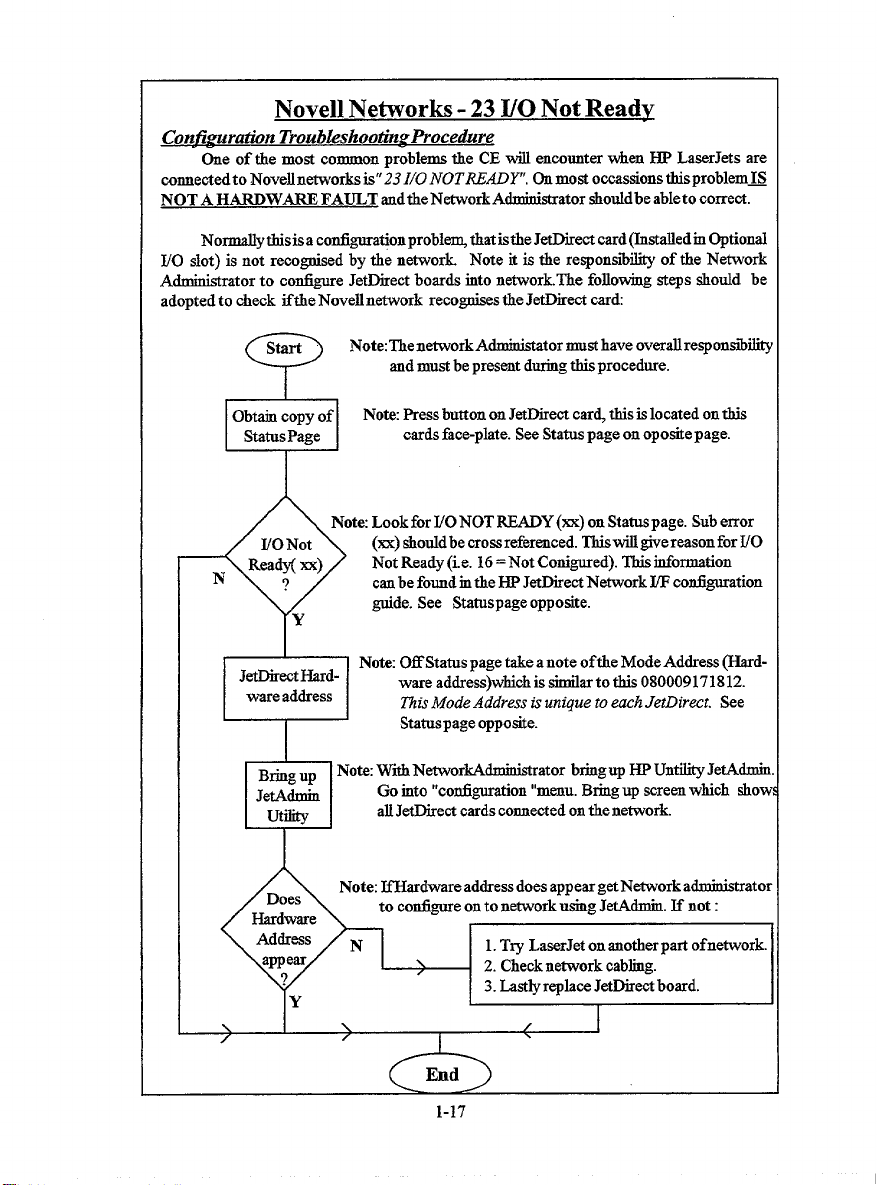
Novell Networks -23 I/O Not Readv
Coniiguratin TroubLeshootin~Pi’ocedure
of tie most common problems the CE will encounter when ~ LaserJets are
One
mnnected to Novell n-orks is” 23 1/0 NOTREADY”. On
NOT A H~WARE FAULT andthe NetworkA~ator shotidbe able to correct.
Notiythisisa co-ationprobl~ thatistheJe~ect card(Installedrn Optional
I/O slot) is not reco~ed by the network. Note it is tie responsii~ of the N*ork
Administrator to configure JetDirect boards into network. The foJlowing steps should be
adopted to check ifthe Novell n~ork reco@es the JetDirect card
Note: Then~orkA_ator nmst have overall responsibii
and must be present dtig this procedure.
most occasions tiproblem~
COPY Of
Obtain
Status Page
N
Jet13ir-Hard-
ware address
B~g up Note With NetworkAdministrator bring up HP Untility JetAdmir
JetAdmin
utility
No@ Press button on JetDirect car~ this is located on this
cards face-plate. See Status page on oposite page.
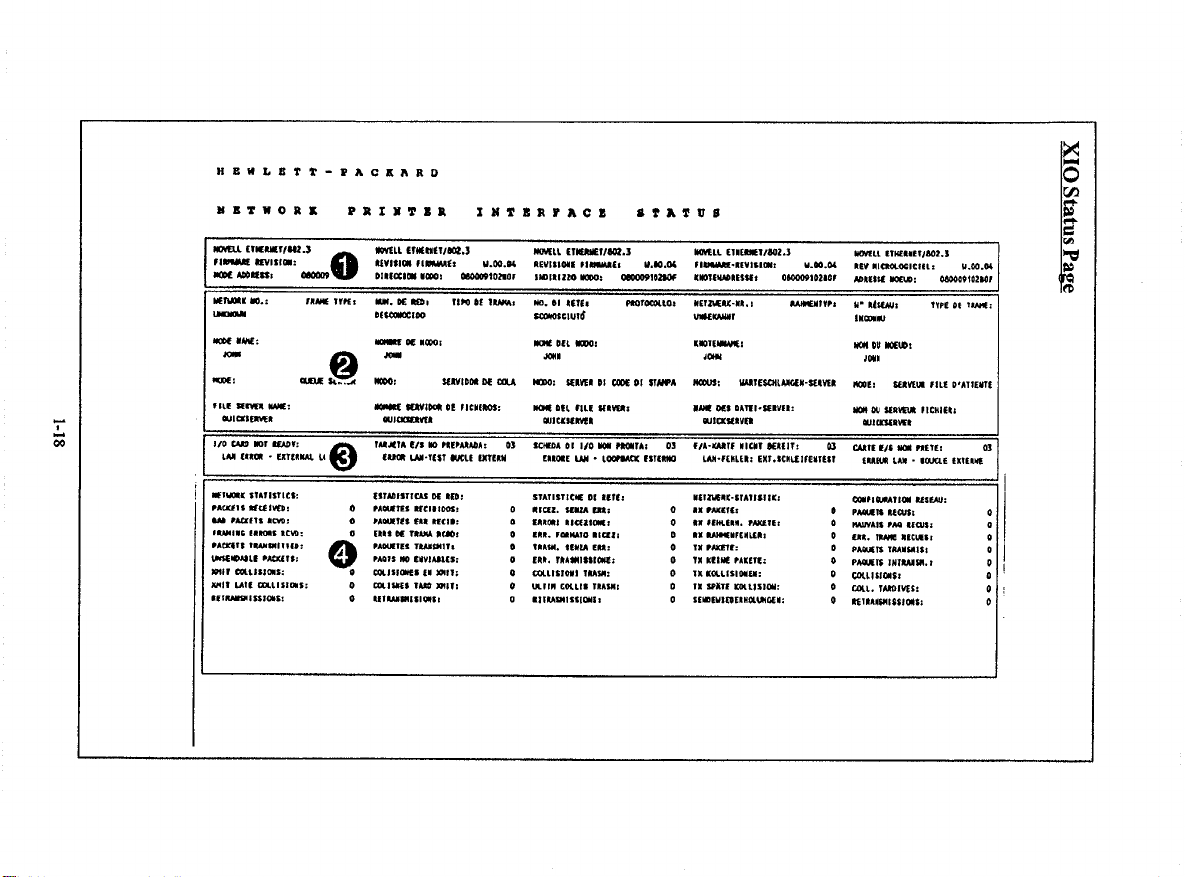
Note Look for I/O NOT READY(xx) on Status page. Sub error
(x) shotidbe crosreferenced. ThiswillgivereasonforUO
Not Ready (i.e. 16= Not Configured).Tkis information
canbe found m tke HP JetJ)irect Network ~ con.figuration
guide. See Statuspage opposite.
Note Off Status page take a note oftke Mode Address (Hard-
ware address)wkich is sirnilarto this 080009171812.
~is Mode Address is unique to emh JetDirmt. See
Statuspage opposite.
Go into “con6guration “menu. Bring up screen which shov
alIJetDirect cards connected en the network.
Note: JfHardware address does appear get Network a~atol
to contignre on to network using JetAdmin. If not:
1.Try LaserJet on another part ofnetwork.
2. Checknetwork cabling.
3. Lastly replace JetDirect board.
\
/
1-17
/
Page 23
1-18
XIO Status Pape
Page 24
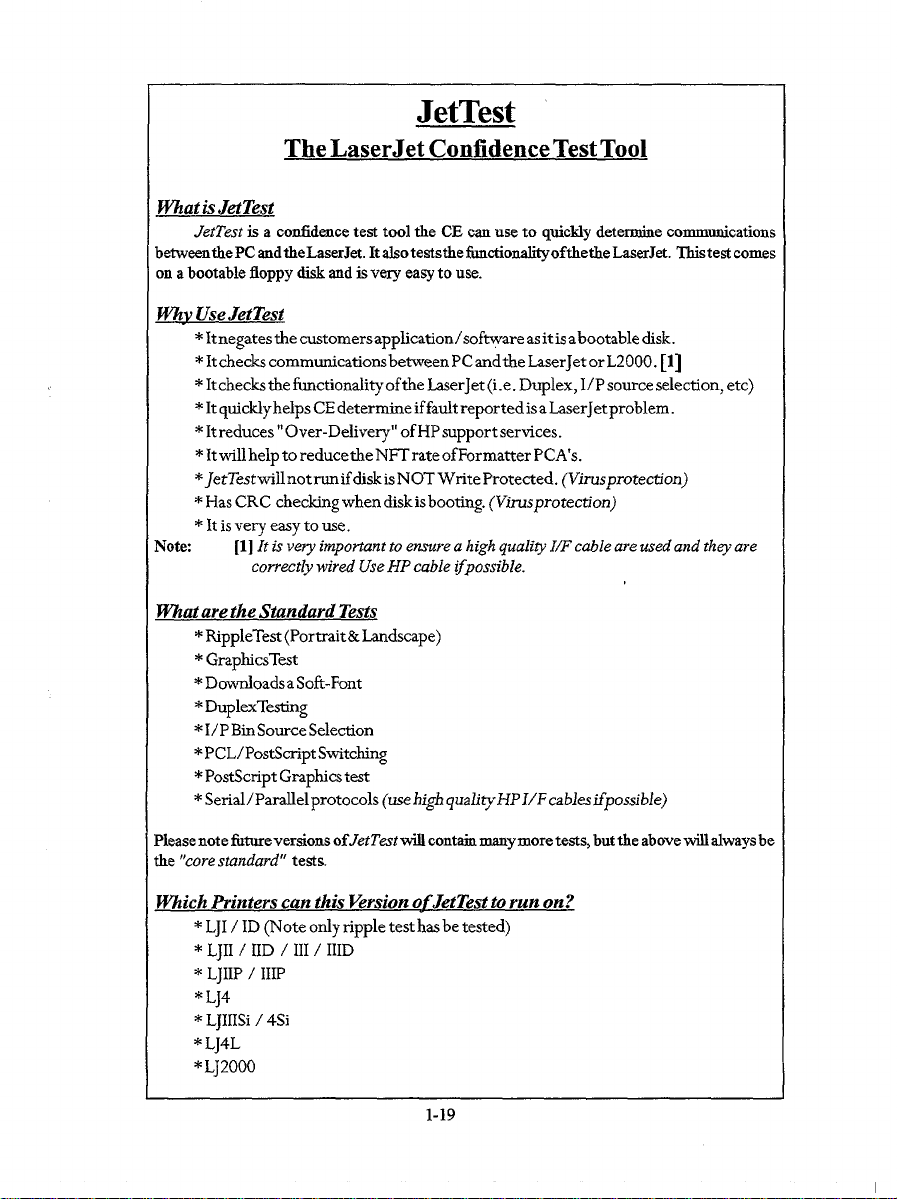
JetTest
The LaserJet Confidence Test Tool
WhatisJetTest
JetTest is a confidence test tool tie CE can use to quickly detetie communications
betweenthe PC andtheLaserJet. It alsoteststhe fimctionalityofthethe LaserJet. ~stest comes
on a bootable floppy disk and is very easy to use.
WhvUseJetTest
negates the customers application/sof~are asit isabootable disk.
*It
*It checks communications between PC andthe LaserJet or L2000. [1]
checks tie functionality of the LaserJet (i.e. Duplex, I/P source selection, etc)
*It
*It quickly helps CE determine if fault reported is a LaserJetproblem.
*It reduces” Over-Delivery” of HP support services.
*It will help to reduce the NFT rate of Formatter PCA’S.
*JetTestwill not run if disk is NOT Write Protected.
Has CRC checking when disk is booting. (Virusprotection)
*
It is very easy to use.
*
Itis ve.y important to ensure a high qualiy I/F cable are used and thq are
Note
[1]
correctly wired Use HP cable lfpossible.
Matarethe Standard Tests
RippleTest (Portrait& Landscape)
*
* GraphicsTest
* Dotioads a Soft-Font
* DuplexTesting
*1/ P Bin Source Selection
* PCL/PostScript Switching
*PostScript Graphics t=t
* Serial/ Parallel protocols (use high
quality HP I/F cables impossible)
(Virusprotection)
Please note fiturevertions ofJetZ’estwill contain manymore tests, but tie aboveti alwaysbe
tie “corestandard” testa.
Which Printers can this Version ofJetTest to run on?
LJI / ID (Note only ripple test has be tested)
*
* LJII / IID / III / IIID
* LJIIP / 111P
* LJ4
L IIISi / 4Si
*
J
* LJ4L
*LJ2000
1-19
Page 25
How to RUNJtiTest
1.Install the Bootable disk inA: Drive of PCA
2. Power off fie PC, then on again or CTrl, Shift &DEL Keys together
3 .Takeapprox 1 minute to BOOT-up.
4.The J~EST screen will appear,then simpIy follow to menu driven screens and
choose test you wish to run, number of copies, etc.
Note: The mouse will ody work ifthe PC has serial mouse, ifnot use TAB and/or arrow keys.
I
How to Obtaina Covv ofJetTmt
JetTestwasproduced by Steve Oakes(UJSMauchester) and Bob Edwards (UKRC) and
has been widely diatriiuted tioughout the UK and also to mmry countries worldwide. Ifyou
need a copy please send a 3 1/2 inch HD floppy disk to Bob Edwards in the UK Birmingham
office (ext 59369) with return address and I wilIbe ~d to -d you a copy.
mat oftheFuture ofJ&Test
At this time (March 95)we arerntheprocess ofupdatingJetTestto includenewLaserJet
products. We alsorntendtorevampJetTestto allowittobe ea~updatedandto rncludeatider
choice of tests. This will probably be available by the Autumn (Fall) of this year. We will of
course update the field of prowess m this area.
I
1-20
Page 26
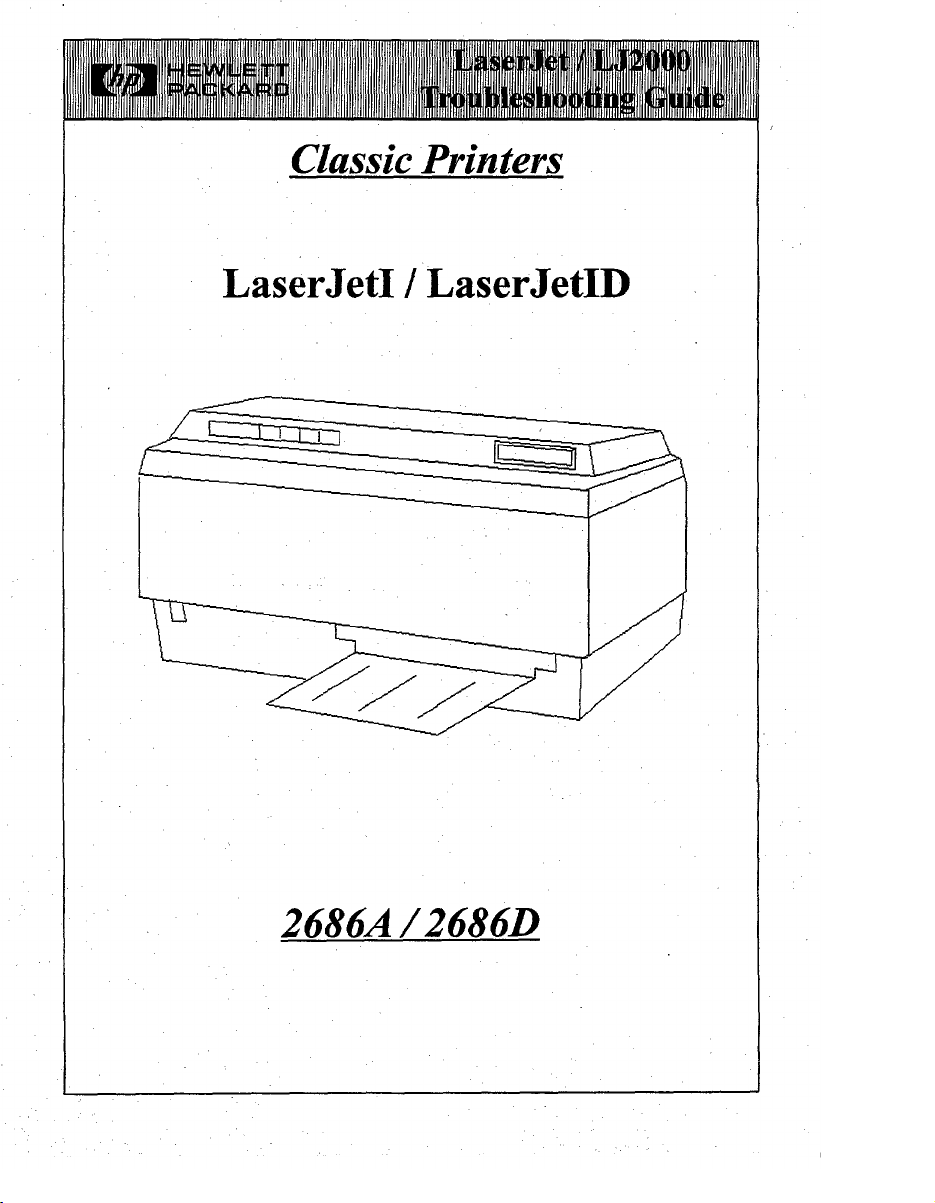
Classic Printers
LaserJetI / LaserJetID
I
2686A /2686D
Page 27
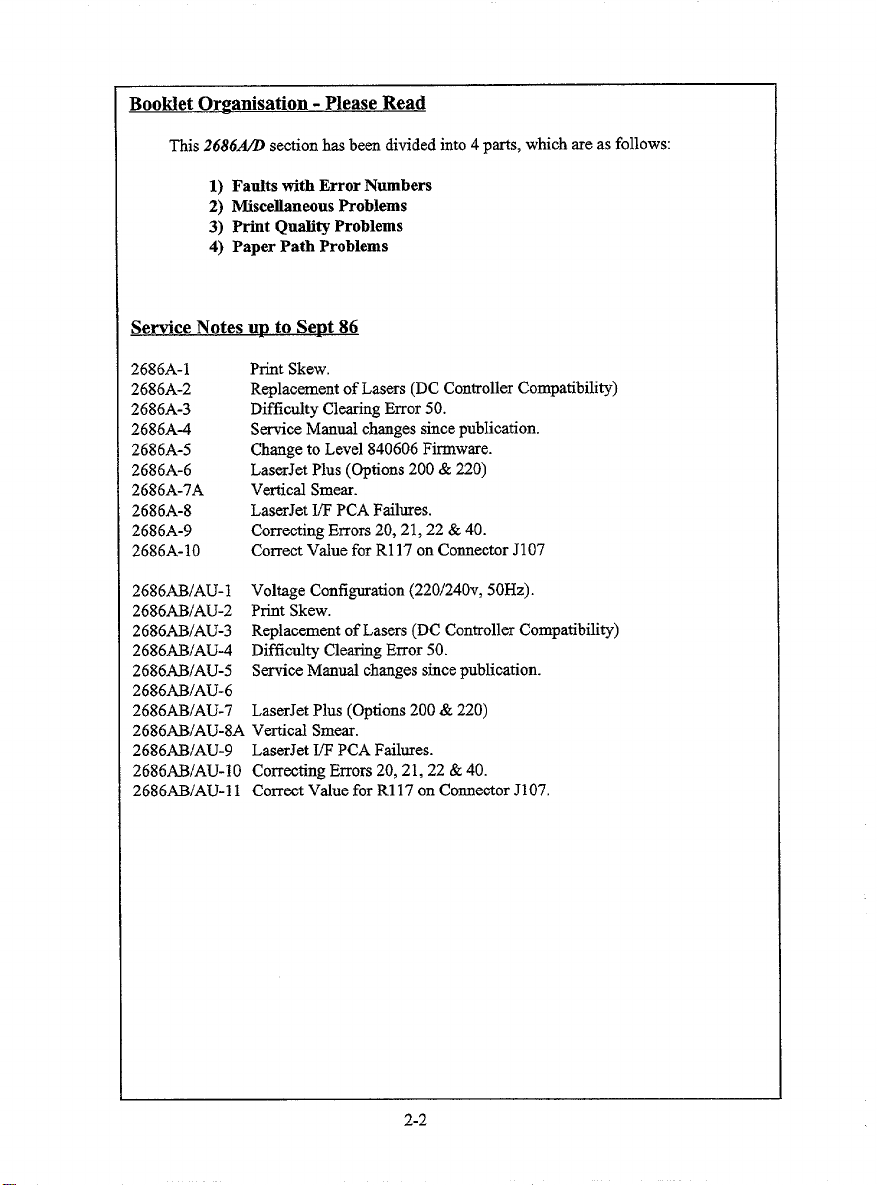
BooMet Or~anisation - Please Read
This 2686fl section has been divided into 4 parts, which areas follows:
1) Faults with Error Numbers
2) Miscellaneous Problems
3) Print Quality Problems
4) Paper Path Problems
Service Notes UD to SCDt 86
2686A-I
2686A-2
2686A-3
2686A-4
2686A-5
2686A-6
2686A-7A
2686A-8
2686A-9
2686A-10
2686ABIAU-1
2686BIAU-2
2686ABIAU-3
2686ABIAU-4
2686ABIAU-5
Print Skew.
Replacement of Lasers (DC Controller Compatibility)
Di;fictity Clearing Error 50.
Service Mannal changes since publication.
Change to Level 840606 Firmware.
LaserJet Plus (Options 200 & 220)
Vertical Smear.
LaserJet I/F PCA Failures.
Correcting Errors 20,21, 22& 40.
Correct Value for R117 on Connector J107
Voltage Configuration (220/240v, 50Hz).
Print Skew.
Replacement of Lasers (DC Controller Compatibility)
Difficulty Clearing Error 50.
Service Manual changes since publication.
2686ABIAU-6
2686~lAU-7
LaserJet Plus (Options 200 & 220)
2686AB/AU-8A V@ical Smear. 2686AJ3/AU-9 LaserJetW PCA Failures.
2686AB/AU-10 Correcting Errors20, 21,22& 40.
2686AB/AU-l 1 CorrectValue for RI17 on ConnectorJI07.
2-2
Page 28
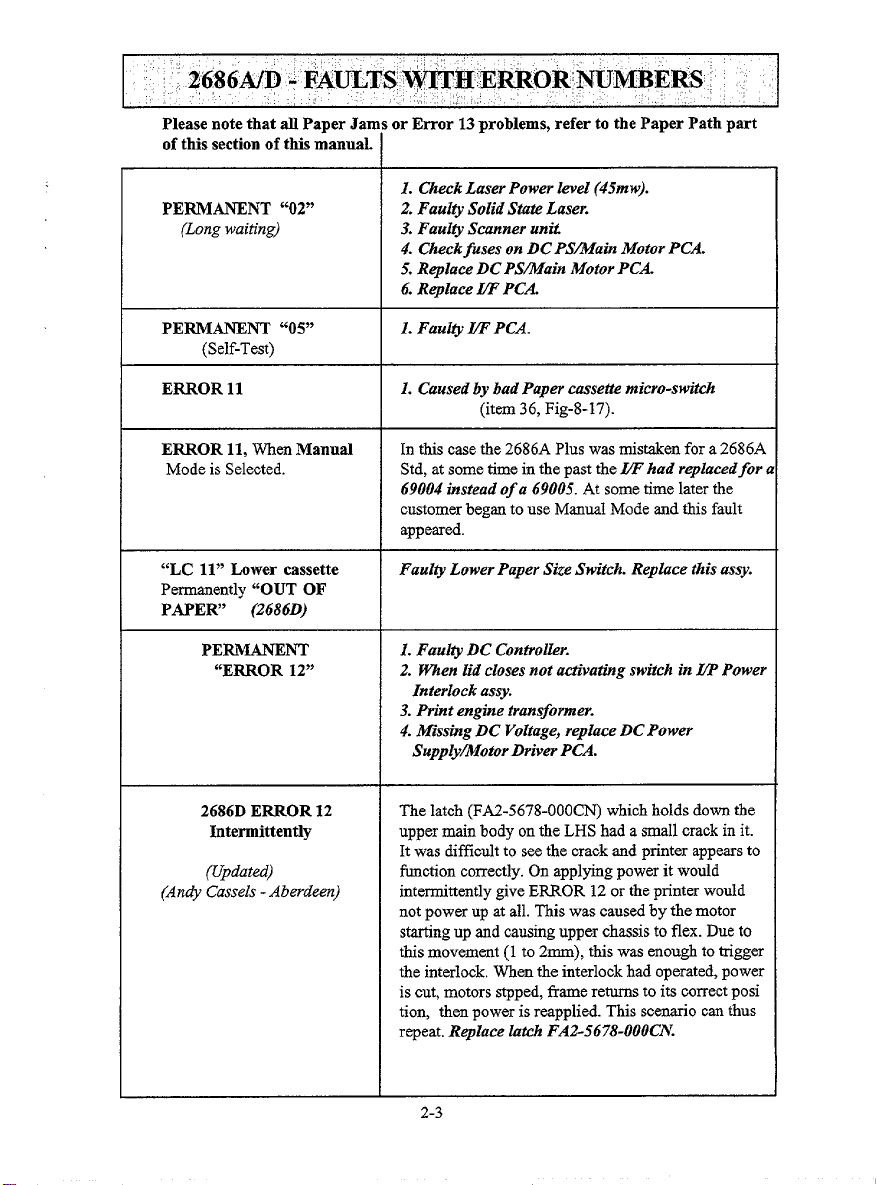
~q86wD -FAULTS*H.EtiOfiWMBERS,
Please note that all Paper Jams or Error 13 problems, refer to the Paper Path part
of this section of this manual.
1. Check Laser Power level (45mw).
PERMANENT “02”
(Long waiting) 3. Faulty Scanner unti
2. Faulty Solid State Laser.
4. Check fuses on DC PS~ain Motor PCA.
5. Replace DC PS/Main Motor PCA.
6. Replace W PCA.
PERMANENT “05”
(Self-Test)
ERROR 11
ERROR 11, When Manual In this case the 2686A Plus was mistaken for a 2686A
Mode is Selected. Std, atsome time in the past the W had replacedfor (
“LC 11” Lower cassette Faulty Lower Paper Stie Switch. Replace this assy.
Permanently “OUT OF
PAPER” (2686D)
PERMANENT
“ERROR 12”
2686D ERROR 12
Intermittently
(Updated)
(Andy Cassels - Aberdeen)
1. Faulty ~ PCA.
1. Caused by bad Paper cusette micro-switch
(item 36, Fig-8-17).
69004 instead of a 69005. At some time later the
customer began to use Manual Mode md this fault
appeared.
I. Faul~ DC Controller.
2. When lid closes not ati”vating switch in ~ Power
Interlock assy.
3. Print engine transformer.
4. Misskrg DC Voltage, replace DC Power
Supply~otor Driver PCA.
The latch (FA2-5678-OOOCN)which holds down the
uppermain body on the LHS had a small crackin it.
It was difficult to see the crackand printer appearsto
function correctly. On applying power it would
intermittently give E~OR 12 or the printer would
not power up at all. This was caused by the motor
starting up and causing upper chassis to flex. Due to
this movement (1 to 2mm), this was enough to trigger
the interlock. When the interlock had operated, power
is cut, motors stpped, frame returns to its correct posi
tion, then power is reapplied. This scenario can thus
repeat. Replace latck FA2-5678-OOOCN.
2-3
Page 29
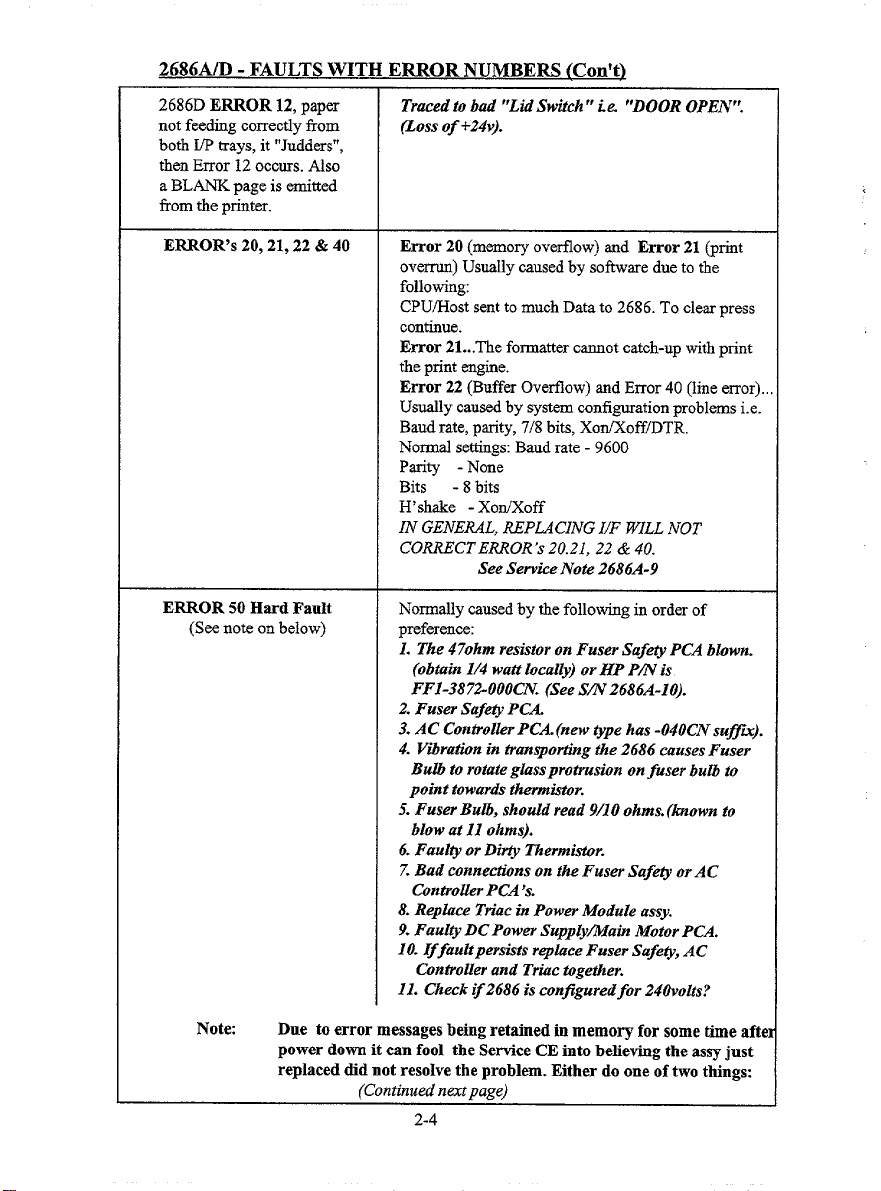
2686A/D - FAULTS WITH ERROR NUMBERS (Con’t)
2686D ERROR 12, paper
not feeding correctlyfrom
both I/P trays, it “Judders”,
then Error12 occurs. Also
a BLANK page is emitted
from the printer.
ERROR’s 20,21, 22& 40
ERROR 50 Hard Fault
(S= note on below)
Traced to bad “Lid Switch” ie “DOOR OPEN”.
(Loss of +24v).
Error 20 (memory overflow) and Error 21 (print
ovemm) Usually caused by software due to the
following
CPU~ost sent to much Data to 2686. To clear press
continue.
Error 21...The formatter cannot catch-up with print
the print engine.
Error 22 (Buffer Overflow) and Error 40 (line error).,
Usually caused by system configuration problems i.e.
Baud rate, parity, 7[8 bits, Xofioff/DTR,
Normal settings: Baud rate -9600
Parity - None
Bits
-8 bits
H’stie - XotiXoff
IN GENERAL, REPLACING IIF WILL NOT
CORJU?CTERROR
‘S 20.21, 22& 40.
See Servke Note 2686A-9
Normally caused by the following in order of
preference:
L The 470hm resistor on Fuser Safe@ PCA blown.
(obtain 1/4 watt local~) or HP PIN is
FF1-3872-OOOCN.(See Sfl 2686A-10).
2. Fuser Saf@ PCA.
3. AC Controller PCA.(new @pe has -040CN suffm).
4. Vibration in @anspo&g the 2686 causes Fuser
Bulb to rotate glass protrusion on fuser bulb to
point towards thermistor.
5. Fuser Bulb, should read 9/10 ohms. (known to
blow at 11 ohms).
6. Faulty or Dirty Thermistor.
Z Bad connections on the Fuser Saf@ or AC
Controller PCA ‘s.
8. Repbce The in Power Module assy.
9. Faul@ DC Power SuppfyMain Motor PCA.
10. Iffaultpersists replace Fuser Safety, AC
ControUer and Trtic together.
11. Check z~2686 is conjiguredfor 240volts?
N’otc Due to error messages being retained in memory for some time afte
power down it can fool the Service CE into believing the assy just
replaced did not resolve the problem. Either do one of two things:
(Continued nextpage)
2-4
Page 30
26~6AM - FAIJ1 ,TS WITH F.RROR NITMRW,RS (Pnn$tl
-. --.-— ------- .----- -. =.- -.. .w...__=.- ,_w-.
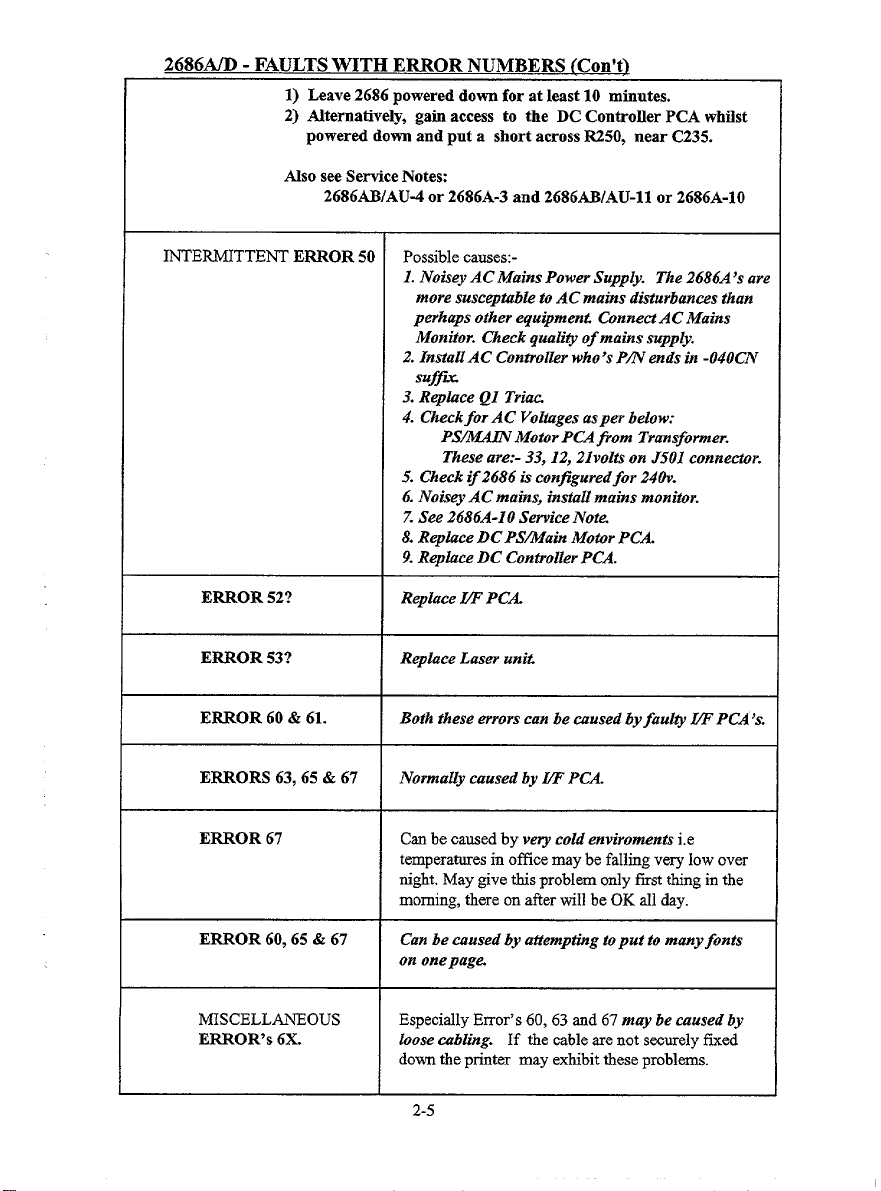
1) Leave 2686 powered down for at least 10 minutes.
2) Alternatively, gain access to the DC Controller PCA whilst
powered down and put a short across R250, near C235.
Also see Service Note~
2686N/AU-4 or 2686A-3 and 2686~/AU-11 or 2686A-10
INTERMITTENT ERROR 50
ERROR 52?
ERROR 53?
E~OR 60 & 61.
ERRORS 63, 65& 67
Possible causes-
1. Nohey AC Mains Power Supply. The 2686A’s are
more susceptabfe to AC mains disturbances than
perhaps other equipment ConnectAC Mains
Monitor. Check quality of mains supply.
2. InstallAC Controller who’s Pm ends in -040CN
Suffa
3. Replace QI Triac.
4. Checkfor AC Voltages asper below:
PS/W Motor PCA @om Transformer.
These are:- 33, 12, 21volts on J501 connetir.
5, Check z~2686 is conjiguredfor 240v.
6. Noisv AC mains, instaU mains monitor.
Z See 2686A-10 Service Note.
8. Replace DC PS~ain Motir PCA.
9. Replace DC Controller PCA.
Replace ~ PCA
Replace Laser unit
Both these errors can be wused byfaulty W PCA ‘s.
Normally caused by LT PCA.
ERROR 67
ERROR 60, 65& 67
MISCELLANEOUS
ERROR’s 6X.
Cm be caused by very cold environmentsi.e
temperatures in office maybe falling very low over
night. May give this problem only first thing in the
morning, there on after will be OK all day.
Can be caused by atteinptkag to put to many fonts
on one page
Especially Error’s 60,63 and 67 may be caused by
loose ubfing. If the cable are not securely fixed
down the printer may exhibit these problems.
2-5
Page 31

2686A/D-,MISCELL~EOtiS’PROBLEMS ~~
ARC~G? Check all earthing assoicated with Transfer Corona,
ensure all earth connection and all wires associated
with Varistor PCA have good continuity, check 16Mej
ohm(R9) by Transfer Corona is OK.
No FRONT PANEL 1. Probably the I/F power supply that lies at the botton
DISPLAY?
of the 2686A. Check the 5 volts coming from this
PCA.
2. Faulty W PCA.
3. Check wires under VF Power Supply have not been
punctured, especially after reassembly. If are has
not been taken to route lower cables carefuUy, this
cause unit to Smoke and hmage L!FPCA.
VERY LONG “WAITING
FOR DATA” 02 on Display
FrontPanel.
Will not recognise NEW
CHARACTER FONTS
92286J, 92286G & 92286H.
Laserjet 2686 plus outputs at
50% of expected rate with
some applications when using Note Throughput OK when using internal default font.
operational fast font cartridge.
TONER CARTRIDGE 1. Customer not shaking ca~”dge.
problem’s
Customer changes horn the
2686A to 2686D LJ. When unit, be aware you may increase the amount print
using PREP~ED paper
that was previously used on the difference between the first printed line on 2686A
2686A it was found the text hat’
displaced by approximately
1.58mm in relationship to the therefore a resolution may NOT be available The
preprinted lines or boxes. customer may need to compensate by either changing
See “PERMANENT 02” in 2686WD “Fatits with
ErrorNumbers”at the beginning on this section of
manual.
Reference Servtie Note 2686A-5.
Reference Service Note 2686A-6.
2. End stopsfallen out (see Video). Problem only sea
in the early introduction phase of this pm”nter.
3. Drum Shutter damage (L @ Rfade).
4. TONER Cartridge in red zone
5. DFS Cartridge
6. See “LASER PRINTER PRINT QUALITT”
book (UK only)
Try adjusting thephysicalpositin of the scanning
skews on page (See S/N 2686A-1). Note there is a
when compared to a 2686D. The aetualphysicalpape,
path length between the printers is slightly dz~eren~
the position of the preprinted images of repositioning
laser printer images.
2-7
Page 32
““”.. = -
. . -------- . . --- .,- . ----------
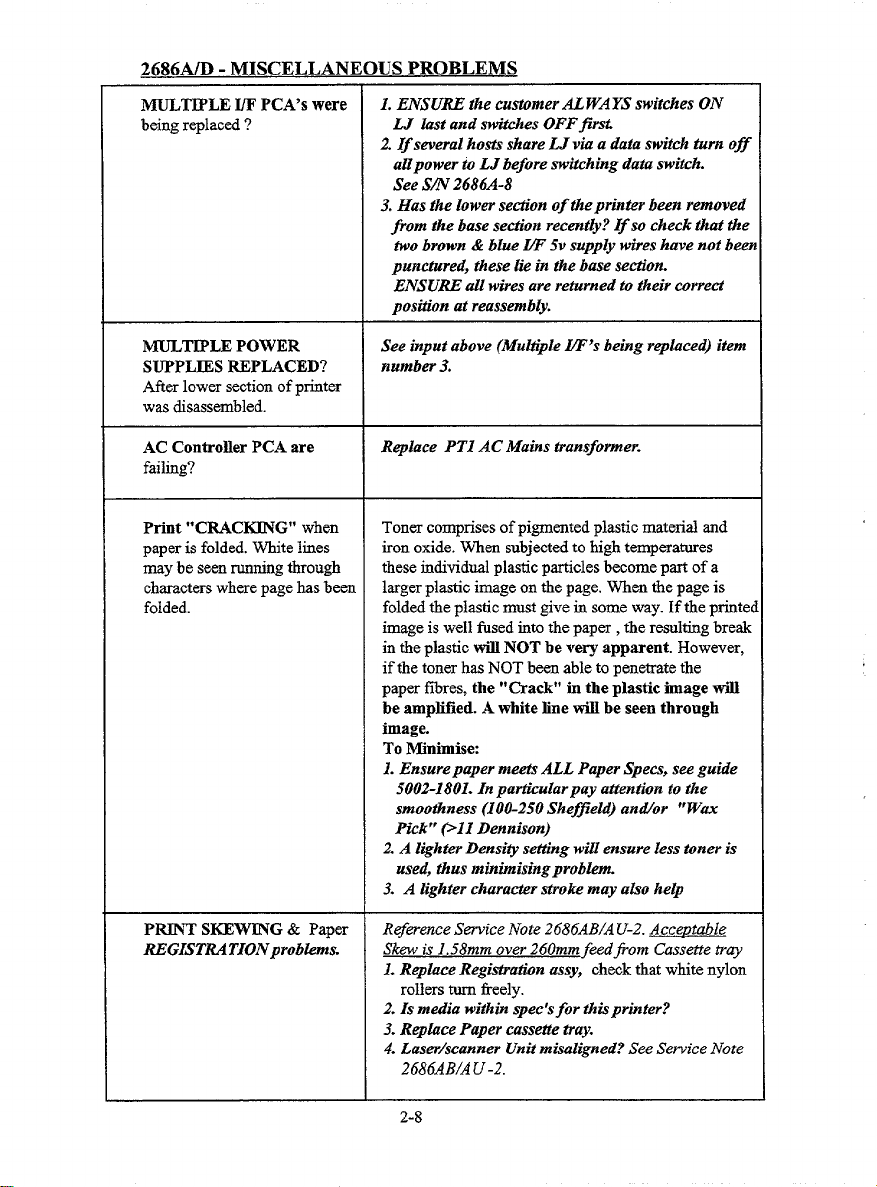
MULTDLE ~ PCA’S were
being replaced ?
MULTIPLE POWER
SUPPLIES REPLACED?
After lower section of printer
was disassembled.
AC Controller PCA are
failing?
Print “CRACKING” when
paper is folded. White lines
may be seen rnnning tbrougb
ch-cters where page has been
folded.
1. ENSU~ the customer AL WAYS switches ON
LJ lmt and switches OFFfirst
2. If several hosts share LJ via a data switch turn off
aZZpowerto LJ before switching data switch.
See S/N 2686A-8
3. Has the lower section of theprinter been removed
from the base seti”on recent~? ~so check that tie
two brown & blue ~ 5V supply m“reshave not been
punctured, these lie in tie base seti”on.
ENSURE all wires are returned to their correct
position at reassemb~.
See input above (Mutiple W’s being replaced) item
number 3.
Replace PT1 AC Mains transformer.
Toner comprises of pigmented plastic material and
iron oxide. WIIcn subjected to high temperatures
these individual plastic particles become part of a
larger plastic image on the page. When the page is
folded the plastic must give in some way. If the printed
image is well fused into the paper , the resulting break
in the plastic will NOT be very apparent. However,
if the toner has NOT been able to penetrate the
paperfibres, the “Crack” in the plastic image will
be amp~led. A white line will be seen through
image.
To Minimise:
1. Ensure paper meets ALL Paper Specs, see guide
5002-180L In patiularpay attention to the
smoothness (100-250 Sheffield) andor “W&
Pick” ~11 Dennison)
2. A lighter Density seti”ng WD
ensure lesstiner is
used, thus minbnisingproblem.
3. A lighter character stroke may ako he~
Pm S~W~G & Paper R@wence Service Note 2686AB/A U-2. AcceDtab~e
REGISTRATIONprobiems.
Skew is 1.58mm over 260mm feedfiom Cassette tray
L Replace Registration assy, check that white nylon
rollers turn freely.
2. Is media within spec’sfor this printer?
3. RepCacePaper cassette tray
4. Laser/scanner Unit misaligned? See Service Note
2686AB1AU-2.
2-8
Page 33

-“””mu - ,T.l”uuuum, ,Uu ““ . ..WJDMML.1” ,G”M .L
~~G EDGES OF
ENVELOPES “Wrinkled”
Adjust springtension on FuserPressurerollers, Mis
may help. Note, envelopes areproblematr”c due to
as it passes throughfuser tha-r construction. Contact RCE for further informs
assy. tion
Customer printing BOTH Thismodel of bserJet is a SIMPLEXprinterandis
SIDES of tke Page or
DUPLEX printing?
~S can print on both sides, thisprti”ce is not supported
WY cause paper jams, paper
not designedfor Duplex printing.Although this printer
byHP. For the generalHP statementon “Duplex
feeding or print quality printing v Simplex” please referenceHP Reference
problems. Guide (Green Book) section 3.
Customer RE~ED~G paper, As above ref= to HP general statement on “Duplex
not two sided printing? printing v Simplex” in HP Reference Guide (Green
Book) seetion 3.
PAPER JAMS/MISFEEDS/ Interleaving, where a variety ofpaper is placed in the
SKEWING caused by
paper tray, is not recommended by HP. ~ practice k
customers practice of likely to lead to Paper jams& Misfeeds. For the general
~ERLEAVING ~ermt HP statement on ‘interleaving Paper” please reference
types ofpaper m paper trays? HP Reference Guide (Green Book) section 3.
2-9
Page 34

2686A/D-PR~
T QUfiITY PROBLEMS
MARKS
REGULAR INTERVALS
Prints in only a sma~ portion
of the page with “Print Test”
and only a small portion of
“Self Test”. See below:
ELONGATION OF PRINT 1. Replace DC PS,ain Motor Pa
in the direction of paper
movement.
BACKGROUND
ON PAPER AT
If marks repeat at re~ar intervals, measure distance
between marks to determine where tie problem lies:-
Marks %375” apart - Drum Related
8.0” apart - Drum gear Related
2.5”
apart - Fusm Roller Related
Paper tray size microswitck problem. Check
operation of these switches, alternatively paper size
switch cables may be defective. There are 3 micro-
switches to the left of the paper tray, which sense type
of paper tray (A4, 1lx 8.5, etc) installed.
2. Check drive mechanism, gear train& motor
3. Replace main motir
4. Is the use of Non-HP Toner Cart’s causing this
pbm?
] 1. AdjustPriittDensi@ dial
2. Ground Spring in centre of drum dn”vegear, is it
damaged or missing?
3. Check Laser Power adjustment
4. Replace HVPS.
5. Replace DC Controller PCA
6. Replace DC Power Supp& ~ain Motor Dvr PCA.
VERTICAL SMEAR problem.
Thin grey band in approx
middle of paper. Band in the
direction of paper movement.
This band is Approx 6 to 12m
wide. This problem is also
known as “VERTICAL
FOGGED STRIPES”.
WAW PRINT
Reference Service Note 2686A-7.
L Pay special attention to the quality of media used
2. Supply customer with 2686A Paper Spec’s Guidfi
3. Replace Feed Guide Assy (RGI-1039-OOOCN)
4. Dirty Primary Corona.
5. Tiy replacing Toner Cartridge.
6. Clean interior ofprinter.
1. Repbce Scanner unit
2. Rplace DC Controller PCA.
2-11
Page 35

2686A/D - PRINT OUALITY PRO.BLEMS (Con’t)
MARK ON PAPER in line 1. Separation belt installed upside down.
with SEPWTION BELT. 2. Dirty Separation Belt
3. Dirty Separatin RoUer.
4. Replace Toner Cartridge.
GHOST CHARACTER on the
Ov@lling t?tepaper tray can thepick-up rollers to
43rd line? drag on the paper, causing motor to slow down,
causing EP Cartridge to stall slightly. Causing inprope
transfer of printed data born drum to paper.
LIGHT WGES?
1. Adust Print Densiq Dial
2. Try Laser QuaZi@Paper.
3. Replace Transfm Corona.
4. Check Laser Power. (Laser Checker Too~
5. Replace HWS.
6. Replace DC Controller PCA.
Z Check Drum Sensitivity switches.
RANDOM LIGHT
Clean centre of large brass drum drive gear.
PATCHES over the page BEWARE, do not darnageorlose spring in the
orGRADIENT from left to
centreof this brassgear.
right?
LIGHT PRINT ON RHS
side of paperin the diection of
paper movement.
1. Due to a missing or loose earth conneti”on on
2686A situated nmr the RHS hinge as viewed
@om the front of theprinter.
2. Missing Doctor bladepin in EP Ca~”dge, replace
EP tirtridge. Have not seen this problem for a ion,
time
3. Replace Varistor PCA, there maybe dz~ferences of
outpub ie narrow bands of darkprint at the far
RHS, whereas a missing doctor blade pin wdl not
LIGHT AREA bottom RHS
Replace Feeder Guide Assy andpossibly the
md irre@ar. Transfer Corona.
LIGHT PRINT in same
position down page? Always
in dirmtion of paper movement.
Image very light in in this area.
BLANK PAGES?
BLACK PAGES?
Clean Optics Exit mirror to Drum.
L Empty toner cartridge?
2. Has seal been removed in toner ca~”dge?
3. Replace Trmsfer corona, wire broken?
4. Replace HWS.
5. Replace DC Controller.PCA.
1. Replace EP Toner cartn”dge
2. Replace HVPS.
2-12
Page 36

2686A/D - PRINT C)UALITY PROBLEMS_(_Conlt)
Sharp THIN LINES
Horizontal Lines across
Page
1. Replace Scanning Assy
2. Replace Laser Unit, check laser power.
3. Replace DC POwer Supply~ain Motor Dvr PCA.
RANDOM GAPS between
connective lines across page?
THIN VERTICAL “BLACK”
LINES/STWES down page?
THIN VERTICAL “~ITE”
L~S/STRIPES down page?
BANDS Down page ? Fuser
Rollers scored. on thefuser separation pawls (page 8-58
PRINT SKEWING & Paper
REGIST~TIONproblems.
Faulty brass dram drive gear, the centre collar was
protruding wtich prevented the silver pin locking in th
end of the EP cartridge.~is resulted in the b
stopping intermittently.
1. Is Fuser Cleaning Pad dirty? Replace if necessary..
2. Scotig onfuser roller? replace z~necessary.
3. Scoring on EP Ca~”dge, try another cartridge
1. Replace Totier Cartn”dg&
2. Dirty Fuser Cleaning Pao!
3. Dirty Transfer Corona wire.
4. Ckeckfor obstacles or OP mirror contamination
in laser beam path. Laser Shutter?
5. Reptice stunning assy.
Scoring is normally caused by a build up of dust, etc
This problem is accentuated by the use of non-sup
ported media i.e paper with a high cotton content or
with talc/clay content. See 2686 Paper Spec Guides.
The use teflon coated darnage resistant fuser rollers
have been found to be more reliable. Use Higk Quali@
Laser medti asperpaper spec’s.
Reference Service Note 2686AB/A U-2. Acceptable
Skew is 1.58mm over 260mm feedfrom Cassette tray
1. Replace Registration assy, check that white nylon
rollers turn freely.
2. 1smedia witkin spec’sfor this printer?
3. Replace Paper cassette tray.
4. Laser/scanner Unit misaligned? See Service Note
2686AB/A U -2.
item34).
STAINS on REAR of PAPER
EP Cartridges DEGRADING
extremely quickly of found to
be D.F.S on arrival.
I. Clean interinr ofprinter.
2. Dirty Fuser Cleaning Pad.
3. Replace Fusing assy.
Check the EP Cartridges are HP and are not refilled
EP Cartridges. BEWARE, although the cartridges
may be in a HP or look alike boxes, it still could be of
the refilled variety.
2-13
Page 37

2686ti26i6D-P~ER:PATH PROBLEMS
ERROR 13’s Paper Jams
(Summary)
FJRST PRJNTED PAGE
JAM’s, but operates OK thereon
afterwardsuntil the printerhas
been turnedoff orunused for
some time. @RROR 13)
1. Using ~SUPPORTED PAPER, 79 grrns max,
use high quality laser bond paper to test.
2. Paper Jams/Smears - caused by broken or
missing separadon belt or incorrectly instalIed
3. Paper Jams caused by EP Toner Cartridge shutter
not opening. The plastic strut in the base(~S)
base (US) whti opens this shutter was broken.
4. Paper Jam caused by Paper Cassette clutch collet
(item-4,Fig 8-IV hose. This also applies to
2686D’s.
5. Paper jams at rear access door - due to a resti”ctin
in the guidefiom the rear aaess up to the
registration assy. Use slightly stiff cardstock md
push up from the rearaccess doorareainto this guide
to clearobstruction.
6. PaperJamat Regishation area- Registration
solenoid binding or shutter not moving correctly.
Replaced regis~tion assy.
7. Paper Jam at Registration Assy - due to cover hinges
incorrectly set causing a lack offriction between the
registration rollers.
8. Paper Jam at Fuser Assy - caused byfuser exit
sensor.
See page 8-49 in Service Manual, item 9 Registration
Shutterassy. On this assy thereis arubbergrommet
which when the printeris unused for aperiod of time
sticks, This causes the Registration assy not to operate
correctly, thus Paper Jam3einove this grommet as a
temporary measure, replace registration assy at a later
time z~not immediately available.
FAJSE PAPER JAMS, no
paperfed at all.
(ERROR 13)
FALSE PAPER JAMS, i.e
paperfeeds thru OK, but with
no printing, then a false paper
jam occurs. (ERROR 13)
Onpower up, beforepower
up initialisation has completed,
main motor energises ERROR
13 occurs.
Springs on Registration Shutter assy not positioned
correctly,fooling the LJinto belieting paper has
stuck in this assy. i.e. sensor activated at all times.
Reposition these springs into its correct location or
replace registration assy.
Ref page 8-37 item 4/25, the allen screw may come
loose or it may slip on its shaft. This results in the “D
cassette pick roller incorrectly positioned.
1. F&t edge of ‘D’ rolJer should face paper tray, or
2. Too much paper in paper tray may cause the same
problem.
Registration Sensor arm binding. A misalignment of
the Registration Shutter Spring (page 8-49, item 15)
Realign to wrrectproblem.
2-15
Page 38

A“””-. ””” U - .-. U.. .-. .1 . I.VHUU,..” ,G”I. *Z
PAPER JAMM3NG at rear
of printer,in areabetween
Fromrear of 2686A, ptil back Lower Castie guide
(page 8-3’7,item 7), push somefair~ rigidpaper
rear access door and Reg Assy. up awards registration area @ clear any blockage.
Alternatively the guide plates in this area are too C1OS,
and W-llhave to be stripped down to correct this
problem.
ERROR 13- 1st page leaves Replace Exit fuser Sensor.
1“protruding fiorn fuser assy.
ERROR 13-
OCCurS when
leading edge of paper is about
Replace EP Catige, either shutter not opening or it
is restricting paper movement.
to enter separation belt roller.
ERROR 13- Occurs after Repkace back door springs (RS1-2011-OOOCN).
paper is picked up, dl movement stops then jam message.
ERROR 13 when warming up.
1.Registration pbte bent or misaligned, also cheek
Does not get to “00 READY “ springs on this assy.
condition before paper jam 2. Replace Registradon assy.
occurs.
PERMANENT ERROR 13 The 24v was being pulled down by faulty AC Cent
on switching-on.
PCA. Replaee AC Controller PCA.
ERROR 13, 6mm of Paper Replace Fuser Exit Sensor.
protruding out of the Fuser
Rollers.
2686A Paper Jams when user Paper Feed clutch found to be heavily congeled in
begins operating printer for
firsttime in the morning. resolvedprobkm.
the
grease/paper dust. ~roughly cleaning clutd
No problems after first initial
nasage.
LOSING TOF when using 1. Check quali~ of Labels.(Use Ave~)
label paper horn the manual 2. Repkrm Manual Feed Assy(FG1-2354-OOOC~.
feed I/P tray. 3. Check alignment of manual idler poller on Reg
assy in relationship to rotir on the manual feed
assy.
2686D -in FACE-DOWN
MODE RH edge of paper
rollers sl@ping on paperpick-up shafi (item I.
Nylon
Fig 8-21).
BENT over.
2-16
Page 39
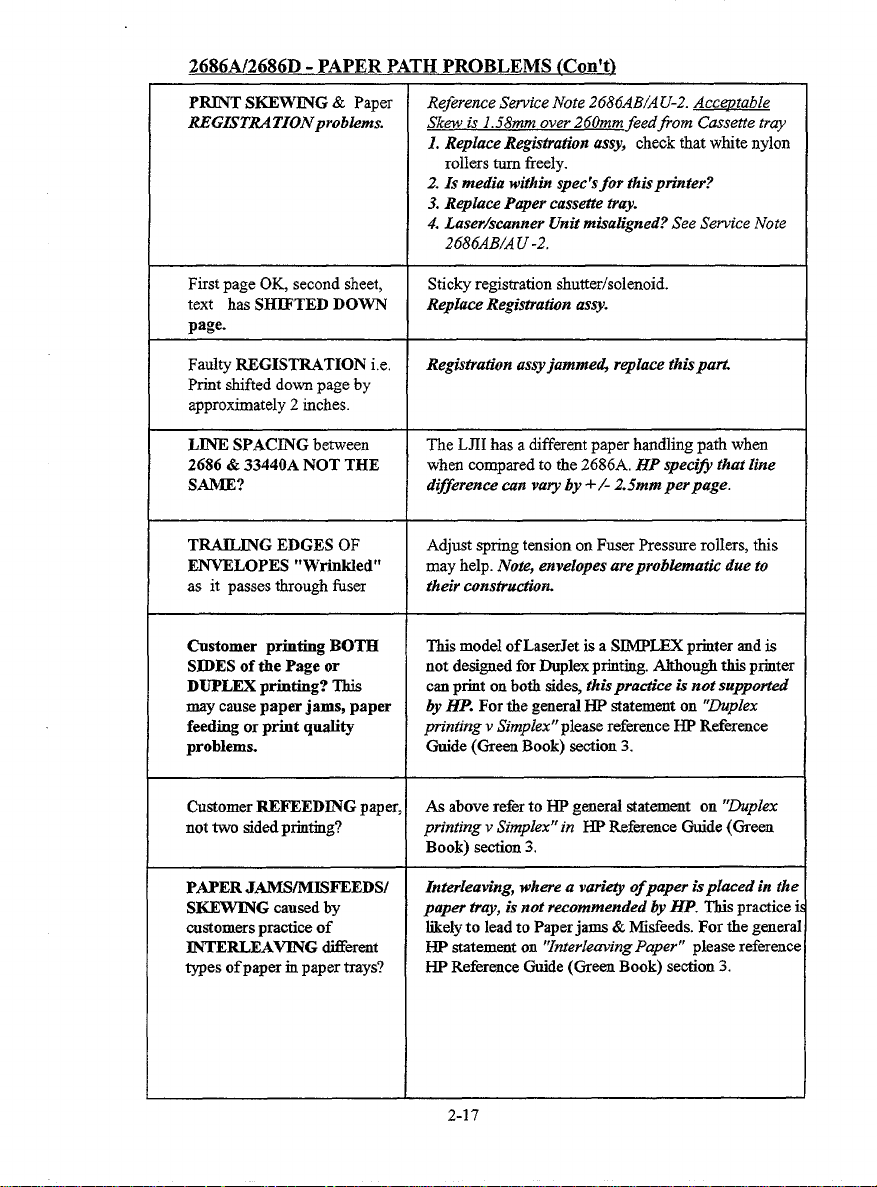
2686A/2686D - PAPER PATHPROBLEMS (Con’t)
PRINT SKEW~G & Paper Reference Service Note 2686AB/A U-2. Accqtable
REGISTUTIONproblems. Skew is 1.58inm over 260mm feedfiom Cassette tray
1. Replace Registiatio@ assy, check that white nylon
rollers turn freely.
2. Is media withti spec’sfor this printer?
3. Replace Paper cassette tray.
4. Laser/scanner Unit misaligned? See Service Note
2686AB/A U -2.
First page OK, second sheet,
text has SHETED DOWN
Sticky registration shutierisolenoid.
Replace Registration as~.
page.
Faulty REGISTRATION i.e.
Print shifted down page by
approximately 2 inches.
LINE SPACING between The LJII has a different paper handling path when
2686 & 33440A NOT THE when compared to the 2686A, HP specifi that Iine
Registration assyjammed replace thispati
SAME? d~foence uir vary by +/- 2.5mm perpage.
T~G EDGES OF
ENVELOPES “Wrinkled” may help. Note, envelopes areprob&matti due to
as it passes through fuser their instruction.
@stomer printig BOTH
SIDES of the Page or
DUPLEX printing? Tbia
may cause paper jams, paper
feeding orprint quality
problems. Guide (Green Book) section 3.
Customer REFEEDING paper,
not two aidedprinting?
Adjust spring tension on FuserPressurerollers, this
This model of LaserJetis a SIMPLEX printerand is
not designed forDuplex printing.Although this printer
canprint on botb tide$ thisprad”ce is not suppotied
byHP. Forthe generalHP statementon “Duplex
printing v Simplex” please reference HP Rderence
Aa above refer to HP general statement on “~plex
printing v Simplex” in HP Refmence Guide (Green
Book) section 3.
PAPER JAMS/M~FEEDS/
SKEWfNG caused by
customers practice of
INTERLEAVING Merent
~es of paperin paper tiys? HP Reference Guide (Green Book) section 3.
Interleaving, where a variety ofpaper isplaced in the
paper tray, is not recommended by HP. Tbia practice i
likely to lead to Paper jams& Mifeeds. For the general
HP statement on ‘!IrUerlem”ngPaper” please refwence
2-17
Page 40

2686D - PAPER PATH PROBLEMS
2686D - ERROR 13, feeds OK Replace registration asv and CHECK quality of the
from upper tray, jams from
lower tray. ALWAYS prints Ist
page, 2nd page is just leaving
the fuser assy, 3rd page is half
way up the rear acc=s door,
paper jam occurs
2686D - When paper is fed
from UPPER TRAY, one sheet
is fed incorrectly from the
LOWER TRAY?
2686D, When labels are fed
mannaJly, the image loses
TOF and also manual I/p seems
to snatch at label when feeding . 000CW to wrreti
ERROR 13- 2686D after pape r Delivery sensor PS6 faul~, though it seemed OK
exits delivery exit area in face
in face up mode orin face down
mode. This erroroccurs when
paperis aboutto enterthe
holding trayarea.
ERROR 13- 2686D, PAPER
JAMS IN HOLDING TRAY
AREA. Paper entering holding
Tray from fuser assy collides
with paper about to exit the
the holding tray.
media being used If paper is NOT checked the
problem will most likely recur again.
NOTE: Media is known to cause this problem, use
paper that meets 2686A/D Paper Spec’s guide.
Stic@ lower cJutch,possibly caused by using
incorrect lubrkant. Dismantle clutch, clean and use
light oil to lubricate. (3-in-One)
Replace clutch spring and other parts if necessary.
DO NOT use grease.
Ensure Idler roller on the Manual feed assy are
aligned with the lower Manual feed roller. Bend
metalwork on idler as~ (Page 8-48 Pm FGl-2354-
when measured with a DVM.
1. Adjust pot on Paper Control PCA, this controls ti{
speed ofpaper exiting the holding tray.
NOTE:- these pots are initiaJly factory set
2. Replm% Paper Control PCA.
2686D ERROR 12
Intermittently
(Up&te@
(Andy Cassels - Aberdeen)
The latch (FA2-5678-OOOCN)which holds down the
upper main body on the LHS had a small crack in it.
It was difficnJt to see the crack and printer appears to
function correctly. On applying power it wodd
intermittently give ERROR 12 or the printer would
not power up at dl. This was caused by the motor
starting up and causing upper chassis to flex. Due to
this movement (1 to 2mm), this was enough to trigger
the interlock. When the interlock had operated, power
is cut, motors stpped, frame returns to its correet posi
tion, then power is reapplied. This smario crarthus
repeat. Replace latch FA2-5678-OOOCN.
2-18
Page 41
. . ..-
. ... . .. . . . . .. .
~ FACEDOWN mode right
1.----.,. ” ,-” - .2
Nylon roller slipping onpaper-up sha@ (item 15,
hand edge of paper has bent Fig 8-21).
over.
~stomer changed from 2686A TW adjusting position of scanning assyj be aware the
the 2686D. When using paper amount of print skew on printed page may increase
preprinted paper on the 2686D (see S/N 2686A-1). Note there is a difference between
which was used successfullyon
the 2686A, the
text has moved the 2686D. In this case, a problem resolution may not
the 1st printed line on the 2686A, when compared to
by approximately 1.58mm. possible which wuld be offered to the customer.
There are differences between the physical paper paths
The printer has TWO PAGES The paper tray clutches are NOT stopping after one
coming out of the fuser assy. revolution. Try:
The 1st page is 25 to 1. Check if tension provided by the solenoid armature
5Gmrnin front of the 2nd page. spring is sufficient.
2. Replace clutch spring and lubricate with light oil.
(e.g. 3-in-One Oil).
Customer printing BOTH This model of LaserJet is a SfMPLEX printer and is
SIDES of the Page or not designed for Duplex pfiting. Athougb this ptiter
DUPLEX printing? This can priot on both sides, this practice is not suppotied
WY cause paper jams, paper
byHP. Forthe generalHP statementon “@lex
feeding or print quality printing v Simplex” please referenceHP Reference
problems. Guide (GreenBook) section 3.
CustomerHEFEEDING paper, As above refer to HP general statement on “DrAplex
not two sidedpriutiug? printing v Simplex” in HP ReferenceGuide (Green
Book) section 3.
PAPER JAMS/MISFEEDS/ Interleaving, where a vm”ety ofpaper is placed in the
SKF~G caused by
paper tray, is not recommended by HP. This practicei
customerspractice of likely to leadto Paperjams& Weeds. Forthe gened
INTERLM~G ~erent HP atatemimton ‘Interleaving Paperf’ please refaence
types of paperin papertrays? ~ Refmence Guide (Green Book) section 3,
2-19
Page 42

2686A/D - MANUAL FEED PROBLEMS
2686D, When labels are fed
manually, the image loses
TOF and also manual I/P seems mtilwork on idler assy (Page 8-48 Pm FGZ-2354-
to snatch at label when feeding.
LOSING TOF when using 1. Ckeck quali~ of Labels. (Use Avery)
label paper fed from manual 2. Replace Manual Feed Assy(FG1-2354-OOOCN).
feed input tray. 3. Ckeck alignment of manual idfer roller on.
NO MANUAL FEED, Ensure correct intirfacepca is instaffed, shotid be
ERROR 11 OCCURS when 69005 not 69004.
MANUAL FEED is 02686-69005 for 2686A+ & 2686D(senal & Parallel)
SELECTED. 02686-69004 for Std 2686A (serial I/F only)
MANUAL FEED, Two pages Customer notpressing FOWEED a@ermanually
of data printed on same
page.
Feeds one sheet via manual Replace Inte~ace PCA!
IR, gives permanent status
ERROR 11 (paperout) cleared
temponaly by powering down
printer.
Ensure Idler roller on the Manual feed assy are
aligned with the lower Manual feed roller. Bend
OOOC~ to correti
feedingpaper, resultsin 2 pages of data on one page.
2-20
Page 43
Classic Printers
LaserJet II (33440)
LaserJet III (33449)
LaserJet IID (33447)
LaserJet IIID (33459)
Page 44

,., ,,,
33440#33447&33449M33459A,LaserJet Printers:
,,, .
,.
:,
Booklet Organisation -
This
section has been divided into 4 part% which are as follows
1) Faults with Error Numbers [Error 13b@aperJams) in Paper Path section]
Miscellaneous Problems
2j
Print Quality Problems
3)
Paper Path Problems [All Error 13k {Paperjam] in this section]
4)
5)
PostScript Problems
- / ~ Only Faults
6)
Appendiz
T
Service
33440A- 1
33440A-2
33440A-3
33440A-4
33440A-5
33440A-6
33440A-7
33440A-8
33440A-9
33440AB/AU-9
3344OA-10
33440A-1 1
33440A-12
Notes UD to Feb 95
Parallel UO Incompatib@
Shim Under Laser / Scanner Unit
Rubber Foot
RS-422 Operation
Laser Power
White Pages
Replaceable Ozone Filter & Housing
NTF Rate of the L3 Interface PCA
Error 41, 50, 51 or 52 Error’s and cable PiN’s
Error 12& 55 connectd to Vectrs ES, CS, ES/12 or QS using 220/240v
Lubrication of Fuser Assy Oround Contact.
Upper Cooling Fan
Fuser ~ - Potentional Safety Concern
Please Read
33440A-T-1
33447ABIAU-I
33447ABIAU-2
33447ABIAU-3
33447AB/AU-4
33447ABIAU-5
33447ABIAU-6
33447AB/AU-7
33447AB/AU-8
33447AB/AU-9
33447AB/AU- 10 Light Brown “Oil-Like” Stain on the Front Side of a Duplexed Page.
33449A-O 1A
33449A-02
33449A-03 Opening the Top cover when the Release Button is Inoperative.
33449A-04 DC Contro~er PC~ Interchangeability Notice.
Internal Cable replscemmt
AC Power Modtie (Incorrect P/N)
Lubrication of Fuser Assy Oround Conta~.
Replacement of Duplex Drive Roller Clutch
Packaging the LJD for Shipprng
Printrng Labels m Duplex Mode is NOT supported
Upper Cooling Fan
Duplex Paper Jams
HP26013A Status readback I/O
Fuser Assy - Potentional Safety Concern
LaserJet Ill Update for HP 33440 PersonneL
HP26013AStatns Readback I/O (optional I/O PCA)
3-3
Page 45

33449A-05
Fuser Assy - Potentional Safety Concern
33459A-OIA
33459A-02
33459A-03
33459A-04
33443A-1
33444A- I
33445A- 1
26013A- 1
88141A-1
33439P-01
33439Q-01
LaserJet IIII) Update for the HP33447A Stice Personnel
DC Controller PC~ Interchangeability Notice.
Fuser Assy - Potentional Safety Concern
Light Brown “Oil-Like” Stain on the Front Side of a Duplexed Page.
1 Mb Memory Card Accesso~
2 Mb Memory Card Accessow
3 Mb Memory Card Accessov
HP26013A Status readback I/O
JetScript, Warranty Processing& Quality Trackiug
HP 33439P/Q PostScript Camidges
~ 33439P/Q PostScript Cartridges
LJ2/2D/3/3D SX Entine Refurbishment Kit
Both the 240v & the 115v SX engines now have a Stice Msintenence Kt available.
This kit is msde available for long term wear and the priuter still has NO PM Schedtie provision. The Pm for fiese kits are:
This kit includes the fo~owing parts for the LJII and L3LU:
It does not include the Ozone Filter (92295@ which shotid be revlaced at 50K napes.
Printers not equipped with replaceable Ozone Housing Shodd be updated by the CE usrng
P/N RGI-1753-OOOCN
* 33449-69008 240v kit
*33449-69007 I15v kit
- 240v or I15v Rebuilt FuserAsw.
- Paper Pick-up Roller
- Separation Pad
- Transfw Corona ASV
- New ‘Yxiai” exhaustfan.
If the pfiters are LJHD or L~’s the additional parts shotid be ordered
- RG1-2499-OOOCN Upper Feed RollerAs~
- RG1-2500-OOOCN Lower Feed Roller ASW
- RF1-2548-OOOCN Lower Separation Pad
- RGI-1356-OOOCN Duplex Paper Alignment ~ObIique’~ Roller
- RG1-2498-OOOCN tiplex %ide ASW
3-4
Page 46

Service Test Tool Boards
LaserJet IMII
a vmy useti too~ for the mm LaserJets, which is installed rnto the DC
Thisis
Controller PCA at J210. An access plate can be found and this is located on the RHS of the
printer on the bottom cover pan. Its Part Number k
~ test board allows the CE to check the following visually (LED)
* +5Vdc & -5Vdc Power Supply
* +24A VdcPower Supply
*DBAC @resence of the Developer ACBias enable line)
*DBDC @resence of the Developer DC Bias enable line)
*PRLM@Y @resence of the Primary Corona endle line)
* TRANSFER @resence of the Transfm Corona endie line)
33440-67905 Service Test Tool
This tool additionally allows user to print the follotig print samples
It also has a READY INHJBIT switch which allows
AU
* Whife Page This is use~ for detecting ~t leaks, toner spills, defective EP
Drums, primary corona fkilure~ etc
* Veti-cal Lines USM for measming skew, deteeting scanner motor speed
problems (lines will be wavy).
*Horiz Lines Usefol for measuring horizontal skew, detecting paper motion
problems (lines will be wavy).
*Black Pages UseM for detecting white spots, drop outs, drum defects,
transfm system probelms, etc.
* No paper in the paper trays
* Non Paper tray
* No EP Caxt installed
* Beam Deteet igpored
* Paper Jams are ignored.
inall a very good diagnostic Tool
LJIIDAJIIID
Part Number 33447-67906
tool does all the above fimction~ but additionally provides visoal indication
This
the following solenoids enabled and Photo-Sensors operating
*SL301 (Upper Paper Feed Clut&)
*SLI (Lower Paper Feed Clutch)
*SL302 (Registration Ctit&)
*SL 7 (Switchback De@ecto~
*SL5 (Switchback Drive Contro~
*SL6 Switcirbaek Directional
*SL3 (Vert Reg Guide Roller)
*SL2 (Duplex Drive Rolle~
*SL4 (Vert Reg Guide Assy)
*PS2 (Lower Motor Clock)
*PS4 (Switchback Paper sensor-Paper Jarn
*PS5 pert Reg Assy “Home” Posiiion)
*PS301 (Upper Tray-Paper Ou+
*PS302 (Upper Tray- manual Feed)
*PSI (Lower Tray - Paper Ou#
*PS6 (Lower Tray - Manual Feed)
*PS3 (Dup Roller Sensor - Jam Dete&”on)
*PS331 (Em-tSensor- Jam Detection)
3-5
Page 47

LJII/111DC Power SUDDIV/ Error 12
Troubleshooting
With Error 12, No Display, Dead & Power Supply problems on the LJII, ~ ~ &
~ printers use the flow diagram below to help isolate the problem Do NOT jump to
cause, use a Iogicd troubleahootig for the more difEdt types of this problem Error 12
means the Top Lid is open or the +24v is missing. Use this process to ascertain why the
+24v is not present.
Error 12 or
no Disphy
u
Mea~e DC
Voltages
I
Any tig?
I
YEs
I
W PCA (Display *be lost)
Do Missing Vloltages reappear?
Do Missing Voltages reappear?
Disconnect DC Con’t PCA (Grd PIN 7 on
the DC PS/MTR DW Module, this will
Disconnect
I
Jo
DisconnectDC Contt
bring up the DC Voltages)
Do Missing Voltages reappear?
Replace DC PS / Mtr
I
PCA Loads
I
I
I
NO
Driver Amy
NO
Refer to
Troubleshooting
“Error 12Printer
open
YEs
Replace Formatter
PCA
Replace Fa@
Load
YEs
Replace DC
Controller PCA
3-6
Page 48
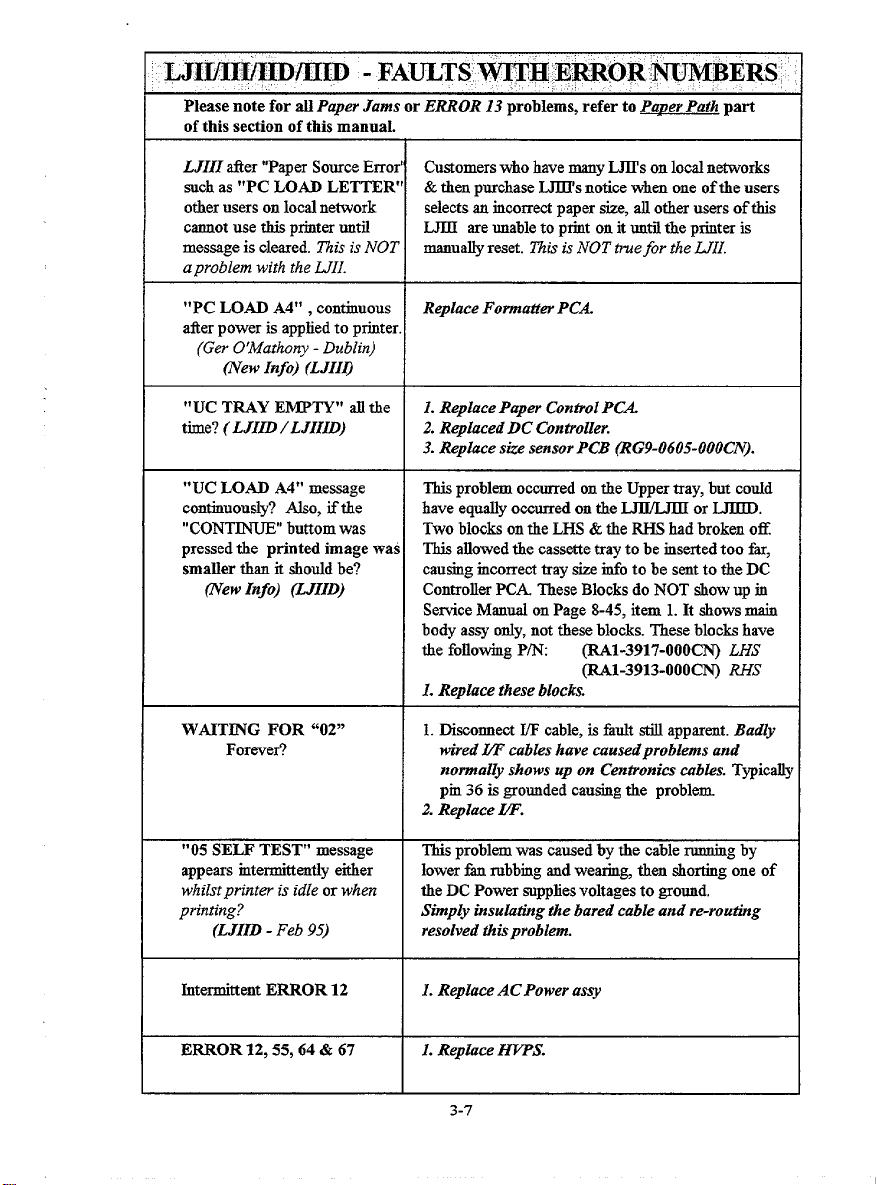
LJImm@mID - FAmTS wI~@ EWOR WMBERS
Please note for all Paper Jams or ERROR 13 problems, refer to Par)erPath part
of this section of this manual.
LJIII ~er “Paper Source Error’ Customers who have many LJI1’son local networks
such as “PC LOAD LETTER” & then purchase ~’s notice when one of the users
otier users on local network selects au incorrect paper size, all otier users of this
cannot use this printer untfl LJIII are unable to print on it until the printer is
message is cleared. This is NOT manually reset. l?zis is NOT truefor the LJII.
aproblem with the LJII.
“PC LOAD A4° , continuous Replace Formatter PCA.
tier power is applied to printer.
(Ger O’Mathony - Dublin)
(New Info) (LJII~
“UC TRAY EMPTY” all the L Replace Paper ControlPCA
LJIID /LJIIID)
tie? (
2. Replaced DC Controller.
3. Replace size sensor PCB (RG9-0605-OOOCN).
“UC LOAD A4° message
continuously? Also, if tie have equally occurred on the ~ or L.JIM).
“CONT~ buttom was Two blocks on the LHS & the RHS had broken OR
pressed the printed image was This allowed the cassette tray to be rnsetied too far,
smaller than it shotid be? causing rncorrect tray@ info to be smt to the DC
(New Info) (MIID) Controller PCA. These Blocks do NOT show up in
WAITING FOR “02” 1. Disconnect f/F cable, is fauk still apparent. Badly
Forever? wired W cables Isave causedproblems and
“05 SELF TEST” message
appears rntermittentiy either
whilst printer is idle or when the DC Power snpplies voltages to gro~d,
printing?
(LJIID - Feb 95) resolved this problem.
Intermittent ERROR 12
ERROR 12,55, 64& 67 L Replace HVPS.
This problem occurred on the Upper tray, but cotid
Sefice Manual on Page 8-45, item 1. It akows main
body assy ordy, not these blocks. These blocks have
the following Pm
1. Replace these blocks.
normally shows up on Centronics cabies. Typically
pm 36 is grounded causing the problem,
2. Replace L2?
This problem was caused by the cable running by
lower h rubbing and wearin~ then shorting one of
Simp~ insulatig the bared cable and re-routing
I. Replace AC Power assy
(RA1-3917-OOOCN) LHS
(R.A1-3913-OOOCN) RHs
3-7
Page 49

LJII/HI/IID/IIID - FAULTS WITH ERROR NUMBERS(Con’t\
ERROR 12 or 55’s
ERROR 12, 11OVprinter
Usedwith step dow
transformer. Printer would
power up, as LJZH began to
take load a “Clickiug” noise
was heard and pxinter exkibite~
Emor 12.
ERROR 12 or no Display
(LJIfl
PERMANENT ERROR
16 “Toner Low”.
1. Check Jumper J209 is wnnected on DC Cent PCA
2. See Service Note 33440AB/A U-09 wken
connected to a Vectra.
Customer was using a - variable transformer that
obviously codd not supply the current the printer
required. Customer to ensure the transformer can
supply the necessary current to the LaserJd
1. Repkce the DC Controller PCA. (See S/N
33440AB/AU-09 if used w“th Vectra)
2. Rephce Formatter PCA.
3. Replace DC Power Supply.
4. Reptice Scanner Motor.
5. AC Power Module.
See Error 12 flow diagram at end of this section
Appendix Al.
L Grey wirefiom ~S sub-block to HVPS was
connected to lowerposition instead of upper
positin.
2. Replace HWS
3. Replace HVPS to DC Con@oUercable @~RGI0906-OOOC~
4. Replace DC Controller PCA.
ERROR 20 Memory
Overflow
When continuous SeE-Test
’04’is used on PLC 5 printers
ERROR 20 my
OCCUI’.
(LJIII/IIID)
ERROR 41 (Intermittent)
(LJIQ
Downloading too many sofi-fonts/graphti Initiate
a ‘fit Font” and work out how much memoxy this
takes mmpared to the memory actmdly available.
Referenw ‘~ogr
armning =ts m Tech Ref Man.
Standard User Memory is 395Kb.(LJII)
This is normal for PCL5pvinter, NOT PCL4. Due to
HPGL2 vwor commands used on SeIt-Teat and the
additional memory it requires. The number of pages
of Self-test which are printed before this error may
occur depends on the av~ble RAM. Ifprinter is
powered bwn more RAM maybe available, tierefore
ERROR 20 may take longer to appear. No remedial
actions is required to correct this problem
Z. See Service Note 33440A-09 concerning
Error’s 41,50,51 & 52. Replace Laser/Scauner
cab~ RG1-0908-OOOW
2. Check grounding bushing on LHS of Reg assy.
Especially when replacrng Reg Asay, ensure
this brass buaking is orientated correctly. This(Con~
3-8
Page 50
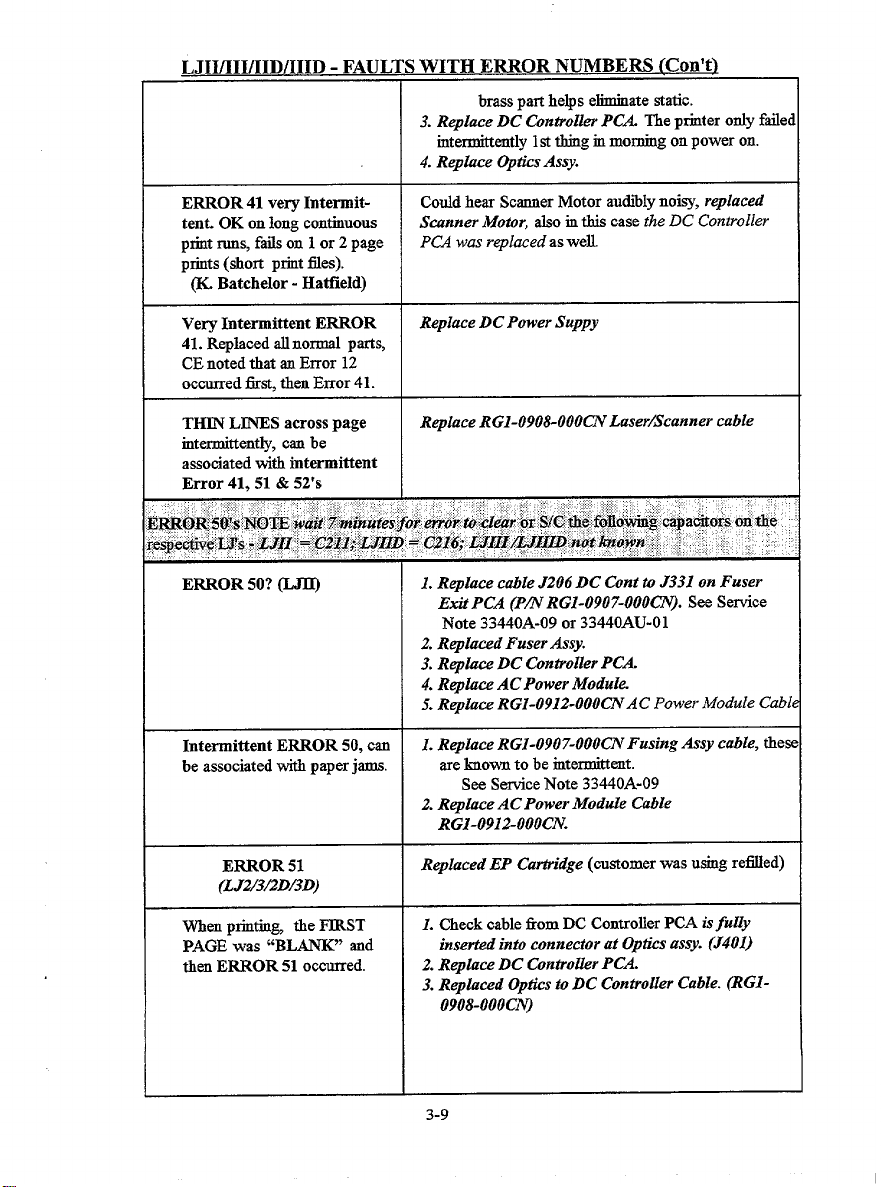
LJII/111/IID/IIID - FAUL
;WITH EKKUK NUMBEKS lCon’tl
3. Replace DC Controller PCA. The printer ordy faile
4. Repkce Optics Assy.
—————
brass part helps eliminate static.
intermittently 1st tking in morning on power on.
----- -———-.- ...
ERROR 41 very Intermittent. OK on long continuous
print runs, fails on 1or 2 page
prints (short print tiles).
(K Batchelor - Hatield)
Very Intermittent ERROR
41. Replaced d normal parts,
CE noted that an Error 12
occurred fist, then Error 41.
THIN LINES across page
rntermittently, can be
associated with intermittent
Error 41,51 & 52’s
ERROR 50? ~
Intermittent ERROR 50, can
be associated with paper jams.
Codd hear Scanner Motor audiily noisy, replaced
Sunner Motor, ho in this case
PCA was i-~laced as well.
Replace DC Power Suppy
Replace RG1-0908-OOOCNLaser/Scanner cable
the DC Controller
.. .. . ..,,
~r~o~ &&&r br SJCtie ~~~~~ capa~o~s on the
Z%tifpliw++t&@@flj.;,j ‘“ : ,:
= C21h;
1. Replace cable J206 DC Cent to J331 on Fuser
Exit PCA (Pm RGI-0907-OOOW). See Service
Note 33440A-09 or 33440AU-01
2. Replaced FuserAssy.
3. Reptice DC Controller PCA.
4. Replace AC Power Module
5. Replace RGI-0912-OOOCNAC Power Module Cab
1. Replace RG1-0907-OOOCNFusing Assy cable, the:
areknown to be intermittent.
See Stice Note 33440A-09
2. Replace AC Power Module Cable
RGI-0912-OOOCN.
ERROR 51
(LJw3/2D/3D)
When printing, the FIRST
PAGE was “BLANK” and
then ERROR 51 occorred.
Replaced EP Cartridge (customer was using re~ed)
Z. Check cable horn DC Controller PCA isful@
inserted into connector at Optics assy. (J401)
2. Replace DC Controller PCA
3. Replaced Optics to DC Controller Cable. (RG10908-OOOC~
3-9
Page 51

LJII/111/IID/IIID - FAULTS WITH ERROR NUMBERS (Con’t]
ERROR 51 intermittently Trying nod parts did not fi this problem It was
(Mike Duthie-Aberdeen) noticed that the customer was extremely gentle when
(iVewInfo) (LJ.1~) closing down the lid. Whereas the CE was not so
daimy when shutting the lid. A@ustmestt of the
hinges and locking mechanism resolvedproblem. It
was believed that the Laser Shutter was not opening
folly. Thisfault ocmred on a UIID.
Intermittent ERROR 51 On power up ERROR 16 (Toner Low) occurred, Main
(Frank Dasilva Ihndon}
~ew Info) ptiter (in ti case a LJIJD) the I/P feed solenoid was
(LJIfD)
ERROR 53 (LJBD) Memory No
Incompatibili~ problem? placed lMb (33443-69001) (Rev B) memory b~
Wmsell - B!rtoke)
(Dave
(Mw 94) To resolve thisproblem the Formatter and lMb
motor turned. When print command was received by
heard to fie, no paper movement, then ERROR 51.
Replacing DCPS ASW resolvedproblem.
fiultifrnemory deinsttied born printer. CE re-
replaced Formatter PCA & DC Power Supply.
memory PCa ’swere reulaced as a uair.
Jntdent ERROR 51 / 52’s 1. Replaced Cabh (RG1-0908-OOOC~ from Laser
Scanner Unit (J451) to DC ContioUer (J202/203)
See Service Note 33440A-09.
2. Replace Laser Scanner Unit
ERROR 52, a blank page
moves through printer. (J401) to Optics Asay. Reseated this @le.
ERROR 55? I. Replace Formatter PCA.(See S/N 33440ABIAU-09
ERROR 55? my when
Script Cart’s (33439P/Q) are installed m a ~ the printer completes Self-Test and
installed. (LJIII only)
post-
L Scanner Motor cable NOT mrmected come~
2. Rephrce Laser/Scanner uble RGI-0908-OOOCN
if comected to a Vectra).
2. Repkce DC Controller Pa.
3. Replace DCPS ASW.
4. Replace Formattw & DC Controller PCA’s as a
pair.
When
some HP PostScript cartridges (33439P/Q) are
then lock%up in tie start-up page. The main motor
starts, but paper is never picked from the paper tray.
Error 55 maybe diapbyed if the printer is powered on
for more than 3 minutes. Tbia situation only occurs*
~s that have the newer DC Controllers (P/N RGl2706-OOOCN).The exchange PCA (33449-69004) is
NOT tiated by this problem The PS tirt’s must be
exckaizged with another with a DC of 3150 and may
have a blue dot on its shelL See service Note 33439P-
01 or 33439Q-01 forfirther detail.
3-1o
Page 52

LJII/111/HD/IIID - FAULTS WITH ERROR NUMBEN (Con’t)
ERROR 55 or 64 or 67 or 12
ERROR 55 or 12
ERROR 63
ERROR 67 when print
command is received by
Fo-tter PCA@ew Info)
~Donaldson - SQF)
mew Info)
Intermittent ERROR 67?
(New Info)
ERROR 70 When downloadiug soft-fonts (LJHD)
ERROR 79
1. Replace HVPS.
1. Check Jumper J209 is connected on DC Con PCA.
2. See Servti Note 33440AB/AU - 09 when
wnnected to a Vectra.
1. Fauky Expansion Memory PCA.
2. Using Non HP Memov.
If Formatter PCA is disconnected the print engine
test does nrn OK Replacing DCPS as~@ed this
problem. Other causes for this error are
L Replace Formatter PCA
L Replace Formatter PCA.
2. Replace HVPSAssy.
Not enough memory!
L Non HP Font cartridge causedproblem
2. Non HP Memoiy
3. Faul@ Formatter PCA
4. Faulty HP Memory or Font
5. Check any boards installed in Optwnal WO slot,
eg. Network i-Data boards, etc
ERROR 79 (Olae)
(LJIID)
ERROR 79 Customer using
HPGL2 commands and
getting this error mid-print?
(Mike Duthie-Abmdeen)
(New Info) (LJII~
Only faila in Dnplex mode, using none HP font,
normally on one particti progrramne. Programme
works tie on LJ2000. Problem caused by undetined
char from a char-fon~ normally treated as a “space”,
m this case it does not. Solution, do not use these
none HP-fonts on HP LJpn.nters..
All the normal parts were replaced, Formatter, memory,
driver, etc without resolving the problem. By changing
from intirnalfont 12 to printer default, itprovided
the solution to this probhm?
3-11
Page 53

DELAMINATION of the rear
side of page near the leading tol
edge. There can be two marks
which are in line with the two
ecentric cam rollers mounted
on the I/P Pick-up Assy.
The probhu can be intermittent.
(Updated Info)
.
(LJII/111/IID /IILD)
~ problem can ocw on LJM3JAD & 1110’s.
1. Changing media to a Laser Quali@paper that
adheres to the Paper Spec’s Guide always resolves
this problem.
2. Replace both tke Separatin Pad & ~ feed Assy.
3. If customer is NOT using extremely light or heavy
paper (161bor 361b), remove one of 2 tension spr’gs
(P~RA1-3871-OOOCN) on Reg Assy. Remove
the spring on the side that delamination occurs.
DO NOT remove both springs.~Suuuorted bv Div]
4. If 1 & 2 do not work for you, try tkis unsu~uorted
method. Remove high spot off the 2 ecentric cams
these cams arepart of the W feed assy.
NOTE: Ifthe paper is of extremely poor quality items’
2,3 &4may not help at sAIL.......
Eroneous lines appearing
on XY Chart, printing in
HPGL2, see example
opposite. The problem
appears the more complex
the XY Chart plot is.
(LJZI~
~11 Intermittently drops
OFF-LINE?
(G. Clark - Leeds - Jan 94)
COMPLETELY DEAD?
No Display, ERROR 12, this
fatit cotid be Intermittent
(Updated)
1. Use hstest rtilon of bare (DC 19900430)
on the Formatter PCA.
I
iiil\(l
Replacing Formatter PCA seem to resolve thispbin.
1. Replace DC Controller PCA
2. Replace Formatter PCA
3. Remove any PCA rnstalled in the optional I/O
(JetDirect XIO, i-Dat~ etc), is fitit resolved? If
not replace this PCA.
4.. Replace DC Power Supp@. If the DC Controller &
Formatter PCA are removed you can check DCPS
by grounding pm 7, Remote Enable line, on the DC
Power Supply, if the sIIpplyis OK the + /- 5V& 24v
shotid mme up. If not replace DC Power Supply
Modde.
See FhIw Diagram towards beginning of this setin
3-13
<<<Emoneous, unwanted
Data
Page 54

LJII/111/IID/IIID - MISCELLANEOUS4Cont)
Display goes Blank for very Top lid switch was found to be moment~ opening
Aort periods of time? Then OK causing this intermittent problem
@ndy Buddle - Leeds)
flew Info)
Replacing DCPS assy resolved this problem.
Intermittently goes DEAD?
@ill Baigrie - SQF)
Intermittently goes DEAD or All norrmd parts were replaced for this fatit, but prob
loses DISPLAY? (LJIH’) lem still preveiled. A Mains Monitor was installed and
(JohnHolmes - Gatwic~
mew Info)
FRONT PANEL DEAD, 1. Replace Opera@r’s Front Panel PCA.
DC Power still active, fans
-g?
DATA LOSS or G-LED See Service Note 33440A-1.
data on Centronics port?
CORRUPT DATA when Use HP 24542D Centronics cable:
Soft-fonts or dotioaded.
No- text seems OK This H
was connected to an H3M PS2
using Centronics protowl.
FRONT PANEL LED’s Replace AC Power Module.
ON ALL THE TIME
SELF-TEST
All Front Panel LED’s on.
Fuser Assy making a See Service Note 33440A U-02. A viiration proof
“SQUEAKING NOISE” pad at LH end of Fusing Assy beeomes completely dry
WillNot Run? Replace W PCA.
Repbce DCpOwer Srappti.
highlighted 900vpeaks between neutral& earth.
2. Replace Formatter PCA
of lubricant, thus making this noise. Luticate with
CK-0544-OOOCN.This will apply to ALL LJ’s utig
this print engine.
NOISY, Squealing, Chirpiug.
(LJII Only)
The Upper Cooliug fm brass bushiug lubrication is
-g-up? Sometimes this ti may seize.
See Setice Note 33440A-11, with fan assy RH7-
1047-OOOCNsimply replace the bushing and the
bushing holder ONLX Please note, the LHIItHD use
RH7- 1074-OOOCN&s. These models C~OT use
these replacement parts.
3-13
Page 55

LJII/111/IID/IIID - MISCELLANEOUS (Cent]
NOISY when Marn Motor
turns on? (LJIII/IIID)
(Andy Suen)
(New Info) Supply~d tkisproblem in the LJIII & LJIHD.
NOISY when Main Motor turns This ~ure can occur with the use o~NON-HP Toner
on? (LI~In~~Im)
(Hans Hjertquist - Boise)
mew Info)
Grinding NOISES? @IZ~
(A. Cowie - Leeds - Spt 94)
EXCESS TONER depo=mg
rnside ptiter?
Print “CRACKING” when
paper is folded. White lines
may be seen rmming tbrough
characters where page is
folded.
When motor turns it makes a loud grinding noise,
very similarto gear meshing prodems. All mechanical
parts were replaced. Replacing the DC Power
‘fhis codd occur on the ~ & ~ ptiters.
Cartridges. Some of these cartridges use material
in their dnun drive gears that is incompatible with
materials used m the LJ drive gears. The red is
ag~ated wear and results in premature failure
of the LJ drum drive gear P~RSI-0105-OOOCN.
Repkrcing Lower Fan resolved thfi problem.
Dweloper Bias constantly ON, due to a S/C on
ribbon cable J211 between 6 and 7(DC Controller to
HVPS cable.) Replace Pm HWS Grbie RGl-0906-
000CN
Toner comprises of pigmmted plastic material and
iron oxide. When subjected to high temperatures
these individual pkttic particles become part of a
larger plastic image on the page. When the page is
folded the plastic must give m some way. If the print
image is well set rnto the paper, the resulting break
in the phstic will NOT be very apparent. However, if
the toner has NOT been able to penetrate the paper
fire$ the “Crack” in the plastic image will be
amplified. A white line will be seen through image.
To Minimise
1. Ensure paper ineeh ALL Paper Specs, see guide
5002-1801. In pardcularpay attention to the
smoothness (100-250 SheffieU) antior “Wax
Pick” ~ZI Dennison)
2. A lighter Densi@ setting will ensure less toner
used, thus minimisingproblem.
3. A lighter character stroke may also help
L,JJIIfier “Paper Source Error ‘ Customers who have many LJII’s on local networks
such as “PC LOAD LETTER”
other users on local network
cannot use b printer until
message is cleared. This h NOT
aproblem with the UII.
&then purchase L.JflTsnotice when one of the users
selects an rncorrect paper size, all other users of this
~ are unable to ptit on it until the printer is
rnmmidlyreset. This is NOT tree for the L.JTI.
3-14
Page 56

LJII/111/IID/IIID - MISCELLANEOUS (ConQ
NO STATUS
Returned by printer. Connetted to 3000.
I/O Protocol changes horn
CENTRONIC’S to Factory
Defati
Optional I/O which was selected via the Front Panel returns
to default Serial? (LJII’IID)
(Anja Rabold - PGE)
CANNOT Configure
PROTECT to Letter, Legal
etc, size paper together with the 1. In%te a 08 Cold Reset by @ressing ONLfNE
OPTIONAL I/O. whilst powering on printer.
(Hans Hjertquist - Boise) CONT~U~SET keyfor 5 sewnds.
Request MO
(LJID/ZIZ/IIfD) the status readback. This allows the LJIID, LJIII
SERIAL?
flew Info)
flew Info)
PAGE
(~111/IIIID)
~ew Info) 3. Initiate a 07 RESET by depressing the
‘fke L.iJIO and later were unable to respond to status
requests (Ese ?, DCI). The Optional Status Read board
(26013A) plugs rnto the Optiomd I/O slot, provides
& LJlllD to be comected to a 3000. Term-type 26 is
recommended. Install 26013A into Optinal I/O
slot to resolve this problem.
Power Fails may cause tbi.aproblem LJIZI/IZfD’s
may be susceptible to this problem due to power
interruptions. Ensure customer has a stable AC Powe]
SuppZy. InstallMains Monitor to check-out supply.
Ensure cutimer has stible AC Power Supp@.
Inti Mains Monitor to check-out supply.
If the Optional I/O cannot be selected with Page
Protect try the following:
2. Set Page Protect to the sti of media required
4. Cyclepower to thepri”nter. .
5. Go to 2nd level menu, within this menu select
f/O = OPTIONAL.
NOTE: This procedure will reset to fkctory defiuks,
therefore prior to initiating above obtain copy of
SeK-Test with customers cdguration.
Not FUS~G
(m/ m) reduce the costs and rnvolves the removal of Fuser
Cannot OPEN TOP COVER
when the release button is hard tit piece of plastic, 3mm thick and broad
depressed. enough to diatriiute a force across 3-4 cm of cover
COIT+? See Service Note 33449A-04 or 33459A-02, MS
descri%esa motivation to DC Controller PCA to
switch (SW205). When ever this PCA is replaced the
CE sholdd pay partiti attention to the presence or
absence of SW205. A circuit trace MUST be cut if
SW205 activating lever is not present.
See Service Note 33449A-03, open using tool like a
(LJII@ aurfkce.@e. 3.5” disc). Place between top cover gap,
near release button and pry open.
3-15
Page 57

T TTT~ / T TITTn - MTCPWT T .ANF.nlTS PRnRT .W,M,C
U“*. U f -. . ..- — . ...”----. . . --- vu . ----------
Customer was attempting to
This is not Supported and annot be done
print the 1st side in Portrait
& the 2nd page in Landscape?
(Duplex Mode - LJI~)
Does not Feed from Lower Replaa”ng the DC Controller resolved the feed
Trsy & does not FUSE
problem.
correctly? (LJI~HIfD) Note The problem with not fising was due to the
fiser ~ch on DC Controller NOT installed correctly
after the PCA replacement.
Not FUSING Correctly tier
Fuser switch SW205 has been removed from L~
replacing the DC Controller & L.JIICD printer to reduce costs. When replacing
PCA DC Controller, note the presence or absence of this
(LJIII/IIID) SW205 activating lever. If absence cut trace on new
DC Controller PCA between SW205 pin 1 & R889.
See Service Notre 33449A-04 or 33459A-02
Printed image on front side The Duplex page is printed tist with LJIblDD’s,
of page is always longer therefore side 2 passes through fiser first. The paper
than the rear side in Duplex. ahrinks, then aide 1 is printed next. Tkia side goes
(LJI~ /LJIIID) through the fiser again In Total side 2 gets shrunk 2
times. This is why the front aide is longer than the rea
tide.
Paper BUCKLES as it comes up
tiom the Doplexer. Also the prin
image SLIPS DOWN page by
25mm to 30mm wew Info)
(Steve Mmshall - Washington)
The active signal to SL2 was LOW at all times. There
I fore this feed mech-
was ON all the time. This
forced the paper to arrive earlier to the registration
assy. This caused the paper to buckle. If the paper
manages to get through the Registration Assy the
image has slipped down tie page by 25 to 30rom
(LJIILD) 1. Replace DC Controller
2. Replace SL” Duplex Drive roller Clutch Sohnoid
Paper “DOG EAR’s” utig A5
sixe paper, fed from manual tray
(M. Brabyn - LJ3 - Jan 95)
The leading edge corners are bent back to give the so
; called “Dog Ear” effect. This is caused by the
depector ti the Fuser Em-tarea. A5 paper just
happens to coincide with2 of tkese deflector pawls.
Aa A5 paper is not supported the unoffical actions to
try are
L TV 100grm paper straight through.
2. DispLrce manual feed guide on ussette tray cover,
remove one screw & allow guides to move, then
veplace this screw. The disadvantage of this is the
the printed image wotid have to be offset to
compensate.
3-16
Page 58

Lnm~D/lIm- PRINT QUALITYpROBLEMS
Repetitive marks on paper,
print defects appear at rem
intervals
(LJII/HD/HI/IIID)
1
95mm apart (EP Drum)
1.
2. 80mm apart (Upper Fuser RoUe@
3. 65mm apart (Lower Fuser Rollm)
51mm apart (Toner Cartridge Developer Rolleq
4.
5. 44mm apart (Lower Reg Rolled
38mm apart (Upper Reg Rolled
6.
z 13mm apart (Reg Assy Transfer Roller)
BLANK PAGES?
(Ott94)
WHITE or BL~ pages
When printing tie FIRST
PAGE it was “BLANK” and
tken ERROR 51 occurred.
BLANK column down page,
apprx 6cm horn RHS and
lcm wide. DUPLEX ONLY
(Dave WasseU- S’ton)
1. Emp@ EP Cati
2. Sealing tape not removedfrom EP Cad
3. Brokem Transfm Corona (See S/N 33440A-6)
4. Are connections on EP cart & HWS damaged,
cowoded, dirty or missing.
5. Replace HVPS or HVPS Cable to DC Controller.
6. EP GrtDrum not rotating.
Z Replace Laser/Scanner Assy or Laser/Scanner
@De Controller cable
8. repIace DC Con@oUm.
9. Bent top cover hinge brackets?
1. Replace Transfer corona? See Service Note
33440A-6 (Disconnect Pink sleeved wire on HVPS
to ascertain ifimsge is on the drum)
2. Top tige badly bent, no mechanical comection
to drum from tke main gear train. Replaced the two
lid hinges.
3. Replace DC Cent PCA, Not turning on HV
syste~ use Service Tool PCA to ve~ LED on.
4. Replace LJDrum Drive gear RS1-0105-OOOCN.
1. Check cable from DC Controller PCA isfully
inserted into connector at theOptics assy. (J401)
2. Replace DC Controlhr PCA.
3. Replaced Optics to DC Controller Cable.
Replaee Transfer Corona
BLANH Page? (LJII.
(Steve Oakes - Cheadle)
~ew Znfo)
EP Cartridge Drum Moving, due to damaged printer
Drum Drive gear M1-0105-OOOCN. This is
tk.eLJ, not part of EP Cartridge. Aggravated wear
of this gear w be cauaed by the use of NON-HP
Toner Cartridged (ReMed). Replace this gear.
3-18
internalto
Page 59

LJII/111/IID/IIID - PRIN
BLACK Pagesprinted?
(Ott 94)
QUALI~ PROBLEMS (Con’tl
1. Repace EP Grti
2. Check connections on EP Cart & HWS connectoz
3. Replace H~S or HVPS to DC Controller cable
4. Replace Laser/Scanner assy or Laser/Scmner to
DC Controller PCA abla
Random Honontal BLACK
Lines?
(Ott94)
TH~ LINESacrosspage
intermittently, can be associate
with intermittent Error 41, 51
& 52’s.
Many BLACK Horizontal
lines down page?
(~IILD - Feb 95)
Vertical White Streaks
(oc@4)
THJN Vertical DARK Black
Streaks? (Ott 94)
BLACK LINE down RHS of
sheet.
I. D@e~”ve or improperly seated Fibre Optics cable
2. Replace LasmBanner as~.
3. Replace DC Controller PCA
4. This applies to LJII & III ONLY, Rephce Laser/
Scanner cdle RG1-0908-OOOCN
Replace RGI-0908-OOOCNLaser/Scanner cable. See
Service Note 33440A-09
Some of tkese horizontal Black lines were pencil this
others were approx lmrn tide. In wme examples these
had lines across page which appeared all down the page
In otier examples ordya fw kes appeared. Replacing
the Laser/Scanner to DC Cent PCA cable resolved
nbm.
1. Empty Toner Cartridge
2. Dirty Transfer Corona
3. Dirty Beam-to-Drum Mirror.
4. Replace Laser/Sunner assy
1. Dirty Prima~ Corona ~re
2. ChecWrepfa@ for scratches on EP dram.
3. CheMreplace Fuser rollers & haningpad.
Clean Corona m EP Car&ridgewith Cletig TOOL
Angle tool to get to extreme rigkt hand edge of the
corona wire cleaning slit. This problem has been
resolved by extending this slit on the ~S of the.
Toner carti”dge. This was rnplemented some time ago.
Pencil Thin BLACK L~
down page, appears on Text
sent from host or Self Teat or
Wt En@e Test. Maybe
ticuk to see on Print Engine
Test, the line will appear
bolder. (LJII~
Replace Formatter PCA
3-19
Page 60

LJII/111/IID/IIID - PRINT OUALITY PROBLEMS (Con’t)
THIN Line down page, it
appeared approx 3 inches
(75mm) from RHS of page.
(Tony Gn~fiths - B’ham)
Heavy media was cautig problem(110 grins), using
90 grnap~er resolved problem.
BLACK STRIPE on RHS of
Page?
On allBLACK page, at 6 lpi
WHITE horizontional lines
at intervals of 50mm appeared
down the page. These
ALWAYS appear in exactly
the same place on the page.
However at 7 & 8 lpi it is
OK? (LJ~~~
(Ott94)
BACKGRO~?
(Ott94)
BANDS of BACKGROfJND
Normslly down page ody
where characters are printed.
S@lex OK 2nd page of
Duplex shows this problem.
GREY BACKGRO~
~ Primary Corona m EP Cartridge.
L Clean this wire of replace EP Cartridge
In this case the FORMATTER PCA replacement
@ed this problem.
customer Orginal which Me&
33449-60001, Rev A
Kit PCA which tied problem
33451-69001, DC 3040
1. Set Print Deirsi@ towards “1” to minimise back
ground
2. Medti out of Spec
3. Is Printer very dirty inside? Clean.
4. Dirty prima~ Corona, clean.
5. Replace EP Cartridge.
1. Check qual~ ofpaper.
2. Replace Trairsfm Corona.
Caused by unsupported media, shows up partictiarly
well on envelopes.
GHOSTING OF CHAR’s
My very slightly in the top
LH comer of page. (LJIID)
0~ COLUMN D-R
or SLIGHT GHOSTING,
2 inches born LHS of page.
FAINT PRINT?
(Ott94)
Replace Transfer Corona.
Replace Transfer Coron~
L Emp@ Toner Cart?
2. Adjust Print Densi@.
3. Media out of Spec
4. Dirty Transfer Corona, Clean or replace.
5. Replace HVPS.
3-20
Page 61

LJII/111/IIDflIID - PRINT OUALIU PROBLEMS (Con’t)
FAINT Pm& LOSING Replace EP Ca~”dge
HALF OF CHAR’S on RHS.
Parts of print MISSING or
White area’s where text shodd
be, typically at the edges oftke
The toner cartridge inst~tion label which is attached
to the Mirror Shutter Assy inside the hinged lid of LJ
had become detached and was rntetierring with the
page? (New Info) laser beam on its passssge to the EP DrmtL This
(LJII/IID /H.I/IHD) problem could occur on any of this printer family.
Remove offending label
RHS Text MCSSING or may 1. Empty EP Cati
be DISTORTED
2. Bean-to-Drum Miwor is bent or misaligned
(Ott94) 3. Bent Top Cover Assy Hinge Brackets.
WAVEY Print?
Repface LaserBcanner assy
(Ott94)
Intermittent POOR PRINT Replace Scanner As~.
QUALITY when printer is
cold. Text appears -?
COMPRESSED Characters. Faulty EP Cmlridge
Text appears SMEARED With
BLACK BLOTCHES. These cable. (RGI-090S-OOOC!N)
blotches appear to be 3.7 inches
apart
running do~ the page.
1. Replace HVPS (J601) to DC Controller (J21 1)
2. Replace DC Controller.
THIS FA UL.TCAN BE SEEN USING SERVICE
TOOL PCA, PRIMARY CORONA PEWNENTLY
SWITCHED ON)
SMUDGES on back side Replace RG1-0906-OOOCNHigh Votige Cable See
of page, EXCESSfVE toner
Service Note 33440A-09
built up around corona, 94mm
Repetitive pfit defect that
appems on mntiguous pages,
Yelowing & deterioration of iu-
ternsl components may occur.
S~GES down page, tis
occurs on page 2 wkich is the
page to be ptited (LJIIID) rotated 90 degrees to the nom
first
(New Info)
This problem exkiiits itself as’’scallops’’down the page
Tkese “scallops” are similar to horseshoes or letter
L Cfean Static Teeth.
2. Reptie Transfer Corona
SMUDGED ON 3rd LtNE
of PRINT?
Caused by a aBDT 6 Bin Sheet Feeder” (None ~
sheet feeder attachment to the LJ). It can easily be
cleared by disconnecting the Sheet Feeder tefig LJ as
a stand-alone priuter.
. -.
5-L 1
“u”
Page 62
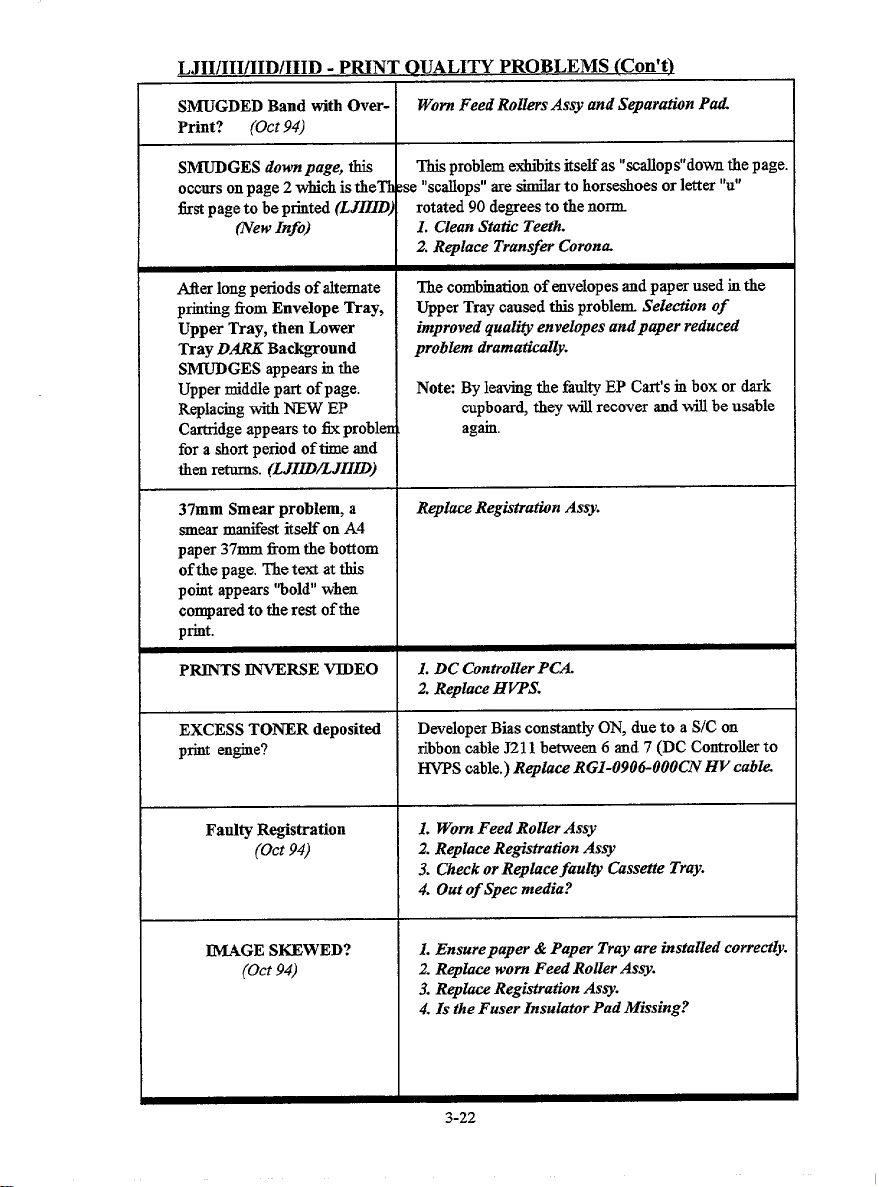
T 111 ~TT /TTm/TI1n
Ualllltxllluflllw - L LUIT 1 Wunmfi a * . xxuuu~..=u t,--- -J
DDTNTW fiTTA T TW DT?nRT Ti’MC (~nntt)
SMUGDED Band with Over-
Print? (Ott 94)
SMUDGES dow page, this
occurs on page 2 which is theTh
fist page to be printed
(LJIIID)
mew Info)
Mer long periods of dtemate
printing from Envelope Tray,
Upper Tray, then Lower
Tray DARK Background
SMUDGES appears in the
Upper middle part of page.
Replaciug with NEW EP
Cartridge appears to fi problerr
for a short period of time and
then returns. (LJIIDfiJZIZD)
37mm Smear problem, a
smear manifest itself on A4
paper 37mm from the bottom
of the page. The text at this
point appears “bold” when
compared to the rest of the
priut.
PRINTS JIWERSE WEO
Worn Feed Rollers AST and SePar@”on Pd
This problem exhiiits itself as “scallops’’dow the page.
se “scallops” are -r to horseshoes or letter “u”
e
rotated 90 degrees to the nom
1. Clean Static Teeth.
2. Replace Transfm Coroir~
The combination of envelopes and paper used in the
Upper Tray caused tkia problem Sele@”on of
improved quali~ envelopes andpaper reduced
problem dramatically.
Note By leaving tie fatity EP Cart’s m box or dark
cupboard, they will recover and will be usable
again.
Replace Registration ASW.
1. DC Controller PCA.
2. Replace HWS.
EXCESS TONER deposited
print engine?
Fanl~ Registration
(Ott 94)
IMAGE SKEWED?
(Ott 94)
Developer Bias cmstantly ON, due to a S/C on
ribbon cable J211 between 6 and 7 (DC Controller to
WS cable.) Replace RG1-0906-OOOCNHV cable.
1. Worn Feed Roller Assy
2. Replace Registration ASV
3. Check or Replace faulty Cassette Tray.
4. Out of Spec media?
1. Ensurepaper & Paper Tray are instilled correctly.
2. Replace worn Feed Roller Assy.
3. Replace Registration Assy.
4. Is the Fuser Insulator Pad Missing?
.-
Page 63

LJII/111/IID/IIID - PRIN
OUALITY PROBLEMS (Con’t)
FIRST LINE of characters
SL13’P~G DOWN PAGE
slightly.
JMAGE Moving DOWN
page? (LJIQ
(S. Davies - Cheadle - Ju~ 94)
Character VOIDS / POOR
FUS~G?
(Ott94)
BACK of Page DIRTY?
(Ott94)
Light-Brown “OIL -LI~”
IOmm Stain on the Front RHS
of a DUPLEXED Page.
(Mar 94)
1. Regtiation Solenoid stictig, replati
2. Repface Paper ControlPCA.
When printig SeK-Teat, prints 1st page OK 2nd page
image moves down page 5mm and every following
page begins printig at this pornt.
Replacing Paper ControlP~ resolved thispbm.
1. Tiy setting Print Dens@ toward “9”.
2. tiver Interlock switch on DC Cent not activated
(Switch notprment on all DC Cent’s, see 33449A-O<
or 33459A-02).
3. Out of Spec Me&
4. Dry Fuser Cfeaniug Pad.
5. Replace FuserAs~.
1. Inside of Printer Dirty?
2. Lower FuserRoller contaminated (i.e Preprinted
Letterhead melting infiser See Paper Spec’s.
3. L2 & LJ3 ONLY- use Test Tool to vetifi “Corona
wire Stuck ON”. Repkrce RG1-0906-000~ cable
(HVPS to DC Controller).
This stain can appear on the front aide of a Duplexed
Page when the duplex fmtnre is NOT used for several
weeks. Thisproblem will @ically r~olve itself after
10/50pages. This is due to “Oblique Roller” m Duplex
area, this roller has a preservative which can awmnulate on the roller ifmmsed.
See Service Note 33447A-10 for more detail.
1. Run tkrough 10/50pages to cfean this roller.
2. Clean roller wtih paper, not alwhol
3. Replace Oblique Roller RGI-1356-OOOCN.
STREAKS down the Page?
(Gaiy McGaw - LJ2 - Jan 95)
These streaks were of a lighter backgound m appear-
ance. Adjusdng Density seemed to rnprove towards
being acceptable. The use of Non-HP EP Toner
Cart’s were the cause of thispbm, use HP EP Cart’s
if more reliable reauks are required. Trade billing
customer &odd be considered.
3-23
Page 64

,,
LJIfiI~D@ID +PAPYRPAT? PROBLEMS
ERROR 13, tier approx.
20-30 pages, paper
“ammingunderneath
J
pick-up rollers. When tkis
fatit occurs severaJ
lines are partly overprinted.
ERROR 13 Intermittmt
Intermittent ERROR 13, can
can be associated with Error
50.
ERROR 13& 51 ~ID) Very Fax Lid switches on DCPS Supply assy, replace
Intermittent, motor does not
and does not feed paper.Error
13 appear frrst and then51.
E~OR 13 Intermittently anc
Main Motor seems to me as
paper moves through the
printer? ~IID)
(S. Stanway -Bill’cay - an 94)
ERROR 13 ON POWER-UP.
(New Info)
(Kim Bateman - Basingstoke)
Replacepick-up assy complete, including clutch.
Printer had been worked on prtioualy, CE had routed
fire optic cable wong way, tkus allowing it to restrict
movement of paper out sensor bsiL Take care to
Route Fibre Optis cable correctly.
Replace RGl-0907-OOOCNFusing ASW cable, this is
known to be intermittent.
this module
i
Teeth were missing off one of the “Upper Feed Drive
Assy” gears. ~~RG1-0934-OOOC~ See page
h LJJJM33
Upper CooLingti was found to be pulLiugdown 24v.
Replace Upper Cooling Fan.
Service MsnuaL
8-34
ERROR 13 (Paper Jams) and
Tearing RHS of Sheet
False ERROR 13 or Paper
Out or Manual Feed problems.
ERROR 13 when uaiug
“FOOLSCAP” media.
Leaves approx. 1 inch of paper
m the fiser unit.
ERROR 13 from Upper Tray
Only?
(Graham Stead - UK- Feb 95)
{L.JIIID)
Caused by small steel tab (Far LHS as viewed from
front) on paper cassette tray. Iftis is bent do~ it
will cause paper jams. Correct by straightening this
metalwork on the Paper Cassette tray.
Paper out fig becomes wedged -g to conditions
descriied. Fix was to reinseti LH end ofpaperjlag in
ifi pivotposition.
As this paper is a non-standard size for the paper
trays, k can only be realiatictiy fed via manual J/P.
Ensure the escape sequence to select “Legal Size”
paper is implemented
Replaeing the following parts resolved this pb~ not
sore wkich part actually tixed pbm
1. Upper Main Motor& Drive assy(Fig 8-11 item l&3
2. UnDerFeed Drive assv (Fiz 8-12 iten 1)
3-24
Page 65

LJII/111/IID/IIID - PAPER PATH PROBLEMS
IMAGE Moving up or down
the PAGE, perhaps up to
12mm?
(Guy Picton - Nov 94)
LINE SPACING between LJI
& L.ilI D~FER?
Faulty Re@tiation
(Ott94)
JMAGE SKEWED?
(Ott94)
S~W PROBLEMS?
(Top and bottom)
( margins ordy )
S~WED by 5mm at the
top of the page. (LJLI@
I. Registr@”on Solenoid sticking, replace.
2. Replae Paper ControlPCA & maybe DCCont
Note Firs page may be affected o~.
The L.11has a Merent paper path when compared to
the L311.HP speczfi that line d~ference can va~ by
+/- 2.5mm perpage
1. Worn Feed Roller Assy
2. Replace Registration Assy
3. Check or Replace faulty Cassette Tray.
4. Out of Spec nredti?
1. Ensure paper & Paper Tray are intilled correctiy
2. Replace worn Feed Roller Assy.
3. Replace Registration Assy.
4. Is the Fuser Insulator Pad Missing?
L Have you replaced the Scanner Unitprevwusly?
If so check Service Note 33440A-2.
2. If aU elsefails re-shim Scanner Unti ~ Shodd
be fsctory-seq but m one case we found the setting
rncorrect)
“L” shaped bracket on LHS of the Paper Cassette
Tray which is held m posidon by plastic peg had lost
its circlip. The “L” ahaped bracket had worked lose,
reseated and returned a“rclip to resolve probti.
DELAMINATION of the rear
tide of page near the leading to]
edge. There can be two marks
which are in Jinewith the two
ecentric cam rollers mounted
on the J./PPick-up Assy.
The probhn can be intermittent.
(UpdtiedInfo)
(LJII/111/IID/IIID)
No MANUAL FEED
~ problem can occur on LJMIIMD &
Changing media to a Laser Quali@paper that
L
DID’S.
adheres to the Paper Spec’s Guide always resolves
this problem
2. Replace botiz the Separation Pad& ~feedAs~.
3. If customer is NOT uhg extremely light or heavy
paper (161bor 361b),remove one o~2 tenstiw spr’g
(P~RA1-3871-OOOCN) on Reg Assy. Remove
the spring on the aide that delamination occurs.
DO NOT remove both springs. (Suuuorted by Div]
4. If 1 &
2 do not work for yoq try this unsnDvorted
method. Remove high spot off the 2 e~ti cams
these cams arepart of the ~ feed assy.
NOTE: If the paper is of extremely poor quality it-
2,3 & 4 may not help at
sAIL.......
Replace Paper ControlPCA.
3-25
Page 66
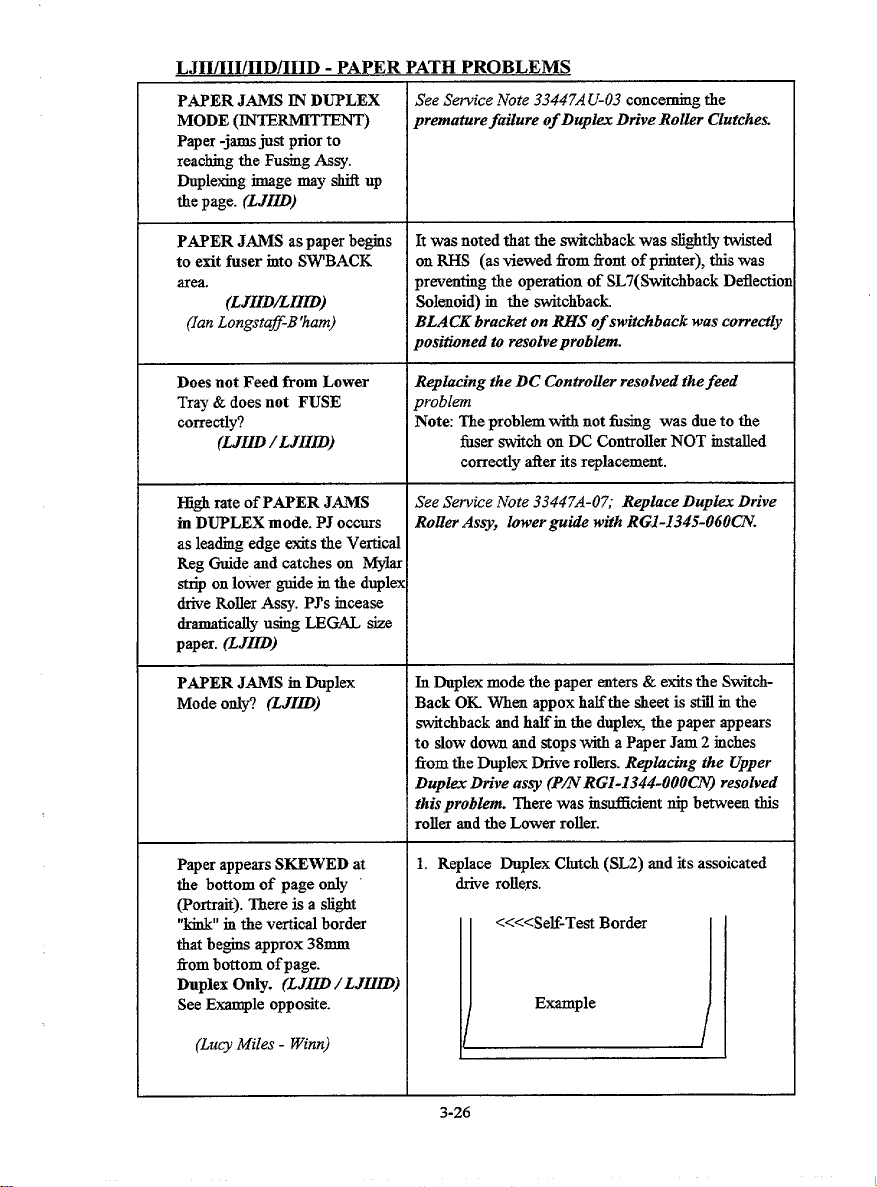
LJII/111/IID/IIID - PAPER PATH PROBLEMS
PAPER JAMS ~ DUPLEX
MODE (~~RMITTENT)
Paper -jamsjust prior to
reaching the Fuaiug Aasy.
Duplexing image may shift up
the page. (LJLfD)
PAPER JAMS as paper be~s It was noted that the awitchback was slightly tied
to exit fuser rnto SWBACK
area.
(LJIID/ZIIfD)
(Ian Longsta#-B’ham)
See Service Note 33447A U-03 concerning the
premature failure of Duplex Dn-ve Roller Clutches.
on RHS (as viewed from front of printer), this was
preventing the operation of SL7(Switchback Deflection
Solenoid) m the awitchback.
BLACK bracket on RHS of switchback was correctly
positined to resolve problem.
Does not Feed from Lower
Tray & does not FUSE
corretily?
(LJZID/LJIILD)
Hig,brate of PAPER JAMS
m DUPLEX mode. PJ occurs
as leading edge exits the Vertical
Reg Guide and catches on Mylar
atrip on lower guide m the duplex
drive Roller Assy. PTs iuceaae
dramatically using LEGAL sue
paper. (LJIID)
PAPER JAMS m ~plex
Mode ody? (LJI~)
Paper appears SKEWED at
the bottom of page or.dy
(Portrait). There is a slight
“kiuk”in the vertical border
that be-s approx 38mm
from bottom of page.
Duplex Only. (LJI~ /LJZIZD)
See Example opposite.
Replacing the DC Controller resolved thefeed
problem
Note The problem with not fnaing was due to the
fiser switch on DC Controller NOT installed
correctly after its replacement.
See Service Note 33447A-07; Replace Dupla Drive
Roffer Assy, fewer guide with RG1-1345-060Ch?
IUDoplex mode the paper enters& exits the SwitchBack OK When appox half the sheet is still m the
awitchback and half in the duple> the paper appears
to slow down and stops with a Paper Jam 2 inches
from the Duplex Drive rollers. Repfucing the Upper
Dupfex Drive assy (P~RG1-1344-OOOC~ resolved
this probkm. There was rnficient nip between this
roll= and the Lower roller.
1. Replace Duplex Clutch (SL2) and its assoicated
drive rollers.
<<<<SeK-TeS Border
Example
(Lucy Miles - Winn)
L
3-26
Page 67

LJII/111/IID/IIID - PAPER PATH PROBLEMS
Paper “DOG EAR’s” using A5 The leading edge corners are bent back to give tke so
b paper, fed from manual tray?
(M. Brabyn - LJ3 - Jan 95)
called “Dog Ear” effect. This is caused by the
dejlector in the Fuser Em-tarea. AS paper just
happens to corncide wit.b2 of these deflector pswla.
As A5 paper is not supported tie unoffical actions to
try are
L TW IOOgrmpaper straight through.
2. Displace ntanual feed guide on cassette tray cover,
remove one screw & allow guides to move, then
repIace this screw. The disadvantage of tkis is the
tie ptited image wotid tie to be offwt to
compensate.
3-27
Page 68

LJWItiID/IIID -Postscript Problems
ERROR 55? my wheo postscript Cart’s (33439P/Q) are
installed. (~ only)
,,
,,,
When some ~ PostScript cartridges (33439P/Q) are
installed in a ~ the printer completes Self-Test and
then locks-up m the start-up page. The main motor
starts, but paper is never picked born the paper tray.
Error 55 maybe displayed if the printer is powered on
for more than 3 miuutes. This situation only occurs ti
LJ13Tsthat have the newer DC Controllers (P/N RGl-
2706-OOOCN).The exchimge PCA (33449-69004) is
NOT affwted by this problem. The PS Cart’s must be
-hanged with another with a DC of 3150 and may
a blue dot on its shell See service Note 33439P-01 or
33439Q-01 forfirther detail.
~MI~Dfl~I~ - ~~~ FEE@‘PROBLEMS
No MANUAL FEED
ERROR 13 when using
“FOOLSCAP” media.
Leaves approx. 1 inch of paper
m the fuser unit.
Replace Paper Control PCA.
As this paper is a non-~andard size for the paper
trays, it can onlybe reslistic~ fed via manual ~.
Ensure the eswpe sequence to select “Legal Size”
paper is implemmted.
onPower up,normal 05 then
PAPER JAM (ERROR 13)
when Envelope Feeder is
Connected?
Mer long periods of alternate
printrng from Envelope Tray,
Upper Tray, then Lower
Tray DARK Background
SMUDGES appears in the
Upper middle part of page.
Replacrng with NEW EP
Cartridge appears to fi problem
for a short period of * and
then returns.
Replace Paper Con@ol PCA
The combination of envelopes and paper used m the
Upper Tray caused this problem Selectin of
improved quality envelopes andpaper reduced
problem dramatically.
Note By leaving the fiulty EP Cart’s m box or dark
cupboard, they @ recover and W be usable
agarn.
3-28
Page 69

Classic Printers
LaserJetIIP / LaserJetIIIP
33471 /33481
Page 70
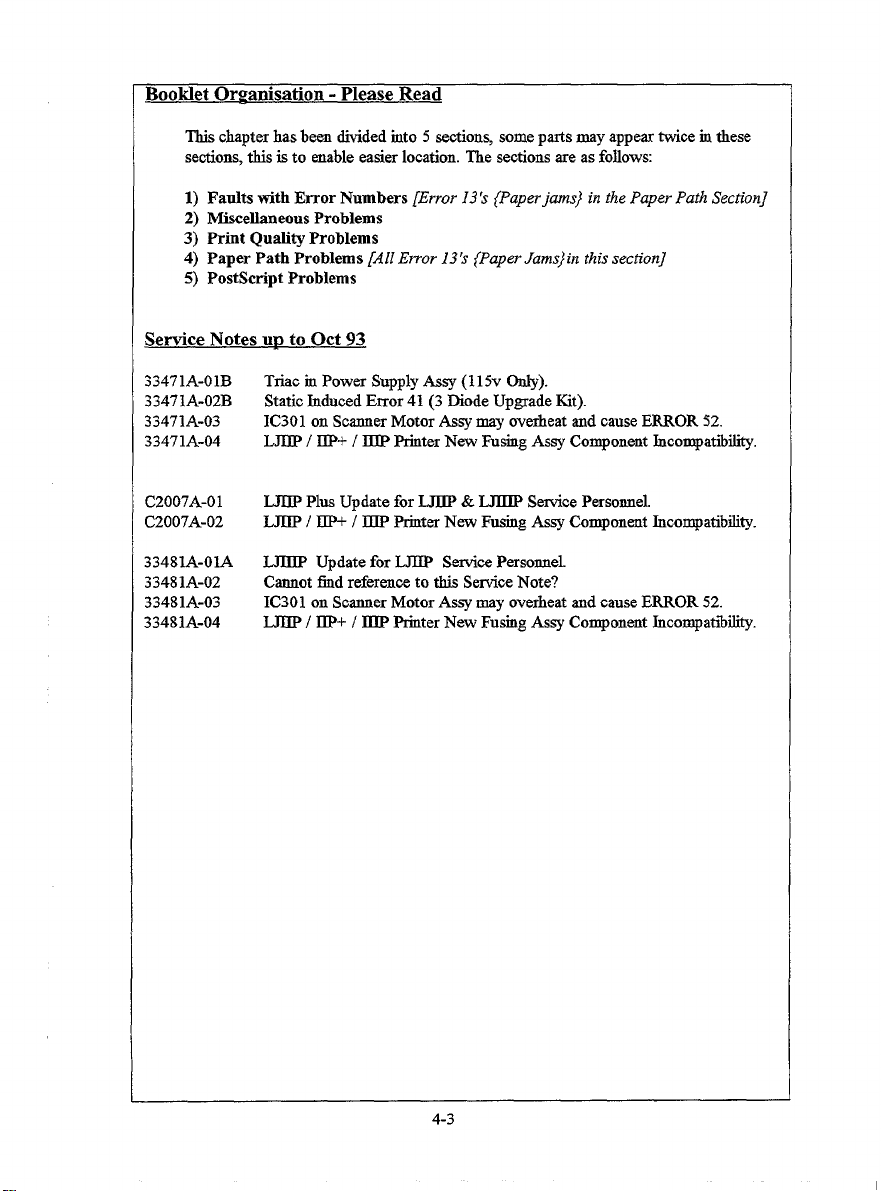
BooMet Organisation - Please Read
Thischapterhasbeendividedrnto5 sections somepartsmayappemtwicemthese
sections,thisis to enableeasierlocation.The sectionsareasfollows
1) Faults with Error Numbers [Error 13k {Paper jms} in the Paper Path Section]
2) Miscellaneous Problems
3) Print Quality Problems
4) Paper Path Problems [All Error 13’s {Paper Jams)in this section]
5) PostScript Problems
Service Notes up to Ott 93
33471A-OIB
33471A-02B
33471A-03
33471A-04
C2007A-01
C2007A-02
33481A-OIA
33481A-02
33481A-03
33481A-04
Triacm Power SupplyAssy(115v Only).
StaticInducedError 41 (3 Diode Up8radeKit).
IC301 on ScannerMotorAasymayoverheatandcauseERROR52.
L~ / W+ / IllP PrinterNew FusingAssyComponentIncompatibii,
L311PPlusUpdateforLJBP& ~ ServicePersonnel.
L~ / W / ~ PrinterNew FusingAssy ComponentIncompatibfity.
~ Updatefor W ServicePersonnel
Cannottid referenceto tis ServiceNote?
IC301 on ScannerMotorAssy mayoverheatandcauseERROR52.
~ / 13P+/ ~ PrinterNew FusrngAssyComponentJncompatiii.
4-3
Page 71

,.
LJ1lP / LJ~llP -,~A~TS ‘tiTH EmQR NtiBERS
Pleasenote thatall Paper Jams or Error 13’s problems, refer to Paper Path part of
thissection of thismanual.
“02 WARM TJPJJ
CONTINUOUSLY
ERROR 12
(very intermittent)
ERROR 12 from Power-up.
(Updated
WhencontinuousSelf-Teat
“04” isusedon PCL5printers
.
~~), ERROR 20
(
Lnsyoccur.
(LJIIIP)
IntermittentERROR 41
(June 92)
(LJIP)
Fault traced to a bad wire conneti”on on J209 of DC
Controller PCA (namely pin 1). This is the +24V to
MP PICK-UPSOLENOID.
Replace Density PCA
@roblemtemporaryclearedbytapprngonthisPCA)
1. Replace Densi@ PCA
2. Reptice Fan
3. Replace Scanner Motor (this motorpulled down
+12v line)
4. Check PS4 & PS5 Sensors.
5. No Toner Ca*”dge Installed
6. Etirnal Fuser Access Door not closed
This is normalfor PCL5printer, NOT PCL4.Dueto
HPGL2veetorcommandsused on SeW-Teatandthe
additiomdmemoryit requires. The nmnberof pages
of Self-testwhichareprintedbeforethiserrormay
occur dependson the avdable W. If printeris
powereddown,moreRAM maybe available,tiereforf
ERROR20 maytakelongerto appear.Note: Thisis
NOT an Error, no further action is required.
Install“3Diode” FuserAasy,thismotied assy
preventsstaticdischargefromfiser roller.See
Service Note 33471A-02B. ZnstaUdiode kit aspev
service note(cheaper)rather than repkzcingfuser assy
Anew &singasayisnow availableandis compatible
withtheLJBP,L3JIP+& ~, withtheexceptionof
theORIG~AL fusingasayusedintheLJIIP.See
ServiceNote33471A-02B for detail
ERROR 41
ERROR 50 or PrintedO/p is
not Fusingcorrectly.
90)
(Ott
This can be mused by the Paper Feed system. Have
seen this occur mostly from LC Tray.This occurswhen
paper gets out of~nch with the image system.
1. Does itfail from W Tray?
2.Check paper isfeeding correctlyfiom LC Tray.
1. Repticing Fusing Assy
2. Replace DC Controller PCA
Notetilwavs keep printerpowered offfor at 10
minutes to allow Fuser Error to reset orShort
C212 on DC Controller PCA to ground, printer
must be turned OS
4-5
Page 72

LJ1lP / LJ1llP - FAULTS WITH ERROR NUMBERS (Con’t)
ERROR 51 Intermittent
(LJIIIP).Norrmdtroubleshootingproceduredoesnot resolve
W problem.
(Mar 94)
ERROR 51?
(LJIPBJIHP - Jan 95)
ERROR 52
@ew Info)
ERROR 53
ERROR 57
ERROR 79
(Trevor Smith - B’ham)
Jfthe normaltroubleahootigpathsfm andthenormal
assydcomponentshavebeenreplaced,pleasecontact
RCE forfurther action plan, cold environments are
known to cause this problem on some LJIZIP’S.
This can be caused by Non-HP Cart’s (Refdled).
JfnonHP CartisusedtryHPEP Cartto atleast
eliminatethispoaiii~. Ifthisis thecausem normal
circumstancesthecustomerahodd be billed.
condensationaccurmdatingon ScannerMirror.
Sw Sewice Note 33471A-03 or 33481A-02.
Reptice scanner motor assy, noteithasthesamePIN
astheoldassy,an#or inrprove environment where
printer is located.
P/N RGI-I 771- OOOCNScmner Motor Assy
1. Error 53 Unit 1- Replace top memory card
2. Error 53 Unit 3- Replace bottom memory
card.
I. Error 57 Unit 1- Incompatible memoV card (top)
2. Error 57 Unit 2- Incomp&”bie memory card (boo
‘fhisLJIIPhad512Kb of memo~, thecustomerwas
usingWINDOWS. me memory* windows
NOTE:Ingene~ for Error79, thiscanbe causedby
So&are/Drivers, MemoryPCA’S,Font-MacroPersomdityCartridges,optionalI/O cardsorFormatter
PCA.
4-6
Page 73

LJIIP / LJ1lIP : MISCELLANEOUS
4-7
Page 74

LJ1lP / LJ1llP - MISCELLANEOUS (Con’t)
PS BUSYwhenusingHP
PostscriptCartridge @
33439P).A eontirmous“PS
BUSY” conditioncanoccur
if “AUT().CON~lt is ON
andthedo~nt islongerthan
I to 2 pages.If thepageis
priutedit mayresultm missing
lines,Wed te~ tiormed
letters.Faultypagewill be
ejectedandErrorwillbe
displayed.
33481A
W withPostscriptinatalle~
recognisesprinter as a ~
(512Kb)?
(Updated)
Thisa similarproblemto theIntermittentError41,
causedby staticdischargefromfiaer assy.PS can
notreportError41, insteaditdisplaysPS BUSY.
Install diode infuser assy (Cheaper) or replace
@ser assy(Eqensive). See service note 33471A-02B
A 33439P moatprobablywillbe installed,a LJIIfP
requires the Postscr@t catige 33439Q. A LJIIIP
an also use the C2089A Switehable PS Ca~”dg&
See Postaeriptcompatib* matrixinsection 1 of this
book.
LJDJPIMAGE MOVES
DOWN page by Approx.
3 inches. Thisproblemcan
occurwhenPaci~c Page
Postscn>tplug-in cartridges
are usedwiththisprinter.
PrinterOKin PCL mode.
(NewInfo)
REGISTRATION CHECK
See Page seetion4 m Service
Manualfor RegistrationAdj.
(Ott 94)
Theproblemhasbeenidentied do~ to theNVRAM
page countof theL~ causedbythePacKcPage
PS Cartridge.Thispagecounterdoesnot rncrement
usingthisPS cartridge.Itseemswhenthe counter
rmches2047, for somereasonthePS Cartbelieves
ithas a Legalpapersizeinstalled.Thisis why print
imagemoves downthepage.
CE’s have in the past replaced both Formatter and
DC Controller PCA’$ thiswill&m the shorttq
butwill fd againwhenthepage munterreaches
2047.
ThisisNOT a HPproblem, the customer MUST
contact Pacz~c Page
A temporaryworkaroundk
1. Resetpage counter to zero via Service Mode,
remove Pacr~c Page PS cartridge to do this.
2. Use HP PS art 33439Q or C2089A{LJIIIP on~)
~ problemahorddbe resolvedby now, but may
Aow up occasionally.
Printoff A SeK-testPage:
TOP - LeadingEdge to FirstDotRow (A4fi&)
= 3mm=/- lmm (Top Horz Border)
LEFT - LeftEdgeto FirstDotRow (Le@Vert Border)
= 5mm +/- 2mLn, (A4)
LEFT - Lefi Edgeto FirstDot Row (Leji Vert Borde)
= 6mm +/- 2- (Lti)
4-8
Page 75

LJ1lP / LJ1llP - MISCELLANEOUS (Con’t)
IMAGE SKEW Max Image tolerance = 1.5mm over 259mm(10.2’~
(Ott 94) Check:
L Ispaper correctly installed in MP or LC Tray?
2. Check Medti forpaper gmizityprobleins, refer
customer b Paper Spec’s Guide 5002-1801.
3. Is media cut square?
4. Worn MP or LC Picbup roller.
5. Replace Separation Pad
6. Replace W RoUer.
Customer printing BOTE
SIDESof thePage or
‘fbis modelof LaserJetis a SIMPLEXprinterandis
not designedfor Duplexprinting.Althoughthisprinter
DUP~X printig? ~S canptintonbotb aides,thiaprati”ce is not supported
may causepaper jams, paper
feedingor print quality
by ~. ForthegeneralHP statementon “L)uplex
printing v Simplex” pleasereferenceHPReference
problems. Guide(GreenBook) section3.
@JLU?AIIP- Feb 95)
CustomerREFEEDINGpaper,
nottwo sidedpfiting?
Aa abovereferto HP generalstatementon “hplex
printing v Simplex” in W ReferenceGuide(Green
(L~lP~LP - Feb 95) Book) section3.
PAPER JAMS/MEFEEDS/ Interleaving, where a variety ofpaper is placed in the
S~G causedby
customerspracticeof
~ERLEAVING ~erent
typesof papermpapertrays?
paper tray, is not recommended by HP. This practiceis
likelyto leadto Paperjams& Miafeeds.For tbe general
HP statementon ‘!ZnterleavbzgPaper” pleasereference
~ ReferenceGuide(GreenBook) section3.
(LJIIPLIIIP - Feb 95)
4-9
Page 76

LJ1lP / LJl~lP -’PR~T QU@ITY PROBLEMS
RepetitiveMARKS appearing
onpage atre@ar interv~ see
tableopposite.
THIN VERTIC& BLACK
LINES?
(Ott 94)
HorizontalBLACK LMS?
BLACK BANDS appear
acrosspage,approx.3.7 rnches
apart,around0.5 rncheswide.
May appearwhilstprintingtie
fist fm pagesfier standing
idlefor awtie. (Updatd)
WHITE BANDSdownthe
page.
(Heiiier Waite - Glasgow)
(New Info)
BLANK PAGE? Occurswith
bothSeK-Testandcustomers
print fles. (New Info)
flan tigstafi- B’ham)
@m)
1. 94mm (3. 7inches) apart (EP Drum Defeci).
2. 63mm (2.48inches) apart (Upper Fuser Roller)
3. 54mm (2.13iuches) apart (Lower Fuser Rollefl
4. 52mm (2.05inches) apart (Transfer Roller)
6, 51mm (2.Olinckes) apart @eveloping Rolled
7. 49mm (1.93inches) apart (~ Feed Rollers)
8. 38mm (1.5bzches) apart (Charging Rollw)
1. Toner Drum scratched, replaced
2. Scratche@cores on Fusing Rollers.
1. Check Fibre Optics cable, maybe assoicated with
Error 41 or 51.
2. Replaced DC Controller.
1. Replace EP Cartridg&
2. Checkfor direct sunlight, doesit occuratone
parti- timeof day?
I ThelasershutterhadbecorneaWandwasblocking
tie laserbeam.
Replace lowercoverassy Pm RGI-1773-OOOCN.
No imageonEP DromandPrintEnginetestwasfound
to be working.Replacing the Formatter PCA resolved
this problem.
BLANK PAGE?
(Ott 94)
BLACK PAGES?
(Ott 94)
1. Seal tape left in Toner Cartridge
2. Empty Toner Cartridge
3. Replace Toner Cartridge Interlock Tab.
4. Replace Transfer Roller.
5. Replace ~S.
6. Replace DC Controller.
1. Replace wkh HP Toner Cartridges
2. Replace HV Contact Assy.
3. Replace Fibre Optics cabl~
4. Replace HVPS.
5. Replace DC Controller PCA.
1
4-11
Page 77

LJ1lP / LJ1llP - PRINT OUALITY PROBLEMS (Con’t)
I
BLACK Pagmtith someTkin
Horizontal~ LINES?
This~ alsogiveERROR 51
(Ott 94)
1
Damagedor severedFibreOpticscable.Replace the
Fibre Optics cable
I
FAINT PRINT?
[Ott94)
BACKGROUND?
(Ott 94)
1. Density Slide set to LHS, move b middle position.
2. EP Ca~”dge empty?
3. Replase Transf& Roller.
4. Replace ~S.
5. Replace DC Controller ~
6. Media out of spec, refer to 5002-1801 Paper Speck
Guid&,
1. Replaee EP Cartridge, ~ Toner Cart’s used?
2. Media out of spec, r~o to 5002-1801 Paper Spec’s
Guide
3. Clean or replace Transfer Roller.
4. Print Density may need a~usting.
5. Inside ofpn.nter dirty, clean.
L
I COMPRESSED PRINT, / SometitnesEPTonerCartridge“freezes’wkiclr \
maybecoqresaed on any makesthegearextremelyhardto turn.Tkeskfi on
partof thepage.Itmaylook theDrumdrivegearcontinuesto turnfora short
liketextcompressedrntoa timeeventhoughtkerestof theptiter ia
“thin line” or gaps between fietioning. Theredt is thatthedrumahafiturns
lines. andthedrumdrivegeardoesnot.The softerplasdc
of thedrumtie geargives,eventhoughit is
“keyed”.
P~RG1-1777-OOOCN
refer to 5002-1801 Paper Spec’s
UGE SH.EW?
(Ott 94)
Repace drum dtive gear
1. Is paper loaded correctly?
2. Media out of spec,
Guide
3. Wmn LC orMP Pick-up roller.
4. Replace Separ@.on Pd
5. Replace L!PRoller.
REGISTRATION problems?
(Ott94)
1. Check MP or LC Paper Tr~s are not overloaded
2. Paper Guides on MP Tray or Envelope Tray
adjusted too tight
3. Media out of spec, refm to 5002-1801 Paper Spec’s
Guide
4. If 1st dot row is NOT 3mm +\-lmmfiom leading
edge ofpage, then a~ust VR201 Regpot on DC
ControUer ~
5. Check for worn or damaged Drive Gears.
6. Replace W Paper Sensor PSI.
NOTE For Re&tration Check see Miscellaneous
section or Service Manual seti”on 4.
4-12
Page 78
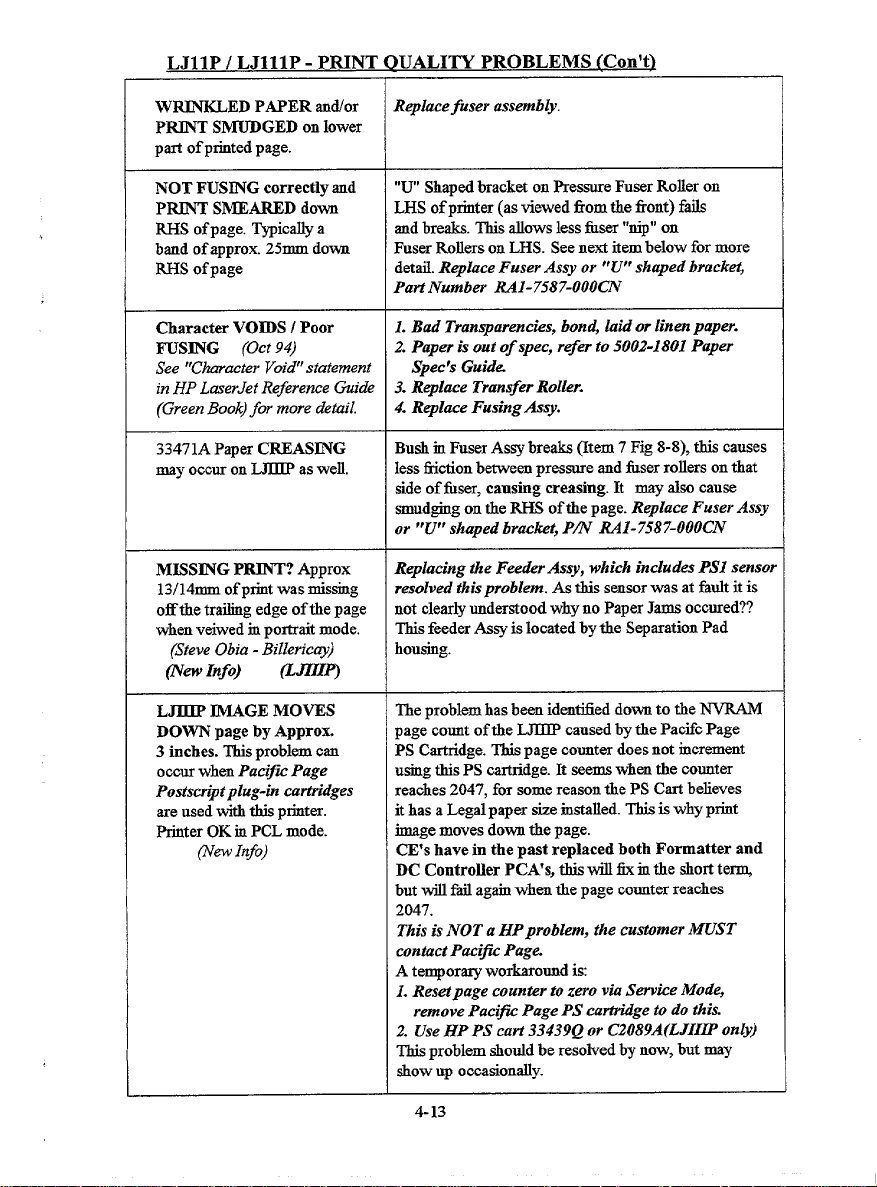
LJ1lP / LJ1llP - PRINT OUALITY PROBLEMS (Con’t)
W~ED PAPER ~d/01
PRINT SMUDGED onlower
partofprintedpage.
NOT FUSINGcorrectly and
PRJNT SMEARED down
RHS ofpage. Typicallya
bandof approx.25mmdown
RHSof page
CharacterVOIDS / Poor
FUSING (Ott 94)
See “Character Void”statement
in HP LaserJet Reference Guide 3. Replace Transfer Roller.
(Green Boo@for more detail.
33471A PaperCREAS~G
mayoccm on~ aswell.
MISSING PRINT? Approx
13/14mm ofprintwasmissing
off thetrailingedgeof thepage
whenveiwedmportraitmode.
(Steve Obia - Billeric~)
flew Info) @JZIIP)
Replace fuser assembly.
“U ShapedbracketonpressureFuserRolleron
LHS of printer(asviewedbornthefront)fails
andbreaka.Thisallowslessfiser “nip”on
FuserRollersonLHS. Seenextitembelow for more
detail.Rqlace Fuser Assy or “U” shaped bracket,
Part Number RAI-7587-OOOCN
I. Bad Transparencies, bond, laid or linen paper.
2. Paper is out of spec, r~m to 5002-1801 Paper
Spec’s Guide
4. Replace Fusing Assy.
BushinFuserAsaybreaka(Item7 Fig 8-8), thiscauses
lesstiictionbetweenpressureandfiser rollersonthat
sideof fiser, causing creasing.It mayalsocause
smud~g ontheRHS of tie page.Rqlace Fuser Assy
or “U” shaped bracket, Pm RA1- 7587-OOOCN
Replacing the Feeder Assy, which includes PS1 sensor
resolved this problem. As tkissensorwasatfadt itis
notclearlyunderstoodwhyno PaperJamsoccnred??
ThisfeederAaayislocatedbythe SeparationPad
housing.
LJ131PJMAGE MOVES
DOWN page by Approx.
3 inches. Thisproblemcan
occurwhenPacific Page
Postsmiptplug-in cartridges
areusedwiththisprinter.
PrinterOKinPCLmode.
~ewInfo)
Theproblemhasbeenidentied downto theNVRAM
pagecountof theLJTIfPcausedby thePacKcPage
PS Cartridge.~ page counterdoesnotrncrement
usingthisPS cartridge.It seemswhenthecounter
reaches2047, for somereasonthePS Cartbelieves
ithasaLegalpapersizeinstalled.Thisiswhyprint
imagemovesdownthepage.
CE’Shavein thepast replaced both Formatter and
DC Controller PCA’S)thiswill fIXmtherJIort
butwill failagarnwhenthepagecounterreaches
2047.
This is NOT a HPproblem, the customer MUST
contact Pacijic Pag&
A temporaryworkaroundis
1.Resetpage counter to zero via Servtie Mode,
remove Paci@ Page PS cartridge to do this.
2. Use HP PS cart 33439Q or C2089A(LJIHP on~)
TkiaproblemAodd be resolvedby now,butmay
ahowup occasionally.
4-13
teq
Page 79

LJ1lP / LJ1llP - PRINI
)UALITY PROBLEMS (Con’t)
Text looks BOLDER m a
banddownRHS of page.
Thisbandis approx,25mm
wide andm itsworstcase
mayappearalsowith aband
of Bsndground.A bandDISy
rdsoappeardow LHS of
page.
(Updated)
TOPS & BOTTOMS of
charactersclipped.Thisoccurs
eve~ 19mmdow.rrthepage.
(Ron Wallace - Manches$w)
mew Info)
Print “CRACKING” when
paperis folded.Whitelines
maybe seennuudngthrough
characterswherepageis
folded.
(Update@
Normallystrong sunlight causesthis problem.
Positionprinterwell awayfromthistidow, etc.
~ooommooooooooo
DDDDDDDDDDDDDDDDDDDDDDDD
_Q~QQQQQQQQQQQ
HHHHHHHHHHHHHHHHHHHHHHHH
DDDDDDDDDDDDDDDDDDDDDDDD
Cccccccccccccccccccccccccc
uuuuuuuuL
uuUuuuu!uuTuuu
I
page
I
TLriaprobleminitiallylookslikearepetitiveroller
problem.Replacing the Formatter
PCA resolved this
problem.
Tonercomprisesof pigmentedplasticmaterialand
ironoxide.Whensubjectedtohightemperatures
thesein~duai plasticparticlesbecomepartof a
largerplasticimageon thepage.Whenthepageis
foldedtheplasticmustme m someway.If theprint
iIDSgek well set
rntothe paper, theresukingbreak
intheplasticwill NOT be very apparent. However,
ifthetonerhasNOTbeenabletopenetratethepaper
fibre~the “Crack” in the plastic image ~ be
amp~ed. A whiteline will be seenthroughimage.
To ~e
1. Ensure paper meets ALL Paper Specs, see guide
5002-1801. In pahularpay attention to the
smoothness (1 OO-25OShefieU) and/or “W& Bd
~11 Dennison)
2. A tighter Density setting will ensure less toner
used, thusminimizing problem.
3. A lighter chara- stroke may also help.
Note: See HP LaserJetRe&ence Guide,section4,
“CrackingUp” page 4-1l(rtision RCO 4.01)
4-14
Page 80

LJ1lP / LJ1llP - PRINT OUALITY PROBLEMS (Con’t)
THIN LINE Down page,
aPProx50mmborn RH edge
of page? (LJIIP)
(La OReilly - Dublin - Feb 95)
Thispbrn was resolved by replacing the Formatter
PCA At firstsightthispbm doesnot look likea
Formatterfauk.To helpyou diagnosethisremove
FormatterPCA completelyanduseEngineTeat to
ascertainif pbm is stillapparent.Eventkougbthereis
no displaythe “tramlines”shotid print.
4-15
Page 81
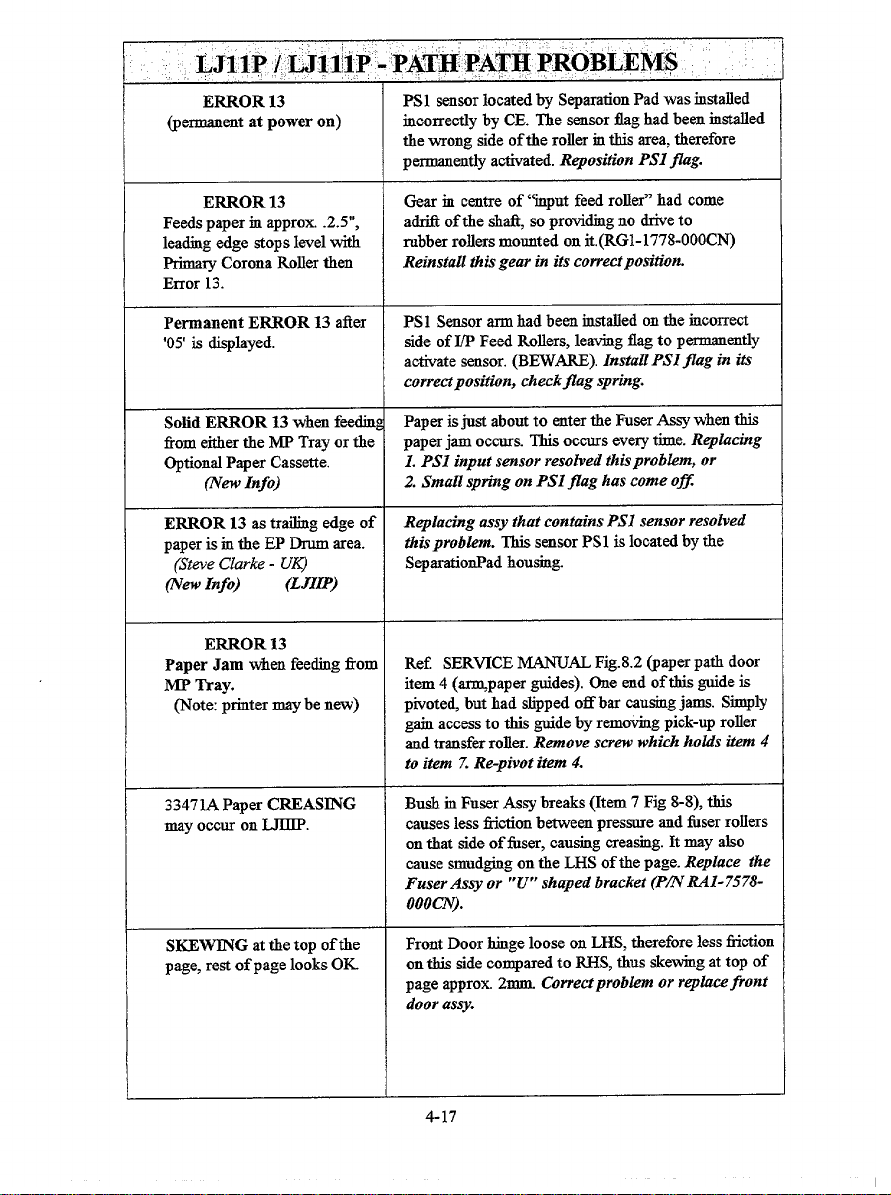
LJ1lP / LJ1llP - PATti PATH PROBLEMS
ERROR 13 PSI sensorlocatedby SeparationPadwas installed
@ermanentat power on) incorrectlyby CE. Thesenmrfig hadbeeninstalled
thewrong sideof thero~ermthisarea,therefore
permanen~ activated.Repositin PSI jlag.
ERROR 13
Feedspaperm approx..2.5”,
leadingedge stopslevelwith
PrimaryCoronaRollerthen
Error 13.
PermanentERROR 13 afier
’05’ is displayed.
Solid ERROR 13whenfeding
fromeithertheMP Trayor tie
Optional PaperCassette.
(New
Info)
ERROR 13 astrailingedgeof
paperisinthe EP Drumarea.
(Steve Clarke - UK)
(NewInfo)
{LJIIP)
ERROR 13
Paper Jam whenfeedingfrom
MP Tray.
(Note printermaybenew)
Gearm centreof ‘tiput feed roller”had come
am of theshaft,so providingno driveto
rubberrollersmountedon it.(RGl-1778-OOOCN)
Reinstall this gear in its correctpositin.
PSI Sensorarmhadbeeninstalledon tie incorrect
sideof J/PFeedRollers,leavingflag to permanency
activatesensor.(BEWARE).Install PSI flag in h
correctpositin, checkjlag spring.
Paperisjust aboutto entertheFuserAssywhen this
paperjamoccurs. Thisoccurseve~ time.Replacing
L PSI input sensorresolved this problem,
or
2. Small spring on PSljlag has come of$
Replacing assy that contains PSI sensor resolved
this problem. This sensorPS1is locatedby the
SeparationPadhousing.
Ref. SERVICEMANUAL Fig.8.2(paperpathdoor
item4 (-paper guides).Oneendof thisguideis
ptioted, buthad slippedoff bar causingjams. Simply
gainaccessto tis guideby removingpick-uproller
andtransferroller.Remove screw which ko~s kern 4
to item 7. Re-pivot item 4.
33471A PaperCREASING
mayoccur on LJIllP.
SKEWING attie top of the
page,restof pagelooks OK
BushmFuserAssybreaks(Item7 Fig 8-8), this
causeslessfrictionbetweenpressureandfiser rollers
ontkatsideof fuser,causingcreasrng.Itmay also
causesmudgingon theLHS of thepage.Replace the
FuserAsW or “U” shaped bracket (P~RAI-7578-
000CN).
FrontDoor hingeloose on LHS,thereforelessfiction
onthissidecomparedto RHS,thusskewingattop of
pageapprox.2rmu.Correctprobti or
rephce front
door assy.
417
Page 82

LJ1lP / LJ1llP - PATH PATH PROBLEMSlC_on3
REGISTRATION CHECK Priutoff A Self-testPage
See Page section4 m Service
Manual for RegistrationAdj. LEFT - Lefi Edgeto FirstDotRow (tifi Vert Border)
(Ott 94) LEFT - Le%Edgeto FirstDotRow (Le@Vert Border)
IMAGE SKEW MaxImage tolerance = 1.5mm over 259mm(I0.2’~
(Ott 94)
Customer printing BOTH Tbiamodelof LaserJetis a SIMPLEXprinterandis
SIDESof tkePage or not designedforDuplexpriuting.Altiougk thisprinter
DUPLEXprinting? ‘ThiS
may causepaper jams, paper
feedingor print quali~ printing v Simplex” pleasereferenceHPRefwence
problems. Ouide(GreenBook) section3.
@~~P - Feb 95)
CustomerREFEED~G
nottwo aidedprinting? printing v Simplex” in HP ReferenceGuide(Oreen
~P4~- Feb 95) Book) section3.
PAPER JAMS/MJSFEEDS/ Interleaving, where a variety ofpaper &placed in the
SKEWING causedby paper tray, is not recommended by 33ZJ.This practiceis
customerspracticeof likelyto leadto Paperjams& Miafeeds.Fortie general
INTERLEA~G ~went
~es of papermpapertrays?
(ZJZLP..ZLZP- Feb 95)
paper, As above refer to HP generalstatement on “&plex
TOP - LeadingEdge to FirstDot Row (A4Z@)
= 3mm=/- lrum,(Top HorzBorder)
= 5mm +/- 2mm (A4)
= 6mm +1-2mm (Lti)
Check:
1. Ispaper correctly tistalled in MP Tray?
2. Check Media forpaper quhrityprobiems, refer
customer to Paper Spec’s Guide 5002-1801.
3. Is medti cut square?
canprinton botb sides,this practice is not suppotied
byHP. ForthegeneralHP statementon “fiplex
HP statementon ‘interleaving Paper” pleasereference
HPRekrence Guide(OreenBook) section3.
tillP~Jlllp - :OPT16NM FW~k’ TUY’RROB~EM~’
UNABLETO RECOGNISE Check connectorJ901 onlowertrayPCA. CarefuUy
Lower OptionalTray?
Solid ERROR 13 whenfeetig Paperk~st aboutto entertheFuaerAasywhenti
fromeitkertheMF Trayor tie paperjamoccurs. Tkisoccurs everytime.Replacing
OptionalPaperCassette. PSI input sensor resolved this problem.
@ew Info)
,’, ,,, .
resolder if necessary
4-18
or replace this PCA.
Page 83

L311P / LJ1llP - POSTSGR~T PROBLEMS
PS BUSY whenusingHP
PostscriptCartridge (HP
33439P).A continuous“PS
BUSY” condition
if ‘lAuT@CO~ is
can occur
Oh
andthe documentis longertha
1to 2pages.Mthepageis
printeditmayreti m missing
lines,Wed text, malfomed
letters.Fatitypagewillbe
ejectedandError will be
d~layed.
33481A
LJffCPwithPostscriptinstalled
recognisesprinter as a L~
(512Kb)?
(Updated)
L~ IMAGE MOVES
DOWN page by Approx.
3 inches. Thisproblemcan
occurwhenPacific Page
Postscriptplug-in cartridges
areusedwiththisprinter.
PrinterOKm PCLmode.
(NewInfo)
Thisa similarproblemto theInterrnittmtError41,
causedby staticdischargefrom&ser as~. PS can
not reportError41, insteadit displaysPSBUSY.
Install dwde in fuser assy (Cheapm) or replace
fuser assy (Expensive). See service note33471A-02B
A 33439Pmostprobablywillbe rnstrdle~a
LJHIP
requires the Postscript cartridge 33439Q. A LJHIP
can also use tie C2089A Switchable PS Cam”dge
See Postscriptcompatibilitymatrixm section 1 of this
book.
Theproblemhasbeenidenthieddownto theNVRAM
page countof theL3’fLIPcausedbythePacifcPage
PS Car&ridge.Thispage counterdoesnot increment
usingthisPS cartridge.Itseemswhenthecounter
reaches2047,for somereasonthePS Cartbelieves
ithas a Legalpapersize installed.Thisis why print
imagemovesdownthepage.
CE’Shavein the past replaced both Formatter and
DC Controller PCA’S, thisW fi inthe shorttq
butwillfail agti whenthepagecounterreaches
2047.
Thisis NOT a HPproblem, the customer
MUST
contact Pmific Page
A tempo~ workaroundk.
1. Resetpage counter to zero via Service Mode,
remove Pacific Page PS cavtridge to do this.
2. Use HP PS cart 33439Q or C2089A(LJIHP only)
This problemshotid be resolvedby now, but may
showup occasionm.
LJIILP~GE MOVES
DOWN page by Approx.
3 inches. Thisproblemcan
occurwhen Pacific Page
Postscnptplug-in cati”dges
areusedwiththisprinter.
PrinterOKm PCL mode.
(NewInfo)
Theproblemhasbeenidentifieddow to the~
pagecountof theLJTffPcausedby thePacifcPage
PS Cartridge.Thispagecounterdoesnot increment
usingthisPScartridge.It seemswhenthecounter
reaches2047,for somereasonthePS Cartbelieves
ithas a Legalpapersizeinstalled.Thisis why print
imagemoves downthepage.
CE’Shave in the past replaced both Formatter and
DC Controller PCA’S, Ws willfix in the shortte~
4-19
Page 84

LJ1lP / LJ1llP - POSTS( UPT PROBLEMS (Con’t)
(Conl)
but will fiil againwhenthepagecounterreaches
2047.
This is NOT a HPproblem, the customer WST
contict Pacz~c Page or Dealer.
A tempor~ workaroundis
1. Resetpage counter to zero vin Service Mode,
remove Paci~c Page PS ca~”dge to do this.
2. Use HP PS art 33439Q or C2089A(LJIIP on~)
This problemshotid be resolvedby now, but may
showup occasionally.
4-20
Page 85

Classic Printers
LaserJet 2000
2684M!
Page 86

How to use this Section:
The faults are sub-divided into the following four categories
1) Faults with ErrorNumbers
2) Miscellaneous Faults, Le.frontpanelhangs, pages out of sequent, et{
3) Print Qual@Probleins
4) Paperpath Problems, Le.paperjams (surprise, surprise,
this is the biggest section)
PLEASENO~
Whenlookingfor 13.X PaperJsrnspleasereferto paperpathsection, asallof these
~es of errorsappearthere.
5-2
Page 87

JUMBO.IETF~URES (REALONES}WITH SOLUTIONS...
ThefaultscontainedinthissectionareALL realfaultthathaveactuallyoccuredinthe
field.ThisbookletwillhelppreventotherCESgoingthroughthesamelogicaltroubleshoot-
ingpath,thussavingtimeandincreasingefficiency.
NotethisisNOT areplacementforthe2684TROUBLESHOOTINGGUIDEChapter.7
intheServiceManual,butcanbeusedinparallelto aidfaultlocation.
PleasenoteallpagereferencesarefortheNEWSERVICEMANUAL(02684-90903).
LIST of SERVICE NOTES up to Jan 91
HerearetheServiceNoteswhichhavebeenreleasedontheJumbotodate
2684-1 Centronics 1/0 data loss
-2 PDXUnit Improvements
-3 Drum Damage Service Hints
-4 SwitchbackService Hints
-5 Duplex UnitImprovements
-6AFuserAssemblyImprovements
-7 Switchback UnitImprovements
-8 Drive chain andgear wear
-9 Out offocus laser
-l OSwitchback -Friction /Positive dn”ves
-11 Font CartridgeMagaine mod
-12Front PanelK~ CapReplacement
-13 DuplaHolding TrayLED
-14A Toner WasteLED
failures
Hereis alistofitemswhichyoushouldalsohaveavailable whengoing
onsite:
SERVICEMANUAL...............
PAPERSPECIFICATIONGUIDE....5954-8953
REAMof standardwhiteLaserQualityphoto-copimpaper.(Xerox80premier has always
worked well with theseprinters)
Orderup severalcopiesof thepaperspecguidefortheoffice andgiveacopy to
customerswithpaperproblerns.Remembertoalways teti out theprinter withstan&nf
white Xerox 80photo-copierpaper wheneverthecustomer’spaperis suspected.
Otherdocumentation:
0PER4TORSMANUAL ............02684-90901
TECHNICALREFERENCE..... ...02684-90904
;;
02684-90903 (2ndeditioncomplete)
5-3
Page 88

Please Note thtiallPaperJams or Error 13.xproblems, refer to the Paper Path part of
this section of this mariual
10.1PRINTERDOOROPEN
(whendoor areactuallyclosed)
WhenopeningLH doorget
Error62.
10.2OUTPUTDOOROPEN
11.3ADD PAPER - topaper
Deck
UsingPDXTray,13.1Paper
Jams,oftenpreceededwith
25.3~SPRINT. Failure
OCCUrSwhenPDXrunsout
of paperof thedooris open.
TheDCControllerPCAhadbeenreplaced,connectors
J-124on theDC CtlrPCA and J902B on the DFD
PCA had been reversed.
BEWAR.Ethis6 easily done.
Microswitch bracket bent at rear of the switchback
FeederAssy (i.e. opendooron LHStorevealfuser
rollers).Themicroswitchinquestionisontop towards
theback(or on the left of theswitchback,lookinginto
thefuserarea).SeeservicenoteonSWITCH-BACK
UNITIMPROVEMENTS(2684-4),thisadvisestoorde
adoorguide~/n RAI-7035-OOOCN).
1. Invalidpaperstie selected on PDDUd@ switches.
The onlyvalidsizesare
LETTER-SW3 I (UP) A4 -SW3 O(DOWN)
SW41 (UP) SW41 (UP)
2. DCPS1 in the ,PDXwas tr~ping when the tray
ll~ed to its working height
(The buttonwaspoppingup). The cause
wasafadty PDXDRIVERPCA (alsoknown
asaDeck UnitControlPCA).
SwitchesSwl-5 &Swl-6on thePD-Decontroller
PCA arele@ in the UP(Active)position. These
switchesazeusedtolocateDuplexjams(page7-59)
andshodd be norrnaJlyDOWN (OFF).
ERROR25.3 - ~SPRINT
(Intermiaen#
ERROR51-BEAM DETECT
DETECTMALFUNC~ON
onpower-up
ERROR51-BEAM
DETE~MALFUNC~ON
(Intermitten~
Customerusingpaperwithperforations.The
perforationareawasthickerthantherestof
thepaperand falselyreportedamisprint.
Hastheprinterjust been installedafierhavingbeing
moved from a coldenvironment?If yes,wait30
minutes forpn”nter to warm up and try again.
1.Foldback mirror out of adjustment Perform
adjustmentas perthe ServiceManualpage6B-28.
2.Fokiback mirror had slipped out of adjustment
due to one of 2 metaVrubber discs moving out of
position. These disc aregluedontothethemirror
mount(item52,Fig 8A-04,P8A-18) oneisunderthe
adjustmentscrew,theother(lowerone)actsasa(Con’t)
5-5
Page 89

..”- . . .Wu. “ ,. . . . . M.u.u.. ,. U..IBUL- , Q“n *
(Con’t) backstopforthemirrormount.Thefix inthiscasewas
tore-gluethelowerdiscinthecorrectposition.UseRF
PROBE(34301A) withDVM to adj, seeinstructions
foritsuseinAppendixB-1 attheendof thissection.It
hasfound by qenence replacing theFoldback Mir
rormount assyprovides the long term% as glua”ng
rubber dies’s have notproved to be to successfu~
ERROR53 -OVERTEMP? Theprobiem was caused by a Defe@”veFM5fm.
Afterprinterisswitchedoffthen
onagain.Severalpageswillbe
ThisfanblowsairtheoughthePrimaryCoronainorder
to keepwiresfreehorncontamination.Also if thisfanis
printedbefore thiserroroccurs. inoperativehotairwillNOTbepulledhornfoldback
mirror(viathelasertunnel)and laserunit.Thiscauses
@ewZnfi)
the lasertooverheat.Thisfanisaccessedfromthefront
of theprinterbehindthelargeblackplasticguardbelow
&or.
ERROR 54-DRUMMOTOR Faulty MOTORDRIVERPCA.
MALFUNCTION
ERROR 56- ImageCounter
FwkyDCCONTROLLERPCA.
Malfunction
Will not pick-up fromPaper Replacing thePDDUPCA resolvedtkispbm The
TraysorPDX, alsoIntermit trickherewastodisconnectthePDX & Duplexunits
ERROR57 (DuplexCounter)
(Graham Jones - B%am)
fromtheprintengine,Nowtry again,will itpickpaper
frompapercassettetrays?
(Ott 94)
ERROR58 OR UNIT
FAXLURE.my OCCWS
whenpapermovesfroma
I/Ptray.StackerO/Ptray
jammedatthetopof its
travel,only2.5cm of textis
printed.
ERROR 60- PrinterAC power
LineUNSTABLE.
ERROR62 whenopeningLH
sidedoor. 10.1Pfiter Door
Openmessagewasfirsttoappea
eventhoughdoor wasactually
closed.
Worn shank on brass gear bearing on the nearside
lifterassy drive shafi
item26 Fig8b-8,page8b-15
(p/nRS1-O078-OOOCN),causingstackertraytoseize.
Thismeantthatthetraycodd notinitialiseby dropping
therequired1/2inch.
L JI09 connector on DECONTROLLER PCA
not connected
2.Faulty DCPSI (See Fig 9-1,p 9-3for location.
3.FaultySLAVECPUPCARG1-0513-040CN.
TheDC ControllerPCAhadbeenreplacedand
connemr J-124 on tie DC CtlrPCA and J902B on
DFDPCA hadbeen reversed BEWAREthisiseasily
mistakenlydone.
5-6
Page 90

ERROR70 - SystemFault
(06FF) (Intermittm~
I
ERROR70 (160~ intermittent?
@ewInfo)
Fau@FOMTTERPCA.
I
TheFormatterPowerSupply+5vwasfoundtomeasure
4.5v, ThisDC Voltige was reajustedto +5v and
prob&m didnotrem. NOTE:anyproblemsinthe
Formatterareaitisalwaysworthwhilecheckingthis
voltage.
ERROR74 - LocalRAM
Malfunction(Itiwitten$
ERROR79 whendotioading
Macro’s.
(H Thorsagan- Norway)
Fau@FO~TTERP&
UsingNon-HPmemory chips
5-7
Page 91
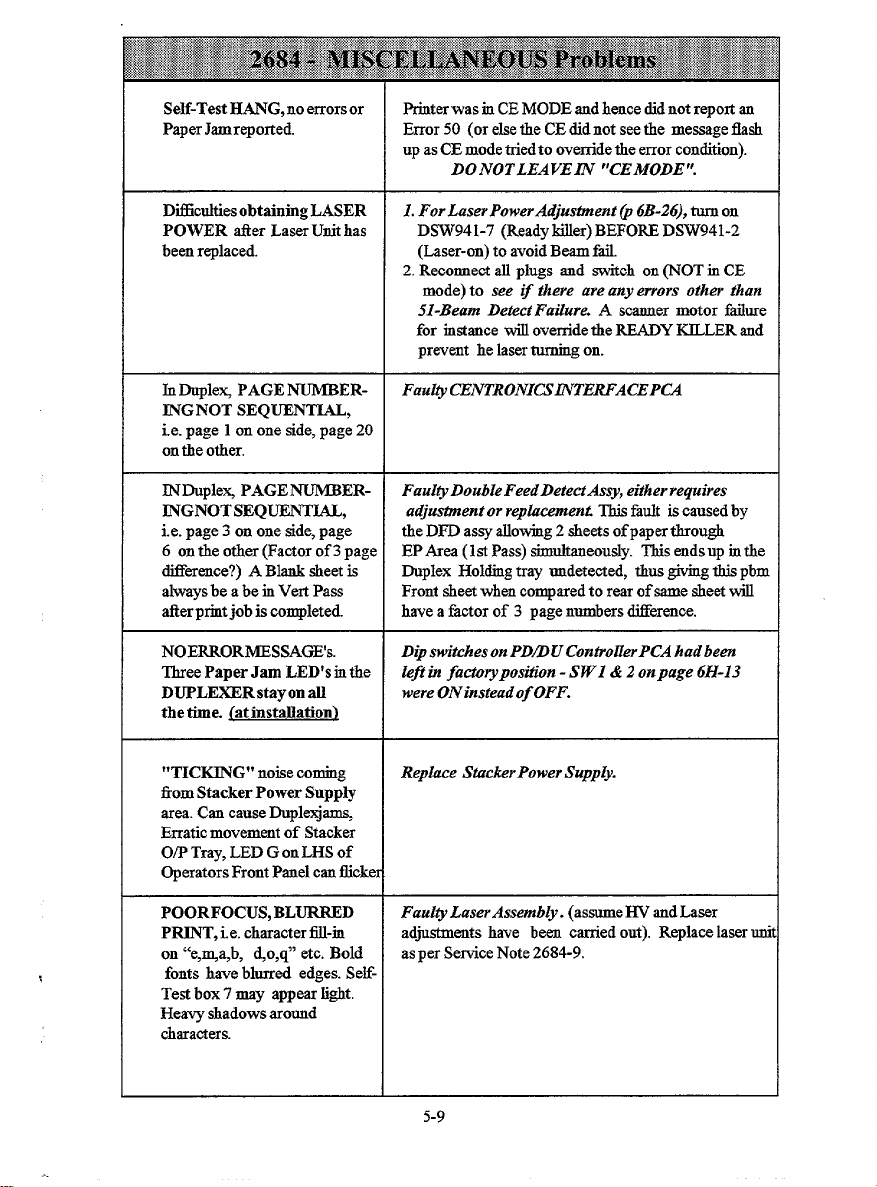
Self-TestHANG,no errorsor
PaperJamreported.
PtinterwasinCEMODEandhencedidnotreportan
Error50 (or eke theCEdidnotseethe messagefish
upasCEmodetriedto overridetheerrorcon~lon).
DO NOTLEAVE~ “CEMODE “.
Dfictiesobtaining LASER
POWER Aer LaserUnithas
beenreplaced.
InDuple&PAGE ~ERINGNOT SEQUENTIAL,
i.e.page 1on one side,page20
ontheother.
INDupleX PAGE NUMBER~GNOTSEQUENTIAL,
i.e.page3 on one side,page
6 ontheother(Factorof 3 page
differmce?) A Blanksheetis
alwaysbe a be inVertPass
tier printjob is completed.
NOERRORMESSAGE’S.
ThreePaperJam LED’s inthe
DUPLEXERstayon all
thetime. [atinstallation)
“TICKING” noisecoming
fromSta*er Power Supply
area.CancauseDuplexj~
Erraticmovementof Stacker
O/p Tray,LEDGonLHS of
OperatorsFrontPanelcanticke
I. ForLaserPowerAdjus fment @ 6B-26), tutu on
DSW941-7 (Readykiller)BEFOREDSW941-2
(Laser-on)toavoidBeamfd.
2. Reconnectall plugs and switchon (NOT inCE
mode)to see Zythere are any errors other than
51-Beam Detect Failure. A scannermotor failure
for instancewilloverridetheREADYKILLERand
preventhelaserturningon.
Fau@CENTRONIGINTERFACEP~
Faulty Double FeedDetectAssy, either requires
adjustment or repbcement This faultiscausedby
theDFDassyallowing2 sheetsof papertiough
EPArea(la Pass)sbmdtaueously.Thisendsupinthe
Duplex Holdingtrayundetected,tkus-g thispbm
Frontsheetwhencomparedto rearofsamesheetwill
haveafactorof 3 pagenumbersWerence.
Dip switches on PDDUControllerPCA had been
lefi in factoryposition - SW1 & 2 onpage 6H-13
were ONinsteadof OFF.
Replace StackerPowerSupp~.
POORFOCUS,BLURRED
PRINT,ie. characterfl-rn
on “e,qa,b, ~o,q” etc. Bold
fonts haveblurred edges.SeK-
Testbox 7 may appearlight.
Heavyskadowsaround
characters.
Faul@LaserAssembly. (assumeHVandLaser
adjustmentshave been carriedout). Replacelaseruni
aspm ServiceNote2684-9.
5-9
Page 92

““m- .T..”buuum, , m““ 0, -“U L
IntermittentDARK2 rnchWide
BANDOF Toner mLaser
Scandirection.Occursevery
20-50pages,edgesof band are
bl~and extendsacrossthe
entirekmgthofh
STREAKY BACKGROUND
Faintlinesacrosspage, approx
1/2mmapart.Theselinesappear
in~ direetioqbutarenot
stmighthes. Theyareslighty
unevenandlooksvqmuchlike
background.
HORIZONTAL Displacement
LH PARTS OF ALL CHARACTERS (LANDSCflE
MODE).
Charsareclearlyformed(i.e.NOT
@)but havedifictiveLH
tails(ii thiseasea row atthe
topandbotto% andoneininthe
rniddIe).SeeExampleopposite.
Fau@ POTENTL4L CONTROL PCA. The ‘ES
LOOP’’wasnumingoutofcontrolcauaiugthe
-Corona aentto rncreaseuntilitbegsntoarc.
~ SetSW1onthemodeselectswitches(P6C33) to
OFF(right). This setsthePrimaryCoronacontrolto
NON-AUTOMATI~ mode,which keeps the current
fiedat theti(V&rktarget)value.
1. Worn/di@ cleaner blade - reverse edge or replace
2.Replace Cleaner Stition Assy.
Faul@ SC~ER MOTOR asstvnbly.
e.g.
<\~QJq
I
1Paper
~Movenzent
!
Direction
JAM JNDICATOR AND
PS4LEDo%accompanied
by either
* 13.1PRINTJAM( SIMP)
Faulty DCPS1 in the print engine. This symptom
ocmwhmthe 24v fds sndhencesensors/countersetc
WiJlbecomernoperativeandgivefalaereadings.Check
the24v comingrntotheDC CTLRPCAat J1OI,pin2;
* 13.3DUPLEXJAM(DUF) this comesdirectfromthepowersupplyandif low the]
* 56-MAJNCOUNTER DCPS1shodd bereplaced.(RememberPS4LED
MALFUNCTION
correspondsto thesensorabovethe PDX, andbekind
Iowercassetteholder).
Will not pick-upfiomPaper
TraysorPDX,alsoIntermit
ERROR 57(Duplex Counter)
(Graham Jones - B ‘ham)
Replaang the PDDUPCA resolved this pbin. The
txickherewastodisconneathePDX&Duplex~sfiorr
theprintengine.NowtVa~ willitpickpaperfiom
papercassettetrays?
(Ott 94)
5-1o
Page 93

2684- MISCELLANEOUS Problems (Con’t)
Atpower displays’05‘asno@
doesnot Display‘W~G
UP’,butjurnpsto’00READY’?
Mer Completingwarmupwith
incorrectdisplsy,printerworks
fine.Jfdoorsareopened(except
frontdoors)thereisNOdoor
OPENmessage.Also if PJ
occurs,noPJmessageis
displayedthougkorangePJligkt
~es.AlsoifMISP~
occursno25.xmessageappears,
thoughpaperdoesappearrn
ErrorTray.
(PaulKroon - Holland)
HANGSON-LINEin
D~LE~nopaperrnhokiing
tray,largegreenhobinDuplex
continuouslytuming.Last
pagesonstackerhaspage
numbtig outof sequence.
ERRATIC movementof
O& STACKERTray.
LHjamLED(stacker)on
indicatordisplayfiketig.
DUPLEXJAMS(aspaper
mtersduplexfiomtier).
“TIC~G noisefrom
STACKERPOWER
SUPPLY.
ReplaceEnginePCA.
Double Feed hd ouured in Duplex. Dropholdingtra~
&force2pagestiougktheupperandlower separation
rollers.Ifthiscanbeea~ ackieve~theserollersarewon
andShoddbeadj’edorreplaced.
FaukyStackerPowerSupply(+24v).V@by
monitoringthe+24vrailontheStackerControlPCA
(TP103).If~plyisfkukythenthevoltagewilldip
to 15-2lvwhenseK-testisinitiate~dthoughfican
measure+24vwhmtieprinterisidle.
FUSERTOWELrunning
outafter 20-30K pages
(220-240v)
Onpowero% AC Marns
CircuitBreakerTTUPS
OUT(notprintercb).
A IOK10watt resister (item 80, Fig8a-03,page8a-10)
in parallel with fusing towel motor as~ had gone
O/C, causingthemotortorunfist.Thisresistorkshown
ontheBASICPRINTENGINEdiagrampage9-3,
middleleftof AC Ner PCA.
10K ohm 10 watt resistor for Fuser Towel motor was
shoti”ng down to eatih. ~ resistorisinparallel
w%hTowelMotor.
5-11
Page 94

. . ------- . . .-- w”. . . . . . . . . . ,
-“., .
-“u .x
MfSPRINTS & multiple copies
ofthesameprintedpages
appearsmtheO/Ptxay.ONLY
TwoakeetsofA3paperfeedingaimukaneouslyfiom
Duplexhokiingtray.Adjustor replaeSeparation
rollers.
withA3paper.
OnPoweron, goestoReady
asno~ thenjumps to
CEnoted5VonFormatterPowerSupplymeasured
4.7v, readjusted to 5v~dproblein.
“05 Self-Test”?
Print“cR.4cfuNG” when Tonermmpriaesofpigmentedplaaticmaterialandiron
paperisfolded.White lines oxide.Whensobjectedtohightemperaturesthese
maybeseenmnningtkrougb iudividtiplasticparticlesbecomepartofalargerplastic
characterswkerepageis imageonthepage.Whenthepageisfoldedtheplatic
folded. mustgiveinsomeway.Iftheprintimageiswellsetrntoth
paper,thereaultingbreakiutheplaaticwillNOTbevery
apparent.However,ifthetonerhasNOTbeenableto
penetratethepapertibre$tie “Crwk” in thepkstic
image will be amplz~d A white line w“ll be seen
through image
To~
L Ensurepaper meets ALL Paper Specs, see guide
5002-1801. In patiularpay atintion to the
smoothness (100-250 Shef@ld) an~or “Wax
~“ ~11 Dennison)
2. A lighter Density setting will ensure less toner,
thus mininrising theproblem.
3. A lighter character stroke may also help
le
i’
Self-TestwillNOT run from Checkiflowertrayisa “SECURESOURCE”
LowerPaperTray.
LEADfNG EDGEof Paper
hastoner SMUDGE,mostly
Turn OFF secure source via fiontpane.?
Iftheleadingedgewasobaervedclosely,fiomtherearof
printertowardsthefiont,thepaperhadpickeduptoner.
ontherearsideofpage.Also ~tonersmudge appearedmairdyontherearsideof
imageisSKEWED.
@ew Info)
@anMartin,B’ti, Jun 94)
pageandgraduallygetworsetowardstherearofthe
printer.AlaotheimageisSkewedcomparedtothe
leadingedge of thepaper.Thisproblem was resolved by
adjusting BLOCKS on item 66, page 8a-14, Fig 8a-4.
Inthis casetherearblockwasajustedtorescdveboththe
TonerSmudgeandSkewproblems
CustomerRE~EDING paper, As abovereferto~ generalstatementon“~plex
nottwo tidedprinting? prtrzting vSirnpla” in HP RefmenceGuide(Green
Book)seetion3.
5-12
v
Page 95

26S4- MISCELLANEOUS ProbIems{Con’t)
PAPERJAMS~FEEDS/ In&rleaving, where a vari@ ofpaper isphwd in the
SKEWING causedby
cuatomerspracticeof
INTERLEA~G ~ment
typesofpapermpapertrays?
I
paper tray, is not rewmmmded by HP. This pracdcek
likelyto leadto Paperjams& Miafeeds.Forthegeneral
HPstatementon “InterleavingPaper” pleasereference
HPReferenceGuide(GreenBook) section3.
5-13
Page 96

RepetitiveMarks on the page
priutdefectsatre@distsnee
apart.
1. 50mm apart (Registration Rolkrs)
2. 50mm apart (Duplex Rollers)
3. 64mm apart (Cleming Assy)
4. 100mm apart (DeveloperAssy)
5. 135mm apart (Fuser Rolled
6. 250mmapart @P Drum)
~~N’TFAINT
Pm (1-15K pages)
acrossentirepage.Less
fiequentlyaBLACK page.
isprinted.~W Printer)
PrintFADEStowardsfiont
Ofprinter?
FAINTAREA’s onleading
edgeof Duplex page.
(Approx l/4to 3/8 rnch
@ncan FranMand- Ha)
(Fred& Olsen-Denmar~
Fault was due to groundingproblem with HVT1
whichsupplies~SFER(tit pageproblem)and
PRIMARY(blackpage)coronas.Checkthe4LED’sson
HVTl; rnthiscaseD107,D106&D207were on but
D206alwaysremainedoff.Thelowerlefthmdspring
contactof item73 (springle@, Fig8A-03,p8A-13
wasrncorrectlypositionedto thelefi of thecoronaguide
(Ioobgfiomtheback). The fiwastoremovetie
springlesfsndthenrepositiontheLHspfig contactto
therigktsothatitispressingagainstthecoromguide,
1. Cleaner Blade NOT SEATED propera~.
2. Print En@”nelowerpaper guide ptite (item 67
Fig 8a-4, page 8a-14) was loose due to screw
(E62) missing?
3. Check Height of Prima~ Corona wires adjust
to wrred
1. Caused bypaper rippling tier fist pagepasses
throughFuserforthelsttime.Try snothertypeof
paper.
2. Check EP Voltages & Drum Potentionals.
3. Adjust Separation/Transfer wrona m“reheight
ormoveSepiTransferCoronamountinggnidetotake
coronaclosertoEPDrum.Refertopage8a-14,the
paperguideisitem67tich isattachedtotheTransfer
frameitem66byguideblocksitem69.Thereare2
gnideblocks, oneateachendoftransferfisme.To
ad~st thepaper~de, loosenscrewsateachendof
theTransfertie, slidetheblockupordown sndthen
retightenthescrew.Toget attherearscrew,takeoff
therearcoveraadlowerTransfer/SepCoronaassy.
BEWAREifadjustedto closetotheEPDrmnpaper
jamsmayoccur.
SomeCharactersFAINTin
Scandirection?~ewInfo)
BLOTCHY Backgroundall
overpage?
Check Foldback Mirror a~ustment or replace mirror
mount.
Customer hadputNON-HP toner(ie Xerox) rntothe
DeveloperAssembly.Look atTonercoatingonDev
~itwillappesreitherveryuneven ortihaveave~
thinwating
5-15
Page 97

26S4- PRINT OUALITY PROBLEMS (Con’t\
BLACKPAGES. 1.Potential sensor was shorted to it’s mounting
(Ray Warnbold, US: 5vto PetentionalControlPCA.
PrintscompletelyBLACK Resolvedby replaciisgPotentianalSensingAsW.
PAGESwithnowhiteborders?
(F. VanGrieken,Amtralia)
flew In@,May94)
BACKGROUND,prints Varistoron PRIMARYCORONASCREENwasnot
sligh@FUZ~? grounded.MPrimaryCorons (No.1)out about3rnchea
GeneralBACKGROUND all Replace Dmeloper ASW.
overpage?
(Mike McGough - B%am)
plste(iiem62,iig8A-04,p8A-18 by ametalburr. A
quick teatis to removetheonescrewat thefront
whichfixesthemountingplate and providesthepathto
ground(thescrewistheoneholdingm plastic item11,
Fig8A-02, p 8A-8). If the blackpagesdiaap
pearthenremovepotentialsenaer/plateasayandcheck
for shortingburrs,fltietc.
2. DS 106onHVT1 HVPSdimornotlit,alsoLED1
&LED2 onPotentionslControlPCAnotM.
This w~ uusedby DCLPS2 Power Supply, no
(7cm) sndnotethemetslprnseithersideof
handle.Theright-hsndpinshotidengageametalground
tabastheCoronais phggedin. Int.biscasethemetal
tabhadbeenbentandwas notcontactingtheRHprn;the
f= was simp~ to bend the tab straight
the
BLANKPAGES running Pins bent on J109 wnne~r of the DC ControUer
SELF-TEST(noexrors,no PCA.
imageondrum.DC Cent
PCA kad justbeenchanged).
BLANKPAGESonlyrn
Graphicsmode(htus)when
connectedtoanIBMPC.
WZZYMARK(5mm wide)
recurringevery10.5cmm
directionofpaperpath.
DOTS REPEATED every Drnm damaged (LE arcing). Enaoreall coronas,W
25cminthedirectionof
paperpath(ieonceperA4/
LETTERsizesheetbutnot NEVERruntheprinterwithtltedweloperempty.
inthe sameplace).Dot
size is unacceptabletothe
customer/CE.
IBM PC had an old version of the PRfiVTER Driver
Foreign body had stuck onto DEVELOPER
ROLLER.
anddevbmssuppliesareoperatingcorrectlyandtheEP
areaisfieefiomexcesatoner betirereplacingthedrom
Seeservicenote onDR~DAMAGE SERVICE
HINTS(2684-3).
5-16
Page 98

2684- PRINT OUALITYPROBLEMS (Con’t)
RecurringSMUDGEor
markevery10cm.This
patterncoddbe seenin
developerbrush.Cleaning
Developerwoddgetridof
itforawhile.Repkicrng
developergetsridofproblem
foralittlelonger.
(Ed Rote, Uti)
In ScanDirectio~fromLH
sideprintsApprox75mmthen
bkm~ thenprintsthelast
25mm.Asprintchsngestono
print,theprintedtigedoesfade
Seeexsmpleopposhe.
CHAR’s BREAKING UP
EVENLYACROSSTHE
PAGE.Even@ dthatit
printedisajumbledseriesof
brokenscanlinesnmningedge
to edgeofthepaper.
55mmJTTTERonlywith
A3 or Ledgerpaper. Seems
toappearwhenShaded
areasareprinted.A smear
appesrs55mmfiomthe
trailingedgesndis2/3mm
wide.
(Hubert Villtirs)
Theprinterwasma verywarmenvironmentand
enclosedrnasmsllsrea,whhnosirmovement.This
causedtonertoCLUMPonthedeveloper.Erzsun”rrg
there is adequate aiflow to dissapate the heatfied
this problem.
Adjust Foldbackmirror or replace mirror mount
Fardty ENGINE INTERFACE PCA.
Replace with new Feeder guide Assy(RGI-1719-
000CN)
PrintImageMOVEDDOWN
pagebyapprox15mm?This
wasinthedirectionofpaper
movement.@ewlrr~o)
(PeterSalesbury - Ci@ Gate)
TheCharacterFontonSelf-Tes
lookWAVEY,no&y they
shouldbediagonal.
CharactersCOMPRESSED&
ELONGA~D, morenoticable
whentextisprintedinlsnd-
scapemode(iiPaperDirection)
(ChrisRivett)
RephceMain Motor. Thismotormusthavebeen
-g slightlytistto@etbiasymptom
CustomerhasaProportionslPlug-rnfont,similarto
perhapsa92286Ffont.Theptinter always grabs the
plug-in font rather than the normal internal font
Itwasnoticedalso,thatmthed squaresontheSeE-
Testhasnsrrowdsrkerbsudsappox4/5mmapart.These
bandswerefiomfionttobackofptiter. Removableoftht
EPDmmshowedtheselineswbichcouldnotberemoved
by cletig. Replacing EPDrum resolvedproblem.
Initiallythis problemlookslikePrintEngChainorMain
Motor,soBEWARE.
5-17
Page 99

26S4- PRINT OUALITY PROBLEMS (Con’t)
LEADING
hastoner SMUDGE, mostly
ontherearsideofpage.Also Thistoneremudgeappearedmainlyontheresrsideof
imageisSKEWED.
@anMartin, B’ti, Jun 94)
EDGEof Paper
flew Inf@
Iftheleadiagedgewasobservedclosely,fiomtherearof
printertowardsthefront,thepaperhadpickeduptoner,
pageandgraduallygetworeetowardstherearofthe
printer.AlsotheimageisSkewedcomparedtothe
leadingedge of thepaper.Thisproblem was resolvedly
adjtiing BLOC~ on tiem 66, page 8a-14, Fig 8a-4.
Inthis casetherearblockwasajustedtoresolveboththe
TonerSmudgeandSkewproblems
BOLD lineacross middle of Thisproblemoccuredfiombothpapercassttes.
page
flm Info) to resolve thisproblem.
@ave tierden, M% May 94)
OFFSETWGE appearson Thiaonlyoccurefierlongcontrnuousptitrons.The
pagetierlong printruna. customerptitliuesrnthepaperdirectionmovementand
New Info)
~iks Collins, Bristol, Mq94) Thisproblemiscausedbythernab~ of
PrintEngine Regi~ation assy was replaced
The
m exactly the eamepoeitiononthepagerepethively.
cleaningtoweltocleartheoffsetimagethat~appear on
thefuserrollersduetotheimagebeingplacedrepetitively
inthesameplace.Thereprobably is no solution short
of g~g c~stom~ to vary th~”rpn”nt.”ngto ensure
no repd”tive lines areprinted over a long pen”od
E~thefiIlo~
1.Cleaningtoweldoesnotrequirereplacement.
2.Clesufieerrollersandapplysilicon-oil.
3.Checkforcorrectoperationoftowelassy.
thefiser assy
5-18
Page 100
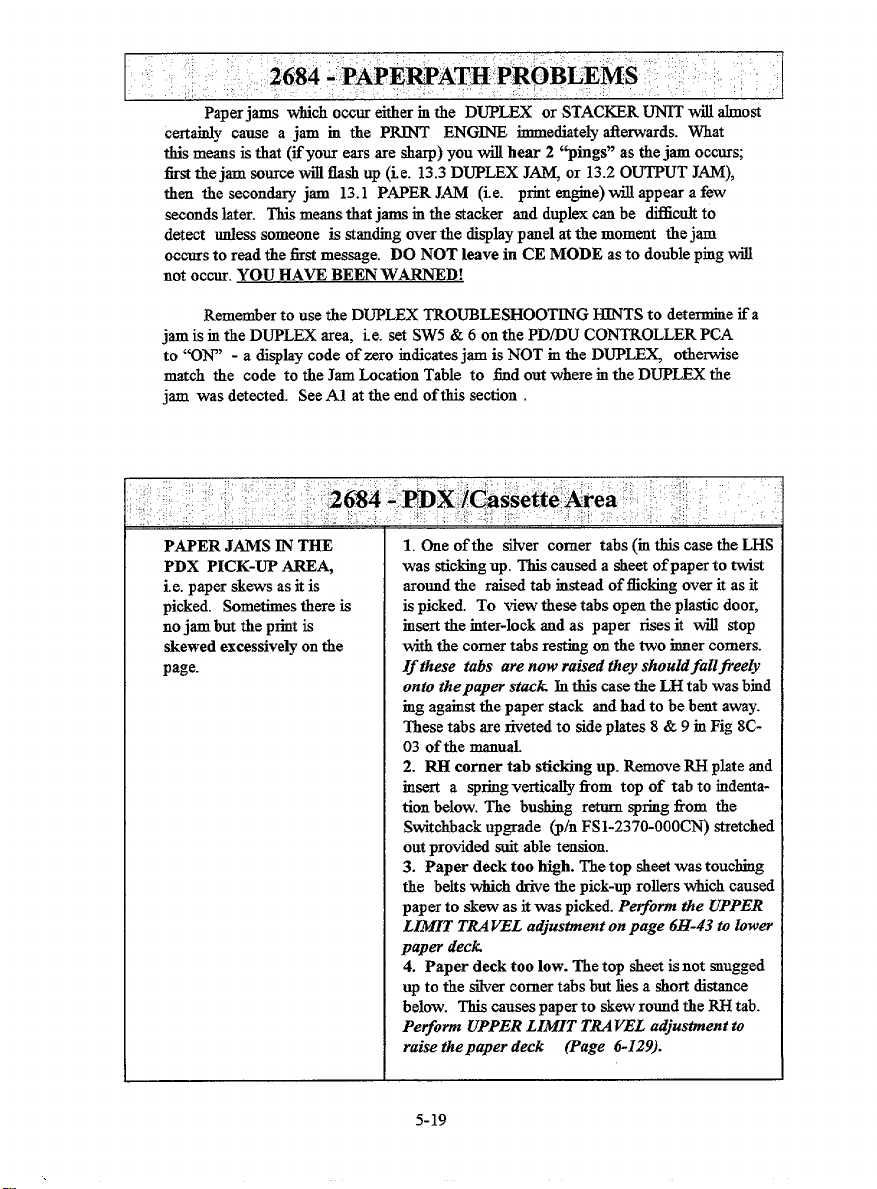
2684 -PAPE*ATHPROBLE~S ,
Paperjams whichoccur eithermthe DUPLEX or STACKERUNITwillalmost
certairdycause a jam in the Pm ENGINE immediatelyfierwards. What
dis meansisthat(iiyour earsare&arp)you will hear 2 ‘~ings” asthejam occurs;
firstthejam source~ tlaalrup (i.e. 13.3 DUPLEXJ~, or 13.2 OUTPUTJAM),
then the secondaryjam 13.1 PAPERJAM (i.e. printengine)will appearafew
secondslater. Thismeansthatjamsinthestacker andduplexcanbe difiicukto
detect urdesssomeone is standingoverthe displaypanelatthemommt thejam
occursto readthefist message. DO NOT leave in CE MODE asto doublepingwill
not occur.YOU HA~ BEENWARNED!
RemembertousetheDUPLEXTROUBLESHOOTINGHJNTSto determineifa
jam isintheDUPLEX area, i.e. setSW5 & 6 on thePD/DU CONTROLLERPCA
to “ON” match the code to theJamLocationTable to fid outwherem theDUPLEXthe
jam was detected. SeeAl attie endofthis section
a displaycode of mro indicatesjam is NOT m theDIJPL~ othetise
PAPER JAMS JNTHE
PDX PICK-UP AREA,
i.e. paperskewsasitis
picked. Sometimesthereis
nojam buttheprintis
skewed excessivelyonthe
page.
1. Oneof the silver corner tabs(mthiscasetheLHS
was tictig up. Tkiacauseda sheetof paperto tist
aroundthe raisedtabinsteadoffickirrgover it as it
ispicked. To view thesetabsopenthepkstic door,
insertthernter-lockandas paper risesit will atop
withthe comertabsrestingon thetwo innercomers.
If these tabs are now raised they should fall@ee@
onto thepaper stack Jnthis casetheLHtabwasbrnd
rngagainstthepaperstack andhadto be bentaway.
Thesetabsarerivetedto sideplates8 & 9 m Pig 8C-
03 of the manuaL
2. RH corner tab stickingup. RemoveRHplateoud
iusert a springvertic~ from top of tabto indentationbelow. The bushing returnspringfrom the
Switchbackupgrade@/n FSI-2370-OOOCN)stretched
outprovidedsuitabletension.
3. Paper deck too high. Thetop sheetwastouching
the beltswhichdrivethepick-uprollerswhichcaused
paperto skew as
LIMIT TRAVEL adjustment on page 6H-43 to lower
paper deck
4. Paper deck too low. Thetop sheetisnot snugged
upto tie silvercomer tabsbutliesa shortdistance
below. Thiscausespaperto skewroundtheRHtab.
Pe~orm UPPER LIMIT TU VEL adjustment to
raise the paper deck (Page 6-129).
5-19
itwas picked.Pe#ornr the UPPER
 Loading...