

Page 1

HP df808 Series
Digital Picture Frame
User Manual
Page 2

1
Page 3

FCC Compliance Statement
Note: This equipment has been tested and found to comply with the
limits for a Class B digital device, pursuant to Part 15 of the FCC Rules.
These limits are designed to provide reasonable protection against harmful
interference in a residential installation. This equipment generates, uses,
and can radiate radio frequency energy and, if not installed and used in
accordance with the instructions, may cause harmful interference to radio
communications. However, there is no guarantee that interference will
not occur in a particular installation. If this equipment does cause harmful
interference to radio or television reception, which can be determined by
turning the equipment off and on, the user is encouraged to try to correct
the interference by one of the following measures:
- Reorient or relocate the receiving antenna.
- Increase the separation between the equipment and receiver.
- Connect the equipment into an outlet on a circuit different from that
to which the receiver is connected.
- Consult the dealer or an experienced radio/TV technician for help.
FCC Caution: To assure continued compliance, only use shielded interface
cables when connecting to computer or peripheral devices. Any changes
or modications not expressly approved by the party responsible for
compliance could void the user’s authority to operate this equipment.
This device complies with Part 15 of the FCC Rules. Operation is subject
to the following two conditions: (1) this device may not cause harmful
interference, and (2) this device must accept any interference received,
including interference that may cause undesired operation.
English
1
Page 4

3
Table of Contents
English
What’s in the Box..........................................................2
Getting Started..............................................................3
Installing the Foot Stand..............................................5
Powering on the Frame.................................................6
Using the Digital Photo Frame......................................7
Settings Menu..............................................................15
Cleaning and Care Tips................................................17
Getting Help.................................................................18
2
Page 5
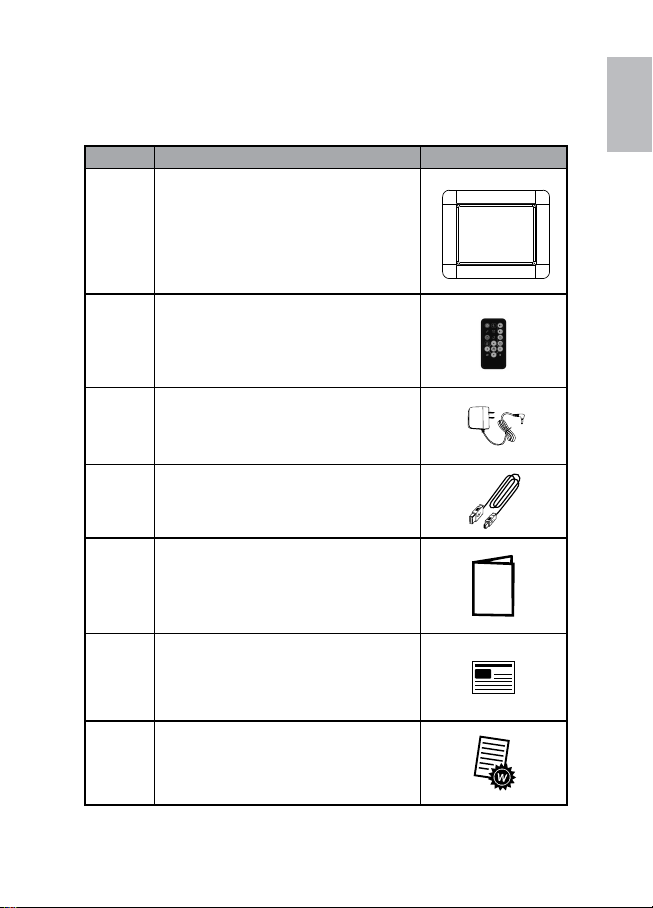
What’s in the Box
Qty Item Image
1 Digital Picture Frame
Remote Control
1
Replacement Battery = CR2025
English
1 Universal Power Adapter (5V, 2A)
1 USB Cable
User Manual with
1
Declaration of Conformity
1 Quick Start Guide
1 Warranty Document
3
Page 6
5
Getting Started
English
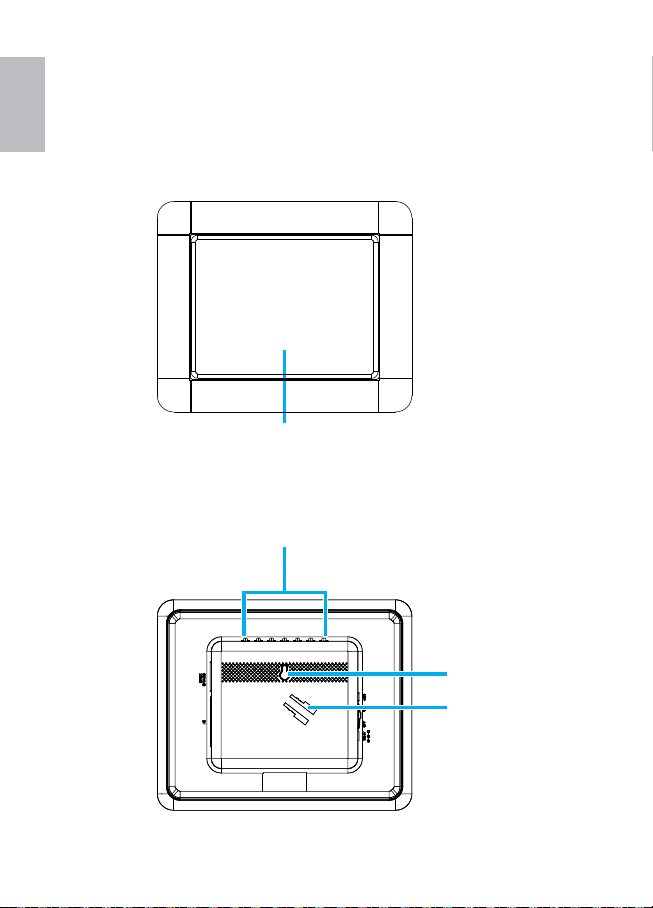
Identifying the parts
Front view
Rear view
LCD (Liquid Crystal Display) panel
Control buttons
Hanging slot
Lock slot
4
Page 7
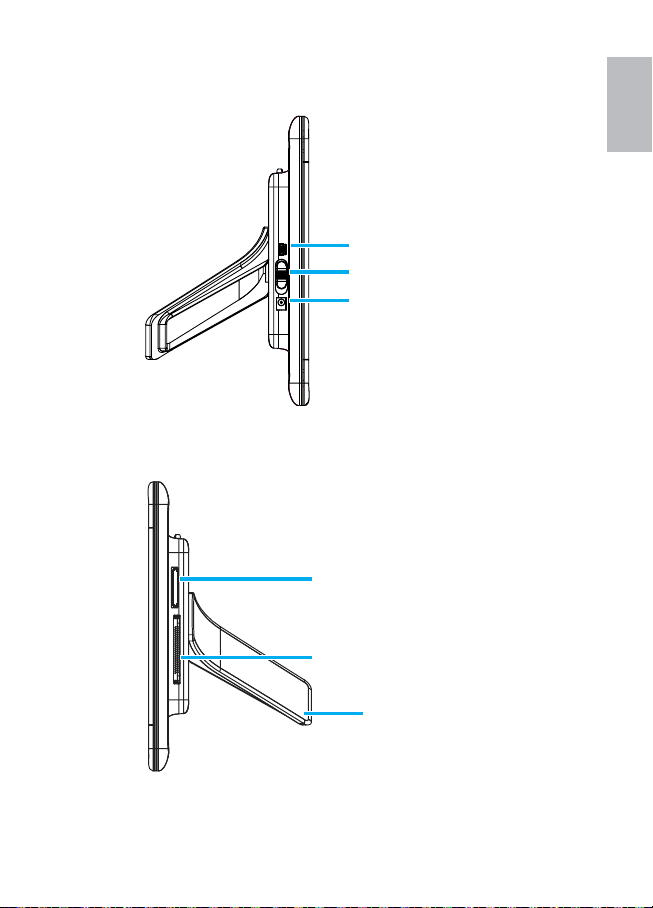
Left view
Right view
English
Mini USB port for le transfer
Power switch transfer
Power socket
5-in-1 memory card slot
(SD/SDHC, MMC, MS, MS-Pro, xD)
CF memory card slot
Foot stand
5
Page 8

7
Installing the Foot Stand
English
On the back of the frame, align the foot stand with the lock slot.1.
Install the foot stand onto the frame as illustrated until it clicks into 2.
place.
6
Page 9

Powering on the Frame
DC 5V
Plug the AC power adapter into the power outlet, then plug the other 1.
end into the power socket of the frame.
Insert a memory card (to be purchased separately) to the appropriate 2.
card slot.
Note:
You can also view the demo images preloaded in the internal •
memory of this frame without inserting a memory card.
Supported memory card type: Secure Digital™, xD-Picture Card™, •
MultiMedia Card™, Memory Stick™, and Memory Stick PRO™.
Both 5-in-1 and CF memory card slots support hot-swap function.•
When one memory card is inserted and then a second one is •
inserted, the frame only will display les from the second one.
When two memory cards are inserted simultaneously and the •
power is turned off and then back on, the frame only will display
les from the SD card.
This frame may not read all image or video les downloaded from •
the Internet.
English
Turn on the frame by sliding the power switch to the ON position. 3.
7
Page 10
9
Using the Digital Photo Frame
1
9
12
11
13
8
2
3
4
5
7
6
Using the control buttons
English
You can operate this frame by pressing the control buttons which are located
on the back of the frame. The icons at the top of the screen correspond to the
control buttons. If there are no icons at the top of the screen, then press any
of the control buttons to display the icons.
Note: Control buttons do not always perform the same function between •
modes.
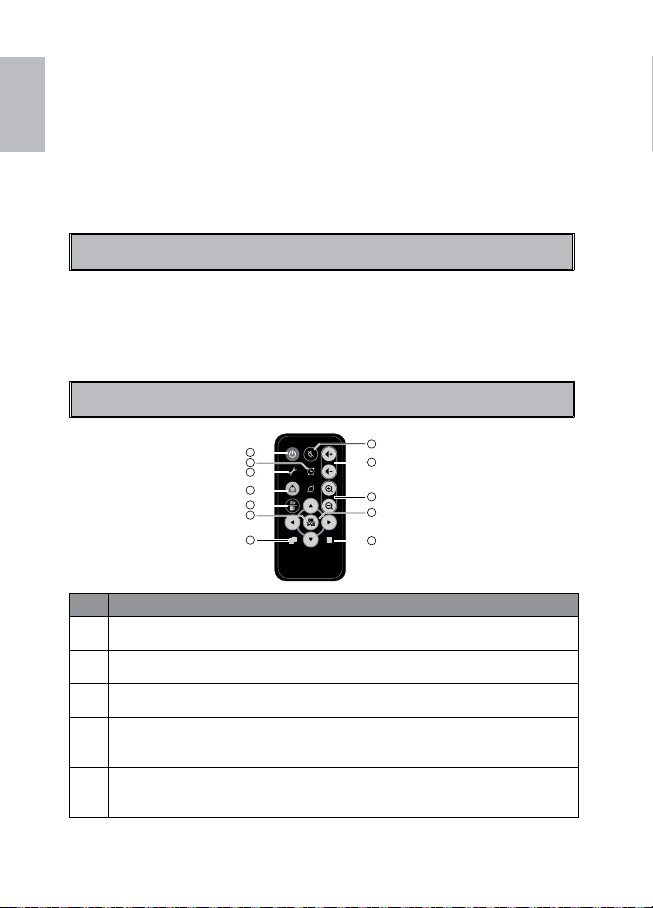
Using the remote control
This frame comes with a remote control. Below is a table of all the buttons
and a description of their functions.
Note: This guide assumes you are using the remote control to control the •
frame.
No Description
Backlight Saving
1
Press this button to activate Backlight Saving function.
Alarm
2
In Calendar mode, you can press this button to set up the alarm.
Setup
3
Press this button to access the Setup menu.
Mode selection
4
Press this button to switch among different Photo, Calendar, Video, and
Settings modes.
Return
5
Press this button to cancel current action and/or go back to the previous
page.
8
Page 11

OK & Play/Pause
6
Press this button to conrm a selection, start, or pause le playback.
Copy
7
Press this button to copy a selected le to the internal memory.
Mute
8
Press this button to activate the Mute mode. Press it again to restore the
volume.
Vol+ / Vol-
9
Press these buttons to increase/decrease the volume.
Rotate
10
Each time you press this button, the selected photo rotates clockwise 90
degrees.
Zoom in/Zoom out
11
Press these buttons to zoom in/zoom out the selected image le.
Navigation buttons
• In list or menus: Press to scroll up, down, left or right.
12
•
/ : Press to scroll to the previous/next item.
Delete
13
Press this button to delete the selected le.
English
9
Page 12
11
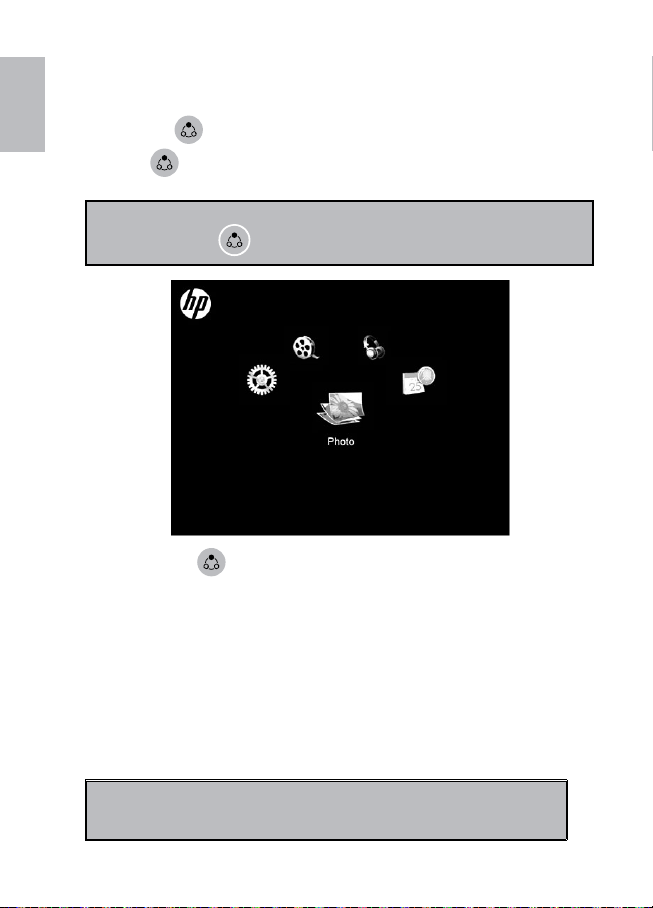
Main Menu
English
You can access the different modes from the main menu.
Press the
Press
button to view the main menu as illustrated below.
button to view the Main Menu as illustrated below.
Note:
Depending on the screen you are originating from, you will have to •
press the
Press the • once to cycle to the next mode icon.
When you get to the desired mode icon, allow two seconds for the •
mode to be selected.
5 modes available: Photo, Calendar, Music, Video, and Settings Menu•
button either once or twice to display the main menu.
Photo mode
The Photo mode allows you to view images in three kinds of viewing
modes: slideshow view, single view, and thumbnail view.
After the frame is turned on, a slideshow starts automatically.
Note: In a slideshow, background music will play sequentially if the •
feature has been enabled. Please refer to the section on the
Settings Menu on page 14
10
Page 13
Slideshow mode will begin automatically a few seconds after the •
frame is powered on or when an external memory card is inserted.
English
To switch to thumbnail view, press the button •
and
a particular photo.
Note: This frame only supports the JPEG le format.•
to move among images.
To switch to photo slideshow mode, press the button •
To view images individually, press •
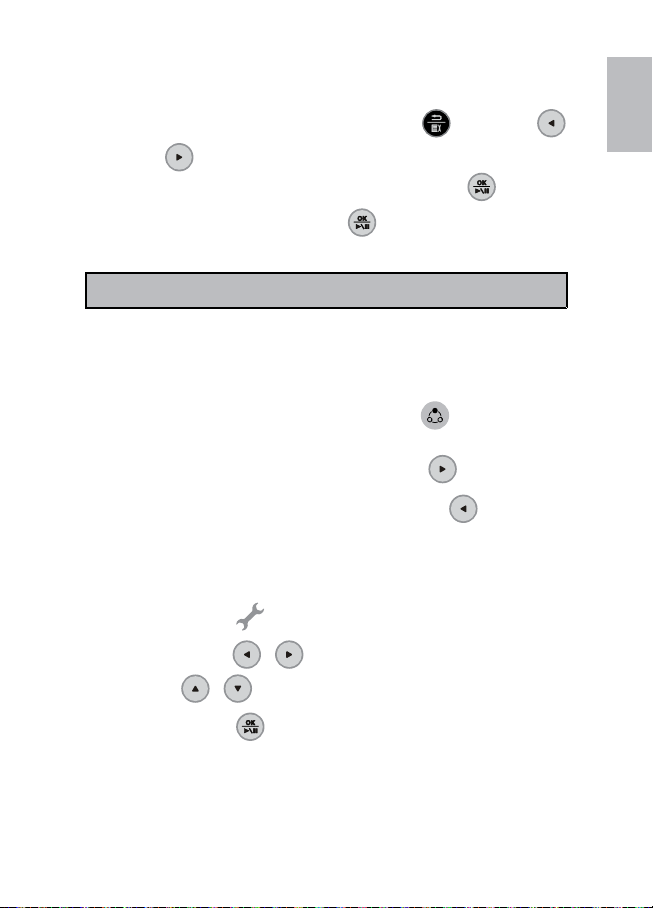
Calendar mode
The Calendar mode displays a monthly calendar.
After you turn on the frame, press the button •
Calendar mode.
To switch to the next month, press the button •
To switch to the previous month, press the button •
Setting the date and time
Go to the Calendar mode1.
Press the button 2.
Use the buttons 3.
buttons
to go to Calendar setup menu.
/ to move to different elds, and use the
/ to adjust date and time.
. Use buttons
.
again to pause slideshow on
to switch to the
.
.
Press the button 4.
Setting the alarm
Go to the Calendar mode.1.
.
11
Page 14

13
Press the button 2. .
English
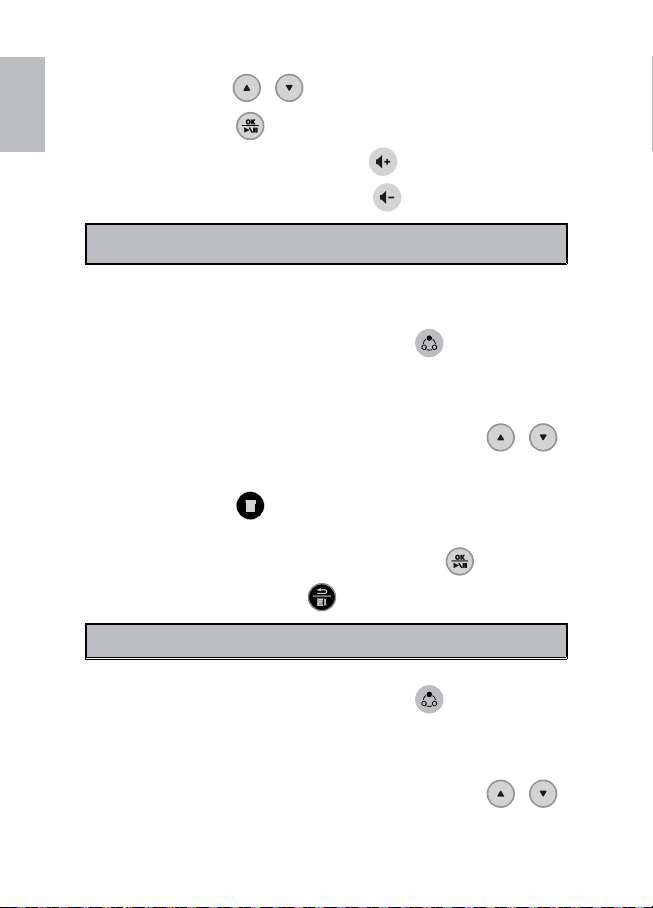
Music mode
Use the buttons 3.
buttons
Press the button 4.
The Music mode allows you to play audio les that are stored in the
internal memory or on the inserted memory card.
Note: This frame only supports the MP3 audio le format.•
Playing the music
After you turn on the frame, press the button 1.
Music mode.
Press the button 2.
Use the buttons 3.
Press the button 4.
To increase volume, press the button •
To decrease volume, press the button •
Deleting a music le
After you turn on the frame, press the button 1.
Music mode.
Press the button 2.
/ to move to different elds, and use the
/ to adjust alarm time, tone, and mode.
.
to switch to the
to show the Music List.
/ to select a music le.
to start the playback.
.
.
to switch to the
to show the Music List.
From the Music List screen that appears, use the buttons 3.
12
/
Page 15

to select the music le to be deleted.
English
Press the button 4.
A conrmation message appears.5.
To delete the selected music le, press the button •
To cancel, press the button •
Note: This frame only deletes les from internal memory.•
Copying a music le
After you turn on the frame, press the button 1.
mode.
Press the button 2.
From the Music List screen that appears, use the buttons 3.
select the music le to be copied.
Press the button 4.
A conrmation message appears.5.
To copy the selected music le, press the button •
To cancel, press the button •
Note:
This frame only copies les from external memory to internal memory.•
.
.
.
to switch to the Music
to show the Music List.
/ to
.
.
.
Video mode
Viewing a video le
After you turn on the frame, press the button 1.
mode.
The 2. Video List screen appears.
to switch to the Video
13
Page 16
15
Use the buttons 3. / to select a video le.
English
Press the button 4.
To increase volume, press the button •
To decrease volume, press the button •
Note:
This frame only supports Motion JPEG video le format •
at 30 fps).
Deleting a video le
After you turn on the frame, press the button 1.
Music mode.
The 2. Video List screen appears.
From the Video List screen that appears, use the buttons 3.
to select the video le to be deleted.
Press the button 4.
A conrmation message appears.5.
To delete the selected video le, press the button •
To cancel, press the button •
Note: This frame only deletes les from internal memory.•
Copying a video le
After you turn on the frame, press the button 1.
Video mode.
The 2. Video List screen appears.
to start the playback.
.
.
.
(640X480
to switch to the
/
.
.
to switch to the
From the Video List screen that appears, use the buttons 3.
to select the video le to be copied.
14
/
Page 17

Press the button 4. .
A conrmation message appears.5.
To copy the selected video le, press the button •
English
.
Note:
To cancel, press the button •
This frame only copies les from external memory to internal •
memory.
.
15
Page 18

17
Settings Menu
After you turn on the frame, press the mode selection button to switch
English
to the Settings mode.
Settings
menu
Photo Display
Photo
Information
Display Clock
Slideshow
Setup...
Sub-menus Formats the internal memory.
Optimizes the image to t the whole
Full Screen
Real Size
On Allows you to display or hide the
Off
On
Off
Background
Music
Frequency
Effect
Order
On
Off
5 Secs
30 Secs
1 Min.
15 Mins.
30 Mins.
1 Hr.
4 Hrs.
12 Hrs.
1 Day
1 Week
None
Fade
Shutter
Cross
Mask
Brick
Sequential
Random
screen.
Note: Some cropping of the images
may occur in this option.
Displays images in their original aspect
ratio.
information about image les in the
thumbnail mode.
Allows you to display or hide the clock in
the slideshow mode.
Turns the background music on or off.
Selects speed of your slideshow.
Selects style of image transition.
Allows images to be displayed in a
sequential order.
Allows images to be displayed in a
random order.
16
Page 19
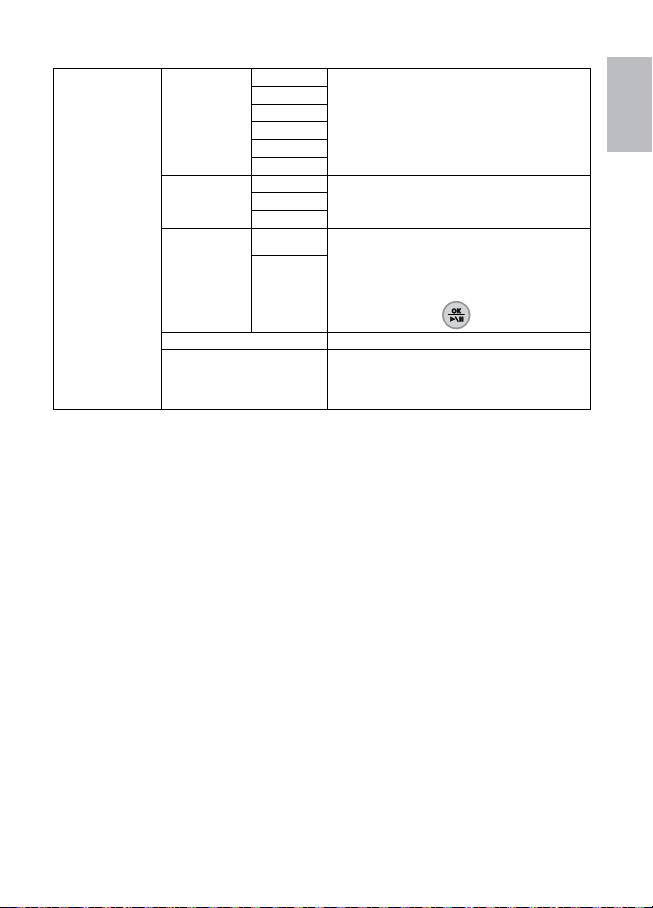
System
Setup...
0
1
Brightness
Language
Auto Copy
System Reset... Reset all settings back to default.
Format...
2
3
4
5
English
Spanish
On
Off
Allows you to adjust the brightness of
the screen.
Changes the OSD menu language.French
Allows you to select whether image les
will be automatically copied from an
inserted memory card to the internal
memory. An auto copy message will
appear once a memory card is inserted.
Press the button
Formats the internal memory.
Note: If you use this option to format
the internal memory, all image/ video/
audio les will be deleted permanently.
to conrm.
English
17
Page 20

19
Cleaning and Care Tips
English
Please power off the HP Digital Picture Frame before cleaning. √
DO NOT √ push on the screen too rmly.
DO NOT √ spray or pour liquid cleaning agents directly on the screen
or frame.
DO NOT √ use ammonia, alcohol, or abrasive detergent cleaning
agents.
Cleaning the Screen:
Wipe screen with a clean, soft, lint-free cloth to remove dust and 1.
loose particles.
If further cleaning is required, apply an appropriate cleaning agent 2.
(approved for LCD displays) to a clean, soft, lint-free cloth and wipe
the screen.
Cleaning the Frame and Backing:
Use a clean, soft, lint-free cloth to remove dust and loose particles.1.
If desired, apply an appropriate cleaning agent to a clean, soft, 2.
lint-free cloth and wipe the appropriate surfaces.
18
Page 21

Getting Help
Should your HP Branded Product require service within the Warranty
period, please contact the original point of purchase or an authorized
HP reseller in your country. If service is not available at those locations,
please contact an HP Branded Product warranty agent from the support
contact list provided on this document. Supported languages are:
English, French, German, Italian, Portuguese and Spanish. A warranty
agent will work with you to troubleshoot your issue and if necessary,
issue a Return Material Authorization (RMA) number in order to replace
your HP Branded Product. For warranty claims, you will be required to
provide a copy of your original dated sales receipt as proof of purchase
and the issued RMA number. End User customer shall be responsible
for shipping charges when shipping the product to the service center.
The service agent will provide you with an address and you will also be
responsible for any shipping charges to the warranty service center. Once
your product is received by the service center, a replacement frame will
be shipped back to you within 5 business days.
Email Support:
Language Email Address
English english@hpodd.com
Français francais@hpodd.com
Italiano italiano@hpodd.com
Espanol espanol@hpodd.com
Portuguese portugues@hpodd.com
Dutch hollands@hpodd.com
Deutsch deutsch@hpodd.com
Svensk svensk@hpodd.com
Chinese
trad.chinese@hpodd.com
simp.chinese@hpodd.com
English
19
Page 22
English
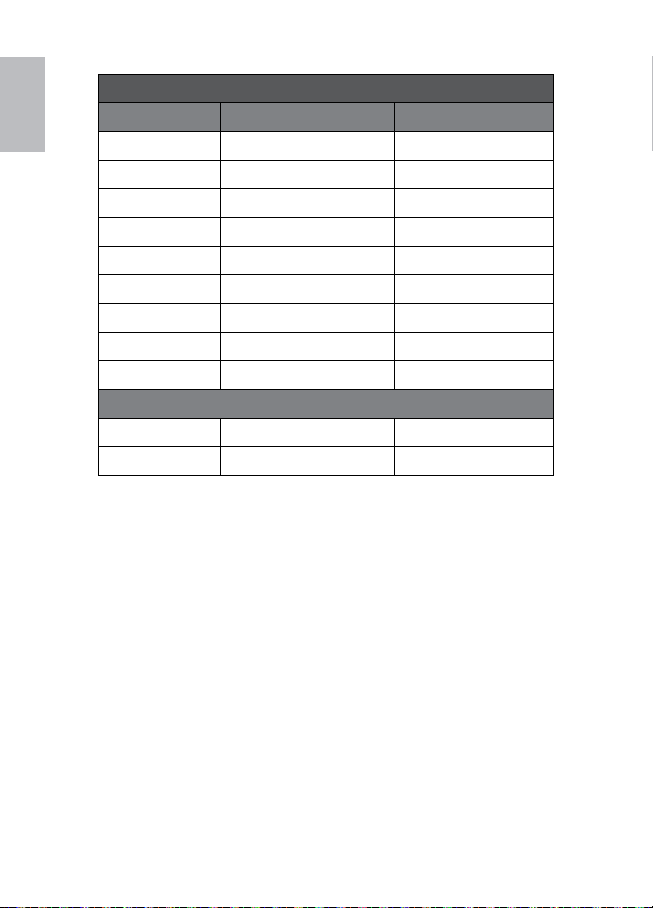
Contact/Phone Support:
Country Language Number
België Dutch and German + 32 2700 1724
Deutchland German + 49 6950073896
España Spanish + 34 914533458
France French + 33 171230454
Ireland English + 353 1850882016
Italia Italian + 39 269682189
Nederland
Switzerland German/French/Italian + 41 18009686
United Kingdom English + 44 2073652400
North America
United States English + 1-866-694-7633
Canada English & French + 1-866-694-7633
Dutch
+ 31 202015093
20
Page 23

P/N: 7525C00066A
 Loading...