

Page 1

HP df1200 Series
Digital Picture Frame
Marco de Fotos Digital
Cadre Photo Numérique
User Manual
Manual del usuario
Manuel de l'utilisateur
Page 2

Page 3

I
ENGLISH
FCC Compliance Statement
Note: This equipment has been tested and found to comply with
the limits for a Class B digital device, pursuant to Part 15 of the FCC
Rules. These limits are designed to provide reasonable protection
against harmful interference in a residential installation. This equipment
generates, uses, and can radiate radio frequency energy and, if not
installed and used in accordance with the instructions, may cause
harmful interference to radio communications. However, there is no
guarantee that interference will not occur in a particular installation. If
this equipment does cause harmful interference to radio or television
reception, which can be determined by turning the equipment off and
on, the user is encouraged to try to correct the interference by one of
the following measures:
- Reorient or relocate the receiving antenna.
- Increase the separation between the equipment and receiver.
- Connect the equipment into an outlet on a circuit different from that
to which the receiver is connected.
- Consult the dealer or an experienced radio/TV technician for help.
FCC Caution: To assure continued compliance, only use shielded
interface cables when connecting to computer or peripheral devices. Any
changes or modifi cations not expressly approved by the party responsible
for compliance could void the user’s authority to operate this equipment.
This device complies with Part 15 of the FCC Rules. Operation is subject
to the following two conditions: (1) this device may not cause harmful
interference, and (2) this device must accept any interference received,
including interference that may cause undesired operation.
Page 4

II
ENGLISH
Table of Contents
What’s in the Box...................................................................1
Identifying the parts..............................................................2
Getting Started.......................................................................3
Remote Control.......................................................................6
Using the Picture Frame.........................................................7
Main Menu..........................................................................................7
Card Selection Mode............................................................................7
Photo mode........................................................................................8
Music mode.......................................................................................12
Video mode.......................................................................................15
Calendar mode..................................................................................17
Settings Menu.......................................................................19
Specifi cations...................................................................22
Frequently Asked Questions................................................23
Cleaning and Care Tips..........................................................24
Getting Help..........................................................................25
Page 5
1
ENGLISH
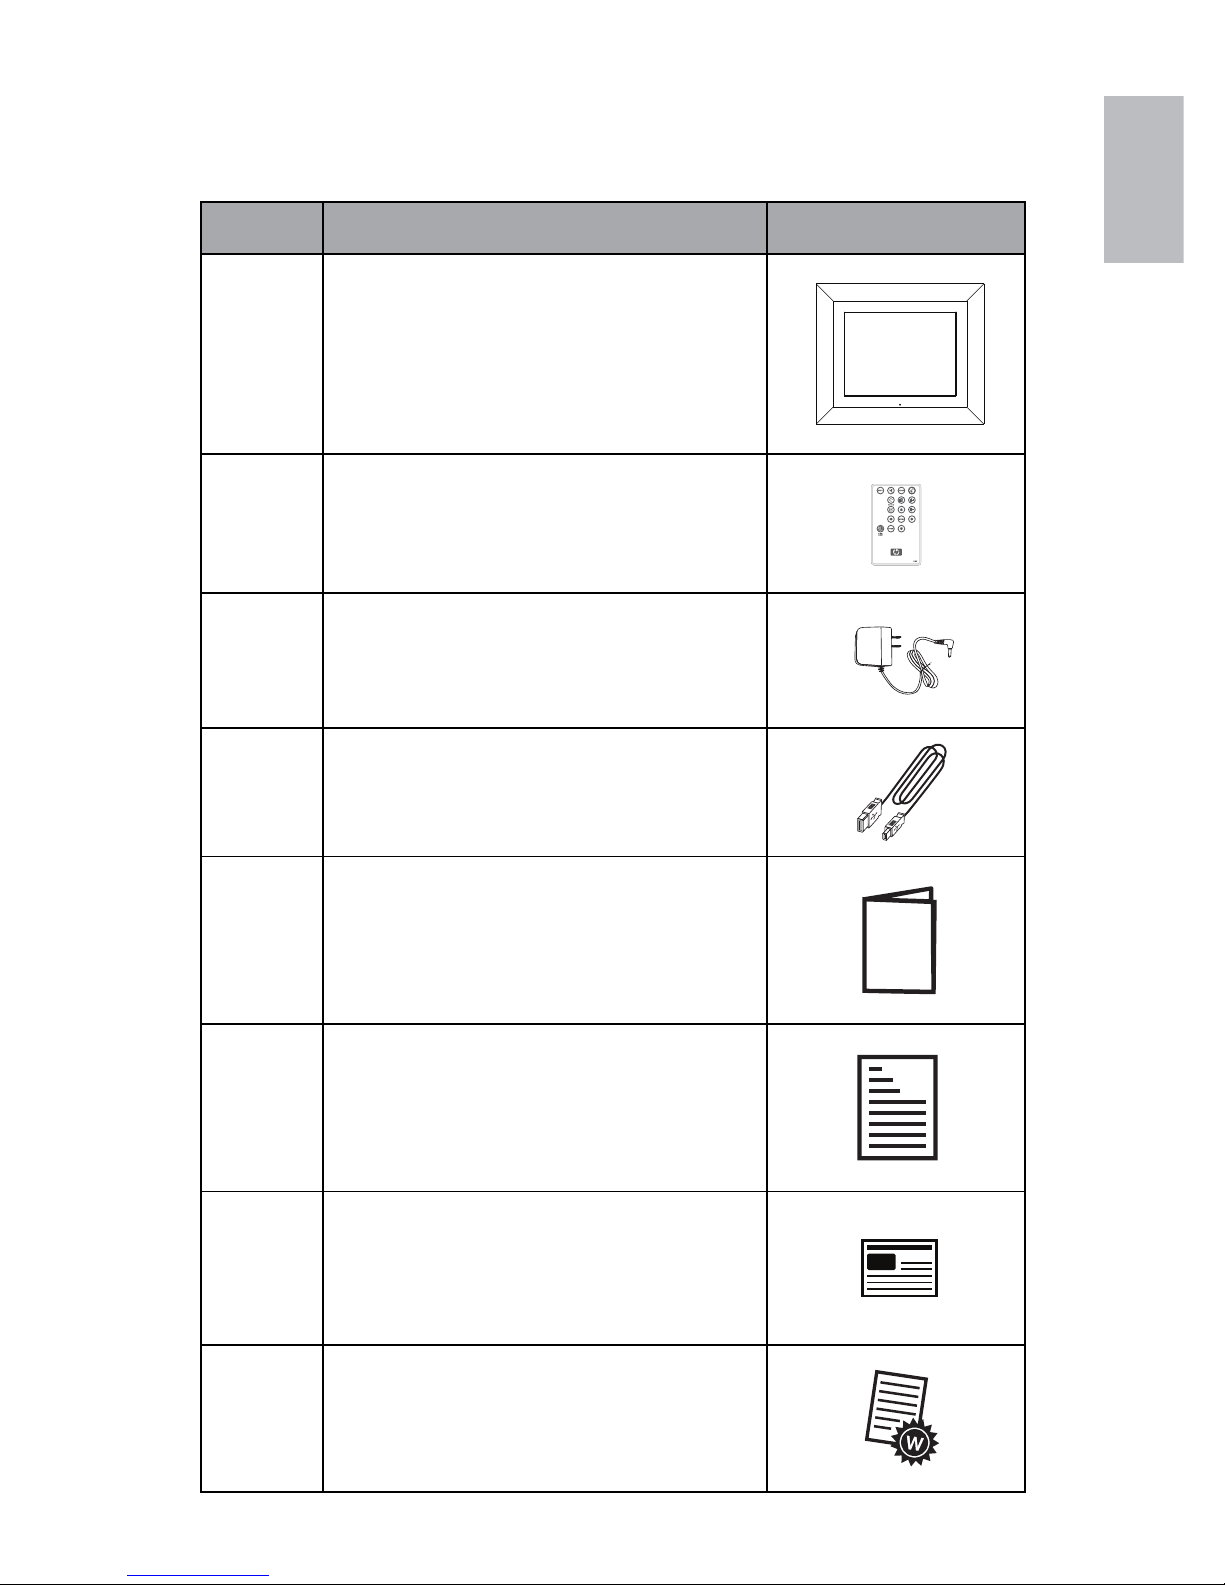
What’s in the Box
Qty Item Image
1 Digital Picture Frame
1
Remote Control
Replacement Battery = CR2025
1 Universal Power Adapter (12V, 1.5A)
1 USB Cable
1 User Manual
1 Declaration of Conformity
1 Quick Start Guide
1 Warranty Document
Page 6
2
ENGLISH
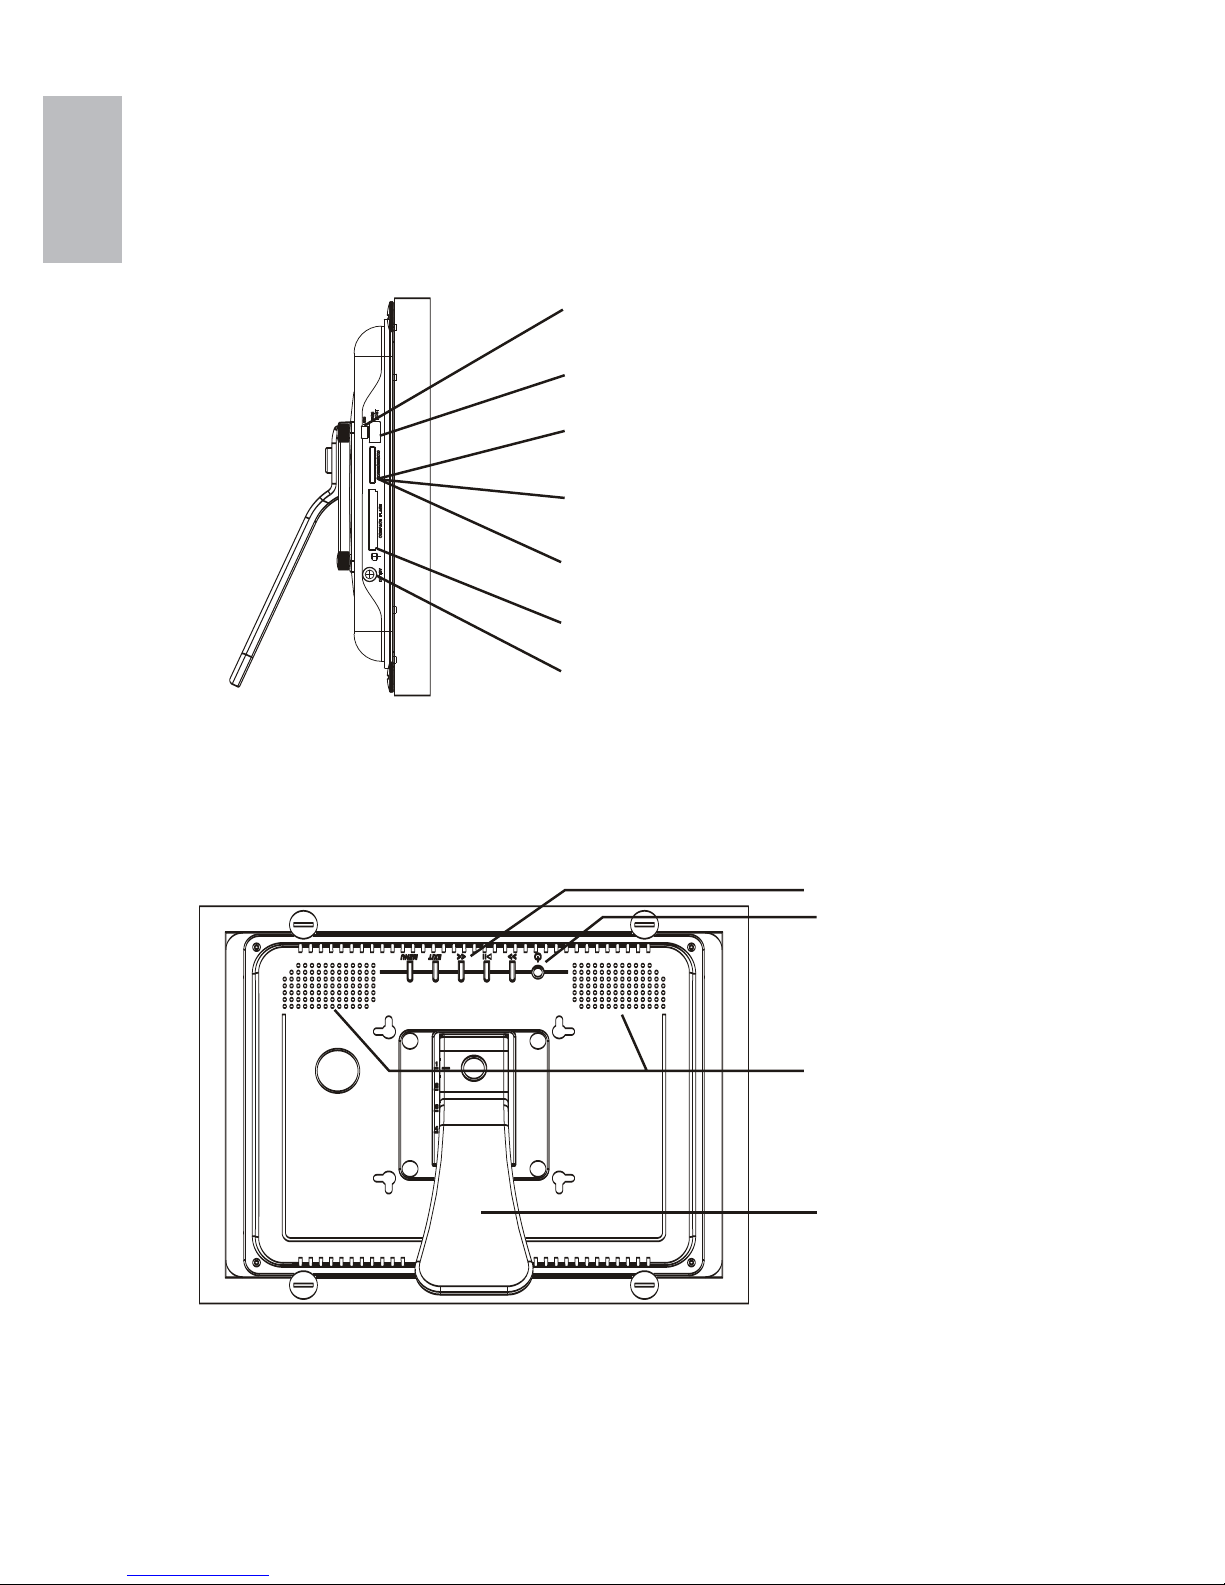
Identifying the parts
Mini USB Port for File Transfer
USB Port for USB Flash Drives
xD-Picture Card™ Slot
Secure Digital™ and
Multi Media Card™ Slot
Compact Flash™ Slot
AC Power Input
Memory Stick™, Memory Stick PRO™,
Memory Stick Duo™, and
Memory Stick PRO Duo™ Slot
Key Pad
Power Button
Speaker
Adjustable Stand
Page 7
3
ENGLISH
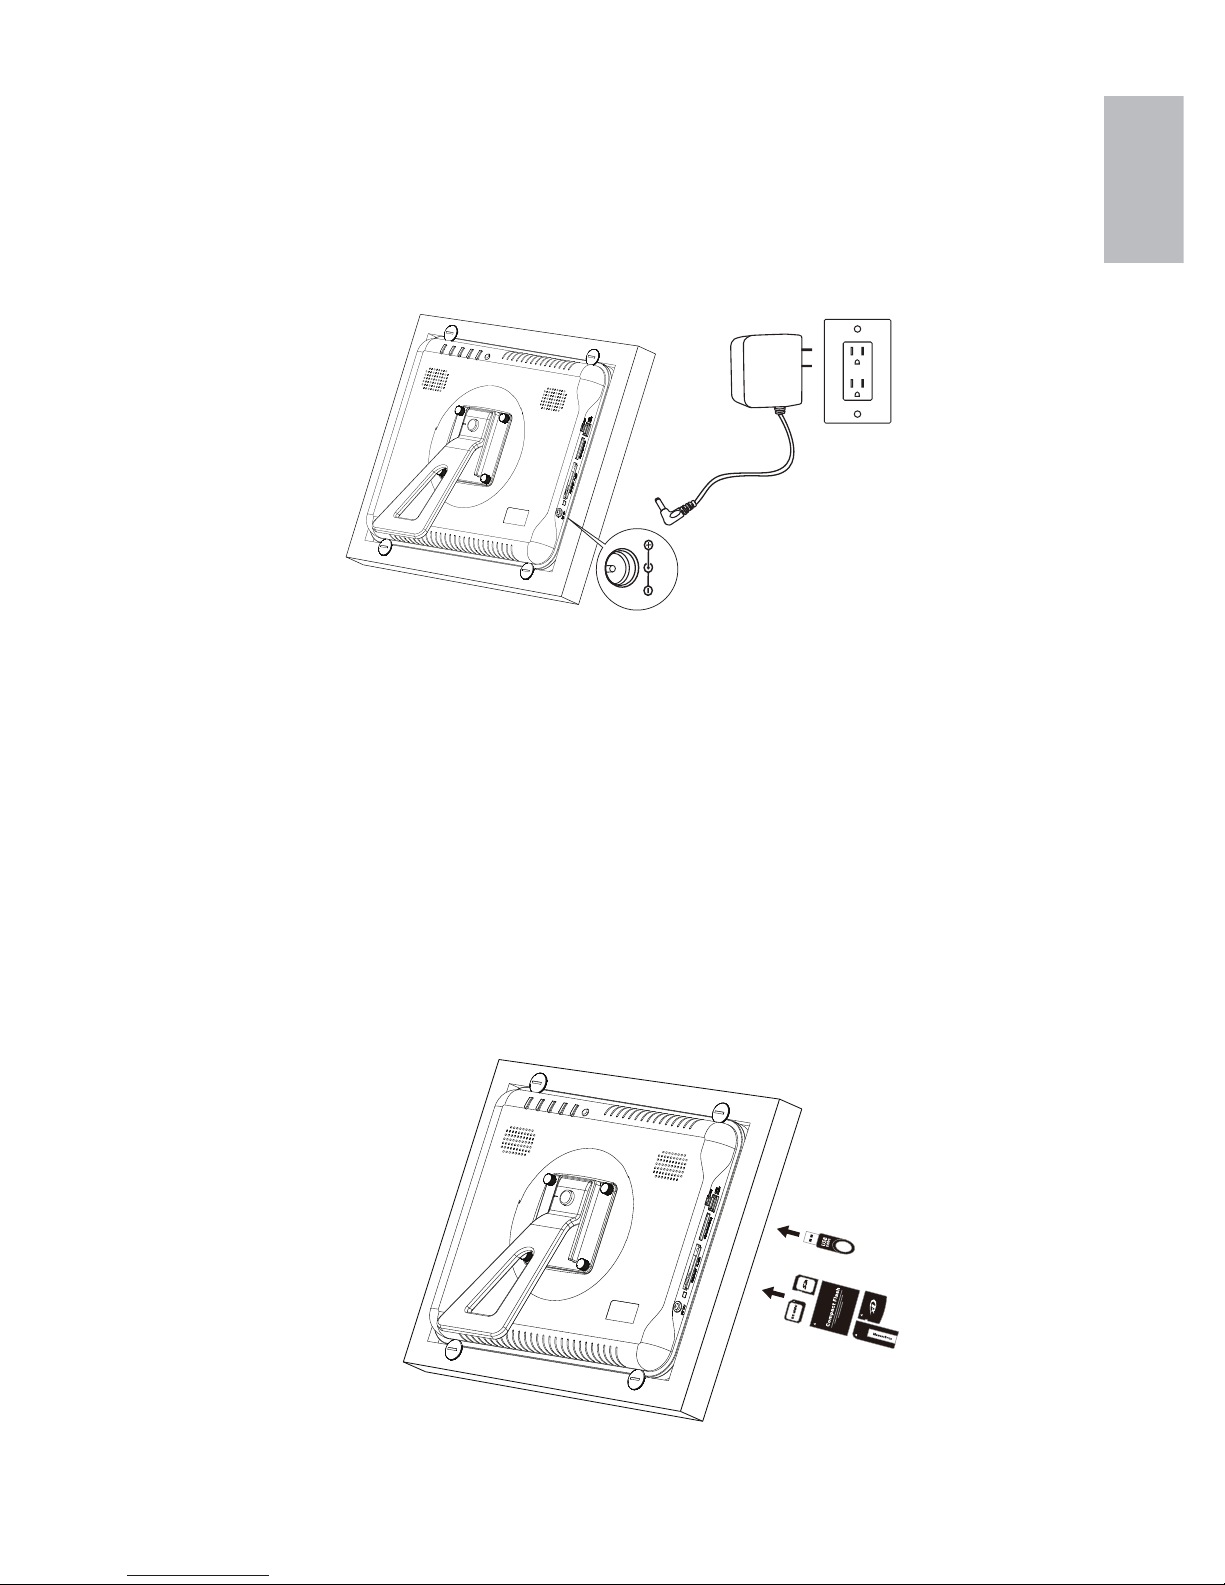
Getting Started
Plug the adapter into a power outlet and connect the power cord into 1.
the DC input of the digital picture frame as illustrated below.
DC 12V
The HP Digital Picture Frame is preloaded with pictures that illustrate 2.
the basic features of this product. If you want to view these pictures,
turn the frame on as illustrated in step 4. The slideshow will begin
in a few seconds.
Insert a memory card or USB storage device (external memory) 3.
containing desired pictures, music, and/or video into the appropriate
card slot or USB port as illustrated below. Note: Memory cards and
USB storage devices must be orientated correctly.
Page 8
4
ENGLISH
Power on the digital picture frame.4.
POWER
Press the POWER botton
MEMUEXIT
A slideshow of your pictures will begin automatically in a few seconds.
If music tracks are available on the same external memory device, the
slideshow will be displayed with background music unless disabled in the
SETUP MENU. Enjoy it and have fun!
In addition to the remote control, the digital picture frame has basic 5.
control buttons and LCD backlighting controls on the top of the frame
as illustrated below.
MEMUEXIT
! "
# $ % & ' ( ) )
Page 9
5
ENGLISH
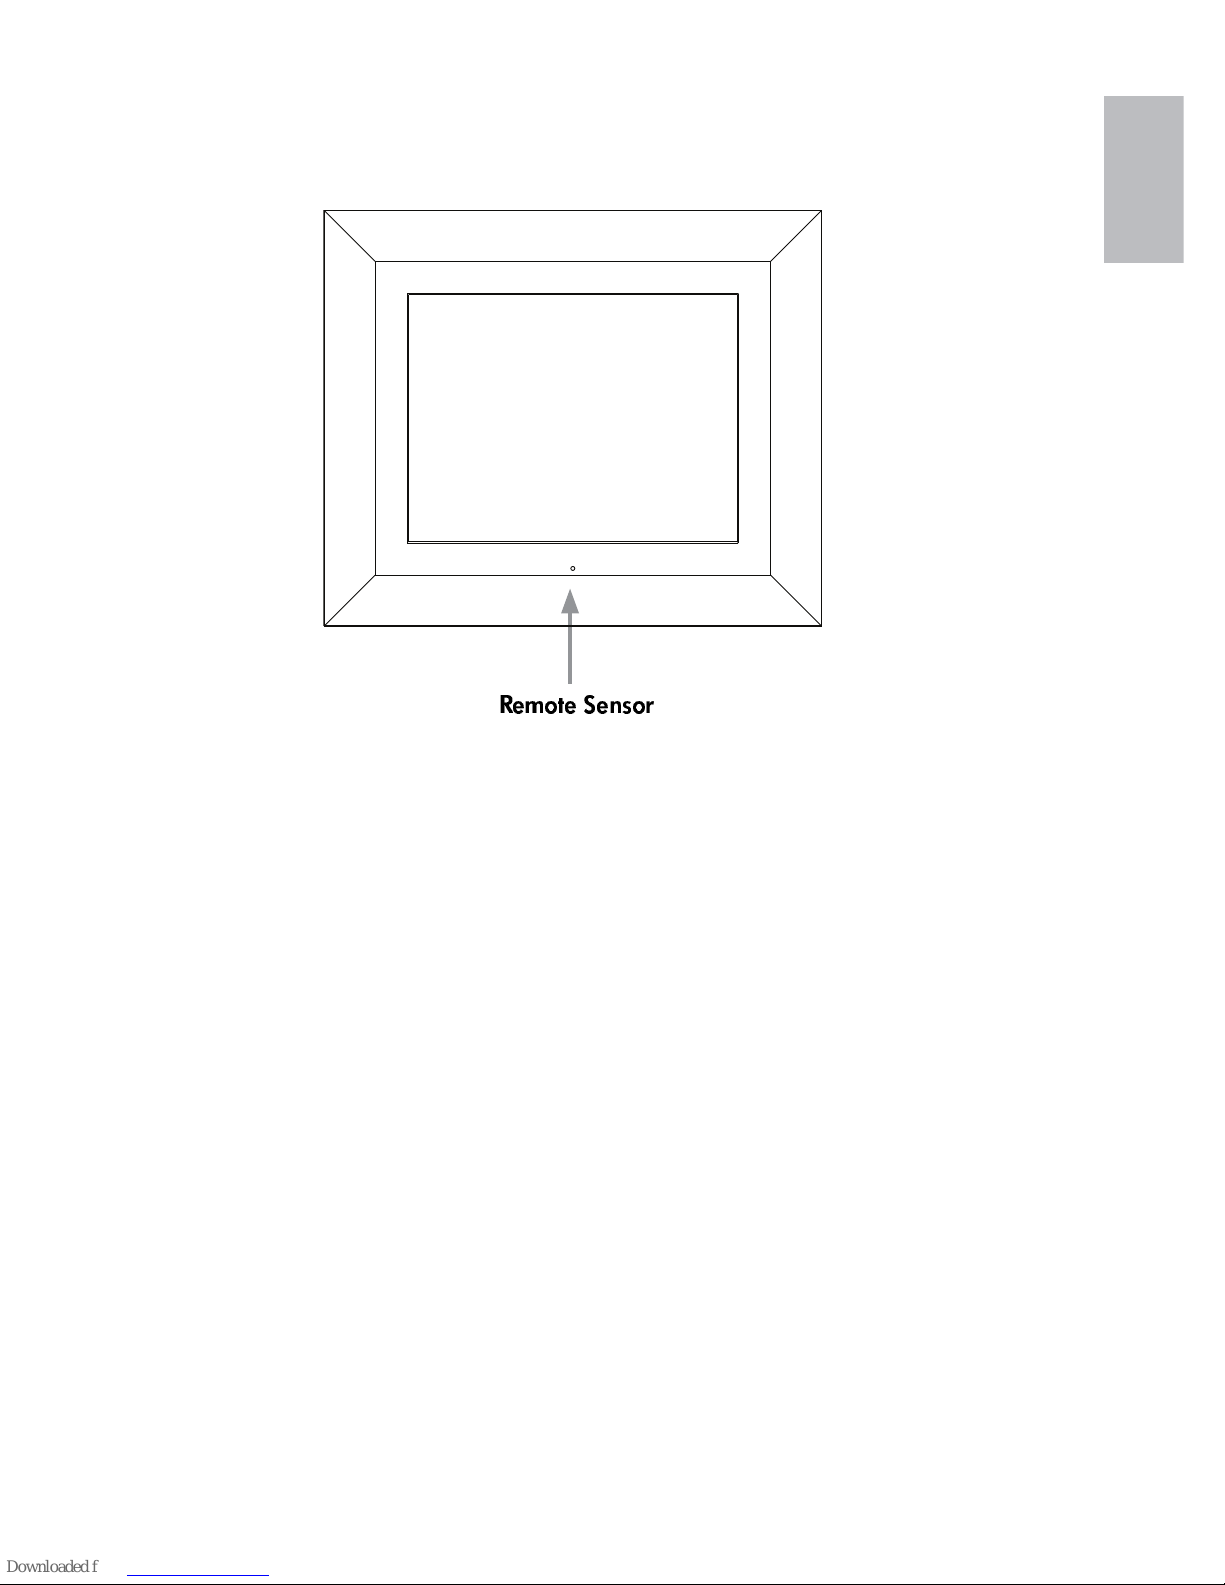
When using the remote control, point it at the remote sensor on the 6.
front of frame as illustrated below.
* + , - . + / + 0 1 - 2
Page 10
6
ENGLISH
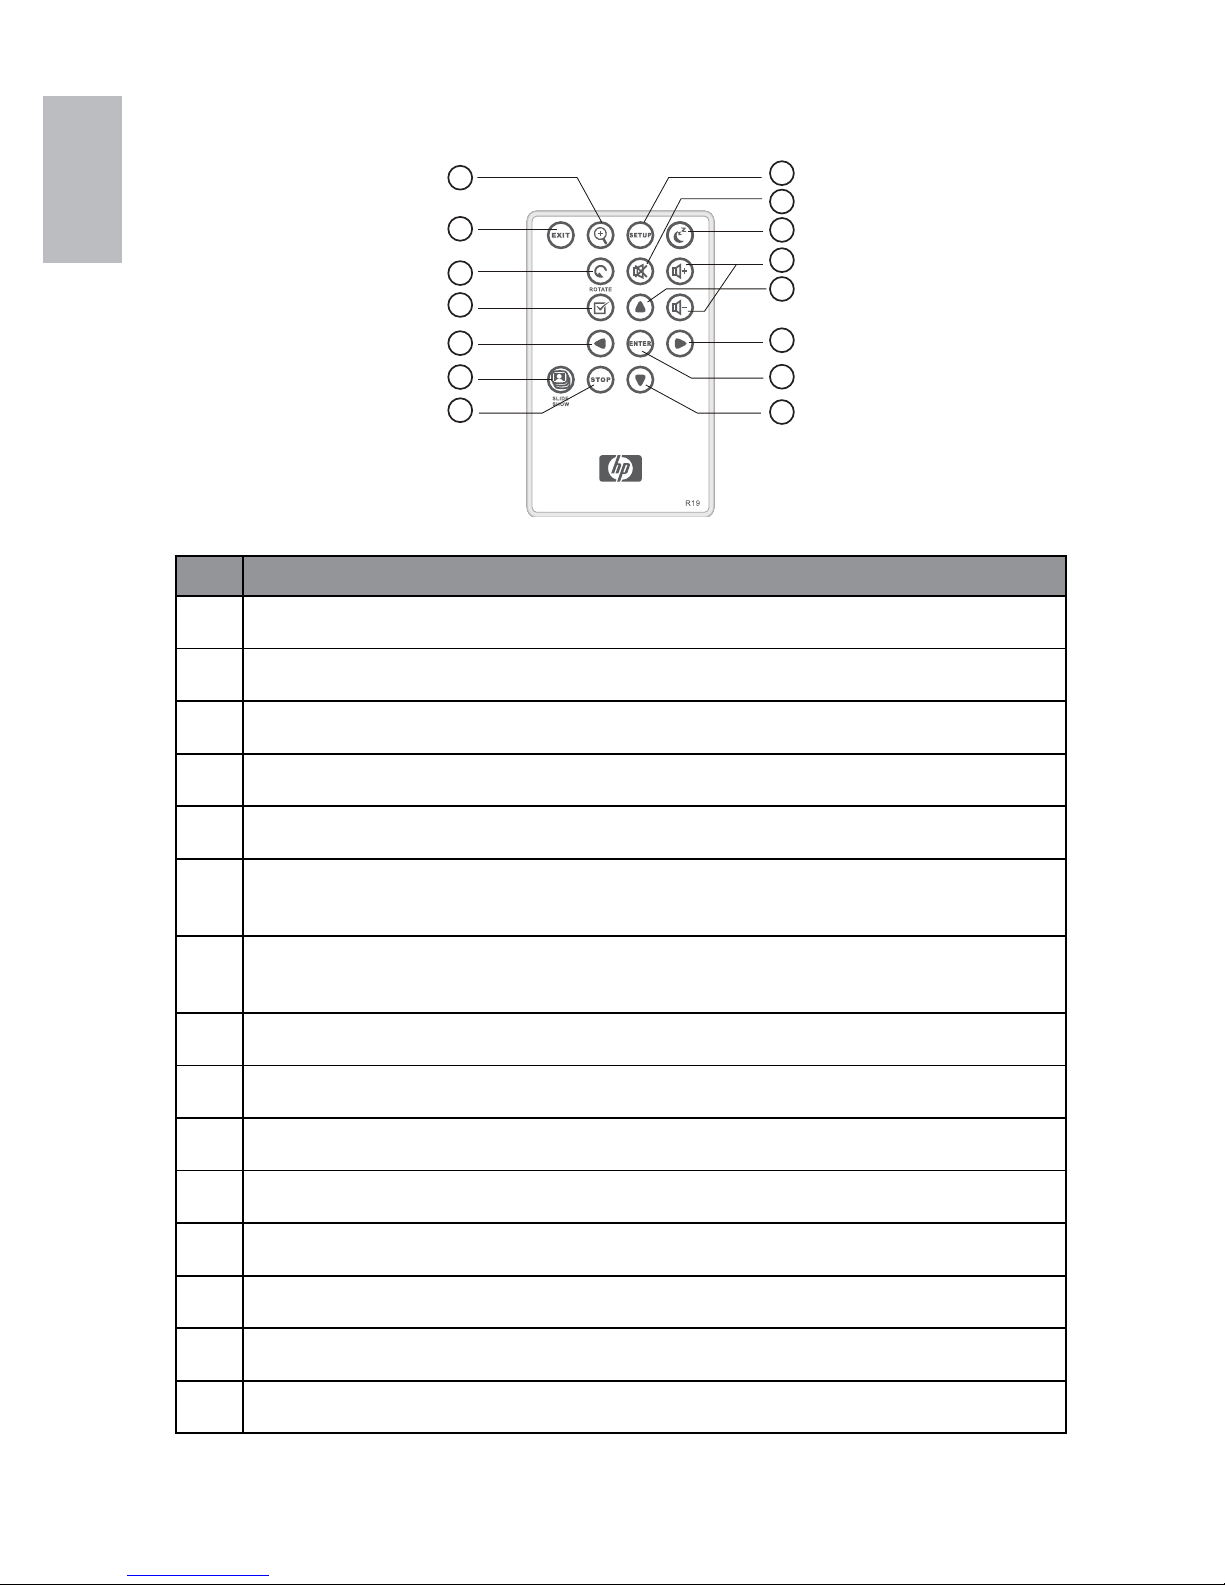
Remote Control
9
11
10
14
3
15
7
1
12
13
8
2
4
5
6
No Description
1
POWER
Press this button to turn on/off the frame.
2
SETUP
Press this button to access settings menu.
3
SLIDESHOW
Press this button to begin a picture slideshow.
4
UP
Press to move up in thumbnail mode or when setting options.
5
NEXT or FORWARD
Press to move right in browse, thumbnail or menu mode.
6
ENTER
Press to change display mode (slideshow, browse, or humbnail). Press to play or
pause music or video fi le.
7
PREV or RETURN
Press to move left in browse, thumbnail or menu mode, or return to previous screen
in slideshow mode.
8
DOWN
Press to move down in thumbnail mode or when setting options.
9
SELECT
Press to make selections in menu or settings mode.
10
ROTATION
Press to rotate the picture.
11
ZOOM IN
Press to enlarge picture in photo browse mode.
12
VOLUME CONTROL
Press the + button to increase and the - button to decrease audible playback volume.
13
MUTE
Press this button to activate mute mode. Press it again to restore the volume.
14
EXIT
Press this button to exit the current displayed page/mode.
15
STOP
Press this button to stop slideshow, music, and video playback.
Page 11

7
ENGLISH
Using the Picture Frame
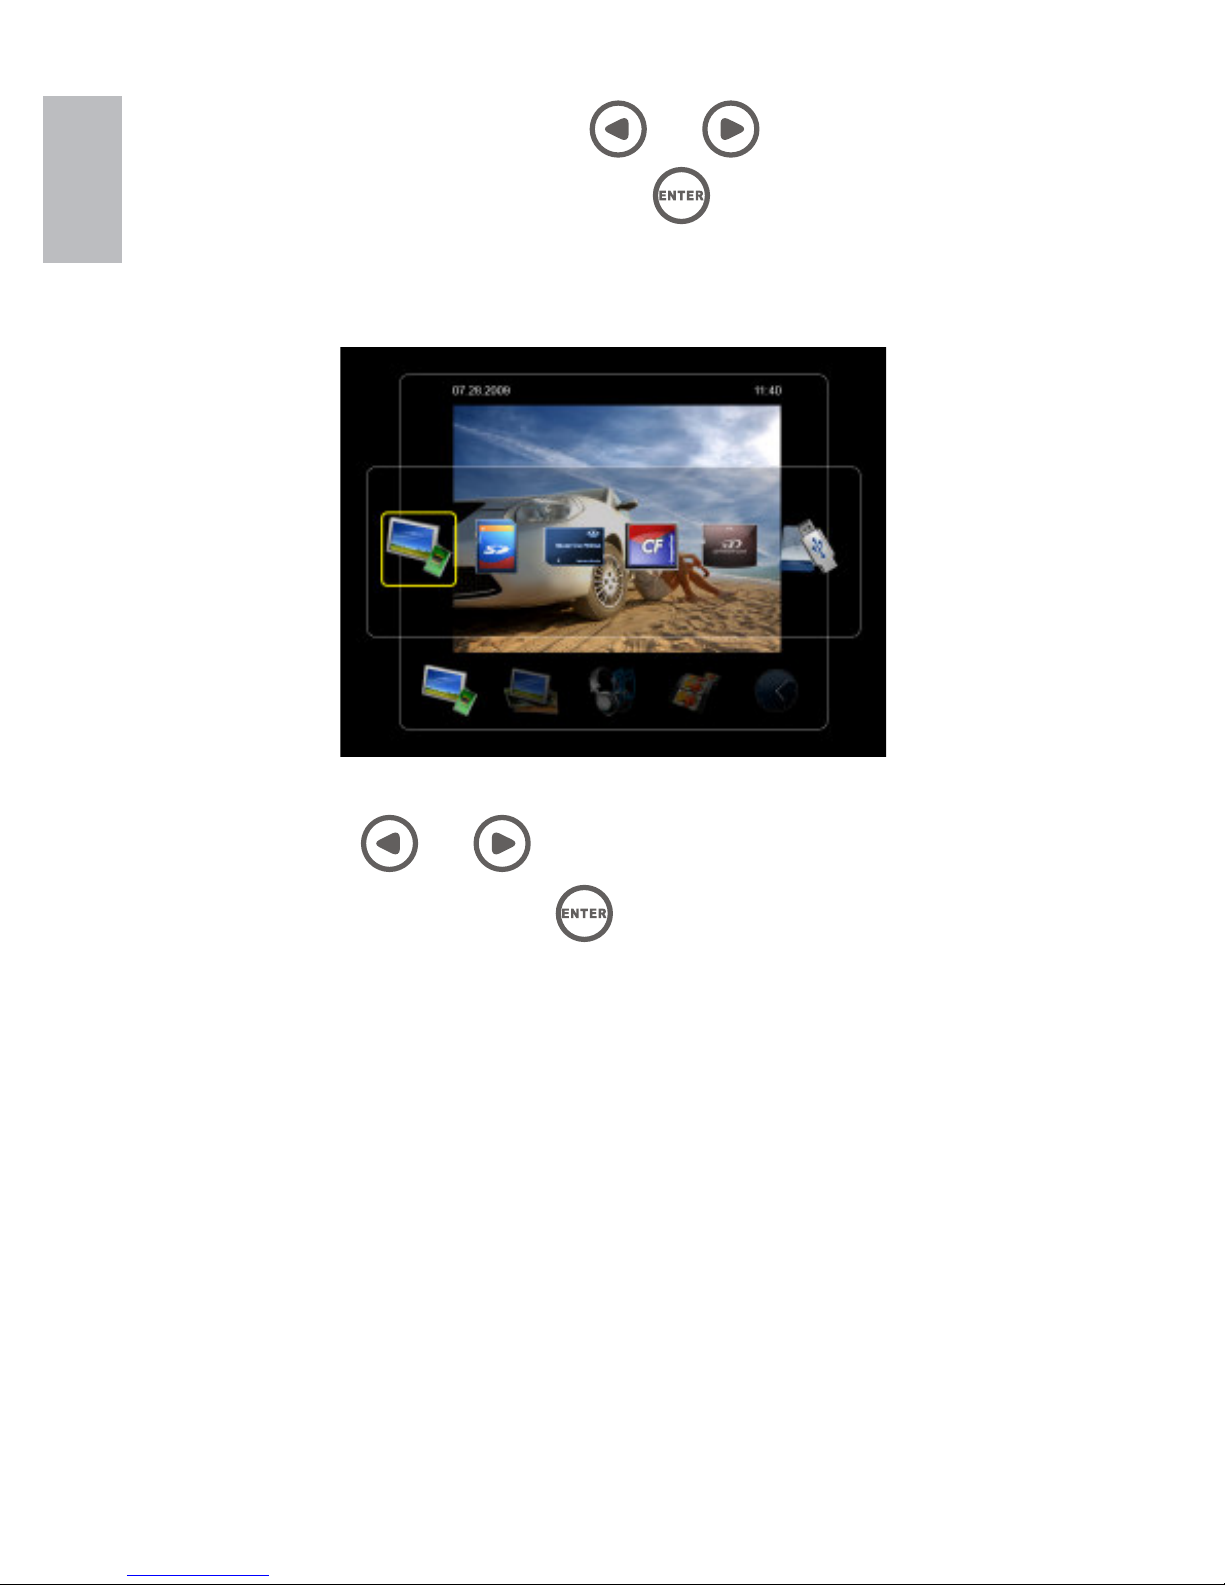
Main Menu
After the Digital Picture Frame is turned on, the slideshow starts
automatically after a few seconds. Pressing the
button on the
remote will then display the main menu screen as shown below.
Use• the and buttons to highlight a mode icon. Press the
button to select the desired mode.
There are 5 modes available: Memory Source Selection, Photo, Music, •
Video, and Calendar.
Memory Source Selection
The HP Digital Picture Frame can play back content from internal and
external memory devices such as USB fl ash drives and memory cards
typically used with digital cameras. More than one external memory
device can be inserted at any given time. However, content from only
one memory source can be selected for playback.
To select the desired picture source:
Page 12
8
ENGLISH
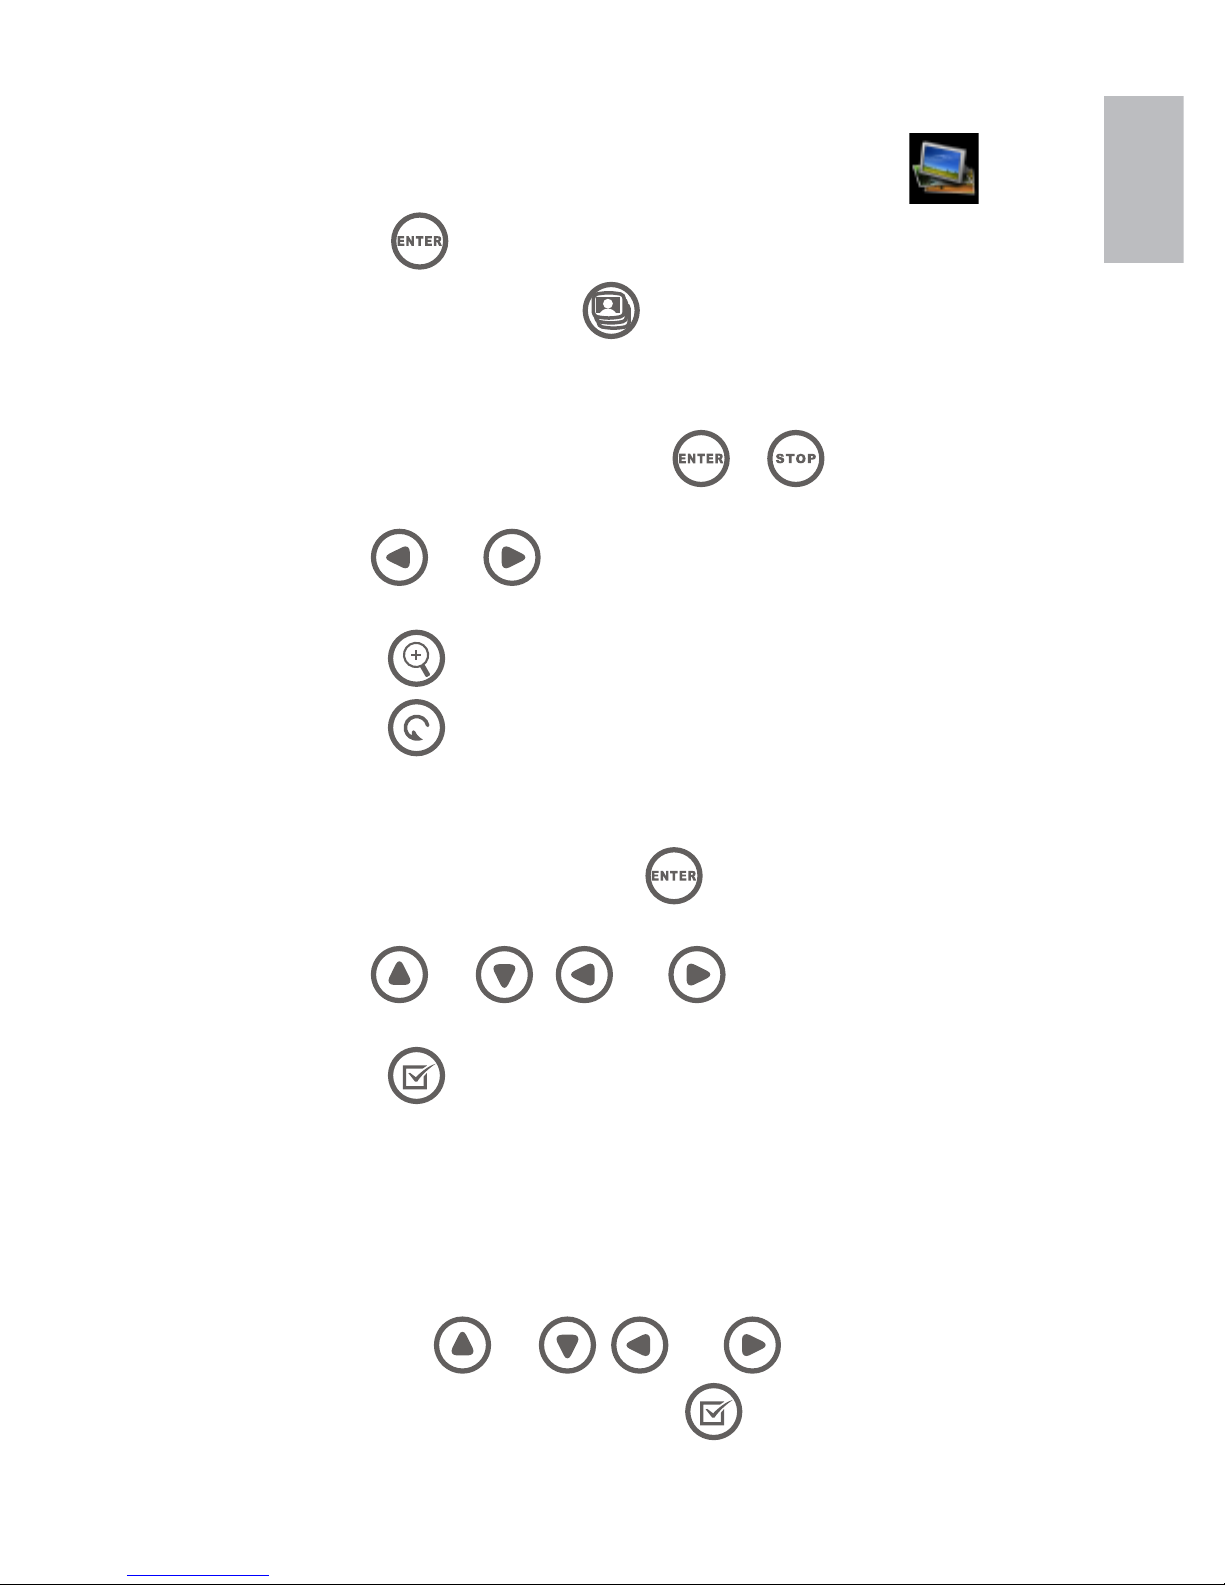
In Main Menu mode, use1. the and buttons to highlight the
Memory Source icon and press the button.
The memory source options will appear as illustrated below.
Use2. the and buttons to highlight the desired memory
source icon and press the
button. Note: The Memory Source
icon in the lower left corner of the Main Menu indicates the currently
selected memory source.
Photo mode
The Photo mode allows you to view images in three viewing modes:
Slideshow mode, Browse mode, and Thumbnail mode.
- Slideshow mode
There are three ways to begin the slideshow mode.
Slideshow mode will begin automatically a few seconds after the •
frame is powered on or when an external memory card is inserted.
Page 13
9
ENGLISH
To begin slideshow mode from the main menu, select• the and
press the button.
From any screen, press the •
button.
- Browse mode
When in slideshow mode, press the •
or buttons once to
enter Browse mode.
Use the •
and buttons for previous and forward picture
viewing.
Press• the
button to zoom in the photo.
Press• the
button to rotate the image 90 degrees counterclockwise.
- Thumbnail mode
When in browse mode, press the •
button once to enter
thumbmail mode.
Use the •
and , and buttons to move among the
images.
Press the•
button to select or unselect a photo. Selected photos can
be copied to external memory or deleted from internal memory.
Deleting photo fi les
When in Browse mode, proceeds directly to step 2. 1. When in Thumbnail
mode, use the
and , and buttons to highlight the
photo fi le to be deleted and press the
button.
Page 14
10
ENGLISH
You may select multiple photo fi les to be deleted at once.•
2. Press the
, then use the and buttons to navigate to
delete option and press the button.
Use the 3.
and buttons to highlight either Delete All or Delete
Selected option. Press the button to delete the photo fi les.
A confi rmation message appears.4.
To delete the selected photo fi les, select • Confi rm and press the
button.
To cancel, select • Cancel and press the
button.
This frame only allows deleting fi les from internal memory.•
Copying photo fi les
When in Browse mode, proceeds directly to step 2. When in Thumbnail 1.
mode, use the
and , and buttons to highlight the
photo fi le to be copied and press the button.
You may select multiple photo fi les to be copied at once.•
2. Press the button, then use the and buttons to navigate
to copy option and press the
button.
Page 15

11
ENGLISH
3. Use the and buttons to highlight either Copy All or Copy
Selected option. Press the button to copy the photo fi les.
4. A confi rmation message appears.
To optimize the photo size that fi ts the whole screen, select • Auto
Resize and press the
button.
To copy the selected photo fi les, select • Confi rm and press the
button.
To cancel, select • Cancel and press the
button.
This frame only copies fi les from external memory to internal memory.•
Page 16
12
ENGLISH
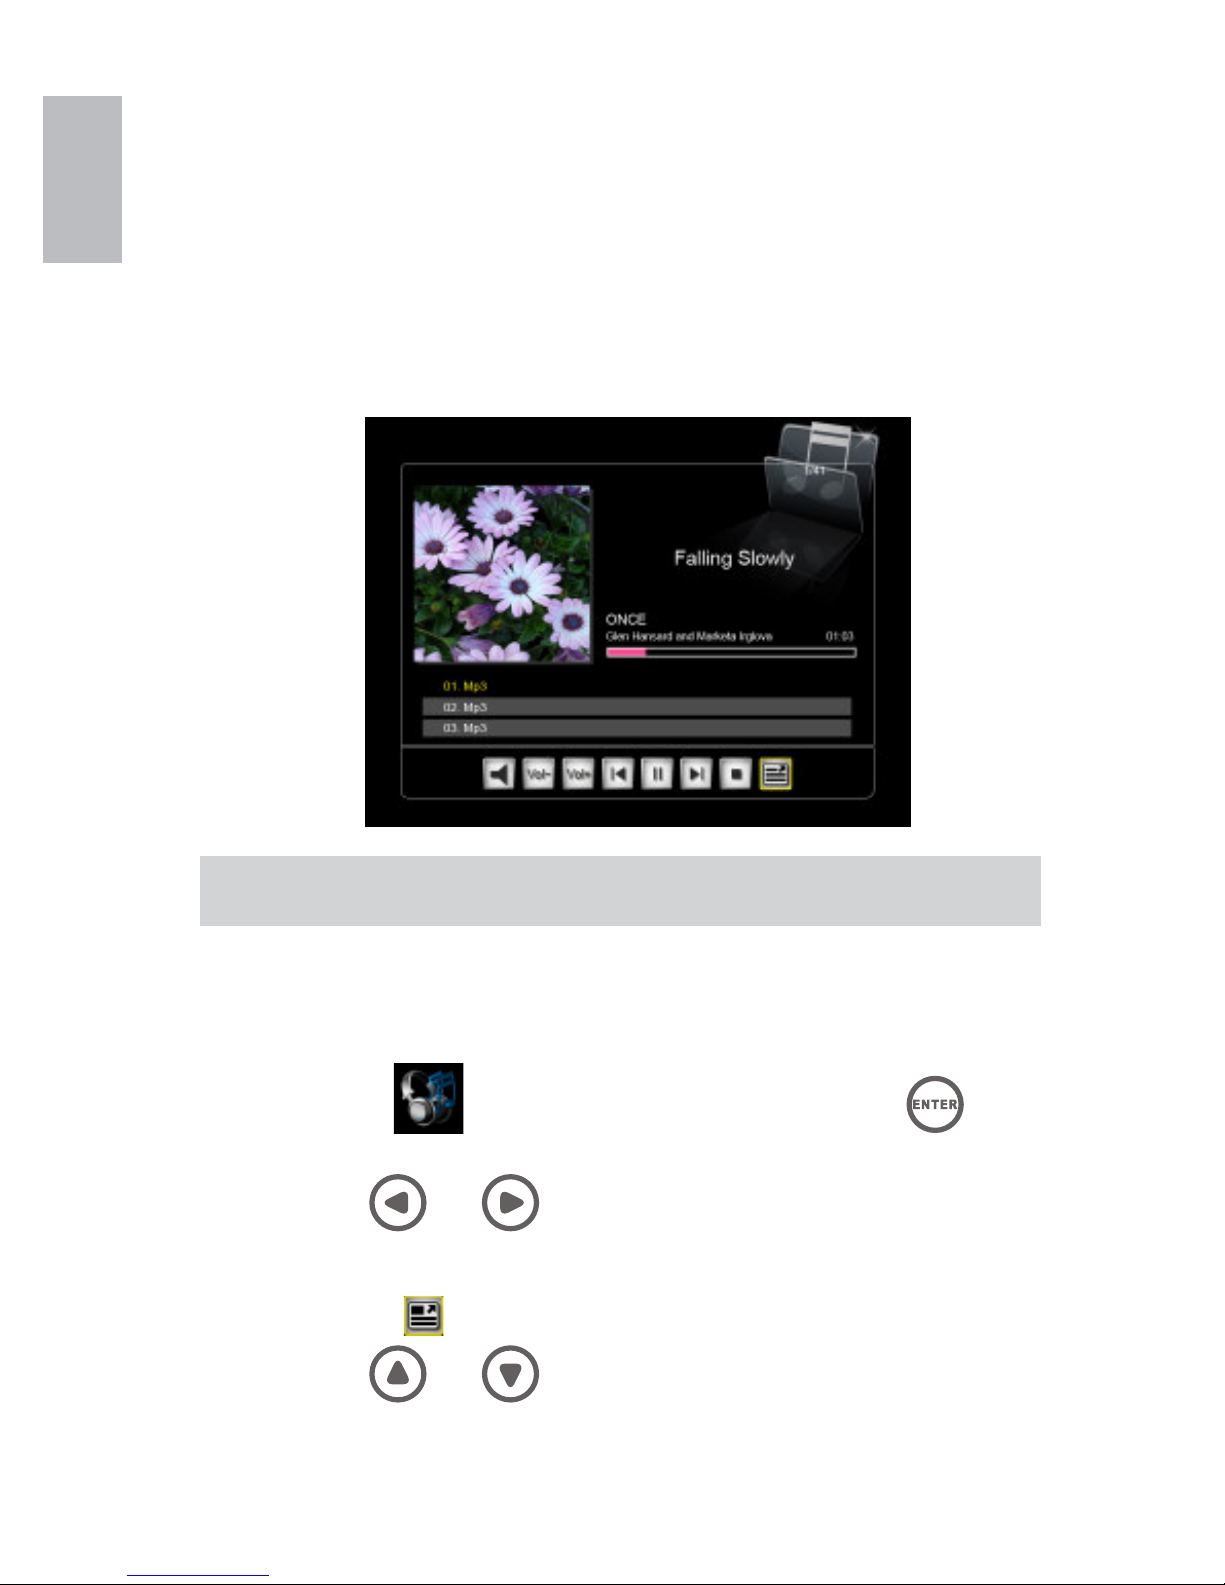
Music mode
The Music mode allows you to play audio fi les that are stored in the
internal memory or on the inserted memory card.
In this mode, a slideshow and the music can play simultaneously if the
memory type selected contains both fi le types. The music information
and the play time are shown at the right side of the slideshow. The
control buttons are at the bottom of the screen.
This frame only supports the MP3 audio fi le format.•
Playing the music
Select the 1.
icon from the main menu and press the
button.
Use2. the and buttons to move between the control
buttons
Select the •
to view a complete list of music fi les.
Use3. the and buttons to select a music fi le.
Page 17
13
ENGLISH
Press the • or buttons to adjust the audio volume.
Press• the
button once to mute the audio, press the again
to restore the audio.
Deleting a music fi le
When1. in music mode, use the
and buttons and select to
display a complete list of music fi les.
From the Music List screen that appears, use2. the
and
buttons to select the music fi le to be deleted.
Press3. the
button, then use the and buttons to
navigate to the delete option and press the button.
Use the 4.
and buttons to highlight the Delete Selected
option, Press the button to delete the music fi le.
A confi rmation message appears.5.
To delete the selected music fi le, select • Confi rm and press the
button.
To cancel, select • Cancel and press the button.
This frame only allows deleting fi les from internal memory.•
Copying a music fi le
From the main menu, select1. the
icon and press the button.
Page 18

14
ENGLISH
When in music mode, use2. the and buttons and select
to display a complete list of music fi les.
From the Music List screen that appears, use3. the
and
buttons to select the music fi le to be copied.
Press4. the , then use the and buttons to navigate to
copy option and press the button.
Use the 5.
and buttons to highlight the Copy Selected
option, press the button to copy the music fi le.
A confi rmation message appears.6.
To copy the selected music fi le, select • Confi rm and press the
button.
To cancel, select • Cancel and press the
button.
This frame only copies fi les from external memory to internal memory.•
Page 19
15
ENGLISH
Video mode
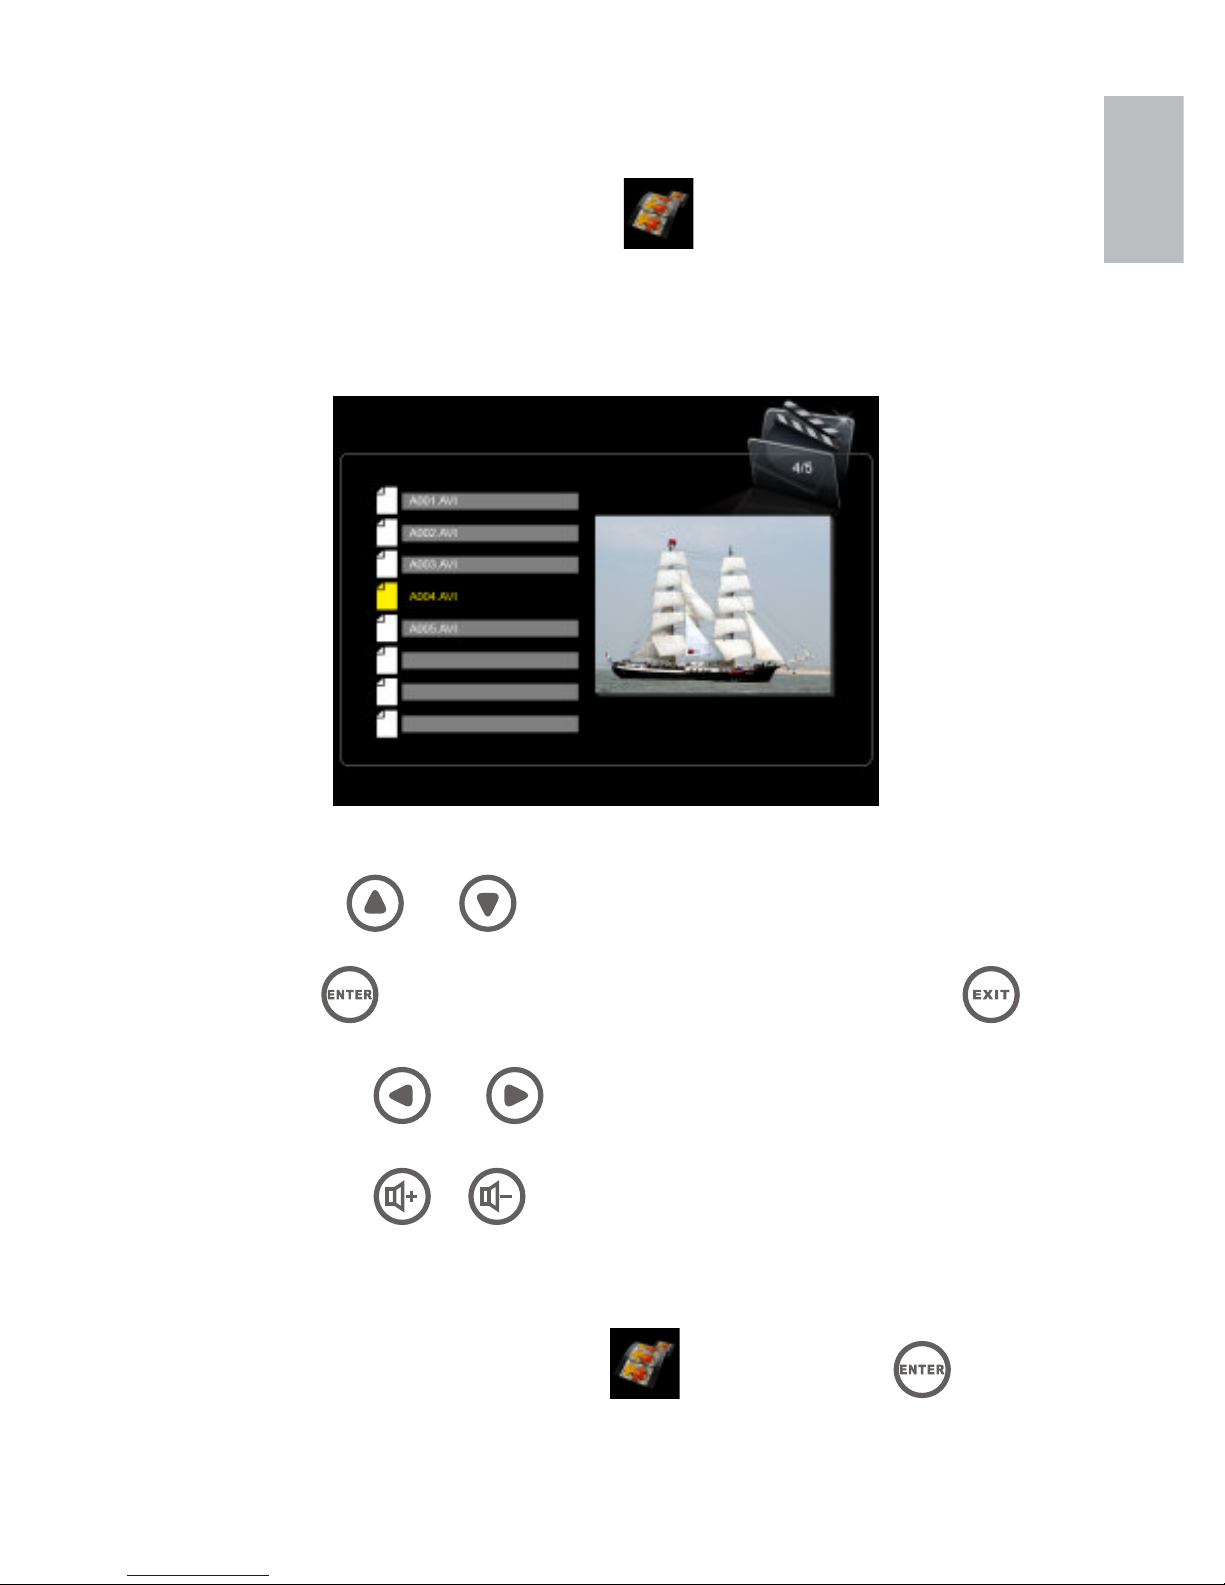
Viewing a video fi le
From the manin menu, select1. the
icon and press the button.
The video fi le list will be on the left side and the preview will be on the 2.
right side.
Use3. the and buttons to select a video fi le.
Press 4.
button to start the playback on full screen; press the
button to return to video fi le list.
Press• the
and buttons to fast forward and reverse the
video.
Press the •
or buttons to adjust the audio volume.
Deleting a video fi le
From the main menu, select1. the
icon and press the
button.
Page 20
16
ENGLISH
The video list screen appears.2.
From the video list screen that appears, use3. the
and
buttons to select the video fi le to be deleted.
Press4. the
button, then use and buttons to navigate
to delete option and press the button.
Use the 5.
and buttons to highlight the Delete Selected
option, Press the button to delete the video fi le.
A confi rmation message appears.6.
To delete the selected • video fi le, select Confi rm and press the
button.
To cancel, select • Cancel and press the button.
This frame only allows deleting fi les from internal memory.•
Copying a video fi le
From the main menu, select1. the icon and press the
button.
The video list screen appears.2.
From the video list screen that appears, use3. the
and
buttons to select the video fi le to be copied.
Press4. the
button, then use and buttons to navigate
to copy option and press the
button.
Page 21

17
ENGLISH
Use the 5. and buttons to highlight the Copy Selected
option, press the
button to copy the video fi le.
A confi rmation message appears.6.
To copy the selected • video fi le, select Confi rm and press the
button.
To cancel,select • Cancel and press the
button.
This frame only copies fi les from external memory to internal memory.•
Calendar mode
The Calendar mode displays a monthly calendar and a digital clock while
slideshow is playing.
From the main menu, select• the
and press the button.
The slideshow plays on the left side and the calendar shows at the •
right side. The time is displayed at the bottom of the screen.
Press• the
button to switch to the next month.
Press• the
button to switch to the previous month.
Setting the date and time
Go to the Calendar mode1.
Press2. the
button to go to Calendar setup menu.
Use3. the / buttons to move to different fi elds, press the
Page 22
18
ENGLISH
button to select a fi eld and use the and buttons to
adjust date and time.
Press the 4.
button to save.
Setting the alarm
Go to the Calendar mode.1.
Press2. the
button to enter alarm setup menu.
Use3. the / buttons to move to different fi elds, press the
button to select a fi eld and use the and buttons to turn on/off
alarm and adjust alarm time, volume, and snooze mode.
Press the 4.
button to save.
Page 23
19
ENGLISH
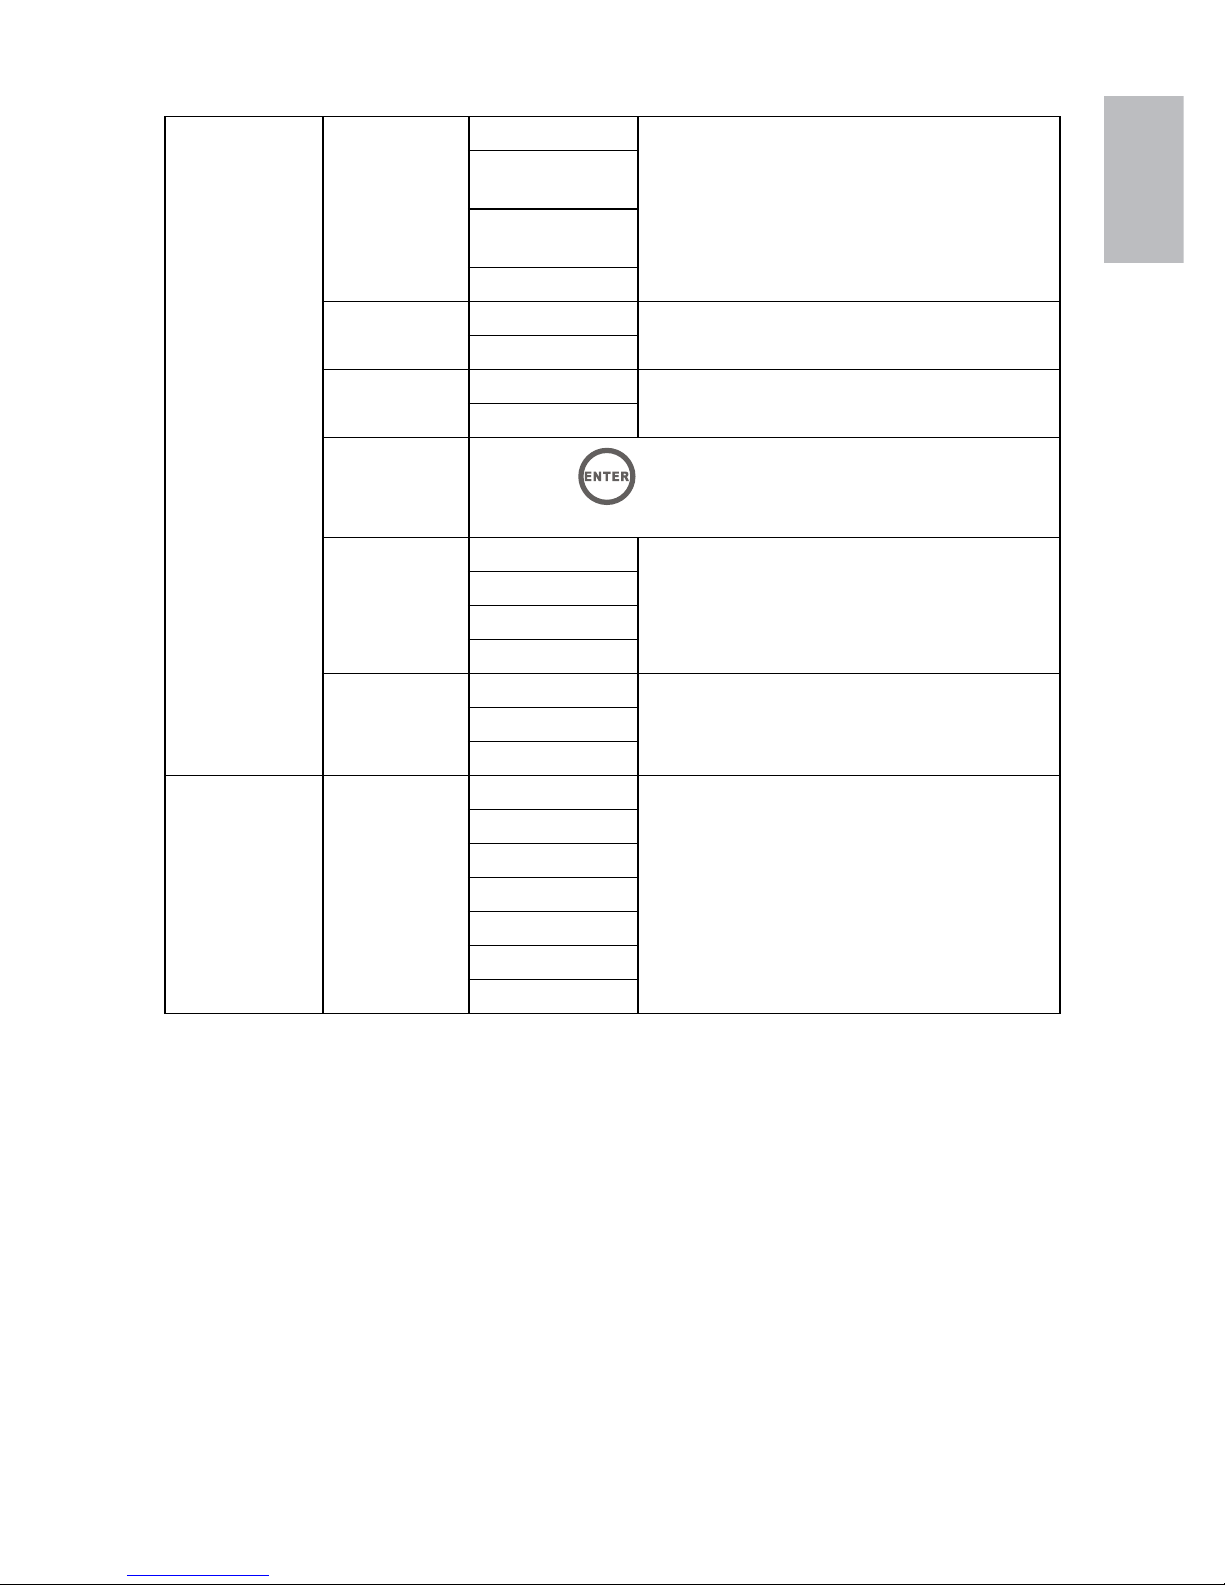
Settings Menu
The settings available depend on the current mode selection.
The system settings menu is displayed by pressing the
button from the
main menu. The mode settings are available by pressing the button
button from a given mode.
The table below provides details of the settings available from within each
mode.
Settings
menu
Sub-menus Description
Photo mode
File Sorting
Method
No sort
Sort your image fi les in a preferred
method.
By Date
(Newest First)
By Date
(Oldest First)
By Name
Copy Photo
Copy All Copy your image fi les from external storage
devices to internal memory.
Copy Selected
Delet Photo
Delete All
Delete your image fi les from internal
memory.
Delete Selected
Factory
Default
Press the
button to restore all options and settings to
the factory default.
Select Card
Memory
Choose a memory source for your image
fi les.
SD/MS/XD
CF
USB
Display
Image Size
Original Display image either in original aspect ratio
or in optimized size that fi ts the whole
screen.
Optimal
SlideShow
Transition
Normal
Select a style of image transition.
Random
Fade
Curtain
Open Door
Cross Comb
SlideShow
Speed
Fast
(5 secs)
Select the speed of your slideshow.Medium (30 secs)
Slow (60 secs)
Page 24
20
ENGLISH
Adjust LCD
Color
Brightness
Adjust the LCD brightness, contrast,
color, and tint. Use the
and
buttons to adjust the level.
Contrast
Color
Tint
Music mode
File Sorting
Method
No sort
Sort your audio fi les in a preferred
method.
By Date
(Newest First)
By Date
(Oldest First)
By Name
Copy Music
Copy All
Copy your audio fi les from external
storage devices to internal memory.
Copy Selected
Delet Music
Delet All
Delete your audio fi les from internal
memory.
Delet Selected
Factory
Default
Press the
button to restore all options and settings
to the factory default.
Select Card
Memory
Choose a memory source for your audio
fi les.
SD/MS/XD
CF
USB
Music
Repeat
Mode
Repeat Single
Select the mode for audio playback.Repeat All
No Repeat
Set As Alarm
Music
Press the
button to set the selected audio as alarm
sound.
Page 25
21
ENGLISH
Video Mode
File Sorting
Method
No sort
Sort your video fi les in a preferred
method.
By Date
(Newest First)
By Date
(Oldest First)
By Name
Copy Video
Copy All
Copy your video fi les from external
storage devices to internal memory.
Copy Selected
Delet Video
Delete All
Delete your video fi les from internal
memory.
Delete Selected
Factory
Default
Press the
button to restore all options and settings
to the factory default.
Select Card
Memory
Choose a memory source for your video
fi les.
SD/MS/XD
CF
USB
Video
Repeat
Mode
Repeat Single
Select the mode for video playback.Repeat All
No Repeat
System Setup
Language
Set
English
Choose from 7 on screen languages.
The factory default setting is “English”.
German
French
Spanish
Portuguese
Italian
Dutch
Page 26

22
ENGLISH
Specifi cations - df1200
Panel
Size 12.1”
Aspect Ratio 4:3 ratio
Resolution 800 x 600 pixels
Power
AC adapter 12V / 1.5A
Audio
Internal speakers 1.5W x 2pcs
Connectivity
USB Ports 1- USB 2.0 (Host for thumb drive)
1- Mini USB 2.0
(Connect to PC to manage internal memory and inserted
external memory cards)
Storage/Media
Internal Memory 128 MB
Supported Memory Cards
Memory Card Slot 1 MS, SD, XD, MMC
Memory Card Slot 2 Compact Flash (CF1), Microdrive (CF II)
Media Format Support
Picture fi le formats JPEG
Audio fi le formats MP3
Video fi le formats MPEG-1, MPEG-4, Motion JPEG
User Interface
On-Screen Display English, German, French, Spanish, Portuguese,
Italian, Dutch
Page 27

23
ENGLISH
Frequently Asked Questions
Q: How do I set up my Digital Picutre Frame?
A: It is very simple to get your Digital Picture Frame out of the box and running in
just a few minutes. Just plug the power adapter into the Digital Picture Frame
and into a standard wall socket. Insert a memory card into the appropriate card
slot on the side of the Digital Picture Frame and turn it on. Your fi rst slideshow
will automatically start to play.
Q: What memory cards can the Digital Picture Frame read?
A: Compatible memory cards include CF, SD/SDHC, MMC, xD, MS.
Q: I set up the Digital Picture Frame; why does it not turn on?
A: The adapter may be not securely connected to the Digital Picture Frame or wall
socket, or the Power Switch may not be on. Please check if the adapter is
properly plugged to the Digital Picture Frame and the wall socket.
Q: I have a memory card in the Digital Picture Frame; why can’t I view my photos?
A: First, check whether the memory card is one of the listed above and the images
are one of the formats listed in the Specifi cation on page 16 . Second, turn
the Digital Picture Frame off and make sure that the memory card is facing the
correct direction and is inserted all the way into the card slot and. Third, turn
the Digital Picture Frame on; you should see the Select Mode Screen. Follow
the instruction of Card Selection to select your memory card.
Note: Some digital cameras save images in other formats. Please refer to your
camera’s manual if your photo format is not listed in the Specifi cation.
Q: Why is the picture display slower with some pictures and faster with others?
A: Higher resolution pictures will take longer to display. Try to use lower resolution
pictures or down sampling your images. See your cameara’s operating manual
for details on downsizing your photos.
Q: Does the Digital Picture Frame support all JPEG fi les?
A: No. The Digital Picture Frame supports the baseline JPEG fi les taken by a digital
camera. It may not read all image fi les downloaded from the Internet or form
other graphic applications.
Page 28

24
ENGLISH
Cleaning and Care Tips
Please power off the HP Digital Picture Frame before cleaning. √
DO NOT √ push on the screen too fi rmly.
DO NOT √ spray or pour liquid cleaning agents directly on the screen
or frame.
DO NOT √ use ammonia, alcohol, or abrasive detergent cleaning
agents.
Cleaning the Screen:
Wipe screen with a clean, soft, lint-free cloth to remove dust and 1.
loose particles.
If further cleaning is required, apply an appropriate cleaning agent 2.
(approved for LCD displays) to a clean, soft, lint-free cloth and wipe
the screen.
Cleaning the Frame and Backing:
Use a clean, soft, lint-free cloth to remove dust and loose particles.1.
If desired, apply an appropriate cleaning agent to a clean, soft, 2.
lint-free cloth and wipe the appropriate surfaces.
Page 29

25
ENGLISH
Getting Help
Should your HP Branded Product require service within the Warranty
period, please contact the original point of purchase or an authorized
HP reseller in your country. If service is not available at those locations,
please contact an HP Branded Product warranty agent from the support
contact list provided on this document. Supported languages are:
English, French, German, Italian, Portuguese and Spanish. A warranty
agent will work with you to troubleshoot your issue and if necessary,
issue a Return Material Authorization (RMA) number in order to replace
your HP Branded Product. For warranty claims, you will be required to
provide a copy of your original dated sales receipt as proof of purchase
and the issued RMA number. End User customer shall be responsible
for shipping charges when shipping the product to the service center.
The service agent will provide you with an address and you will also be
responsible for any shipping charges to the warranty service center. Once
your product is received by the service center, a replacement frame will
be shipped back to you within 5 business days.
Email Support:
Language Email Address
Chinese
trad.chinese@hpodd.com
simp.chinese@hpodd.com
Dutch hollands@hpodd.com
Deutsch deutsch@hpodd.com
English english@hpodd.com
Espanol espanol@hpodd.com
Français francais@hpodd.com
Italiano italiano@hpodd.com
Portuguese portugues@hpodd.com
Svensk svensk@hpodd.com
Page 30

26
ENGLISH
Contact/Phone Support:
Country Language Number
België Dutch and German + 32 2700 1724
Deutchland German + 49 6950073896
España Spanish + 34 914533458
France French + 33 171230454
Ireland English + 353 1850882016
Italia Italian + 39 269682189
Nederland
Dutch
+ 31 202015093
Switzerland German/French/Italian + 41 18009686
United Kingdom English + 44 2073652400
North America
United States English + 1-866-694-7633
Canada English & French + 1-866-694-7633
Page 31

27
ESPAÑOL
Tabla de contenidos
¿Qué hay en la caja?.............................................................28
Identifi car las partes.............................................................29
Primeros pasos......................................................................30
Mando a distancia..................................................................33
Usar el marco de fotos............................................................34
Menú principal...................................................................................34
Modo selección de tarjeta...................................................................34
Modo foto.........................................................................................35
Modo música.....................................................................................39
Modo vídeo.......................................................................................42
Modo calendario................................................................................44
Menú Confi guración..............................................................46
Especifi caciones...............................................................49
Preguntas más frecuentes....................................................50
Consejos para la limpieza y cuidados...................................51
Obtener ayuda.......................................................................52
Page 32

28
ESPAÑOL
¿Qué hay en la caja?
Qty Item Image
1 Marco de Fotos Digital
1
Batería de repuesto del
mando a distancia CR2025
1
Adaptador de corriente universal
(5V, 2A)
1 Cable USB
1
Manual del usuario con
Declaración de conformidad
1 Declaración de conformidad
1 Guía de inicio rápido
1 Documento de garantía
Page 33

29
ESPAÑOL
Identifi car las partes
Puerto Mini USB para la transferencia
de archivos
Puerto USB para unidades Flash USB
Ranura xD-Picture Card™
Ranura Secure Digital™ y Multi Media
Card™
Ranura Compact Flash™
Entrada de alimentación AC
Ranura Memory Stick™, Memory Stick
PRO™, Memory Stick Duo™ y Memory
Stick PRO Duo™
Teclado
Botón de encendido
Altavoz
Soporte ajustable
Page 34

30
ESPAÑOL
Primeros pasos
Enchufe el adaptador en una toma de corriente y conecte el cable de 1.
corriente en la entrada DC del marco de fotos digital como se ilustra a
continuación.
DC 12V
El marco de fotos digital HP ya viene con fotos que ilustran las 2.
características básicas del producto. Si desea ver esas imágenes,
encienda el marco como se ilustra en el paso 4. La secuencia de
diapositivas comenzará en unos segundos.
Inserte una tarjeta de memoria o dispositivo de almacenamiento USB 3.
(memoria externa) que contenga fotos, música y/o vídeo en la ranura
de tarjeta apropiada o puerto USB como se ilustra a continuación.
Nota: Las tarjetas de memoria y dispositivos de almacenamiento USB
deben estar orientados correctamente.
Page 35

31
ESPAÑOL
Encienda el marco de fotos digital.4.
MEMUEXIT
Presione el botón POWER
POWER
Comenzará una secuencia de sus fotos automáticamente en unos
segundos. Si hay pistas de música disponibles en el mismo dispositivo de
memoria externo, la secuencia de diapositivas aparecerá con música de
fondo a menos que se deshabilite en el MENÚ CONFIGURACIÓN.
Además del mando a distancia, el marco de fotos digital tiene botones 5.
de control básico y controles de retroiluminación de la pantalla LCD en
la parte superior, como se ilustra a continuación.
3 4 5 6 7
3 8 9 : 8 ; < = ; > 4 ? ; @ A < = ;
7 ; B C D ? : E 8 C > F A : G G > 3 ; @ ; E E 8 D < A C
4 < = ; C 8 D C > 4 = C H G
I
< E ; < ? 8 ? D
MEMUEXIT
J I K L
(CONFIGURACIÓN)
M N O P N Q R S T U V W W
Page 36

32
ESPAÑOL
Cuando utilice el mando a distancia, apunte al sensor remoto frontal 6.
como se ilustra a continuación.
X Y Z [ \ ] ^ Y _ ` a Z ^ \
Page 37

33
ESPAÑOL
Mando a distancia
9
11
10
14
3
15
7
1
12
13
8
2
4
5
6
No Description
1
ALIMENTACIÓN
Presione este botón para encender/apagar el marco.
2
CONFIGURACIÓN
Presione este botón para acceder al menú de confi guración.
3
SECUENCIA DE DIAPOSITIVAS
Presione este botón para comenzar una secuencia de diapositivas.
4
ARRIBA
Presione para mover arriba en modo miniatura o para confi gurar opciones.
5
SIGUIENTE o ADELANTE
Presione para mover a la derecha en modo explorar, miniatura o menú.
6
ENTRAR
Presione para cambiar el modo de pantalla (secuencia de diapositivas, examinar o
miniatura). Presione para reproducir o pausar archivos de música o vídeo.
7
ANT o RETORNO
Presione para mover a la izquierda en modo explorar, miniatura o menú o para
regresar a la pantalla anterior en modo presentación de diapositivas.
8
ABAJO
Presione para mover abajo en modo miniatura o para confi gurar opciones.
9
SELECCIONAR
Pulse para realizar selecciones en el modo menú o confi guración.
10
ROTACIÓN
Presione para girar la imagen.
11
ACERCAR
Presione para aumentar la imagen en modo explorar foto.
12
CONTROL DEL VOLUMEN
Presione el botón + para aumentar y el botón – para disminuir el volumen de la
reproducción.
13
SILENCIAR
Presione este botón para activar el modo silencio.
14
SALIR
Presione este botón para salir del modo o página mostrada actualmente.
15
DETENER
Presione este botón para detener la reproducción de la secuencia de diapositivas,
música y vídeo.
Page 38

34
ESPAÑOL
Usar el marco de fotos
Menú principal
Tras encender el marco de fotos digital, la secuencia de diapositivas
comenzará automáticamente tras unos segundos. Si presiona el botón
en el mando aparecerá la pantalla del menú principal como se
muestra a continuación.
Utilice• y para resaltar un icono de modo. Presione
para seleccionar el modo deseado
Hay 5 modos disponibles: Selección de tarjeta de memoria, Foto, •
Música, Vídeo y Calendario.
Modo Selección de tarjeta
El Marco de Fotos Digital puede reproducir contenido de dispositivos
de memoria internos y externos como unidades USB fl ash y tarjetas
de memoria usadas normalmente en cámaras digitales. Se puede
insertar más de un dispositivo de memoria externo en un momento
dado. Sin embargo, sólo el contenido de una fuente de memoria puede
seleccionarse para la reproducción.
Para seleccionar la fuente de imágenes deseada:
Page 39

35
ESPAÑOL
En el Menú principal, utilice1. y para seleccionar Selección
de tarjeta y presione el botón
Esto mostrará la pantalla de la fuente de memoria como se ilustra a
continuación. Nota: La pantalla puede ser distinta dependiendo del tipo y
número de dispositivos de memoria externos que estén insertados.
Utilice2. y para resaltar el icono de la fuente de memoria
deseada y presione . Esto abrirá el Menú principal para la fuente
de memoria que acaba de seleccionar.
Modo foto
El modo Foto le permite ver imágenes en tres modos de visualización:
Modo secuencia de diapositivas, Modo examinar y Modo
miniatura
- Modo secuencia de diapositivas
Hay tres modos de iniciar el modo secuencia de diapositivas.
El modo secuencia de diapositivas comenzará automáticamente unos •
segundos después de encender el marco o cuando se inserta una
tarjeta de memoria externa.
Page 40

36
ESPAÑOL
Para iniciar el modo secuencia de diapositivas en el menú principal, •
seleccione y presione el botón .
En una pantalla, presione el botón •
.
- Modo examinar
En el modo secuencia de diapositivas, presione el botón•
o
una vez para entrara en el Modo examinar.
Utilice •
y para ver la imagen anterior o siguiente.
Presione •
para ampliar la foto.
Presione•
para girar la imagen 90 grados en sentido
contrahorario.
- Modo miniatura
En el modo examinar, presione el botón•
una vez para entrar en
el modo miniatura.
Utilice •
y , y para moverse por las imágenes.
Presione•
para seleccionar o quitar la selección a la(s) foto(s).
Las fotos seleccionadas pueden copiarse a la memoria externa o
eliminarse de la memoria interna.
Borrar archivos de fotos
En el Modo examinar, vaya directamente al paso 2. En el Modo miniatura, 1.
utilice los botones
y , y para resaltar el archivo de
foto que se va a borrar y presione el botón
.
Puede seleccionar múltiples archivos de fotos para borrarlos a la vez.•
Page 41

37
ESPAÑOL
Presione 2. , luego utilice y para navegar hasta la
opción de borrar y presione el botón .
Utilice3.
y para resaltar la opción Borrar todos o Borrar
seleccionados. Presione el botón para borrar los archivos de
fotos.
Aparecerá un mensaje de confi rmación.4.
Para borrar los archivos de fotos seleccionados, seleccione •
Confi rmar y presione el botón
.
Para cancelar, seleccione Cancelar y presione el botón •
.
Este marco sólo borra archivos de la memoria interna.•
Copiar archivos de fotos
En el Modo examinar, vaya directamente al paso 2. 1. En el Modo
miniatura, utilice los botones
y , y para resaltar
el archivo de foto que se va a copiar y presione el botón .
Puede seleccionar múltiples archivos de fotos para copiarlos a la vez.•
Presione2. , luego utilice y para navegar hasta la
opción de borrar y presione el botón
.
Utilice3.
y para resaltar la opción Copiar todos o Copiar
Page 42

38
ESPAÑOL
seleccionados. Presione el botón para copiar los archivos de fotos.
A confi rmation message appears.4.
Para optimizar el tamaño de foto para que se ajuste a toda la •
pantalla, seleccione Auto redimensionar y presione el botón
.
Para copiar los archivos de fotos seleccionados, seleccione •
Confi rmar y presione el botón
.
Para cancelar, seleccione • Cancelar y presione el botón
.
Este marco sólo copia archivos de la memoria externa a la memoria interna.•
Page 43

39
ESPAÑOL
Modo música
El modo Música le permite reproducir archivos de audio almacenados en la
memoria interna o en la tarjeta de memoria insertada.
En este modo, podrá ver la secuencia de diapositivas y reproducir música al
mismo tiempo si el tipo de memoria seleccionada contiene ambos tipos de
archivos. La información de la música y el tiempo de reproducción aparecen
en el lado derecho de la secuencia de diapositivas. Los botones de control
están en la parte inferior de la pantalla.
Este marco sólo soporta el formato de archivo de audio MP3.•
Reproducir la música
Seleccione el icono 1.
en el menú y presione el botón .
Utilice los botones 2.
y para moverse entre los botones de
control.
Seleccione •
para ver una lista completa de archivos de música.
Utilice los botones 3. y para seleccionar un archivo de música.
Presione los botones • o para ajustar el volumen del audio.
Presione el botón•
una vez para silenciar el audio, vuelva a
Page 44

40
ESPAÑOL
presionar para restablecer el audio.
Borrar un archivo de música
En el modo música, utilice los botones1.
y y seleccione
para mostrar una lista completa de archivos de música.
En la pantalla Lista de música que aparece, utilice los botones 2.
y
para seleccionar el archivo de música que se va a borrar.
Presione3.
, luego utilice y para navegar a la opción
de borrar y presione el botón .
Utilice 4.
y para resaltar la opción Suprimir selección,
presione para borrar el archivo de música.
Aparecerá un mensaje de confi rmación.5.
Para borrar los archivos de música seleccionados, seleccione •
Confi rmar y presione el botón .
Para cancelar, seleccione • Cancelar y presione el botón
.
Este marco sólo borra archivos de la memoria interna.•
Copiar un archivo de música
En el menú principal, seleccione el icono 1.
y presione el botón
.
En el modo música, utilice los botones2. y seleccione
Page 45

41
ESPAÑOL
para mostrar una lista completa de archivos de música.
En la pantalla Lista de música que aparece, utilice los botones3.
y
para seleccionar el archivo de música que se va a copiar.
Presione 4.
, luego utilice y para navegar hasta la
opción de copiar y presione el botón
Utilice 5. y para resaltar la opción Copiar seleccionado,
presione para copiar el archivo de música.
Aparecerá un mensaje de confi rmación.6.
Para copiar los archivos de música seleccionados, seleccione •
Confi rmar y presione el botón
.
Para cancelar, seleccione • Cancelar y presione el botón .
Este marco sólo copia archivos de la memoria externa a la memoria interna.•
Page 46

42
ESPAÑOL
Modo de vídeo
Ver un archivo de vídeo
En el menú principal, seleccione el icono 1.
y presione el botón .
La lista de archivos de vídeo aparecerá en el lado izquierdo y la vista 2.
previa en el lado derecho.
Utilice los botones3. y para seleccionar un archivo de vídeo.
Presione el botón4.
para iniciar la reproducción a pantalla completa;
presione para volver a la lista de archivos de vídeo.
Presione •
y para avanzar rápido y rebobinar el vídeo.
Presione los botones •
o para ajustar el volumen del audio.
Borrar un archivo de vídeo
En el menú principal, seleccione el icono 1. y presione el botón .
Page 47

43
ESPAÑOL
Aparecerá la pantalla lista de vídeos2.
From the video list screen that appears, use3. the
and
buttons to select the video fi le to be deleted.
Presione 4.
, luego utilice y para navegar hasta la
opción de borrar y presione el botón .
Utilice 5.
y para resaltar la opción Suprimir selección,
presione para borrar el archivo de vídeo.
Aparecerá un mensaje de confi rmación.6.
Para borrar los archivos de vídeo seleccionados, seleccione •
Confi rmar y presione el botón
.
Para cancelar, seleccione • Cancelar y presione el botón .
Este marco sólo borra archivos de la memoria interna.•
Copiar un archivo de vídeo
En el menú principal, seleccione el icono 1. y presione el botón
.
Aparecerá la pantalla lista de vídeos.2.
En la pantalla lista de vídeos que aparece, utilice los botones3.
y
para seleccionar el archivo de vídeo que se va a copiar.
Presione 4. , luego utilice y para navegar hasta la
Page 48

44
ESPAÑOL
opción de copiar y presione el botón .
Utilice5.
y para resaltar la opción Copiar seleccionado,
presione para copiar el archivo de vídeo.
Aparecerá un mensaje de confi rmación.6.
Para copiar los archivos de vídeo seleccionados, seleccione •
Confi rmar y presione el botón
.
Para cancelar, seleccione • Cancelar y presione el botón .
Este marco sólo borra archivos de la memoria interna.•
Modo calendario
El modo Calendario muestra un calendario mensual y un reloj digital
mientras se reproduce la secuencia de diapositivas.
En el menú principal, seleccione •
y presione .
La secuencia de diapositivas aparecerá en el lado izquierdo y el •
calendario en el lado derecho. La hora aparece en la parte inferior de
la pantalla.
Presione el botón •
para cambiar al mes siguiente.
Presione el botón•
para cambiar al mes anterior.
Ajustar la fecha y la hora
Vaya al modo Calendario.1.
Presione el botón 2.
para ir al menú de confi guración del Calendario.
Page 49

45
ESPAÑOL
Utilice3. / para moverse por los campos, presione para
seleccionar un campo y utillice los botones / para ajustar
la fecha y hora.
Presione 4.
para guardar.
Ajustar la alarma
Vaya al modo Calendario.1.
Presione 2.
para entrar en el menú de confi guración.
Utilice3. / para moverse por los campos, presione para
seleccionar un campo y utilice y para activar o desactivar
y ajustar la hora de la alarma, el volumen y la repetición de alarma.
Presione 4.
para guardar.
Page 50

46
ESPAÑOL
Menú Confi guración
Las confi guraciones disponibles dependen de la selección del modo actual.
El menú de confi guración del sistema aparece al presionar
en el menú
principal. La confi guración del modo está disponible presionando el botón en
un modo dado.La tabla siguiente ofrece detalles de las confi guraciones disponibles
dentro de cada modo.
Menu
Paramètres
Sous-menus Description
Modo foto
Método de
clasifi cación de
archivos
Sin clasifi car
Clasifi que sus archivos de imágenes con
el método preferido.
Por fecha
(nuevas primero)
Por fecha (antiguas
primero)
Por nombre
Copiar foto
Copiar todos
Copia sus archivos de imágenes desde
dispositivos de almacenamiento externo a
la memoria interna.
Copiar
seleccionados
Supresión foto
Borrar Todos
Borra sus archivos de imágenes de la
memoria interna.
Suprimir
selección
Predeterminado
de fábrica
Presione
para restaurar todas las opciones y
confi guraciones a los valores predeterminados de fábrica.
Seleccionar tarjeta
Memoria
Elija una fuente de memoria para sus
archivos de imágenes..
SD/MS/XD
CF
USB
Tamaño de la
imagen
Original
Muestra la imagen con su relación de
aspecto original o a tamaño optimizado
que se ajusta a toda la pantalla.
Óptimo
Transición de
diapositivas
Normal
Seleccione un estilo de transición de la
imagen
Al azar
Fundido
Cortinilla
De puerta abierta
Barrido
Velocidad de
diapositivas
Rápido (5 seg)
Seleccione la velocidad de la secuencia de
diapositivas.
Medio (30 seg)
Lento (60 seg)
Page 51

47
ESPAÑOL
Ajustar color LCD
Brillo Ajusta el brillo de la pantalla LCD, el
contraste, color y el matiz.
Utilice y para ajustar el
nivel.
Contraste
Color
Matiz
Modo música
Método de
clasifi cación de
archivos
Sin clasifi car
Clasifi que sus archivos de audio con el
método preferido.
Por fecha
(nuevas
primero)
Por fecha
(antiguas primero)
Por nombre
Copiar música
Copiar todos
Copia sus archivos de audio desde
dispositivos de almacenamiento externo
a la memoria interna.
Copiar
seleccionados
Borrar música
Borrar Todos
Borra sus archivos de audio de la
memoria interna.
Copiar
seleccionados
Predeterminado
de fábrica
Presione
para restaurar todas las opciones y
confi guraciones a los valores predeterminados de fábrica.
Seleccionar
tarjeta
Memoria
Elija una fuente de memoria para sus
archivos de audio.
SD/MS/XD
CF
USB
Repetir
reproducción del
audio
Repetir todo
Seleccione el modo para la reproducción
del audio.
Repetir todo
No repetir
Ajustar como
alarma
Presione
para ajustar el audio seleccionado como
sonido de alarma.
Page 52

48
ESPAÑOL
Modo vídeo
Método de
clasifi cación de
archivos
Sin clasifi car
Clasifi que sus archivos de vídeo con el
método preferido.
Por fecha
(nuevas primero)
Por fecha
(antiguas primero)
Por nombre
Copiar vídeo
Copiar todos
Copia sus archivos de vídeo desde
dispositivos de almacenamiento externo
a la memoria interna.
Copiar
seleccionados
Borrar vídeo
Borrar Todos
Borra sus archivos de vídeo de la
memoria interna.
Suprimir
selección
Predeterminado
de fábrica
Presione
para restaurar todas las opciones y
confi guraciones a los valores predeterminados de fábrica.
Seleccionar
tarjeta
Memoria
Elija una fuente de memoria para sus
archivos de vídeo.
SD/MS/XD
CF
USB
Repetir
reproducción del
vídeo
Repetir uno
Seleccione el modo para la reproducción
del vídeo.
Repetir todo
No repetir
Confi guración
del sistema
Confi g. Idioma
Inglés
Elija entre 7 idiomas en pantalla. El
predeterminado de fábrica es “English”.
Alemán
Francés
Español
Portugués
Italiano
Holandés
Page 53

49
ESPAÑOL
Especifi caciones - df1200
Pantalla
tamaño 12.1”
Relación de aspecto Relación 4:3
Resolución 800 x 600 pixels
Alimentación
Adaptador AC 12V / 1.5A
Audio
Altavoces internos 1.5W x 2 pzs
Conectividad
Puertos USB
1- USB 2.0
(Host para lápiz de memoria)
1- Mini USB 2.0
(Conectar al PC para administrar la memoria
interna y las tarjetas de memoria externa
insertadas.)
Almacenamiento/Medio
Memoria interna 128 MB
Tarjetas de memoria soportadas
Ranura 1 para tarjetas de memoria MS, SD, XD, MMC
Ranura 2 para tarjetas de memoria Compact Flash (CF1), Microdrive (CF II)
Formatos multimedia soportados
Formatos de archivos de imágenes JPEG
Formatos de archivos de audio MP3
Formatos de archivos de vídeos MPEG-1, MPEG-4, Motion JPEG
Interfaz de usuario
Menú en pantalla
Inglés, alemán, francés, español, portugués,
italiano, holandés
Page 54

50
ESPAÑOL
Preguntas más frecuentes
P: ¿Cómo instalo mi marco de fotos digital?
R: Es muy fácil sacar su marco de fotos digital de la caja y ponerlo en marcha en
sólo unos minutos. Simplemente enchufe el adaptador de corriente en el marco
de fotos digital y en una toma de corriente estándar. Inserte una tarjeta de
memoria en la ranura para tarjetas apropiada en el lateral del marco de fotos
digital y enciéndalo. La primera secuencia de diapositivas comenzará
automáticamente.
P: ¿Qué tarjetas de memoria puede leer el marco de fotos digital?
R: Las tarjetas de memoria compatibles son CF, SD/SDHC, MMC, xD, MS.
P: ¿He instalado el marco de fotos digital; ¿por qué no se enciende?
R: El adaptador puede no estar conectado de forma segura en el marco de
fotos digital o en el enchufe de la pared, o el interruptor de corriente
puede que no esté encendido. Compruebe si el adaptador está
correctamente enchufado al marco de fotos digital y al enchufe de la pared.
P: Tengo una tarjeta de memoria en el marco de fotos digital;¿por qué no puedo
ver mis fotos?
R: Primero, compruebe si la tarjeta de memoria está incluida en la lista de arriba y
si las imágenes son del formato en las Especifi caciones en la página 16.
Segundo, apague el marco de fotos digital y asegúrese de que la tarjeta de
memoria mire a la dirección correcta y esté insertada hasta el fondo en la ranura
para tarjetas. Y tercero, encienda el marco de fotos digital; debería ver la
pantalla de selección de modo. Siga las instrucciones en Selección de tarjeta
para seleccionar su tarjeta de memoria.
Nota: Algunas cámaras digitales guardan imágenes en otros formatos. Consulte el
manual de su cámara si el formato de sus fotos no aparece en las
Especifi caciones.
P: ¿Por qué aparece la imagen más lenta con algunas imágenes y más rápida con
otras?
R: Las imágenes de resolución más alta tardan más en aparecer. Intente utilizar
imágenes de resolución baja o comprima sus imágenes. Consulte el manual
de uso de su cámara para más detalles sobre la compresión de sus fotos.
P: ¿Soporta el marco de fotos digital todos los archivos JPEG?
R: No. El marco de fotos digital soporta archivos JPED de línea base tomadas por
una cámara digital. Puede que no lea todos los archivos de imágenes
descargados de Internet o de otras aplicaciones de gráfi cos.
Page 55

51
ESPAÑOL
Consejos para la limpieza y cuidados
Apague el Marco de Fotos Digital HP antes de su limpieza. √
NO √ ejerza demasiada presión sobre la pantalla.
NO √ rocíe spray o líquidos de limpieza directamente sobre la pantalla
o el marco.
NO √ utilice amoníaco, alcohol o detergentes abrasivos para la
limpieza.
Limpieza de la pantalla:
Límpiela con un trapo limpio, suave y sin pelusas para quitar el polvo 1.
y partículas.
Para una limpieza más profunda, aplique un limpiador apropiado 2.
(aprobado para pantallas LCD) en un trapo limpio, suave y sin pelusas
y limpie la pantalla.
Limpieza del marco y carcasa:
Utilice un trapo limpio, suave y sin pelusas para quitar el polvo y 1.
partículas.
Si lo desea, aplique un limpiador apropiado en un trapo limpio, suave 2.
y sin pelusas y limpie las superfi cies apropiadas.
Page 56

52
ESPAÑOL
Obtener ayuda
Si su producto de la marca HP necesita reparación dentro del período
de garantía, contacte con el punto de venta original o con un vendedor
HP autorizado en su país. Si el servicio no está disponible en esas
ubicaciones, contacte con un agente de garantía de productos de la
marca HP en la lista de contactos facilitada en este documento. Los
idiomas soportados son: Inglés, Francés, Alemán, Italiano, Portugués y
Español. Un agente de la garantía trabajará con usted para solucionar
el problema y, si es necesario, emitirá un número Return Material
Authorization (RMA) para reemplazar su producto de la marca HP. Para
reclamaciones de garantía, necesitará ofrecer una copia de su recibo
de ventas original como prueba de compra y el número RMA emitido.
El cliente usuario fi nal se hará cargo de los gastos de envío cuando
se envíe el producto al centro de servicios. El agente de servicios le
ofrecerá una dirección y usted también se hará cargo de cualquier gasto
de envío al centro de servicio de garantía. Una vez que su producto sea
recibido en el centro de servicios, se le enviará un marco nuevo en 5
días laborables.
Soporte por correo electrónico:
Idioma Dirección de correo electrónico
Inglés english@hpodd.com
Francés francais@hpodd.com
Italiano italiano@hpodd.com
Español espanol@hpodd.com
Portugués portugues@hpodd.com
Holandés hollands@hpodd.com
Alemán deutsch@hpodd.com
Sueco svensk@hpodd.com
Chino
trad.chinese@hpodd.com
simp.chinese@hpodd.com
Page 57

53
ESPAÑOL
b c d e f g e c h e i j k l c d c m i n c o c p e i q
País Idioma Número
BELGIË Holandés y alemán + 32 2700 1724
ALEMANIA Alemán + 49 6950073896
ESPAÑA Español + 34 914533458
FRANCIA Francés + 33 171230454
IRLANDA Inglés + 353 1850882016
ITALIA Italiano + 39 269682189
HOLANDA Holandés + 31 202015093
SUIZA Alemán/Francés/Italiano + 41 18009686
RU Inglés + 44 2073652400
Norteamérica
United State Inglés 1-866-694-7633
Canadá Inglés y francés 1-866-694-7633
Page 58

54
FRANÇAIS
Table des matières
Contenu de l’emballage........................................................55
Identifi cation des composants.............................................56
Mise en route........................................................................57
Télécommande...................................................................60
Utiliser le Cadre Photo Numérique......................................61
Menu Principal..................................................................................61
Mode Sélection Carte........................................................................61
Mode Photo......................................................................................62
Mode Musique..................................................................................66
Mode Vidéo......................................................................................69
Mode Calendrier................................................................................71
Menu Paramètresn................................................................73
Spécifi cations........................................................................76
Questions Fréquemment Posées.........................................77
Astuces de nettoyage et d’entretiens..................................78
Obtenir de l’aide.....................................................................79
Page 59

55
FRANÇAIS
Contenu de l’emballage
Qty Item Image
1 Cadre Photo Numérique
1
Télécommande
Pile de rechange CR2025
1
Adaptateur secteur universel
(5V, 2A)
1 Câble USB
1
Manuel de l’utilisateur et la
Déclaration de conformité
1 Déclaration de Conformité
1 Guide de mise en route rapideo
1 Document de garantie
Page 60

56
FRANÇAIS
Identifi cation des composants
Port mini-USB pour le transfert de
fi chier
Port USB pour les clés USB
xD-Picture Card™ Slot
Logement pour carte Secure Digital™
et Multi Media Card™
Logement pour carte Compact Flash™
Entrée alimentation CA
Memory Stick™, Memory Stick PRO™,
Memory Stick Duo™, et Memory Stick
PRO Duo™ Slot
Pavé numérique
Bouton Marche/Arrêt
Haut-parleur
Pied réglable
Page 61

57
FRANÇAIS
Mise en route
Branchez l’adaptateur à la prise de courant électrique et connectez le 1.
cordon d’alimentation à l’entrée CC du cadre photo numérique comme
illustré ci-dessous..
DC 12V
Le Cadre Photo Numérique HP est préchargé avec des photos afi n 2.
d’illustrer les principales caractéristiques de ce produit. Si vous
souhaitez voir ces photos, allumez le cadre comme illustré dans
l’étape 4. Le diaporama commencera dans quelques secondes.
Insérez une carte mémoire ou un périphérique de stockage USB 3.
(mémoire externe) contenant les photos, la musique, et/ou la vidéo
dans le logement de carte approprié ou dans le port USB comme
illustré ci-dessous. Remarque: Les cartes mémoire et les périphériques
de stockage USB doivent être orientés correctement.
Page 62

58
FRANÇAIS
Allumez le cadre photo numérique.4.
Appuyez sur le bouton MARCHE/ARRET
MEMUEXIT
POWER
Un diaporama de vos photos commencera automatiquement dans
quelques secondes. Si des morceaux de musique sont disponibles sur le
périphérique de mémoire externe, le diaporama défi lera avec la musique
de fond sauf si la fonction est désactivée dans MENU CONFIGURER.
En plus de la télécommande, le cadre photo numérique a des 5.
boutons de contrôle principaux et des boutons de contrôle pour le
rétroéclairage sur le dessus du cadre comme illustré ci-dessous.
r s t u u v w
x y z { | } ~ { | }
~ y | y x ~ z } }
} ~ w ~ y
z } ~ | ~ z }
MEMUEXIT
v s
Page 63

59
FRANÇAIS
Lors de l’utilisation de la télécommande, pointez-la sur le capteur 6.
distant comme illustré ci-dessous.
¡ ¢ £ ¤ ¥ ¦ § ¨ © ª ¤ ¢ « ¤
Page 64

60
FRANÇAIS
Télécommande
9
11
10
14
3
15
7
1
12
13
8
2
4
5
6
No Description
1
MARCHE/ARRET
Appuyez sur ce bouton pour allumer/éteindre le cadre.
2
SETUP
Appuyez sur ce bouton pour accéder au menu des paramètres.
3
DIAPORAMA
Appuyez sur ce bouton pour lancer un diaporama photo.
4
HAUT
Appuyez pour aller vers le haut en mode miniature ou avec les options de
confi guration.
5
SUIVANT ou AVANCE
Appuyez pour aller vers la droite en mode parcourir, miniature ou menu.
6
ENTREE
Appuyez pour changer le mode d’affi chage (diaporama, parcourir, ou miniature).
Appuyez pour lire ou mettre en pause un fi chier audio ou vidéo.
7
PREC ou RETOUR
Appuyez pour aller vers la gauche en mode parcourir, miniature ou menu, ou revenir
à l’écran précédent en mode diaporama.
8
BAS
Appuyez pour aller vers le bas en mode miniature ou avec les options de
confi guration.
9
SELECTIONNER
Appuyez pour effectuer des sélections en mode menu ou paramètres.
10
ROTATION
Appuyez pour faire pivoter l’image.
11
ZOOM AVANT
Appuyez pour agrandir un image en mode parcourir.
12
CONTROLE DU VOLUME
Appuyez sur le bouton +/- pour augmenter/baisser le volume sonore.
13
DESACTIVER
Appuyez sur ce bouton pour activer le mode de désactivation du son.
14
QUITTER
Appuyez sur ce bouton pour quitter le mode/page en cours.
15
ARRETER
Appuyez sur ce bouton pour arrêter la lecture du diaporama, de la musique, et de
la vidéo.
Page 65

61
FRANÇAIS
Utiliser le Cadre Photo Numérique
Menu principal
Une fois que le Cadre Photo Numérique est allumé, le diaporama
commence automatiquement après quelques secondes. L’appui du
bouton
sur la télécommande affi chera ensuite l’écran du menu
principal comme illustré ci-dessous.
Utilisez le• et pour mettre en surbrillance une icône de
mode. Appuyez sur le pour sélectionner le mode souhaité.
Il y a 5 modes disponibles: Sélection Carte Mémoire, Photo, Musique, •
Vidéo, et Calendrier.
Mode Sélection Carte
Le Cadre Photo Numérique HP peut lire le contenu des périphériques
mémoire internes et externes comme les clés USB et les cartes mémoire
communément utilisées avec les appareils photo numériques. Plus
d’un périphérique de mémoire externe peut être inséré à tout moment.
Cependant, seul le contenu d’une source mémoire peut être sélectionné
pour être lu.
Pour sélectionner la source:
Page 66

62
FRANÇAIS
En mode Menu Principal, utilisez le1. et pour sélectionner le
mode Sélection Carte et appuyez sur le bouton
Ceci affi chera l’écran de la source mémoire comme illustré ci-dessous.
Remarque: L’écran peut être différent suivant le type et le nombre de
périphériques de mémoire externes insérés.
Utilisez le2. et pour mettre en surbrillance l’icône de source
mémoire souhaitée et appuyez sur le . Ceci fera apparaître
le Menu Principal pour la source mémoire que vous venez de
sélectionner.
Mode Photo
Le mode Photo vous permet d’affi cher des images suivant trois types
de modes d’affi chage: Mode Diaporama, Mode Parcourir, et Mode
Miniature.
- mode Diaporama
Il y a trois façons de lancer le mode diaporama.
Page 67

63
FRANÇAIS
Le mode Diaporama commence automatiquement quelques secondes •
après la mise sous tension du cadre ou quand une carte mémoire
externe est insérée.
Pour lancer le mode diaporama à partir du menu principal, •
sélectionnez le
et appuyez sur le bouton .
À partir de n’importe quel écran, appuyez sur le bouton •
.
- mode Parcourir
En mode diaporama, appuyez une fois sur le bouton•
ou
pour accéder au mode Parcourir.
Utilisez le •
et pour visualiser l’image précédente ou
suivante.
Appuyez sur le •
pour faire un zoom avant de la photo.
Appuyez sur le •
pour faire pivoter l’image de 90 degrés dans le
sens contraire des aiguilles d’une montre.
- mode Miniature
En mode Parcourir, appuyez une fois sur le bouton•
pour
accéder au mode miniature.
Utilisez le •
et , et pour parcourir les images.
Appuyez sur le•
pour sélectionner ou désélectionner les
photo(s). Les photos sélectionnées peuvent être copiées sur une
mémoire externe ou être supprimées de la mémoire interne.
Supprimer des fi chiers photo
En mode Parcourir, procédez directement avec l’étape 2..\. En mode 1.
Page 68

64
FRANÇAIS
Miniature, utilisez les boutons et , et pour mettre
en surbrillance le fi chier photo à supprimer et appuyez sur le bouton
.
Vous pouvez sélectionner plusieurs fi chiers photo à supprimer en même •
temps.
2. Appuyez sur le
, puis utilisez et pour aller à l’option de
suppression et appuyez sur le bouton .
3. Utilisez le et pour mettre en surbrillance l’option Supprimer
tout ou Supprimer sélectionné. Appuyez sur le bouton pour
supprimer les fi chiers photo.
4. Un message de confi rmation apparaît.
Pour supprimer les fi chiers photo sélectionnés, sélectionnez • Confi rmer
et appuyez sur le bouton
.
Pour annuler, sélectionnez • Annuler et appuyez sur le bouton X.
Ce cadre supprime uniquement les fi chiers de la mémoire interne.•
Copier des fi chiers photo
En mode Parcourir, procédez directement avec l’étape 2..\. En mode 1.
Miniature, utilisez les boutons
et , et pour mettre
en surbrillance le fi chier photo à supprimer et appuyez sur le bouton
.
Page 69

65
FRANÇAIS
Vous pouvez sélectionner plusieurs fi chiers photo à copier en même •
temps.
2. Appuyez sur le
, puis utilisez et pour aller à l’option
de copie et appuyez sur le bouton .
3. Utilisez le
et pour mettre en surbrillance l’option Copier
tout ou Copier sélectionné. Appuyez sur le bouton pour copier
les fi chiers photo.
4. Un message de confi rmation apparaît.
Pour optimiser la dimension de la photo à l’écran, sélectionnez •
Redimensionnement automatique et appuyez sur le bouton
.
Pour copier les fi chiers photo sélectionnés, sélectionnez • Confi rmer et
appuyez sur le bouton
.
Pour annuler, sélectionnez • Annuler et appuyez sur le bouton
.
Ce cadre copie uniquement les fi chiers de la mémoire externe vers la •
mémoire interne.
Page 70

66
FRANÇAIS
Mode Musique
Le mode Musique vous permet de lire les fi chiers audio stockés sur la
carte mémoire interne ou externe.
Dans ce mode, un diaporama et la musique peuvent être lus
simultanément si le type de mémoire sélectionné contient les deux types
de fi chier. Les informations du fi chier audio et la durée de lecture sont
affi chées à droite du diaporama. Les boutons de contrôle sont en bas de
l’écran.
Ce cadre est compatible du format de fi chier MP3.•
Lire la musique
Sélectionnez l’icône 1.
dans le menu principal et appuyez sur le
bouton .
Utilisez les boutons 2.
et pour parcourir les boutons de
contrôle
Sélectionnez le• pour affi cher la liste complète des fi chiers audio.
Utilisez les boutons 3. et pour sélectionner un fi chier audio.
Page 71

67
FRANÇAIS
Appuyez sur les boutons • ou pour régler le volume sonore.
Appuyez une fois sur le bouton•
pour désactiver le son, appuyez
de nouveau sur le pour restaurer le son.
Supprimer un fi chier audio
En mode musique, utilisez les boutons1.
et et sélectionnez
pour affi cher la liste complète de fi chiers audio.
À partir de la Liste musicale qui apparaît, utilisez les boutons2.
et
pour sélectionner le fi chier audio à supprimer.
Appuyez sur le3.
, puis utilisez et pour aller à l’option
de suppression et appuyez sur le bouton .
Utilisez le 4.
et pour mettre en surbrillance l’option
Supprimer sélectionné. Appuyez sur pour supprimer le fi chier
audio.
Un message de confi rmation apparaît.5.
Pour supprimer les fi chiers audio sélectionnés, sélectionnez •
Confi rmer et appuyez sur le bouton
.
Pour annuler, sélectionnez • Annuler et appuyez sur le bouton
.
Ce cadre supprime uniquement les fi chiers de la mémoire interne.•
Page 72

68
FRANÇAIS
Copier un fi chier audio
À partir du menu principal, sélectionnez l’icône 1.
et appuyez sur
le bouton
.
En mode musique, utilisez les boutons2.
et et sélectionnez
pour affi cher la liste complète des fi chiers audio.
À partir de la Liste musicale qui apparaît, utilisez les boutons3. et
pour sélectionner le fi chier audio à copier.
Appuyez sur le4.
, puis utilisez et pour aller à l’option
de copie et appuyez sur le bouton .
Utilisez le 5.
et pour mettre en surbrillance l’option Copier
sélectionné. Appuyez sur pour copier le fi chier audio.
Un message de confi rmation apparaît.6.
Pour supprimer les fi chiers audio sélectionnés, sélectionnez •
Confi rmer et appuyez sur le bouton
.
Pour annuler, sélectionnez • Annuler et appuyez sur le bouton .
Ce cadre copie uniquement les fi chiers de la mémoire externe vers la •
mémoire interne.
Page 73

69
FRANÇAIS
Mode Vidéo
Affi cher un fi chier vidéo
À partir du menu principal, sélectionnez l’icône 1.
et appuyez sur
le bouton .
La liste des fi chiers vidéo apparaîtra à gauche et l’aperçu à droite.2.
Utilisez les boutons3. et pour sélectionner un fi chier vidéo.
Appuyez sur le bouton4.
pour lancer la lecture en plein écran;
appuyez sur le pour revenir à la liste des fi chiers vidéo.
Appuyez sur le •
et pour l’avance ou le retour rapide de la
vidéo.
Appuyez sur les boutons • ou pour régler le volume sonore.
Supprimer un fi chier vidéo
À partir du menu principal, sélectionnez l’icône 1. et appuyez sur
Page 74

70
FRANÇAIS
le bouton .
L’écran Liste des vidéos apparaît.2.
À partir de la Liste des vidéos qui apparaît, utilisez les boutons3.
et
pour sélectionner le fi chier vidéo à supprimer.
Appuyez sur le 4.
, puis utilisez et pour aller à l’option de
suppression et appuyez sur le bouton .
Utilisez le 5.
et pour mettre en surbrillance l’option Supprimer
sélectionné. Appuyez sur pour supprimer le fi chier vidéo.
Un message de confi rmation apparaît.6.
Pour supprimer le fi chier vidéo sélectionné, sélectionnez • Confi rmer
et appuyez sur le bouton
.
Pour annuler, sélectionnez • Annuler et appuyez sur le bouton .
Ce cadre supprime uniquement les fi chiers de la mémoire interne.•
Copier un fi chier vidéo
À partir du menu principal, sélectionnez l’icône 1. et appuyez sur le
bouton
.
L’écran Liste des vidéos apparaît.2.
À partir de la Liste des vidéos qui apparaît, utilisez les boutons3.
et
Page 75

71
FRANÇAIS
pour sélectionner le fi chier vidéo à copier.
Appuyez sur le4.
, puis utilisez et pour aller à l’option
de copie et appuyez sur le bouton .
Utilisez le5.
et pour mettre en surbrillance l’option Copier
sélectionné. Appuyez sur pour copier le fi chier vidéo.
Un message de confi rmation apparaît.6.
Pour copier le fi chier vidéo sélectionné, sélectionnez • Confi rmer et
appuyez sur le bouton
.
Pour annuler, sélectionnez • Annuler et appuyez sur le bouton .
This frame only copies fi les from external memory to internal memory.•
mode Calendrier
Le mode Calendrier affi che un calendrier mensuel et l’horloge numérique
pendant la lecture du diaporama.
À partir du menu principal, sélectionnez le •
et appuyez sur le
.
Le diaporama s’affi che à gauche et le calendrier à droite. L’heure est •
affi chée en bas de l’écran.
Appuyez sur le bouton •
pour passer au mois suivant.
Appuyez sur le bouton•
pour passer au mois précédent.
Page 76

72
FRANÇAIS
Confi gurer l’alarme
Allez au mode Calendrier1.
Appuyez sur le bouton 2.
pour passer au menu de confi guration du
calendrier.
Utilisez les boutons 3.
/ pour passer à un autre champ, et utilisez
les boutons / pour régler la date/heure.
Appuyez sur le bouton 4.
pour sauvegarder.
Confi gurer l’alarme
Allez au mode Calendrier1.
Appuyez sur le 2. pour accéder au menu de confi guration de l’alarme.
Utilisez le3.
/ pour parcourir les différents champs, appuyez sur le
pour sélectionner un champ et utilisez le et pour activer/
désactiver l’alarme et régler l’heure de l’alarme, le volume, et le mode
veille.
Appuyez sur le bouton 4. pour sauvegarder.
Page 77

73
FRANÇAIS
Menu Paramètresn
Les paramètres disponibles dépendent du mode en cours. Le menu des
paramètres du système est affi ché en appuyant sur le
à partir du menu
principal. Les paramètres du mode sont disponibles en appuyant sur le
bouton à partir d’un mode donné. Le tableau ci-dessous fournit les
détails des paramètres disponibles pour chaque mode.
Menu
Paramètres
Sous-menus Description
Mode Photo
Méthode de tri
des fi chiers
Pas de tri
Triez vos fi chiers image suivant la méthode
préférée.
Par date
(Les plus
récents d’abord)
Par date (Les plus
anciens d’abord)
Par nom
Copier photo
Copier tout
Copiez vos fi chiers image du périphérique de
stockage externe vers la mémoire interne.
Copier
sélectionné
Supprimer
photo
Supprimer tous
les
Supprimez tous vos fi chiers image de la
mémoire interne.
Supprimer
sélectionné
Réinitialisation
Appuyez sur le
pour restaurer toutes les options et
paramètres aux valeurs d’usine par défaut.
Sélection Carte
Mémoire
Choisissez une source mémoire pour vos
fi chiers image.
SD/MS/XD
CF
USB
Taille d’affi chage
Original Affi chez l’image dans son format d’origine
ou dans une taille optimisée pour l’écran
tout entier.
Optimal
Transition
diaporama
Normal
Sélectionnez un style de transition d’image.
Aléatoire
Fondu
Rideau
Ouverture
Croix
Durée
d’affi chage
Rapide
(5 sec)
Sélectionnez la vitesse de votre diaporama.Moyen (30 sec)
Lent (60 sec)
Page 78

74
FRANÇAIS
Réglez la
couleur du LCD
Luminosité
Réglez la luminosité, contraste, couleur, et
teinte du LCD. Utilisez le
et
pour régler le niveau.
Contraste
Couleur
Teinte
Mode
Musique
Méthode
de tri des
fi chiersMethod
Pas de tri
Triez vos fi chiers audio suivant la méthode
préférée.
Par date
(Les plus récents
d’abord)
Par date
(Les plus anciens
d’abord)
Par nom
Copier Musique
Copier tout
Copiez vos fi chiers audio du périphérique de
stockage externe vers la mémoire interne.
Copier
sélectionné
Supprimer
Musique
Copier tout
Supprimez tous vos fi chiers audio de la
mémoire interne.
Copier
sélectionné
Réinitialisation
Appuyez sur le
pour restaurer toutes les options et
paramètres aux valeurs d’usine par défaut.
Sélection Carte
Mémoire
Choisissez une source mémoire pour vos
fi chiers audio.
SD/MS/XD
CF
USB
Lecture audio
Répéter un
morceau
Sélectionnez le mode pour la lecture audio.
Lecture en
boucle
Répétition
désactivée
Défi nir comme
alarme
Appuyez sur le
pour défi nir la musique sélectionnée en
tant qu’alarme.
Page 79

75
FRANÇAIS
Mode Vidéo
Méthode de tri
des fi chiers
Pas de tri
Triez vos fi chiers vidéo suivant la méthode
préférée.
Par date
(Les plus récents
d’abord)
Par date
(Les plus anciens
d’abord)
Par nom
Copier vidéo
Copier tout
Copiez vos fi chiers vidéo du périphérique de
stockage externe vers la mémoire interne.
Copier
sélectionné
Supprimer
vidéo
Supprimer
tous les
Supprimez tous vos fi chiers vidéo de la
mémoire interne.
Supprimer
sélectionné
Réinitialisation
Appuyez sur le
pour restaurer toutes les options et
paramètres aux valeurs d’usine par défaut.
Select Card
Mémoire
Choisissez une source mémoire pour vos
fi chiers vidéo.
SD/MS/XD
CF
USB
Lecture vidéo
Répéter un
morceau
Sélectionnez le mode pour la lecture vidéo.
Lecture en
boucle
Répétition
désactivée
Confi g.
système
Réglage langue
Anglais
Choisissez parmi 7 langues. Par défaut, la
langue est l’anglais.
Allemand
Français
Espagnol
Portugais
Italien
Néerlandais
Page 80

76
FRANÇAIS
Spécifi cations - df1200
Panneau
Taille 12.1”
Format d’écran 0.16875
Résolution 800 x 600 pixels
Alimentation
AC adapter Adaptateur secteur
Audio
Haut-parleurs internes 2 x 1,5W
Connectivité
Ports USB
1- USB 2.0
(Host pour clé USB)
1- Mini USB 2.0
(Connexion à l’ordinateur pour gérer la mémoire
interne et des cartes mémoire externes.)
Stockage/Multimédia
Mémoire interne 128 Mo
Cartes mémoire compatibles
Logement 1 de cartes
mémoire
MS, SD, XD, MMC
Logement 2 de cartes
mémoire
Compact Flash (CF1), Microdrive (CF II)
Formats multimédia compatibles
Formats de fi chier image JPEG
Formats de fi chier audio MP3
Formats de fi chier vidéo MPEG-1, MPEG-4, Motion JPEG
Interface utilisateur
Affi chage à l’écran
Anglais, Allemand, Français, Espagnol, Portugais,
Italien, Néerlandais
Page 81

77
FRANÇAIS
Questions Fréquemment Posées
Q: Comment installer mon Cadre Photo Numérique?
R: Il est très facile de déballer le Cadre Photo Numérique et de le mettre en marche
en quelques minutes. Branchez simplement l’adaptateur secteur au Cadre Photo
Numérique et à la prise de courant électrique murale. Insérez une carte mémoire
dans le logement de la carte mémoire approprié sur le côté du Cadre Photo
Numérique et mettez-le sous tension. Votre premier diaporama démarrera
automatiquement.
Q: Quelles sont les cartes mémoire compatibles avec le Cadre Photo Numérique?
R: Les cartes mémoires compatibles incluent CF, SD/SDHC, MMC, xD, MS.
Q: J’ai installé le Cadre Photo Numérique; pourquoi est-ce qu’il ne s’allume pas?
R: L’adaptateur n’est peut-être pas bien connecté au Cadre Photo Numérique ou à
la prise électrique murale, ou l’interrupteur d’alimentation n’est peut-être pas bien
positionné. Veuillez vérifi er si l’adaptateur est correctement branché au Cadre
Photo Numérique et à la prise de courant électrique murale.
Q: J’ai une carte mémoire dans le Cadre Photo Numérique; pourquoi est-ce que
je ne peux pas visualiser mes photos?
R: Premièrement, vérifi ez si la carte mémoire est l’une des cartes listées ci-dessus et
si le format des images est l’un des formats listés dans les Spécifi cations en
page 16. Deuxièmement, éteignez le Cadre Photo Numérique et vérifi ez que la
carte mémoire est orientée dans le bon sens et insérée à fond dans le logement
de la carte. Troisièmement, allumez le Cadre Photo Numérique; vous verrez
l’écran du mode sélection. Suivez les instructions de Sélection Carte pour
sélectionner votre carte mémoire.
Remarque: Certains appareils numériques enregistrent les images dans d’autres
formats. Veuillez vous référer au manuel de votre appareil photo si votre format
de photo n’est pas listé dans les Spécifi cations.
Q: Pourquoi est-ce que l’image s’affi che plus lentement avec certaines photos et
plus rapidement avec d’autres?
R: Les photos de résolution supérieure prendront plus de temps à s’affi cher. Essayez
d’utiliser des photos de résolution inférieure ou compressez vos images. Consultez
le manuel opérateur de votre appareil photo pour plus de détails concernant
la compression de vos photos.
Q: Est-ce que le Cadre Photo Numérique prend en charge tous les fi chiers JPEG?
R: Non. Le Cadre Photo Numérique prend en charge les fi chiers baseline JPEG
provenant d’un appareil photo numérique. Il peut ne pas lire tous les fi chiers
image téléchargés d’Internet ou autres applications graphiques.
Page 82

78
FRANÇAIS
Astuces de nettoyage et d’entretien
Eteindre le Cadre Photo Numérique HP avant de le nettoyer. √
NE PAS √ appuyez trop fort sur l’écran.
NE PAS √ vaporiser ou renverser un agent de nettoyage liquide
directement sur l’écran ou le cadre.
NE PAS √ utiliser d’ammoniac, alcool, ou agents de nettoyage abrasifs.
Nettoyage de l’écran:
Essuyez l’écran avec un chiffon propre, doux, et non pelucheux pour 1.
retirer la poussière et les particules.
Si un nettoyage supplémentaire est requis, appliquez un agent de 2.
nettoyage approprié (approuvé pour les écrans LCD) sur un chiffon
propre, doux, et non pelucheux, et nettoyez l’écran.
Nettoyage du cadre et du support:
Utilisez un chiffon propre, doux, et non pelucheux pour retirer la 1.
poussière et les particules.
Si vous le souhaitez, appliquez un agent de nettoyage approprié sur 2.
un chiffon propre, doux, et non pelucheux, et essuyez les surfaces
souhaitées.
Page 83

79
FRANÇAIS
Obtenir de l’aide
Si votre produit HP nécessite une réparation pendant la période de
maintenance, veuillez contacter le magasin où vous avez acheté votre
appareil ou un revendeur HP agréé dans votre région. Si un tel service
n’est pas disponible dans ces régions, veuillez contacter un agent de
garantie du produit HP parmi la liste de contacts fournie ci-dessous
pour vous assister. Les langues prises en charge: Anglais, Francais,
Allemand, Italien, Portugais et Espagnol. Un technicien vous assistera
pour remédier à votre problème et si nécessaire, vous donnera un
numéro d’autorisation de retour de matériel (RMA) afi n de remplacer
votre produit HP. Pour les réclamations sous garantie, vous serez invité
à fournir une copie de votre facture d’origine datée comme preuve
d’achat et le numéro RMA émis. Les frais d’envoi seront à la charge de
l’utilisateur fi nal pour l’envoi du produit au centre de services. L’agent
de service vous fournira une adresse et les frais d’envoi seront aussi à
votre charge pour l’envoi au centre de réparation sous garantie. Une
fois que votre produit est reçu par ce centre de service, un cadre de
remplacement vous sera renvoyé dans les 5 jours ouvrables.
Assistance par courrier électronique :
Langue Adresse email
Anglais english@hpodd.com
Français francais@hpodd.com
Italien italiano@hpodd.com
Espagnol espanol@hpodd.com
Portugais portugues@hpodd.com
Néerlandais hollands@hpodd.com
Allemand deutsch@hpodd.com
Suède svensk@hpodd.com
Chinois
trad.chinese@hpodd.com
simp.chinese@hpodd.com
Page 84

80
FRANÇAIS
¬ ® ¯ ° ± ¯ ² ³ ´ ´ µ ´ ¯ ° ® ± ¶ ¯ · ¸ · ¹ º ® µ » ¼ ¶ ½
Pays Langue Numéro
BELGE Néerlandais et Allemand + 32 2700 1724
ALLEMAGNE Allemand + 49 6950073896
ESPAGNE Espagnol + 34 914533458
FRANCE Français + 33 171230454
IRLANDE Anglais + 353 1850882016
ITALIE Italien + 39 269682189
PAYS BAS
Néerlandais
+ 31 202015093
SUISSE Allemand/Français/Italien + 41 18009686
RU Anglais + 44 2073652400
Amérique du nord
United State Anglais 1-866-694-7633
Canada Anglais et Français 1-866-694-7633
Page 85

Page 86

P/N: 7525C00084A
 Loading...