

Page 1
Page 2

tour the product
tour the product
tour the producttour the product
Table of contents
tour the product......................................................................................................................1
product overview............................................................................................................... .....4
key selling points....................................................................................................................5
available options.................................................................................................................5
quality ...............................................................................................................................5
media flexibility...................................................................................................................5
low printing costs ................................................................................................................6
unique product features...........................................................................................................7
localization............................................................................................................................8
foot print ...............................................................................................................................9
hp color inkjet printer cp1700/ hp color inkjet printer cp1700ps...............................................9
hp color inkjet printer cp1700d.............................................................................................9
top of the printer...................................................................................................................10
front of the printer.................................................................................................................11
rear of the printer .................................................................................................................12
controls...............................................................................................................................13
auto-duplex unit....................................................................................................................14
product specifications............................................................................................................15
model numbers .................................................................................................................1 5
serial number location........................................................................................................15
printer description .............................................................................................................15
printer features..................................................................................................................16
software compatibility........................................................................................................16
system requirements...........................................................................................................17
I/O interface.................................................................................................................. ..17
recommended cables.........................................................................................................17
font information.................................................................................................................17
HP supplies and accessories ...............................................................................................17
media specifications..........................................................................................................19
media handling.................................................................................................................20
memory information ...........................................................................................................20
reliability ..........................................................................................................................21
physical specifications........................................................................................................21
electrical specifications.......................................................................................................21
environmental specifications................................................................................................22
warranty..........................................................................................................................22
product certifications..........................................................................................................22
Accessories, User Replaceable Parts, Supplies and Manuals.......................................................24
Page 3

hardware accessories........................................................................................................24
user replaceable components..............................................................................................24
supplies and manuals.........................................................................................................24
identify expiration dates.....................................................................................................25
Manuals...........................................................................................................................27
upgrades.............................................................................................................................28
model upgrades................................................................................................................28
firmware upgrades............................................................................................................28
software upgrades.............................................................................................................28
service and support...............................................................................................................29
support pack options..........................................................................................................29
web links..........................................................................................................................29
telephone support..............................................................................................................29
calling from elsewhere in the world......................................................................................31
support ...............................................................................................................................32
customer sends unit directly to HP for Exchange or Repair.......................................................32
customer sends/takes unit to at HP Bench .............................................................................32
other support offerings .......................................................................................................33
warranty .............................................................................................................................35
warranty..........................................................................................................................35
repair and warranty information..........................................................................................35
duration of warranty period................................................................................................35
Extent of limited warranty...................................................................................................35
Limitations of Warranty......................................................................................................36
Limitations of Liability.........................................................................................................36
Local Law.........................................................................................................................36
1 - 2 hp confidential tour of the product
Page 4

Table of figures
Figure 1 - hp color inkjet printer cp1700....................................................................................4
Figure 1.2 - hp color inkjet printer cp1700.................................................................................7
Fig 1.10 hp color inkjet printer cp1700/ hp color inkjet printer cp1700ps.....................................9
Fig 1.11 hp color inkjet printer cp1700d...................................................................................9
top of the printer...................................................................................................................10
Front of the printer................................................................................................................11
rear of the printer .................................................................................................................12
controls...............................................................................................................................13
auto-duplex unit....................................................................................................................14
hp color inkjet printer cp1700................................................................................................1 5
hp color inkjet printer cp1700d..............................................................................................15
hp color inkjet printer cp1700ps.............................................................................................15
Tour of the product hp confidential 1 - 3
Page 5
product overview
product overview
product overviewproduct overview
•=Product positioning: High performance, wide-format printer providing the benefits of
individual color cartridges for small business
•=Takes over the price points of the DJ 1220C with higher performance and
expandability options
•=Printer price: USD 499
•=Announcement date of the printer is Nov 1, 2001
•=High speeds: 16 ppm black fast; 14.5 ppm color fast
•=Designed for small business
•=Prints on both A4/Letter and A3+/13X19" and B size paper and special media
•=Prints cost-effective color documents, proofs, collateral, and comps on a wide variety of
paper
•=Prints automatically on both sides of the document using the auto-duplex unit
Figure 1 - hp color inkjet printer cp1700
1 - 4 hp confidential tour of the product
Page 6

key selling points
key selling points
key selling points key selling points
available opti
available options
available optiavailable opti
•=3 printer SKU options available:
•=hp color inkjet printer cp1700
•=hp color inkjet printer cp1700d
•=hp color inkjet printer cp1700ps
•=Expandability options:
•=Auto-duplex unit
•=250-sheet paper tray
•=LIO internal network module
•=HP Jetdirect external print servers
•=Connectivity features
•=USB
•=IEEE 1284
•=LIO
•=front connect infrared
quality
quality
qualityquality
•=Uses HP PhotoRet III color layering technology
•=2400 x 1200 dpi printing (on hp premium photo paper only)
•=Adobe PostScript 3 software RIP included with the hp color inkjet printer cp1700ps
provides:
•=Greater color accuracy
•=Support for industry color management standards including ColorSync, ICC Profiles,
PANTONE
•=Emulation for press standards, such as SWOP/EuroScale
•=ADI Driver (releases 13 onwards) included in-box for AutoCAD users (for Windows
only)
•=High Speeds: Fast - 16 ppm black/14.5 ppm color
ons
onsons
media flexibility
media flexibility
media flexibilitymedia flexibility
•=Prints on paper types ranging from plain paper and transparencies to thick card stock
(up to 72lb/270gsm)
•=Prints on media sizes ranging from 4 x 6 inch/A6 size small postcards to 13 x 19
inch/A3+ posters and 13 x 50 inch banners
•=Built-in media size sensor, for A3 paper size
•=Built in media type sensor - recognizes the paper type in use and automatically selects
the appropriate settings
•=Paper path capacity:
•=Rear manual feed: 1 sheet (16 to 72 lb)
•=Front manual feed: 10 sheets (16 to 36 lb)
•=Tray 1: 150-sheet paper tray (16 to 36 lb), envelopes (20 to 24 lb), and cards (110 lb
index)
•=Optional Tray 2: 250 sheets (16 to 36 lb) plain paper
Tour of the product hp confidential 1 - 5
Page 7

low printing costs
low printing costs
low printing costs low printing costs
•=Four separate high-volume ink cartridges
•=Low-ink status indicator LCD
•=Front-panel cancel button to help maximize your consumables
•=Duty cycle of an average of 5000 pages per month
•=Low Costs: 2.2 cents K/8.4 cents (CMYK), 1750 pages o u t
1 - 6 hp confidential tour of the product
Page 8
unique product features
unique product features
unique product featuresunique product features
Figure 1.2 - hp color inkjet printer cp1700
•=Superior print quality
•=outstanding photo quality (with HP PhotoRet III)
•=Up to 2400 x 1200 dpi resolution on premium photo paper only
•=CANCEL button terminates print jobs at one touch of the key, reducing ink and time
wastage
•=Optional network card enables
•=Sharing of printer in small workgroups (of 2-3 users)
•=Remote printer management
•=Smart printing features:
•=LCD printer status indicator
•=CANCEL button
•=Smart software features:
•=ZoomSmart
•=Booklet
•=Handouts
•=Tiling
•=2-sided printing (manual or automatic)
•=Watermark
•=Banner
•=Mirror Image
•=Smart hardware features:
•=automatic pen alignment
•=Media type sensor
•=Media size sensor (A3 only)
•=Straight paper path eliminates bends and smudges in the print output
•=Front-access infrared sensor allows wireless printing from a variety of mobile devices
including laptops and PDAs
Tour of the product hp confidential 1 - 7
Page 9

localization
localization
localizationlocalization
Localization language options available for the following:
•=Reference Guide
•=Starter CD
•=Packaging
•=LCD Messaging
Each of the above has the following localized language options:
available language options
Reference Guide o US English
Packaging o US English
o Starter CD 1
o Starter CD 2
o Bahasa Indonesia
o Traditional Chinese
o Simplified Chinese
o Korean and Japanese
o Starter CD1
Windows Driver: US English,
Portuguese(Brazilian), Euro-Spanish, French,
Italian, German, Dutch, Polish, Czech, Turkish,
Arabic, Traditional Chinese
MAC Driver: US English, Portugese (Brazilian),
Euro-Spanish, Swedish, French, Italian, Germany,
Dutch, Japanese
o Starter CD2
Windows Driver: US English, Swedish,
Norwegian, Danish, Finish, Russian,
Greek, Hebrew, Japanese, Korean,
Simplified Chinese
MAC Driver: US English, Portugese
(Brazilian), Euro-Spanish, Swedish,
French, Italian, Germany, Dutch,
Japanese
o Bahasa Indonesia
o Traditional Chinese
o Simplified Chinese
o Korean and Japanese
localized language options
1 - 8 hp confidential tour of the product
Page 10
foot print
foot print
foot printfoot print
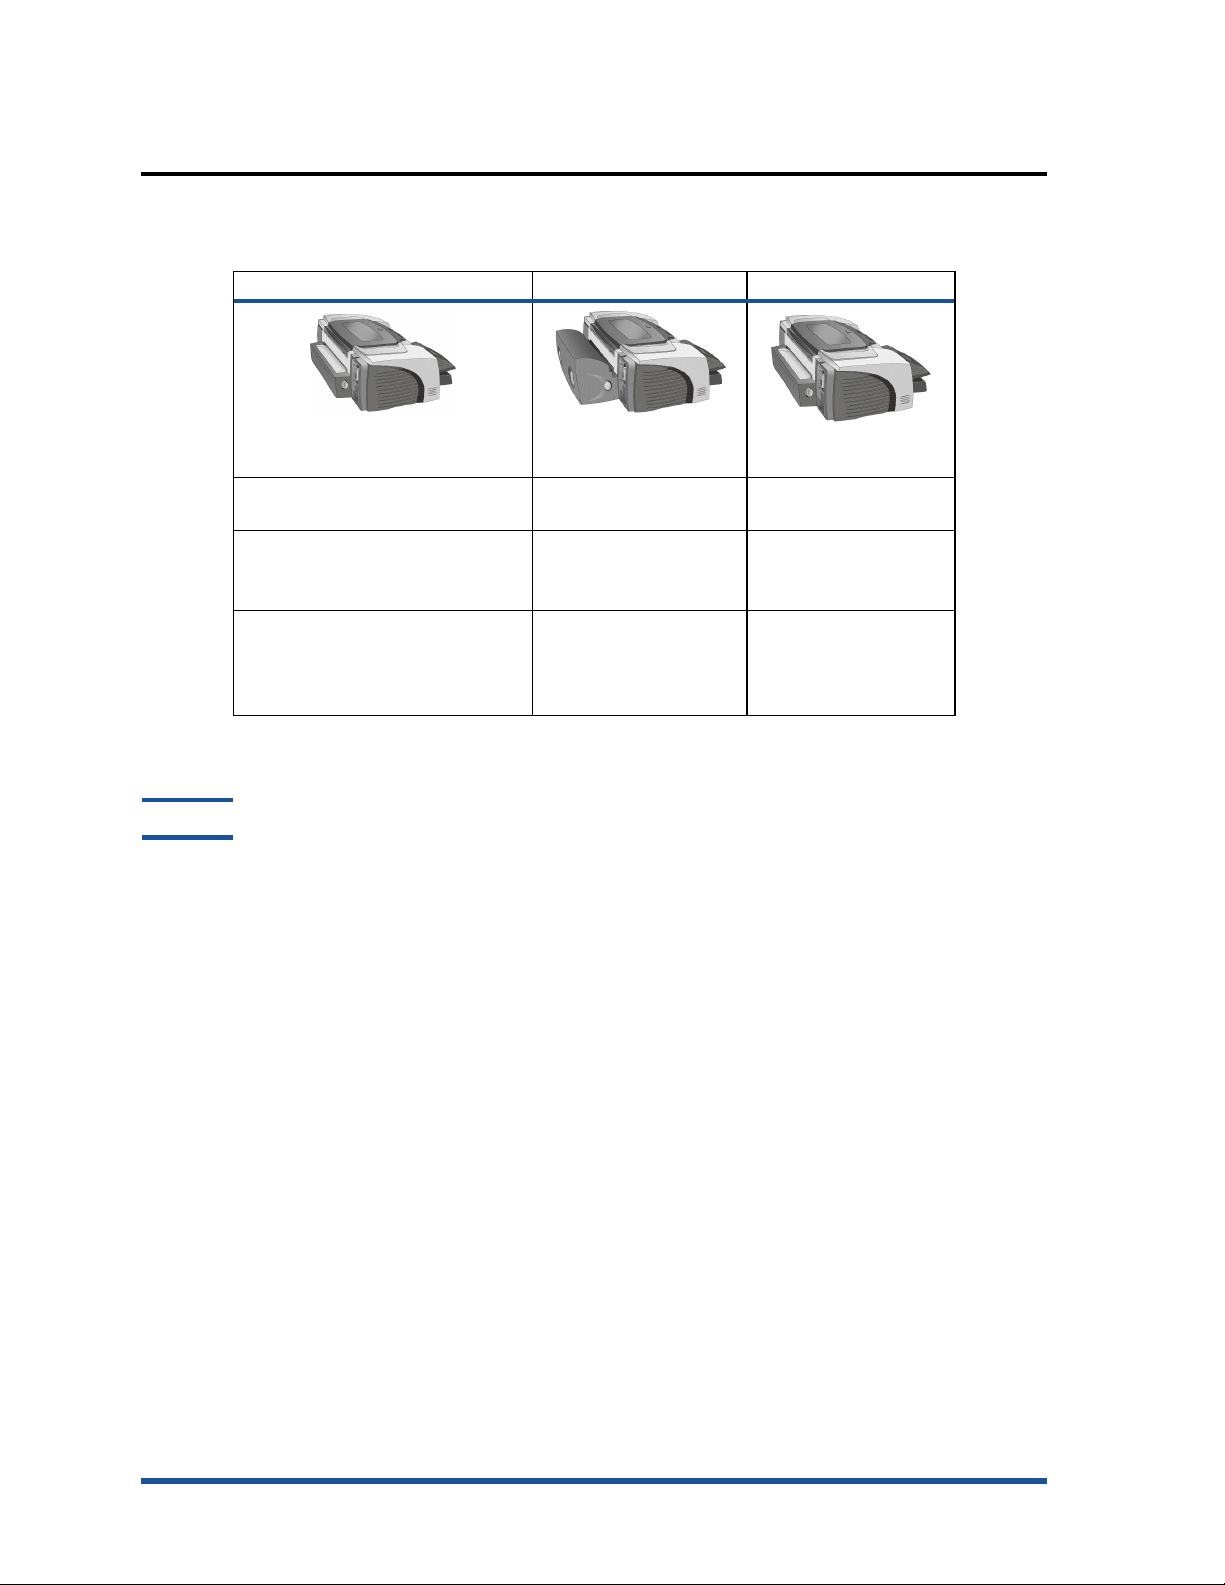
hp color inkjet printer cp1700/ hp color inkjet printer cp1700ps
hp color inkjet printer cp1700/ hp color inkjet printer cp1700ps
hp color inkjet printer cp1700/ hp color inkjet printer cp1700pshp color inkjet printer cp1700/ hp color inkjet printer cp1700ps
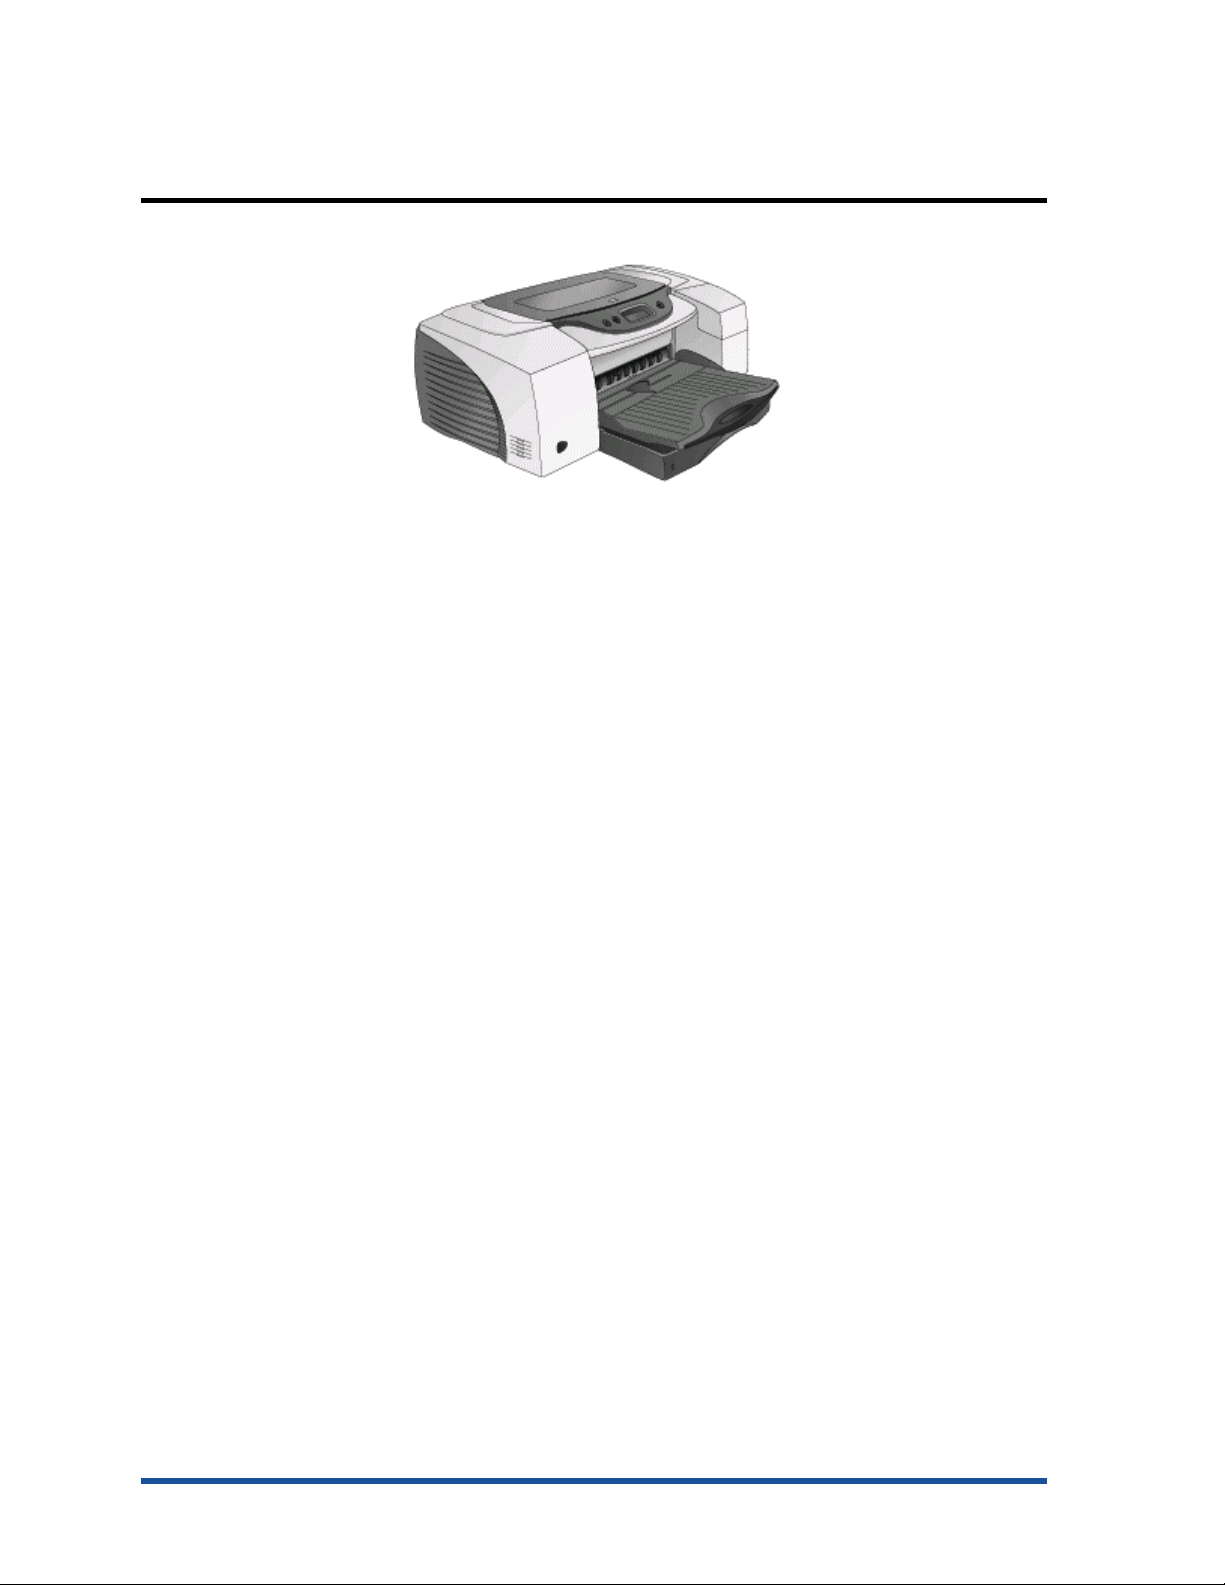
Fig 1.10 hp color inkjet printer cp1700/ hp color inkjet printer cp1700ps
hp color inkjet printer cp1700d
hp color inkjet printer cp1700d
hp color inkjet printer cp1700dhp color inkjet printer cp1700d
•=Weight: 13.5 kilograms
•=Width: 673.3 mm
•=Height: 284.3 mm
•=Depth: 567.7 mm
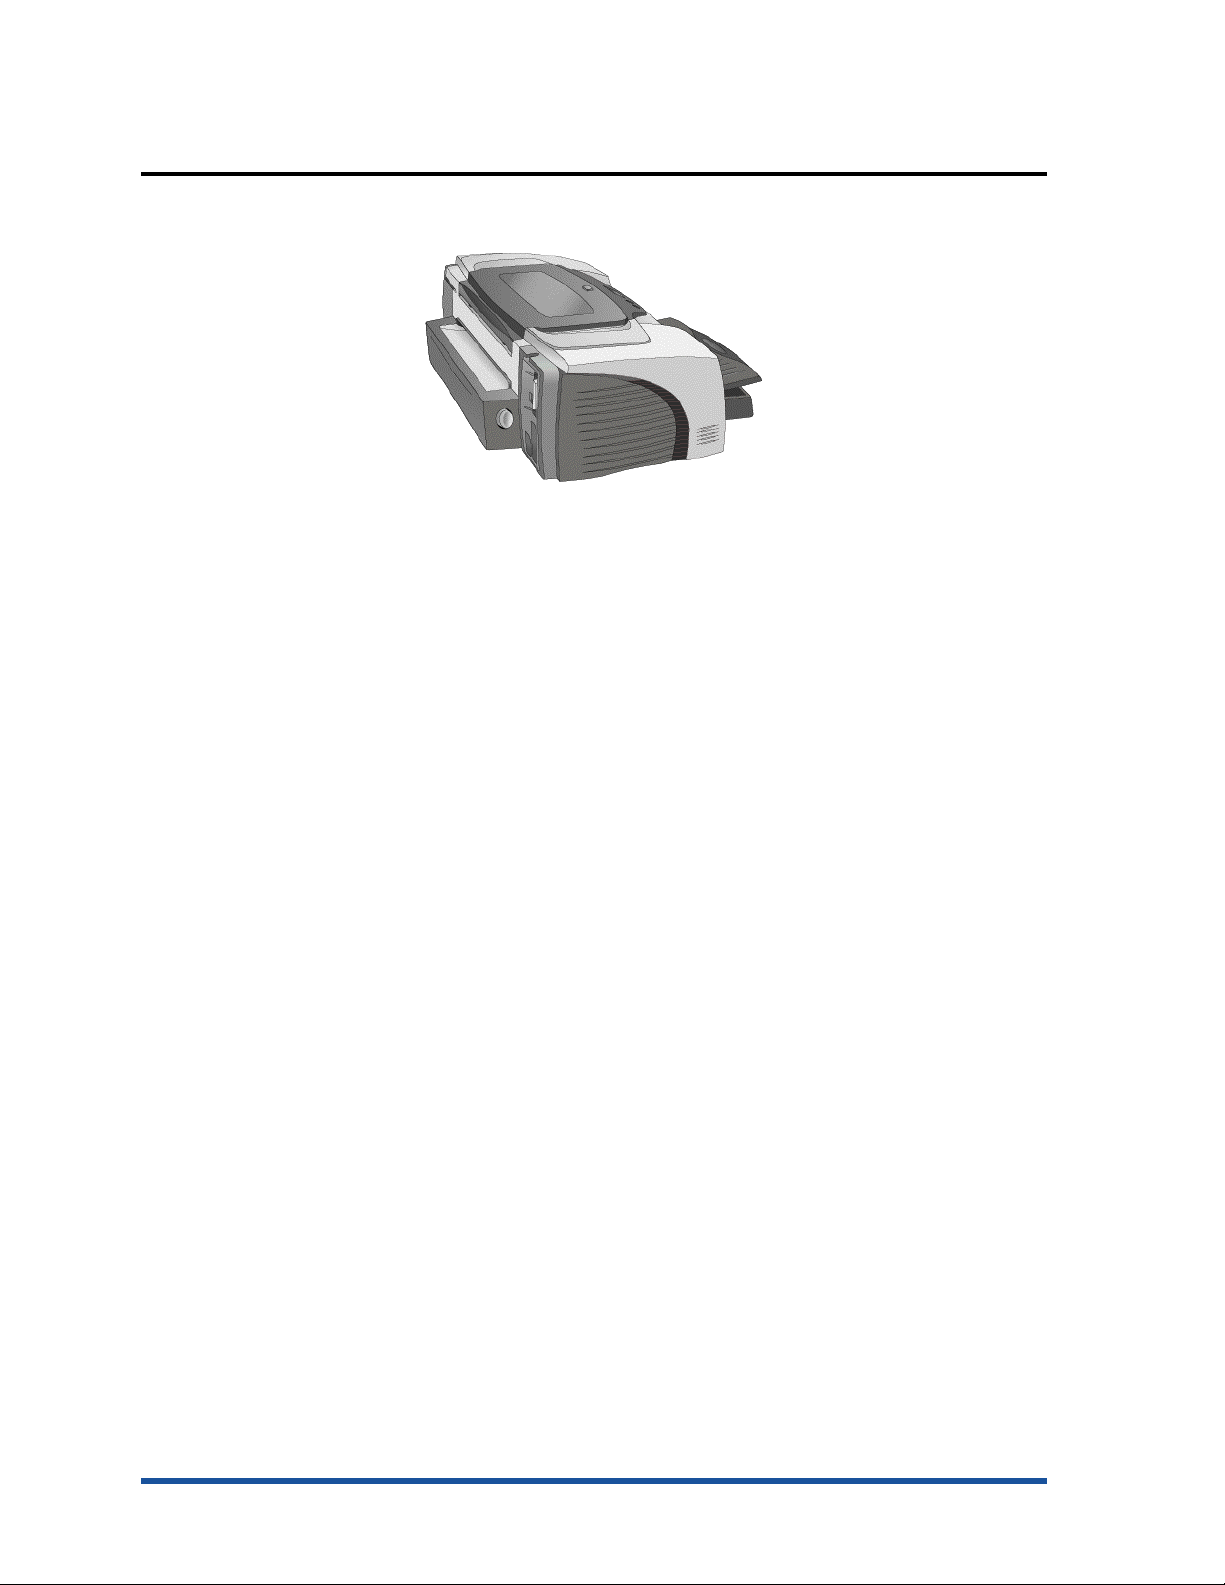
Fig 1.11 hp color inkjet printer cp1700d
•=Weight (printer): 13.5 kilograms
•=Weight (Auto-Duplex Unit): 2.4 kilograms
•=Width: 673.3 mm
•=Height: 284.3mm
•=Depth: 653.5mm
Tour of the product hp confidential 1 - 9
Page 11
top of the printer
top of the printer
top of the printertop of the printer
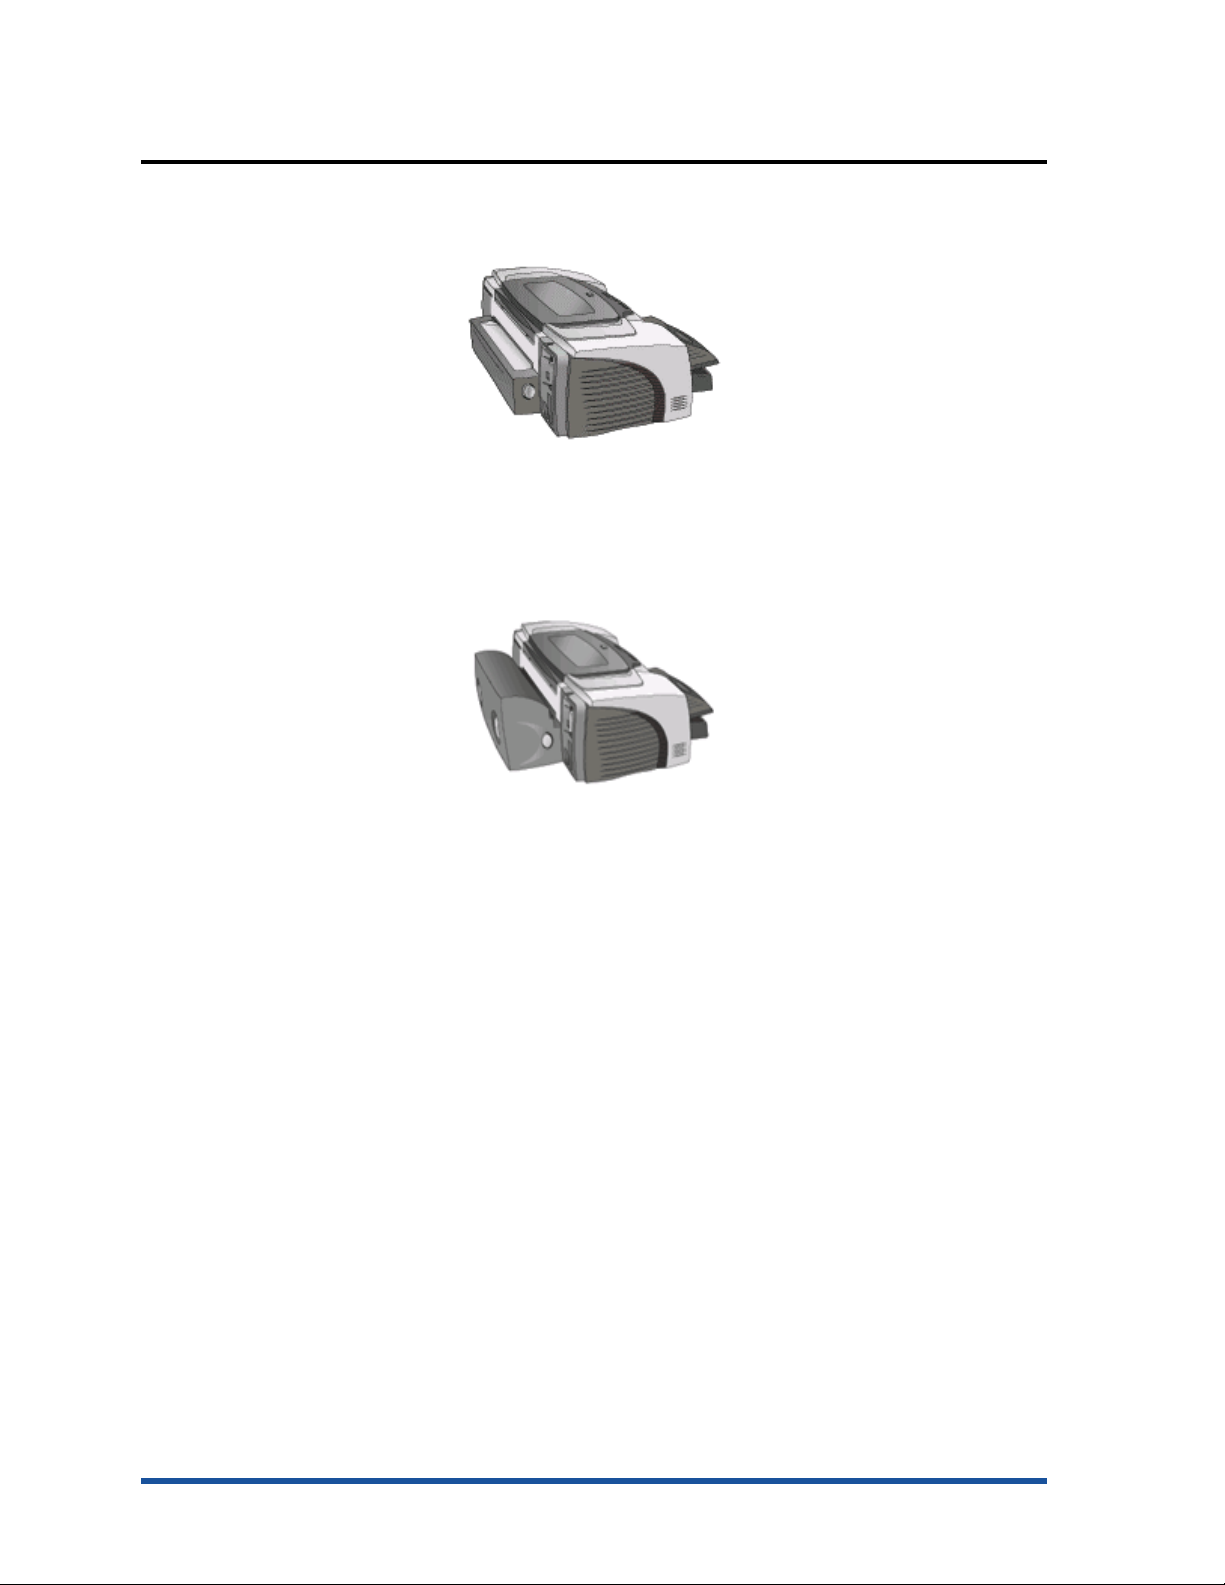
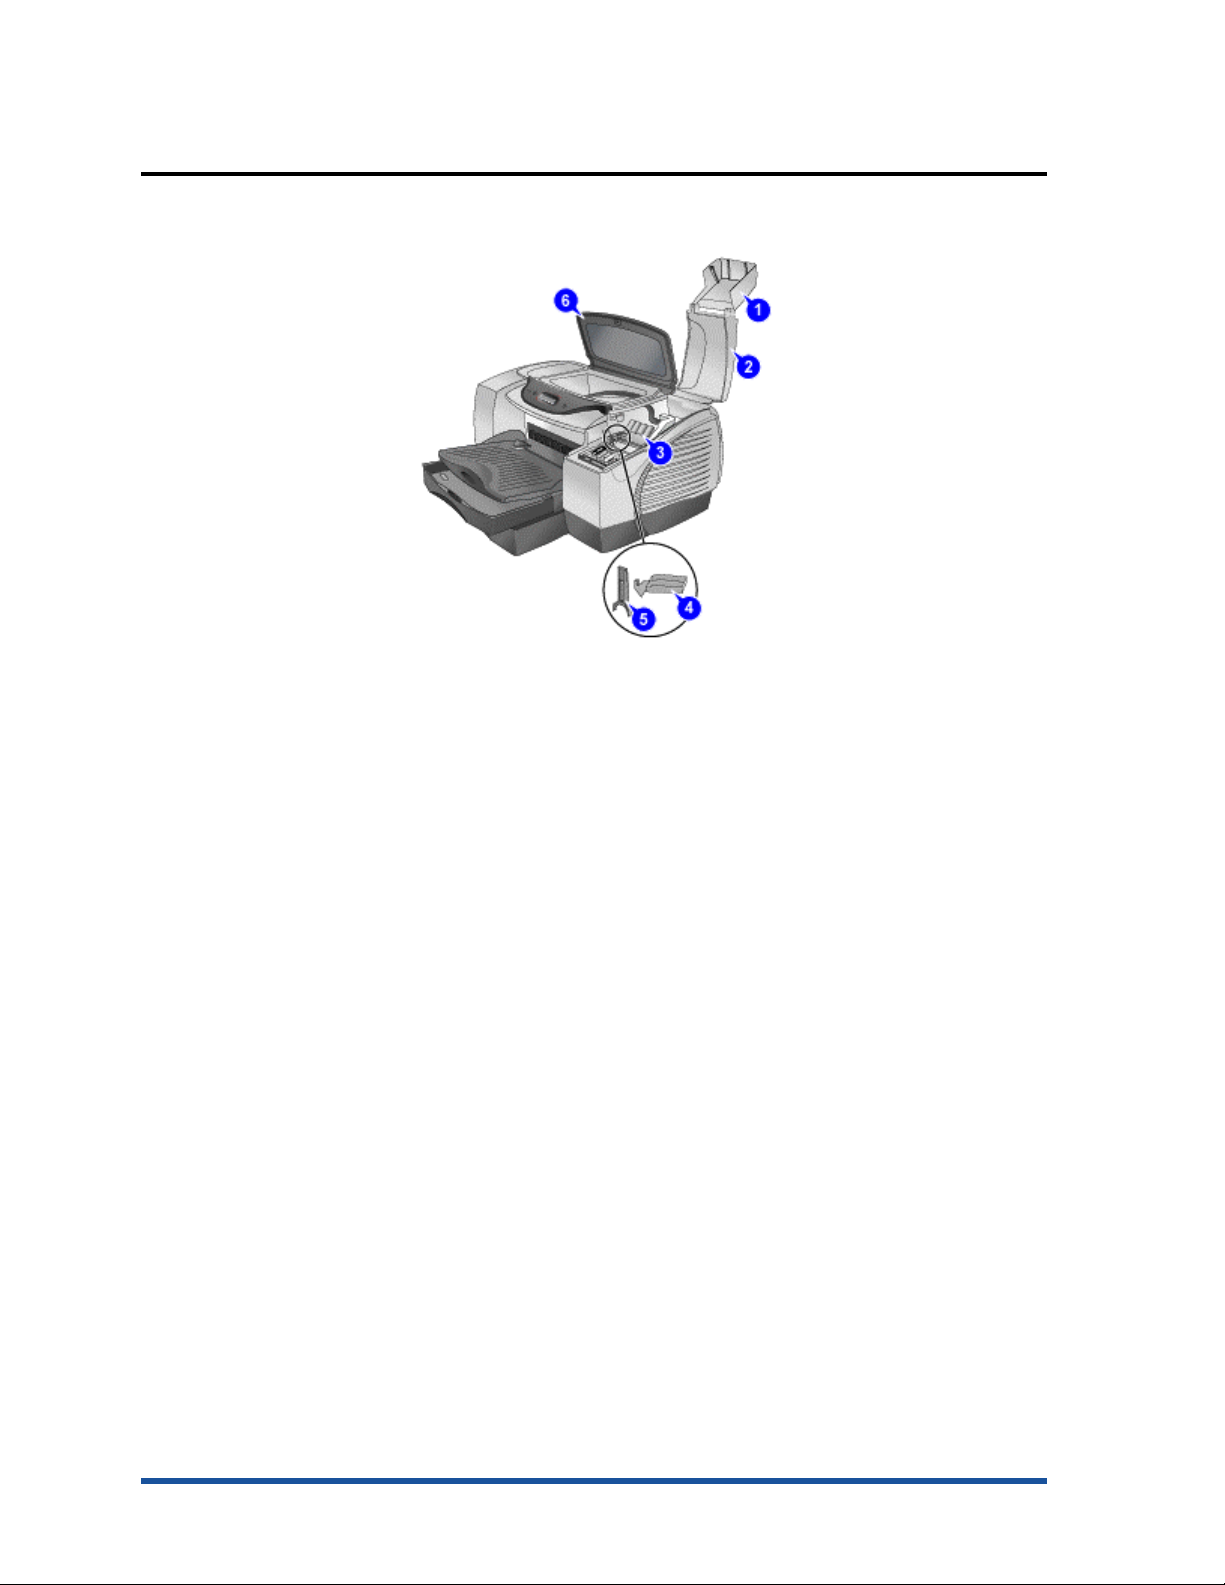
The top of the printer displays the following:
1. Ink cartridge cover - Provides access to the ink cartridges
2. Printhead cover - Provides access to the printheads
3. Printhead access latch - Lifts to allow each printhead to be removed from its color-
coded socket
4. Carriage lock - Locks the printhead access latch.
5. Hook - Connects to the carriage lock. Must be engaged for the printer to operate
6. Top cover - Provides access to the interior of the printer
top of the printer
1 - 10 hp confidential tour of the product
Page 12
front of the printer
front of the printer
front of the printerfront of the printer
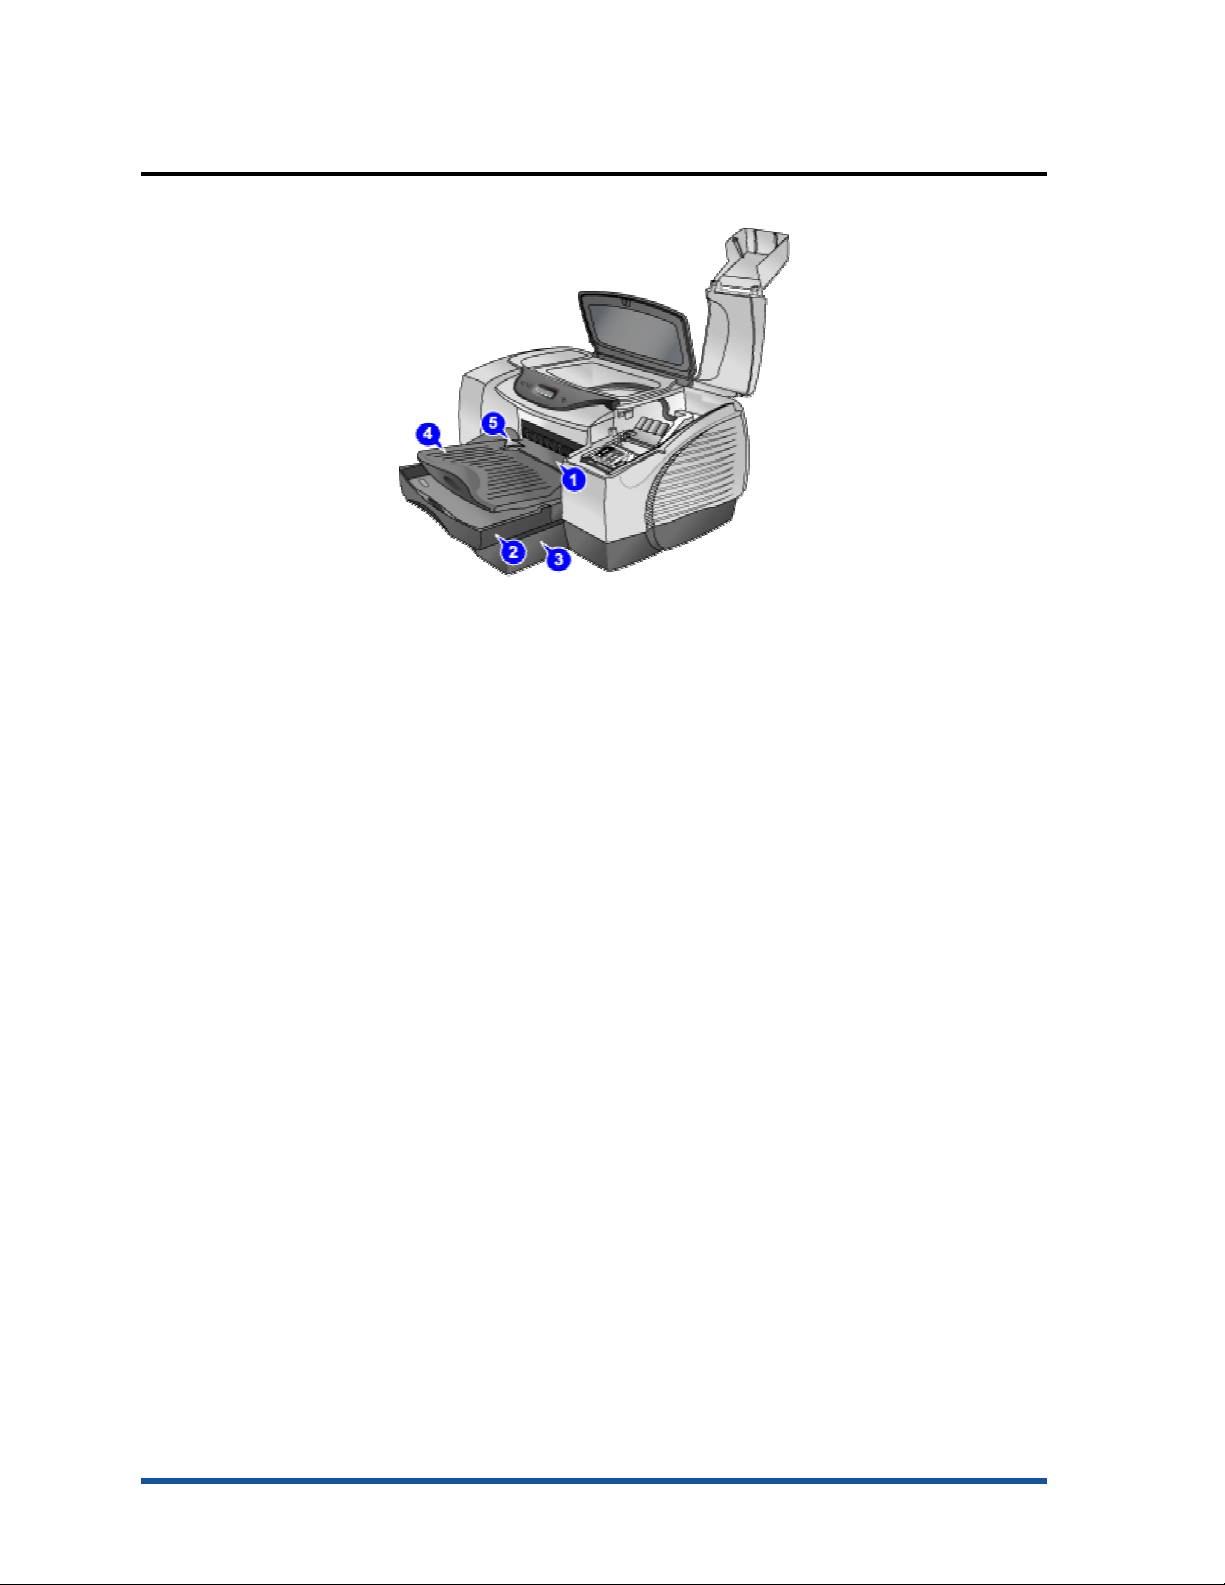
The front of the printer displays the following:
1. Front manual feed - Holds the paper to be fed into the printer. The paper width guide
slides to fit the width of the paper.
2. Tray 1 - Holds plain paper and special media.
3. Tray 2 - Holds plain paper. This is an optional accessory.
4. Output tray - Collects the printed pages.
5. Paper guides - Guides the print paper into the printer.
Front of the printer
Tour of the product hp confidential 1 - 11
Page 13
rear of the printer
rear of the printer
rear of the printerrear of the printer
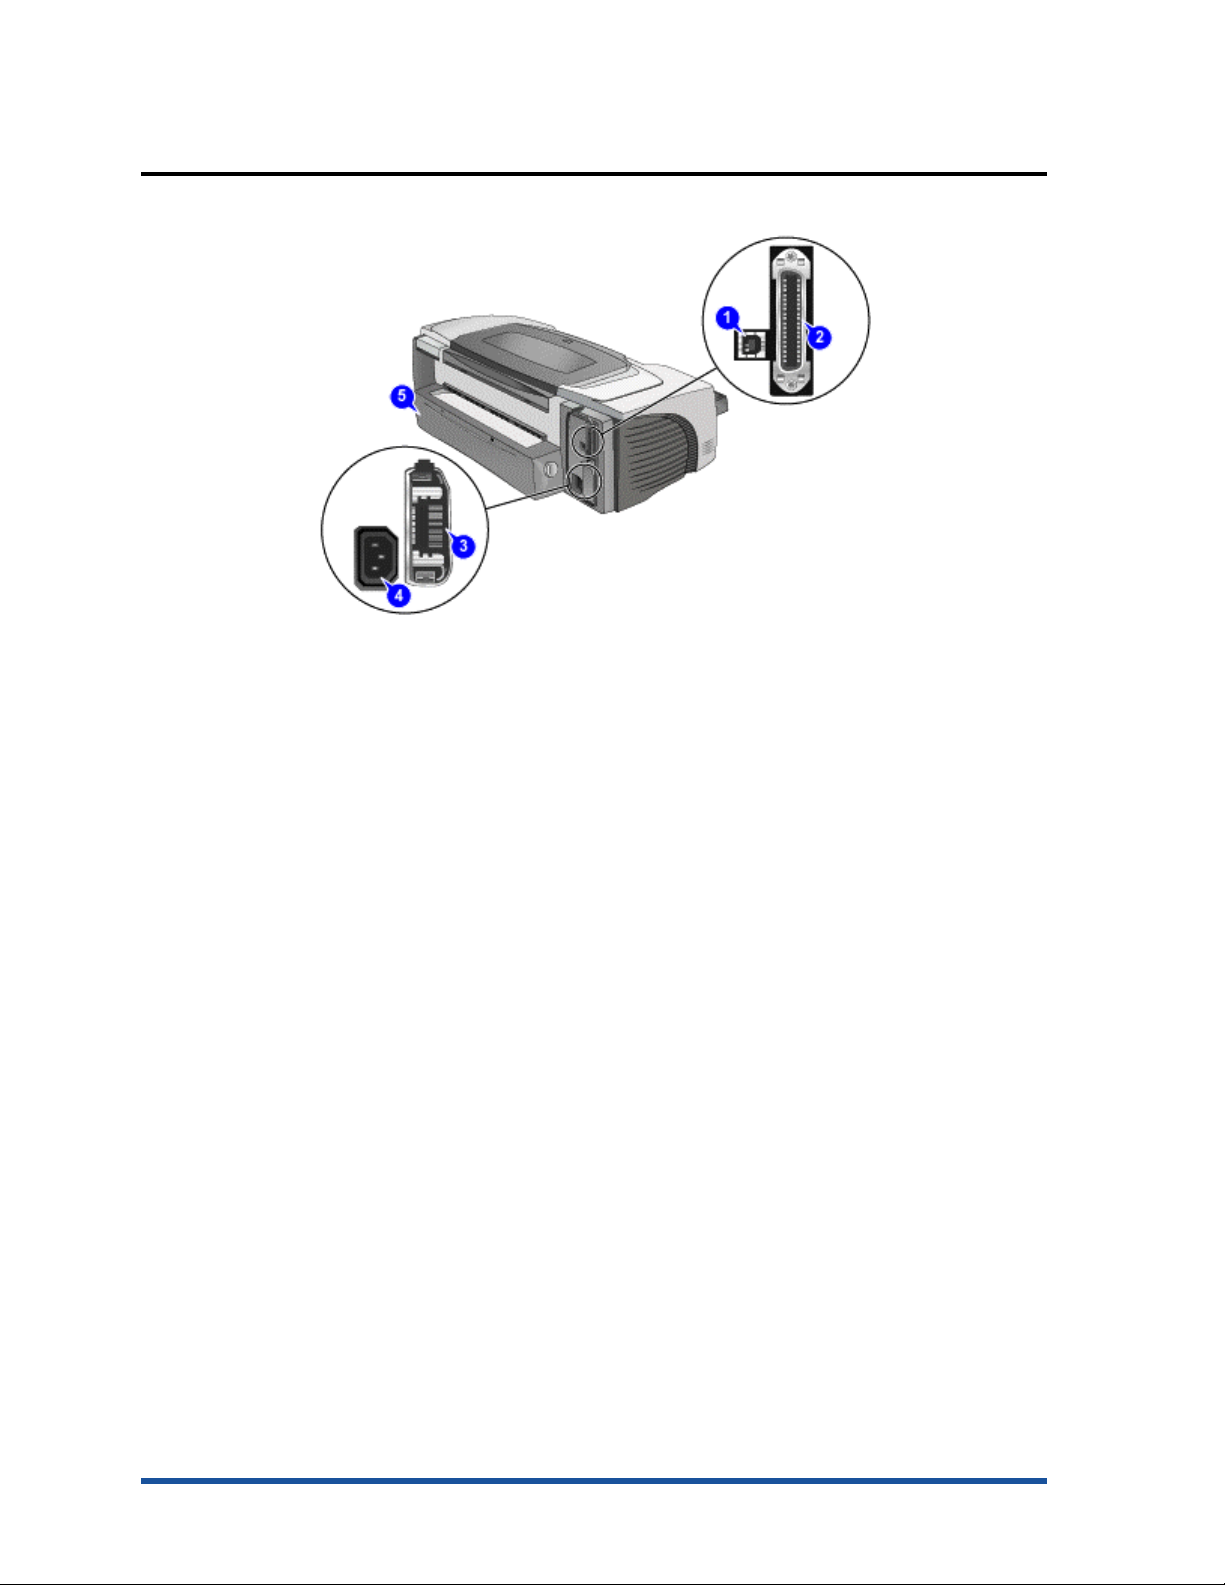
The rear of the printer displays the following:
1. USB port - Attach a USB cable.
2. Parallel port - Attach the parallel cable
3. LIO Adaptor Slot - Install an optional HP JetDirect print server/Internet connector LIO
module
4. Power input - Attach the power cord..
5. Rear access panel - Remove this to clear paper jam. Remove the rear access panel to
install the optional auto-duplex unit. Rear access panel required for straight paper path
(rear manual feed).
rear of the printer
1 - 12 hp confidential tour of the product
Page 14
controls
controls
controlscontrols
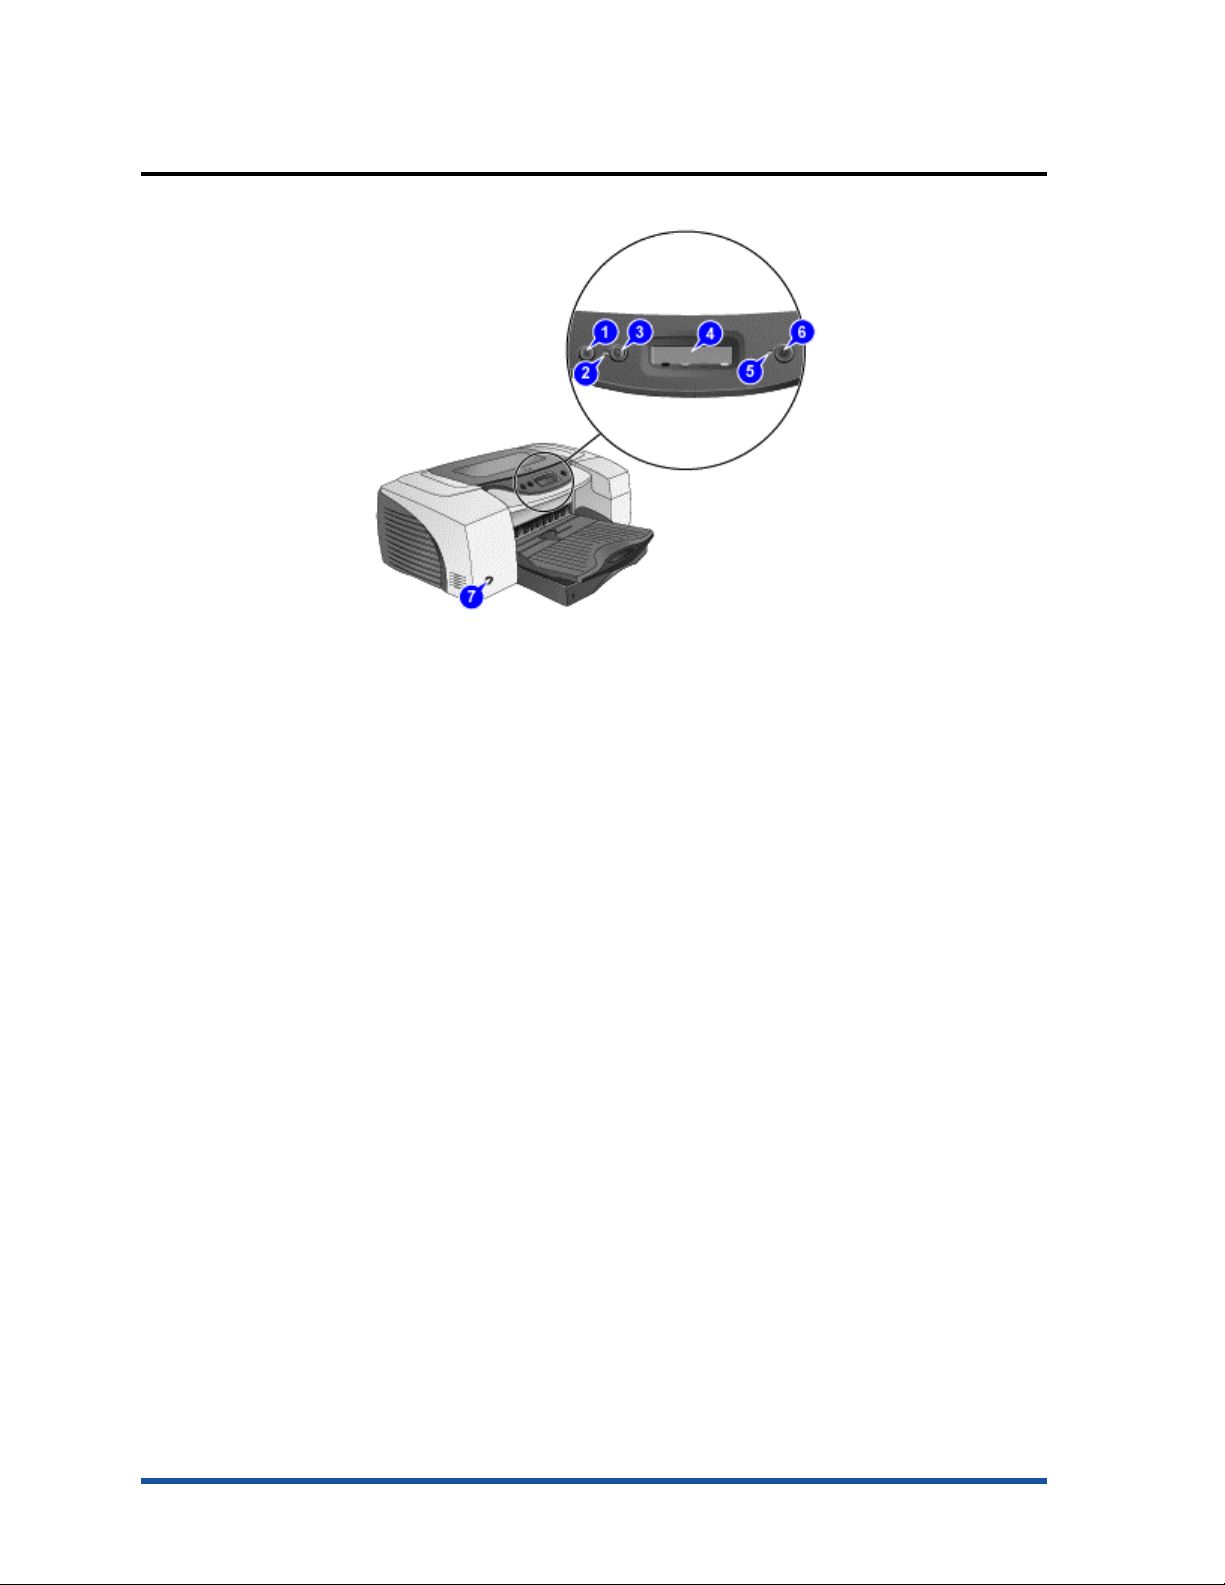
The Liquid Crystal Display (LCD) panel displays information about the status of the printer. It
also has buttons to perform basic printer operations. The LCD panel of the printer displays the
following:
controls
1. CANCEL button: Cancels the current print job
2. POWER light: Is always lit when the printer is on. Blinks when printer is initializing,
canceling a job, or turning off.
3. Power button: Controls power to the printer. Press to turn the printer on or off.
4. LCD: Displays messages relating to the current state of the printer and the ink levels in
the individual ink cartridges.
5. RESUME light: Blinks whenever the printer requires user intervention (for example, to
clear a paper jam or to close an open cover.
6. Resume button: Resumes current print operation after temporary interruption, for
example, when adding print media to printer.
7. Infra-red port: Used for printing form an infra-red device, such as a handheld device or
laptop.
Tour of the product hp confidential 1 - 13
Page 15
auto
auto----duplex unit
autoauto
duplex unit
duplex unitduplex unit
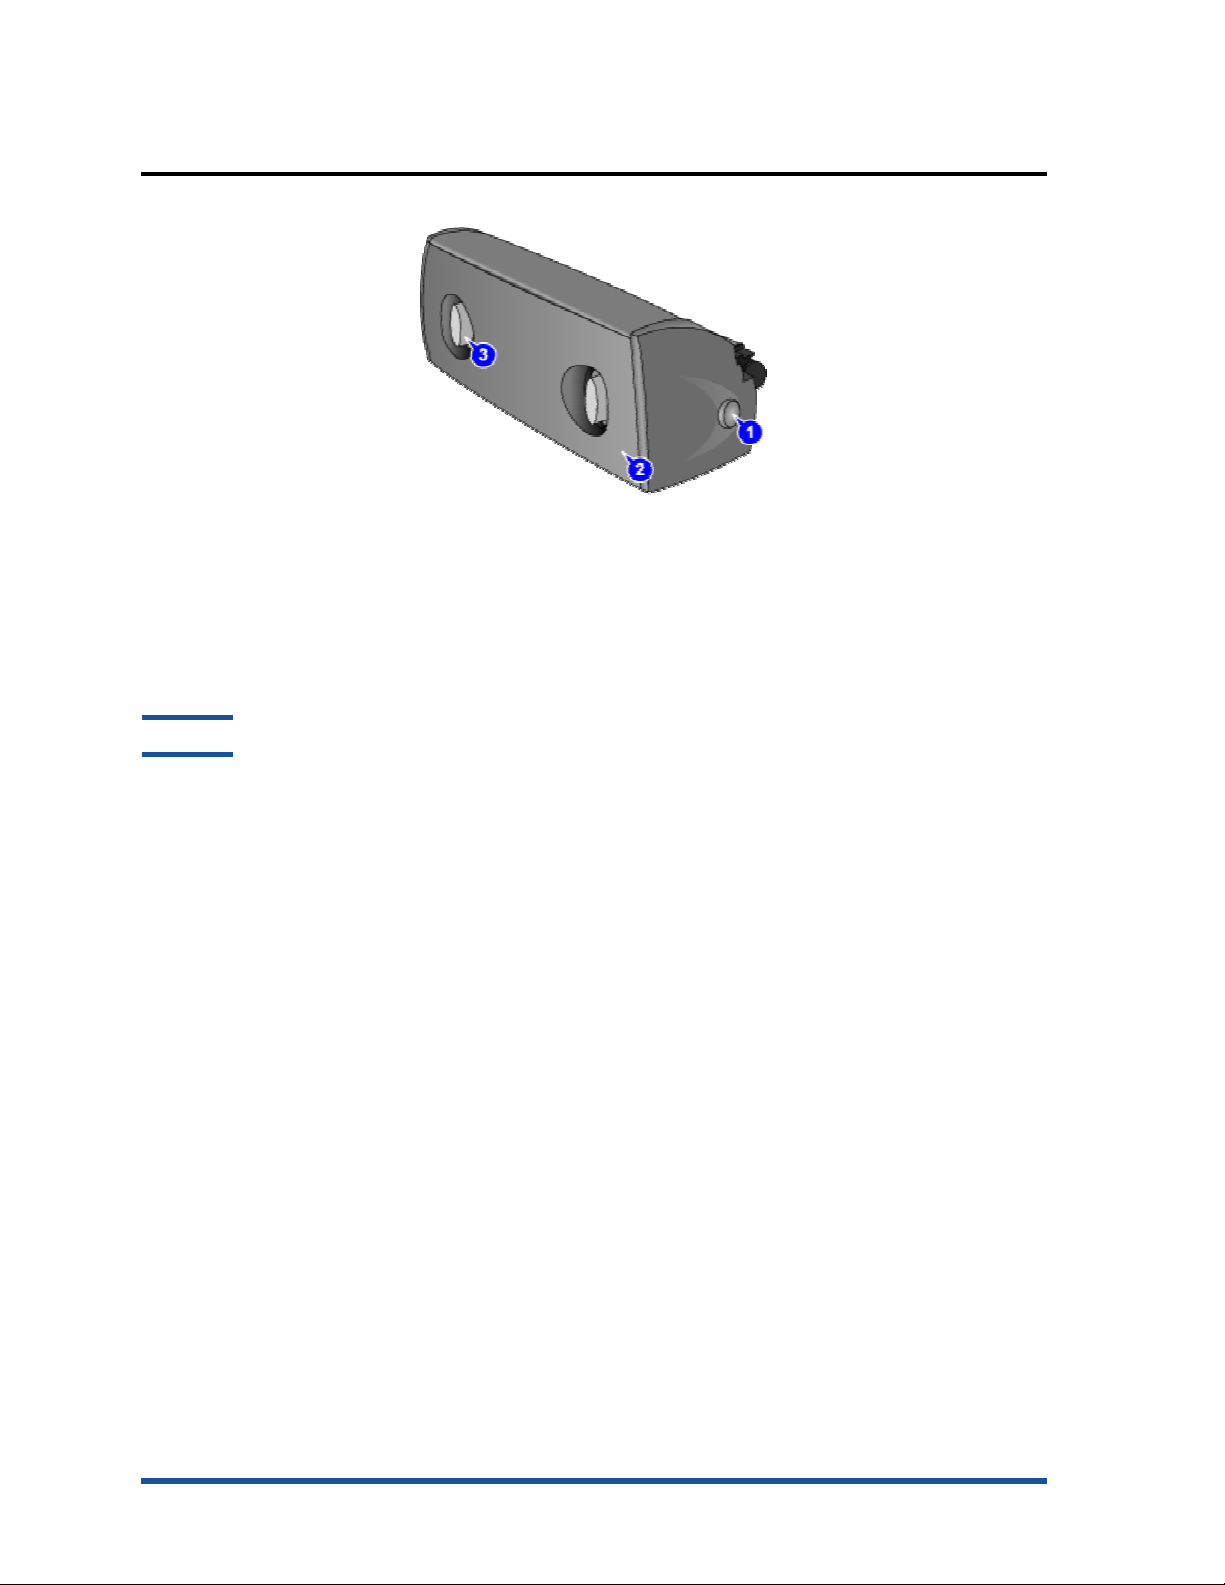
The printer automatically prints on both sides of paper by using a printing accessory called the
auto-duplex unit. The auto-duplex unit is attached at the back of the printer. The auto-duplex
unit of the printer displays the following:
1. Buttons: Press to remove the auto-duplex unit from the printer.
2. Rear cover: Remove to clear a paper jam from the auto-duplex unit.
3. Handles: Press to remove the rear cover from the auto-duplex unit.
auto-duplex unit
Note
Note
NoteNote
The auto-duplex unit is a standard accessory provided with the hp color inkjet printer
cp1700d.
1 - 14 hp confidential tour of the product
Page 16
product specifications
product specifications
product specificationsproduct specifications
model numbers
model numbers
model numbersmodel numbers
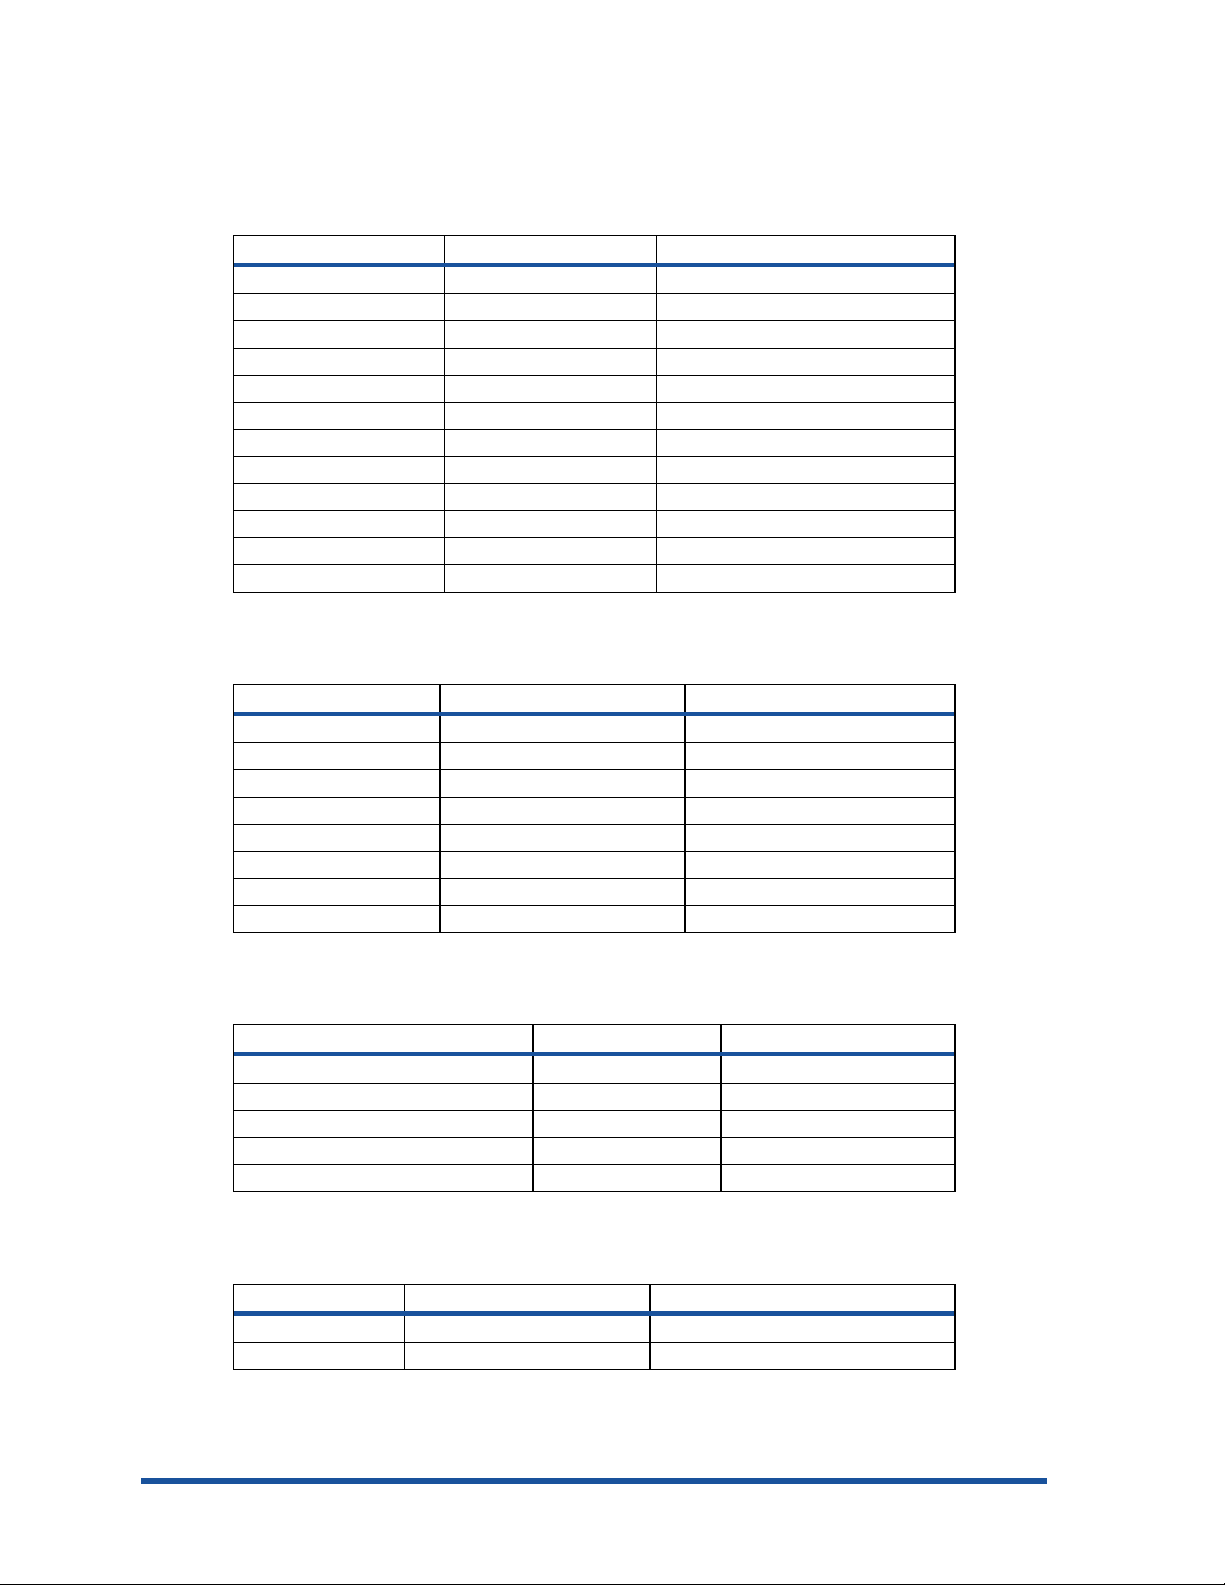
printer name model number availability
Note
Note
NoteNote
hp color inkjet printer
cp1700
hp color inkjet printer cp1700
(base model)
hp color inkjet printer
cp1700d(base printer plus autoduplexer)
hp color inkjet printer cp
1700ps (base printer plus
software Adobe PostScript 3
RIP)
printer model numbers
The hp color inkjet printer cp1700, model C8108A, is the base model or starting point for
each additional model listed above. The additional model numbers are created for specific
distribution channels or by the addition of hardware or software.
serial number location
serial number location
serial number locationserial number location
hp color inkjet
printer cp1700d
C8108A Worldwide
C8106A Worldwide
C2691A Worldwide
hp color inkjet
printer cp1700ps
The serial number is located on the serial number plate found on the back of the printer and on
the Diagnostic test page.
printer description
printer description
printer descriptionprinter description
•=Connectivity features, such as USB, IEEE 1284, front connect infrared, an d a LI O
networking slot PCL3 enhanced
•=HP PhotoREt III print quality with alternative 2400 8 1200 dpi mode for photo printing
•=Individual print cartridge for each color (CMYK)
•=Uses HP PhotoRet III color layering technology
•=Accepts a wide variety of media from plain paper to transparencies or thick card stock
(72 lb/270 gsm)
•=Low cost-per-page and intervention rates
•=Expandability options including auto-duplex unit, 250-page second input tray, and
network capability with LIO internal/Jetdirect external modules
•=Media size sensor (A3 only)
•=Infrared printing
Tour of the product hp confidential 1 - 15
Page 17

•=Low-ink indicator and printer status LCD
•=ADI Driver (releases 13 onwards) for AutoCAD users (for Windows only)
•=The hp color inkjet printer cp1700 series supports the printing of Hagaki cards in the
Japan region.
printer features
printer features
printer featuresprinter features
print speed
print speed
print speedprint speed
print speed
print speed: letter/A4
print speedprint speed
These are approximate page-per-minute (ppm) figures. Exact speeds will vary depending upon
system configuration, software program, and document complexity.
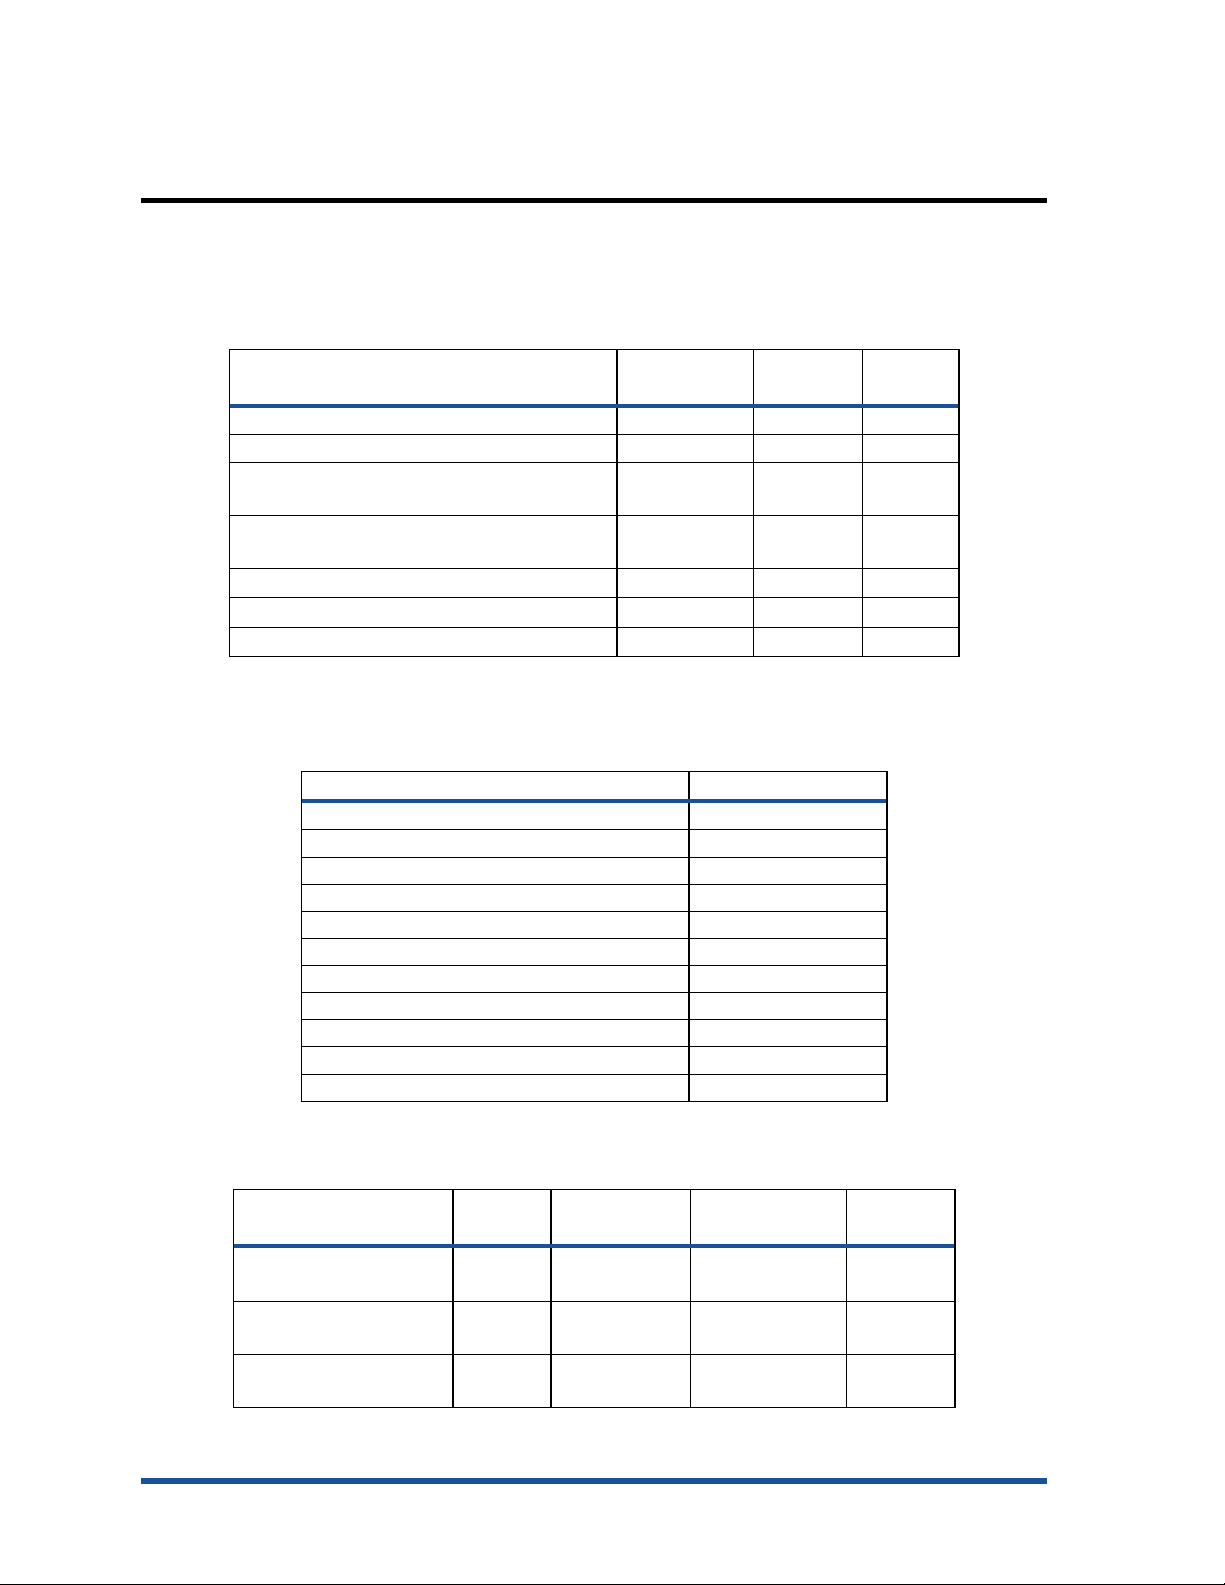
characteristic fast normal best
Black text 16 ppm 8 ppm 4 ppm
Mixed text color 14.5 ppm 7 ppm 4 ppm
4 in by 6 in Photo 1.4 ppm 0.9 ppm 0.7 ppm
Full page color 5.5 ppm 1.3 ppm 0.7 ppm
print speed
print speed: (11 in by 17 in/A3)
print speedprint speed
These are approximate page-per-minute (ppm) figures. Exact speeds will vary depending upon
system configuration, software program, and document complexity.
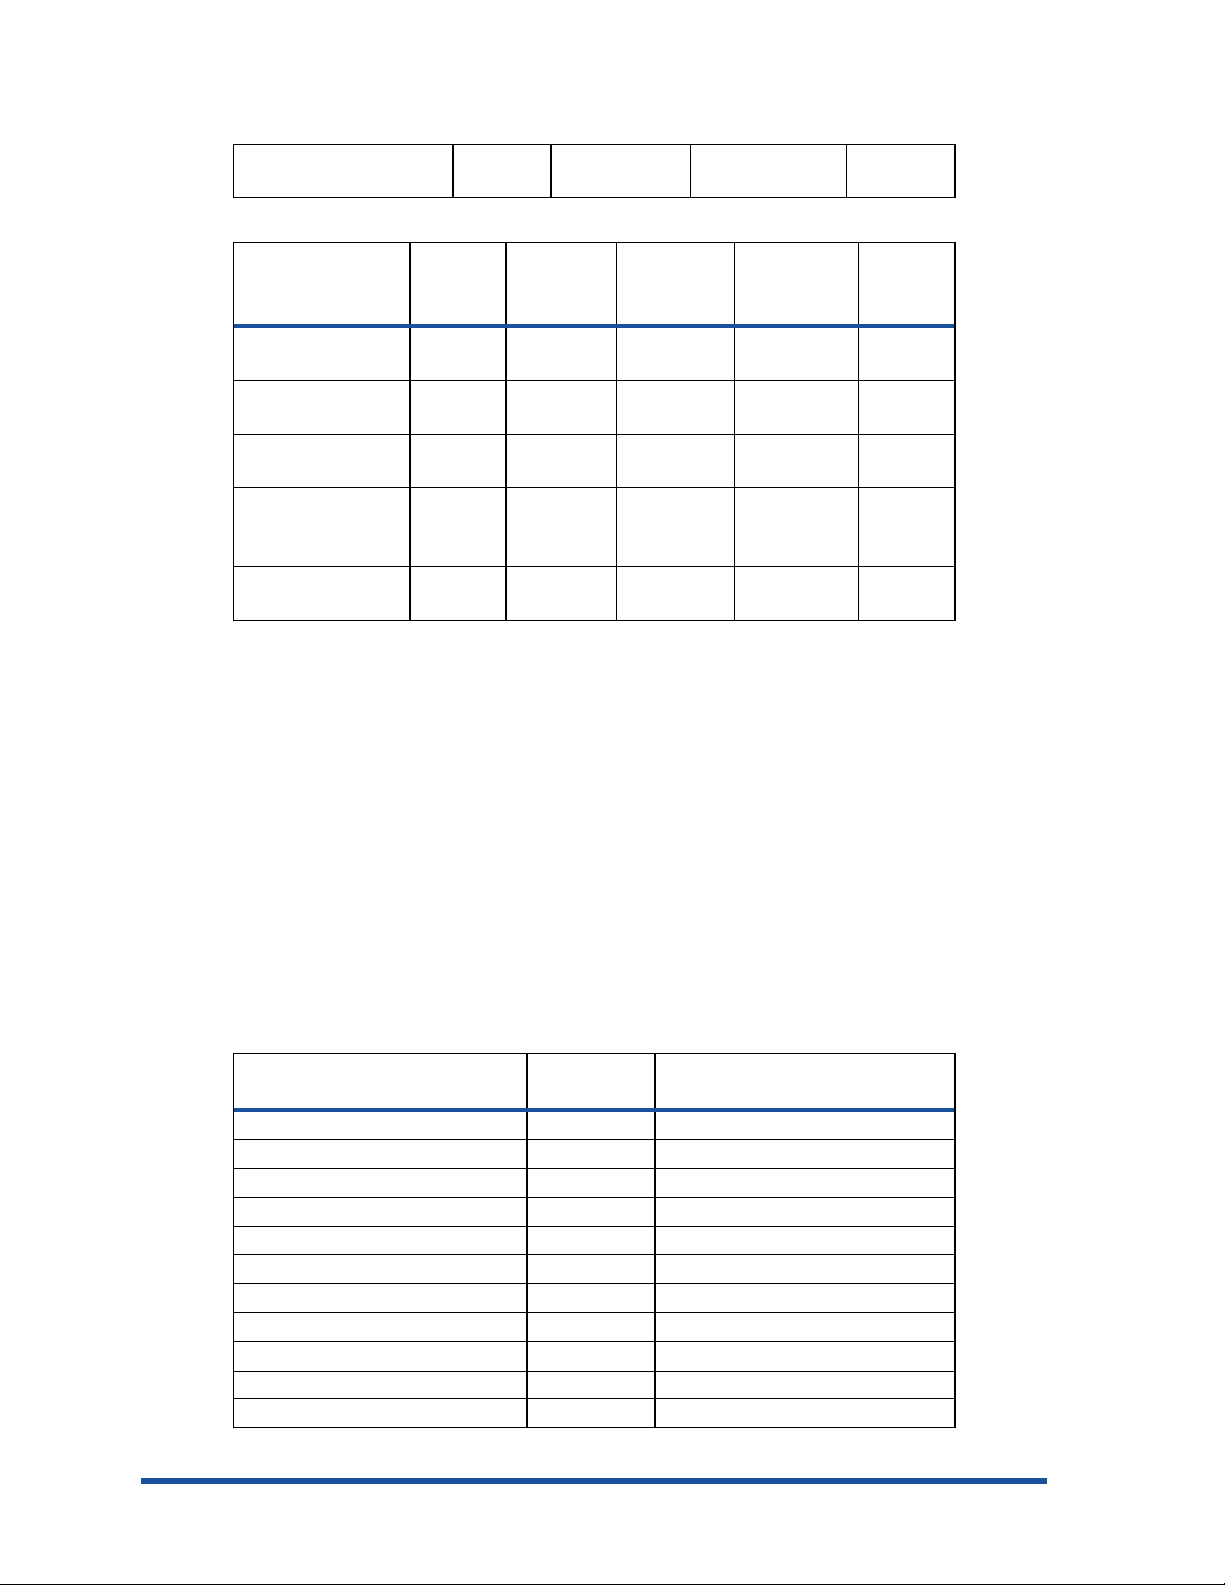
characteristic fast normal best
Black text 10 ppm 5 ppm 1.7 ppm
Mixed text color 9.5 ppm 3. 5 ppm 1.6 ppm
8 in by 10 in Photo 0.5 ppm 0. 3 ppm 0.2 ppm
Full page color 3.7 ppm 0. 9 ppm 0.5 ppm
: letter/A4
: letter/A4: letter/A4
print speed: letter/A4
: (11 in by 17 in/A3)
: (11 in by 17 in/A3): (11 in by 17 in/A3)
print speed: 11 in by 17 in/A3
pr
print resolution
int resolution
prpr
int resolutionint resolution
characteristic specification
Black Printing Max. 600 x 600 dpi
Color Printing Max. 2400 x 1200 dpi
print resolution
print method
print method
print methodprint method
Drop-on-demand thermal inkjet printing
printer languages
printer languages
printer languagesprinter languages
•=hp color inkjet cp1700: HP PCL 3 enhanced
•=hp color inkjet cp1700d: HP PCL 3 enhanced
•=hp color inkjet cp1700ps: HP PCL 3 enhanced and
•=Adobe PostScript 3 Softwar e RI P
software compatibility
software compatibility
software compatibilitysoftware compatibility
•=Microsoft Windows 95, Windows 98,
•=Windows Me, Windows NT 4.0, Windows 2000,
1 - 16 hp confidential tour of the product
Page 18
•=Mac OS 8.6 or later
system requirements
system requirements
system requirementssystem requirements
system
requirements
Windows 95/98 Pentium 60 MHz,
Windows NT 4.0 Pentium 60 MHz, 24
Windows Me Pentium 150 MHz,
Windows 2000 Pentium 133 MHz,
Mac OS 8.6 or
later
Mac OS 8.6 or
9.x
I/O interface
I/O interface
I/O interfaceI/O interface
USB, IEEE 1284, IR, network LIO
recommended cables
recommended cables
recommended cablesrecommended cables
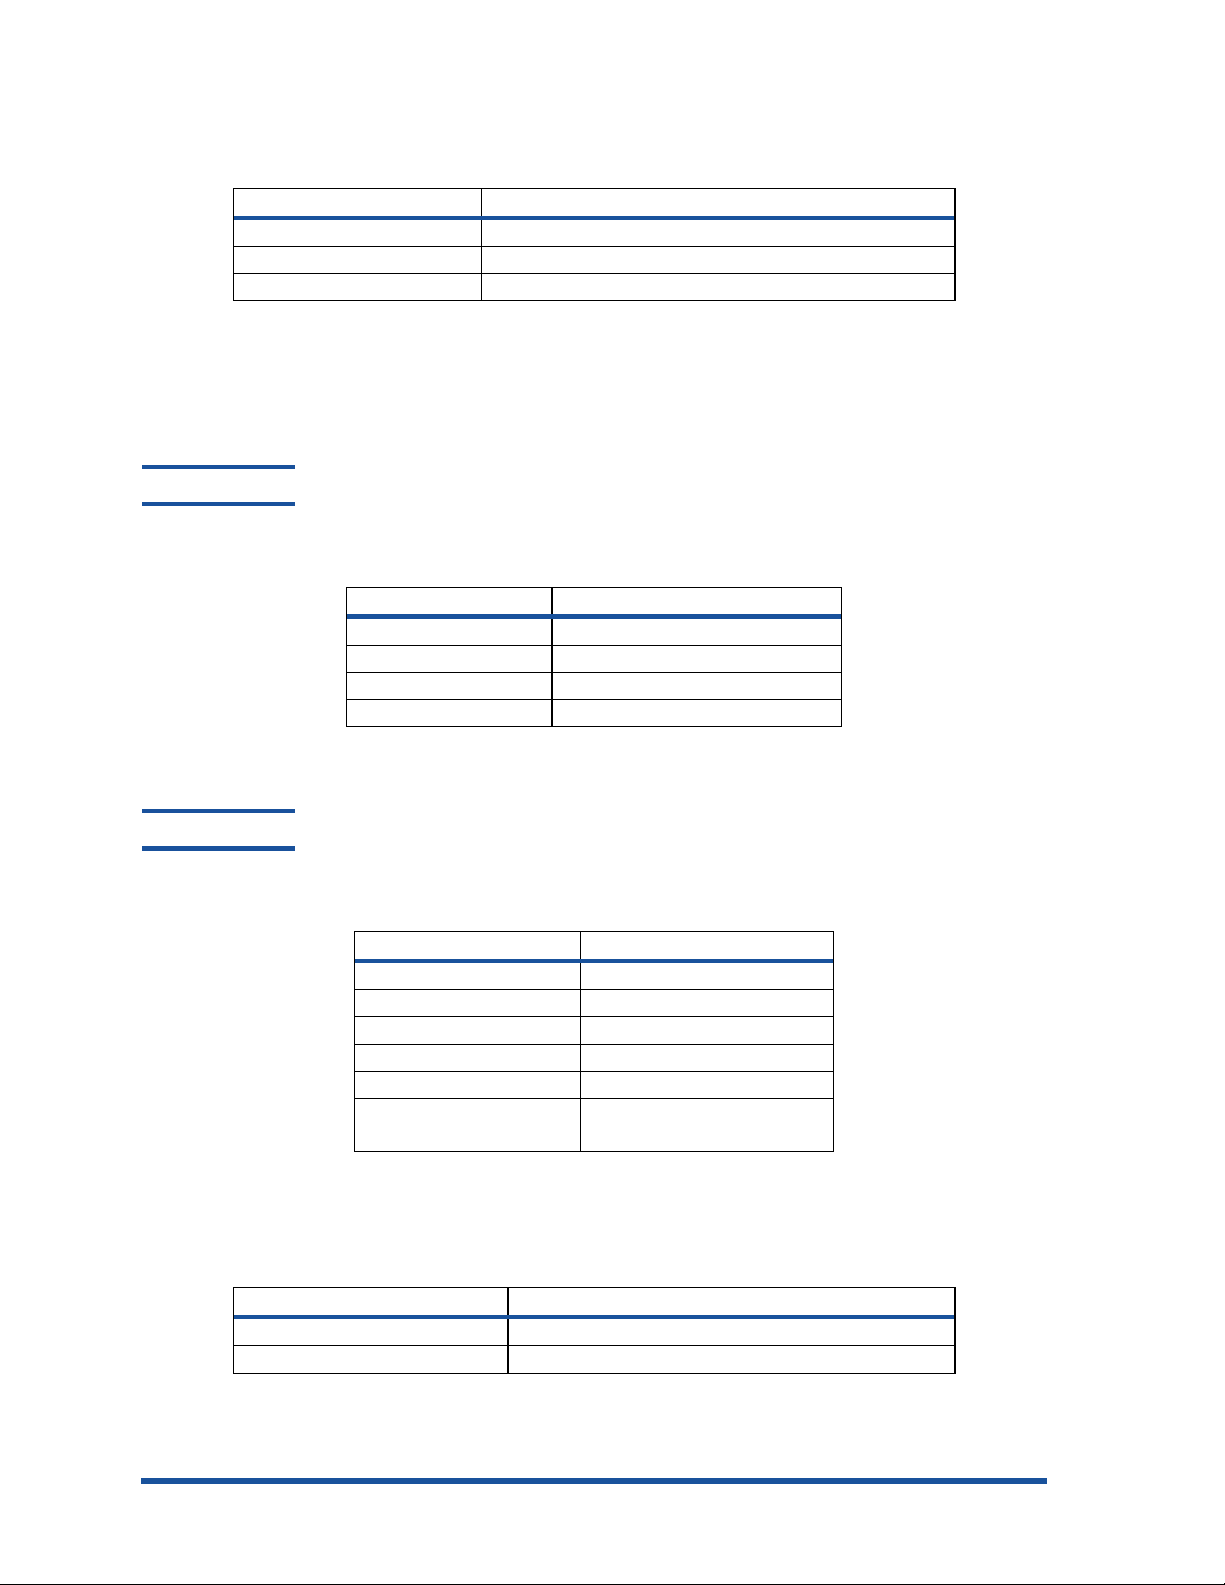
cable part number
HP USB A-B (2 m) C6518A
HP IEEE-1284 A-B Parallel Cable (2 m) C2950A
HP IEEE-1284 A-B Parallel Cable (3 m) C2951A
minimum recommended
Pentium II 450 MHz, 128 MB RAM,
16MB RAM
MB RAM
32 MB RAM
32 MB RAM
32 MB RAM
(USB/AppleTalk)
32 MB RAM (IR) Mac OS 8.6 or la te r ( P ower Mac G3
system requirements
cables
200 MB hard disk space
Pentium II 450 MHz, 128 MB RAM,
200 MB hard disk space
Pentium II 450 MHz, 128 MB RAM,
200 MB hard disk space
Pentium II 450 MHz, 128 MB RAM,
200 MB hard disk space
Mac OS 8.6 or later (iMac): 333
MHz. 64 MB RAM
or later): 350 MHz, 64 MB RAM
font information
font information
font informationfont information
•=8 built-in fonts, 4 each in portrait and landscape orientations
•=CG Times, CG Times Italic, Universe, Universe Italic, Courier, Courier Italic, Letter
Gothic, Letter Gothic Italic
HP supplies and accessories
HP supplies and accessories
HP supplies and accessoriesHP supplies and accessories
accessories
accessories
accessoriesaccessories
part name part number
Auto-duplex unit C8219A
Second input paper tray C8220A
HP accessories
ink information
ink information
ink informationink information
printheads HP Part number
HP No. 11 Black C4810A
HP No. 11 Cyan C4811A
Tour of the product hp confidential 1 - 17
Page 19
HP No. 11 Magenta C4812A
HP No. 11 Yellow C4813A
printheads
ink cartridges HP part number
HP No. 10 Black (69 ml) C4844A
HP No. 11 Cyan (28 ml) C4836A
HP No. 11 Magenta (28 ml) C4837A
HP No. 11 Yellow (28 ml) C4838A
ink cartridges
hp photo quality inkjet paper
hp photo quality inkjet paper
hp photo quality inkjet paperhp photo quality inkjet paper
print server HP part number size
Two-sided, matte, 100 sheets C7007A letter
Two-sided, semi-gloss, 25 sheets C6983A letter
Two-sided, semi-gloss, 25 sheets C6984A A4
Two-sided, semi-gloss, 25 sheets C7006A A4/AP
hp photo quality inkjet printer
hp professional
hp professional brochure and flyer paper
hp professionalhp professional
print server HP part number size
Two-sided, gloss, 50 sheets C6817A letter
brochure and flyer paper
brochure and flyer paper brochure and flyer paper
hp professional brochure and flyer paper
hp heavyweight paper
hp heavyweight paper
hp heavyweight paperhp heavyweight paper
print server HP part number size
Premium, 100 sheets C1853A A4
Design, 100 sheets C6790A super B/A3
hp heavyweight paper
network
network
networknetwork
print server HP part number
HP Jetdirect 200m print server/Internet connector (LIO
module
HP Jetdirect 250m print server/Internet connector (LIO
module)
HP Jetdirect 170x external print server J3258A
HP Jetdirect 175x external print server J6035A
HP Jetdirect 300x external print server J3263A
network
J6039A
J6042A
1 - 18 hp confidential tour of the product
Page 20
media specifications
media specifications
media specificationsmedia specifications
paper
paper
paperpaper
media metric size english size
U.S. Letter 216 x 279 mm 8.5 x 11 inches
U.S. Legal 216 x 356 mm 8.5 x 14 inch es
Tabloid 279 x 432 mm 11 x 17 inches
Super B 330 x 482 mm 13 x 19 inches
A3 297 x 420 mm 11.7 x 16.5 inches
A3+ 330 x 483 mm 13.0 x 19.0 inches
A3 Banner 297 x 420 mm 11.7 x 16.5 inches
Tabloid Banner 279 x 432 mm 11 x 17 inches
A4 210 x 297 mm 8.3 x 11.7 inches
A5 148 x 210 mm 5.8 x 8.3 inches
B4 257 x 364 mm 10.12 x 14.33 inches
JIS B5 182 x 257 mm 7.17 x 10.12 inches
paper specifications
envelopes (tray 1 and rear manual feed only)
envelopes (tray 1 and rear manual feed only)
envelopes (tray 1 and rear manual feed only)envelopes (tray 1 and rear manual feed only)
media metric size english size
U.S. No. 10 105 x 241 mm 4.12 x 9.5 inches
Monarch 98 x 191 mm 3.87 x 7.5 inch es
DL 200 x 110 mm 4.33 x 8.66 inc hes
A2 111.1 x 146 mm 4.4 x 5.8 8 inches
Kaku No.2 240 x 333 mm 9.4 x 13.1 inches
JIS Envelope 3 120 x 235 mm 4.7 x 9.3 inches
JIS Envelope 4 90 x 205 mm 3.5 x 6.1 inches
C6 114 x 162 mm 4. 49 x 6. 38 inches
envelope specifications
cards (tray 1)
cards (tray 1)
cards (tray 1)cards (tray 1)
media metric size english size
Index card 102 x 152 mm 4 x 6 inches
Index card 127 x 203 mm 5 x 8 inches
A6 card 105 x 148 mm 4.13 x 5.83 inches
J Hagaki card (for Japan) 100 x 148 mm 3.94 x 5.83 inches
Hagaki Ofuku (for Japan) 200 x 148 mm 7.9 x 5.8 inches
card specifications
transparencies
transparencies
transparenciestransparencies
media metric size english size
U.S. Letter 216 x 279 mm 8.5 x 11 inches
A4 210 x 297 mm 8.27 x 11.7 inch es
transparency specifications
Tour of the product hp confidential 1 - 19
Page 21

min
minimum printing margins (based o n portrait orie ntation)
imum printing margins (based on portrait orientation)
minmin
imum printing margins (based on portrait orientation)imum printing margins (based on portrait orientation)
Note
Note
NoteNote
paper description left and right
margins
Letter, legal, Tabloid, Executive,
A3, B4, media of user-defined size
A4, A5, B5, envelopes, cards,
other media sizes
minimum printing margins
When you are using the auto-duplex unit, the minimum top margin must match o r exc eed
0.46 in or 11.8 mm.
media handling
media handling
media handlingmed ia hand ling
recommended me
recommended media weight
recommended merecommended me
category specification
Paper •= 16 to 36 lb Bond using Tray 1 or front manual feed
Envelopes 20 to 24 lb Bond
Cards 110 lb Index
dia weight
dia weightdia weight
•= 16 to 72 lb Bond using rear manual feed
0.25 in (6.4
mm)
0.13 in (3.4
mm)
media weight
top
margin
0.12 in
(3.0 mm)
0.12 in
(3.0 mm)
bottom
margin
0.46 in
(11.8 mm)
0.46 in
(11.8 mm)
maximum number of pages supported (tray 1)
maximum number of pages supported (tray 1)
maximum number of pages supported (tray 1)maximum number of pages supported (tray 1)
Media capacity is dependent on the manufacturer, the type of media, and the media
construction.
category maximum number of pages supported
Plain paper 150 sheets of plain paper
Envelopes 10 envelopes
Transparency 30 transparencies
tray 1: number of pages supported
maximu
maximum number of pages supported (tray 2)
maximumaximu
Media capacity is dependent on the manufacturer, the type of media, and the media
construction.
memory information
memory information
memory informationmemory information
hp
hp color inkjet printer cp1700 series
hphp
m number of pages supported (tray 2)
m number of pages supported (tray 2)m number of pages supported (tray 2)
category maximum number of pages supported
Plain paper 250 sheets
tray 2: number of pages supported
color inkjet printer cp1700 series
color inkjet printer cp1700 series color inkjet printer cp1700 series
•=16 MB built-in RAM
1 - 20 hp confidential tour of the product
Page 22
reliability
reliability
reliabilityreliability
characteristic specification
Printer Duty Cycle 5,000 pages/month
Black Printhead 18 months (from DOM2) or 200 ml
Color Printheads 18 months (from DOM) or 530 ml
reliability
2- DOM = Date of Manufacture
physical specifications
physical specifications
physical specificationsphysical specifications
Note
Note
NoteNote
Note
Note
NoteNote
The specifications below are given for a printer without Tray 2 and auto-duplex unit
installed.
characteristic specification
Width 26 in or 674 mm (width)
Height 8.4 in or 215 mm
Depth 22.3 in or 568 mm
Weight printer only 29.7 lbs (13.5 kilograms)
physical specifications (without tray 2 and auto-duplex unit)
The specifications below are given for a printer with Tray 2 and auto-duplex unit
installed.
characteristic specification
Width 26 in or 674 mm
Height 11.2 in or 285 mm
Depth 25.4 in or 646 mm
Weight printer only 29.7 lbs (13.5 kilo grams)
Weight Tray 2 only 7.7 lbs (3.5 kilo grams)
Weight auto-duplex unit
only
physical specifications (with tray 2 and auto-duplex unit)
4.4 lbs (2 kilograms)
electrical specifications
electrical specifications
electrical specificationselectrical specifications
power requirements: input voltage and frequency
power requirements: input voltage and frequency
power requirements: input voltage and frequencypower requirements: input voltage and frequency
characteristic specification
Source 100 to 200 VAC ( ± 10%)
Frequency 50 to 60 Hz ( ± 3 Hz)
power requirements
Tour of the product hp confidential 1 - 21
Page 23

power consumption (varies according to region)
power consumption (varies according to region)
power consumption (varies according to region)power consumption (varies according to region)
Printing: 47.7 watts
Standby: 9 watts
Energy Star®compliant
Off mode: 0.6 watts
environmental specifications
environmental specifications
environmental specificationsenvironmental specifications
Characteristic
(Temperature)
Operating
Storage
Humidity: (non-condensing) Relative
Noise Levels per ISO 9614-1 Sound Power
warranty
warranty
warrantywarranty
1-year limited warranty
product certifications
product certifications
product certificationsproduct certifications
safety
safety
safetysafety
•=CCIB S and E (China)
•=CSA (Canada)
•=PSB (Singapore)
•=UL (USA)
•=NOM-1-NYCE(Mexico)
•=TUV-GS (Germany)
•=K Mark and MIC Mark ( K orea)
•=LS (Lithuania)
•=EEI (Estonia)
•=CE (European Union)
•=B mark (Poland)
EMC
EMC
EMCEMC
Specification
(Celsius)
5 to 40 degrees 41 to 104 degrees
-40 to 60 degrees -40 to 140 degrees
temperature specifications
humidity specifications
Sound Pressure
noise level specifications
Specification
(Fahrenheit)
20 to 80 percent RH
: 6.4 B(A)
LpAm: 48.8 dB(A)
•=FCC Title 47 CFR Part 15 Class B (USA)
•=CTICK (Australia and New Zealand)
•=VCCI (Japan)
•=CE (European Union)
•=BSMI (Taiwan)
•=GOST (Russia)
•=ICES (Canada)
1 - 22 hp confidential tour of the product
Page 24

PANTONE (R)*
PANTONE (R)*
PANTONE (R)*PANTONE (R)*
PANTONE calibrated
PostScript (R) is a trademark of Adobe
Systems Incorporated which may be registered in certain jurisdictions.
Microsoft (R) is a U.S. registered trademark of Microsoft Corp.
PANTONE (R)* *Pantone, Inc.'s check-standard trademark for color.
Pentium (R) is a U.S. registered trademark of Intel Corporation.
TrueType (TM) is a U.S. trademark of Apple Computer,Inc.
Windows NT (R) is a U.S. registered trademark of Microsoft Corporation.
Windows (R) and MS Windows,(R) are U.S. registered trademarks of Microsoft Corp.
Copyright C Hewlett-Packard Co. 2000
This information is subject to change without notice and is provided as is with no
warranty.Hewlett-Packard shall not be liable for any direct, indirect, special, incidental or
consequential damages in connection with the use of this material.
Tour of the product hp confidential 1 - 23
Page 25
Accessories, Us
Accessories, User Replaceable Parts, Supplies and Manuals
Accessories, UsAccessories, Us
hardware accessories
hardware accessories
hardware accessorieshardware accessories
The following HP accessories are available for order on the HP website. Visit
http://www.hpshopping.comfor more information.
name part
Tray 2 (250-sheet input tray) C8220A US$ 129 3.5 kg
HP auto-duplex unit C8219A US$ 129 2.4 kg
HP Jetdirect 200m printer server/Internet
connector (LIO module)
HP Jetdirect 250m printer server/Internet
connector (LIO module)
HP Jetdirect 170x external print server J3258A US$ 144
HP Jetdirect 175x external print server J6035A US$ 199
HP Jetdirect 300x external print server J3263A US$ 255
user replaceable components
user replaceable components
user replaceable componentsuser replaceable components
er Replaceable Parts, Supplies and Manuals
er Replaceable Parts, Supplies and Manualser Replaceable Parts, Supplies and Manuals
street
number
J6039A US$ 159
J6042A US$ 249
hardware accessories
price
weight
The following are the customer replaceable parts for the printer.
part name part number
Assy - Cleanout Trough SVC C8108-67036
Assy - Tray Main SVC C8108-67044
Assy - Output Tray SVC C8108-67045
HP No. 11 Black Printhead C4810A
HP No. 11 Cyan Printhead C4811A
HP No. 11 Magenta Printhead C4812A
HP No. 11Yellow Printhead C4813A
HP No. 10 Black ink cartridge C4844A
HP No. 11 Cyan ink cartridge C4836A
HP No. 11 Magenta ink cartridge C4837A
HP No. 11 Yellow ink cartridge C4838A
user replaceable components
supplies and manuals
supplies and manuals
supplies and manualssupplies and manuals
name part
no.
HP No. 11 Black
Printhead
HP No. 11 Cyan
Printhead
HP No. 11 Magenta
Printhead
C4810A $39.99 ~ $35 16,000
C4811A $39.99 ~ $35 24,000
C4812A $39.99 ~ $35 24,000
list price
(US$)
street price
(US$)
pages
out
1 - 24 hp confidential tour of the product
Page 26
HP No. 11Yellow
Printhead
C4813A $39.99 ~ $35 24,000
printheads
name part
no.
Black ink
cartridge
HP No. 10 Black
ink cartridge
HP No. 11 Cyan
ink cartridge
HP No. 11
Magenta ink
cartridge
HP No. 11 Yellow
ink cartridge
identify expiration dates
identify expiration dates
identify expiration datesidentify expiration dates
•=Install-by Date: This date is printed on the retail box for both ink cartridges and
printheads. Install the ink cartridges and printheads before the Install-by date for
optimized performance.
•=Manufacture Date: This date is printed on the pouch for both ink cartridges and
printheads. The number is in the following format: YYMMDDhhmm. For example, a
printhead manufactured on November 19, 1999 at 1:12 pm has a Manufacture Date
of 9911191312.
•=End-of-Warranty Date: This date is printed directly on the ink cartridges and printheads.
It is the date by when the warranty period for the ink cartridges and printheads will be
over.
C4840A 28 cc In-Box Only In-Box Only 700
C4844A 69cc $38.99 ~ $34 1750
C4836A 28cc $38.99 ~ $34 1750
C4837A 28cc $38.99 ~ $34 1750
C4838A 28cc $38.99 ~ $34 1750
ink
capacity
ink cartridges
list price
(US$)
street
price
(US$)
pages
out
paper type part
number
hp bright white inkjet paper C1824A 500 sheets, letter
hp premium plus photo paper C6944A Gloss, 20 sheets, 4 x 6 in
hp premium photo paper C6979A Gloss, 50 sheets, letter
Tour of the product hp confidential 1 - 25
C1825A 500 sheets, A4
C1857A 200 sheets, B
C1858A 200 sheets, A3
C6950A Matte, 20 sheets, letter
C6831A Gloss, 20 sheets, letter
C6951A Matte, 20 sheets, A4
C6832A Gloss, 20 sheets, A4
C6040A Gloss, 15 sheets, A4
part description
Page 27

hp photo paper C1846A Gloss, 20 sheets, letter
hp colorfast photo paper C7013A Gloss, 20 sheets, letter
hp photo quality inkjet paper C7007A Two-sided, matte, 100 sheets,
hp design paper C6791A Gloss, 50 sheets, B
hp professional brochure and
flyer paper
hp heavyweight paper C1853A Premium, 100 sheets, A4
hp premium inkjet paper C 1856A 100 sheets, A3
hp premium inkjet transparency
film
hp social expressions banner
paper
hp social expressions greeting
cards
C6058A Gloss, 20 sheets, B
C6059A Gloss, 15 sheets, A3
C1847A Gloss, 20 sheets, A4
C6745A Matte, 20 sheets, A4
C6765A One-sided, gloss, 20 sheets, A4
C7014A Gloss, 20 sheets, A4
letter
C6983A Two-sided, semi-gloss, 25
sheets, letter
C6984A Two-sided, semi-gloss, 25
sheets, A4
C7006A Two-sided, semi-gloss, 25
sheets, A4/AP
C6817A Two-sided, gloss, 50 sheets,
letter
C6818A Two-sided, gloss, 50 sheets, A4
C7020A Tri-fold, two-sided, 100 sheets,
letter
C6821A Two-sided, gloss, 50 sheets, A3
C6820A Two-sided, gloss, 50 sheets, B
C6955A Matte, 50 sheets, letter
C6790A Design, 100 sheets, super B/A3
51634Z 200 sheets, A4
51634Y 200 sheets, letter
C1855A 100 sheets, B
C3828A 20 sheets, letter
C3834A 50 sheets, letter
C3832A 20 sheets, A4
C3835A 50 sheets, A4
C1820A 100 sheets, letter
C1821A 100 sheets, A4
C6828A Felt-textured, ivory, half-fold, 20
sheets, letter
C6829A Felt-textured, ivory, half-fold, 20
sheets, A4
C7019A Textured, white, half-fold, 20
sheets, letter
C6044A Gloss, 10 sheets, letter
1 - 26 hp confidential tour of the product
Page 28

hp social expressions iron-on tshirt transfers
Manuals
Manuals
ManualsManuals
documentation purpose
release notes •= Includes installation and the latest printer
Hp JetDirect guide •= Configuring the printer for network
user guide •= Setting up the computer
reference guide •= Includes specific information about
setup poster •= Helps set up the printer
printer web sites •= Printer information
education and training material
C6045A Gloss, 10 sheets, A4
C1812A 1/4 fold, 20 sheets, letter
C6042A 1/4 fold, 20 sheets, letter
C7018A 1/2 fold, 20 sheets, A4
C6049A 10 sheets, letter
C6050A 10 sheets, A4
paper types
information
•= Includes last minute changes and
software troubleshooting tips.
printing
•= Troubleshooting
•= Help sources
•= Using the printer
•= Performing common printer tasks
•= Maintaining the printer
•= Troubleshooting when a problem occurs
•= Resolving printer problems
setting up the printer
•= Information about installing the software
•= Provides illustrated setup information
•= Printed version of this document is
provided with the printer
•= An electronic version is available as an
Adobe® Acrobat® Portable Document
Format (PDF) file on the Starter CD
•= Latest printer software
Tour of the product hp confidential 1 - 27
Page 29

upgrades
upgrades
upgrades upgrades
model upgrades
model upgrades
model upgradesmodel upgrades
You need to purchase the auto-duplex unit to upgrade from hp co lo r inkjet printer c p1700 to
hp color inkjet printer cp1700d.
base model sku upgrade option upgraded sku
hp color inkjet printer
cp1700 (C8108A)
You can purchase the following accessories to upgrade the printer hardware.
accessory upgrade option
2nd Input paper tray C8220A
hp jetdirect 200m print server (LIO module) J6039A
hp jetdirect 250m print server (LIO module) J6042A
hp jetdirect 170x external print server J3258A
hp jetdirect 175x external print server J6035A
hp jetdirect 300x external print server J3263A
firmware upgrades
firmware upgrades
firmware upgradesfirmware upgrades
To flash your printer with the latest firmware flash code, perform the following steps:
1. Download the latest firmware flash code
2. Set the printer in manufacturing mode by holding down the RESUME button and hitting
3. Initiate the DOS prompt.
4. At the MS-DOS prompt enter the command "copy/b<filename>/lpt1:"
5. To check the firmware flash code version sent, print the 4-button self-test page or press
Auto-duplex
unit(C8219A)
the POWER button.
the RESUME button 5 times while holding on to the POWER button
hp color inkjet printer
cp1700d (C8106A)
software upgrades
software upgrades
software upgradessoftware upgrades
You can access the latest printer software by using the following URL:
www.hp.com/support/hp business inkjet printer cp1700 series
1 - 28 hp confidential tour of the product
Page 30

service and support
service and support
service and supportservice and support
support pack options
support pack options
support pack optionssupport pack options
region description part
Europe HP warranty extension, 3-year, next day unit
North
America
web links
web links
web linksweb links
Information about products, ordering, setting up, and using printers, downloading printer
drivers, technical support, and details about the e-services, personal services, and business
services.
•=http://www.hp.com
HP main web page. Contains information about the products, technical support, and details
about the e-services, personal services, and business services offered by HP
•=http://www.hp.com/cposupport
Contains information about ordering, setting up, and using printers, and downloading printer
drivers.
•=http://www.software.hp.com
HP Software Depot. Printer driver upgrades for maximizing printer operations
•=http://www.hp.com/go/partsinfo
HP SPI/HP Part Surfer. A web-based solution for obtaining the latest parts information for HP
products
•=http://cvseesc.cv.hp.com
Requires a user name and password
•=http://ijbuwww.cv.hp.com/techmktg
Requires access to the HP intranet
•=http://snserver.mayfield.hp.com
Service Notes Web Page
exchange
HP warranty extension, 1-year, next day unit
exchange
HP warranty extension, 2-year, next day unit
exchange
HP warranty extension, 3-year, next day unit
exchange
available support pack options
number
H3678A
H3685E
H3684E
H3683E
telephone support
telephone support
telephone supporttelephone support
Before making a call, print a diagnostic page from the Toolbox utility or the LCD panel and
then fill in the following information for the Customer Care Center representative.
Printer model
Serial number of the printer
Brand and model of the computer
Version of printer software
Printer driver
CPU speed
Tour of the product hp confidential 1 - 29
Page 31

RAM size
The telephone service at the HP Customer Care Center is available free of cost during the
printer warranty period. Customer support representatives answer questions regarding the
setup, configuration, installation, and operation of the printer. They also help troubleshoot and
diagnose printer problems and provide instructions for service and repair.
region phone number
Africa/Middle
East
Argentina •= Buenos Aires: 11 4778 8380
Australia •= During warranty: 3 8877 8000
Austria 0660 6386
Belgium •= Dutch: 02 626 88 06
Brazil •= Sao Paulo: 11 3747 7799 or 11 4197 4998
Chile 800 36 0999
China 010 6564 5959 or 800 810 5959
Colombia 9 800 91 9477
Czech
Republic
Denmark 39 29 4099
Finland 0203 4 7 288
France 01 43 62 34 34
Germany 0180 52 58 143
Greece 01 6189890
Hong Kong 300 28555
Hungary 36 1 252 4505
India 9111 682 6035
Indonesia 21 350 3408
Ireland 01 662 5525
Italy 02 264 10350
Japan 0570 000511
Korea •= Seoul: 02 3270 0700
Malaysia 03 295 2566
Mexico •= Mexico C i ty: 5258 9922
New Zealand 09 356 6640
Norway 22 11 6299
Peru 0 800 10111
41 22 780 71 11
•= Outside Bu eno s Aires: 0810 555 5520
•= After warranty: If your product is not under warranty, you
can call 613 8877 8000. A per-incident, out-of-warranty
support fee of $27.50(inc GST) will be charged to your
credit card. You can also call 1902 910 910 ($27.50
charged to your phone account) from 9: 00 am to 5: 00
pm, Monday to Friday. (Charges and support hours are
subject to change without notice.)
•= French : 02 626 88 07
•= Outside Sao Pau l o : 0800 15 7751 o r 0800 13 0999
02 471 7327
•= Outside Seo u l: 080 999 0700
•= Outside Mexic o City: 01 800 472 6684
1 - 30 hp confidential tour of the product
Page 32

Philippines 2 867 3551
Poland 22 37 5065 or 22 37 5065
Portugal 1 441 7 199
Puerto Rico 1 877 232 0589
Russia 095 923 50 01
Singapore 272 5300
Spain 902 321 123
Sweden 8 619 2170
Switzerland 0 848 80 11 11
Taiwan 2 2717 0055
Thailand 2 6614000
The
Netherlands
Turkey 1 216 579 71 71
United
Kingdom
Venezuela •= Caracas: 207 8488
Vietnam 8 823 4530
calling from elsewhere in the world
calling from elsewhere in the world
calling from elsewhere in the worldcalling from elsewhere in the world
020 606 8751
0 207 512 5202
•= Outside C aracas: 800 10111
call center numbers
Contact the local dealer or nearest HP Sales and Support Office for technical assistance or
hardware repair services.
Tour of the product hp confidential 1 - 31
Page 33

support
support
support support
customer sends unit directly to HP for Ex
customer sends unit directly to HP for Exchange or Repair
customer sends unit directly to HP for Excustomer sends unit directly to HP for Ex
World-wide Repair Strategy: Standard Bench Repair (5-7 Days)
customer sends unit directly to HP for Exchange or Repair, or Customer takes unit to
Dealer/ASP and Dealer/ASP sends unit to HP for Exchange or Repair.
change or Repair
change or Repairchange or Repair
centralized repair service
centers (e.g. CRCS, SM E , A P
HUBS)
HP Exchange(FRU at product level) •= North
HP Express Exchange(FRU at
product level)
Return to HP(Assembly Level Repair
at PCA Level)
Pick-up and Return •= North
HP Express Repair
HP dealer/ASP
America
•= Middle East
•= Latin America
•= Europe
•= Asia Pacific
•= Africa
North America
•= North
America
Middle East
•= Latin America
•= Europe
•= Asia Pacific
•= Africa
America
Middle East
•= Latin America
•= Europe
•= Asia Pacific
•= Africa
•= North
America
•= Middle East
•= Latin America
•= Europe
•= Asia Pacific
•= Africa
•= Middle East
•= Latin America
•= Europe
•= Asia Pacific
•= Africa
•= North
America
Middle East
•= Latin America
•= Europe
•= Asia Pacific
•= Africa
customer sends/takes unit to at HP Bench
customer sends/takes unit to at HP Bench
customer sends/takes unit to at HP Benchcustomer sends/takes unit to at HP Bench
customer sends/takes unit to at HP Bench or ASP for Exchange or Repair.
non-centralized repair service
centers (e.g. Bench Repair,
ASP, Depot)
HP Exchange(FRU at product level) •= North
1 - 32 hp confidential tour of the product
HP ASP
•= North
America
Middle East
•= Latin America
•= Europe
•= Asia Pacific
•= Africa
America
Middle East
•= Latin America
•= Europe
•= Asia Pacific
•= Africa
Page 34

HP Express Exchange(FRU at
product level)
Return to HP(Assembly Level Repair
at PCA Level)
other support offerings
other support offerings
other support offeringsother support offerings
Response Center Support •= North
Mfg Division Support only •= North
Customer Support Center •= North
Free Phone Support
Toll Phone Support
Email Support
POP(Parts Ordering Process) •= North
Repair and Return Parts Program
Replacement Parts Program
Self-Maintenance Program
Customer Self Repair
North America
•= North
America
•= Middle East
•= Europe
•= Asia Pacific
•= Africa
•= North
•= Middle East
•= Europe
•= Asia Pacific
•= Africa
•= Middle East
•= Latin America
•= Europe
•= Asia Pacific
•= Africa
•= Middle East
•= Latin America
•= Europe
•= Asia Pacific
•= Africa
•= Middle East
•= Latin America
•= Europe
•= Asia Pacific
•= Middle East
•= Latin America
•= Europe
•= Asia Pacific
•= Africa
America
America
America
America
America
Tour of the product hp confidential 1 - 33
Page 35

Support Pack or E-Pack Offered •= North
America
•= Middle East
•= Latin America
•= Europe
•= Asia Pacific
•= Africa
CREW (Customer Replaceable End-User Warranty)
Program
•= North
America
•= Middle East
•= Latin America
•= Europe
•= Asia Pacific
•= Africa
1 - 34 hp confidential tour of the product
Page 36

warranty
warranty
warrantywarranty
warranty
warranty
warrantywarranty
repair and warranty
repair and warranty information
repair and warrantyrepair and warranty
If the hp color inkjet printer cp1700 needs repair, customers are directed to an authorized
service provider or an hp facility. Repair services are free during the printer's limited warranty
period. If repairs are needed after the limited warranty period has expired, the customer is
quoted a repair cost.
duration of warranty
duration of warranty period
duration of warrantyduration of warranty
Extent of limi
Extent of limited warranty
Extent of limiExtent of limi
information
information information
period
period period
hp product duration of limited warranty
hp color inkjet printer cp1700 1 year
Software 90 days
Accessories 90 days
Ink cartridges 90 days
Printer peripheral hardware 1 year
duration of limited warranty
ted warranty
ted warrantyted warranty
Hewlett-Packard warrants to the end-user customer that the HP products specified above will be
free from defects in materials and workmanship for the duration specified above, which
duration begins on the date of purchase by the customer.
For software products, HP’s limited warranty applies only to a failure to execute programming
instructions. HP does not warrant that the operation of any product will be uninterrupted or
error free.
HP’s limited warranty covers only those defects that arise as a result of normal use of the
product, and does not cover any other problems, including those that arise as a result of:
•=Improper maintenance or modification;
•=Software, media, parts, or supplies not provided or supported by HP; or
•=Operation outside the product’s specifications.
For HP printer products, the use of a non-HP ink cartridge or a refilled ink cartridge does not
affect either the warranty to the customer or any HP support contract with the customer.
However, if printer failure or damage is attributable to the use of a non-HP or refilled ink
cartridge, HP will charge its standard time and materials charges to service the printer for the
particular failure or damage.
If HP receives, during the applicable warranty period, notice of a defect in any product which
is covered by HP’s warranty, HP shall either repair or replace the product, at HP’s option.
If HP is unable to repair or replace, as applicable, a defective product which is covered by
HP’s warranty, HP shall, within a reasonable time after being notified of the defect, refund the
purchase price for the product.
HP shall have no obligation to repair, replace, or refund until the customer returns the defective
product to HP.
Any replacement product may be either new or like new, provided that it has functionality at
least equal to that of the product being replaced.
Tour of the product hp confidential 1 - 35
Page 37

HP products may contain remanufactured parts, components, or materials equivalent to new in
performance.
HP’s Limited Warranty Statement is valid in any country where the covered HP product is
distributed by HP. Contracts for additional warranty services, such as on-site service, are
available from any authorized HP service facility in countries where the product is distributed
by HP or by an authorized importer.
Limitations of Warranty
Limitations of Warranty
Limitations of WarrantyLimitations of Warranty
TO THE EXTENT ALLOWED BY LOCAL LAW, NEITHER HP NOR ITS THIRD PARTY SUPPLIERS
MAKES ANY OTHER WARRANTY OR CONDITION OF ANY K I ND, WHETHER EXPRESS OR
IMPLIED WARRANTIES OR CONDITIONS OF MERCHANTABILITY, SATISFACTORY QUALITY,
AND FITNESS FOR A PARTICULAR PURPOSE.
Limitations of Liability
Limitations of Liability
Limitations of LiabilityLimitations of Liability
To the extent allowed by local law, the remedies provided in this Warranty Statement are the
customer’s sole and exclusive remedies.
TO THE EXTENT ALLOWED BY LOCAL LAW, EXCEPT FOR THE O BLIGATIO NS SPECIFICALLY
SET FORTH IN THIS WARRANTY STATEMENT, IN NO EVENT SHALL HP OR ITS THIRD PARTY
SUPPLIERS BE LIABLE FOR DIRECT, INDIRECT, SPECIAL, INCIDENTAL, OR CONSEQUENTIAL
DAMAGES, WHETHER BASED ON CONTRACT, TORT, OR ANY OTHER LEGAL THEORY
AND WHETHER ADVISED OF THE POSSIBILI TY O F SUCH DAMAGES.
Local Law
Local Law
Local LawLocal Law
This Warranty Statement gives the customer specific legal rights. The customer may also have
other rights which vary from state to state in the United States, from province to province in
Canada, and from country to country elsewhere in the world.
To the extent that this Warranty Statement is inconsistent with local law, this Warranty
Statement shall be deemed modified to be consistent with such local law. Under such local law,
certain disclaimers and limitations of this Warranty Statement may not apply to the customer.
For example, some states in the United States, as well as some governments outside the United
States (including provinces in Canada), may:
•=Preclude the disclaimers and limitations in this Warranty Statement from limiting the
statutory rights of a customer (e.g. the United Kingdom);
•=Otherwise restrict the ability of a manufacturer to enforce such disclaimers or
limitations; or
•=Grant the customer additional warranty rights, specify the duration of implied
warranties which the manufacturer cannot disclaim, or allow limitations on the duration
of implied warranties.
FOR CONSUMER TRANSACTIONS IN AUSTRALIA AND NEW ZEALAND, THE TERMS IN
THIS WARRANTY STATEMENT, EXCEPT TO THE EXTENT LAWFULLY PERMITTED, DO NOT
EXCLUDE, RESTRICT, OR MODIFY, AND ARE IN ADDITION TO, THE MANDATORY
STATUTORY RIGHTS APPLICABLE TO THE SALE OF THE HP PRODUCTS TO SUCH
CUSTOMERS.
1 - 36 hp confidential tour of the product
Page 38

set up and configure
set up and configure
set up and configureset up and configure
Table of contents
set up and configure...........................................................................................................1
hardware setup requirements...............................................................................................7
contents of the box.............................................................................................................8
printer ............................................................................................................................13
components on the basis of the types of SKUs...................................................................13
steps to unpack the printer..............................................................................................13
optional tray 2.................................................................................................................14
Steps to unpack Tray 2..................................................................................................14
auto-duplex unit ...............................................................................................................15
Steps to unpack the auto-duplex unit................................................................................15
overall setup procedure.....................................................................................................16
check the box contents...................................................................................................16
unpack the printer and install tray 2.................................................................................16
install the auto-duplex unit..............................................................................................17
turn on the printer .........................................................................................................17
install ink cartridges.......................................................................................................18
install printheads...........................................................................................................18
load paper...................................................................................................................19
install the printer software...............................................................................................21
connect the interface cable .............................................................................................21
set the LCD language........................................................................................................22
set the LCD language using the LCD panel ........................................................................22
set the LCD language using the Toolbox...........................................................................22
install tray 2 ....................................................................................................................25
Steps to install tray 2.....................................................................................................25
install the auto-duplex unit .................................................................................................26
Steps to install the auto-duplex unit ..................................................................................26
hp JetDirect print server.....................................................................................................27
hp JetDirect print server..................................................................................................27
differences between hp JetDirect 200m and hp JetDirect 250m ...........................................27
install ink cartridges..........................................................................................................28
identifying the part numbers and part names of ink cartridges.............................................28
installing ink cartridges..................................................................................................28
guidelines for maintaining ink cartridges..........................................................................29
identifying the expiration dates.......................................................................................29
install printheads..............................................................................................................31
identifying the part numbers and part names of printheads.................................................31
installing printheads ......................................................................................................31
Page 39

guidelines for maintaining printheads ..............................................................................35
identifying the expiration dates.......................................................................................35
media type matrix ............................................................................................................36
paper capacity and weight matrix......................................................................................37
guidelines for loading paper..............................................................................................38
extend tray 1 or tray 2......................................................................................................39
Steps to extend tray 1 or tray 2.......................................................................................39
load the front and rear manual feed....................................................................................40
load the front manual feed .............................................................................................40
load the rear manual feed..............................................................................................40
scrubber utility.................................................................................................................42
connectivity options..........................................................................................................4 3
print a demo page ...........................................................................................................44
print a demo page........................................................................................................44
print a double-sided demo page......................................................................................44
install the printer software..................................................................................................46
printer software.............................................................................................................46
steps to install the printer software......................................................................................46
contents of the software CD ROM.......................................................................................50
identifying the contents of the software CD ROM...............................................................50
languages supported by CD 1........................................................................................50
languages supported by CD 2 for Windows and Mac drivers.............................................51
startup page of the CD browser..........................................................................................52
software installation requirements.......................................................................................53
software installation requirement in Windows...................................................................53
software installation requirement in Macintosh..................................................................53
install the Macintosh printer software ..................................................................................54
install the printer software for Mac OS X..........................................................................54
install the printer software for Mac OS other than Mac OS X ..............................................54
install the software on DOS ...............................................................................................55
DOS software installation steps.......................................................................................55
install the printer software using the add printer wizard.........................................................57
install the printer software for local printing using the add printer wizard..............................57
browse documentation......................................................................................................64
register product................................................................................................................65
customization utility..........................................................................................................66
copy the printer software to a floppy disk or hard drive......................................................66
copy printer software to a network drive...........................................................................67
optional software .............................................................................................................68
quick tour........................................................................................................................69
test the software installation...............................................................................................70
uninstall printer software ...................................................................................................71
uninstall the printer software using the uninstaller in Windows.............................................71
uninstall the printer software using the Add printer wizard in Windows ................................72
uninstall the printer software in the Mac operating system...................................................75
install the software on DOS ...............................................................................................76
installing the software on DOS........................................................................................76
install the printer software using the add printer wizard.........................................................78
install the printer software for local printing using the add printer wizard..............................78
2 - 2 hp confidential set up and configure
Page 40

optional software .............................................................................................................84
establish a network connection using the LIO module............................................................85
install a network printer on a client computer....................................................................85
hp file expansion utility .....................................................................................................86
establish a network connection using the LIO module............................................................87
setup issues.....................................................................................................................88
paper handling................................................................................................................90
identifying the printer paper paths...................................................................................90
loading paper ..............................................................................................................90
printing on special media...............................................................................................94
set up and configure hp confidential 2 -3
Page 41

Table of figures
contents of the box.............................................................................................................8
checking the box contents..................................................................................................16
unpacking the printer........................................................................................................16
installing the auto-duplex unit.............................................................................................17
turning on the printer........................................................................................................17
installing ink cartridges .....................................................................................................18
installing printheads..........................................................................................................18
installing printheads..........................................................................................................19
pulling the tray out of the printer.........................................................................................19
loading paper..................................................................................................................20
loading paper larger than the legal size..............................................................................20
loading paper larger than the legal size..............................................................................20
resuming the print operation..............................................................................................21
installing the printer software.............................................................................................21
connecting the interface cable............................................................................................21
accessing the toolbox .......................................................................................................22
printer services tab...........................................................................................................23
set language for LCD panel option......................................................................................23
set the required language..................................................................................................24
remove the rear access panel.............................................................................................26
slide the auto-duplex unit...................................................................................................26
hp JetDirect print server/Internet connector LIO module..........................................................27
turning on the printer........................................................................................................28
lifting the ink cartridge door...............................................................................................28
installing the ink cartridge .................................................................................................29
ensuring proper installation................................................................................................29
lifting the printhead cover..................................................................................................31
opening the printhead access latch.....................................................................................32
lifting the printhead access latch.........................................................................................32
removing the protective tape..............................................................................................33
inserting the printhead ......................................................................................................33
ensuring correct installation ...............................................................................................34
closing the printhead access latch.......................................................................................34
closing the printhead and ink cartridge covers......................................................................35
printhead initialization......................................................................................................35
tray extension lock............................................................................................................39
pull the tray out................................................................................................................39
sliding the paper width guide outward................................................................................40
inserting media................................................................................................................40
sliding the paper width guide against the paper...................................................................40
inserting paper ................................................................................................................41
pushing the paper............................................................................................................41
connection points in the rear of the printer...........................................................................43
demo page .....................................................................................................................44
selecting the language......................................................................................................46
accepting the terms of license agreement .............................................................................47
setting up the printer for local printing.................................................................................47
2 - 4 hp confidential set up and configure
Page 42

selecting the type of cable.................................................................................................48
completing the installation of the software for local connection...............................................49
startup page of the CD browser..........................................................................................52
changing to the CD-ROM drive..........................................................................................55
typing install to install the printer software............................................................................55
identifying the language version of DJCP.............................................................................56
opening the Printers window..............................................................................................57
accessing the Add Printer wizard .......................................................................................58
selecting the Local printer option ........................................................................................58
selecting the printer port....................................................................................................59
selecting the printer manufacturer.......................................................................................59
selecting the model of the printer........................................................................................60
inserting the installation disk..............................................................................................60
specifying the location of the hp1700k.inf file......................................................................61
specifying whether to keep or replace the existing driver .......................................................61
specifying the printer name................................................................................................62
specifying whether to share the printer ................................................................................62
specifying whether to print a test page................................................................................63
completing the installation of the printer software..................................................................63
browse documentation......................................................................................................64
register the product...........................................................................................................65
customization utility..........................................................................................................66
Optional software ............................................................................................................68
quick tour........................................................................................................................69
accessing the uninstaller....................................................................................................71
selecting the components to be uninstalled ...........................................................................72
completing the uninstallation procedure...............................................................................72
accessing the Add printer wizard.......................................................................................73
accessing the printer server properties .................................................................................73
accessing the Drivers tab...................................................................................................74
selecting the printer software to be uninstalled......................................................................75
changing to the CD-ROM drive..........................................................................................76
typing install to install the printer software............................................................................76
selecting the language version of DJCP................................................................................77
opening the Printers window..............................................................................................78
accessing the Add Printer wizard .......................................................................................79
selecting the Local printer option ........................................................................................79
selecting the printer port....................................................................................................79
selecting the printer manufacturer.......................................................................................80
selecting the model of the printer........................................................................................80
specifying the location of the hp1700k.inf file......................................................................81
specifying whether to keep or replace the existing driver .......................................................81
specifying the printer name................................................................................................82
specifying whether to share the printer ................................................................................82
specifying whether to print a test page................................................................................83
completing the installation of the printer software..................................................................83
Optional software ............................................................................................................84
lifting the output tray.........................................................................................................90
pulling tray 2...................................................................................................................91
set up and configure hp confidential 2 -5
Page 43

sliding paper guides.........................................................................................................91
sliding the lock.................................................................................................................91
pulling out the tray ...........................................................................................................92
inserting paper into tray 1.................................................................................................92
sliding the paper guides....................................................................................................92
lowering the output tray ....................................................................................................93
sliding the paper guides....................................................................................................93
pushing the paper............................................................................................................93
sliding the paper guides....................................................................................................94
inserting paper into the rear manual feed ............................................................................94
pushing paper .................................................................................................................94
selecting the paper type and paper size..............................................................................95
lifting the output tray.........................................................................................................95
removing paper from tray 1 ...............................................................................................95
inserting cards.................................................................................................................96
sliding the paper guides....................................................................................................96
lowering the output tray ....................................................................................................96
selecting the paper type....................................................................................................97
inserting paper in the rear manual feed...............................................................................98
removing paper from tray 1 ...............................................................................................98
inserting transpararencies in tray 1.....................................................................................98
sliding paper guides.........................................................................................................98
sliding the tray back.........................................................................................................9 9
selecting the transparency size...........................................................................................99
lifting the output tray.......................................................................................................100
removing paper .............................................................................................................100
inserting custom - sized paper..........................................................................................100
sliding the paper guides..................................................................................................101
selecting the paper size...................................................................................................101
2 - 6 hp confidential set up and configure
Page 44

hardware setup requirements
hardware setup requirements
hardware setup requirementshardware setup requirements
operating system minimum operating
system requirements
Windows 95/98 Pentium 60 MHz; 16-MB
RAM
Windows ME Pentium 150 MHz; 32-
MB RAM
Windows NT 4.0
(service pack 4 and
above)
Windows 2000 Pentium 133 MHz; 32-
Mac OS 8.6 or later 32-MB RAM
Mac OS 8.6 or 9.x 32-MB RAM (IR)
The hardware requirements for postscript are:
•=Mac OS 8.6 and above: G3; 300 MHz
•=Windows: Pentium III; 350 MHz; 128-MB RAM
Pentium 60 MHz; 24-MB
RAM
MB RAM
(USB/AppleTalk)
hardware setup requirements
target operating
system requirements
Pentium II 450 MHz; 128MB RAM; 200-MB hard
disk space
Pentium II 450 MHz; 128MB RAM; 200-MB hard
disk space
Pentium II 450 MHz; 128MB RAM; 200-MB hard
disk space
Pentium II 450 MHz; 128MB RAM; 200-MB hard
disk space
(iMac): 333 MHz; 64-MB
RAM (Power Mac G3 or
later): 350 MHz; 64-MB
RAM
Note
Note
NoteNote
The hardware setup requirements are specific for direct connect or peer-to-peer network. A
client server network requires higher setup specifications.
set up and configure hp confidential 2 -7
Page 45

contents of the box
contents of the box
contents of the boxcontents of the box
contents of the box
•=hp color inkjet printer cp1700: The printer is packaged in the box.
•=Auto-duplex unit: An optional accessory to print on both sides of paper
automatically.
Note
Note
NoteNote
2 - 8 hp confidential set up and configure
The auto-duplex unit is packaged with the hp color inkjet printer cp1700/d.
•=Ink cartridge box: Contains four ink cartridges in the following colors:
•=Black
•=Cyan
•=Magenta
•=Yellow
•=Printheads box: Contains four printheads in the following colors:
Page 46

•=Black
•=Cyan
•=Magenta
•=Yellow
Power cord: Used to connect the printer to a power connection.
•=
country part name part number
Saudi Arabia o AC Cordset - Euro
o AC Cordset - US
o AC Cordset - UK
Czech Rep., Hungary, Poland, Portugal,
Spain, Turkey
Norway, Finland, Sweden, Denmark AC Cordset - Euro 8120-6811
UK AC Cordset - UK 8120-8706
Europe - England, Russia, Greece, Israel,
Croatia, Slovenia, Romania, Slovakia
Europe - England, France, Germany,
Netherlands, Italy
South Africa AC Cordset - South Africa 8120-8886
Australia, NewZealand AC Cordset - Aust 8121-0524
Thailand, Indonesia AC Cordset - Euro 8120-6811
India AC Cordset - India 8121-0564
Singapore, Malaysia, Vietnam, Hong
Kong, NSC
Taiwan AC Cordset - US 8120-6812
Philippines AC Cordset - US 8120-6812
China AC Cordset - China 8120-8376
Korea AC Cordset - Korea 8121-0017
Japan AC Cordset - Japan 8120-6798
US AC Cordset - US 8120-6812
Canada AC Cordset - US 8120-6812
LAR, Mexico, Brazil o AC Cordset - US
AC Cordset - Euro 8120-6811
AC Cordset - Euro 8120-6811
AC Cordset - Euro 8120-6811
AC Cordset - UK 8120-1351
o AC Cordset - Chilean
o AC Cordset -
Argentinean
power cord information
o 8120-6811
o 8120-6812
o 8120-8706
o 8120-6812
o 8120-6980
o 8120-6869
Starter CD: Includes the printer software and other optional software.
country part name part number
Saudi Arabia o Driver Kit - CD1
o Starter CD - CD1
Czech Rep.Hungary, Poland, Portugal,
Spain, Turkey
Norway, Finland, Sweden, Denmark o Driver Kit - CD2
o Driver Kit - CD1
o Starter CD - CD1
o Starter CD - CD2
o C8108-60077
o C8108-10001
o C8108-60077
o C8108-10001
o C8108-60078
o C8108-10002
set up and configure hp confidential 2 -9
Page 47

UK o Driver Kit - CD1
o Starter CD - CD1
Europe - England, Russia, Greece, Israel,
Croatia, Slovenia, Romania, Slovakia
Europe - Engand, France, Germany,
Netherlands, Italy
South Africa o Driver Kit - CD2
Australia, NewZealand o Driver Kit - CD2
Thailand, Indonesia o Driver Kit - CD2
India o Driver Kit - CD2
Singapor, Malaysia, Vietnam, Hong
Kong, NSC
Taiwan o Driver Kit - CD1
Philippines o Driver Kit - CD1
China o Driver Kit - CD2
Korea o Driver Kit - CD2
Japan o Driver Kit - CD2
US o Driver Kit - CD1
Canada o Driver Kit - CD1
LAR, Mexico, Brazil o Driver Kit - CD1
o Driver Kit - CD2
o Starter CD - CD2
o Driver Kit - CD1
o Starter CD - CD1
o Starter CD - CD2
o Starter CD2
o Starter CD2
o Starter CD2
o Driver Kit - CD1
o Starter CD - CD1
o Starter CD - CD1
o Starter CD - CD1China
o Starter CD2
o Starter CD2
o Starter CD2
o Starter CD 1
o Starter CD 1
o Starter CD 1
starter CD information
o C8108-60077
o C8108-10001
o C8108-60078
o C8108-10002
o C8108-60077
o C8108-10001
o C8108-60078
o C8108-10002
o C8108-60078
o C8108-10002
o C8108-60078
o C8108-10002
o C8108-60078
o C8108-10002
o C8108-60077
o C8108-10001
o C8108-60077
o C8108-10001
o C8108-60077
o C8108-10001
o C8108-60078
o C8108-10002
o C8108-60078
o C8108-10002
o C8108-60078
o C8108-10002
o C8108-60077
o C8108-10001
o C8108-60077
o C8108-10001
o C8108-60077
o C8108-10001
Setup poster: A detailed, graphical roadmap on the setup procedure.
country part name part number
Saudi Arabia Roadmap C8108-90001
Czech Rep., Hungary, Poland, Portugal, Spain, Turkey Roadmap C8108-90001
Norway, Finland, Sweden, Denmark Roadmap C8108-90001
UK Roadmap C8108-90001
Europe - England, Russia, Greece, Israel, Croatia,
Slovenia, Romania, Slovakia
Europe - Englland, France, Germany, Netherlands, Italy Roadmap C8108-90001
South Africa Roadmap C8108-90001
Singapore, Malaysia, Vietnam, Hong Kong, NSC Roadmap C8108-90001
Taiwan Roadmap C8108-90001
Roadmap C8108-90001
2 - 10 hp confidential set up and configure
Page 48

Philippines Roadmap C8108-90001
China Roadmap C8108-90001
Korea Roadmap C8108-90001
Japan Roadmap C8108-90001
US Roadmap C8108-90001
Canada Roadmap C8108-90001
LAR/Mexico/Brazil Roadmap C8108-90001
•= setup poster information
Reference guide: Includes information to set up the printer and install the printer software:
country part name part number
Saudi Arabia o Reference Guide - UGFIDA
o Regulatory Guide - UGFIDAPS
Czech Rep., Hungary, Poland,
Portugal, Spain, Turkey
Norway, Finland, Sweden, Denmark o Reference Guide - NFSD
UK o Reference Guide - U
Europe - England, Russia, Greece,
Israel, Croatia, Slovenia, Romania,
Slovakia
Europe - English, France, Germany,
Netherlands, Italy
South Africa o Reference Guide - UGFIDA
Australia, NewZealand o Reference Guide - UTCI
Thailand, Indonesia o Reference Guide - UTCI
India o Reference Guide - UTCI
Singapore/Malaysia/Vietnam/Hong
Kong/NSC
Taiwan o Reference Guide - UTCI
Philippines o Reference Guide - UTCI
China o Reference Guide - USCKJ
Korea o Reference Guide - USCKJ
Japan o Reference Guide - USCKJ
o Reference Guide - PCHSPT
o Regulatory Guide - CHPT
o Regulatory Guide - UGFIDAPS
o Regulatory Guide - NFSD
o Regulatory Guide - UGFIDAPS
o Reference Guide - UGRHCSRS
o Regulatory Guide -
URGHCSRS
o Reference Guide - UGFIDA
o Regulatory Guide - UGFIDAPS
o Regulatory Guide - UGFIDAPS
o Regulatory Guide - UTCI
o Regulatory Guide - UTCI
o Regulatory Guide - UTCI
o Reference Guide - UTCI
o Regulatory Guide - UTCI
o Regulatory Guide - UTCI
o Regulatory Guide - UTCI
o Regulatory Guide - USCKJ
o Regulatory Guide - USCKJ
o Regulatory Guide - USCKJ
o C8108-90002
o C8108-90008
o C8108-90003
o C8108-90024
o C8108-90008
o C8108-90005
o C8108-90011
o C8108-90006
o C8108-90008
o C8108-90007
o C8108-90010
o C8108-90002
o C8108-90008
o C8108-90002
o C8108-90008
o C8108-90023
o C8108-90021
o C8108-90023
o C8108-90021
o C8108-90023
o C8108-90021
o C8108-90023
o C8108-90021
o C8108-90023
o C8108-90021
o C8108-90023
o C8108-90021
o C8108-90022
o C8108-90020
o C8108-90022
o C8108-90020
o C8108-90022
o C8108-90020
set up and configure hp confidential 2 11
Page 49

US o Reference Gu ide - U
o Regulatory Guide - UGFIDAPS
Canada o Reference Guide - UFPS
o Regulatory Guide - UGFIDAPS
LAR/Mexico/Brazil o Reference Guide - UFPS
o Regulatory Guide - UGFIDAPS
reference and regulatory guide information
o C8108-90006
o C8108-90008
o C8108-90018
o C8108-90008
o C8108-90018
o C8108-90008
2 - 12 hp confidential set up and configure
Page 50

prin
printer
ter
prinprin
terter
components on the basis of the types of SKUs
components on the basis of the types of SKUs
components on the basis of the types of SKUscomponents on the basis of the types of SKUs
•=hp color inkjet printer cp1700: Packaged with the base printer
•=hp color inkjet printer cp1700ps: Packaged with the base printer and Adobe
PostScript 3 Softwar e R I P
•=hp color inkjet printer cp1700/d: Packaged with the base printer and auto-
duplex unit
steps to unpack the printer
steps to unpack the printer
steps to unpack the printersteps to unpack the printer
1. Unpack the printer.
2. Remove the packing tape and any shipping material from inside the printer.
set up and configure hp confidential 2 13
Page 51

optional tray 2
optional tray 2
optional tray 2optional tray 2
Steps to unpack Tray 2
Steps to unpack Tray 2
Steps to unpack Tray 2Steps to unpack Tray 2
Tray 2 is an optional accessory that can be purchased separately. The steps to unpack
Tray 2 are:
1. Unpack the printer.
2. Remove the packing tape and any shipping material from inside the trays.
2 - 14 hp confidential set up and configure
Page 52

auto
auto----duplex unit
autoauto
duplex unit
duplex unitduplex unit
Steps to unpack the auto
Steps to unpack the auto----duplex unit
Steps to unpack the autoSteps to unpack the auto
1. Unpack the printer.
2. Remove the packing tape and any shipping materials from the auto-duplex unit.
duplex unit
duplex unitduplex unit
set up and configure hp confidential 2 15
Page 53

overall setup procedure
g
overall setup procedure
overall setup procedureoverall setup procedure
check the box contents
check the box contents
check the box contentscheck the box contents
setup
procedure
Check the box
contents
unpack the printer
unpack the printer and install tray 2
unpack the printerunpack the printer
setup
procedure
Unpack the
printer and
install Tray 2
(optional)
Steps
1. Identify and check the box contents of the printer.
checking the box contents
check the box contents
and install tray 2
and install tray 2 and install tray 2
steps
1. Unpack the printer.
2. Remove the packin
inside the trays.
3. To install Tray 2, position the tray at the location
where you want to place the printer.
4. Lift the printer and align the sides of Tray 1 with the
sides of Tray 2.
5. Set the printer over Tray 2.
tape and shipping material from
unpacking the printer
unpack the printer and install tray 2
2 - 16 hp confidential set up and configure
Page 54

install the auto
install the auto----duplex unit
install the autoinstall the auto
duplex unit
duplex unitduplex unit
setup
procedure
Install the autoduplex unit
(Available with
hp color inkjet
printer
cp1700/d)
(Optional with
hp color inkjet
printer cp1700
and hp color
inkjet printer
cp1700 ps)
turn on the printer
turn on the printer
turn on the printerturn on the printer
setup
procedure
Turn on the
printer
Steps
1. At the rear of the printer, push the buttons on both
sides of the rear access panel. Then, slide the rear
access panel out.
2. Slide the auto-duplex unit into the rear of the printer.
installing the auto-duplex unit
install the auto-duplex unit
steps
1. Connect the power cord to the printer and plug it in.
2. Press the POWER button to turn on the printer.
turning on the printer
turn on the printer
set up and configure hp confidential 2 17
Page 55

install ink cartridges
install ink cartridges
install ink cartridgesinstall ink cartridges
setup
procedure
Install ink
cartridges
Steps
1. Turn on the
printer.
2. Lift the ink
cartridge
door.
3. Remove
each ink
cartridge
from its
package and install each ink cartridge in its respective
color-coded socket.
installing ink cartridges
install ink cartridges
install printheads
install printheads
install printheadsinstall printheads
setup
procedure
Install
printheads
6. Insert each printhead in its respective color-coded socket.
Steps
1. Ensure that the printer is turned on.
2. Lift the printhead cover.
3. Open the printhead access latch and first pull it forward
and then down. This releases the hook of the latch from
the carriage lock.
4. Lift and push the printhead access latch toward the rear of
the printer.
5. Remove the package and protective tape from each
printhead.
installing printheads
2 - 18 hp confidential set up and configure
Page 56

Install
printheads
1. Close the printhead access latch firmly so that the hook
catches the carriage lock.
2. Close the printhead and ink cartridge covers.
3. Wait until the printer initializes the printheads. When
initialization is complete, an alignment page prints.
Ensure that paper is present in the printer before an
Note
Note
NoteNote
alignment page prints.
installing printheads
install printheads
load paper
load paper
load paperload paper
setup
procedure
Load paper 1. Pull the tray out of the printer to load the paper.
steps
pulling the tray out of the printer
set up and configure hp confidential 2 19
Page 57

Load paper 1. Slide the paper length and width guides to their outermost
positions.
2. Insert paper or transparencies into the tray.
3. Slide the paper length and width guides to fit against the
paper.
4. Reinsert the tray.
loading paper
Load paper 1. To support paper larger than the legal size, locate the tray
extension lock on the front left of the tray.
2. Slide the tray extension lock to the left and then release it.
3. Pull the tray out lengthwise.
loading paper larger than the legal size
Load paper 1. Insert paper or transparencies into the tray.
2. Reinsert the tray.
loading paper larger than the legal size
2 - 20 hp confidential set up and configure
Page 58

Load paper
install the printer
install the printer software
install the printerinstall the printer
1. Press the RESUME button to resume the print operation.
software
software software
resuming the print operation
load paper
setup
procedure
Install the printer
software
connect the interface
connect the interface cable
connect the interface connect the interface
setup
procedure
Connect the
interface cable
Steps
1. Install the printer software from the starter CD.
install the printer software
cable
cablecable
steps
1. Connect the printer to the computer using:
2. Select the interface cable based on the operating system
used and the system configuration.
installing the printer software
o USB cable or
o Parallel cable or
o LIO mo du le
connecting the interface cable
overall setup procedure
set up and configure hp confidential 2 21
Page 59

set the LCD language
set the LCD language
set the LCD languageset the LCD language
The LCD panel displays messages in English, by default. You can set the printer to
display messages and print configuration pages in a different supported language. To
set the LCD language you can use the Toolbox or the LC D panel.
set the LCD language using the LCD panel
set the LCD language using the LCD panel
set the LCD language using the LCD panelset the LCD language using the LCD panel
1. Ensure that the printer is turned off.
2. Hold down the CANCEL button and press the POWER button to turn on the printer in
a language-setting mode.
Note
Note
NoteNote
When the printer turns on, the LCD displays the current language.
3. Press the CANCEL button to scroll through the language list.
4. Press the RESUME button to confirm the langu age selec ted.
set the LCD language using th
set the LCD language using the T oolbox
set the LCD language using thset the LCD language using th
1. Ensure that the printer is turned on.
2. Select the Start -> Programs -> HP Color Inkjet CP1700 -> HP Color Inkjet
CP1700 Toolbox menu command to open the Toolbox.
e Toolbox
e Toolboxe Toolbox
accessing the toolbox
3. Select the Printer Services tab.
2 - 22 hp confidential set up and configure
Page 60

printer services tab
4. Select the Set Language for LCD panel option to set the required language.
set language for LCD panel option
5. In the Set language for LCD panel dialog box, select the required language from
the Set Language for LCD panel combo box.
set up and configure hp confidential 2 23
Page 61

set the required language
2 - 24 hp confidential set up and configure
Page 62

install tray 2
install tray 2
install tray 2install tray 2
Steps to install tray 2
Steps to install tray 2
Steps to install tray 2Steps to insta ll tray 2
Tray 2 is an optional accessory for the hp color inkjet printer cp1700. The steps to install
tray 2 are:
1. Position Tray 2 where the printer is to be placed. The printer is designed to rest
directly on top of the tray.
2. Lift the printer and align the sides of Tray 1 with the sides of Tray 2.
3. Set the printer over Tray 2.
set up and configure hp confidential 2 25
Page 63

install the auto
install the auto----duplex unit
install the autoinstall the auto
Steps to install the auto
Steps to install the auto----duplex unit
Steps to install the autoSteps to install the auto
To install the auto-duplex unit, remove the preinstalled rear access panel.
1. At the rear of the printer, push the buttons on both sides of the rear access panel.
Then, slide the rear access panel out.
duplex unit
duplex unitduplex unit
duplex unit
duplex unitduplex unit
Warnin
Warningggg
WarninWarnin
Do not press the buttons on either side of the auto-duplex unit during installation. This
may disrupt the installation process.
remove the rear access panel
2. Slide the auto-duplex unit into the rear of the printer.
slide the auto-duplex unit
2 - 26 hp confidential set up and configure
Page 64

hp JetDirect
hp JetDirect print server
hp JetDirecthp JetDirect
hp JetDirect
hp JetDirect print serve r
hp JetDirecthp JetDirect
print server
print server print server
print server
print server print server
hp JetDirect print server/Internet connector LIO module
The printer can be shared in a network environment by using an LIO module. The LIO
module can be used in a client-server or peer-to-peer network.
The LIO module provides:
•=Networking capabilities
•=Internet connectivity
The LIO module is an optional accessory that you can purchase.
The hp JetDirect 200m/250m print server is a low-end input/output (LIO) module that
plugs into the LIO slot of the printer and provides networking for the printer. It utilizes
10/100Base-Tx Ethernet networking technology and comes with Status and Link-speed
LEDs, and a Test/Reset Button.
The hp JetDirect 200m/250m print server helps small businesses and small workgroups
share hp printers with LIO connectivity slots on a network. By connecting their printer to
the Internet with this print server, workgroups can use a variety of current and future
printing e-services and other distributed printing services.
di
differences between hp JetDirect
fferences between hp JetDirect 200m and hp JetDirect 250m
didi
fferences between hp JetDirectfferences between hp JetDirect
The hp JetDirect 200m and the hp JetDirect 250m are very similar. The main difference
between the two print servers is 250m's greater versatility. Both the print servers support
recent Microsoft and Apple network operating systems. However, the hp JetDirect250m
also supports Novell, Linux, Unix and several other Network operating systems and the
250m is upgradeable via flash memory downloads using the hp Download Manager.
set up and configure hp confidential 2 27
200m and hp JetDirect 250m
200m and hp JetDirect 250m 200m and hp JetDirect 250m
Page 65

install ink cartridges
install ink cartridges
install ink cartridgesinstall ink cartridges
identifying the part numbers and part names of ink cartridges
identifying the part numbers and part names of ink cartridges
identifying the part numbers and part names of ink cartridgesidentifying the part numbers and part names of ink cartridges
part name part number
Black ink cartridge C4840A
HP No. 10 Black ink cartridge C4844A
HP No. 11 Cyan ink cartridge C4836A
HP No. 11 Magenta ink cartridge C4837A
HP No. 11 Yellow ink cartridge C4838A
part numbers and part names of ink cartridges
installing ink cartridges
installing ink cartridges
installing ink cartridgesinstalling ink cartridges
1. Turn on the printer (not a necessary step, though).
turning on the printer
2. Lift the ink cartridge door.
lifting the ink cartridge door
3. Remove each ink cartridge from its package, and install each ink cartridge in its
respective color-coded socket.
2 - 28 hp confidential set up and configure
Page 66

installing the ink cartridge
4. Press each ink cartridge firmly to ensure proper contact after installation.
ensuring proper installation
guidelines for maintaining ink cartrid ge s
guidelines for maintaining ink cartrid ge s
guidelines for maintaining ink cartrid ge s guidelines for maintaining ink cartridges
•=Keep the ink cartridges sealed in the original packaging until you are ready to
use them.
•=Keep the opened ink cartridges in the printer or sealed in a plastic bag.
•=Use the first-in first-out inventory process to avoid having expired ink cartridges in
stock.
•=Store ink cartridges at room temperature.
identifying the expiration dates
identifying the expiration dates
identifying the expiration datesidentifying the expiration dates
set up and configure hp confidential 2 29
Page 67

•=Install-by Date: Printed on the retail box for ink cartridges. Install by this date for
optimized performance.
•=Manufacture Date: Printed on the pouch for ink cartridges. The number is in the
following format: YYMMDDhhmm. For example, an ink cartridge manufactured
on November 19, 1999 at 1:12 pm has a Manufacture Date of 9911191312.
•=End-of-Warranty Date: Printed directly on ink cartridges. It marks the end date of
the warranty period for ink cartridges.
2 - 30 hp confidential set up and configure
Page 68

install printheads
install printheads
install printheadsinstall printheads
identifying the
identifying the part numbers and part names of printheads
identifying the identifying the
part name part number
HP No. 11 Black Printhead C 4810A
HP No. 11 Cyan Printhead C4811A
HP No. 11 Magenta Printhead C4812A
HP No. 11 Yellow Printhead C4813A
part numbers and part names of printheads
part numbers and part names of printheadspart numbers and part names of printheads
part numbers and part names of printheads
Warning
Warning
WarningWarning
installing printheads
installing printheads
installing printheadsinstalling printheads
Before installing the printheads ensure that you move the carriage to the docking
position.
1. Ensure that the printer is turned on.
2. Lift the printhead cover.
lifting the printhead cover
3. Open the printhead access latch and first pull it forward and then down. This releases
the hook of the latch from the carriage lock.
set up and configure hp confidential 2 31
Page 69

opening the printhead access latch
4. Lift and push the printhead access latch toward the rear of the printer.
lifting the printhead access latch
5. Remove the package and protective tape from each printhead.
2 - 32 hp confidential set up and configure
Page 70

removing the protective tape
6. Insert each printhead in its respective color-coded socket.
inserting the printhead
7. Press each printhead firmly to ensure proper contact after installation.
set up and configure hp confidential 2 33
Page 71

ensuring correct installation
8. Close the printhead access latch firmly so that the hook catches the carriage lock.
closing the printhead access latch
9. Close the printhead and ink cartridge covers.
2 - 34 hp confidential set up and configure
Page 72

closing the printhead and ink cartridge covers
10. Wait until the printer initializes the printheads. When initialization is complete, an
alignment page prints.
Note
Note
NoteNote
If an alignment page does not print, ensure that the printer is loaded with paper.
printhead initialization
gu
guidelines for mainta ining printhe ad s
idelines for maintaining printhea ds
gugu
idelines for maintaining printhea ds idelines for maintaining printhea ds
•=Keep the printheads sealed in the original packaging until you are ready to use
them.
•=Keep the opened printheads in the printer or sealed in a plastic bag.
•=Store printheads at room temperature.
•=Power off the printer by pressing the Power button. Do not power off the printer
by unplugging the power cord. Powering off with the Power button returns the
Carriage to the Service Station. The Service Station caps the printhead ink
nozzles to prevent them from drying.
identifying the expiration dates
identifying the expiration dates
identifying the expiration datesidentifying the expiration dates
•=Install-by Date: Printed on the retail box for printheads. Install by this date for
optimized performance.
•=Manufacture Date: Printed on the pouch for printheads. The number is in the
following format: YYMMDDhhmm. For example, a printhead manufactured on
November 19, 1999 at 1:12 pm has a Manufacture Date of 9911191312.
•=End-of-Warranty Date: Printed directly on printheads. It marks the end date of the
warranty period for printheads
set up and configure hp confidential 2 35
Page 73

media type
media type matrix
media typemedia type
matrix
matrix matrix
media type tray 1 tray 2 front
manual
feed
Plain Paper Yes Yes Yes Yes
Inkjet Paper Yes
Photo Paper Yes
Transparency Film Yes
Special Paper
(Bannerpaper,
restickables,iron
transferables)
Greeting cards,
including Hagaki cards
Index Cards Yes
Brochure Paper Yes
The printer supports media ranging from 4 x 6 inches to 13 x 19 inches. The printer has
4 paper paths:
•=Tray 1 (default tray)
•=Tray 2 (optional accessory)
•=Front manual feed
•=Rear manual feed
Yes
Yes
media type matrix
Yes Yes
Yes Yes
Yes Yes
Yes Yes
Yes Yes
rear
manual
feed
Yes
Yes
2 - 36 hp confidential set up and configure
Page 74

paper capacity a
paper capacity and weight matrix
paper capacity apaper capacity a
nd weight matrix
nd weight matrixnd weight matrix
tray or
bin
Tray 1 •= Paper (Plain, Inkjet,
Tray 2 •= Plain paper up to 13 x
Front
manual
feed
Rear
manual
feed
Output
tray
Autoduplex
unit
size or type of media weight capacity
Photo, Brochure paper)
•= Envelopes
•= Cards
•= Transparencies
19 inches
•= Paper (All paper types
supported by Tray 1)
•= Envelop es
•= Cards
•= Transparencies
•= Paper (Plain, Inkjet,
Photo, Brochure paper)
•= Envelopes
•= Cards
•= Transparencies
•= Special media
All media types
Media up to 13 x 19 inches 16 to 36 lb
tray specifications
•= 16 to
36 lb
(60 to
135
gsm)
•= 20 to
24 lb
•= 110 lb
index
16 to 28 lb
(60 to 105
gsm)
•= 16 to
36 lb
(60 to
135
gsm)
•= 20 to
24 lb
•= 110 lb
index
•= 16 to
72 lb
(60 to
270
gsm)
•= 20 to
24 lb
•= 110 lb
index
•= Up to 150
sheets
•= Up to 15
envelopes
•= Up to 60
cards
•= Up to 80
transparen
cies
•= Up to 400
sheets
•= Up to 10
sheets
•= Up to 10
envelopes
•= Up to 10
cards
•= Up to 3
transparen
cies
•= 1 sheet
•= 1 envelope
•= 1 card
•= 1
transparen
cy
•= 1 sheet
Up to 75 sheets
set up and configure hp confidential 2 37
Page 75

guidelines for loading paper
guidelines for loading paper
guidelines for loading paperguidelines for loading paper
•=Default paper size of Tray 1 and Tray 2: 8.5 x 14 inches (215.9 x 355.6 mm).
•=Default tray: Tray 1.
•=For paper that is smaller than the default size of paper for the trays: Adjust the
paper width and length guides in the required tray.
•=For paper of sizes A3, 11 x 17 inches, and 13 x 19 inches/A3+: Extend Tray 1
and Tray 2.
•=Media is always loaded in portrait orientation even when printing in landscape
orientation. Select the output orientation from the software used.
Note
Note
NoteNote
To prevent a paper jam, do not load more than one type of paper in a paper path.
Always remove the existing paper and realign the paper with new paper before loading.
2 - 38 hp confidential set up and configure
Page 76

extend tray 1
extend tray 1 or tray 2
extend tray 1extend tray 1
Steps to extend tray 1
Steps to extend tray 1 or tray 2
Steps to extend tray 1Steps to extend tray 1
or tray 2
or tray 2 or tray 2
You need to extend the tray to load paper that is larger than the legal size. The steps to
extend tray 1 or tray 2 are:
1. Locate the tray extension lock on the front left of the tray.
2. Slide the tray extension lock to the left and then release it.
To support paper up to 11 x 17 inches, pull the tray out lengthwise.
or tray 2
or tray 2 or tray 2
tray extension lock
pull the tray out
set up and configure hp confidential 2 39
Page 77

load the front and rear manual feed
load the front and rear manual feed
load the front and rear manual feedload the front and rear manual feed
load the front manual feed
load the front manual feed
load the front manual feedload the front manual feed
1. Slide the paper width guide on the output tray to its outermost position.
sliding the paper width guide outward
2. Insert paper or transparencies into the front manual feed.
•=Insert a maximum of 10 sheets of paper or 3 transparencies.
•=Place the paper along the right of the front manual feed.
•=Push the paper in until it reaches the maximum depth.
inserting media
3. Slide the paper width guide to fit securely against the paper.
sliding the paper width guide against the paper
load the rear manual feed
load the rear manual feed
load the rear manual feedload the rear manual feed
The steps to load the rear manual feed are:
1. Insert a single sheet of paper.
•=Insert the paper in portrait orientation.
•=Insert the paper to the left of the rear manual feed. The printer sensors activate
the rear manual feed mechanism.
2 - 40 hp confidential set up and configure
Page 78

Note
Note
NoteNote
The paper should be placed with the print side facing upward.
inserting paper
2. Push the paper into the printer until it reaches the maximum depth. When the printer
sensors detect the paper, the printer pulls the paper further into the printer.
Note
Note
NoteNote
The printer sensors activate the rear manual feed mechanism after 2 seconds.
pushing the paper
set up and configure hp confidential 2 41
Page 79

scrubber
scrubber utility
scrubberscrubber
utility
utility utility
The scrubber utility enables you to clean the system in the following situations:
•=A failed uninstallation
•=An unclean uninstallation
Note
Note
NoteNote
Note
Note
NoteNote
The scrubber utility is available only for Windows 2000 and Windows 98/ME.
•=Reads the .ini file for all information.
•=Deletes all printers using the driver specified.
•=Deletes the printer driver and its dependent files.
•=Deletes all the devices in the computer with the specified plug-n-play ID and USB
ID.
•=Deletes all the .inf and .pnf files specified in the scrub.ini file.
•=Deletes all oem*.* files in the inf directory.
•=Deletes all the files specified in the DeleteFiles section.
To ensure a clean system, execute the uninstaller before using the scrubber utility.
2 - 42 hp confidential set up and configure
Page 80

connectivity
connectivity options
connectivityconnectivity
options
options options
connection points in the rear of the printer
set up and configure hp confidential 2 43
Page 81

prin
print a demo page
t a demo page
prinprin
t a demo paget a demo page
print a demo page
print a demo page
print a demo pageprint a demo page
Print a demo page to perform the following activities:
•=Check the printer setup.
•=Check the printer hardware configuration.
You can print a demo page without connecting the printer to the computer and with only
a power supply connection. The demo page does not ensure that the computer and
printer are properly connected.
The steps to print a demo page are:
1. Turn on the printer.
2. Press and hold down the POWER button.
3. Hold the RESUME button for three seconds.
4. Release the POWER button to print the demo page.
demo page
print a double
print a double----sided
print a doubleprint a double
To check whether the printer is working with the auto-duplex unit, print a double-sided
demo page.
2 - 44 hp confidential set up and configure
sided demo page
demo page
sidedsided
demo page demo page
Page 82

Note
Note
NoteNote
Print a double-sided demo page with only a power supply connection by using the
CANCEL and RESUME buttons.
The steps to print a double-sided demo page are:
1. Turn on the printer.
2. Press and hold down the POWER button.
3. Press the CANCEL button three times.
4. Press the RESUME button once.
5. Release the POWER button to print a double-sided demo page.
set up and configure hp confidential 2 45
Page 83

install the printer
install the printer software
install the printerinstall the printer
printer
printer software
printerprinter
software
software software
Printer software enables the computer to communicate with the printer. If you do not
have access to a CD-ROM drive, download the printer software and other updates from
the Internet at the following address:
www.hp.com/support/c1p1700.
The following Windows operating systems support the printer software:
You must have administrator privileges to install a printer driver on a computer running
the Windows NT 4.0 or Windows 2000 operating systems.
software
software software
•=Windows 95
•=Windows 98
•=Windows Me
•=Windows NT 4.0
•=Windows 2000
Note
Note
NoteNote
steps to install the printer
steps to install the printer software
steps to install the printersteps to install the printer
Note
Note
NoteNote
It is recommended to install the printer software before connecting the printer to the
computer.
software
software software
1. Start Windows and ensure that no Windows applications are running.
2. Insert the starter CD into the CD-ROM drive. System Setup Wizard executes
automatically.
3. Click Install Printer Driver on the starter CD menu.
4. Select the language of the printer software and click OK.
The software is installed in the language that you select in Windows Control Panel.
selecting the language
2 - 46 hp confidential set up and configure
Page 84

5. Click Yes to accept the terms of the license agreement.
accepting the terms of license agreement
6. If the printer is set up for local printing, click Connected to this computer and
click Next . If the printer is set up for network printing, continue with step 9.
setting up the printer for local printing
7. Select the type of cable to connect the printer to the computer in the Cable Type
Selection window and click Next .
set up and configure hp confidential 2 47
Page 85

selecting the type of cable
8. To complete installing the software for a local connection, click the Finish button.
9. If the printer is set up for network printing, click Connected via the network and
then click Next .
10. Click Connected to this computer if the printer is connected to a server or to
another computer.
•=Click Basic Server or Peer-to-peer Network Setup to create a connection
to the printer attached directly to the network.
•=Click Client Setup if the printer is setup as a shared printer on the network and
is managed by a server or another computer.
11. To complete installing the software for network connection, follow the instructions
that appear on the screen.
Note
Note
NoteNote
You can also install the printer software by using the Add Printer wizard.
2 - 48 hp confidential set up and configure
Page 86

completing the installation of the software for local connection
set up and configure hp confidential 2 49
Page 87

contents of the software CD ROM
W
contents of the software CD ROM
contents of the software CD ROMcontents of the software CD ROM
identifying the contents of the
identifying the contents of the software CD ROM
identifying the contents of the identifying the contents of the
The contents of the software CD ROM are:
•=CD Shell
•=Installer for PCL3 for Windows 9x, Windows NT, and Windows 2000 platforms
•=Drivers: Windows, Mac, and ADI
•=Toolbox
•=Optional software: Print Creator and Acrobat
•=Documentation: User Guide and Quick Tour
•=Miscellaneous drivers and utilities for other operating systems:
•=DOS DJCP
•=Scrubber utility
•=HP File Expansion utility
languages supported by CD 1
languages supported by CD 1
languages supported by CD 1languages supported by CD 1
software CD ROM
software CD ROMsoftware CD ROM
driver
Mac
driver
indows
Europe NA AP
•= US English
•= Portuguese(Brazilian)
•= Euro-Spanish
•= French
•= Italian
•= German
•= Dutch
•= Polish
•= Czech
•= Turkish
•= Arabic
•= Traditional Chinese
•= US English
•= Portuguese
(Brazilian)
•= Euro-Spanish
•= Swedish
•= French
•= Italian
•= Germany
•= Dutch
•= Japanese
languages supported by CD 1 for Windows and Mac drivers
•= US English
•= Portuguese(Brazilian)
•= Euro-Spanish
•= French
•= Italian
•= German
•= Dutch
•= Polish
•= Czech
•= Turkish
•= Arabic
•= Traditional Chinese
•= US English
•= Portuguese
(Brazilian)
•= Euro-Spanish
•= Swedish
•= French
•= Italian
•= Germany
•= Dutch
•= Japanese
•= US English
•= Portuguese(Brazilian)
•= Euro-Spanish
•= French
•= Italian
•= German
•= Dutch
•= Polish
•= Czech
•= Turkish
•= Arabic
•= Traditional Chinese
•= US English
•= Portuguese
(Brazilian)
•= Euro-Spanish
•= Swedish
•= French
•= Italian
•= Germany
•= Dutch
•= Japanese
2 - 50 hp confidential set up and configure
Page 88

languages supported by CD 2 for Windows and Mac drivers
languages supported by CD 2 for Windows and Mac drivers
languages supported by CD 2 for Windows and Mac driverslanguages supported by CD 2 for Windows and Mac drivers
Windows driver •= US English
Mac driver •= US English
Europe AP
•= Swedish
•= Norwegian
•= Danish
•= Finish
•= Russian
•= Greek
•= Hebrew
•= Japanese
•= Korean
•= Simplified Chinese
•= Portuguese (Brazilian)
•= Euro-Spanish
•= Swedish
•= French
•= Italian
•= Germany
•= Dutch
•= Japanese
languages supported by CD 2
•= US English
•= Swedish
•= Norwegian
•= Danish
•= Finish
•= Russian
•= Greek
•= Hebrew
•= Japanese
•= Korean
•= Simplified Chinese
•= US English
•= Portuguese (Brazilian)
•= Euro-Spanish
•= Swedish
•= French
•= Italian
•= Germany
•= Dutch
•= Japanese
set up and configure hp confidential 2 51
Page 89

startup page of the CD browser
startup page of the CD browser
startup page of the CD browserstartup page of the CD browser
The startup page of the CD browser consists of the following buttons:
1. Install printer driver : Enables you to install the printer driver on the
computer.
2. Browse documentation : Enables you to view the contents of the following
documentation:
•=Release notes
•=User guide
•=Setup poster
•=Printer Web site
3. Register product : Enables you to link to the site http://register.hp.com to
register the printer and access service or support.
4. Customization utility: Enables you to copy the printer software onto disks, hard
drive or network drive.
5. Optional software: Enables you to install the following optional software:
•=HP Web JetAdmin
•=AutoCAD Driver
•=IrPrint
•=HP Photo Printing software
6. Quick tour : Enables you to access the following information related to the
printer:
•=Expandability options
•=Connectivity
•=Smart software features
startup page of the CD browser
2 - 52 hp confidential set up and configure
Page 90

software installation requirements
software installation requirements
software installation requirementssoftware installation requirements
software installation requirement in Windows
software installation requirement in Windows
software installation requirement in Windowssoftware installation requirement in Windows
•=Windows 95
•=Windows 98
•=Windows Me
•=Windows NT 4.0
•=Windows 2000
software installation requirem
software installation requirement in Macintosh
software installation requiremsoftware installation requirem
•=USB port/IR port/LIO module
•=Mac OS 8.6 and above
ent in Macintosh
ent in Macintoshent in Macintosh
set up and configure hp confidential 2 53
Page 91

install the Macintosh printer
install the Macintosh printer software
install the Macintosh printerinstall the Macintosh printer
install the printer
install the printer software for Mac OS X
install the printerinstall the printer
software for Mac OS X
software for Mac OS X software for Mac OS X
software
software software
Note
Note
NoteNote
Note
Note
NoteNote
Set up the printer before installing the printer driver in the Macintosh operating system.
1. Insert the starter CD into the CD-ROM drive.
2. Double-click the Installer icon for the Mac operating system.
3. To complete installing the printer driver, follow the instructions on the screen.
4. Connect the USB cable, containing the part number C6518A.
5. Launch the Print Center located in the applications:utility folder. The Print Center
automatically binds the printer driver.
install the printer
install the printer software for Mac OS other than Mac OS X
install the printerinstall the printer
1. Repeat steps 1 to 4 of the procedure to install the printer driver for Mac operating
system.
2. Select Chooser from the Apple menu.
3. Click the HP Deskjet xx Printer icon on the left of the Chooser window, where
xx represents the version of the current printer driver.
4. Select HP Color Inkjet CP1700 from the right of the Chooser window.
5. Close the Chooser window.
Use the USB cable, which is sold separately, to install the printer driver on the Macintosh
operating system.
software for Mac OS other than Mac OS X
software for Mac OS other than Mac OS X software for Mac OS other than Mac OS X
2 - 54 hp confidential set up and configure
Page 92

install the software on DOS
install the software on DOS
install the software on DOSinstall the software on DOS
DOS software installation steps
DOS software installation steps
DOS software installation stepsDOS software insta llation ste ps
Before installing the DeskJet Control Panel on DOS, ensure that the printer is set up and
turned on.
1. Insert the starter CD into the CD-ROM drive.
2. At the DOS prompt, type the CD-ROM drive letter and press ENTER. Change the
directory to drivers\dos\<location>\ where <location> represents either Europe or
chi_tra.
changing to the CD-ROM drive
3. Type INSTALL and press ENTER.
typing install to install the printer software
4. Type the letter of the language version of DJCP to be installed from the language
menu displayed.
set up and configure hp confidential 2 55
Page 93

identifying the language version of DJCP
2 - 56 hp confidential set up and configure
Page 94

install the printer
install the printer software using the add printer wizard
install the printerinstall the printer
insta
install the printer
ll the printer software for local printing using the add printer wizard
instainsta
ll the printerll the printer
The steps to install the printer software local printing are:
1. Select the Start -> Settings -> Printers menu command.
software using the add printer wizard
software using the add printer wizard software using the add printer wizard
software for local printing using the add printer wizard
software for local printing using the add printer wizard software for local printing using the add printer wizard
opening the Printers window
2. Double-click the Add Printer icon and click Next button.
set up and configure hp confidential 2 57
Page 95

accessing the Add Printer wizard
3. Select the Local Printer option and click Next .
selecting the Local printer option
4. Select the printer port and click Next .
2 - 58 hp confidential set up and configure
Page 96

selecting the printer port
5. Select the manufacturer of the printer as HP.
selecting the printer manufacturer
6. Select the model of the printer as HP Color Inkjet CP1700 and click the Have Disk
button.
set up and configure hp confidential 2 59
Page 97

selecting the model of the printer
7. Insert the installation disk.
inserting the installation disk
8. Specify the location of the hp1700k.inf file in the Copy ma nu fa ctur er file from
combo box, click OK , and click the Next button.
2 - 60 hp confidential set up and configure
Page 98

specifying the location of the hp1700k.inf file
9. Specify whether you want to use the existing driver or replace the existing driver and
click the Next button.
specifying whether to keep or replace the existing driver
10. Specify the printer name and whether the printer is to be set as default and click the
Next button.
set up and configure hp confidential 2 61
Page 99

specifying the printer name
11. Indicate whether you want to share the printer and click the Next button.
specifying whether to share the printer
12. Specify whether you want to print a test page and click the Next button.
2 - 62 hp confidential set up and configure
Page 100

specifying whether to print a test page
13. Click the Finish button to complete the Add Printer wizard and install the printer
software.
completing the installation of the printer software
set up and configure hp confidential 2 63
 Loading...