

Page 1

Aero 2100 Series
Color Palm-size PC
Reference Guide
Page 2

NOTICE
The information in this reference guide is subject to change without
notice.
COMPAQ COMPUTER CORPORATION SHALL NOT BE LIABLE
FOR TECHNICAL OR EDITORIAL ERRORS OR OMISSIONS
CONTAINED HEREIN; NOR FOR INCIDENTAL OR
CONSEQUENTIAL DAMAGES RESULTING FROM THE
FURNISHING, PERFORMANCE, OR USE OF THIS MATERIAL.
This reference guide contains information protected by copyright. No part
of this reference guide may be photocopied or reproduced in any form
without prior written consent from Compaq Computer Corporation.
© 1999 Compaq Computer Corporation.
All rights reserved.
COMPAQ, AERO and the Compaq logo are registered in the U.S. Patent
and Trademark Office. Microsoft, MS, ActiveSync, Active Desktop,
Outlook, Windows, Windows NT, and the Windows CE logo are either
registered trademarks or trademarks of Microsoft Corporation in the
United States and/or other countries. Microsoft products are licensed to
OEMs by Microsoft Licensing, Inc., a wholly owned subsidiary of
Microsoft Corporation.
The software described in this reference guide is furnished under a
Program License Agreement or nondisclosure agreement. The software
may be used or copied only in accordance with the terms of such
agreement. Product names mentioned herein may be trademarks and/or
registered trademarks of their respective companies.
R
EFERENCE GUIDE
Aero 2100 Series Color Palm-size PC
Second Edition August 1999
Compaq Computer Corporation
Page 3

TABLE OF CONTENTS
preface: Before You Begin
chapter 1: Introducing the Device
chapter 2: Basic Operations
chapter 3: Using Power
chapter 4: Software Functions
chapter 5: Backup and Restore
chapter 6: Pocket Outlook
chapter 7: Voice Recorder
chapter 8: Note Taker
chapter 9: Picture Viewer
chapter 10: AudiblePlayer
chapter 11: Infrared Feature
chapter 12: CompactFlash Cards
chapter 13: ActiveSync
chapter 14: Channels
chapter 15: Getting Connected Remotely
chapter 16: Upgrading the Memory Module
chapter 17: Using Jot Character Recognizer
chapter 18: Tips & Troubleshooting
appendix A: Hardware Specifications
appendix B: Icon Reference
appendix C: Regulatory Notices
Page 4

preface
BEFORE YOU BEGIN
Before using your Compaq Aero 2100 Series, be sure to read through the
Quick Start Guide. Read this chapter for information about:
documentation and online help
customer registration
symbols and conventions used in this guide
FINDING INFORMATION
References are provided as printed materials and as online information
that is accessible from your desktop computer and your Aero 2100. In
addition to this guide the following references come with your Aero 2100:
Quick Start Guide
Pocket Reference Guide
Accessories Information
Accessories Business Card
Important Safety Information
Register Now Card (North America only)
For Help... (warranty and service information)
Program License Agreement
Microsoft® ActiveSync booklet (with Microsoft ActiveSync CD)
Page 5

The following online references are also available:
Name Location
Palm-size PC Help
Microsoft ActiveSync Help On your desktop computer. Install the
Microsoft Palm-size PC Home
Page
Compaq Aero 2100 Home Page
Compaq Aero 2100. Tap Start
Microsoft ActiveSync software. Next,
click on the Microsoft ActiveSync icon
on your desktop, then click
HelpààActiveSync Help.
www.microsoft.com/
windowsce/ppc
www.compaq.com/
products/
ààHelp.
Page 6

LOCATING INFORMATION QUICKLY
To quickly find the information you’re looking for, use this table as a
starting point.
To Find Information About: Look Here:
Using the programs on your
Compaq Aero 2100
Synchronizing and exchanging files
with your desktop computer
Toolbar buttons and dialog box
items
Information on this release of
Windows CE and ActiveSync
Information on Aero 2100
accessories and how to order them
Compaq Aero 2100 Reference
Guide
Palm-size PC Help
Microsoft ActiveSync Help.
ActiveSync Help also includes
troubleshooting information on
connections.
Palm-size PC Help
The booklet accompanying the
Microsoft ActiveSync CD
Tap and hold on a toolbar button or
dialog box item to see its name or a
short description. Drag off the
toolbar button or item before lifting
to avoid activating it.
Read Me files (located in the
ActiveSync folder on your desktop
computer).
Accessories Information
Accessories Business Card
The latest information and offers for
your Aero 2100 device and
accessories
Aero 2100 Home Page
(www.compaq.com/
products/)
Page 7

CUSTOMER REGISTRATION
In North America
To receive the latest information on your Compaq Aero 2100 Series, as
well as special offers on device accessories and software, be sure to
register with Compaq by completing and mailing the Register Now card
included with your Palm-size PC.
Outside of North America
Outside of North America, use the Compaq Info Messenger service to
obtain Internet and e-mail access to the latest software updates and service
documentation for your device.
Once you register with this free service at www.compaq.com/
infomessenger and build your profile(s), Info Messenger searches the
Compaq Web site and collects information specific to your Compaq Aero
2100 Series environment. Info Messenger then sends an e-mail alerting
you when new and/or updated information is available on a Compaq
customized Web page.
Page 8

SYMBOLS AND CONVENTIONS
Some or all of the following format conventions may be used in this guide
to distinguish elements of text:
Names of menus, commands and icons are shown in bold type as they
appear on the display, for example, Start, Close all tasks, Q.
An arrow is used to separate icons or menu options that you should
select in succession, for example, tap Start
WARNING: Text set off in this manner indicates that failure to follow
directions could result in bodily harm or loss of life.
CAUTION: Text set off in this manner indicates that failure to follow
directions could result in damage to equipment or loss of
information.
NOTE: Text set off in this manner presents commentary, sidelights, or
interesting points of information.
IMPORTANT: Text set off in this manner presents clarifying information or
specific instructions.
ààSettingsààOwner.
Page 9

chapter 1
INTRODUCING THE DEVICE
Welcome to the colorful world of the Compaq Aero 2100 Series (referred
to as the "device" throughout this reference guide). Powered by
Microsoft's Windows CE operating system, the Aero 2100 is designed to
provide you quick and convenient access to critical information while
away from your PC. It fits neatly in your pocket and acts as a mobile
extension to your PC, letting you access and organize important
information such as your contacts, schedule and task list wherever you go.
Best of all, the Aero 2100 Series features a bright, high resolution, color
TFT display that greatly enhances the crispness of text and pictures so that
you can view more information at a glance. New reflective technology
ensures the Compaq Aero 2100 Series display is as easy to read in bright
outdoor environments as it is in low-light indoor settings. You can even
make changes to your data or add new data by using the stylus and the
software keyboard or the Jot handwriting recognition system. Because its
Windows CE interface closely emulates the Windows interface on your
PC, the Aero 2100 Series is the most intuitive way to stay productive and
access, organize and exchange information with a Windows-based PC.
This chapter describes the following features:
front side components
left side components
top edge components
bottom edge components
back side components
cradle components and auto-sync cable
Page 10

FRONT SIDE COMPONENTS
Ê
ÍËÌ
Î
Front Side
Item Component Function
Ê
Battery Charge and Alarm
Light
The indicator light on the top of the
device serves as both a battery charge
indicator and a visual alarm indicator.
Flashing green: Notification alarm
signal.
Flashing amber: Battery is
charging.
Solid amber: Battery is fully
charged.
For more information, see "Charging
the Battery Pack" in Chapter 3, and
"Setting Notification Alarms" in
Chapter 4.
Continued
Page 11

Front Side Components Continued
Item Component Function
Ë
Ì
Program Buttons
Power and Backlight
Button
The program buttons on the front
panel of the device are used to open
some of the most frequently used
applications. You can change the
shortcuts of the program buttons so
that they open different applications,
or so that they act as game keys. For
more information, see "Program
Buttons" in Chapter 6.
Opens the Calendar
application.
Opens the Contacts
application.
Opens the Tasks
application.
Opens the Note Taker
application.
The Power and Backlight button is
used to turn on and off your device
and the screen backlight. Press and
release the button to turn on or off the
device. Press and hold the button for
one second to toggle on or off the
backlight.
Continued
Page 12

Front Side Components Continued
Item Component Function
Í
Î
Color TFT Display The 65,536-color TFT (thin-film
transistor) display greatly enhances
the crispness of text and pictures so
that you can view more information at
a glance. New reflective technology
ensures the Compaq Aero 2100
display is as easy to read in bright
outdoor environments as it is in lowlight indoor settings.
Microphone The two small holes at the top of the
device are the microphone for the
built-in Voice Recorder. For more
information, see Chapter 7, "Voice
Recorder."
Page 13

LEFT SIDE COMPONENTS
ÊËÌ
Left Side
Item Component Function
Ê
Ë
Ì
Voice Recorder Button You can record brief notes and messages
by speaking into the built-in microphone
while holding down the voice recorder
button. For more information, see
Chapter 7, "Voice Recorder."
Dial/Action Button This is a wheel with three functions.
Rotate the dial up to cause an
upward scrolling action while you
are using an application.
Rotate the dial down to cause a
downward scrolling action while you
are using an application.
Press the center of the dial to use it
as an action button, much like the
Enter key on a full-sized PC
keyboard.
Exit Button Press this button to exit a window within
an application. The Exit button is similar
to the Esc key on a full-size PC
keyboard.
Page 14

TOP EDGE COMPONENTS
ÌÊË
Í
Top Edge
Item Component Function
Ê
Ë
Ì
Í
Infrared Port You can use the infrared port to
exchange data with other infraredequipped devices. The infrared port can
transmit at speeds up to 115 Kb per
second. For more information, see
Chapter 11, "Infrared Feature."
Audio Jack The audio jack lets you connect the
supplied combo earplug/microphone to
your Compaq Aero 2100.
CompactFlash Card Slot The CompactFlash slot is protected by a
removable cover. The slot supports Type
I and Type II CompactFlash cards. For
more information, see Chapter 12
"CompactFlash Cards."
Stylus Press down the stylus to automatically
pop it up for easy removal. Press the
stylus again to lock it back into its
holder.
Page 15

BOTTOM EDGE COMPONENTS
ÊËÌ
Bottom Edge
Item Component Function
Ê
Ë
Ì
Backup Battery
Compartment
Communications Port The communications port establishes a
DC Jack The DC jack allows you to connect to
The system relies on a coin-sized backup
battery to maintain data when the main
battery pack is low or unavailable. Open
the cover of the backup battery
compartment to access the backup
battery. For more information, see
"Backup Battery" in Chapter 3.
connection with the serial port of your
desktop PC. You can connect the device
to a PC by using a cradle or an auto-sync
cable. For information on using the
communications port to establish a
connection to a PC, see ActiveSync Help
on your desktop computer.
external power with the supplied AC
adapter. For more information, see
"Using AC Power" in Chapter 3.
Page 16

BACK SIDE COMPONENTS
ÊÌÍ
Back Side
Item Component Function
Ë
Ê
Ë
Ì
Memory Compartment The memory compartment holds the
memory module installed in the device.
You can improve system performance
and increase the storage capacity of your
device by changing the installed memory
module for a larger one. For more
information, see Chapter 15, "Upgrading
the Memory Module."
Battery Compartment The battery compartment holds the
rechargeable battery pack. For more
information, see "Rechargeable Battery
Pack" in Chapter 3.
Speaker The system sounds alarms and plays
back sound recordings through this
speaker.
Continued
Page 17

Back Side Components Continued
Item Component Function
Í
Reset Button
The Reset button is recessed inside the
case of the device. Occasionally, some
hardware or software malfunctions can
prevent the device from responding. To
get the device working again, use the tip
of the stylus to press the Reset button.
For more information, see "Resetting
Your Device" in Chapter 3.
CAUTION: When you use the
Reset button, you will lose any
data that has not been saved.
Page 18

CRADLE COMPONENTS AND
Ê
Ë
AUTO-SYNC CABLE
Your Compaq Aero 2100 Series comes with either a standard or deluxe
cradle. You can also buy an auto-sync cable separately. All three
accessories can be used to establish a link between the Aero 2100 and a
desktop computer.
Standard Cradle
Item Component Function
Ê
Ë
Standard Cradle The cradle links your Aero 2100 to your
desktop computer. You can also recharge
the main unit's battery by docking the main
unit in the cradle while the cradle is
attached to external power.
Fixed Auto-sync Cable The fixed auto-sync cable connects your
cradle to the desktop PC. When you dock
the device into the cradle, the device
automatically connects with the desktop
PC. (You must install ActiveSync on the
desktop PC first.) For more information, see
ActiveSync Help on your desktop PC.
Page 19

Ì
Using the Cradle
Í
Item Component Function
Ì
Í
AC Adapter The AC adapter connects the cradle to
external power. For more information,
see "Using AC Power" in Chapter 3.
DC Jack The DC jack allows you to connect to
external power via the supplied AC
adapter.
Page 20

Î
Deluxe Cradle
Item Component Function
Ï
Î
Ï
Battery Charging
Compartment
Battery Charge Light The deluxe cradle's battery charge light lets
The deluxe cradle is similar to the standard
cradle, except that it has a battery-charging
compartment used to charge an additional
battery pack.
you track the charging status of a spare
battery pack.
Flashing amber: Spare battery is
charging.
Sold amber: Spare battery is fully
charged.
For more information, see "Charging the
Battery Pack" in Chapter 3.
Page 21

The Auto-sync Cable
Item Component Function
Ð
Ð
Auto-sync Cable
(Accessory)
The auto-sync cable allows you to make
a direct connection from the
communications port on your device to
the serial port on your desktop PC.
Page 22

chapter 2
BASIC OPERATIONS
This section helps you to start using your Compaq Aero 2100 Series.
In-depth information on each of the individual operations described can be
found elsewhere in this reference guide.
This chapter describes the following features:
using the stylus
programs
Active Desktop
start menu and taskbar
command bar
typing and writing on your device
finding information on your device
viewing information on your device
customizing your device
adjusting the backlight
Page 23

USING THE STYLUS
The Compaq Aero 2100 Series has a touch-sensitive screen. It allows you
to use your stylus to interact with the device. With the Compaq Aero 2100
Series, you can input data using the full screen area.
When it's not in use, the stylus is stored inside a compartment located at
the top edge of your device. Press down the top of the stylus to free it
from the stylus compartment. When you are finished using the stylus,
reinsert it into the compartment and press it down to lock it into place.
Using the Stylus
CAUTION: Do not touch the screen with sharp objects or any other
type of writing instrument. It can damage the screen.
The stylus tip can also be used to open the cover of the backup battery
compartment, or to press the Reset button.
Page 24

PROGRAMS
The basic set of Windows CE programs is installed on your Compaq Aero
2100 Series. You can switch to any program by selecting from the Start
menu or the Q Menu, or by pressing a program button on the device. The
programs listed below are installed on your device.
Program Description
ActiveSync Synchronizes your desktop computer and your
device.
AudiblePlayer Lets you listen to audio recordings.
Auto Run Allows specialized programs stored on a
CompactFlash card to run automatically.
Calendar Allows you to review or change your
appointments.
CF Backup/Restore Allows you to backup and restore data with a
CompactFlash card.
Channels Downloads data to your device.
Connections Connects to other computers or the Internet.
Contacts Keeps track of your friends and colleagues.
Diagnostics Allows you to test various functions of your Aero
2100.
File Explorer Lets you manage and navigate among your files.
Game Keys Converts the application launch keys into
directional keys so that you can play games.
Inbox Sends and receives e-mail.
Note Taker Creates handwritten or typed notes and drawings.
PC Link Initiates a connection with your desktop computer.
Picture Viewer Allows you to view images on your Aero 2100.
Solitaire Entertains you while you are on the road.
Continued
Page 25

Programs Continued
Program Description
QLaunch Adds a Q icon to the task bar so you can quickly
access the Q Menu.
Q Menu Allows you to switch between tasks, close tasks
and view QUtilities.
QUtilities Allows you to access several important setting
controls.
Tasks Allows you to review and change your task list.
Voice Recorder Allows you to record a memo.
You don't have to close programs on your device. Simply switch to
another program you want to use. To switch between open programs, tap
the Q icon on the taskbar, then the desired program from the program list.
NOTE: The pre-installed programs on your device are stored in ROM
(read-only memory) and cannot be removed or lost. You can install
additional software that will be placed in RAM (random access memory).
Programs placed in RAM can be removed. See ActiveSync Help on your
desktop computer for information on installing third-party software.
Page 26

ACTIVE DESKTOP
Use the Active Desktop to display important information, such as today’s
appointments and tasks.
Active Desktop Screen
Page 27

To select the type of information you want to display on the desktop, tap
Start
ààSettingsààDisplayààDisplay Active Desktop.
Display Properties Screen
Page 28

START MENU AND TASKBAR
Use the Start menu on the taskbar to open programs, adjust settings, find
information, and view Help for the current program.
Start Menu
On the taskbar, you can also do the following.
Page 29

Taskbar
NOTE: When your batteries are running low, a battery icon appears in the
status area. For icon descriptions, see Appendix B, "Icon Reference."
Low battery messages are also displayed on your screen. For information
on optimizing battery life, see "Conserving Battery Power" in Chapter 3.
You can change what you see on the Start menu and taskbar by tapping
Start
ààSettingsààTaskbar.
COMMAND BAR
The command bar at the top of the device screen includes both menu
names and toolbar buttons. You can decide which you want to display.
Command Bar
Page 30

TYPING AND WRITING ON YOUR DEVICE
Typing with the Keyboard
With your Compaq Aero 2100 Series, you can quickly type, write, and
draw in the way that’s most convenient for you. You can type with the
keyboard, write using character recognition, or write and draw directly on
the screen using your stylus.
In Note Taker, and in notes that you attach to entries in Calendar,
Contacts, and Tasks, you can use your stylus to write on the screen.
You can enter information in any program on your device by typing with
the keyboard or writing using character recognition. First, select the input
method you want to use in your device’s input panel. Tap the Input
Method arrow to see your choices.
Type with the keyboard
To type, tap the Input Method arrow and select Keyboard. Then tap the
keys with your stylus.
Page 31

You can adjust keyboard settings by tapping StartààSettingsààInput
Panel. Select Keyboard as the input method, then tap Options.
Enable swipe shortcuts (gestures) on your keyboard so that you can:
Insert a space by swiping across the keyboard from left to right.
Delete a character by swiping across the keyboard from right to left.
Enter a carriage return by swiping the keyboard from top to bottom.
Enter the character in uppercase by starting on a key and swiping up.
Write using character recognition
You can write using the character recognition software CIC® Jot™. Tap
the Input Method arrow and select Jot Character Recognizer. When
you write a letter in the box, your handwritten character is converted to
typed text that appears on the screen.
Page 32

Input Panel
Some letters must be written in a particular way to be recognized. To see
how to write letters, tap the Help button for an online demonstration or
see Chapter 17, "Using Jot Character Recognizer."
NOTE: Drag your stylus across the panel horizontally from right to left to
delete a character. Drag from left to right to type a space.
Page 33

As you type or write, your device anticipates the word you are writing and
displays it above the input panel. When you tap the displayed word, it is
inserted into your text at the insertion point. The more you use your
device, the more words it learns to anticipate.
Using the Word Completion Function
To customize the suggested words, tap StartààSettingsààInput Panel,
and select the Word Completion tab.
Page 34

FINDING INFORMATION
The Find feature on your device helps you quickly locate information.
Tap Start
tap OK to start the search.
ààFind. Enter the text you want to find, select a data type, then
Finding Information Screen
VIEWING INFORMATION
Most programs provide a list view, showing the items or files you’ve
already created in that program. You can display the list in the manner
that’s most helpful for you.
You can sort the list on a particular column by tapping the column
heading.
In Calendar, Contacts, and Tasks, you can assign entries to
particular categories then filter the list to show a specific category.
In Note Taker, Voice Recorder, and Inbox, you can place files or
messages in folders, then filter the list to show only the files or
messages in a specific folder.
Page 35

CUSTOMIZING YOUR DEVICE
You can adjust your Aero 2100 Series's settings to suit the way you work.
Select Start
You might want to adjust the following:
Item Description
Asset Viewer Access detailed information about your Aero 2100,
Buttons Associate program buttons with specific programs
Communications Set the name and customize settings for
Dialing Adjust dialing location settings and dialing patterns.
Display Adjust Active Desktop and backlight settings.
Input Panel Customize the input method and set word
Owner Enter contact information in case your device is
ààSettings to see the settings available on your device.
as well as your owner information.
and adjust the Up/Down control.
connecting to a desktop computer.
completion settings.
misplaced.
Password Limit access to your device.
Power Maximize battery life.
Regional Settings Customize the appearance of numbers, currency
values, times, and dates.
Remove Programs Uninstall a program.
Stylus Recalibrate your screen or adjust double-tap
sensitivity.
System Adjust memory allocation between storage
memory and program memory.
Taskbar Customize the Taskbar and Start menu.
Volume & Sounds Customize or turn off sounds.
World Clock Set the date and time for your location and a
second location.
Page 36

NOTE: Some settings are adjustable from the Q Menu and QUtilities. For
more information, see "Q Menu and QUtilities" in Chapter 4.
For information on a particular setting, you can do either of the following:
Open the setting, tap StartààHelp.
Open the setting, then tap and hold on the label of the item on which
you want more information.
Display Properties Screen
Page 37

ADJUSTING THE BACKLIGHT
The Compaq Aero 2100 Series's adjustable backlight lets you view text
and graphics clearly whether you're indoors or outdoors, in a dim study or
at a brightly lit worksite. There are three ways to manipulate the
backlight: using the Power and Backlight button, tapping the light bulb
icon on the taskbar, and using the Q Menu.
Using the Power and Backlight Button
You can use the Power and Backlight button on the front of your device to
turn the backlight on and off. Press and hold the Power and Backlight
button for one second to toggle on or off the backlight.
Using the Light Bulb Icon
You can use the light bulb icon on the taskbar to turn the backlight on or
off or adjust its brightness level. Tap the icon to toggle among its three
settings:
Icon Meaning
The backlight is on at low brightness.
The backlight is on at high brightness.
The backlight is off.
Page 38

Using the Q Menu's Backlight Control
You can adjust even more settings using the Q Menu. Tap the Q icon on
the taskbar, then tap Backlight. (If the Q icon does not appear on your
taskbar, tap Start
You can perform the following actions:
ààQLaunch.)
Backlight Menu
Tap High to set the backlight brightness to high.
Tap Low to set the backlight brightness to low.
Tap Off to turn off the backlight.
Tap Disable to turn off the backlight and remove the light bulb icon
from the taskbar.
Page 39

Tap PropertiesààBacklight tab to adjust the backlight timeout. Use
the drop-down menus to set the amount of idle time before the
backlight turns off when the device is using battery power or external
power.
Setting the Backlight Timeout
After the timeout has turned off the backlight, any screen tap or button
activation will turn the backlight on again at its previous brightness level.
Page 40

chapter 3
USING POWER
Your Compaq Aero 2100 Series is installed with a rechargeable,
removable battery pack that can power the device wherever you go. In
addition, the device has a small backup battery. The backup battery
maintains the data stored on RAM memory when the main battery pack is
fully discharged or while you are changing one battery pack for another
battery pack.
The battery pack can be recharged by connecting the device to a power
outlet with the supplied AC adapter. You can also recharge the battery
pack by placing the device in the cradle while the cradle is connected to a
power outlet with the supplied AC adapter.
This chapter describes the following features:
rechargeable battery pack
charging the battery pack
backup battery
conserving battery power
using AC power
resetting your device
Page 41

RECHARGEABLE BATTERY PACK
For mobile computing, your Compaq Aero 2100 Series draws power from
a rechargeable Lithium-Ion (Li-Ion) battery pack. When the battery is
fully charged, it can store enough energy to power your device for several
hours. If you use heavy power-using features such as the screen backlight,
you will discharge the battery faster. If you frequently use the device with
battery power for a long duration exceeding several hours, you may want
to purchase a spare battery.
Changing the Battery Pack
To remove and replace the battery pack in your Compaq Aero 2100
Series, follow the steps below. Before removing the battery, always verify
that the coin-sized backup battery is installed in the device and has a
rating of Low to Good.
CAUTION: The backup battery maintains the data held in your
Compaq Aero 2100 Series whenever the battery is low, or if the
battery pack is removed. The backup battery is not rechargeable, so
when you change battery packs, do not cause an unnecessary drain
on the backup battery by leaving the device without a battery pack
for more than a short period of time.
Page 42

Turn off the device.
Turn over the device and slide the cover of the battery compartment
downwards
Ê so that you can remove it completely.
Ê
Removing the Battery Compartment Cover
Take the battery out of the battery compartment.
Insert the new battery into the compartment Ë. Align the battery as
shown on the placement label
Verify that the terminal end of the pack is adjacent to the terminals
inside the battery pack compartment.
Slide up the cover of the battery pack compartment so that it locks in
place.
Ì inside the battery compartment.
Page 43

Ì
Ë
Inserting the Battery Pack
IMPORTANT: The battery compartment cover must be installed for the
device to power on.
If the inserted battery is new, connect the device to the AC adapter and
charge the battery for three hours.
Checking the Battery Pack Charge
When you are working with your Compaq Aero 2100 Series and using
battery power, you can monitor the charge held in the battery pack by
using the Power Properties window. To display the Power Properties
window:
Tap StartààSettingsààPower or QààPower. (Tap StartààQLaunch
to make the Q icon appear on the taskbar.)
If the battery pack is low on charge, the battery icon appears on the
taskbar. You can display the Power Properties window by tapping the
battery icon on the taskbar.
Page 44

Power Properties (Battery Tab) Screen
The Power Properties window only shows the battery charge level if you
are using the battery pack. If you have connected the AC adapter, the
window shows the recharging status of the battery.
NOTE: If you have just powered on your Aero 2100 Series, or
disconnected it from AC power, the battery gauge may appear blank. Wait
a few moments before checking the battery pack charge.
Low Rechargeable Battery Indicators
When the charge level in the battery pack becomes low, the battery icon
appears in the taskbar. The battery icon gives a graphic representation of
the amount of charge remaining in the battery pack.
Page 45

Icon Meaning
Main battery is low.
Main battery is very low.
External (AC) power source is connected and/or main battery is
charging.
Note that when the charge level in the battery pack gets very low, an
exclamation mark (!) appears beside the battery icon.
Shortly after the battery icon explanation mark appears, a warning
message appears to explain that the device cannot continue operating
because of insufficient battery charge, and the device shuts down.
NOTE: To save power, the backlight is automatically disabled when the
exclamation mark (!) appears beside the battery icon.
Responding to a Low Battery Pack
When the battery icon appears in the task bar, be aware that the battery
pack charge level is low. If you can’t connect the AC adapter or install a
spare charged battery pack, you may continue working but avoid using
heavy power-consuming features such as the screen backlight or
CompactFlash cards.
When the exclamation mark (!) appears beside the battery icon, save any
unsaved data you are working on and turn off the device. Don’t try to
restart the device until you have connected to a power outlet using the AC
adapter or you have replaced the discharged battery pack with a fully
charged battery pack.
Page 46

CHARGING THE BATTERY PACK
You can recharge the Compaq Aero 2100 Series battery pack by:
Connecting the AC adapter directly to your device.
Connecting the AC adapter to the cradle and docking the device into
the cradle.
Removing the battery pack from the device and inserting it into the
battery charging compartment of the deluxe cradle.
NOTE: There is no requirement to fully discharge the battery pack before
recharging and there is no requirement to continue charging a battery pack
until it is fully charged. If you purchase a replacement or a spare battery
back, always give it a full charge the first time that you use it.
Battery Pack Inside the Palm-size PC
Connect the device to a wall outlet Ê using the AC adapter Ë. You
can connect the DC connector
device,
Ì from the AC adapter directly to the
Ë
Ì
Ê
Charging the Battery Using the AC Adapter Directly
Page 47

or, you can connect it to the desktop cradle and dock the device into the
cradle.
Charging the Battery Using the Cradle
The amber battery charge light Í begins flashing to indicate that
battery charging is underway. If the battery is completely discharged,
the battery will receive a full charge in 2 to 3 hours. If you have turned
on your device while the battery is charging, it might take up to 4
hours for the battery to receive a full charge.
Í
Battery Charge Light
Page 48

When the battery pack is fully charged, the battery charging light stops
flashing and the amber LED remains on.
Using the Deluxe Cradle Charging Compartment
If you have the deluxe cradle, you can recharge a spare battery in its
battery charge compartment
Ensure that the cradle is connected to a power outlet through the
supplied AC adapter.
Insert the battery Ï, terminals facing downwards, into the battery
charge compartment, so that the placement of the terminals matches
the icon embossed on the compartment cover.
Î.
Î
Ï
Ð
Charging the Battery Using the Deluxe Cradle
The cradle's amber battery charge light Ð begins flashing to indicate
that battery charging is underway. If the battery is completely
discharged, the battery will receive a full charge in 2 to 3 hours. When
the battery pack is fully charged, the battery charge light stops flashing
and remains on.
NOTE: You can use the deluxe cradle to charge the device's main battery
(while installed in the device) and a spare battery at the same time.
Page 49

Useful Battery Life
The removable battery pack is rated to remain useful for at least 300
cycles of charging and discharging. Beyond this time, the battery will
become less efficient and progressively begin to store less charge. When
you notice that your battery begins to hold less charge, replace it with a
new Compaq-approved battery pack.
Battery Disposal
Because of the type of batteries used in your Compaq Aero 2100 Series,
follow local regulations regarding the safe disposal of batteries. Your
Compaq vendor can advise you on local regulations, and/or the existence
of any battery disposal programs in operation.
In North America, dispose of lithium-ion batteries by taking advantage of
the Compaq battery recycling program. You will be provided with a
postage-paid battery pack mailer preaddressed to a reclamation facility
where the metals are recycled.
Batteries/battery packs and accumulators should not be disposed of
together with the general household waste. In order to forward them to
recycling or proper disposal, please use the public collection system or
return them to Compaq, your authorized Compaq partners, or their agents.
Some important points to remember are:
There is a danger of explosion and risk of personal injury if the battery
is incorrectly replaced or mistreated.
Do not attempt to disassemble the battery, immerse it in water or
dispose of it in fire.
Replace only with the battery designated for this product.
Discard used batteries according to the manufacturer's instructions.
Page 50

BACKUP BATTERY
The backup battery in your Compaq Aero 2100 Series is a coin-sized
Lithium cell battery (CR2032). This battery maintains the integrity of the
data stored in RAM memory whenever the main battery pack is fully
discharged, or whenever the main battery pack is not installed in the
device. The backup battery is installed in a compartment located in the
bottom edge of your device
Ê
Backup Battery Compartment
The backup battery is not rechargeable, but in normal use, it should have
enough charge to last for a year or more. Follow the guidelines below to
maintain the backup battery:
Ê.
Whenever the main battery pack is fully discharged, recharge it at the
earliest opportunity.
If you have two main battery packs, try to always keep a charged
battery inside your Compaq Palm-size PC. When you exchange the
battery packs, make sure the device is without a main battery pack for
just a short period of time.
If you will not be using your device for several days or more, first
back up your data to your computer, then make sure that the battery
pack is charged by keeping the device connected to AC power.
CAUTION: Failure to keep the main battery charged, or the Aero 2100
connected to AC power, can cause the backup battery to discharge
and the eventual loss of data stored in RAM memory.
Page 51

Low Backup Battery
When the backup battery becomes low, the backup battery icon appears in
the taskbar.
Icon Meaning
Backup battery is low.
Backup battery is very low.
Note that when the charge level in the battery pack gets very low, an
exclamation mark (!) appears beside the battery icon. The Aero 2100 will
also display a message to alert you. The message recurs periodically until
you have replaced the backup battery.
When you see this message, obtain a new backup battery (CR2032) at
your earliest convenience from your authorized Compaq Reseller. In the
interim period, be sure to make a full backup of the data held in your
Compaq Aero 2100 Series, and take steps to make sure that you avoid
fully discharging the main battery pack.
Changing the Backup Battery
Change the backup battery in your Compaq Aero 2100 Series as follows:
Verify that the device is installed with a main battery pack with a
charge rating of Low to Good.
Turn off the device.
Use the tip of the stylus Ê to open the cover of the backup battery
compartment
at one end.
Ë on the bottom edge of the device. The cover is hinged
Page 52

Ë
Ê
Opening the Backup Battery Compartment Cover
Remove the used backup battery from the backup battery compartment
Ì. Insert the new battery into the compartment, taking care that you
correctly replace the battery. The positive terminal of the battery faces
downwards, as shown on the label
Í inside the compartment.
Í
Ì
Inserting a Backup Battery
Close the battery compartment and restart your device.
Page 53

WARNING: Your device contains a coin-cell lithium battery powered
Real-Time Clock circuit. There is a danger of explosion and risk of
personal injury if the battery is incorrectly replaced or mistreated.
Do not attempt to recharge the battery, disassemble it, or immerse it
in water or dispose of it in fire. Replace only with the battery
designated for this product. Discard used batteries according to the
manufacturer's instructions.
CONSERVING BATTERY POWER
The many features of your Compaq Aero 2100 Series can consume quite a
lot of energy. Some features, such as the screen backlight and
CompactFlash cards, use more power than others. When running your
system on battery power, turn off or refrain from using those features that
use a lot of energy unless necessary.
Backlight
If you use the backlight, program the device to turn off the backlight
whenever the system is idle for a short time. To learn how to set the
backlight timer, see "Adjusting the Backlight" in Chapter 2.
After it has been turned off by the timer, the backlight will return to the
selected level the next time you tap the screen with your stylus or press a
button.
CompactFlash Cards
CompactFlash cards can consume quite a lot of power. If you don’t need
the services provided by an installed CompactFlash card, such as a
fax/modem, consider removing the card while running the system on the
battery pack.
Page 54

Infrared Transmissions
Infrared transmissions are power consuming. If possible, refrain from
transmitting large documents or files through the infrared port while you
are using the system on battery power.
Active Synchronization
Synchronizing the data on your Compaq Aero 2100 Series with your
desktop computer consumes power. Whenever possible, arrange your
synchronization routine so that it is transmitted through the cradle while
your system is powered by the AC adapter.
Automatic Power Off
You can program your Compaq Aero 2100 Series to automatically shut
down whenever it is idle for a short period. If you are running on battery
power, it might help to conserve charge if you shorten the interval before
the system automatically powers off.
Tap StartààSettingsààPower, or QààPower, then the Power Off tab.
(Tap Start
ààQLaunch to make the Q icon appear on the taskbar.)
Page 55

Use the battery drop down menu to set the idle interval before the
system automatically powers off.
Setting the Power Off Timeout
NOTE: If you are playing an audio file on your Aero 2100 under battery
power, the display will automatically turn off after 1 minute if there has
been no input to the device. The display will turn back on once the audio
file has finished playing. This power saving feature is not adjustable.
Page 56

USING AC POWER
The AC adapter included with your Compaq Aero 2100 Series allows you
to connect to AC power through a power outlet. While connected to AC
power, the device does not use its internal battery pack. Instead, it
automatically starts charging the internal battery pack. A plug icon
appears in the status area of the taskbar to indicate that the device is
connected to external power. When charging the battery, the battery
charge light shows the battery charging status.
When the AC adapter is connected to the cradle, the cradle can act as a
power source for your Compaq Aero 2100 Series, and charge the battery.
It is not necessary to turn off your Compaq Aero 2100 Series before
connecting to AC power. The device automatically switches to AC power
without interrupting operation.
See "Charging the Battery Pack" earlier in this chapter, for information
on how to connect your Compaq Aero 2100 Series to a power outlet.
CAUTION: If you disconnect the external power while the batteries are
very low, the device may shut down. Any unsaved data in RAM will
be lost. You can restart the device by connecting to AC power or
installing a charged battery.
Page 57

RESETTING YOUR DEVICE
Ê
If your Compaq Aero 2100 Series locks up and stops responding due to a
hardware or software malfunction, you may need to reset your device.
Your device can be reset in two ways, depending on the situation. A
normal reset does not affect data that has been saved in memory. A full
reset erases memory contents and settings. Resetting your device does not
affect the operating system.
Performing a Normal Reset
A normal reset restarts your device much like pressing Ctrl+Alt+Del
restarts a computer.
To perform a normal reset:
Save all work.
IMPORTANT: Do not turn off the device as the device must remain on in
order to reset.
Turn over the device.
Reset Button
Page 58

Use the tip of the stylus to press the reset button Ê.
The device automatically restarts.
Performing a Full Reset
A full reset restarts your device and removes all information stored in
RAM memory such as data files and system settings. Perform a full reset
if a normal reset does not solve the system lockup or failure.
NOTE: If you have saved your data using one of the backup procedures, it
is possible to restore your saved data after performing a full reset.
To perform a full reset:
Disconnect the device from the AC Adapter, if using external power.
Turn over the device.
Remove both the main battery and the backup battery.
Wait at least 1 minute, then replace the batteries.
Turn over the device, then press the power button to restart the device.
Run through the Setup Wizard again to reestablish your system and
calibration settings.
Page 59

chapter 4
SOFTWARE FUNCTIONS
This section provides information on using some of the applications that
come preinstalled in your Compaq Aero 2100 Series. Other applications
can be installed to your device's Random Access Memory (RAM). For
instructions on installing applications, refer to ActiveSync Help on your
desktop computer. For help using the applications, read this section or
refer to the online Help supplied with the applications.
This chapter describes the following features:
using the Asset Viewer
using the Q Menu and QUtilities
using the owner properties window
setting notification alarms
setting a password
using the File Explorer
Page 60

USING THE ASSET VIEWER
This program provides information specific to your Aero 2100 Series,
such as model number, serial number, and memory size. It also shows
your personal information that you have entered in the Owner Properties
window in Settings. This information is useful when making a technical
support call and to give system administrators the data needed to
understand their inventory.
To use the Asset Viewer, tap Start
A screen appears similar to the one below. By selecting a topic from the
drop down menu, you can quickly review the current setup of your device.
ààSettingsààAsset Viewer.
Asset Viewer Screen
The drop down menu has the following 5 categories: Identity, Memory,
Version, Display, and System. Each category shows a certain amount of
information in the box below.
Page 61

USING THE QUTILITIES AND Q MENU
Customizing your Compaq Aero 2100 Series is both convenient and easy
when you use the Q Menu and the QUtilities. The Q Menu and
QUtilities let you quickly access several important setting controls. The
Q Menu also lets you switch between, or close, open applications.
The QUtilities are located on the Q Menu.
Tap the Q icon on the taskbar to access the Q Menu.
If you want to remove the Q icon from your taskbar, tap QààExit. To
restore the Q icon, tap Start
To change which items appear on the Q Menu, tap QààQUtilities and
select the Q Menu tab. Any items that you select will appear on the Q
Menu.
ààQLaunch.
Q Menu Tab in QUtilities
Page 62

Task Management
The Q Menu includes three options that allow you to close or switch
among tasks on your Aero 2100:
To close the program that is currently active, tap Close active task.
To close all the open programs on your device, tap Close all tasks.
NOTE: When you close a task, all unsaved data in that task is lost.
Below these two options is a list of running tasks. To switch among
running tasks, tap the name of the task you want to go to.
Q Menu
Page 63
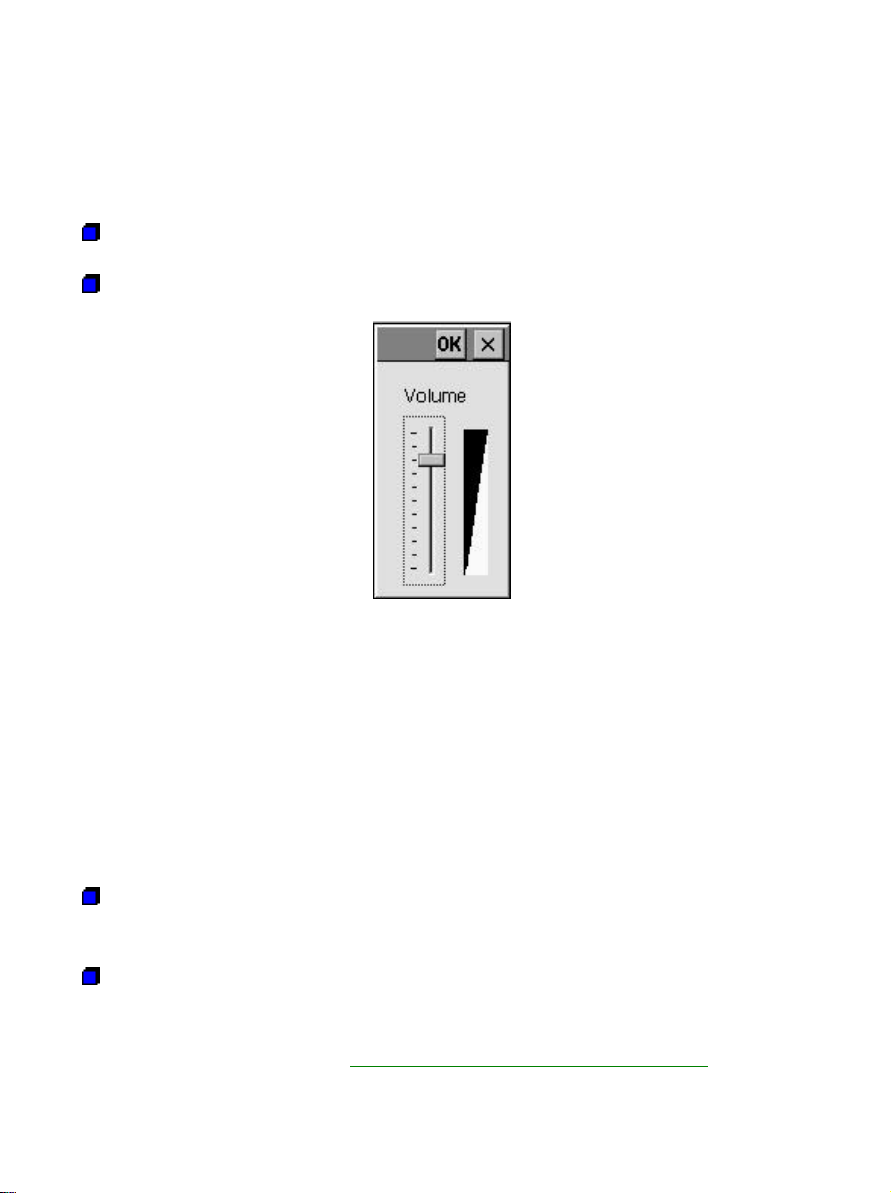
Controlling Volume
You can record and play wavefiles using the internal audio features on
your Compaq Aero 2100 Series. The Volume utility provides an easy way
to adjust the volume of your device.
Tap QààVolume. Then, simply adjust the volume level on the slider.
Tap OK to save the new setting and close the window.
Volume Slider
Power
The Power utility on the Q Menu includes both a battery gauge and a
timer allowing you to power off the device when it is idle. To access it,
tap Q
ààPower. On the Battery tab, you can check on the status of your
main and backup batteries:
The gauges indicate the charge level of the main battery and backup
battery.
The main battery icon indicates whether the device is connected to
external power and the main battery is charging.
For more information, see "Checking the Battery Pack Charge" in
Chapter 3.
Page 64

The Power Off tab contains an auto-suspend feature that allows you to
save energy, which can extend your battery life. The timeout powers off
your device after it has been idle for a predetermined amount of time. To
adjust the timeout feature:
Use the drop-down menus to set the length of idle time before the
device powers off when your device is running on battery power and
external power.
If you want to deactivate the external power timeout, click on the
check box to uncheck it.
For more information, see "Conserving Battery Power" in Chapter 3.
File Explorer
The File Explorer on the Q Menu lets you navigate and organize your
files as well as browse shared network resources and connect to those
resources. To access the File Explorer, tap Q
For more information, see "Using File Explorer" later this chapter.
ààFile Explorer.
Backlight Control
You can adjust the backlight brightness, turn off the backlight, or adjust
the timeout setting using the Backlight option on the Q Menu. To access
it, tap Q
For more information, see "Adjusting the Backlight" in Chapter 2.
ààBacklight.
Page 65

Auto Run
The Auto Run feature in QUtilities allows specialized programs stored
on a CompactFlash card to begin running automatically as soon as the
card is inserted.
You can disable this function by tapping QààQUtilitiesààAuto
Run
ààDisable, then tapping OK.
You can also manually run a specialized program stored on an inserted
CompactFlash card. On the Auto Run tab, tap Restart.
Auto Run Tab
For more information, see Chapter 12, "CompactFlash Cards."
Page 66

Diagnostics
The Diagnostics utility within QUtilities activates a debugging and
system diagnostic tool. Use this tool to verify any problems that you may
have experienced on your device.
Before running the diagnostics tool, close all open programs by
tapping Q
If you have enabled password protection at power-on, disable this by
tapping Start
deselect the Enable password check box.
If you have enabled display owner identification at power-on, disable
this by tapping Start
owner identification check box.
Tap QààQUtilitiesààDiagnostics tab.
ààClose all tasks.
ààSettingsààPassword. Enter your password, then
ààSettingsààOwner. Deselect the Display
Diagnostics Tab
Page 67

Tap the check boxes to select the items you want to test, then tap
Next.
NOTE: The "IR transfer" test item is an internal infrared functionality test.
You do not need to set up another IR device to test this item.
Tap Start. The device will reset (unless you have disabled this
option), and the test will start automatically. Follow the instructions to
complete the test.
NOTE: When Diagnostics finishes running, it displays the result of each
test item. You can also choose to save the results as a log file. This is
stored in My Documents on your device.
Reset your password and owner identification settings.
To read the Diagnostics log file on your Compaq Aero 2100 Series,
follow these steps:
In Note Taker, tap ToolsààOptionsààFile tab.
Select Show all file types. Tap OK.
Double tap on the DIAGNOSTICS file.
To read the diagnostics log file on your desktop PC, follow these steps:
Connect your device to your desktop PC, then use ActiveSync to copy
the file from My Documents on your device, to your desktop PC.
On your desktop PC, open the DIAGNOSTICS.log file in WordPad.
CF Backup/Restore
The CF Backup utility in the QUtilities lets you back up and restore data
using a CompactFlash storage card. To access it, tap Q
Backup tab.
For more information, see Chapter 5, "Backup and Restore."
ààQUtilitiesààCF
Page 68

Game Keys
The Game Keys feature in the QUtilities lets you play your favorite game
applications with ease on the Aero 2100. This feature switches the
program buttons to directional controls, letting you move up, down, left,
and right within a game.
To use the program buttons as directional controls, tap QààQUtilities,
select the Game Keys tab, then select Enable. There is no need to
reset your device after enabling or disabling the Game Keys feature.
When the Game Keys are enabled, an arrow icon appears on the
taskbar. You can quickly disable the Game Keys by tapping the arrow
icon then tapping Disable.
The buttons are reprogrammed as illustrated below:
Game Keys Tab
Page 69

USING THE OWNER PROPERTIES WINDOW
The Owner Properties window allows you to display personal
identification on the Active Desktop and in Asset Viewer. To enter your
information in the Owner Properties window, follow these steps:
Tap StartààSettingsààOwner.
Type the requested information in each box.
To view this information as a welcome screen every time you start the
device, select the Display owner identification box at the bottom of
the screen. You can adjust your owner information by tapping on this
welcome screen.
SETTING NOTIFICATION ALARMS
You can set up notification alarms on your Aero 2100. The device alerts
you of important appointments or reminders with the following alarms:
Flashing green alarm light on the top of the device.
Pop-up message on the display.
Audio alarm or vibration alarm.
You can choose the manner to be notified for each particular appointment
or reminder. When you set an alarm, tap the alarm icon to set the
Notification Options.
If you check the audio box, the device sounds an audio alarm but not a
vibratory alarm. If you deselect the audio box, the device gives a
vibratory alarm, but not an audio alarm.
Sound & Vibratory Alarm Status
Audio box checked Audio alarm on, vibratory alarm off.
Audio box unchecked Vibratory alarm on, audio alarm off.
Page 70

You can install an alarm using the following three applications: the World
Clock, Calendar and Tasks. An alarm set in the World Clock recurs on
a daily basis. An alarm set in the Calendar or Tasks occurs once on a
given date and time.
Setting an Alarm in Calendar
To set an alarm for an event in your Calendar, add the calendar entry you
want to be reminded of, and set the alarm by checking the Remind me
box. You can set the alarm properties by tapping on the alarm icon, then
tapping the Reminder Options button. For more information on setting
an alarm through the Calendar, see the Help installed on the device.
Appointment Screen
Page 71
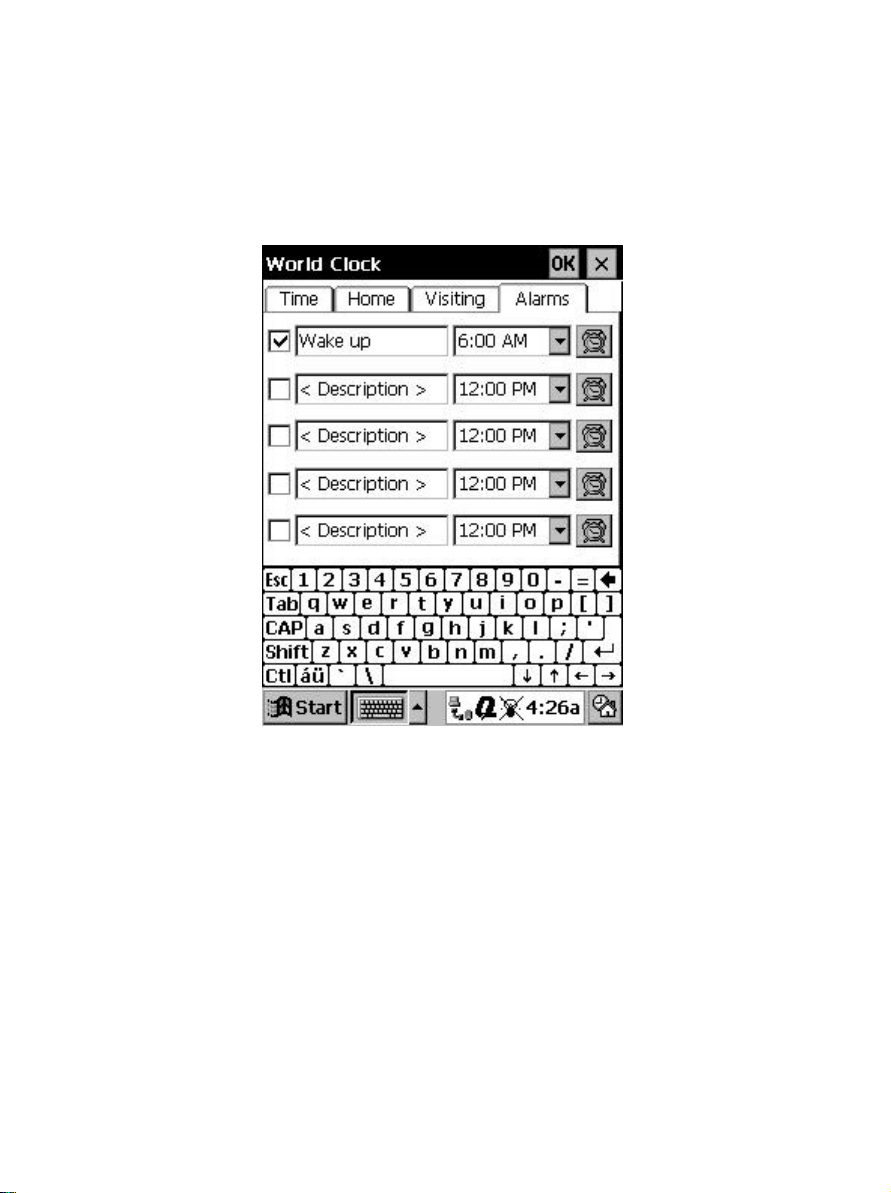
Setting an Alarm in World Clock
To set a general alarm, tap StartààSettingsààWorld Clock, then tap the
Alarms tab. Use the drop down menus to set the alarm, then tap the
Alarm Clock icon on the right side of the menu to set the Notification
Options.
World Clock (Alarms Tab) Screen
Page 72

SETTING A PASSWORD
To help protect against unauthorized use of your Compaq Aero 2100
Series, password security is provided. For immediate protection, Compaq
recommends setting up the password security through the Password
utility in the Settings of your device as soon as possible. If set, your login
password must be entered to access Windows CE. This occurs each time
that you turn on your device.
CAUTION: Choose a password that's easy to remember. If you forget
it, you must perform a full reset to use your device again. A full reset
restarts your device and removes all information that was stored in
memory, such as your data files and your system settings.
To set your login password, follow these steps:
On your device, tap StartààSettingsààPassword.
If a password has been previously set, the Enter Password dialog
appears. Enter the password and tap the OK button. This gives you
access to the rest of the Password application. This step is necessary
only if a password has been previously set.
To set a new password or change an existing password, type the new
password into the Password box, then into the Confirm box.
Enable the login password by checking the Enable password
protection at power-on box. This causes a password prompt to
appear each time you turn on the device.
Save your new settings by tapping OK.
Your login password is now set. The login password screen appears each
time you turn on your device.
Page 73

USING FILE EXPLORER
Use File Explorer to navigate among and manage the files stored on your
Compaq Aero 2100 Series.
To access the File Explorer, tap QààFile Explorer. (If the Q icon
does not appear on the taskbar, tap Start
A split screen will appear. The top half of the screen contains a complete
hierarchical list of all the folders on your device. The bottom half of the
screen contains a list of the items contained within the folder that is
selected in the top half of the screen.
ààQLaunch.)
File Explorer Screen
To make either half of the screen larger, use your stylus to tap and drag
the divider up or down.
Page 74

To change the appearance of the lists, use the options provided in the
View menu. Selecting the Details option in the View menu allows you to
view information about highlighted items, such as file size, file type, and
the date the file was last modified.
Navigating among Your Files
You can navigate among the folders and files on your Aero 2100.
In the top half of the screen, tap the plus sign (+) to the left of the
folder's name to open a folder. When the folder is open, you can view
its contents in the bottom half of the screen. Tap the minus sign (-) to
the left of the folder's name to close the folder.
In the bottom half of the screen, you can double-tap a folder's name to
view its contents. Double-tap a file's name to open that file.
Organizing Your Files
Use the File and Edit menus to organize the folders and files on your
device.
In the File menu, you can:
Create a new folder or shortcut.
Open, delete, rename, or view the properties of a highlighted folder or
file. (Tap the item's name to highlight it.)
In the Edit menu, you can:
Cut, copy, or paste a highlighted item. (Tap the item's name to
highlight it.)
Paste a shortcut.
Select all the items displayed in the bottom half of the screen.
Page 75

Managing a Network Connection
The File Explorer is also useful if your Aero 2100 is connected to a
network via your desktop computer. File Explorer allows you to browse
shared network resources and connect to those resources provided you
have the rights to do so.
You must have established a network connection by either dial-up or
LAN card. You must have pre-configured RAS on the desktop to
allow RAS clients to access the entire network. For more information
see "Connecting to a Network" in Chapter 15 and ActiveSync Help
on your desktop PC.
To browse the network, use Network Neighborhood in the top pane.
You can use the Tools menu to configure, map, or disconnect your
network connection, or to find an individual computer on the network.
To map a network connection, tap ToolsààMap Network
Connection.
The mapped connections are visible under Remote Folders in the top
pane. Mapped network connections are restored the next time a new
network connection is made when File Explorer is running.
Page 76

chapter 5
BACKUP AND RESTORE
The Compaq Aero 2100 Series stores your personal information, data you
have entered, and third-party applications you have installed, in the
device’s RAM (random access memory). However, a power loss or other
disruption of power can cause your data to be lost. You can back up and
restore your device's data using the following utilities:
ActiveSync Backup/Restore. Use this ActiveSync utility to
periodically back up your device's data onto your desktop computer’s
hard drive. You can manually back up data or set this utility to back
up automatically each time you connect to your Palm-size PC. For
more information, see ActiveSync Help on your desktop PC.
CF Backup/Restore. This utility, preinstalled on your Compaq Aero
2100 Series, lets you back up and restore your entire Palm-size PC
memory contents to a CompactFlash storage card (purchased
separately). You can then carry a CompactFlash card–based copy of
your data with you at all times for quick retrieval.
NOTE: To avoid losing your data in the event that your Palm-size PC is
lost, stolen, or becomes defective, Compaq recommends periodic backups
to the desktop computer or a CompactFlash card. Depending on your
usage, you may want to perform a backup as often as once a day.
This chapter describes the following features:
using CF Backup/Restore
backing up data to a CF card
restoring data from a CF card
Page 77

USING CF BACKUP/RESTORE
Use CF Backup/Restore to save the entire contents of your Compaq Aero
2100 Series memory to a CompactFlash storage card (purchased
separately), which can be carried everywhere your device goes for easy
retrieval while on the road.
NOTE: These utilities are designed for use with CompactFlash storage
cards that are approved by Microsoft as Windows CE 2.0 compatible. You
should use a card at least as big as your device's RAM (Random Access
Memory) size, e.g., 16 or 24 MB. For information on ordering a Compaq
CompactFlash storage card, see the Accessories Information flier included
in the shipping box. For a list of other Compaq-tested CompactFlash
cards, visit the Compaq Aero 2100 Series home page at
www.compaq.com/products.
BACKING UP DATA TO A CF CARD
Each time you use the CF Backup utility, your data files, databases,
preferences, Windows CE system data, and applications are copied to the
CompactFlash storage card. The subdirectories on your Compaq Aero
2100 Series are also duplicated on the storage card.
To perform a backup:
Connect to external power or verify that you have good batteries in
your device.
Insert the CompactFlash storage card into the card slot on your device,
as described in "Inserting a CompactFlash Card" in Chapter 12.
Close all active programs before proceeding. Tap QààClose all tasks.
Tap QààQUtilitiesààCF Backup tab. Tap Backup.
Page 78

The screen displays a list of all the items that will be backed up, so it
is easy to identify the data and size that is saved to the CompactFlash
storage card.
CF Backup/Restore Utility (Backup Tab) Screen
Tap the Start button to begin the backup process. A status bar reports
the data activity until the function is complete.
When backup is complete, remove the CompactFlash storage card and
keep it close for easy retrieval.
Page 79

RESTORING DATA FROM A CF CARD
To restore a backup onto your Compaq Aero 2100 Series:
Turn on the device and insert the CompactFlash storage card into the
card slot.
Close all active programs before proceeding. Tap QààClose all tasks.
Tap QààQUtilitiesààCF Backup tab.
Tap Restore.
Tap the Start button to begin the restore process. A status bar reports
the data activity until the function is complete.
When the restore process is complete, press the reset button to restart
your device.
CF Backup/Restore Utility (Restore Tab) Screen
Page 80

chapter 6
POCKET OUTLOOK
The Microsoft Pocket Outlook program includes Calendar, Contacts,
Tasks, and Inbox. Using ActiveSync, you can synchronize information in
Microsoft Outlook, Microsoft Schedule+, or Microsoft Exchange on your
desktop computer with your device. Each time you synchronize,
ActiveSync compares the changes you made on your device and desktop
computer and updates both computers. For more information on
synchronization, see ActiveSync Help on your desktop computer.
Calendar, Contacts, and Tasks have a card view and a list view. The
card view is where you enter or view the details for each entry. The list
view is where you view all entries. With Inbox, you can send and receive
e-mail messages through synchronization with either Outlook or Exchange
on your desktop computer, or by connecting directly to your mail server
through an ISP or network account.
You can switch to these programs at any time by tapping them on the
Start menu. Calendar, Contacts, and Tasks can also be started by using
the program buttons.
NOTE: More information on the procedures described in this chapter, as
well as information on additional procedures, can be found in online Help
on the device. Tap Start
information.
ààHelp, then the item on which you want
Page 81

This chapter describes the following features:
program buttons
Calendar application
Contacts
Tasks
Inbox
using Inbox with a remote connection
Page 82

PROGRAM BUTTONS
The four program buttons are located just below the screen on your
Compaq Aero 2100 Series. The program buttons act as shortcuts to
frequently used applications so that you can start the application without
selecting from the Start menu.
NOTE: When a program button shortcuts to an application that has a list
view and a card view (such as Contacts or Calendar) you can create a new
card by holding the program button down for a few seconds.
Icons are inscribed beside the program buttons
application that can be started by each of the buttons.
Ê to indicate the
Program Buttons
Ê
Page 83

Program Button Description
Opens the Calendar application.
Opens the Contacts application.
Opens the Tasks application.
Opens the Note Taker application.
Changing the Program Button Shortcuts
You can change the shortcuts of the program buttons so that they open
different applications.
Tap on StartààSettingsààButtons.
In the Button Properties screen, tap the Program tab.
Highlight the button that you want to change by tapping with the
stylus. Use the icons to identify the buttons numbered 1 to 5. Note that
you can also change the shortcut of the Voice Recorder button.
In the Button Assignment drop down menu, select the new
application that you want to be associated with the highlighted button
by tapping it with the stylus.
Tap the OK button to close the Button Properties screen.
NOTE: The Game Keys feature in the QUtilities lets you switch the four
program buttons to directional controls. For more information, see "Game
Keys" in Chapter 4.
Page 84

CALENDAR APPLICATION
Use Calendar to schedule appointments, meetings, and other events.
Check your appointments in one of several views (Day, Week, Month,
Year, and Agenda). Switch among the views by tapping the corresponding
command bar button.
NOTE: You can display current appointments on your Active Desktop. Tap
Start
ààSettingsààDisplayààActive Desktop, then select Appointments.
Calendar Screen
Enter the details for an appointment on the appointment card.
Page 85

NOTE: You can quickly display a new appointment card by pressing and
holding the Calendar program button.
Appointment Screen
If you need to schedule a meeting with people who use Outlook, Pocket
Outlook, or Schedule+, you can use Calendar to schedule the meeting.
When attendees receive a meeting request, they can accept or decline the
meeting. If they accept, the meeting is automatically added to their
schedule. In addition, their response is automatically sent back to you, and
your calendar is updated the next time you connect to your mail server or
synchronize with your desktop computer.
Before you can send a meeting request, enter e-mail addresses in Contacts
and set up Inbox to send and receive messages.
Page 86

To create a meeting request:
Tap ToolsààOptions, then select a mail transport. If you send and
receive messages using synchronization, select Windows CE Inbox
Services. If you connect to an ISP or network, select the service you
set up in Inbox.
Tap File then Make Meeting.
Enter the meeting information.
Select the contacts you want to invite.
Select other desired options then tap OK.
Inbox automatically creates a meeting request and sends it to the attendees
the next time you connect to your mail server or synchronize with your
desktop computer.
NOTE: Your device reminds you about your appointments and meetings by
sounding an alarm, flashing the notification light, or displaying a message
on the screen. To change how you are notified, tap Tools
the Alarm button, then Reminder Options.
ààOptions. Tap
CONTACTS
Contacts maintains a list of your friends and colleagues so that you can
easily find the information you’re looking for, whether you’re at home or
on the road. Using the IR port of the Compaq Aero 2100 Series, you can
also quickly share Contacts information with other Windows CE-based
mobile device users.
NOTE: You can quickly create a contact card by pressing and holding the
Contacts program button.
Page 87

Contacts Screen
Enter the details for a contact on the contact card. You can enter both
business and personal information.
NOTE: To change the type of information that appears in your list, tap
Tools
ààCustomize Columns.
Contact Details Screen
Page 88

TASKS
Use Tasks to keep track of what tasks you have to perform. Overdue tasks
are displayed in red.
Tasks Screen
Enter the details for a task on the task card. You can assign a task to a
category, and if you associate a date with a task, you can set a reminder
for it.
Task Details Screen
Page 89

All active tasks (tasks that have a start date before the current date and are
not marked completed) are displayed in the Active Tasks box in the
Agenda view of Calendar.
INBOX
Use Inbox to send and receive e-mail messages by:
Synchronizing messages with Microsoft Exchange or Microsoft
Outlook on your desktop computer.
Sending and receiving messages using a dial-up connection to an ISP
or a network.
Synchronize Messages
E-mail messages can be synchronized as part of the general
synchronization process. During synchronization:
Messages are copied from the Inbox folder of Exchange or Outlook on
your desktop computer to the Inbox folder on your device. The
messages on the two computers are linked, so when you delete a
message on your device, it’s deleted from your desktop computer as
well the next time you synchronize.
Messages in the Outbox folder on your device are transferred to
Exchange or Outlook, then sent from those programs.
Features available on your desktop computer, such as scheduling meetings
and selective downloading of file attachments, are also available on your
device.
By default, e-mail synchronization is disabled. To enable e-mail
synchronization, see ActiveSync Help on your desktop computer.
Page 90

Send e-mail remotely
In addition to exchanging e-mail messages with your desktop computer,
you can send and receive mail from a remote mail server by setting up an
e-mail account with an Internet service provider (ISP).
NOTE: If you are setting up an ISP, the ISP must use a POP3 mail server
and an SMTP mail gateway.
You need a modem for your device for dial-up connections. You also
need to set up the remote connection on your device using the
Connections program.
Set up remote mail
You can use multiple mail services to receive your mail. For each mail
service you intend to use, first set up and name the mail service. If you use
the same service to connect to different mailboxes, set up and name each
mailbox connection.
In Inbox on your device, tap Compose
the Add button. A setup wizard guides you through the steps.
ààOptions, the Services tab, then
Inbox Options Screen
The software for creating an ISP connection is already installed on your
device.
Page 91

For more information on working with Inbox remotely, see Chapter 15,
"Getting Connected Remotely."
USING INBOX WITH A REMOTE
CONNECTION
The mail that you receive using a dial-up connection appears in the Inbox
folder on your device, together with the mail you synchronize with your
desktop computer. Messages that you receive remotely are linked to your
mail server rather than your desktop computer.
You can work online, which means that you read and respond to messages
while connected to the server. Messages are sent as soon as you tap Send,
which saves space on your device.
You can also work offline. Once you’ve downloaded new message
headers or partial messages, you can disconnect from the server then
decide which messages to download completely. The next time you
connect, Inbox downloads the complete messages you’ve marked for
retrieval and sends the messages you’ve composed.
Page 92

Receive messages
When you receive a message, double-tap it to open it.
Inbox Message Screen
When you connect to your Internet mail service, by default Inbox
downloads only the first 100 lines of each new message to the Inbox
folder. No mail attachments are downloaded. When you synchronize with
your desktop computer, only the first 50 lines of each new message are
downloaded. The original messages remain on the mail server or your
desktop computer.
Page 93
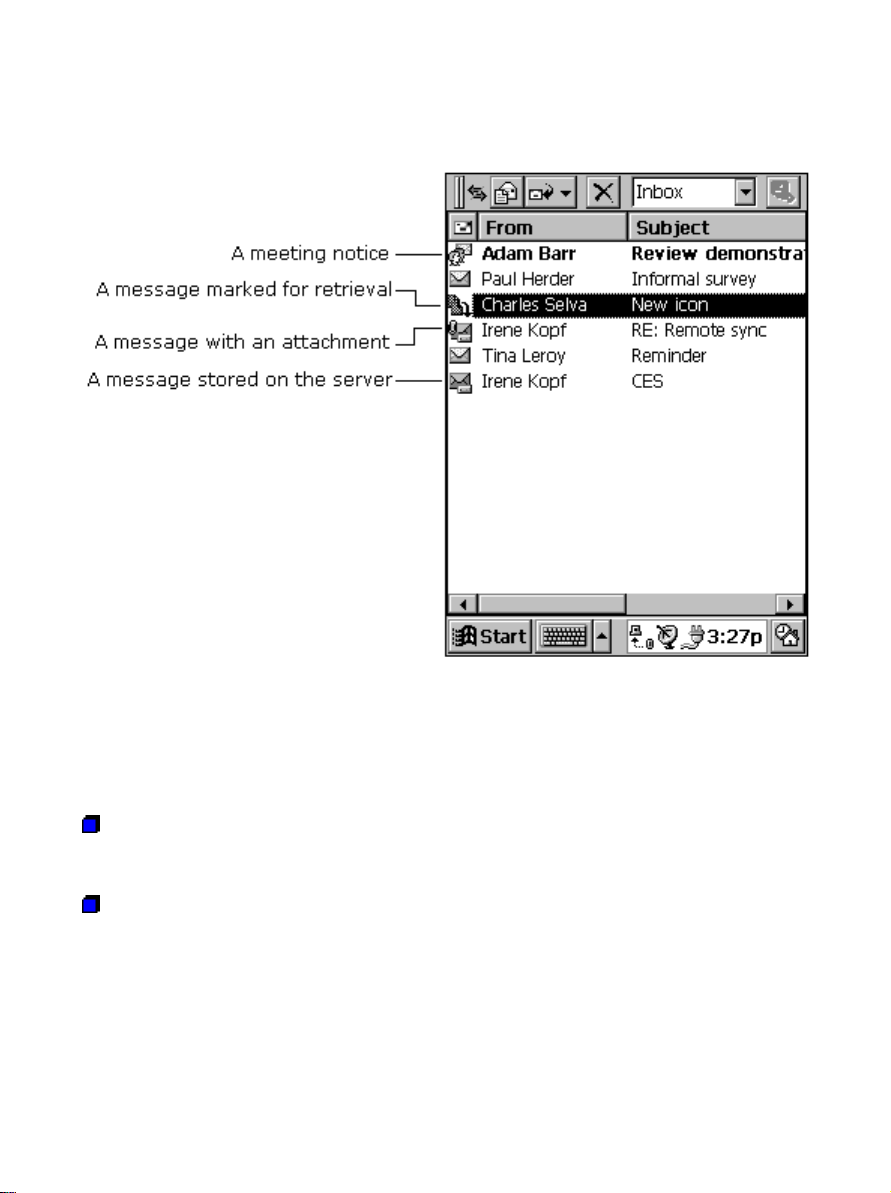
You can mark the messages that you want to retrieve in their entirety the
next time you synchronize or connect to your mail service. Select the
message, tap Service
message list give you visual indications of message status.
ààRetrieve Full Copy. The icons in the Inbox
Inbox Screen
You specify your downloading preferences when you set up the service or
select your synchronization options. You can change them at any time.
To change Inbox delivery options for mail synchronization, see
ActiveSync Help on your desktop computer.
To change Inbox delivery options for remote mail, in Inbox on your
device, tap Service then the service name. Then tap Service again and
tap Properties.
You’ll need to download a full message before you can view its
attachments.
Page 94

Microsoft Exchange users can use Inbox to schedule meetings remotely.
Your network administrator must enable Microsoft rich text support for
any accounts that are accessed by mobile device users.
To process meeting requests, download the complete message, either by
marking specific messages for downloading or by choosing to download
all messages completely during the service setup. In addition, make sure
to enable the Meeting Requests option during the service setup.
Send messages
To compose a new message, tap the New Message button on the toolbar.
You can enter an e-mail address in the To box, or select a name from the
Address Book. All e-mail addresses entered in the e-mail fields in
Contacts appear in the Address Book.
To send your message, tap File
Outbox folder on your device and are delivered to their destination in one
of the following two ways:
They are transferred to the Outbox folder in Exchange or Outlook on
your desktop computer the next time you synchronize.
They are transmitted to your mail server the next time you connect
remotely. In Inbox, make sure the appropriate service is selected on
the Service menu. Then tap Connect.
ààSend. Messages are placed in your
Page 95

Inbox New Message Screen
Page 96

chapter 7
VOICE RECORDER
Voice Recorder is a program for quickly capturing your ideas and
thoughts, reminders, and phone numbers. Use it in the way that’s most
convenient for you by using the hardware buttons on your device or using
the buttons on your screen.
NOTE: More information on the procedures described in this topic, as well
as information on additional procedures, can be found in online Help on
the device. Select Start
information.
This chapter describes the following features:
using the hardware buttons
ààHelp, then the program on which you want
using the screen buttons
settings and organization
Page 97

USING THE HARDWARE BUTTONS
Ê
Ë
You can use the buttons on your device to record and play recordings
using only one hand.
Item Component Function
Ê
Ë
Voice Recorder button
Action button
Voice Recorder Hardware Buttons
Make a recording
Press and hold the Voice Recorder
button to record. Release to stop
recording.
Press the Action button to play. Press
again to pause. Press once more to
resume.
To Do this
Record
Stop recording
Press and hold the Voice Recorder program
button. You’ll hear one beep when it’s ready to
record.
Release the Voice Recorder program button.
You’ll hear two beeps when recording stops.
Page 98

Play a recording
To Do this
Play
Pause/Resume
Stop
Play all
NOTE: If you are playing a recording on your Aero 2100 under battery
power, the display will automatically turn off after 1 minute if there has
been no input to the device. The display will turn back on once the audio
file has finished playing.
While the recording is selected, press the Action
button.
Press the Action button.
Press the Exit button (returns to the beginning of
the recording).
Press the Action button twice (plays all
messages in the list).
Navigate
To Do this
Fast-forward, while
playing
Rewind, while playing
Press and hold the Up/Down control in the down
position. (Mobile Voice files only)
Press and hold the Up/Down control in the up
position. (Mobile Voice files only)
Scroll through the list of
recordings
IMPORTANT: When using earphones, unplug them from the device before
using Voice Recorder to make a recording.
Press and quickly release the appropriate
position on the Up/Down control.
Page 99

USING THE SCREEN BUTTONS
Instead of using the device buttons, you can tap the buttons on your screen
to record and play your recordings. A progress bar and a status bar
provide visual indications of the process.
Voice Recorder Screen
NOTE: To skip part of a recording, move the slider to any place in the
recording before you play it.
If you play a recording that lasts longer than a minute, the device will
automatically turn off the screen display after one minute in order to
conserve battery charge. You can turn the screen display back on by
tapping anywhere on the screen, or by pressing any button (other than the
power button). The display turns on automatically when the recording has
finished playing.
Page 100

SETTINGS AND ORGANIZATION
Adjusting memory
If your device runs out of memory while recording, you’ll hear several
beeps and see an out-of-memory message on your screen. You can adjust
the allocation of memory on your device by tapping Start
System, then the Memory tab. If you run out of memory frequently, you
might consider buying a CompactFlash storage card for your device.
NOTE: Voice Recorder uses approximately 8 Kb per second for recording
using the default PCM format. For example, a 10-second note uses
approximately 80Kb.
Choosing a recording format
Voice Recorder uses a format called PCM to ensure the best sound
quality. You can also use the alternative Mobile Voice codec, which
makes recordings 25 times smaller than the original size. This enables you
to store more recordings, although the sound quality is less than optimal.
For the best sound quality, use the default PCM format. These files are
larger than those stored in Mobile Voice format. To switch formats, tap
Tools then Recording Format.
ààSettingsàà
Organizing recordings
Your recordings are saved automatically and given the default names
Recording1, Recording2, etc. These recordings are listed in the Voice
Recorder window. To quickly rename a recording, tap it to select it, tap it
again, then enter the new name.
You can organize your recordings by renaming and placing them in
folders. For example, you can create a folder called My Novel and place
all relevant recordings in that folder.
 Loading...