

Page 1

HP Designjet 9000s Printer series
User's Guide
Page 2

Legal notices
The information contained in this document
is subject to change without notice.
Hewlett-Packard makes no warranty of any
kind with regard to this material, including,
but not limited to, the implied warranties of
merchantability and fitness for a particular
purpose.
Hewlett-Packard shall not be liable for
errors contained herein or for incidental or
consequential damages in connection with
the furnishing, performance, or use of this
material.
No part of this document may be
photocopied or translated to another
language without the prior written consent
of Hewlett-Packard Company.
Page 3

Table of contents
1 Introduction
Using this guide.................................................................................................................................2
Introduction.................................................................................................................2
How do I ....................................................................................................................2
The problem is ...........................................................................................................2
Tell me about .............................................................................................................2
Index..........................................................................................................................2
The printer's main components..........................................................................................................2
Front view...................................................................................................................3
Rear view...................................................................................................................4
The heaters................................................................................................................4
The printer's front panel.....................................................................................................................5
Basic printer operations and keys......................................................................................................8
The heater's front panel.....................................................................................................................9
Defining heater parameters.............................................................................................................10
Safety precautions...........................................................................................................................10
General warnings.....................................................................................................10
General cautions......................................................................................................12
Handling precautions.......................................................................................................................13
Power supply............................................................................................................13
Printer.......................................................................................................................13
Regular inspection and maintenance........................................................................13
Consumables...........................................................................................................13
2 How do I perform basic operations?
Connect to a computer.....................................................................................................................15
Choose the system configuration..............................................................................15
Connection procedure..............................................................................................15
Turn the power on/off.......................................................................................................................16
Turn on the printer....................................................................................................16
Turn on the heater....................................................................................................19
Turn the power off....................................................................................................19
Turn off the printer.............................................................................19
Turn off the heater.............................................................................20
3 How do I load/unload media?
ENWW iii
Install a media roll in the printer.......................................................................................................24
Remove a media roll from the printer...............................................................................................32
Replace a jammed media roll...........................................................................................................33
Page 4

Load cut sheet.................................................................................................................................34
Use the take-up reel........................................................................................................................39
Set the take-up reel winding direction.......................................................................39
Define the take-up reel winding mode.......................................................................41
Load media on to the take-up reel............................................................................43
Use the media edge guard...............................................................................................................47
Set the fan guard lever.....................................................................................................................49
4 How do I... (printing topics)
Perform a manual media feed..........................................................................................................51
Use manual nesting.........................................................................................................................52
Increase/reduce pressure on media.................................................................................................55
Pause or cancel print jobs................................................................................................................56
5 How do I… (ink topics)
Replace an ink cartridge..................................................................................................................59
Change the printhead height............................................................................................................61
6 How do I maintain the printer?
Regular maintenance guide.............................................................................................................65
Daily printhead maintenance...........................................................................................................66
Wiper blade cleaning................................................................................................67
Capping unit cleaning...............................................................................................72
Leave the printer off for two to four weeks.......................................................................................74
Ink system storage...................................................................................................75
Leave the printer off for less than two weeks...................................................................................76
Clean ink system......................................................................................................76
Charge the ink system.....................................................................................................................77
Clean the exterior of the printer........................................................................................................77
Clean the rear cover and media feed...............................................................................................78
Clean the platen...............................................................................................................................78
Replace the waste ink bottle............................................................................................................80
Normal printhead recovery...............................................................................................................83
IQ Print............................................................................................................................................85
7 How do I get the best image quality?
Print the Image Quality print............................................................................................................88
Interpret the image quality print........................................................................................................90
Manage media types.......................................................................................................................91
Copy a media type to create a new one....................................................................91
Create a new media type..........................................................................................92
Modify media type settings.......................................................................................93
Delete a media type..................................................................................................94
Calibrate the printer.........................................................................................................................95
Calibrate media advance..........................................................................................95
Perform printhead position adjustment.....................................................................98
Back feed adjustment print.......................................................................................99
Adjust heater and print mode settings............................................................................................101
iv ENWW
Page 5

8 The problem is… (troubleshooting topics)
The problem is… (checklist)...........................................................................................................104
A head crash.................................................................................................................................105
Ink cartridge is not installed...........................................................................................................108
Ink cartridge is not detected...........................................................................................................108
Ink cartridge is near expiry date.....................................................................................................108
Ink cartridge has passed its expiry date.........................................................................................109
An error message..........................................................................................................................109
Service errors.........................................................................................................109
POC error messages.......................................................................110
Engine error messages...................................................................110
System error messages...................................................................110
Operator error messages........................................................................................110
Ink cartridge....................................................................................110
Waste ink bottle is not installed.......................................................112
Waste ink bottle is full......................................................................112
Media crash.....................................................................................112
Media..............................................................................................112
Other messages..............................................................................113
An abnormal sound........................................................................................................................114
9 The problem is print quality
The ink LED flashes.................................................112
Error LED is flashing................................................113
10 Tell me about… (basic knowledge topics)
Operating conditions......................................................................................................................118
Installation space....................................................................................................118
Environmental conditions........................................................................................118
Operating temperature and humidity levels.....................................118
Places where the printer must not be installed................................119
The power supply..........................................................................................................................119
Power ....................................................................................................................119
Dryer......................................................................................................................120
Exhaust attachment................................................................................................120
Front panel messages and printer state.........................................................................................120
Messages on the front panel...................................................................................120
Initialization display.........................................................................120
Online state (idle mode) display......................................................121
Online state (print mode) display.....................................................121
Online state (print pause mode) display..........................................121
Print stop and resume..............................................121
Print cancel (end).....................................................121
Online state (print information mode) display...................................122
Offline (menu mode) display............................................................122
Shutdown state display....................................................................123
11 Tell me about media
Storing media................................................................................................................................125
ENWW v
Page 6

Disposing of media........................................................................................................................125
Using media...................................................................................................................................126
Handling prints...............................................................................................................................126
Other precautions..........................................................................................................................126
12 Tell me about the ink system
Ink cartridges.................................................................................................................................127
Replacing an ink cartridge.............................................................................................................129
Ink cartridge storage and disposal.................................................................................................130
HP 790 Waste Ink Bottle................................................................................................................131
Precautions for handling the waste ink bottle..........................................................131
HP 790 Cap Cleaning Liquid..........................................................................................................131
HP 790 Wiper Cleaning Liquid and Dropper..................................................................................132
HP Cleaning Swabs.......................................................................................................................132
HP 790 Storage Kit........................................................................................................................132
HP 790 Ink System Cleaning Kit....................................................................................................133
13 Tell me about waste management
General recommendations.............................................................................................................136
14 Tell me about front panel menus
Menu operations............................................................................................................................140
Menu structure........................................................................................................140
The INK menu & messages...........................................................................................................143
Replacing an empty ink cartridge............................................................................143
Replacing ink cartridges during printing..................................................................143
The MEDIA menu..........................................................................................................................144
The MEDIA REG menu..................................................................................................................145
Selecting a media type number (SELECT MEDIA).................................................146
Setting a media type name (RENAME MEDIA)....................................................... 146
Media advance value (MEDIA ADV VALUE)..........................................................146
Manufacturing default media advance value (MFNG VAL).....................................147
Dry time value (DRY TIME VALUE)........................................................................147
Print mode setting (PRINT MODE).........................................................................147
Print direction setting (PRINT DIRECTION)............................................................147
Flatten time (FLATTEN TIME) ...............................................................................148
Use media edge guard (USE EDGE GUARD)........................................................149
Media advance mode (MEDIA ADV MODE)...........................................................149
Take-up reel mode (TUR MODE)...........................................................................149
Leading edge mode (LEADING EDGE)..................................................................150
Vacuum level setting (VACUUM LEVEL)................................................................150
Initial temperature setting for the front heater (FRONT HEATER T)........................151
Initial temperature setting for the print heater (PRINT HEATER T).........................151
Making front panel selections and settings......................................140
To define a setting....................................................140
To define a value......................................................141
Character list............................................................142
The ink cover is open......................................................................144
The ink cartridge is empty...............................................................144
vi ENWW
Page 7

Initial temperature setting for the rear heater (REAR HEATER T)...........................151
Color stripe setting (COLOR STRIPE)....................................................................152
Printhead firing mode setting (IMAGE GRADIENT)................................................152
Printhead height setting (PH HEIGHT VAL)............................................................153
Bidirectional print position (Left) adjustment (YY BIDIR DEF(L)).............................153
Bidirectional print position (Right) adjustment (YY BIDIR DEF(R))..........................153
Printhead cleaning mode (PH CLEANING).............................................................154
Media back feed adjustment (BACK ADJUST VAL)................................................154
Media advance preference (ADVANCE PREF)....................................................... 155
Print mode preference (PRINT MODE PREF)........................................................155
Heater preference (HEATER PREF).......................................................................155
Printhead rest period (PH REST PERIOD).............................................................155
Printhead rest time (PH REST TIME).....................................................................156
Printhead temperature rest (PH TEMP REST)........................................................156
Deleting a media type (DELETE MEDIA)................................................................156
Copying a media type (COPY MEDIA)...................................................................156
Pasting a media type (PASTE MEDIA)...................................................................156
Default values for media types................................................................................156
Media advance calibration.............................................................................................................158
Media advance calibration print..............................................................................158
Back feed adjustment print.....................................................................................158
Media back feed adjustment value..........................................................................159
The PH. MAIN menu......................................................................................................................159
Ink system optimization (INK SYS OPT).................................................................159
Cap cleaning (CAP CLEANING).............................................................................160
Wiper cleaning (WIPER CLEANING)......................................................................160
Washing printheads (WASH PRINTHEADS)..........................................................160
Printhead height (PH HEIGHT ADJ).......................................................................161
The PH.RECOVERY menu............................................................................................................161
The FEED menu............................................................................................................................161
The PRINTER menu......................................................................................................................162
Configuration print (CONFIG PRINT)......................................................................162
Error log information print (ERROR LOG PRINT)...................................................162
History print (HISTORY PRINT)..............................................................................162
The ADJUST menu........................................................................................................................163
Adjustment pattern print (TEST PRINTS)...............................................................163
Printhead nozzle position adjustment (#YY PH ROW VAL)....................................163
Printhead position adjustment (#YY PH TO PH VAL).............................................163
Bidirectional print position (Left) adjustment (YY BIDIR DEF(L)).............................164
Bidirectional print position (Right) adjustment (YY BIDIR DEF(R))..........................164
Bidirectional print position (Left) adjustment (YY BIDIR F.D (L)).............................164
Bidirectional print position (Right) adjustment (YY BIDIR F.D (R))..........................165
The SETUP menu..........................................................................................................................165
Language for front panel (LANGUAGE)..................................................................165
BOOT version display (BOOT VERSION)...............................................................165
Acoustic warning (BEEP)........................................................................................165
F/W version display (F/W VERSION)......................................................................166
Main PCA version display (MAIN PCA VER)..........................................................166
ICB board version display (CARRIAGE PCA).........................................................166
ASIC version display (ASIC VER)...........................................................................166
ENWW vii
Page 8

Heater H/W version display (HEATER HW VER)....................................................166
Heater F/W version display (HEATER FW VER)....................................................167
System date setting (SYSTEM DATE)....................................................................167
System time setting (SYSTEM TIME).....................................................................167
Factory default setting (FACTORY DEFAULT).......................................................167
USB address (USB ADDRESS)..............................................................................167
USB speed (USB SPEED)......................................................................................168
15 Tell me about the heaters
The heaters...................................................................................................................................169
Heater temperature settings...........................................................................................................170
Heater preset temperature by medium...................................................................171
Flow of heater temperature setting.........................................................................172
Temperature control...............................................................................................172
Maintaining the preset temperature.................................................172
Maintaining the standby temperature...............................................173
Turning off the heaters....................................................................173
The heater front panel............................................................................................173
Display in normal mode...................................................................173
Display — heater on........................................................................174
Display — heater off........................................................................174
Display — heater AC power is turned off.........................................174
Heater parameter setup mode................................................................................174
Setup items and parameters............................................................174
Heater error messages..................................................................................................................175
16 Tell me about printer specifications
Specifications................................................................................................................................178
Ecological specifications................................................................................................................179
17 Tell me about ordering supplies and accessories
Ordering supplies...........................................................................................................................182
Ordering media..............................................................................................................................182
Ordering accessories.....................................................................................................................183
18 Tell me about getting help
HP Customer Care........................................................................................................................185
HP Designjet Online......................................................................................................................186
Index....................................................................................................................................................................187
viii ENWW
Page 9

1 Introduction
Using this guide
●
● The printer's main components
● The printer's front panel
Basic printer operations and keys
●
The heater's front panel
●
● Defining heater parameters
● Safety precautions
Handling precautions
●
ENWW 1
Page 10

Using this guide
Using your printer is organized into the following chapters.
Introduction
This chapter provides a brief introduction to the printer and its documentation for new users.
How do I ...
These chapters help you to carry out various procedures such as loading media or changing an ink
cartridge. Many of these procedures are illustrated with drawings.
The problem is ...
These chapters help you to solve problems that may occur while printing.
Tell me about ...
These chapters contain reference information, including the specifications of the printer, and the part
numbers of media types, ink supplies, and other accessories.
Index
In addition to the table of contents, there is an alphabetical index to help you to find topics quickly.
The printer's main components
The following front and rear views of the printer illustrate the main components.
2 Chapter 1 Introduction ENWW
Page 11

Front view
1. Printer front panel
2. Heater front panel
3. Ink supply station
4. Media hub
5. Wheel lock
6. Media pressure lever
7. Media load lever
8. Media End (ME) lever
9. Roll
ENWW The printer's main components 3
Page 12

Rear view
1. Printer power socket
2. Printer power on/off switch
3. Rear cover
4. USB port
5. Not used
6. Media output
7. Waste ink bottle
8. 100 V / 200 V alternation switch
9. Heater power on/off switch
10. Heater power socket
11. Cap cover
12. Wiper cover
13. Printer Online — Cancel keys
14. Fan guard lever
15. Printhead height lever
The heaters
The printer includes three heaters for fixing and stabilizing the printed image on the media. Each heater
is controlled separately.
4 Chapter 1 Introduction ENWW
Page 13

1. Front heater (preheats the media)
2. Print heater (fixes the ink on to the media)
3. Rear heater (dries the ink and stabilizes the printed image)
4. Media roll
5. Pressure roller
6. Grid roller
7. Carriage
8. Rear cover
WARNING! Do not touch heater surfaces in the paper path. This may cause burns.
The printer's front panel
Your printer's front panel is located on the front of the printer, on the right-hand side. It has the following
important functions:
● It must be used to perform certain operations, such as loading and unloading media.
It can display up-to-date information about the status of the printer, the ink cartridges, the
●
printheads, the media, etc.
● It can provide guidance in using the printer.
ENWW The printer's front panel 5
Page 14

It displays warning and error messages when appropriate.
●
● It can be used to change the values of printer settings, changing the operation of the printer.
The front panel has the following components:
1. The LEDs light, flash, or turn off to indicate the status of the printer.
A. The green Data LED shows the data reception state.
Flashing: data are being received from the computer
●
Off: nothing is being received from the computer
●
B. The orange Error LED indicates whether an error has occurred.
On: an error has occurred
●
● Flashing: warning state (take-up reel time-out error)
● Off: normal (no error has occurred)
C. The green Ink LED shows the status of the ink cartridges.
● On: all ink cartridges are present
● Flashing: ink is running out in at least one cartridge
Off: no ink (ink has run out in at least one cartridge)
●
D. The green Media LED shows whether media is loaded.
● On: media is loaded (roll or cut sheet)
● Off: no media is loaded
6 Chapter 1 Introduction ENWW
Page 15

E. The green Online LED indicates whether the printer is online.
● On: online
● Flashing: online pause mode
Off: offline
●
2. The keys set printer functions.
● The ONLINE key switches the printer online or offline and provides access to the front panel
menu groups.
● The SHIFT key is used to switch between the menu groups.
● The CANCEL key cancels an input parameter.
The OK key selects a menu or enters a parameter.
●
● The four arrow keys select a menu or select menu options (selection, number up/down).
3. The Power key turns the printer on and off.
4. The LCD displays information and menus.
ENWW The printer's front panel 7
Page 16
Basic printer operations and keys
To enable menu operations:
1. Enter the offline mode by pressing the ONLINE key.
2. When the printer enters the offline mode, a menu group screen is displayed.
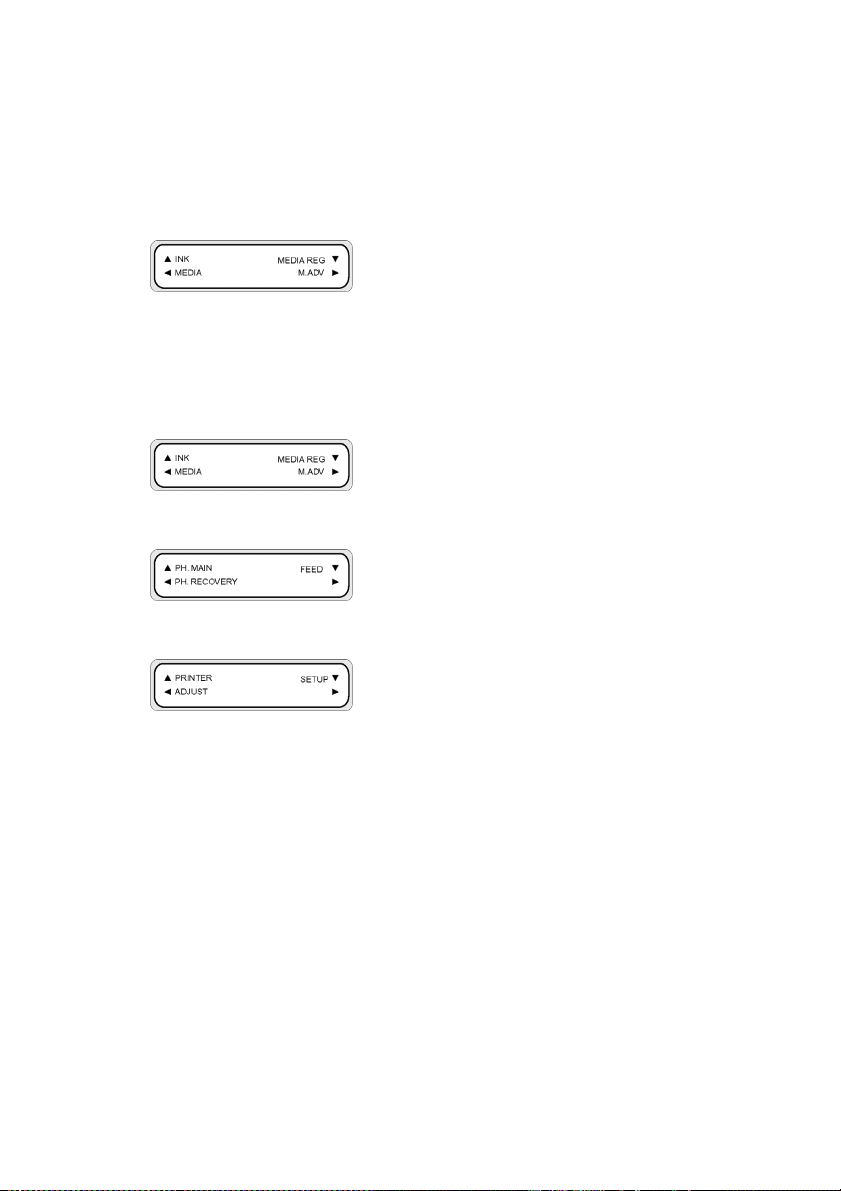
Menu group selection:
● Select a menu group using the ▲, ►, ▼, and ◄ keys.
● Switch between menu group screens with the SHIFT key.
To access a menu, use the arrow key that corresponds to the menu group you want to access.
To switch to the next menu group, press SHIFT.
To switch to the next menu group, press SHIFT.
If you select a menu in the menu groups, you will then be able to select an option or submenu:
▲ and ▼ keys: change between menus at the same level.
●
◄ key: return to menu group selection.
●
● OK key: select a submenu or option so that parameters can be changed.
Setting or changing parameters:
▲ and ▼ keys: switch between parameters, or increase or decrease a selected value.
●
◄ and ► keys: change the digit you need to modify when entering a value.
●
Setting a parameter or canceling:
● OK key: sets a parameter.
● CANCEL key: cancels an input parameter value and returns to the submenu/option selection.
8 Chapter 1 Introduction ENWW
Page 17

The heater's front panel
The heater's front panel is located on the front of the printer, on the left-hand side. The heater front
panel displays the settings for the Front, Print, and Rear heaters. It can also be used to control the
temperature settings.
1. The display screen at the top of the panel shows the target temperature and the current
temperature of each heater.
2. The three On/Off switches turn the three heaters on or off. The three pairs of ▲ or ▼ keys can be
used to raise or lower the target temperatures of the heaters.
ENWW The heater's front panel 9
Page 18
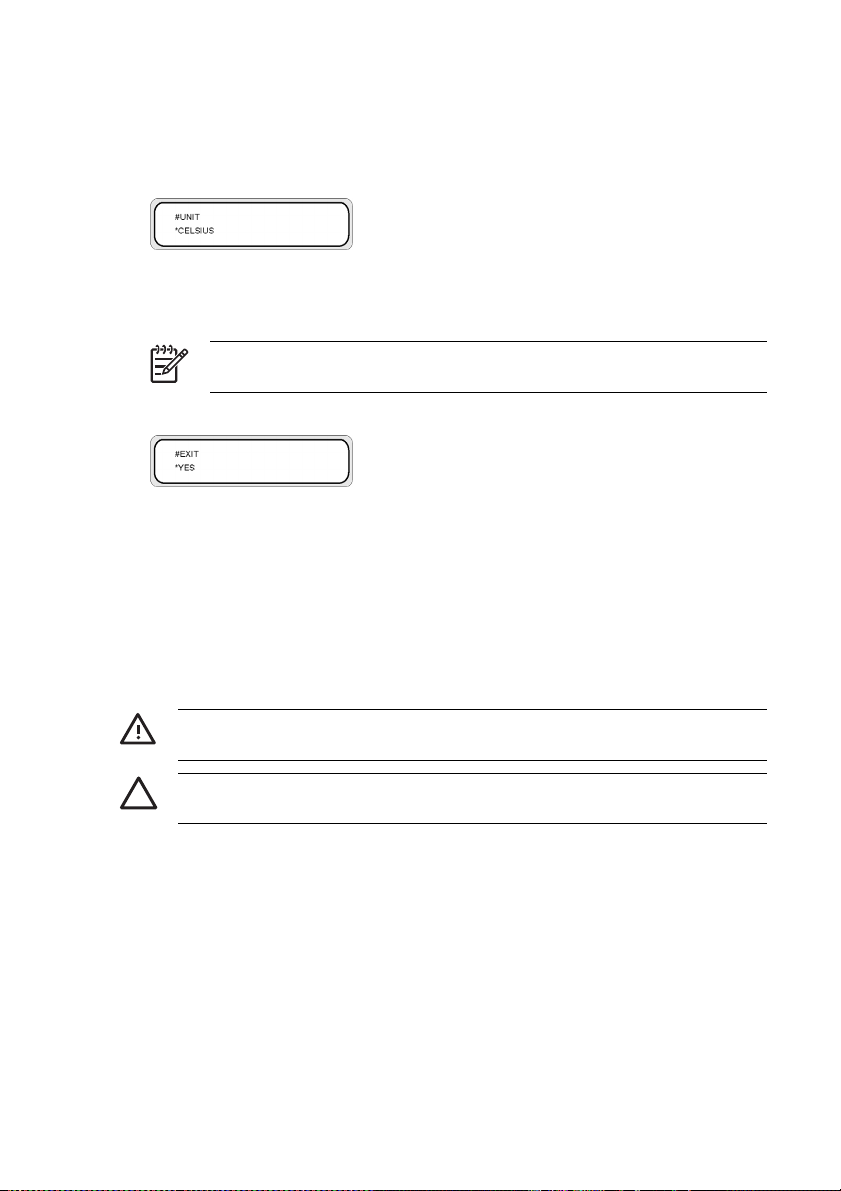
Defining heater parameters
1. On the heater front panel press the ON/OFF key, and the ▲ and ▼ keys at the same time to enter
the parameter setup mode.
2. Select a setup parameter using the ▲ and ▼ keys on the heater front panel and press the ON/
OFF key on the heater front panel to modify the setup item displayed.
3. Use the ▲ and ▼ keys to select the value and press the ON/OFF key to confirm.
NOTE If you have selected an incorrect setup value, you can press the ON/OFF key
again to cancel the setting and repeat from step 2.
4. To exit the parameter setup mode, scroll to the EXIT option and press the ON/OFF key to select YES.
5. Press the ON/OFF key on the heater front panel to confirm.
Safety precautions
The following symbols are used in this manual to ensure the proper use of the printer and to prevent the
printer from being damaged. Follow the instructions marked with these symbols.
WARNING! Failure to follow the guidelines marked with this symbol could result in serious
personal injury or death.
CAUTION Failure to follow the guidelines marked with this symbol could result in minor
personal injury or damage to the product.
General warnings
Use the power supply voltage specified on the nameplate. Avoid overloading the printer’s electrical
●
outlet with multiple devices.
Be sure the printer is well-grounded. Failure to ground the printer may result in electrical shock,
●
fire, and susceptibility to electromagnetic interference.
Do not disassemble or repair the printer yourself. Do not reinstall the printer in a new location. Call
●
your local HP Service Representative for service.
10 Chapter 1 Introduction ENWW
Page 19

Use only the electrical cord supplied by HP with the printer. Do not damage, cut, or repair the
●
power cord. A damaged power cord has risk of fire and electric shock. Replace a damaged power
cord with an HP-approved power cord.
Do not allow metal or liquids (except those used in HP Cleaning Kits) to touch the internal parts of
●
the printer. Doing so may cause fire, electric shock, or other serious hazards.
Power OFF the printer and unplug the power cable from the power outlet in any of the following
●
cases:
When placing your hands inside the printer.
●
● If there is smoke or an unusual smell coming from the printer.
● If the printer is making an unusual noise not heard during normal operation.
A piece of metal or a liquid (not part of cleaning and maintenance routines) touches internal
●
parts of the printer.
During an electrical (thunder/lightning) storm.
●
During a power failure.
●
● Inks used in the printer and liquids in the HP Cleaning kits contain an organic solvent (ethylene
glycol monobutyl ether acetate, CAS No. 112-07-2). Observe all local, state, and federal
regulations related to the handling, use, storage, and disposal of organic solvents.
● Ink and fluids used in the Cleaning Kits are combustible. Do not use or store within 8 meters (25
feet) of open flames, sparks, or other sources of ignition.
● Do not operate printer within 8 meters (25 feet) of open flames, sparks, or other sources of ignition.
Do not smoke within 8 meters (25 feet) of the printer.
● Install and operate the printer in a well-ventilated area.
● The printer installation must meet local, state, and federal regulations on the emissions of volatile
organic compounds in the workplace. It is the responsibility of the user to comply with these
regulations. HP recommends that installations use an ink vapor extraction and exhaust system or
an HP Air Purification System. Before installing a system exhausting ink vapors to the outside
atmosphere, consult with your local air quality control authorities. It is your responsibility to comply
with all local, state, and federal air pollution control regulations and building codes.
Avoid contact between ink and skin, eyes, and clothing.
●
Immediately wash skin with soapy water.
●
● Remove clothing soaked with ink from contact with skin.
Use an approved eye wash station if ink is splashed into eyes and consult a doctor if
●
necessary.
If an approved eye wash station is unavailable, flush eyes with cold water and consult a
doctor if necessary.
Do not swallow ink. If swallowed, do not induce vomiting, but seek immediate medical attention.
●
● Keep ink cartridges, cleaning kits, and waste ink bottles out of the reach of children.
● Be sure all operators are trained in the use of emergency equipment such as eye wash stations
and fire extinguishers and know where they are located.
ENWW Safety precautions 11
Page 20

General cautions
● Handle media rolls with care. They can be heavy and difficult to move in confined spaces. In some
cases, two people should move and install media rolls. Dropping a media roll could cause personal
injury or damage to the printer.
● Allow and maintain adequate space around printer for immediate access to safety equipment such
as eye wash stations, fire extinguishers, glove and safety glass dispensers, and fireproof waste
storage containers.
● Treat any media, used cleaning and maintenance supplies, and wipes soaked with ink as
combustible materials. Handle and dispose of properly.
● If an Air Purification System is installed, allow adequate space for exhaust hoses from the printer.
Locate these hoses and the Air Purification System so that they do not pose a trip hazard or
interfere with the operation of the printer such as loading and unloading media, replacing ink
cartridges, inspecting and replacing the waste ink bottle.
● Always hold the power cord by the plug when connecting and disconnecting from the power outlet.
Never pull on the cord because this may damage it and create risk of fire and electric shock.
● Do not touch heater surfaces in the paper path. This may cause burns.
In order to ensure the safe operation of the printer, heed all of the cautions and warnings contained
throughout this manual.
12 Chapter 1 Introduction ENWW
Page 21

Handling precautions
These precautions are recommended to avoid damage to your printer and its components.
Power supply
● Use the power supply voltage specified on the nameplate.
● Check the printer electrical outlet for proper polarity and grounding before connecting printer.
Failure to do so may result in fire and electric shock hazards.
● Be sure the printer is well-grounded. Failure to ground the printer may result in electrical shock,
fire, and susceptibility to electromagnetic interference.
● Avoid overloading the printer’s electrical outlet with multiple devices.
Use only the electrical cord supplied by HP with the printer.
●
Printer
Wipe the printer clean with a soft cloth. A cloth moistened with a neutral detergent may be used.
●
Do not allow liquid to enter the printer. This may create risk of fire and electrical shock and cause a
malfunction. Do not clean the printer with benzene or paint thinner. This may damage the paint.
Never touch the printhead nozzles. They can be easily damaged or clogged.
●
Regular inspection and maintenance
● Clean the capping unit and wiper blade every day.
● Check the moisture of the wiper sponge every day.
Store the ink system when leaving the printer for a long time (two weeks or more with the power off).
●
Clean and charge the ink system before printing when leaving the printer for a long time.
●
Consumables
Ink inside the ink cartridge is combustible. Do not expose or store near open flames, sparks, or
●
other sources of ignition.
HP ink cartridges must be installed before the “Install By” date printed on the cartridge. Use of the
●
ink cartridge 3 months beyond the “Install By” date may cause deterioration in print quality or a
printer malfunction.
Do not disassemble the ink cartridges. Ink cartridges are intended for single use only.
●
● Avoid contact between ink and skin, eyes, and clothing.
● Immediately wash skin with soapy water.
Remove clothing soaked with ink from contact with skin.
●
Use an approved eye wash station if ink is splashed into eyes and consult a doctor if
●
necessary.
If an approved eye wash station is unavailable, flush eyes with cold water and consult a
doctor if necessary.
ENWW Handling precautions 13
Page 22

Use only an HP waste ink bottle. The bottle must be installed according to instructions or waste ink
●
may overflow. An HP waste ink bottle must always be installed before turning the printer ON.
Automatic and manual service cycles produce waste ink that must be contained in an HP waste ink
bottle. Do not remove the cap from its tether to the HP waste ink bottle. The cap is needed to
properly seal the HP waste ink bottle for disposal. Keep the HP waste ink bottle upright. Do not
place on tables or shelves where it could fall. Waste ink is combustible. Keep an HP waste ink
bottle containing waste ink away from open flames, sparks, or other sources of ignition. The level
in the HP waste ink bottle must be checked by visual inspection to prevent overflow. If the waste
ink level is above the indication line, the bottle must be replaced with an empty HP waste ink bottle.
Place a sheet of paper under the HP waste ink bottle on the floor when removing a bottle
●
containing waste ink. This will help clean up any ink spills. If soaked with ink, treat the paper as a
combustible material and dispose of properly.
● Do not store HP ink cartridges in direct sunlight. Store HP ink cartridges in a cool, dry place. This
prevents deterioration of the ink during storage.
14 Chapter 1 Introduction ENWW
Page 23
2 How do I perform basic operations?
Connect to a computer
●
● Turn the power on/off
Connect to a computer
This section describes system configuration and cable connection procedures.
NOTE Before connecting or disconnecting the USB cable, turn the printer OFF.
Choose the system configuration
The following connections are possible.
1. Printer
2. USB interface
3. Printer server (RIP)
Connection procedure
NOTE Before you connect the USB cable, you should ensure that the RIP is installed so that
the printer can be detected by your operating system. Refer to the instructions that came with
your RIP for installation instructions.
Connect a USB cable as follows:
1. Disconnect the USB cable from the rear of your printer if it is already connected.
2. Turn the printer off at the front panel.
3. Power off the printer using the power switch at the rear.
4. Connect a USB cable to the USB connector at the rear of the printer.
5. Connect a USB cable to the USB connector at the rear of the computer.
6. Power on the printer using the power switch at the rear.
7. Turn the printer on at the front panel.
8. On your computer, select the printer.
ENWW Connect to a computer 15
Page 24

Turn the power on/off
WARNING! Use the power supply voltage specified on the nameplate.
Be sure the printer is well-grounded. Failure to ground the printer may result in electrical
shock, fire, and susceptibility to electromagnetic interference.
CAUTION Always hold the power cord by the plug when connecting and disconnecting from
the power outlet. Never pull on the cord because this may damage it and create risk of fire and
electric shock.
Turn on the printer
1. Turn off (0) the printer switch on the left rear of the printer, and plug one end of the supplied power
cable into the socket of the printer. Insert the other power plug of the cable into an electrical outlet.
WARNING! Avoid overloading the printer’s electrical outlet with multiple devices. Use
only the electrical cord supplied by HP with the printer. Do not damage, cut, or repair the
power cord. A damaged power cord has risk of fire and electric shock. Replace a
damaged power cord with an HP-approved power cord.
1. Printer switch
2. Power socket
16 Chapter 2 How do I perform basic operations? ENWW
Page 25

2. Turn on (1) the printer switch on the left rear of the printer.
1. Printer switch
2. Power socket
ENWW Turn the power on/off 17
Page 26
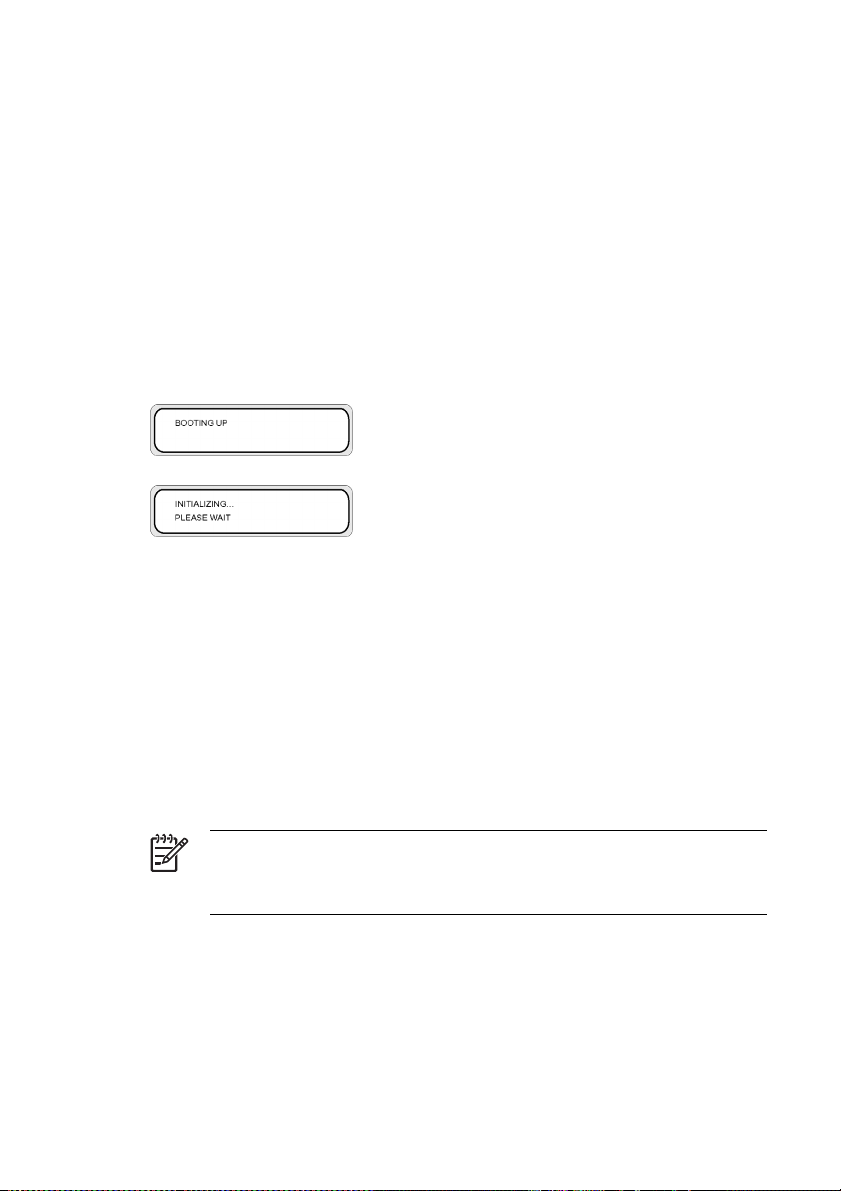
3. Press the POWER ON/OFF key on the front panel.
1. POWER ON/OFF key
When you press power on, the printer performs a power-on self-diagnostic test and the following
message is displayed on the front panel.
(If a 64" paper roll is loaded).
When you turn the printer power on, the heater front panel display turns on. Turn on the heater
power on/off switch at the rear of the printer to use the heater.
When the heater power is off, the following message is displayed on the heater front panel.
NOTE Only turn off the printer while PRINTER READY is displayed on the front panel
except in an emergency. Do not turn off the printer while INITIALIZING or
PH.RECOVERY is displayed on the front panel to avoid ink drops and damage to the
printhead.
18 Chapter 2 How do I perform basic operations? ENWW
Page 27
Turn on the heater
▲
Turn on the heater by pressing the power switch on the right rear of the printer.
1. Heater switch
NOTE Use the heater switch on the right rear of the printer only when turning the printer off
completely for removal, installation, or servicing.
Turn the power off
Turn off the printer
WARNING! The printer has an internal clock which allows it to wash the printheads
automatically, flushing some ink through the printhead, which keeps the printheads in good
condition. This is done after the first 20 hours without printing and every 3 days. If the printer is
switched off for a long period, this process does not happen. If the ink does not flow through
the printheads from time to time, the ink will dry inside the nozzles, reaching a point where it is
impossible to recover them and the printhead will fail. This will mean an expensive printhead
replacement.
Automatic maintenance and cleaning will not be performed even if you turn off the printer at
the front panel. The printer power switch on the rear of the printer should be used only when
the printer is turned off to move it, to connect it to a computer, or to install or maintain printer
parts.
CAUTION If you need to leave the printer unattended for any reason, ensure that the printer
is on, the ink cartridges are full, and the waste ink bottle is empty, so that automatic
maintenance (performed after the first 20 hours without printing and every 3 days) can be
completed successfully for the time you are not present. If needed, install new ink cartridges.
The ink cartridges that you replace can be reused when you return to your printer, if they still
contain ink.
ENWW Turn the power on/off 19
Page 28
WARNING! Turn the printer off and unplug the power cable from the power outlet in any of
the following cases;
when placing your hands inside the printer, if there is smoke or an unusual smell coming from
the printer, if the printer is making an unusual noise not heard during normal operation, a piece
of metal or a liquid (not part of cleaning and maintenance routines) touches internal parts of
the printer, during an electrical (thunder/lightning) storm, during a power failure.
CAUTION Always hold the power cord by the plug when connecting and disconnecting from
the power outlet. Never pull on the cord because this may damage it and create risk of fire and
electric shock.
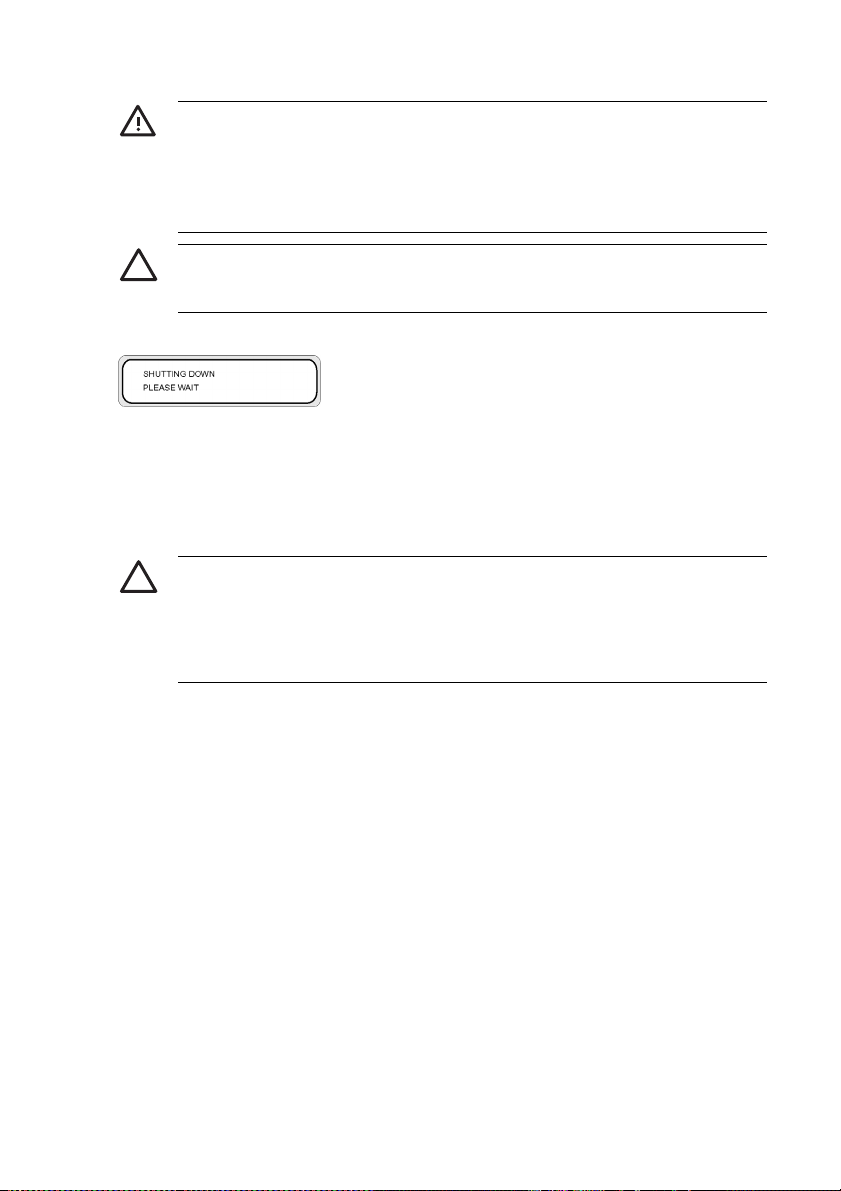
Turn off the power by pressing the power on/off key on the front panel for a couple of seconds.
▲
The front panel displays the message above to indicate that a shutdown process is in progress. After
the process ends, the power is turned off.
If you intend to turn the printer off for a short time, you can avoid the printhead wash operation by
pressing the power on/off key while pressing the CANCEL key.
The printhead wash operation is recommended.
CAUTION The printer power switch on the rear of the printer should only be used when the
printer is turned off to move it, connect it to a computer, or to install or maintain printer parts.
Turn off the power on/off switch, wait for at least ten seconds, then turn it on again.
The printer washes the printheads 20 hours after the last printing process and every 3 days.
We recommend that the printer power is left on.
Turn off the heater
▲
Turn off the heater by pressing the on/off keys on the heater front panel.
Under normal conditions of use, you do not need to turn off the heater using the heater power
switch on the rear of the printer.
20 Chapter 2 How do I perform basic operations? ENWW
Page 29

1. Heater switch
NOTE Use the heater switch on the right rear of the printer only when turning the printer off
completely for removal, installation, or servicing.
ENWW Turn the power on/off 21
Page 30

22 Chapter 2 How do I perform basic operations? ENWW
Page 31

3 How do I load/unload media?
This section describes how to load and remove media in the printer.
● Install a media roll in the printer
● Remove a media roll from the printer
Replace a jammed media roll
●
Load cut sheet
●
● Use the take-up reel
● Use the media edge guard
Set the fan guard lever
●
ENWW 23
Page 32

Install a media roll in the printer
CAUTION Do not touch heater surfaces in the paper path. This may cause burns.
Handle media rolls with care. They can be heavy and difficult to move in confined spaces. In
some cases, two people should move and install media rolls. Dropping a media roll could
cause personal injury or damage to the printer.
The printer's front panel messages will guide you through the process of loading media. To install a
media roll:
1. Open the rear cover and slide the media edge guards to each end of the platen.
Slide the fan guide lever to the right side of the platen to avoid obstructing the media path and
damaging the media.
NOTE Position the media edge guards after loading the media. See How do I... Use the
media edge guard. Position the fan guide lever after loading the media.
2. Close the rear cover.
24 Chapter 3 How do I load/unload media? ENWW
Page 33

3. Loosen the lock on the left media hub by turning the lock anti-clockwise.
1. Sliding media hub
2. Media hub lock
4. Adjust the position of the left media hub to allow for insertion of the roll of media.
ENWW Install a media roll in the printer 25
Page 34

5. You can feed the media through the media path over (externally) or under (internally) the roll
according to the side of the media you want to print on. Make sure you insert the end of the roll that
will allow you to print on the correct side.
1. External (clockwise) winding
2. Internal (anti-clockwise) winding
26 Chapter 3 How do I load/unload media? ENWW
Page 35

6. Insert the roll of media into the right media stop (fixed side).
1. Media stop
2. Roll
7. Slide the left media hub (movable side) into the core of the media roll.
1. Media roll
2. Media hub lock
3. Sliding media hub
8. Tighten the left media hub lock by turning clockwise.
ENWW Install a media roll in the printer 27
Page 36

9. Lift the media load lever.
10. Ensure the ME (Media End) lever is in the forward position.
28 Chapter 3 How do I load/unload media? ENWW
Page 37

11. Feed the media until a beep sounds from the media feeder (about 200 mm).
NOTE If you have problems loading media, feed the media into the printer by holding
both edges of the media.
Take care that the media does not curl inside the rear cover and that the media edge
guards are not obstructing the media path. See How do I...
NOTE The vertical media line guide on the printer is for sheet media loading only. Do
not use for roll media.
12. Take up any excess media by rewinding the media stop on the media roll. This will help to make
sure there is even tension across the width of the media and avoid skew.
Use the media edge guard.
1. Rewind excess media onto the roll.
ENWW Install a media roll in the printer 29
Page 38

13. Lower the media load lever.
14. Open the rear cover and adjust the media edge guards and adjust the position of the fan guard
lever.
1. Fan guard lever
2. Media edge guard
To complete the loading procedure, follow the front panel instructions.
15. Confirm the position of the media edge guard and press the OK key.
16. Select media roll.
30 Chapter 3 How do I load/unload media? ENWW
Page 39

a. Select ROLL using the ▲ or ▼ keys. For the NEST option, see How do I...Use manual nesting.
b. Press the OK key to confirm the selection.
17. Select a media type.
a. Select the media type with the ▲ or ▼ key.
There are five preset media types to choose from:
Paper
●
Glossy
●
● Matte
● Banner
● BLT_B (Backlit)
b. Press the OK key to confirm.
NOTE If you wish to select a media type that is currently not available, then you
will need to create a new media type.
c. Select the NEW MEDIA ENTRY option using the ▲ or ▼ key and press the OK key (For
details, see How do I...
Manage media types.
Press the CANCEL key to return to the SELECT MEDIA menu.
18. The media will be loaded automatically.
ENWW Install a media roll in the printer 31
Page 40

Remove a media roll from the printer
To remove a media roll from the printer:
1. Lift the media load lever.
2. Loosen the left media hub lock, and pull the left media hub out of the media roll.
1. Left media hub
2. Lock
3. Media roll
32 Chapter 3 How do I load/unload media? ENWW
Page 41

3. Remove the media roll from the printer.
CAUTION Handle media rolls with care. They can be heavy and difficult to move in
confined spaces. In some cases, two people should move and install media rolls.
Dropping a media roll could cause personal injury or damage to the printer.
1. Media roll
2. Right media hub
Replace a jammed media roll
To replace a jammed media roll, see The problem is... A head crash.
ENWW Replace a jammed media roll 33
Page 42

Load cut sheet
The printer's front panel messages will guide you through the process of loading media. To load cut
sheet:
1. Open the rear cover and slide the media edge guards to each end of the platen.
Slide the fan guide lever to the right side of the platen to avoid obstructing the media path and
damaging the media.
NOTE Position the media edge guards after loading the media. See How do I.. Use the
media edge guard.
Position the fan guide lever after loading the media.
2. Close the rear cover.
34 Chapter 3 How do I load/unload media? ENWW
Page 43

3. Lift the media load lever.
4. When installing the cut sheet in the printer, align the cut sheet to the left of the guide line.
1. Guide line
ENWW Load cut sheet 35
Page 44

5. Ensure the ME (Media End) lever is in the forward position.
6. Feed the media until a beep sounds from the media feeder (about 200 mm).
NOTE If you have problems loading media, feed the media into the printer by holding
both edges of the media.
Take care that the media does not curl inside the rear cover and that the media edge
guards are not obstructing the media path. See How do I...
36 Chapter 3 How do I load/unload media? ENWW
Use the media edge guard.
Page 45

7. Lower the media load lever.
8. Open the rear cover and adjust the media edge guards and adjust the position of the fan guard
lever.
1. Fan guard lever
2. Media edge guard
To complete the loading procedure, follow the front panel instructions.
9. Confirm the position of the media edge guard and press the OK key.
10. Select cut sheet.
ENWW Load cut sheet 37
Page 46

a. Select SHEET using the ▲ or ▼ keys. For the NEST option, see How do I... Use manual
nesting.
b. Press the OK key to confirm.
11. Select a media type.
a. Select the media type with the ▲ or ▼ key.
There are five preset media types to choose from:
● Paper
Glossy
●
Matte
●
● Banner
● BLT_B (Backlit)
b. Press the OK key to confirm.
NOTE If you wish to select a media type that is currently not available, then you
will need to create a new media type.
c. Select the NEW MEDIA ENTRY option using the ▲ or ▼ key and press OK. See How do I...
Manage media types.
Press the CANCEL key to return to the SELECT MEDIA menu.
12. The media will be loaded automatically.
If an error message is displayed, remove the media and repeat the task.
38 Chapter 3 How do I load/unload media? ENWW
Page 47

Use the take-up reel
There are three tasks required to complete loading of media on the take-up reel. The first part of
attaching a roll to the take-up reel is attaching the end of the roll (with tape) to the core tube supplied
with the take-up reel. You can also use an empty cardboard tube. Both types of core must be the same
length as the roll you are using.
● Set the take-up reel for clockwise or anti-clockwise winding.
● Define the winding mode.
Load media onto the take-up reel.
●
Set the take-up reel winding direction
Internal (anti-clockwise) winding or external (clockwise) winding can be selected. When the take-up reel
is not used, set the take-up reel switch to off.
1. Take-up reel switch
ENWW Use the take-up reel 39
Page 48

1. Take-up reel off
2. Internal (anti-clockwise) winding
3. External (clockwise) winding
NOTE For LOOSE winding mode, make sure that the media passes inside the take-up reel
sensor.
If the take-up reel is not used, turn the take-up reel switch off.
Make sure that you change the media roll on the take-up reel before the roll size exceeds the
diameter of the take-up reel media stop. Replace the core tube with a new one to avoid
winding errors.
1. Take-up reel sensor
40 Chapter 3 How do I load/unload media? ENWW
Page 49

NOTE When printing without using the take-up reel, make sure the media or printing surface
is not damaged or folded by the take-up reel sensor.
Define the take-up reel winding mode
The take-up reel supports two winding modes; tension winding and loose winding.
By default, use LOOSE winding mode. Always use TENSION winding mode when printing long plots or
if you have problems with skew.
NOTE The HP Designjet High Speed Dryer is not usable with the take-up reel when in
TENSION winding mode. Please use LOOSE mode when using the HP Designjet High Speed
Dryer.
To set the winding mode:
Loose: place the take-up reel roller in the top position.
●
1. Tension roller
ENWW Use the take-up reel 41
Page 50

Tension winding: place the take-up reel roller in the bottom position.
●
1. Tension roller
NOTE Do not change the order of the seven tension rollers as their outside diameters are
different. Changing the order will cause media skew. Distribute the tension rollers to support
the full width of the media.
1. Position each tension rollers by unscrewing the three screws to the left of the roller. Tighten the
screws when the roller is in its final position.
2. Press the ONLINE key to view the MEDIA REG menu.
3. Press ▼ to select MEDIA REG.
42 Chapter 3 How do I load/unload media? ENWW
Page 51

4. Press ▼ to display the TUR MODE option.
5. Select LOOSE or TENSION and press OK to confirm.
Load media on to the take-up reel
1. Prepare the core tube and 1 m of media. Attach one edge of the media to the tube using tape.
1. Tape
2. Core tube
3. Lead paper
4. Approximately 1 m
NOTE Make sure the lead paper is attached to the correct side of the tube. You may
wind the media over the roll for anti-clockwise winding, or under the roll for clockwise
winding.
Attach the paper to the core tube in a straight line so that media winding is even.
ENWW Use the take-up reel 43
Page 52

2. Insert the core tube with the lead paper against the left media stop.
1. Left media hub
2. Media tube
3. Tension roller
3. Slide the right media hub (movable side) and insert it into the media tube.
1. Right media hub
2. Core tube
44 Chapter 3 How do I load/unload media? ENWW
Page 53

4. Tighten the lock.
5. Load media into the printer.
Lift the media load lever
●
● Load the media
● Lower the media load lever
6. Feed the media into the printer using the Feed menu on the front panel (see How do I... Perform a
manual media feed) until there is sufficient media at the rear of the printer to attach the lead paper
on the core tube.
ENWW Use the take-up reel 45
Page 54

7. Tape the edge of the media onto the lead paper on the core tube on the take-up reel. Tape on both
edges and in the center.
1. Lead paper
2. Tape
3. Media
4. Tape
8. Manually turn the media stop to wind some media onto the take-up reel. Remember to turn the
media stop in the same direction as the take-up reel winding direction (clockwise or anti-clockwise
winding).
1. Right media stop
46 Chapter 3 How do I load/unload media? ENWW
Page 55

9. Check the positions of the media and take-up reel sensor, and load the media.
1. Take-up reel switch
2. Take-up reel sensor in LOOSE winding mode.
Use the media edge guard
Set the media edge guards on the right and left of the printing path to reduce the risk of printhead
crashes.
ENWW Use the media edge guard 47
Page 56

1. Media edge guards
2. Media
NOTE When using the media edge guards, the right and left margins increase from 5 mm to
10 mm.
You need to activate or deactivate use of the media edge guards on the front panel. To access the
MEDIA REG menu:
1. Press the ONLINE key.
2. Press the ▼ key to see MEDIA REG menu options.
48 Chapter 3 How do I load/unload media? ENWW
Page 57

3. Select the media with which you want to use or not use the media edge guards, and press the OK
key.
This setting will only apply to the selected media.
4. Scroll to USE EDGE GUARD using the ▲ or ▼ keys and press the OK key.
5. Select YES or NO and press OK to confirm.
Set the fan guard lever
NOTE Correct use of the fan guide lever will protect your printheads from exposure to the
suction fan that could cause them to dry. When loading media, ensure that the position of the
fan guard lever does not obstruct the media path.
1. Set the fan guard lever position according to the width of the media on which you are printing.
2. Align the arrow on the lever with the edge of the media.
NOTE To make sure that the fan guard lever does not come into contact with the media, that
can be caused by skew on long rolls, ensure a 5 mm gap between the arrow on the fan guard
lever and the edge of the media.
1. Fan guard lever arrow
2. Media edge guard
ENWW Set the fan guard lever 49
Page 58

NOTE Do not move the fan guard lever during printing. If the fan guard lever touches the
media, a media jam could occur.
50 Chapter 3 How do I load/unload media? ENWW
Page 59

4 How do I... (printing topics)
Perform a manual media feed
●
● Use manual nesting
● Increase/reduce pressure on media
Pause or cancel print jobs
●
Perform a manual media feed
This section describes how to feed media manually through the printing path, for example to use cut
sheets without causing skew.
1. Press the ONLINE key.
2. Press the SHIFT key to display the FEED menu.
3. Hold down the ▼ key.
While the ▼ key is pressed, roll media advances. If cut sheet is loaded, it is discharged.
4. When the ▼ key is released, media feeding stops and the menu group is displayed.
ENWW Perform a manual media feed 51
Page 60

Use manual nesting
When printing a small-sized image, such as A4, on a 64-inch width roll, a large area of media is left
blank. You can rewind the roll and nest an image in the blank area using the Origin Point Setting feature.
NOTE The manual nesting feature can be used only with roll media.
To use manual nesting:
1. Lift the media load lever.
2. Rewind the media.
A. Blank area
NOTE Rewind the media only when the image is dry, to avoid smearing.
3. The front panel instructs you to load media. Load the media.
52 Chapter 4 How do I... (printing topics) ENWW
Page 61

4. Lower the media load lever.
5. Select NEST in the SELECT MEDIA menu and press the OK key.
NOTE In the next steps, use the MEDIA WIDTH setting if you cut the media to remove
the image that was previously printed. Use the NEST ORIGIN setting if you have not cut
the media and to start printing from a point that excludes the previously printed image.
6. Enter the media width and press the OK key. The media width previously detected is displayed.
(Media width input range: 290 to 1635 mm)
ENWW Use manual nesting 53
Page 62

7. Input the nest origin point (print offset value for media width: origin point).
The nest origin setting is displayed.
The start position for printing is modified if either the media width or the nest origin is set.
A. Nest origin point
B. Print margin including the image
C. Media width input value
8. Select YES or NO.
● Select YES to increase the available area for printing. Rewind the media back onto the roll
ensuring the media is present between the media output sensor and media rollers. (The first
20 – 30 mm from the front edge will not be available for printing).
● Select NO if the area from the media output sensor position to the print start position (the
media rollers) will not be available for printing.
NOTE Ensure the media is aligned with the vertical guide line before loading.
54 Chapter 4 How do I... (printing topics) ENWW
Page 63

9. Select a media type again.
SHIFT
NOTE Ensure front, right, and left margins are sufficient as you rewind the media
manually.
The media width and nest origin settings cannot be saved.
Increase/reduce pressure on media
The media pressure lever allows you to change the pressure on the media exerted by the media
transmission roller. This can be used to solve skew with certain types of media.
Pull the lever to the front and lift or lower to change the pressure on the media.
ENWW Increase/reduce pressure on media 55
Page 64

1. High pressure
2. Normal pressure
3. Media pressure lever
Pause or cancel print jobs
You can pause and cancel printing from the rear of the printer. This may be useful if there are problems
with media output from the rear of the printer.
Hint We recommend that you always pause or cancel printing through your software RIP.
56 Chapter 4 How do I... (printing topics) ENWW
Page 65

1. Print Pause/Restart and Cancel buttons
2. Press the Pause button to interrupt printing and the Restart button to continue printing after an
interruption.
3. Press the Cancel button to cancel printing.
ENWW Pause or cancel print jobs 57
Page 66

58 Chapter 4 How do I... (printing topics) ENWW
Page 67

5 How do I… (ink topics)
This section describes ink cartridge topics and printhead height adjustment for the printer.
● Replace an ink cartridge
● Change the printhead height
Replace an ink cartridge
CAUTION Always use genuine HP ink cartridges. These have been designed for high-quality
imaging performance and reliable printer operation. Using non-HP inks may cause poor print
quality, printer malfunction, or printer failure. The hazard characteristics of different solvent
inks can vary widely. HP has not conducted product safety testing for non-HP inks with this
printer and is not responsible for any loss or damage that may result if non-HP inks are used.
HP ink cartridges must be installed before the “Install By” date printed on the cartridge. Use of
the ink cartridge 3 months beyond the “Install By” date may cause deterioration in print quality
or a printer malfunction.
NOTE
If an ink cartridge cannot be inserted, check that the color matches the slot. A mechanical key
prevents an ink cartridge from being inserted into the wrong slot.
Do not shake ink cartridges before inserting into the printer.
The front panel will advise you when you need to change an ink cartridge.
XX: Ink name (K: Black, Lm: Light magenta, Lc: Light cyan)
XX: Ink name (C: Cyan M: Magenta Y: Yellow)
ENWW Replace an ink cartridge 59
Page 68

NOTE The printer will continue to print while you are replacing an ink cartridge.
To replace an empty ink cartridge:
1. Open the ink cover.
2. Remove an ink cartridge from the printer.
60 Chapter 5 How do I… (ink topics) ENWW
Page 69

3. Insert a new ink cartridge into the printer.
4. Close the ink cover.
Change the printhead height
You can increase or reduce the printhead height depending on the thickness of the media you are
using. Two tasks must be performed to change the printhead height:
● Mechanical height adjustment on the printhead carriage.
● Firmware height adjustment through the front panel.
ENWW Change the printhead height 61
Page 70

To change the printhead height:
1. Press the ONLINE key.
2. Press the SHIFT key to display the PH. MAIN menu.
3. Press the ▲ key to enter the PH.MAIN menu.
4. Scroll to PH HEIGHT ADJUSTon the front panel and press OK to confirm.
The following message is displayed.
The following message is displayed.
62 Chapter 5 How do I… (ink topics) ENWW
Page 71

5. Open the cap cover and loosen the head fixing screws (2) with a screwdriver.
1. Capping unit cover
2. Head fixing screws
6. Change the height of the head by lifting the head height lever to lower the head, or by lowering the
head height lever to lift the head.
1. Printhead height lever
7. Tighten the head fixing screws (2) using the long screwdriver provided with your printer.
NOTE Tighten the head fixing screws while applying slight downward pressure on the
head using your hand.
8. Close the rear cover.
ENWW Change the printhead height 63
Page 72

To change the printhead height on the front panel:
1. Press the ONLINE key.
2. Press the ▼ key to display the MEDIA REG menu.
3. Scroll to the PH HEIGHT VAL option and press the OK key.
4. Select NORMAL or HIGH, according to the mechanical change you have made, and press the OK
key.
Parameters: NORMAL (default) or HIGH (for thick media).
NOTE When the printhead height is changed, a gap in printing may occur in bidirectional
printing. Adjust the correction value for bidirectional printing. See How do I...
position adjustment.
Perform printhead
64 Chapter 5 How do I… (ink topics) ENWW
Page 73

6 How do I maintain the printer?
This section describes the regular inspection and maintenance procedures to be performed by users.
● Regular maintenance guide
● Daily printhead maintenance
Leave the printer off for two to four weeks
●
Leave the printer off for less than two weeks
●
● Charge the ink system
● Clean the exterior of the printer
Clean the rear cover and media feed
●
Clean the platen
●
● Replace the waste ink bottle
● Normal printhead recovery
IQ Print
●
Regular maintenance guide
The printer requires regular inspection and maintenance. The table below lists all regular inspection and
maintenance procedures. For details on each procedure, see the page reference.
WARNING! Never switch off the printer without following the correct procedures. Even with
the storage liquid installed, never leave the printer off for more than 4 weeks. Leaving your
printer off for more than 4 weeks can cause permanent damage that cannot be repaired. In all
other cases make sure you observe the appropriate maintenance guidelines.
ENWW Regular maintenance guide 65
Page 74

CAUTION The printer has an internal clock which allows it to wash the printheads
automatically, flushing some ink through the printhead, which keeps the printheads in good
condition. This is done after the first 20 hours without printing and every 3 days. If the printer is
switched off for a long period, this process does not happen. If the ink does not flow through
the printheads from time to time, the ink will dry inside the nozzles, reaching a point where it is
impossible to recover them and the printhead will fail. If the printer must be switched off for a
long period of time, the customer must use either the optional HP Ink System Cleaning Kit or
HP 790 Storage Kit to recover or protect the printheads.
Automatic maintenance and cleaning will not be performed even if you turn off the printer on
the front panel. The printer power switch on the rear of the printer should only be used when
the printer is turned off to move it, to connect it to a computer, or to install or maintain printer
parts.
Category Inspection/Maintenance
1 Daily inspection and maintenance Wiper blade cleaning
Wiper sponge cleaning — see
blade cleaning
Capping unit cleaning
Normal printhead recovery
IQ Print
2 Monthly inspection and maintenance Normal printhead recovery
3 When leaving the printer for a long time
4 When returning the printer from a long
5 When returning the printer from a long
6 When leaving the printer in power off
in power off state (more than 2 weeks)
time leaving (more than 2 weeks)
time leaving (within 2 weeks) in power
off state
for more than one month
Ink system storage
Clean ink system
Charge the ink system after cleaning
the ink system
Clean ink system
Charge the ink system after cleaning
the ink system
A service call error message will be
displayed on the front panel. Contact
HP Support.
Wiper
Daily printhead maintenance
WARNING! Failure to perform daily maintenance procedures may result in damage to your
printer printheads and will invalidate your warranty.
66 Chapter 6 How do I maintain the printer? ENWW
Page 75

CAUTION If you need to leave the printer unattended for any reason, ensure that the printer
is on, the ink cartridges are full, and the waste ink bottle is empty, so that automatic
maintenance (performed after the first 20 hours without printing and every 3 days) can be
completed successfully for the time you are not present. If needed, install new ink cartridges.
The ink cartridges that you replace can be reused when you return to your printer, if they still
contain ink.
Daily printhead maintenance will ensure optimal print quality and the life of your printheads. The ink in
your HP Designjet 9000s Printer dries very quickly, so maintenance procedures ensure that the ink does
not dry in the capping unit, the wiper blades, the ink tubes and printheads.
● Wiper blade cleaning
Wiper sponge cleaning
●
Capping unit cleaning
●
NOTE Perform the above every day before printing.
Always use the specified cleaning liquid and HP cleaning swabs.
Wiper blade cleaning
CAUTION Make sure that the wiper cleaning liquid does not drip on to other parts of the
printer. If the wiper cleaning liquid drips on to the belt or any nearby sensors, this could cause
serious damage to the printer.
When the PRINTER READY message appears on the front panel, press the ONLINE key to take the
printer offline.
1. Press the ONLINE key.
2. Press the SHIFT key to display the PH.MAIN menu.
3. Press the ▲ key to enter the PH.MAIN menu and scroll to the WIPER CLEANING option using the
▼ key.
4. Press OK to select WIPER CLEANING.
ENWW Daily printhead maintenance 67
Page 76

5. Press OK to confirm.
The wiper blade is moved to its cleaning position.
The front panel displays the following message:
6. Open the rear cover and the wiper cover.
1. Rear cover
2. Wiper cover
1. Wiper blade
68 Chapter 6 How do I maintain the printer? ENWW
Page 77

7. Dip a new HP cleaning swab into the wiper cleaning liquid.
CAUTION Make sure that you use the wiper cleaning liquid and not the capping liquid
to clean the wiper blades. The capping liquid is not strong enough to clean the wiper
blades properly and could cause damage to the printheads.
1. HP cleaning swab
2. Wiper cleaning liquid
WARNING! Avoid contact between ink and skin, eyes, and clothing.
Immediately wash skin with soapy water.
Remove clothing soaked with ink from contact with skin.
Use an approved eye wash station if ink is splashed into eyes and consult a doctor if
necessary.
If an approved eye wash station is unavailable, flush eyes with cold water and consult a
doctor if necessary.
ENWW Daily printhead maintenance 69
Page 78

8. Use the HP cleaning swab to clean the front and back parts of the wiper blades.
CAUTION Make sure that the wiper cleaning liquid does not drip on to other parts of the
printer. If the wiper cleaning liquid drips on to the belt or any nearby sensors, this could
cause serious damage to the printer.
NOTE Make sure that there is no dried ink stuck on the wiper blades. Also make sure
that the wiper blades are not damaged. Clean the front and back of the blades with the
HP cleaning swab moistened with the HP wiper cleaning liquid.
70 Chapter 6 How do I maintain the printer? ENWW
Page 79

9. Apply a full dropper of the wiper cleaning liquid on to the sponge using the dropper.
1. Dropper
2. Wiper cleaning liquid
CAUTION Make sure that the wiper cleaning liquid does not drip on to other parts of the
printer. If the wiper cleaning liquid drips on to the belt or any nearby sensors, this could
cause serious damage to the printer.
1. Wiper sponge
ENWW Daily printhead maintenance 71
Page 80

10. Make sure you also moisten both ends of the sponge under the belt on each side.
1. Belt
2. Dropper
Capping unit cleaning
This cleaning procedure will remove any dried ink and particles from the capping unit.
1. Press the ONLINE key.
2. Press the SHIFT key to display the PH.MAIN menu.
3. Press the ▲ key to select the PH.MAIN menu.
4. Scroll to the CAP CLEANING option using the ▼ key and press OK to select.
5. Press OK again to confirm your selection.
The carriage will automatically move to the wiping side of the printer so that the Capping Unit can
easily be accessed. The front panel displays CARRIAGE MOVING — PLEASE WAIT.
CAUTION Once the carriage is out of the capping unit, the cleaning procedure must be
done as quickly as possible to avoid permanent damage to the printheads. The printer
will emit an acoustic warning (beep) while the carriage is out of the capping unit.
72 Chapter 6 How do I maintain the printer? ENWW
Page 81

6. When the following message is displayed, open the rear cover and capping unit cover.
1. Rear cover
2. Capping unit cover
7. Dip a new HP cleaning swab into the HP cap cleaning liquid.
1. HP cleaning swab
2. HP cap cleaning liquid
CAUTION Make sure that you use the cap cleaning liquid and not the wiper cleaning
liquid to clean the capping unit, otherwise you could cause damage to the printheads.
ENWW Daily printhead maintenance 73
Page 82

8. Clean the top outside edges and the upper surfaces of all six caps. Use one side of a swab per
color and then use a new swab for the next color.
9. Close the capping unit cover and rear cover. The head carriage will return to the capping unit
position (home position) automatically.
Leave the printer off for two to four weeks
WARNING! Never switch off the printer without following the correct procedures. Even with
the storage liquid installed, never leave the printer off for more than 4 weeks. Leaving your
printer off for more than 4 weeks can cause permanent damage that cannot be repaired. In all
other cases make sure you observe the appropriate maintenance guidelines.
74 Chapter 6 How do I maintain the printer? ENWW
Page 83

CAUTION The printer has an internal clock which allows it to wash the printheads
automatically, flushing some ink through the printhead, which keeps the printheads in good
condition. This is done after the first 20 hours without printing and every 3 days. If the printer is
switched off for a long period, this process does not happen. If the ink does not flow through
the printheads from time to time, the ink will dry inside the nozzles, reaching a point where it is
impossible to recover them and the printhead will fail. If the printer must be switched off for a
long period of time, the customer must use either the optional HP Ink System Cleaning Kit or
the HP 790 Storage Kit to recover or protect the printheads.
Automatic maintenance and cleaning will not be performed even if you turn off the printer at
the front panel. The printer power switch at the rear of the printer should be used only when
the printer is turned off to move it, to connect it to a computer, or to install or maintain printer
parts.
Have available the HP 790 Ink System Storage Kit. Six ink system storage liquid cartridges and six ink
system purging cartridges are packed together in the storage kit.
Have available an empty waste ink bottle.
Ink system storage
This procedure allows you to empty the ink system of ink and fills it with storage liquid that will preserve
the ink system if you do not intend to use the printer for a period of time (two to four weeks).
CAUTION Do not open or close the rear covers or change the position of levers while the ink
system storage process is being performed, or the operation may have to be restarted from
the beginning. This will result in the waste of the storage liquid. If ink system storage has to be
restarted, new storage liquid cartridges will be needed.
1. Press the ONLINE key.
2. Press the SHIFT key to display the PH.MAIN menu.
3. Press the ▲ key to select the PH.MAIN menu and press OK.
4. Press the ▲ or ▼ keys to select the STORE INK SYS option and press OK.
5. When the front panel displays the waste ink bottle warning message, check whether the waste ink
bottle is present and make sure it is empty.
CAUTION This process will produce over 3 liters of waste liquid so the waste ink bottle
must be empty.
6. Press the OK key once the waste ink bottle has been checked.
7. Follow the instructions on the printer front panel that will guide you through each step of the
process.
When the front panel refers to PURGING CAR, install or remove an HP 790 Ink System Purging
Cartridge that came with your HP 790 Ink System Storage Kit.
ENWW Leave the printer off for two to four weeks 75
Page 84

When the front panel refers to SL CARTRIDGE, install or remove an HP 790 Ink System Storage
Liquid Cartridge that came with your HP 790 Ink System Storage Kit.
8. Once the ink system storage process has been completed, the front panel will return to the Ink
system optimization menu.
9. You can now turn the printer off.
When you turn on the printer again, you will have to perform the cleaning ink system process.
Leave the printer off for less than two weeks
CAUTION If you need to leave the printer unattended for any reason, ensure that the printer
is on, the ink cartridges are full, and the waste ink bottle is empty, so that automatic
maintenance (performed after the first 20 hours without printing and every 3 days) can be
completed successfully for the time you are not present. If needed, install new ink cartridges.
The ink cartridges that you replace can be reused when you return to your printer, if they still
contain ink.
To clean the ink system you will need the HP 790 Ink System Cleaning Kit (part number CB296A). This
kit includes:
Six ink system purging cartridges
●
● Six cleaning liquid cartridges
Clean ink system
This option allows you to clean dry ink from the ink system with cleaning liquid after the printer is
powered on after being stored for less than two weeks.
CAUTION Do not open or close the rear covers or change the position of levers while the
Service Clean process is being performed, or the operation may have to be restarted from the
beginning. This will result in the waste of the cleaning liquid. If the Service Clean has to be
restarted, new cleaning liquid cartridges will be needed.
1. Press the ONLINE key.
2. Press the SHIFT key to display the PH.MAIN menu.
3. Press the ▲ key to select the PH.MAIN menu and press OK.
4. Press the ▲ or ▼ keys to select the CLEAN INK SYS option and press OK.
5. When the front panel displays the waste ink bottle warning message, check whether the waste ink
bottle is present and make sure it is empty.
6. Press the OK key once the waste ink bottle has been checked.
7. Follow the instructions on the printer front panel that will guide you through each step of the
process.
76 Chapter 6 How do I maintain the printer? ENWW
Page 85

When the front panel refers to PURGING CAR, install or remove an HP 790 Ink System Purging
Cartridge that came with your HP 790 Ink System Cleaning Kit.
When the front panel refers to CL CARTRIDGE, install or remove an HP 790 Ink System Cleaning
Liquid Cartridge that came with your HP 790 Ink System Cleaning Kit.
8. The extraction process starts and you need to recheck whether the waste ink bottle is present and
is not full. Press the OK key once the waste ink bottle has been checked.
Once the cleaning ink system process has been completed, the front panel will return to the PH.
MAIN menu.
After cleaning the ink system, the ink system needs to be charged (see
cleaning the ink system).
Charge the ink system
When the printer is left for a long time and you need to clean the ink system, then you will need to
charge the ink system with ink. You will need ink cartridges with more than 250 cc of ink available.
If any of the ink cartridges contain less than 250 cc of ink, or if an ink system purging cartridge has been
installed, a warning message is displayed on the front panel. Install a correct ink cartridge that contains
more than 250 cc of ink in the indicated slot in order to continue.
To charge the ink system:
1. Press the ONLINE key.
2. Press the SHIFT key to display the PH.MAIN menu.
3. Press the ▲ key to select the PH.MAIN menu.
4. Select the CHARGE INK SYS option and press OK.
5. When the front panel displays the waste ink bottle warning message, check whether the waste ink
bottle is present and is not full. Check the waste ink bottle and press the OK key.
6. The charge process starts. Check whether the waste ink bottle is present and is not full. Check the
waste ink bottle and press the OK key.
When the ink charge process is complete, the front panel displays the Ink Charge option.
Charge the ink system after
Clean the exterior of the printer
CAUTION Wipe the printer clean with a soft cloth. A cloth moistened with a neutral detergent
may be used. Do not allow liquid to enter the printer. This may create risk of fire and electrical
shock and cause a malfunction. Do not clean the printer with benzene or paint thinner. This
may damage the paint.
ENWW Charge the ink system 77
Page 86

Clean the outside of the printer and all other parts of the printer that you regularly touch as part of
normal operation (e.g. ink cartridge doors) as required with a damp sponge or a soft cloth and a mild
household cleaner such as non-abrasive liquid soap.
Clean the rear cover and media feed
NOTE Do not attempt to remove dust from media by blowing it off. This may affect print
quality.
CAUTION Wipe the printer clean with a soft cloth. A cloth moistened with a neutral detergent
may be used. Do not allow liquid to enter the printer. This may create risk of fire and electrical
shock and cause a malfunction. Do not clean the printer with benzene or paint thinner. This
may damage the paint.
1. Unload all media from the printer.
2. Open the rear cover.
3. Using a damp cloth, clean the rear cover.
4. Using a damp cloth, absorb ink deposits on the media feed.
5. Remove dust using a vacuum cleaner.
1. Rear cover
2. Media feed
Clean the platen
You should plan to clean your printer's platen on a regular basis, every few months or when needed.
When glue adheres to the platen or there are ink marks on the platen, clean the platen according to the
following procedures.
78 Chapter 6 How do I maintain the printer? ENWW
Page 87

NOTE If you print on wide media after you have used narrower media for some time, you
may find that the left side of the platen has become dirty and will leave marks on the back of
the media if not cleaned.
To clean the platen:
1. Unload all media from the printer.
2. Open the rear cover.
3. Using a soft cloth, absorb ink deposits.
1. Platen
2. Ink
3. Soft cloth
4. Use a soft cloth slightly dampened with alcohol to wipe off loosened ink deposits from the platen.
CAUTION Do not use commercial cleaners or abrasive cleaners. Do not wet the platen
directly because you will leave too much moisture behind.
ENWW Clean the platen 79
Page 88

5. If there are ink deposits in the vacuum holes on the platen, clean them using commerciallyavailable 3 mm mini-cotton swabs and then wipe off loosened ink deposits with a mini-cotton swab
slightly dampened with alcohol.
Replace the waste ink bottle
WARNING! The HP waste ink bottle has been specifically designed to contain waste ink
from the printer. It is designed to work with the printer’s waste ink quantity estimation system
to alert the user when the bottle is full. It provides safe handling and disposal of waste ink
when sealed with its attached cap.
Use only an HP waste ink bottle. The bottle must be installed according to instructions or
waste ink may overflow.
An HP waste ink bottle must always be installed before turning the printer on. Automatic and
manual service cycles produce waste ink that must be contained in an HP waste ink bottle.
CAUTION Do not remove the cap from its tether to the HP waste ink bottle. The cap is
needed to seal the HP waste ink bottle properly for disposal.
WARNING! Always use both hands to remove and carry an HP waste ink bottle.
Keep the HP waste ink bottle upright. Do not place it on tables or shelves where it could fall.
Waste ink is combustible. Keep an HP waste ink bottle containing waste ink away from open
flames, sparks, or other sources of ignition.
Never store waste ink in a glass container.
Never pour waste ink into a container filled with other chemicals.
80 Chapter 6 How do I maintain the printer? ENWW
Page 89

CAUTION The level in the HP waste ink bottle must be checked by visual inspection to
prevent overflow. If the waste ink level is above the indication line, the bottle must be replaced
with an empty HP waste ink bottle.
NOTE Place a sheet of paper under the HP waste ink bottle on the floor when removing a
bottle containing waste ink. This will help clean up any ink spills. If soaked with ink, treat the
paper as a combustible material and dispose of properly.
HP recommends that you always keep a spare empty HP waste ink bottle available. Some
maintenance procedures require installation of an empty HP waste ink bottle to prevent ink
overflow.
The HP waste ink bottle contains organic solvents and must be disposed of in compliance with
all local, state, and federal regulations. Always securely replace the cap on a full or partiallyfull the HP waste ink bottle after removing it from the printer to prevent ink spills.
Ensure all operators are trained in the use of emergency equipment such as eye wash
stations and fire extinguishers and know where they are located.
NOTE Do not replace the waste ink bottle during printing.
The waste ink bottle must be checked on a daily basis to make sure that it is not full.
If full, it should be emptied as follows:
1. Loosen the screw and lift up the lever to release the waste ink bottle.
1. Screw
2. Lever
ENWW Replace the waste ink bottle 81
Page 90

2. Carefully pull out the waste ink bottle, taking care not to spill ink on the printer or on the floor.
1. Screw
2. Cap
3. Pour any used ink contained in the waste ink bottle in to a suitable container.
4. Lift the lever and install the empty waste ink bottle.
82 Chapter 6 How do I maintain the printer? ENWW
Page 91

5. Lower the lever and insert the ink tube on the screw into the bottle, and tighten the screw. Make
sure the waste ink bottle is securely in position.
1. Lever
2. Screw
6. The front panel will request you to reset the waste ink counter.
7. Select YES and press the OK key to reset the waste ink counter.
Normal printhead recovery
1. Press the ONLINE key.
2. Press the SHIFT key to display the PH.RECOVERY menu.
ENWW Normal printhead recovery 83
Page 92

3. Press the ◄ key to enter the PH.RECOVERY menu.
4. Press the OK key to confirm.
5. Press the ▲ or ▼ keys to select NORMAL ALL.
NOTE If NORMAL ALL is not sufficient to clean the nozzles, then try a STRONG option
for the set of printheads that are affected. Perform the IQ Print first to determine which
set of printheads are affected.
6. Press the OK key.
7. Make sure that the waste ink bottle is not full, and then press the OK key again.
NOTE Cleaning may take several minutes.
8. When cleaning is completed, the PH.RECOVERY option is displayed.
9. Press the ◄ key to return to the offline mode.
84 Chapter 6 How do I maintain the printer? ENWW
Page 93

IQ Print
Use the IQ print to check that all printhead nozzles are working correctly. Perform the IQ print every day
before using your printer.
NOTE Use the IQ print to check that all printhead nozzles are working correctly after cap
cleaning.
ENWW IQ Print 85
Page 94

86 Chapter 6 How do I maintain the printer? ENWW
Page 95

7 How do I get the best image quality?
Print the Image Quality print
●
● Interpret the image quality print
● Manage media types
Calibrate the printer
●
Adjust heater and print mode settings
●
Different types of media may give better image quality based on specific mechanical and electrical
settings in your printer. To optimize image quality you can perform a series of test prints for the media
type that you are using. Based on the results you can then adjust the printer settings for the media type.
To adjust the printer settings for a media type, you can modify existing media types or create new ones.
Before creating or modifying a media type for the media you intend to use, print the IQ print to determine
the overall quality that you get with one of the existing preset media types. Some media types may
require no printer setting adjustments.
● Load your new media and select a media type that is similar to the media you are loading. See
How do I…
● Print the IQ print. See How do I…
If the IQ print is satisfactory you can use the preset media type for printing.
If the IQ print is not satisfactory, create a new media type or modify the one selected. See How do
I…
● Calibrate the printer for the media type. See
Change the media type settings. See How do I...
●
Print the IQ print again to check the overall image quality with the new settings.
●
If you are still not satisfied with the image quality, you may need to make more adjustments to printer
settings, such as the print mode or the heater temperature. For a description of image quality problems
that you may see and the recommended solution, refer to
Install a media roll in the printer.
Print the Image Quality print.
Manage media types
Calibrate the printer.
Modify media type settings.
The problem is print quality.
ENWW 87
Page 96

Print the Image Quality print
Use the Image Quality print to check the overall image quality of images. Perform the Image Quality
print every day before using your printer. If the image quality is satisfactory, no calibrations are required.
If the image quality is not satisfactory, then you may need to adjust the media type settings. Also use
the Image Quality print to check that there are no printhead nozzles out.
NOTE Use the IQ print to check that there are no printhead nozzles out after cap cleaning.
To print the IQ print:
1. Press the ONLINE key and press the SHIFT key twice.
2. Select the ADJUST menu using the ◄ key.
3. In the ADJUST submenu, scroll to TEST PRINTS and press the OK key.
88 Chapter 7 How do I get the best image quality? ENWW
Page 97

4. In the TEST PRINTS menu scroll to the IQ PRINToption and press the OK key.
5. Press the OK key to start printing.
ENWW Print the Image Quality print 89
Page 98

Interpret the image quality print
Below are examples of the print results you may see in the Image Quality Print and the recommended
action.
If the IQ print quality is satisfactory, you can print on the media without changing printer or heater
settings.
If you see banding in one color (in the black color in the image above), then there are printhead nozzles
out and you will need to perform printhead recovery. See How do I...
performing printhead recovery, print the IQ print again to check that the printhead is printing correctly.
If you see banding in all colors then you need to calibrate the printer for the media you have loaded. If
you have selected a preset media type, we recommend that you create a new media type before
90 Chapter 7 How do I get the best image quality? ENWW
Normal printhead recovery. After
Page 99

modifying the settings (see How do I... Create a new media type), and then calibrate the printer. See
Calibrate the printer. Banding may be present in the form of white lines (as in the image above), or in
the form of darker lines.
If you still see banding in all colors after performing the calibrations, then try adjusting the heater
temperature and/or print mode settings. See How do I....
Manage media types
You can create new media types, or you can modify or delete existing media types by using the MEDIA
REG menu.
Hint We recommend that you do not modify the preset media types that came with your
printer. You can copy a preset media type with characteristics that are similar to the new
media that you want to use, and use the copy to create a new one before changing the
settings. This means that you will have to make changes to only one or two parameters and
you will not need to set new values for all of the parameters.
For a complete list of the options available in the MEDIA REG menu, see Tell me about... The MEDIA
REG menu.
Copy a media type to create a new one
1. Press the ONLINE key.
2. Press the ▼ key to enter the MEDIA REG menu.
3. Select the COPY MEDIA option with the ▲ and ▼ keys, and press the OK key.
Adjust heater and print mode settings.
4. Select a media number using the ▲ and ▼ keys, and press the OK key.
Only numbers for media types that already exist are displayed.
5. To create a new media type from the copy, press the ▼ key to enter the MEDIA REG menu.
6. Select the PASTE MEDIA option with the ▲ and ▼ keys, and press the OK key.
ENWW Manage media types 91
Page 100

7. Select a media number using the ▲ and ▼ keys.
NOTE If the number on the right is followed by an asterisk (*), the number displayed
already contains media type information.
8. Press the OK key to confirm.
9. Press the OK key to create the new media type.
Create a new media type
Hint We recommend that you do not modify the preset media types that came with your
printer. You can copy a preset media type with characteristics that are similar to the new
media that you want to use, and use the copy to create a new one before changing the
settings. This means that you will have to make changes to only one or two parameters and
you will not need to set new values for all of the parameters.
To create a new media type:
1. Press the ONLINE key.
2. Press the ▼ key to enter the MEDIA REG menu.
3. Scroll to the SELECT MEDIA menu with the ▲ and ▼ keys.
4. Press the OK key to select a media type number.
92 Chapter 7 How do I get the best image quality? ENWW
 Loading...