

Page 1

HP Insight Control Server Deployment 7.3 Update 1 User Guide
HP Part Number: 656830-004
Published: June 2014
Edition: 1
Page 2

© Copyright 2003, 2014 Hewlett-Packard Development Company, L.P.
Confidential computer software. Valid license from HP required for possession, use or copying. Consistent with FAR 12.211 and 12.212, Commercial
Computer Software, Computer Software Documentation, and Technical Data for Commercial Items are licensed to the U.S. Government under
vendor's standard commercial license.
The information contained herein is subject to change without notice. The only warranties for HP products and services are set forth in the express
warranty statements accompanying such products and services. Nothing herein should be construed as constituting an additional warranty. HP shall
not be liable for technical or editorial errors or omissions contained herein.
Acknowledgments
Microsoft and Windows are U.S. registered trademarks of Microsoft Corporation. Windows Server is a U.S. trademark of the Microsoft group of
companies. AMD is a trademark of Advanced Micro Devices, Inc. Intel is a trademark or registered trademark of Intel Corporation or its subsidiaries
in the United States and other Countries.
Page 3

Contents
1 Overview..................................................................................................4
2 Licensing...................................................................................................5
License types............................................................................................................................5
Adding a license file to an existing installation.............................................................................5
3 Getting started...........................................................................................6
Deployment Console basics.......................................................................................................6
Connecting server blades..........................................................................................................7
Deploying the first server blade..................................................................................................7
Reconfiguring the server blade...................................................................................................7
4 Changing deployment server/solution username or password (after initial
installation)...................................................................................................9
Prerequisites.............................................................................................................................9
Changing the password............................................................................................................9
Changing service account password...........................................................................................9
Changing each service log on username and password.................................................................9
Changing the Windows user password.....................................................................................10
Drive mappings and file permissions.........................................................................................10
Changing the database’s user password (example: SQL Server Express)........................................11
Changing the password in the PXE configuration utility (if PXE is installed locally)............................11
5 Reference................................................................................................12
Design..................................................................................................................................12
Firmware and hardware features...............................................................................................12
Windows features...................................................................................................................13
Linux features.........................................................................................................................14
Virtualization Host features.......................................................................................................15
6 Support and other resources......................................................................17
Information to collect before contacting HP.................................................................................17
How to contact HP..................................................................................................................17
Security bulletin and alert policy for non-HP owned software components......................................17
Subscription service............................................................................................................17
Registering for software technical support and update service.......................................................17
How to use your software technical support and update service...............................................18
HP authorized resellers............................................................................................................18
Related information.................................................................................................................18
Typographic conventions.........................................................................................................18
7 Documentation feedback...........................................................................20
A Manually installing distribution files............................................................21
B Manually modifying configuration settings...................................................23
Synchronize display names with computer names option..............................................................23
Primary lookup key option.......................................................................................................23
PXE initial deploy boot timeout option.......................................................................................23
Client/server file transfer port option.........................................................................................23
Windows product keys............................................................................................................23
Contents 3
Page 4

1 Overview
HP Insight Control server deployment is a server deployment solution that provides:
• Automated server hardware configuration and operating system deployment.
• Consistent Windows, VMware, and Linux deployment on the latest HP servers.
• Scalable deployment of ProLiant Blade Servers.
This document describes the provided content and outlines how to get started.
NOTE: This document does not cover how to use the Altiris Deployment Server. You can find
Altiris Deployment Server help in the Deployment Console help menu.
You can find additional help in the Knowledge Base at http://www.hp.com/go/insightdeploy/
kb. It contains:
• Release notes (which contain known issues, supported hardware and operating systems, and
so on)
• Troubleshooting information
• How-to procedures
• Frequently asked questions
The following are some key articles in the knowledge base.
Table 1 Knowledge Base articles
TitleArticle number
License Files And Licenses20000001
Primary Lookup Key And Virtual Connect20000023
Troubleshooting Windows 2008 Sysprep Image Installs20000037
Servers With Multiple Disks Deployment Support20000038
How To Perform a Boot From SAN Installation20000039
How To Install Software Packages And Support Packs20000042
How To Add A Windows Localized Distribution Or Edition20000043
20000063
20000086
Fibre Channel Over Ethernet (FCoE) And Internet Small Computer System Interface (iSCSI)
Deployment Support
Roles/Features to be enabled in IIS for Deployment Server/Web Console installed on
Windows 2012
4 Overview
Page 5

2 Licensing
A license allows Insight Control server deployment to deploy and manage either a physical server
or a virtual machine. One license is required to manage each server. After you apply a license to
a server, you cannot remove or transfer the license to another server. A license file contains licenses
for a predetermined number of servers. Purchased license files are not specific to Insight Control
server deployment versions. To view the number of licensed nodes from the console, click
Help>About.
License types
10-node, 7-day evaluation license—This license is built into the Deployment Server.
You can purchase licenses for HP Insight Control Server Deployment from http://
h30094.www3.hp.com/Server-options/ProLiant-Essentials-software/Rapid-deployment-pack/
store17/search183/dept1150.
Adding a license file to an existing installation
To add a license file to an existing installation:
1. Shut down all Deployment Server Consoles and Deployment Server Web Consoles.
2. Click Start>Programs>Altiris>Deployment Solution>Product Licensing Utility.
3. Enter the path to the new license file in the Activation Key File Information field and click Next.
4. Follow the instructions to apply your additional licenses.
If you have combined or transferred licenses and have obtained a new license file, to replace your
existing license file follow the steps above for adding a license file.
On the third wizard step, select Replace all existing license Activation Keys with this new Activation
Key.
License types 5
Page 6

3 Getting started
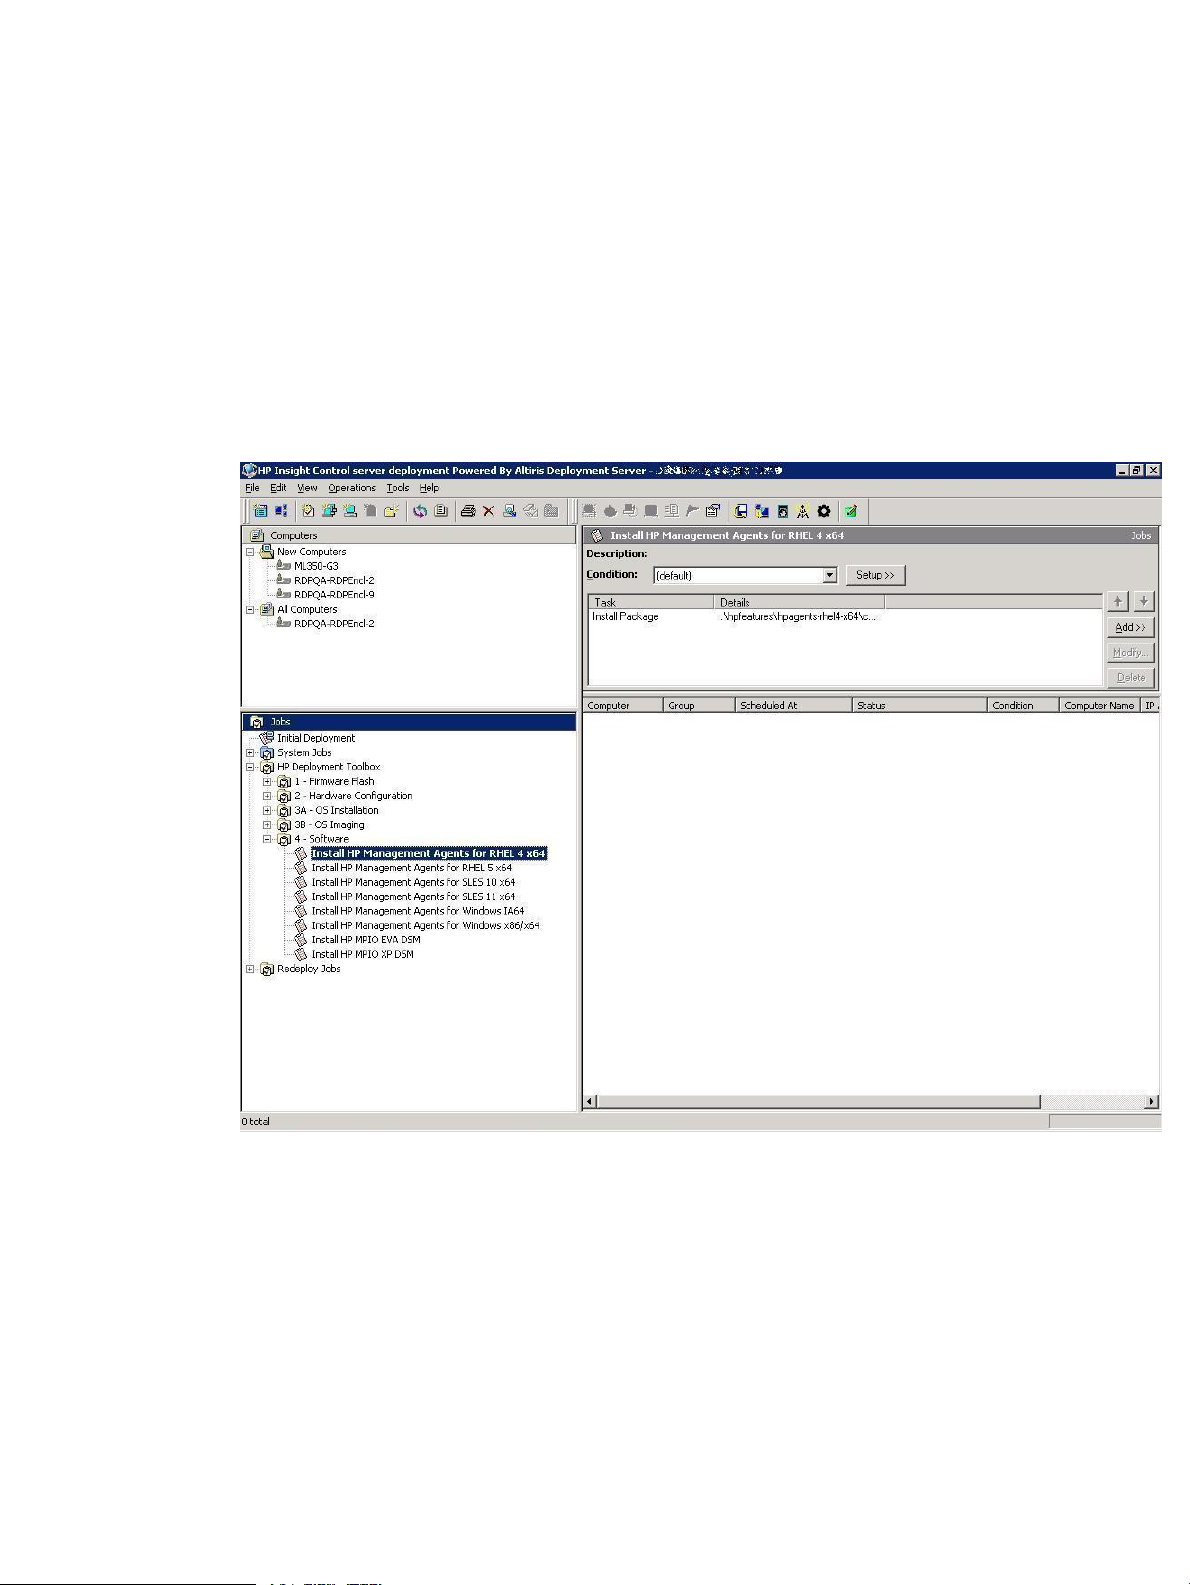
To get started, double-click the Deployment Console icon on the desktop. The Deployment Console,
from which you can manage computers and execute jobs, appears.
Deployment Console basics
• Computers pane
This pane shows managed computers. The New Computers group shows computers that have
connected to the Deployment Server for the first time. Click View→Show Physical Devices to
show the Physical Devices group.
• Jobs pane
This pane shows the provided jobs.
• Details pane
The right-hand side of the console displays information about the selected computer or job.
For each computer, basic properties and job history appear. For each job, tasks and computer
history appear. The Job Schedule Information dialog box displays the status of each task in
the schedule. To view this dialog box, double-click an item in the job history or computer
history. The Schedule Status Detail dialog box displays return codes and status messages. To
view this dialog box, click Status Details.
To execute a job, drag and drop one or more computers onto a job, or vice-versa.
6 Getting started
Page 7
Connecting server blades
1. Connect the enclosure to the network that contains your Deployment Server, and power up
the enclosure.
2. Change the default rack and enclosure names.
3. Insert the server blades into the enclosure and wait for the blades to power up.
4. From the Computer pane, right-click on a server blade and select Power Control→iLO –
Interface.
The iLO homepage appears.
Deploying the first server blade
1. In the Jobs pane, select a Windows scripted install job. Drag the job to the server blade in
the Computers pane.
2. Select Run this job immediately, and then click OK.
3. To view the progress of the job, double-click the computer in the job’s computer history.
Reconfiguring the server blade
By default the Windows scripted install job configures the computer name as the console display
name and configures the network as DHCP.
If you need to reconfigure the server:
1. In the Computers pane, right-click the blade and click Configure.
2. Click Microsoft Networking, and then enter a new computer name and a new workgroup or
domain name.
3. Click TCP/IP, and then enter the appropriate IP information.
Connecting server blades 7
Page 8

4. Click OK.
5. Select Run this job immediately, and then click OK.
6. If the Windows scripted install job is still running when the warning message appears, click
OK.
NOTE: HP recommends that HP Insight Control Server Deployment must run only on private secure
networks to prevent risk of security compromise.
8 Getting started
Page 9

4 Changing deployment server/solution username or
password (after initial installation)
Prerequisites
Before changing the password perform the following steps:
1. Verify that Insight Control server deployment has been installed and configured correctly with
the local SQL server.
2. Verify that all Insight Control server deployment/Altiris servers are running successfully.
Changing the password
To change the password after Insight Control server deployment installation, perform the following
steps:
1. Log out from the Administrator account to take the password change settings.
2. Verify the services of SQL server whether they are running or not. (SQL services should be
running).
Changing service account password
To change the service account password, perform the following steps:
1. Click Start→All Programs→Altiris→Deployment Solution→Configuration. A new window
opens.
2. Click Account.
3. Change the username and password, then click OK, OK.
Changing each service log on username and password
To change each service log-on username and password, perform the following steps:
Prerequisites 9
Page 10

1. Click Start→Run. Type "services.msc" > change the logon password of the services mentioned
below by Right-click on the service, click “Properties”, click the “Log On” tab, change the
password and confirm password with the new username/password, click “OK”
2. Type services.msc.
3. Change the logon password of the following services.
• Altiris Deployment Server Console Manger
• Altiris Deployment Server Data Manager
• Altiris Deployment Server DB Management
• Altiris eXpress Server Altiris PXE Manager
Right-click on the service, click Properties, click the Log On tab, then change the password.
Changing the Windows user password
You can change the Windows user password in several ways.
If you are logged in as the Administrator user, you can press CTRL + ALT + DELETE and click Change
Password, then change your password and confirm it.
NOTE: This method is preferred because it does not require you to accept the message that
reports that some data could be lost.
You can also change the password by right-clicking on My Computer, selecting Manage+System
Tools+Local Users and Groups+Users.
Alternately, open Local Users and Groups by clicking Start+Run, then typing lusrmgr.msc, and
pressing Enter.
Right-click on the user and select Set Password, click Proceed. Type in a password of your choice,
then confirm the password.
Drive mappings and file permissions
All of the drives that are mapped in your Altiris Deployment Solution Configuration require that
you modify those file systems and mappings to have the same username and password as your
Altiris Deployment Solution. For example, if your Altiris Deployment Solution Server has had all of
the passwords change for the username “Administrator,” then you must create a user on your other
file shares on other servers to have the same username “Administrator” and password. You may
need to follow the Changing the Windows user password procedure for each server. You may
also need to verify that the shared folder has the correct file permissions. In some cases on Windows
machines, you must grant them both NTFS and sharing permissions.
If you have any jobs that were set up to run with a specific username and password, you may
need to change those jobs as well.
To modify file systems and mappings, perform the following steps:
10 Changing deployment server/solution username or password (after initial installation)
Page 11

1. Click Start+All Programs+Altiris+Deployment Solution+Configuration. A new window opens.
2. Click the Option.
3. Select Drive Mapping to change the credentials.
Changing the database’s user password (example: SQL Server Express)
To change the user password on the database, perform the following steps:
1. Click Start Menu+ All Programs +Microsoft SQL Server 2005+ SQL Server Management Studio
Express.
2. Login with your username and password.
3. Click the Security folder and the Logins folder.
4. Double-click on the user and change the password.
Changing the password in the PXE configuration utility (if PXE is installed locally)
To change the password in the PXE configuration utility (if PXE is installed locally), perform the
following steps:
1. Select the PXE Configuration Utility +Boot Menu tab.
2. Select Linux Managed and click the Edit button. A new window, Edit Shared Menu option,
opens.
3. Click Edit Boot Image. A new window, Boot disk creator- Linux Configuration, opens.
4. Click on the Edit button. A new window, Boot disk creator Step 1, opens.
5. Follow the windows by clicking the Next button until the credential page Step 5 of 11 displays.
6. Change the password and click Next to complete the steps.
7. Click Finish to complete the task.
8. Click OK to close the Edit Shared Menu option.
9. Select the Window PXE option and repeat Steps 3 through 8 to regenerate the windows PXE.
Changing the database’s user password (example: SQL Server Express) 11
Page 12

5 Reference
Design
HP delivers content as "features," each of which is a self-contained set of files and jobs. Each
feature is independent, and resides in its own folder with key files located in the root folder and
other supporting files located in various subfolders.
Because the features are independent, their jobs are also independent. That means there are no
monolithic jobs that configure the system, configure the smart array, install an operating system
and install a support pack. Jobs are solely in a toolbox scheme. Servers auto-configure themselves,
so default hardware configuration jobs are not necessary. If needed, hardware configuration jobs
will have to be scheduled before operating system jobs. There are a few exceptions to this scheme,
such as jobs that deploy a virtualization host include a system configuration task to enable the
processor virtualization extensions.
Operating system feature naming consists of four elements — os+version, architecture,
edition, and language/locale — that appear in some combination between the feature’s
folder name and the answer file names. There are a few exceptions to this scheme, such as operating
systems that do not include the concept of editions. Operating system features map one-to-one with
their media. For example, for Windows Server 2008 Enterprise (X64) English, the folder name is
ws6-x64-en_us and the unattend answer files are unattend-ent.xml and
unattend-std.xml. There is one media consisting of multiple editions.
The provided jobs and files are sufficient for generic operating system deployment. For more
complex deployments, you can use the provided jobs and files as templates. When this is the case,
HP strongly recommends that you follow a copy, rename, and modify process — copy the job or
file, rename it so that the name conveys the new behavior, and make the necessary modifications.
This process provides a clean separation between the customized jobs and the provided jobs and
enables the provided jobs to act as working baselines.
NOTE: When editing ESX or Linux files on the Deployment Server, use a text editor that saves
the file in Linux compatible format.
NOTE: When editing Windows 2008 answer files, use the Windows System Image Manager
utility included in the Windows Automated Installation Kit (AIK).
NOTE: Server Deployment program files inherit file and folder permissions from their parent
folder. Express share needs a minimum of read permission to allow all users to download and to
execute the task.
Firmware and hardware features
These features enable you to flash the firmware, read/write system configuration, read/write smart
array configuration, and read/write fiber channel host bus adapter configuration.
• Jobs denoted with server-specific use an input or output filename based on the computer
ID of the target server instead of a static filename. To determine the computer ID, in the
Deployment Console, right-click on the computer and select Properties.
• To determine the filename of the input or output file, look for the inputfilename or
• When executing a read job, the output file will be overwritten.
12 Reference
outputfilename variable in the relevant Run Script task.
Page 13

• All input and output files are stored in the root of the feature.
• The bin subfolder contains various scripts and utilities.
• For firmware, the components subfolder contains the contents of the \compaq\swpackages
directory from the Firmware CD.
• For firmware, overwriting the components subfolder with a newer version of the Firmware
CD is not supported.
• For firmware, the logs subfolder contains output logs from the flashing utility. The log filenames
are based upon the computer ID of the target server. Every time the job is executed against
a server, that log file gets appended to.
• ProLiant jobs use the LinuxPE automation environment. Integrity jobs use the WinPE automation
environment.
Windows features
These features enable you to deploy Windows either via a scripted install or Sysprep imaging.
• Scripted install product keys are stored in the express database, user_tokens table.
• Sysprep product keys can be accessed and modified in the Deployment Server Console Options
dialog.
• You can accomplish most customizations by either editing the answer file or adding a step to
the *-post.cmd script.
• You can change the default Altiris Deployment Agent settings by editing the aclient.inp
file.
Table 2 Typical Windows scripted install job layout
DescriptionTask
Partitions and formats the target hard drive.Distribute Disk Image
Copies drivers to the target hard drive.Run Script – Copy OEM Files
Generates the unattend answer file for this target.Run Script – Configure Answer File
Starts the Windows scripted install.Run Script – Install OS
Performs any additional configuration and installs additional software.Install Package
NOTE: This task will not execute until:
• The operating system has been installed.
• The Altiris agent has been installed and connects to the Deployment Server.
Reboots the target for all changes to take effect.Power Control
Table 3 Typical Windows file layout
DescriptionFile/Subfolder
unattend files
sysprep files
bin\
dist\
images\
Various support utilities
Distribution files
Captured Sysprep images
Windows features 13
Page 14

Table 3 Typical Windows file layout (continued)
DescriptionFile/Subfolder
oem\
drivers\
components\
Post-deployment scripts for configuration and software installation
Drivers required for deployment
A small set of smart components required to make the target manageable
Table 4 Windows scripted install default settings
Default settingComponent
Administrator password
Networking
The administrator password is password. For Windows 2003, this password is stored
as clear text in the unattend answer file. HP recommends changing the default
administrator password.
NOTE: To hide local administrator passwords, use the “Hide Sensitive Data in an
Answer File” option in “Windows System Image Manager” available in Microsoft
Windows AIK.
A single partition is created automatically that expands to the full drive size.Drive configuration
The computer name uses the 15 right-most characters of the console display name.Computer name
Firewall settings are disabled.Firewall
Added to workgroup "WORKGROUP". SNMP and WMI are enabled. The default value
of the SNMP community is public.
Linux features
These features enable you to deploy Red Hat Enterprise Linux (RHEL) or SUSE Linux Enterprise
Server (SLES) via a scripted install.
• You can accomplish most customizations by either editing the answer file or adding a step to
the *-post.sh script.
• You can change the default Altiris Deployment Agent settings by editing the adlagent.conf
file.
Table 5 Typical RHEL and SLES scripted install job layout
Environment
DescriptionTask
Partitions and formats the target hard drive.Distribute Disk Image
Copies the distribution’s initrd, kernel, and grub configuration to the hard drive.Run Script – Configure Boot
Generates the kickstart or control answer file for this target.Run Script – Configure Answer File
Performs any additional configuration and installs additional software.Install Package
NOTE: This task will not execute until:
• The operating system has been installed.
• The Altiris agent has been installed and connects to the Deployment Server.
Reboots the target for all changes to take effect.Power Control
14 Reference
Page 15

Table 6 Typical RHEL and SLES file layout
DescriptionFile/Subfolder
answer files
bin\
dist\
oem\
drivers\
components\
updates\
Various support utilities
Distribution files
Post-deployment scripts for configuration and software installation; as needed,
boot files for deployment
As needed, drivers required for deployment
A small set of smart components required to make the target manageable
Contains operating system specific updates, installed after operating system
installation.
Table 7 RHEL and SLES scripted install default settings
Default settingComponent
Root password
Drive configuration
The root password is password. This password is stored as clear text in the
kickstart/control file. HP recommends changing the default root password.
NOTE: Anonymous network users can access the kickstart file. HP recommends changing
the kickstart file password to the default, once the job is complete.
The disk space is portioned according to RHEL or SLES default specifications. RHEL installs
Logical Volume Manager (LVM) by default.
The Linux host name uses the console display name.Host name
Basic Linux server packages are installed.Packages
Firewall settings are disabled.Firewall
Networking
All NICs are enabled. SNMP is enabled. The default value of the SNMP community is
public.
Virtualization Host features
These features enable you to deploy Hyper-V, ESX, or ESXi via a scripted install.
• The design of the Hyper-V features is very similar to Windows.
• The design of the ESX features is very similar to Linux.
• Imaging of virtualization hosts is not supported.
• The scripted install jobs include a system configuration task to enable processor virtualization
extensions.
Design of ESXi is not similar to other operating systems: ESXi does not run Altris Adlagent, but is
an agent-less deployment. Limited network configuration tasks are supported on ESXi from RDP
6.3.1 and later; however, network configuration tasks ( known as reconfigure tasks) must be
scheduled before scheduling ESXi deployment task
Table 8 Hyper-V scripted install default settings
Default settingComponent
The administrator password is password.Administrator password
A single partition is created automatically that expands to the full drive size.Drive configuration
Virtualization Host features 15
Page 16

Table 8 Hyper-V scripted install default settings (continued)
Default settingComponent
The computer name uses the 15 right-most characters of the console display name.Computer name
Firewall settings are disabled.Firewall
Added to workgroup "WORKGROUP". SNMP and WMI are enabled.Networking
Table 9 ESX scripted install default setting
Default settingComponent
Root password
Drive configuration
The root password is password. This password is stored in encrypted form in the kickstart
file. HP recommends changing the default root password.
When configuring the disk partition for a scripted operating system installation, various
VMware ESX Server specific partitions are created. These settings are default. Do not
change them.
The host name uses the console display name.Host name
VMware ESX Server specific packages are installed. Do not change this setting.Packages
Firewall settings are disabled. SSH configuration modified to allow root login.Firewall
16 Reference
Page 17

6 Support and other resources
Information to collect before contacting HP
Be sure to have the following information available before you contact HP:
• Software product name
• Hardware product model number
• Operating system type and version
• Applicable error message
• Third-party hardware or software
• Technical support registration number (if applicable)
How to contact HP
Use the following methods to contact HP technical support:
• In the United States, see the Customer Service / Contact HP United States website for contact
options:
http://welcome.hp.com/country/us/en/contact_us.html
• In the United States, call 1-800-HP-INVENT (1-800-474-6836) to contact HP by telephone.
This service is available 24 hours a day, 7 days a week. For continuous quality improvement,
conversations might be recorded or monitored.
• In other locations, see the Contact HP Worldwide website for contact options:
http://welcome.hp.com/country/us/en/wwcontact.html
Security bulletin and alert policy for non-HP owned software components
Open source software (such as OpenSSL) or third-party software (such as Java) are sometimes
included in HP products. HP discloses that the non-HP owned software components listed in the
Insight Management end user license agreement (EULA) are included with Insight Management.
The EULA is included with the Insight Management Installer on Insight Management DVD #1.
HP addresses security bulletins for the software components listed in the EULA with the same level
of support afforded HP products. HP is committed to reducing security defects and helping you
mitigate the risks associated with security defects when they do occur.
When a security defect is found, HP has a well defined process that culminates with the publication
of a security bulletin. The security bulletin provides you with a high level description of the problem
and explains how to mitigate the security defect.
Subscription service
HP recommends that you register your product at the Subscriber's Choice for Business website:
http://www.hp.com/country/us/en/contact_us.html
After registering, you will receive email notification of product enhancements, new driver versions,
firmware updates, and other product resources.
Registering for software technical support and update service
Insight Management includes one year of 24 x 7 HP Software Technical Support and Update
Service. This service provides access to HP technical resources for assistance in resolving software
implementation or operations problems.
Information to collect before contacting HP 17
Page 18

The service also provides access to software updates and reference manuals in electronic form as
they are made available from HP.
With this service, Insight Management customers benefit from expedited problem resolution as
well as proactive notification and delivery of software updates. For more information about this
service, see the following website:
http://www.hp.com/services/insight.
Registration for this service takes place following online redemption of the license certificate.
How to use your software technical support and update service
As HP releases updates to software, the latest versions of the software and documentation are
made available to you. The Software Updates and Licensing portal gives you access to software,
documentation, and license updates for products on your HP software support agreement.
You can access this portal from the HP Support Center:
http://www.hp.com/go/hpsc
After creating your profile and linking your support agreements to your profile, see the Software
Updates and Licensing portal at http://www.hp.com/go/hpsoftwareupdatesupport to obtain
software, documentation, and license updates.
HP authorized resellers
For the name of the nearest HP authorized reseller, see the following sources:
• In the United States, see the HP U.S. service locator website:
http://www.hp.com/service_locator
• In other locations, see the Contact HP worldwide website:
http://www.hp.com/go/assistance
Related information
Documents
• HP Insight Control documentation:
http://www.hp.com/go/insightcontrol/docs
Websites
• Knowledge Base:
http://www.hp.com/go/insightdeploy/kb
• HP Insight Control:
http://www.hp.com/go/insightcontrol
• Systems Insight Manager:
http://www.hp.com/go/hpsim
Typographic conventions
This document uses the following typographical conventions:
18 Support and other resources
Page 19

Table 10 Typographic conventions
Book title
Command
Ctrl+x or Ctrl-x
Key
Term
User input
Replaceable
[ ]
{ }
The title of a book. On the web, this can be a hyperlink to
the book itself.
A command name or command phrase, for example ls
-a.
Information displayed by the computer.Computer output
A key sequence that indicates you must hold down the
keyboard key labeled Ctrl while you press the letter x.
The name of an environment variable, for example, PATH.ENVIRONMENT VARIABLE
The name of a keyboard key. Return and Enter both refer
to the same key.
A term or phrase that is defined in the body text of the
document, not in a glossary.
Indicates commands and text that you type exactly as
shown.
The name of a placeholder that you replace with an actual
value.
In command syntax statements, these characters enclose
optional content.
In command syntax statements, these characters enclose
required content.
...
WARNING
CAUTION
NOTE
The character that separates items in a linear list of choices.|
Indicates that the preceding element can be repeated one
or more times.
An alert that calls attention to important information that,
if not understood or followed, results in personal injury.
An alert that calls attention to important information that,
if not understood or followed, results in data loss, data
corruption, or damage to hardware or software.
An alert that calls attention to essential information.IMPORTANT
An alert that contains additional or supplementary
information.
An alert that provides helpful information.TIP
Typographic conventions 19
Page 20

7 Documentation feedback
HP is committed to providing documentation that meets your needs. To help us improve the
documentation, send any errors, suggestions, or comments to Documentation Feedback
(docsfeedback@hp.com). Include the document title and part number, version number, or the URL
when submitting your feedback.
20 Documentation feedback
Page 21

A Manually installing distribution files
If you did not copy the Windows, ESX, or Linux distribution files during the installation, you must
manually copy the files for the scripted installation jobs to function properly. Manually copying the
distribution files produces the same results as copying the files during the installation. To manually
copy the distribution files, copy the entire contents of each distribution CD or DVD to the appropriate
location\\localhost\express\hpfeatures\yyyy, where yyyy indicates operating system
shortcut name.
NOTE: For SLES 10, do not copy the second DVD.
Table 11 Operating system directory names
Directory nameOperating system
esx40u3Deploy ESX 4.0 U3 (EN-US)
esx41u2Deploy ESX 4.1 U2 (EN-US)
esxi50Deploy ESXi 5.0 (EN-US)
esxi50u1Deploy ESXi 5.0 U1(EN-US)
esxi50u2Deploy ESXi 5.0 U2(EN-US)
esxi50u3Deploy ESXi 5.0 U3(EN-US)
esxi51Deploy ESXi 5.1 (EN-US)
esxi51u1Deploy ESXi 5.1 U1 (EN-US)
hs7sp1-x64-en_usDeploy Hyper-V Server 2008 R2 SP1 x64 (EN-US)
hs7-x64-en_usDeploy Hyper-V Server 2008 R2 x64 (EN-US)
hs6-x64-en_usDeploy Hyper-V Server 2008 x64 (EN-US)
hs12r2-x64-en_usDeploy Hyper-V Server 2012 R2 x64 (EN-US)
hs12-x64-en_usDeploy Hyper-V Server 2012 x64 (EN-US)
rhel510KVM-x64Deploy RHEL 5.10 KVM Hypervisor x64(EN-US)
rhel510-x64Deploy RHEL 5.10 x64 (EN-US)
rhel59KVM-x64Deploy RHEL 5.9 KVM Hypervisor x64(EN-US)
rhel59-x64Deploy RHEL 5.9 x64 (EN-US)
rhel64kvm-x64Deploy RHEL 6.4 KVM Hypervisor x64(EN-US)
rhel64-x64Deploy RHEL 6.4 x64 (EN-US)
rhel65kvm-x64Deploy RHEL 6.5 KVM Hypervisor x64(EN-US)
rhel65-x64Deploy RHEL 6.5 x64 (EN-US)
sles10sp4-x64Deploy SLES 10 SP4 x64(EN-US)
sles11sp2KVM-x64Deploy SLES 11 SP2 KVM Hypervisor x64 (EN-US)
sles11sp2-x64Deploy SLES 11 SP2 x64 (EN-US)
sles11sp3KVM-x64Deploy SLES 11 SP3 KVM Hypervisor x64 (EN-US)
sles11sp3-x64Deploy SLES 11 SP3 x64 (EN-US)
esxi51u2Deploy vSphere 5.1 U2(EN-US)
esxi55Deploy vSphere 5.5 (EN-US)
21
Page 22

Table 11 Operating system directory names (continued)
Directory nameOperating system
ws7-x64-sp1-en_usDeploy Windows 2008 R2 SP1 x64 Enterprise (EN-US)
/Standard
ws7-x64-en_usDeploy Windows 2008 R2 x64 Enterprise
(EN-US)/Standard
ws6-x64-en_usDeploy Windows 2008 x64 Enterprise (EN-US)/Standard
ws6-x86-en_usDeploy Windows 2008 x86 Enterprise (EN-US) /Standard
ws12r2-x64-en_usDeploy Windows 2012 R2 x64 Standard (EN-US)
ws12-x64-en_usDeploy Windows 2012 x64 Standard (EN-US)
w7-x64-pro-en_usDeploy Windows 7 x64 Professional (EN-US)
22 Manually installing distribution files
Page 23

B Manually modifying configuration settings
Synchronize display names with computer names option
The Deployment Server can use a console display name that is different from the actual computer
name. However, the console can always reflect the same name as the computer name.
To manually enable synchronization of the display and computer names:
1. In the Deployment Server Console, click Tools>Options.
2. Click the Global tab.
3. Select the Synchronize display names with computer names.
4. Click OK.
Primary lookup key option
The Deployment Server uses the primary lookup key to determine if a server exists in the database.
HP recommends setting the primary lookup key as the server serial number and MAC address.
To manually set the primary lookup key to serial number and MAC address:
1. In the Deployment Server Console, click Tools>Options.
2. Click the Global tab.
3. Select Serial Number and MAC Address as the Primary lookup keys.
4. Click OK.
PXE initial deploy boot timeout option
By default, when a new computer (a computer not listed in the Deployment Server database)
performs a PXE boot, the PXE server sends the computer the PXE menu and waits for manual
selection of the Initial Deployment option. This process is not practical for servers, especially server
blades with no local keyboard, mouse, or monitor.
To manually change the Initial Deploy boot option:
1. In the Deployment Server Console, click Tools>PXE Configuration.
2. Click the DS tab.
3. Select Enable response to request from computers not in the DS Database.
4. Select Wait for Boot Menu default timeout before continuing with the PXE process.
5. Click Save, and then click OK.
Client/server file transfer port option
For adlagent to properly transfer files under VMware ESX 3.x, the client/server file transfer port
must be set to match the value in the supplied ESX kickstart files.
To manually set the client/server file transfer port to 4300:
1. In the Deployment Server Console, click Tools>Options.
2. Click the Global tab.
3. Select Client/server file transfer port, and enter 4300.
4. Click OK.
Windows product keys
For Windows scripted installation deployments, you must provide a Windows product key.
To manually configure the Windows product keys:
1. In the Deployment Server Console, click Tools>Integration Module>User Tokens Editor.
2. Add or edit the appropriate entry.
3. Click Save.
Synchronize display names with computer names option 23
Page 24

Table 12 User Tokens table entries
Token nameOperating system
w7-x64-pro-en_us-productkeyWindows 7 x64
ws7-x64-sp1-std-en_us-productkeyWindows 2008 R2 SP1 x64 Standard
ws7-x64-sp1-ent-en_us-productkeyWindows 2008 R2 SP1 x64 Enterprise
ws7-x64-std-en_us-productkeyWindows 2008 R2 x64 Standard
ws7-x64-ent-en_us-productkeyWindows 2008 R2 x64 Enterprise
ws6-x64-std-en_us-productkeyWindows 2008 x64 Standard
ws6-x64-ent-en_us-productkeyWindows 2008 x64 Enterprise
ws6-x86-std-en_us-productkeyWindows 2008 x86 Standard
ws6-x86-ent-en_us-productkeyWindows 2008 x86 Enterprise
ws12-x64-en_us-productkeyWindows 2012 x64
ws12r2-x64-en_us-productkeyWindows 2012 R2 x64
24 Manually modifying configuration settings
 Loading...