

HP 5130 EI Configuration Manual

HP 5130 EI Switch Series
Fundamentals
Configuration Guide
Part number: 5998-5473
Software version: Release 3106
Document version: 6W100-20140919

Legal and notice information
© Copyright 2014 Hewlett-Packard Development Company, L.P.
No part of this documentation may be reproduced or transmitted in any form or by any means without
prior written consent of Hewlett-Packard Development Company, L.P.
The information contained herein is subject to change without notice.
HEWLETT-PACKARD COMPANY MAKES NO WARRANTY OF ANY KIND WITH REGARD TO THIS
MATERIAL, INCLUDING, BUT NOT LIMITED TO, THE IMPLIED WARRANTIES OF MERCHANTABILITY
AND FITNESS FOR A PARTICULAR PURPOSE. Hewlett-Packard shall not be liable for errors contained
herein or for incidental or consequential damages in connection with the furnishing, performance, or
use of this material.
The only warranties for HP products and services are set forth in the express warranty statements
accompanying such products and services. Nothing herein should be construed as constituting an
additional warranty. HP shall not be liable for technical or editorial errors or omissions contained
herein.

Contents
Using the CLI ································································································································································ 1
CLI views ············································································································································································ 1
Entering system view from user view ······················································································································ 2
Returning to the upper-level view from any view ·································································································· 2
Returning to user view ·············································································································································· 2
Accessing the CLI online help ·········································································································································· 2
Using the undo form of a command ······························································································································· 3
Entering a command ························································································································································· 3
Editing a command line ··········································································································································· 4
Entering a text or string type value for an argument ···························································································· 4
Abbreviating commands·········································································································································· 4
Configuring and using command keyword aliases ······························································································ 5
Configuring and using command hotkeys ············································································································· 5
Enabling redisplaying entered-but-not-submitted commands ··············································································· 6
Understanding command-line error messages ··············································································································· 7
Using the command history function ······························································································································· 7
Controlling the CLI output ················································································································································· 8
Pausing between screens of output ························································································································ 8
Numbering each output line from a display command ······················································································· 9
Filtering the output from a display command ········································································································ 9
Saving the output from a display command to a file ························································································ 12
Viewing and managing the output from a display command effectively ························································ 13
Saving the running configuration ································································································································· 13
Login overview ··························································································································································· 14
Logging in through the console port for the first device access ·············································································· 15
Logging in to the CLI ·················································································································································· 18
CLI overview ··································································································································································· 18
User lines ································································································································································ 18
Login authentication modes ·································································································································· 19
User roles ······························································································································································· 19
FIPS compliance ····························································································································································· 20
Logging in through the console port locally ················································································································ 20
Disabling authentication for console login ········································································································· 20
Configuring password authentication for console login ··················································································· 21
Configuring scheme authentication for console login ······················································································· 22
Configuring common AUX line settings ·············································································································· 22
Logging in through Telnet ·············································································································································· 24
Configuring Telnet login on the device ··············································································································· 25
Using the device to log in to a Telnet server ······································································································ 30
Logging in through SSH ················································································································································ 31
Configuring SSH login on the device ·················································································································· 31
Using the device to log in to an SSH server ······································································································· 33
Logging in through a pair of modems ························································································································· 33
Displaying and maintaining CLI login ························································································································· 36
i

Accessing the device thro
ugh SNMP ······················································································································· 37
Controlling user access ·············································································································································· 38
FIPS compliance ····························································································································································· 38
Controlling Telnet/SSH logins ······································································································································ 38
Configuration procedures ····································································································································· 38
Configuration example ········································································································································· 39
Controlling SNMP access·············································································································································· 39
Configuration procedure ······································································································································ 39
Configuration example ········································································································································· 40
Configuring command authorization ··························································································································· 41
Configuration procedure ······································································································································ 41
Configuration example ········································································································································· 42
Configuring command accounting ······························································································································· 44
Configuration procedure ······································································································································ 44
Configuration example ········································································································································· 45
Configuring RBAC ······················································································································································ 47
Overview ········································································································································································· 47
Permission assignment ·········································································································································· 47
Assigning user roles ·············································································································································· 49
FIPS compliance ····························································································································································· 50
Configuration task list ···················································································································································· 50
Creating user roles ························································································································································· 50
Configuring user role rules ············································································································································ 51
Configuration restrictions and guidelines ··········································································································· 51
Configuration procedure ······································································································································ 52
Configuring feature groups ··········································································································································· 52
Changing resource access policies ······························································································································ 53
Changing the interface policy of a user role ······································································································ 53
Changing the VLAN policy of a user role ·········································································································· 53
Assigning user roles ······················································································································································· 54
Enabling the default user role feature ················································································································· 54
Assigning user roles to remote AAA authentication users ················································································ 54
Assigning user roles to local AAA authentication users ···················································································· 55
Assigning user roles to non-AAA authentication users on user lines ······························································· 55
Configuring temporary user role authorization ·········································································································· 56
Configuration guidelines ······································································································································ 56
Configuring user role authentication ··················································································································· 58
Obtaining temporary user role authorization ···································································································· 58
Displaying RBAC settings ·············································································································································· 59
RBAC configuration examples ······································································································································ 59
RBAC configuration example for local AAA authentication users ··································································· 59
RBAC configuration example for RADIUS authentication users ······································································· 61
RBAC temporary user role authorization configuration example (HWTACACS authentication) ················· 64
RBAC temporary user role authorization configuration example (RADIUS authentication) ·························· 68
Troubleshooting RBAC ··················································································································································· 71
Local users have more access permissions than intended ················································································ 71
Login attempts by RADIUS users always fail ······································································································ 71
Configuring FTP ·························································································································································· 73
FIPS compliance ····························································································································································· 73
Using the device as an FTP server ································································································································ 73
Configuring basic parameters ····························································································································· 74
Configuring authentication and authorization ··································································································· 74
Manually releasing FTP connections ··················································································································· 75
ii

Displaying and maintaining the FTP server ········································································································ 75
FTP server configuration example ························································································································ 75
Using the device as an FTP client ································································································································· 77
Establishing an FTP connection ···························································································································· 77
Managing directories on the FTP server ············································································································· 78
Working with files on the FTP server ··················································································································· 78
Changing to another user account ······················································································································ 79
Maintaining and troubleshooting the FTP connection ······················································································· 80
Terminating the FTP connection ··························································································································· 80
Displaying command help information ··············································································································· 80
Displaying and maintaining FTP client ························································································································· 80
FTP client configuration example ·································································································································· 81
Configuring TFTP ························································································································································ 83
FIPS compliance ····························································································································································· 83
Configuring the device as an IPv4 TFTP client ············································································································ 83
Configuring the device as an IPv6 TFTP client ············································································································ 84
Managing the file system ·········································································································································· 85
FIPS compliance ····························································································································································· 85
File name formats ··························································································································································· 85
Managing files ······························································································································································· 86
Displaying file information ··································································································································· 86
Displaying the contents of a text file ··················································································································· 86
Renaming a file ······················································································································································ 86
Copying a file ························································································································································ 87
Moving a file ·························································································································································· 87
Compressing/decompressing a file ···················································································································· 87
Archiving/extracting files ····································································································································· 87
Deleting/restoring a file ······································································································································· 87
Deleting files from the recycle bin ······················································································································· 88
Calculating the file digest ····································································································································· 88
Managing directories ···················································································································································· 89
Displaying directory information ························································································································· 89
Displaying the current working directory ············································································································ 89
Changing the current working directory ············································································································· 89
Creating a directory ·············································································································································· 89
Removing a directory ············································································································································ 89
Managing storage media ············································································································································· 90
Repairing a storage medium ································································································································ 90
Formatting a storage medium ······························································································································ 90
Setting the operation mode for files and folders ········································································································ 90
Managing configuration files ···································································································································· 92
Overview ········································································································································································· 92
Configuration types ··············································································································································· 92
Startup configuration loading process ················································································································ 93
Configuration file formats ····································································································································· 94
Startup configuration file selection ······················································································································ 94
Configuration file content organization and format ·························································································· 94
FIPS compliance ····························································································································································· 95
Enabling configuration encryption ······························································································································· 95
Saving the running configuration ································································································································· 95
Configuring configuration rollback ······························································································································ 96
Configuration task list ··········································································································································· 96
Configuring configuration archive parameters ·································································································· 97
iii

Enabling automatic configuration archiving ······································································································· 98
Manually archiving the running configuration ··································································································· 98
Rolling back configuration···································································································································· 98
Specifying a next-startup configuration file ················································································································· 99
Backing up the main next-startup configuration file to a TFTP server ····································································· 100
Restoring the main next-startup configuration file from a TFTP server ···································································· 100
Deleting a next-startup configuration file ··················································································································· 101
Displaying and maintaining configuration files ········································································································ 101
Upgrading software ················································································································································ 103
Overview ······································································································································································· 103
Software types ····················································································································································· 103
Software file naming conventions ······················································································································ 103
Comware image redundancy and loading procedure ··················································································· 104
System startup process ········································································································································ 104
Upgrade methods ························································································································································ 105
Non-ISSU upgrade procedure summary ···················································································································· 105
Preparing for the upgrade ·········································································································································· 106
Preloading the Boot ROM image to Boot ROM ········································································································ 106
Specifying the startup image file and completing the upgrade ·············································································· 107
Displaying and maintaining software image settings ······························································································ 108
Non-ISSU software upgrade examples ······················································································································ 109
Example of software upgrade through a reboot ······························································································ 109
Managing the device ·············································································································································· 111
Device management task list ······································································································································· 111
Configuring the device name ····································································································································· 111
Configuring the system time ········································································································································ 112
Specifying the system time source ····················································································································· 112
Setting the system time ········································································································································ 112
Enabling displaying the copyright statement ············································································································ 113
Configuring banners ···················································································································································· 113
Banner types ························································································································································ 113
Banner input modes ············································································································································ 113
Configuration procedure ···································································································································· 114
Rebooting the device ··················································································································································· 115
Configuration guidelines ···································································································································· 115
Rebooting devices immediately at the CLI ········································································································ 115
Scheduling a device reboot ······························································································································· 115
Scheduling a task ························································································································································· 116
Configuration guidelines ···································································································································· 116
Configuration procedure ···································································································································· 116
Schedule configuration example ······················································································································· 118
Disabling password recovery capability ··················································································································· 121
Setting the port status detection timer ························································································································ 122
Configuring CPU usage monitoring ··························································································································· 122
Setting memory thresholds ·········································································································································· 122
Configuring the temperature alarm thresholds ·········································································································· 124
Verifying and diagnosing transceiver modules ········································································································ 125
Verifying transceiver modules ···························································································································· 125
Diagnosing transceiver modules ························································································································ 126
Restoring the factory-default settings and states ······································································································· 126
Displaying and maintaining device management configuration ············································································ 127
Using Tcl ·································································································································································· 129
Benefits and restrictions ··············································································································································· 129
iv

Entering Tcl configuration view from user view ········································································································ 129
Returning from Tcl configuration view to user view ·································································································· 129
Using automatic configuration ······························································································································· 130
Understanding automatic configuration ···················································································································· 130
Overall automatic configuration process ·········································································································· 130
Interface selection process ·································································································································· 132
Automatic-configuration parameter acquisition process ················································································· 133
Configuration file acquisition process ··············································································································· 134
Deploying and configuring servers for automatic configuration ············································································· 135
DHCP server configuration guidelines ·············································································································· 136
HTTP server configuration guidelines ················································································································ 137
TFTP server configuration guidelines ················································································································· 137
Support and other resources ·································································································································· 138
Contacting HP ······························································································································································ 138
Subscription service ············································································································································ 138
Related information ······················································································································································ 138
Documents ···························································································································································· 138
Websites ······························································································································································· 138
Conventions ·································································································································································· 139
v
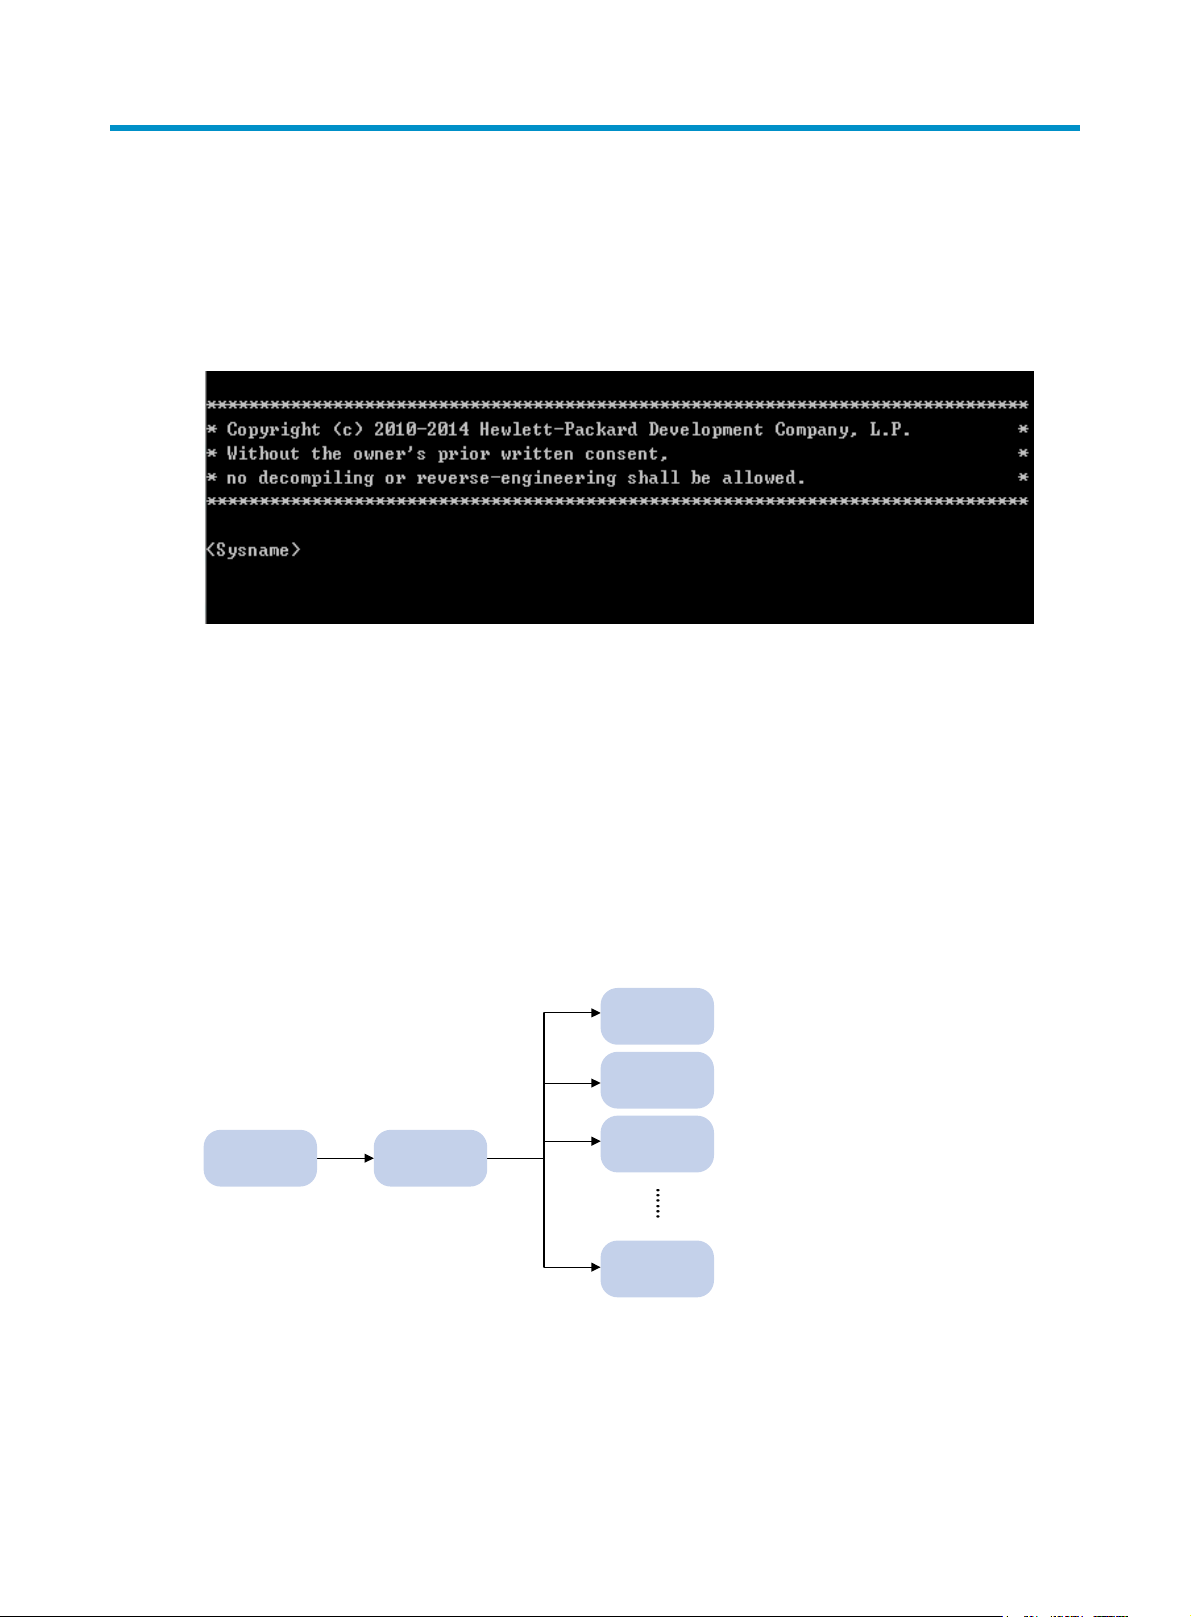
Using the CLI
At the command-line interface (CLI), you can enter text commands to configure, manage, and monitor
the device.
Figure 1 CLI example
You can use different methods to log in to the CLI, including through the console port, Telnet, and SSH.
For more information about login methods, see "Login overview."
CLI views
Commands are grouped in different views by function. To use a command, you must enter its view.
CLI views are hierarchically organized, as shown in Figure 2. E
you can identify where you are and what you can do. For example, the prompt [Sysname-vlan100]
shows that you are in VLAN 100 view and can configure attributes for that VLAN.
Figure 2 CLI views
User view
You are placed in user view immediately after you log in to the CLI. The user view prompt is
<Device-name>, where Device-name indicates the device name. The device name is Sysname by default.
You can change it by using the sysname command.
System
view
ach view has a unique prompt, from which
Interface
view
VLAN view
User line
view
Local user
view
In user view, you can perform the following tasks:
1

• Perform basic operations including display, debug, file management, FTP, Telnet, clock setting, and
reboot.
• Enter system view. The system view prompt is [Device-name].
In system view, you can perform the following tasks:
• Configure global settings (such as the daylight saving time, banners, and hotkeys) and some
functions.
• Enter different function views. For example, you can perform the following tasks:
{ Enter interface view to configure interface parameters.
{ Enter VLAN view to add ports to the VLAN.
{ Enter user line view to configure login user attributes.
To display all commands available in a view, enter a question mark (?) at the view prompt.
Entering system view from user view
Task Command
Enter system view. system-view
Returning to the upper-level view from any view
Task Command
Return to the upper-level view from any view. quit
Executing the quit command in user view terminates your connection to the device.
In public key view, use the peer-public-key end command to return to system view.
Returning to user view
To return directly to user view from any other view, use the return command or press Ctrl+Z.
Task Command
Return directly to user view. return
Accessing the CLI online help
The CLI online help is context sensitive. Enter a question mark at any prompt or in any position of a
command to display all available options.
To access the CLI online help, use one of the following methods:
• Enter a question mark at a view prompt to display the first keyword of every command available in
the view. For example:
<Sysname> ?
User view commands:
2

archive Archive configuration
backup Backup the startup configuration file to a TFTP server
boot-loader Set boot loader
…
• Enter a space and a question mark after a command keyword to display all available, subsequent
keywords and arguments.
{ If the question mark is in the place of a keyword, the CLI displays all possible keywords, each
with a brief description. For example:
<Sysname> terminal ?
debugging Enable to display debugging logs on the current terminal
logging Display logs on the current terminal
monitor Enable to display logs on the current terminal
{ If the question mark is in the place of an argument, the CLI displays the description of the
argument. For example:
<Sysname> system-view
[Sysname] interface vlan-interface ?
<1-4094> Vlan-interface interface number
[Sysname] interface vlan-interface 1 ?
<cr>
[Sysname] interface vlan-interface 1
<1-4094> is the value range for the argument. <cr> indicates that the command is complete
and you can press Enter to execute the command.
• Enter an incomplete keyword string followed by a question mark to display all keywords starting
with that string. For example:
<Sysname> q?
quit
<Sysname> display ftp?
ftp
ftp-server
ftp-user
Using the undo form of a command
Most configuration commands have an undo form for the following tasks:
• Canceling a configuration.
• Restoring the default.
• Disabling a feature.
For example, the info-center enable command enables the information center. The undo info-center
enable command disables the information center.
Entering a command
When you enter a command, you can perform the following tasks:
• Use keys or hotkeys to edit the command line.
• Use abbreviated keywords or keyword aliases.
3

Editing a command line
y
To edit a command line, use the keys listed in Table 1 or the hotkeys listed in Table 2. When you are
finished, you can press Enter to execute the command.
A command line can have up to 512 characters, including keywords, arguments, spaces, and special
characters.
Table 1 Command line editing keys
Ke
s Function
If the edit buffer is not full, pressing a common key inserts a character at the
Common keys
cursor and moves the cursor to the right. The edit buffer can store up to 511
characters. Unless the buffer is full, all common characters that you enter
before pressing Enter are saved in the edit buffer.
Backspace
Left arrow key (←) Moves the cursor one character to the left.
Right arrow key (→) Moves the cursor one character to the right.
Up arrow key (↑) Gets the previous history command.
Down arrow key (↓) Gets the next history command.
Tab
Deletes the character to the left of the cursor and moves the cursor back one
character.
If you press Tab after entering part of a keyword, the system automatically
completes the keyword:
• If a unique match is found, the system displays the complete keyword.
• If there is more than one match, press Tab multiple times to pick the
keyword you want to enter.
• If there is no match, the system does not modify what you entered but
displays it again in the next line.
Entering a text or string type value for an argument
A text type argument value can contain printable characters other than the question mark (?).
A string type argument value can contain any printable characters except for the following characters:
• Question mark (?).
• Quotation mark (").
• Backward slash (\).
• Space.
A specific argument might have more requirements. For more information, see the relevant command
reference.
To enter a printable character, you can enter the character or its ASCII code (in the range of 32 to 126).
Abbreviating commands
You can enter a command line quickly by entering incomplete keywords that uniquely identify the
complete command. In user view, for example, commands starting with an s include startup
4

saved-configuration and system-view. To enter the command system-view, you only need to type sy. To
enter the command startup saved-configuration, type st s.
You can also press Tab to complete an incomplete keyword.
Configuring and using command keyword aliases
The command keyword alias function allows you to use your own keywords to replace the following
keywords when you execute a command:
• The first keywords of non-undo commands.
• The second keywords of undo commands.
For example, if you configure the alias show for the display keyword, you can enter either show clock or
display clock to execute the display clock command.
Usage guidelines
• After you successfully execute a command by using a keyword alias, the system saves the keyword,
instead of its alias, to the running configuration.
• If a string you entered for a command partially matches an alias and a keyword, the command
indicated by the alias is executed. To execute the command indicated by the keyword, enter the
complete keyword.
• If a string you entered for a command partially matches multiple aliases, the system displays an
error message.
• If you enter a string that partially matches an alias and a keyword and press Tab, the keyword
indicated by the alias is displayed. Pressing Tab again displays the keyword.
Configuration procedure
To configure a command keyword alias:
Step Command
1. Enter system view.
2. Enable the command keyword
alias function.
3. Configure a command
keyword alias.
4. (Optional.) Display command
keyword alias information.
system-view N/A
command-alias enable
command-alias mapping
cmdkey alias
display command-alias
Configuring and using command hotkeys
The system defines the hotkeys shown in Table 2 and provides five configurable command hotkeys.
Pressing a command hotkey is the same as entering a command.
Remarks
By default, the command keyword
alias function is disabled.
By default, no command keyword
alias is configured.
You must enter the cmdkey and alias
arguments in their complete form.
This command is available in any
view.
If a hotkey is also defined by the terminal software you are using to interact with the device, the terminal
software definition takes effect.
To configure a command hotkey:
5

y
Step Command
1. Enter system view.
system-view N/A
Remarks
By default:
• Ctrl+G is assigned the display
current-configuration command.
2. Assign a command
to a hotkey.
hotkey { ctrl_g | ctrl_l | ctrl_o |
ctrl_t | ctrl_u } command
• Ctrl+L is assigned the display ip
routing-table command.
• Ctrl+O is assigned the undo debugging all
command.
• No command is assigned to Ctrl+T or
Ctrl+U.
3. (Optional.) Display
hotkeys.
display hotkey
Available in any view.
Table 2 System-reserved hotkeys
Hotke
Ctrl+A Moves the cursor to the beginning of a line.
Ctrl+B Moves the cursor one character to the left.
Ctrl+C Stops the current command.
Function
Ctrl+D Deletes the character at the cursor.
Ctrl+E Moves the cursor to the end of a line.
Ctrl+F Moves the cursor one character to the right.
Ctrl+H
Ctrl+K Aborts the connection request.
Ctrl+R Redisplays the current line.
Ctrl+V Pastes text from the clipboard.
Ctrl+W Deletes the word to the left of the cursor.
Ctrl+X Deletes all characters to the left of the cursor.
Ctrl+Y Deletes all characters from the cursor to the end of the line.
Ctrl+Z Returns to user view.
Ctrl+] Terminates the current connection.
Esc+B Moves the cursor back one word.
Esc+D Deletes all characters from the cursor to the end of the word.
Esc+F Moves the cursor forward one word.
Deletes the character to the left of the cursor.
Enabling redisplaying entered-but-not-submitted commands
Your input might be interrupted by system information output. If redisplaying entered-but-not-submitted
commands is enabled, the system redisplays your input after finishing the output. You can then continue
entering the command line.
6

To enable redisplaying entered-but-not-submitted commands:
g
Step Command Remarks
1. Enter system view.
2. Enable redisplaying
entered-but-not-submit
ted commands.
system-view N/A
By default, the system does not redisplay
entered-but-not-submitted commands.
info-center synchronous
For more information about this command, see
Network Management and Monitoring
Command Reference.
Understanding command-line error messages
After you press Enter to submit a command, the command line interpreter examines the command syntax.
• If the command passes syntax check, the CLI executes the command.
• If the command fails syntax check, the CLI displays an error message.
Table 3 Common command-line error messages
Error messa
% Unrecognized command found at '^' position. The keyword in the marked position is invalid.
% Incomplete command found at '^' position.
e Cause
One or more required keywords or arguments are
missing.
% Ambiguous command found at '^' position.
% Too many parameters.
% Wrong parameter found at '^' position. The argument in the marked position is invalid.
The entered character sequence matches more than one
command.
The entered character sequence contains excessive
keywords or arguments.
Using the command history function
The system automatically saves commands successfully executed by a login user to two command history
buffers:
• Command history buffer for the user line.
• Command history buffer for all user lines.
Table 4 Comparison between the two types of command history buffers
Item Command history buffer for a user line
What kind of
commands are stored
in the buffer?
Commands successfully executed by the
current user of the user line.
Command history buffer for all
user lines
Commands successfully executed by
all login users.
Cleared when the user
logs out?
Yes. No.
7

Item Command history buffer for a user line
Command history buffer for all
user lines
How to view buffered
commands?
How to call buffered
commands?
How to set the buffer
size?
How to disable the
buffer?
Use the display history-command command.
1. Navigate to the command in the buffer:
{ In Windows 200x or Windows XP
HyperTerminal or Telnet, use the up or
down arrow key (↑ or ↓).
{ In Windows 9x HyperTerminal, use
Ctrl+P and Ctrl+N.
2. Press Enter.
Use the history-command max-size
size-value command in user line view to set
the buffer size.
By default, the buffer can store up to 10
commands.
Setting the buffer size to 0 disables the
buffer.
Use the display history-command all
command.
You cannot call buffered commands.
You cannot set the buffer size.
By default, the buffer can store up to
1024 commands.
You cannot disable the buffer.
The system follows these rules when buffering commands:
• Buffering a command in the exact format in which the command was entered. For example, if you
enter an incomplete command, the buffered command is also incomplete. If you enter a command
with a command keyword alias, the buffered command also uses the alias.
• If you enter a command in the same format multiple times in succession, the system buffers the
command only once. If you enter a command in different formats multiple times, the system buffers
each command format. For example, display cu and display current-configuration are buffered as
two entries but successive repetitions of display cu create only one entry.
• To buffer a new command when a buffer is full, the system deletes the oldest command entry in the
buffer.
Controlling the CLI output
This section describes the CLI output control features that help you identify the desired output.
Pausing between screens of output
The system automatically pauses after displaying a screen if the output is too long to fit on one screen.
You can use the keys described in "Output controlling keys" to displa
display.
By default, up to 24 lines can be displayed on a screen. You can change the limit by using the
screen-length screen-length command. For more information about this command, see Fundamentals
Command Reference.
You can also disable pausing between screens of output for the current session. Then, all output is
displayed at one time and the screen is refreshed continuously until the final screen is displayed.
y more information or stop the
8

Output controlling keys
Keys Function
Space Displays the next screen.
Enter Displays the next line.
Ctrl+C Stops the display and cancels the command execution.
<PageUp> Displays the previous page.
<PageDown> Displays the next page.
Disabling pausing between screens of output
To disable pausing between screens of output, execute the following command in user view:
Task Command Remarks
Disable pausing
between screens of
output for the current
session.
screen-length disable
The default for a session varies by settings of the
screen-length command in user line view. The default settings
of the screen-length command are pausing between screens
of output and displaying up to 24 lines on a screen.
This command is a one-time command and takes effect only
for the current session.
Numbering each output line from a display command
You can use the | by-linenum option to prefix each display command output line with a number for easy
identification.
Each line number is displayed as a 5-character string and might be followed by a colon (:) or hyphen (-).
If you specify both | by-linenum and | begin regular-expression for a display command, a hyphen is
displayed for all lines that do not match the regular expression.
To number each output line from a display command:
Task Command
Number each output line from a display command. display command | by-linenum
For example:
# Display system time information, numbering each output line.
<Sysname> display clock | by-linenum
1: 06:14:21 UTC Sat 01/01/2011
Filtering the output from a display command
You can use the | { begin | exclude | include } regular-expression option to filter the display command
output:
• begin—Displays the first line matching the specified regular expression and all subsequent lines.
• exclude—Displays all lines not matching the specified regular expression.
9

• include—Displays all lines matching the specified regular expression.
g
• regular-expression—A case-sensitive string of 1 to 256 characters, which can contain the special
characters described in Table 5.
he amount of time for the filtering operation varies by regular expression. The more complicated the
T
regular expression is, the longer the operation takes. To stop the operation, press Ctrl+C.
Table 5 Special characters supported in a regular expression
Characters Meanin
^ Matches the beginning of a line.
$ Matches the end of a line.
. (period) Matches any single character. ".s" matches "as" and "bs".
*
+
|
( )
\N
Matches the preceding character or
string zero, one, or multiple times.
Matches the preceding character or
string one or multiple times.
Matches the preceding or succeeding
string.
Matches the string in the parentheses,
usually used together with the plus
sign (+) or asterisk sign (*).
Matches the preceding strings in
parentheses, with the Nth string
repeated once.
Examples
"^u" matches all lines beginning with "u". A line
beginning with "Au" is not matched.
"u$" matches all lines ending with "u". A line
ending with "uA" is not matched.
"zo*" matches "z" and "zoo", and "(zo)*"
matches "zo" and "zozo".
"zo+" matches "zo" and "zoo", but not "z".
"def|int" matches a line containing "def" or "int".
"(123A)" matches "123A".
"408(12)+" matches "40812" and
"408121212", but not "408".
"(string)\1" matches a string containing
"stringstring".
"(string1)(string2)\2" matches a string containing
"string1string2string2".
"(string1)(string2)\1\2" matches a string
containing " string1string2string1string2".
[ ]
[^]
{n}
{n,}
Matches a single character in the
brackets.
Matches a single character that is not
in the brackets.
Matches the preceding character n
times. The number n must be a
nonnegative integer.
Matches the preceding character n
times or more. The number n must b e a
nonnegative integer.
10
"[16A]" matches a string containing 1, 6, or A;
"[1-36A]" matches a string containing 1, 2, 3, 6,
or A (- is a hyphen).
To match the character "]", put it immediately after
"[", for example, []abc]. There is no such limit on
"[".
"[^16A]" matches a string that contains one or
more characters except for 1, 6, or A, such as
"abc". A match can also contain 1, 6, or A (such as
"m16"), but it cannot contain these three
characters only (such as 1, 16, or 16A).
"o{2}" matches "food", but not "Bob".
"o{2,}" matches "foooood", but not "Bob".

Characters Meaning Examples
Matches the preceding character n to
{n,m}
\<
\>
m times or more. The numbers n and m
must be nonnegative integers and n
cannot be greater than m.
Matches a string that starts with the
pattern following \<. A string that
contains the pattern is also a match if
the characters preceding the pattern
are not digits, letters, or underscores.
Matches a string that ends with the
pattern preceding \>. A string that
contains the pattern is also a match if
the characters following the pattern
are not digits, letters, or underscores.
" o{1,3}" matches "fod", "food", and "foooood",
but not "fd".
"\<do" matches "domain" and "doa".
"do\>" matches "undo" and "cdo".
\b
Matches a word that starts with the
pattern following \b or ends with the
pattern preceding \b.
"er\b" matches "never", but not "verb" or "erase".
"\ber" matches "erase", but not "verb" or "never".
Matches a word that contains the
\B
pattern but does not start or end with
"er\B" matches "verb", but not "never" or "erase".
the pattern.
\w
Same as [A-Za-z0-9_], matches a
digit, letter, or underscore.
"v\w" matches "vlan" and "service".
Same as [^A-Za-z0-9_], matches a
\W
character that is not a digit, letter, or
"\Wa" matches "-a", but not "2a" or "ba".
underscore.
Escape character. If a special
\
character listed in this table follows \,
the specific meaning of the character
is removed.
"\\" matches a string containing "\", "\^"
matches a string containing "^", and "\\b"
matches a string containing "\b".
For example:
# Use | begin line for the display current-configuration command to match the first line of output that
contains line to the last line of output.
<Sysname> display current-configuration | begin line
line class aux
user-role network-admin
#
line class vty
user-role network-operator
#
line aux 0
user-role network-admin
#
line vty 0 63
authentication-mode scheme
user-role network-operator
#
11

ssh server enable
#
return
# Use | exclude Direct for the display ip routing-table command to filter out direct routes and display
only the non-direct routes.
<Sysname> display ip routing-table | exclude Direct
Destinations : 12 Routes : 12
Destination/Mask Proto Pre Cost NextHop Interface
2.2.2.0/24 RIP 10 2 1.1.2.2 Vlan 2
# Use | include snmp for the display current-configuration command to filter in entries that contain
snmp.
<Sysname> display current-configuration | include snmp
snmp-agent
snmp-agent community write private
snmp-agent community read public
snmp-agent sys-info version all
snmp-agent target-host trap address udp-domain 192.168.1.26 params securityname public
Saving the output from a display command to a file
A display command shows certain configuration and operation information of the device. Its output
might vary over time or with user configuration or operation. You can save the output to a file for future
retrieval or troubleshooting.
Use one of the following methods to save the output from a display command:
• Save the output to a separate file. Use this method if you want to use one file for a single display
command.
• Append the output to the end of a file. Use this method if you want to use one file for multiple
display commands.
To save the output from a display command to a file, use one of the following commands in any view:
Task Command
Save the output from a display command to a separate file. display command > filename
Append the output from a display command to the end of a file. display command >> filename
For example:
# Save system time information to a separate file named clock.txt.
<Sysname> display clock > clock.txt
# Verify whether the system time information is saved to file clock.txt.
<Sysname> more clock.txt
06:03:58 UTC Sat 01/01/2014
# Append system time information to the end of file clock.txt.
<Sysname> display clock >> clock.txt
12

# Verify whether the system time information is appended to the end of file clock.txt.
<Sysname> more clock.txt
06:03:58 UTC Sat 01/01/2014
06:04:58 UTC Sat 01/01/2014
Viewing and managing the output from a display command effectively
You can use the following measures in combination to filter and manage the output from a display
command:
• Numbering each output line from a display command
• Filtering the output from a display command
• Saving the output from a display command to a file
o use mul tip le measures t o view and m ana ge t he o utp ut from a display command effectively, execute the
T
following command in any view:
Task Command
View and manage the output from a
display command effectively.
For example:
# Save the running configuration to a separate file named test.txt, with each line numbered.
<Sysname> display current-configuration | by-linenum > test.txt
# Append lines including snmp in the running configuration to the file test.txt.
<Sysname> display current-configuration | include snmp >> test.txt
# Display the first line that begins with user-group in the running configuration and all the following lines.
<Sysname> display current-configuration | by-linenum begin user-group
114: user-group system
115- #
116- return
display command [ | [ by-linenum ] { begin | exclude | include }
regular-expression ] [ > filename | >> filename ]
Saving the running configuration
To make your configuration take effect after a reboot, save the running configuration to a configuration
file by using the save command in any view. This command saves all commands that have been
successfully executed, except for the one-time commands. Typical one-time commands include display
commands used for displaying information and reset commands used for clearing information.
For more information about the save command, see Fundamentals Command Reference.
13

g
Login overview
The first time you access the device, you can log in to the CLI through the console port. After login, you
can change console login parameters or configure other access methods, including Telnet, SSH,
modem,, and SNMP.
Telnet is not supported in FIPS mode.
Table 6 Login methods at a glance
Lo
in method Default settings and minimum configuration requirements
Logging in to the CLI:
• Logging in through the console
port locally
• Logging in through Telnet
By default, login through the console port is enabled, no username or
password is required, and the user role network-admin is assigned.
After login, configure password or scheme authentication mode to
improve device security.
By default, Telnet login is disabled.
To Log in through Telnet, complete the following configuration tasks:
• Enable the Telnet server function.
• Assign an IP address to a Layer 3 interface and make sure the
interface and the Telnet client can reach each other.
• Configure an authentication mode for VTY login users. By default,
password authentication is used but no password is configured.
• Assign a user role to VTY login users (network-operator by default).
• Logging in through SSH
• Logging in through a pair of
modems
Accessing the device through SNMP
By default, SSH login is disabled.
To log in through SSH, complete the following configuration tasks:
• Enable the SSH server function and configure SSH attributes.
• Assign an IP address to a Layer 3 interface and make sure the
interface and the SSH client can reach each other.
• Configure scheme authentication for VTY login users (password
authentication by default).
• Assign a user role to VTY login users (network-operator by default).
By default, modem dial-in is enabled, and you can dial in to the
switch. The default user role is network-admin.
By default, SNMP access is disabled.
To access the device through SNMP, complete the following
configuration tasks:
• Assign an IP address to a Layer 3 interface, and make sure the
interface and the NMS can reach each other.
• Configure SNMP basic parameters.
14
t
Logging in through the console port for the first device access
The first time you access the device, you can only log in to the CLI through the console port.
To log in through the console port, prepare a console terminal (for example, a PC). Make sure the
console terminal has a terminal emulation program, for example, HyperTerminal in Windows XP.
To log in through the console port:
1. Connect the DB-9 female connector of the console cable to the serial port of the PC.
2. Connect the RJ-45 connector of the console cable to the console port of the device.
IMPORTANT:
• Identify the mark on the console port and make sure you are connecting to the correct port.
• The serial ports on PCs do not support hot swapping. If the switch has been powered on, always connec
the console cable to the PC before connecting it to the switch, and always disconnect the console cable
from the switch before disconnecting it from the PC.
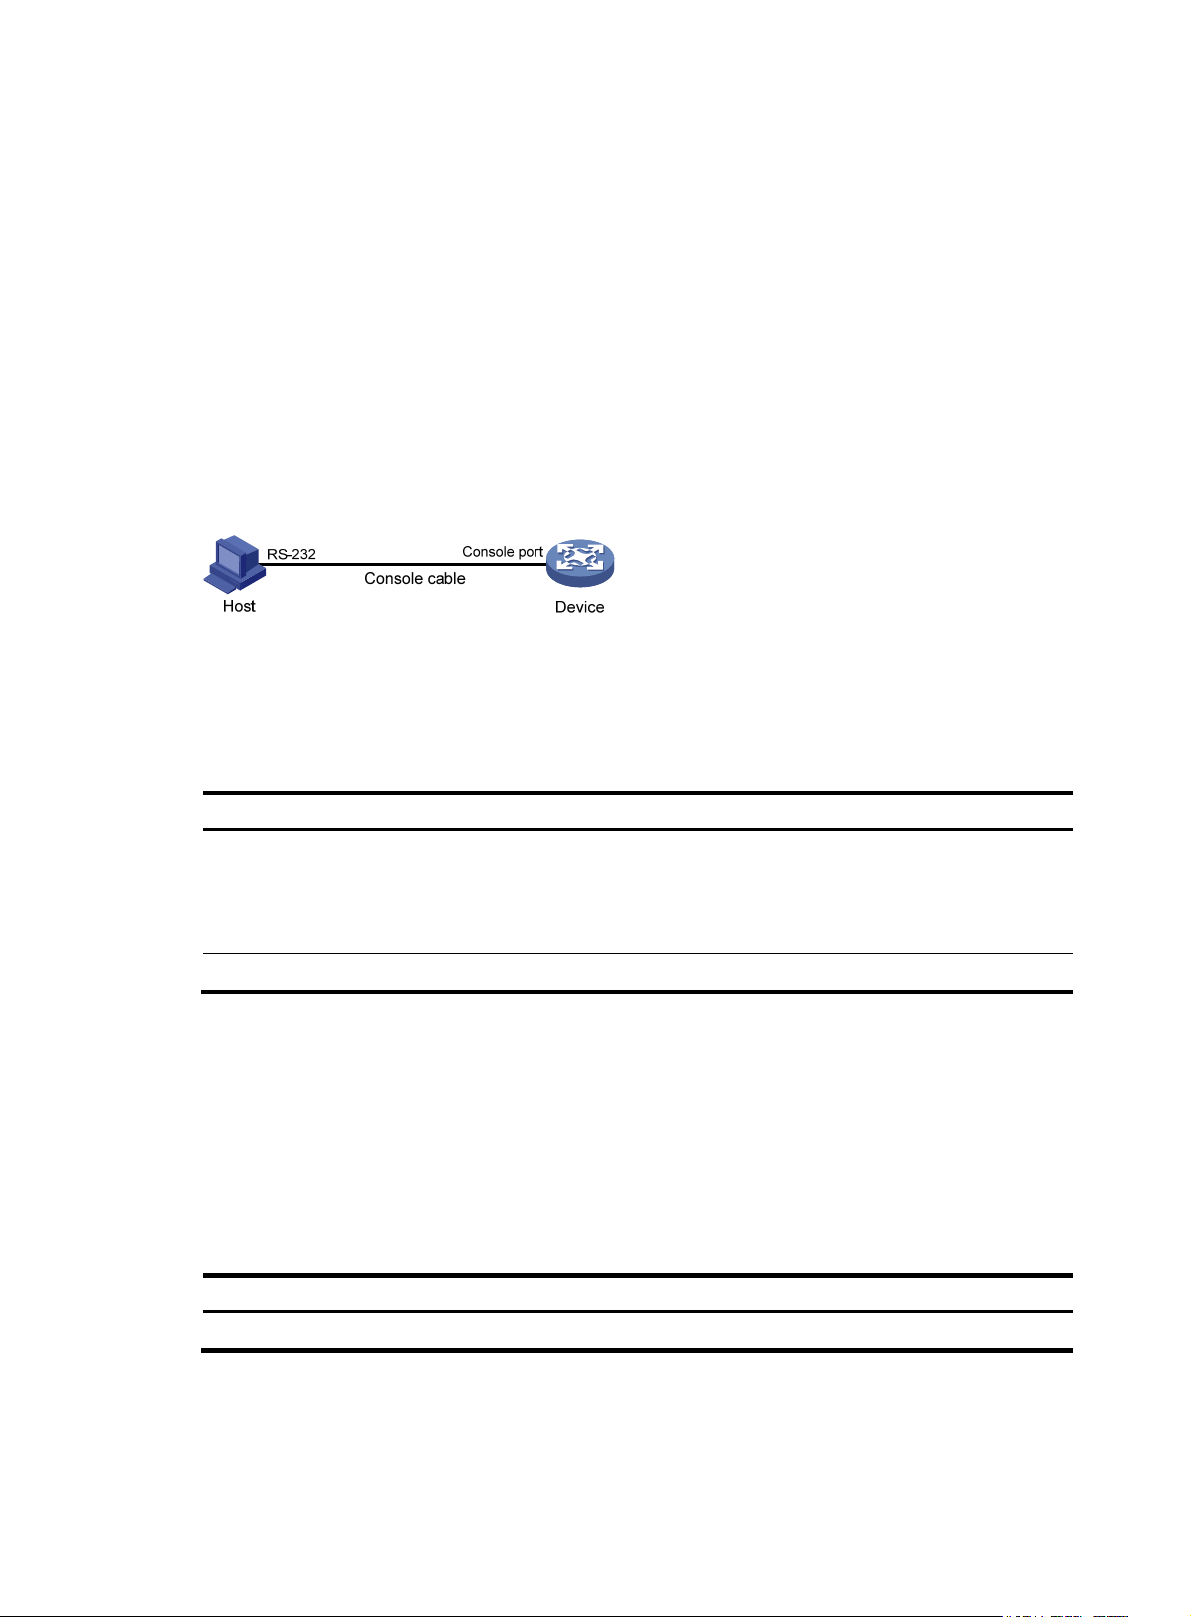
Figure 3 Connecting a terminal to the console port
RS-232
Console cable
Host
Console port
Device
3. If the PC is off, turn on the PC.
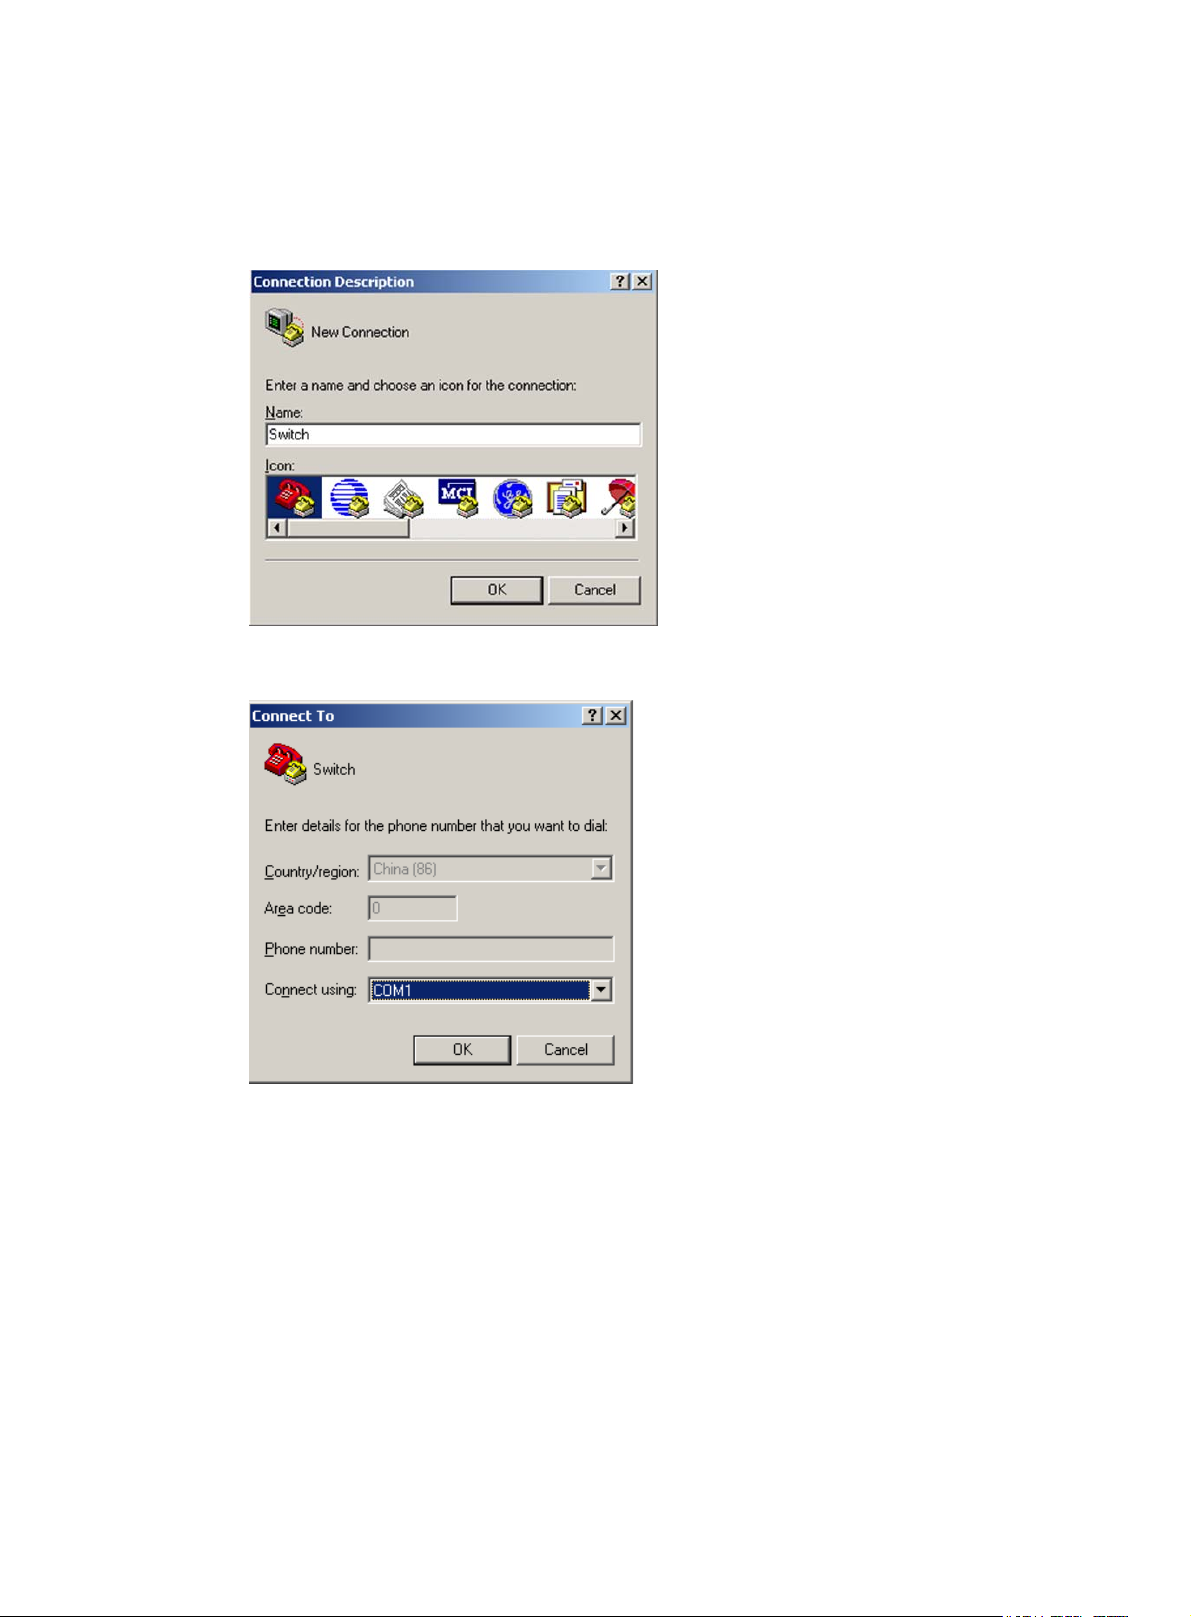
4. On the PC, launch the terminal emulation program and create a connection that uses the serial port
connected to the device. Set the port properties so the port properties match the following console
port default settings:
{ Bits per second—9600 bps
{ Flow control—None
{ Parity—None
{ Stop bits—1
{ Data bits—8
Figure 4 through Figure 6
show the configuration procedure on Windows XP HyperTerminal. On
Windows Server 2003, you must add the HyperTerminal program first. On Windows Server
2008, Windows 7, Windows Vista, or another operating system, you must obtain and install a
third-party terminal control program. Then, follow the user guide or online help to log in to the
device.
To start the HyperTerminal on Windows XP:
a. Click start.
b. Select All Programs > Accessories > Communications > Hyper Terminal.
To view the serial port connected to the device:
c. Right-click the My Computer icon on the desktop.
15
d. Select Manage to open the Computer Management window.
e. Select System Tools > Device Manager from the navigation tree.
f. Select Ports (COM & LPT) from the right pane.
Figure 4 Creating a connection
Figure 5 Specifying the serial port used to establish the connection
16
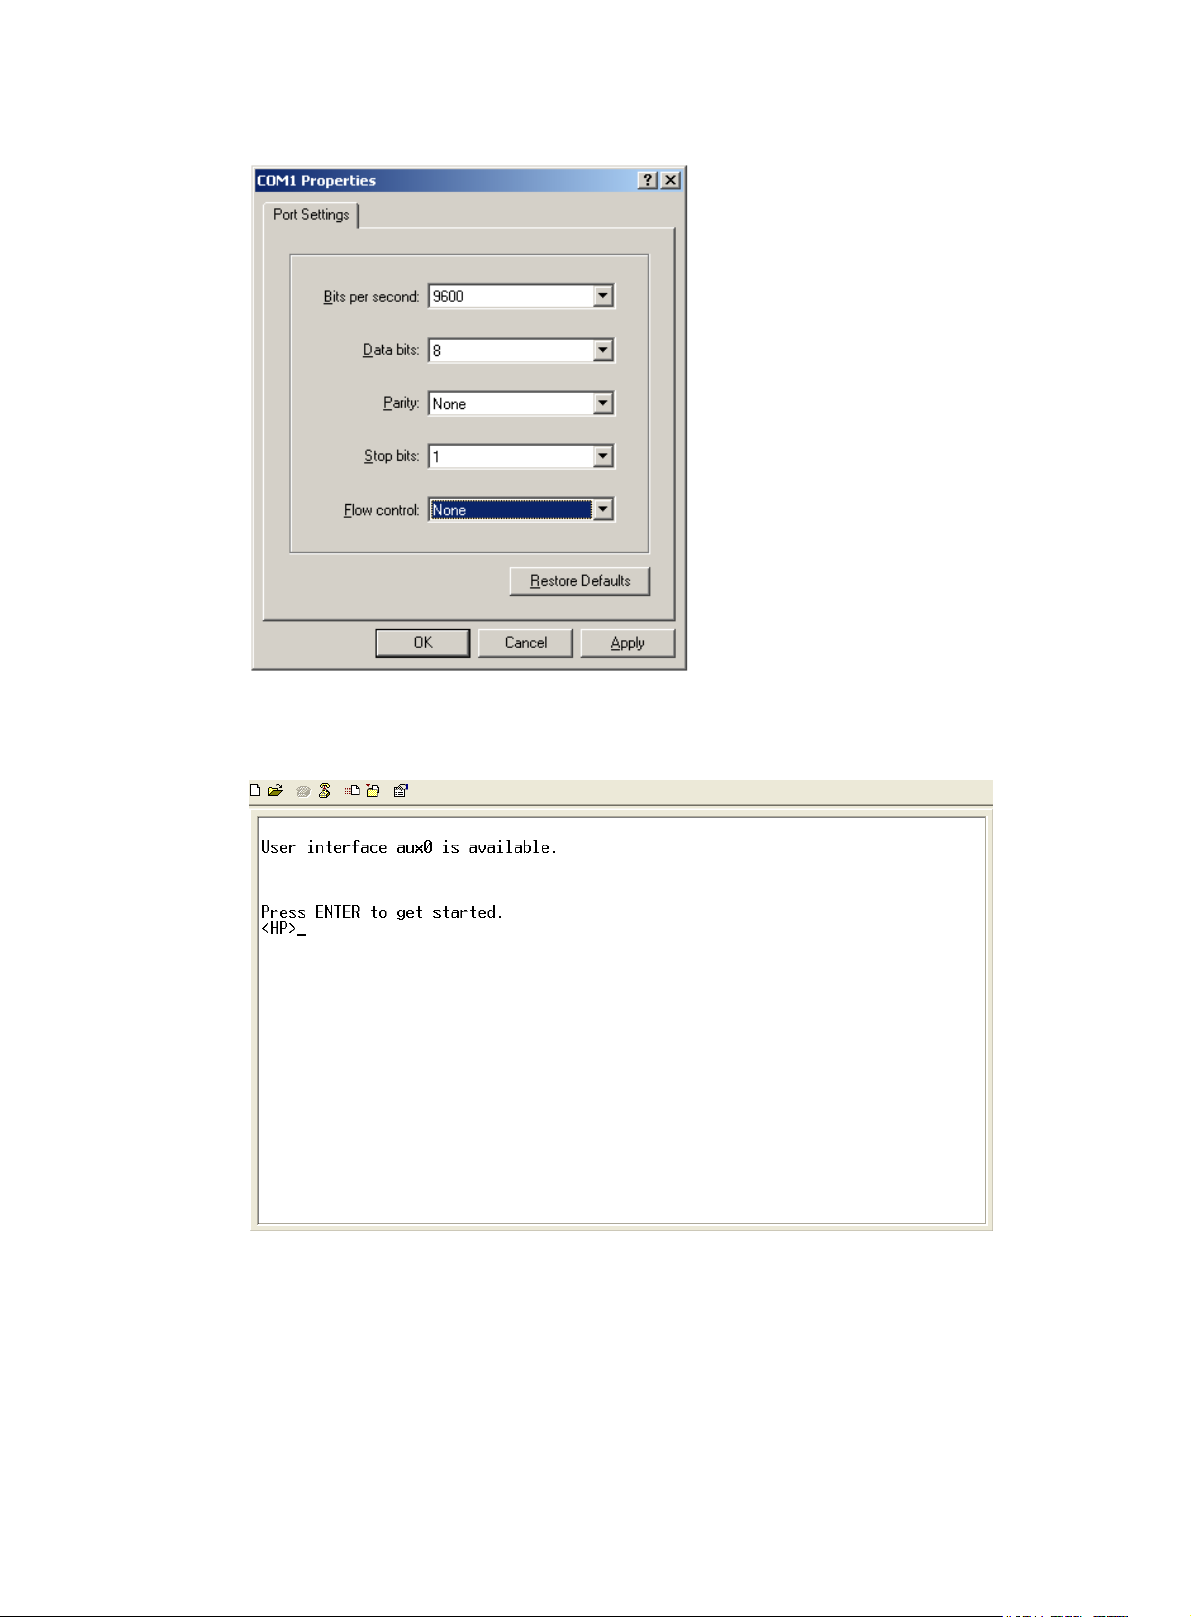
Figure 6 Setting the properties of the serial port
5. Power on the device and press Enter as prompted.
Figure 7 Device CLI
6. At the default user view prompt <HP>, enter commands to configure or manage the device. To get
help, enter ?.
17

g
Logging in to the CLI
By default, you can log in to the CLI through the console port. After you log in, you can configure other
login methods, including Telnet, SSH, and modem dial-in.
To prevent illegal access to the CLI and control user behavior, you can perform the following tasks:
• Configure login authentication.
• Assign user roles.
• Configure command authorization and command accounting.
• Use ACLs to filter unauthorized logins.
This chapter describes how to configure and use CLI login methods, including login authentication, user
roles, and common user line settings. For more information about command authorization, command
accounting, and unauthorized access filtering, see "Controlling user access."
CLI overview
User lines
The device uses user lines (also called user interfaces) to manage CLI sessions and monitor user behavior.
You can configure access control settings, including login authentication and user role, on user lines.
After users are logged in, their actions must be compliant with the settings on the user lines assigned to
them.
Users are assigned different user lines, depending on their login methods, as shown in Table 7.
Table 7 CLI login method and u
User line Lo
AUX line Console port.
Virtual type terminal (VTY) line Telnet or SSH.
User line assignment
The device automatically assigns user lines to CLI login users, depending on their login methods. Each
user line can be assigned only to one user at a time. If no user line is available, a CLI login attempt will
be rejected.
For a CLI login, the device always picks the lowest numbered user line from the idle user lines available
for the login type. For example, four VTY lines (0 to 3) are configured, of which VTY 0 and VTY 3 are idle.
When a user Telnets to the device, the device assigns VTY 0 to the user, and uses the settings on VTY 0
to authenticate and manage the user.
ser line matrix
in method
User line identification
Every user line has an absolute number and a relative number for identification.
18

g
An absolute number uniquely identifies a user line among all user lines. The user lines are numbered
starting from 0 and incrementing by 1 and in the sequence of AUX, and VTY lines. You can use the
display line command without any parameters to view supported user lines and their absolute numbers.
A relative number uniquely identifies a user line among all user lines that are the same type. The number
format is user line type + number. All the types of user lines are numbered starting from 0 and
incrementing by 1. For example, the first VTY line is VTY 0.
Login authentication modes
You can configure login authentication to prevent illegal access to the device CLI.
In non-FIPS mode, the device supports the following login authentication modes:
• None—Disables authentication. This mode allows access without authentication and is insecure.
• Password—Requires password authentication.
• Scheme—Uses the AAA module to provide local or remote login authentication. You must provide
a username and password at login.
In FIPS mode, the device supports only the scheme authentication mode.
Different login authentication modes require different user line configurations, as shown in Table 8.
Table 8 Configuration required for
Authentication mode Confi
None Set the authentication mode to none.
Password
Scheme
User roles
A user is assigned one or more user roles at login, and a user can access only commands permitted by
the assigned user roles. For more information about user roles, see "Configuring RBAC."
T
he device assigns user roles based on the login authentication mode and login method:
• If none or password authentication is used, the device assigns user roles according to the user role
configuration made for the user line.
• If scheme authentication is used:
different login authentication modes
uration tasks
1. Set the authentication mode to password.
2. Set a password.
1. Set the authentication mode to scheme.
2. Configure login authentication methods in ISP domain view. For more
information, see Security Configuration Guide.
{ For an SSH login user who uses publickey or password-publickey authentication, the device
assigns the user roles specified for the local device management user with the same name.
{ For other users, the device assigns user roles according to the user role configuration made on
the AAA module. If the AAA server does not assign any user role and the default user role
function is disabled, a remote AAA authentication user cannot log in.
19
FIPS compliance
The device supports the FIPS mode that complies with NIST FIPS 140-2 requirements. Support for features,
commands, and parameters might differ in FIPS mode and non-FIPS mode. For more information about
FIPS mode, see Security Configuration Guide.
Telnet login is not supported in FIPS mode.
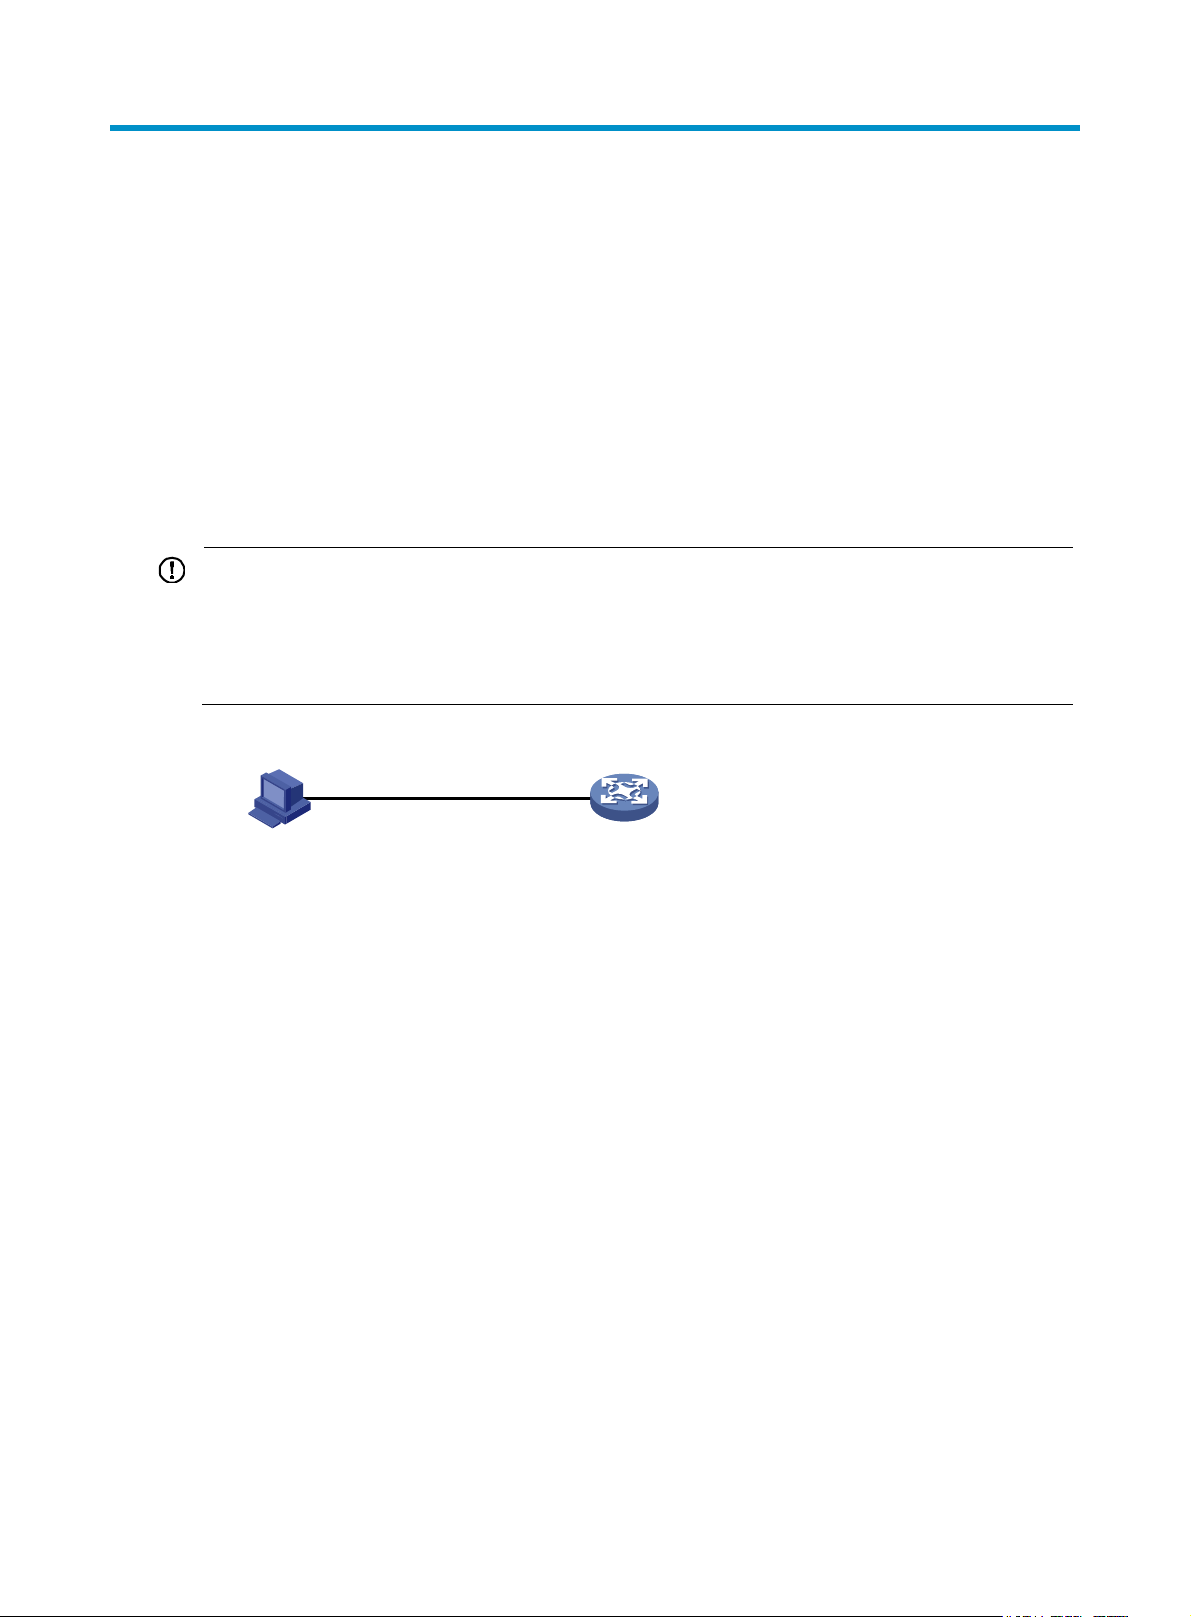
Logging in through the console port locally
You can connect a terminal to the console port of the device to log in and manage the device, as shown
in Figure 8. F
Figure 8 Logging in through the console port
By default, console login is enabled and does not require authentication. To improve device security,
configure password or scheme authentication and assign user roles immediately after you log in to the
device for the first time.
or the login procedure, see "Logging in through the console port for the first device access."
To configure console login, complete the following tasks:
Task Remarks
(Required.) Configuring login authentication:
• Disabling authentication for console login
• Configuring password authentication for console login
• Configuring scheme authentication for console login
(Optional.) Configuring common AUX line settings N/A
The console login configuration is effective only for users who log in after the configuration is completed.
Before using multiple devices to form an IRF fabric, enter AUX line class view on each device and perform
the following tasks:
• Disable authentication.
• Assign the user role network-admin.
Configure one authentication mode as
required.
In FIPS mode, only the scheme
authentication mode is supported.
Disabling authentication for console login
Step Command
1. Enter system view.
system-view N/A
Remarks
20

Step Command
• Enter AUX line view:
2. Enter AUX line
view or class view.
3. Disable
authentication.
4. Assign a user role.
line aux first-number
[ last-number ]
• Enter AUX line class view:
line class aux
authentication-mode none
user-role role-name
Remarks
A setting in user line view is applied only to
the user line. A setting in user line class view
is applied to all user lines of the class.
A non-default setting in either view takes
precedence over a default setting in the
other view. A non-default setting in user line
view takes precedence over a non-default
setting in user line class view.
A setting in user line view takes effect
immediately and affects the online user. A
setting in user line class view does not affect
online users and takes effect only for users
who log in after the configuration is
completed.
By default, authentication is disabled for the
AUX line.
By default, an AUX line user is assigned the
user role network-admin.
The next time you log in through the console port, you do not need to provide any username or password.
Configuring password authentication for console login
Step Command
1. Enter system view.
system-view N/A
• Enter AUX line view:
2. Enter AUX line view or
class view.
3. Enable password
authentication.
line aux first-number
[ last-number ]
• Enter AUX line class view:
line class aux
authentication-mode password
Remarks
A setting in user line view is applied
only to the user line. A setting in user
line class view is applied to all user
lines of the class.
A non-default setting in either view
takes precedence over a default
setting in the other view. A
non-default setting in user line view
takes precedence over a non-default
setting in user line class view.
A setting in user line view takes effect
immediately and affects the online
user. A setting in user line class view
does not affect online users and takes
effect only for users who log in after
the configuration is completed.
By default, authentication is disabled
for the AUX line.
4. Set a password.
5. Assign a user role.
set authentication password { hash |
simple } password
user-role role-name
21
By default, no password is set.
By default, an AUX line user is
assigned the user role
network-admin.

The next time you log in through the console port, you must provide the configured login password.
Configuring scheme authentication for console login
Step Command
1. Enter system view.
system-view N/A
• Enter AUX line view:
2. Enter AUX line view or
class view.
3. Enable scheme
authentication.
line aux first-number
[ last-number ]
• Enter AUX line class view:
line class aux
authentication-mode scheme
Remarks
A setting in user line view is applied only
to the user line. A setting in user line class
view is applied to all user lines of the
class.
A non-default setting in either view takes
precedence over a default setting in the
other view. A non-default setting in user
line view takes precedence over a
non-default setting in user line class view.
A setting in user line view takes effect
immediately and affects the online user.
A setting in user line class view does not
affect online users and takes effect only
for users who log in after the
configuration is completed.
By default, authentication is disabled for
the AUX line.
To use scheme authentication, you must also complete the following tasks:
• Configure login authentication methods in ISP domain view.
• To use remote authentication, configure the scheme to be used.
• To use local authentication, configure a local user and the relevant attributes.
For more information, see Security Configuration Guide.
The next time you log in through the console port, you must provide the configured login username and
password.
Configuring common AUX line settings
Some common settings configured for an AUX line take effect immediately and can interrupt the current
session. Use a login method different from console login to log in to the device before you change AUX
line settings.
To log in through the console port after you configure AUX line settings, change the terminal settings on
the configuration terminal to match the line settings.
To configure common settings for an AUX line:
Step Command
1. Enter system view.
system-view N/A
Remarks
22

Step Command
• Enter AUX line view:
2. Enter AUX line view
or class view.
3. Set the baud rate.
4. Specify the parity
check mode.
line aux first-number
[ last-number ]
• Enter AUX line class view:
line class aux
speed speed-value
parity { even | mark | none | odd |
space }
Remarks
A setting in user line view is applied only to
the user line. A setting in user line class
view is applied to all user lines of the class.
A non-default setting in either view takes
precedence over a default setting in the
other view. A non-default setting in user
line view takes precedence over a
non-default setting in user line class view.
A setting in user line view takes effect
immediately and affects the online user. A
setting in user line class view does not
affect online users and takes effect only for
users who log in after the configuration is
completed.
By default, the baud rate is 9600 bps.
This command is not available in AUX line
class view.
By default, the parity check mode is none,
and no parity check is performed.
This command is not available in AUX line
class view.
5. Specify the number
of stop bits.
6. Specify the number
of data bits for
each character.
7. Define a shortcut
key for starting a
terminal session.
8. Define a shortcut
key for terminating
tasks.
9. Configure the flow
control mode.
stopbits { 1 | 1.5 | 2 }
databits { 5 | 6 | 7 | 8 }
activation-key character
escape-key { character | default }
flow-control { hardware | none |
software }
The default is 1.
Stop bits indicate the end of a character.
The more the stop bits, the slower the
transmission.
This command is not available in AUX line
class view.
The default is 8.
The setting varies by character coding
type. For example, you can set it to 7 if
standard ASCII characters are to be sent. If
extended ASCII characters are to be sent,
set it to 8.
This command is not available in AUX line
class view.
By default, pressing Enter starts the
terminal session.
By default, pressing Ctrl+C terminates a
task.
This command is not available in AUX line
class view.
By default, the flow control mode is none.
23
 Loading...