

Hotpoint LL 6088 X SK, LL 6088 SK User Manual

Instruction booklet
DISHWASHER
EN
English, 1
D A
LL 6066
LL 6088
N O S V
Norsk, 13
F I
Suomi, 49 Dansk, 37
Svenka, 25
Contents
Installation, 2-3
Positioning and levelling
Connecting the water and electricity supplies
Technical data
Description of the appliance, 4
Overall view
Control panel
Loading the racks, 5
Lower rack
Cutlery basket
Upper rack
Start-up and use, 6
Starting the dishwasher
Loading the detergent
Washing options
Wash cycles, 7
Wash cycle table
Rinse aid and refined salt, 8
Loading the rinse aid
Loading the refined salt
Care and maintenance, 9
Shutting off the water and electricity supplies
Cleaning the dishwasher
Preventing unpleasant odours
Cleaning the sprayer arms
Cleaning the filters
Leaving the machine unused for extended periods
Precautions and advice, 10
General safety
Disposal
Saving energy and respecting the environment
Troubleshooting, 11
Assistance, 12
Before calling for Assistance
Installation
EN
Keep this instruction manual in a safe place for
future reference. If the appliance is sold, given
away or moved, please ensure the manual is kept
with the machine, so that the new owner may benefit
from the advice contained within it.
Please read this instruction manual carefully: it
contains important information regarding the safe
installation, use and maintenance of the appliance.
If the appliance must be moved at any time,
keep it in an upright position; if absolutely
necessary, it may be tilted onto its back.
Positioning and levelling
1. Remove the appliance from all packaging and
check that it has not been damaged during
transportation.
If it has been damaged, contact the retailer and do
not proceed any further with the installation process.
2. Check the dishwasher by placing it so that its
sides or back panel are in contact with the adjacent
cabinets or even with the wall. This appliance can
also be recessed under a single worktop (
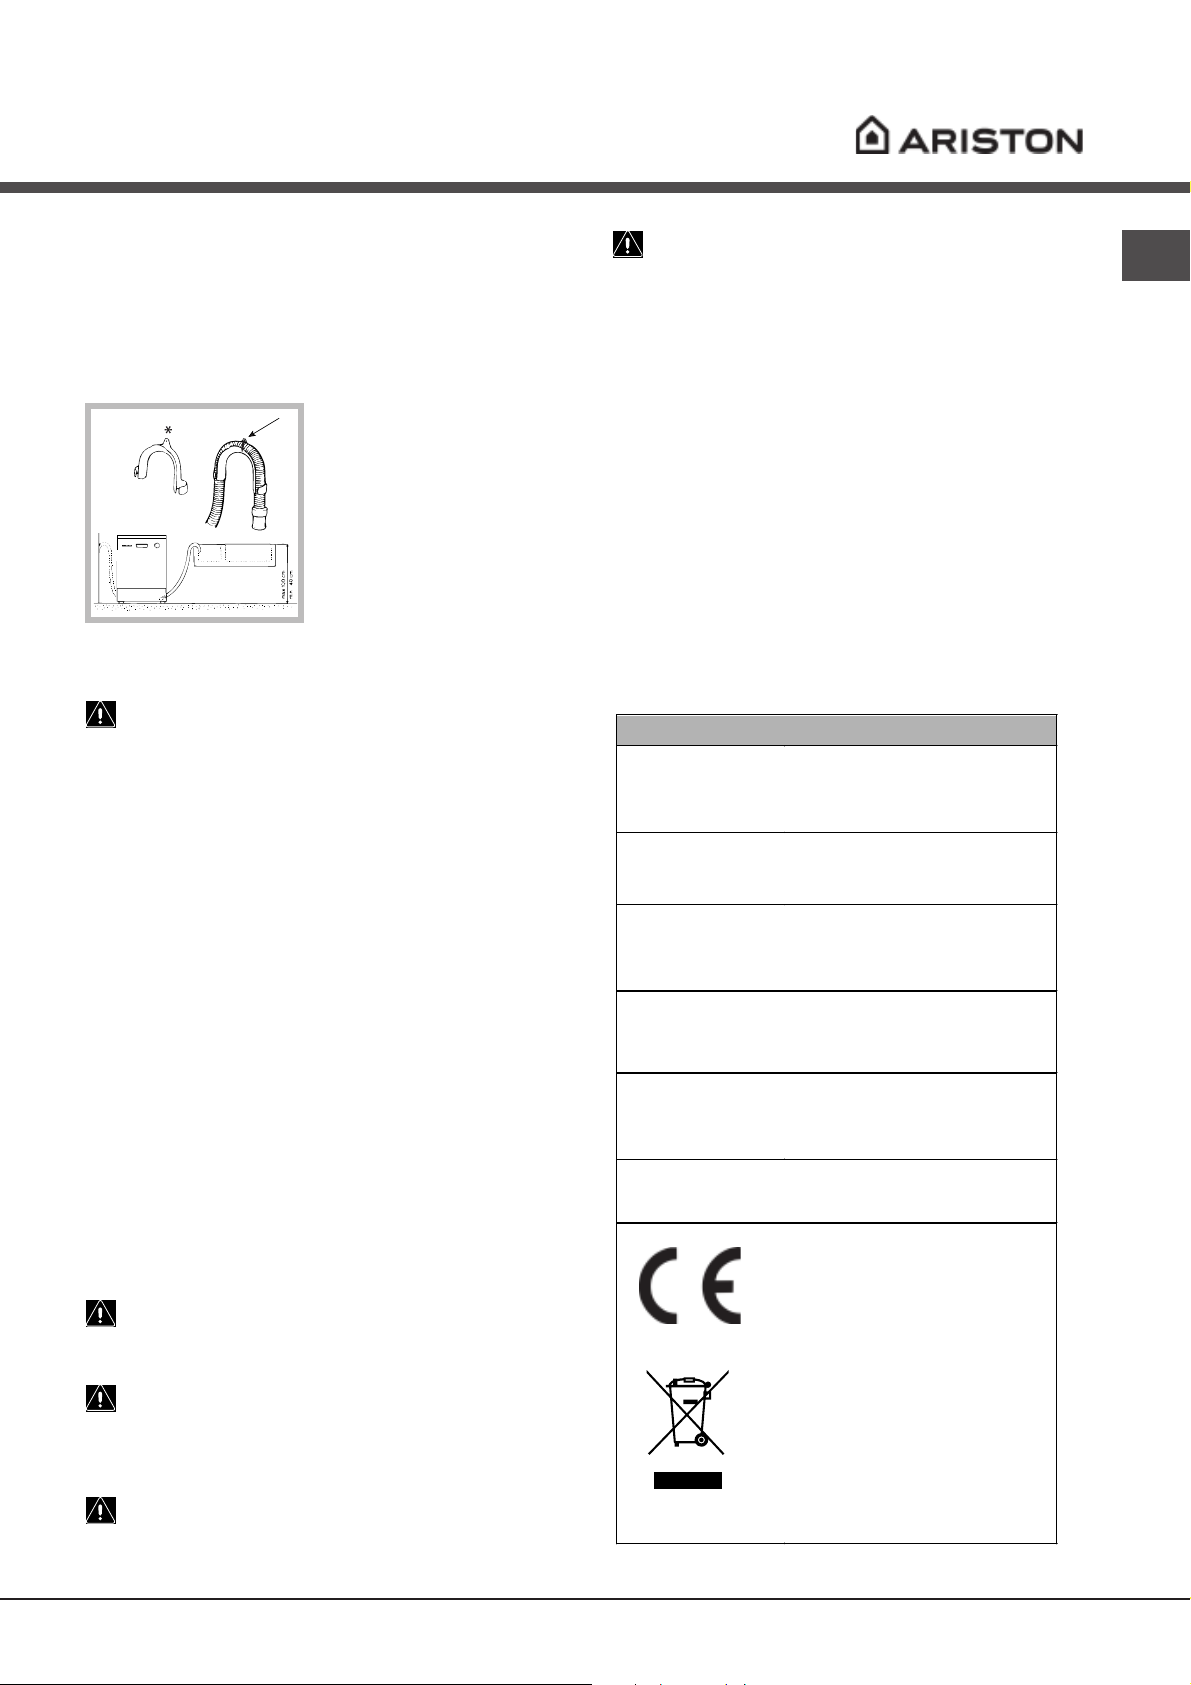
Assembly instruction sheet*
3. Position the dishwasher on a level and sturdy floor.
If the floor is uneven, the front feet of the appliance
may be adjusted until it reaches a horizontal position
(the angle of inclination must not exceed 2 degrees).
If the appliance is levelled correctly, it will be more
stable and much less likely to move or cause
vibrations and noise while it is operating.
).
see the
Connecting the water inlet hose
• To a suitable cold water connection point: before
attaching the hose, run the water until it is
perfectly clear so that any impurities that may be
present in the water do not clog the appliance;
after performing this operation, screw the inlet
hose tightly onto a tap with a ¾ gas threaded
connection.
• To a suitable hot water connection point: your
dishwasher may be provided with hot water from
the mains supply (if you have a central heating
system with radiators) provided that it does not
exceed a temperature of 60°C.
Screw the hose to the tap as described for
connection to a cold water supply.
If the inlet hose is not long enough, contact a
specialist store or an authorised technician (
Assistance
The water pressure must be within the values
indicated in the Technical data table (
The hose should not be bent or compressed.
).
see
see below
).
Connecting the water and electricity
supplies
Connection to the water and electricity supplies
should only be performed by a qualified technician.
The dishwasher should not stand on top of the
water hoses or the electricity supply cable.
The appliance must be connected to the water
supply network using new piping.
- Do not use old piping.
The water inlet (A) and outlet (B) hoses and the
electricity supply cable may be positioned towards
the right or the left in order to achieve the best
possible installation (
2
see figure
).
Anti-flooding protection
To ensure floods do not occur, the dishwasher:
- is provided with a special system which blocks the
water supply in the event of anomalies or leaks from
inside the appliance.
- is provided with a
other words it has a water inlet hose that consists of
a transparent hose on the outside and a red hose on
the inside: both the hoses can withstand extremely
high pressure. If the internal hose breaks, the
external hose becomes a bright red colour and
carries the water instead, thus avoiding any leakage.
It is very important to check the external hose
regularly: if it is a bright red colour, it must be
replaced by an authorised technician as soon as
possible (
* Only available in selected models.
see Assistance
Water Stop
* safety device, in
).
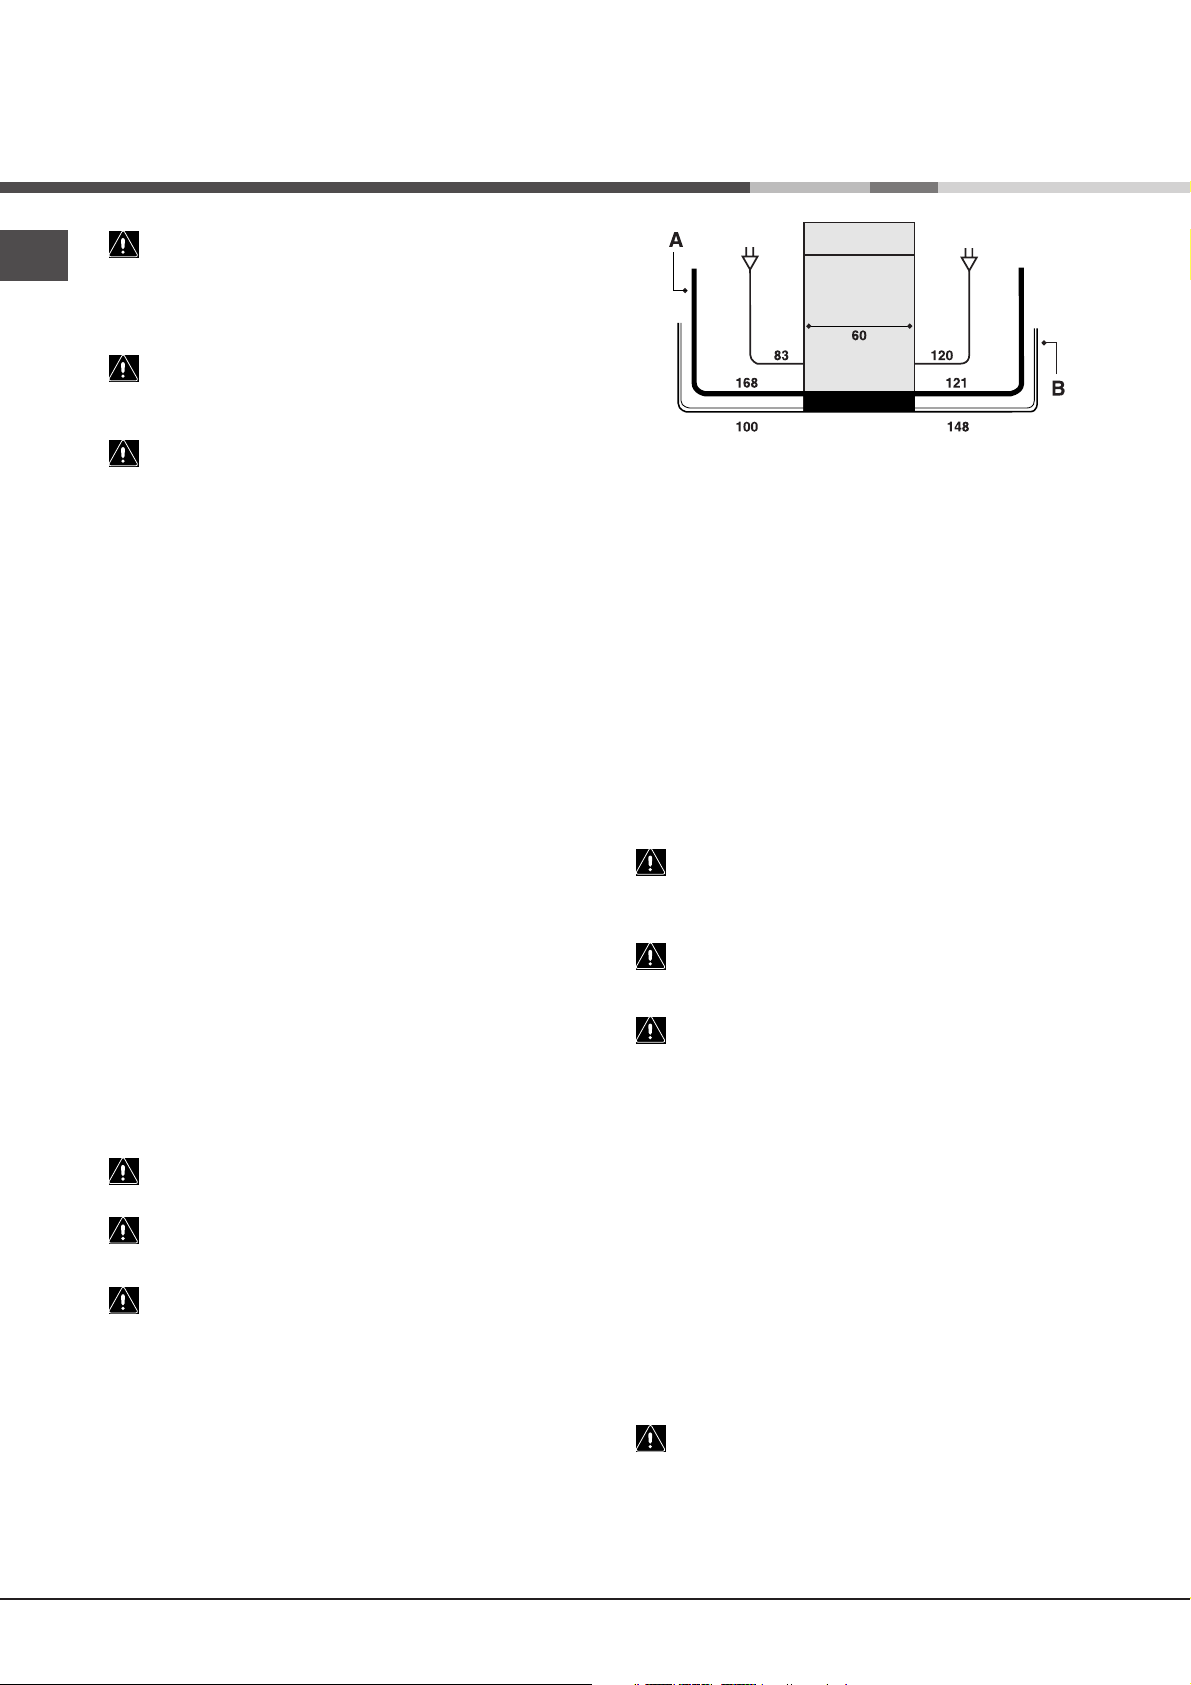
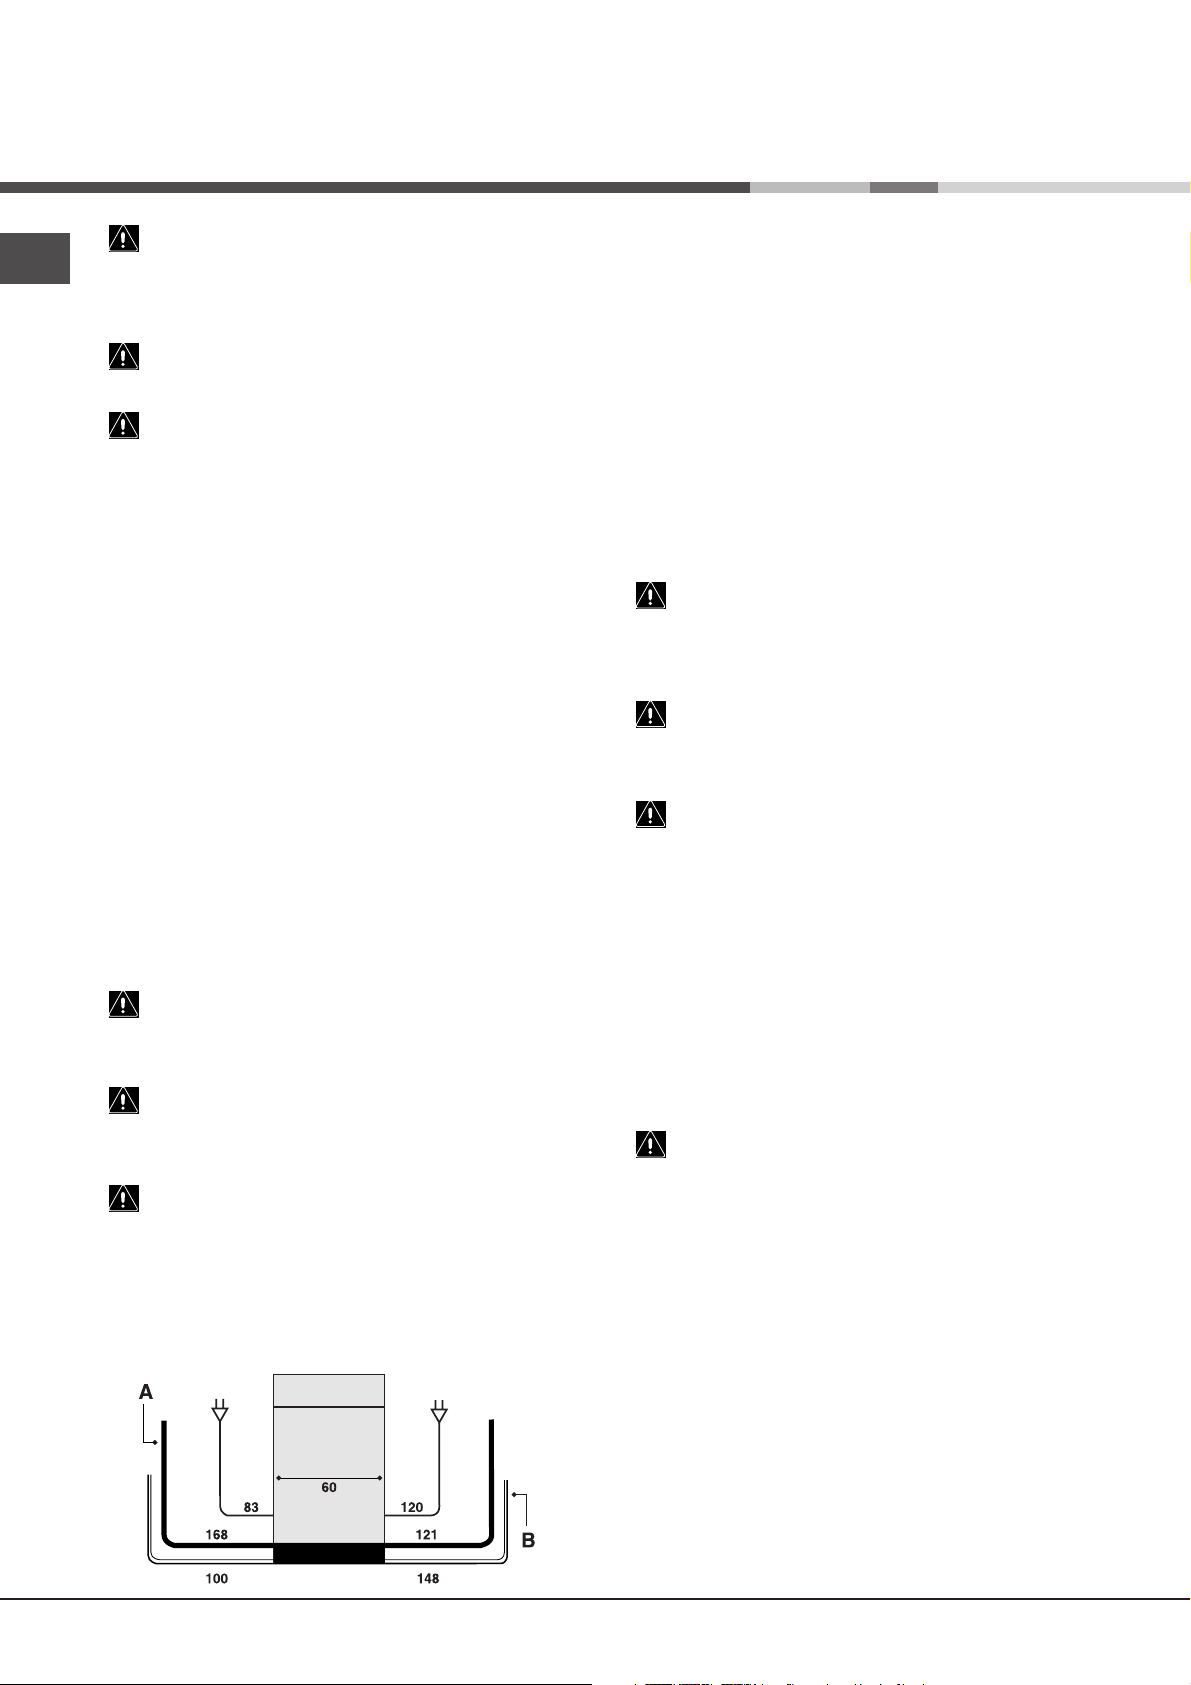
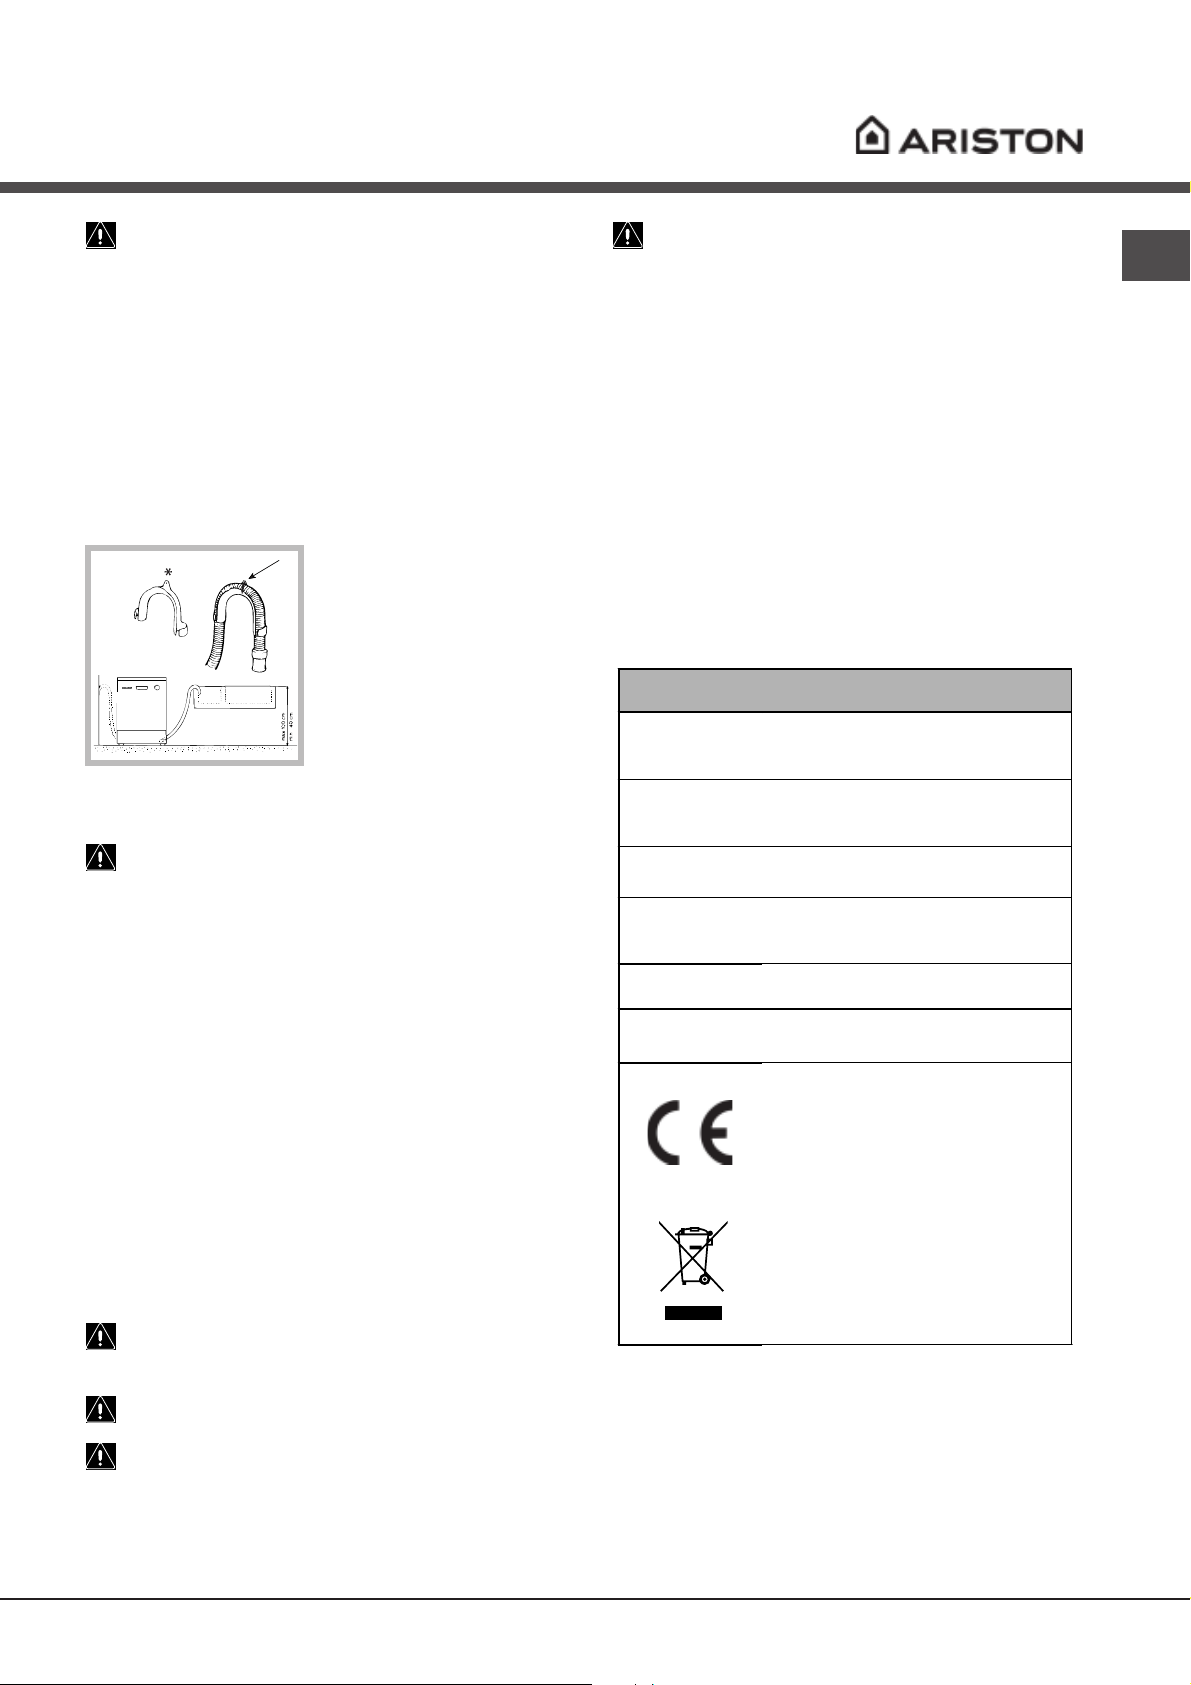
Connecting the water outlet hose
A
Connect the outlet hose (without bending it) to a
drain duct with a minimum diameter of 4 cm.
Alternatively, rest it over a sink or tub; the free end
of the hose should not remain immersed in water.
The special plastic
elbow* makes it easier to
find the best layout: fix
the elbow to the wall
securely in order to
prevent the outlet hose
from moving and spilling
the dirty water.
The part of the hose
marked with the letter A
should be between 40 and 100 cm above the ground
see figure
(
).
We advise against the use of hose extensions.
The Company shall not be held responsible for
any incidents that occur if these regulations are not
observed.
Advice regarding the first wash cycle
After the appliance has been installed, immediately
before running the first wash cycle, completely fill
the salt dispenser with water and add approximately
2 kg of salt (
water may overflow: this is normal and is not a
cause for concern. It is also normal that the LOW
SALT* indicator light continues to flash for a few
cycles after the salt has been loaded.
see Rinse aid and refined salt
). The
Technical data
EN
Electrical connection
Before inserting the plug into the electrical socket,
make sure that:
• the socket is earthed and complies with current
regulations;
• the socket can withstand the maximum load of
the appliance, which is indicated on the data
plate located on the inside of the door (
Description of the appliance
• the power supply voltage falls within the values
indicated on the data plate on the inside of the
door;
• the socket is compatible with the plug of the
appliance. If this is not the case, ask an
authorised technician to replace the plug (
Assistance
multiple sockets.
Once the appliance has been installed, the
power supply cable, the electrical plug and socket
should remain accessible.
If the power supply cable is damaged, it must
be replaced by the manufacturer or its Technical
Assistance Service in order to prevent all potential
hazards. (See Assistance)
The cable should not be bent or compressed.
); do not use extension cables or
);
see
see
Dimensions
Capacity
Water supply
pressure
Power supply
voltage
Total absorbed
power
Fuse
width 60 cm
height 85 cm
depth 60 cm
12 standard place-settings
0,03 ÷ 1Mpa (0.3 ÷ 10 bar)
4.3 psi – 145 psi
See appliance data plate
See appliance data plate
See appliance data plate
This dishwasher conforms to
the following European
Community Directives:
-73/23/EEC dated 19/02/73
(Low Voltage) and subsequent
modifications
-89/336/EEC dated 03/05/89
(Electromagnetic Compatibility)
and subsequent modifications
-97/17/EC (Labelling)
-2002/96/ CE
Waste
Electrical and Electronic
Equipment (WEEE)
* Only available in selected models.
3

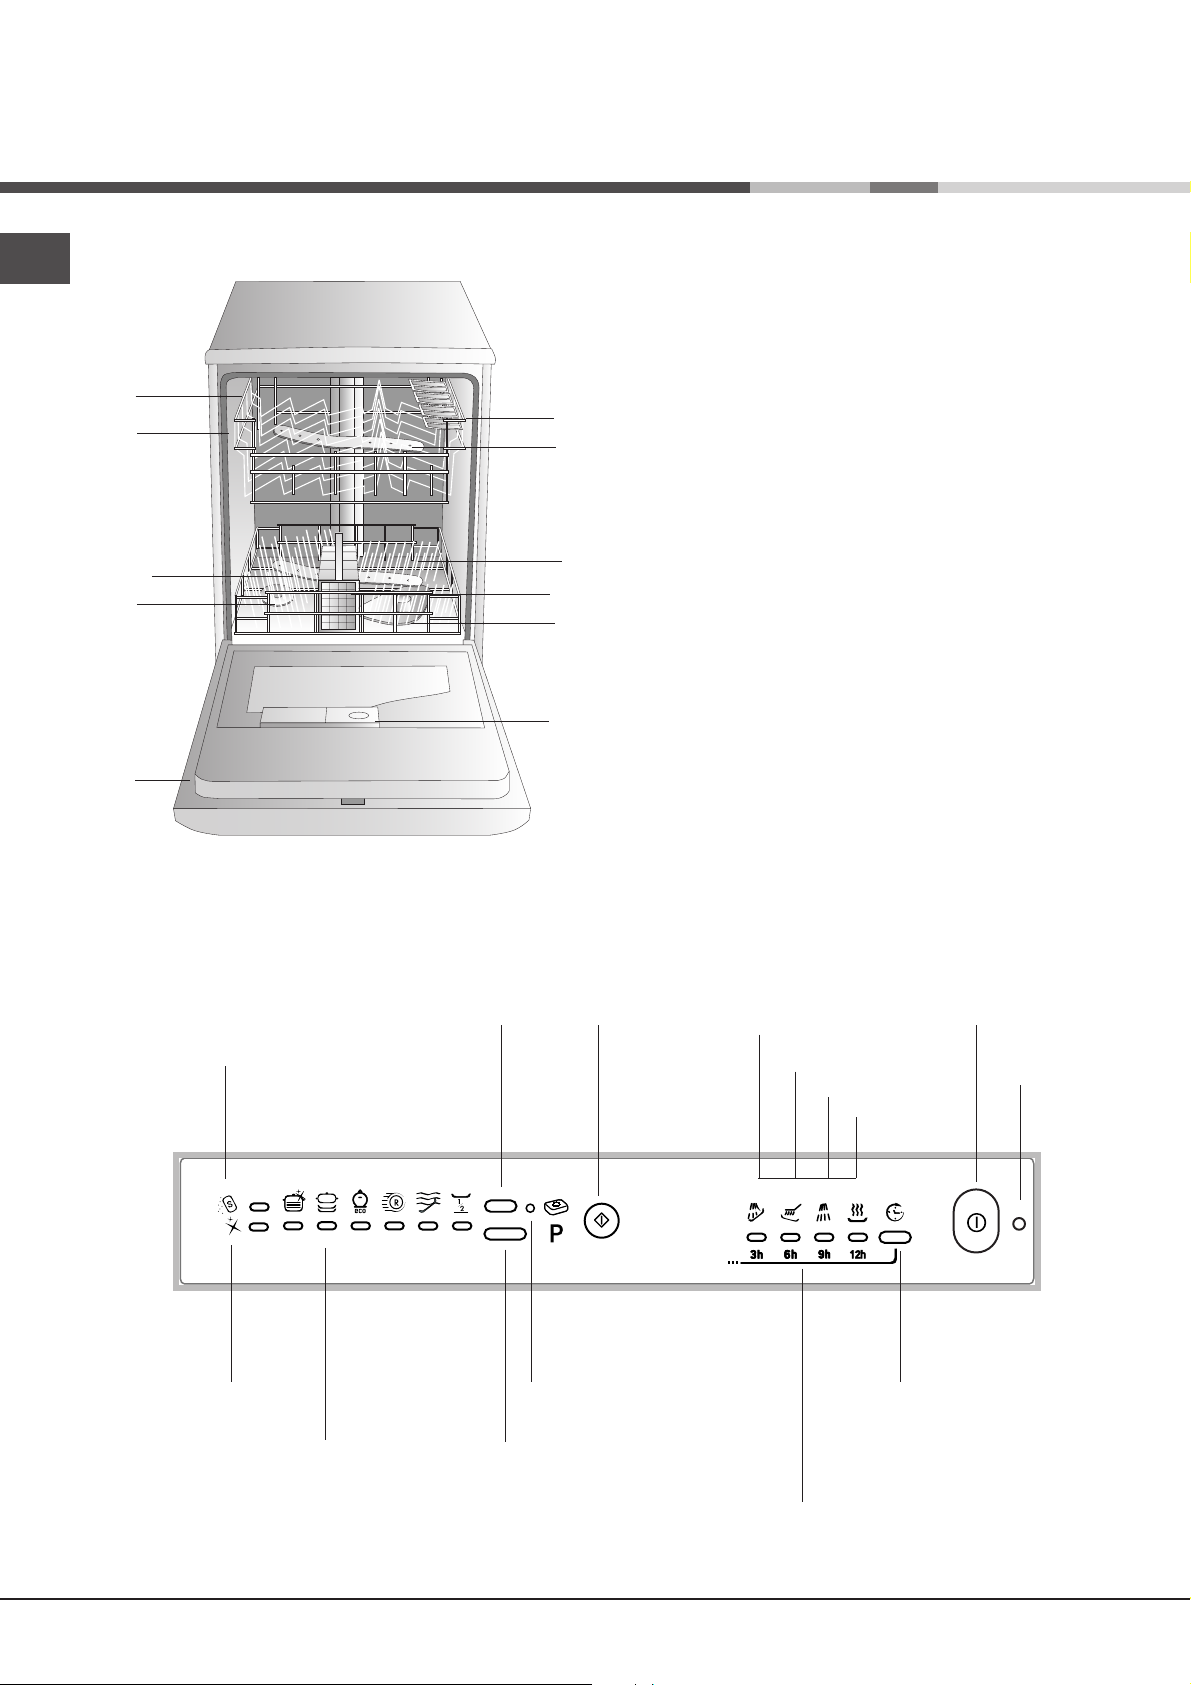
Description of the appliance
EN
Overall view
1
4
6
9
11
7
10
1. Upper rack
2. Upper sprayer arm
3. Tip-up compartments
4. Rack height adjuster
5. Lower rack
3
2
6. Lower sprayer arm
7. Cutlery basket
8. Washing filter
9. Salt dispenser
10. Detergent and rinse aid dispensers
11. Data plate
5
8
Control panel
LOW SALT
indicator light*
LOW RINSE AID
indicator light*
ALL-IN-ONE TABLETS
WASH CYCLE
indicator light
Button
WASH CYCLE
SELECT
button
START/RESET
button
ALL-IN-ONE TABLETS
indicator light
PRE-WASH
WASH
RINSES
DRYING
WASH CYCLE PHASE
indicator lights
and DELAYED START
indicator light*
ON-OFF
button
ON-OFF
indicator light
DELAYED START
button*
* Only available in selected models.
4
Loading the racks
Before loading the rack, remove all food residue from the
crockery, leave saucepans and frying pans with burnt-on
residue to soak
from cups and glasses. After loading the appliance, check
that the sprayer arms can rotate freely.
in water only and empty all remaining liquid
Lower rack
Arrange the more difficult items to wash using the
examples
needed.
• Serving dishes and lids: place these at the sides of the
• Saucepans and salad bowls: always turn these upside
• Very deep dishes: position these at an angle.
In order to guarantee the best washing and drying
performance, the surface of the lower rack is more uneven
than that of the upper rack.
as a guide and use the collapsible supports* where
rack.
down.
Loading
Cutlery basket
The type of cutlery basket may vary according to the
dishwasher model.
Knives and other utensils with sharp edges must be
placed in the cutlery basket with the points facing downwards,
or they must be positioned horizontally in the tip-up
compartments on the upper rack.
If the rack is equipped with the click
clack handles* (
them upwards or downwards to
adjust the height.
see figure
Loading examples for the upper rack
Loading examples for the lower rack
), pull
EN
To divide the central basket* into two separate pieces: pull out
the handle. The two detachable side compartments* may be
hooked onto the upper or lower rack.
The two grids* may be positioned in the basket to separate
the cutlery: place the pieces of cutlery into the appropriate
compartments with the handles at the bottom.
Upper rack
Load this rack with delicate and lightweight crockery: glasses,
tea and coffee cups, saucers, small salad bowls, saucepans
and small saucepans that are not too soiled, using the
examples
• Lightweight crockery: position these dishes so that they
• Mugs and cups: place these on the tip-up
• Long sharp knives and serving utensils: place these on
as a guide.
will not be moved by the jets of water.
compartments**.
the tip-up compartments**.
Adjusting the height of the upper rack
In order to make it easier to arrange
the crockery, the upper rack may be
1
3
moved to a higher or lower level.
2
Open the left and right guide rail
stops and pull out the rack; position it
higher or lower as required, slide it
along the guide rails until the front
4
wheels are in place and close the
stops (
see figure
).
Loading
Baby Tip-up compartments
**
For dishwasher models with a
Baby Cycle, tip-up
compartments suitable for
washing bottles, rings and
teats are provided.
Items that should not be washed in the dishwasher
• Wooden items, objects with wooden or horn handles or
glued-on parts.
• Items made from aluminium, copper, brass, pewter or tin.
• Items made from plastic that is not heat-resistant.
• Antique or hand-painted porcelain.
• Antique silver. Silver that is not antique may, however, be
washed in the dishwasher using a delicate wash cycle,
provided that it does not come into contact with other
metals.
When buying crockery and cutlery we recommend that
you check whether it can be washed using the dishwasher.
Washing the handles*
To wash the upper and lower rack handles: remove the two
fastening plugs, lift out the handles and rinse them under
running water, then fasten them to the rack using the same
plugs.
* Only available in selected models.
** The number and position may vary.
5
A
B
D
C
Start-up and use
EN
Starting the dishwasher
1. Open the water inlet valve.
2. Press the ON/OFF button: the machine will emit a beep and
the ON/OFF indicator light will illuminate.
3. Open the door and measure out a suitable amount of
detergent
4. Load the racks
5. Select the wash cycle by pressing the SELECT WASH
CYCLE button: the corresponding indicator light will illuminate.
6. Select the wash options
7. Start the cycle by pressing the START/RESET button: the
machine will emit a confirmation beep. The WASH CYCLE
PHASE indicator lights display the status of the cycle:
Pre-wash, Wash, Rinse, or Drying.
8. At the end of the cycle two short beeps will sound and the
DRYING indicator light will flash. Switch off the appliance by
pressing the ON/OFF button and close the water inlet valve.
9. Open the door and wait for a few minutes before removing
the crockery inside, in order to avoid burns. Unload the racks,
beginning with the lower level.
Modifying the duration of a wash cycle already in
progress
If a mistake was made during the wash cycle selection
process it is possible to change the cycle, provided that it has
only just begun:press and hold the START/RESET button for 5
seconds After one long beep and three short beeps, the
WASH CYCLE PHASE indicator light will switch off: select the
new cycle and switch the machine back on by pressing the
START/RESET button.
Recap Settings
Press the SELECT WASH CYCLE button:
The indicator light corresponding to the wash cycle selected
will illuminate, followed by the HALF LOAD* indicator light or the
ALL-IN-ONE TABLETS* indicator light (if these options have
been selected).
Adding extra crockery
Press the ON/OFF button and open the door, taking care to
avoid the escaping steam, and place the crockery inside the
dishwasher. Press the ON/OFF button again: the cycle starts
from the point at which it was interrupted.
Accidental interruptions
If the door is opened during the wash cycle, or if there is a
power cut, the cycle stops. It starts again from the point at
which it was interrupted once the door has been shut or the
electricity supply is restored.
(see below)
.
(see Loading the racks)
(see below)
and shut the door.
.
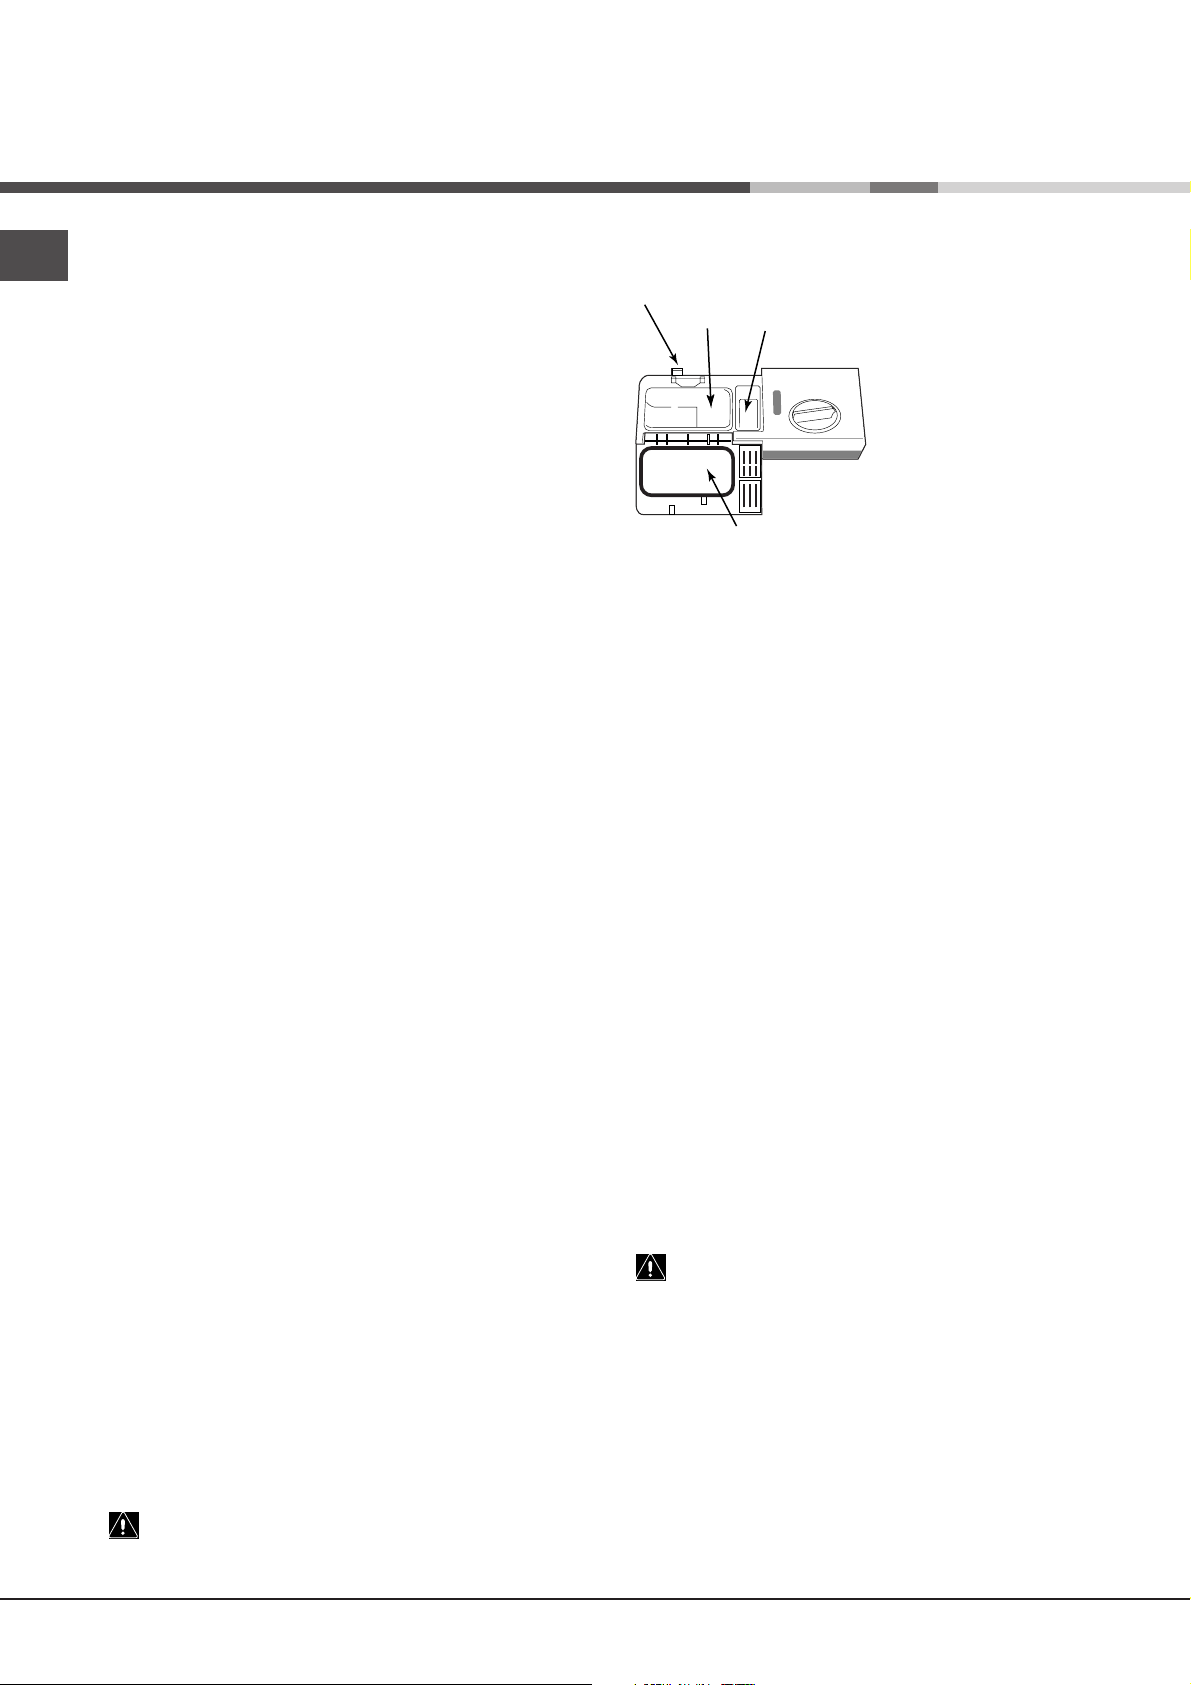
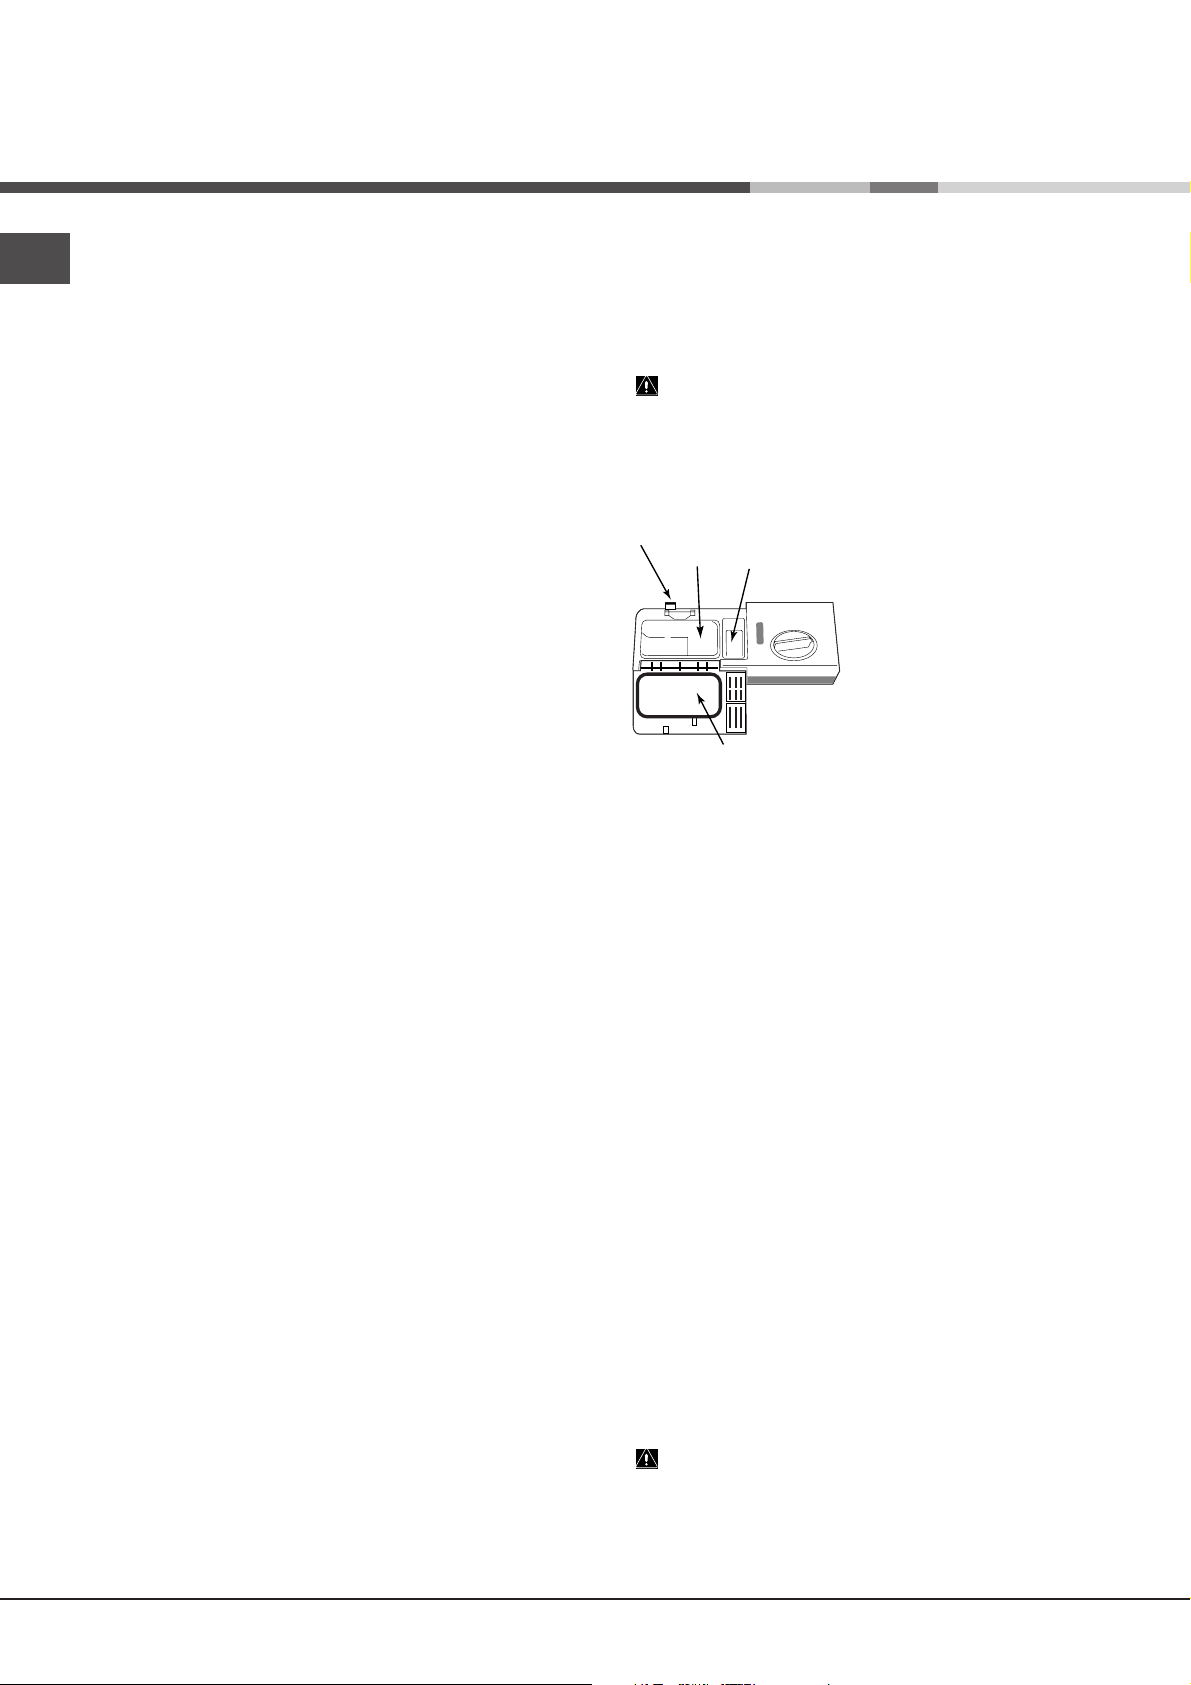
compartment A: Washing detergent
compartment B: Pre-wash detergent
1. Open cover C by pressing
button D.
2. Pour in the detergent after
consulting the
table
:
• for powder detergent use
compartments A and B
• for tablets, use
compartment A and the
bottom of the appliance, i.e.
when the cycle requires 1
tablet, place it in compartment
A and close the cover; when it
requires 2, place the second tablet at the bottom of the
appliance.
3. Remove detergent residues from the edges of the
compartment and close the cover until it clicks.
Wash cycle
Washing options
Delayed start
It is possible to delay the start time of the cycle by 12, 9, 6 or 3
hours.
1. Press the DELAYED START button: every time the button is
pressed, a beep is emitted and the selected delayed start
indicator light illuminates.
2. Select the wash cycle and press the START/RESET button:
after the beep sounds, the timer begins counting down.
3. Once this time has elapsed, the indicator light switches off
and the wash cycle begins.
To adjust the delay time and select a smaller period of time,
press the DELAYED START button. To cancel it, press the
button repeatedly until the wash cycle begins and the WASH
CYCLE PHASE indicator light corresponding to the start of the
cycle in progress illuminates.
All-in-one tablets*
When using multi-use tablets (2-in-1, 3-in-1, 4-in-1 etc.), press
the ALL-IN-ONE TABLETS button. This option optimises the
results of the wash. The overall duration of the programme
increases by approximately 10 minutes.
This option is not recommended for use with wash cycles
which do not specify the use of multi-use tablets (
wash cycles
).
see table of
Loading the detergent
A successful wash also depends on the correct amount of
detergent being used, as recommended by the manufacturer.
Exceeding the recommended amount does not result in a
more effective wash and pollutes the environment.
To obtain the best results from each washing and drying
cycle, powder detergent, rinse aid liquid and salt should be
used.
6
* Only available in selected models.
Wash cycles
Wash cycle table
Ariston dishwashers are fitted with an automatic filter cleaning system that may increase the cycle duration.
The number and type of wash cycles varies according to the model of dishwasher.
If the crockery is only lightly soiled or if it has been rinsed with water before being placed in the dish-
washer, reduce the amount of detergent used accordingly.
Detergent
Wash cycle selection
instructions
Extremely soiled dishes
and pans (not to be
used for delicate items).
Normally soiled pans
and dishes. Standard
daily wash cycle.
Wash cycle
Super Wash
Normal
(A) = compartment A
(B) = compartment B
Powder Liquid Tablets
1 (A)
30 g (A)
5 g (B)
30 g (A) 30 ml (A) 1 (A)
30 ml (A)
5 ml (B)
1 (bottom of
the
appliance)
Pre-wash Drying
•
•
•
Wash cycle
duration
(tolerance ±10%)
2:00’
1:28’
EN
Environmentally-friendly
wash cycle with low
energy consumption
levels, suitable for pans
and dishes.
Economic and fast
wash cycle to be used
for lightly soiled dishes.
(Run cycle immediately
after use.)
Preliminary wash cycle
for dishes while the load
is awaiting completion
with the dishes from the
next meal.
Special wash cycle,
ideal for frequent
washes and a reduced
load of dishes.
Normal soiling in the
lower rack and light
soiling in the upper
rack.
Eco
Rapid
Soak
Half load
25 g (A)
5 g (B)
25 g (A) 25 ml (A) 30'
30 g (A) 30 ml (A)
25 ml (A)
5 ml (B)
12'
1 (A)
•
•
•
2:25’
1:00’
Note
To make it easier to measure out the detergent, it is worth remembering that:
1 tablespoon = 15 grams of powder = approximately 15 ml of liquid
1 teaspoon = 5 grams of powder = approximately 5 ml of liquid
7

Rinse aid and refined salt
EN
Only use products that have been specifically designed
for dishwashers.
Do not use table salt or industrial salt.
If using a multi-functional product (2-in-1, 3-in-1, 4-in-1, etc.)
it is not necessary to add rinse aid; however, we recommend
that you add salt, especially if you live in an area where the
water is hard or very hard. If you do not add salt or rinse aid,
the LOW SALT* and LOW RINSE AID* indicator lights will flash
continuously.
Loading the rinse aid
Rinse aid makes it easier for the crockery to dry, as water runs
off surfaces more readily and therefore does not leave streaks
or marks.
The rinse aid dispenser should be filled:
• whenever the indicator light (H) signals that it is empty.
Illuminated light: add rinse aid; unlit light: there is no
shortage of rinse aid in the dispenser.
• when the LOW RINSE AID* indicator light on the panel
flashes;
1. Open the dispenser by
H
NEVER pour the rinse aid directly into the appliance tub.
turning the lid (G) in an
anticlockwise direction.
2. Pour in the rinse aid, making
sure it does not overflow from
the dispenser. If this happens,
F
clean the spill immediately with
a sponge.
G
3. Screw the lid back on.
• when the LOW SALT* indicator light on the panel flashes;
• if your machine is not equipped with an indicator light or a
green float:
approximately every 30 wash cycles;
1. Remove the lower rack and
unscrew the cap of the dispenser
(in an anti-clockwise direction).
2. For the first wash cycle only: fill
the dispenser up to the edges with
water.
3. Position the funnel provided
correctly (
dispenser up to the edges (approximately 2 kg); it is normal
for a little water to leak out.
4. Remove the funnel, wipe away any salt residue from the
thread and screw the cap on tightly, so that detergent does
not leak into the dispenser during the wash cycle (this could
damage the water softening system beyond repair).
When salt has been added, run a wash cycle
immediately, without crockery, in order to remove any salt
solution that has leaked out and to avoid corrosion.
see figure
) and fill the salt
Adjusting the amount of salt*
It is possible to adjust the amount of salt used according to the
hardness of the water in your area (this information is available
from your local water board).
1. Unscrew the dispenser cap.
2. Turn the arrow on the neck of the
dispenser (
symbols, using the table below as a guide.
see figure
) towards the + or -
Adjusting the amount of rinse aid
If you are not completely satisfied with the washing or drying
results, you may adjust the quantity of rinse aid used. Use a
screwdriver to turn the dosage adjuster to one of the 6 pre-set
positions (the default position is set to 4):
• if there are bluish streaks on the crockery, set the adjuster
to a lower number (1-3).
• if drops of water remain on the crockery or there are
limescale marks present after the cycle has finished, set the
adjuster to a higher number (4-6).
If you are using multi-functional tablets (2-in-1, 3-in-1, 4-in1,etc.) and you wish to further improve the drying
performance of the appliance, fill the dispenser and set the
dosage adjuster to 2.
Loading the refined salt
In order to obtain the best possible results from a wash cycle,
make sure that the dispenser is never empty. Refined salt
removes limescale from the water, thus avoiding the formation
of deposits on crockery. The salt dispenser is located in the
lower part of the dishwasher (
filled:
• when the green float* cannot be seen by simply looking at
the cap of the salt dispenser;
see Description
) and should be
The default setting of the water softening system is +.
- If using multi-functional tablets (2-in-1, 3-in-1, 4-in-1, etc.) fill the
salt dispenser and set the adjuster to -; if the hardness of the
water is greater than 60°fH, set it to +.
* Only available in selected models.
8
Care and maintenance
Shutting off the water and electricity
supplies
• Turn off the water tap after every wash cycle to
avoid leaks.
• Remove the plug from the socket when cleaning
the machine and when carrying out maintenance
work.
Cleaning the dishwasher
• The external surfaces of the machine and the
control panel may be cleaned using a nonabrasive cloth which has been dampened with
water. Do not use solvents or abrasive products.
• Any marks on the appliance interior may be
removed using a cloth dampened with water and
a little vinegar.
Preventing unpleasant odours
• Always keep the door of the appliance ajar in
order to avoid moisture from forming and being
trapped inside the machine.
• Clean the seals around the door and detergent
dispensers regularly using a damp sponge. This
will avoid food becoming trapped in the seals,
which is the main cause of the formation of
unpleasant odours.
Cleaning the sprayer arms
Food residue may
become encrusted onto
the sprayer arms and
block the holes used to
spray the water. It is
therefore recommended
that the arms are
checked from time to
time and cleaned with a
small non-metallic
brush.
Cleaning the filters
The filters remove food residue from the water used
in the wash cycle: to obtain the best results from
each wash, they should be cleaned.
Clean the filters regularly.
After cleaning check that the filter assembly has
been replaced correctly.
The dishwasher should not be used without
filters or when the filter is loose.
1. Remove the filters by pulling the handle upwards.
2. Clean the filters:
• after every wash
cycle, remove the
C
1
2
A
B
B
C
A
direction). Use a small non-metallic brush to clean
these parts.
3. Reconstruct the filter assembly and replace it in
the correct position, following movements 1 and 2 as
shown in the figure, until it clicks into place.
largest pieces of
residue from
semicircular plate A
and glass B (these
may be removed by
pulling the handle) by
rinsing them under
running water.
• The entire filter
assembly should be
cleaned thoroughly
once a month: this
includes the
semicircular plate A,
the glass B and the
cylinder C (this may be
removed by turning it in
an anti-clockwise
Leaving the machine unused for
extended periods
• Run a wash cycle when the dishwasher is empty.
EN
• Unplug the appliance and disconnect the water
supply.
• Leave the door of the appliance ajar.
9

Precautions and advice
EN
The appliance was designed and manufactured in
compliance with current international safety
standards. The following information has been
provided for safety reasons and should therefore be
read carefully.
General safety
• The appliance was designed for domestic use
inside the home and is not intended for
commercial or industrial use.
• The appliance must be used by adults only, to
wash domestic crockery according to the
instructions in this manual.
• The appliance must not be installed outdoors,
even in covered areas. It is extremely dangerous
to leave the machine exposed to rain and storms.
• Do not touch the appliance when barefoot.
• When unplugging the appliance always pull the
plug from the mains socket, do not pull on the
cable.
• The water supply tap must be shut off and the
plug should be removed from the electrical
socket before cleaning the appliance or carrying
out any maintenance work.
• If the appliance breaks down, do not under any
circumstances touch the internal parts in an
attempt to carry out the repair work yourself.
• Never touch the heating element.
• Do not lean or sit on the open door of the
appliance: this may cause the appliance to
overturn.
• The door should not be left open as it may create
a dangerous obstacle.
• Keep detergent and rinse aid out of reach of
children.
• The packaging material should not be used as a
toy: it can become a choking or suffocation
hazard.
Disposal of old electrical appliances
The European Directive 2002/96/EC on Waste
Electrical and Electronic Equipment (WEEE),
requires that old household electrical appliances
must not be disposed of in the normal unsorted
municipal waste stream. Old appliances must be
collected separately in order to optimise the
recovery and recycling of the materials they contain
and reduce the impact on human health and the
environment. The crossed out "wheeled bin" symbol
on the product reminds you of your obligation, that
when you dispose of the appliance it must be
separately collected.
Consumers should contact their local authority or
retailer for information concerning the correct
disposal of their old appliance.
Saving energy and respecting the
environment
Saving water and energy
• Only start a wash cycle when the dishwasher is
full. While waiting for the dishwasher to be filled,
prevent unpleasant odours with the Soak cycle
see Wash Cycles
(
• Select a wash cycle that is suited to the type of
crockery and to the soil level of the crockery
using the
- for dishes with a normal soil level, use the Eco
wash cycle, which guarantees low energy and
water consumption levels.
- if the load is smaller than usual activate the Half
load option (
• If your electricity supply contract gives details of
electricity saving time bands, run wash cycles
during the periods when a lower tariff is applied.
The Delayed start* button (
helps you organise the wash cycles accordingly.
Phosphate-free and chlorine-free detergents
containing enzymes
• We strongly recommend that you use detergents
that do not contain phosphates or chlorine, as
these products are harmful to the environment.
• Enzymes provide a particularly effective action at
temperatures around 50°C, and as a result
detergents containing enzymes can be used in
conjunction with low-temperature wash cycles in
order to achieve the same results as a normal
65°C wash cycle.
• To avoid wasting detergent, use the product in
appropriate quantities based on the
manufacturer’s recommendations, the hardness
of the water and the soil level and quantity of the
crockery. Even if they are biodegradable,
detergents contain substances that may alter the
balance of nature.
Wash cycle table
).
:
see Start-up and use
see Start-up and use
).
)
10
* Only available in selected models.
Troubleshooting
Whenever the appliance fails to work, check for a solution from the following list before calling for Technical
Assistance Centre.
Some problems are indicated by specific indicator lights flash on the control panel: make a note of any indicator
lights flashes before calling Assistance.
Malfunction: Possible causes / Solutions:
The dishwasher does not start.
No water enters the
dishwasher.
No water drains out from the
dishwasher.
The plug has not been inserted into the electrical socket
properly, or there is no power in the house.
The dishwasher door has not been shut properly.
A delayed start has been programmed (see Start-up and use).
There is no water in the mains supply.
The water inlet hose is bent (see Installation).
The dishwasher cycle has not yet finished.
The water outlet hose is bent (see Installation).
The drain duct is blocked.
The filter is clogged up with food residues.
The dishwasher makes
excessive noise.
The dishes and glasses are
covered in a white film or
limescale deposits.
The dishes and glasses are
streaked or have a bluish
The dishes are rattling against each other or against the
sprayer arms.
The level of the refined salt is low or the dosage setting is not
suited to the hardness of the water (see Rinse aid and salt).
The lid on the salt dispenser is not closed properly.
The rinse aid has been used up or the dosage is too low.
The crockery is made from non-stick material.
The rinse aid dosage is too high.
tinge.
The crockery has not been
dried properly.
The dishes are not clean.
Shut off tap alarm.
(several short beeps are
emitted)*
* Only available in selected
models
(the 2
.
nd
and 3rd WASH CYCLE
indicator lights flash, beginning
from the right).
The rinse aid has been used up or the dosage is too low (see
Rinse aid and salt).
The rinse aid dispenser setting is not high enough.
A wash cycle without a drying programme has been selected.
The racks are overloaded (see Loading the racks).
The crockery has not been arranged well.
The sprayer arms cannot move freely.
The wash cycle is too gentle (see Wash cycles).
The detergent has not been measured out correctly or it is not
suited to the type of wash cycle (see Start-up and use).
The filter is dirty or blocked (see Care and maintenance).
The refined salt level is low (see Rinse aid and salt).
Turn on the tap and the appliance will start after a few
minutes.
The appliance lock has been activated because no action was
taken when the beeps* sounded. Switch off the machine using
the ON/OFF button, turn on the tap and switch the machine
back on after 20 seconds by pressing the same button. Re-
programme the machine and
restart the wash cycle.
Blocked filter alarm
(the
nd
2
and 4th
WASH CYCLE
indicator lights flash beginning
from the right).
Water loading solenoid valve
malfunction alarm
rd
(the
WASH CYCLE indicator
3
lights flash beginning from the
Switch off the machine by pressing the ON/OFF button and
clean the filters (see Maintenance), then switch the
dishwasher back on by pressing the same button. Reprogramme the machine and restart the wash cycle.
Switch off the appliance by pressing the ON/OFF button and
switch it back on after a minute. If the alarm continues, turn
off the water tap to reduce the risk of flooding, remove the
plug from the electrical socket and call Assistance.
right).
EN
11

EN
Assistance
Before calling for Assistance:
• Check whether you can solve the problem on
your own (
• Restart the programme to check whether the
problem has been solved;
• If this is not the case, contact an authorised
Technical Assistance Centre on the telephone
number provided on the guarantee certificate.
Always request the assistance of authorised
servicemen.
Notify the operator of:
• the type of problem.
• the appliance model (Mod.).
• the serial number (S/N).
This information can be found on the data plate
situated on the internal edge of the stainless steel
door (see Description of the appliance).
see Troubleshooting
);
12

Bruksanvisning
OPPVASKMASKIN
EN
NO
Norsk, 13
LL 6066
LL 6088
Innholdsfortegnelse
Installasjon, 14-15
Plassering og nivellering
Hydraulisk og elektrisk tilkobling
Tekniske data
Beskrivelse av apparatet, 16
Oversikt
Kontrollpanel
Laste kurvene, 17
Underkurv
Bestikkurv
Overkurv
Start og bruk, 18
Starte oppvaskmaskinen
Ha i vaskemiddel
Vaskevalg
Programmer, 19
Programtabell
Glansmiddel og mykgjøringsmiddel, 20
Ha i glansmiddelet
Ha i mykgjøringsmiddelet
Vedlikehold og ettersyn, 21
Koble fra vann og strøm
Rengjøre oppvaskmaskinen
Unngå dårlig lukt
Rengjøre spylearmene
Rengjøre filtrene
Hvis du reiser bort
Forholdsregler og råd, 22
Generell sikkerhet
Avhending
Spare og beskytte miljøet
Feil og løsninger, 23
Assistanse, 24
Installasjon
N O
Det er viktig å ta godt vare på håndboken for å
ha den klar for senere behov. Ved eventuelt salg,
overdragelse eller flytting, må man forsikre seg om
at håndboken følger med maskinen.
Les anvisningene nøye: Her finnes viktig
informasjon om installasjon, bruk og sikkerhet.
I tilfelle flytting hold maskinen i vertikal posisjon;
skulle det være nødvendig, bøy den bakover.
Plassering og nivellering
1. Ta av emballasjen og kontrollere at maskinen ikke
har blitt påført skader under transporten. Hvis den er
skadet, må den ikke tilkoples, men ta kontakt med
forhandleren.
2. Plassere oppvaskmaskinen og sett sidene eller
baksiden inntil møblene ved siden av eller inntil
veggen. Oppvaskmaskinen kan også bygges inn
under en hel arbeidsbenk (
3. Plassere vaskemaskinen på et flatt og hardt gulv.
Rett opp eventuelle uregelmessigheter ved å skru ut
eller inn føttene helt til maskinen står helt vannrett
(den må ikke skrå mer enn 2 grader). En nøyaktig
nivellering gjør at maskinen står stødig og forhindrer
vibrasjoner, støy og flyttinger.
se Monteringsarket*
).
Hydraulisk og elektrisk tilkobling
Tilpasningen av det elektriske og det
hydrauliske anlegget for installasjonen må bare
utføres av kyndig personale.
Apparatet må kobles til vannforsyningsnettet
ved hjelp av nye rør.
Ikke bruke gamle rør på nytt.
Oppvaskmaskinen må ikke hvile på rørene eller
på den strømførende kabelen.
Tilkobling av røret for vanninntak
• Til et kaldtvannsuttak: Kople nøye inntaksrøret til
en kran med gjenget munning på 3/4 gass. Før
det skrus til, la vannet renne til det kommer klart
ut, slik at eventuelle urenheter ikke tetter til
oppvaskmaskinen.
• Til et varmtvannsuttak: Hvis du er tilkoplet et
sentralisert varmeanlegg kan oppvaskmaskinen
kan forsynes med varmt vann såfremt
temperaturen ikke overstiger 60° C.
Koble røret til kranen som beskrevet for
kaldtvannsuttaket.
Dersom lengden på vanninntaksrøret ikke er
tilstrekkelig må du henvende deg til en
spesialforhandler, eller en autorisert fagperson (
Assistanse
Vanntrykket må befinne seg mellom de
ytterverdiene angitt i tabellen over Tekniske data (
nedenfor
Pass på at røret ikke bøyes eller innsnevres.
Vern mot oversvømmelse
For å verne mot oversvømmelser, er
oppvaskmaskinen:
- utstyrt med et system som avbryter inntaket av
vann i tilfelle feil eller lekkasjer fra maskinens indre.
- utstyrt med sikkerhetsanordning
vil si at den har et rør til inntak av vann som består
av en ytre gjennomsiktig slange og en innvendig rød
slange: Begge slangene tåler veldig høyt trykk.
I tilfelle den innvendige slangen går i stykker,
farges den ytre slangen helt rød og fører vannet i
den indre slangens sted, og dermed unngås
lekkasjer.
).
).
Water Stop
se
se
*, det
Inntaksrørene (A) og utløpsrørene (B) kan dreies til
høyre eller venstre for en bedre installasjon (
).
figur
14
se
* Finnes bare på enkelte modeller.
A
Det er veldig viktig å kontrollere den ytre
slangen med jevne mellomrom: Dersom du ser at
den har blitt helt rød må du sørge for at den skiftes
ut så snart som mulig av godkjent Teknisk
assistanse (
se Assistanse
).
Tilkobling av røret for vannutløp
Kople utløpsslangen til et avløpsrør med en minimal
diameter på 4 cm, uten å bøye den. Eller legg den
over vasken eller i badekaret. Enden av
utløpsslangen må ikke ligge under vann.
Den spesielle albuen * i
plast gjør det enklere å
sette alt riktig på plass:
Albuen må festes
skikkelig til veggen for å
unngå at slangen
beveger seg og tømmer
vannet utenfor utløpet.
Delen av slangen som er
merket med bokstaven A
må ligge på en høyde mellom 40 og 100 cm fra
gulvet (
se figuren
).
Det anbefales ikke å bruke skjøteslanger.
Elektrisk tilkopling
Forsikre deg om følgende før støpslet settes inn i
stikkontakten:
• at stikkontakten er jordet og i samsvar med
lovforskriftene.
• at stikkontakten har tilstrekkelig kapasitet til
maksimum kraftbehov for maskinen, som angitt
på merkeskiltet som er montert på motdøren (
Beskrivelse av oppvaskmaskinen
).
se
• at matespenningen er innenfor verdiene som er
angis på merkeskiltet som er festet på motdøren;
• at stikkontakten passer til oppvaskmaskinens
støpsel. I motsatt tilfelle be om at en godkjent
tekniker skifter ut støpselet (
se Assistanse
). Ikke
bruk skjøteledninger eller forgreningskontakter.
Når apparatet er installert må el-ledningen og
stikkontakten være lett tilgjengelige.
Produsenten fraskriver seg ethvert ansvar
dersom disse forskriftene ikke overholdes.
Advarsler for første gangs vask.
Etter installasjonen, rett før første vask, fylle
saltbeholderen fullstendig med vann og hell i cirka 2
Kg salt (
se Glansmiddel og mykgjøringssalt
): det er
normalt at vannet renner over. Det er også normalt at
varsellampen ”MANGEL PÅ SALT”* fortsetter å
blinke i noen sykluser etter at saltet er fylt på.
Tekniske data
Bredde cm 60
Mål
Kapasitet
Vanntrykk
Nettspenning
Total
opptatt kraft
Sikring
Høyde cm 85
Dybde cm 60
Standard dekketøy til 12
0,03 - 1MPa (0.3 - 10 bar)
4,3 psi – 145 psi
se merkeplaten
se merkeplaten
se merkeplaten
Dette apparatet er i samsvar
med følgende Direktiver fra
den Europeiske Union:
- 73/23/EØS av den 19.02.73
(Lavspenning) og etterfølgende
endringer.
- 89/336/EØS av den 03.05.89
(Elektromagnetisk kompatibilitet)
og etterfølgende endringer.
97/17/EØS (Merking).
-
- 2002/96/EØS
N O
Kabelen må ikke bøyes eller utsettes for trykk.
Dersom strømkabelen er ødelagt må denne
byttes ut av produsenten eller dennes servicesenter,
slik at enhver fare unngås. (se Assistanse)
* Finnes bare på enkelte modeller.
15
Beskrivelse av apparatet
N O
Oversikt
1
4
6
9
11
7
10
1. Overkurv
2. Øvre spylearm
3. Nedfellbare hyller
4. Regulator for høyde på kurven
5. Underkurv
3
2
6. nedre spylearm
7. Bestikkurv
8. Vaskefilter
9. Saltbeholder
10. Skuffer for vaskemiddel og beholder for
glansmiddel
5
11. Merkeskilt
8
Kontrollpanel
Varsellampe
Mangel på SALT
Mangel på
MYKGJØRINGSSALT*
Varsellampe
Varssellamper
PROGRAMMER
FLERFUNKSJONSTABLETTER
Tast
Tast
FOR VALG
AVPROGRAM
Tast
START/RESET.
Varssellampe
FLERFUNKSJONSTABLETTER
FORVASK
VASK
SKYLLINGER
Varsellamper For
SYKLUSFORLØP
Varsellamper For
FORSINKET
IGANGSETTING*
TØRKING
Tast
FORSINKET
IGANGSETTING*
Tast
ON-OFF
Varsellampe
ON-OFF
16
* Finnes bare på enkelte modeller.
Laste kurvene
Før oppvasken lastes inn, fjerne matrester fra servise,
legg skitne kasseroller og stekepanner i bløt, tøm glass
og kopper for væsker. Etter at oppvasken er lagt inn,
kontrollere at spylearmene roterer fritt.
Underkurv
Plassere det som er vanskeligst å vaske opp i henhold til
Eksempler på innlasting
• Serveringsfat og lokk: på kurvens sider.
• Kasseroller og salatboller: må alltid vendes opp ned.
• Veldig dypt servise: i bøyd stilling.
For å sikre ypperste vaske- og tørkeytelser er overflaten i
underkurven grovere enn den i overkurven.
og benytt de nedfellbare støttene*.
Bestikkurv
Bestikkurvens type kan variere i henhold til
oppvaskmaskinens modell.
Kniver og redskaper med spisse kanter må settes inn i
bestikkurven slik at spissene er vendt nedover eller plassert i
liggende stilling oppe i den øvre kurven.
Hvis kurven er utstyrt med håndtak
av typen click clack* (
trekk dem opp eller skyv dem ned
for å justere høyden .
se figur
Eksempler på innlasting av overkurven
Eksempler på innlasting av underkurven
),
N O
For å dele hoveddelen* i to: trekk ut håndtaket. De to
sidesperrene* kan tas av og hektes til over- eller underkurven.
De to ristelementene* settes inn på kurven for å holde
bestikket adskilt: Sett dem inn med skaftet vendt nedover.
Overkurv
I overkurven plasseres sart og lett servise: Glass, te- og
kaffekopper, tefat, lave salatboller, stekepanner, lave gryter og
panner som er lite skitne, i henhold til
• Lett servise: Plassere serviset slik at delene ikke flyttes av
vannspruten.
• Krus og små kopper: Plassere dem på de nedfellbare
ristene**.
• Lange og spisse kniver, arbeidsbestikk: Plassere dem på
de nedfellbare ristene**.
Justere høyden på overkurven
For å forenkle plasseringen av
oppvasken kan overkurven
1
sperrene (
3
se figur
plasseres i høy eller lav stilling:
2
åpne sperrene til kurvens skinner til
høyre og til venstre og trekke ut
kurven. Plassere kurven i høy eller
lav posisjon og la den gli langs
4
skinnene helt til også hjulene fremme
kommer på plass. Lukk deretter
).
Eksempler på innlasting
Nedfellbare hyller Baby
.
**
På de oppvaskmaskinene der
man har en såkalt Baby-syklus
vil det følge med noen
spesielle hyller for vask av
tåteflasker, flaskeringer og
smukker.
Servise som ikke passer til vask i oppvaskmaskin
• Gjenstander i tre, med skaft i tre eller horn, eller med
pålimte deler.
• Gjenstander i aluminium, kobber, messing, tinn.
• Plastservise som ikke tåler varme.
• Antikt eller håndmalt porselen.
• Antikt sølv. Ikke antikt sølv kan derimot vaskes med et
mildt program såfremt man passer på at det ikke kommer i
kontakt med andre metaller.
Det anbefales å kjøpe servise som passer til vask i
oppvaskmaskin.
Vask av håndtakene*
For å vaske håndtakene i under- og overkurven: Ta ut de to
festepluggene og trekk håndtakene ut. Vask dem under
rennende vann og fest dem til kurven igjen etterpå med de
samme pluggene.
* Finnes bare på enkelte modeller.
** Kan variere i antall og plassering.
17
Start og bruk
N O
Starte oppvaskmaskinen
1. Åpne vannkranen.
2. Trykk på tasten ON/OFF: et ’bip’ vil høres og varsellampen
ON/OFF tennes.
3. Åpne døren og ha i riktig dose oppvaskmiddel (
nedenfor
4. Last inn oppvasken i kurvene (
kurvene
5. Velg programmet ved hjelp av tasten VALG AV PROGRAM
til ønsket program belyses.
6. Velg vaskefunksjoner (
7. Start programmet ved å trykke på START/RESET-tasten. et
’bip’ vil bekrefte at oppvaskmaskinen har startet.
Varsellampene SYKLUSFORLØP angir programmets status:
Forvask, vask, skylling, tørking.
8. Til slutt vil to korte lydsignaler høres
og varsellampen TØRKING blinker. Slå av maskinen ved å
trykke på tasten “ON/OFF” og steng av vannkranen.
9. Åpne døren og vent i noen minutter før
du tar ut oppvasken, slik at du ikke brenner deg. Ta ut
oppvasken fra kurvene, start med å tømme den nedre kurven.
).
) og lukk døren.
se Hvordan laste inn i
se nedenfor
).
Endre et vaskeprogram som er i gang
Hvis du har valgt feil vaskeprogram er det mulig å endre det,
dersom det nettopp har startet: Hold tasten “START/RESET”
inne i ca. 5 sekunder. Etter et langt ’bip’ og tre korte, vil
varsellampen “SYKLUSFORLØP” slukkes: Velg det nye
programmet og sett i gang maskinen ved å trykke på tasten
“START/RESET”.
Legg inn mer dekketøy.
Trykk på tasten “ON/OFF”, åpne døren, vær varsom da damp
kommer ut og legg inn oppvasken. Trykk på nytt på tasten
“ON/OFF”: Syklusen starter igjen.
Oppsummering av oppsettet
Trykk på tasten “VALG AV PROGRAM”:
Varsellampen for det valgte programmet tennes og deretter
varsellampen “HALV MASKIN”* eller varsellampen
“FLERFUNKSJONSTABLETT”* (hvis de respektive valgene er
lagt inn).
Ufrivillige avbrudd
Hvis døren åpnes under vask eller et strømbrudd oppstår, vil
programmet stanse. Det gjenopptas fra det punktet det ble
avbrutt nås døren lukkes igjen eller strømmen kommer tilbake.
se
Ha i vaskemiddel
Et godt vaskeresultat avhenger også av en riktig dosering av
vaskemiddelet, som anbefalt av produsenten. Bruk av for mye
vaskemiddel gir ikke en mer effektiv vasking, men fører til
forurensing av naturen.
De beste resultatene for vasking og tørking oppnås bare
med bruk av oppvaskmiddel i pulver, flytende glansmiddel og
salt.
vaskemiddelskufvaskemiddelskuf
vaskemiddelskuf
vaskemiddelskufvaskemiddelskuf
vaskemiddelskufvaskemiddelskuf
vaskemiddelskuf
vaskemiddelskufvaskemiddelskuf
D
A
krever 2, legg den andre på bunnen av skuffen.
3. Fjerne restene av vaskemiddel fra skuffens kanter og lukk
lokket til det knepper.
f A:f A:
f A: Vaskemiddel
f A:f A:
f B:f B:
f B: Vaskemiddel for forvask
f B:f B:
B
C
1. Åpne lokket C ved å trykke på
knappen D.
2. Mål opp vaskemiddelet ved
hjelp av (
• i pulver: vaskemiddelskuffer
A og B.
• tabletter: vaskemiddelskuff A
og bunnen av skuffen,
det vil si når programmet krever
1, ha den i vaskemiddelskuffen
A og lukk igjen lokket; når det
Programtabellen
):
Vaskealternativer*
Forsinket igangsetting
Det er mulig å utsette starten av programmet med 12, 9, 6 eller
3 timer
1. Trykk på tasten FORSINKET IGANGSETTING: Ved hvert
trykk høres et lydsignal varsellampen for valgt forsinkelse
tennes.
2. Velg programmet og trykk på tasten START/RESET: etter
”bipet” starter nedtellingen.
3. Når tiden er gått slukkes varsellampen programmet starter.
For å endre forsinkelsen må du trykke på tasten FORSINKET
START. For å slette forsinkelsen trykker du på tasten i
rekkefølge til programmet starter og varsellampen for
SYKLUSFORLØP som tilsvarer starten av programmet tennes.
FLERFUNKSJONSTABLETTER*
Når flerfunksjonstablettene brukes (2 i 1, 3 i 1, 4 i 1, osv.)
trykker du på tasten FLERFUNKSJONSTABLETTER. Med dette
valget oppnår man det beste vaskeresultatet.. Programmets
totale varigheter øker med cirka 10 minutter.
18
Dette valget frarådes med de programmene som ikke
forutser bruk av flerfunksjonstabletter (
se programtabellen
* Finnes bare på enkelte modeller.
).
 Loading...