

Page 1
Version 1.0
Floor
Polisher
User Guide
HFPB1V1
HFPB2V1
Hoover.ae
Hoover.za.com
Page 2

MACHINE OVERVIEW
GENERAL SAFETY INFORMATION
Unit
1
7
4
2
8
5
3
6
1
2
Accessories
7
Handle assembly upper section
Handle assembly lower section
Handle height adjust
Cleaning and polishing head
Scrubbing pads (white) x2
Coral cleaning/polishing
pads (blue) x2
Scrubbing brush plates x2
Velcro backing plates for scrubbing
and polishing pads x2
3
FOR HOUSEHOLD USE ONLY. READ ALL INSTRUCTIONS BEFORE USING THIS APPLIANCE.
When using the Hard Floor Polisher, basic safety precautions should always be observed, including
the following:
1. Do not leave the Hard Floor Polisher to run unattended for any period of time.
2. Do not use outdoors.
3. Do not use on carpet.
4. Children should be supervised to ensure that they do not play with the appliance.
5. This appliance can be used by children aged from 8 years and above and persons with reduced
physical, sensory or mental capabilities or lack of experience and knowledge if they have been
given supervision or instruction concerning use of the appliance in a safe way and understand
the hazards involved. Children shall not play with the appliance.
6. Cleaning and user maintenance shall not be made by children without supervision.
7. Do not use with a damaged cord. If the supply cord is damaged, it must be replaced by the
manufacturer, its service agent or similarly qualified persons in order to avoid a hazard.
8. The appliance should only be used as described in this user guide.
9. Only Hoover recommended attachments should be used with this appliance.
10. Do not pull or carry the unit by the cord, use the cord as a handle, allow the cord to come into
contact with hot or sharp surfaces or close a door on the cord.
11. Do not unplug by pulling on the cord.
12. Do not pull or carry this appliance by the cord. Do not use the cord as a handle, close a door on
the cord or pull the cord around sharp edges or corners. Do not run the Hard Floor Polisher over
the cord. Keep the cord away from heated surfaces.
13. Do not handle the plug or Hard Floor Polisher with wet hands.
14. Do not put any objects into openings or operate with openings blocked, keep them free of
anything that may impair operation.
15. Keep hair, loose clothing, fingers and all parts of the body away from openings and moving parts.
16. Do not use the Hard Floor Polisher on any glowing, burning or smoking particles.
17. Store in a dry place. Do not expose machine to freezing temperatures.
18. Do not use to pick up flammable or combustible liquids such as petrol, or use in areas where they
may be present.
19. Keep the unit on the floor.
20. Do not attempt to remove blockages with sharp objects as they may cause damage.
21. Store indoors put away after use to prevent tripping accidents.
22. Using improper voltage may result in damage to the motor and possible injury to the user.
The correct voltage is listed on the rating label.
23. Do not carry appliance while motor is running.
24. Do not immerse power cable, plug or machine in water or any other liquid.
25. Do not use this Hard Floor Polisher if it has been dropped, damaged, left outdoors or dropped
into water.
26. Check pads for embedded grit or hard material before using on floors or scratching may occur.
This Hard Floor Polisher is intended for household use only and NOT for commercial or industrial use.
PLEASE KEEP INSTRUCTIONS FOR FURTHER USE.
2
1
4
5
6
8
Page 3
Warning: Always switch off and unplug the Hard Floor Polisher from the electrical socket before
assembling, opening or emptying the bin, or before connecting/disconnecting the attachments.
OPERATION
OPERATION
4
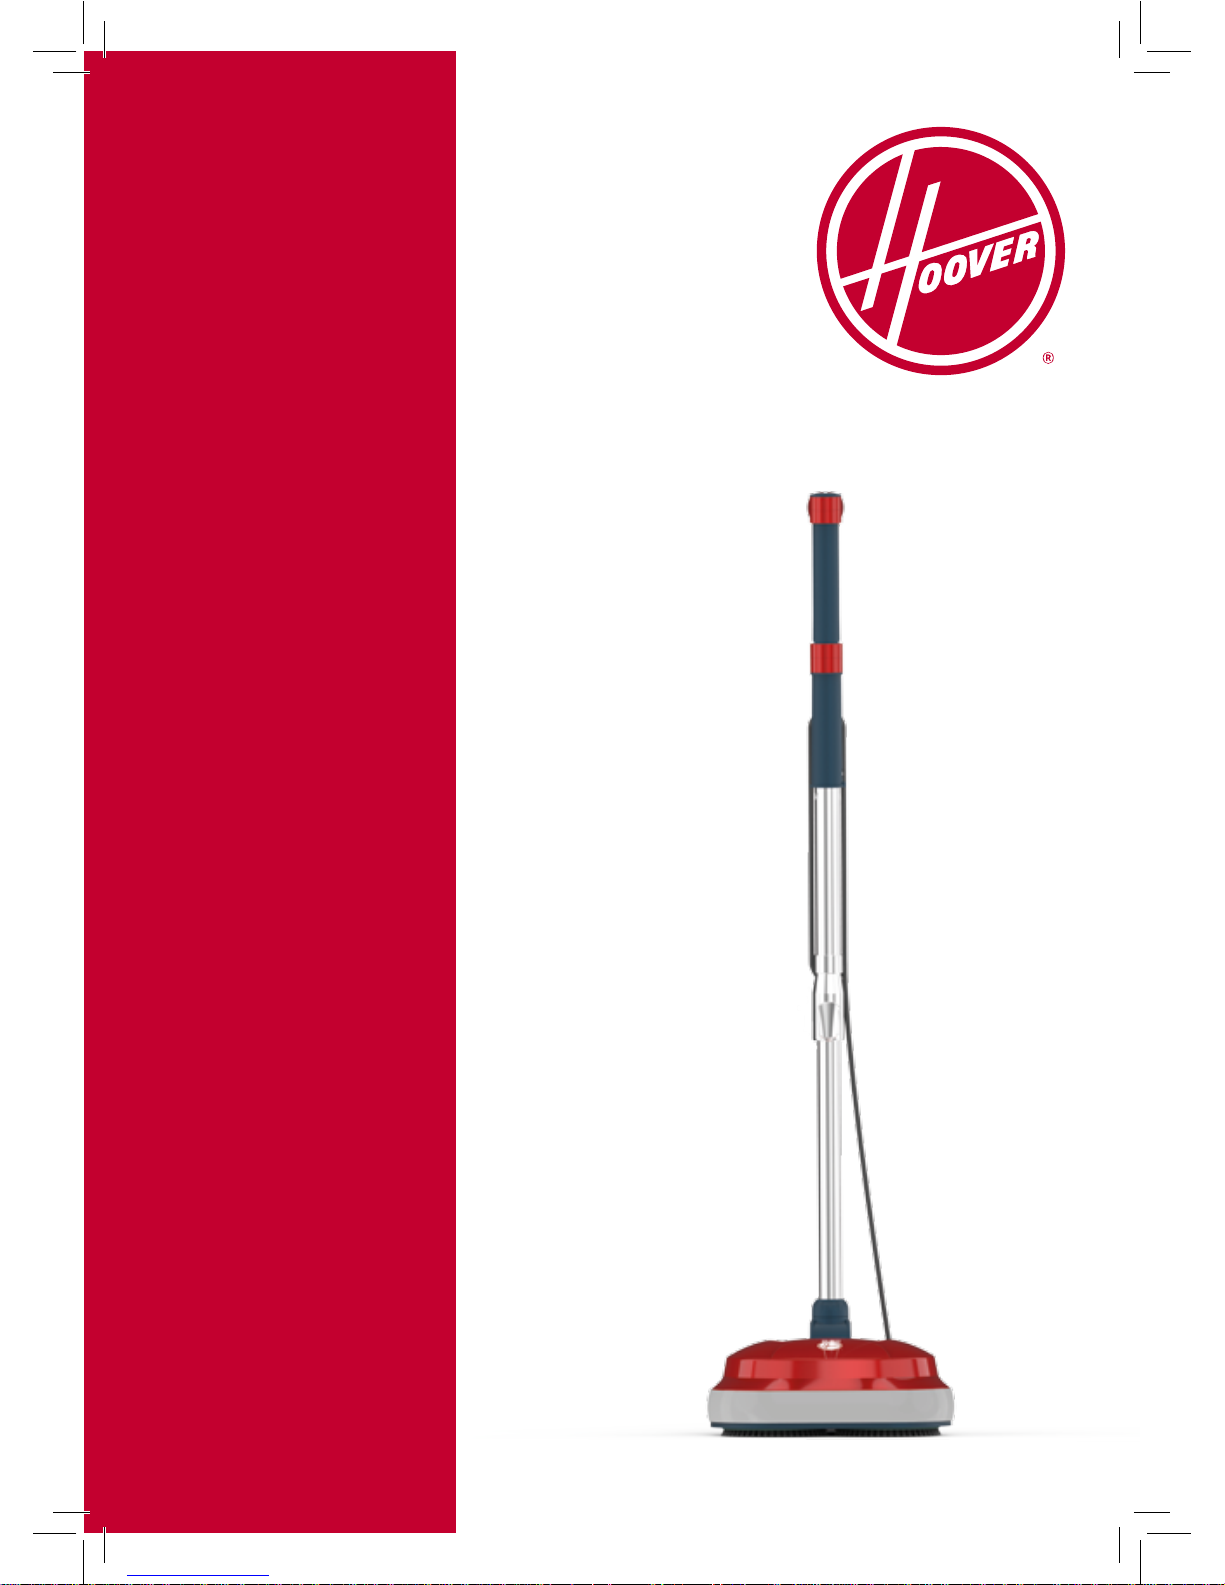
Assembling your Floor Polisher
3
Insert the lower section of the handle into the
aperture at the top of the head and screw the
collar in securely.
Changing the pads and plates on your product
Invert the cleaning
head so that the drive
hubs are accessible.
Place the required
hook and loop
backing plate
(for pads) or brush
plate over the hub,
making sure the four
connectors are aligned
to the holes in the hub.
Press the plate down
to clip into place.
Simply pull the
plates/brushes off to
remove and change.
Coral and scrubbing
pads can be applied
directly to the velcro
backing plates and
peeled off to remove.
Important: Always use two plates/pads of the same type.
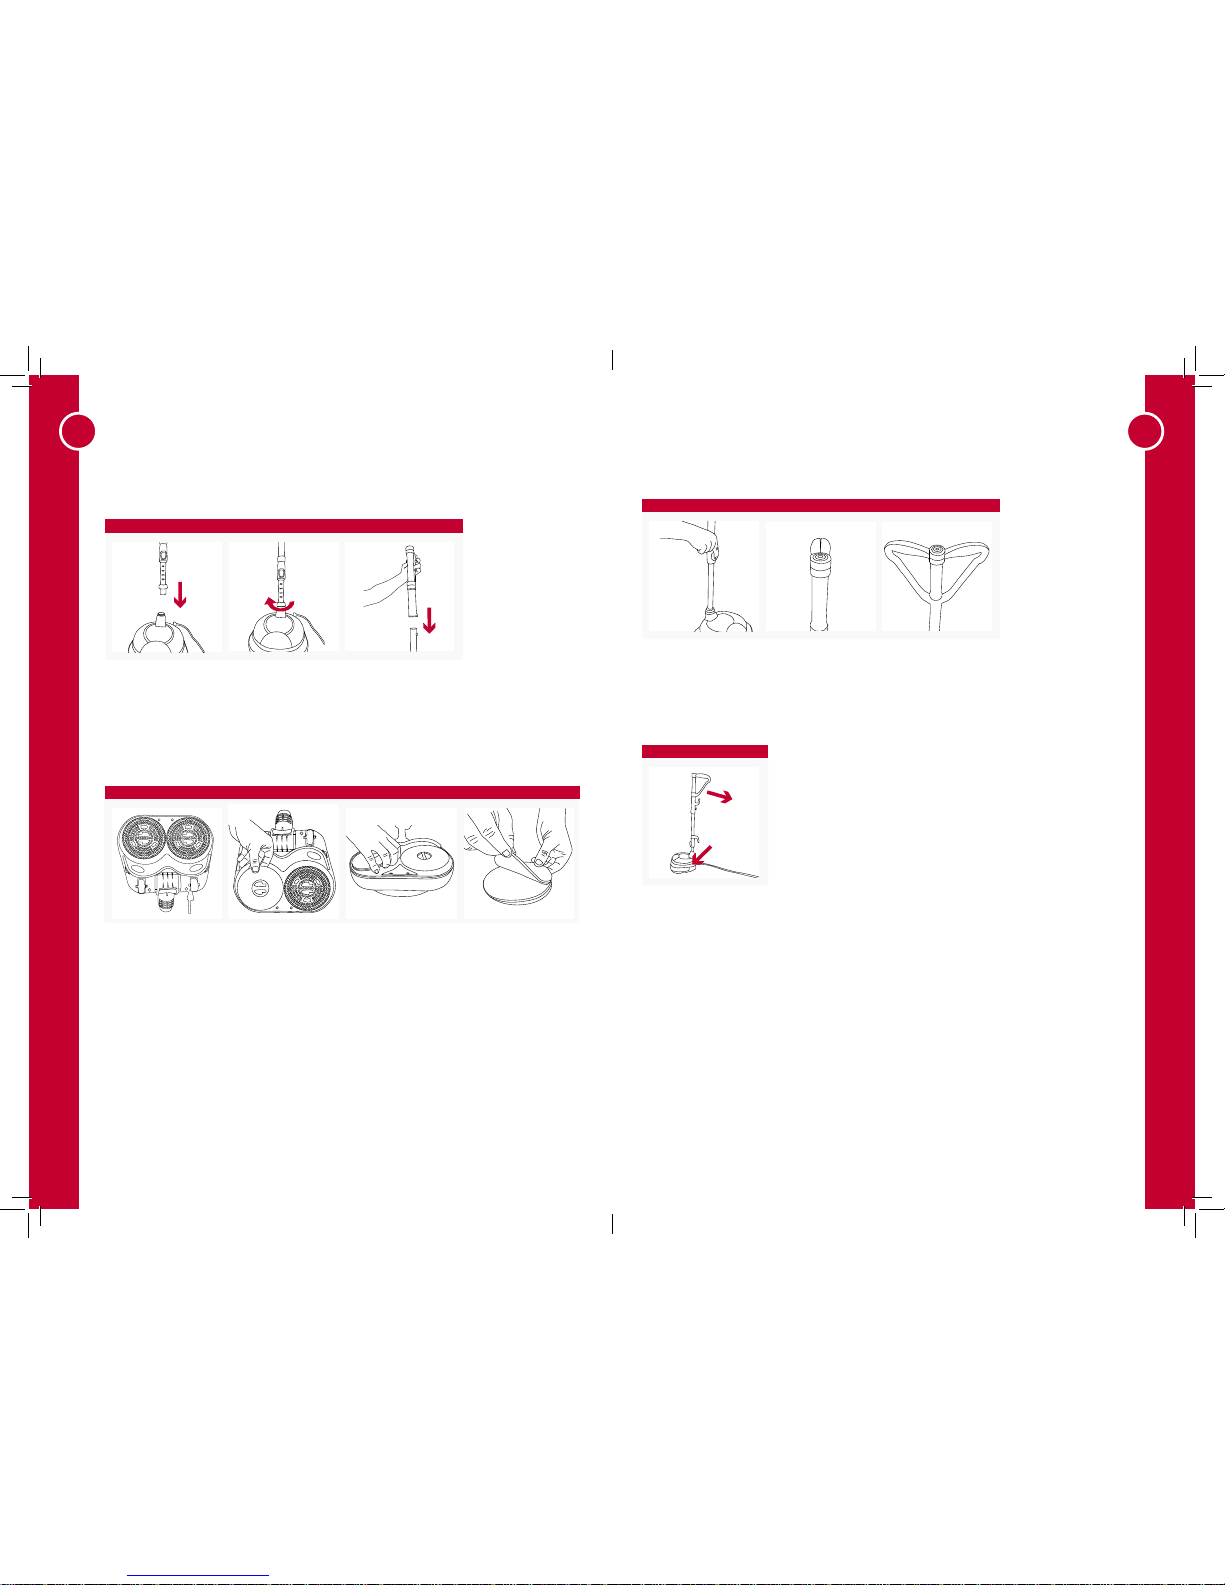
Adjust the height of
the handle to suit your
needs by pulling on the
extension button.
Adjusting the handle
For additional stability the pro-grip handle can
be opened to enable two-handed use.
Important: Please test Hoover Floor Polisher on a small area of flooring before use, please do not
continue use if any damage is caused during the test.
Turning on and off
Insert power plug
into mains socket.
Place your foot on
the base and pull the
handle back to turn on.
To switch off, return
the handle to upright
position and fix
into place.
Push the plastic upper
handle section until
the metal button clicks
into place. Ensure the
handle is attached
securely prior to using.
Page 4

OPERATION
OPERATION
5
6
Move at a speed
of about 1 minute
every 1m2 and follow
the diagram for an
even finish.
Using your Floor Polisher
Warning: Hoover Floor Polisher is only intended for use on hard floors. Any use on Carpet may
lead to damage to both carpet and/or machine. Take care not to slip over when polishing floors,
they can become very slippery in the process. Only use dedicated floor products,
other inappropriate detergents or types of polish could leave the floor dangerously slippery.
Do not leave the product operating in one area for a prolonged period of time as this
may damage your floor surface.
Applying floor treatments
Apply the treatment directly to the floor unless instructions indicate otherwise.
Scrubbing / Cleaning the floor
Heavily soiled surfaces may require the brush attachments are used initially to loosen any debris.
Otherwise ensure that the white scrubbing pads are attached (see page 3). Use the white
scrubbing pads with floor cleaner to remove stubborn stains or old treatments from the floor surface.
Once polishing is complete, turn the unit off by returning it to its upright position.
Warning: Do not leave the product operating in one area for a prolonged period as this may
damage your floor.
Polishing / Buffing the floor
Clean floor thoroughly first before adding your chosen floor polish / wax. Keep the polisher
moving. Do not stop in one place for a long time or it will spoil the finish. Once polishing is
complete, turn the unit off by returning it to its upright position. A glossy finish may not always be
possible; this depends on the polish/wax used and the type of floor surface. Sometimes several
coats of polish will enable a glossy finish.
Storage
The electrical power
cable can be stored on
the rear of the product
using the convenient
power cable storage
hooks. When not in
use please wind cable
around the storage
hooks to avoid a
tripping hazard.
(approx 1 minute per metre square)
1m
1m
Page 5

7 8
MAINTENANCE
FAQs
Important: The unit must be unplugged from the mains socket outlet after use, and before cleaning
or maintaining the unit.
The brushes and
scouring pads can
be washed under
the tap with warm
water (40ºC MAX).
Please leave to air
dry for 24 hours. It is
recommended to
re-shape the pads
whilst drying.
Cleaning the floor pads
The polishing head
unit is not suitable for
washing in water, it
must be wiped with
a damp cloth. Please
ensure polishing head
is fully dry before
re-use. Do not
submerge in water.
Is there an accessory missing?
• Check the ‘Machine Overview’ page in this guide to make sure the part is definitely included
in your unit. If it’s missing, please contact your local Hoover service agent.
Why will the Floor Polisher not run?
• It may not be plugged into the electrical outlet correctly; ensure that the plug
is pushed in securely.
• The electrical outlet may not be working properly; check the fuse or breaker,
or consult an electrician.
Why are smear marks made on floor when polishing?
• Make sure the polish/wax been allowed to dry.
• Consider removing existing floor treatment.
Why is there no gloss sheen after polishing?
• Floor polish/wax application level may need to be increased, try another coat. Allow to dry
and re-polish.
• Please note some types of floor do not produce gloss finish.
Why are there scratches being made on the floor?
• Check for grit or dirt stuck to the pads or on the rear wheels.
• Clean/replace the pads or wipe the wheels free from debris.
Why is the floor too slippery?
• Check the polish/wax is designed to be used on floors. Good floor polish should always
produce a glossy but grippy finish.
What do I do if the unit becomes damaged or broken?
• Contact your local Hoover service agent.
All pads and floor attachments are washable.
40˚ C max
Page 6

OTHER INFORMATION
9
NOTES
10
If you have any queries or concerns about using your Hoover, simply visit hoover.ae
or hoover.za.com
Technical Specification
Consumables
Service and Help
Power: 180W
Voltage: 220-240V
Frequency: 50/60Hz
RPM: 2,200
Sound pressure: 82dB(A) approx.
Subject to technical change without notice.
To purchase spares and accessories, please visit hoover.ae or hoover.za.com
The use of genuine Hoover spare parts helps to maintain optimised performance and validates
your guarantee.
Manufacturer/EEC importer: Hoover, hereby on our own responsibility, declare that the Hoover
HFPB1V1 and HFPB2V1 is manufactured in compliance with the following Directives:
Safety: 2014/35/EC Low Voltage Directive
EMC: 2014/30/EU Electromagnetic Compatibility Directive
Waste electrical products should not be disposed of with household waste. Please recycle where
facilities exist. Check with your Local Authority or retailer for recycling advice.
EEC Statement of Compliance
Page 7

 Loading...