

Page 1

Cooker hood
Instruction Manual
HECH 616 X
HECH 916 X
1
Page 2

CONTENT
1……………………………………….………. Notice
2………….……………………………………. Feature
3……………….………………………………. Installation
4…………………….…………………………. Notice of installation
5………………………….……………………. Safety Warning
6……………………………….………………. Use
7…………………………………….…….…… Maintenance
8…………………………………..…………... Troubleshooting
9…………………………………..…….......... Service Centre
2
Page 3

(1) NOTICE
1. Thank you for choosing our cooker hood. Please read the
instruction manual carefully before use.
2. The installation work must be undertaken by a qualified and
competent fitter.
3. The manufacturer disclaims all liability for any damage or injury
caused as a result of not following instructions for installation
contained in the following text.
The cooker hood is used on 220/240v, 50Hz.
(2) FEATURE
1. The cooker hood uses high quality materials, and is made with a
streamlined design.
2. Equipped with a large power low noise electric motor and
centrifugal leaf, it produces strong suction, low noise, non stick
grease filter and easy to clean.
3. Special wind tunnel construction and oil collector design, free dirt
will be absorbed in a second.
3
Page 4

(3) INSTALLATION
3.1 The cooker hoods should be placed
at a distance of 65-75cm from the
cooking surface for best effect. See
pic1.
3.2 To install onto the wall every 100mm
drill 3 holes of Ø8mm on a suitable
place in line with the hook on the hood.
3.3 Insert expended screws into the
holes.
3.4 Fix the hook on the wall, put Drilling
template on the hook. See pic2.
3.5 Add the soot tube to the one way
valve, and put it outdoor. See pic3.
3.6 Calculate the final height of the U-shaped section, pull out the inside Ushaped section to a suitable height. (See pic4). Finally, drill 2 holes of
Ø8mm on a suitable place in line with the 2
nd
inside U-shaped on the 2
plate and tighten the two screws (see pic4A).
nd
plate. Repeat 3.3. Put the
(4)
4
Page 5

NOTICE OF INSTALLATION
1. Before installation, please ensure the area is clean to avoid
suction of the remaining bits of broken wood and dust.
2. It cannot share the same air ventilation tube with other appliance
such as gas tube, warmer tube, and hot wind tube.
3. The bending of ventilation tube should be≥120°, parallel or above
the start point and should be connected to the external wall.
4. After installation, make sure that the extractor is level to avoid
grease collection at one end.
(5) SAFETY WARNING
• Never let the children operate the machine
• The cooker hood is for home use only, not suitable for barbecue,
Roast shop and other commercial purpose.
• Please ask the technical person to do the assembling.
• The cooker hood and its filter mesh should be clean regularly in
order to keep in good working order.
• Before cleaning, please switch the power off at the main supply.
• Clean the cooker hood according to the instruction manual and
keep the cooker hood from the danger of burning.
• If there is any fault with the appliance, please call the service
department to arrange a service engineer.
5
Page 6

(6) USE – (Speed adjustment. See pictures)
Push button
1. Push stop button, and the motor will stop.
2. Push the Low button, the buzzer will buzz once, and the motor runs
at low speed.
3. Push the Mid button, the buzzer will buzz once, and the motor runs
at mid speed.
4. Push the High button, the buzzer will buzz once, and the motor runs
at high speed.
5. Push the light button and the two lights will come on. Push it again
and the light will turn off.
6
Page 7
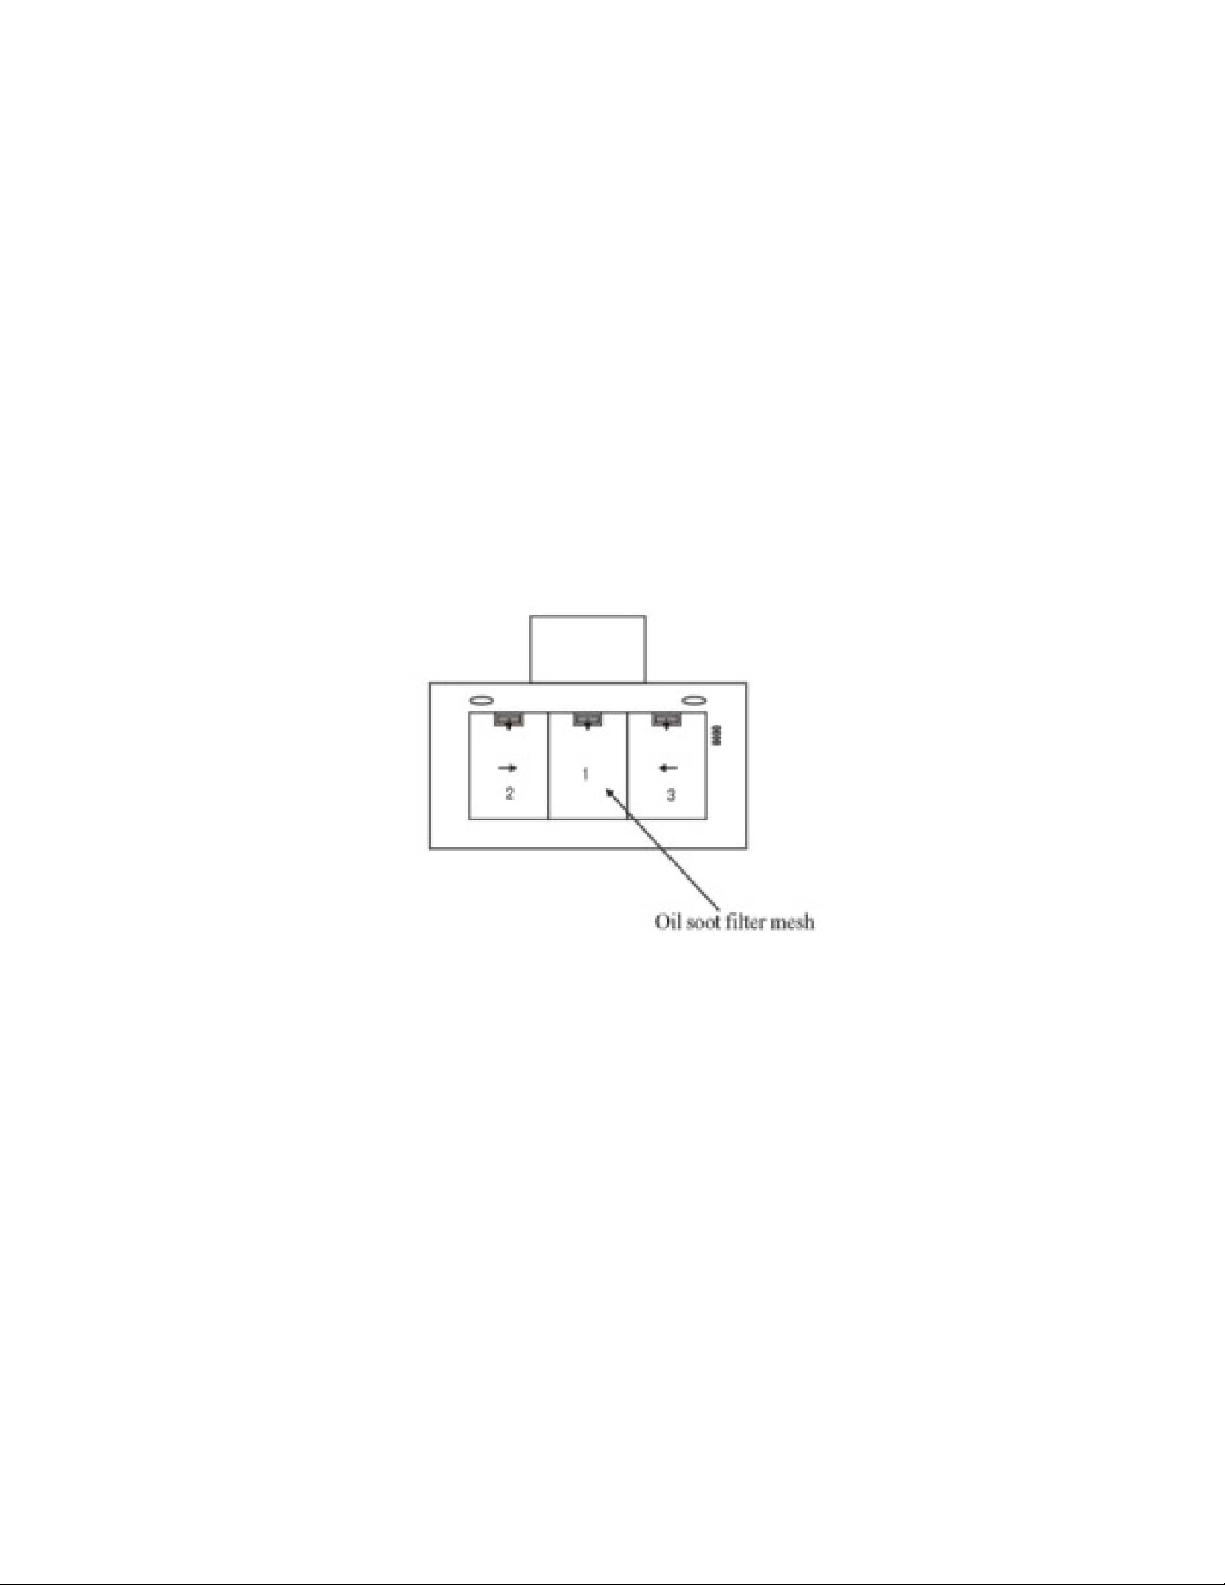
(7) MAINTENANCE
7.1 The cleaning of the carbon grease filter mesh
The filter mesh is made of high-density stainless steel. Please do not
use the corrosive detergent on it. Keeping this filter clean will keep the
appliance running correctly. Please strictly follow the guidelines below.
Method 1: Put the mesh into 40-50 c clean water, pour on detergent,
and soak for 2-3 mins. Wear gloves and clean with a soft brush.
Please do not apply too much pressure, as the mesh is delicate and
will damage easy.
Method 2: If instructed to do so, it can be put into a dishwasher, set the
temperature at around 60 degrees.
7.2 Notice of cleaning cooker hood
A. To protect the main body from corrosion over a long period of
time, the cooker hood should be cleaned with hot water plus non
corrosive detergent every two months.
B. Please do not use abrasive detergent for it will damage the body.
C. Keep the motor and other spare parts free from water, as this will
cause damage to the appliance.
D. Before cleaning the appliance please remember to cut off power
E. The carbon filter shouldn’t be exposed to heat.
F. Please don’t tear open the fixed bar around the carbon filter
G. If the plug or cord is damaged, please replace it with special soft
cord.
7
Page 8

(8) TROUBLESHOOTING
Fault
Cause Solution
Light on, but motor
does not work
Light does not
work, motor does
not work
Oil leakage
Shake of the body
The machine
inclines
The leaf blocked Get rid of the
blocking
The capacitor damaged Replace capacitor
The motor jammed bearing
damaged
The internal with of motor off
or a bad smell from the motor
Beside the above mentioned, check the following:
Light damaged Replace lights
Power cord looses Connect the wires as
One way valve and the air
ventilation entrance are
not tightly sealed
Leakage from the
connection of U-shaped
section and cover
The leaf damaged and
causes shaking
The motor is not tightly
hanged
The body is not tightly
hanged
The distance between the
body and the gas top too
long
Too much ventilation from
open doors or windows
The fixing screw not tight
enough
The hanging screw not
tight enough
Replace motor
Replace motor
per the electric
diagram
Take down the one
way valve and seal
with glue
Take U-shaped section
down and seal with
soap or paint
Replace the leaf
Lock the motor tightly
Fixed the body tightly
Readjust the distance Insufficient suction
Choose a new place
and resemble the
machine
Tighten the hanging
screw and make it
horizontal
Tighten the hanging
screw and make it
horizontal
8
Page 9

Electrical Diagram
Main Parameters
Rated Input 220V-240V, 50Hz
Rated Power 220W
Lighting Power 40W X 2
Motor Power 140W
Drive Mode Single Motor
Speed Speed I Speed II Speed III
Air tube diameter 150MM
Air output ≥6.6m3/min
Air pressure ≥250Pa
Noise ≤64Db(A)
9
Page 10

(9) SERVICE CENTRE
Before calling the Service Centre
If the hood is not working, we recommend that:
- you check the troubleshooting on chapter 8.
- you check that the cooker hood is properly plugged into the power
supply
If the cause of the fault cannot be detected:
disconnect the hood from the mains, do not touch the hood and call
the after sales service.
Before calling the Service Centre remember to make a note of the
serial number on the serial number specifications plate
The hood is supplied with a guarantee certificate that ensures that it
will be repaired free of charge at the Service Centre.
This appliance is marked according to the European
directive 2002/96/EC on Waste Electrical and Electronic
Equipment (WEEE).
By ensuring this product is disposed of correctly, you will
help prevent potential negative consequences for the
environment and human health, which could otherwise be
caused by inappropriate waste handling of this product.
The symbol on the product indicates that this product may not be
treated as household waste. Instead it shall be handed over to the
applicable collection point for the recycling of electrical and electronic
equipment
Disposal must be carried out in accordance with local environmental
regulations for waste disposal.
For more detailed information about treatment, recovery and recycling
of this product, please contact your local city office, your household
waste disposal service or the shop where you purchased the product.
10
 Loading...