

Page 1
QUICK START GUIDE
[4, 8, 16] HRDP Digital Video Recorder
Performance Series
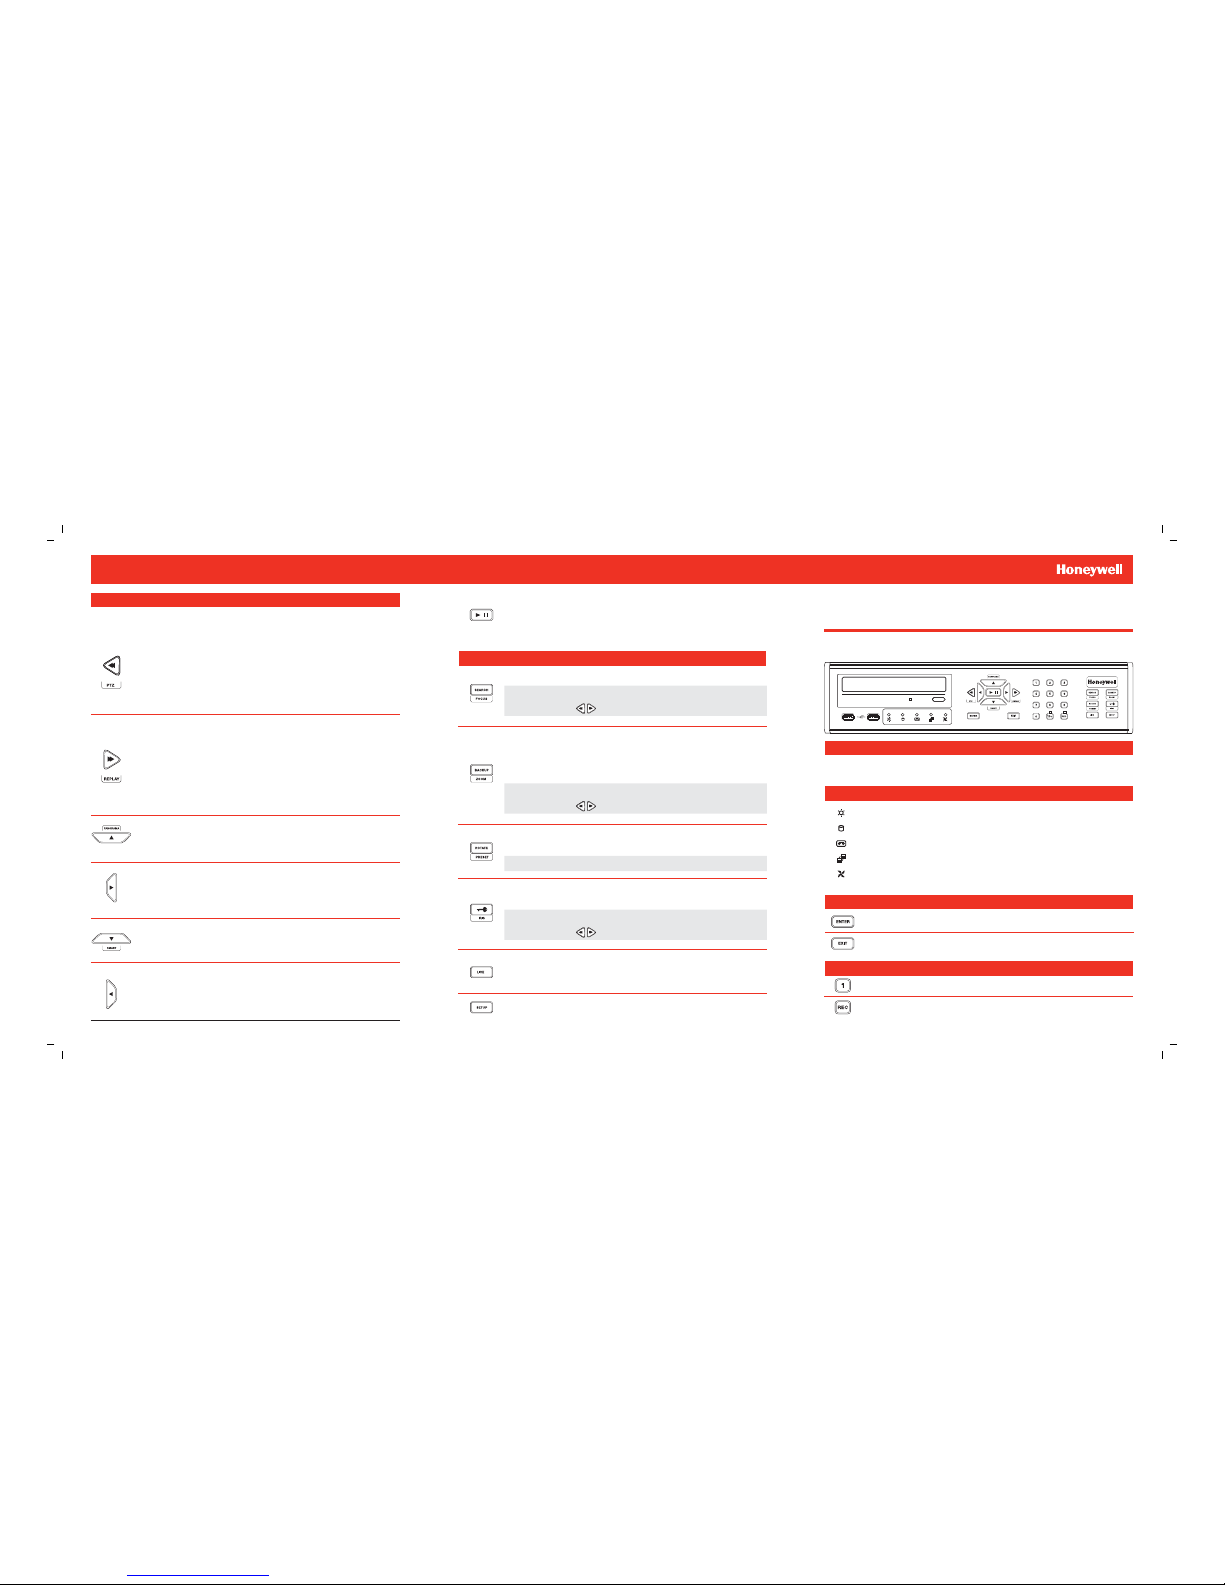
LED STATUS INDICATOR
ENTER / EXIT BUTTONS
Power
Illuminates when power is supplied to the DVR.
HDD
Flashes when the hard drive is being accessed.
Record
Flashes when live video is recording.
Network
Illuminates when the DVR is connected to a network.
Fan
Illuminates when the fan is working. Flashes when the fan is working
improperly. Unlit when the fan is not working.
Enter
Input data, make selections, and open pop-up menus.
DIRECTIONAL AND PLAYBACK CONTROL BUTTONS
Live
Go to PTZ mode.
PTZ
Adjust zoom, focus, and iris on a PTZ channel.
Search
Start reverse playback of recordings. When pressed
successively, the search jumps back in time by 30 minute
increments.
Search-Pause
When pressed successively, the reverse playback rate
decreases from 1/2X speed to 1/8X.
Live
Start playback of the latest recordings.
(By default, the system searches recordings in the past 30
secs. If no recording is archived, the system will play back
the latest one.)
PTZ
Adjust zoom, focus, and iris on a PTZ channel.
Search
Start playback of recordings. When pressed successively,
the search jumps forward in time by 30 minute increments.
Search-Pause
When pressed successively, the playback rate increases
from 1/2X speed to 1/8X.
Navigation
Move up.
PTZ
Move the camera view point up.
Search
Start Panorama Search.
Navigation
Move to the right.
PTZ
Move the camera view point to the right.
Search
Play recorded videos.
Search-Pause
Step forward one frame.
Navigation
Move to the left.
PTZ
Move camera’s view point to the left.
Search
Play recorded videos in reverse.
Search-Pause
Step back one frame.
Navigation
Move down.
PTZ
Move the camera view point down.
Search
Start Smart Search.
Operation Modes: Live Mode, Live Freeze Mode, Search Mode, Search-Pause Mode,
Navigation Mode, and PTZ Mode.
FUNCTION BUTTONS
NUMERIC BUTTONS AND REC
Numeric
In live and search modes, press to watch that channel full screen.
Live
Freeze live channels.
Live Freeze
Resume live view.
Search
Pause playback channels.
Search Pause
Resume playback.
Rotate
Rotate through to the remaining channels in the current display
mode or rotate the display confi guration.
Preset
In PTZ mode, press to use the Preset function.
Setup
Open the setup menu.
Live
Change the display mode. Display switches in the following order
when the LIVE key is pressed successively: (Single > 4 > 7 > 9 >
10 > 13 > 16 > Single > 4 > 7 > 9 ...split screen mode)
Record
In live mode, press to start instant recording of all channels.
Exit
Return to the previous mode or menu, without saving.
Search
Open the search menu.
Focus
In PTZ mode, press to use the Focus function.
Use the buttons to adjust.
Backup
In live mode, press to open the backup menu.
In the search mode,
Press once, to set the start time for Backup.
Press twice, to set the end time for Backup.
Press three times, to complete Backup.
•
•
•
Zoom
In PTZ mode, press to use PTZ Zoom function.
Use the buttons to adjust.
Key
Log out the current user. Use to prevent accidental or
unauthorized system-wide changes.
Iris
In PTZ mode, press to use the IRIS function.
Use the buttons to adjust.
Document 800-02090 - Rev C - 06/09
LOGGING IN FOR THE FIRST TIME
DVR User ID: admin Remote Software User ID: admin1
Password: <none> Password: <none>
Page 2
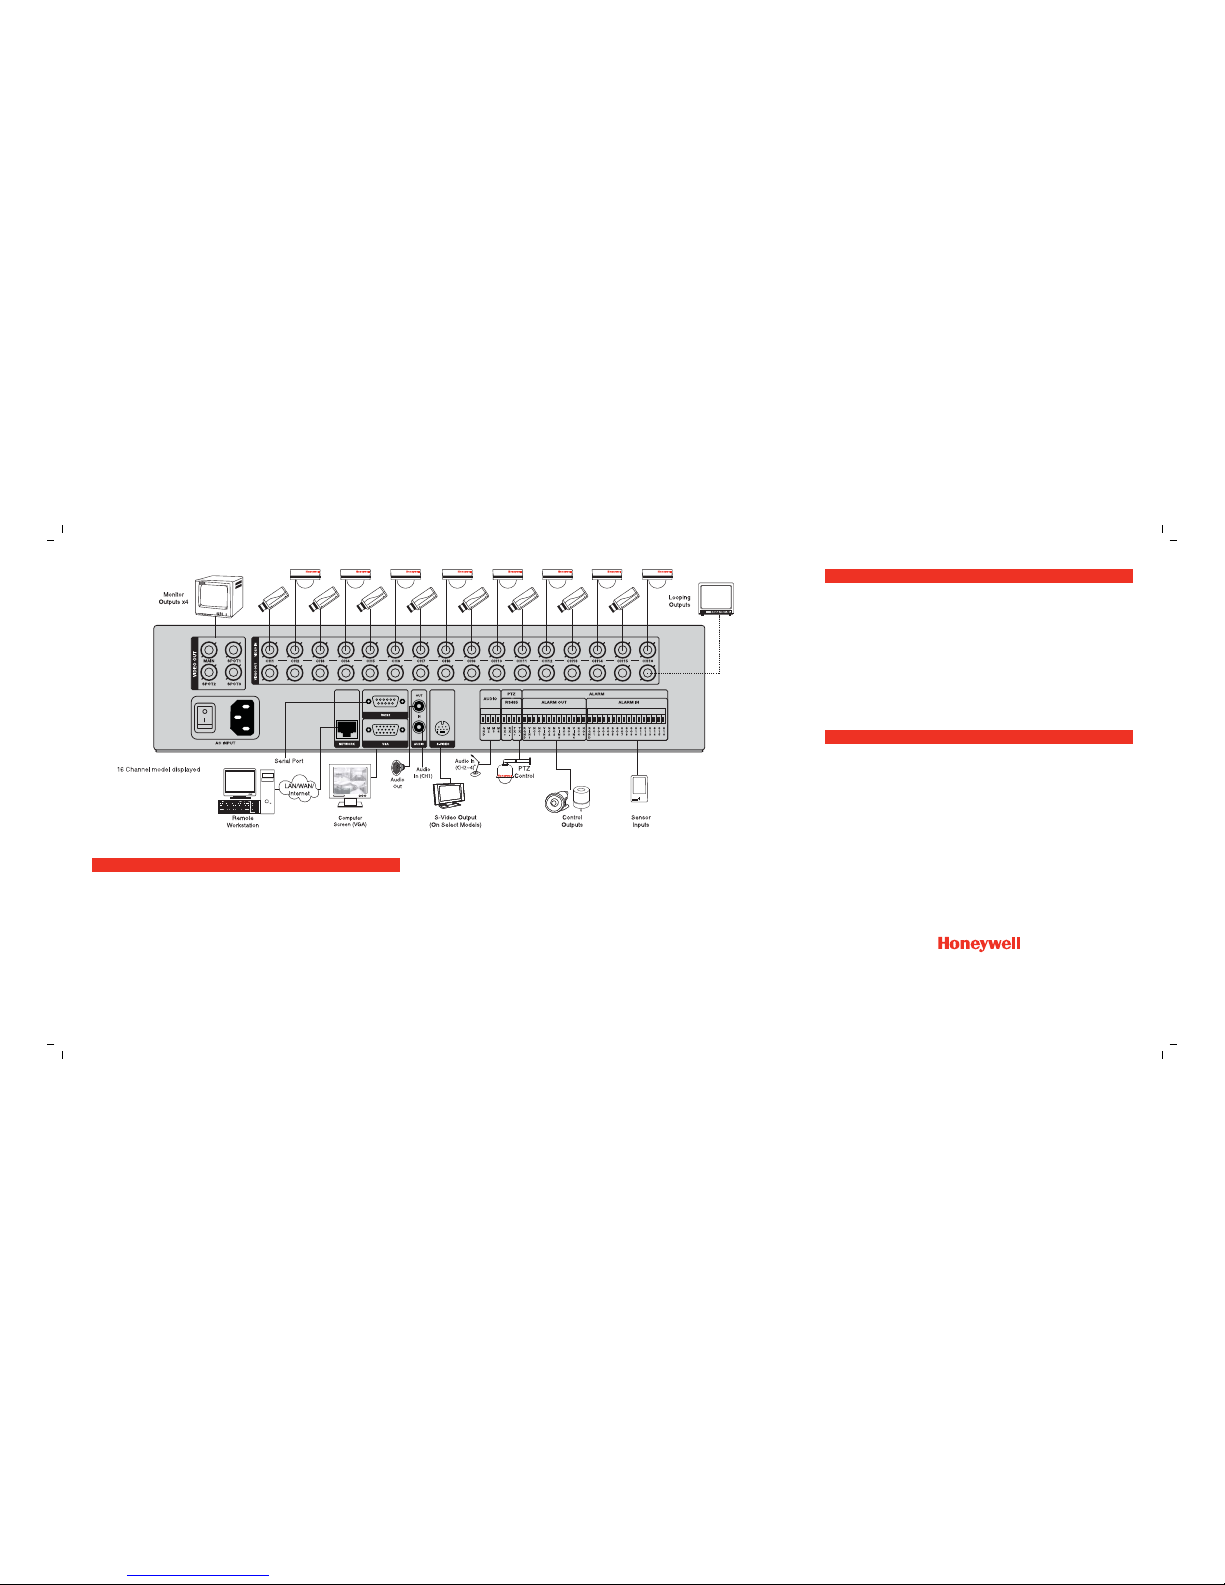
Connect cameras to video inputs, and if using, connect PTZ camera control
lines to RS485 connector.
Connect the main monitor to the VGA monitor output or
main video output - BNC.
If using, connect analog monitors to looping video ouputs.
If using, connect the monitor to SPOT video outputs (up to 3 on HRDP16 only).
If using, connect sensors to alarm signal inputs.
If using, connect alarm devices such as buzzers to alarm signal outputs.
If using, connect external controllers to RS232 connector.
1.
2.
3.
4.
5.
6.
7.
When the HRDP Performance Series DVR starts for the fi rst time, it will take about 40-45 sec-
onds to boot up. Once boot is complete, the Install Setup window will appear. Use this setup
window to confi gure the basic settings of the system and also format the HDDs. If any settings
are changed, you are encouraged to reboot the system.
Video Format: NTSC/PAL
Date Format: ASIA (YYYY/MM/DD), US (MM/DD/YYYY) and EURO (DD/MM/YYYY).
Date: Specify the current date.
Time: Specify the current time.
Time Zone: Set the local time zone.
Use DST: Select to use DST(Daylight Saving Time), turn on this toggle option.
When more than one HRDP Performance Series DVR is installed in the same location, use one
remote controller to control multiple DVRs. To control multiple DVRs, you must change the
remote controller ID to match the DVR ID of the DVR.
Follow the instructions below to change the remote controller ID.
On the DVR
Go to SYSTEM > SYSTEM CONFIGURATION.
Enter the desired DVR ID number.
On the Remote Controller
Press and hold the ID button on the remote controller and enter the desired
DVR ID number to operate the corresponding DVR.
Note The DVR ID must be input as two numbers on the remote controller. Therefore you
should input 00 for the DVR ID 0 and input 01 for 1.
1.
2.
3.
If using, connect a speaker and microphone to the audio input and output.
Connect a network cable to the network port.
Power on all the connected equipment.
Connect the power cord to the DVR.
Turn the power switch on.
8.
9.
10.
11.
12.
www.honeywellvideo.com
#1.800.796.CCTV (North America only)
HVSsupport@honeywell.com
Document 800-02090 — Rev C — 06/09
28832AC
© 2009 Honeywell International Inc. All rights reserved.
QUICK INSTALLATION
HOW TO USE IR REMOTE CONTROLLER
STARTING FOR THE FIRST TIME
© 2009 Honeywell International Inc. All rights reserved. No part of this publication may be reproduced by any
means without written permission from Honeywell Video Systems. The information in this publication is believed
to be accurate in all respects. However, Honeywell Video Systems cannot assume responsibility for any consequences resulting from the use thereof. The information contained herein is subject to change without notice.
Revisions or new editions to this publication may be issued to incorporate such changes.
*Audio In (CH 2~4) ONLY available on Rev B hardware DVR
- see serial number label on DVR chassis for Rev B indication.
Models earlier than Rev B support 1 CH of Audio In.
 Loading...