

Page 1
HRD 80
Fernbedienung
Bedienungsanleitung
Remote Control
Operating Instructions
Mando a distancia
Manual de instrucciones
Page 2

Page 3

Deutsch 3
English 21
Español 39
Page 4

Page 5

Inhalt
Inhalt
Inhalt 3
Übersicht 4
Bedienelemente 5
Tastenbelegung 6
Tasten belegen 6
Weitere Tasten belegen 11
Tastenbelegung ändern 11
Hometronic mit der Fernbedienung steuern 12
Beispielbelegung der Tasten 13
Beleuchtung steuern (Taste 1) 13
Rollladen steuern (Taste 2) 14
Soll-Temperatur senken und erhöhen (Taste 3) 15
Lifestyle "Abend" aktivieren (Taste A) 16
Fernbedienung sperren (Kindersicherung) 17
Batterien einlegen/wechseln 18
Technische Daten 19
Hilfe im Problemfall 19
3
Page 6

Übersicht
Übersicht
Mit der Fernbedienung HRD 80 können Sie
• Schaltgeräte ein- und ausschalten oder Lichter dimmen
• Rollläden und Markisen ansteuern
• die Soll-Temperatur eines Raumes erhöhen oder senken
• Lifestyles aktivieren
Es ist möglich, beliebig viele Fernbedienungen bei Hometronic zu
verwenden.
Mit einer einfachen Tastenkombination kann die Fernbedienung gesperrt werden (Kindersicherung).
Die Belegung der Tasten ist frei wählbar und jederzeit änderbar.
4
Page 7
Bedienelemente
Bedienelemente
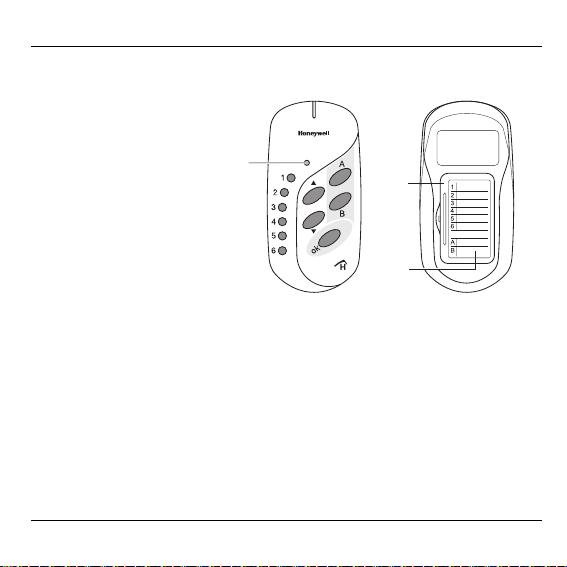
1 LED grün/rot
2 Batteriefach
3 Belegungstabelle
(Aufkleber)
1
2
3
1 ... 6
A und B Tasten für Lifestyles
ok Bestätigungstaste
▼/▲ Steuertasten
5
Tasten für Lampen, Schaltgeräte, Rollläden,
Heizung etc.
Page 8
Tastenbelegung
Tastenbelegung
Tasten belegen
1. Tastenbelegung festlegen
► Festlegen, mit welcher Taste das jeweilige installierte Gerät gesteuert
werden soll.
► Belegung in der Belegungstabelle (Aufkleber) notieren.
2. Am HCM 200D in das Untermenü "Installation" wechseln
► Falls sich Hometronic im Manuell-Betrieb befindet:
Taste für Auto-/Manuell-Betrieb drücken, um in den Automatik-Betrieb
zu wechseln.
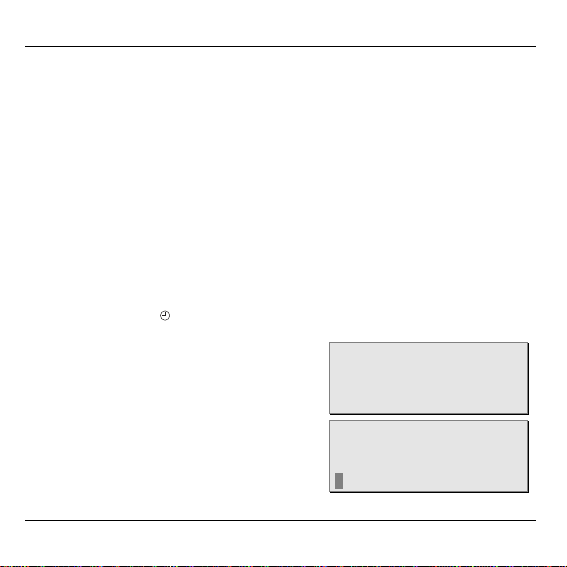
Die gelbe LED
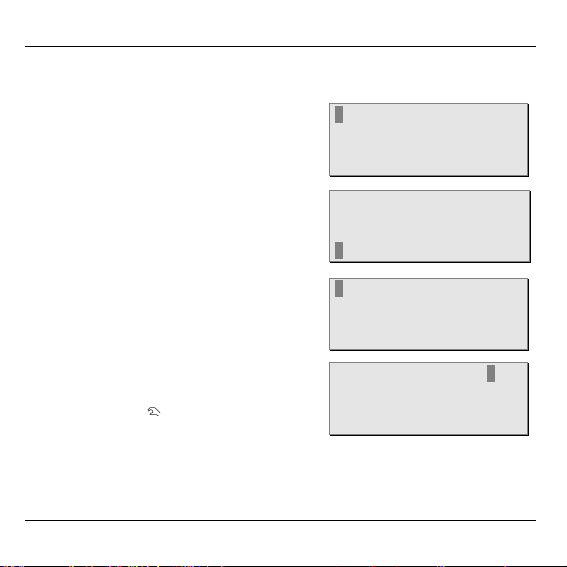
Das Display zeigt die StandardAnzeige (Beispiel):
► Eingabeknopf am Hometronic
Manager drücken.
Der Cursor blinkt in der untersten
Zeile.
6
am Hometronic Manager leuchtet.
HOMETRONIC
DO 01.03.2007 11:15
Kein Lifestyle aktiv
WOHNEN 20.0 C
HOMETRONIC
DO 01.03.2007 11:15
Kein Lifestyle aktiv
WOHNEN 20.0 C
Page 9
Tastenbelegung
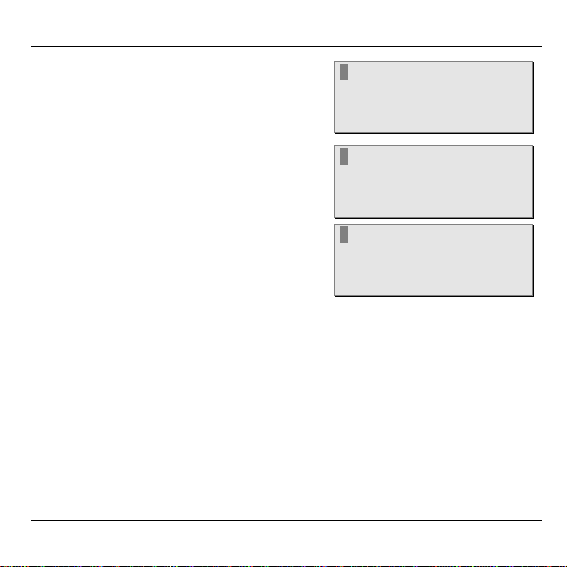
► Eingabeknopf nach rechts drehen, bis
der Cursor in der obersten Zeile ist.
Der Text der obersten Zeile wechselt
von "Hometronic" zu "Menü":
► Eingabeknopf drücken.
Im Display erscheint:
► "Einstellungen" wählen und Eingabe-
knopf drücken.
Im Display erscheint:
MENÜ
DO 01.03.2007 11:15
Kein Lifestyle aktiv
WOHNEN 20.0 C
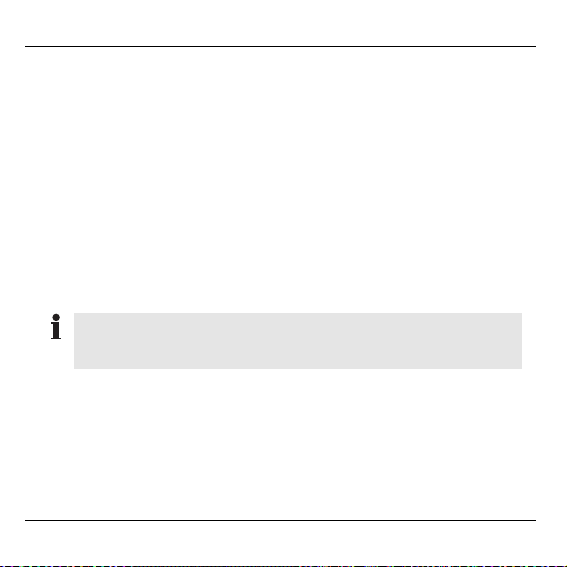
LIFESTYLE
ZEITPROGRAMME
ANZEIGE
EINSTELLUNGEN
INSTALLATION
DE-INSTALLATION
FÜHLERFUNKTION
SOMMERZEIT
7
Page 10
Tastenbelegung
3. Teach-in am Hometronic Manager HCM 200D aktivieren
Im folgenden Beispiel wird die Taste 1 der Beleuchtung zugeordnet.
► Eingabeknopf drücken.
Im Display erscheint:
HEIZUNG/KÜHLUNG
ROLLADEN
GERÄTE/LICHT
FÜHLER
► Wenn Sie später eine Taste mit einem
Lifestyle belegen, drehen Sie den Eingabeknopf weiter, bis im Display erscheint:
► "Geräte/Licht" wählen und Eingabe-
knopf drücken.
Im Display erscheinen die Gerätenamen, z. B.:
► Gerätenamen wählen (z. B. "Beleuch-
tung") und Eingabeknopf drücken.
Die rote LED
leuchtet hell.
Der Hometronic Manager ist jetzt zur Datenübertragung für ca. 8 Minu-
für Manuell-Betrieb
ten bereit. Anschließend erlischt die rote LED am HCM 200D wieder.
8
GERÄTE/LICHT
FÜHLER
KESSELANFORDERUNG
LIFESTYLE
BELEUCHTUNG *
MODUL-2
MODUL-3
MODUL-4
BELEUCHTUNG *
MODUL-2
MODUL-3
MODUL-4
Page 11

Tastenbelegung
4. Taste 1 der Fernbedienung zuweisen (Beispiel)
► Taste 1 der Fernbedienung drücken, bis die LED rot-grün blinkt.
Die Fernbedienung ist 15 Sekunden lang für den Teach-in bereit.
► Fernbedienung mit der Stirnsei-
te an der leuchtenden LED
des Hometronic Manager entlang führen.
Fernbedienung und Hometronic
Manager tauschen Daten aus.
Der Vorgang dauert einige Sekunden.
Der Vorgang sollte nicht bei direkter Sonneneinstrahlung
durchgeführt werden. Dunkeln Sie den Raum ggf. ab.
9
Page 12

Tastenbelegung
Erfolgreicher Teach-in
Der Teach-in ist erfolgreich, wenn die LED der Fernbedienung ca.
5 Sekunden grün leuchtet.
Die Beleuchtung kann jetzt mit der Taste 1 gesteuert werden (siehe
"Hometronic mit der Fernbedienung steuern", Seite 12)
► Tastenbelegung in die Belegungstabelle eintragen.
Misslungener Teach-in
Der Teach-in ist misslungen, wenn die LED der Fernbedienung nach
15 Sekunden rot leuchtet.
► Teach-in wiederholen.
10
Page 13

Tastenbelegung
Weitere Tasten belegen
► Komponente gemäß Ihrer Belegungstabelle wählen (Schritt1).
► In das Untermenü "Installation" wählen (Schritt 2).
► Teach-in für die gewünschte Komponente oder den Lifestyle aktivie-
ren (Schritt 3).
► Weitere Taste der Fernbedienung einer Komponente zuweisen
(Schritt 4).
Tastenbelegung ändern
Sie können die Belegung einzelner Tasten jederzeit ändern (siehe
"Weitere Tasten belegen").
11
Page 14
Hometronic mit der Fernbedienung steuern
Hometronic mit der Fernbedienung steuern
Nach der Tastenbelegung können Sie Hometronic mit der Fernbedienung steuern:
► Um eine Komponente oder einen Lifestyle zu wählen:
Eine der Tasten 1 bis 6 bzw. A oder B drücken.
Die LED leuchtet grün.
► Um eine Komponente zu steuern:
Tasten ▼/▲ drücken bzw. den Lifestyle mit der Taste ok bestätigen.
Die LED blinkt und leuchtet anschließend wieder grün.
Die gewählte Komponente bleibt aktiv, bis die LED erlischt (ca. 15
Sekunden) oder eine andere Komponente gewählt wird.
Wenn Hometronic im Automatik-Betrieb arbeitet, bleiben
Änderungen mit der Fernbedienung ggf. nur bis zum nächsten
Schaltpunkt erhalten.
12
Page 15

Hometronic mit der Fernbedienung steuern
Beispielbelegung der Tasten
In der folgenden Erläuterung wird von einer typischen Tastenbelegung
ausgegangen:
Taste 1 steuert die Beleuchtung
Taste 2 steuert den Rollladen
Taste 3 steuert die Soll-Temperatur des Wohnzimmers
Taste A aktiviert den Lifestyle "Abend"
Beleuchtung steuern (Taste 1)
Beleuchtung ein- oder ausschalten
► Taste 1 drücken.
Die LED leuchtet grün.
► Taste ▲ kurz drücken.
Die LED blinkt. Die Beleuchtung schaltet sich ein.
► Taste ▼ kurz drücken.
Die Beleuchtung schaltet sich aus.
Beleuchtung dimmen
► Taste 1 drücken.
► Tasten ▲ oder ▼ gedrückt halten, bis die gewünschte Helligkeit
erreicht ist.
13
Page 16

Hometronic mit der Fernbedienung steuern
Rollladen steuern (Taste 2)
Rollladen vollständig öffnen und schließen
► Taste 2 drücken.
Die LED leuchtet grün.
► Taste ▼ kurz drücken.
Der Rollladen schließt sich vollständig.
► Taste ▲ kurz drücken.
Der Rollladen öffnet sich vollständig.
► Um den Rollladen zu stoppen:
Taste ▲ für ca. 2 Sekunde gedrückt halten.
Der Rollladen bleibt beim Loslassen der Taste stehen.
Rollladenposition beliebig verstellen
► Taste 2 drücken.
► Tasten ▲ oder ▼ gedrückt halten, bis die gewünschte Position
erreicht ist.
14
Page 17

Hometronic mit der Fernbedienung steuern
Soll-Temperatur senken und erhöhen (Taste 3)
Die Soll-Temperatur ist nicht stufenlos einstellbar. Der Temperatursprung ist auf 2 °C am Hometronic Manager voreingestellt.
Wie Sie diesen ändern (max. 8 °C), lesen Sie in der Bedienungsanleitung zum Hometronic Manager.
Beispiel: Eine Soll-Temperatur von 20 °C kann mit der Voreinstellung
auf 18 °C gesenkt bzw. 22 °C erhöht werden.
Temperatur senken
Die Soll-Temperatur beträgt 20 °C.
► Taste 3 drücken.
► Taste ▼ drücken.
Die Soll-Temperatur wurde auf 18 °C gesenkt.
Temperatur erhöhen
Die Soll-Temperatur wurde mit der Fernbedienung auf 18 °C gesenkt.
► Taste 3 drücken.
► Taste ▲ drücken.
Die Soll-Temperatur wurde auf 20 °C erhöht.
► Taste ▲ erneut drücken.
Die Soll-Temperatur wurde auf 22 °C erhöht.
15
Page 18

Hometronic mit der Fernbedienung steuern
Lifestyle "Abend" aktivieren (Taste A)
► Taste A kurz drücken.
► Taste ok drücken.
Der Lifestyle "Abend" ist aktiviert.
16
Page 19

Fernbedienung sperren (Kindersicherung)
Fernbedienung sperren (Kindersicherung)
Sie können die Fernbedienung gegen unbefugte Bedienung sperren:
► Tasten ▲,▼und ok gleichzeitig drücken.
Die Fernbedienung ist gesperrt.
► Sperre durch Drücken einer beliebigen Taste prüfen.
Die LED blinkt während der Tastenbetätigung rot.
► Um die Sperre aufzuheben:
Tasten
▲,▼ und ok gleichzeitig drücken.
Die Fernbedienung ist wieder einsatzbereit.
Das Herausnehmen der Batterien hebt die Sperre auf.
17
Page 20

Batterien einlegen/wechseln
Batterien einlegen/wechseln
Wechseln Sie die Batterien, sobald die LED der Fernbedienung beim
Drücken einer Taste rot oder gar nicht leuchtet (Ausnahme: Fernbedienung ist gesperrt, die LED blinkt.)
► Batteriefach an der Unterseite
der Fernbedienung öffnen.
► Ggf. alte Batterien entfernen.
► Neue Batterien mit der richti-
gen Polung einlegen.
► Batteriefach schließen.
Gebrauchte Batterien nicht mit dem Hausmüll, sondern
entsprechend den gesetzlichen Bestimmungen entsorgen.
Immer beide Batterien wechseln.
Nur 1,5-V-Mignon-Batterien vom Typ LR06, AA verwenden.
18
Page 21

Technische Daten
Technische Daten
Fern-Offset Bereich 0 ... 8 °C (Werkseinstellung
am Hometronic Manager: 2 °C)
Umgebungstemperatur 0 bis 50 °C
Lagertemperatur –20 bis +70 °C
Schutzklasse IP 20
Maximale Luftfeuchtigkeit 95 %
Hilfe im Problemfall
Problem Ursache Lösung
LED leuchtet nicht bzw.
leuchtet rot bei Tastendruck
LED blinkt rot bei Tastendruck
LED leuchtet grün bei
Betätigung einer
Steuertaste
▲,▼.
19
Batterien leer
bzw. schwach
Fernbedienung
gesperrt
Taste nicht belegt
► Batterien wechseln
(siehe Seite 18).
► Sperre aufheben
(siehe Seite 17).
► Taste belegen (siehe
Seite 6).
Page 22

Page 23

Contents
Contents
Contents 21
Overview 22
Operating elements 23
Button assignment 24
Assigning buttons 24
Assigning additional buttons 29
Changing button assignment 29
Controlling Hometronic with the remote control 30
Example assignment of the buttons 31
Controlling illumination (button 1) 31
Controlling shutters (button 2) 32
Lowering and raising setpoint temperature (button 3) 33
Activating "Evening" lifestyle (button A) 34
Locking remote control (child-proofing) 35
Inserting/changing batteries 36
Technical data 37
Help with problems 37
21
Page 24

Overview
Overview
With the HRD 80 Remote Control, you can
• switch control units on and off or dim lights
• operate shutters and awnings
• raise or lower the setpoint temperature of a room
• activate lifestyles
Any number of remote controls can be used with the Hometronic.
The remote control can be locked (child-proofing) with a simple button
combination.
The buttons can be assigned as desired and changed at any time.
22
Page 25

Operating elements
Operating elements
1 Green/red LED
2 Battery compartment
3 Assignment table
(sticker)
1
2
3
1 ... 6
A and B Buttons for lifestyles
ok Confirmation button
▼/▲ Control buttons
23
Buttons for lamps, control units, shutters, heating
etc.
Page 26

Button assignment
Button assignment
Assigning buttons
1. Specifying button assignment
► Specify the button with which the respective installed device is to be
controlled.
► Record assignment in the assignment table (sticker).
2. Switching to the "Installation" submenu on the HCM 200D
► If the Hometronic is in manual mode, press the button for auto-
matic/manual mode to switch to automatic mode.
The yellow LED
The display shows the default display
(for example):
► Press the Input button on the Homet-
ronic Manager.
The cursor flashes on the bottom
line.
24
on the Hometronic Manager illuminates.
HOMETRONIC
TU 14.05.2007 10:00
No lifestyle active
LIVING 20.0°C
HOMETRONIC
TU 14.05.2007 10:00
No lifestyle active
LIVING 20.0°C
Page 27

Button assignment
► Turn the Input button to the right until
the cursor is on the top line.
The text on the top line changes from
"Hometronic" to "Menu":
► Press the Input button.
The following is displayed:
► Select "Settings" and press the Input
button.
The following is displayed:
MENU
TU 14.05.2007 10:00
No lifestyle active
LIVING 20.0°C
LIFESTYLES
TIME PROGRAMS
DISPLAY
SETTINGS
INSTALLATION
DE-INSTALLATION
SENSOR FUNCTION
DAYLIGHT SAVING TIME
25
Page 28

Button assignment
3. Activating binding at Hometronic Manager HCM 200D
In the following example, button 1 is assigned to illumination.
► Press the Input button.
The following is displayed:
HEATING/COOLING
SHUTTER
DEVICES/LIGHTS
SENSOR
► If you assign a button a lifestyle at a
later point in time, turn the Input button
further until the following is displayed:
DEVICE/LIGHT
SENSOR
BOILER DEMAND
LIFESTYLE
► Select "Devices/Lights" and press the
Input button.
The device names appear in the display, e.g.:
► Select device name (e.g. "Illumina-
tion") and press the Input button.
The red LED
luminates brightly.
The Hometronic Manager is now ready for data transfer for approx.
for manual mode il-
8 minutes. The red LED on the HCM 200D then goes out again.
26
ILLUMINATION *
MODE-2
MODE-3
MODE-4
ILLUMINATION *
MODE-2
MODE-3
MODE-4
Page 29

Button assignment
4. Assigning button 1 of the remote control (example)
► Press button 1 of the remote control until the LED flashes red and
green.
The remote control is ready for binding for 15 seconds.
► Guide front end of remote con-
trol along with the illuminated
LED
of the Hometronic Man-
ager.
The remote control and Hometronic Manager exchange data.
The procedure lasts a few seconds.
The procedure should not be carried out in direct sunlight.
Darken the room if necessary.
27
Page 30

Button assignment
Successful binding
Binding was successful if the LED of the remote control illuminates
green for approx. 5 seconds.
The illumination can now be controlled with button 1 (see "Controlling
Hometronic with the remote control", Page 30)
► Enter button assignment in the assignment table.
Failed binding
Binding was unsuccessful if the LED of the remote control illuminates
red after 15 seconds.
► Repeat binding.
28
Page 31

Button assignment
Assigning additional buttons
► Select component according to your assignment table (step 1).
► Switch to the "Installation" submenu (step 2).
► Activate binding for the desired component or lifestyle (step 3).
► Assign additional button of the remote control to a component
(step 4).
Changing button assignment
You can change the assignment of individual buttons at any time
(see "Assigning additional buttons").
29
Page 32

Controlling Hometronic with the remote control
Controlling Hometronic with the remote control
You can control the Hometronic with the remote control once button
assignment has occurred:
► To select a component or lifestyle:
Press one of the buttons 1–6 or A or B.
The LED illuminates green.
► To control a component:
Press the ▼/▲ buttons or confirm the lifestyle with the ok button.
The LED flashes and then illuminates green again.
The selected component remains active until the LED goes out
(approx. 15 seconds) or another component is selected.
If the Hometronic is in automatic mode, changes made with
the remote control are only retained until the next switching
point.
30
Page 33

Controlling Hometronic with the remote control
Example assignment of the buttons
A typical button assignment is assumed in the following explanation:
Button 1 Controls the illumination
Button 2 Controls the shutters
Button 3 Controls the setpoint temperature of the living room
Button A Activates the "Evening" lifestyle
Controlling illumination (button 1)
Switching illumination on or off
► Press button 1.
The LED illuminates green.
► Press the ▲ button briefly.
The LED flashes. The illumination switches on.
► Press the ▼ button briefly.
The illumination switches off.
Dimming illumination
► Press button 1.
► Press and hold the ▲ or ▼ button until the desired brightness is
reached.
31
Page 34

Controlling Hometronic with the remote control
Controlling shutters (button 2)
Opening and closing shutters fully
► Press button 2.
The LED illuminates green.
► Press the ▼ button briefly.
The shutters close fully.
► Press the ▲ button briefly.
The shutters open fully.
► To stop the shutters:
Press and hold the ▲ button for approx. 2 seconds.
The shutters stop when the button is released.
Adjusting shutter position as desired
► Press button 2.
► Press and hold the ▲ or ▼ button until the desired position is
reached.
32
Page 35

Controlling Hometronic with the remote control
Lowering and raising setpoint temperature (button 3)
The setpoint temperature is not continuously adjustable. The temperature increment is preset to 2 °C at the Hometronic Manager.
For information on how to change this (max. 8 °C), refer to the operating instructions of the Hometronic Manager.
Example: A setpoint temperature of 20 °C can be lowered to 18 °C or
raised to 22 °C.
Lowering temperature
The setpoint temperature is 20 °C.
► Press button 3.
► Press the ▼ button.
The setpoint temperature has been lowered to 18 °C.
Raising temperature
The setpoint temperature has been lowered to 18 °C with the remote
control.
► Press button 3.
► Press the ▲ button.
The setpoint temperature has been increased to 20 °C.
► Press the ▲ button again.
The setpoint temperature has been increased to 22 °C.
33
Page 36

Controlling Hometronic with the remote control
Activating "Evening" lifestyle (button A)
► Press button A briefly.
► Press the ok button.
The "Evening" lifestyle is activated.
34
Page 37

Locking remote control (child-proofing)
Locking remote control (child-proofing)
You can lock the remote control to prevent unauthorised operation:
► Press the ▲,▼ and ok buttons simultaneously.
The remote control is locked.
► Check to confirm locking by pressing any button.
The LED flashes red while the button is pressed.
► To unlock:
Press the
The remote control is ready for use once again.
35
▲,▼ and ok buttons simultaneously.
Removing the batteries unlocks the remote control.
Page 38

Inserting/changing batteries
Inserting/changing batteries
Change the batteries as soon as the LED of the remote control illuminates red or not at all when buttons are pressed (an exception to this is
when the remote control is locked; the LED flashes.)
► Open the battery compart-
ment on the bottom of the remote control.
► Remove the old batteries if
necessary.
► Insert new batteries, paying
attention to correct polarity.
► Close the battery compart-
ment.
Do not dispose of batteries with household rubbish. They
must be returned in accordance with the local statutory
requirements.
Always replace both batteries.
Only use 1.5 V mignon batteries of the type LR06, AA.
36
Page 39

Technical data
Technical data
Remote offset range 0 ... 8 °C (factory setting
in the Hometronic Manager: 2 °C)
Ambient temperature 0 to 50 °C
Storage temperature –20 to +70 °C
Protection class IP 20
Maximum humidity 95 %
Help with problems
Problem Cause Remedy
LED does not illuminate
or illuminates red when
buttons are pressed
LED flashes red when
buttons are pressed
LED illuminates green
when one of the control
buttons (
pressed.
▲,▼) is
37
Batteries flat or
weak
Remote control
locked
Button not assigned
► Change batteries
(see Page 36).
► Unlock
(see Page 35).
► Assign button
(see Page 24).
Page 40

Page 41

Índice
Índice
Índice 39
Visión general 40
Elementos de mando 41
Asignación de botones 42
Asignar botones 42
Asignación de otros botones 47
Modificación de la asignación de botones 47
Control del Hometronic con el mando a distancia 48
Asignación ejemplar de los botones 49
Mando de la iluminación (botón 1) 49
Control de las persianas (botón 2) 50
Bajar y subir la temperatura ajustada (botón 3) 51
Activación del Lifestyle "Noche" (botón A) 52
Bloqueo del mando a distancia (seguro a prueba de niños) 53
Poner/Cambiar pilas 54
Características técnicas 55
Ayuda en caso de problemas 56
39
Page 42

Visión general
Visión general
El mando a distancia HRD 80 le permite a usted
• Conectar y desconectar aparatos conmutadores o atenuar luces
• Comandar persianas y marquesinas
• Subida o bajada de la temperatura ajustada de una habitación
• Activar Lifestyles
El Hometronic permite la utilización de cualquier cantidad de mandos a
distancia.
El mando a distancia puede bloquearse con una sencilla combinación
de botones (seguro a prueba de niños).
La asignación de los botones es libremente elegible y modificable en
todo momento.
40
Page 43

Elementos de mando
Elementos de mando
1 LED verde/rojo
2 Compartimento para
pilas
3 Tabla de asignación
(adhesivo)
1
2
3
1 ... 6
A y B Botón para Lifestyles
OK Botón de confirmación
▼/▲ Botones de mando
41
Botones para lámparas, aparatos conmutadores,
persianas, calefacción, etc.
Page 44

Asignación de botones
Asignación de botones
Asignar botones
1. Fijación de la asignación de botones
► Fijar el botón con el que el respectivo dispositivo debe ser
controlado.
► Anotar la asignación en la tabla de asignación (adhesivo).
2. Cambio al submenú "Instalación" en el HCM 200D
► Si el Hometronic está en el modo de servicio manual:
Pulsar el botón para servicio Automático/Manual, para cambiar a
servicio automático.
El LED amarillo
El display muestra la pantalla
estándar (ejemplo):
► Pulsar el botón de entrada de datos
en el Hometronic Manager.
El cursor parpadea en la última línea
de abajo.
42
se ilumina en el Hometronic Manager.
HOMETRONIC
MA 14.05.2007 10:00
Ningun lifestyle act
SALON 20.0°C
HOMETRONIC
MA 14.05.2007 10:00
Ningun lifestyle act
SALON 20.0°C
Page 45

Asignación de botones
► Girar el botón de entrada de datos a
la derecha, hasta que el cursor esté
en la línea superior.
El texto de la línea superior cambia
de "Hometronic" a "Menú":
► Pulsar el botón de entrada de datos.
En la pantalla aparece:
► Elegir "Ajustes" y pulsar el botón de
entrada de datos.
En la pantalla aparece:
MENU
MA 14.05.2007 10:00
Ningun lifestyle act
SALON 20.0°C
LIFESTYLES
PROGRAMAS HORARIOS
PANTALLA
AJUSTES
INSTALACION
DESINSTALACION
FUNCION SENSOR
HORA VERANO
43
Page 46

Asignación de botones
3. Activación de la sincronización en el Hometronic Manager
HCM 200D
En el siguiente ejemplo el botón 1 de la iluminación.
► Pulsar el botón de entrada de datos.
En la pantalla aparece:
CALEFAC./REFRIGERAC.
PERSIANAS
APARATOS/LUCES
SENSOR
► Si usted asigna posteriormente un
botón con un Lifestyle, continúe
girando el botón de entrada de datos,
hasta que en la pantalla aparece:
► Elegir "Aparatos/Luces" y pulsar el
botón de entrada de datos.
En la pantalla aparecen los nombres
de aparatos, p.ej.:
► Elegir nombres de aparatos (p.ej.
"Iluminación") y pulsar el botón de
entrada de datos.
El LED rojo
ilumina.
de servicio manual se
44
APARATOS/LUCES
SENSOR
DEMANDA CALDERA
LIFESTYLE
ILUMINACIÓN *
MÓDULO-2
MÓDULO -3
MÓDULO -4
ILUMINACIÓN *
MÓDULO -2
MÓDULO -3
MÓDULO -4
Page 47

Asignación de botones
El Hometronic Manager está ahora disponible para la transmisión de
datos durante unos 8 minutos. A continuación el LED rojo en el
HCM 200D se apaga de nuevo.
4. Asignación del botón 1 del mando a distancia (ejemplo)
► Pulsar el botón 1 del mando a distancia, hasta que el LED rojo-
verde parpadea.
El mando a distancia está 15 segundos disponible para la
sincronización.
► Dirigir el mando a distancia a lo
largo con la cara frontal en
LED iluminado del Hometronic
Manager.
El mando a distancia y el
Hometronic Manager
intercambian datos. El proceso
dura algunos segundos.
el
El proceso no deberá realizarse bajo la radiación directa del
sol. Oscurezca la habitación si es necesario.
45
Page 48

Asignación de botones
Sincronización eficaz
La sincronización es efectiva, cuando el LED del mando a distancia se
ilumina verde durante unos 5 segundos.
La iluminación puede ahora controlarse con el botón 1 (véase "Control
del Hometronic con el mando a distancia", página 48)
► Registrar la asignación de botones en la tabla de asignación.
Sincronización fallida
La sincronización es inefectiva, cuando el LED del mando a distancia
se ilumina rojo durante unos 15 segundos.
► Repetir la sincronización.
46
Page 49

Asignación de botones
Asignación de otros botones
► Elija los componentes de acuerdo a su tabla de asignación
(paso 1).
► Elegir "Instalación" en el submenú (paso 2).
► Activar la sincronización el componente o el Lifestyle deseado
(paso 3).
► Asignar otro botón del mando a distancia a un componente
(paso 4).
Modificación de la asignación de botones
Usted puede modificar la asignación de cada botón en todo momento
(véase "Asignación de otros botones").
47
Page 50

Control del Hometronic con el mando a distancia
Control del Hometronic con el mando a
distancia
Después de la asignación de botones puede usted controlar el
Hometronic con el mando a distancia:
► Para elegir un componente o un Lifestyle:
Pulsar uno de los botón 1 hasta 6 ó bien A o B.
El LED se ilumina verde.
► Para controlar un componente:
Pulsar el botón ▼/▲ o confirmar el Lifestyle con el botón OK.
El LED parpadea y se ilumina a continuación nuevamente verde.
El componente elegido permanece activo hasta que, el LED se
apaga (aprox. 15 segundos) o se elija otro componente.
Cuando el Hometronic funciona en servicio automático, las
modificaciones hechas con el mando a distancia se
conservan, dado el caso, sólo hasta el siguiente punto de
conmutación.
48
Page 51

Control del Hometronic con el mando a distancia
Asignación ejemplar de los botones
En la siguiente explicación se parte de la base de una asignación de
botones típica:
Botón 1 controla la iluminación
Botón 2 controla las persianas
Botón 3 controla la temperatura ajustada del salón
Botón A activa el Lifestyle "Noche"
Mando de la iluminación (botón 1)
Encender o apagar la iluminación
► Pulsar el botón 1.
El LED se ilumina verde.
► Pulsar el botón ▲ brevemente.
El LED parpadea. La iluminación se apaga.
► Pulsar el botón ▼ brevemente.
La iluminación se apaga.
Atenuar la iluminación
► Pulsar el botón 1.
► Mantener el botón ▲ o ▼ pulsado, hasta que se obtiene la
claridad deseada.
49
Page 52

Control del Hometronic con el mando a distancia
Control de las persianas (botón 2)
Apertura y cierre total de persianas
► Pulsar el botón 2.
El LED se ilumina verde.
► Pulsar el botón ▼ brevemente.
La persiana se cierra completamente.
► Pulsar el botón ▲ brevemente.
La persiana se cierra completamente.
► Para parar la persiana:
Mantener el botón ▲ aprox. 2 segundos pulsado.
La persiana queda parada cuando se suelta el botón.
Correr la persiana a cualquier posición
► Pulsar el botón 2.
► Mantener el botón ▲ o ▼ pulsado, hasta que se obtiene la
posición deseada.
50
Page 53

Control del Hometronic con el mando a distancia
Bajar y subir la temperatura ajustada (botón 3)
La temperatura ajustada es ajustable sin escalonamiento. El salto de
temperatura en el Hometronic Manager está preajustado en 2 °C.
El procedimiento para modificarlo (máx. 8 °C) lo puede ver en el
manual de instrucciones del Hometronic Manager.
Ejemplo: Una temperatura ajustada de 20 °C puede bajarse con el
ajuste previo a 18 °C o elevarse a 22 °C.
Bajada de temperatura
La temperatura ajustada es 20 °C.
► Pulsar el botón 3.
► Pulsar el botón ▼
La temperatura ajustada se bajó a 18 °C.
Subida de temperatura
La temperatura ajustada se bajó a 18 °C con el mando a distancia.
► Pulsar el botón 3.
► Pulsar el botón ▲
La temperatura ajustada se subió a 20 °C.
► Pulsar el botón ▲ de nuevo.
La temperatura ajustada se subió a 22 °C.
51
Page 54

Control del Hometronic con el mando a distancia
Activación del Lifestyle "Noche" (botón A)
► Pulsar el botón A brevemente.
► Pulsar el botón OK.
El Lifestyle "Noche" está activado.
52
Page 55

Bloqueo del mando a distancia (seguro a prueba de niños)
Bloqueo del mando a distancia (seguro a
prueba de niños)
El mando a distancia puede asegurarse contra manejo no autorizado
como sigue:
► Pulsar el botón ▲,▼ y OK simultáneamente.
El mando a distancia está bloqueado.
► Comprobar el bloqueo pulsando cualquier botón.
El LED parpadea rojo cuando se pulsan botones.
► Para desactivar el bloqueo:
Pulsar el botón ▲,▼ y OK simultáneamente.
El mando a distancia está nuevamente disponible para el uso.
El bloqueo se anula al sacar las pilas.
53
Page 56

Poner/Cambiar pilas
Poner/Cambiar pilas
Cambie las pilas tan pronto el LED del mando a distancia no se
ilumina rojo, o no luce en absoluto, cuando se pulsa un botón
(Excepción: el mando a distancia está bloqueado, el LED parpadea.)
► Abrir el compartimento para
pilas en la parte inferior del
mando a distancia.
► Dado el caso, quitar las pilas
gastadas.
► Poner pilas nuevas con la
polaridad correcta.
► Cerrar el compartimento para
pilas.
No tire las pilas usadas a la basura, deposítelas en los
lugares adecuados de acuerdo con las normativas legales
al respecto.
Cambie siempre las dos pilas.
Utilice únicamente pilas Mignon de 1,5 V del tipo LR06, AA.
54
Page 57

Características técnicas
Características técnicas
Régimen offset 0 ... 8 °C (ajuste de fábrica
en el Hometronic Manager: 2 °C)
Temperatura ambiente 0 hasta 50 °C
Temperatura de
almacenaje
Clase de protección IP 20
Humedad máxima del aire 95 %
55
–20 hasta +70 °C
Page 58

Ayuda en caso de problemas
Ayuda en caso de problemas
Problema Causa Solución
El LED no se ilumina o
luce rojo con la
pulsación de botones
El LED parpadea rojo
con la pulsación de
botones
El LED se ilumina
verde al pulsar un
botón de mando
56
▲,▼.
Pilas gastadas o
débiles
Mando a
distancia
bloqueado
Botón no
asignado
► Cambiar las pilas
(véase página 54).
► Anular el bloqueo
(véase página 53).
► Asignar el botón
(véase página 42).
Page 59

Page 60

Manufactured for and on behalf of the Environmental and Combustion Controls
Division of Honeywell Technologies Sàrl, Ecublens, Route du Bois 37, Switzerland
by its Authorized Representative:
Honeywell GmbH
Böblinger Straße 17
71101 Schönaich, Germany
Tel.: (++49) (0) 7031 637 01
Fax: (++49) (0) 7031 637 493
http://europe.hbc.honeywell.com
This document is definitive for the enclosed product and replaces all previous
publications.
Honeywell Inc. hereby declares that this device complies with the basic
requirements and other relevant regulations of guideline 1999/5/EC. The declaration
of conformity of the product can be requested from the manufacturer.
Note to non-EU countries: This product may only be used if operation in the
868 MHz frequency band is permissible.
MU2H-0335GE51 R0607A
 Loading...