

Page 1
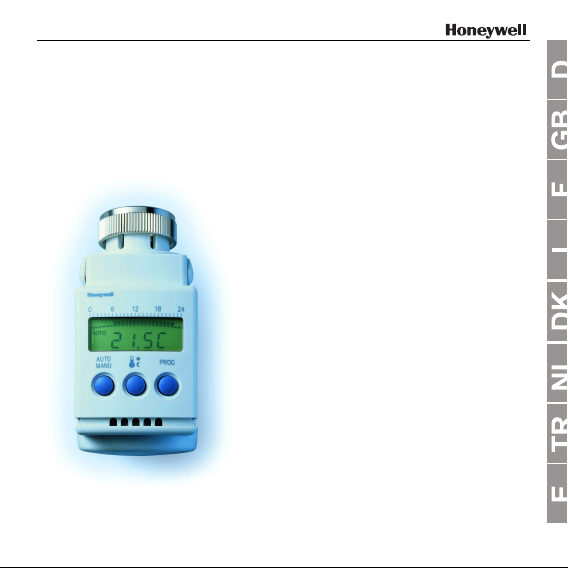
HR 4
0
Heizkörperregler
Montage- und Bedienungsanleitung
Radiator controller
Installation and operating instructions
Régulateur de radiateur
Instructions de montage et d'utilisation
Termostato
Istruzioni di montaggio e per l'uso
Radiatortermostat
Monterings- og betjeningsvejledning
Radiatorthermostaat
Montage- en gebruiksaanwijzing
Radyatör regülatörü
Montaj ve kullanma kilavuzu
Regulador de radiador
Instrucciones de montaje y de manejo
Page 2

Page 3
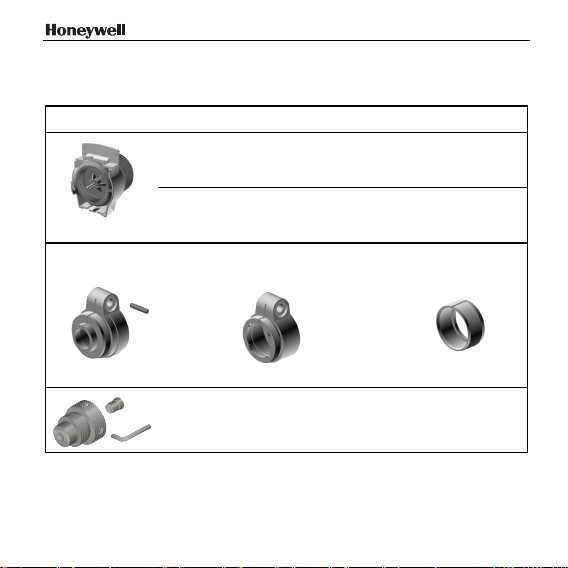
Lieferumfang: (1) Bedienteil inklusive Batterien
Nach dem Auspacken prüfen! (2) Ventilaufsatz mit Handrad
Scope of Supply: (1) Control unit including batteries
After unpacking make sure (2) Valve actuator with handwheel
you have all components!
Etendue de la livraison: (1) Commande avec des piles
vérifier après le déballage! (2) Tête de vanne a. volant de réglage manuel
Articoli forniti: Da controllare (1) Elemento di comando con pile elettriche
al disimballaggio (2) Attacco della valvola con rotella
dell'apparecchio!
Indhold: Husk at kontrollere (1) Betjeningsdel inklusive batterier
indholdet efter udpakning! (2) Ventildel med håndhjul
Inhoud van de verpakking: (1) Bedieningsgedeelte inclusief batterijen
na het uitpakken controleren! (2) Klepopzetstuk met handwiel
Teslimat kapsamı: (1) Piller de dahil olmak üzere kumanda aygıtı
Ambalajından çıkarttıktan (2) El çarklı supap başlığı
sonra kontrol edin!
Volumen del suministro: (1) La sección de mando inclusive baterías
¡Controlar después del (2) La pieza sobrepuesta de válvula con el
desembalaje! tornillo de regulación
Page 4

Inhalt
Lieferumfang.................................................................................................. 4
Montage......................................................................................................... 5
Bedienelemente und Display ......................................................................... 9
Automatische Funktionen ............................................................................10
Fensterfunktion....................................................................................... 10
Ventilschutz ............................................................................................ 10
Frostschutz............................................................................................. 10
Sommer-/Winterzeit................................................................................ 10
Anzeige Batteriewechsel.........................................................................10
Temperaturen und Regelzeiten....................................................................11
Ändern der Solltemperatur mit dem Stellrad ................................................ 12
Einstellungen anpassen............................................................................... 13
Werkseinstellungen ändern ....................................................................13
Komfort- und Spartemperatur einstellen ................................................. 13
Zeitprogramm ändern ............................................................................. 14
Wochenprogramm (alle Tage gleich) einstellen:..................................... 14
Tagesprogramm (Wochentage individuell) einstellen:.............................15
Schaltpunkte löschen..............................................................................16
Weitere Einstellmöglichkeiten...................................................................... 17
Uhrzeit und Datum neu einstellen........................................................... 17
Konstante Temperatur ohne Zeitprogramm (Urlaub) .............................. 18
Heizpause (Sommer).............................................................................. 18
Heizkörper aus .......................................................................................18
Bedienelemente sperren (Kindersicherung)............................................ 18
Bedienelementsperre aufheben.............................................................. 18
Einstellung des Ventilhubs........................................................................... 19
Voll-Hub-Modus aktivieren...................................................................... 19
Standard-Hub-Modus aktivieren ............................................................. 19
2
Page 5

Batteriewechsel............................................................................................20
Hilfe im Problemfall ......................................................................................21
Werkseinstellungen wiederherstellen......................................................21
Ventil bei leeren Batterien verstellen.......................................................22
WEEE-Richtlinie 2002/96 EG Elektro- und Elektronikgesetz.......................23
Der HR 40 ist ein elektronischer Heizkörperregler mit einer Reihe
komfortabler Funktionen:
• Frei einstellbare Zeitpunkte und zwei unterschiedliche Solltemperaturen
ermöglichen ein individuelles Heizprogramm für jeden Wochentag.
• Selbstüberwachende Eigenschaften bieten Schutz vor Verkalkung und
Frost, helfen Energie zu sparen oder weisen auf einen notwendigen
Batteriewechsel hin.
• Das Stellrad am Bedienteil ermöglicht jederzeit eine einfache Veränderung
der Raumtemperatur.
• Die Montage des HR 40 ist einfach und verursacht keinen Schmutz und
keine Wasserflecken.
3
Page 6

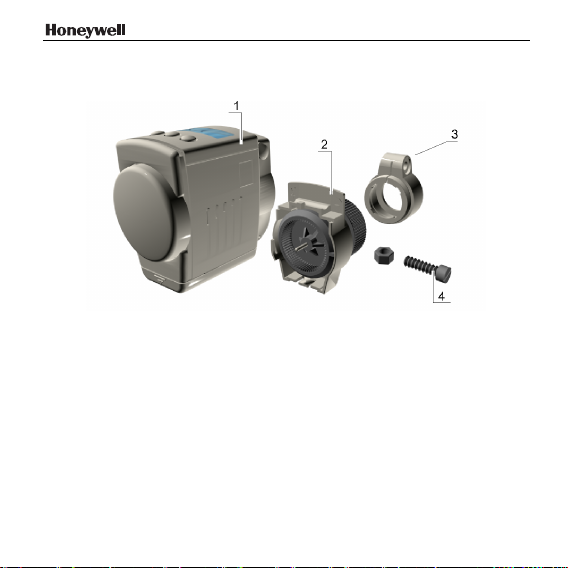
Lieferumfang
• Nach dem Auspacken prüfen!
Bedienteil inklusive Batterien (1)
Ventilaufsatz mit Stellrad (2)
Beutel mit Adapter (3), Schraube und Mutter (4)
4
Page 7
Montage
In
Schritten am Ziel...
4
4
Für die Montage des HR 40 benötigen Sie nur kurze Zeit:
• Sie entfernen den alten Thermostat.
• Sie montieren bei Bedarf einen Adapter auf dem Ventil.
• Sie montieren den Ventilaufsatz.
• Sie stecken das Bedienteil auf ... FERTIG!
1. Alten Thermostaten entfernen
1. Befestigung des alten Thermostat lösen.
2. Thermostat vom Ventil abziehen.
2. Ventiladapter montieren (optional)
1. Aus der Tabelle passenden Adapter auswählen.
2. Wenn Sie einen Adapter benötigen: Adapter aufweiten und bis zum
Anschlag auf das Ventil schieben. Dabei drehen, bis er spürbar
einrastet.
3. Bei Adapter Danfoss RAV: Adapterstift auf den Ventilstößel stecken.
4. Wenn am Adapter vorgesehen: Adapter mit Schraube festziehen.
5
Page 8

Die Ventile Honeywell-Braukmann, MNG, Heimeier, Junkers,
Landis & Gyr 'Duogyr' erfordern keinen Adapter, für Ovendrop-, Herz-,
Danfoss- und Vaillantventile sind Adapter erhältlich:
Adapterfabrikat/-typ Bestellnr.
Oventrop HU 01
(Rändelmutter M30x1)
073341076
Herz HU 02
Danfoss-Adapter Set
RAV (grau)
6
(Rändelmutter M28)
EVA 1-Danfoss
RA (weiß) (liegt bei)
Vaillant-Adapter EHA 1VAI 072031082
073341725
072031201
RAVL (schwarz)
Page 9
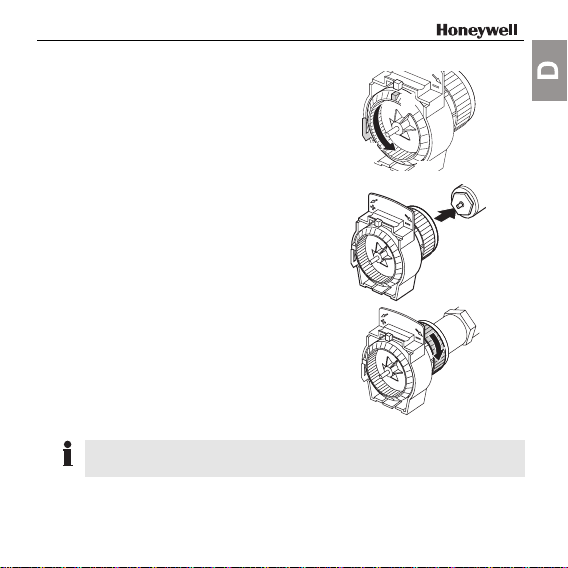
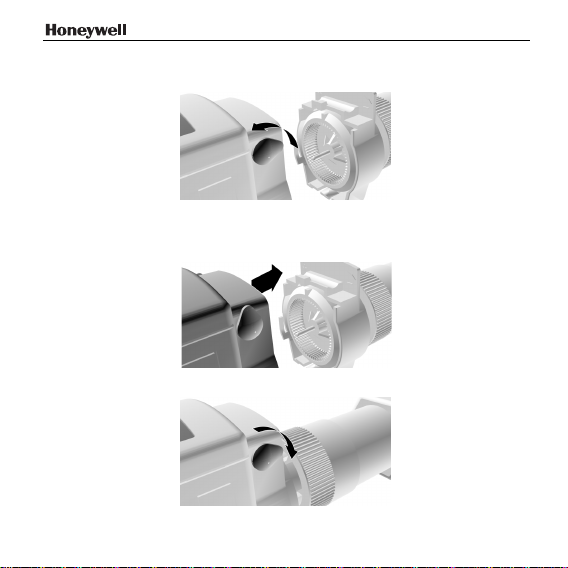
3. Ventilaufsatz montieren
1. Stellrad (3) des Ventilaufsatzes nach
links drehen, bis die Nase (1) des
Stellrads am Anschlag (2) des
Gehäuses sitzt.
2. Ventilaufsatz auf Ventil oder Adapter
schieben.
Die ebene Fläche am Kopf des
Ventilaufsatzes muss nach oben
zeigen.
1
2
3
3. Rändelmutter vorschieben und von
Hand (ohne Werkzeug!) kräftig
festdrehen.
In diesem Zustand ist das Ventil geöffnet und bei eingeschalteter
zentraler Heizung wird der Heizkörper warm.
7
Page 10
4. Bedienteil aufstecken/abnehmen
1. Haltebügel am Bedienteil mit der Spitze nach oben drehen.
2. Bedienteil auf Ventilaufsatz stecken und bis zum Anschlag aufschieben.
Die ebene Fläche des Ventilaufsatzes muss mit dem Bedienteil bündig
abschließen.
3. Haltebügel am Bedienteil mit der Spitze nach hinten drehen.
Um das Bedienteil abzunehmen, gehen Sie in umgekehrter Reihenfolge vor.
8
Page 11
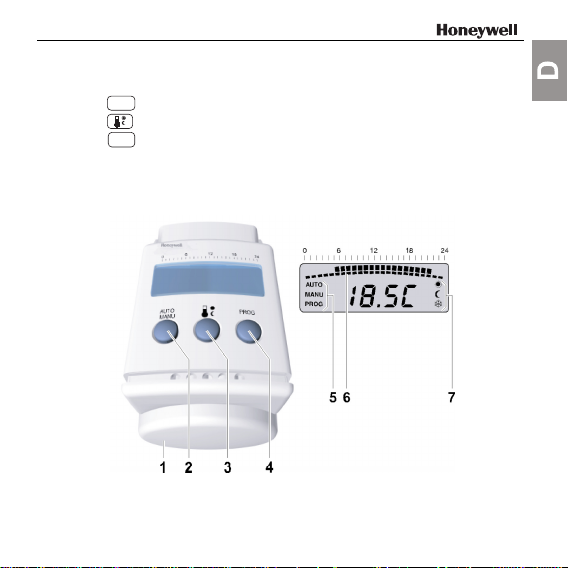
Bedienelemente und Display
(1) Stellrad zum Einstellen von Temperatur oder Zeit
(2) Taste
(3) Taste
(4) Taste
(5) Betriebsart: Auto, Manu oder Prog
(6) Heizzeit in Stunden
(7) Komfort- oder Spartemperatur oder Frostschutz
AUTO
MANU
zum Wechsel zwischen Auto- und Manu-Betrieb
zum Einstellen von Komfort- und Spartemperatur
PROG
zum Einstellen des Zeitprogramms
9
Page 12
Automatische Funktionen
Fensterfunktion
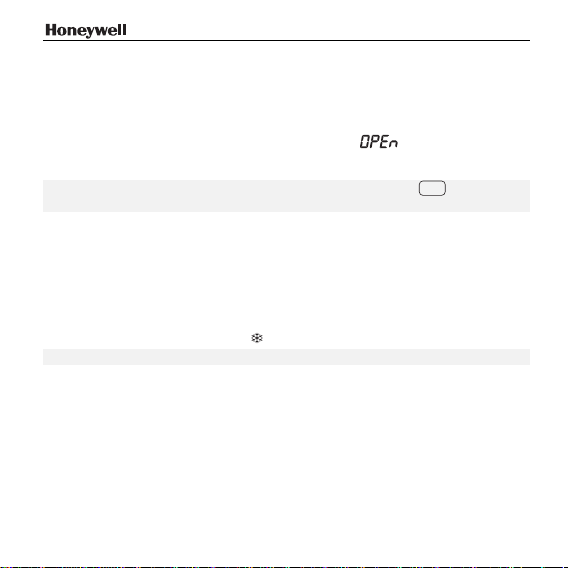
Wenn Sie ein Fenster öffnen und dadurch die Temperatur am HR 40 länger
als 3 Minuten stark sinkt, schließt der HR 40 das Heizungsventil, um Energie
zu sparen. Im Display erscheint dann die Meldung
Wenn die Temperatur wieder steigt – spätestens aber nach 30 Minuten –,
nimmt der HR 40 wieder den normalen Betrieb auf.
Hinweis: Die Fensterfunktion kann durch Drücken der Taste
Drehen am Stellrad jederzeit beendet werden.
Ventilschutz
Zum Schutz des Ventils wird es jede Woche montagmittags kurzzeitig geöffnet.
Im Display erscheint cycl.
Frostschutz
Sinkt die Temperatur unter 4 °C, öffnet der HR 40 das Heizkörperventil, bis
die Temperatur wieder über 6 °C steigt. Der HR 40 verhindert so, dass der
Heizkörper einfriert. Das Symbol
blinkt, sobald der Frostschutz aktiv ist.
Hinweis: Der Frostschutz funktioniert nur mit aufgestecktem Bedienteil.
Sommer-/Winterzeit
Der HR 40 stellt automatisch auf Sommer- und Winterzeit um.
Anzeige Batteriewechsel
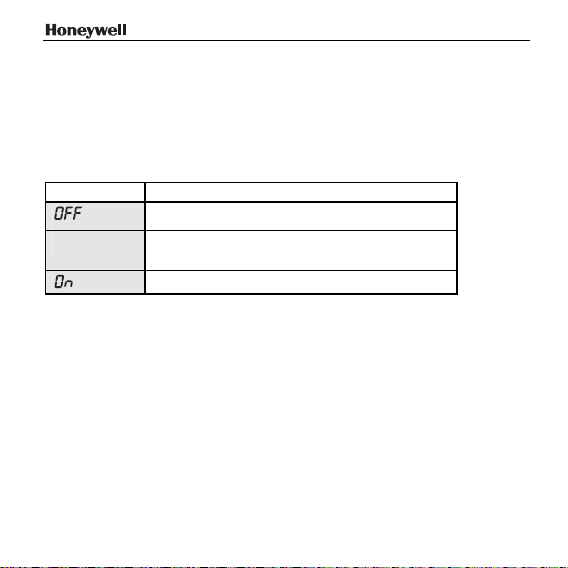
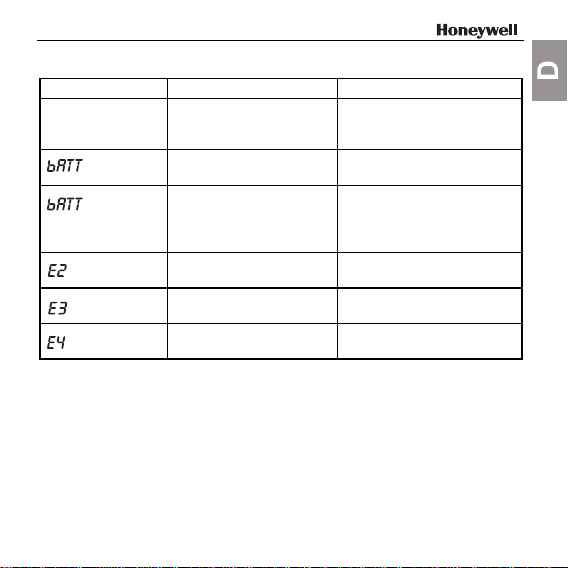
Wenn die Anzeige BaTT blinkt, ist der HR 40 weiterhin funktionsfähig. Sie
sollten aber die Batterien so bald wie möglich wechseln.
Wenn BaTT dauerhaft angezeigt wird, ist der HR 40 inaktiv und das
Heizungsventil ist geöffnet (Frostschutz).
10
.
PROG
oder durch
Page 13
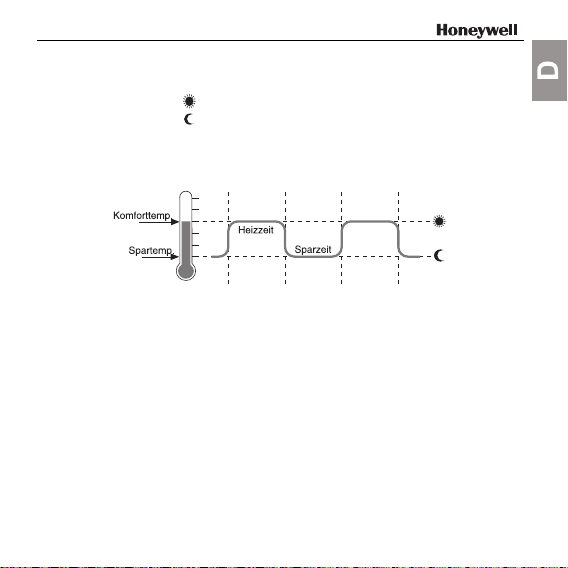
Temperaturen und Regelzeiten
Der HR 40 wechselt zwischen 2 Solltemperaturen...
• Komforttemperatur:
• Spartemperatur:
... und 2 Zeiten:
• Heizzeit: Beginn ab
• Sparzeit: Beginn ab Werk um 22:00 Uhr, Absenken auf Spartemperatur
(ab Werk 21 °C)
(ab Werk 16 °C)
Werk um 6:00 Uhr, Heizen auf Komforttemperatur
Heiz- und Sparzeiten sind frei einstellbar. Die 2. Heiz- und Sparzeit ist
optional.
11
Page 14
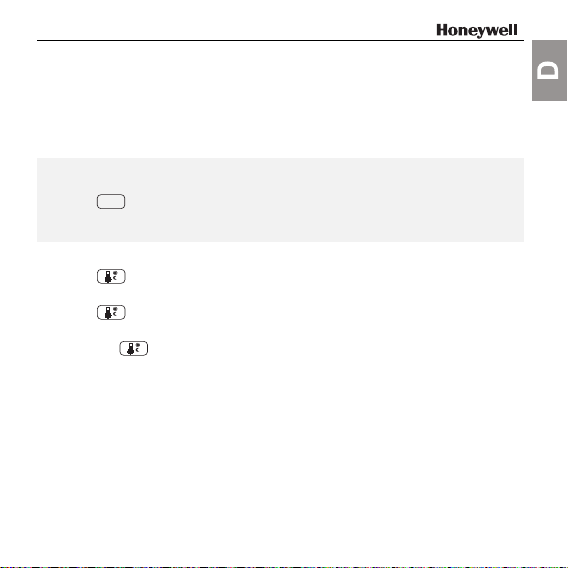
Ändern der Solltemperatur mit dem Stellrad
Mit dem Stellrad des Bedienteils können Sie die Solltemperatur jederzeit
ändern. Die Einstellung gilt bis zur nächsten programmierten Heiz- oder
Sparzeit. Das Display zeigt beim Drehen des Stellrads die Vorgabe der
Raumtemperatur an.
Das Stellrad hat keinen Anschlag. Während des Drehens im Uhrzeigersinn
werden folgende Bereiche durchlaufen:
Display Bereich
5...30
12
Heizungsventil geschlossen
aktuelle Temperaturvorgabe
(mögl. Verstellbereich)
Heizungsventil vollständig geöffnet
Page 15
Einstellungen anpassen
Werkseinstellungen ändern
1. Stellen Sie die Komfort- und Spartemperatur ein.
2. Stellen Sie die Heiz- und Sparzeiten für das Wochen- oder
Tagesprogramm ein.
Tipps zur Bedienung
• Bedienteil zum Einstellen abnehmen.
• Taste
Komfort- und Spartemperatur einstellen
1. Taste drücken.
2. Mit Stellrad des Bedienteils Komforttemperatur einstellen.
3. Taste
4. Mit Stellrad Spartemperatur einstellen.
5. Mit Taste
AUTO
MANU
Der HR 40 ignoriert die letzte Eingabe und kehrt in den Auto- bzw. Manu-
drücken, um Programmierung abzubrechen.
Betrieb zurück.
drücken.
Der HR 40 kehrt in den Auto/Manu-Betrieb zurück.
Änderung bestätigen.
13
Page 16
Zeitprogramm ändern
Der HR 40 verfügt über zwei unabhängige Zeitprogramme:
- Das Wochenprogramm verwendet für alle Tage das gleiche Zeitprogramm.
- Mit dem Tagesprogramm können Sie für jeden Wochentag ein
individuelles Zeitprogramm erstellen.
Hinweis: Beachten Sie, dass jeweils zwei Schaltpunkte eine Heizzeit
festlegen.
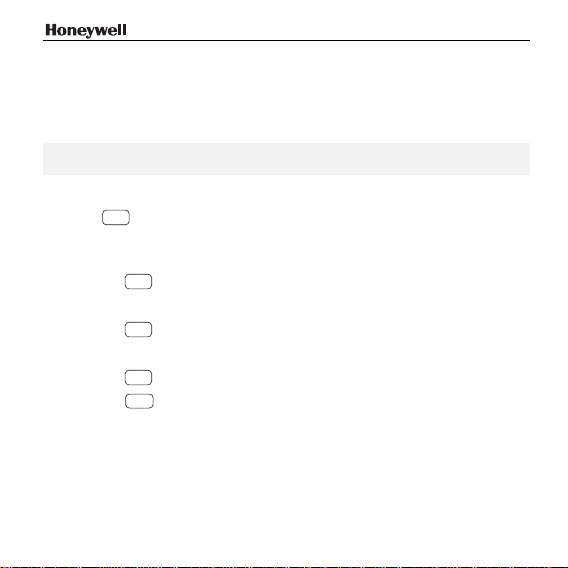
Wochenprogramm (alle Tage gleich) einstellen:
1. Taste
2. Mit Stellrad
3. Mit Taste
4. Mit Stellrad den 1. Schaltpunkt einstellen.
5. Mit Taste
6. Mit Stellrad den 2. Schaltpunkt einstellen.
7. Mit Taste
8. Mit Taste
14
PROG
drücken.
Im Display erscheint PROG.
1-7
wählen.
PROG
bestätigen.
PROG
bestätigen.
PROG
bestätigen.
AUTO
MANU
– oder –
Für eine zweite Heizzeit die Schaltpunkte 3 und 4 einstellen.
Vorgang beenden.
Die neuen Zeiten sind programmiert.
Page 17
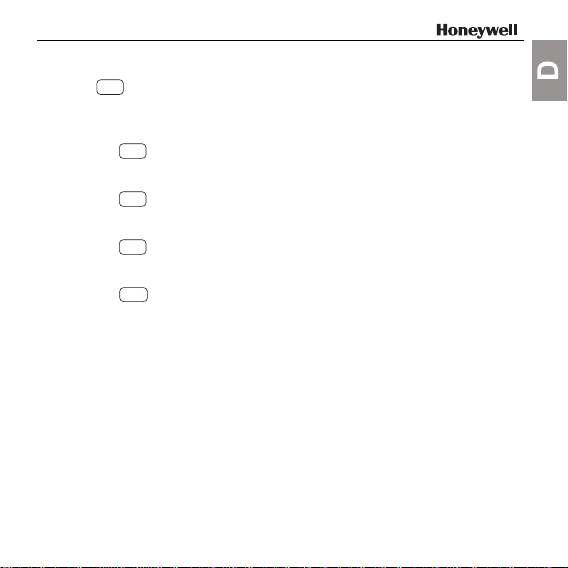
Tagesprogramm (Wochentage individuell) einstellen:
1. Taste
2. Mit Stellrad den gewünschten Wochentag wählen. Die Wochentage sind
3. Mit Taste
4. Mit Stellrad den 1. Schaltpunkt einstellen.
5. Mit Taste
6. Mit Stellrad den 2. Schaltpunkt einstellen.
7. Mit Taste
8. Schaltpunkte 3 und 4 gleichermaßen einstellen.
9. Mit Taste
PROG
drücken.
von 1 bis 7 (Montag–Sonntag) nummeriert.
PROG
bestätigen.
PROG
bestätigen.
PROG
bestätigen.
AUTO
MANU
– oder –
Wochentag wählen und Schritte 3–8 wiederholen.
Die neuen Zeiten sind programmiert.
Vorgang beenden.
15
Page 18
Bedienbeispiel
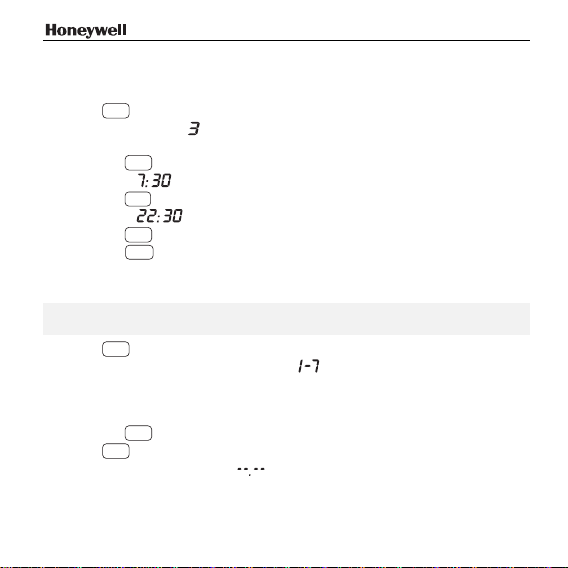
Im folgenden Beispiel soll für Mittwoch der Beginn der Heizzeit auf 7:30 Uhr
eingestellt werden und das Ende auf 22:30 Uhr.
1. Taste
2. Stellrad drehen, bis
3. Mit Taste
4. Mit Stellrad
5. Mit Taste
6. Mit Stellrad
7. Mit Taste
8. Mit Taste
Schaltpunkte löschen
Hinweis: Beachten Sie, dass jeweils zwei Schaltpunkte eine Heizzeit
festlegen.
1. Taste
2. Alle Wochentage wählen: Mit Stellrad
3. Mit Taste
4. Taste
5. Stellrad drehen, bis Display
16
PROG
drücken.
Mittwoch ist ausgewählt.
PROG
PROG
PROG
PROG
AUTO
MANU
drücken.
– oder –
Einzelnen Tag wählen:
Mit Stellrad gewünschten Wochentag einstellen.
PROG
PROG
so oft drücken, bis der gesuchte Schaltzeitpunkt erscheint.
im Display erscheint.
Auswahl bestätigen.
einstellen.
bestätigen.
einstellen.
bestätigen.
Vorgang beenden.
einstellen.
Auswahl bestätigen.
anzeigt.
Page 19
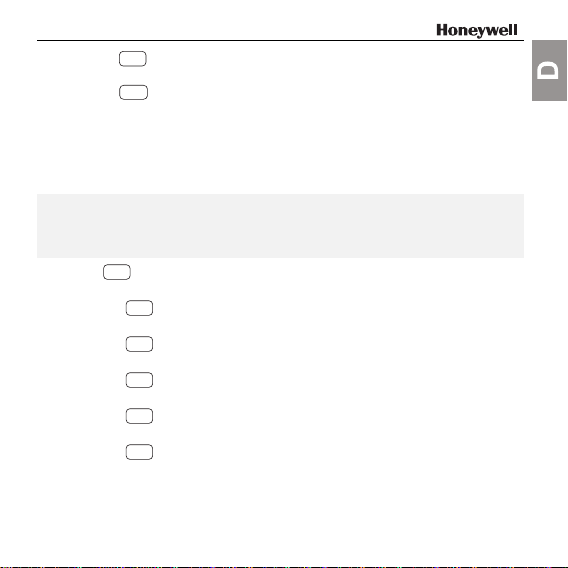
6. Mit Taste
Schaltpunkt ist gelöscht.
7. Mit Taste
– oder –
Um weitere Schaltpunkte zu löschen, Schritte 5 und 6 wiederholen.
PROG
bestätigen.
AUTO
MANU
Vorgang beenden.
Weitere Einstellmöglichkeiten
Uhrzeit und Datum neu einstellen
Hinweis: Datum und Uhrzeit sind ab Werk eingestellt. Sollten die Batterien
einmal über längere Zeit leer sein (keine Anzeige auf dem Display) oder ein
Batteriewechsel zu lange gedauert haben, müssen Datum und Uhrzeit neu
eingestellt werden.
1. Taste
2. Mit dem Stellrad Jahreszahl einstellen.
3. Mit Taste
4. Mit Stellrad Monat einstellen.
5. Mit Taste
6. Mit Stellrad Tag einstellen.
7. Mit Taste
8. Mit Stellrad Stunde einstellen.
9. Mit Taste
10. Mit Stellrad Minute einstellen.
11. Mit Taste
PROG
3 Sekunden gedrückt halten.
PROG
Auswahl bestätigen.
PROG
bestätigen.
PROG
bestätigen.
PROG
bestätigen.
PROG
bestätigen.
17
Page 20

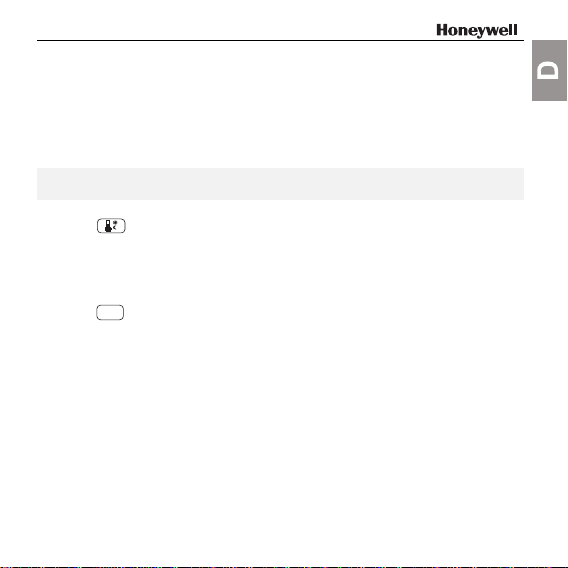
Konstante Temperatur ohne Zeitprogramm (Urlaub)
1. Mit Taste
Im Display erscheint
2. Mit dem Stellrad Temperatur einstellen.
Diese Temperatur bleibt erhalten, bis Sie wieder auf Auto-Betrieb umstellen.
Heizpause (Sommer)
Wenn im Sommer die Heizung zentral abgeschaltet ist, können Sie die
Batterien des HR 40 schonen.
1. Mit Taste
2. Stellrad nach rechts drehen, bis im Display
Das Heizungsventil bleibt offen, der HR 40 regelt nicht.
Heizkörper aus
1. Mit Taste
2. Stellrad nach links drehen, bis im Display
Das Heizungsventil ist geschlossen.
Hinweis: Der Frostschutz ist weiterhin gewährleistet.
Bedienelemente sperren (Kindersicherung)
• Taste
Im Display erscheint
Bedienelementsperre aufheben
• Taste
18
AUTO
MANU
auf manuellen Betrieb schalten.
MANU.
AUTO
MANU
auf manuellen Betrieb schalten.
AUTO
MANU
auf manuellen Betrieb schalten.
AUTO
MANU
und gleichzeitig 3 Sekunden drücken.
AUTO
MANU
und erneut gleichzeitig 3 Sekunden drücken.
.
erscheint.
erscheint.
Page 21
Einstellung des Ventilhubs
Der HR 40 arbeitet ab Werk mit dem optimalen Ventilhub, der zur Regelung
der Raumtemperatur benötigt wird.
Voll-Hub-Modus aktivieren
Wenn der gesamte Ventilhub genutzt werden soll, oder das Ventil nicht
vollständig schließt, aktivieren Sie den Voll-Hub-Modus.
Hinweis: In der Betriebsart Voll-Hub-Modus verringert sich die Lebensdauer
der Batterie.
1. Bedienteil abnehmen.
2. Taste
Ventilaufsatz schieben und verriegeln.
Im Display erscheint full.
Standard-Hub-Modus aktivieren
1. Taste
2. Bedienteil bis zum Anschlag auf Ventilaufsatz schieben und verriegeln.
Im Display erscheint Def.
gedrückt halten und Bedienteil bis zum Anschlag auf
PROG
gedrückt halten.
19
Page 22
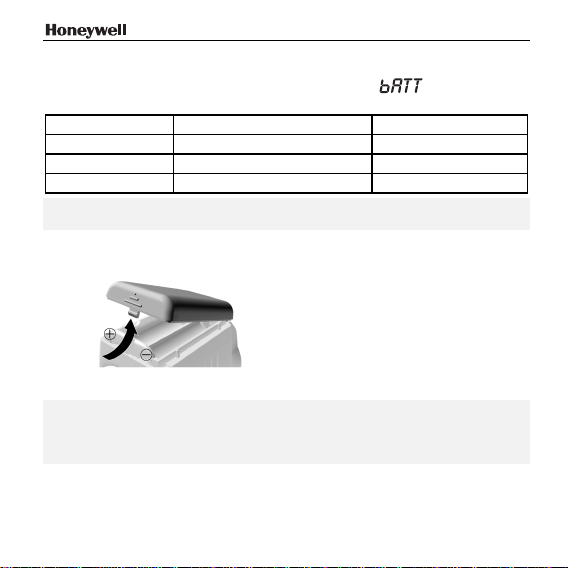
Batteriewechsel
Ein Batteriewechsel wird notwendig, wenn im Display blinkt. Folgende
auslaufsichere Batterien können für den HR 40 verwendet werden:
Art Bezeichnung Lebensdauer
Mignon-Batterie Alkali-Mangan LR6 AA AM3 2 Jahre
1,5-V-Akku Alkali-Mangan LR6 AA AM3 ¾ Jahr
Lithium-Batterie LR6 AA AM3 2 Jahre
Hinweis: Wenn der Batteriewechsel länger andauert oder das Bedienteil nicht
abgezogen wurde, muss die Uhrzeit neu eingestellt werden.
1. Bedienteil abnehmen.
2. Batteriefach an der Unterseite des Bedienteils öffnen.
3. Alte Batterien entnehmen und entsorgen.
Batterie-Entsorgung
Batterien dürfen nicht mit dem Hausmüll entsorgt werden. Entsorgen Sie die
Batterien gemäß den gesetzlichen Bestimmungen, indem Sie diese an den
entsprechenden Stellen zurückgeben.
4. Zwei Batterien mit richtiger Polung in das Batteriefach des Bedienteils
einlegen.
5. Batteriefach wieder schließen und einrasten lassen.
6. Bedienteil aufstecken.
20
Page 23
Hilfe im Problemfall
Problem/Anzeige Ursache Lösung
Heizkörper wird
nicht kalt
blinkt
Werkseinstellungen wiederherstellen
• Alle 3 Tasten gedrückt halten und gleichzeitig die Batterien wieder
einlegen.
Ventil schließt nicht
vollständig
Batterien haben zu wenig
Leistung
Batterien sind leer (keine
Ventilbewegung möglich,
keine Regelung, Ventil
offen)
Bedienteil nicht
aufgesteckt
Motor kann nicht bewegt
werden
– Wenden Sie sich an Ihren
Montage prüfen,
evtl. Voll-Hub-Modus
aktivieren
Batterien so bald wie
möglich wechseln
Batterien sofort wechseln
Bedienteil richtig aufstecken
Montage prüfen, evtl.
Schmutz entfernen
Händler
21
Page 24
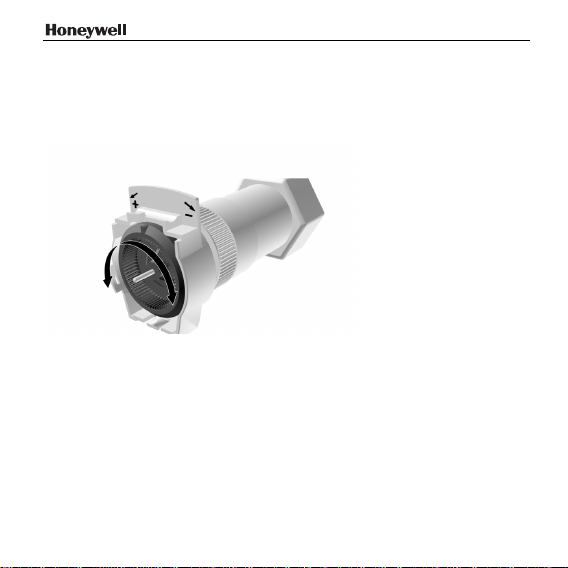
Ventil bei leeren Batterien verstellen
1. Bedienteil abnehmen.
2. Heizungsventil mit dem Stellrad am Ventilaufsatz von Hand bedienen:
+ warm / – kalt.
22
Page 25
WEEE-Richtlinie 2002/96
EG Elektro- und Elektronikgesetz
Entsorgen Sie Verpackung und Produkt am Ende der
Produktlebensdauer in einem entsprechenden
Recycling Zentrum. Entsorgen Sie das Produkt nicht
mit dem gewöhnlichen Hausmüll. Verbrennen Sie das
Produkt nicht.
23
Page 26

Contents
Scope of delivery ......................................................................................... 26
Installation ...................................................................................................27
Operating elements and display...................................................................31
Automatic functions .....................................................................................32
Window function ..................................................................................... 32
Valve protection...................................................................................... 32
Frost protection....................................................................................... 32
Summer/winter time................................................................................ 32
Battery change display ...........................................................................32
Temperatures and control periods ............................................................... 33
Adjusting the setpoint temperature with the adjustment dial......................... 34
Adjusting settings.........................................................................................35
Changing the factory settings .................................................................35
Setting the comfort and economy temperatures......................................35
Changing the time program ....................................................................36
Setting the week program (all days identical):......................................... 36
Setting the day program (weekdays individually): ...................................37
Deleting switching points ........................................................................ 38
Other setting options.................................................................................... 39
Resetting the time and date.................................................................... 39
Constant temperature without time program (vacation)........................... 40
Heating break (summer) ......................................................................... 40
Radiator off............................................................................................. 40
Disabling the operating elements (child-proofing)................................... 40
Undoing the blockage of the operating elements.................................... 40
Setting the valve lift...................................................................................... 41
Activating full-stroke mode...................................................................... 41
Activating the default stroke mode.......................................................... 41
24
Page 27

Changing batteries .......................................................................................42
Help with problems.......................................................................................43
Restoring the factory settings..................................................................43
Adjusting the valve when the batteries are empty ...................................44
WEEE directive 2002/96 EC Waste Electrical and Electronic Equipment
directive........................................................................................................45
The HR 40 is an electronic radiator controller with a series of convenient
functions:
• You can set your own times and choose from 2 different setpoint
temperatures to set up your own heating programme for each day of the
week.
• Self-monitoring features offer protection against calcification and frost, help
save energy or indicate when the batteries need to be changed.
• The adjustment dial on the operating unit allows simple changing of the
room temperature at any time.
• The installation of the HR 40 is simple and does not cause any dirt or
water staining.
25
Page 28
Scope of delivery
• Check after unpacking!
Operating unit including batteries (1)
Valve lantern with adjustment dial (2)
Bag containing adapter (3), screw and nut (4)
26
Page 29

Installation
Only
Steps to Completion ...
4
4
It only takes a short time to install the HR 40:
• You remove the old thermostat.
• If necessary you install an adapter on the valve.
• You install the valve lantern.
• You attach the operating unit ... FINISHED!
1. Removing the old thermostat
1. Loosen the mounting of the old thermostat.
2. Pull the thermostat off the valve.
2. Mounting the valve adapter (optional)
1. Select the right adapter from the table.
2. If you need an adapter: Open up the adapter and push it onto the valve
as far as the stop. Turn it while doing so until you feel it click into place.
3. For the Danfoss RAV adapter: Insert the adapter pin in the valve rocker.
4. If provided on the adapter: Tighten the adapter with the screw.
27
Page 30
The Honeywell-Braukmann, MNG, Heimeier, Junkers, Landis & Gyr 'Duogyr'
valves do not require an adapter. Adapters are available for Oventrop, Herz,
Danfoss and Vaillant valves:
Adapter manufacturer/type Order No.
Oventrop HU 01
(knurled nut M30x1)
073341076
Herz HU 02
Danfoss adapter set
RAV (grey)
28
(knurled nut M28)
EVA 1-Danfoss
RA (white) (enclosed)
Vaillant adapter EHA 1VAI 072031082
073341725
072031201
RAVL (black)
Page 31

3. Installing valve lantern
1. Turn the adjustment dial (3) of the
valve lantern to the left until the
nose (1) of the adjustment dial is
positioned at the stop (2) of the
housing.
2. Slide the valve lantern onto the valve
or adapter.
The flat area on the valve lantern
head must point upwards.
1
2
3
3. Move the knurled nut forwards and
tighten it firmly by hand (do not use a
tool for this!).
The valve is now open and, with the central heating switched on, the
radiator warms through.
29
Page 32

4. Inserting or removing the operating unit
1. Turn the retaining bracket on the operating unit until it points upward.
2. Fit the operating unit onto the valve lantern, pushing it on as far as the stop.
The flat surface of the valve lantern must be flush with the operating unit.
3. Turn the retaining bracket on the operating unit until the tip points
rearward.
To remove the operating unit, reverse this sequence of operations.
30
Page 33

Operating elements and display
(1) Adjustment dial for setting the temperature or time
AUTO
MANU
button for changing between Auto and Manu mode
(2)
button for setting the comfort and economy temperatures
(3)
PROG
button for setting the time program
(4)
(5) Operating mode: Auto, Manu or Prog
(6) Heating period in hours
(7) Comfort or economy temperature or frost protection
31
Page 34

Automatic functions
Window function
If you open a window so that the temperature at the HR 40 drops sharply for
more than 3 minutes, the HR 40 closes the radiator valve in order to save
energy. The display then shows the message
When the temperature rises again – but no later than after 30 minutes – the
HR 40 will resume normal operation.
Note: The window function can be ended at any time by pressing the
button or by turning the adjustment dial.
Valve protection
In order to protect the valve it is opened every Monday at midday.
cycl is displayed.
Frost protection
If the temperature drops below 4 °C, the HR 40 opens the radiator valve until
the temperature rises above 6 °C again. In this way, the HR 40 prevents the
radiator from freezing. The
activated.
Note: Frost protection only works with the operating unit attached.
symbol flashes as soon as frost protection is
Summer/winter time
The HR 40 will switch to summer or winter time automatically.
Battery change display
When the BaTT display flashes, the HR 40 remains functional. However,
you should change the battery as soon as possible.
If BaTT is displayed permanently, the HR 40 is inactive and the radiator
valve is opened (frost protection).
32
.
PROG
Page 35

Temperatures and control periods
The HR 40 changes between 2 setpoint temperatures...
• Comfort temperature:
• Economy temperature:
... and 2 periods:
• Heating period: Set at the factory to start 6.00 a.m., heating to comfort
temperature
• Economy period: Set at the factory to start 10.00 p.m., lowering to
economy temperature
Heating and economy periods are freely adjustable. The 2nd heating and
economy period is optional.
(at the factory 21 °C)
(at the factory 16 °C)
period
period
33
Page 36

Adjusting the setpoint temperature with the
adjustment dial
The adjustment dial on the operating unit can be used to adjust the setpoint
temperature at any time. The setting will apply until the next programmed
heating or economy period. When the adjustment dial is turned the display
shows the preset setpoint temperature.
The adjustment dial does not have a stop. By turning the ring clockwise, the
following settings are shown:
Display Setting
5...30
34
Radiator valve closed
Current setpoint temperature
(poss. adjustment range)
Radiator valve fully open
Page 37

Adjusting settings
Changing the factory settings
1. Set the comfort and economy temperatures.
2. Set the heating and economy periods for the week program or day
program.
Operating hints
• Remove the operating unit to make settings.
• Press the
The HR 40 ignores the last input and returns to Auto or Manu mode.
Setting the comfort and economy temperatures
1. Press the button.
2. Use the adjustment dial on the operating unit to set the comfort
temperature.
3. Press the
4. Use the adjustment dial to set the economy temperature.
5. Press the
The HR 40 then returns to Auto/Manu mode.
AUTO
MANU
button to cancel the programming.
button.
button to confirm this change.
35
Page 38

Changing the time program
The HR 40 has two independent time programs:
- The week program uses the same time program for all the days.
- With the day program you can set an individual time program for each
weekday.
Note: Please note that two switching points each determine a heating period.
Setting the week program (all days identical):
1. Press the
PROG is displayed.
2. Select
3. Confirm with the
4. Use the adjustment dial to set the 1st switching point.
5. Confirm with the
6. Use the adjustment dial to set the 2nd switching point.
7. Confirm with the
8. End the procedure with the
– or –
Set the switching points 3 and 4 for the second heating period.
The new periods are programmed.
36
PROG
button.
1-7
using the adjustment dial.
PROG
button.
PROG
button.
PROG
button.
AUTO
MANU
button.
Page 39

Setting the day program (weekdays individually):
1. Press the
2. Select the desired weekday with the adjustment dial. The weekdays are
numbered from 1 to 7 (Monday to Sunday).
3. Confirm with the
4. Use the adjustment dial to set the 1st switching point.
5. Confirm with the
6. Use the adjustment dial to set the 2nd switching point.
7. Confirm with the
8. Set the switching points 3 and 4 in the same way.
9. End the procedure with the
– or –
Select a weekday and repeat Steps 3–8.
The new periods are programmed.
PROG
button.
PROG
PROG
PROG
button.
button.
button.
AUTO
MANU
button.
37
Page 40

Operating example
In the following example, the start of the heating period for Wednesday is set
to 7.30 a.m. and the end to 10.30 p.m (22:30).
1. Press the
2. Turn the adjustment dial until
Wednesday is now selected.
3. Confirm the selection with the
4. Set
5. Confirm with the
6. Set
7. Confirm with the
8. End the procedure with the
Deleting switching points
Note: Please note that two switching points each determine a heating period.
1. Press the
2. Select all the weekdays: Set
– or –
Select an individual day:
select the desired weekday with the adjustment dial.
3. Confirm the selection with the
4. Keep pressing the
5. Turn the adjustment dial until
38
PROG
button.
using the adjustment dial.
PROG
using the adjustment dial.
PROG
PROG
button.
PROG
appears in the display.
PROG
button.
button.
button.
AUTO
MANU
button.
using the adjustment dial.
PROG
button.
button until the required switching time appears.
appears in the display.
Page 41

6. Confirm with the
The switching point is deleted.
7. End the procedure with the
– or –
In order to delete further switching points, repeat Steps 5 and 6.
PROG
button.
AUTO
MANU
button.
Other setting options
Resetting the time and date
Note: The date and time are set at the factory. Should the batteries be empty
for an extended period (nothing in the display) or if it has taken too long to
change the batteries, you will need to reset the date and time.
1. Hold the
2. Set the year using the adjustment dial.
3. Confirm the selection with the
4. Set the month using the adjustment dial.
5. Confirm with the
6. Set the day using the adjustment dial.
7. Confirm with the
8. Set the hour using the adjustment dial.
9. Confirm with the
10. Set the minute using the adjustment dial.
11. Confirm with the
PROG
button down for 3 seconds.
PROG
PROG
button.
PROG
button.
PROG
button.
PROG
button.
button.
39
Page 42

Constant temperature without time program (vacation)
1. Switch to manual mode with the
MANU is displayed.
2. Set the temperature using the adjustment dial.
This temperature is retained until you return to Auto mode.
Heating break (summer)
If the central heating system is switched off in summer, you can ensure that
the batteries of the HR 40 are not wasted.
1. Switch to manual mode with the
2. Turn the adjustment dial clockwise until
The radiator valve now remains open and the HR 40 does not control.
Radiator off
1. Switch to manual mode with the
2. Turn the adjustment dial anti-clockwise until
display.
The radiator valve is closed.
Note: Frost protection is still ensured.
Disabling the operating elements (child-proofing)
• Press the
" " is displayed.
Undoing the blockage of the operating elements
• Press the
40
AUTO
MANU
AUTO
MANU
and
and
AUTO
MANU
AUTO
MANU
AUTO
MANU
button.
AUTO
MANU
button.
is displayed in the display.
AUTO
MANU
button.
is displayed in the
buttons simultaneously for 3 seconds.
buttons simultaneously again for 3 seconds.
Page 43

Setting the valve lift
The HR 40 operates with a factory setting with the optimum valve lift that is
required for room temperature control.
Activating full-stroke mode
If the entire valve stroke is to be used or if the valve does not close
completely, activate the full-stroke mode.
Note: The battery life is reduced through the full-stroke operating mode.
1. Remove the operating unit.
2. Press and hold the
lantern until the stop is reached and lock.
full is displayed.
Activating the default stroke mode
1. Hold the
2. Slide the operating unit onto the valve lantern until the stop is reached and
lock.
Def is displayed.
PROG
button down.
button and slide the operating unit onto the valve
41
Page 44

Changing batteries
The batteries need changing when flashes on the display. The
following anti-leak batteries can be used for the HR 40:
Type Designation Battery life
Mignon battery Alkaline-manganese LR6 AA AM3 2 years
1.5 V accumulator Alkaline-manganese LR6 AA AM3 ¾ year
Lithium battery LR6 AA AM3 2 years
Note: If changing the batteries takes a long time or the operating unit is not
removed, the time will need to be reset.
1. Remove the operating unit.
2. Open the battery compartment on the underside of the operating unit.
3. Remove and dispose of the used batteries.
Battery disposal
Batteries may not be disposed of with household garbage. Dispose of used
batteries according to the local statutory requirements by returning them to
the corresponding recycling centre.
4. Insert 2 batteries into the battery compartment of the operating unit making
sure the polarity is correct.
5. Close the battery compartment and click it in place.
6. Attach the operating unit.
42
Page 45

Help with problems
Problem/Display Cause Remedy
The radiator does
not become cold
flashes
Restoring the factory settings
• Press and hold all 3 buttons while inserting the batteries at the same time.
The valve is not closing
fully
The battery level is too
low
Batteries are flat (no
valve movement
possible, no control, valve
open)
The operating unit is not
attached
Motor cannot be moved Check the installation. If
– Please contact your local
Check the installation. If
appropriate, activate the
full-stroke mode
Change the batteries as
soon as possible
Change the batteries
immediately
Attach the operating unit
correctly
appropriate, remove the dirt
dealer
43
Page 46

Adjusting the valve when the batteries are empty
1. Remove the operating unit.
2. Operate the radiator valve by hand using the adjustment dial on the valve
lantern:
+ hot/ – cold.
44
Page 47

WEEE directive 2002/96
EC Waste Electrical and Electronic Equipment
directive
At the end of the product life dispose of the packaging
and product in a corresponding recycling centre. Do
not dispose of the unit with the usual domestic refuse.
Do not burn the product.
45
Page 48

Sommaire
Etendue de la livraison.................................................................................48
Montage....................................................................................................... 49
Eléments de commande et affichage........................................................... 53
Fonctions automatiques............................................................................... 54
Fonction fenêtre...................................................................................... 54
Protection contre le tartre........................................................................54
Protection contre le gel........................................................................... 54
Heure d'été/heure d'hiver........................................................................ 54
Indication de remplacement des piles..................................................... 55
Températures et périodes de régulation ...................................................... 56
Modification de la température de consigne avec la molette de réglage ...... 57
Adapter les réglages.................................................................................... 58
Modifier les réglages d'usine...................................................................58
Régler la température confort et la température économie ..................... 58
Modifier le programme temporisé ........................................................... 59
Régler le programme hebdomadaire (tous les jours identiques): ............ 59
Régler le programme journalier (jour de la semaine individuellement):... 60
Supprimer des points de commutation.................................................... 61
Autres possibilités de réglage...................................................................... 62
Régler la date et l'heure.......................................................................... 62
Température constante sans programme temporisé (vacances) ............63
Pause de chauffage (été)........................................................................63
Radiateur fermé...................................................................................... 63
Verrouiller la molette (protection enfants) ...............................................63
Supprimer le verrouillage........................................................................ 63
Réglage de la course de la vanne................................................................64
Activer le mode course intégrale.............................................................64
Activer le mode course standard.............................................................64
46
Page 49

Changement de piles ...................................................................................65
Aide en cas de problème..............................................................................67
Rétablir les réglages d'usine ...................................................................67
Régler la vanne lorsque les piles sont plates...........................................68
Directive 2002/96/CE relative aux déchets d'équipements électriques et
électroniques (DEEE)...................................................................................69
Le régulateur HR 40 est un régulateur de radiateur électronique offrant une
série de fonctions conviviales:
• Des moments de commutation librement définissables et deux
températures de consigne différentes permettent une programmation
individuelle du chauffage pour chaque jour de la semaine.
• Des caractéristiques d'autocontrôle protègent contre l'entartrage et le gel,
aident à économiser de l'énergie ou signalent la nécessité d'un
changement de piles.
• La molette de réglage de la commande permet à tout moment de modifier
facilement la température ambiante.
• Le montage du régulateur HR 40 est simple, ne provoque ni saletés ni
taches d'eau.
47
Page 50

Etendue de la livraison
• Contrôler après le déballage!
Commande avec les piles (1)
Tête de vanne avec molette (2)
Sachet avec adaptateur (3), vis et écrou (4)
48
Page 51

Montage
En
étapes, vous aurez le régulateur prêt à l'emploi:
4
4
Le montage du régulateur HR 40 ne demande que peu de temps:
• Enlever l'ancien thermostat.
• Si nécessaire, monter un adaptateur sur la vanne.
• Monter la tête de vanne.
• Insérer la commande sur ... TERMINÉ!
1. Enlever l’ancien thermostat
1. Défaire la fixation de l'ancien thermostat.
2. Détacher le thermostat de la vanne.
2. Monter l'adaptateur de vanne (optionnel)
1. Sélectionner l'adaptateur approprié dans le tableau.
2. Si vous avez besoin d'un adaptateur: Elargir l'adaptateur et le faire
glisser jusqu'à la butée sur la vanne. Ce faisant, tourner jusqu'à ce qu'il
se verrouille de manière perceptible.
3. Adaptateur Danfoss RAV: Enficher la broche d'adaptateur sur le
poussoir de la vanne.
4. Si prévu sur l'adaptateur: serrer l'adaptateur avec la vis.
49
Page 52

Les vannes Honeywell-Braukmann, MNG, Heimeier, Junkers, Landis & Gyr
'Duogyr' ne requièrent pas d'adaptateur, des adaptateurs sont disponibles
pour les vannes Oventrop, Herz, Danfoss et Vaillant:
Marque/type d'adaptateur N° de
Oventrop HU 01
(écrou moleté M30x1)
commande
073341076
Herz HU 02
Kit d'adaptation Danfoss
RAV (gris)
50
(écrou moleté M28)
EVA 1-Danfoss
RA (blanc) (fourni)
Adaptateur Vaillant EHA 1VAI 072031082
073341725
072031201
RAVL (noir)
Page 53

3. Monter la tête de vanne
1. Tourner la molette de réglage (3) de la
tête de vanne vers la gauche, jusqu'à
ce que le nez (1) de la molette de
réglage se trouve contre la butée (2)
du boîtier.
2. Placer la tête de vanne sur la vanne
ou sur l'adaptateur.
La surface plane de la tête sur la
partie avant de la tête de vanne doit
être orientée vers le haut.
1
2
3
3. Faire glisser l'écrou moleté et le serrer
fortement à la main (sans outil!).
Dans cet état, la vanne est ouverte et le radiateur devient
chaud si le chauffage central est en service.
51
Page 54

4. Placer/enlever la commande
1. Tourner l'étrier de retenue de la commande avec la pointe vers le haut.
2. Placer la commande sur la tête de vanne et la faire glisser jusqu'à la
butée. La surface plane de la tête de vanne doit venir exactement à niveau
avec la commande.
3. Tourner l'étrier de retenue de la commande avec la pointe vers l'arrière.
Pour enlever la commande, procédez dans l'ordre inverse.
52
Page 55

Eléments de commande et affichage
(1) Molette de réglage de la température ou de l'heure
(2) Touche
(3) Touche
(4) Touche
(5) Mode de fonctionnement: Auto, Manuel ou Programme
(6) Période de chauffage en heures
(7) Température confort ou économie ou protection contre le gel
AUTO
MANU
de réglage entre fonctionnement Auto et Manuel
de réglage de température confort ou économie
PROG
de réglage du programme temporisé
53
Page 56

Fonctions automatiques
Fonction fenêtre
Si vous ouvrez une fenêtre et que la température diminue de ce fait
sensiblement pendant plus de 3 minutes, le régulateur HR 40 ferme la vanne
de radiateur afin d'économiser l'énergie. Le message
Lorsque la température remonte, au plus tard cependant après 30 minutes, le
régulateur HR 40 reprend le fonctionnement normal.
Indication: La fonction fenêtre peut être annulée à tout moment en appuyant
sur la touche
PROG
ou en tournant la molette.
Protection contre le tartre
A titre de protection de la vanne, celle-ci est ouverte chaque semaine pendant une
courte période le lundi après-midi.
L'affichage indique cycl.
Protection contre le gel
Si la température tombe en dessous de 4 °C, le régulateur HR 40 ouvre la
vanne de radiateur jusqu'à ce que la température remonte au-dessus de
6 °C. Le régulateur HR 40 évite ainsi que le radiateur gèle. Le symbole
clignote dès que la protection contre le gel est active.
Indication: La protection contre le gel fonctionne uniquement lorsque la
commande est enfichée.
Heure d'été/heure d'hiver
Le régulateur HR 40 commute automatiquement entre l'heure d'été et l'heure
d'hiver.
54
est alors affiché.
Page 57

Indication de remplacement des piles
Lorsque l'indication BaTT clignote, le régulateur HR 40 reste en état de
fonctionner. Vous devriez cependant remplacer les piles dès que possible.
Si BaTT est affiché en permanence, le régulateur HR 40 est inactif et la
vanne de radiateur est ouverte (protection contre le gel).
55
Page 58

Températures et périodes de régulation
Le régulateur HR 40 commute entre 2 températures de consigne...
• Température confort:
• Température économie:
... et 2 périodes:
• Période de chauffage: Début réglé en usine sur 6:00 h, chauffage à
température confort
• Période de economie: Début réglé en usine sur 22:00 h, abaissement à la
température économie
(réglée en usine sur 21 °C)
(réglée en usine sur 16 °C)
Les périodes de chauffage et d'économie sont réglables à volonté.
e
période de chauffage et d'économie est optionnelle.
La 2
56
Page 59

Modification de la température de consigne avec
la molette de réglage
Avec la molette de réglage de la commande, vous pouvez modifier à tout
moment la température de consigne. Le réglage est valable jusqu'à la
prochaine période programmée de chauffage ou d'économie. L'affichage
indique pendant la rotation de la molette la valeur de la température de
consigne.
La molette ne possède pas de butée. Pendant la rotation dans le sens
horlogique, on parcourt les zones suivantes:
Affichage: Zone
5...30
Vanne de radiateur fermée
Température de consigne actuelle
(plage de réglage possible)
Vanne de radiateur entièrement ouverte
57
Page 60

Adapter les réglages
Modifier les réglages d'usine
1. Réglez les températures confort et économie.
2. Réglez les périodes de chauffage et d'économie pour le programme
journalier ou le programme hebdomadaire.
Conseils d'utilisation
• Enlever la commande pour le réglage.
• Pour interrompre la programmation, appuyer sur la touche
Le régulateur HR 40 rejette la dernière entrée et revient au mode Auto ou
Manuel.
Régler la température confort et la température économie
1. Appuyer sur la touche .
2. Régler la température confort avec la molette de réglage de la commande.
3. Appuyer sur la touche
4. Régler la température économie avec la molette de réglage.
5. Confirmer la modification avec la touche
Le régulateur HR 40 revient au mode Auto ou Manuel.
58
.
.
AUTO
MANU
.
Page 61

Modifier le programme temporisé
Le régulateur HR 40 dispose de deux programmes temporisés indépendants:
- Le programme hebdomadaire utilise le même programme temporisé pour
tous les jours.
- Avec le programme journalier, vous pouvez régler un programme
temporisé individuel pour chaque jour de la semaine.
Indication: Tenez compte de ce que deux points de commutation définissent
respectivement une période de chauffage.
Régler le programme hebdomadaire (tous les jours
identiques):
1. Appuyer sur la touche
L'affichage indique
2. Sélectionner
1-7
3. Confirmer avec la touche
4. Régler le 1
er
point de commutation avec la molette de réglage.
5. Confirmer avec la touche
6. Régler le 2
e
point de commutation avec la molette de réglage.
7. Confirmer avec la touche
8. Terminer le processus avec la touche
– ou –
Régler les points de commutation 3 et 4 pour une deuxième période de
chauffage.
Les nouvelles périodes sont programmées.
PROG
.
PROG.
avec la molette de réglage.
PROG
.
PROG
.
PROG
.
AUTO
MANU
.
59
Page 62

Régler le programme journalier (jour de la semaine
individuellement):
1. Appuyer sur la touche
2. Sélectionner le jour de la semaine désiré avec la molette. Les jours de la
semaine sont numérotés de 1 à 7 (lundi–dimanche).
3. Confirmer avec la touche
4. Régler le 1
er
point de commutation avec la molette de réglage.
5. Confirmer avec la touche
6. Régler le 2
e
point de commutation avec la molette de réglage.
7. Confirmer avec la touche
8. Régler de la même manière les points de commutation 3 et 4.
9. Terminer le processus avec la touche
– ou –
Sélectionner le jour de la semaine et répéter les étapes 3–8.
Les nouvelles périodes sont programmées.
60
PROG
PROG
PROG
PROG
.
.
.
.
AUTO
MANU
.
Page 63

Exemple de commande
Dans l'exemple suivant, on veut définir pour mercredi le début du chauffage à
7:30 h et faire commencer la période d'économie à 22:30 h.
1. Appuyer sur la touche
2. Tourner la molette de réglage jusqu'à ce que
Le mercredi est sélectionné.
3. Confirmer la sélection avec la touche
4. Régler
avec la molette de réglage.
5. Confirmer avec la touche
6. Régler
7. Confirmer avec la touche
8. Terminer le processus avec la touche
PROG
.
PROG
PROG
avec la molette de réglage.
PROG
.
.
AUTO
MANU
soit affiché.
.
.
Supprimer des points de commutation
Indication: Tenez compte de ce que deux points de commutation définissent
respectivement une période de chauffage.
1. Appuyer sur la touche
2. Sélectionner tous les jours de la semaine: Régler
réglage.
– ou –
Sélectionner un seul jour de la semaine:
Sélectionner le jour de la semaine désiré avec la molette de réglage.
3. Confirmer la sélection avec la touche
4. Enfoncer la touche
de commutation désiré apparaisse.
5. Tourner la molette de réglage jusqu'à ce que
PROG
.
avec la molette de
PROG
PROG
de manière répétitive jusqu'à ce que le moment
.
soit affiché.
61
Page 64

6. Confirmer avec la touche
Le point de commutation est supprimé.
7. Terminer le processus avec la touche
– ou –
Pour supprimer des points de commutation supplémentaires, répéter les
étapes 5 et 6.
PROG
.
AUTO
MANU
.
Autres possibilités de réglage
Régler la date et l'heure
Indication: La date et l'heure sont réglées en usine. Si les piles devaient
rester un jour déchargées pendant une longue période (pas d'indication à
l'affichage) ou si un changement de piles dure trop longtemps, vous devrez
réintroduire la date et l'heure.
1. Maintenir la touche
2. Régler l'année avec la molette.
3. Confirmer la sélection avec la touche
4. Régler le mois avec la molette.
5. Confirmer avec la touche
6. Régler le jour avec la molette.
7. Confirmer avec la touche
8. Régler l'heure avec la molette.
9. Confirmer avec la touche
10. Régler les minutes avec la molette.
11. Confirmer avec la touche
62
PROG
enfoncée pendant 3 secondes.
PROG
.
PROG
.
PROG
.
PROG
.
PROG
.
Page 65

Température constante sans programme temporisé (vacances)
1. Passer en mode Manuel avec la touche
L'affichage indique
MANU.
AUTO
MANU
.
2. Régler la température avec la molette.
Cette température reste maintenue jusqu'à ce que vous commutiez à
nouveau en mode Auto.
Pause de chauffage (été)
Si vous avez arrêté le chauffage en été et que vous voulez ménager les piles
du régulateur HR 40.
1. Passer en mode Manuel avec la touche
2. Tourner la molette de réglage vers la droite jusqu'à ce que
La vanne de radiateur reste ouverte, le régulateur HR 40 est hors service.
Radiateur fermé
1. Passer en mode Manuel avec la touche
2. Tourner la molette de réglage vers la gauche jusqu'à ce que
affiché.
La vanne de radiateur est fermée.
Indication: La protection contre le gel est assurée.
Verrouiller la molette (protection enfants)
• Maintenir les touches
AUTO
MANU
et simultanément enfoncées pendant
3 secondes.
A l'écran apparaît
.
Supprimer le verrouillage
• Maintenir à nouveau les touches
pendant 3 secondes.
AUTO
MANU
AUTO
MANU
.
AUTO
MANU
.
AUTO
MANU
et
simultanément enfoncées
soit affiché.
soit
63
Page 66

Réglage de la course de la vanne
Le régulateur HR 40 est réglé en usine sur la course de vanne optimale qui
est nécessaire pour la régulation de température ambiante.
Activer le mode course intégrale
Lorsque la course entière de la vanne doit être utilisée ou si la vanne ne se
ferme pas entièrement, vous passez au mode course intégrale
Indication: Dans le mode course intégrale, la durée de vie des piles diminue.
1. Détacher la commande.
2. Maintenir la touche
de vanne jusqu'à la butée et la verrouiller.
L'affichage indique full.
Activer le mode course standard
1. Maintenir la touche
2. Faire glisser la commande jusqu'à la butée sur la tête de vanne et la
verrouiller.
L'affichage indique Def.
64
enfoncée et faire glisser la commande sur la tête
PROG
enfoncée.
Page 67

Changement de piles
Un changement de piles est nécessaire lorsque l'affichage indique .
Les piles sans risques de couler suivantes peuvent être utilisées pour le
régulateur HR 40:
Type Désignation Durée de vie
Pile Mignon Alcaline au manganèse LR6
AA AM3
Accu 1,5 V Alcaline au manganèse LR6
AA AM3
Pile au lithium LR6 AA AM3 2 ans
Indication: Si le changement de piles dure trop longtemps ou si la commande
n'a pas été détachée, vous devrez réintroduire l'heure.
1. Détacher la commande.
2. Ouvrir le compartiment à piles à la face inférieure de la commande.
3. Enlever les anciennes piles et les éliminer.
Elimination des piles
Les piles ne peuvent pas être jetées avec les ordures domestiques. Eliminez
les piles conformément aux stipulations légales, en les remettant aux
organismes appropriés.
2 ans
¾ an
65
Page 68

4. Placer deux piles dans le compartiment à piles de la commande en
respectant la polarité correcte.
5. Refermer le compartiment à piles et le verrouiller.
6. Replacer la commande.
66
Page 69

Aide en cas de problème
Problème/affichage Cause Solution
Le radiateur ne
devient pas froid
clignote
Rétablir les réglages d'usine
• Maintenir les 3 touches enfoncées et replacer simultanément les piles.
La vanne ne ferme
pas complètement
Les piles sont trop
faibles
Les piles sont plates
(pas de mouvement
possible de la vanne,
pas de régulation, la
vanne reste ouverte)
La commande n'est
pas mise en place
Le moteur ne peut
pas se mouvoir
– Adressez-vous à votre
Contrôler le montage,
passer éventuellement au
mode course intégrale
Remplacer les piles dès
que possible
Remplacer immédiatement
les piles
Placer correctement la
commande
Contrôler le montage,
enlever éventuellement la
saleté
revendeur
67
Page 70

Régler la vanne lorsque les piles sont plates
1. Détacher la commande.
2. Commander la vanne de radiateur à la main avec la molette sur la tête de
vanne:
+ chaud / – froid.
68
Page 71

Directive 2002/96/CE relative aux déchets
d'équipements électriques et électroniques
(DEEE)
Eliminer l'emballage et le produit dans un centre de
recyclage approprié à la fin de la durée de vie du
produit. Ne jetez pas le produit avec les ordures
ménagères normales. N'incinérez pas le produit.
69
Page 72

Indice
Volume di fornitura....................................................................................... 72
Montaggio.................................................................................................... 73
Elementi di comando e Display.................................................................... 78
Funzioni automatiche................................................................................... 79
Funzione finestra aperta......................................................................... 79
Protezione della valvola.......................................................................... 79
Protezione antigelo................................................................................. 79
Ora legale/solare ....................................................................................79
Segnalazione di sostituzione delle pile ...................................................80
Temperature e tempi di regolazione ............................................................81
Modifica della temperatura nominale con la manopola ................................ 82
Adattamento delle impostazioni................................................................... 83
Modifica delle impostazioni predefinite ...................................................83
Impostazione della temperatura comfort e di economia.......................... 83
Modifica del programma temporale.........................................................84
Impostazione del programma settimanale (lo stesso per ogni giorno):....84
Impostazione del programma giornaliero (diverso per ogni giorno):........ 85
Cancellazione dei punti di commutazione............................................... 86
Ulteriori possibilità di regolazione.................................................................87
Impostazione della data e dell'ora...........................................................87
Temperatura costante senza programma temporale (vacanze).............. 88
Pausa di riscaldamento (estate)..............................................................88
Radiatore spento ....................................................................................88
Bloccaggio degli elementi di comando (protezione bambini)................... 88
Sbloccaggio degli elementi di comando.................................................. 88
Regolazione della corsa della valvola.......................................................... 89
Attivazione della modalità di corsa massima........................................... 89
Attivazione della modalità di corsa standard........................................... 89
70
Page 73

Sostituzione delle pile...................................................................................90
Se si presentano problemi............................................................................91
Ripristino delle impostazioni predefinite ..................................................91
Regolazione della valvola a pile scariche................................................92
Direttiva RAEE 2002/96 legge CE sugli apparecchi elettrici ed elettronici ...93
L'HR 40 è un regolatore elettronico per radiatori con tutta una serie di
comode funzioni:
• Gli istanti di commutazione a programmazione libera e due diversi valori
nominali di temperatura consentono di creare un programma di
riscaldamento individuale per ogni giorno della settimana.
• Le caratteristiche di autosorveglianza offrono un'efficace protezione dal
gelo, aiutano a risparmiare energia e segnalano la necessità di sostituire le
pile elettriche.
• La manopola di regolazione dell'elemento di comando consente di
modificare semplicemente la temperatura ambiente in qualsiasi momento.
• Il montaggio dell'HR 40 è semplice, non provoca sporco né macchie di
calcare.
71
Page 74

Volume di fornitura
• Da controllare al disimballaggio!
Elemento di comando con pile elettriche (1)
Attacco della valvola con manopola (2)
Sacchetto contenente adattatore (3), vite e dado (4)
72
Page 75

Montaggio
In soli
Per il montaggio dell'HR 40 è necessario poco tempo:
• Smontare il vecchio termostato.
• Se necessario, montare un adattatore sulla valvola.
• Montare l'attacco della valvola.
• Applicare l'elemento di comando ... FINITO!
1. Smontaggio del vecchio termostato
1. Sbloccare gli elementi di fissaggio del vecchio termostato.
2. Estrarre il termostato dalla valvola.
2. Montaggio dell'adattatore per valvola (opzione)
1. Scegliere l'adattatore adatto nella tabella.
2. Se è necessario un adattatore: allargare l'adattatore e spingerlo
3. Per l'adattatore Danfoss RAV: applicare la spina adattatrice sullo stelo
4. Se previsto sull'adattatore: serrare a fondo l'adattatore con la vite.
passi ...
4
4
completamente sulla valvola. Allo stesso tempo ruotarlo fino a farlo
innestare percettibilmente.
della valvola.
73
Page 76

Le valvole Honeywell-Braukmann, MNG, Heimeier, Junkers, Landis & Gyr
'Duogyr' non richiedono adattatori; per le valvole Ovendrop, Herz, Danfoss e
Vaillant sono disponibili i seguenti adattatori:
Marca/tipo di adattatore N. d'ord.
Oventrop HU 01
(dado zigrinato M30x1)
073341076
Herz HU 02
Kit adattatore Danfoss
RAV (grigio)
74
(dado zigrinato M28)
EVA 1-Danfoss
RA (bianco)
(in dotazione)
Adattatore Vaillant EHA 1VAI 072031082
073341725
072031201
RAVL (nero)
Page 77

3. Montaggio dell'attacco della valvola
1. Ruotare la manopola (3) dell'attacco
della valvola verso sinistra fino a
portare il nasello (1) della manopola a
contatto con il fermo (2)
dell'alloggiamento.
2. Applicare l'attacco sulla valvola o
sull'adattatore.
La superficie piana della testa
dell'attacco della valvola deve essere
rivolta verso l'alto.
1
2
3
3. Inserire con cautela il dado zigrinato e
serrarlo a fondo a mano (senza usare
attrezzi!)
In questo stato la valvola è aperta e se l'impianto di riscaldamento
centralizzato è acceso, il radiatore si riscalda.
75
Page 78

4. Montaggio/smontaggio dell'elemento di comando
1. Ruotare la staffa dell'elemento di comando con la punta verso l'alto.
2. Inserire l'elemento di comando sull'attacco della valvola e spingerlo
completamente. La superficie piana dell'attacco della valvola deve essere
a filo con l'elemento di comando.
76
Page 79

3. Ruotare la staffa dell'elemento di comando con la punta rivolta verso il lato
.
posteriore
Per togliere l'elemento di comando procedere in successione inversa.
77
Page 80

Elementi di comando e Display
(1) Manopola per la regolazione della temperatura o del tempo
(2) Tasto
(3) Tasto
(4) Tasto
(5) Modo operativo: "Auto", "Manu" o "Prog"
(6) Periodo di riscaldamento in ore
(7) Temperatura comfort o economia, oppure protezione antigelo
AUTO
MANU
per commutare tra modo operativo automatico e manuale
per regolare la temperatura comfort o economia
PROG
per impostare il programma temporale
78
Page 81

Funzioni automatiche
Funzione finestra aperta
Se viene aperta la finestra facendo abbassare fortemente la temperatura per
oltre 3 minuti, l'HR 40 chiude la valvola del radiatore per risparmiare energia.
Il display visualizza il messaggio
Al nuovo aumento della temperatura (tuttavia entro 30 minuti), l'HR 40 ritorna
a funzionare nel modo operativo normale.
Nota: la funzione "Finestra aperta" può essere disattivata in qualsiasi
momento premendo il tasto
PROG
Protezione della valvola
Per proteggerla, la valvola viene aperta brevemente il lunedì pomeriggio di ogni
settimana.
Il display visualizza cycl.
Protezione antigelo
Se la temperatura si abbassa oltre 4 °C, l'HR 40 apre la valvola del radiatore
e la mantiene aperta fino a riportare la temperatura ad oltre 6 °C. In questo
modo l'HR 40 impedisce il congelamento del radiatore. All'attivazione della
protezione antigelo, il simbolo
Nota: la protezione antigelo funziona solo se l'elemento di comando è
applicato.
Ora legale/solare
L'HR 40 si regola automaticamente sull'ora legale ed invernale.
.
o ruotando la manopola.
inizia a lampeggiare.
79
Page 82

Segnalazione di sostituzione delle pile
L'HR 40 continua a funzionare anche se sul display lampeggia il messaggio
BaTT. Le pile vanno tuttavia sostituite il più presto possibile.
Se il messaggio BaTT viene costantemente visualizzato, l'HR 40 è inattivo e
la valvola del radiatore è aperta (protezione antigelo).
80
Page 83

Temperature e tempi di regolazione
L'HR 40 commuta tra 2 temperature nominali...
• Temperatura comfort:
• Temperatura di economia:
... e 2 tempi di riscaldamento:
• Periodo di riscaldamento: inizio standard alle ore 06:00; riscaldamento alla
temperatura comfort
• Periodo di economia: inizio standard alle ore 22:00; raffreddamento alla
temperatura economia
(standard 21 °C)
(standard 16 °C)
I periodi di riscaldamento e di economia possono essere regolati liberamente.
Il 2° tempo di riscaldamento e di economia è opzionale.
81
Page 84

Modifica della temperatura nominale con la
manopola
Con la manopola dell'elemento di comando è possibile modificare la
temperatura nominale in qualsiasi momento. La modifica continua a valere
fino al successivo tempo di riscaldamento o di economia programmato.
Ruotando la manopola, il display indica il valore nominale impostato per la
temperatura ambiente.
La manopola può essere ruotata senza limite. Durante la rotazione in senso
orario si passa attraverso i seguenti campi:
Display Campo
5...30
82
Valvola del radiatore chiusa
Impostazione attuale della temperatura
(possibile campo di regolazione)
Valvola del radiatore completamente aperta
Page 85

Adattamento delle impostazioni
Modifica delle impostazioni predefinite
1. Impostare la temperatura comfort e la temperatura economia.
2. Impostare i periodi di riscaldamento e di economia per il programma
settimanale o giornaliero.
Suggerimenti sul procedimento
• Per la programmazione togliere l'elemento di comando.
• Per interrompere la programmazione premere il tasto
L'HR 40 ignora l'ultima modifica e ritorna nel modo operativo
"Auto"/"Manu".
Impostazione della temperatura comfort e di economia
1. Premere il tasto .
2. Impostare la temperatura comfort con la manopola dell'elemento di
comando.
3. Premere il tasto
4. Impostare la temperatura di economia con la manopola.
5. Confermare la modifica premendo il tasto
L'HR 40 ritorna al modo operativo "Auto"/"Manu".
.
AUTO
MANU
.
.
83
Page 86

Modifica del programma temporale
L'HR 40 possiede due programmi temporali indipendenti:
- Il programma settimanale adotta lo stesso programma temporale per ogni
giorno.
- Con il programma giornaliero è possibile impostare un programma
temporale per ogni singolo giorno della settimana.
Nota: si tenga presente che una coppia di punti di commutazione definisce un
periodo di riscaldamento.
Impostazione del programma settimanale (lo stesso per ogni
giorno):
1. Premere il tasto
Il display visualizza
2. Con la manopola scegliere
3. Confermare premendo il tasto
4. Con la manopola impostare il 1° punto di commutazione.
5. Confermare premendo il tasto
6. Con la manopola impostare il 2° punto di commutazione.
7. Confermare premendo il tasto
8. Confermare e terminare premendo il tasto
– oppure –
Per un secondo periodo di riscaldamento impostare i punti di
commutazione 3 e 4.
I nuovi tempi sono ora programmati.
84
PROG
.
PROG.
1-7
PROG
PROG
PROG
.
.
.
.
AUTO
MANU
.
Page 87

Impostazione del programma giornaliero (diverso per ogni
giorno):
1. Premere il tasto
2. Selezionare il giorno desiderato con la manopola. I giorni della settimana
sono numerati da 1 a 7 (lunedì–domenica).
3. Confermare premendo il tasto
4. Con la manopola impostare il 1° punto di commutazione.
5. Confermare premendo il tasto
6. Con la manopola impostare il 2° punto di commutazione.
7. Confermare premendo il tasto
8. Impostare allo stesso modo i punti di commutazione 3 e 4.
9. Confermare e terminare premendo il tasto
– oppure –
Selezionare il giorno della settimana e ripetere le operazioni da 3 a 8.
I nuovi tempi sono ora programmati.
PROG
.
PROG
.
PROG
.
PROG
.
AUTO
MANU
.
85
Page 88

Esempio
L'esempio seguente si riferisce alla programmazione di un periodo di
riscaldamento che inizia alle ore 7:30 e che termina alle ore 22:30 di ogni
mercoledì.
1. Premere il tasto
2. Ruotare la manopola fino a far comparire
È selezionato il mercoledì
3. Confermare la selezione premendo il tasto
4. Con la manopola programmare
5. Confermare premendo il tasto
6. Con la manopola programmare
7. Confermare premendo il tasto
8. Confermare e terminare premendo il tasto
Cancellazione dei punti di commutazione
Nota: si tenga presente che una coppia di punti di commutazione definisce un
periodo di riscaldamento.
1. Premere il tasto
2. Selezionare tutti i giorni della settimana: con la manopola programmare
.
– oppure –
Selezionare un singolo giorno:
Selezionare il giorno desiderato con la manopola.
3. Confermare la selezione premendo il tasto
4. Premere ripetutamente il tasto
l'istante di commutazione cercato.
5. Ruotare la manopola fino a far comparire
86
PROG
PROG
.
sul display.
PROG
PROG
PROG
.
.
.
.
.
AUTO
MANU
.
.
PROG
PROG
fino a far comparire sul display
.
sul display.
Page 89

6. Confermare premendo il tasto
Il punto di commutazione è cancellato.
7. Confermare e terminare premendo il tasto
– oppure –
Per cancellare altri punti di commutazione, ripetere le operazioni 5 e 6.
PROG
.
AUTO
MANU
.
Ulteriori possibilità di regolazione
Impostazione della data e dell'ora
Nota: la data e l'ora sono state impostate in fabbrica. Se le pile restano
scariche per un periodo prolungato (nessuna visualizzazione sul display) o la
sostituzione delle pile è avvenuta troppo tardi, occorre impostare di nuovo la
data e l'ora.
1. Tenere premuto il tasto
2. Con la manopola programmare l'anno.
3. Confermare la selezione premendo il tasto
4. Impostare il mese con la manopola.
5. Confermare premendo il tasto
6. Impostare il giorno con la manopola.
7. Confermare premendo il tasto
8. Impostare l'ora con la manopola.
9. Confermare premendo il tasto
10. Impostare i minuti con la manopola.
11. Confermare premendo il tasto
PROG
per 3 secondi.
PROG
PROG
PROG
PROG
PROG
.
.
.
.
.
87
Page 90

Temperatura costante senza programma temporale (vacanze)
1. Commutare sul modo operativo manuale premendo il tasto
Il display visualizza
MANU.
2. Con la manopola impostare la temperatura.
Questo valore di temperatura resta costante fino alla commutazione sul modo
operativo "Auto".
Pausa di riscaldamento (estate)
Questa funzione è prevista per l'estate, quando l'impianto di riscaldamento è
completamente spento e si desidera non far scaricare inutilmente le pile
dell'HR 40.
1. Commutare sul modo operativo manuale premendo il tasto
2. Ruotare la manopola verso destra fino a far comparire
La valvola resta aperta e l'HR 40 non esegue la regolazione.
Radiatore spento
1. Commutare sul modo operativo manuale premendo il tasto
2. Ruotare la manopola verso sinistra fino a far comparire
La valvola del radiatore è chiusa.
Nota: la protezione antigelo continua ad essere attiva.
Bloccaggio degli elementi di comando (protezione bambini)
• Premere contemporaneamente i tasti
Il display visualizza il messaggio
Sbloccaggio degli elementi di comando
• Ripremere contemporaneamente i tasti
88
AUTO
MANU
e per 3 secondi.
.
AUTO
MANU
e per 3 secondi.
AUTO
MANU
.
AUTO
MANU
.
sul display.
AUTO
MANU
.
sul display.
Page 91

Regolazione della corsa della valvola
Alla consegna, l'HR 40 opera con la corsa ottimale della valvola necessaria
per la regolazione della temperatura ambiente.
Attivazione della modalità di corsa massima
Per utilizzare l'intera corsa della valvola o se la valvola non chiude
completamente, attivare la modalità di corsa massima.
Nota: nella modalità di corsa massima la durata delle pile diminuisce.
1. Togliere l'elemento di comando.
2. Premere e tenere premuto il tasto
di comando sull'attacco della valvola.
Il display visualizza full.
Attivazione della modalità di corsa standard
1. Tenere premuto il tasto
2. Inserire completamente l'elemento di comando sull'attacco della valvola e
bloccarlo.
Il display visualizza Def.
PROG
.
ed applicare e bloccare l'elemento
89
Page 92

Sostituzione delle pile
Occorre sostituire le pile quando sul display lampeggia il messaggio .
Per l'HR 40 si possono utilizzare le seguenti pile di sicurezza:
Tipo Designazione Durata
Pila mignon LR6 AA AM3 alcalina al manganese 2 anni
Accumulatore
da 1,5 V
Pila al litio LR6 AA AM3 2 anni
Nota: se la sostituzione delle pile avviene con ritardo o se non si stacca
l'elemento di comando, occorre impostare di nuovo l'ora.
1. Togliere l'elemento di comando.
2. Aprire il vano delle pile sul lato inferiore dell'elemento di comando.
3. Togliere le pile scariche e smaltirle correttamente.
Smaltimento delle pile
Le pile non devono essere smaltite insieme ai rifiuti domestici. Smaltire le pile
conformemente alle norme di legge riconsegnandole al centro di vendita.
4. Collocare due pile nel vano delle pile dell'elemento di comando facendo
attenzione alla polarità giusta.
5. Richiudere il vano delle pile.
6. Riapplicare l'elemento di comando.
90
LR6 AA AM3 alcalina al manganese 9 mesi
Page 93

Se si presentano problemi
Problema/
visualizzazione
Il radiatore non si
raffredda
lampeggia
Ripristino delle impostazioni predefinite
• Tenendo premuti contemporaneamente tutti i 3 tasti, riapplicare le pile.
Causa Rimedio
La valvola non si chiude
completamente
Le pile sono quasi
completamente scariche
Le pile sono scariche
(non è più possibile
azionare la valvola,
nessuna regolazione, la
valvola si apre)
Elemento di comando
non applicato
correttamente
Il motorino non può
essere azionato
– Rivolgersi al proprio
Controllare il montaggio, se
necessario attivare la
modalità di corsa massima
Sostituire le pile il più presto
possibile
Sostituire immediatamente
le pile
Applicare correttamente
l'elemento di comando
Controllare il montaggio, se
necessario togliere lo
sporco
rivenditore
91
Page 94

Regolazione della valvola a pile scariche
1. Togliere l'elemento di comando.
2. Aprire o chiudere la valvola del radiatore agendo manualmente sulla
manopola dell'attacco della valvola:
+ caldo / – freddo.
92
Page 95

Direttiva RAEE 2002/96
legge CE sugli apparecchi elettrici ed elettronici
Al termine della durata utile, smaltire l'imballaggio ed il
prodotto consegnandoli ad un centro di riciclaggio.
Non smaltire il prodotto insieme ai normali rifiuti
domestici. Non bruciare il prodotto.
93
Page 96

Indhold
Leveringens omfang .................................................................................... 96
Montering..................................................................................................... 97
Betjeningsenhed og display....................................................................... 102
Automatiske funktioner .............................................................................. 103
Vinduesfunktion .................................................................................... 103
Ventilsikring .......................................................................................... 103
Frostsikring........................................................................................... 103
Sommer-/vintertid .................................................................................103
Visning af batteriskift.............................................................................103
Temperatur og indstillingstid...................................................................... 104
Ændring af den nominelle temperatur med indstillingshjulet ...................... 105
Tilpasning af indstillinger............................................................................ 106
Ændring af standardindstillinger............................................................106
Indstilling af komfort- og økonomitemperatur........................................ 106
Ændring af tidsprogram ........................................................................ 107
Indstilling af ugeprogram (alle dage ens):............................................. 107
Indstilling af dagsprogram (separat indstilling af ugedage): .................. 108
Sletning af funktionsskift....................................................................... 109
Yderligere indstillinger................................................................................110
Ny indstilling af klokkeslæt og dato....................................................... 110
Konstant temperatur uden tidsprogram (ferie) ......................................111
Uden for fyringssæsonen (sommer)......................................................111
Radiator slukket.................................................................................... 111
Spærring af betjeningselementer (børnesikring)................................... 111
Deaktivering af spærring af betjeningselementer.................................. 111
Indstilling af ventilvandring......................................................................... 112
Aktivering af fuld løftehøjde .................................................................. 112
Aktivering af standardløftehøjde ........................................................... 112
94
Page 97

Batteriskift ..................................................................................................113
Problemløsning ..........................................................................................114
Gendannelse af standardindstillinger ....................................................114
Indstilling af ventil ved tomme batterier .................................................115
WEEE-direktivet 2002/96/EF om elektrisk og elektronisk udstyr.................116
HR 40 er en elektronisk radiatortermostat med en række komfortfunktioner:
• Frit indstillelige tidspunkter og to forskellige nominelle temperaturer gør det
muligt at definere et separat varmeprogram for hver eneste ugedag.
• Selvovervågende egenskaber giver beskyttelse mod tilkalkning og frost, er
energibesparende og gør opmærksom på, når det er nødvendigt at skifte
batteri.
• Indstillingshjulet på betjeningsenheden gør det muligt til enhver tid at
ændre rumtemperaturen, nemt og bekvemt.
• HR 40 er nem at montere, og monteringen medfører ingen snavs eller
vandpletter.
95
Page 98

Leveringens omfang
• Husk at foretage en kontrol efter udpakning!
Betjeningsenhed uden batterier (1)
Ventilsokkel med hjul (2)
Pose med adapter (3), skure og møtrik (4)
96
Page 99

Montering
Montering i
Det tager ikke lang tid at montere HR 40:
• Afmonter den gamle termostat.
• Monter om nødvendigt en adapter på ventilen.
• Monter ventilsoklen.
• Sæt betjeningsenheden på ... FÆRDIG!
1. Afmontering af gammel termostat
1. Løsn fastgørelsen af den gamle termostat.
2. Træk den termostaten af ventilen.
2. Montering af ventiladapter (kun hvis nødvendigt)
1. Find den passende adapter i tabellen.
2. Hvis det er nødvendigt at montere en adapter: Udvid adapteren, og
skub den på ventilen indtil anslag. Drej den, samtidig med at du
skubber den, indtil den går mærkbart i indgreb.
3. Ved adapter Danfoss RAV: Sæt en adapterstift på ventilspindlen.
4. Hvis adapteren kræver det: Spænd adapteren fast med en skrue.
trin...
4
4
97
Page 100

Ventilerne Honeywell-Braukmann, MNG, Heimeier, Junkers,
Landis & Gyr 'Duogyr' kræver ikke nogen adapter. Til Ovendrop-, Herz-,
Danfoss- og Vaillant-ventiler er det nødvendigt med en adapter:
Adaptermærke/-type Bestill.-nr.
Oventrop HU 01
(fingermøtrik M30x1)
073341076
Herz HU 02
Danfoss-adaptersæt
RAV (grå)
98
(fingermøtrik M28)
EVA 1-Danfoss
RA (hvid) (medfølger)
Vaillant-adapter EHA 1VAI 072031082
073341725
072031201
RAVL (sort)
 Loading...