

Page 1

Honeywell Forge Worker Assist
Worker Assist Mobile User Guide
___________________________________
Mobile User Guide
___________________________________
Document ID: DWADOC-X709-en WA
Release Date: February 2021
Page 2

DISCLAIMER
This document contains Honeywell proprietary information. Information contained herein is to be
used solely for the purpose submitted, and no part of this document or its contents shall be
reproduced, published, or disclosed to a third party without the express permission of Honeywell
International Sàrl.
.While this information is presented in good faith and believed to be accurate, Honeywell disclaims
the implied warranties of merchantability and fitness for a purpose and makes no express
warranties except as may be stated in its written agreement with and for its customer
.In no event is Honeywell liable to anyone for any direct, special, or consequential damages. The
information and specifications in this document are subject to change without notice.Copyright
2021 - Honeywell International Sàrl
- 2 -
Page 3

Contents
Chapter 2 - Getting Started 5
2.1 Introduction 5
2.2 Installation 5
2.2.1 Android 5
2.2.2 IOS 6
2.3 Sign In 6
2.4 Understanding User Interface 8
2.5 Status Change 8
2.6 Sign Out 9
Chapter 3 - Forgot Password 11
Chapter 4 - Managing Contacts 12
4.1 Viewing All Contacts 12
4.2 Viewing Call History 14
4.3 Viewing Favourites 15
4.4 Searching Contacts 15
Chapter 5 - Using the Call Features 16
5.1 Making a Call 16
5.2 Using In-call Texting 18
5.3 Making Conference Call 20
5.4 Inviting Guest User 25
5.5 Sharing Files & Pictures 26
5.6 Sharing Video Stream 28
5.7 Controlling Remote Camera 29
5.8 Sharing Screen 30
5.9 Using Annotation 30
5.10 Using Split Screen 37
5.11 Controlling Resolution 38
- 3 -
Page 4

CHAPTER
2
l Introduction
l Installation
l Sign In
l Understanding the User Interface
l Status Change
l Sign Out
GETTING STARTED
2.1 Introduction
Honeywell Forge Workforce Productivity - Worker Assist, is a new Software as a Service (SaaS)
based mobility application aimed at improving:
l Workforce productivity
l Decision making
l Worker efficiency
l Operational performance
Honeywell Forge Worker Assist ("Worker Assist") comprises of a portal and a mobile application. It
allows capturing of voice, video, pictures, and annotations directly in the field or while
collaborating with remote experts, to properly document observations and trigger informed
actions faster.
The application of Honeywell Forge Worker Assist enables you to:
l Collaborate with SMEs and co-workers on issues in the plant, even when they are located
remotely
l Minimize unplanned downtime in a plant
Currently Honeywell Forge Worker Assist supports two languages:
l English
l Spanish
2.2 Installation
2.2.1 Android
- 5 -
Page 5

Chapter 2 - Getting Started
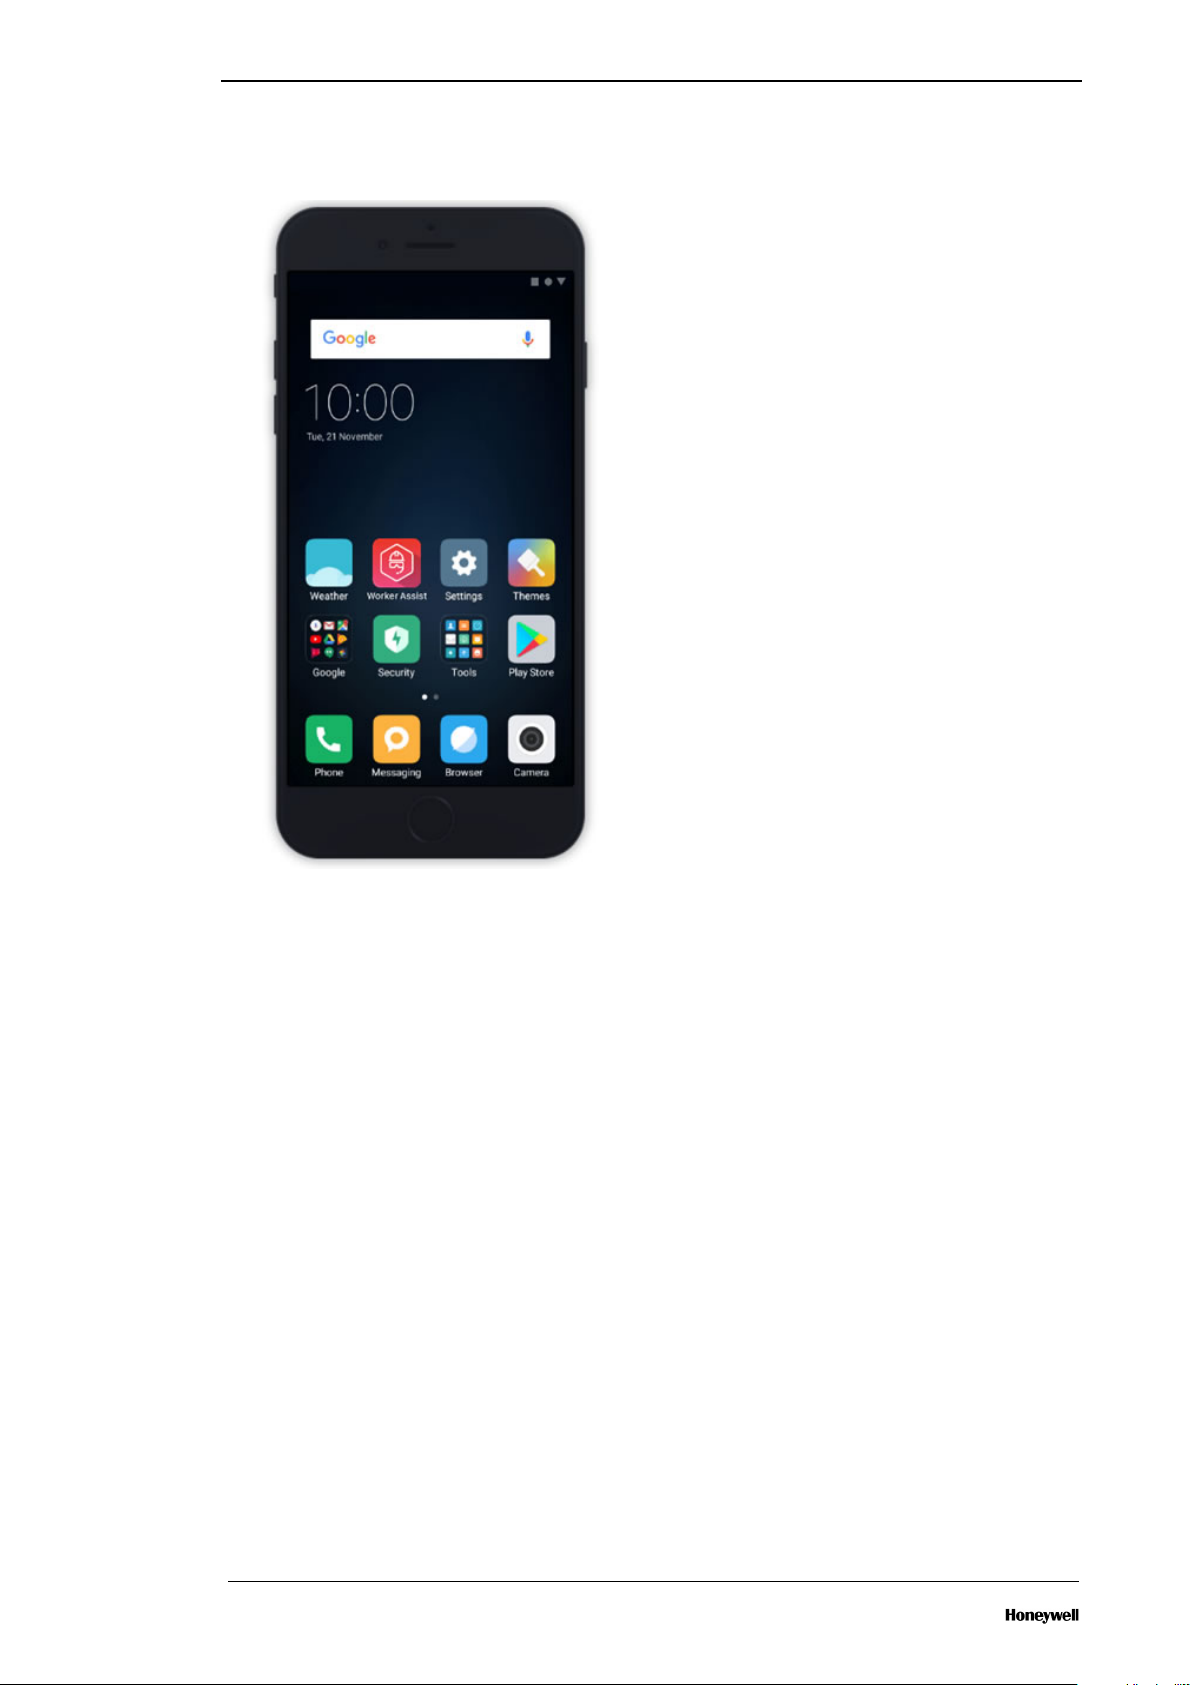
1. Open Play Store.
2. Search for worker assist.
3. Select Honeywell Forge Worker Assist from the search results.
4. Tap Install
5. Tap Open to launch the mobile application.
6. Tap Allow for the device access permission popups.
7. Read the END USER AGREEMENT agreement and tap Agree.
2.2.2 IOS
1. Go to your home screen by pressing the home button (iPhone 8 or older) or swiping up from
2. Tap App Store.
3. Tap the Search option at the bottom-right of the screen.
4. Search for worker assist.
5. Select Honeywell Forge Worker Assist from the search results.
6. Tap Get.
7. Tap Open to launch the mobile application.
8. Tap Allow for the device access permission popups.
9. Read the END USER AGREEMENT agreement and tap Agree.
the bottom of the screen. (iPhone X or newer)
2.3 Sign In
- 6 -
Page 6
1. Open Worker Assist.
Chapter 2 - Getting Started
2. Tap Sign In.
3. Enter your Email or Username.
4. Tap NEXT.
5. Enter your Username / Email and Password.
6. To login directly the next time, check the Remember Me checkbox (Optional).
7. Tap SIGN IN.
You will be directed to the landing page once you have successfully signed in into the
application.
- 7 -
Page 7
Chapter 2 - Getting Started
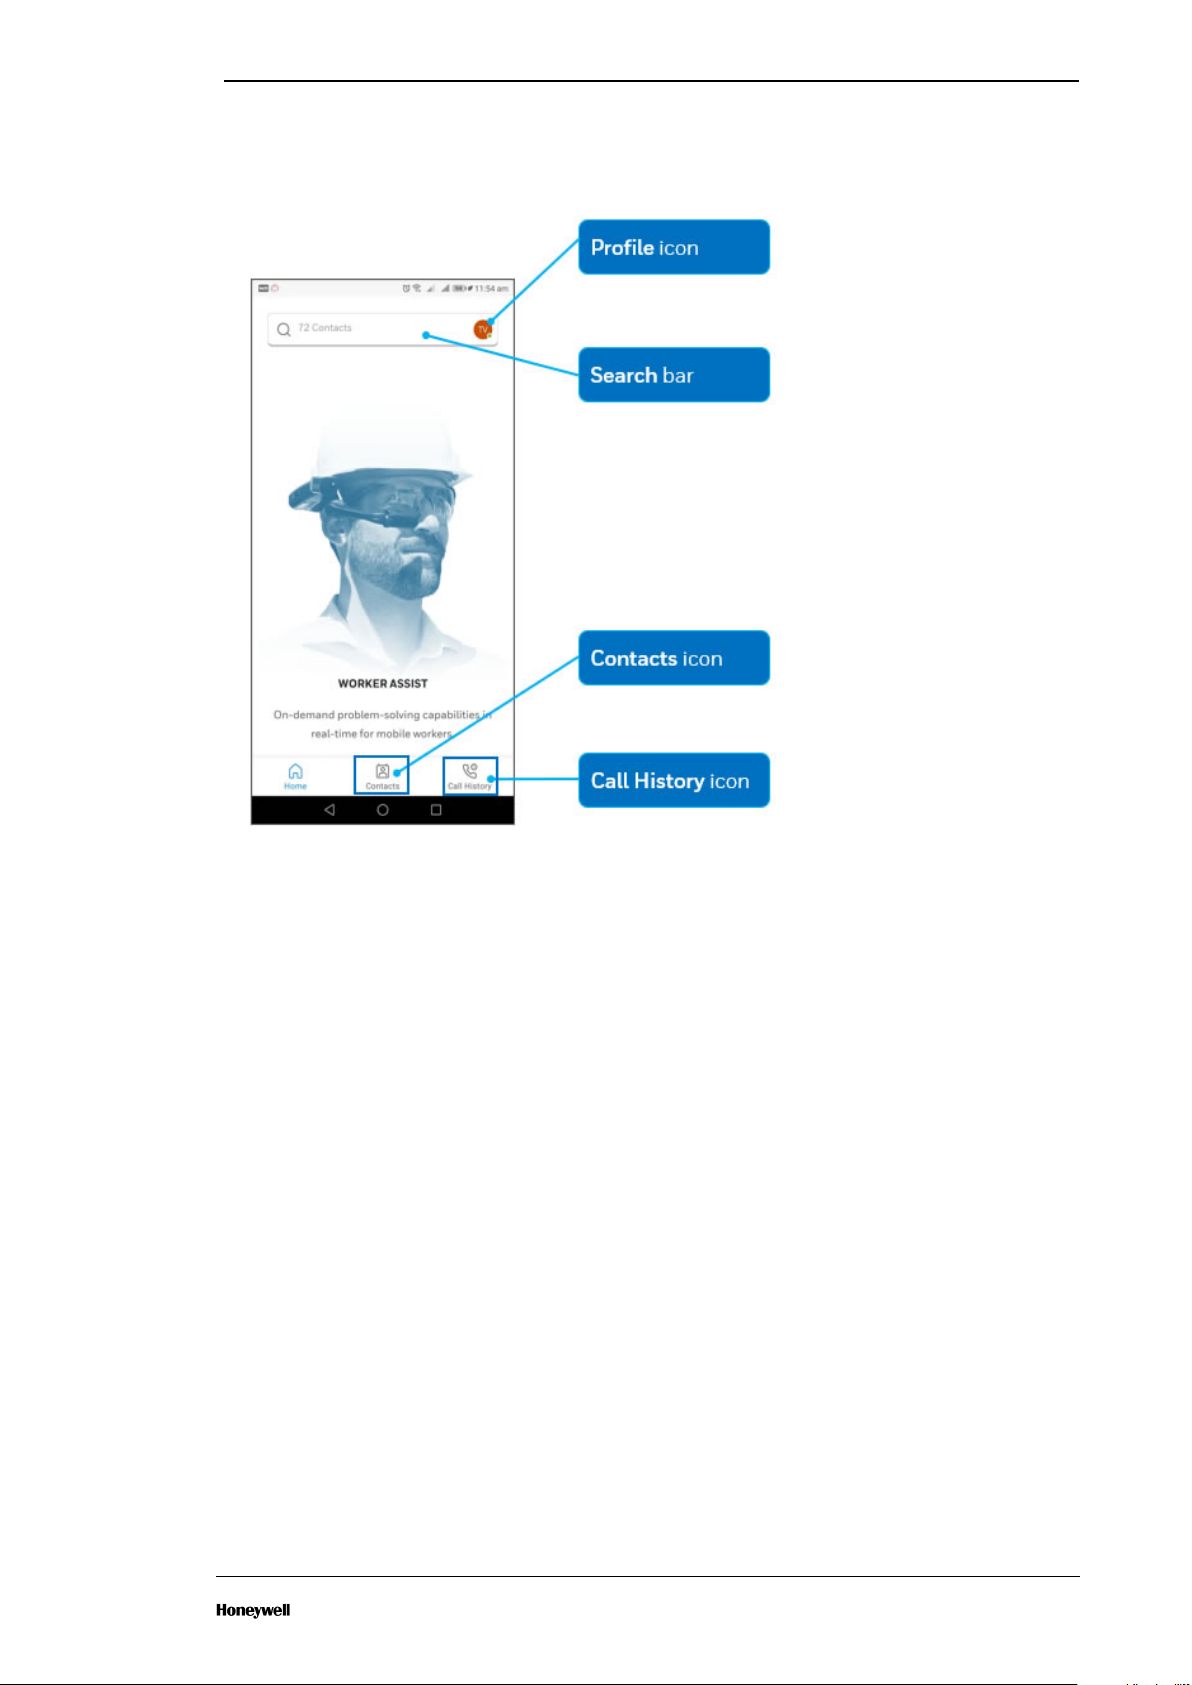
2.4 Understanding User Interface
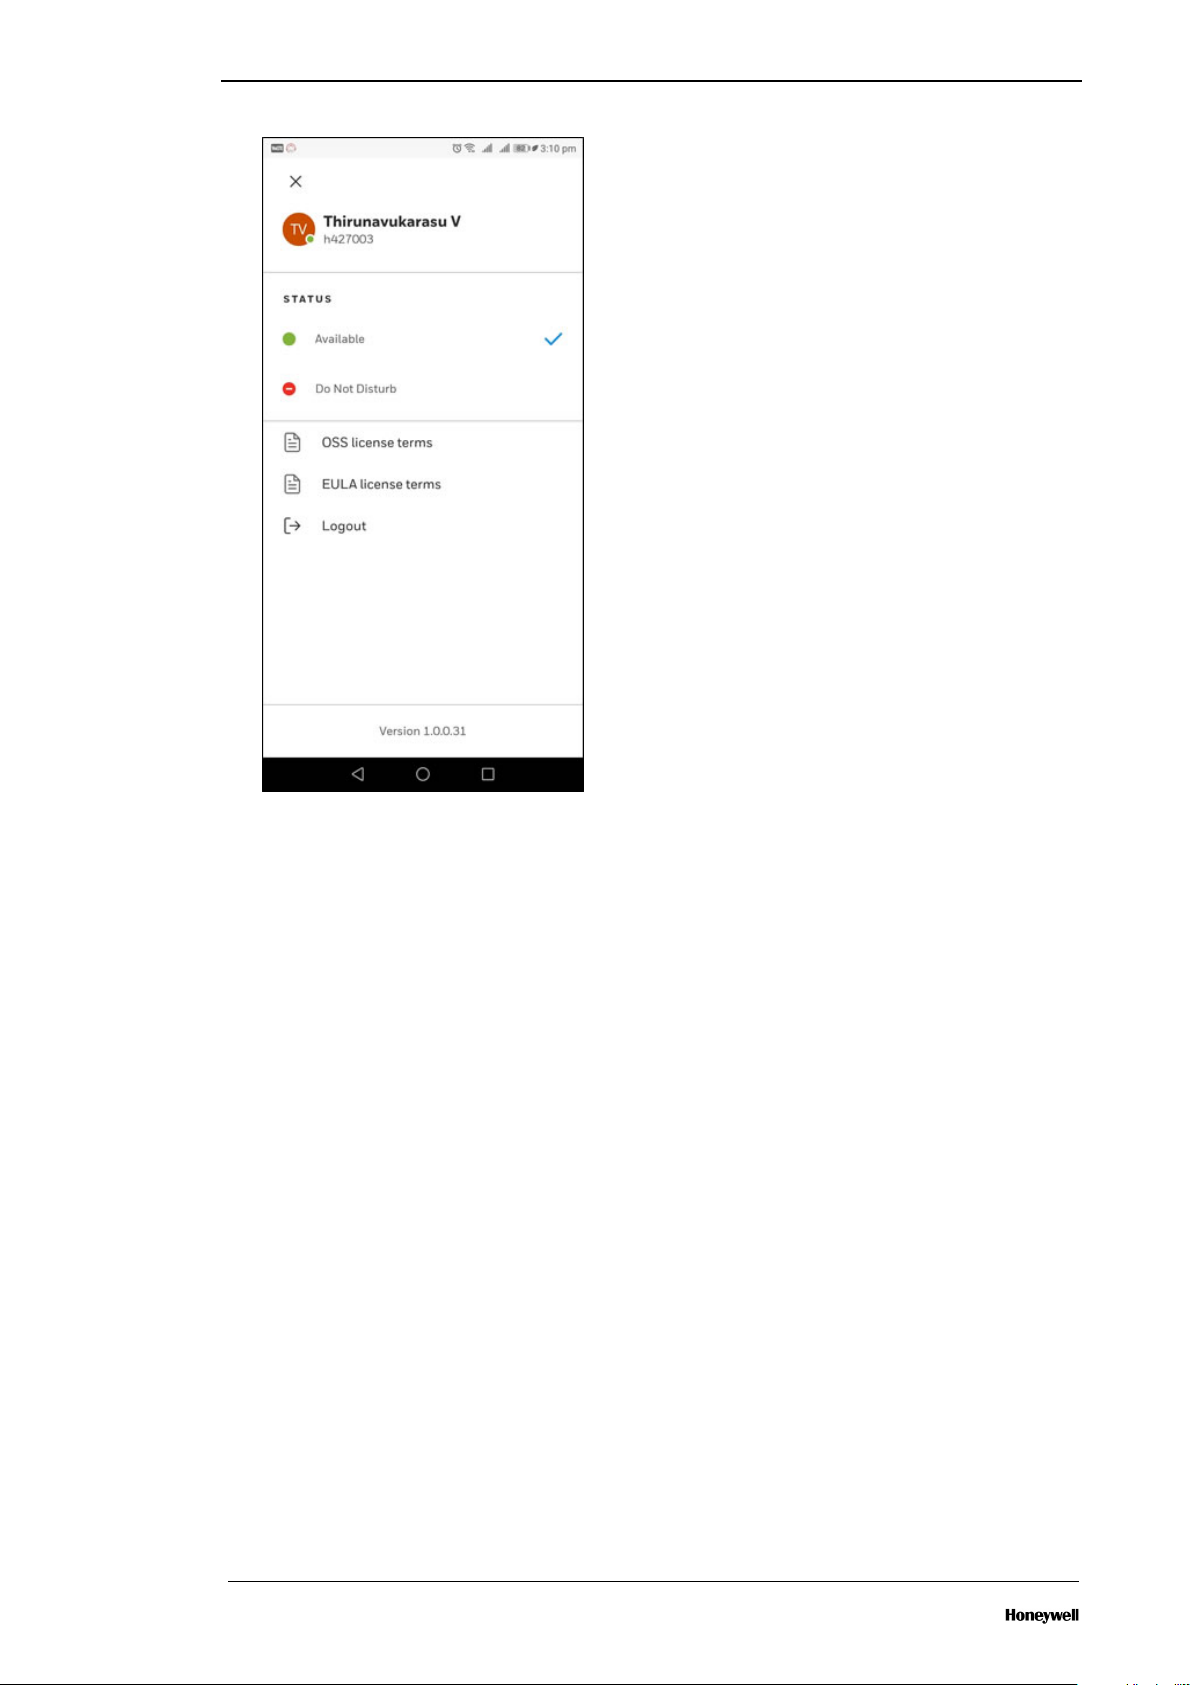
2.5 Status Change
1. To sign out, tap Profile icon.
2. Select the status you want.
- 8 -
Page 8
Chapter 2 - Getting Started
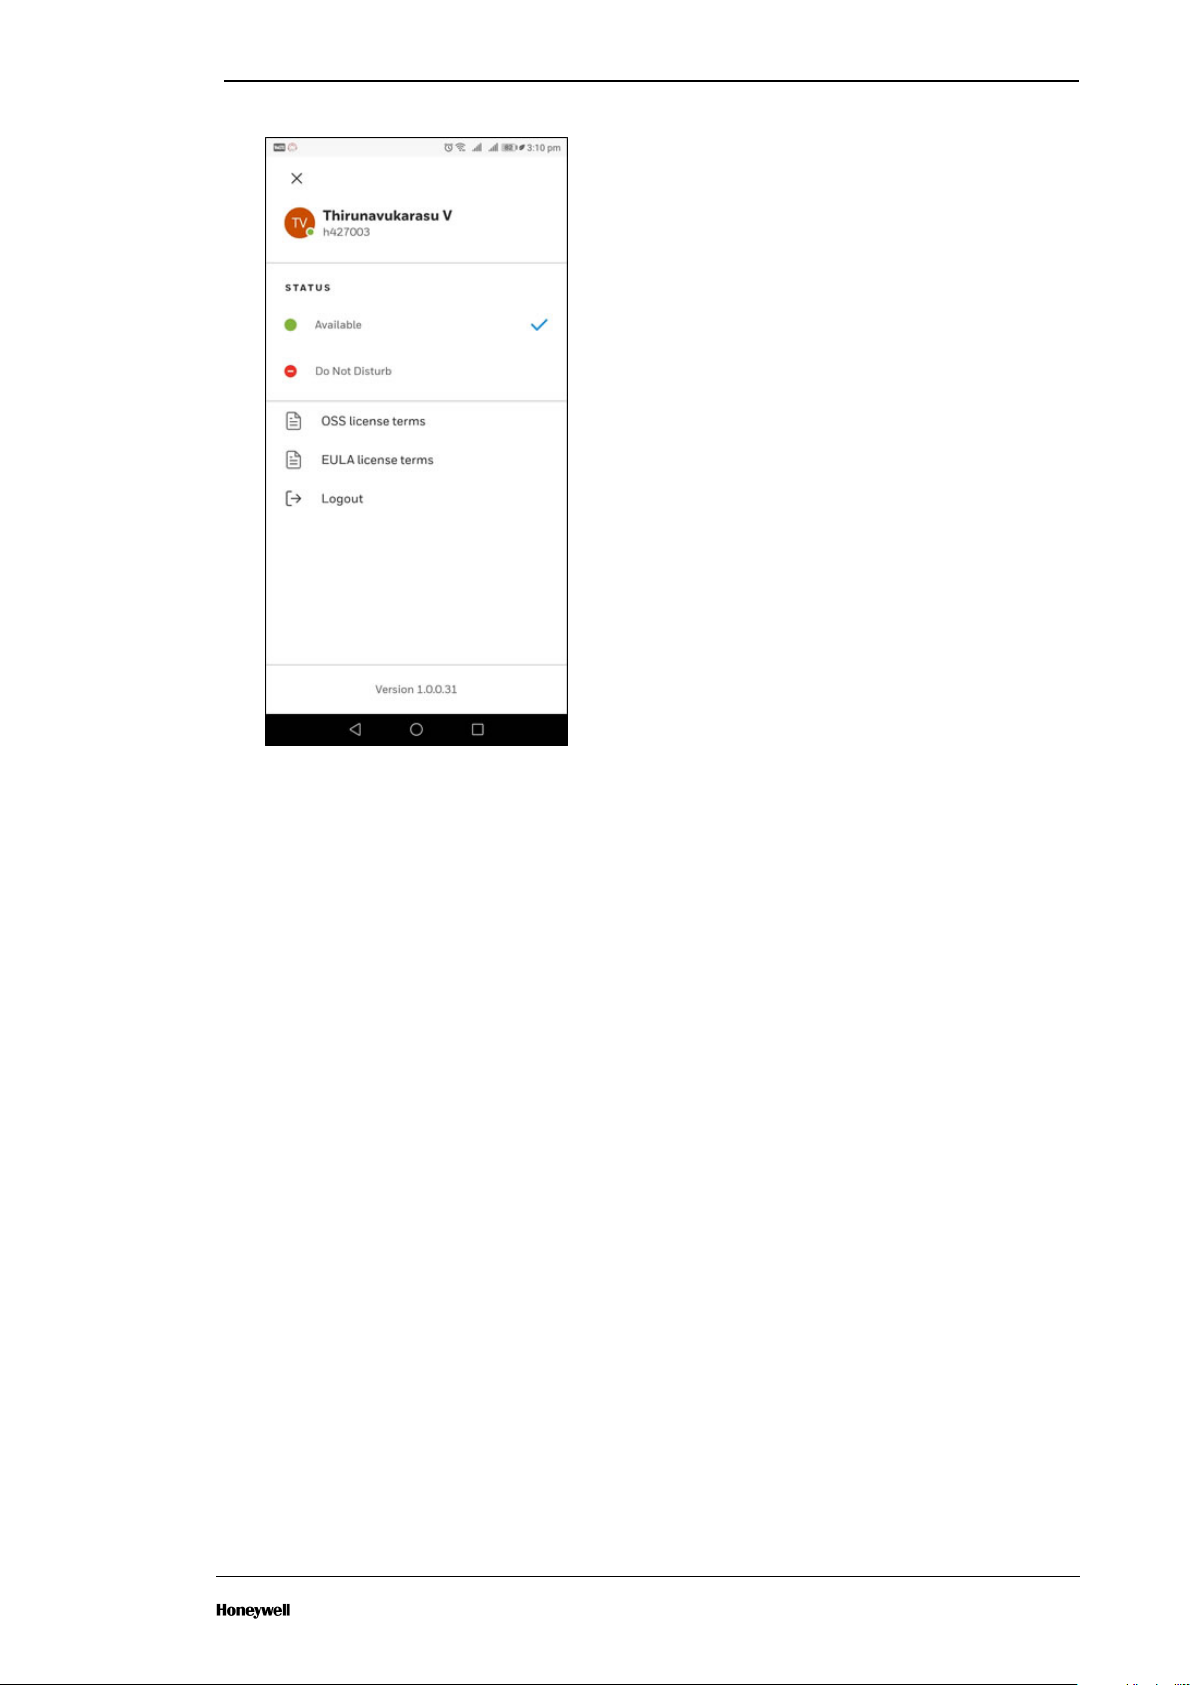
2.6 Sign Out
1. To sign out, tap Profile icon.
2. Select Logout.
- 9 -
Page 9
Chapter 2 - Getting Started
- 10 -
Page 10

CHAPTER
3
Please follow organization password reset practice to reset your password or contact your
organizations Worker Assist administrator to contact Honeywell Cloud Operations team to reset
your password.
FORGOT PASSWORD
- 11 -
Page 11

CHAPTER
4
l Viewing All Contacts
l Viewing Call History
l Viewing Favourites
l Searching Contacts
MANAGING CONTACTS
4.1 Viewing All Contacts
In Worker Assist, users are not added manually. They are always added through the onboarding
process. This process can be carried out only by the administrator.
As a user you can access the contacts by below steps.
1.
To go to contacts, tap .
ALL CONTACTS screen appears.
- 12 -
Page 12

Chapter 4 - Managing Contacts
2. Tap the contact name to view complete details.
You can see the below details.
- 13 -
Page 13
l Contact Name
l Status
l Call button
l To favourite/unfavourite
3. To initiate call from this screen, tap the call button.
4. To favourite/unfavourite any contact, tap the favourites icon.
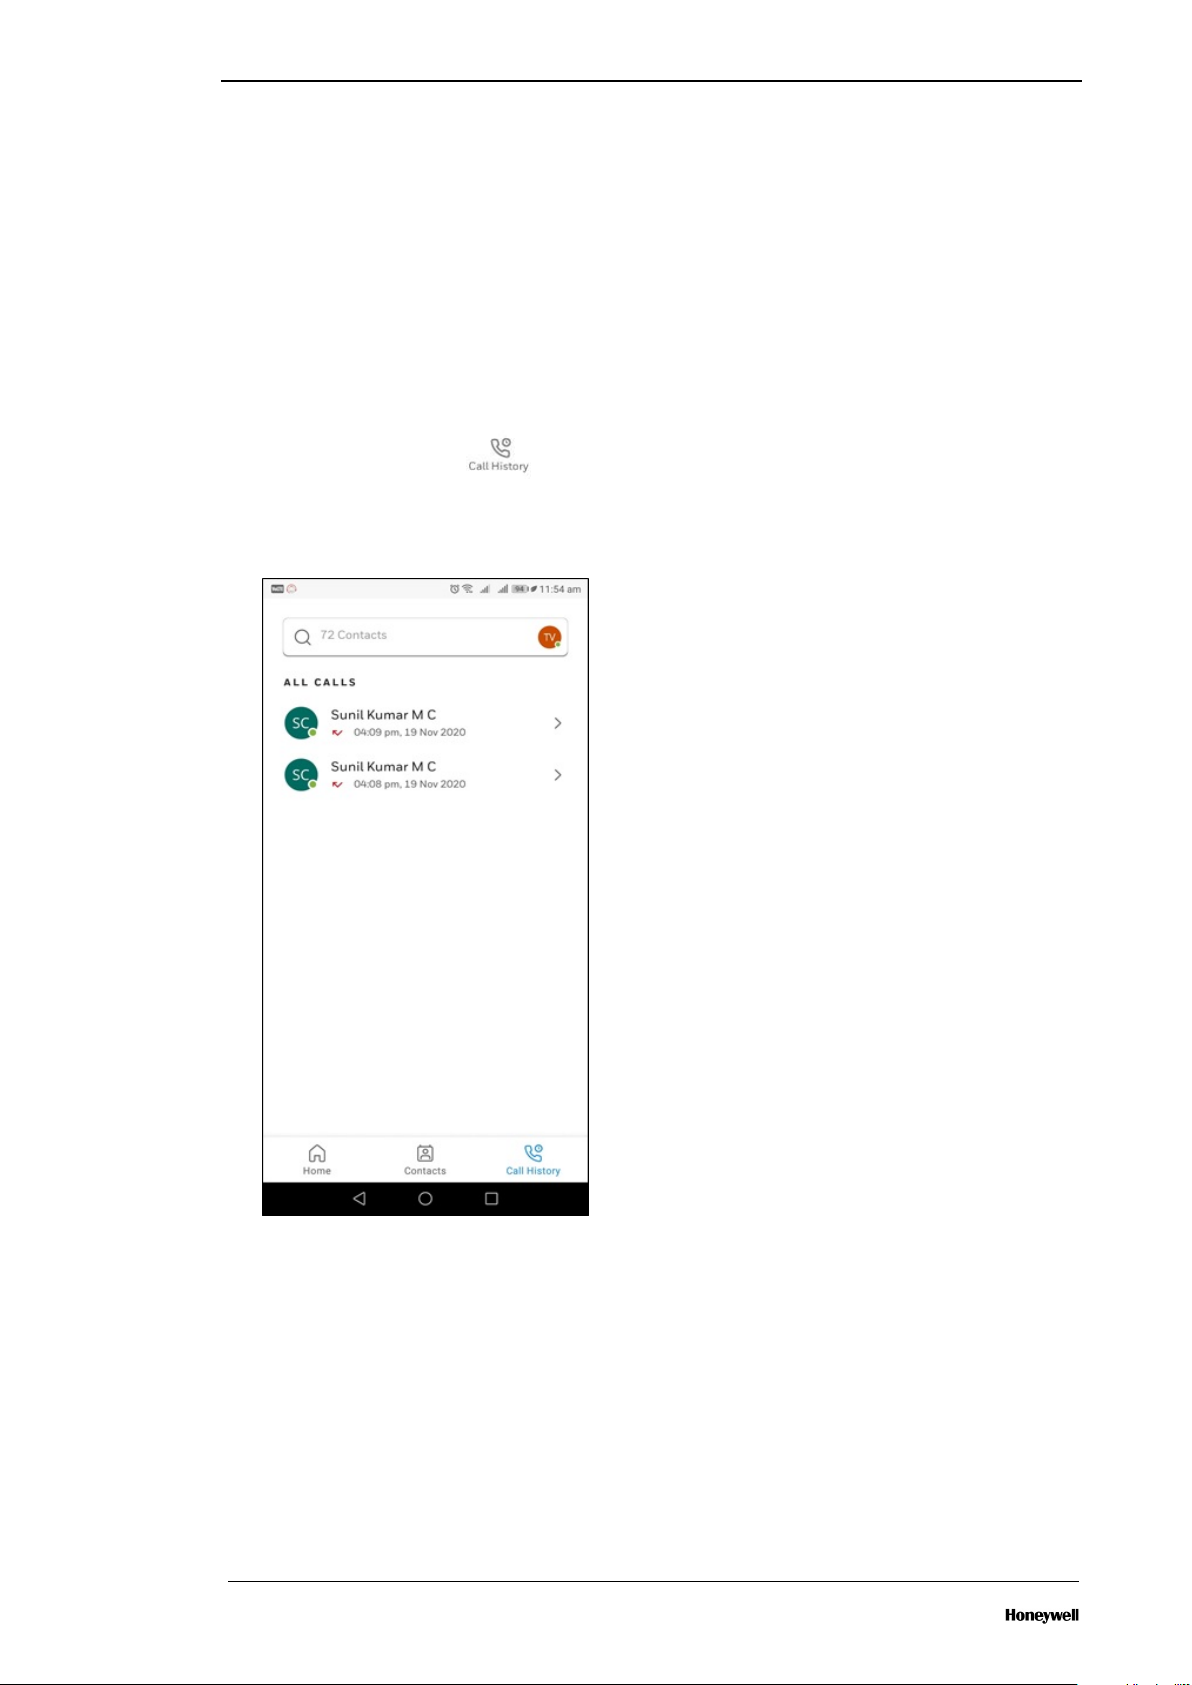
4.2 Viewing Call History
1.
To go to call history, tap .
The ALL CALLS screen appears
Chapter 4 - Managing Contacts
Recently contacted list is displayed in this screen.
l Contact Name
l Status
l Type of call (Incoming/Outgoing/Group Call)
l Date & Time
2. To initiate a call from this screen, tap the name.
- 14 -
Page 14

Chapter 4 - Managing Contacts
4.3 Viewing Favourites
1.
To add any contact to favourites, tap .
2.
To remove any contact from favourites, tap .
4.4 Searching Contacts
1. To search for any contacts, enter the First or Last name of the contact in the search bar.
2. Select the correct contact from the search results.
NOTE Only the onboarded contact names wll be displayed in the search results. To
add a new contact or missing contacts, please contact your Worker Assist
administrator.
- 15 -
Page 15

CHAPTER
5
l Making a Call
l Using In-call Texting
l Making Conference Call
l Inviting Guest User
l Sharing File & Pictures
l Sharing Video Stream
l Controlling Remote Camera
l Sharing Screen
l Using Annotation
l Using Split Screen
l Controlling Resolution
USING THE CALL FEATURES
5.1 Making a Call
1.
To initiate a call, tap .
NOTE
You can call only when the participant status is Available.
- 16 -
Page 16

Chapter 5 - Using the Call Features
2. Once the call is established, below screen appears.
3. Call Control bar options are shown below.
4.
To answer the incoming call, tap .
- 17 -
Page 17

Chapter 5 - Using the Call Features
5.
To mute the microphone, tap .
6.
To unmute the microphone, tap .
7.
To end/disconnect the call, tap .
5.2 Using In-call Texting
In-call texting provides a way to initiate one-on-one conversation or multi-party conversation that
provides immediate notifications and quick answers from field workers and experts.
l Chat in parallel to an active audio/video call
l Multiple users can send text simultaneously
1.
To text, from the call control bar, tap .
2. Tap the free text field.
Keypad appears.
- 18 -
Page 18

Chapter 5 - Using the Call Features
3.
To send the message, type the message in the free text field and tap .
4. Message displayed in the chat.
5.
- 19 -
Page 19

Chapter 5 - Using the Call Features
Messages are displayed in the below format.
l Your message
o
Date & Time
o
Message
l Participant message
o
Name
o
Message
6.
A small red dot appears on the message icon notifying a new message .
For long texts, scroll bar appears.
5.3 Making Conference Call
You can use the conference calling feature to connect with more than one participants at a time
and ensure that all the field tasks are carried out efficiently and timely.
- 20 -
Page 20

Chapter 5 - Using the Call Features
1. To initiate the conference call, you can do any of the following:
l Call any of the participant from the contact list
(OR)
l You can Answer the conference call request.
NOTE You can call/invite others, only when the participant status is
Available.
2. To add more participants, once the call is established, from the call control bar, tap "…".
3. Select Meeting Participants.
Meeting participants screen appears.
- 21 -
Page 21

Chapter 5 - Using the Call Features
In the search box, search by first or last name.
4.
To invite to the conference, from the search results, select the participant name.
- 22 -
Page 22

Chapter 5 - Using the Call Features
5. Now you can find the invited participants under Currently in this call list and number of
participants.
- 23 -
Page 23

Chapter 5 - Using the Call Features
6. Similar way, you/other participant from the conference can add participants.
l Maximum 20 participants are allowed to the conference.
l Each participant can add maximum of two more people onto the call
l Participants can Add/Leave during the conference call.
7. From the Meeting Participants screen, under the Currently in this call list you can do the
following:
l
To mute any of the participant, tap .
l
To unmute any of the participant, tap .
l
To mute all, tap .
l
To remove the participant, tap " " and select Remove From Call.
- 24 -
Page 24

Chapter 5 - Using the Call Features
l
To invite to stream, tap " " and select Invite To Stream.
8. When you get disconnected from the conference call, to re-join, go to the Call History screen
and tap Join Call.
9. While ending the conference call, you can download the chat transcript. To download, tap
Download Chat Transcript.
5.4 Inviting Guest User
1. Once the conference call is established, from the call control bar, tap "…".
2. Select Meeting Participants.
Meeting participants screen appears.
3. In the search bar, enter the guest email id.
From the search results, next to the guest email id, select Invite.
4.
Email invitation sent to the guest user.
- 25 -
Page 25

Chapter 5 - Using the Call Features
NOTE When you enter an invalid guest email id, you will get the following error
message Inviting Guest failed. Please try again.
5. If the guest did not receive the email invitation, you can share through email.
To copy the invitation, tap Copy link.
6. To join, guest user should click “Click here to join the meeting” link.
7. Guest user can use the below credentials to SIGN IN.
l For Username/Email ID, use MeetingId
l For Password, use MeetingCode
8. After entering the credentials, guest user should select Skip for now (14 days until this is
required).
9. Guest user should click Next.
10. Guest user should click JOIN CALL.
11. You should accept the guest user request by clicking on the tick mark.
When you in home screen, following notification appears <Guest email id> wants to join the
call. To accept, tap Admit.
12. Now you can find the invited participant under Currently in this call list.
13. From the Meeting Participants screen, under the Currently in this call list you can do the
following:
l
To mute any of the participant, tap .
l
To unmute any of the participant, tap .
l
To mute all, tap .
l
To remove the participant, tap " " and select Remove From Call.
l
To invite to stream, tap " " and select Invite To Stream.
5.5 Sharing Files & Pictures
- 26 -
Page 26

Chapter 5 - Using the Call Features
1.
To share file/picture, tap next to the free text field in the chat screen.
2. Select one of these options:
l Camera
l Gallery
l Document
3. Select the file and tap Open.
l You can share the file/picture of maximum 5 MB.
l Supported formats are PDF, PNG, JPG/JPEG and TIFF/TIF.
4. Shared file/picture displayed in the chat.
- 27 -
Page 27

Chapter 5 - Using the Call Features
5. Shared file/picture are displayed in below format.
l Your attachment
o
Date & Time
o
Attachment
l Participant attachment
o
Name
o
Attachment
5.6 Sharing Video Stream
Video sharing offers you a direct conversation with your field expert. This makes you feel more
connected. You can initiate the video share during a call simultaneously.
NOTE
l Video stream will be paused when capturing picture during a call
l Only 1 video stream possible at a time. Multiple users cannot stream video
simultaneously
- 28 -
Page 28

Chapter 5 - Using the Call Features
1.
To start video share, from the call control bar, tap .
2.
To stop video share, from the call control bar, tap .
Invite to video share
To request any of the participant to start video sharing, you can follow the below steps.
1. From the call control bar, tap "…" .
2. Select Meeting Participants.
3.
Under Currently in this call, next to the participant name, tap " " and select Invite To
Stream.
5.7 Controlling Remote Camera
Remote camera control feature allows you to control the camera of another user, only during the
video call.
This can be accessed as below.
l Mobile user can access another Mobile and HMT.
l Mobile user cannot access Desktop.
1.
To initiate camera control request, tap .
Camera Control popup appears.
2. Tap Send Request.
You will get the following notification "Remote Camera Control access request sent".
3. To whom you have requested the access will receive a Grant Camera Access popup. They
should approve the request.
4. After the approval, you can control the camera of the other participant.
5. You can do the following:
l Zoom: Zoom level 0-5.
l Flash: Flash ON/OFF.
l Capture Image: Clicking on this button, will share the captured image in the chat
window instantly.
- 29 -
Page 29

NOTE While capturing, other participant will get the countdown (Count of 3)
and notification "Please hold your camera steady".
6. When more than two participants are on the call and when third participant requests for
camera access, following notification appears "User is already sharing their camera controls,
please try again later.".
7.
To stop the remote camera control, tap .
5.8 Sharing Screen
Screen sharing also known as desktop sharing allows you to share your screen with another
device or multiple devices. This can include all the elements on a screen or simply one window,
which allows for complete control over the visibility of your desktop and provides the solutions for
the problems.
You can initiate the screen share during a call simultaneously.
Chapter 5 - Using the Call Features
1.
To initiate screen share, from the call control bar, tap .
2. SelectScreenshare.
3.
To stop screen sharing, from the call control bar tap .
4. SelectStop Screenshare.
5.9 Using Annotation
Annotation allows the user to highlight the area in the picture/image shared to annotate/highlight
during a call. You can select the required shape, color, and alphanumeric entry. Shapes could be
square/circle/arrow.
l Dragging the borders will increase the size
l You can select the color of the annotation
l In a multi-party conference, you can annotate a video/picture and the participants can see the
changes
l The actual video should be running in Picture-In-Picture (PIP) mode when you are annotating
on the pictures shared
l End user (Whose screen is being annotated) have an option to take a picture of the video with
annotation. This feature is available only on Phone and HMT devices.
1.
To initiate annotation, from the call control bar tap .
2. Select the Annotation option.
3. You can select any one of the three options:
l Live Stream: Broadcast in real-time. You will get an option to capture the screen for
annotation.
To capture the screen, tap CAPTURE SCREEN.
- 30 -
Page 30

Chapter 5 - Using the Call Features
l Shared Files: You can use the shared picture for annotation. Before using, you must
download.
l Gallery: You can use/share file/picture from the gallery.
Annotation mode is activated.
Below are the annotation tools.
Additional options in each tools are shown below.
4. You can annotate any specific area in a picture using the available tools.
5.
You can share the annotated image in the chat. To share, tap .
While sharing, you can provide file name and comments in the Share In Chat popup.
- 31 -
Page 31

Chapter 5 - Using the Call Features
Annotated image shared in the chat.
- 32 -
Page 32

Chapter 5 - Using the Call Features
6. When other participant is annotating you can request control by tapping “…” and select
Annotation.
When you request control, you will get the Request Annotation popup. To confirm request, tap
Request Control or tap Cancel.
- 33 -
Page 33

Chapter 5 - Using the Call Features
7. When other participant wants to annotate, they can request control. You will get the
notification.
You can close the annotation by clicking Close Annotation.
The Confirm Close popup appears.
- 34 -
Page 34

Chapter 5 - Using the Call Features
8. To download the annotated image, tap Close Annotation or tap Cancel.
- 35 -
Page 35

Chapter 5 - Using the Call Features
9. When you close the annotation, the Confirm Close popup appears.
l You can download the annotated image by tapping Download Image.
l To close without downloading, tap Close.
- 36 -
Page 36

Chapter 5 - Using the Call Features
5.10 Using Split Screen
During a call, when a participant is sharing their screen or performing annotation, you can switch
stream.
l To switch between the video and the annotation/screen share, tap on the small screen.
Split screen appears as below.
- 37 -
Page 37

Chapter 5 - Using the Call Features
5.11 Controlling Resolution
During the call, you can select the video quality.
l By default, it will be in High (720p).
l When you change the video quality anytime, from next call, the video quality remains the same
as the previously selected one.
- 38 -
Page 38

Chapter 5 - Using the Call Features
1.
From the call control bar tap .
2. Select Video Steaming Quality and choose the video quality you want.
- 39 -
Page 39

Chapter 5 - Using the Call Features
3. When you select the video quality, from next time you will find a tick mark on the selected one.
- 40 -
Page 40

Chapter 5 - Using the Call Features
NOTICES
Trademarks
Experion®, PlantScape®, SafeBrowse®, TotalPlant®, and TDC 3000® are registered trademarks of
Honeywell International, Inc.
ControlEdge™ is a trademark of Honeywell International, Inc.
OneWireless™ is a trademark of Honeywell International, Inc.
Matrikon® and MatrikonOPC™ are trademarks of Matrikon International. Matrikon International is
a business unit of Honeywell International, Inc.
Movilizer® is a registered trademark of Movilizer GmbH. Movilizer GmbH is a business unit of
Honeywell International, Inc.
Trademarks
Experion®, PlantScape®, and SafeBrowse® are registered trademarks of Honeywell International,
Inc.
Trademarks
Experion® and SafeBrowse® are registered trademarks of Honeywell International, Inc.
PlantCruise™ is a trademark of Honeywell International, Inc.
Trademarks
Experion® is a registered trademark of Honeywell International, Inc.
ControlEdge™ is a trademark of Honeywell International, Inc.
OneWireless™ is a trademark of Honeywell International, Inc.
Other Trademarks
Microsoft and SQL Server are either registered trademarks or trademarks of Microsoft Corporation
in the United States and/or other countries.
Trademarks that appear in this document are used only to the benefit of the trademark owner,
with no intention of trademark infringement.
Third-party licenses
This product may contain or be derived from materials, including software, of third parties. The
third party materials may be subject to licenses, notices, restrictions and obligations imposed by
the licensor. The licenses, notices, restrictions and obligations, if any, may be found in the
materials accompanying the product, in the documents or files accompanying such third party
materials, in a file named third_party_licenses on the media containing the product, or at
http://www.honeywell.com/ps/thirdpartylicenses.
Documentation feedback
You can find the most up-to-date documents on the Honeywell Process Solutions support website
at: http://www.honeywellprocess.com/support
If you have comments about Honeywell Process Solutions documentation, send your feedback to:
hpsdocs@honeywell.com
- 41 -
Page 41

Chapter 5 - Using the Call Features
Use this email address to provide feedback, or to report errors and omissions in the
documentation. For immediate help with a technical problem, contact your local Honeywell
Process Solutions Customer Contact Center (CCC) or Honeywell Technical Assistance Center
(TAC).
How to report a security vulnerability
For the purpose of submission, a security vulnerability is defined as a software defect or weakness
that can be exploited to reduce the operational or security capabilities of the software.
Honeywell investigates all reports of security vulnerabilities affecting Honeywell products and
services.
To report a potential security vulnerability against any Honeywell product, please follow the
instructions at:
https://honeywell.com/pages/vulnerabilityreporting.aspx
Support
For support, contact your local Honeywell Process Solutions Customer Contact Center (CCC). To
find your local CCC visit the website, https://www.honeywellprocess.com/en-US/contact-
us/customer-support-contacts/Pages/default.aspx.
Training classes
Honeywell holds technical training classes that are taught by process control systems experts. For
more information about these classes, contact your Honeywell representative, or see
http://www.automationcollege.com.
- 42 -
 Loading...