

Page 1

Honeywell Process Solutions
Experion PKS
Series A Fieldbus Interface
Module
User's Guide
EP-DCX166
R400
July 2010
Release R400
Honeywell
Page 2

Notices and Trademarks
Copyright 2010 by Honeywell International Sárl.
Release R400 July 2010
While this information is presented in good faith and believed to be accurate, Honeywell disclaims
the implied warranties of merchantability and fitness for a particular purpose and makes no
express warranties except as may be stated in its written agreement with and for its customers.
In no event is Honeywell liable to anyone for any indirect, special or consequential damages. The
information and specifications in this document are subject to change without notice.
Honeywell, PlantScape, Experion PKS, and TotalPlant are registered trademarks of Honeywell
International Inc.
Other brand or product names are trademarks of their respective owners.
Honeywell Process Solutions
1860 W. Rose Garden Lane
Phoenix, AZ 85027 USA
1-800 822-7673
ii Experion PKS Series A Fieldbus Interface Module User's Guide R400
Honeywell July 2010
Page 3

About This Document
Provides guidelines and procedures for interf aci ng fi el d bu s devi ces with an Experion system. It
includes module installation, configuration, operation, maintenance, and FOUNDATION
Fieldbus reference data.
Release Information
Document Name Document ID
Release
Number
Publication
Date
Series A Fieldbus Interface Module User's
Guide - figd
Document Category
Purpose
EP-DCX166 R400 July 2010
R400 Experion PKS Series A Fieldbus Interface Module User's Guide iii
July 2010 Honeywell
Page 4

Support and Other Contacts
Support and Other Contacts
United States and Canada
Europe, Middle East, and Africa (EMEA)
Contact:
Phone:
Fascimile:
Mail:
Contact:
Phone:
Fascimile:
Mail:
Honeywell Solution Support Center
1-800-822-7673
Calls are answered by dispatcher between 6:00 am and 4:00 pm
Mountain Standard Time. Emergency calls outside normal working hours
are received by an answering service and returned within one hour.
1-973-455-5000
Honeywell TAC, MS L17
1860 W. Garden Lane
Phoenix, AZ, 85027 USA
Honeywell TAC-EMEA
+32-2-728-2345
+32-2-728-2696
TAC-BE02
Hermes Plaza
Hermeslaan, 1H
B-1831 Diegem, Belgium
Pacific
Contact:
Phone:
Fascimile:
Mail:
Email:
Honeywell Global TAC – Pacific
1300-364-822 (toll free within Australia)
+61-8-9362-9559 (outside Australia)
+61-8-9362-9564
Honeywell Limited Australia
5 Kitchener Way
Burswood 6100, Western Australia
GTAC@honeywell.com
India
iv Experion PKS Series A Fieldbus Interface Module User's Guide R400
Honeywell July 2010
Contact:
Phone:
Fascimile:
Mail:
Email:
Honeywell Global TAC – India
+91-20- 6603-9400
+91-20- 6603-9800
Honeywell Automation India Ltd
56 and 57, Hadapsar Industrial Estate
Hadapsar, Pune –411 013, India
Global-TAC-India@honeywell.com
Page 5

Korea
Contact:
Phone:
Fascimile:
Mail:
Email:
Honeywell Global TAC – Korea
+82-2-799-6317
+82-2-792-9015
Honeywell Co., Ltd
4F, Sangam IT Tower
1590, DMC Sangam-dong, Mapo-gu
Seoul, 121-836, Korea
Global-TAC-Korea@honeywell.com
People’s Republic of China
Contact:
Phone:
Mail:
Email:
Honeywell Global TAC – China
+86- 21-2219-6888
800-820-0237
400-820-0386
Honeywell (China) Co., Ltd
33/F, Tower A, City Center, 100 Zunyi Rd.
Shanghai 200051, People’s Republic of China
Global-TAC-China@honeywell.com
Singapore
Contact:
Phone:
Fascimile:
Mail:
Email:
Honeywell Global TAC – South East Asia
+65-6580-3500
+65-6580-3501
+65-6445-3033
Honeywell Private Limited
Honeywell Building
17, Changi Business Park Central 1
Singapore 486073
GTAC-SEA@honeywell.com
Support and Other Contacts
Taiwan
R400 Experion PKS Series A Fieldbus Interface Module User's Guide v
July 2010 Honeywell
Contact:
Phone:
Fascimile:
Mail:
Email:
Honeywell Global TAC – Taiwan
+886-7-536-2567
+886-7-536-2039
Honeywell Taiwan Ltd.
17F-1, No. 260, Jhongshan 2nd Road.
Cianjhen District
Kaohsiung, Taiwan, ROC
Global-TAC-Taiwan@honeywell.com
Page 6

Support and Other Contacts
Japan
Contact:
Phone:
Fascimile:
Mail:
Email:
Honeywell Global TAC – Japan
+81-3-6730-7160
+81-3-6730-7228
Honeywell Japan Inc.
New Pier Takeshiba, South Tower Building,
20th Floor, 1-16-1 Kaigan, Minato-ku,
Tokyo 105-0022, Japan
Global-TAC-JapanJA25@honeywell.com
Elsewhere
Call your nearest Honeywell office.
World Wide Web
Honeywell Solution Support Online:
http://www.honeywell.com/ps
Training Classes
Honeywell Automation College:
http://www.automationcollege.com
vi Experion PKS Series A Fieldbus Interface Module User's Guide R400
Honeywell July 2010
Page 7
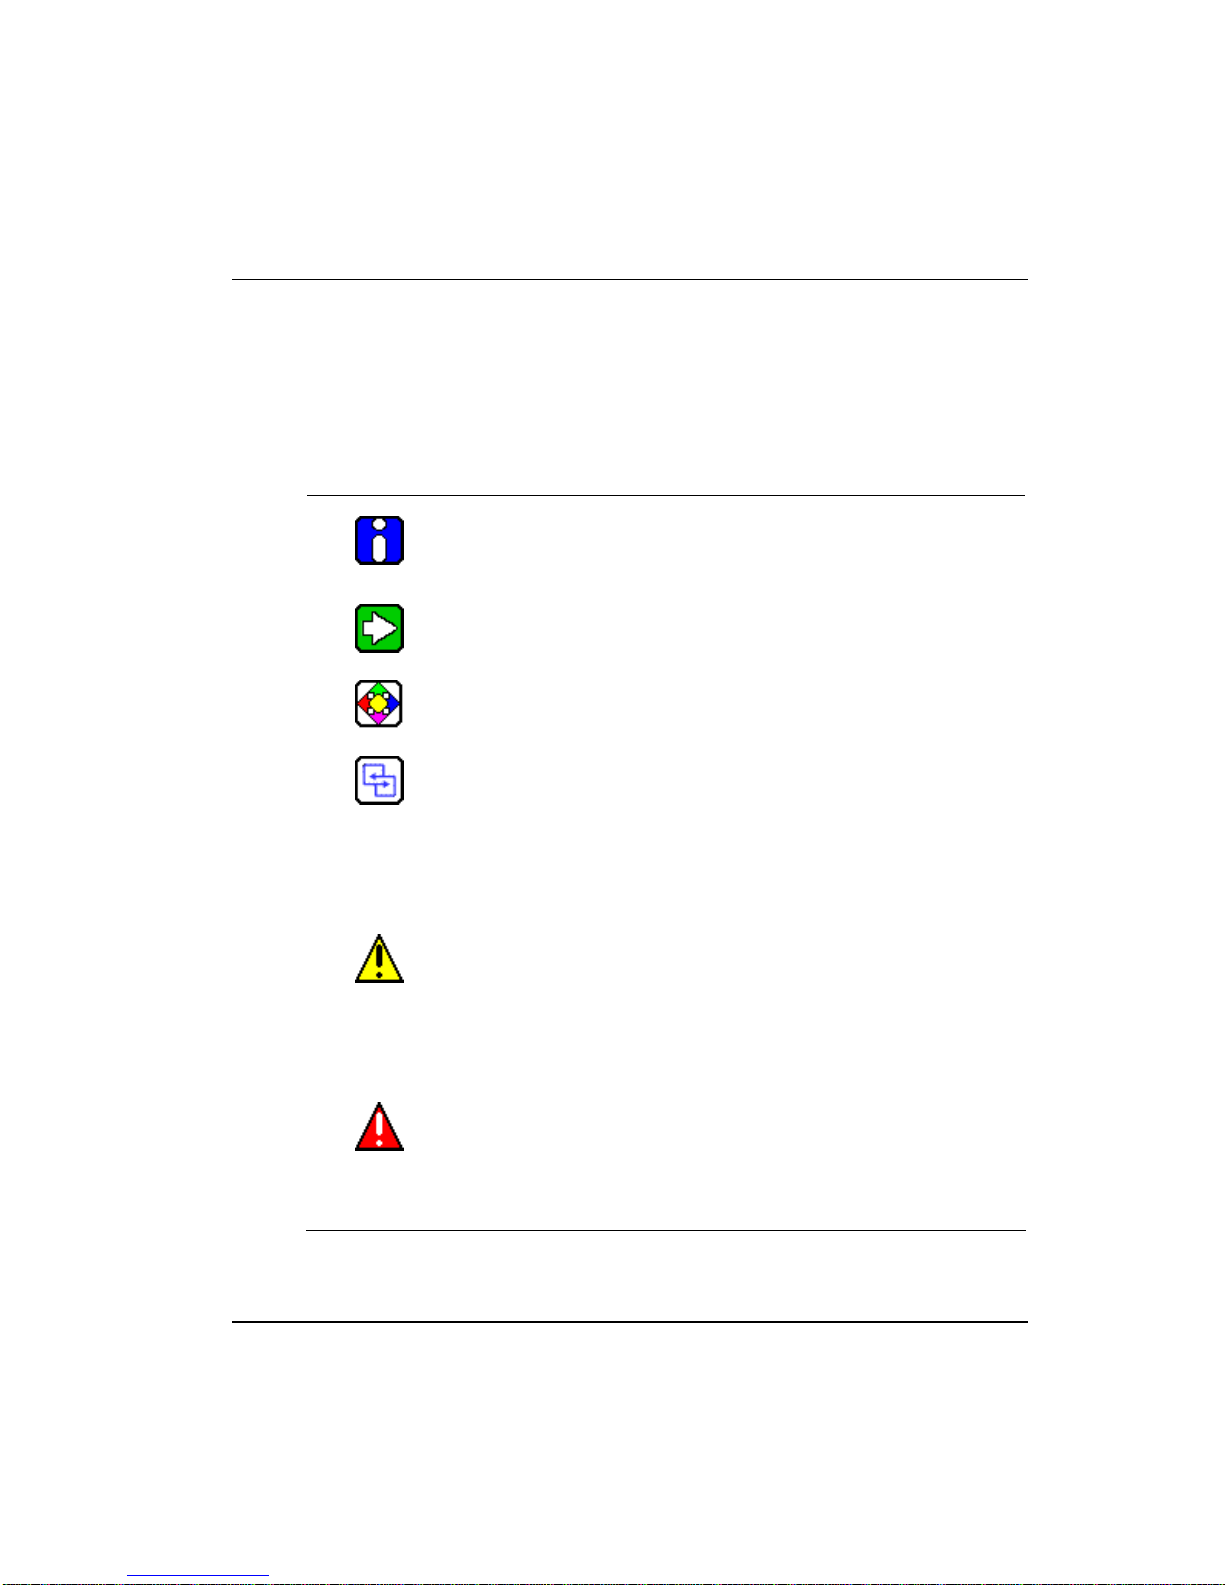
Symbol Definitions
Symbol Definitions
The following table lists those symbols used in this document to denote certain conditio ns.
Symbol Definition
CAUTION
ATTENTION: Identifies information that requires special
consideration.
TIP: Identifies advice or hints for the user, often in terms of
performing a task.
REFERENCE -EXTERNAL: Identifies an additional source of
information outside of the bookset.
REFERENCE - INTERNAL: Identifies an additional source of
information within the bookset.
Indicates a situation which, if not avoided, may result in equipment
or work (data) on the system being damaged or lost, or may result in
the inability to properly operate the process.
CAUTION: Indicates a potentially hazardous situation which, if not
avoided, may result in minor or moderate injury. It may also be used
to alert against unsafe practices.
CAUTION symbol on the equipment refers the user to the product
manual for additional information. The symbol appears next to
required information in the manual.
WARNING: Indicates a potentially hazardous situation, which, if not
avoided, could result in serious injury or death.
WARNING symbol on the equipment refers the user to the product
manual for additional information. The symbol appears next to
required information in the manual.
R400 Experion PKS Series A Fieldbus Interface Module User's Guide vii
July 2010 Honeywell
Page 8
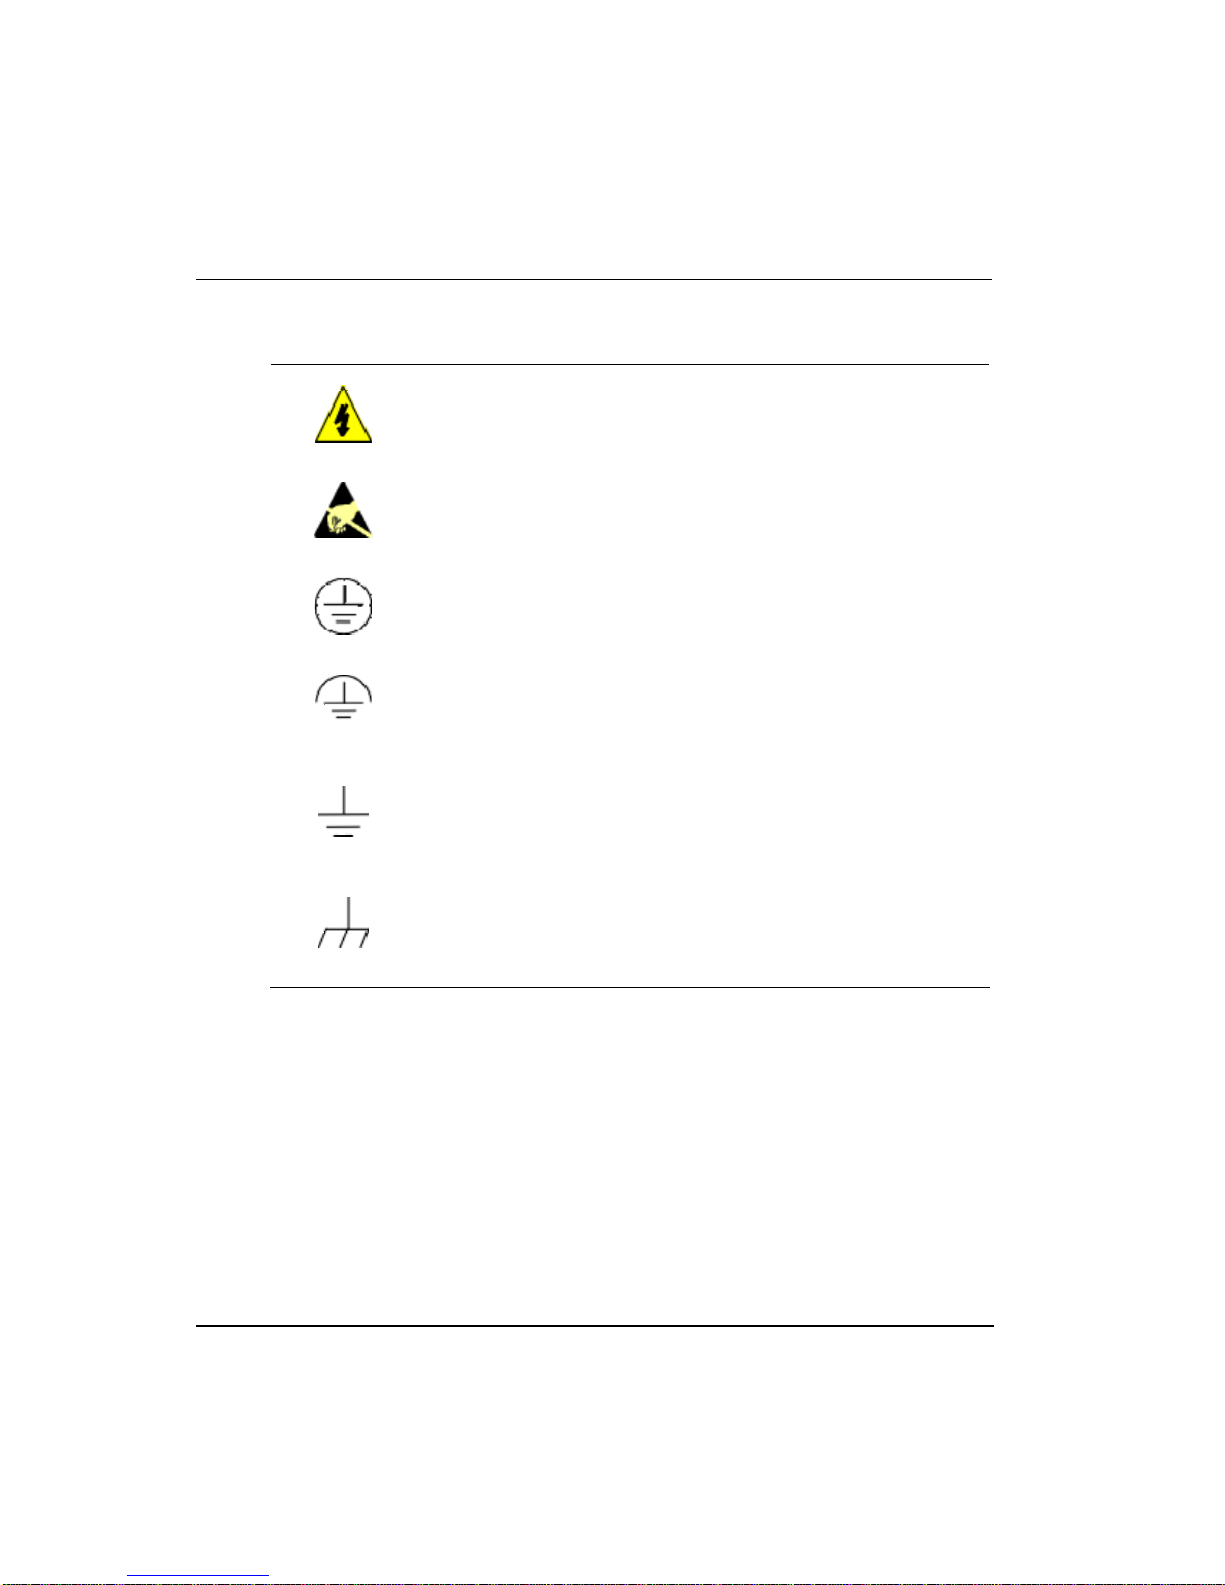
Symbol Definitions
Symbol Definition
WARNING, Risk of electrical shock: Potential shock hazard where
HAZARDOUS LIVE voltages greater than 30 Vrms, 42.4 Vpeak, or
60 VDC may be accessible.
ESD HAZARD: Danger of an electro-static discharge to which
equipment may be sensitive. Observe precautions for handling
electrostatic sensitive devices.
Protective Earth (PE) terminal: Provided for connection of the
protective earth (green or green/yellow) supply system conductor.
Functional earth terminal: Used for non-safety purposes such as
noise immunity improvement. NOTE: This connection shall be
bonded to Protective Earth at the source of supply in accordance
with national local electrical code requirements.
Earth Ground: Functional earth connection. NOTE: This
connection shall be bonded to Protective Earth at the source of
supply in accordance with national and local electrical code
requirements.
Chassis Ground: Identifies a connection to the chassis or frame of
the equipment shall be bonded to Protective Earth at the source of
supply in accordance with national and local electrical code
requirements.
viii Experion PKS Series A Fieldbus Interface Module User's Guide R400
Honeywell July 2010
Page 9

Contents
1. INTRODUCTION ..........................................................................23
1.1 Where to look for information......................................................................23
Contents guide.....................................................................................................................23
1.2 Conventions...................................................................................................24
Terms and type representations...........................................................................................24
2. WHAT IS FIELDBUS?..................................................................27
2.1 Fieldbus Organization ..................................................................................27
About the Fieldbus Foundation ............................................................................................27
Want more information?.......................................................................................................27
2.2 Fieldbus Technology .................................................................................... 27
Reference.............................................................................................................................27
2.3 Fieldbus Terms..............................................................................................27
Description...........................................................................................................................27
3. FIELDBUS INTEGRATION WITH EXPERION SYSTEM.............33
3.1 Overview ........................................................................................................33
Background..........................................................................................................................33
CIOM-A FIM versus Series C FIM........................................................................................33
Non-Redundant Fieldbus integrated architecture for CIOM-A FIM.......................................34
Redundant Fieldbus integrated architecture for CIOM-A FIM ..............................................35
Fieldbus Interface Module (FIM) - the key to integration......................................................37
Redundancy Module - the key to redundant operation.........................................................37
Control Builder serves as common configuration tool ..........................................................37
Parameter Definition Editor serves as key interoperability tool ............................................39
Parameter Definition Editor supports Fieldbus Methods......................................................40
Station provides centralized operator interface....................................................................41
3.2 Control Integration........................................................................................42
FIM handles data integration................................................................................................42
About link object...................................................................................................................42
Network Management description ........................................................................................42
System Management description.........................................................................................43
About device objects............................................................................................................43
About VFD objects...............................................................................................................43
Type creation makes integration possible............................................................................44
R400 Experion PKS Series A Fieldbus Interface Module User's Guide ix
July 2010 Honeywell
Page 10

Contents
Fieldbus device Analog Input integration............................................................................. 44
Fieldbus Analog Input data manipulation ............................................................................ 45
Fieldbus device Analog Output or PID integration............................................................... 46
Fieldbus Analog Output or PID data manipulation............................................................... 48
Fieldbus device Discrete Input integration........................................................................... 50
Fieldbus Discrete Input data manipulation .......................................................................... 51
Fieldbus device Discrete Output data integration................................................................ 52
Fieldbus Discrete Output data manipulation........................................................................ 53
Interface Connections Summary......................................................................................... 54
A word about SCM parameter interaction ........................................................................... 54
Fieldbus status data details................................................................................................. 55
Fieldbus status indications .................................................................................................. 57
3.3 Control Mode Interaction..............................................................................57
Fieldbus block modes versus control modes....................................................................... 57
Control mode priorities and indications ............................................................................... 59
Rotary Switch Model versus Toggle Switch Model.............................................................. 61
Display indications and mode calculation............................................................................ 62
Access control through GRANT_DENY parameter............................................................. 63
3.4 Link and Block Schedules............................................................................64
Link Active Scheduler (LAS) and Link Master ..................................................................... 64
Link Schedule...................................................................................................................... 66
Function block execution schedule...................................................................................... 67
3.5 Tags, Addresses, and Live List....................................................................69
Tag and address assignments ............................................................................................ 69
A word about fieldbus address assignments in Control Builder........................................... 70
Live List and Uncommissioned Devices.............................................................................. 70
3.6 Notification Scheme......................................................................................71
Fieldbus versus Experion Alarm Priorities........................................................................... 71
Advanced Alarming............................................................................................................. 73
Fieldbus Alarm Conditions .................................................................................................. 73
Loading alarm conditions .................................................................................................... 77
Alarm server operation........................................................................................................ 77
3.7 CIOM-A FIM Redundancy Functionality......................................................78
About CIOM-A FIM redundancy.......................................................................................... 78
CIOM-A FIM versus C200 CPM redundancy....................................................................... 79
Switchover and Secondary readiness................................................................................. 80
Switchover behavior considerations.................................................................................... 81
Failure conditions and switchover ....................................................................................... 82
Fieldbus network switchover considerations....................................................................... 83
Switchover versus fieldbus network activities...................................................................... 84
Switchover events............................................................................................................... 86
3.8 Block Instantiation Support..........................................................................86
About instantiable blocks..................................................................................................... 86
Control Builder supports block instantiation ........................................................................ 86
x Experion PKS Series A Fieldbus Interface Module User's Guide R400
Honeywell July 2010
Page 11

Contents
Instantiable block implementation considerations ................................................................87
4. INSTALLATION ...........................................................................99
4.1 Planning Considerations..............................................................................99
Experion system references.................................................................................................99
Installation declaration .........................................................................................................99
CIOM-A FIM and I/O module allowance...............................................................................99
CIOM-A FIM only chassis configuration considerations.....................................................100
Fieldbus component references.........................................................................................101
Fieldbus network references..............................................................................................102
Fieldbus wiring selection and calculation...........................................................................103
Intrinsically safe applications..............................................................................................104
4.2 Installing CIOM-A Fieldbus Interface Module TC-FFIF01........................104
Front View..........................................................................................................................104
Inserting module in chassis................................................................................................105
Connecting RTP cable to module.......................................................................................107
Loading FIM firmware ........................................................................................................108
4.3 Installing Fieldbus RTP TC-FFRU01/TC-FFRP02 or RRTP TC-FFSU01/TC-
FFSP02....................................................................................................................109
Front view...........................................................................................................................109
Mounting on a DIN rail .......................................................................................................110
Mounting Dimensions.........................................................................................................111
Wiring.................................................................................................................................112
5. CONFIGURATION .....................................................................117
5.1 Before You Start..........................................................................................117
What do you know about Control Builder?.........................................................................117
Do you know how to configure a Control Processor Module?............................................117
Can you configure a Control Module?................................................................................117
Are you familiar with your system architecture?.................................................................117
Do you understand and have experience with fieldbus?....................................................117
Are you Ready? .................................................................................................................118
5.2 Non-Experion Interface Precautions.........................................................118
5.3 Free VCR Recommendation....................................................................... 119
5.4 Configuring Fieldbus Components In a Control Strategy ...................... 120
About control strategy configuration...................................................................................120
Example Application and Control Strategy for Procedural Reference................................120
Configuration considerations only for redundant CIOM-A FIM applications.......................122
Adding CIOM-A FIM block to Project .................................................................................123
Checking link configuration ................................................................................................133
Creating a Fieldbus device type from vendor DD...............................................................141
R400 Experion PKS Series A Fieldbus Interface Module User's Guide xi
July 2010 Honeywell
Page 12

Contents
Editing device block parameters........................................................................................ 145
Adding a fieldbus device to Project ................................................................................... 146
Assigning a device to a Link in Project.............................................................................. 151
Checking device configuration........................................................................................... 154
Making fieldbus block template and assigning function block to device............................ 164
Creating Control Module for sample PID loop - Optional................................................... 172
5.5 Loading Components Online......................................................................202
About load operations ....................................................................................................... 202
About Load Dialog box...................................................................................................... 204
Load order guidelines........................................................................................................ 205
General load considerations.............................................................................................. 206
Fieldbus device states....................................................................................................... 206
Fieldbus device matching rules......................................................................................... 207
Loading a CIOM-A FIM and its Links................................................................................. 208
Matching uncommissioned device to project device or vice versa .................................... 211
Loading Link contents or fieldbus device........................................................................... 219
5.6 Configuring Advanced Alarming ...............................................................225
Overview........................................................................................................................... 225
Opening the Configuration dialog box............................................................................... 226
Configuring/creating a condition........................................................................................ 227
Managing the conditions ................................................................................................... 230
Enabling or disabling a condition ....................................................................................... 230
Assigning criticalities and priorities.................................................................................... 232
Editing an existing condition.............................................................................................. 233
5.7 Block Offnet Diagnostic Alarm...................................................................234
Behavior of the Block Offnet and Device Offnet System alarms in various communication loss
scenarios........................................................................................................................... 235
Behavior of the Block Offnet and Device Offnet System alarms in various operational
scenarios........................................................................................................................... 236
5.8 Configuring non-cache parameters...........................................................238
5.9 Summary ......................................................................................................240
6. OPERATION..............................................................................243
6.1 Monitoring Fieldbus Functions Through Station Displays.....................243
Using Station Detail displays............................................................................................. 243
6.2 Foundation Fieldbus Detail Displays/Faceplates.....................................244
Detail Displays contents based on FF control points loading............................................ 245
Naming conventions for Detail Displays............................................................................ 245
Tabs of FF Detail Displays................................................................................................ 246
Detail Displays tabs of the different Foundation Fieldbus blocks....................................... 247
Common functionalities of faceplates................................................................................ 250
FF Detail Displays example templates for Control Builder ................................................ 252
xii Experion PKS Series A Fieldbus Interface Module User's Guide R400
Honeywell July 2010
Page 13

Contents
Using Station Event Summary display...............................................................................252
6.3 Monitoring Fieldbus Functions Through Monitoring Tab.......................253
Inactivating/Activating a Link..............................................................................................253
Monitoring/Interacting with given component/block............................................................256
Checking/changing fieldbus device functional class...........................................................257
Checking live list and interacting with uncommissioned devices........................................264
Viewing and optimizing Link schedule configuration..........................................................267
CheckingCIOM-A FIM redundancy status and initiating manual switchover ......................273
Using Controller menu functions........................................................................................275
7. FIELDBUS DEVICE COMMISSIONING.....................................277
7.1 Getting Started ............................................................................................277
Read this first.....................................................................................................................277
Initial checks and operations..............................................................................................279
7.2 Connecting Devices....................................................................................280
7.3 Checking Device..........................................................................................282
7.4 Checking Control Strategy.........................................................................283
7.5 Flowchart Summary....................................................................................284
8. MAINTENANCE, CHECKOUT, AND CALIBRATION................287
8.1 Adding, Removing and Replacing Components......................................287
About removal and insertion under power (RIUP)..............................................................287
General procedure .............................................................................................................287
Guidelines for adding fieldbus device to "live"/operating Link ............................................288
Using optional safe handling of new devices......................................................................289
Replacing a failed device with a like device having the same model name and device revision
...........................................................................................................................................290
Replacing a failed device with a different device using a different block type ....................297
8.2 Unlike Device Replacement Report...........................................................317
8.3 Replacing Device Template with a Different One ....................................320
Prerequisites......................................................................................................................320
Considerations...................................................................................................................321
Using Unlike Template Replacement wizard to make device replacements......................321
8.4 Correcting Some Common UTR errors.....................................................328
8.5 Upgrading Firmware in Uncommissioned Device...................................328
8.6 Changing or Clearing Tag and/or Address of Uncommissioned Device332
8.7 Using Fieldbus Device Simulate Function ...............................................334
R400 Experion PKS Series A Fieldbus Interface Module User's Guide xiii
July 2010 Honeywell
Page 14

Contents
8.8 Preparing Fieldbus Device for a Move or Software Migration................343
Migrating Fieldbus device type to a release supporting Enable Block Offnet Diagnostic Alarm
.......................................................................................................................................... 347
8.9 Interpreting Component LED Indications .................................................348
CIOM-A FIM LED indications ............................................................................................ 348
8.10 FIM Self-Test Diagnostic Codes .............................................................349
8.11 Checking Fieldbus Device Calibration...................................................358
8.12 Using Fieldbus Methods Manager..........................................................359
Prerequisites ..................................................................................................................... 359
Launching Methods Manager............................................................................................ 360
Interacting with Methods Manager .................................................................................... 360
9. EXPERION PKS HOST REGISTRATION ................................. 365
9.1 Overview.......................................................................................................365
New features..................................................................................................................... 365
Conditional support for FF devices.................................................................................... 367
EDDL................................................................................................................................. 368
DD View tab ...................................................................................................................... 368
Following are some of the considerations for FF blocks with DD View. ............................ 373
Persistent data handling.................................................................................................... 375
10. APPENDIX A.............................................................................377
10.1 Fieldbus Technology ...............................................................................377
Open communications architecture................................................................................... 377
Communication layer description ...................................................................................... 378
10.2 Standard Function Blocks.......................................................................381
Overview........................................................................................................................... 383
About modes of operation................................................................................................. 384
Analog Input block............................................................................................................. 386
Analog Output block.......................................................................................................... 388
Bias/Gain block ................................................................................................................. 390
Control Selector block ....................................................................................................... 393
Discrete Input block........................................................................................................... 396
Discrete Output block........................................................................................................ 397
Manual Loader block......................................................................................................... 400
Proportional/Derivative block............................................................................................. 402
Ratio block ........................................................................................................................ 412
10.3 Device Descriptions and Block Parameters..........................................416
About Device Descriptions ................................................................................................ 416
Device Description Language ........................................................................................... 416
Device Description infrastructure....................................................................................... 416
xiv Experion PKS Series A Fieldbus Interface Module User's Guide R400
Honeywell July 2010
Page 15

Contents
Block parameter definitions................................................................................................417
10.4 Fieldbus Foundation Documents...........................................................418
Reference Data..................................................................................................................418
11. APPENDIX B..............................................................................419
11.1 Standard Function Block Parameters ...................................................419
ACK_OPTION....................................................................................................................419
ALARM_HYS .....................................................................................................................419
ALARM_SUM .....................................................................................................................419
ALERT_KEY ......................................................................................................................420
BAL_TIME..........................................................................................................................421
BIAS...................................................................................................................................421
BKCAL_HYS......................................................................................................................422
BKCAL_IN ..........................................................................................................................422
BKCAL_OUT......................................................................................................................423
BKCAL_OUT_D .................................................................................................................423
BKCAL_SEL_1...................................................................................................................424
BKCAL_SEL_2...................................................................................................................424
BKCAL_SEL_3...................................................................................................................425
BLOCK_ALM......................................................................................................................425
BLOCK_ERR .....................................................................................................................426
BLOCK_ERR.DISABLED...................................................................................................427
BYPASS.............................................................................................................................428
CAS_IN..............................................................................................................................428
CAS_IN_D..........................................................................................................................429
CHANNEL..........................................................................................................................429
CLR_FSTATE....................................................................................................................430
CONFIRM_TIME................................................................................................................430
CONTROL_OPTS..............................................................................................................431
CYCLE_SEL ...................................................................................................................... 432
CYCLE_TYPE....................................................................................................................432
DEV_REV ..........................................................................................................................433
DEV_TYPE ........................................................................................................................433
DD_RESOURCE................................................................................................................434
DD_REV.............................................................................................................................434
DISC_ALM.........................................................................................................................435
DISC_LIM...........................................................................................................................435
DISC_PRI...........................................................................................................................436
DV_HI_ALM.......................................................................................................................436
DV_HI_LIM.........................................................................................................................437
DV_HI_PRI.........................................................................................................................437
DV_LO_ALM......................................................................................................................438
DV_LO_LIM .......................................................................................................................439
DV_LO_PRI .......................................................................................................................439
FAULT_STATE..................................................................................................................439
FEATURES........................................................................................................................440
R400 Experion PKS Series A Fieldbus Interface Module User's Guide xv
July 2010 Honeywell
Page 16

Contents
FEATURE_SEL................................................................................................................. 440
FF_GAIN........................................................................................................................... 441
FF_SCALE........................................................................................................................ 441
FF_VAL............................................................................................................................. 442
FIELD_VAL ....................................................................................................................... 442
FIELD_VAL_D................................................................................................................... 443
FREE_SPACE................................................................................................................... 444
FREE_TIME...................................................................................................................... 444
FSTATE_TIME.................................................................................................................. 445
FSTATE_VAL.................................................................................................................... 445
FSTATE_VAL_D............................................................................................................... 446
GAIN .................................................................................................................................446
GRANT_DENY.................................................................................................................. 446
HARD_TYPES ..................................................................................................................447
HI_ALM ............................................................................................................................. 447
HI_HI_ALM........................................................................................................................ 448
HI_HI_LIM......................................................................................................................... 449
HI_HI_PRI......................................................................................................................... 449
HI_LIM............................................................................................................................... 450
HI_PRI............................................................................................................................... 450
IO_OPTS........................................................................................................................... 451
IN....................................................................................................................................... 452
IN_1................................................................................................................................... 452
LIM_Notify......................................................................................................................... 453
L_TYPE............................................................................................................................. 453
LO_ALM............................................................................................................................ 454
LO_LIM ............................................................................................................................. 455
LO_LO_ALM ..................................................................................................................... 455
LO_LO_LIM....................................................................................................................... 456
LO_LO_PRI....................................................................................................................... 456
LO_PRI ............................................................................................................................. 457
LOW_CUT......................................................................................................................... 457
MANUFAC_ID................................................................................................................... 458
MAX_NOTIFY ................................................................................................................... 458
MEMORY_SIZE................................................................................................................ 459
MIN_CYCLE_T.................................................................................................................. 459
MODE_BLK....................................................................................................................... 460
NV_CYCLE_T................................................................................................................... 460
OFFNETALM_ENABLED.................................................................................................. 461
OUT................................................................................................................................... 461
OUT_D.............................................................................................................................. 462
OUT_HI_LIM..................................................................................................................... 463
OUT_LO_LIM.................................................................................................................... 463
OUT_SCALE..................................................................................................................... 463
OUT_STATE..................................................................................................................... 464
PV .....................................................................................................................................465
PV_D................................................................................................................................. 465
PV_FTIME......................................................................................................................... 466
xvi Experion PKS Series A Fieldbus Interface Module User's Guide R400
Honeywell July 2010
Page 17

Contents
PV_SCALE.........................................................................................................................466
PV_STATE.........................................................................................................................467
RA_FTIME .........................................................................................................................467
RATE .................................................................................................................................468
RCAS_IN............................................................................................................................468
RCAS_IN_D.......................................................................................................................469
RCAS_OUT........................................................................................................................469
RCAS_OUT_D...................................................................................................................470
READBACK .......................................................................................................................471
READBACK_D...................................................................................................................471
RESET...............................................................................................................................472
RESTART ..........................................................................................................................472
ROUT_IN ...........................................................................................................................473
ROUT_OUT .......................................................................................................................474
RS_STATE.........................................................................................................................474
SEL_1 ................................................................................................................................475
SEL_2 ................................................................................................................................475
SEL_3 ................................................................................................................................476
SEL_TYPE.........................................................................................................................477
SET_FSTATE ....................................................................................................................477
SHED_OPT........................................................................................................................478
SHED_RCAS.....................................................................................................................478
SHED_ROUT.....................................................................................................................479
SIMULATE.........................................................................................................................479
SIMULATE_D.....................................................................................................................480
SP......................................................................................................................................481
SP_D..................................................................................................................................482
SP_HI_LIM .........................................................................................................................482
SP_LO_LIM........................................................................................................................483
SP_RATE_DN....................................................................................................................483
SP_RATE-UP.....................................................................................................................484
ST_REV.............................................................................................................................484
STATUS_OPTS.................................................................................................................484
STRATEGY........................................................................................................................486
TAG_DESC........................................................................................................................486
TEST_RW..........................................................................................................................487
TRK_IN_D..........................................................................................................................488
TRK_SCALE......................................................................................................................488
TRK_VAL...........................................................................................................................489
UPDATE_EVT....................................................................................................................490
WRITE_ALM......................................................................................................................490
WRITE_LOCK....................................................................................................................491
WRITE_PRI........................................................................................................................491
XD_SCALE ........................................................................................................................492
XD_STATE.........................................................................................................................493
12. APPENDIX C..............................................................................495
R400 Experion PKS Series A Fieldbus Interface Module User's Guide xvii
July 2010 Honeywell
Page 18

Contents
12.1 Fieldbus Status Display Indications ......................................................495
12.2 Substatus Definitions for Quality Status...............................................502
13. APPENDIX D.............................................................................507
13.1 Mode Change Conditions........................................................................507
14. APPENDIX E ............................................................................. 511
14.1 Fieldbus Wiring Considerations.............................................................511
Fieldbus topologies ........................................................................................................... 511
Power Conditioning........................................................................................................... 512
Power distribution.............................................................................................................. 513
Signal degradation limitations............................................................................................ 513
Cable guidelines summary................................................................................................ 514
Cable Attenuation.............................................................................................................. 515
Signal distortion versus capacitance................................................................................. 515
Attenuation calculation summary....................................................................................... 516
Cable test.......................................................................................................................... 516
15. APPENDIX F..............................................................................517
15.1 About Parameter Definition Editor for Fieldbus Device Block............517
16. APPENDIX G.............................................................................519
16.1 Loading CIOM-A FIM firmware................................................................519
Checking CIOM-A FIM firmware status............................................................................. 519
Checking firmware version................................................................................................ 520
Loading Boot code ............................................................................................................525
Loading Personality image................................................................................................ 529
17. APPENDIX H.............................................................................533
17.1 Important Functional Considerations....................................................533
General ............................................................................................................................. 533
18. APPENDIX I...............................................................................539
18.1 Link Parameters Reference.....................................................................539
Background....................................................................................................................... 539
More detailed information.................................................................................................. 540
xviii Experion PKS Series A Fieldbus Interface Module User's Guide R400
Honeywell July 2010
Page 19

Contents
18.2 Description...............................................................................................540
Parameters for Link Configuration in Project Mode............................................................540
Parameters for Link Configuration in Monitor Mode...........................................................551
Some term abbreviations ...................................................................................................555
19. APPENDIX J ..............................................................................557
19.1 Load Interactions for Fieldbus Related Operations.............................557
Summary............................................................................................................................557
R400 Experion PKS Series A Fieldbus Interface Module User's Guide xi x
July 2010 Honeywell
Page 20

Contents
Tables
Tables
Table 1 CIOM-AFIM LED Interpretations....................................................................348
Table 2 CONTROL_OPTS Bit Selections...................................................................431
Table 3 IO_OPTS Bit Selections.................................................................................451
Table 4 STATUS_OPTS Bit Selections ......................................................................485
xx Experion PKS Series A Fieldbus Interface Module User's Guide R400
Honeywell July 2010
Page 21

Contents
Figures
Figures
Figure 1 Sample system architecture for non-redundant Fieldbus integration for CIOM-A
FIM..........................................................................................................................34
Figure 2 Sample system architecture for redundant Fieldbus integration for CIOM-A FIM.
................................................................................................................................36
Figure 3 Project tab in Control Builder has new icons for fieldbus components..........39
Figure 4 Typical Parameter Definition Editor view for selected fieldbus device block.40
Figure 5 Sample Fieldbus Methods view in Parameter Definition Editor.....................41
Figure 6 Integration of fieldbus device analog input signal with Control Builder control
strategy...................................................................................................................45
Figure 7 Integration of fieldbus device analog output signal with Control Builder control
strategy...................................................................................................................47
Figure 8 Integration of fieldbus device PID control with Control Builder control strategy48
Figure 9 Integration of fieldbus device digital input signal with Control Builder control
strategy...................................................................................................................51
Figure 10 Integration of fieldbus device digital output signal with Control Builder control
strategy...................................................................................................................53
Figure 11 Block mode calculation summary.................................................................63
Figure 12 Algorithm execution phase sequence..........................................................69
Figure 13 Summary of address allocations for fieldbus devices..................................70
Figure 14 Typical RCP setup in 10-slot chassis...........................................................79
Figure 15 Double-Wide CIOM-A Fieldbus Interface Module TC-FFIF01...................105
Figure 16 RTP model TC-FFRU01 is unpowered and can be used in Division 2
hazardous locations; model TC-FFRP02 is powered and can be used to power
fieldbus devices in Intrinsically Safe applications.................................................109
Figure 17 Redundant RTP model TC-FFSU01 is unpowered and can be used in Division
2 hazardous locations; model TC-FFSP02 is powered and can be used to power
fieldbus devices in Intrinsically Safe applications.................................................110
Figure 18 Simplified wiring schematic for RTP model TC-FFRU01, unpowered. Users
must provide conditioned 24 Vdc power for the Links - Not shown.....................114
Figure 19 Simplified wiring schematic for RRTP model TC-FFXXXX, unpowered. Users
must provide conditioned 24 Vdc power for the Links - Not shown.....................115
Figure 20 Simplified wiring schematic for RTP model TC-FFRP02, powered. Users must
provide 24 Vdc power supply for the GI/IS power supplies..................................116
Figure 21 Sample Application and Control Strategy Integrating Fieldbus Devices with an
Experion System. .................................................................................................121
Figure 22 Completed CM101 for sample loop............................................................197
Figure 23 Sample CM with Device Control block for pump control in sample loop. ..198
Figure 24 Completed CM102 with parameter connections for sample loop interlocks.201
Figure 25 Overview of load operations used to initiate components online...............203
Figure 26 Load Dialog box provides more load choices. ...........................................204
Figure 27 Typical FIM Detail display in Station. .........................................................244
R400 Experion PKS Series A Fieldbus Interface Module User's Guide xxi
July 2010 Honeywell
Page 22

Contents
Figures
Figure 28 FF PID Main Tab Detail Display when loaded in CEE Environment..........249
Figure 29 FF PID Main Tab Detail Display when loaded to FFLINK. .........................250
Figure 30 Event Summary display includes fieldbus related details...........................252
Figure 31 Sample Link Schedule configuration display in Project..............................270
Figure 32 Sample Link Schedule configuration display in Monitoring. .......................271
Figure 33 FIM front panel indicators. ..........................................................................348
Figure 34 Typical Tune tab for fieldbus device's Transducer block............................358
Figure 35 Typical Other tab for fieldbus device's Transducer block...........................359
Figure 36 OSI versus Fieldbus communication model. ..............................................377
Figure 37 User Application (or Function Block Application Process) based on blocks.381
Figure 38 Using Function Blocks in fieldbus devices to form a control loop...............384
Figure 39 Functional schematic for Analog Input function block. ...............................386
Figure 40 Functional schematic for Analog Output function block..............................389
Figure 41 Functional schematic for Bias/Gain function block.....................................391
Figure 42 Functional schematic for Control Selector function block...........................394
Figure 43 Functional schematic for Discrete Input function block. .............................396
Figure 44 Functional schematic for Discrete Output function block............................398
Figure 45 Functional schematic for Manual Loader function block.............................400
Figure 46 Functional schematic for Proportional/Derivative function block................403
Figure 47 Functional schematic for Proportional/Integral/Derivative function block...408
Figure 48 Functional schematic for Ratio function block. ...........................................412
Figure 49 Device Descriptions infrastructure..............................................................417
Figure 50 Overview of fieldbus wiring topologies........................................................511
Figure 51 Communications entity architecture............................................................539
xxii Experion PKS Series A Fieldbus Interface Module User's Guide R400
Honeywell July 2010
Page 23

1. Introduction
1.1 Where to look for information
Contents guide
Read this section, If you,
What is Fieldbus? - Fieldbus Organization
Have no idea what the Fieldbus Foundation
is or what constitutes the F
Fieldbus technology. This section lists some
common fieldbus terms for reference. It also
references, which includes descriptions of
some standard fieldbus function blocks and
describes the role of Device Descriptions and
block parameters for general reference.
OUNDATION
TM
TM
Fieldbus Integration With Experion
System - Control Integration
Installation - Planning Considerations
Configuration- Configuring Fieldbus
Components In a Control Strategy
Operation - Monitoring Fieldbus Functions
Through Monitoring Tab
Want some insight on what functional
relationships result from the integration of
fieldbus devices with an Experion system. The
information in this section will be helpful
background for planning and configuring your
control strategy.
Will be responsible for setting up the hardware
infrastructure to support fieldbus devices. This
section identifies the things you should
consider before installing any equipment and
provides detailed procedures for how to install
the Fieldbus Interface Module (FIM) and its
companion Remote Termination Panel (RTP).
Will be configuring the control strategy through
Control Builder. This section provides detailed
procedures for including fieldbus functional
components in your overall control strategy. It
includes creating hardware blocks, making
block types, associating blocks, assigning
modules, assigning devices, and loading
components
Will be monitoring system operation. This
section provides an overview of functions you
can monitor through Station displays and the
Monitoring tab in Control Builder.
R400 Experion PKS Series A Fieldbus Interface Module User's Guide 23
July 2010 Honeywell
Page 24

1. Introduction
1.2. Conventions
Read this section, If you,
Fieldbus Device Commissioning - Getting
Started
Maintenance, Checkout, and Calibration -
Adding, Removing and Replacing
Components
1.2 Conventions
Terms and type representations
The following table summarizes the terms and type representation conventions used in
this Guide.
Term/Type
Representation
Click
Double-click
Click left mouse button once.
(Assumes cursor is positioned on
object or selection.)
Click left mouse button twice in quick
succession. (Assumes cursor is
positioned on object or selection.)
Will be commissioning the fieldbus loop. This
section provides a suggested process to follow
for fieldbus device commissioning.
Will be responsible for maintaining and trouble
shooting system operation. This section
provides information about replacing
components, upgrading firmware in
uncommissioned devices, and checking device
calibration.
Meaning Example
Click the Browse button.
Double click the Station
icon.
Drag
Right-click
<F1>
<Ctrl>+<C>
24 Experion PKS Series A Fieldbus Interface Module User's Guide R400
Honeywell July 2010
Press and hold left mouse button
while dragging cursor to new screen
location and then release the button.
(Assumes cursor is positioned on
object or selection to be moved.)
Click right mouse button once.
(Assumes cursor is positioned on
object or selection.)
Keys to be pressed are shown in
angle brackets.
Keys to be pressed together are
shown with a plus sign.
Drag the PID function
block onto the Control
Drawing.
Right-click the AND
function block.
Press <F1> to view the
online Help.
Press <Ctrl>+<C> to
close the window.
Page 25

1. Introduction
1.2. Conventions
File->New
>D:\setup.exe<
Shows menu selection as menu name
followed by menu selection
Data to be keyed in at prompt or in an
entry field.
Click File->New to start
new drawing.
Key in this path location
>D:\setup.exe<.
R400 Experion PKS Series A Fieldbus Interface Module User's Guide 25
July 2010 Honeywell
Page 26

1. Introduction
1.2. Conventions
26 Experion PKS Series A Fieldbus Interface Module User's Guide R400
Honeywell July 2010
Page 27

2. What is Fieldbus?
2.1 Fieldbus Organization
About the Fieldbus Foundation
The Fieldbus Foundation is a not-for-profit corporation made up of over 160 leading
suppliers and customers of process control and manufacturing automation products.
Since its inception in 1994, it is totally dedicated to developing one standard, "open,"
interoperable field communication model known as F
is a founding and supporting member of the found a tion.
Want more information?
ou have Internet access, please visit the Fieldbus Foundation web site at
If y
http://www.fieldbus.org/
9005 Mountain Ridge Drive
Bowie Building - Suite 190
Austin, Texas 78759-5316 USA
2.2 Fieldbus Technology
for more information. Alternatively, their mail address is:
OUNDATION Fieldbus. Honeywell
Reference
REFERENCE - INTERNAL
Please refer to Appendix A, if you are interested in more information about
this topic.
2.3 Fieldbus Terms
Description
The following table lists some fieldbus terms and abbreviations for general reference.
Term Abbreviation Description
Capability File
R400 Experion PKS Series A Fieldbus Interface Module User's Guide 27
July 2010 Honeywell
The Capability file contains some or all of the given
fieldbus device's information that can be read from a
device online. It consists of both resource information
(what the device can potentially do) and value
information (how the device should actually be set up).
Page 28

2. What is Fieldbus?
2.3. Fieldbus Terms
Term Abbreviation Description
Common File
CFF
Format
Connection
Manager
Device Description DD
The format of a Capability file is a readable text
document based on a Windows Initialization (INI) file
type.
A Fieldbus Foundation service to manage connection
information about device types, devices, and blocks
that are actively communicating with a host
application.
A binary file that provides the definition for parameters
in the FBAP of a device. For example, what Function
Blocks a device contains, and what parameters are in
those blocks.
28 Experion PKS Series A Fieldbus Interface Module User's Guide R400
Honeywell July 2010
Page 29

2. What is Fieldbus?
2.3. Fieldbus Terms
Term Abbreviation Description
Device Description
Item
DD Item
Item is a fundamental concept of the Device
Description Language (DDL). It makes up the
description of the device and can be any of the
following constructs:
Array*
Block*
Collection
Domain
Edit Display
Item Array
Menu
Method
Program
Record*
Refresh Relation
Response Code
Variable*
Variable List*
WAO Relation
* These items are of the most interest to Block Type
templates.
Device Description
Language
Device Description
Object
DDL
DDO
The language that vendors use to define their device's
Function blocks and parameters.
The suffix name for incremental DD binary files
supplied by vendors that are to be converted to full and
complete DD binary files by the Fieldbus Foundation
Synthesizer.
Device Description
Service
DDS
A software library developed by the Fieldbus
Foundation that provides a generic access to a DD.
R400 Experion PKS Series A Fieldbus Interface Module User's Guide 29
July 2010 Honeywell
Page 30

2. What is Fieldbus?
2.3. Fieldbus Terms
Term Abbreviation Description
DD Synthesizer
Enhanced Device
Description
Enhanced Device
Description
Language
Fieldbus Foundation
Object
Fieldbus Foundation
Tokenizer
H1 Fieldbus
Segment
H1 Fieldbus Link
A tool supplied by the Fieldbus Foundation. It
combines incremental DDs, with unresolved
references, with Fieldbus Foundation standard DDs to
produce a complete/full DD that can be used with
DDS.
EDD
A newer version of the binary file (*.ff5) that provides
the definition for parameters in the FBAP of a device.
For example, what Function Blocks a device contains,
and what parameters are in those blocks.
EDDL
The language that vendors use to define their device's
Function blocks and parameters.
FFO or FF5 The suffix name for the complete/full DD binary file.
A Fieldbus Foundation tool that converts an ASCII text
file written in conformance with the Device Description
Language specification into a DD binary file.
An independent electrical environment consisting of
wire, terminators and a power source per IEC 611581/ISA S50.1 for supporting fieldbus devices.
The logical medium by which H1 Fieldbus devices are
interconnected. It is composed of one or more physical
segments interconnected by bus Repeaters or
Couplers. All of the devices on a link share a common
schedule, which is administered by that link's current
LAS.
Object Dictionary OD
Production Rules
Release Directory
30 Experion PKS Series A Fieldbus Interface Module User's Guide R400
Honeywell July 2010
Contains the Object Descriptions for communication
objects such as DataType,
DataTypeStructureDescription, and SimpleVariable.
The grammar, in BNF format, used to describe a
language. The Common File Format used to construct
the Resource file follows specific production rules.
A directory structure used to store the DD and related
files. Each manufacturer has a directory name that is
the registered manufacturer ID number. There is a
directory for each device type that a manufacturer
produces under their ID directory.
Page 31

2. What is Fieldbus?
2.3. Fieldbus Terms
Term Abbreviation Description
Resource File
Standard Dictionary
Symbol File SYM
Virtual
Communications
Relationship
Virtual Field Device VFD
VCR
The part of the Capability file that is supplied by the
manufacturer. It describes the communication profile,
device capacity, internal record address assignments,
and certain default values for a field device. A
Capability file that has only this content is often called
a Resource file.
A Fieldbus Foundation file that contains standard
strings and enumerations. A compressed form of the
file is called the IMPORT.DCT and it is used by the
Type function in Control Builder.
Contains symbolic names that were used in the DDL
file for the FBAP of the device. It is produced by the
Fieldbus Foundation Tokenizer.
Sets up communications for host to talk to a device. It
acts like a speed dialer to provide for the transfer of
data between applications. F
OUNDATION Fieldbus
describes these three types of VCRs:
Publish/Subscribe
Client/Server
Source/Sink
The management or FBAP section of a device that is
addressable by a VFD tag.
R400 Experion PKS Series A Fieldbus Interface Module User's Guide 31
July 2010 Honeywell
Page 32

2. What is Fieldbus?
2.3. Fieldbus Terms
32 Experion PKS Series A Fieldbus Interface Module User's Guide R400
Honeywell July 2010
Page 33

3. Fieldbus Integration With Experion System
3.1 Overview
Background
The following table summarizes the major areas of enhancement that were key to
bringing Fieldbus into the Experion system.
Area Accomplishment
Connection of Foundation Fieldbus
devices to the Experion system.
Configuration of Foundation Fieldbus
devices through the Experion system.
Integration of Foundation Fieldbus
Devices process, maintenance, and
alarm data with notification and display
functions in the Experion system.
CIOM-A FIM versus Series C FIM
Series C Fieldbus Interface Module (FIM4) is designed to complement the C300
The
Controller and Fault Tolerant Ethernet (FTE) communications within Experion R300
systems or later. While the Series C FIM is functionally equivalent to the Chassis I/OSeries A (CIOM-A) FIM, its physical design, including mounting and wiring
requirements, is drastically different. Please refer to the Series C FIM User's Guide for
information that is specific to integrating fieldbus through a Series C FIM.
ATTENTION
The topology and hardware related details in this document are based on
using a CIOM-A FIM to provide fieldbus integration. The functional details
related to control integration and standard fieldbus functions are applicable to
both CIOM-A and Series C FIMs.
Integrate fieldbus devices on an H1 link
with the Supervisory level ControlNet
and/or the I/O ControlNet network.
Integrate configuration of fieldbus
devices through the Control Builder
application.
Integrate data from fieldbus devices into
Detail, Group, Trend, Maintenance, and
Alarm displays through the Station
application as well as the Monitoring tab
of the Control Builder application.
R400 Experion PKS Series A Fieldbus Interface Module User's Guide 33
July 2010 Honeywell
Page 34

3. Fieldbus Integration With Experion System
3.1. Overview
Non-Redundant Fieldbus integrated architecture for CIOM-A FIM
The following figure shows a typical non-redundant fieldbus architecture using a CIO MA Fieldbus Interface Module (FIM) in a non-redundant C200 Controller and a remote I/O
chassis configuration. The FIM serves as the communication gateway between the
Supervisory ControlNet and/or I/O ControlNet network and the Foundation Fieldbus H1
communications medium. It includes a Remote Termination Panel (RTP) for connecting
and powering up to two fieldbus H1 links.
Ethernet (TCP/IP)
Supervisory ControlNet/Ethernet
Non-Redundant
Controller
I/O ControlNet
Remote
I/O Chassis
24Vdc
Conditioned
H1 Link 2
PT
24Vdc
Conditioned
H1 Link 1
PT
F Fieldbus
OUNDATION
Notes
:
FIM = Fieldbus Interface Module
Only ControlNet is available as redundant media.
Compliant Devices
PT
24Vdc
(Optional)
Station
FIM
Remote
Termination
Panel
PT
F Fieldbus
OUNDATION
Compliant Devices
Remote
I/O Chassis
Redundant
Servers
Redundant
Controllers
I/O ControlNet
24Vdc
(Optional)
PT
H1 Link 2
PT
FIM
Remote
Terminat i on
Panel
Conditioned
PT
PT
H1 Link 1
24Vdc
Figure 1 Sample system architecture for non-redundant Fieldbus
34 Experion PKS Series A Fieldbus Interface Module User's Guide R400
Honeywell July 2010
integration for CIOM-A FIM.
24Vdc
Conditioned
Page 35

3. Fieldbus Integration With Experion System
Redundant Fieldbus integrated architecture for CIOM-A FIM
3.1. Overview
The follo
wing figure shows a sample redundant fieldbus architecture using a pair of
CIOM-A Fieldbus Interface Modules (FIMs) and Redundancy Modules (RMs) in a
redundant C200 Controller and a redundant remote I/O chassis configuration. The FIM
serves as the communication gateway between the Supervisory ControlNet and/or I/O
ControlNet network and the Foundation Fieldbus H1 communications medium. It
includes a redundant Remote Termination Panel (RTP) for connecting and powering up
to two fieldbus H1 links. The illustration in the following figure is for example purposes
only to show the possible architectural variations for a redundant fieldbus application.
ATTENTION
No chassis I/O modules are permitted in a remote I/O chassis pair configured
for redundant fieldbus support. Only redundancy compliant modules can be
used in a Redundant Chassis Pair configuration. The same is true for the
redundant Controller chassis.
R400 Experion PKS Series A Fieldbus Interface Module User's Guide 35
July 2010 Honeywell
Page 36

3. Fieldbus Integration With Experion System
3.1. Overview
Ethernet (TCP/IP)
Non-Redundant
Controller
I/O ControlNet
FIMRM
Redundant
Remote
I/O Chassis
24Vdc
Conditioned
H1 Link 2
PT
24Vdc
Conditioned
H1 Link 1
PT
F Fieldbus
OUNDATION
Notes
:
CPM = Control Processor Module
FIM = Fieldb u s Interface Module
RM = Redundancy Module
Only ControlNet is available as redundant media.
Figure 2 Sample system architecture for redundant Fieldbus integration
Supervisory ControlNet
CPM
FIMRM
24Vdc
(Optional)
Redundant
Remote
Ter mination
Panel
PT
Compliant Devices
for CIOM-A FIM.
Station
Redundant
Controllers
PT
Remote
I/O Chassis
Redundant
Servers
I/O ControlNet
24Vdc
(Optional)
PT
H1 Link 2
PT
24Vdc
Conditioned
F Fieldbus
OUNDATION
Redundant
Remote
Ter mination
Panel
H1 Link 1
24Vdc
Conditioned
Compliant Devices
FIMRMFIMRM
PT
PT
36 Experion PKS Series A Fieldbus Interface Module User's Guide R400
Honeywell July 2010
Page 37

3. Fieldbus Integration With Experion System
Fieldbus Interface Module (FIM) - the key to integration
The Fieldbus Interface Module (FIM) is the key to bringing Foundation Fieldbus into the
Experion system. It serves as the bridge between the control environment and the
fieldbus control functions. It supports both the publish/subscribe and the client/server
communication methods to communicate with fieldbus function blocks. The control
connections must be downstream only. The Experio n syst em controls downstream
function blocks, but it does not allow itself to be controlled by an upstream function
block that resides in a fieldbus device.
The CIOM-A FIM is a doublewide module that plugs into a non-redundant or redundant
C200 Controller, or remote I/O chassis. It connects up to two Fieldbus H1 links through a
companion Remote Termination Panel (RTP). These independent links each have their
own link schedule, link master and time master functions. The RTP is designed for DIN
rail mounting within an enclosure. It optionally accepts a 24 Vdc input from an external
power supply to provide low-level power to fieldbus devices on the H1 links.
Redundancy Module - the key to redundant operation
dundancy Module (RM) serves as a high-performance, chassis-to-chassis,
The Re
communications bridge for redundancy compliant modules in a Redundant Chassis Pair
(RCP). It only provides the path for modules to synchronize themselves and coordinates
the synchronization process. The RM does not determi ne what port i ons of a module's
database get synchronized.
TIP
If you have previously implemented the C200 Controller redundancy
functionality in a PlantScape system, the same basic design concepts apply
for implementing fieldbus redundancy in an Experion system using CIOM-A
FIMs. Please refer to the Control Builder Components Theory for more
information about basic redundancy design concepts.
Control Builder serves as common configuration tool
3.1. Overview
e Experion Control Builder application supports integral creation and configuration of
Th
fieldbus function blocks with Experion system function blocks to incorporate fieldbus
devices in a unified Experion Control Strategy. This means Experion function blocks and
fieldbus function blocks can be easily interconnected, so control can reside on the
fieldbus link, in the Control Processor/Control Execution Environment (CEE), or
cascaded from CEE to the fieldbus device.
You can read the manufacturer's Device Descriptions (DD) for fieldbus devices to be tied
to an H1 Link, and create individual block types for each fieldbus device including their
function blocks. The fieldbus device block types will reside in the Engineering
R400 Experion PKS Series A Fieldbus Interface Module User's Guide 37
July 2010 Honeywell
Page 38

3. Fieldbus Integration With Experion System
3.1. Overview
Repository Database (ERDB) for the Experion system and will appear in the Control
Builder Library tab. Once a fieldbus device type is created, the fieldbus device is easily
associated with the appropriate FIM H1 Link through the Project tab in Control Builder.
The following figure shows how icons are used to readily identify CIO M-A FIM, H1
Links, and fieldbus devices in the Control Builder Project tab.
38 Experion PKS Series A Fieldbus Interface Module User's Guide R400
Honeywell July 2010
Page 39

3. Fieldbus Integration With Experion System
3.1. Overview
Figure 3 Project tab in Control Builder has new icons for fieldbus
components.
Parameter Definition Editor serves as key interoperability tool
e Parameter Definition Editor (PDE) lets you edit the parameter attributes for a given
Th
function block associated with a fieldbus device block type residing in the Control
Builder Library tab. The following figure shows a typical Parameter Definition Editor
view.
R400 Experion PKS Series A Fieldbus Interface Module User's Guide 39
July 2010 Honeywell
Page 40

3. Fieldbus Integration With Experion System
3.1. Overview
Figure 4 Typical Parameter Definition Editor view for selected fieldbus
device block
Parameter Definition Editor supports Fieldbus Methods
Parameter Definition Editor also retrieves any method code that manufactures
The
include in their Device Description (DD) files. The PDE includes a dedicated Methods
tab so you can easily see if the selected device block includes methods data. The
following figure shows a typical Methods tab view for a device block that includes
methods data.
TIP
Methods are usually associated with a device's Transducer and/or Resource
blocks.
40 Experion PKS Series A Fieldbus Interface Module User's Guide R400
Honeywell July 2010
Page 41

3. Fieldbus Integration With Experion System
3.1. Overview
Figure 5 Sample Fieldbus Methods view in Parameter Definition Editor.
Station provides centralized operator interface
e Station application includes Detail Displays dedicated to the configured FIM,
Th
associated H1 Links, fieldbus device, and associated fieldbus function blocks. They
provide access to the same parameters that are accessible through the control charts and
configuration forms in the Monitoring tab of Control Builder. This includes manufacturer
specific parameters, where applicable.
The reporting of alarm conditions and retrieval of process data for inclusion in group,
trend, history, and schematic displays is closely integrated with the system's existing
notification management system. The existing access authorization levels apply and will
take precedence over fieldbus restrictions specified in Device Descriptions.
R400 Experion PKS Series A Fieldbus Interface Module User's Guide 41
July 2010 Honeywell
Page 42

3. Fieldbus Integration With Experion System
3.2. Control Integration
3.2 Control Integration
FIM handles data integration
The Fieldbus Interface Module functions as a dual network bridge using a dynamic data
cache to facilitate the exchange of data between the control communication network and
the fieldbus H1 links. It supports both publish/subscribe and client/server
communications methods to implement control connections between Control Builder
function blocks and fieldbus function blocks. FIM capability includes converting Control
Builder value-status structure to fieldbus value-status by mapping similar fields to one
another and defaulting others. This means the Experion system can monitor fieldbus
control functions, fully integrate with control functions, or provide a combination that
includes using fieldbus based control as backup for selected Ex peri o n sy stem control
functions.
The FIM uses low and high priority send queues to make sure that publish/subscribe data
normally used for control is processed before less important display access data.
Publish/subscribe requests are placed in the high priority send queue and client/server
requests are placed in the low one.
About link object
ink object represents one fieldbus H1 link. It consists of Network Management and
The l
System Management information, along with several application parameters related to
link functions such as startup, shutdown, and diagnostics.
Network Management description
rk Management provides the following capabilities for managing the
Netwo
communication system of a fieldbus device.
Loading a Virtual Communication Relationship (VCR) list or single entries in this
list, (A VCR represents a communication channel through the complete
communication stack.)
Configuring the communication stack;
Loading the Link Schedule;
Monitoring performance; and
Monitoring fault detection.
The collection of managed variables is called the Network Management Information
Base (NMIB).
42 Experion PKS Series A Fieldbus Interface Module User's Guide R400
Honeywell July 2010
Page 43

System Management description
System Management provides the following functions to coordinate the operation of
various devices in a distributed fieldbus system.
Assigning node addresses for devices;
Synchronizing the application clock;
Distributing application scheduling across the link; and
Providing support for locating application tags.
It provides the needed facilities for bringing new devices on the link to an operational
state and for controlling the overall system operation. Information, which is used to
control system management operation, is organized as objects stored in the System
Management Information Base (SMIB).
About device objects
e device object represents a physical device entity connected to the fieldbus link. It
Th
provides access to the device's Network Management (NM) and System Management
(SM) parameters. The client/server VCR is configured in the FIM to access the
Management Interface Base (MIB) of the device as soon as it joins the network. The
Control Builder does not configure the MIB VCR explicitly . Once the MIB VCR is
configured and opened, FIM retrieves MIB information, SM directory, and NM
directory. Knowledge of these directories allows FIM to transform writes into domain
object variables into proper sequence of domain download operations. The SM directory
is also used to determine the number of application VFD s . The NM directory is key in
attempting to configure VCRs to access Function Block Application Process VFDs in the
device.
3. Fieldbus Integration With Experion System
3.2. Control Integration
About VFD objects
The Virtual Fi
access to that VFD. Each physical device may have one or more application VFDs. The
FIM attempts to build a client/server VCR to every VFD in the device, when it is added
to the network. If the VCR configuration is successful, the FIM obtains VFD and
resource identification from the device's VFD. During device download, you can
overwrite VCR configuration used to access VFD parameters through the Control
Builder application.
R400 Experion PKS Series A Fieldbus Interface Module User's Guide 43
July 2010 Honeywell
eld Device object represents an application VFD and provides parameter
Page 44

3. Fieldbus Integration With Experion System
3.2. Control Integration
Type creation makes integration possible
The fieldbus device Type function included with Control Builder makes integrating
fieldbus function blocks with Contr ol B ui l de r ones possible. The Type function reads the
manufacturer's DD for the fieldbus device and creates a device block type that is stored in
the Control Builder Library tab. The device block type includes the device's fieldbus
function blocks, so it can be configured and integrated with control strategies through
Control Builder.
Fieldbus device Analog Input integration
user can functionally "wire" the output from an Analog Input (AI) function block in a
A
fieldbus device residing on an H1 link to the input of a regulatory control type function
block contained in a Control Module in the Experion Control Builder application. The
Proportional, Integral, Derivative (PID) function block is a typical regulatory control type
function block.
The following simplified functional diagram shows how the output from an Analog Input
function block in a fieldbus compliant transmitter is integrated with a PID function block
in a Control Module that is assigned and loaded to the CEE in the Control Processor
Module (CPM).
44 Experion PKS Series A Fieldbus Interface Module User's Guide R400
Honeywell July 2010
Page 45

CM
3. Fieldbus Integration With Experion System
3.2. Control Integration
PV
CPM/CEE
FIM
Fieldbus
Device
Transducer
Analog
Input
Figure 6 Integration of fieldbus device analog input signal with Control
Builder control strategy
Fieldbus Analog Input data manipulation
PID
OUT
FIM
OP
OP
AOC
AOC = Analog Output Channel
CEE = Control Execution Environment
CM = Control Module
CPM = Control Processor Module
FIM = F ieldbus Interface Module
OP = Output
PID = Proportional, Integral, Derivative
PV = Process Variable
n the OUT from the fieldbus analog input function block is wired to the PV input for
Whe
a PID function block, the Control Builder creates a CEE input agent to handle the analog
input from the fieldbus block. The block-like input agent maps the data structure (DS-65)
of the OUT parameter to the Control Builder PV with status parameter. It interprets the
value portion in fieldbus terms and converts it to Control Builder representation. The
floating-point representation is identical, in most cases, but the fieldbus +/-infinity value
must be converted to a Control Builder representation.
If the fieldbus status byte indicates "BAD", the value must be converted to Not a Number
(NaN) for Control Builder representation. The fieldbus data quality of good, bad, and
R400 Experion PKS Series A Fieldbus Interface Module User's Guide 45
July 2010 Honeywell
Page 46

3. Fieldbus Integration With Experion System
3.2. Control Integration
uncertain is mapped to the appropriate Control Builder parameter of PVSTS,
PVSTSFL.NORM, PVSTSFL.BAD, or PVSTSFL.UNCER.
The fieldbus limit indications of no-limit, limited-low, limited-high, and constant are
mapped to the same four indications for Control Builder blocks.
The fieldbus data substatus indicator maps only the limited number of substatus
conditions that have corresponding Control Builder indications. Note that the
handshaking provided by the substatus associated with Good [cascade] status is not
supported from an upstream fieldbus device. This means that control may not originate
in the field and cascade into the Controller.
Fieldbus device Analog Output or PID integration
user can functionally "wire" the output from a regulatory control type function block
A
contained in a Control Module in the Control Builder application to the input of an
Analog Output (AO) or Proportional, Integral, Derivative (PID) function block in a
fieldbus device residing on an H1 link. The Proportional, Integral, Derivative (PID)
function block is a typical Control Builder regulatory control type function block.
The following simplified functional diagram shows how th e output from a PID function
block in a Control Module that is assigned and loaded to the CEE in the Control
Processor Module (CPM) is integrated with an Analog Output function block in a
fieldbus compliant device.
46 Experion PKS Series A Fieldbus Interface Module User's Guide R400
Honeywell July 2010
Page 47

CPM/CEE
A
CM
AIC
DACQ
PV
PV
P1
3. Fieldbus Integration With Experion System
3.2. Control Integration
PV
BACKCALIN
PID
OP
FIM
RCAS_IN
FIM
CAS_IN
Fieldbus
Device
CAS_IN
RCAS_IN
nalog
Output
BKCAL_OUT
RCAS_OUT
OUT
Transducer
AIC = Analog Input Channel
BACKCALIN = Back Calculation Input
BKCAL_OUT = Back Calculation Output
CAS_IN = Cascade Input
CEE = Control Execu tion Environment
CM = Control Module
CPM = Control Processor Module
DACQ = Data Acquistion
FIM = F ieldbus Interface Module
OP = Output
PID = Proportional, Integral, Derivative
PV = Process Variable
RCAS_IN = Remote Cascade Input
RCAS_OUT = Remote Cascade Output
Figure 7 Integration of fieldbus device analog output signal with Control
Builder control strategy
The following simplified functional diagram shows how th e output from a PID function
block in a Control Module that is assigned and loaded to the CEE in the Control
Processor Module (CPM) is integrated with a cascaded Proportional, Integral, Derivative
function block in a fieldbus compliant de vi ce.
R400 Experion PKS Series A Fieldbus Interface Module User's Guide 47
July 2010 Honeywell
Page 48

3. Fieldbus Integration With Experion System
A
A
3.2. Control Integration
CM
CPM/CEE
FIM
Fieldbus
Device
Transducer
Analog
Input
OUT
CAS_IN
RCAS_IN
ROUT_IN
BKCAL_IN
TRK_IN_D
TRK_VAL
FF_VAL
IN
IC
PV
DACQ
PV
PID
P1
FIM
PV
RCAS_IN
BKCAL_OUT
RCAS_OUT
OUT
ROUT_OUT
PID
OP
CAS_IN
RCAS_IN
BACKCALIN
CAS_IN
nalog
Output
BKCAL_OUT
RCAS_OUT
OUT
Transducer
AIC = Analog Input Channel
BACKCALIN = Back Calculation Input
BKCAL_IN = Back Calculation Input
BKCAL_OUT = Back Calculation Output
CAS_IN = Cascade Input
Figure 8 Integration of fieldbus device PID control with Control Builder
Fieldbus Analog Output or PID data manipulation
n the Output from the PID function block is wired to the CAS_IN input for a
Whe
fieldbus Analog Output or Proporti onal , Integral, Derivative function block, the Control
48 Experion PKS Series A Fieldbus Interface Module User's Guide R400
Honeywell July 2010
CEE = Cont r ol Execution Environ ment
CM = Control Module
CPM = Control Processor Module
DACQ = Data Ac qu is ti on
FIM = Fieldbus Interface Module
control strategy
OP = Output
PID = Proport i onal, Integral, Derivativ e
PV = P rocess Variable
RCAS_IN = Remote Cascade Input
RCAS_OUT = Remote Cascad e Output
ROUT_OUT = Remote Out Output
Page 49

3. Fieldbus Integration With Experion System
3.2. Control Integration
Builder automatically creates a CEE output agent to handle the analog output to the
fieldbus block. The block-like output agent maps the Cont OP with status parameter to
the fieldbus data structure (DS-65) of the CAS_IN parameter. It interprets the value
portion in Experion terms and converts it to fieldbus representation. The floating-point
representation is identical, in most cases, but the Experion +/-infinity value must be
converted to a fieldbus representation. If the status of OP is "BAD", its value must be
converted from NaN to zero (0.0) for fieldbus representation or it may retain its previous
good value, as long as the fieldbus status byte indicates "BAD".
WARNING
The Fieldbus Foundation specifications do not clearly state the expectations
of fieldbus devices for handling Not-a-Number (NaN) values. This means that
some may behave as the user desires and others may not.
If you compute a data type float + status value that uses data structure (DS-
65), which includes all F
contained parameters, a resulting NaN value passed outbound throug h the
FIM sets the status element to BAD and changes the value element from
NaN to 0.0 (zero). If you compute a data type float value, which includes
many contained values such as alarm trip points, set points or output limits,
gains, and filter time values, a resulting NaN value that is to be passed
outbound through the FIM will not be written and usually results in retenti on of
the previous value. If the device would not behave in the application as you
desire, you must add appropriate function blocks or logic to test for and
replace the NaN with an acceptable value.
OUNDATION Fieldbus inputs, outputs and some
The CEE output agent also accepts a single BKCAL_OUT parameter with the fieldbus
data structure (DS-65) and maps it to the BACKCALIN parameter of the PID block in
Experion terms.
ATTENTION
The Experion Control Builder application automatica lly makes the appropriate
back calculation connections during configuration and the connections are
"hidden" in Control Chart views.
Like the FIM, the output agent supports both publish/subscribe and client/server
communication methods. The publish/subscribe method allows the FIM to appear as a
fieldbus device on the H1 link. The FIM publishes the output (OP) for subscribing
fieldbus device resident blocks such as Analog Output and Proportional, Integral,
Derivative (PID) through their CAS_IN parameter input connection. This connectio n is
generally used when the downstream control block is in the Cas (cascade) mode. This
R400 Experion PKS Series A Fieldbus Interface Module User's Guide 49
July 2010 Honeywell
Page 50

3. Fieldbus Integration With Experion System
3.2. Control Integration
means that the fieldbus block's BKCAL_OUT parameter is published by the downstream
block and subscribed to by the FIM.
The client/server method allows the FIM to appear as a computing device on the H1 link.
The FIM writes the output (OP) to be read by fieldbus device resident blocks such as
Analog Output and Proportional, Integral, Derivative (PID) through their RCAS_IN
parameter input connection. This connection is generally used when the downstream
control block is in the RCas (Remote Cascade) mode. This means that the fieldbus
block's BKCAL_OUT parameter is written by the downstream block and read by the
FIM.
The client/server method also allows the FIM to function in a Direct Digital Control
(DDC) mode or the Remote Out mode in fieldbus terms. In this case, the FIM writes the
output to be read by the fieldbus PID block though its ROUT_IN parameter input
connection. In turn, the PID block publishes the ROUT_OUT or back calculation output
value for the subscribing FIM.
The Control Builder data quality is converted to fieldbus data quality. The Control
Builder Good indication is represented as fieldbus Good (Cascade).
The Control Builder limit indications of no-limit, limited-low, limited-high, and constant
are mapped to the same four indications for fieldbus.
The Control Builder control initialization indicators map only to the limited number of
substatus conditions that have corresponding indications in fieldbus Good (Cascade).
Fieldbus device Discrete Input integration
user can functionally "wire" the output from a Discrete Input (DI) function block in a
A
fieldbus device residing on an H1 link to the input of a Device Control (DEVCTL)
function block or other block with a digital input contained in a Control Module in the
Experion Control Builder application.
The following simplified functional diagram shows how the output from an Discrete
Input function block in a fieldbus compliant transmitter is integrated with a Device
Control (DEVCTL) function block in a Control Module that is assigned and loaded to the
CEE in the Control Processor Module (CPM).
50 Experion PKS Series A Fieldbus Interface Module User's Guide R400
Honeywell July 2010
Page 51

CPM/CEE
CM
3. Fieldbus Integration With Experion System
3.2. Control Integration
Device
DI[1]
Control
DO[1]
SO
DOC
FIM
Fieldbus
Device
Transducer
Digital
Input
Figure 9 Integration of fieldbus device digital input signal with Control
Builder control strategy
Fieldbus Discrete Input data manipulation
n the OUT from the fieldbus Discrete Input function block is wired to the DI[n]
Whe
input for a DEVCTL function block, the Control Builder creates a CEE discrete input
agent to handle the digital input from the fieldbus block. The block-like discrete input
agent maps the data structure (DS-66) of the OUT parameter to the Experion DI[n] with
status parameter. It interprets the value portion in fieldbus terms as a Boolean for
Discrete Input (DI) block and as the appropriate multi-state representation for special
fieldbus Device Control (DC) block. The value is converted and represented in Control
Builder at the output.
OUT
FIM
CEE = Control Execution Environment
CM = Control Module
CPM = Control Processor Module
FIM = Fieldbus Interface Module
DOC = Digital Output Channel
The discrete input agent accepts inputs from either a published parameter or a
client/server read parameter, depen din g up on the communication method use d.
R400 Experion PKS Series A Fieldbus Interface Module User's Guide 51
July 2010 Honeywell
Page 52

3. Fieldbus Integration With Experion System
3.2. Control Integration
The fieldbus data quality of good (cascade), good (non-cascade), bad, and uncertain is
mapped to the appropriate Contro l Builder parameter for good, bad, and uncertain.
Fieldbus device Discrete Output data integration
user can functionally "wire" the output from a discrete process or control value
A
producing Control Builder function block like Device Control to the input of a Discrete
Output block in a fieldbus device residing on an H1 link.
The following simplified functional diagram shows how the output from a Device
Control (DEVCTL) function block in a Control Module that is assigned and loaded to the
CEE in the Control Processor Module (CPM) is integrated with a Discrete Output
function block in a fieldbus compliant de vi ce.
52 Experion PKS Series A Fieldbus Interface Module User's Guide R400
Honeywell July 2010
Page 53

CPM/CEE
CM
DIC
PVFL
3. Fieldbus Integration With Experion System
3.2. Control Integration
Device
BACKCALIN
Control
DI[1]
DO[1]
FIM
RCAS_IN
FIM
Fieldbus
Device
BACKC ALIN = Back Calculation Input
BKCAL_OUT_D = Back Calculation Output Discrete
CAS_IN_D = Cascade Input Discrete
CEE = Control Ex ecution Environment
CM = Control Module
CPM = Control Processor Module
CAS_IN_D
RCAS_IN_D
Digital
Output
BKCAL_OUT_D
RCAS_OUT_D
OUT_D
Transducer
Figure 10 Integration of fieldbus device digital output signal with Control
Builder control strategy
Fieldbus Discrete Output data manipulation
n the DO[n] from the Device Control (DEVCTL) function block is wired to the
Whe
CAS_IN_D input for a fieldbus Discrete Output function block, the Control Builder
automatically creates a CEE output agent to handle the discrete output to the fieldbus
block. The block-like output agent maps the Control Builder DO[n] with status parameter
CAS_IN
DIC = Digital Input Channel
FIM = Fieldbus Interface Module
OP = Output
PVFL = Process Variable Flag
RCAS_IN_D = Remote Cascade Input Discrete
RCAS_OUT_D = Remote Cascade Output Discrete
R400 Experion PKS Series A Fieldbus Interface Module User's Guide 53
July 2010 Honeywell
Page 54

3. Fieldbus Integration With Experion System
3.2. Control Integration
to the fieldbus data structure (DS-66) of the CAS_IN_D parameter. It interprets the value
portion in Control Builder terms and converts it to fieldbus representation.
The CEE output agent also accepts a single BKCAL_OUT_D parameter with the
fieldbus data structure (DS-66) and maps it to the BACKCALIN parameter of the
DEVCTL block in Control Builder terms.
It sends the outgoing "control signal" either to a subscribed parameter or a client/server
written parameter through the CAS_IN_D or RCAS_OUT_D connection. It can
optionally receive the backcalculation signal from either the corresponding published
parameter or client/server read parameter.
The Control Builder data quality is converted to fieldbus data quality. The Control
Builder Good indication is represented as fieldbus Good (Cascade).
The Control Builder control initialization indicators map only to the limited number of
substatus conditions that have corresponding indications in fieldbus Good (Cascade).
Interface Connections Summary
ce the downstream action with the upstream feedback is the same for all fieldbus
Sin
blocks, there are essentially the following six types of interface connections through the
FIM.
a) Analog process value into the FIM.
b) Discrete process value into the FIM.
c) Analog process output from the FIM.
d) Discrete process output from the FIM.
e) Analog process output from the FIM with backcalculation feedback.
f) Discrete process output from the FIM with backcalculation feedback.
Note that types 5 and 6 support publish/subscribe communications in Cascade mode or
client/server communications in Remote Cascade mode. And, the analog values can also
be used in the Remote Out mode.
Fieldbus also supports direct device-to-device (peer-to-peer) publish/subscribe
connections independent of the FIM. The FIM can also monitor (subscribe to) the data
published between the functions blocks of these fieldbus devices.
A word about SCM parameter interaction
ential Control Module (SCM) Steps and Transitions can write to any contained
Sequ
parameter of a fieldbus function block. The value of a contained parameter can be
54 Experion PKS Series A Fieldbus Interface Module User's Guide R400
Honeywell July 2010
Page 55

configured, set by an operator, higher level device, or calculated. For example, the
GRANT_DENY parameter can be used to check access rights, the MODE_BLK
parameter can be used to request mode changes, and the RCAS_IN and RCAS_OUT
parameters can be used to control set points in the Remote Cascade mode.
If the contained parameter has a DS-65 or DS-66 data structure, you must use multiple
SCM Step outputs to write to the different fields in the parameter's data structure. For
example, if you use a Step output to write to the SP parameter of a fieldbus PID block,
when it is in Auto mode, you will need Step outputs for the related parameter attributes
of value, status, substatus and limits, as defined by its structure. A typical SCM write SP
scenario would include the following actions.
Transition checks if Target MODE of the fieldbus block is AUTO.
Step output sets Target MODE to AUTO, if required.
Step output sets SP value and GOOD (Non Cascade) status.
Optional Step output to set SP Limits.
Optional Transition to verify that the value got stored in the fieldbus device.
The SCM will issue a fail alarm, if the store fails for any reason.
ATTENTION
Avoid SCM configurations that would push a NaN (Not a Number) value as
an output to a fieldbus device. If this is not possible, be sure to test the field
device to observe how it reacts to the possible NaN value.
Fieldbus status data details
3. Fieldbus Integration With Experion System
3.2. Control Integration
rding to Fieldbus Foundation specifications, every fieldbus function block input and
Acco
output connection must support a status byte that provides the following status
indications.
Data Quality (usability)
Bad Data Cause
Degraded Data Cause
Limit Conditions
Cascade Control Initialization, Rejection
R400 Experion PKS Series A Fieldbus Interface Module User's Guide 55
July 2010 Honeywell
Page 56

3. Fieldbus Integration With Experion System
3.2. Control Integration
Fault-State Initiation, Indication
Local Override Indication
Worst Case Alarm Indication
Upstream Block Class Identification
The status byte structure consists of a 2-bit quality, most significant bit, field; a 4-bit
substatus field; and a 2-bit limits, least significant bit, field. The following table provides
a breakdown of bit assignments for general reference. The value of the quality field
determines the applicable substatus field indication.
Bit Quality Substatus, if Quality field is Limits
BAD UNCERTAIN
0
BAD Data
Quality
1
UNCERTAI
N Data
Quality
2
GOOD
(NonCascade)
Data
Quality
3
GOOD
(Cascade)
Data
Quality
4
5
NonSpecific
Configuration Error
Not
Connected
Device
Failure
Sensor
Failure
No Communication,
with Last
Usable
Value
Non-Specific Non-Specific
Last Usable
Value
Substitute
Initial Value
Sensor
Conversion
Not Accurate
Engineering
Unit Range
Violation
GOOD
(NonCascade)*
Active Block
Alarm
Active
Advisory
Alarm
Active
Critical
Alarm
Unacknowledged Block
Alarm
Unacknowledged
Advisory
Alarm
GOOD
(Cascade)*
NonSpecific
Initialization
Acknowledge (IA)
Initialization
Request
(IR)
Not Invited
(NI)
Not
Selected
(NS)
Do Not
Select
(DNS)
No Limits
Low Limit
High
Limit
Constant
56 Experion PKS Series A Fieldbus Interface Module User's Guide R400
Honeywell July 2010
Page 57

3. Fieldbus Integration With Experion System
3.3. Control Mode Interaction
Bit Quality Substatus, if Quality field is Limits
BAD UNCERTAIN
6
7
8
No Communication,
with no
Last
Usable
Value
Out-OfService
Sub-Normal
* The Good (non-cascade) substatus is used by output connections for fieldbus blocks
such as Analog Input and Discrete Input. The Good (cascade) substatus is used by output
connections for fieldbus blocks such as PID. Both of these substatuses are converted to
the single system data quality of Good.
Fieldbus status indications
REFERENCE - INTERNAL
Please refer to Fieldbus Status Display Indications in Appendix C for list of
possible display indications associated with a given fieldbus status and
definitions of related substatuses.
GOOD
(NonCascade)*
Unacknowleged Critical
Alarm
GOOD
(Cascade)*
Local
Override
(LO)
Fault-State
Active
(FSA)
Initiate
Fault-State
(IFS)
3.3 Control Mode Interaction
Fieldbus block modes versus control modes
Every fieldbus function block including Resource and Transducer blocks contain the
MODE_BLK parameter. This structured parameter consists of the Actual, Target,
Permitted, and Normal modes. The eight possible modes are described in the About
modes of operation paragraph in the Standard Function Blocks section of Appendix A.
R400 Experion PKS Series A Fieldbus Interface Module User's Guide 57
July 2010 Honeywell
Page 58

3. Fieldbus Integration With Experion System
3.3. Control Mode Interaction
For use within the Experion system, the structure of the MODE_BLK parameter is
expanded to add MODE to the existing Actual, Target, Permitted, and Normal modes as
outlined in the following table.
Control Mode
Structure
Data Type Description
MODE Enumeration
MODE.TARGET Enumeration
MODE.ACTUAL Enumeration
MODE.PERMITTED Bitstring
MODE.NORMAL Enumeration
Write Only
Experion system style mode enumeration
MAN, AUTO, CAS, NORMAL, BCAS, NONE
Read/Write
Target mode
OOS, MAN, AUTO, CAS, RCAS, ROUT
Read Only
Actual Mode
OOS, IMAN, LO, MAN, AUTO, CAS, RCAS, ROUT
Read/Write
Permitted mode
MAN, AUTO, CAS, RCAS, ROUT
OOS is always permitted
Read/Write
Normal mode
MAN, AUTO, CAS, RCAS, ROUT
OOS is not Normal
The Experion system uses the name MODE instead of MODE_BLK and its enumeration
set is identical to that used in fieldbus. Mode is a write only parameter and the FIM will
reject all reads. The FIM captures all writes to MODE and maps valid changes to
MODE.TARGET. If the value NORMAL is written to the MODE.TARGET, the FIM
replaces it with the value from MODE.NORMAL. If a new MODE.NORMAL value is
entered, it is validated against the MODE.PERMITTED values. The OOS mode is not an
acceptable normal mode.
When a new MODE.PERMITTED value is entered, the FIM forces the OOS mode to be
permitted. Only a user with an access level of Engineer is allowed to put a block into its
OOS mode or to return the block to an operating mode. This means a user must have an
access level of Engineer to put a block in Man, Auto, Cas, Rcas, or Normal, if the blocks
current target mode is OOS. When a mode is changed, the FIM clears the
58 Experion PKS Series A Fieldbus Interface Module User's Guide R400
Honeywell July 2010
Page 59

3. Fieldbus Integration With Experion System
3.3. Control Mode Interaction
GRANT_DENY.GRANT parameter bits. It is standard Experion system behavior to take
a grant back after an operator changes a mode relative to its mode attribute (MODATTR)
parameter.
The following table shows how control modes are mapped to fieldbus ones.
Control Mode Fieldbus Mode Comment
MAN Man
AUTO Auto
CAS Cas
NORMAL Normal
BCAS Error!
NONE Error!
Control mode priorities and indications
e following table shows the 2-character and 4-character mode indications to be used in
Th
operating displays and lists the mode priorities based on several interpretations. The
Priority Order interpretation is based on the Out-of-Service mode being serviced over all
others. The Control Order interpretation is based on the traditional control engineer's
concept that Cascade is a higher mode of operation than Automatic, Automatic is a
higher mode of operation than Manual, and so on. The Dominance Order interpretation is
based on Fieldbus Foundation sp ecial rules for modes dominating one another. For
example, Out-of-Service dominates over Manual, Manual dominates over Remote Out,
and Remote Out dominates over Remote Cascade. This is relevant, if multiple mode bits
are set in the target (or normal) mode bitstrings.
A block uses the concept of priority to compute an actual mode that is different from the
target mode, and to determine if the particular actual mode allows write access.
Mode Abbreviation Priority Interpretation Mode
When setting as target mode, read
MODE.NORMAL value and write to
MODE.TARGET.
Not used in fieldbus blocks. Attempt to set to
target is illegal.
Not used in fieldbus blocks. Attempt to set to
target is illegal.
R400 Experion PKS Series A Fieldbus Interface Module User's Guide 59
July 2010 Honeywell
2-Char 4-Char
Priority
Order
(8=highest)
Control
Order
(8=highest)
Dominance
Order
(6=Highest)
Page 60

3. Fieldbus Integration With Experion System
3.3. Control Mode Interaction
Mode
Out-of-Service OS OOS 8 1 6
Initialization
Manual
Local Override LO LO 6 3 Manual M Man 5 4 5
Auto A Auto 4 5 1
Cascade C Cas 3 6 2
Remote Cascade RC RCas 2 7 3
Remote Output RO ROut 1 8 4
Mode Abbreviation Priority Interpretation
2-Char 4-Char
IM IMan 7 2 -
Priority
Order
(8=highest)
Control
Order
(8=highest)
Dominance
Order
(6=Highest)
While every type or block instance does not need to support all eight modes, all eight
indicator bits are present in the database. The mode bit assignments are listed below for
reference.
Bit Mode
0 (LSB) = Remote Output (ROut)
1 = Remote Cascade (RCas)
2 = Cascade (Cas)
3 = Automatic (Auto)
4 = Manual (Man)
5 = Local Override (LO)
6 = Initialization Manual (IMan)
7 (MSB) = Out of Service (OOS)
60 Experion PKS Series A Fieldbus Interface Module User's Guide R400
Honeywell July 2010
Page 61

3. Fieldbus Integration With Experion System
Rotary Switch Model versus Toggle Switch Model
The Fieldbus Foundation supports both the Rotary Switch and the Toggle Switch models
of mode operation. The Rotary Switch model supports only one mode request at a time.
For example, an operator can request OOS, Man, Auto, Cas, RCas, or ROut. It has no
memory of previous target modes.
The Toggle Switch model supports more than one mode request at a time. For example,
an operator can request Manual override of Cascade, Manual override of Remote
Cascade, and so on.
Experion supports the Rotary Switch model as well as the following two instances of the
Toggle Switch model.
An operator may request the Cas mode at the same time the RCas mode is requested
An operator may request the Cas mode at the same time the ROut mode is requested
Experion also ignores the following illegal mode combinations as defined by the
Fieldbus Foundation.
If ROut is set, RCas may not be set. If it is set, it will be ignored.
The Auto and Man bits must always be of opposite states. If neither Auto nor Man or
both are set, and the ROut, RCas, or Cas mode is set, Auto mode will be assumed
with Man cleared. Likewise, If neither Auto nor Man or both are set, and neither
ROut, RCas, nor Cas mode is set, Man mode will be assumed with Auto cleared. For
the OOS mode, the Man bit should be set unless it is not permitted. If Man is not
permitted, the Auto bit should be set unless it is not permitted. If neither Auto nor
Man is permitted, the OOS bit should be set.
ATTENTION
An operator needs an access level of ENGR or higher to invoke the OOS
mode or to return a block to an in-service mode.
The Experion system adheres to the following additional rules for setting fieldbus target
mode bits for its MODE supported subset of combinations.
Fieldbus
Mode
3.3. Control Mode Interaction
Rule
OOS
R400 Experion PKS Series A Fieldbus Interface Module User's Guide 61
July 2010 Honeywell
When setting as the target mode, obtain the target mode, preserve the
Auto and Man bits, set the OOS bit, and optionally reset all the other bits.
Reject the request, if the access level is not ENGR or higher.
Page 62

3. Fieldbus Integration With Experion System
3.3. Control Mode Interaction
Fieldbus
Mode
IMan
LO
Man
Auto
Cas
RCas
ROut
Normal
This is a Read Only parameter and cannot be set as the target mode.
Never set the IMan as the target mode.
This is a Read Only parameter and cannot be set as the target mode.
Never set the LO as the target mode.
When setting as the target mode set the Man bit and reset all the other
bits. Reject the request, if the current mode is OOS and the access level
is not ENGR or higher.
When setting as the target mode set the Auto bit and reset all the other
bits. Reject the request, if the current mode is OOS and the access level
is not ENGR or higher.
When setting as the target mode, set both Cas and Auto bits and reset
all the other bits. Reject the request, if the current target mode is OOS
and the access level is not ENGR or higher.
When setting as the target mode, set both RCas and Auto bits and reset
all the other bits. Reject the request, if the current target mode is OOS
and the access level is not ENGR or higher.
When setting as the target mode, set both ROut and Auto bits and reset
all the other bits. Reject the request, if the current target mode is OOS
and the access level is not ENGR or higher.
When setting as the target mode read the MODE.NORMAL value and
write to the MODE.TARGET. Reject the request, if the current target
mode is OOS and the access level is not ENGR or higher.
Display indications and mode calculation
Rule
e fieldbus mode indications for actual mode and composite actual/target modes will
Th
appear in the following formats on Station displays.
Format Description Examples
a
a (t)
Satisfied in mode a;
actual same as target.
In mode a; not satisfied in
higher target mode t.
62 Experion PKS Series A Fieldbus Interface Module User's Guide R400
Honeywell July 2010
OOS, MAN, AUTO, CAS, RCAS, ROUT
MAN (A), CAS (RC), IM (A), LO (CAS),
AUTO (M), CAS (M)
Page 63

3. Fieldbus Integration With Experion System
A
3.3. Control Mode Interaction
The block mode calculation of actual mode considers the input parameter status
attributes, input values, and resource state as represented graphical l y in the fi g ure belo w.
Target Mode
Mode
Determine
Host Timeout
Remote Cascade
Remote Out
Shed Option
Cascade
Primary Input
Back Calculation Input
Resource State
Block Specific Inputs
Figure 11 Block mode calculation summary
REFERENCE - INTERNAL
Please refer to Mode Change Conditions in Appendix D for list of conditions,
which will change the mode in order of priority with Good (Non-Cascade)
status on input parameter as the lowest priority.
Access control through GRANT_DENY parameter
ctual Mode
and T arget
Actual and Target
Mode Calculation
fieldbus function block includes a GRANT_DENY parameter. It allows users to
Every
Grant and Deny access permission to groups of function block parameters by other
devices. The following table summarizes the attributes for the Grant and Deny elements
of the parameter.
Element and Bit Attribute Description
R400 Experion PKS Series A Fieldbus Interface Module User's Guide 63
July 2010 Honeywell
Page 64

3. Fieldbus Integration With Experion System
3.4. Link and Block Schedules
Element and Bit Attribute Description
GRANT_DENY.GRANT:0
GRANT_DENY. GRANT:1 Tune
GRANT_DENY.GRANT:2 Alarm
GRANT_DENY.GRANT:3
GRANT_DENY.DENY:0
GRANT_DENY.DENY:1 Tune Turns off Tune permission grant.
GRANT_DENY.DENY:2 Alarm Turns off Alarm permission grant.
GRANT_DENY.DENY:3
Program
Operations
Local
Operations
Program
Operations
Local
Operations
Grants permission to higher level
device to change the target mode, set
point or output of a block, depending
on block mode.
Grants permission to higher level
device to change tuning parameters of
the block.
Grants permission to higher level
device to change alarm parameters of
the block
Grants permission to a local operator's
panel or hand-held device to change
target mode, set point, or output of the
block, depending on block mode.
Turns off Program Operations
permission grant.
Turns off Local Operations grant.
The Grant selections are mutually exclusive. If you select Program Operations, the Local
Operations selection is turned off. If Local Operations is selected, neither an operator nor
a high level device (program) has the right to modify a parameter value of the block.
Note that access by another function block is always granted and is independent of
GRANT_DENY selections. Also, an operator can always change the MODE of a block
with Program or Loc al Operations Granted. When an operator changes the MODE, it
automatically resets all four Grants to off.
The GRANT_DENY parameter will not track the mode of an associated SCM.
3.4 Link and Block Schedules
Link Active Scheduler (LAS) and Link Master
All links must have a Link Active Scheduler (LAS). The LAS operates at the data link
layer as the bus arbiter for the link. It provides the following functions.
64 Experion PKS Series A Fieldbus Interface Module User's Guide R400
Honeywell July 2010
Page 65

3. Fieldbus Integration With Experion System
3.4. Link and Block Schedules
Recognizes and adds new devices to the link.
Removes non-responsive devices from the link
Distributes Data Link and Link Scheduling time on the link. The data link layer
synchronizes the network-wide Data Link Time. Link scheduling time is a link
specific time represented as an offset from Data Link Time. It is used to indicate
when the LAS on each link begins and repeats its schedule. System Management
uses it to synchronize function block execution with the data transfers scheduled by
the LAS.
Polls devices for buffered data at scheduled transmission times.
Distributes a priority-driven token to devices between scheduled transmissions.
Any device on the link may become the LAS as long as it is capable. The devices that are
capable of becoming the LAS are called Link Master devices. All other devices are
referred to as Basic devices.
The FIM is Link Master capable and supports both primary and backup link schedules. It
is designated as the primary Link Master. It is always assigned the lowest network
address.
Upon startup or failure of the existing LAS, the Link Master capable devices on the link
bid to become the LAS. The Link Master that wins the bid begins operating as the LAS
immediately upon completion of the bidding process. The Link Master capable device
with the lowest address usually wins the bid. Link Masters that do not become the LAS
act as basic devices when viewed by the LAS. They also act as LAS backups by
monitoring the link for failure of the LAS, and by bidding to become the LAS when a
LAS failure is detected.
R400 Experion PKS Series A Fieldbus Interface Module User's Guide 65
July 2010 Honeywell
Page 66

3. Fieldbus Integration With Experion System
3.4. Link and Block Schedules
ATTENTION
If the LAS is too large to fit in the active Link Master capable device, the user
must reconfigure the device to become a Basic one through Control Builder,
and restart the device to initiate the change.
Most Link Master capable devices can only support one subschedule and
cannot support blocks that are running two different macrocycles. Each
macrocycle includes one subschedule. Each subschedule includ es
sequences that specify the start time of each element in the sequence. The
elements are actual publications that initiate schedule operations. Dev ices
have predefined limits on the number of subschedules that can exist per LAS
and the number of sequences that can exist in a subschedule. If the number
of subschedules and/or sequences in the current schedule (backup LAS)
exceed the Link Master capable device's predefined limits, a load of the
device through Control Builder will generate load errors ident ifying
subschedule problems. In this case, the user must reconfigure the device to
become a Basic one through Control Builder, and restart the device to initiate
the change. Otherwise, if the FIM fails, the potential for a "no schedule"
condition exists. Since the schedule is cleared from the Link Master capable
device upon the detection of load errors, it cannot function as the backup
LAS without a schedule.
Link Schedule
e Link Schedule is the overall schedule for the link. It includes both the link data
Th
transfer and the device function block execution schedules. A Link Schedule is provided
for the FIM interface port for each link. A backup Link Schedule is provided for all Link
Master capable devices on the link.
The link data transfer schedule is derived from the portion of the link schedule that deals
with publication of parameters. The Control Builder (CB) provides a default link
schedule of publications and function block execution phasing based on the function
block connections in the user configured control strategy. The basis for the link schedule
is this link's content from all currently loaded Control Modules (CM). Execution phasing
is based solely on function block existence in the CM. Order of execution is based on th e
order in CM (ORDERINCM) parameter for each block. Publications are based on interdevice function block connections and device to Experion system or Experion system to
device function block connections. The following publication rules apply.
Function block publications appear in the link data transfer schedule in the order
specified by their ORDERINCM parameters. (Duplicate values of ORDERINCM
may produce indeterminate ordering of those blocks involved.)
66 Experion PKS Series A Fieldbus Interface Module User's Guide R400
Honeywell July 2010
Page 67

If the user changes the sequence of execution order for function blocks in a schedule,
the ORDERINCM parameters of the involved function blocks are appropriately
adjusted.
Publication of each output is scheduled immediately after execution of the function
block that produces the value, considering inter-publication delays and potential
conflicts.
Blocks publish, if their output is connected to an input in another device or the FIM.
No unneeded time delay is allowed in the default link data transfer schedule.
The macrocycle is the least common multiple of the execution periods of all the CMs
involved in the link data transfer schedule.
Note that users will be able to add extra time before and after the execution of a fieldbus
function block through the Pre-execut ion delay (PREXEGAP) and the Post execution
delay (POSTEXEGAP) parameters that appear on the block configuration forms in
Control Builder. This means users can adjust the schedule to achieve such actions as
forcing multiple AI blocks to execute at the same time (even though they must publish
serially).
Function block execution schedule
3. Fieldbus Integration With Experion System
3.4. Link and Block Schedules
function block execution schedule is derived from the portion of the link schedule
The
that deals with starting the execution of each function block or FB_START indications.
The link schedule provides only those entries that pertain to the blocks residing in a given
fieldbus device. While device function blocks may be synchronized to the link schedule,
it is not a Fieldbus Foundation mandated feature. They may run asynchronously.
The block execution time can be broken into these three phases.
1. Preprocessing - Snap of parameter values
2. Execution - Function block outputs are determined
3. Postprocessing - Block output values, alarm and associated trend parameters are
updated.
Since input parameter values used by a function block must not change during execution,
a copy of the input parameter values is captured or snapped at the beginning of
execution. Also, since block outputs to other blocks must be time coincident, the output
values are only updated at the completion of the function block execution. The block
algorithm execution phase is always executed in the following ordered sequence as
shown in the following figure.
R400 Experion PKS Series A Fieldbus Interface Module User's Guide 67
July 2010 Honeywell
Page 68

3. Fieldbus Integration With Experion System
3.4. Link and Block Schedules
1. Determine the actual mode attribute of th e mode pa rameter. This calculation is
based on the target mode and the status attributes of input parameters.
2. Calculate the set point, if the Set Point parameter is defined for the function block.
The calculation of working set point is based on the actual mode, set point input
parameters such as cascade and remote cascade, and any backward path input status.
Also, the value of the controlled parameter, process variable, may be used for set
point tracking. The resulting set point is shown in the set point parameter.
3. Execute the control or calculation algorithm to determine the valu e and status of
output parameters in the forward path. The conditions that determine the status
attribute of output parameters. The value attributes of the block's input parameters
and contained parameters, the actual mode and the working set point are used in this
algorithm. Also, where defined by the block profile, some blocks may use the status
of selected inputs. In general, the calculation of actual mode and the use of actual
mode in the algorithm accounts for the status of critical inputs.
4. Calculate output parameters in the backward path. This phase applies only to output
blocks and calculation blocks designed for use in a cascade path.
TIP
A fieldbus device whose period of function block execution is an integer factor
of the macrocycle of the link will have a function block execution schedule
prepared that has the optimal shorter cycle. For example, if the control
strategy includes a CM with a 2 second period for a temperature loop, a
second CM with a 1 second period for a pressure loop, and a third CM with a
250 millisecond period for a flow loop, a 1 second macrocycle can be
downloaded to the device that contains functions blocks used in the 1 second
and 250 ms CMs.
68 Experion PKS Series A Fieldbus Interface Module User's Guide R400
Honeywell July 2010
Page 69

3. Fieldbus Integration With Experion System
3.5. Tags, Addresses, and Live List
Cascade
Remote Cascade
Remote Out
Back Calculation
Primary Input
Block S pecific
Parameters
T arget
Mode
Mode
Calculation
Actual
1
Mode
Backward Path
Figure 12 Algorithm execution phase sequence
3.5 Tags, Addresses, and Live List
Tag and address assignments
Before a fieldbus device can actively join a network it must be assigned a name and data
link address. Device names are system specific identifiers called physical device tags
(PD_TAG).
Set Point
Calculation
Set Point PV
Out
Calculation
SP & OUT
Output
Parameters In
2
3
Primary Output
4
Remote Cascade Out
Back Calculation Out
Remote Out Out
The PD_TAGs may be assigned by the vendor or through the System Management
Kernel (SMK), normally in an off-line configuration environment so devices without tags
are kept off the operational network.
The SMK for devices without tags are set to the Uncommissioned state and connected to
the bus at one of four default device addresses. The Data Link Layer specifies these
default addresses as non-visitor node addresses. The following figure shows the general
allocation of data link layer addresses to field devices.
R400 Experion PKS Series A Fieldbus Interface Module User's Guide 69
July 2010 Honeywell
Page 70

3. Fieldbus Integration With Experion System
3.5. Tags, Addresses, and Live List
Non-Visitor addresses,
used as default
addresses for devices
requiring address
assignments
248
Usable Addresses
Node
Addresses:
Hexadecimal
Decimal
Standard, Global,
First Unused
Node Address
V(FUN)
010 X Y F8FBFCFF
016
Usable
and Flat Node
Addresses
Addresses
Number of
Unused Node
Addresses
V(NUN)
XY
Figure 13 Summary of address allocations for fieldbus devices
ATTENTION
Temporary devices such as handheld interfaces are not assigned tags or
addresses. They join the network through one of four data link visitor
addresses reserved for them in the data link layer protocol.
Note that the Experion system will show address assignments in Decimal
notation rather than Hexadecimal in Control Builder configuration forms and
Station displays. The address range in Decimal is 0 to 255 and 0 to FF in
Hexadecimal.
A word about fieldbus address assignments in Control Builder
Visitor addresses
used for temporary
(handheld) devices
252
251
255
e Fieldbus Interface Module will be given 16 as its assigned address. The preferred
Th
address range for fieldbus devices is 20 to 40 decimal (14 to 28 hexadecimal). This
provides the most optimized default network range where the first unused node address
(FUN) is 41 decimal (29 hexadecimal) and the number of unused addresses (NUN) is
206. We recommend that the fieldbus device designated as the backup Link Master be
given 21 decimal (15 hexadecimal) as its assigned address.
Live List and Uncommissioned Devices
OUNDATION Fieldbus defines a live list as a 32-byte bitstring (256 bits) where each bit
F
represents an address of the fieldbus network. A set bit at a particular bit number means
that a device is present at that address. The LAS of the network owns the live list and
maintains it as part of its operation.
70 Experion PKS Series A Fieldbus Interface Module User's Guide R400
Honeywell July 2010
Page 71

3. Fieldbus Integration With Experion System
3.6. Notification Scheme
The FIM constantly monitors the live list for each fieldbus link connected to it. When the
LAS for the link recognizes a new device at a default address, it adds it to its live list
according to the data link layer procedures. The FIM detects the change in the live list
and makes a connection to the new uncommissioned device. It gathers the following
information from the device to be passed to Control Builder.
Name Description Data Type Access
PdTag Physical Device Tag 32-byte string Read/Write
Address Device Address Unsigned8 Read/Write
DevID Globally unique Device Identifier 32-byte string Read Only
Vendor Vendor name string 32-byte string Read Only
ModelName Model Name string 32-byte string Read Only
Rev Application Revision 32-byte string Read Only
ManufID Manufacturer Identifier Unsigned32 Read Only
DevType Device Type code Unsigned16 Read Only
DevRev Device Revision Unsigned8 Read Only
DdRev DD Revision Unsigned8 Read Only
Control Builder uses the device information to create an item in its Monitoring tree to
represent the new uncommissioned device on the given link. Users can now view and
configure pertinent information for the uncommissioned d ev ice through appropriate Link
block and device block configuration forms in Control Builder.
TIP
The FIM must be configured and loaded through Control Builder before you
can view it and its links through the Monitoring tab of Control Builder.
3.6 Notification Scheme
Fieldbus versus Experion Alarm Priorities
The fieldbus alarms will be closely integrated with the existing Experion notification
system. The Experion Server will handle FIM alarms in the same way it handles Control
R400 Experion PKS Series A Fieldbus Interface Module User's Guide 71
July 2010 Honeywell
Page 72

3. Fieldbus Integration With Experion System
3.6. Notification Scheme
Processor ones. But, the fieldbus devices themselves own their alarm data and generate
the alarms, clears, and events.
Fieldbus devices use 0 to 15 as numeric priorities for alarm reporting. Experion alarms
use Journal, Low, High and Urgent as priorities with a sub-priority of 0 to 255. The
following table shows how fieldbus priorities are mapped to Experion priorities and
severities.
Fieldbus Alarm Priority Experion Alarm Priority Experion Alarm Severity
0
1
2
BLOCK_ERR bit 14
(power-up)
BLOCK_ERR bit 15 (Out-
of-Service)
2
All other bitstring
indications:
(BLOCK_ERR bits 0-13,
XD_ERROR bits 16-25)
2 (User selected) Journal 2
3 Low 3
4 Low 4
5 Low 5
(Can never be seen by
FIM or above)
(Can never be seen by
FIM or above)
Journal
(Event System Only)
System Level Diagnostic
(High)
(Can never be seen by
FIM or above)
(Can never be seen by
FIM or above)
2
2
6 Low 6
7 Low 7
8 High 8
9 High 9
10 High 10
72 Experion PKS Series A Fieldbus Interface Module User's Guide R400
Honeywell July 2010
Page 73

Fieldbus Alarm Priority Experion Alarm Priority Experion Alarm Severity
11 High 11
12 Urgent 12
13 Urgent 13
14 Urgent 14
15 Urgent 15
Advanced Alarming
3. Fieldbus Integration With Experion System
3.6. Notification Scheme
Prior to R400
, diagnostic alarms were not supported.
With R400, FF devices are configured with a feature of configuring alarm conditions on
diagnostic parameters. The alarms that are generated are based on the status of these
parameters in a device. Individual bits in these strings are selected and configured as a
condition to generate the alarms. Therefore, the conditions that are used for generating
manufacturer-specific alarms are contained in bit string parameters of FF Transducer
blocks and Resource blocks. FIM monitors all the parameters in the condition to generate
corresponding alarms, which are activated with conditions and attached to the H1
connection.
Note: You can configure alarm conditions and save in the ERDB.
Considerations
Following are some of the considerations for configuring diagnostic parameters.
Each condition is associated with at most 5 parameters of a device.
You can select any combination of available bits.
Different conditions can utilize the same or different parameters/bits.
You can enable and disable the conditions at the template level and device lev e l from
both Project and Monitoring modes.
Fieldbus Alarm Conditions
eldbus devices provide both process and device related alarms. The process alarms are
Fi
associated with process variable conditions and they are reported as process alarms into
the Experion system. The device alarms are associated with actual device conditions or
processes within the block as indicated by BLOCK_ERR and XD_ERROR bitstring
alarms. These alarms are reported as device or system alarms into the Experion
R400 Experion PKS Series A Fieldbus Interface Module User's Guide 73
July 2010 Honeywell
Page 74

3. Fieldbus Integration With Experion System
3.6. Notification Scheme
notification system. The following table summarizes the possible fieldbus alarm
enumerations and lists the alarm/event type identification to be used in the alarm
summary and event summary displays in Station.
ATTENTION
Only the first alarm in an overlapping series of alarms associated with
BLOCK_ERR and XD_ERROR bitstring alarms is reported due to a flaw in
the Fieldbus Foundation Specifications regarding the alert state machine.
This has been reported to the Fieldbus Foundation through their Action
Request system and the Foundation has agreed to permit future devices to
issue alerts on changes to the status of any element of these bitstring alarms.
If no more than one of the bits is set at a time, the alarms are reported and
cleared properly
TIP
Fieldbus alarm functions do not support rate of change (ROC) alarms. ROC
alarms can only be generated in applications that use Control Builder Data
Acquisition blocks for input signal conditioning.
Enumeration Description Alarm/Event Type
UNDEF Undefended Alarm No Action
LO Low Limit Alarm PVLO
HI High Limit Alarm PVHI
LO LO Critical Low Limit Alarm PVLOLO
HI HI Critical High Limit Alarm PVHIHI
DV LO Deviation Low Alarm DEVLO
DV HI Deviation High Alarm DEVHI
DISC Standard Discrete Alarm OFFNORM
DISC Standard Discrete Alarm CHNGOFST
DISC DevCtl Fail Alarm FBDCFAIL
74 Experion PKS Series A Fieldbus Interface Module User's Guide R400
Honeywell July 2010
Page 75

3. Fieldbus Integration With Experion System
3.6. Notification Scheme
Enumeration Description Alarm/Event Type
DISC DevCtl Accept Alarm FBDCACC
DISC DevCtl Ignore Alarm FBDCIGN
BLOCK BLOCK_ERR: 0 (Other (LSB)
BLOCK BLOCK_ERR: 1 (Block Configuration Error)
BLOCK BLOCK_ERR: 2 (Link Configuration Error)
BLOCK BLOCK_ERR: 3 (Simulate Active)
BLOCK BLOCK_ERR: 4 (Local Override)
BLOCK BLOCK_ERR: 5 (Dev Fault State Set)
BLOCK
BLOCK_ERR: 6 (Dev Needs Maintenance
Soon)
BLOCK BLOCK_ERR: 7 (I/P Failure or PV BAD Status)
BLOCK BLOCK_ERR: 8 (O/P Failure)
BLOCK BLOCK_ERR: 9 (Memory Failure)
FFOTHER
(Unspecified Error)
FFBLKCFG
(Block Config Error)
FFLNKCFG
(Link Config Error)
FFSIMACT
(Simulation Activ)
FFLO
(Local Override)
FFFLSAFE
(Device Fault State)
FFDEVNMS
(Maintain Device
Soon)
FFINFL
(Device Input Failure)
FFOUTFL
(Device Output Fail)
FFMEMFL
(Memory Failure)
BLOCK BLOCK_ERR: 10 (Lost Static Data)
BLOCK BLOCK_ERR: 11 (Lost NV Data)
BLOCK BLOCK_ERR: 12 (Readback Check Failed)
R400 Experion PKS Series A Fieldbus Interface Module User's Guide 75
July 2010 Honeywell
FFLSTDTA
(Static Data Lost)
FFLNVDTA
(Non-Vol Data Lost)
FFRBCKFL
(Readback Check
Fail)
Page 76

3. Fieldbus Integration With Experion System
3.6. Notification Scheme
Enumeration Description Alarm/Event Type
BLOCK
BLOCK_ERR: 13 (Dev Needs Maintenance
Soon)
BLOCK BLOCK_ERR: 14 (Power Up)
BLOCK BLOCK_ERR: 15 (Out-Of-Service)
BLOCK XD_ERROR: 16 (Unspecified Error)
BLOCK XD_ERROR: 17 (General Error)
BLOCK XD_ERROR: 18 (Calibration Error)
BLOCK XD_ERROR: 19 (Configuratio n Error)
BLOCK XD_ERROR: 20 (Electronics Failure)
BLOCK XD_ERROR: 21 (Mechanical Failure)
BLOCK XD_ERROR: 22 (I/O Failure)
FFDEVNMS
(Maintain Device
Now)
FFPWRUP
(Powered-Up)
FFOOS
(Out-Of-Service)
TBUNSPEC
(Unspecified TB
Error)
TBGENRAL
(General Error)
TBCALERR
(Calibration Error)
TBCFGERR
(Configuration Error)
TBELECFL
(Electronics Failure)
TBMECHFL
(Mechanical Failure)
TBIOFL
(I/O Failure)
BLOCK XD_ERROR: 23 (Data Integrity Error)
BLOCK XD_ERROR: 24 (Software Error)
BLOCK XD_ERROR: 25 (Algorithm Error)
UPDATE TB Static Data Update Event TBSTCHNG
UPDATE FB Static Data Update Event
76 Experion PKS Series A Fieldbus Interface Module User's Guide R400
Honeywell July 2010
TBDTAERR
(Data Integrity Error)
TBSWERR
(Software Error)
TBALGERR
(Algorithm Error)
FBSTCHNG
(Static Revision)
Page 77

3. Fieldbus Integration With Experion System
3.6. Notification Scheme
Enumeration Description Alarm/Event Type
WRITE Write Protect Change Alarm
UPDATE Link Object Update Event
UPDATE Trend Object Update Event No Action
RBWPCHNG
(Write Lock)
FBLOCHNG
(Link Object
Changed)
Loading alarm conditions
After configu
ring the alarm conditions, you must load the saved conditions to the FIM.
Conditions are loaded only after loading only during loading the device. For more
information on loading the conditions, see Loading a CIOM-A FIM and its Links.
ATTENTION
Before loading, turn off the device blocks as it can affect the execution of
associated control strategies.
When you perform device like replacement, advanced alarming conditions
are also loaded from Project mode configuration when the device is
loaded.
When you change the device’s template with an unlike template
replacement, all advanced alarm configuration settings are loaded from
the replacement template.
When you commission the device using Commission Without
Reconfiguration, the device automatically loads the settings from the
selected device template. However, if there are multiple templates that
match the device profile and revision information, you must select the
template before commissioning.
Alarm server operation
efined conditions are configured to generate the system alarm.
User d
System Alarm: System alarms appear in the System Status Display. The alarm attributes
are set as follows:
Attribute Value
Source Device tag
R400 Experion PKS Series A Fieldbus Interface Module User's Guide 77
July 2010 Honeywell
Page 78

3. Fieldbus Integration With Experion System
3.7. CIOM-A FIM Redundancy Functionality
Condition DIAG
Priority User specified (Low, High, Urgent)
Severity Set to “00”
Description The name of the condition configured
Criticality
User specified criticality (Failed,
Maintenance, Check, OffSpec)
3.7 CIOM-A FIM Redundancy Functionality
About CIOM-A FIM redundancy
If you have redundancy compliant hardware, you can implement redundant Series A FIM
operation through a Redundant Chassis Pair (RCP). A RCP consists of two chassis that
include identical redundancy compliant modules in matching slot positions within their
given chassis. The following figure shows a typical hardwa re con fig urat i o n fo r a RCP
that includes a C200 Control Processor Module (CPM). The RCP does not need CPMs to
support FIM redundancy. It does need one pair of Redundancy Modules (RMs) though.
78 Experion PKS Series A Fieldbus Interface Module User's Guide R400
Honeywell July 2010
Page 79

3. Fieldbus Integration With Experion System
3.7. CIOM-A FIM Redundancy Functionality
CIOM-A FIM versus C200 CPM redundancy
Bo
th the CIOM-A FIM and the C200 CPM or Controller redundancy use Redundancy
Modules in a Redundant Chassis Pair (RCP) configuration to provide redundant
functionality. The RCP does this by providing a pair of chassis, so a component failure in
one chassis switches the handling of the assigned functions to the other chassis. This is
R400 Experion PKS Series A Fieldbus Interface Module User's Guide 79
July 2010 Honeywell
Figure 14 Typical RCP setup in 10-slot chassis.
Page 80

3. Fieldbus Integration With Experion System
3.7. CIOM-A FIM Redundancy Functionality
considered a dual redundant system, which is characterized by the following two main
redundancy states.
Primary - Refers to the chassis executing the assigned control functions.
Secondary - Refers to the chassis in some state of readiness to assume the
responsibilities of the Primary.
REFERENCE - INTERNAL
Please refer to the Controller Redundancy Functionality section in the Control
Builder Components Theory for more information about C200 Controller
redundancy.
Switchover and Secondary readiness
switchover describes the process where a Secondary chassis assumes the Primary state,
A
and the Primary chassis assumes the appropriate Secondary state of readiness, depending
upon what triggered the switchover. A switchover can be triggered immediately upon the
detection of a fault in the Primary or upon the receipt of an operator command.
The ability of a Secondary chassis to take over the assigned control functions of the
Primary depends upon which one of the following readiness states reflects its current
state.
If Secondary Chassis State is . . . Then, the Secondary Chassis . . .
Disqualified
Synchronizing
Synchronized
Cannot assume the Primary state. This is a
state of non-readiness.
Cannot assume the Primary State. In this state,
the Secondary chassis is copying database
information from the Primary.
Can assume the Primary state upon
switchover. In this state, the database in the
Secondary is aligned with the database in the
Primary. The Secondary closely tracks
database changes to maintain its
synchronization with the database of the
Primary. Otherwise, the Secondary will revert
to a Disqualified state.
80 Experion PKS Series A Fieldbus Interface Module User's Guide R400
Honeywell July 2010
Page 81

Switchover behavior considerations
The following table lists some display and control data behaviors in response to a CIOMA FIM switchover action.
For This CIOM-A FIM Related
Function . . .
3. Fieldbus Integration With Experion System
3.7. CIOM-A FIM Redundancy Functionality
The Related Switchover Behavior Is . . .
Fieldbus to Fieldbus Device
Communication
Control Data for
Fieldbus/Experion Control
Integration
The "on-the-wire" control is not affected by a
switchover. The new Primary FIM immediately
takes over as a Link Master and resumes
execution of the link schedule.
Control data is available immediately after
switchover. This includes data for connections
in the fieldbus to C200 and in the C200 to
fieldbus directions. The FIM may substitute a
last known good value for publication to
fieldbus devices, while network connections
reform to C200 controller. Substitute value
functionality is bounded to a maximum of five
seconds to account for worse case timing.
R400 Experion PKS Series A Fieldbus Interface Module User's Guide 81
July 2010 Honeywell
Page 82

3. Fieldbus Integration With Experion System
3.7. CIOM-A FIM Redundancy Functionality
For This CIOM-A FIM Related
Function . . .
Display Data Display data may not be available for several
Failure conditions and switchover
The Related Switchover Behavior Is . . .
seconds during switchover. Typically, five
seconds is the time required to refresh a
display after switchover. Exact behavior of
display data during switchover will be different
on a per-configuration and per-device basis.
After a FIM switchover, display clients such as
Control Builder and Station must reform
connections to the new primary FIM. The FIM
then processes requests from reconnected
clients. It populates the FIM parameter cache
by issuing read requests on the H1 network for
device parameter data. As the read requests
complete and the FIM parameter cache is filled,
display traffic resumes. The time to recover
display data is affected by the following things:
The bandwidth available on the H1 link for
unscheduled traffic,
The number of display requests received
by the FIM,
Use of views within the fieldbus device,
and
Third-party fieldbus device behavior,
including time required to reopen
client/server VCRs.
e following table identifies failure conditions that result in a switchover and those that
Th
do not.
ATTENTION
When any failure that results in a switchover occurs in a Secondary, the
Secondary chassis/FIM loses synchronization.
In addition to the failure conditions, these events are reported as diagnostic
notifications:
Loss of view of redundant partner on H1 network (applies to FIM link).
82 Experion PKS Series A Fieldbus Interface Module User's Guide R400
Honeywell July 2010
Page 83

3. Fieldbus Integration With Experion System
3.7. CIOM-A FIM Redundancy Functionality
Loss of private path connection from Primary to Secondary (lonely event).
Failure Conditions That Result in a
Switchover
Power to Primary chassis fails. One or both H1 cables fail.
Failure Conditions That Do Not Result
in a Switchover
Integrated Control Protocol (ICP)
backplane in primary chassis fails
Any module in Primary chassis fails. The 24-Volt power supply fails.
Both ControlNet drop cables to Primary
ControlNet module are lost.
Primary FIM fails.
Primary FIM's connection to Redundant
Remote Terminal Panel fails.
Primary RM fails.
Fieldbus network switchover considerations
CIOM-A Fieldbus Interface Module (FIM) is a Link Master device running the link
The
schedule, performing network maintenance activities, publishing control data and
subscribing to control data, listening to alerts, and so on. All of these activities must be
transferred from one module to another duri ng swit c ho ver. The redundant FIM operation
accounts for the following key considerations associated with initiating a H1 network
switchover.
For this Switchover Consideration . . . FIM Redundancy Operation . . .
Bumpless Switchover Assures that fieldbus devices do not:
One or both H1 network conditioners fail.
R400 Experion PKS Series A Fieldbus Interface Module User's Guide 83
July 2010 Honeywell
Initiate a fault state,
Remote shed, or
Mode shed, during switchover.
The new Primary FIM does not publish
any data on the network until all
switchover actions are completed and it
has good data from the Control Data
Access (CDA) server.
Page 84

3. Fieldbus Integration With Experion System
3.7. CIOM-A FIM Redundancy Functionality
For this Switchover Consideration . . . FIM Redundancy Operation . . .
Online Address Swap
Switchover versus fieldbus network activities
e following table summarizes how given fieldbus network activities behave during a
Th
switchover.
ATTENTION
Depending upon the link communication load, number of devices, and type of
parameter, fresh viewed data from field devices may be delayed for up to 20
seconds during a CIOM-A FIM chassis switchover. This does not apply to
control data.
If Network Activity Is . . . Then, Behavior During Switchover Is . . .
Swaps network addresses between
Primary and Secondary FIM links. The
link addresses are 16 for the Primary FIM
and 17 for the Secondary FIM. During
switchover or swap, the Secondary FIM
becomes the Primary FIM and assumes
address 16, while the Primary FIM
becomes the Secondary FIM and
assumes address 17 or is Disqualified.
The Primary FIM continues Link Master
operations.
Link Maintenance
System Management
Operations
84 Experion PKS Series A Fieldbus Interface Module User's Guide R400
Honeywell July 2010
Since Secondary FIM link is a backup Link Active
Scheduler (LAS), it resumes network management
activities as soon as it detects that the old Primary
FIM is no longer there.
Both Primary and Secondary FIM links have the
same knowledge of current time. When new
Primary takes over as acting Link Master, it also
becomes acting time publisher.
Any System Management operation that is in
progress is interrupted. For example, the new
Primary does not know anything about pending
change tag or address operation. As a result,
device whose address or tag is being changed will
timeout and abort the operation.
Page 85

3. Fieldbus Integration With Experion System
3.7. CIOM-A FIM Redundancy Functionality
If Network Activity Is . . . Then, Behavior During Switchover Is . . .
Link Active Scheduler (LAS)
Alert Queued, User Triggered,
Unidirectional Multicast (QUU)
VCR
Subscriber Buffered, Network
scheduled, Unidirectional
broadcast (BNU) VCR
Publisher Buffered, Network
scheduled, Unidirectional
broadcast (BNU) VCR
The Primary LAS runs the link schedule by telling
devices to publish their data at specific times. The
Secondary FIM link is a backup LAS with a valid
copy of the link schedule. During switchover, it
skips the remainder of the current macrocycle and
starts running its schedule from time zero of next
macrocycle. Unlike backup LAS devices, the
Secondary FIM has full LAS schedule with FIM
publications.
Both Primary and Secondary FIM links subscribe to
alerts from devices and receive them in parallel.
Only the Primary FIM link reports received alerts
through the CDA server to the operator interface.
After switchover, the new Primary FIM starts and
the old Primary FIM stops submitting alerts to the
CDA server. The new primary FIM regenerates its
alarms. This action covers whatever alarms might
have been acknowledged just prior to switchover
but did not get submitted to Server as a result of
event throttling.
Both Primary and Secondary links subscribe to the
same data published by a given device. Secondary
has its VCR open and receives publications in
parallel with the Primary. No specific action needs
to be taken during switchover or swap.
Only acting Primary FIM link can publish data to
fieldbus devices. Both Primary and Secondary can
be configured with the same publication endpoint
connection, but only the Primary link has this
connection open and active at a time. During
switchover, the old Primary closes its connection
and consequently stops publishing. The old
Secondary, that is becoming new Primary, opens
its connection and consequently starts publishing.
Client Queued, User triggered,
Bi-directional peer-to-peer
(QUB) VCR
R400 Experion PKS Series A Fieldbus Interface Module User's Guide 85
July 2010 Honeywell
All client-server connections are broken and reestablished. This way new Primary builds fresh
connection context.
QUB connections are point-to-point and therefore
can only be opened from the primary.
FIM maintains one Management Information Base
Page 86

3. Fieldbus Integration With Experion System
3.8. Block Instantiation Support
If Network Activity Is . . . Then, Behavior During Switchover Is . . .
(MIB) connection to a device, one Function Block
Application Process (FBAP) connection and
possibly one control connection.
Switchover events
Switcho
ver results in several Experion system events and alarms. All of them are system
information or diagnostics type. No process alarms are generated due to switchover.
Typical events generated during switchover include:
Connection failure to secondary module alarm
Switchover event
Chassis ID of primary and secondary events
Not synchronized alarm
Each of these events appears for every module in a chassis where switchover occurred.
3.8 Block Instantiation Support
About instantiable blocks
In addition to the permanent or fixed function blocks that manufacturer's define for their
F
OUNDATION Fieldbus (FF) devices, they can define optional instantiable funct io n
blocks. This gives users the ability to instantiate (create) additional function blocks
within the Function Block Application Process for the given fieldbus device. The
Fieldbus Foundation refers to this function as Block Instantiation and they include it in
their Host Interoperability Support Test (HIST).
REFERENCE - INTERNAL
Please refer to Appendix A for more information about Fieldbus Technology
in general and the Standard Function Blocks
Control Builder supports block instantiation
ATTENTION
The Type function in Control Builder only supports Block Instantiation in
fieldbus devices with single Capability Levels. It does not support fieldbus
devices with multiple Capability Levels.
.
86 Experion PKS Series A Fieldbus Interface Module User's Guide R400
Honeywell July 2010
Page 87

3. Fieldbus Integration With Experion System
3.8. Block Instantiation Support
The Type function in Control Builder supports the function s associated with instantiable
blocks in fieldbus devices with single capability levels. It lets you build block types for
devices that support block instantiation that include both the fixed function blocks and
the instantiable function blocks. This means you can view the instantiable blocks as part
of the device's block hierarchy in the Library tab of Control Builder. The icon for an
instantiable function block has a slash across it and a letter "I_" tag prefix as illustrated
below, so you can easily distinguish it from a fixed function block.
ATTENTION
A manufacturer may choose to define Transducer blocks as instantiable
instead of fixed. In this case, be sure you instantiate a Transducer block for
each physical sensor that is to be used in the device. A Transducer block
usually corresponds to a physical sensor in the vendor's device.
Instantiable block implementation considerations
e following table summarizes considerations that are unique to implementing control
Th
strategies that include fieldbus devices with optional instantiated blocks. Please use these
considerations to supplement the appropriate procedures in the remainder of this
document that are tailored to fieldbus devices with only fixed function blocks including
resource and transducer blocks.
If you want
to . . .
R400 Experion PKS Series A Fieldbus Interface Module User's Guide 87
July 2010 Honeywell
Then, Notes and References
Page 88

3. Fieldbus Integration With Experion System
3.8. Block Instantiation Support
If you want
to . . .
Add an
instantiable
block to
device in
Project tab.
Then, Notes and References
a) Open corresponding device
hierarchy in Library tab.
b) Drag the instantiable block onto
the given device icon in the
Project.
c) Key in desired name for the block
or accept the default in the open
Name New Function Block(s)
dialog.
d) Click Finish to close the dialog
and add the block to the device
hierarchy in Project as shown in
the following illustration.
Default name of instantiated
block may be appended with
a letter. For example, a block
with default name I_AI
becomes I_AIA.
Device does not have to be
connected to the link to
instantiate a block.
An error message is
generated, if device cannot
support an additional block.
See Adding a fieldbus device
to Project for reference.
88 Experion PKS Series A Fieldbus Interface Module User's Guide R400
Honeywell July 2010
Page 89

3. Fieldbus Integration With Experion System
3.8. Block Instantiation Support
If you want
to . . .
Check
instantiated
block
configurati
on in
Project tab.
Then, Notes and References
e) Right-click device block and
select Configure Module
Parameters from shortcut menu.
f) Click Block Instantiation tab.
g) Check Block Template Type
column for list of instantiated
blocks in device.
h) Check Block Tag column to view
assigned tag to see if block is
used in a Control Module or not
as shown in the following
illustration.
The Instantiation tab only
appears if the device
supports Block Instantiation.
See Checking device
configuration for reference
R400 Experion PKS Series A Fieldbus Interface Module User's Guide 89
July 2010 Honeywell
Page 90

3. Fieldbus Integration With Experion System
3.8. Block Instantiation Support
If you want
to . . .
Then, Notes and References
90 Experion PKS Series A Fieldbus Interface Module User's Guide R400
Honeywell July 2010
Page 91

3. Fieldbus Integration With Experion System
3.8. Block Instantiation Support
If you want
to . . .
Optionally,
check
instantiated
block
resource
usage.
Then, Notes and References
i) Right-click device block and
select Configure Module
Parameters from shortcut menu.
j) Click Block Instantiation tab.
k) Check Resource # column for the
amount of resource used by a
particular block. The # (1, 2, …)
columns can vary depending on
vendor and function block type.
l) In Resource Statistics grid, check
Limit and Used columns to view
resource allocations against
assigned limits.
Some vendors provide
resource information as an
option. You can use this
information to determine if
the configured block
contents will fit within the
available resources of the
device.
A resource represents a
finite entity used by a device
such as Central Processing
Unit (CPU) or Memory.
R400 Experion PKS Series A Fieldbus Interface Module User's Guide 91
July 2010 Honeywell
Page 92

3. Fieldbus Integration With Experion System
3.8. Block Instantiation Support
If you want
to . . .
Then, Notes and References
92 Experion PKS Series A Fieldbus Interface Module User's Guide R400
Honeywell July 2010
Page 93

3. Fieldbus Integration With Experion System
3.8. Block Instantiation Support
If you want
to . . .
Add
instantiated
block to
CM.
Then, Notes and References
See Adding blocks to CM for sample
loop for reference.
You add instantiated blocks
to a Control Module the
same way you do fixed
blocks. They also are
configured in the same way
and have the same graphical
appearance as shown here.
Instantiate
an
instantiable
block in a
physical
device.
R400 Experion PKS Series A Fieldbus Interface Module User's Guide 93
July 2010 Honeywell
Load the configured device from
Project containing the desired number
of function blocks as outlined in the
next row.
Block instantiation in a
physical device only
occurs during a load.
Page 94

3. Fieldbus Integration With Experion System
3.8. Block Instantiation Support
If you want
to . . .
Load
Project
device to
physical
device.
Then, Notes and References
m) See Load order guidelines
reference.
n) See Loading a FIM and its Links
for reference.
o) See Matching uncommissioned
device to project device or vice
versa for reference.
p) Right-click device icon and select
Load from short cut menu.
q) Review information on Load
dialog for load details and any
warning messages identifying preload considerations.
r) Click OK button to initiate the load
and monitor Load Progress dialog
for load related activities.
s) Upon successful device load,
open device icon in Monitor tab to
view block hierarchy. Only
transducer and resource blocks
appear in the device hierarchy
after an initial load.
t) Right-click device icon and select
Upload from the shortcut menu.
Click Continue to load device data
into the Monitor database.
A physical device may go offline while its instantiable blocks are
being instantiated through a device load.
for
The existing load order,
FIM/Link load, and device
match functions also apply
for devices with instantiable
blocks.
Device load from Project
synchronizes the contents of
the project device with the
physical device and
instantiates applicable
instantiable blocks in the
physical device.
See About Load Dialog box
for general information.
See Loading Link contents
or fieldbus device for general
device load procedure.
You must load the Control
Module(s) containing fixed
and/or instantiated blocks
associated with the device
for the fixed and instantiated
blocks to appear in the
device hierarchy in
Monitoring tab.
After loading a device from
Project or Monitor tab, the
physical device function
block contents matches that
of the corresponding Project
or Monitor device. This
means necessary blocks will
be instantiated and
unnecessary Blocks will be
removed or de-instantiated.
94 Experion PKS Series A Fieldbus Interface Module User's Guide R400
Honeywell July 2010
Page 95

3. Fieldbus Integration With Experion System
3.8. Block Instantiation Support
If you want
to . . .
ATTENTION
Be sure you load a device from Project before you load a Control Module
that contains instantiable blocks. If you load a Control Module that contains
instantiable block(s) before the associated device in Project is loaded and its
blocks instantiated, the Control Module load will fail.
Deinstantiate
(delete) an
instantiated
block from
Project tab.
Deinstantiate
(delete) an
instantiated
block from
physical
device
Then, Notes and References
u) Open device icon hierarchy in
Project tab.
v) Right-click applicable instantiated
block icon in hierarchy and select
delete from the shortcut menu.
w) Click Continue button to initiate
action and track progress in
Delete dialog.
x) Upon successful deletion the
instantiated block icon is removed
form the device hierarchy.
y) You can not delete an instantiated
block directly from a physical
device.
z) You must first delete the CM from
Monitor, unassign or delete the
instantiated block from CM in
Project tab, and then delete the
block as noted in the row above.
aa) Load device from Project to re-
synchronize contents with
physical device.
bb) Load reconfigured CM.
You cannot delete an
instantiated block that is
contained in a Control
Module unless you unassign or delete the block
from the CM first.
Also, you cannot delete an
Instantiable block from
Project, if it is loaded and
viewable in the Monitor tab.
You must re-load Project
device to re-synchronize
contents with physical device
after any control strategy
changes or physical device
maintenance that may alter
contents in either device.
Deleting a block from
Monitor tab, does not deinstantiate a block in a
device. Only a load of a
device will achieve this.
cc) Right-click device icon and select
Upload from the shortcut menu.
Click Continue to load device data
into the Monitor database.
R400 Experion PKS Series A Fieldbus Interface Module User's Guide 95
July 2010 Honeywell
Page 96

3. Fieldbus Integration With Experion System
3.8. Block Instantiation Support
If you want
to . . .
Replace
failed
device with
like device
Then, Notes and References
dd) See Replacing a failed device
with a like device having the same
model name and device revision
for general replacement
procedure.
ee) If a Control Module (CM) or a
Sequential Control Module (SCM)
has connections to "contained"
Fieldbus parameters, they will
appear as a part of the Load List
under the device in the Load
Dialog and will be automatically
loaded. See the Load Dialog
example in the following
illustration. However, special
consideration must be given to
inactive Sequential Control
Modules.
ff) If connections to instantiable
blocks of the replaced field
device are through SCM
expressions, such an SCM will
not be automatically shown as a
part of the Load List under the
device in the Load Dialog. This
means that the SCM will not be
automatically loaded. In this case,
you must inactivate the SCM and
reload it as a separate procedure.
A device replacement can
cause changes in a device's
block layout, since the
Object Dictionary (OD) index
for an instantiated block can
change.
You must put a Sequential
Control Module in the proper
state (Idle) before you can
inactivate it.
96 Experion PKS Series A Fieldbus Interface Module User's Guide R400
Honeywell July 2010
Page 97

3. Fieldbus Integration With Experion System
3.8. Block Instantiation Support
If you want
to . . .
Then, Notes and References
R400 Experion PKS Series A Fieldbus Interface Module User's Guide 97
July 2010 Honeywell
Page 98

3. Fieldbus Integration With Experion System
3.8. Block Instantiation Support
98 Experion PKS Series A Fieldbus Interface Module User's Guide R400
Honeywell July 2010
Page 99

4. Installation
4.1 Planning Considerations
Experion system references
Please refer to the following Knowledge Builder publications for general planning details
and installation considerations for the Experion system in general. For the sake of
brevity, this Guide does not repeat the applicable general guidelines, consid erations,
cautions, etc. that are covered in these other Guides.
Planning Guide
ControlNet Installation Guide
Control Hardware Installation Guide
If this is a new Experion system installation, we recommend that you familiarize yourself
with the contents of these publications before you install any Experion system
equipment.
Installation declaration
ATTENTION
This equipment shall be installed in accordance with the requirements of the
National Electrical Code (NEC), ANSI/NFPA 70, or the Canadian Electrical
Code (CEC), C22.1. It is supplied as "open equipment" that is intended to be
mounted on a sub-panel within an enclosure. The suitability of the enclosure
and installed system shall be acceptable to the local "authority having
jurisdiction," as defined in the NEC, or "authorized person" as defined in the
CEC.
CIOM-A FIM and I/O module allowance
e sure your Experion System fieldbus and I/O requirements do not exceed the
B
capacities listed in the Software Change Notice (SCN) supplied with the system. The
following table is provided as a quick unofficial reference only for general planning
purposes. In terms of processing allocations, the CIOM-A FIM is the equivalent of three
I/O modules. A pair of redundant CIOM-A FIMs in a Redundant Chassis Pair still count
as two individual FIMs for system capacity calculations, so 50 pairs or 100 FIMs is still
the total allowed per Server.
R400 Experion PKS Series A Fieldbus Interface Module User's Guide 99
July 2010 Honeywell
Component
Total Per
Controller
Total Per
Server
Page 100

4. Installation
4.1. Planning Considerations
Component
Maximum number of CIOM-A FIMs plus I/O
modules divided by three (including local and
remote chassis I/O and rail I/O).
Maximum number of H1 links (independent LAS) 42 200
Maximum number of fieldbus devices* 672 3,000
*Each H1 link is capable of supporting up to 16 devices. This number may vary
depending on the dynamics of the link.
CIOM-A FIM only chassis configuration considerations
our architecture includes chassis that will only contain CIOM-A FIMs, be aware that
If y
the physical construction of the different chassis sizes may result in blank or unused
single slots. The following table lists the maximum number of CIOM-A FIMs that can be
installed in a given size chassis with the resultant number of blank slots, assuming that a
ControlNet module is mounted in the chassis' first slot (0). Reduce the maximum number
by one for redundant CIOM-A FIM applications, since a Redundancy Module must be
mounted in the chassis as well.
If Chassis size is . . .
Then, Maximum
Number of CIOM-A FIMs
is . . .
Total Per
Controller
21 100
And, Number of Blank
Single Slots is . . .
Total Per
Server
4-Slot* 1 1
7-Slot 3 0
10-Slot 4 1
13-Slot 5 2
*A 4-slot chassis is not suitable for use in redundant CIOM-A FIM applications.
Note that the number of FIMs that can be installed in a chassis depends on the available
slots and power. Also, you must consider the CNIs and RMs. For example, a remote I/O
chassis will support a CNI, RM and up to 6 FIMs (power limit) and a C200 Controller
chassis will support a CNI, C200, RM and up to 4 FIMs.
100 Experion PKS Series A Fieldbus Interface Module User's Guide R400
Honeywell July 2010
 Loading...