

Honda CH250 ELITE250, CH250 (1986), ELITE250 (1986) Owner's Manual

IMPORTANT NOTICE
. OPERATOR AND PASSENGER
This scooter is designed to carry the operator and one passenger. Never exceed
the vehicle capacity load as shown on the tire information label.
. ON-ROAD USE ONLY
This scooter is not equipped with a spark arrester and is designed to be used only
on the road. Operation in forest, brush or grass covered areas may be illegal.
Obey local laws and regulations.
. READ THIS OWNER’S MANUAL CAREFULLY
Pay special attention to statements preceded by the following words:
Indicates a strong possibility of severe personal injury or loss of life if instruc-
tions are not followed.
CAUTION
Indicates a possibility of personal
injury
or
equipment t
damage if instructions are
not followed.
NOTE: Gives helpful information.
This manual should be considered a permanent part of the scooter and should
remain with the scooter when resold.
HONDA CH250 ELITE250
OWNER'SMANUAL
1986
All information in this publication is based on the latest product information available at
the time of approval for printing. HONDA MOTOR CO., LTD. reserves the right to make
changes at any time without notice and without incurring any obligation.
No part of this publication may be reproduced without written permission.
@
Honda Motor Co., Ltd.
I985

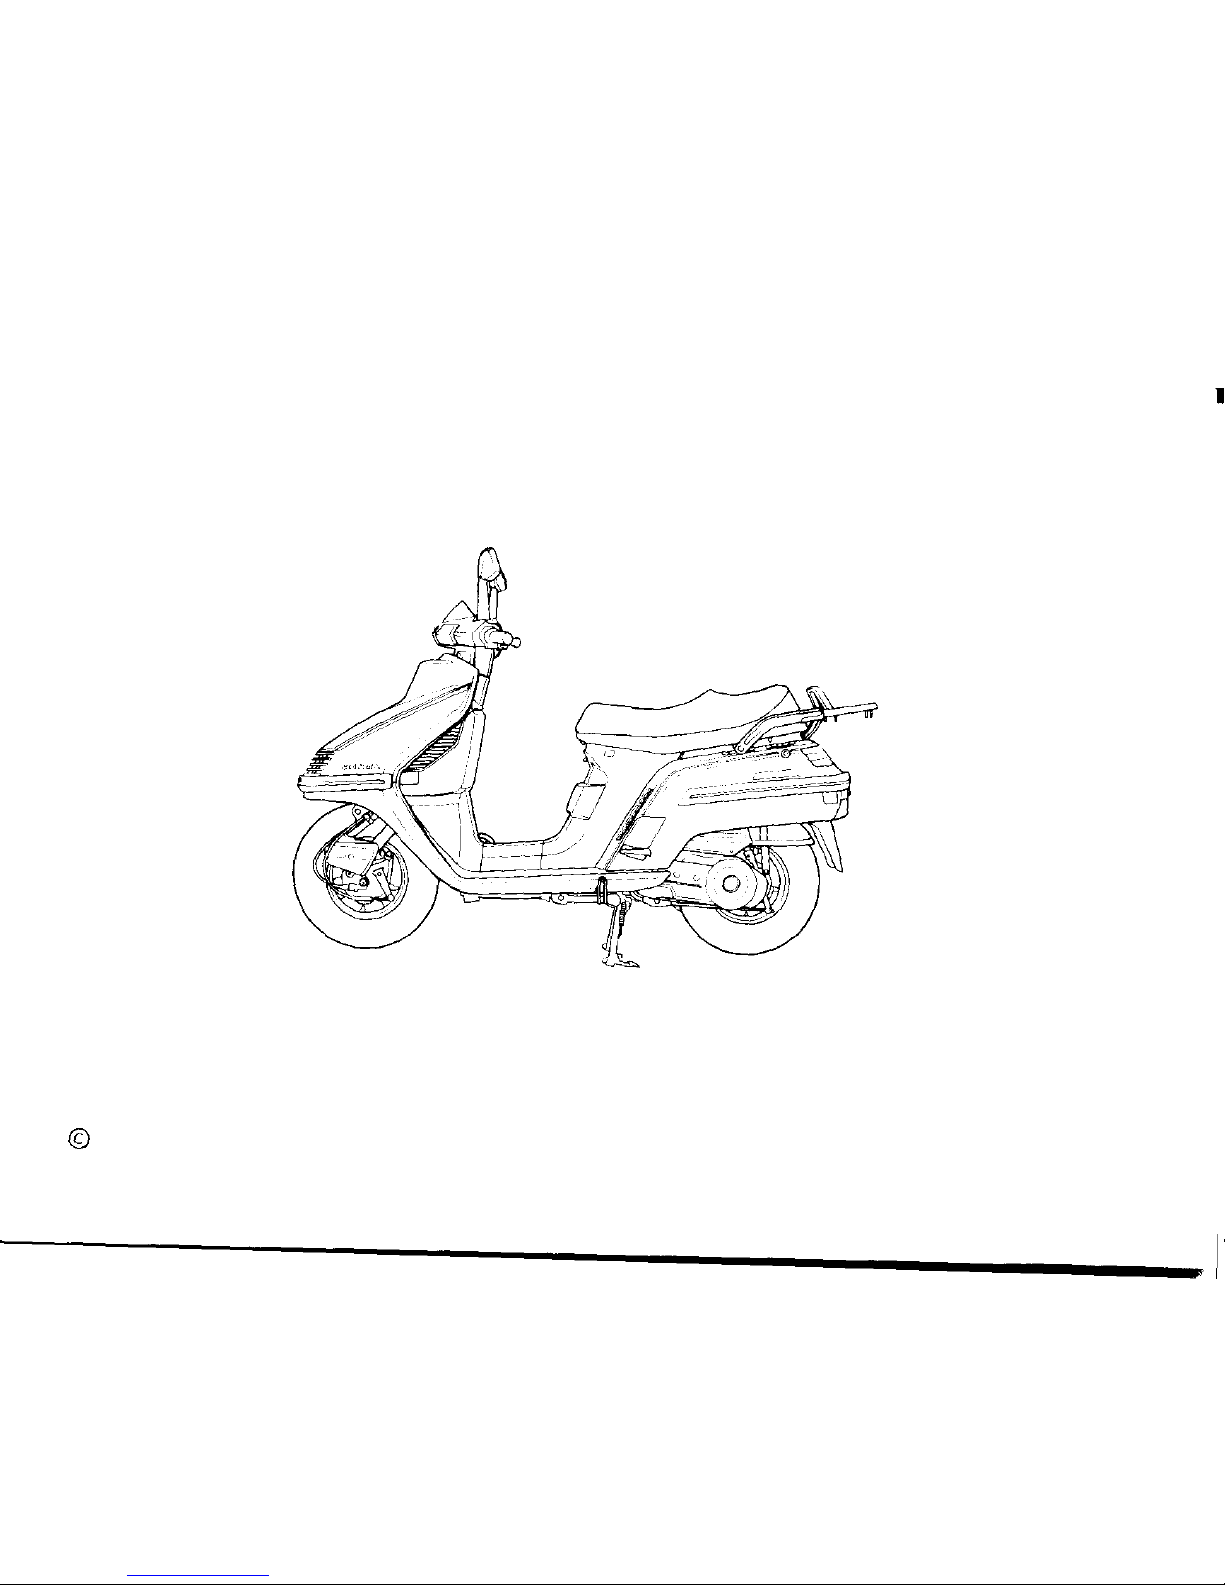
WELCOME
Your new scooter presents you with an invitation to adventure and a challenge to master
the machine. Your safety depends not only on your own alertness and familiarity with
the scooter, hut also the scooter’s mechanical condition. A pre-ride inspection before
every outing and regular maintenance are essential.
To help meet the challenges safely and enjoy the adventure fully, become thoroughly
familiar with this Owner’s Manual BEFORE YOU RIDE THE SCOOTER. Also, for your
own and your Honda’s sake, please read all the written material which came with your
new Honda. These items include:
*
Honda
Owner’s Identification Card
* Set-up and Predelivery
Checklist
*
Honda Motor Scooter Emission Control System, Distributor’s Warranty
* Honda Motor Scooter, Distributor’s Limited Warranty
*
Honda Motor Scooter Noise Control Systems, Distributor’s Warranty.
When service is required, remember that your authorized Honda scooter dealer knows
what it takes to keep your Honda going strong. If you have the required mechanical
“know-how” and tools, your authorized Honda scooter dealer can supply you with an
official Honda Scooter Shop Manual to help you perform many maintenance and repair
tasks.
Pleasant riding and thank you for choosing a Honda!

OPERATION
Page
11|
1
SCOOTER SAFETY
3
Safe Riding Rules
4
Protective Apparel
4
Modifications
5
Loading and Accessories
6
PARTS LOCATION
9
Parts Function
15
15
16
18
20
21
23
MAJOR COMPONENTS (Information you need to operate thisscooter)
Brakes
Coolant
Fuel
Engine Oil Level Check
Tubeless Tires
Battery
24
ESSENTIAL INDIVIDUAL
COMPONENTS
24
Ignition Switch
Page
2 5
25
26
27
28
Right Handlebar Controls
Engine Stop Switch
Left Handlebar Controls
Rear Brake Lock
Ignition Switch Light
29
FEATURES (Not required for operation)
29
Steering Lock
29
Seat Lock
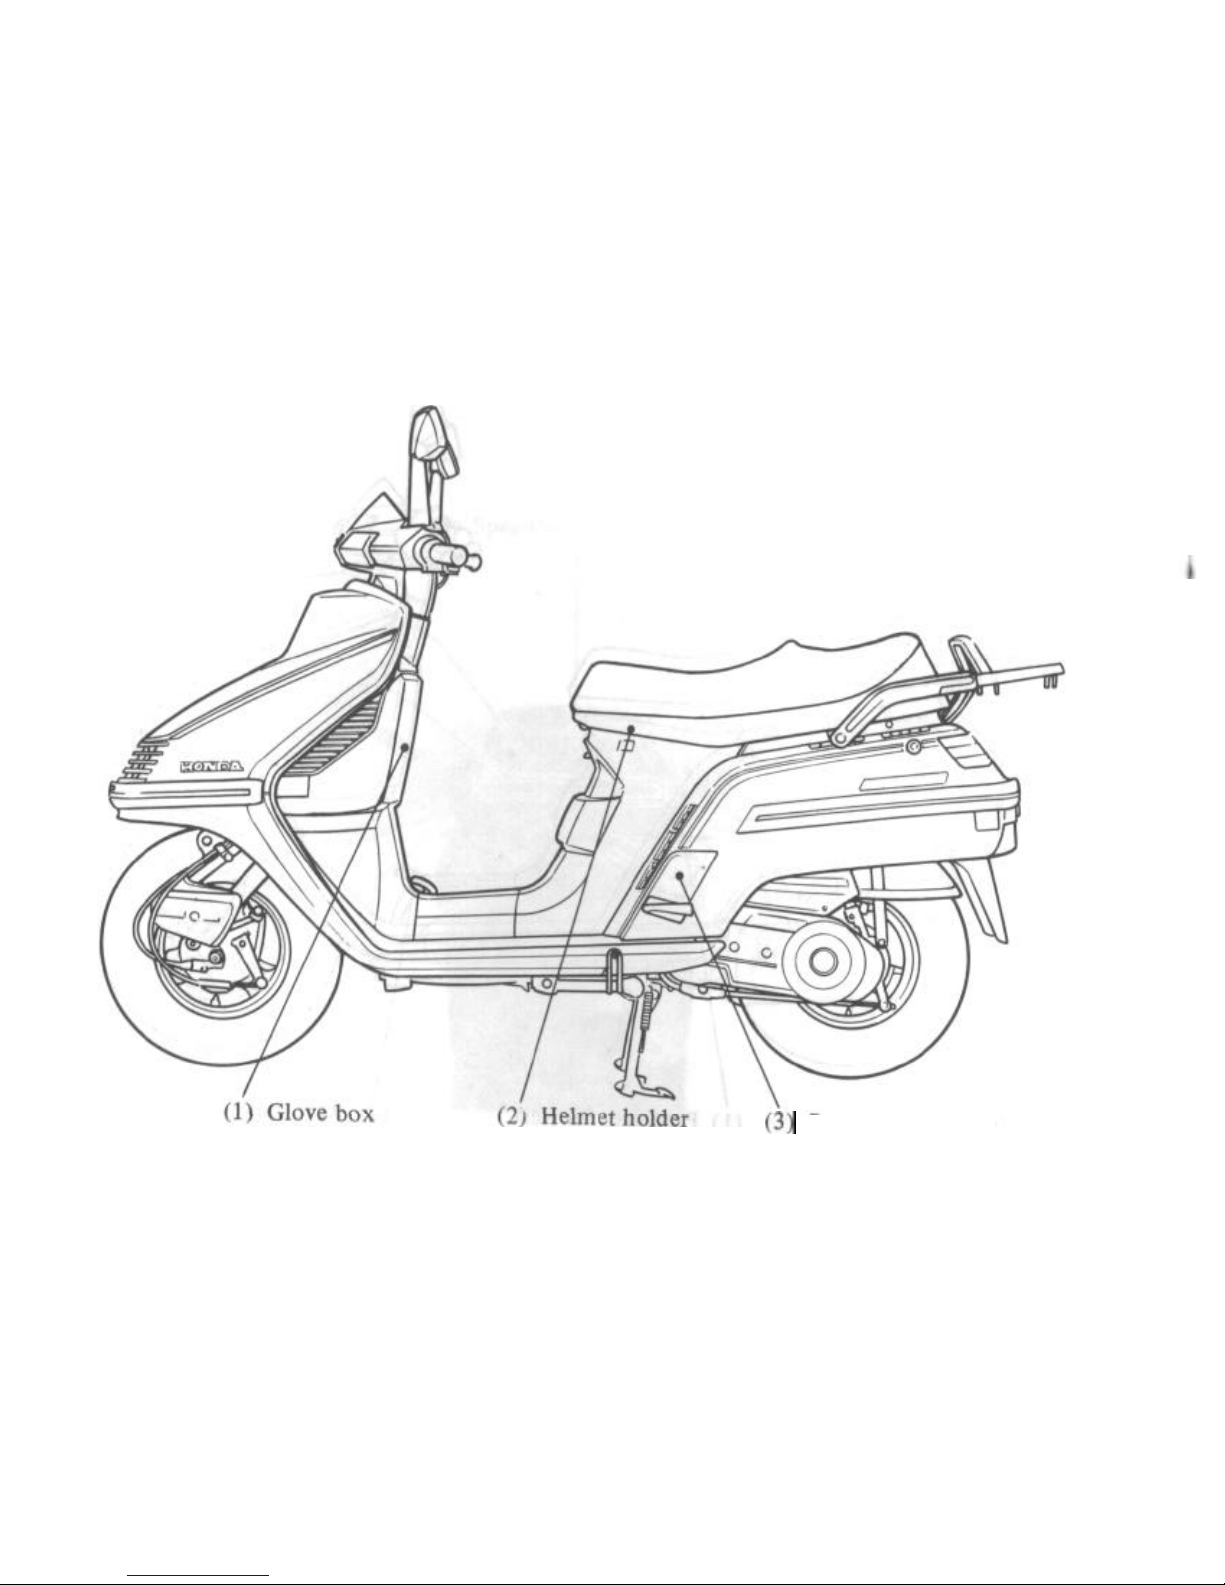
30 Helmet Holder
31
Glove Box
32
OPERATION
32
Pre-ride Inspection
33
Starting the Engine
31
Break-in
38
Riding
41
Braking
42 Parking
42 Anti-theft Tips

MAINTENANCE
Page
43 MAINTENANCE
44 Maintcnance Schedule
46 Maintenance Record
49 Tool Kit
49 Serial Numbers
49
Color
Label
50
Maintenance Precautions
51
FILTERS/LUBRICATION
51
Air Cleaner
52
Belt
Case
Air Cleaner
53
Crankcase Breather
54
Engine Oil and
Filter
Screen
54
ENGINE
51
Spark Plug
58
Idle Speed
Page
59 FRAMF/BRAKES
59
Brake Shoe Wear
60 Side Stand
61 ELECTRICAL
61
Fuse Replacement
62
TRANSPORTING
63 CLEANING
64 STORAGE
GCJlDt
66 SPEClFICATlONS
69
CONSUMER
INFORMATION
69
Stopping Distance
70
Emission Control System
73
Warranty Service
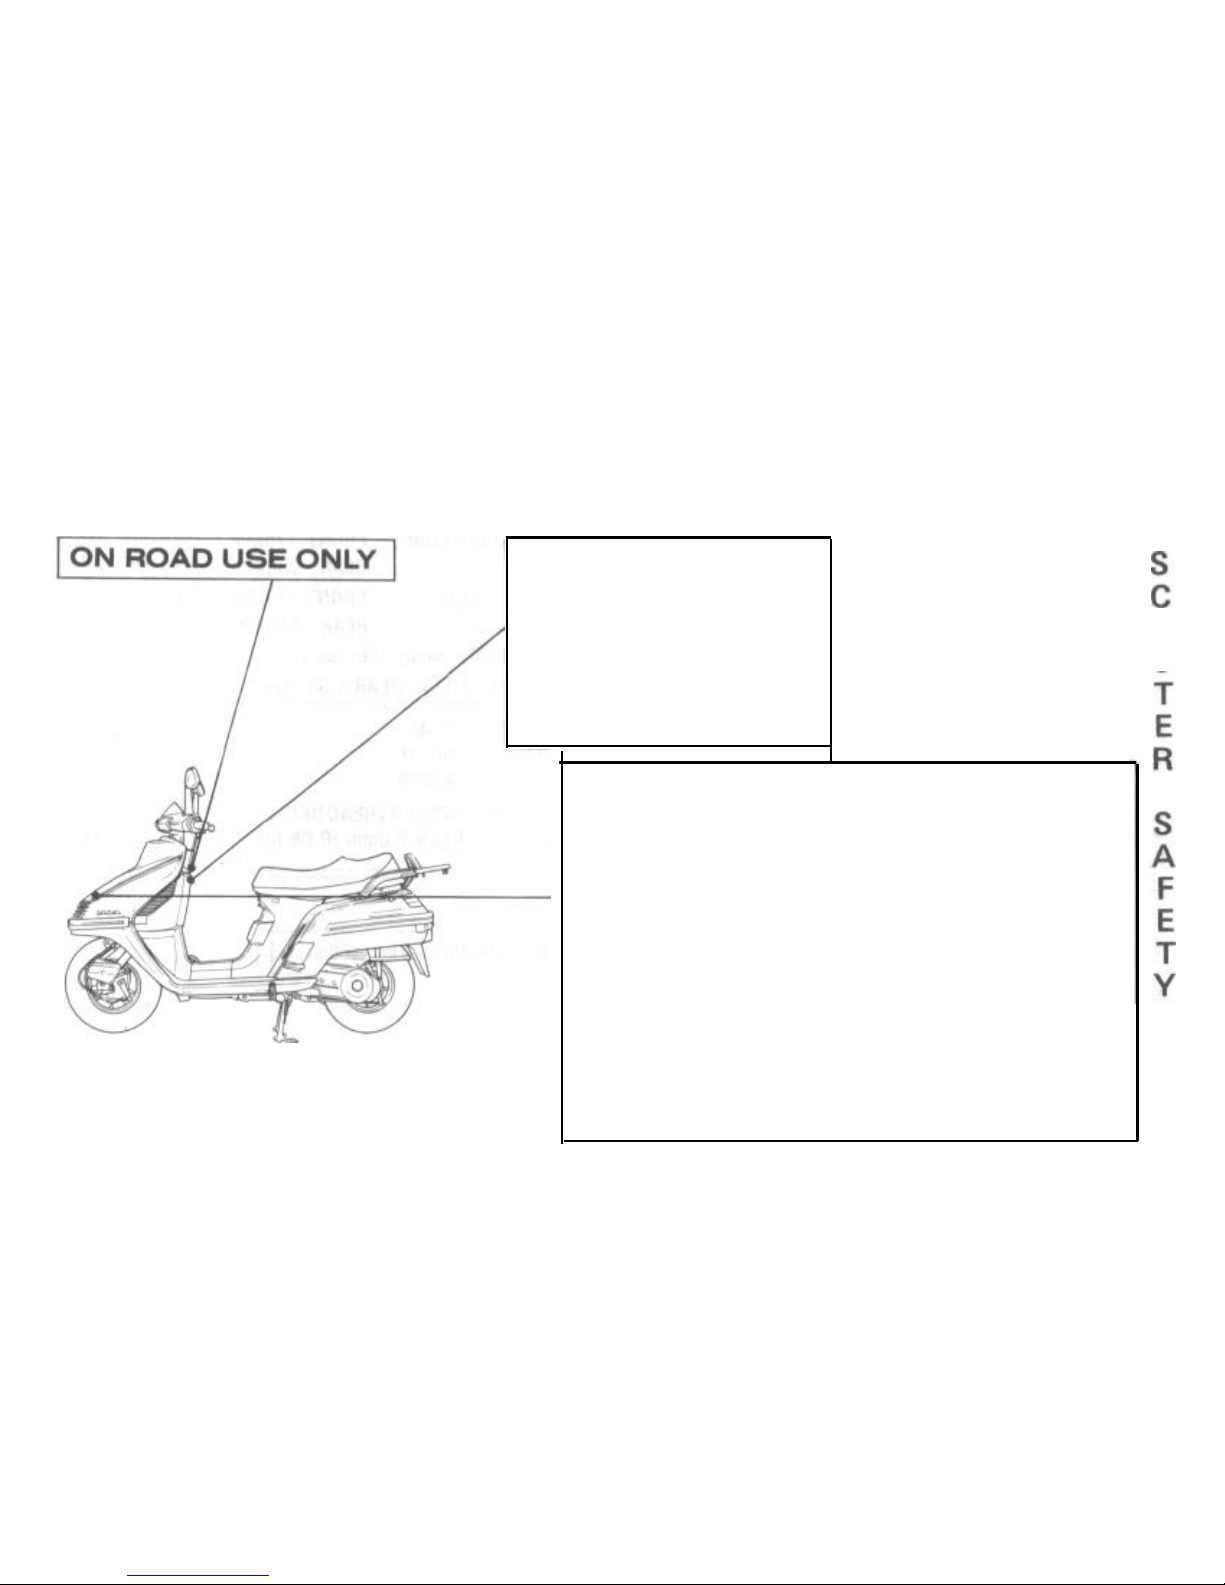
SCOOTER SAFETY
Read these WARNING LABELS before you ride!
REMEMBER
*PRESERVE NATURE
*ALWAYS WEAR A HELMET
0
l
RIDE SAFELY
0
*READ OWNER’S MANUAL
CAREFULLY BEFORE RIDING
CAUTION
l
DO
NOT REMOVE RADIATOR CAP WHEN ENGINE IS HOT.
ONLY REMOVE CAP WHEN DRAINING COOLANT.
l
CHECK THE COOLING SYSTEM
FREQUENTLY
BY OBSERVING LEVEL IN THE RESERVE TANK. ADD NECESSARY
COOLANT AT RESERVE TANK FILLER OPENING.
*USE
A
50/50
SOLUTION OF ANTI-FREEZE AND WATER
USE ONLY ANTI-FREEZE OR SUMMER COOLANT RECOMMENDED FOR USE IN ALUMINUM ENGINES.
*USE SOFT WATER. (HARD WATER OR SALT WATER IS
HARMFUL TO ALUMINUM)
l
REFER TO OWNER’S MANUAL FOR COMPLETE INFORMA-
TION.
1
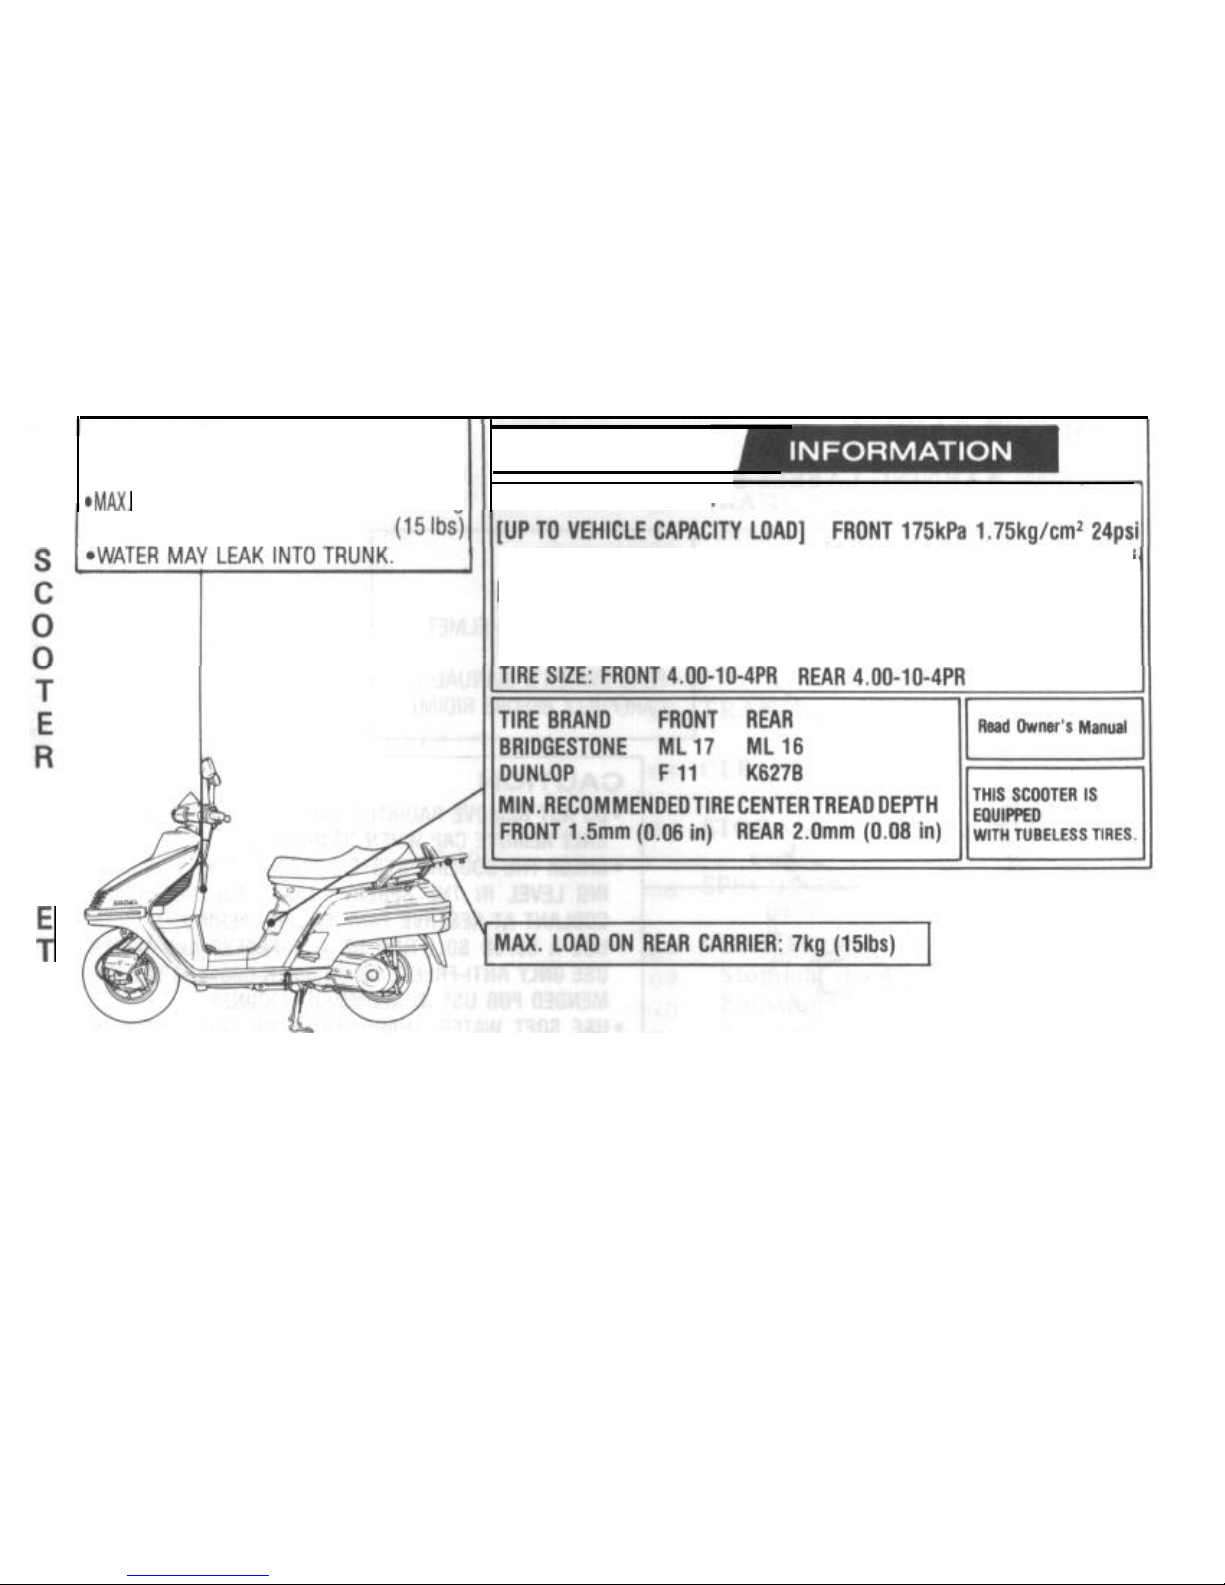
CAUTION
IMPORTANT
l
MAX.LOAD
IN TRUNK:
1.5kg(3lbs)
*MAX.
LOAD ON REAR CARRIER:
7kg COLD TIRE
PRESSURES:
REAR
250kPa 2.50kg/cm2
36psi
[UP TO
90kg (200lbs)
LOAD]
FRONT175kPa 1.75kg/cm2
24psi
REAR
2OOkPa 2.00kg/cm2 28psi
VEHICLE CAPACITY LOAD: 150kg (335 Ibs.)
S
A
F
:
Y
2
*
Scooter riding requires special efforts on your part to ensure your safety. Know these
requirements before you ride.
SAFE RIDING RULES
Always make a pre-ride inspection
(page 32) before you ride the scooter.
You may prevent an accident or equipment damage.
Many accidents involve inexperienced
riders. Most states require a special
riding test or license. Make sure you
are qualified before you ride. NEVER
lend your scooter to an inexperienced
rider.
Many
automobile/scooter accidents
happen because the automobile driver
does not “see” the rider. Make yourself conspicuous to help avoid the
accident that wasn’t your fault:
l Wear bright or reflective clothing.
l Don’t ride in another motorist’s
“blind spot.”
4. Obey all federal, state, and local laws
and regulations.
l Excessive speed is a factor in many
accidents. Obey the speed limits,
and NEVER travel faster than con-
ditions warrant.
0 Signal before you make a turn or
lane change. Your size and maneuverability can surprise other motorists.
5. Don’t let other motorists surprise you.
Use extra caution at intersections,
parking lot entrances and exits, and
driveways.
S
E
0
T
E
R
2
F
E
T
Y

6. Keep both hands on the handlebars
and both feet on the floor boards
while riding. A passenger should hold
onto the scooter or operator with both
S
hands and keep both feet on the passenger footrests.
C 7.
Never leave your scooter unattended
0
0
with the engine running.
8. Moderate your speed when riding over
T
bumpy roads. Avoid hitting road
haz-
E
ards,
such as sharp bumps and holes
R
in the road surface. These hazards can
cause loss of control or structural
S
damage to the vehicle.
A
E’
PROTECTIVE APPAREL
1. Most scooter accident fatalities are due
to head injuries: ALWAYS wear a
helmet. You should also wear a face
shield or goggles as well as boots,
gloves and protective clothing.
2. The exhaust system becomes very hot
during operation, and it remains hot
after operation. Never touch any part
of the hot exhaust system. Wear clothing that fully covers your legs.
3. Do not wear loose clothing which
could catch on the control levers, footrests or wheels.
MODIFICATIONS
* Modification of the scooter or removal
of original equipment may render the
vehicle unsafe or illegal. Obey all
federal, state and local equipment
regula tions.
LOADING AND ACCESSORIES
Kmm
* A scooter is sensitive to changes in
weight distribution. Improper loading
of cargo and mounting of accessories
can impair the scooter’s stability and
performance. To prevent an accident,
use extreme care when mounting accessories and riding with cargo.
These general guidelines may help you
decide whether or how to equip your
scooter, and how to load it safely.
The vehicle load limit is 335 lbs
(150
kg).
The combined weight of the rider, passenger, and cargo must not exceed this
limit.
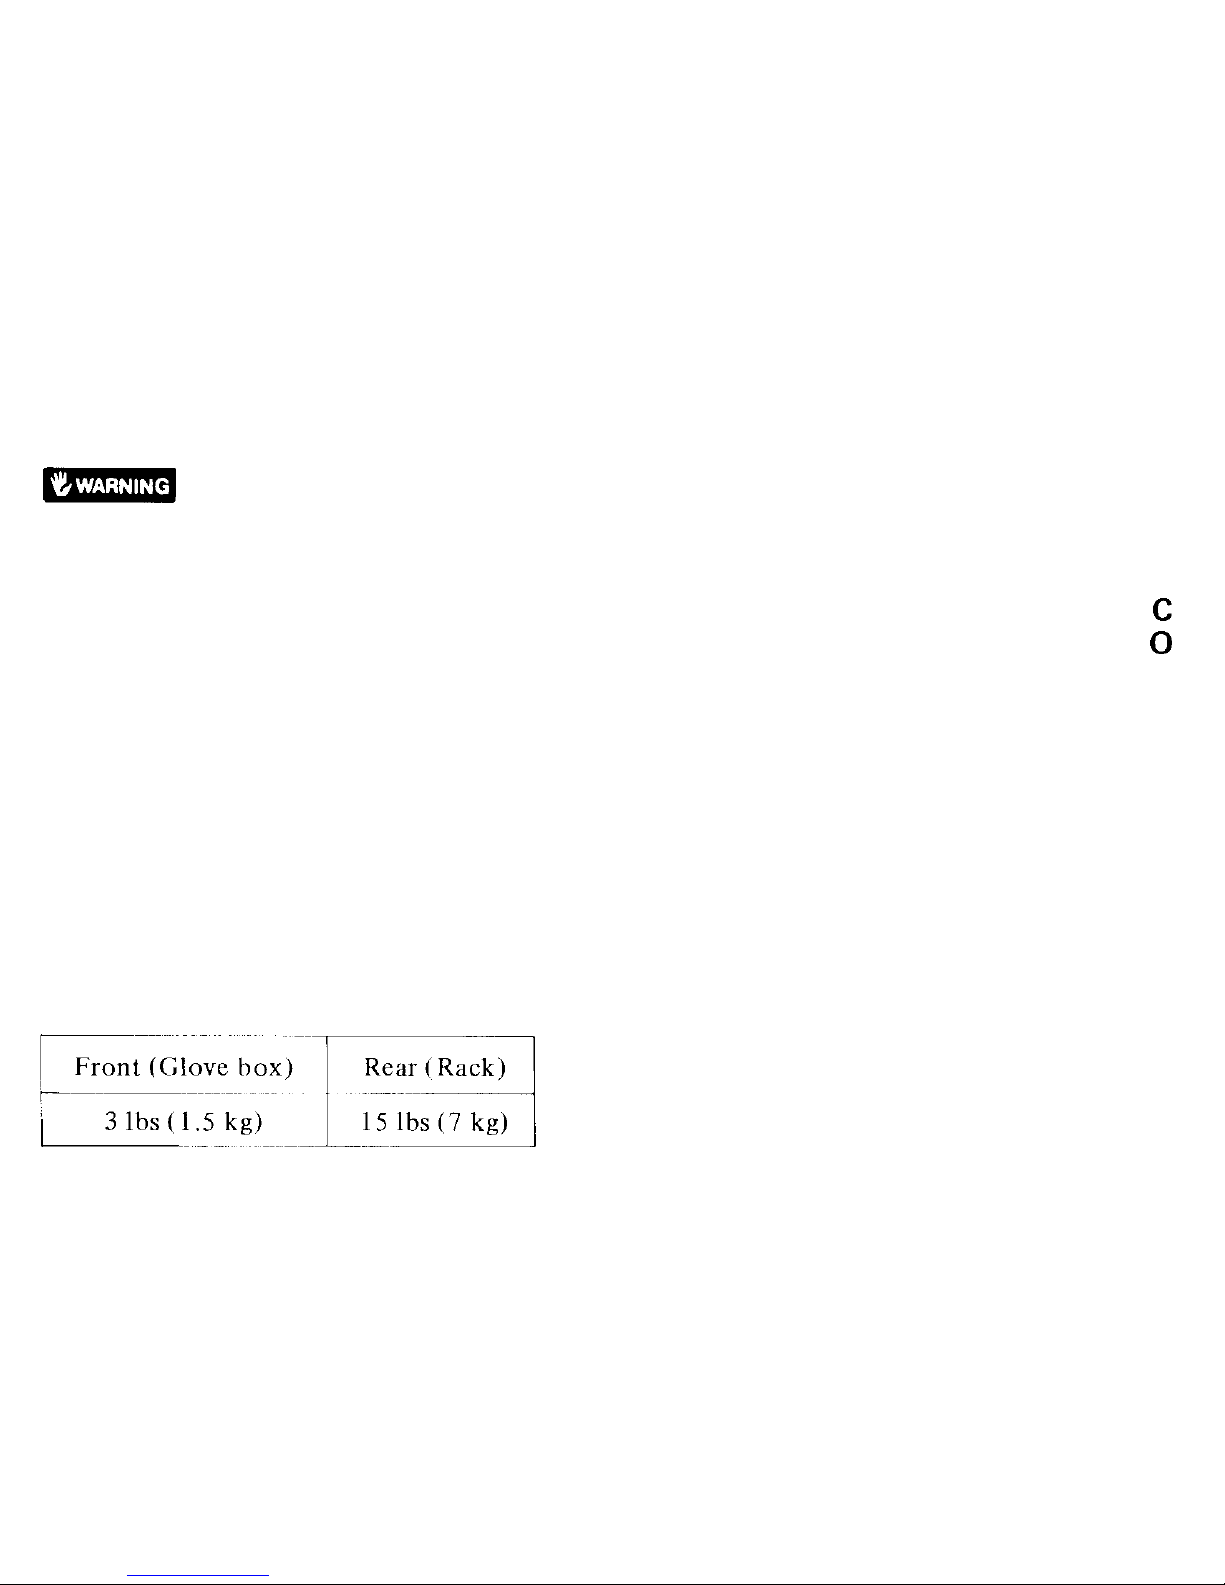
1. Do not exceed these following weight
limits for the luggage rack and glove
box.
Overloading the luggage rack and glove
box will adversely affect stability and
handling.
2. Keep cargo weight low and close to
the center of the scooter. As weight is
located farther from the scooter’s center of gravity, handling is proportionally affected. Load weight equally on
both sides of the glove box to minimize imbalance.
3. All cargo and accessories must be secure for stable handling. Recheck
security frequently.
4. Do not carry items that protrude
through the rack or block the taillight.
5. Do not carry children or pets on the
luggage rack.
6. Do not install another fairing or modi-
fy the existing one.
S
;
0
T
E
R
S
A
F
E
T
Y
5
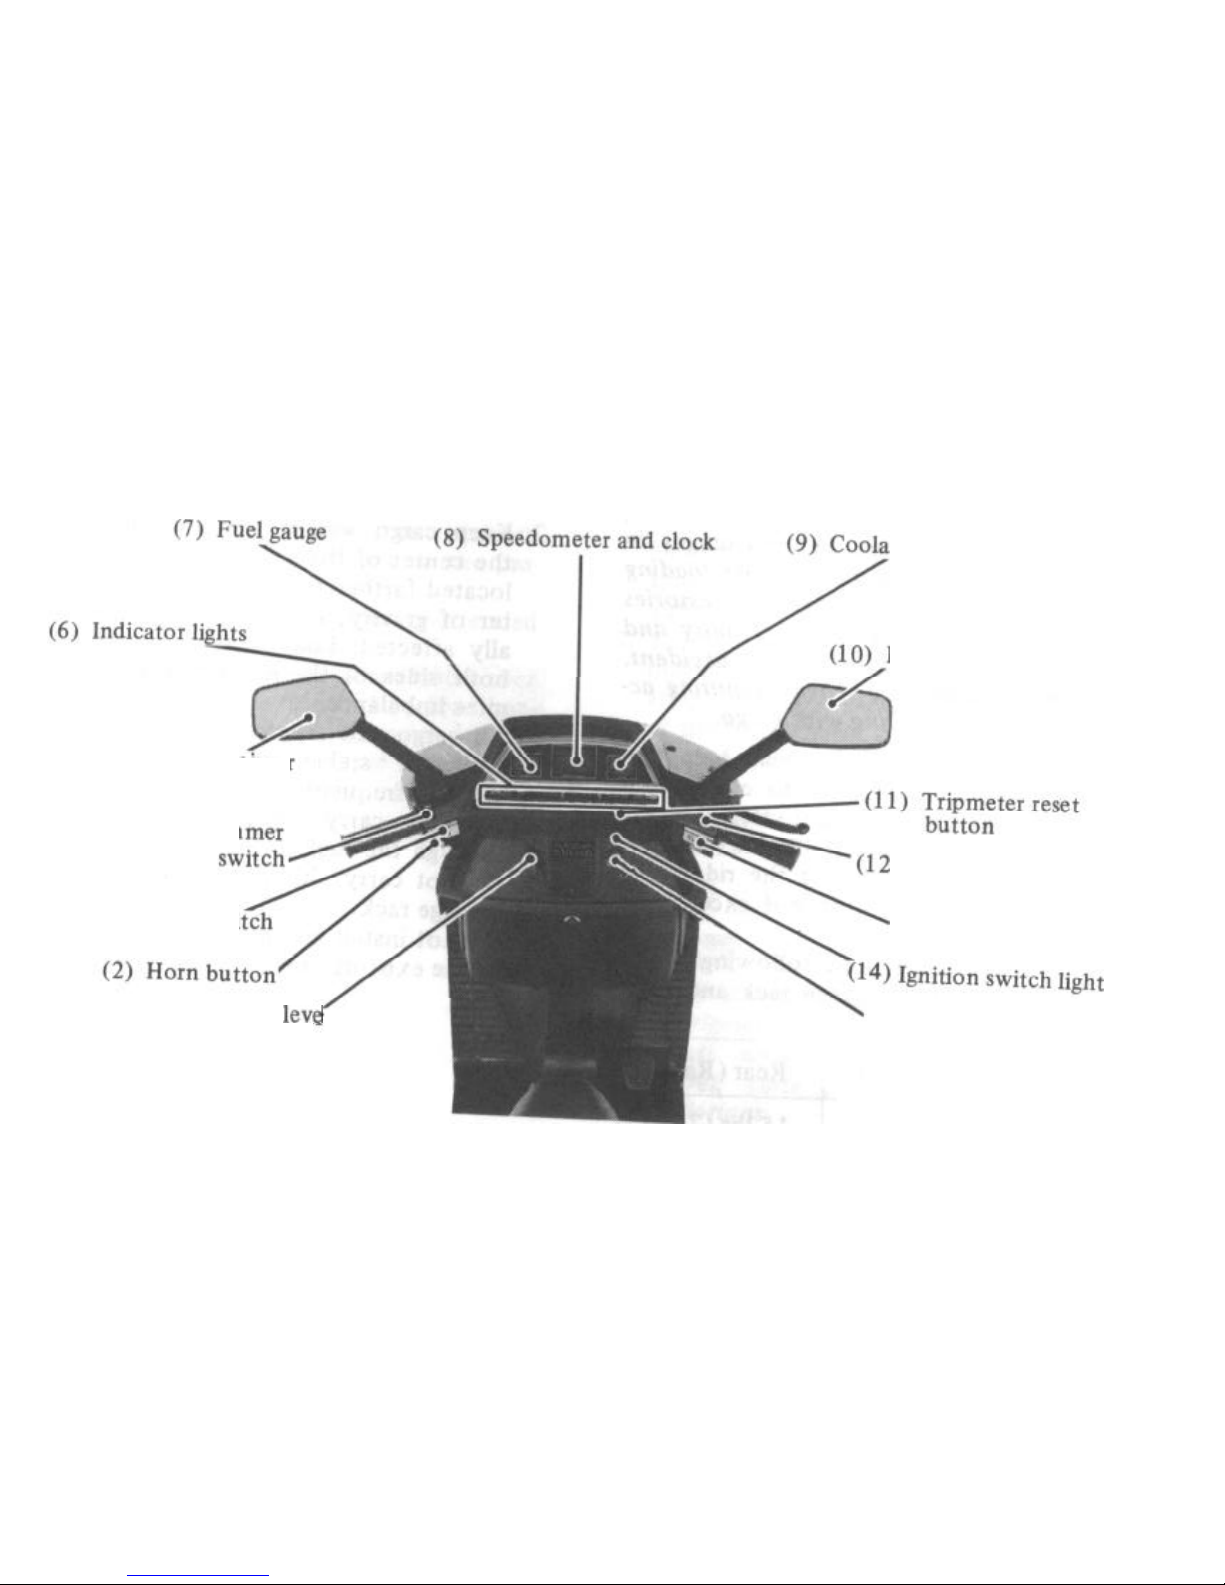
PARTS LOCATION
nt temperature gauge
Right rearview mirror
(5)
Left rearview mirror
(4) Headlight dim
) Engine stop switch
(3) Turn signal swi
(13)
Starter button
(1)
Rear brake lock
levelever
(15) Ignition switch
6
(1) Passenger footrest
(2)Rear brake pedal
7
8
(3)Passenger footrest

PARTS FUNCTION
Instrument and Indicators
The indicators are grouped between the
handlebars.
Their functions are described in the table
on the following page.
USA model:
Odometer reads in miles.
Canadian model:
Odometer reads in kilometers.
(1) Left turn signal indicator
(2) Fuel gauge
(3) Digital clock
(4) Speedometer
(5) Coolant temperature gauge
(6) High beam indicator lamp
(7) Right turn signal indicator
(8) Tripmeter reset button
(9) Tripmeter
(10) Digital clock adjusting buttons
(11) Speedometer (Km/h
*
MPH) select button
(12) Odometer
(13) Maintenance indicator
9
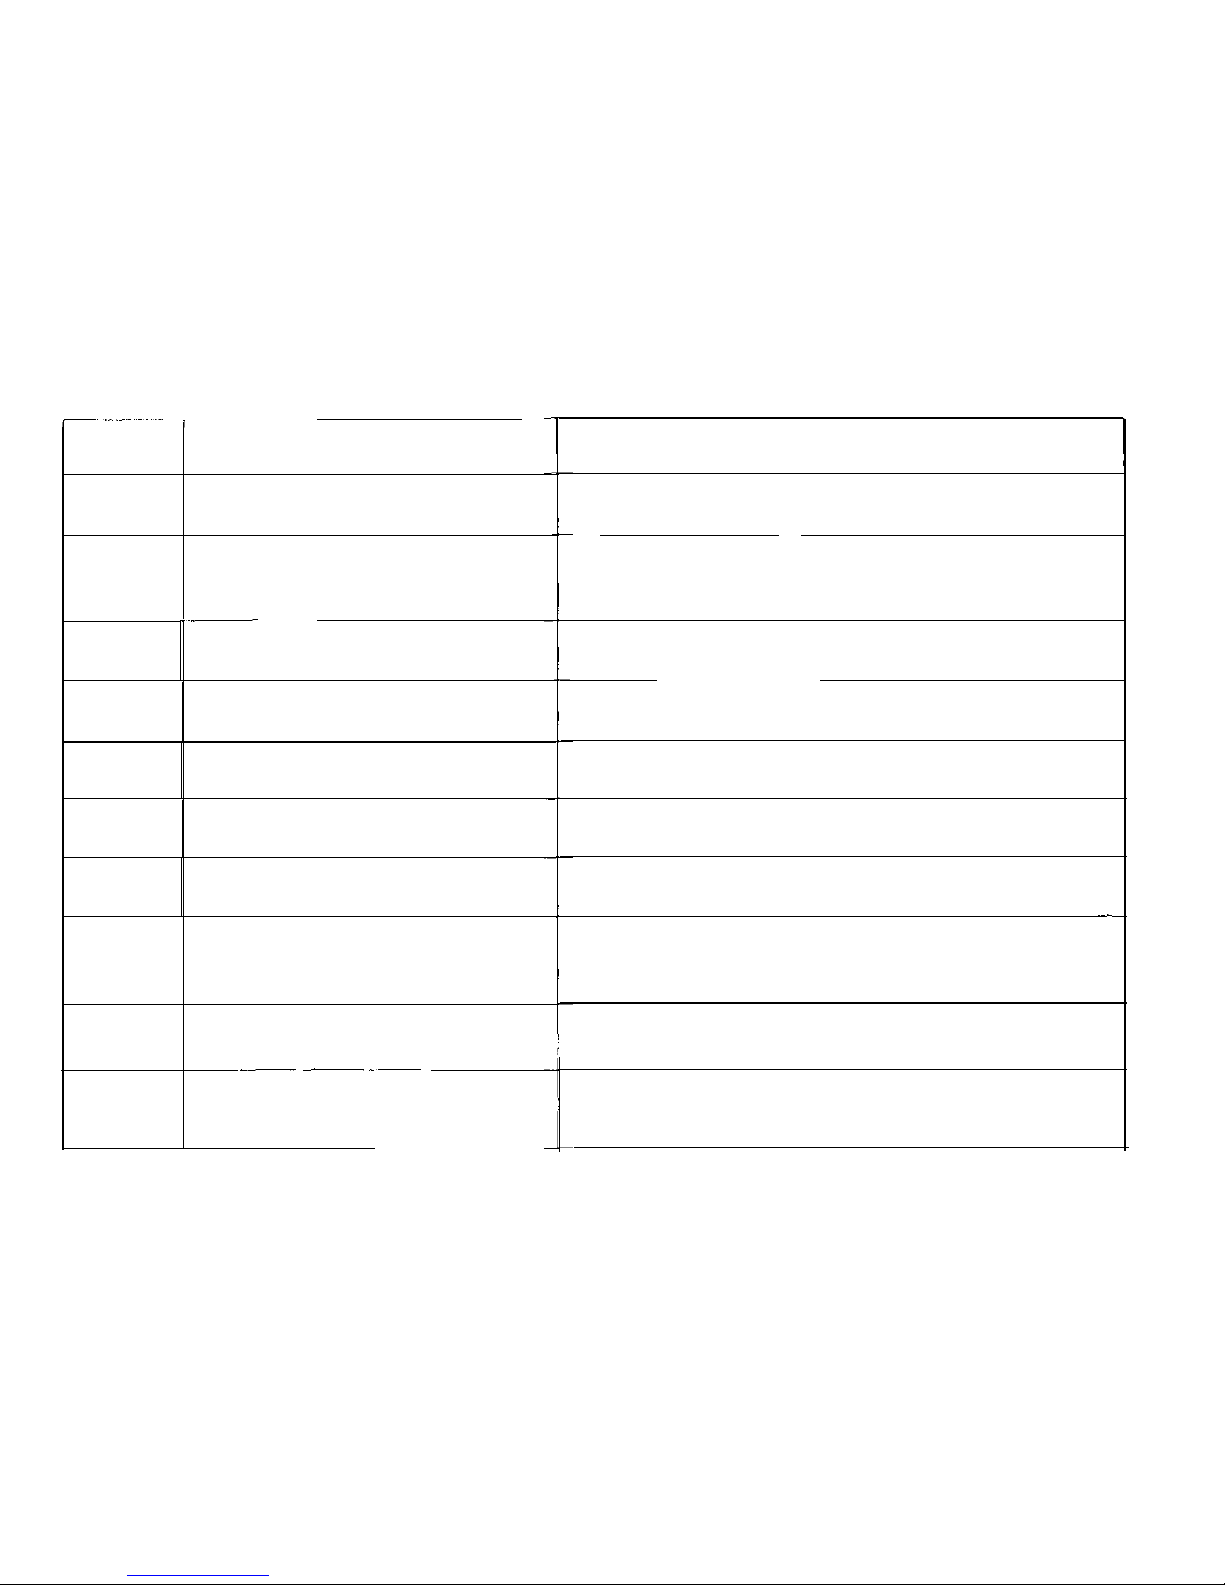
Ref. No.
Description
Left turn signal indicator
2
Fuel gauge
.~
3
Digital clock
4 Speedometer
5
Coolant temperature gauge
6
High beam indicator
7
Right turn signal indicator
8
Tripmeter reset button
9
Tripmeter
_~ ___.~
10
Digital clock adjusting
buttons
_______
Function
Flashes when the left turn signal operates.
Shows approximate fuel supply available
(see page 12).
Shows the time (see page 14).
Shows riding speed (see page 12).
_
Shows coolant temperature (see page 13).
Lights when the headlight is on high beam.
Flashes when the right turn signal operates.
-
Press the button to reset tripmeter to zero
(0).
Shows mileage per trip.
Adjust the clock (see page 14).
10
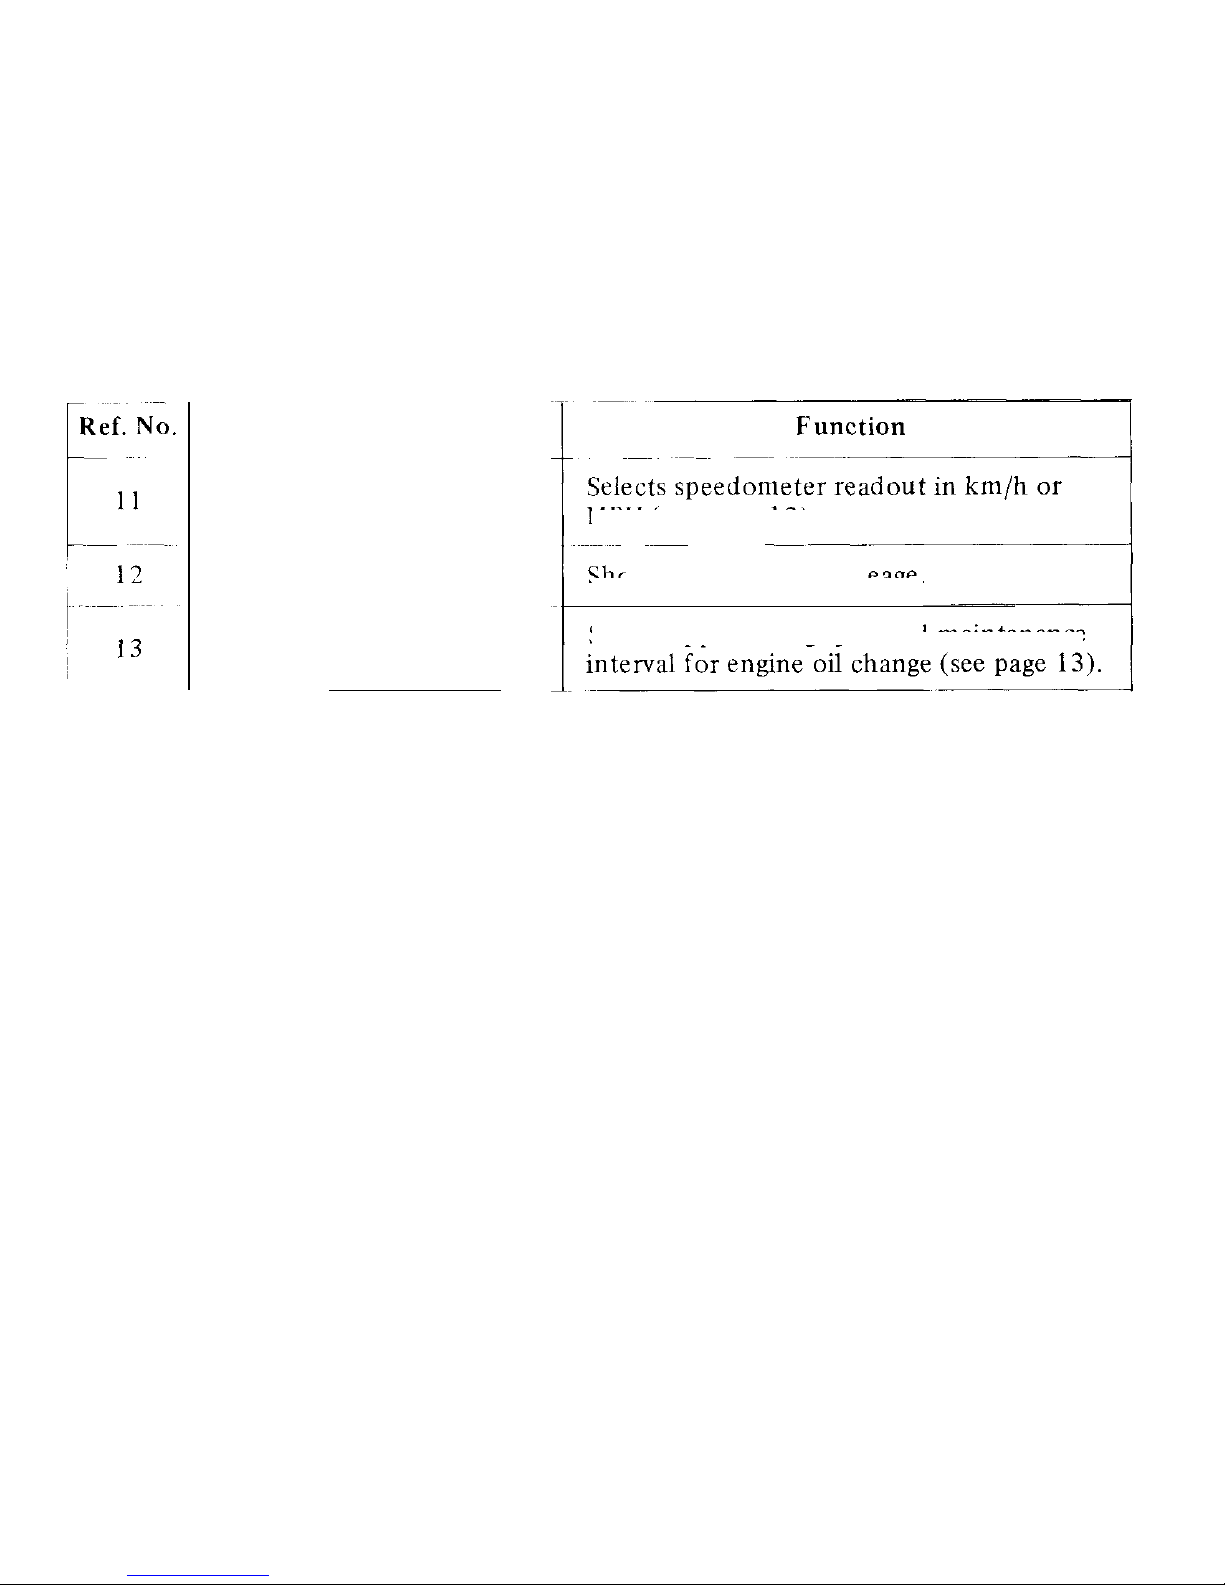
Description
Speedometer (km/h
MPH)
select button
Odometer
Maintenance indicator
MPH
(see page 12).
~~
__
_~~
Shows accumulated mileage.
Shows approaching specified maintenance
11
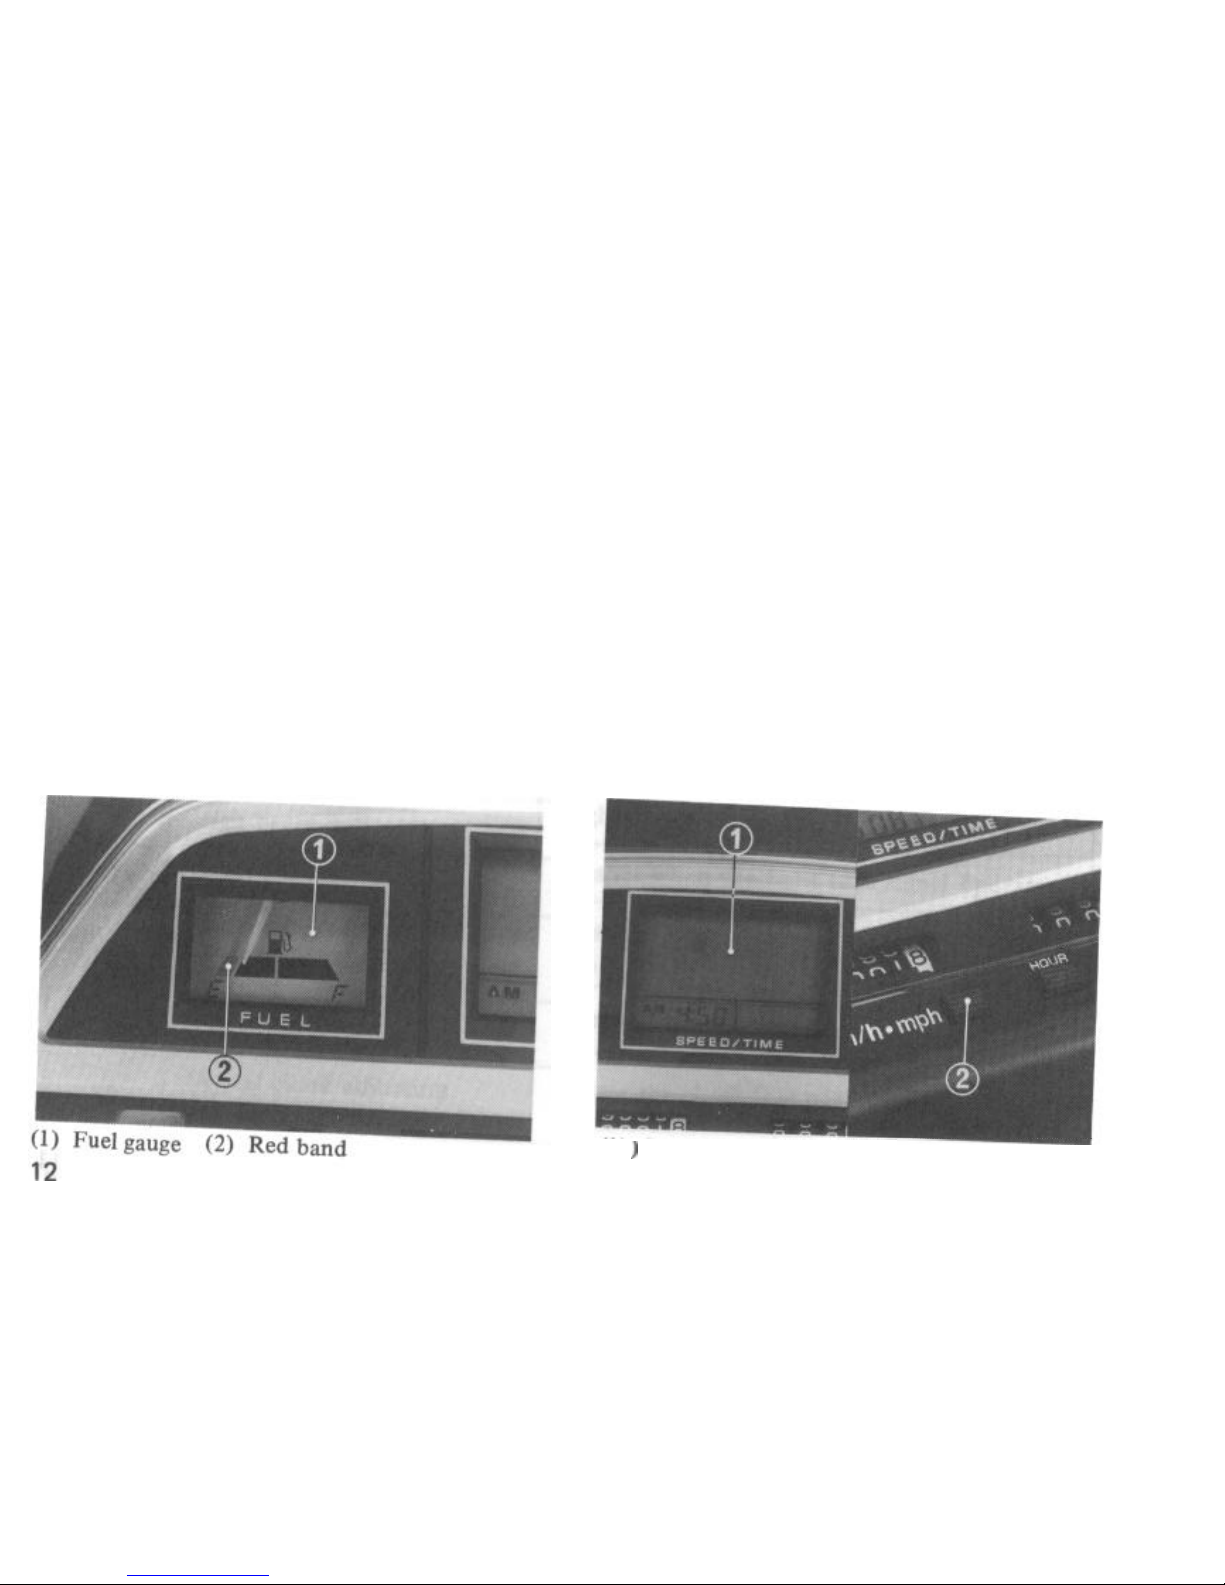
Fuel
Gauge
The fuel gauge shows the approximate
fuel supply available. At F (Full) there
are 8.0 liters (2.1 US gal., 1.7 Imp. gal.),
including the reserve supply.
When the gauge needle enters the red
band
(2),
fuel will be low and you should
refill the tank as soon as possible. The
amount of fuel left in the tank when the
needle enters the red band is approxi-
mately 2.0 liters (0.52 US gal., 0.44 Imp.
gal.)
Speedometer
The speedometer display (1) shows riding
speed.
When the ignition switch is turned ON
the display changes from 100 to 199
in
increments of
11(111,122,133,144
)
until it shows Zero (0). The
speedometer
readout can be changed to show either
MPH or km/h by pressing the display
select button (2). The mode chosen will
be displayed in the MPH km/h display.
(1 J
Speedometer L.C. display
(2)
Display select button
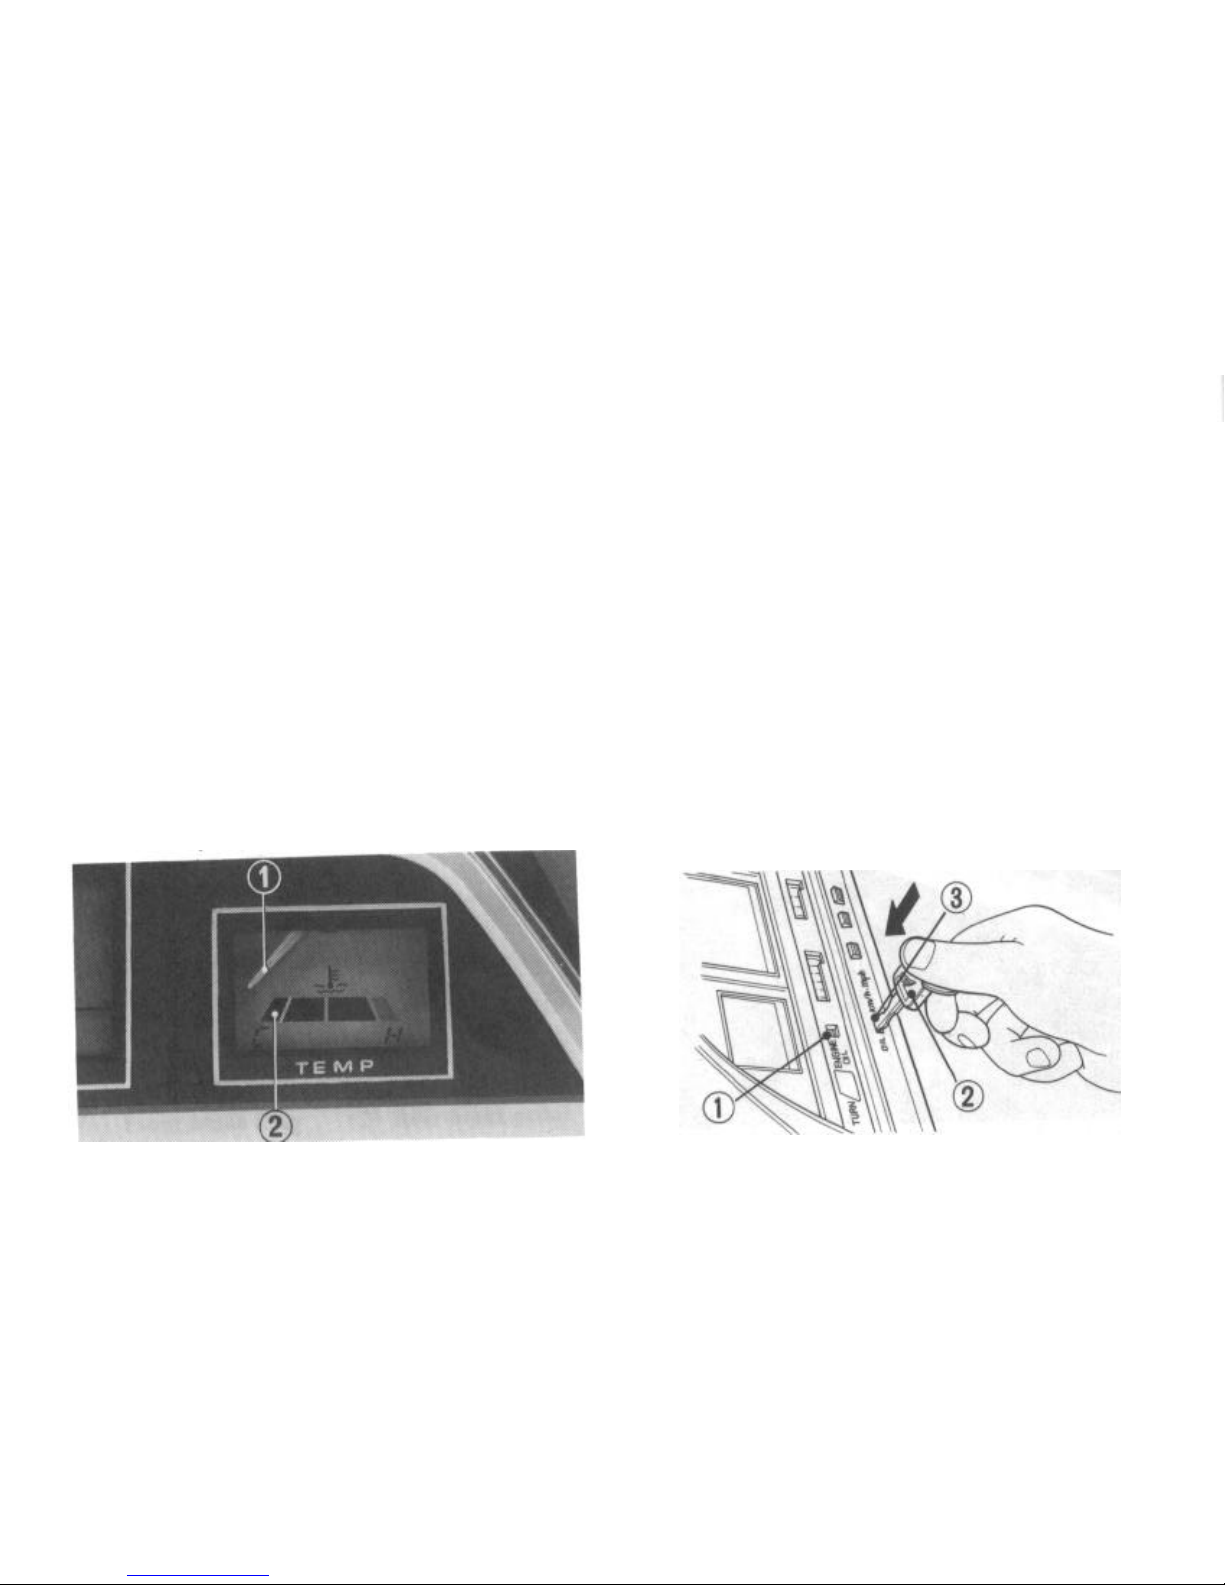
Coolant Temperature Gauge
When the needle (1) begins to move
above the C (Cold) mark
(2),
the engine
is warm enough to operate. The normal
operating temperature range is within the
zone between the C and H marks. If the
needle reaches the H (Hot) mark, stop the
engine and check the reserve tank coolant
level. Read pages 16-17 and do not ride
the scooter until the problem has been
corrected.
CAUTION:
* Exceeding maximum running tempera-
ture
may
cause
serious
engine
damage.
(1) Needle
(2) C mark
Maintenance Indicator
When the mileage on your scooter ap-
proaches the specified maintenance interval to change oil change, the maintenance
indicator (1) will change from green to
red. After replacing the engine oil, reset
the indicator by inserting the key (2) in
the slot (3) below the indicator.
NOTE:
*
The indicator changes from green to
red after the scooter has been ridden
about 1,200 miles. Therefore, after
initial oil change (600 mile) has been
made, be sure to reset the indicator
SO
the next specified maintenance will be
indicated at the proper mileage.
(1) Maintenance indicator
(3)
Slot 13
(2) Key
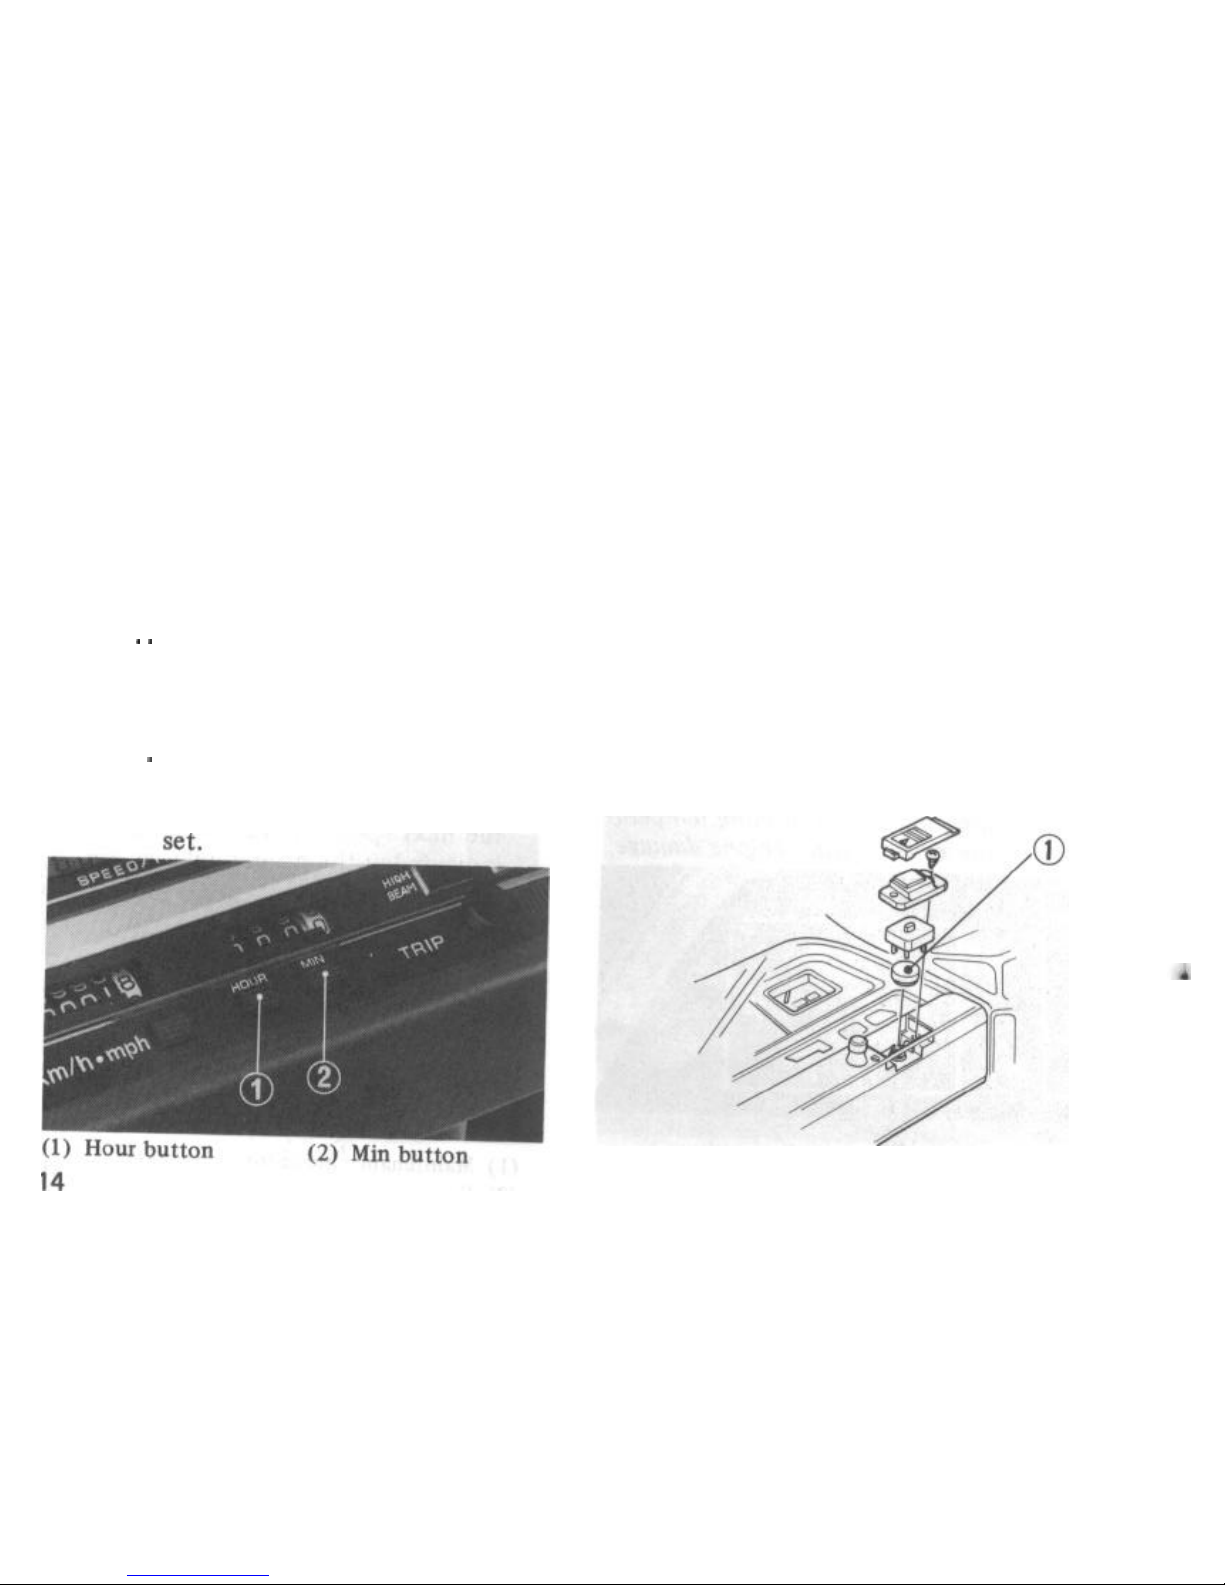
Digital Clock
The digital clock displays the time of day
or night, and it has its own power source.
To adjust time, proceed as follows:
Turn the ignition switch to the ON position.
Hour. .
.
Press the Hour button (1)
until the correct hour is displayed. Be sure to select the
AM or PM hour.
Minute
.
Press the Min button (2)
until the correct minute is
displayed. The clock is now
Battery Replacement
The digital clock’s battery compartment
is located under the tripmeter reset button. Remove the cover and install a new
battery in the compartment.
NOTE:
* Do not reverse the battery polarity.
* The battery is SR44 or LR44H oxi-
dized silver dry battery.
(1) Battery
MAJOR COMPONENTS (Information you need to operate this scooter)
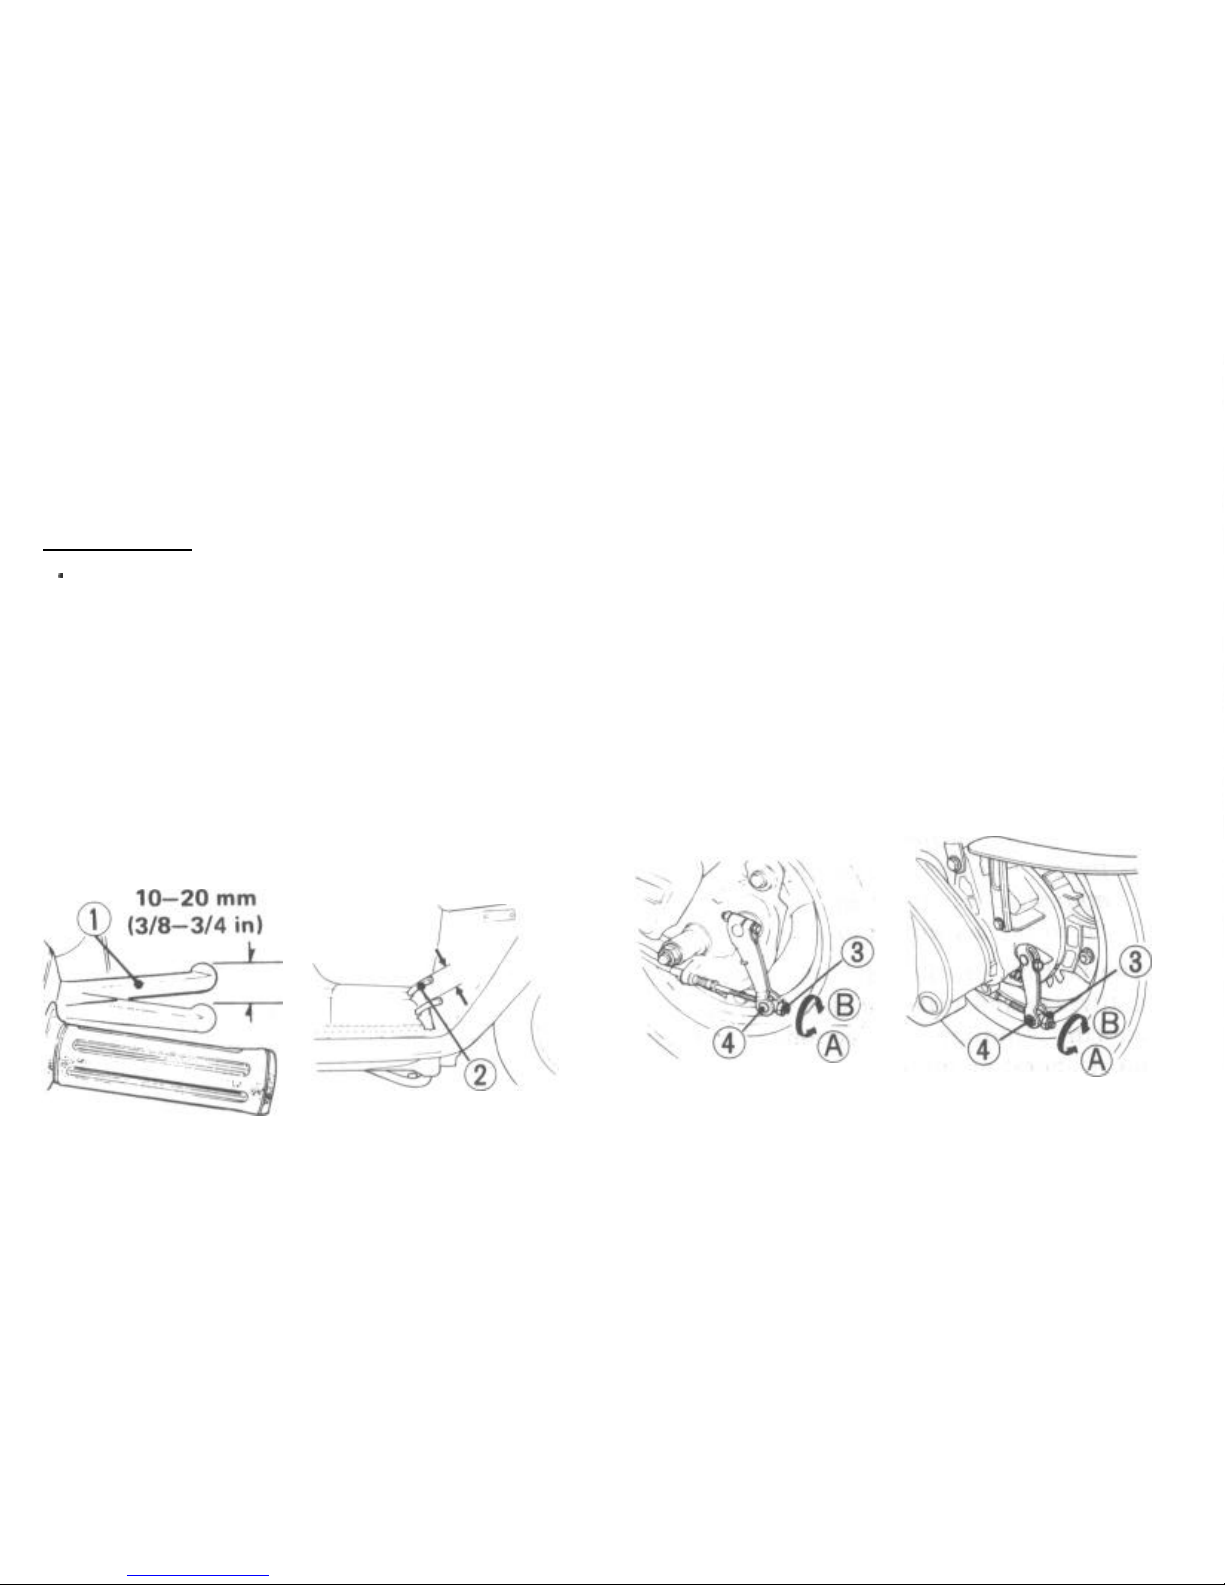
BRAKES
Adjustment:
.
Measure the distance the front brake
lever (1) and the rear brake pedal (2)
move before the brake starts to take
hold. Front brake lever free play
should be
l0-20
mm
(3/8-3/4
in)
and rear brake pedal free play should
be 20-30 mm
(3/4--l-1/4
in) at the
tips of the brake lever and pedal.
2. Make free play adjustments by turning
the adjusting nut (3) at the brake
arm.
(1) Front brake lever
(2) Rear brake pedal
Make sure the cut-out on the adjusting
nut is seated on the brake arm pin (4)
after making the final free play adjustment.
3. Apply the brake several times and
check for free wheel rotation when re-
leased.
NOTE:
*If proper adjustment cannot be obtain-
ed by this method, see
your
author-
ized Honda scooter dealer.
(Front)
(3) Adjusting nut
(4) Arm pin
(Rear)
(A) Increases free play
(B) Decreases free play
15
COOLANT
Coolant Recommendation
The owner must properly maintain the
coolant to prevent freezing, overheating,
and corrosion. Use only high quality
ethylene glycol antifreeze containing corrosion protection inhibitors specifically
recommended for use in aluminum engines. (SEE ANTIFREEZE CONTAINER
LABEL).
CAUTION :
* Use only low-mineral drinking water
or distilled water as a part of the antifreeze solution. Water that is high in
mineral content or salt may be harm-
ful to the aluminum engine.
The factory provides a
50/50
solution of
antifreeze and water in this scooter. This
coolant solution is recommended for
most operating temperatures and provides
good corrosion protection. A higher con-
centration of antifreeze decreases the
16
cooling system performance and is recommended only when additional protection
against freezing is needed. A concentration of less than 40/60 (40% antifreeze)
will not provide proper corrosion protection. During freezing temperatures, check
the cooling system frequently and add
higher concentrations of antifreeze (up to
a maximum of 60% antifreeze) if required.
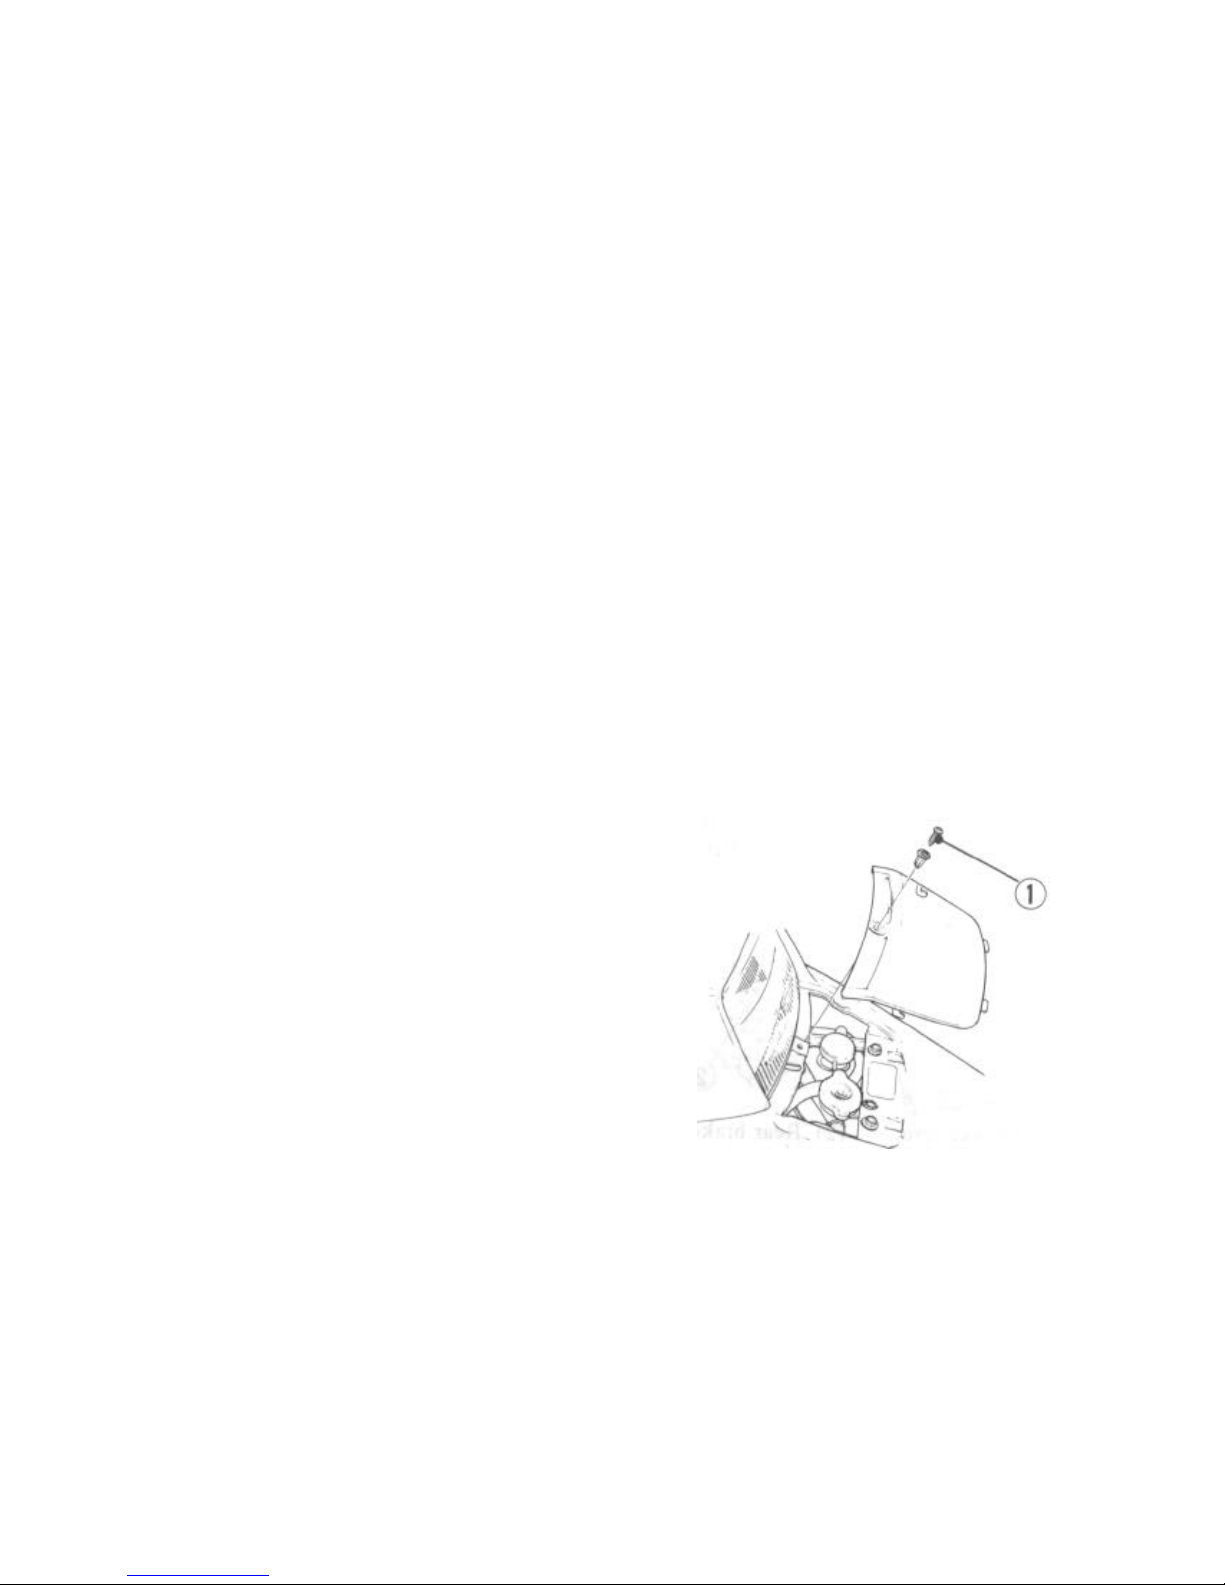
(1) Screw
Inspection
Remove the screw (1) attaching the front
cover.
Raise the front cover.
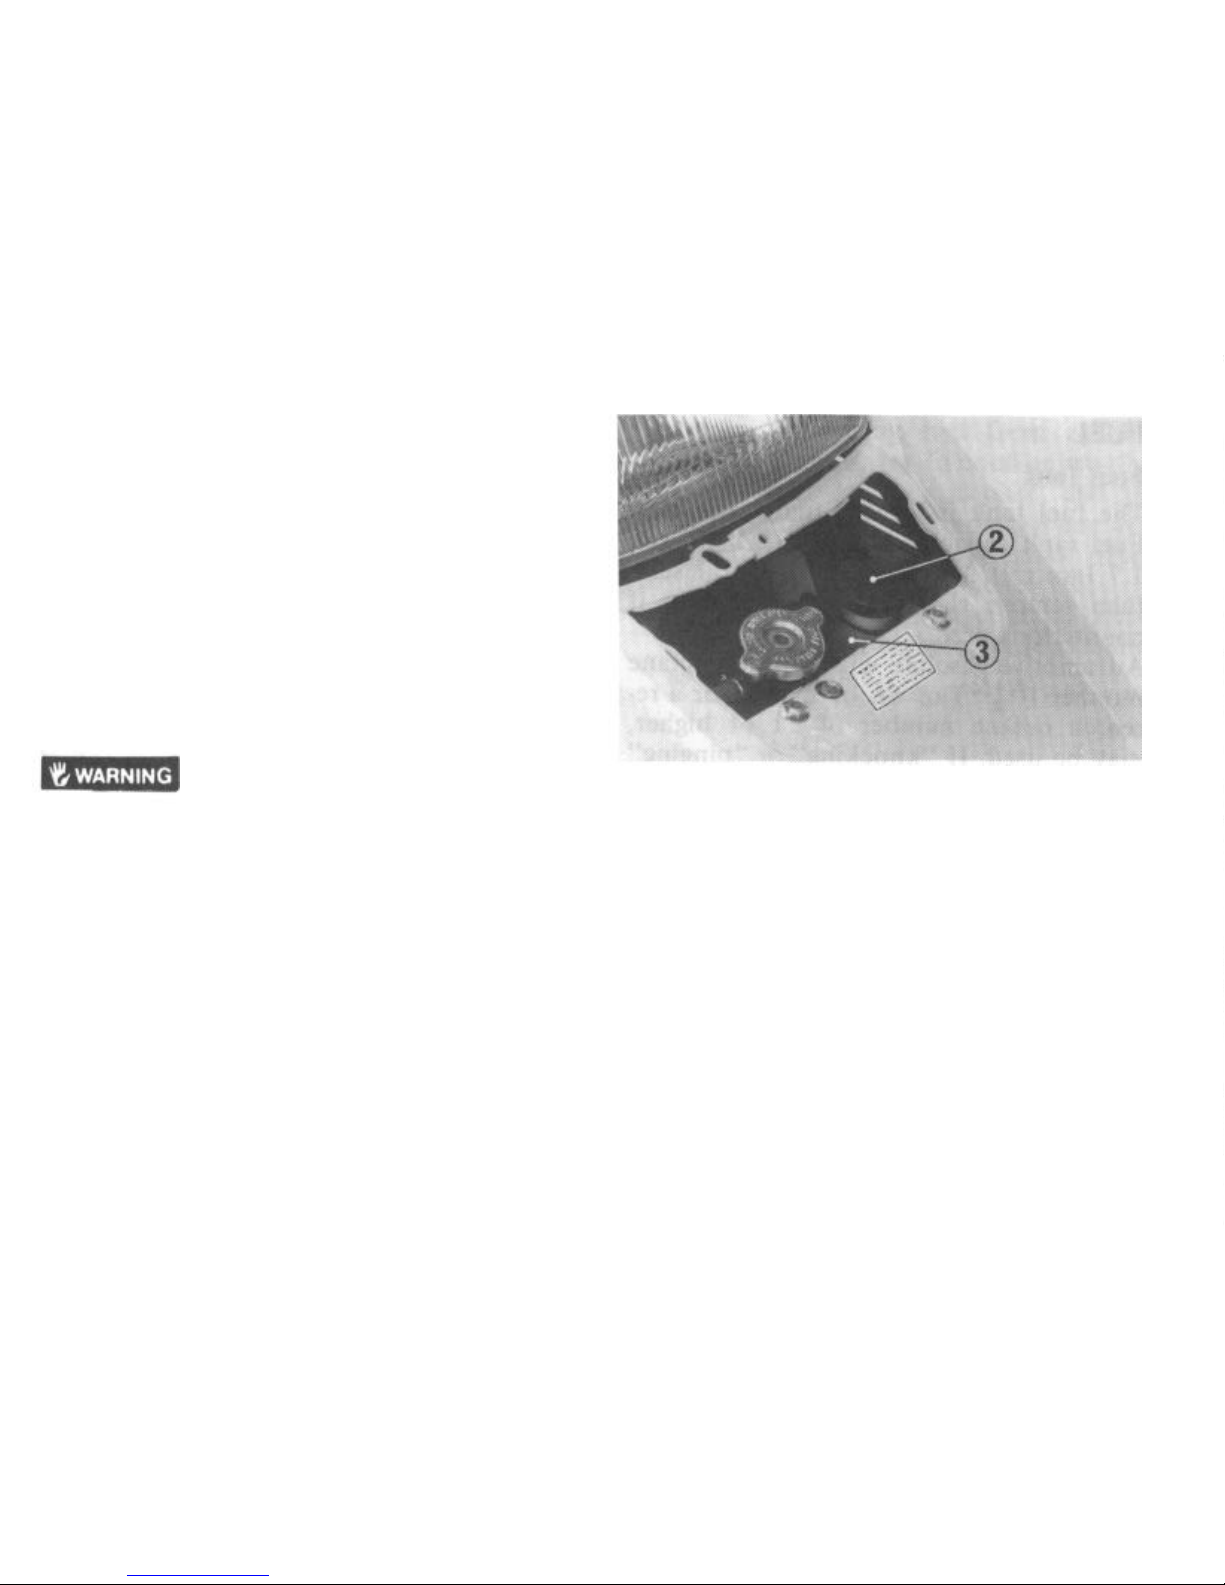
Check the coolant level in the reserve
tank (3) while the engine is at the normal
operating temperature. If the coolant
level is low, remove the reserve tank cap
(2) and add coolant mixture until it
reaches the UPPER level mark. Do not
remove the radiator cap.
* Do not remove the radiator cap when
the engine is hot. The coolant is under
pressure and severe scalding could
result.
*
Keep hands and clothing away from
the cooling fan, as it starts automatically.
If the reserve tank is empty, or if coolant
loss is excessive, check for leaks and see
your authorized Honda scooter dealer
for repair.
(2)
Reserve tank cap
(3)
Reserve
tank
17
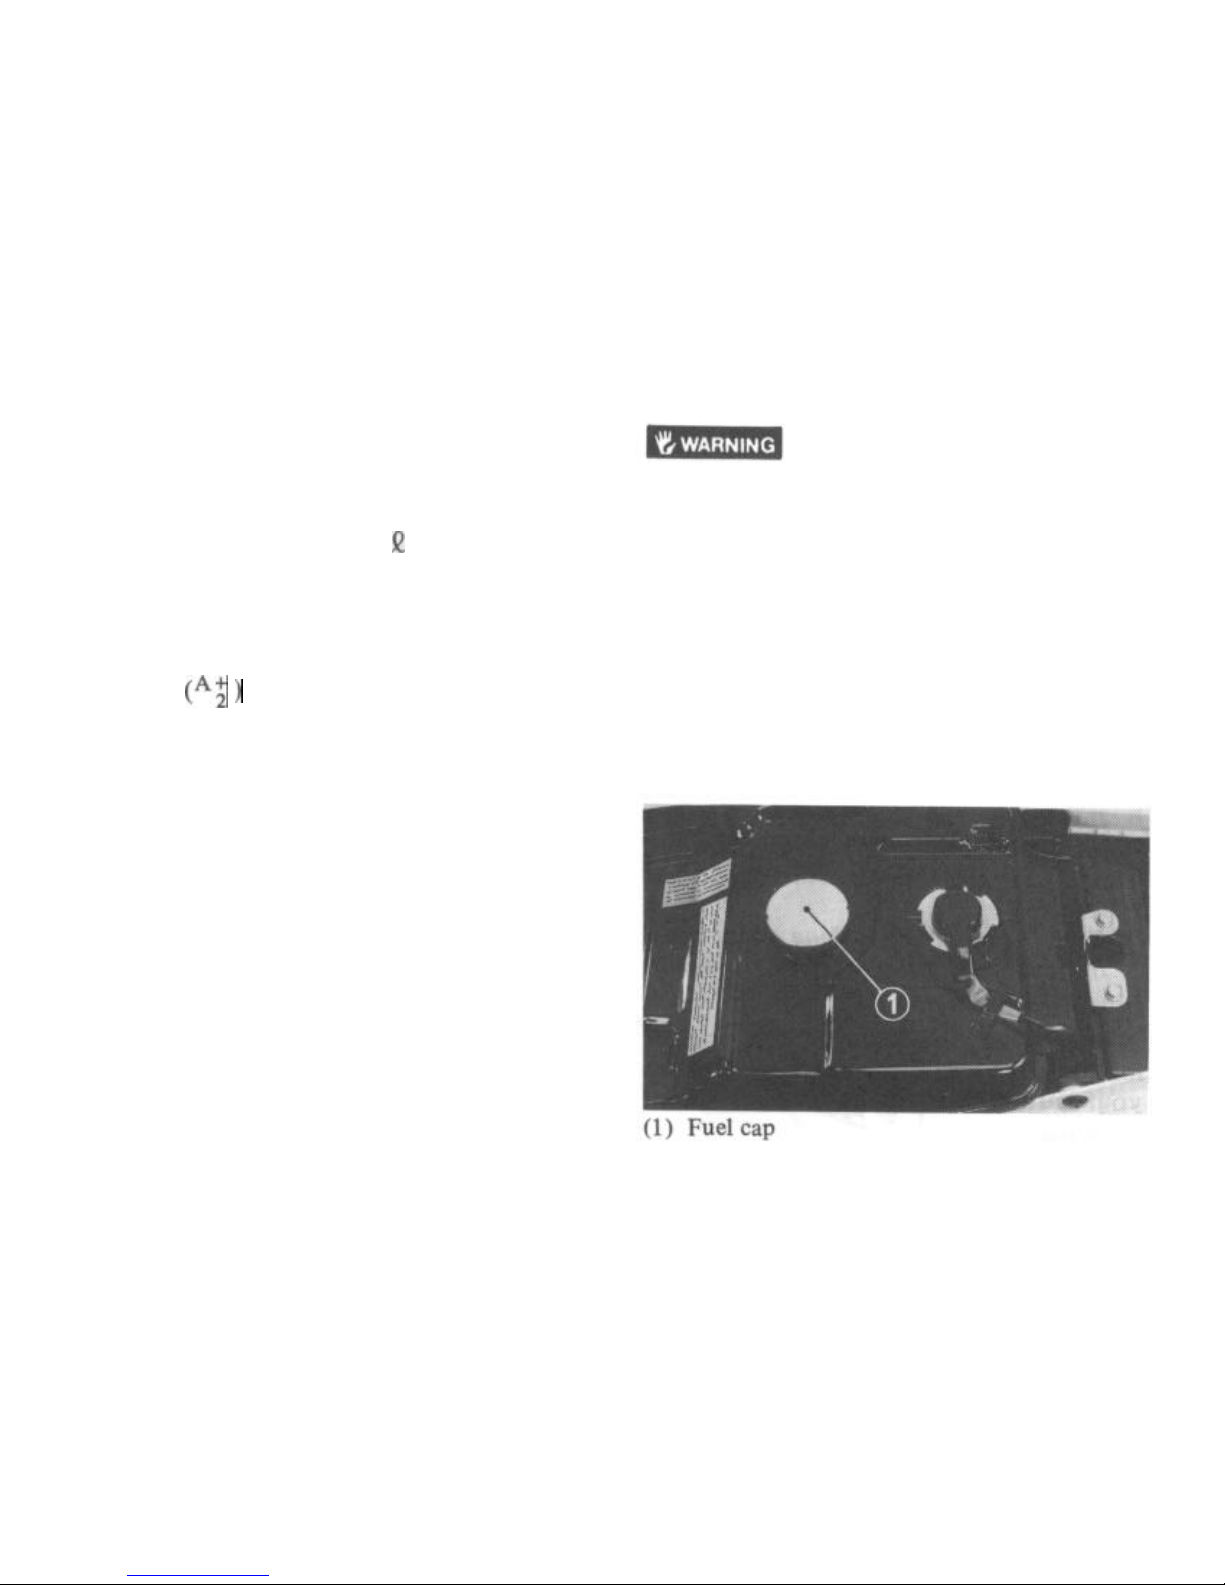
FUEL
Fuel Tank
The fuel tank is located under the seat.
Fuel tank capacity is 8.0
!?
(2.1 US gal,
1.7 Imp gal). Unlock and lift up the seat,
then remove the fuel cap by turning it
counterlock wise.
Automotive
gasoline
with a pump octane
number
(*i )
of 86 or higher, or a research octane number of 91 or higher,
may be used. If “knocking” or “pinging”
occurs, try a different brand of gasoline
or a higher octane grade.
CAUTION:
*
Should knocking or pinging persist
while holding a steady speed on a level
road, try changing brands of gasoline.
If knocking or pinging still persists,
consult your Honda dealer.
After refueling, be sure to tighten the
tank cap firmly by turning it clockwise.
*
Gasoline is extremely flammable and is
explosive under certain conditions.
Refuel in a well-ventilated area with
the engine stopped. Do not smoke or
allow flames or sparks in the area
where the scooter is refueled or where
gasoline is stored.
Do not overfill the tank (there should
be no fuel in the filler neck). After
refueling, make sure the fuel cap is
closed securely.
18

Gasolines Containing
Alkohol
If you decide to use a gasoline containing
alcohol (“gasohol”), be sure its octane
rating is at least as high as tht recommended. There are two types of “gaso-
hol”:
that containing ethanol, and that
containing methanol. Do not use gasohol
that contains more than 10% ethanol. Do
not use gasoline containing methanol
(methyl or wood alcohol) that does not
also contain cosolvents and corrosion
inhibitors for methanol. Never use gasoline containing more than 5% methanol
even if it has cosolvents and corrosion
inhibitors.
NOTE:
* Fuel system damage or vehicle
performance problems resulting from the
use of such fuels is not covered under
new Scooter Warranties. Honda cannot
endorse the use of fuels containing
methanol since evidence of their suitability is as yet incomplete.
* Before purchasing fuel from an un-
familiar station, try to confirm whether the fuel contains alcohol, and to
what percentage. If you notice any undesirable operating symptoms after
using a gasoline that contains alcohol;
or one that you think contains alcohol, switch to a higher octane gasoline
as recommended.
19
I
 Loading...