

Page 1
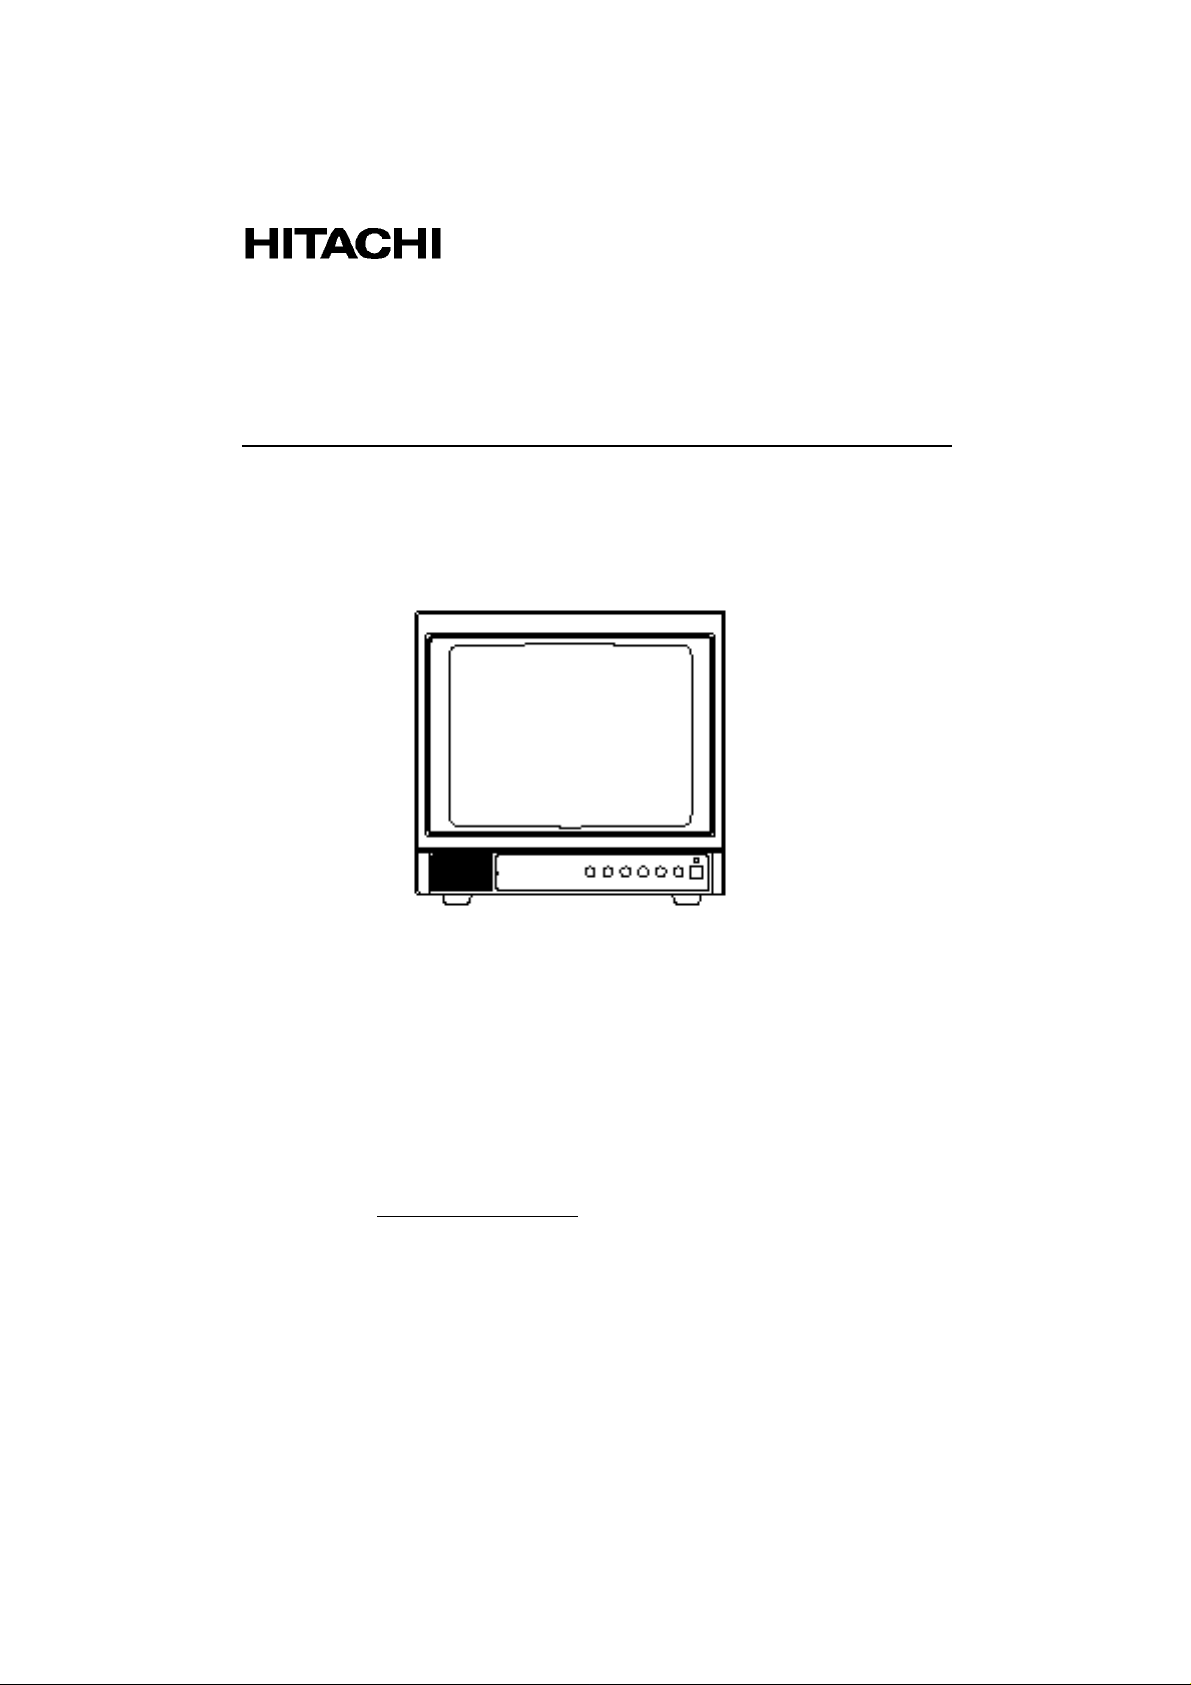
COLOUR CCTV MONITOR
MANUEL D’UTILISATION
CPX1402MS
BEDIENUNGSANLEITUNG
MANUALE DI ISTRUZIONI
USER MANUAL
MANUAL DE USUARIO
READ THE INSTRUCTIONS INSIDE CAREFULLY.
KEEP THIS USER MANUAL FOR FUTURE REFERENCE.
For future reference, record the serial number of your colour monitor.
SERIAL No.
The serial number is loc ated on the rear of the monitor.
1
Page 2

2
CONTENTS
PRECAUTIONS 4
BEFORE OPERATING THIS EQUIPMENT 5
LOCATION OF CONTROLS 6
LOCATION AND OPERATION OF CONTROLS 7
POSSIBLE CONNECTION 9
SAFETY INSTRUCTIONS 10
SPECIFICATIONS 12
GUARANTEE 13
Page 3

3
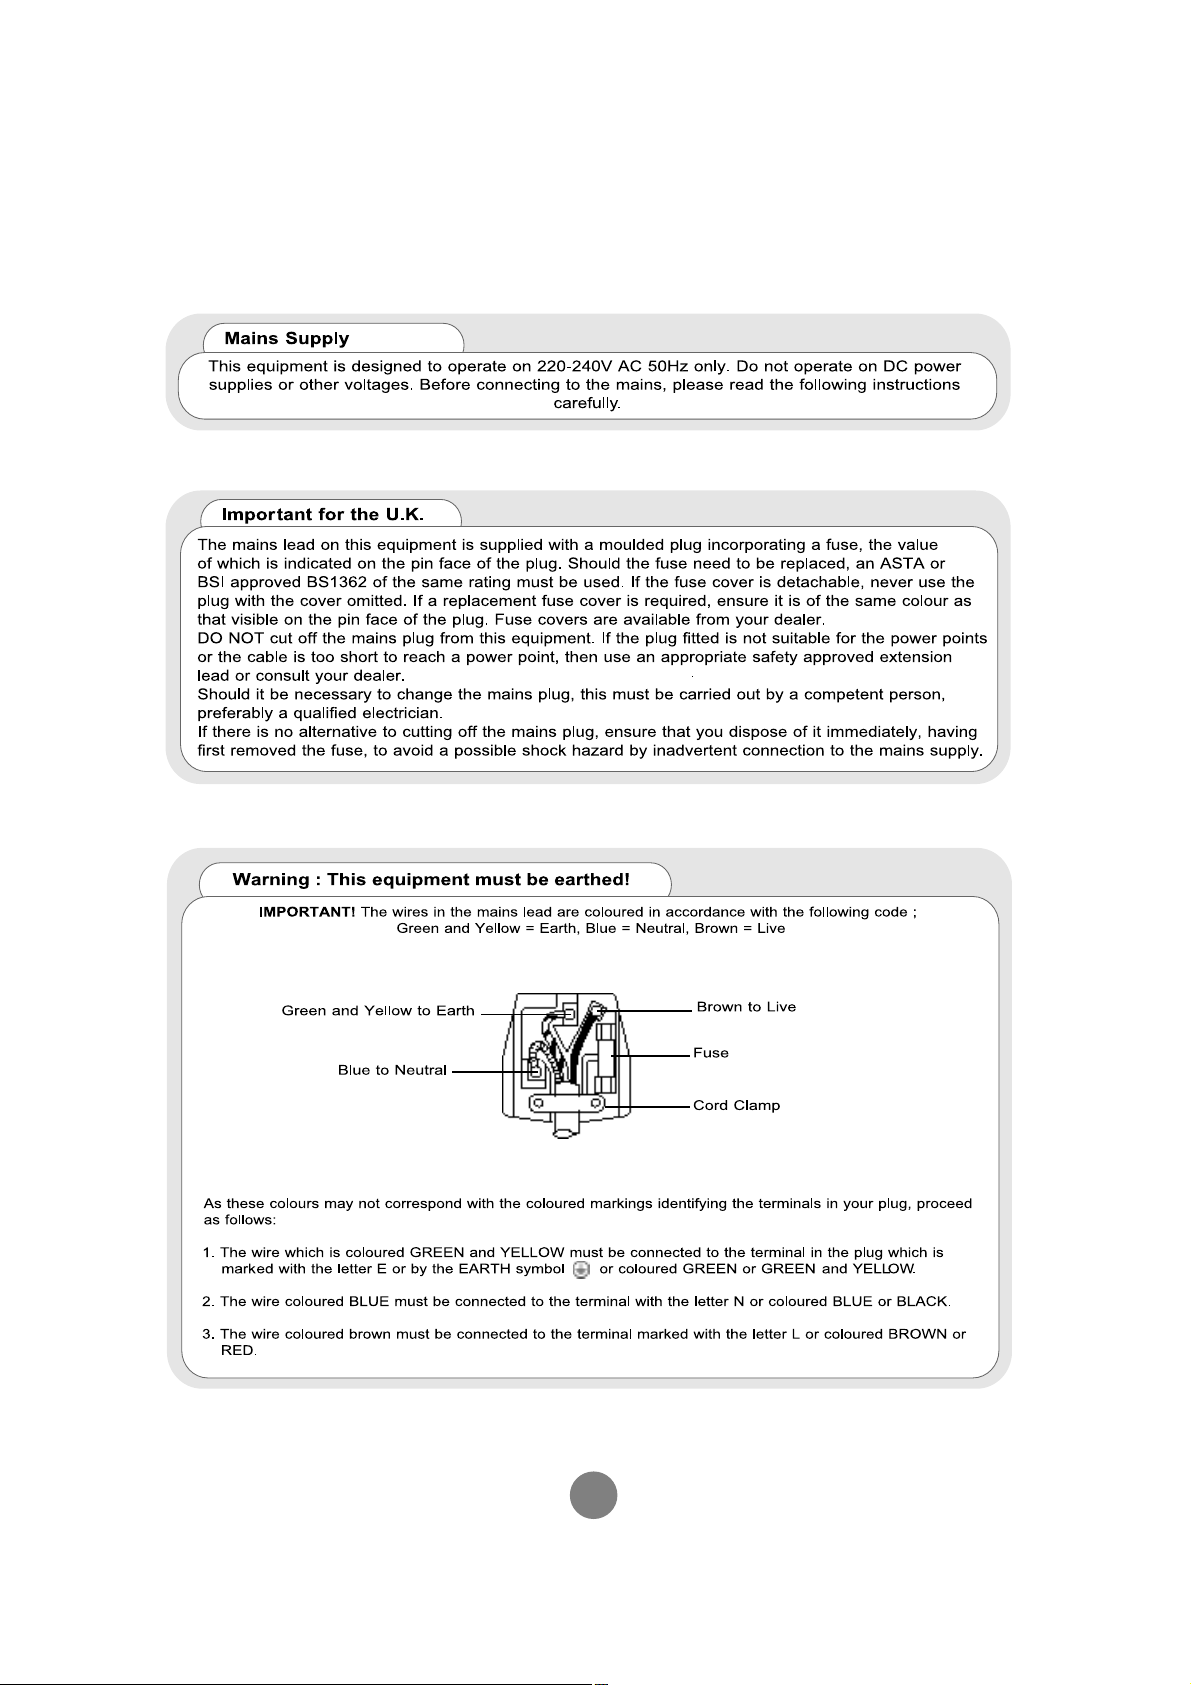
WARNING
TO REDUCE THE RISK OF FIRE OR ELECTRIC SHOCK, DO NOT EXPOSE THIS
APPLIANCE TO RAIN OR MOISTURE. DO NOT INSERT ANY METALLIC OBJECT
THROUGH VENTILATION GRILLS.
CAUTION
Explanation of Graphical Symbols.
This symbol is intended to alert the user to the presence of
uninsulated
dangerous voltage within the product's enclosure
that may be of sufficient magnitude to constitute a risk of electric
shock to persons.
This symbol is intended to alert the user to the presence of
important operating and maintenance(servicing) instructions in the
literature accompanying the appliance.
Page 4

4
Safety
Should any liquid or solid object fall into the cabinet, unplug the unit and have it checked by
qualified personnel before operating it any further.
Unplug the unit from the wall outlet if it is not going to be used for several days or more.To
disconnect the cord,pull it out by the plug.Never pull the cord itself.
Allow adequate air circulation to prevent internal heat build-up.Do not place the unit on
surfaces(rugs,blankets,etc.)or near materials(curtains,draperies)that may block the
ventilation holes.
Installation
Do not install the unit in an extremely hot or humid place or in a place subject to excessive
dust or mechanical vibration.
The unit is not designed to be waterproof.
Exposure to rain or water may damage the unit.
Cleaning
Clean the unit with a slightly damp soft cloth.Use a mild household detergent.
Never use strong solvents such as thinner or benzene as they might damage the surface of
the unit.
PRECAUTIONS
Page 5
5
BEFORE OPERATING THIS EQUIPMENT
Page 6

6
Front View Side View
Rear View
1011 12
13
15
9
14
16
1. POWER BUTTON
2. VOLUME
3. CONTRAST
4. BRIGHT
5. COLOR
6. SHARP
7. TINT
8. POWER LED LAMP
9. POWER INLET
10. IMPEDANCE SWITCH(HIGH/75
)
11. S-VHS/CAMERA SWITCH
12. S-VHS JACK
13. AUDIO IN JACK(RCA)
14. AUDIO OUT JACK(RCA)
15. VIDEO OUT JACK(BNC)
16. CAMERA INPUT JACK(BNC)
LOCATION OF CONTROLS
Page 7

7
1) POWER SWITCH
Press to turn the monitor ON. The POWER LAMP above the switch will illuminate.
2) VOLUME
Adjust the VOLUME control for the desired audio level. Turn the control clockwise to increase
and counterclockwise to decrease.
3) CONTRAST
Adjust the CONTRAST control for the desired overall contrast. Proper adjustment will allow
maximum gradations between the darkest and lightest picture areas. Turn the control
clockwise to increase and counterclockwise to decrease.
4) BRIGHTNESS
Adjust the BRIGHTNESS control for the desired overall display brightness. This control is
also useful to compensate for differences in area lighting. Turn the control clockwise to
increase and counterclockwise to decrease.
5) COLOR
Adjust the COLOR control to set the color saturation level. Turn the control clockwise to
increase and counterclockwise to decrease.
6) SHARPNESS
Adjust the SHARPNESS control to obtain a clearer picture.
7) TINT (NTSC ONLY)
Adjust the TINT control for the proper color phase or flesh tones. When turned counterclockwise, the skin tone becomes reddish. When turned clockwise, skin tone becomes
greenish.
8) POWER LED LAMP
Power lamp indicates the power is on.
9) POWER INLET
Please use AC 100~240V, 50/60Hz.
To prevent electrical shocks and fire hazards, do not use any other power source.
10) IMPEDANCE SWITCH
Set the switch to the HIGH position if another monitor is connected to the VIDEO OUTPUT
on the rear of the monitor. The last monitor should be set in the 75 position.
Set the switch to the 75
position if the VIDEO OUTPUT is not used.
LOCATION AND OPERATION OF CONTROLS
Page 8

8
11) S-VHS/CAMERA SWITCH
Set the switch to S-VHS(VIDEO) if you want to see the higher resolution S-VHS as the VIDEO.
Set the switch to CAMERA if input signal is camera signal.
12) S-VHS JACK
If you want to see the S-VHS(VIDEO), please connect directly to this jack.
13.14) AUDIO INPUT & OUTPUT CONNECTOR
Connect an RCA cable between these jacks and the audio jack of a camera or VCR.
15.16) VIDEO INPUT & OUTPUT CONNECTORS
These BNC connectors permit loop-through connection of a video signal in those
installations where it is desirable to display the video signal on more than one monitor. A
standard 1. 0Vp-p video signal applied to the VIDEO INPUT will also appear at the VIDEO
OUTPUT. Use coaxial cables with BNC type plugs for these connections.
Page 9

9
To use S-VHS(VIDEO) input signal
Please read the installation/operation manual thoroughly before connecting equipment.
Please turn off the power source before connecting the monitor and external equipment.
One Monitor - External equipment (VIDEO)
Monitor to Monitor - External equipment (VIDEO)
Note : Maximum 3 monitors can be connected.
In this case, please set the switch to the S-VHS(VIDEO) position.
Camera
Camera
POSSIBLE CONNECTIONS
Page 10

10
IMPORTANT SAFEGUARDS
All the safety and operating instructions should be read before the appliance is operated. Retain the
instructions for future reference.
1) HEED WARNINGS
All warnings on the appliance and in the operating instructions should be adhered to.
2) FOLLOW INSTRUCTIONS
All operating instructions should be followed.
3) CLEANING
Unplug this equipment from the wall outlet before cleaning.
Do not use liquid or aerosol cleaners. Use a water.dampened cloth for cleaning.
4) WATER AND MOISTURE
Do not use this product near water-for example, near a bath tub, wash bowl, kitchen sink,
swimming pool or laundry tub, or in a wet basement.
5) ACCESSORIES
Do not place this product on an unstable cart, stand, tripod, bracket, or table. Do not drop.
6) VENTILATION
Slots and openings in the cabinet are provided for ventilation.
To ensure reliable operation of this product and to protect it from overheating, the openings must
not be blocked or covered.
This product should never be placed near or over a radiator or heat registor or in a built-in
installation, such as a bookcase or rack, unless proper ventilation is provided.
If you intend placing this Monitor into a cabinet or a wall alcove, please ensure there is at least a
100mm (10cm) gap to the sides, rear and top of the monitor. This is to allow for adequate
ventilation during your equipments operation.
7) POWER SOURCES
This product should be operated only from the type of power source indicated on the marking
label.
SAFETY INSTRUCTIONS
Page 11

11
8) POWER CORD PROTECTION
Power supply cords should be routed so that they are not likely to be walked on or pinched by
items placed on or against them. Pay particular attention to cords and plugs, convenience
receptacles, and the point where they exit from the unit.
9) OUTDOOR ANTENNA GROUNDING
If an outside antenna or cable system is connected to the product, be sure the antenna or cable
system is grounded to provide some protection against voltage surges and built-up static
charges.
Section 810 of the National Electrical Code, ANSI/NFPA No. 70-1981, provides information with
respect to power grounding of the mast and supporting structure grounding of the lead-in wire to
an antenna discharge unit, size of grounding conductors, location of antenna discharge unit,
connection to grounding electrodes, and requirements for the grounding electrodes, see Figure A.
10) OVERLOADING
Do not overload outlets and extension cords, as this can result in a risk of fire or electric shock.
11) OBJECT AND LIQUID ENTRY
Never push objects of any kind into this product through openings, as they may touch dangerous
voltage points or short out parts that could result in a fire or electric shock. Never spill liquid of
any kind on the product.
12) SERVICING
Do not attempt to service this product yourself, as opening or removing covers may expose you
to dangerous voltage of other hazards. Refer all servicing to qualified service personnel.
Page 12

12
Picture Tube 14-inch Diagonal, 90 Deflection Angle
Power Source 100~240V AC, 50/60 Hz
Power Consumption 68Watts
System PAL / NTSC
Sound output 1.1W
Speaker 3W, 77mm X 40mm
Terminals Video Input level/Impedance:1.0Vpp/75
Video output level/Impedance:1.0Vpp/75
Audio Input level/Impedance:0.3Vrms/25K
Audio Input level/Impedance:0.3Vrms/4.7K
Dimensions(W H D) 350 332 370(mm)
Weight Approx. 14kg
Ambient Temperature 0-40 /32-106 F(Performance Range)
Accessory Owner’s manual
Design and specifications are subject to change without notice.
SPECIFICATIONS
Page 13

13
Page 14

Hitachi, Ltd. Tokyo, Japan
International Sales Division
THE HITACHI ATAGO BUILDING,
No. 15 –12 Nishi Shinbashi, 2 – Chome,
Minato – Ku, Tokyo 105-8430, Japan.
Tel: 03 35022111
HITACHI EUROPE LTD,
Whitebrook Park
Lower Cookham Road
Maidenhead
Berkshire
SL6 8YA
UNITED KINGDOM
Tel: 01628 643000
Fax: 01628 643400
Email: consumer-service@hitachi-eu.com
HITACHI EUROPE GmbH
Munich Office
Dornacher Strasse 3
D-85622 Feldkirchen bei München
GERMANY
Tel: +49-89-991 80-0
Fax: +49- 89-991 80-224
Hotline: +49-180-551 25 51 (12ct/min)
Email: HSE- DUS.service@hitachi-eu.com
HITACHI EUROPE srl
Via Tommaso Gulli N.39, 20147
Milano, Italia
ITALY
Tel: +39 02 487861
Tel: +39 02 38073415 Servizio Clienti
Fax: +39 02 48786381/2
Email: customerservice.italy@hitachi-eu.com
HITACHI EUROPE S.A.S
Lyon Office
B.P. 45, 69671 BRON CEDEX
FRANCE
Tel: 04 72 14 29 70
Fax: 04 72 14 29 99
Email: france.consommateur@hitachi-eu.com
HITACH EUROPE AB
Egebækgård
Egebækvej 98
DK-2850 Nærum
DENMARK
Tel: +45 43 43 6050
Fax: +45 43 60 51
Email: csgnor@hitachi-eu.com
Hitachi Europe Ltd
Bergensesteenweg 421
1600 Sint- Pieters-Leeuw
BELGIUM
Tel: +32 2 363 99 01
Fax: +32 2 363 99 00
Email: sofie.van.bom@hitachi-eu.com
www.hitachidigitalmedia.com
HITACHI EUROPE S.A.
364 Kifissias Ave. & 1, Delfon Str.
152 33 Chalandri
Athens
GREECE
Tel: 1-6837200
Fax: 1-6835964
Email: service.hellas@hitachi-eu.com
HITACHI EUROPE S.A.
Gran Via Carlos III, 101- 1
08028 Barcelona
SPAIN
Tel: 93 409 2550
Fax: 93 491 3513
Email: atencion.cliente@hitachi-eu.com
HITACHI Europe AB
Box 77 S-164 94 Kista
SWEDEN
Tel: +46 (0) 8 562 711 00
Fax: +46 (0) 8 562 711 13
Email: csgswe@hitachi-eu.com
HITACHI EUROPE LTD (Norway) AB
STRANDVEIEN 18
1366 Lysaker
NORWAY
Tel: 67 5190 30
Fax: 67 5190 32
Email: csgnor@hitachi-eu.com
HITACHI EUROPE AB
Neopoli / Niemenkatu 73
FIN-15140 Lahti
FINLAND
Tel : +358 3 8858 271
Fax: +358 3 8858 272
Email: csgnor@hitachi-eu.com
HITACHI EUROPE LTD
Na Sychrove 975/8
101 27 Praha 10 – Bohdalec
CZECH REPUBLIC
Tel: +420 267 212 383
Fax: +420 267 212 385
Email: csgnor@hitachi-eu.com
 Loading...