

Page 1
A
Я
Page 2
–
2
–
Аксессуары и дополнительное оборудование
Устранение неполадок
Page 3
–
3
–
Lead based paints
Crystalline silica from bricks, cement and other masonry products
Arsenic and chromium from chemically treated lumber
Wear safety goggles
Wear ear protection
Wear a breathing mask
..............
volts
Page 4

–
4
–
and become familiar with this entire
Look for this symbol that identifi es important
use power tools in the presence of
visitors should be
wear loose
jewelry that may get caught in moving parts.
Non-slip footwear is recommended. Wear protective
before servicing and when
Do not leave the tool
with padlocks,
operate the tool if you are under the
whenever
wear
Feed work into a blade or
Page 5

–
5
–
SAFETY
against the miter
a push stick, especially when ripping
WARNING: FREEHAND CUTTING IS THE MAJOR
or have any part of your body in
behind or over the cutting tool for
the rip fence when crosscutting.
a molding head with this saw.
against the
use the rip fence as a cut-off gauge when
without fi rst turning the saw
immediately to prevent motor
to the rear
(work thrown back towards
and hand
to clean plastic parts.
your table saw on a bench or stand
on
or materials that may make
(
Page 6

–
6
–
SAFETY
used is in accordance with your
or the rating on the
Page 7
–
7
–
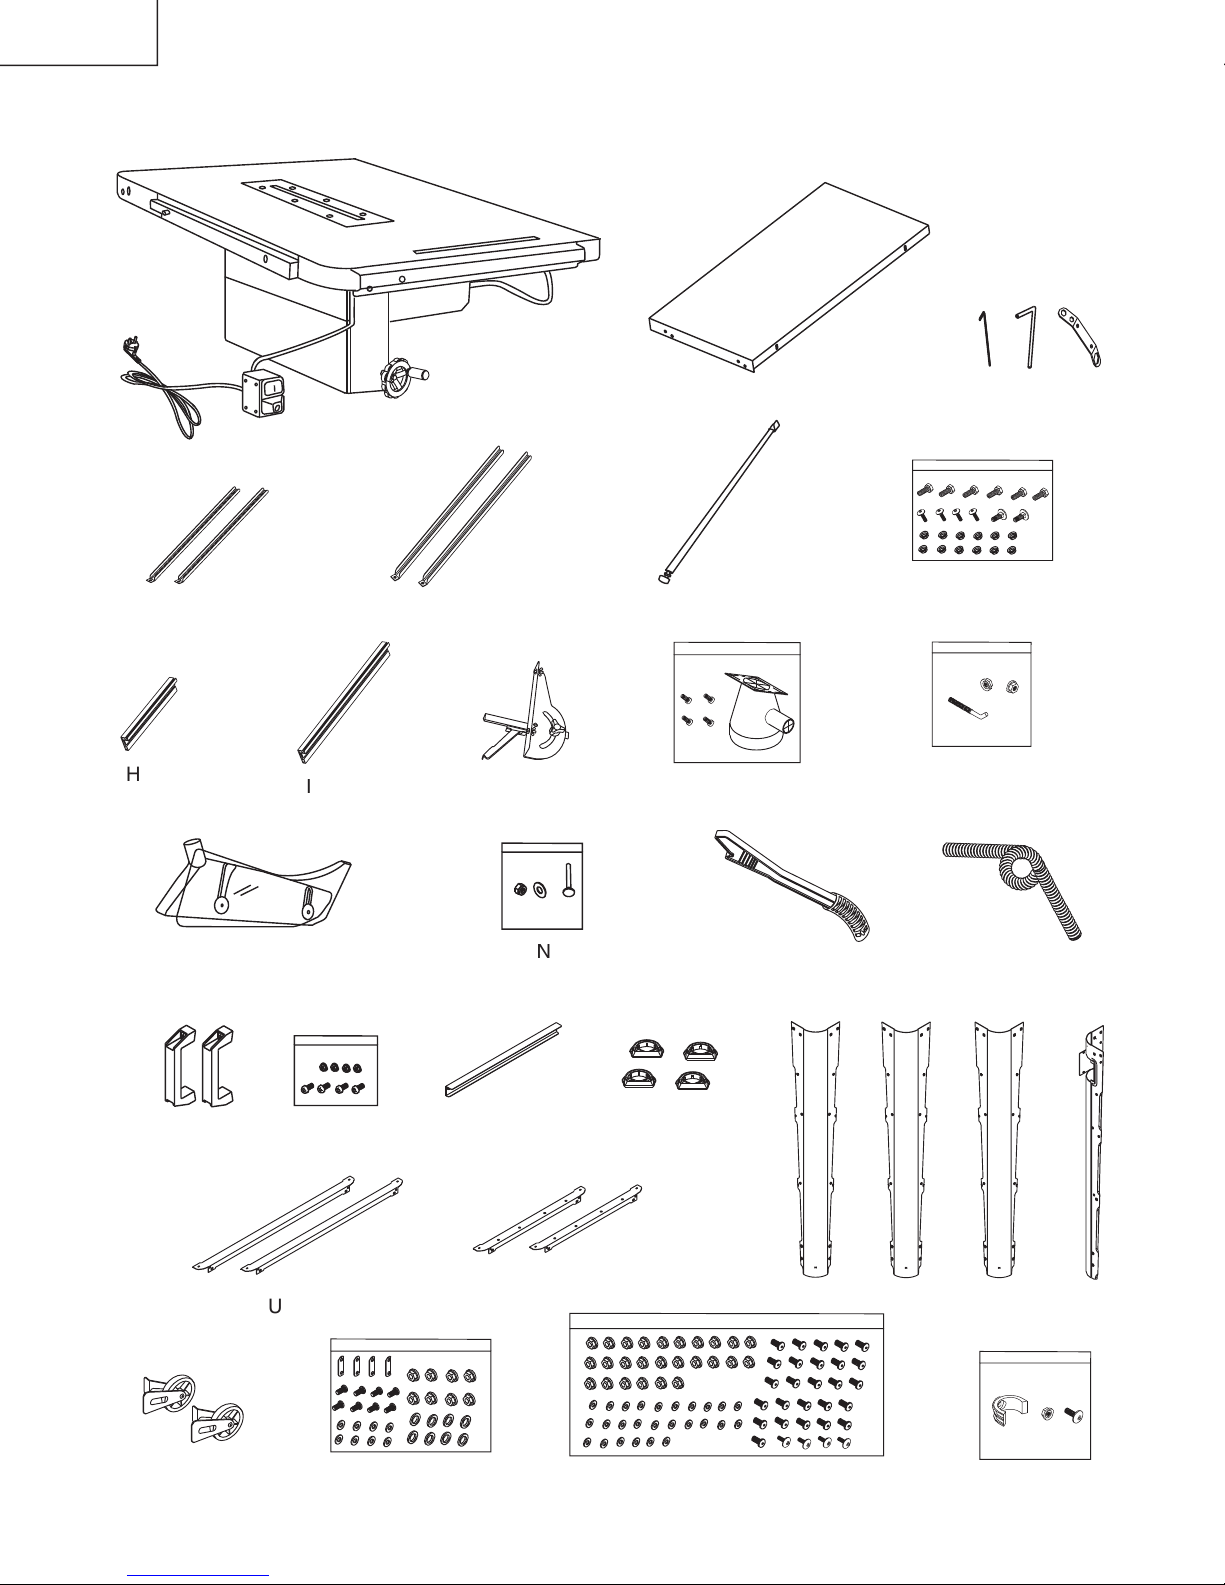
Supplied
CONTENTS
bracket (Short)
bracket (Long)
fence (Long)
Page 8
–
8
–
Page 9
–
9
–
Extra bracket
rod
Page 10
–
10
–
The saw head assembly have been factory
Follow the assembly instruction and carefully
Front-Left leg with a hole for assembling the
Do not tighten bolts until stand is properly
Align detents in the legs with brackets to ensure
Stand should not rock after all bolts are
Page 11
–
11
–
using the bolt (2) and nut (3).
hole (1) of the shaft to keep the arbor from turning.
Fasten with two fl at washers and two nuts.
Assemble the other end of the caster bracket to the
Rear-Right leg using two bolts, fl at washers and
nuts.
in exactly the same way.
NOTE:
The caster marked “R” is used for the Rear-
Right leg, the caster marked “L” is used for the Rear-
Left leg.
to the hole of the leg using the nut (2).
Page 12
–
12
–
is for table
wrench.
teeth pointing toward the front of the saw.
thread the arbor nut as far as possible by hand
Ensure that the blade is fl ush against the inner side
of the blade fl ange.
screws.
remove the blade guard when
The extension table can be installed either at
the extension
Page 13

–
13
–
to
the dust
following adjustments:
Loosen the nut (1) and pull the riving knife to the
Adjust the riving knife to have a distance of 5 mm to
Tighten the nut (1) .
Assemble the saw blade guard.
Page 14

–
14
–
0°.
This tool is accurately adjusted before shipping
Page 15

–
15
–
If the rip fence & mitre gauge assembly is
Page 16

–
16
–
One each 360mm and 700mm fence is supplied
fence is used. The distance should not be less than
The height of the guiding surface shall be not
Page 17

–
17
–
Page 18

–
18
–
Page 19

–
19
–
Service Center.
mechanisms.
Page 20

–
20
–
This is a full-size drawing (actual size)
Use good quality plywood or solid wood
Use 1/2 in (12.7mm). or 3/4 in (19.1mm).
Push stick MUST be thinner than the width
Page 21

–
21
–
Уровень шума данного станка следующий:
Уровень звукового давления: 102,9 Дб
Уровень звуковой мощности: 116,1 Дб
Удлинение стола....................................
Диаметр диска........................................
Холостой ход...................
Ампер
..........................................
Кристаллический кремнезем от кирпича, цемента и других кладочных материалов
Мышьяк и хром от химически обработанной древесины
Данный станок поставляется производителем с проводкой, рассчитанной на работу от сети 230 В. Он должен быть
Page 22

–
22
–
и изучите всю данную инструкцию.
и изучите всю данную инструкцию.
и изучите всю данную инструкцию.
дождем. Обеспечьте хорошее освещение рабочей
используйте станок вблизи
Работа
носите
При
перед обслуживанием
перед обслуживанием
перед обслуживанием
Убедитесь, что переключатель находится в
АКСЕССУАРАМИ.
Список рекомендованных
УБИРАЙТЕ ГАЕЧНЫЕ КЛЮЧИ СО СТАНКА.
Если станок
Для эффективной и безопасной работы всегда
держите инструмент чистым и хорошо заточенным.
Проверяйте движущиеся
при
пользуйтесь станком под действием наркотиков,
Любой
носите закрытые защитные
Защитные очки, не соответствующие
Защитные очки, не соответствующие
Защитные очки, не соответствующие
Подавайте заготовку на
диск или резец только против направления вращения
диска или резца.
Page 23

–
23
–
к
толкателем, особенно при
без использования углового упора или
АМПУТАЦИИ ПАЛЬЦЕВ И КИСТЕЙ РУК.
и не располагайте любые части своего
и не наклоняйтесь над
инструмент для изготовления
только против
не используйте направляющую планку при
задних и
диску и используя установленные должным образом
и положений рук,
пилу на верстаке или подставке перед
и материалы, дающие опасную
для здоровья пыль.
Не отходите от станка, пока диск
на
Page 24

–
24
–
Убедитесь, что источник питания и розетка соответствуют станку. Обратите внимание на информационную табличку на
Удлинитель должен быть снабжен вилкой с заземлением на одном конце, подходящем к розетке, и розетку с заземлением
Page 25

–
25
–
Дополнительный кронштейн
Длинный кронштейн
ДЕТ.
ДЕТ.
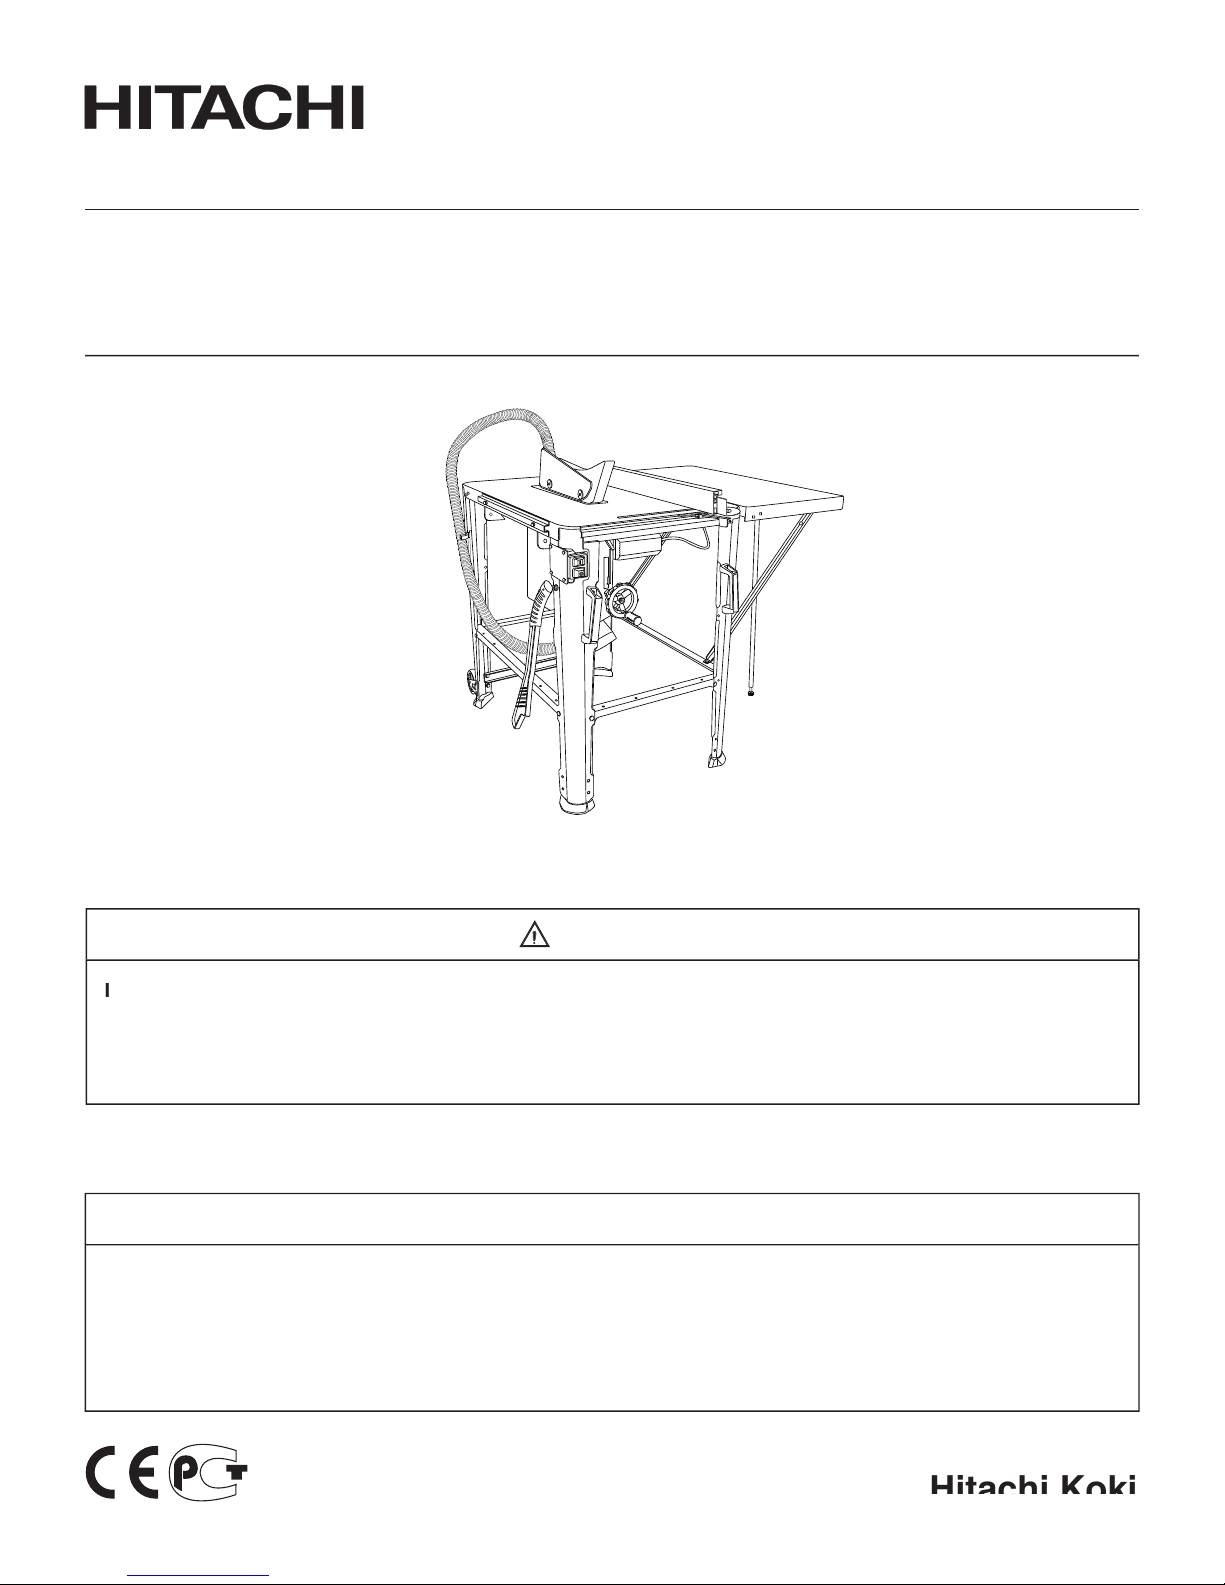
Узел настольной дисковой пилы
Удлинение станка
Угловой упор
АКСЕССУАРЫ И ДОПОЛНИТЕЛЬНОЕ ОБОРУДОВАНИЕ
Для приобретения необходимых для данного станка
ВНИМАНИЕ
ВНИМАНИЕ
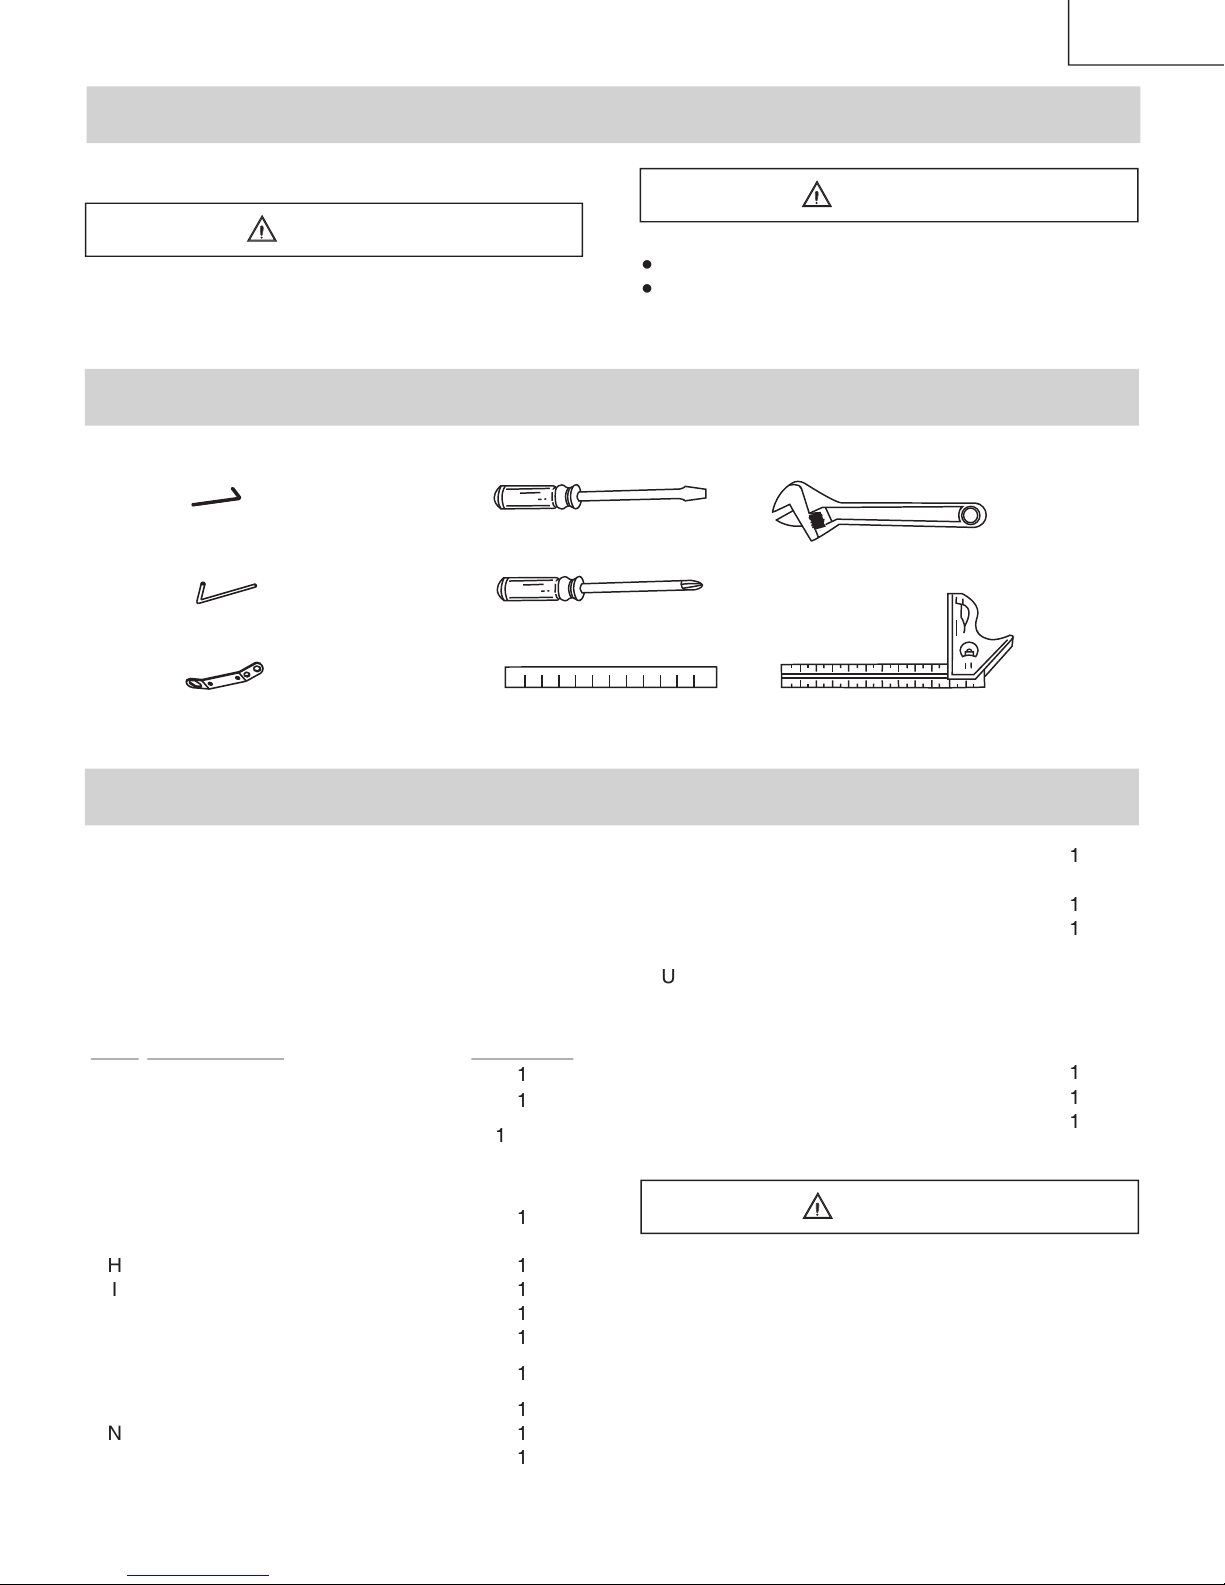
Линейка
деталь.
Для облегчения сборки, держите
Page 26

–
26
–
Page 27

–
27
–
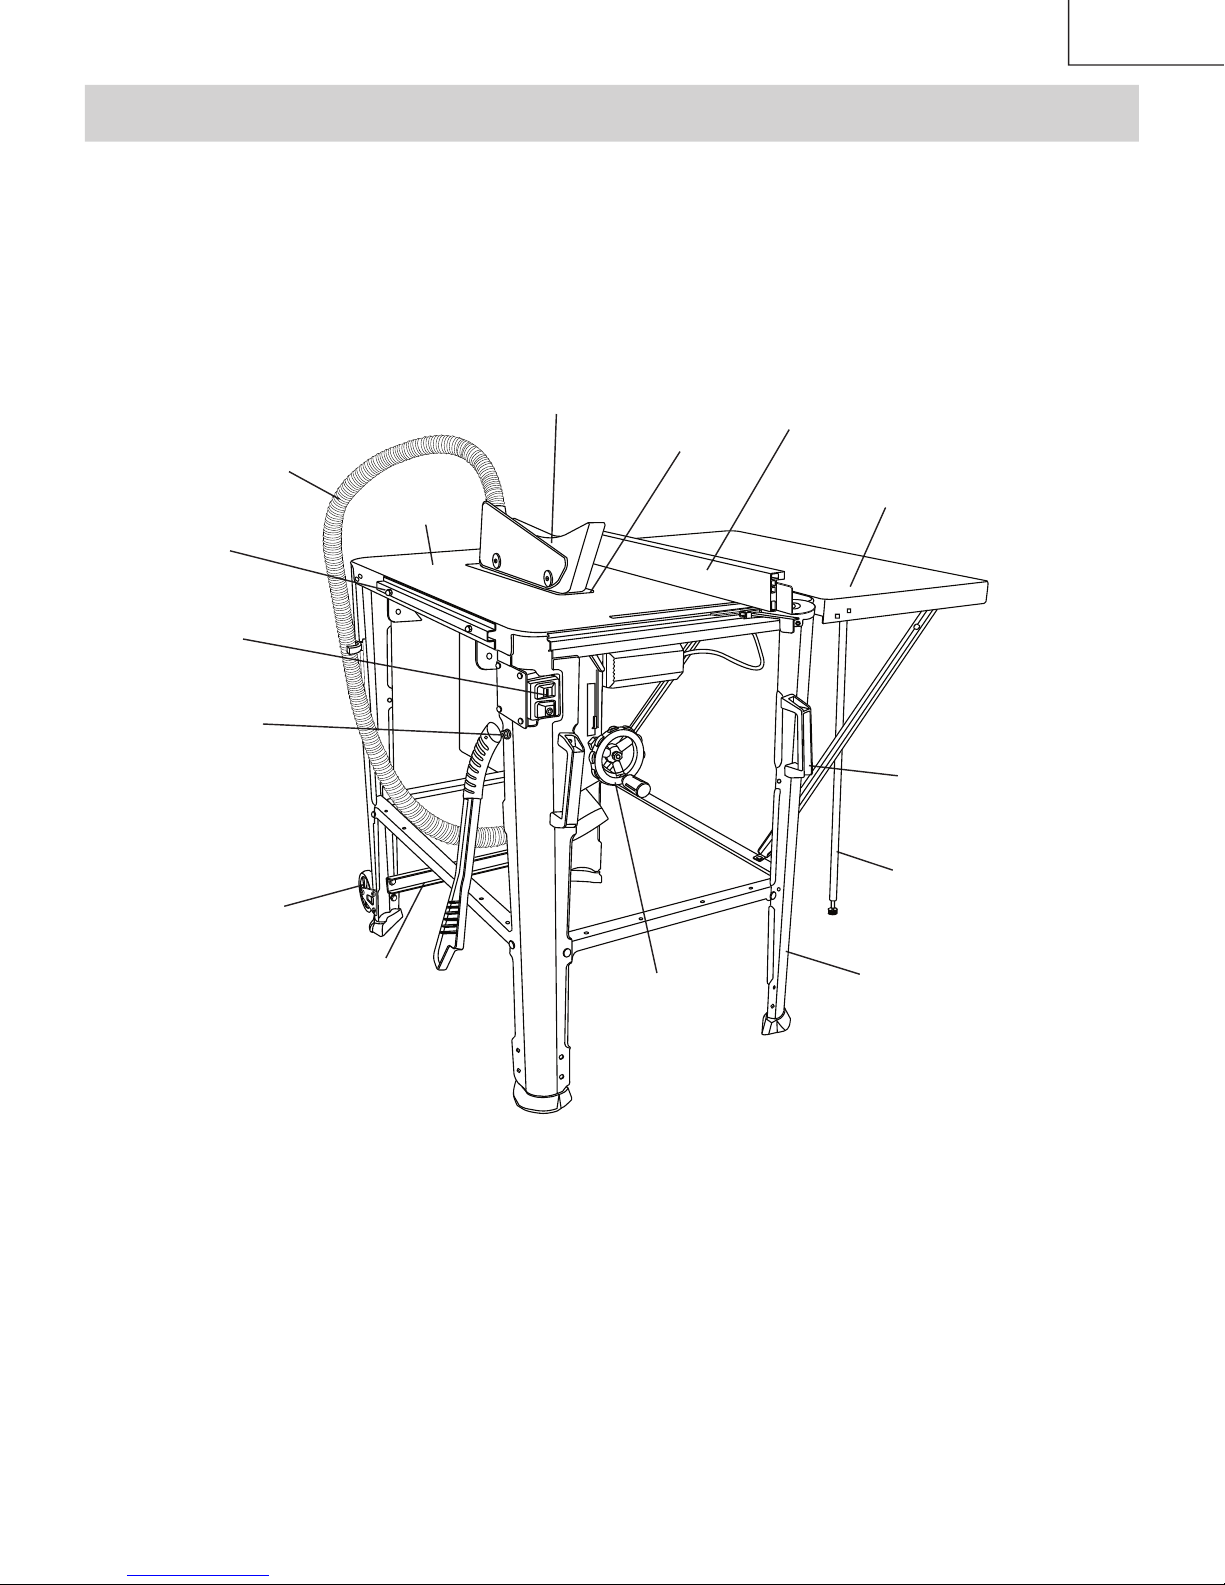
УЗНАЙТЕ КОНСТРУКЦИЮ СТАНКА
диска
Дополнительный
Удлинение стола, монтируемое на
дисковой пилы
Page 28

–
28
–
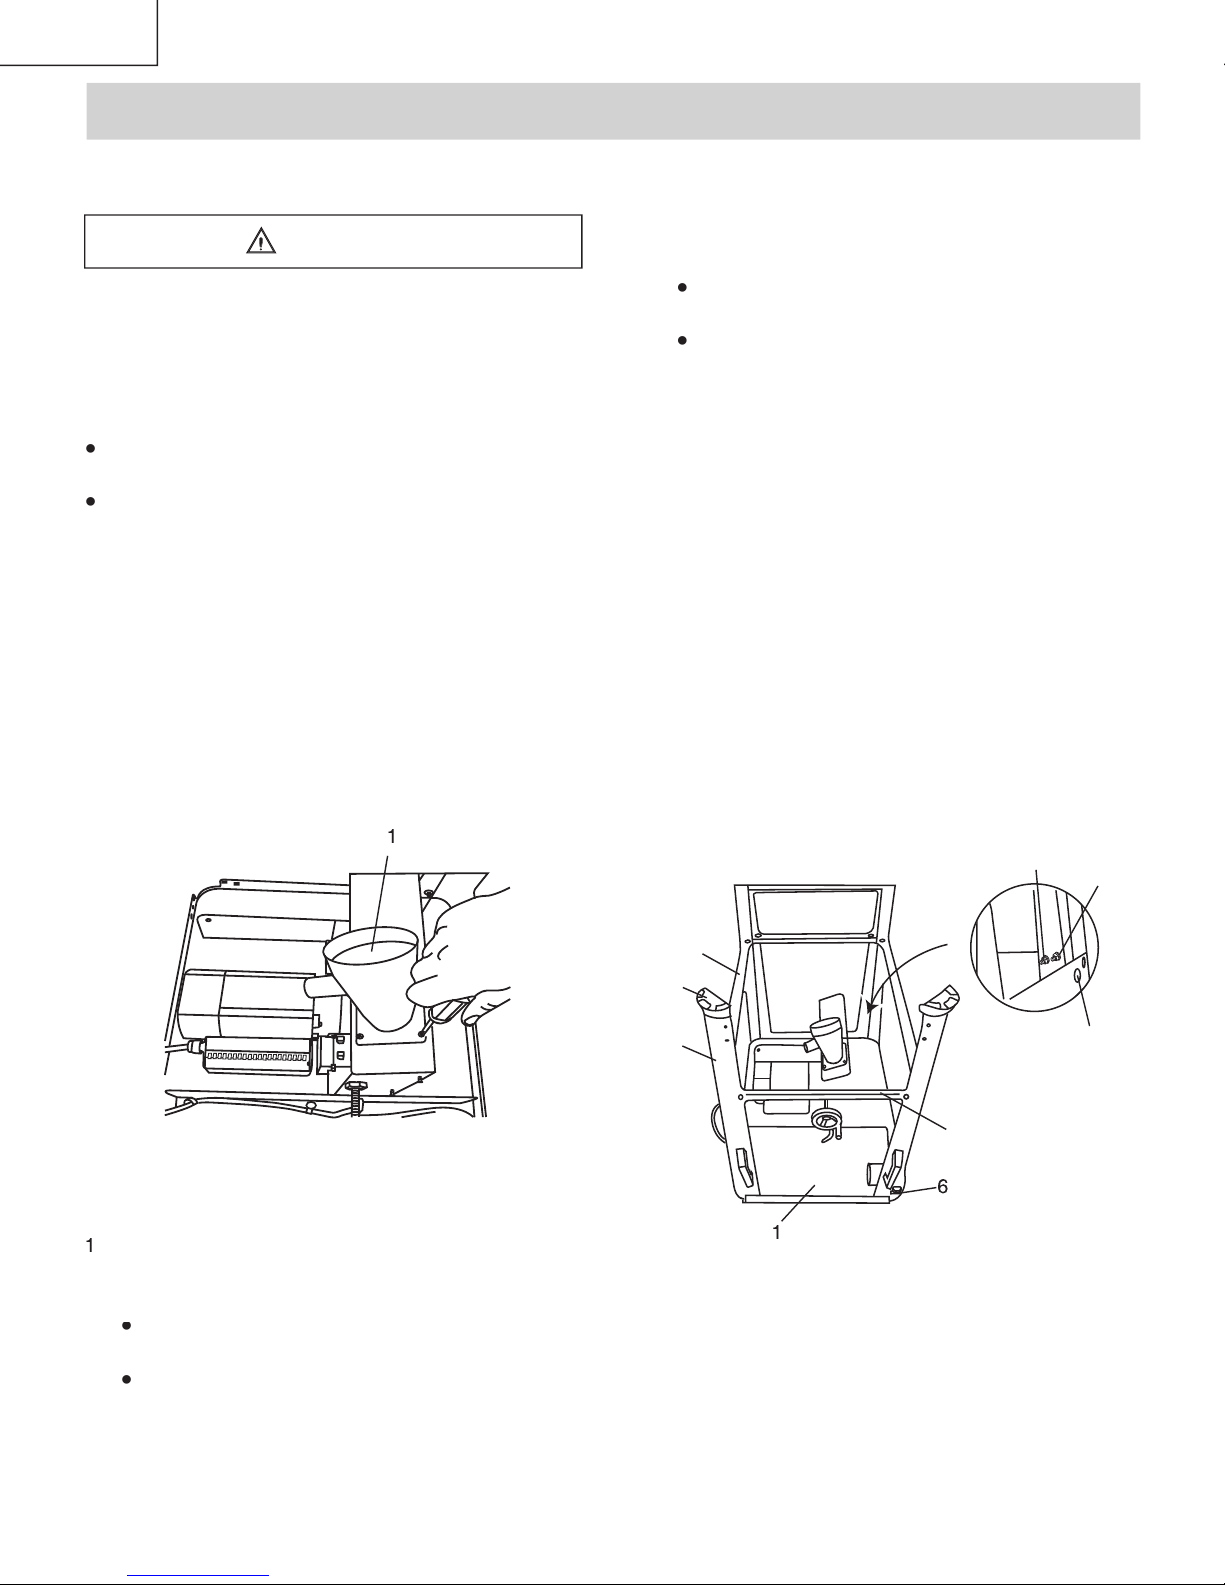
Для обеспечения Вашей собственной безопасности,
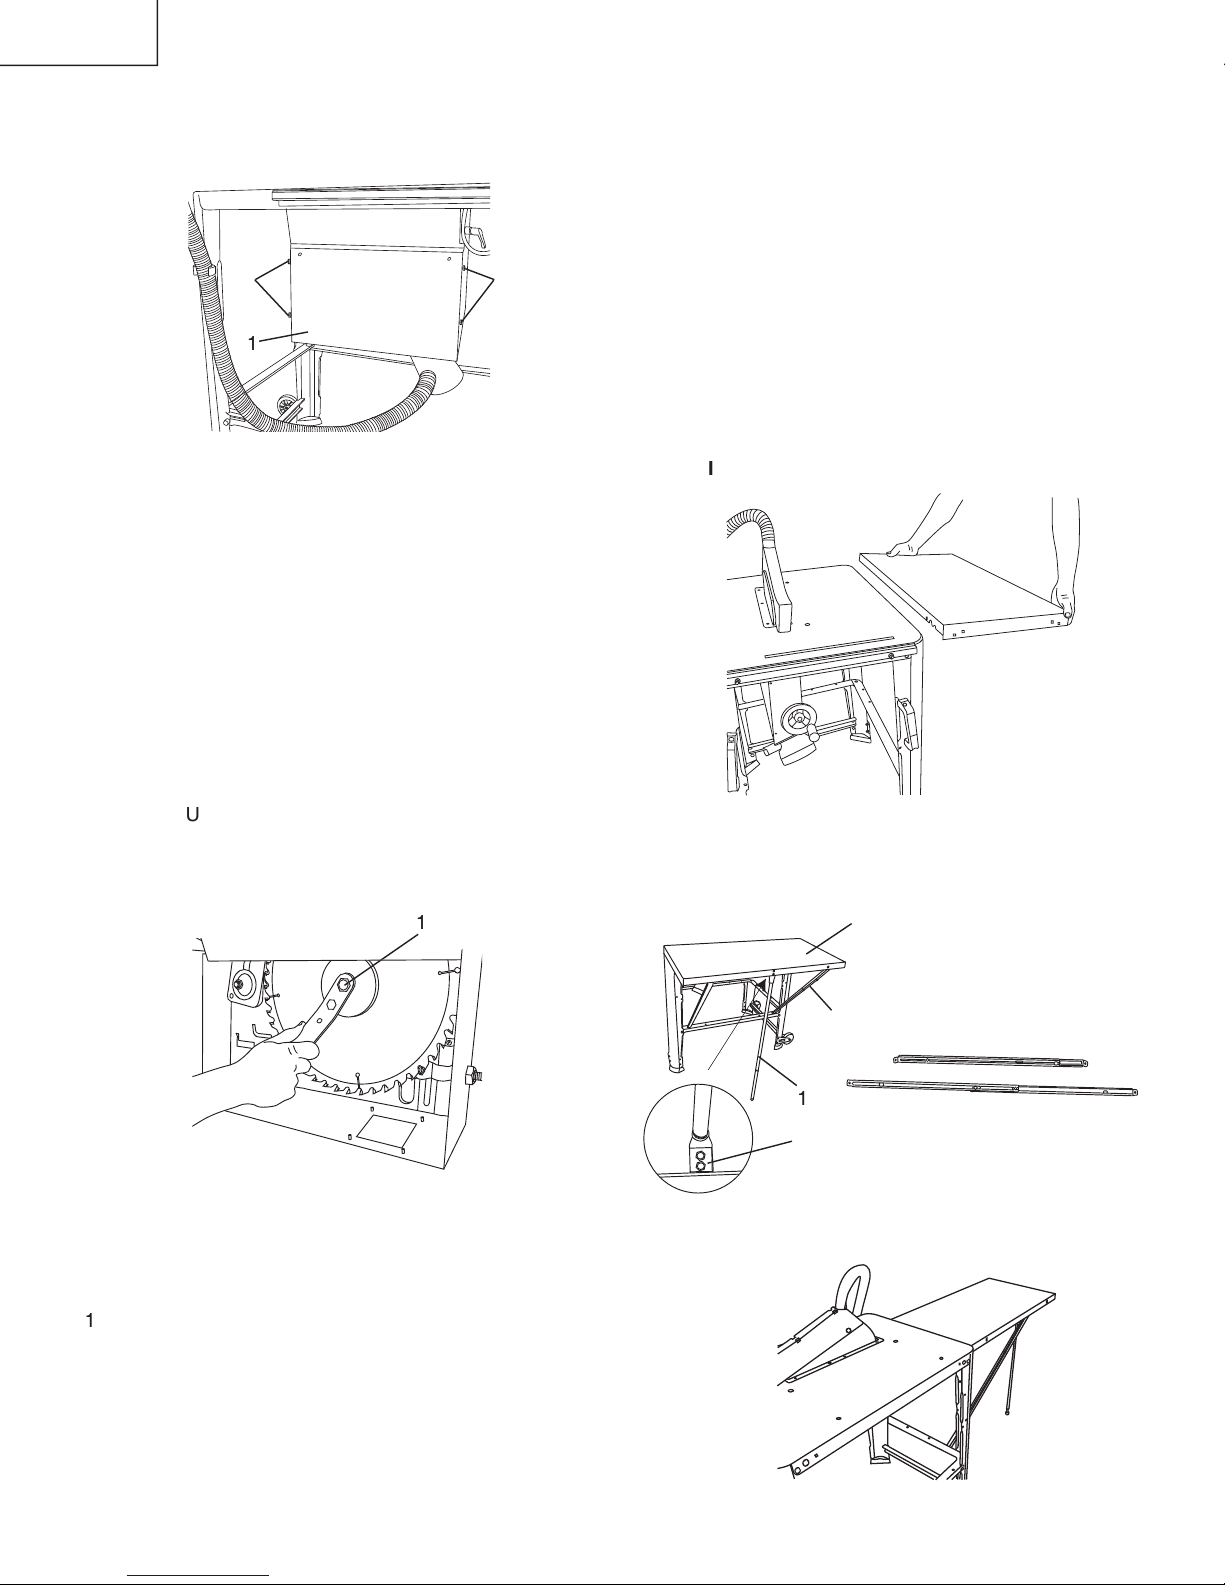
УСТАНОВКА ПЕРЕХОДНИКА ПЫЛЕСБОРНИКА
Выровняйте упоры на ножках с кронштейнами,
для каждой ножки.
Page 29

–
29
–
диска.
(РИС. C)
для задней правой ножки, ролик с маркировкой “L”
Page 30

–
30
–
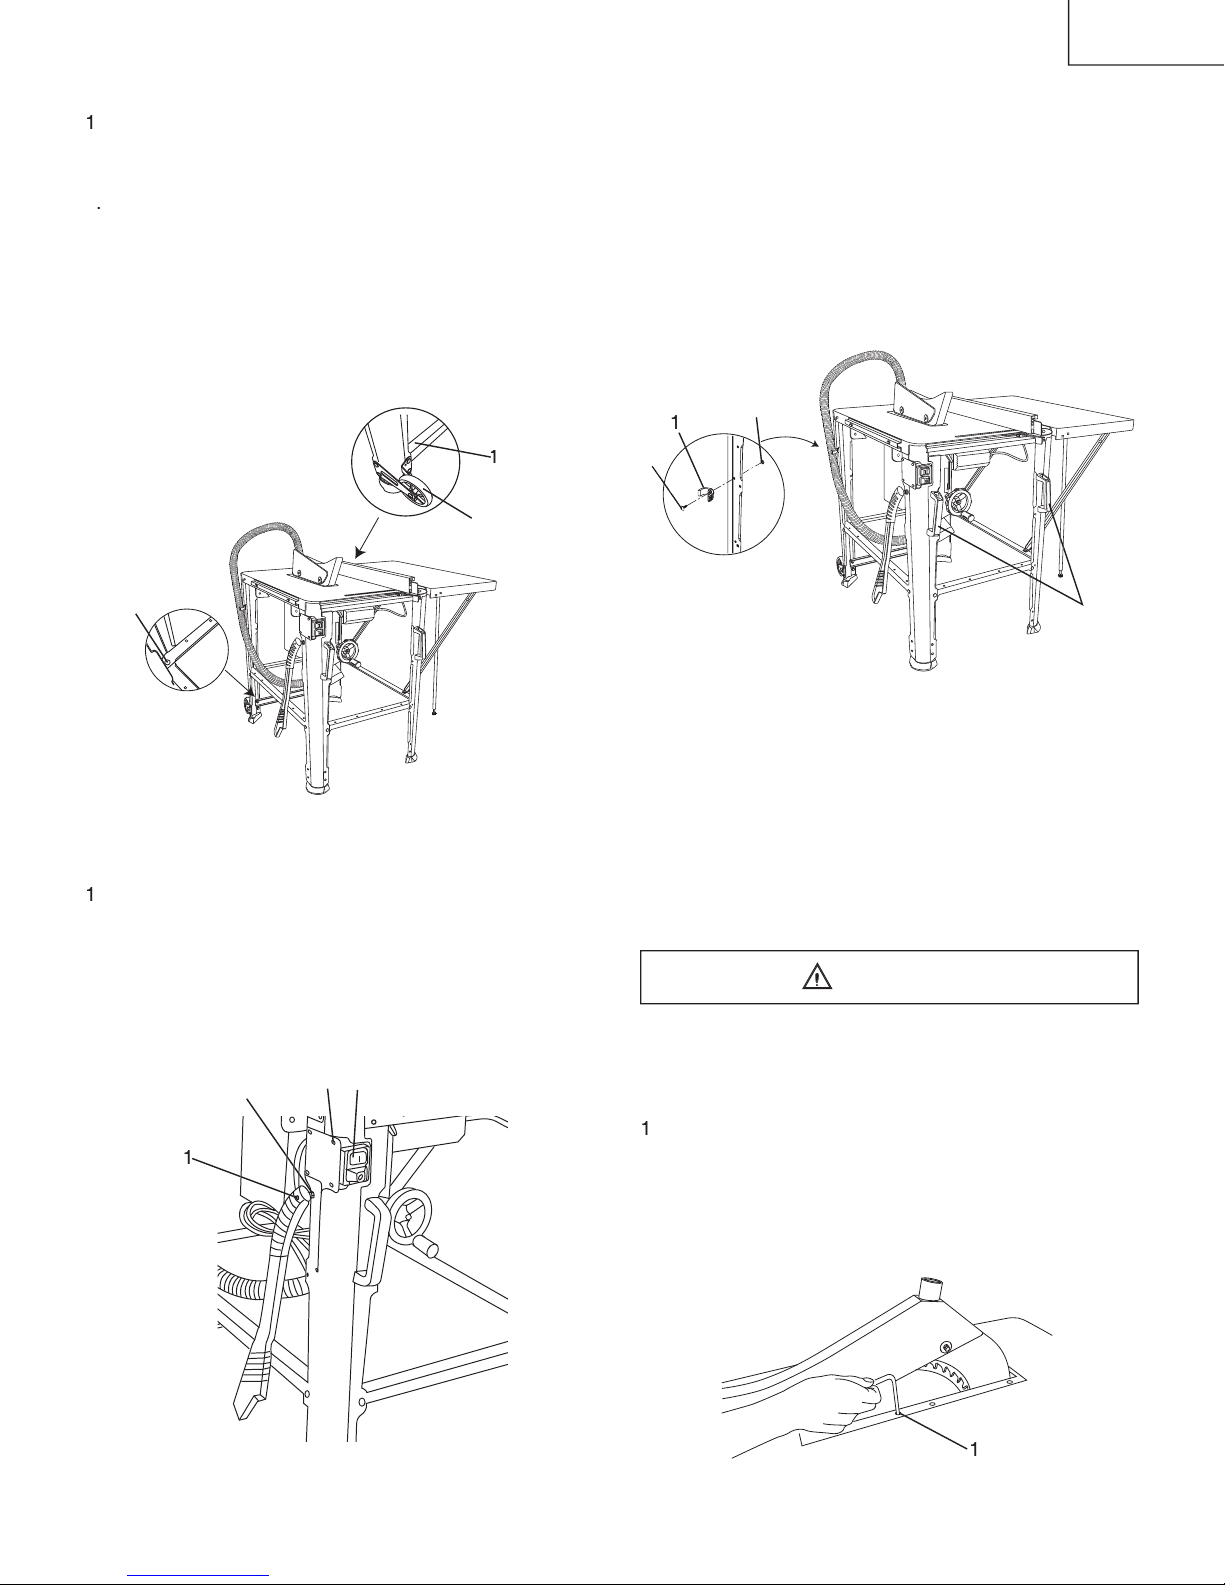
желаемую длину и обтяните болты.
Более короткий кронштейн
длинный кронштейн (B) предназначен для установки
диска.
Установите диск на вал, при этом зубцы диска должны
Убедитесь, что диск надет на внутренний фланец.
дисков.
УДЛИНЕНИЯ СТОЛА (РИС. I, J, K)
Удлинение стола может быть установлено
Page 31

–
31
–
УПОРА
N)
O)
Хомут должен быть расположен
O
(
L, M)
Page 32

–
32
–
(
Данная регулировка должна быть точной, или
Q
Данный станок точно регулируется перед
(
P)
диском. Обтяните гайку (2).
(
Page 33

–
33
–
R)
R)
(
S)
УГЛОВОГО УПОРА
Если направляющая линейка и
Page 34

–
34
–
УПРАВЛЕНИЕ НАПРАВЛЯЮЩЕЙ ЛИНЕЙКОЙ И
УГЛОВЫМ УПОРОМ
желаемый угол, затяните ручку.
желаемую длину, затяните гайку.
V)
Высота направляющей поверхности не
должна быть не более 12мм
(
X)
диск и расклиниватель полностью не пройдет через
Page 35

–
35
–
(
Y)
а. Расклиниватель выровнен, и находится на
б. заготовка должна иметь прямой низ и не
должна быть покороблена, скручена или
траектории резки.
расстоянии 25 мм от кромки диска.
диск.
Page 36

–
36
–
Джордж Ку
(George Ku),
(George Ku),
Дата:
Page 37

–
37
–
УСТРАНЕНИЕ НЕПОЛАДОК
диску.
Диск не поднимается и не
Диск не набирает нужную
длинный
Page 38

–
38
–
жe
заготовки
заготовки
д
дec
д
д
дec
д
д
CM.
Page 39

–
39
–
SWING NUT
HEX. NUT
SPRING PIN
SPRING PIN
STRAIN BELT
SEMI-ROUND INN. HEX. SCREW
SCALE UP OR DOWN
SCALE
SELF-TAPPING CROSS SCREW
STEEL PLATE
SPACER
SHAFT BUSHING
SPACER
STRAIN REFIEF BUSHING
SIDE COVER
SWITCH WITH POWER CORD
SHEET BAR
STAND LEVEL (LONG)
STAND LEVEL (SHORT)
STAND W/I SWITCH HOLE OF TABLE
STAND OF TABLE
SWING NUT
SAW BLADE
SPACER
SCALE 450
SPRING PIN
STRONGER PIECE
SPRING WASHER
Page 40

–
40
–
TABLE SAW MODEL NO.
Page 41

–
41
–
Анализ материалов, поддающихся утилизации
Алюминий
Листовая сталь
Другие
Легкий полиэтилен
Другие
Page 42

–
42
–
Issued by
Minato-ku, Tokyo 108-6020, Japan
Выпущено
 Loading...