

Hilti DST WRC-CA User Manual

DST WRC-CA
English
Printed: 28.02.2018 | Doc-Nr: PUB / 5200714 / 000 / 03

Printed: 28.02.2018 | Doc-Nr: PUB / 5200714 / 000 / 03

*2053441*
2053441 English 1
Contents
1 Information about the documentation . . . . . . . . . . . . . . . . . . . . . . . . . . . . . . . . . . . . 2
1.1 About this documentation . . . . . . . . . . . . . . . . . . . . . . . . . . . . . . . . . . . . . . . . . . . . . 2
1.2 Explanation of symbols used . . . . . . . . . . . . . . . . . . . . . . . . . . . . . . . . . . . . . . . . . . . 2
1.2.1 Warnings . . . . . . . . . . . . . . . . . . . . . . . . . . . . . . . . . . . . . . . . . . . . . . . . . . 2
1.2.2 Symbols in the documentation . . . . . . . . . . . . . . . . . . . . . . . . . . . . . . . . . . . . . 3
1.2.3 Symbols in the illustrations . . . . . . . . . . . . . . . . . . . . . . . . . . . . . . . . . . . . . . . 3
1.3 Text markings . . . . . . . . . . . . . . . . . . . . . . . . . . . . . . . . . . . . . . . . . . . . . . . . . . . . 3
1.3.1 Software . . . . . . . . . . . . . . . . . . . . . . . . . . . . . . . . . . . . . . . . . . . . . . . . . . 3
1.4 Stickers/plates . . . . . . . . . . . . . . . . . . . . . . . . . . . . . . . . . . . . . . . . . . . . . . . . . . . 3
1.5 Product information . . . . . . . . . . . . . . . . . . . . . . . . . . . . . . . . . . . . . . . . . . . . . . . . 3
1.6 Declaration of conformity . . . . . . . . . . . . . . . . . . . . . . . . . . . . . . . . . . . . . . . . . . . . . 4
2 Safety . . . . . . . . . . . . . . . . . . . . . . . . . . . . . . . . . . . . . . . . . . . . . . . . . . . . . . . . . 4
2.1 General power tool safety warnings . . . . . . . . . . . . . . . . . . . . . . . . . . . . . . . . . . . . . . . 4
2.2 Additional safety instructions, remote control unit . . . . . . . . . . . . . . . . . . . . . . . . . . . . . . 5
2.3 Battery use and care . . . . . . . . . . . . . . . . . . . . . . . . . . . . . . . . . . . . . . . . . . . . . . . . 6
3 Description . . . . . . . . . . . . . . . . . . . . . . . . . . . . . . . . . . . . . . . . . . . . . . . . . . . . . 6
3.1 Product overview . . . . . . . . . . . . . . . . . . . . . . . . . . . . . . . . . . . . . . . . . . . . . . . . . . 6
3.2 Information content of display and status bar . . . . . . . . . . . . . . . . . . . . . . . . . . . . . . . . . 7
3.3 Intended use . . . . . . . . . . . . . . . . . . . . . . . . . . . . . . . . . . . . . . . . . . . . . . . . . . . . . 7
3.4 Cut Assist . . . . . . . . . . . . . . . . . . . . . . . . . . . . . . . . . . . . . . . . . . . . . . . . . . . . . . 7
3.5 Joystick . . . . . . . . . . . . . . . . . . . . . . . . . . . . . . . . . . . . . . . . . . . . . . . . . . . . . . . . 7
3.6 Control knob . . . . . . . . . . . . . . . . . . . . . . . . . . . . . . . . . . . . . . . . . . . . . . . . . . . . . 8
3.7 EMERGENCY STOP . . . . . . . . . . . . . . . . . . . . . . . . . . . . . . . . . . . . . . . . . . . . . . . . 8
3.8 Buttons/keys on the remote control unit . . . . . . . . . . . . . . . . . . . . . . . . . . . . . . . . . . . . 8
3.9 Function buttons . . . . . . . . . . . . . . . . . . . . . . . . . . . . . . . . . . . . . . . . . . . . . . . . . . 8
3.10 Parameter settings <...> . . . . . . . . . . . . . . . . . . . . . . . . . . . . . . . . . . . . . . . . . . . . . . 8
3.11 Functions <<...>> . . . . . . . . . . . . . . . . . . . . . . . . . . . . . . . . . . . . . . . . . . . . . . . . . . 8
3.12 Items supplied . . . . . . . . . . . . . . . . . . . . . . . . . . . . . . . . . . . . . . . . . . . . . . . . . . . . 9
4 Technical data . . . . . . . . . . . . . . . . . . . . . . . . . . . . . . . . . . . . . . . . . . . . . . . . . . . 9
4.1 Remote control unit . . . . . . . . . . . . . . . . . . . . . . . . . . . . . . . . . . . . . . . . . . . . . . . . 9
4.2 Wireless communication . . . . . . . . . . . . . . . . . . . . . . . . . . . . . . . . . . . . . . . . . . . . . 9
4.3 PUA 81 charger . . . . . . . . . . . . . . . . . . . . . . . . . . . . . . . . . . . . . . . . . . . . . . . . . . 10
4.4 PRA 84 Li-ion battery . . . . . . . . . . . . . . . . . . . . . . . . . . . . . . . . . . . . . . . . . . . . . . 10
4.5 PRA 84 G Li-ion battery . . . . . . . . . . . . . . . . . . . . . . . . . . . . . . . . . . . . . . . . . . . . . 10
4.6 Interfaces . . . . . . . . . . . . . . . . . . . . . . . . . . . . . . . . . . . . . . . . . . . . . . . . . . . . . . 10
4.7 Requirements for the supply network as per EMC directive . . . . . . . . . . . . . . . . . . . . . . . 10
5 Preparations at the workplace . . . . . . . . . . . . . . . . . . . . . . . . . . . . . . . . . . . . . . . 10
5.1 Removing the battery . . . . . . . . . . . . . . . . . . . . . . . . . . . . . . . . . . . . . . . . . . . . . . 10
5.2 Charging the battery . . . . . . . . . . . . . . . . . . . . . . . . . . . . . . . . . . . . . . . . . . . . . . . 11
5.3 Inserting the battery . . . . . . . . . . . . . . . . . . . . . . . . . . . . . . . . . . . . . . . . . . . . . . . 11
5.4 Pairing the remote control unit and partner device . . . . . . . . . . . . . . . . . . . . . . . . . . . . . 11
5.5 Setting the language, country and unit of measure . . . . . . . . . . . . . . . . . . . . . . . . . . . . 11
5.6 Setting the line fuse rating . . . . . . . . . . . . . . . . . . . . . . . . . . . . . . . . . . . . . . . . . . . 11
5.7 Setting the cutting parameters . . . . . . . . . . . . . . . . . . . . . . . . . . . . . . . . . . . . . . . . . 11
5.8 Saw blade diameter and blade guard . . . . . . . . . . . . . . . . . . . . . . . . . . . . . . . . . . . . . 12
5.8.1 Setting the diameter of the saw blade and the blade guard . . . . . . . . . . . . . . . . . . 12
5.8.2 Changing the diameter of the saw blade or blade guard . . . . . . . . . . . . . . . . . . . . 12
5.8.3 Removing the saw blade diameter with blade guard from the list . . . . . . . . . . . . . . . 12
Printed: 28.02.2018 | Doc-Nr: PUB / 5200714 / 000 / 03

2 English 2053441
*2053441*
5.9 Activating cooling water control . . . . . . . . . . . . . . . . . . . . . . . . . . . . . . . . . . . . . . . . 12
5.10 Changing the password . . . . . . . . . . . . . . . . . . . . . . . . . . . . . . . . . . . . . . . . . . . . . 12
5.11 Setting screen brightness . . . . . . . . . . . . . . . . . . . . . . . . . . . . . . . . . . . . . . . . . . . . 13
5.12 Setting the date and time . . . . . . . . . . . . . . . . . . . . . . . . . . . . . . . . . . . . . . . . . . . . 13
5.13 Reading messages . . . . . . . . . . . . . . . . . . . . . . . . . . . . . . . . . . . . . . . . . . . . . . . . 13
5.14 Reading the logbook . . . . . . . . . . . . . . . . . . . . . . . . . . . . . . . . . . . . . . . . . . . . . . . 13
5.15 Technical information and next service . . . . . . . . . . . . . . . . . . . . . . . . . . . . . . . . . . . . 13
5.16 Resetting the settings . . . . . . . . . . . . . . . . . . . . . . . . . . . . . . . . . . . . . . . . . . . . . . 13
6 Manual operation . . . . . . . . . . . . . . . . . . . . . . . . . . . . . . . . . . . . . . . . . . . . . . . . 14
6.1 Overview . . . . . . . . . . . . . . . . . . . . . . . . . . . . . . . . . . . . . . . . . . . . . . . . . . . . . . 14
6.2 Cutting with the wall saw in manual mode . . . . . . . . . . . . . . . . . . . . . . . . . . . . . . . . . . 14
7 Assisted operation with Cut Assist . . . . . . . . . . . . . . . . . . . . . . . . . . . . . . . . . . . . . 14
7.1 Overview . . . . . . . . . . . . . . . . . . . . . . . . . . . . . . . . . . . . . . . . . . . . . . . . . . . . . . 14
7.2 Cutting with the wall saw in Cut Assist mode . . . . . . . . . . . . . . . . . . . . . . . . . . . . . . . . 15
7.3 Interrupting an assisted cut . . . . . . . . . . . . . . . . . . . . . . . . . . . . . . . . . . . . . . . . . . . 16
7.3.1 Pausing the cut and resuming in manual mode . . . . . . . . . . . . . . . . . . . . . . . . . . 16
7.3.2 Interrupting a cut . . . . . . . . . . . . . . . . . . . . . . . . . . . . . . . . . . . . . . . . . . . . 16
7.4 Changing the saw blade . . . . . . . . . . . . . . . . . . . . . . . . . . . . . . . . . . . . . . . . . . . . . 16
7.5 Configuring the blade guard . . . . . . . . . . . . . . . . . . . . . . . . . . . . . . . . . . . . . . . . . . 16
8 Care and maintenance of cordless tools . . . . . . . . . . . . . . . . . . . . . . . . . . . . . . . . . 17
9 Transport and storage of cordless tools . . . . . . . . . . . . . . . . . . . . . . . . . . . . . . . . . 17
10 Troubleshooting . . . . . . . . . . . . . . . . . . . . . . . . . . . . . . . . . . . . . . . . . . . . . . . . . 18
11 Disposal . . . . . . . . . . . . . . . . . . . . . . . . . . . . . . . . . . . . . . . . . . . . . . . . . . . . . . 18
12 Manufacturer’s warranty . . . . . . . . . . . . . . . . . . . . . . . . . . . . . . . . . . . . . . . . . . . 18
1 Information about the documentation
1.1 About this documentation
• Read this documentation before initial operation or use. This is a prerequisite for safe, trouble-free
handling and use of the product.
• Observe the safety instructions and warnings in this documentation and on the product.
• Always keep the operating instructions with the product and make sure that the operating instructions
are with the product when it is given to other persons.
1.2 Explanation of symbols used
1.2.1 Warnings
Warnings alert persons to hazards that occur when handling or using the product. The following signal words
are used:
DANGER
DANGER !
▶ Draws attention to imminent danger that will lead to serious personal injury or fatality.
WARNING
WARNING !
▶ Draws attention to a potential threat of danger that can lead to serious injury or fatality.
CAUTION
CAUTION !
▶ Draws attention to a potentially dangerous situation that could lead to slight personal injury or damage
to the equipment or other property.
Printed: 28.02.2018 | Doc-Nr: PUB / 5200714 / 000 / 03
*2053441*
2053441 English 3
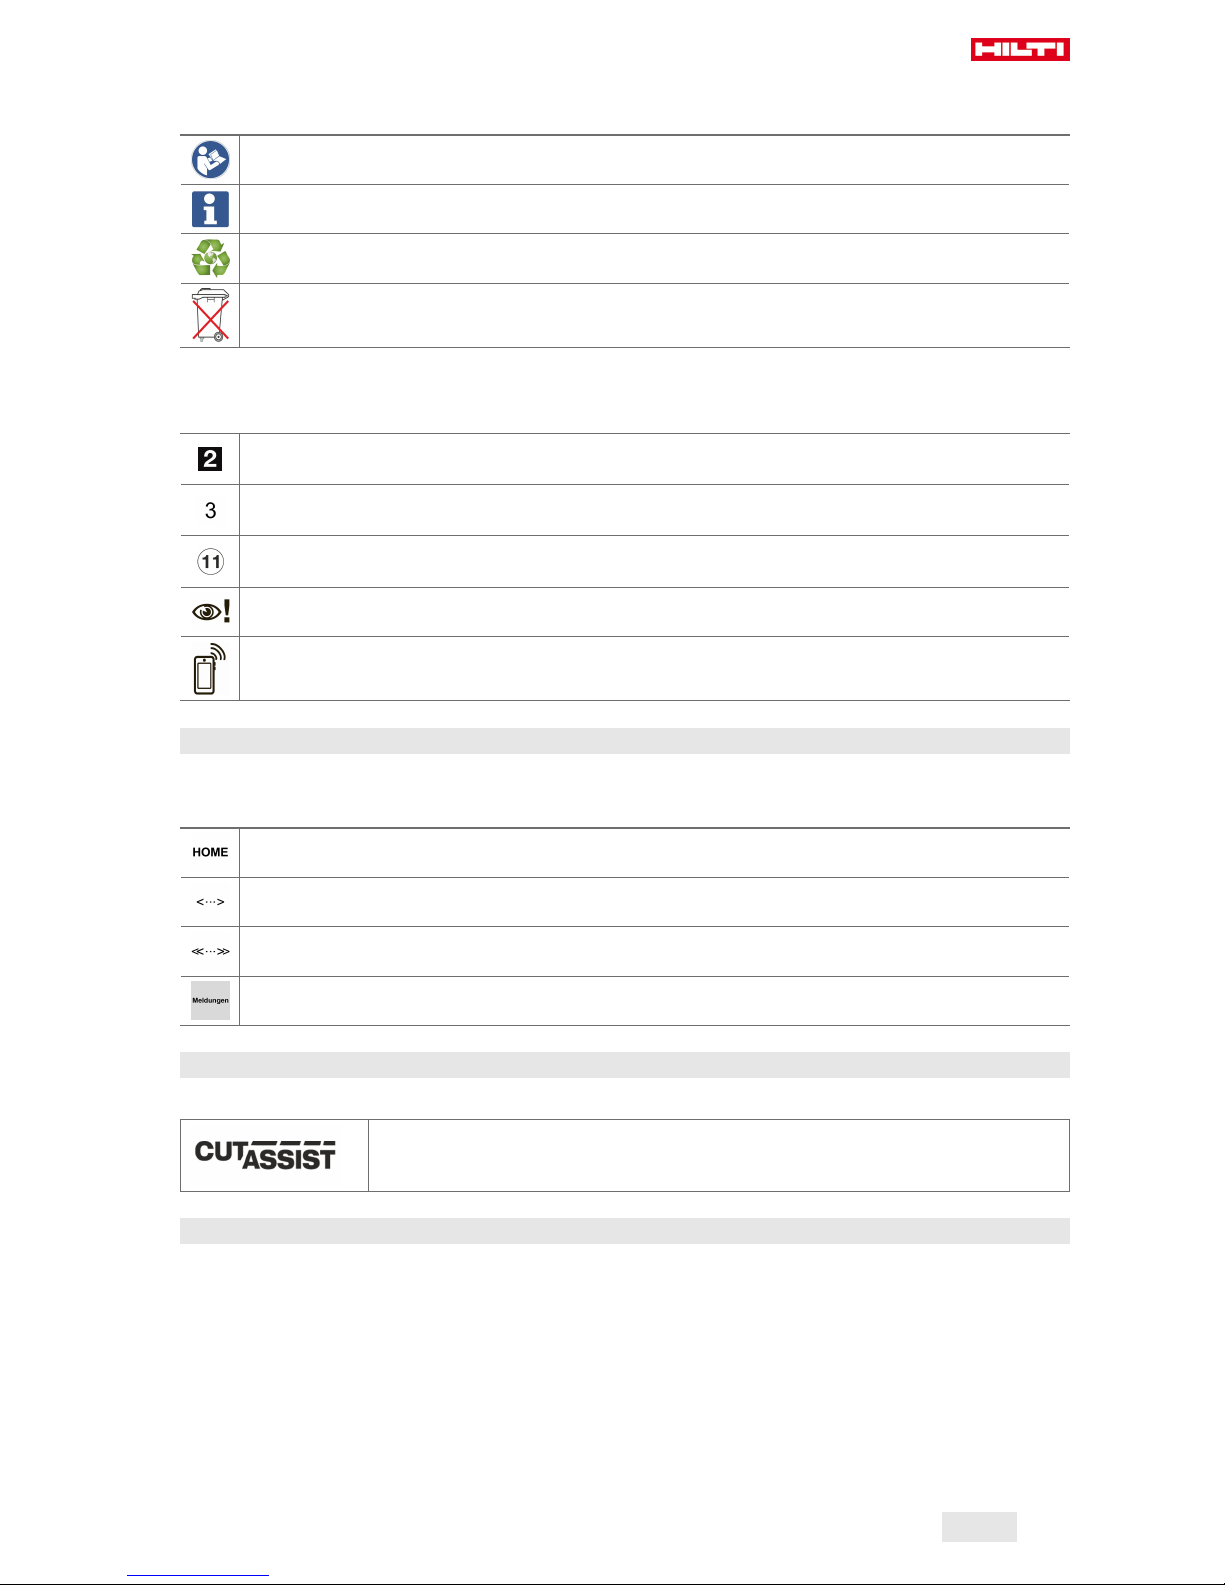
1.2.2 Symbols in the documentation
The following symbols are used in this document:
Read the operating instructions before use.
Instructions for use and other useful information
Dealing with recyclable materials
Do not dispose of electric equipment and batteries as household waste
1.2.3 Symbols in the illustrations
The following symbols are used in illustrations:
These numbers refer to the corresponding illustrations found at the beginning of these operating
instructions
The numbering reflects the sequence of operations shown in the illustrations and may deviate
from the steps described in the text
Item reference numbers are used in the overview illustrations and refer to the numbers used in
the product overview section
This symbol is intended to draw special attention to certain points when handling the product.
Wireless data transfer
1.3 Text markings
1.3.1 Software
The following text markings are used in this documentation:
Buttons/keys are in bold uppercase letters
Settings are inside single chevrons
Functions are inside double chevrons
Screen titles have a grey background
1.4 Stickers/plates
On the product
Product features the Cut Assist function
1.5 Product information
Hilti products are designed for professional use and may be operated, serviced and maintained only by
trained, authorized personnel. This personnel must be informed of any particular hazards that may be
encountered. The product and its ancillary equipment can present hazards if used incorrectly by untrained
personnel or if used not in accordance with the intended use.
The type designation and serial number are stated on the rating plate.
Printed: 28.02.2018 | Doc-Nr: PUB / 5200714 / 000 / 03

4 English 2053441
*2053441*
▶ Write down the serial number in the table below. You will be required to state the product details when
contacting Hilti Service or your local Hilti organization to inquire about the product.
Product information
Remote control unit DST WRC-CA
Generation 01
Serial no.
1.6 Declaration of conformity
We declare, on our sole responsibility, that the product described here complies with the applicable directives
and standards. A copy of the declaration of conformity can be found at the end of this documentation.
The technical documentation is filed and stored here:
Hilti Entwicklungsgesellschaft mbH | Tool Certification | Hiltistrasse 6 | 86916 Kaufering, Germany
2 Safety
2.1 General power tool safety warnings
WARNING
Read all safety warnings and all instructions. Failure to follow the warnings and instructions may result in
electric shock, fire and/or serious injury.
Save all warnings and instructions for future reference.
Work area safety
▶ Keep work area clean and well lit. Cluttered or dark areas invite accidents.
▶ Do not operate power tools in explosive atmospheres, such as in the presence of flammable
liquids, gases or dust. Power tools create sparks which may ignite the dust or fumes.
▶ Keep children and bystanders away while operating a power tool. Distractions can cause you to lose
control.
Electrical safety
▶ Avoid body contact with earthed or grounded surfaces, such as pipes, radiators, ranges and
refrigerators. There is an increased risk of electric shock if your body is earthed or grounded.
▶ Do not expose power tools to rain or wet conditions. Water entering a power tool will increase the
risk of electric shock.
Personal safety
▶ Stay alert, watch what you are doing and use common sense when operating a power tool. Do
not use a power tool while you are tired or under the influence of drugs, alcohol or medication. A
moment of inattention while operating power tools may result in serious personal injury.
▶ Use personal protective equipment. Always wear eye protection. Protective equipment such as dust
mask, non-skid safety shoes, hard hat, or hearing protection used for appropriate conditions will reduce
personal injuries.
▶ Prevent unintentional starting. Ensure the switch is in the off‐position before connecting to battery
pack, picking up or carrying the tool. Carrying power tools with your finger on the switch or energising
power tools that have the switch on invites accidents.
▶ Remove any adjusting key or wrench before turning the power tool on. A wrench or a key left
attached to a rotating part of the power tool may result in personal injury.
▶ Do not overreach. Keep proper footing and balance at all times. This enables better control of the
power tool in unexpected situations.
▶ Dress properly. Do not wear loose clothing or jewellery. Keep your hair, clothing and gloves away
from moving parts. Loose clothes, jewellery or long hair can be caught in moving parts.
▶ If devices are provided for the connection of dust extraction and collection facilities, ensure these
are connected and properly used. Use of dust collection can reduce dust-related hazards.
Power tool use and care
▶ Do not force the power tool. Use the correct power tool for your application. The correct power tool
will do the job better and safer at the rate for which it was designed.
▶ Do not use the power tool if the switch does not turn it on and off. Any power tool that cannot be
controlled with the switch is dangerous and must be repaired.
Printed: 28.02.2018 | Doc-Nr: PUB / 5200714 / 000 / 03

*2053441*
2053441 English 5
▶ Disconnect the battery pack from the power tool before making any adjustments, changing
accessories, or storing power tools. Such preventive safety measures reduce the risk of starting the
power tool accidentally.
▶ Store idle power tools out of the reach of children and do not allow persons unfamiliar with the
power tool or these instructions to operate the power tool. Power tools are dangerous in the hands
of untrained users.
▶ Maintain power tools. Check for misalignment or binding of moving parts, breakage of parts and
any other condition that may affect the power tool’s operation. If damaged, have the power tool
repaired before use. Many accidents are caused by poorly maintained power tools.
▶ Keep cutting tools sharp and clean. Properly maintained cutting tools with sharp cutting edges are
less likely to bind and are easier to control.
▶ Use the power tool, accessories and tool bits etc. in accordance with these instructions, taking
into account the working conditions and the work to be performed. Use of the power tool for
operations different from those intended could result in a hazardous situation.
Battery tool use and care
▶ Recharge only with the charger specified by the manufacturer. A charger that is suitable for one type
of battery pack may create a risk of fire when used with another battery pack.
▶ Use power tools only with specifically designated battery packs. Use of any other battery packs may
create a risk of injury and fire.
▶ When battery pack is not in use, keep it away from other metal objects, like paper clips, coins,
keys, nails, screws or other small metal objects, that can make a connection from one terminal to
another. Shorting the battery terminals together may cause burns or a fire.
▶ Under abusive conditions, liquid may be ejected from the battery; avoid contact. If contact
accidentally occurs, flush with water. If liquid contacts eyes, additionally seek medical help. Liquid
ejected from the battery may cause irritation or burns.
Service
▶ Have your power tool serviced by a qualified repair person using only identical replacement parts.
This will ensure that the safety of the power tool is maintained.
2.2 Additional safety instructions, remote control unit
The remote control unit complies with all the requirements of the applicable directives, but Hilti cannot
entirely rule out the possibility of interference caused by powerful electromagnetic radiation affecting
the remote control unit, possibly leading to incorrect operation.
Check accuracy by taking measurements by other means when working under such conditions, or if
you are unsure.
▶ Never tamper with or modify the remote control unit in any way.
▶ Acclimatize the remote control unit before using it.
◁ Big differences in temperature can lead to incorrect operation.
▶ Check at the location whether the use of wireless devices is permitted. The use of wireless devices is
prohibited in some locations.
▶ Do not use the cable of the remote control unit for purposes for which it is not intended. Never lift the
remote control unit by the cable. When unplugging the cable of the remote control unit, pull the plug, not
the cable.
▶ Carry the remote control unit with you at all times while the saw is cutting.
▶ Press the EMERGENCY STOP button if a hazardous situation occurs.
▶ When using the Cut Assist function, keep the sawing operation under close observation at all times and
make sure that no-one enters the danger zone.
▶ Always press the EMERGENCY STOP button when cutting is finished or interrupted, and for all cleaning
and maintenance work.
▶ Keep power cords and the cable of the remote control unit away from oil, sharp edges and sources of
heat.
▶ The specified operating and storage temperatures must be observed.
▶ Protect the electrical contacts on the remote control unit, charger and battery from moisture.
▶ Do not touch the contacts.
▶ Dry the device before stowing it in the transport container.
Printed: 28.02.2018 | Doc-Nr: PUB / 5200714 / 000 / 03
6 English 2053441
*2053441*
2.3 Battery use and care
▶ Observe the special regulations and instructions applicable to the transport, storage and use of Li-ion
batteries.
▶ Do not expose batteries to high temperatures, direct sunlight or fire.
▶ Do not disassemble, crush or incinerate batteries and do not subject them to temperatures over 80 °C.
▶ Do not attempt to charge or continue to use damaged batteries.
▶ If the battery is too hot to touch it may be defective. In this case, place the product in a non-flammable
location, well away from flammable materials, where it can be kept under observation and allowed to
cool down. Contact Hilti Service after the battery has cooled down.
3 Description
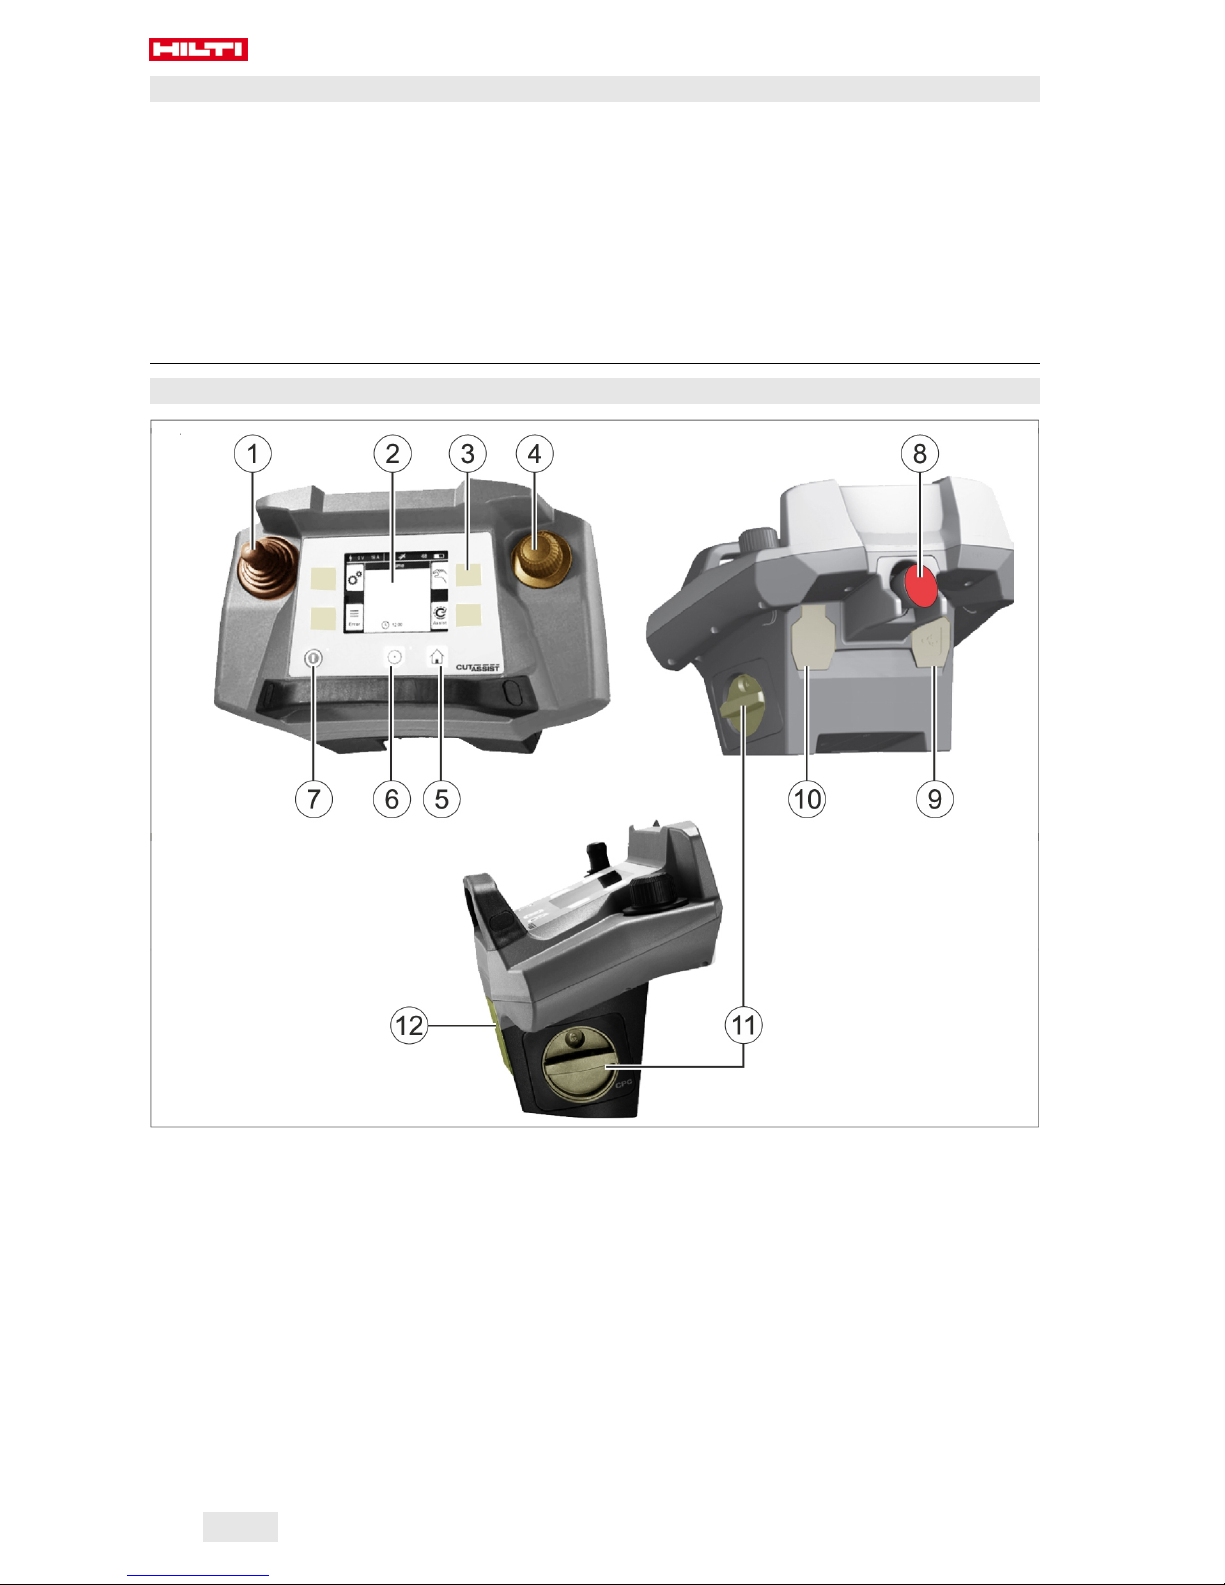
3.1 Product overview
@
Joystick
;
Display
=
Softkeys
%
Control knob
&
HOME button
(
DRIVE ON/OFF button with indicator lamp
)
ON/OFF button with indicator lamp
+
EMERGENCY STOP
§
Data cable socket
/
Connection for remote control cable
:
Battery with locking mechanism
∙
Strap attachment point
Printed: 28.02.2018 | Doc-Nr: PUB / 5200714 / 000 / 03
 Loading...