How it Works
Log In / Sign Up
Buy Points
How it Works
FAQ
Contact Us
Questions and Suggestions
Users
Hikvision
Loading...
D
DS-K3B801-M-M
DS-K3G411
2
DS-K3Y501-L1
DS-K3Y501-L2
DS-K3Y501-M1
DS-K3Y501-M2
DS-K3Y501-R
DS-K4H250D
DS-K4H250-LZ
DS-K4H250S
DS-K4H250-U
DS-K4T100
DS-K5603-Z
DS-K5604A-3XF
DS-K7M102-M-25
DS-K7M151-P
DS-K7M153-P
DS-K7P02
DS-K7P04
DS-K7PEB
DS-KAB13-D
DS-KAB21-H
DS-KAB671-B
DS-KABD8003-RS3
DS-KAD606-P
2
DS-KAD706
2
DS-KB2411-IM
DS-KB6003-WIP
DS-KB8112-IM
3
DS-KD3002-VM
4
DS-KD6002-VM
2
DS-KD8002-VM
4
DS-KD8003-IME1
4
DS-KD8003-IME1-Flush
3
DS-KD8003-IME1-Surface
3
DS-KD8102-V
4
DS-KD-ACW2
DS-KD-ACW3
2
DS-KD-BK
DS-KD-DIS
DS-KD-E
DS-KD-IN
DS-KD-KK
2
DS-KD-KP
3
DS-KD-M
2
DS-KH2220
DS-KH6210-L
3
DS-KH6310
4
DS-KH6310-W
3
DS-KH6310-WL
2
DS-KH6320-WTE1
3
DS-KH6320-WTE2
DS-KH8300-T
5
DS-KH8301-WT
4
DS-KH8301-WTS
DS-KH8301-WT белый
DS-KH8350-WTE1
3
DS-KH8520-WTE1
DS-KIS602(B)
DS-KIS701
3
DS-KIT2DRACP
DS-KIT4DRACP
2
DS-KM8301
2
DS-KV8102-1A
DS-KV8102-1C
DS-KV8102-2C
DS-KV8102-IM
4
DS-KV8102-IP
3
DS-KV8102-VP
3
DS-KV8202-1A
DS-KV8202-IM
4
DS-KV8213-WME1
DS-KV8402-1A
DS-KV8402-IM
4
DS-MH1411I-HM
DS-MH2111/32G
DS-MH2111/32G/GLE
DS-MH2211/32G
2
DS-MH2211/32G/GPS/WIFI
2
DS-MH2211/64G
2
DS-MH2211/64G/GPS/WIFI
2
DS-MH2311/32G
DS-MH2311/32G/GLE
DS-MI9605-GA
DS-MP3504-SD
DS-MP3516-RS
2
DS-MP3516-RS/GW
2
DS-MP5504/GLF
DS-MP5504/GLF/WI58
DS-MP5504/GW
DS-MP5504/GW/WI
DS-MP5504/GW/WI58
DS-MP5604-SD
DS-MP7504
DS-MP7504/GW
DS-MP7504/GW/WI
DS-MP7516
DS-MP75161T
DS-MP7516/GW
DS-MP7516/GW1T
Loading...
Loading...
Nothing found
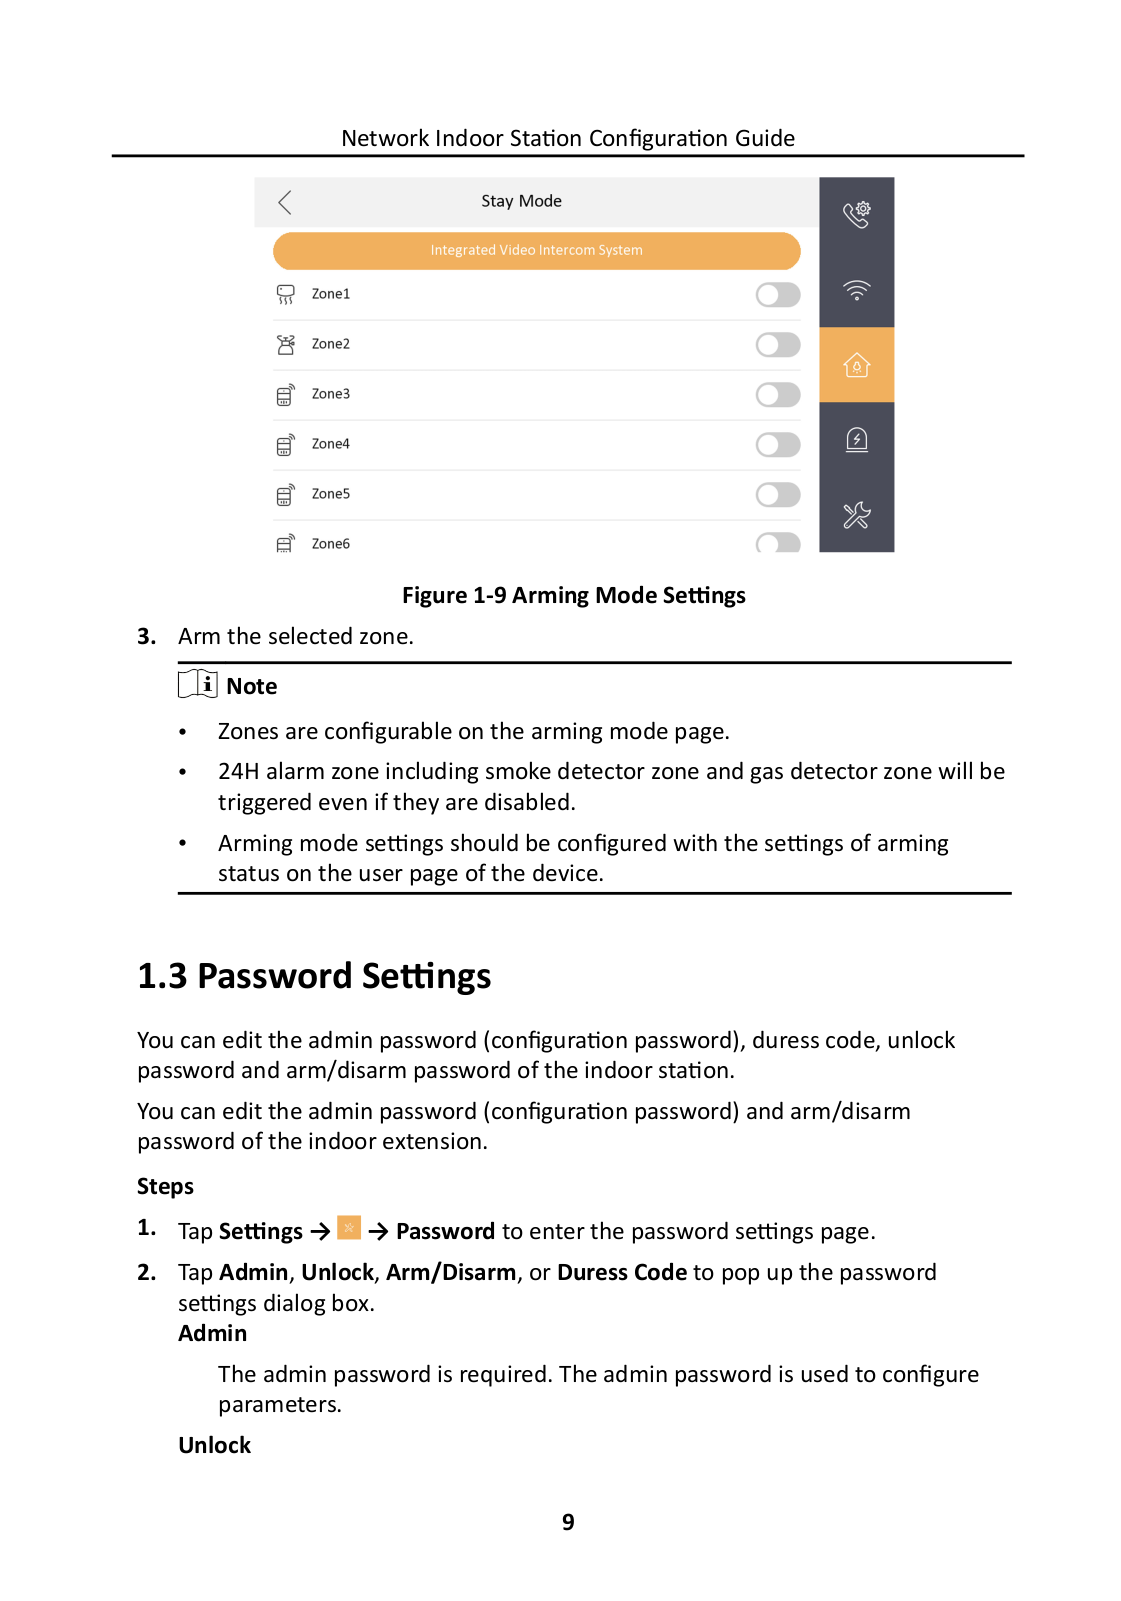
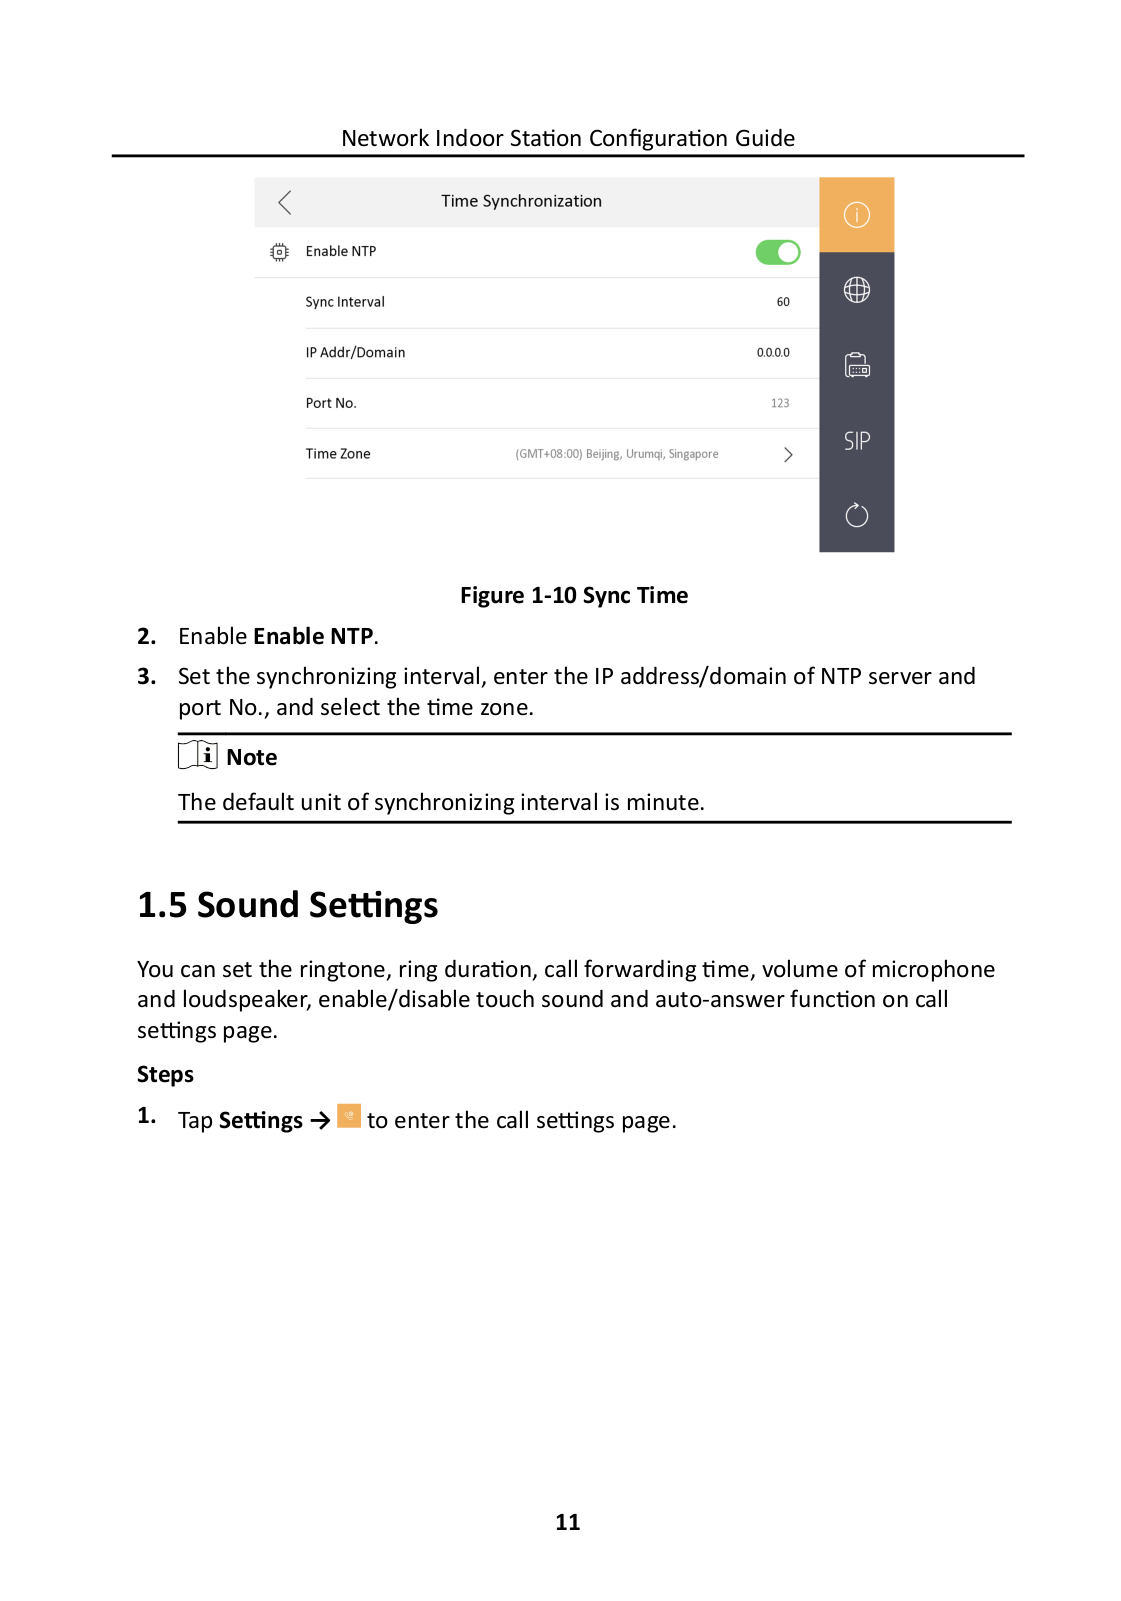
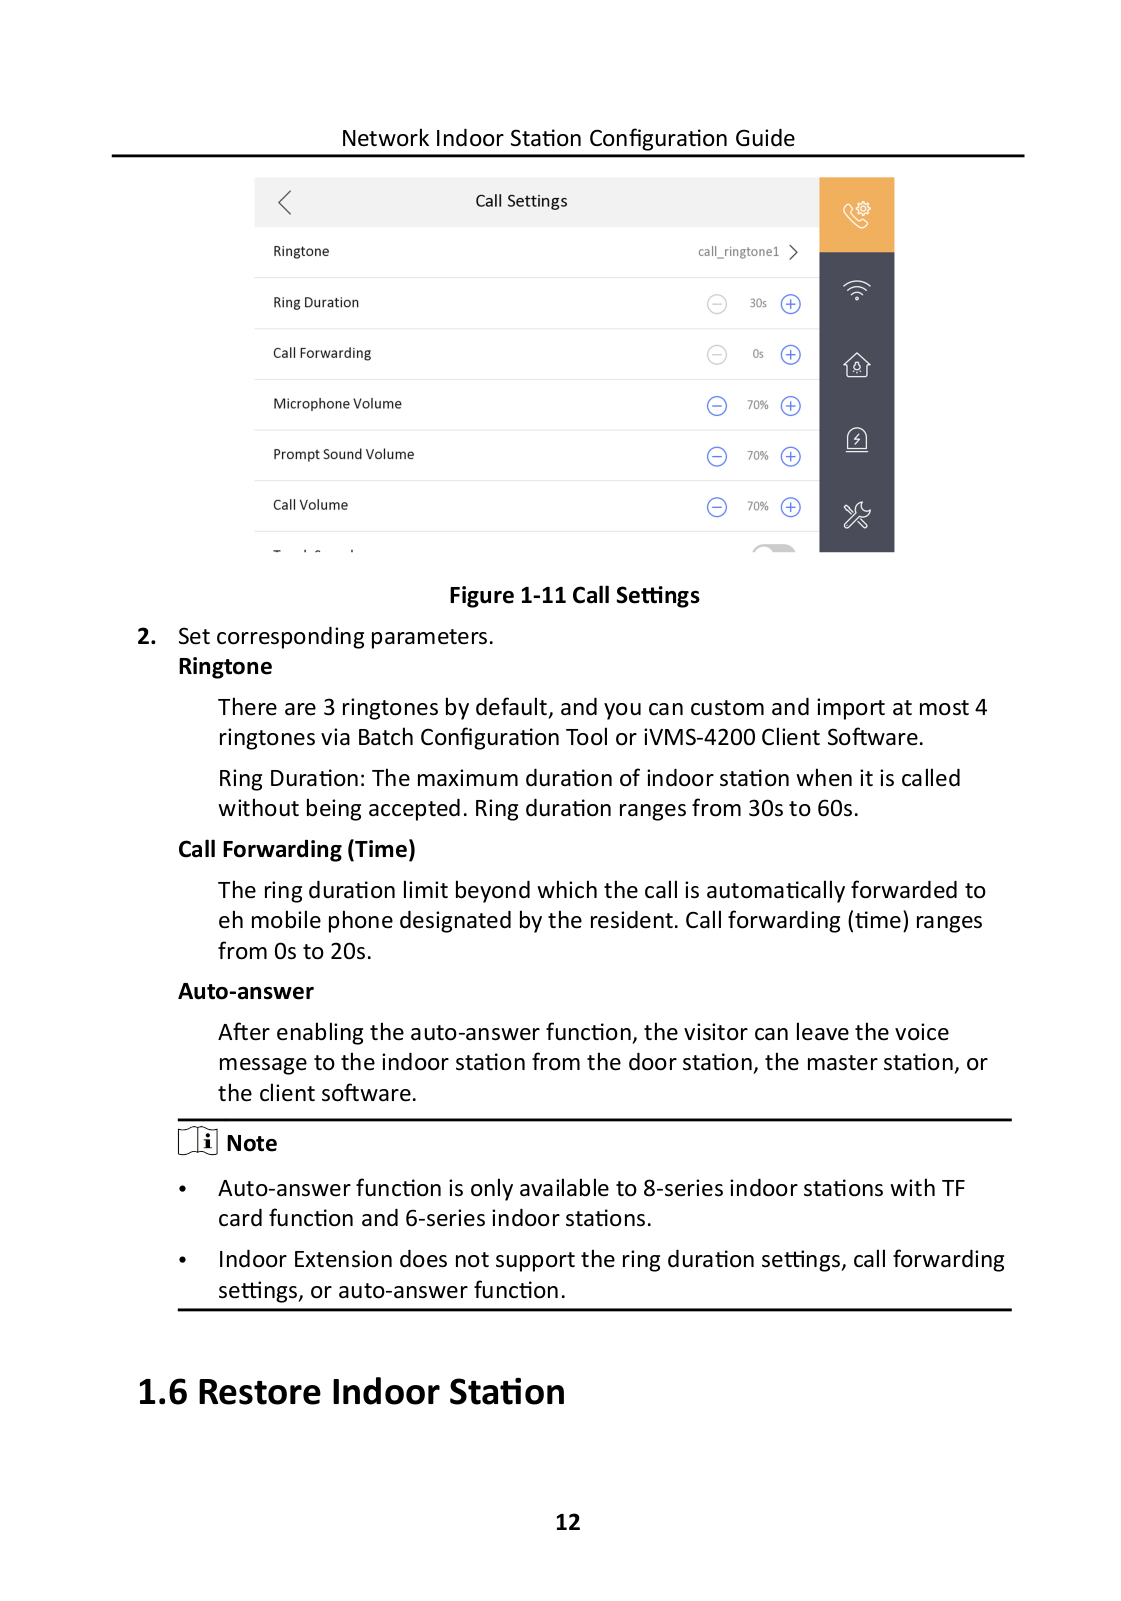
DS-KH6320-WTE1
Installation Manual
11 pgs
673.71 Kb
1
Service Manual
46 pgs
7.79 Mb
6
User Manual
3 pgs
2.25 Mb
2
Table of contents
Loading...
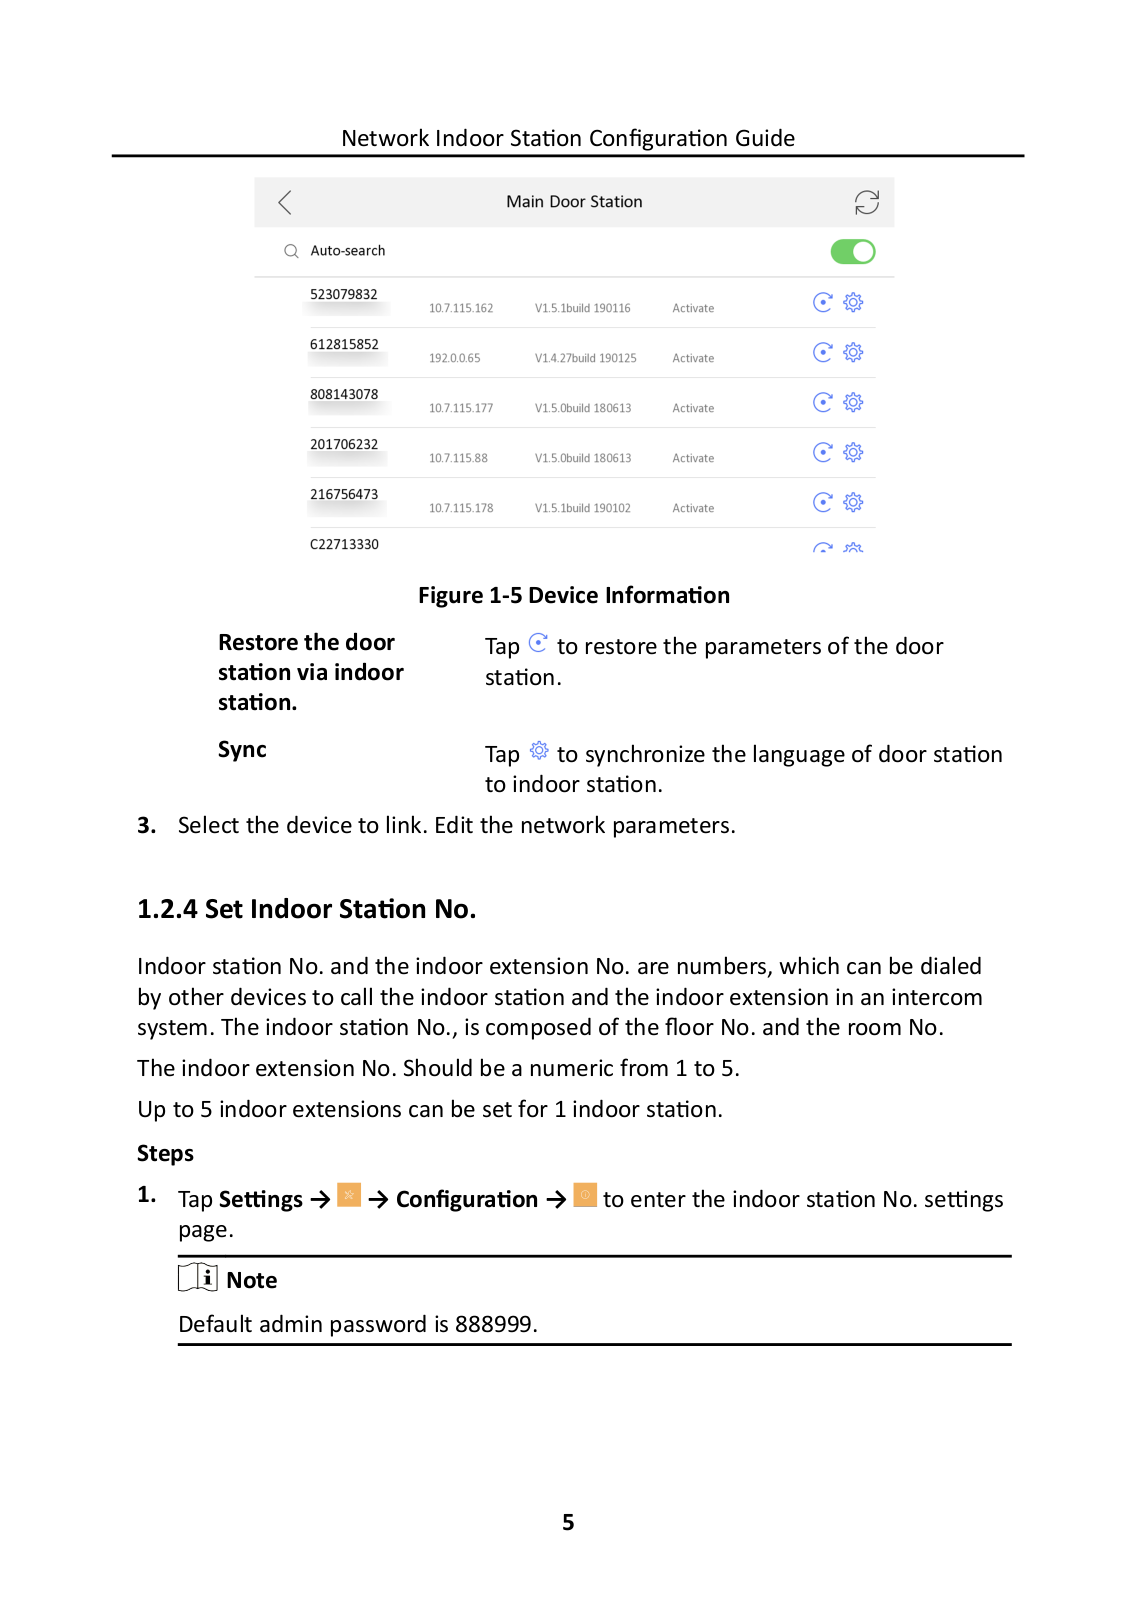
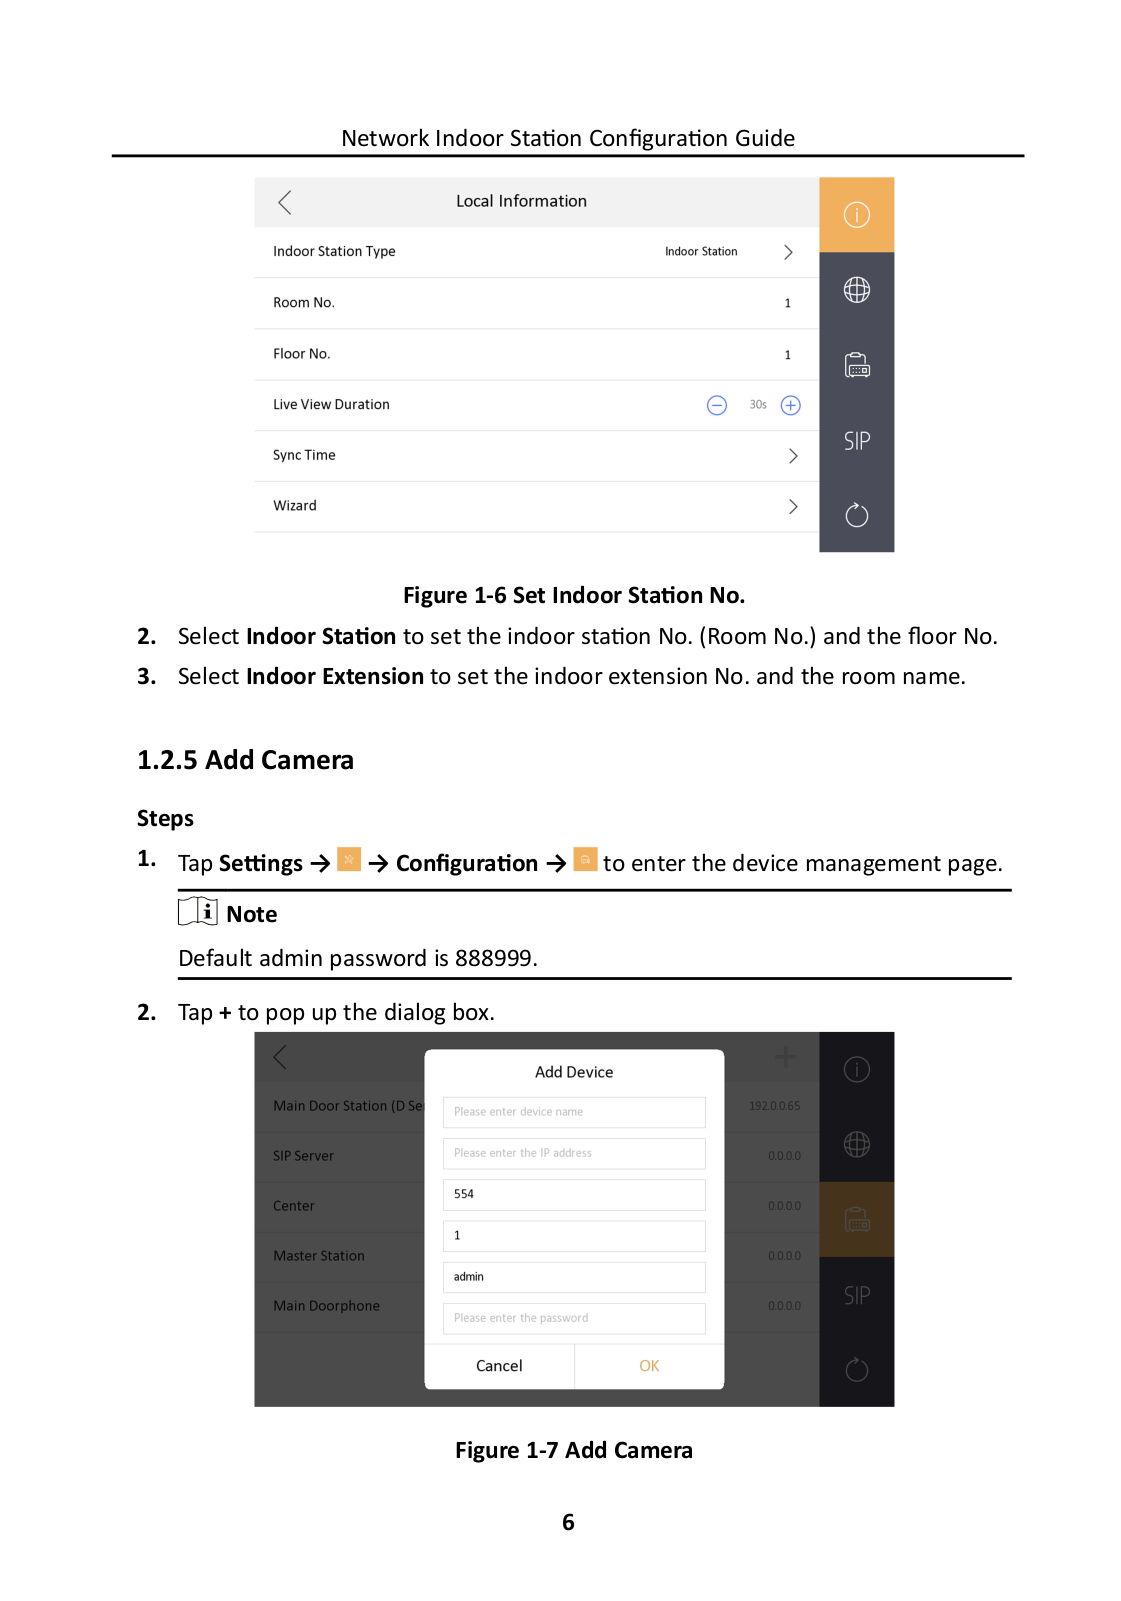
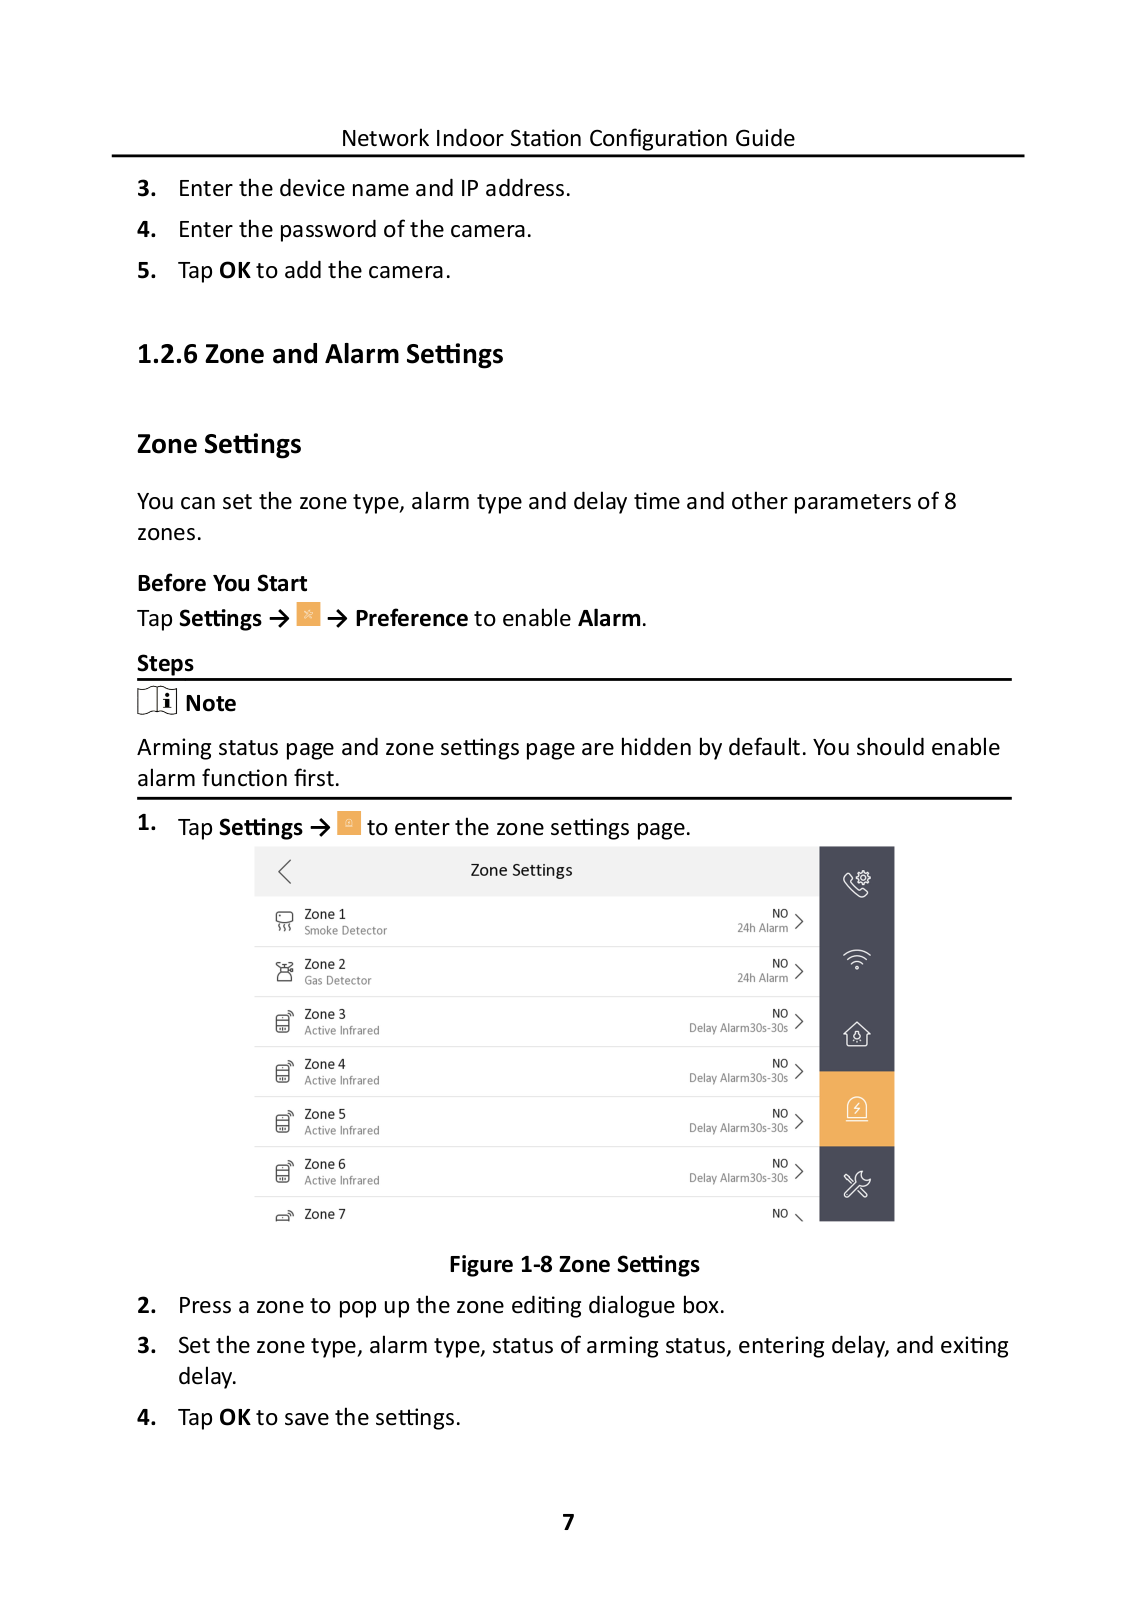
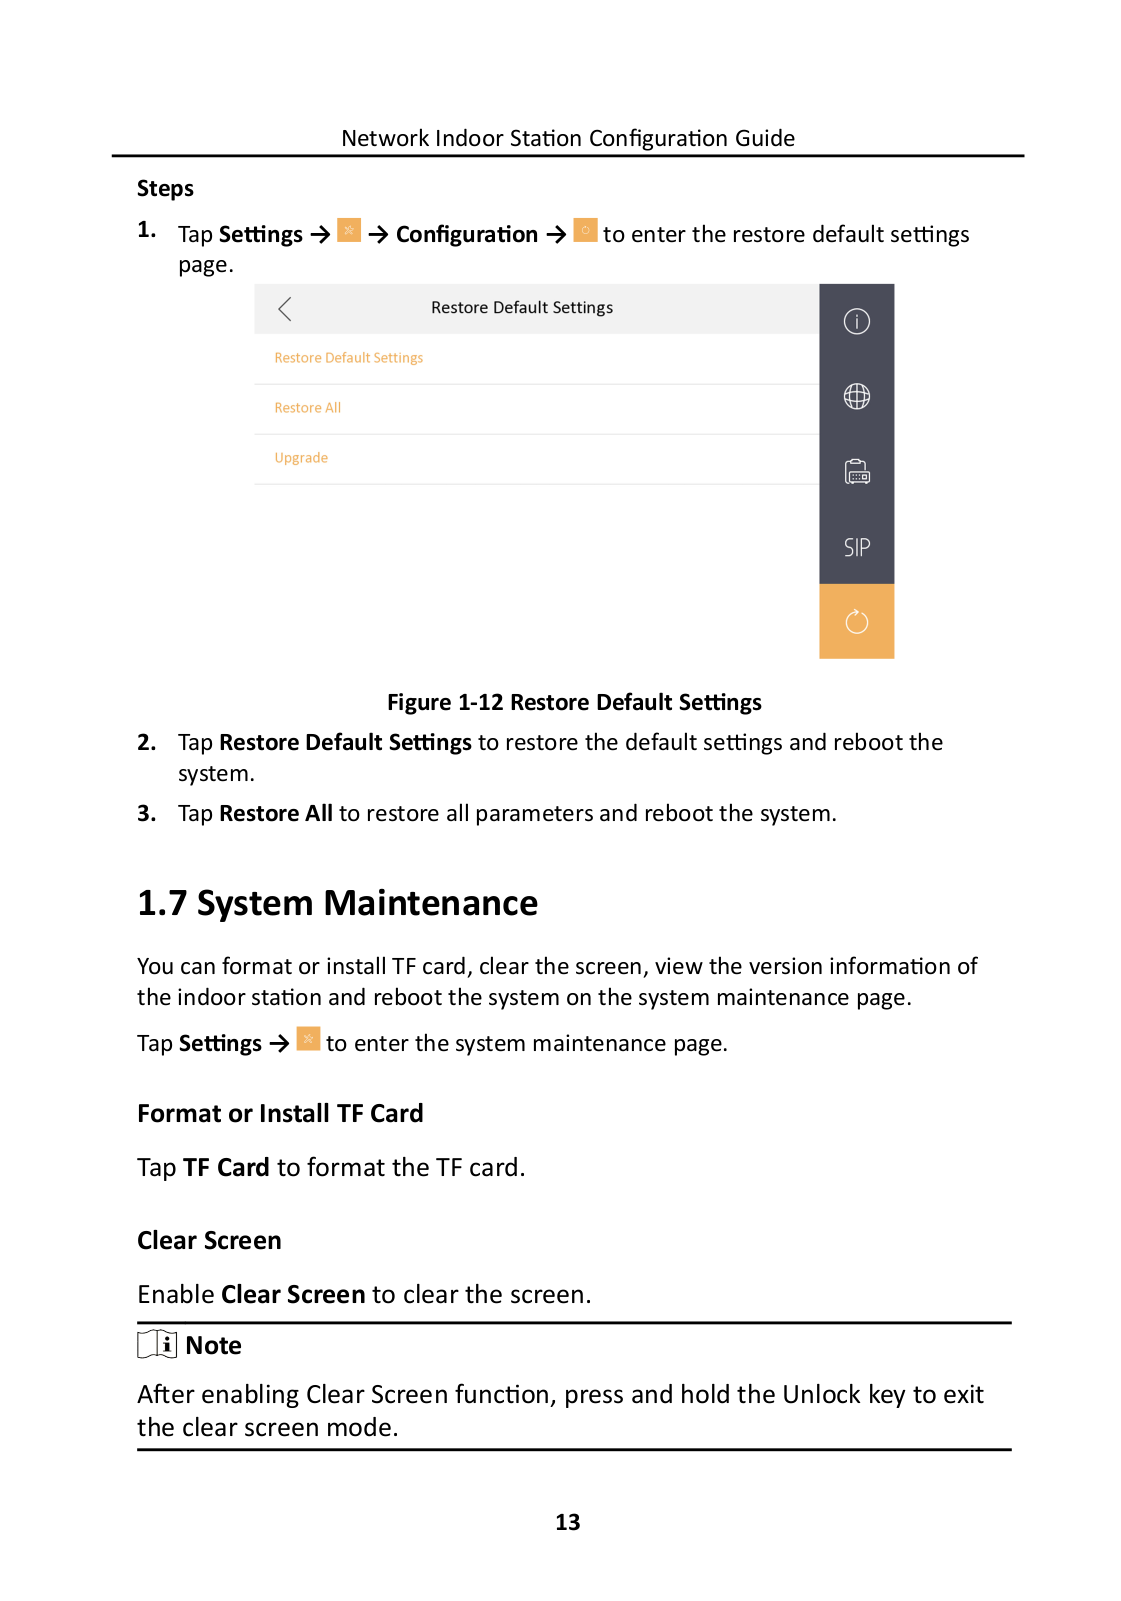
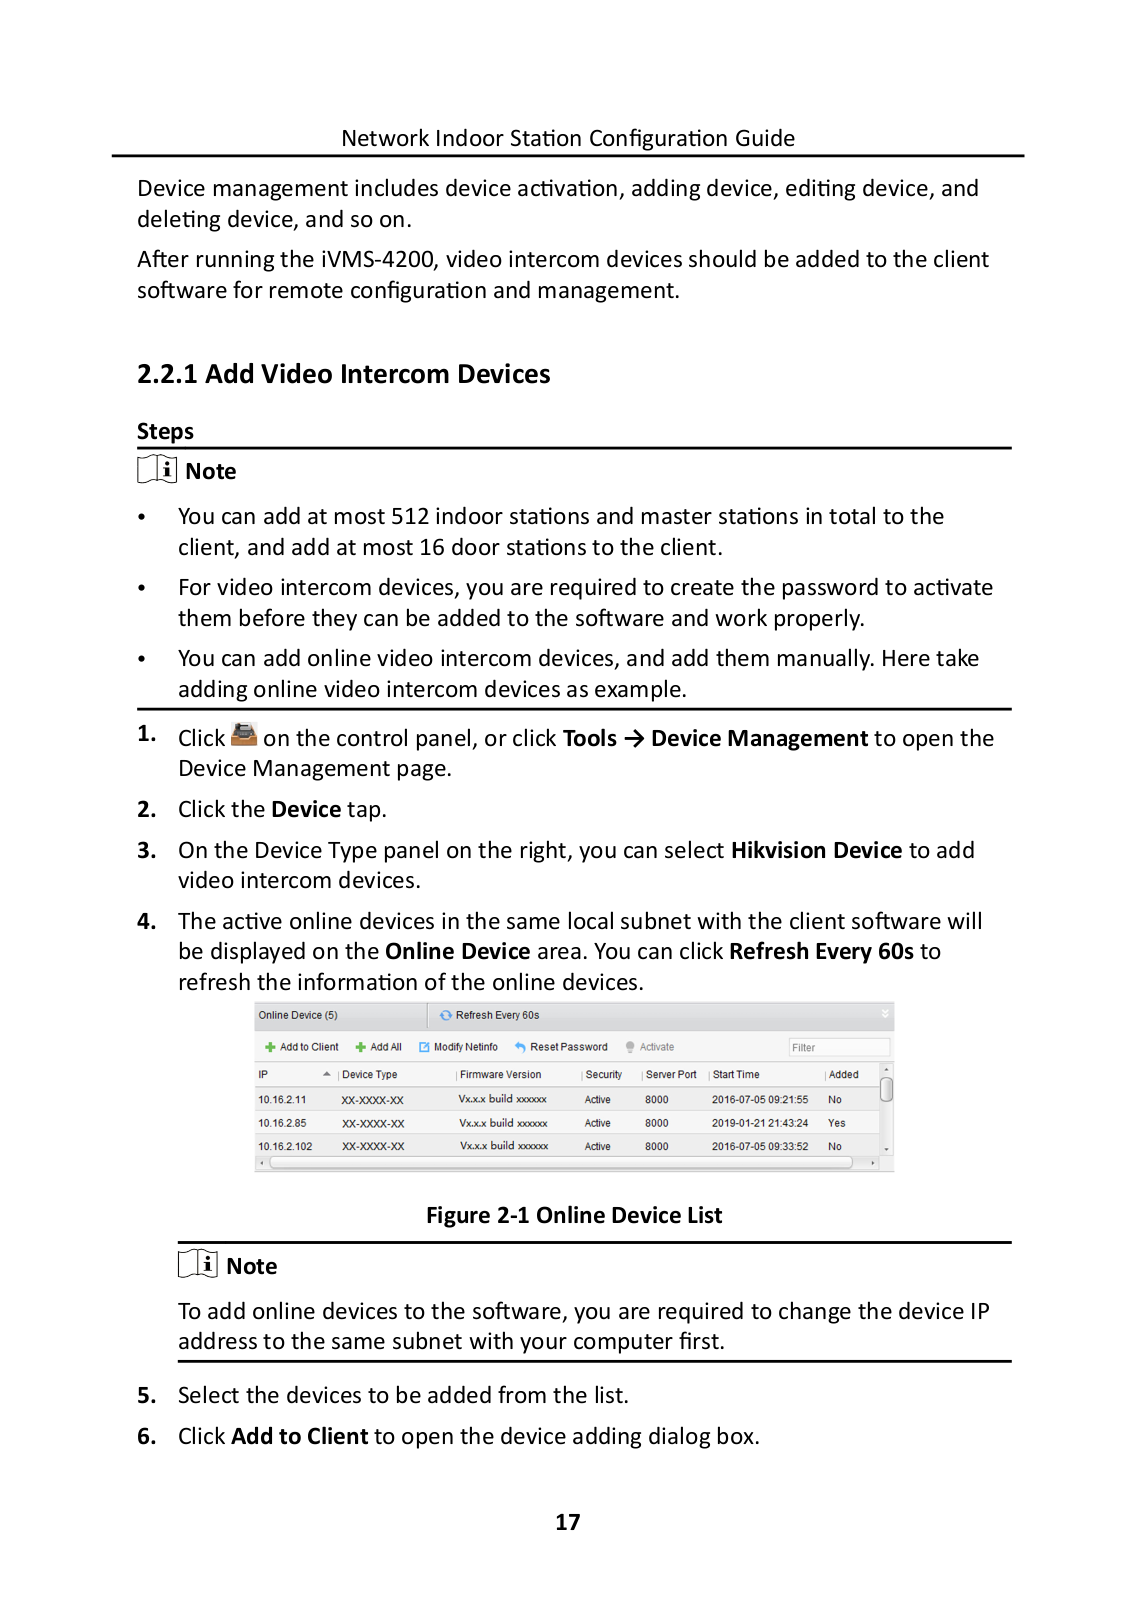
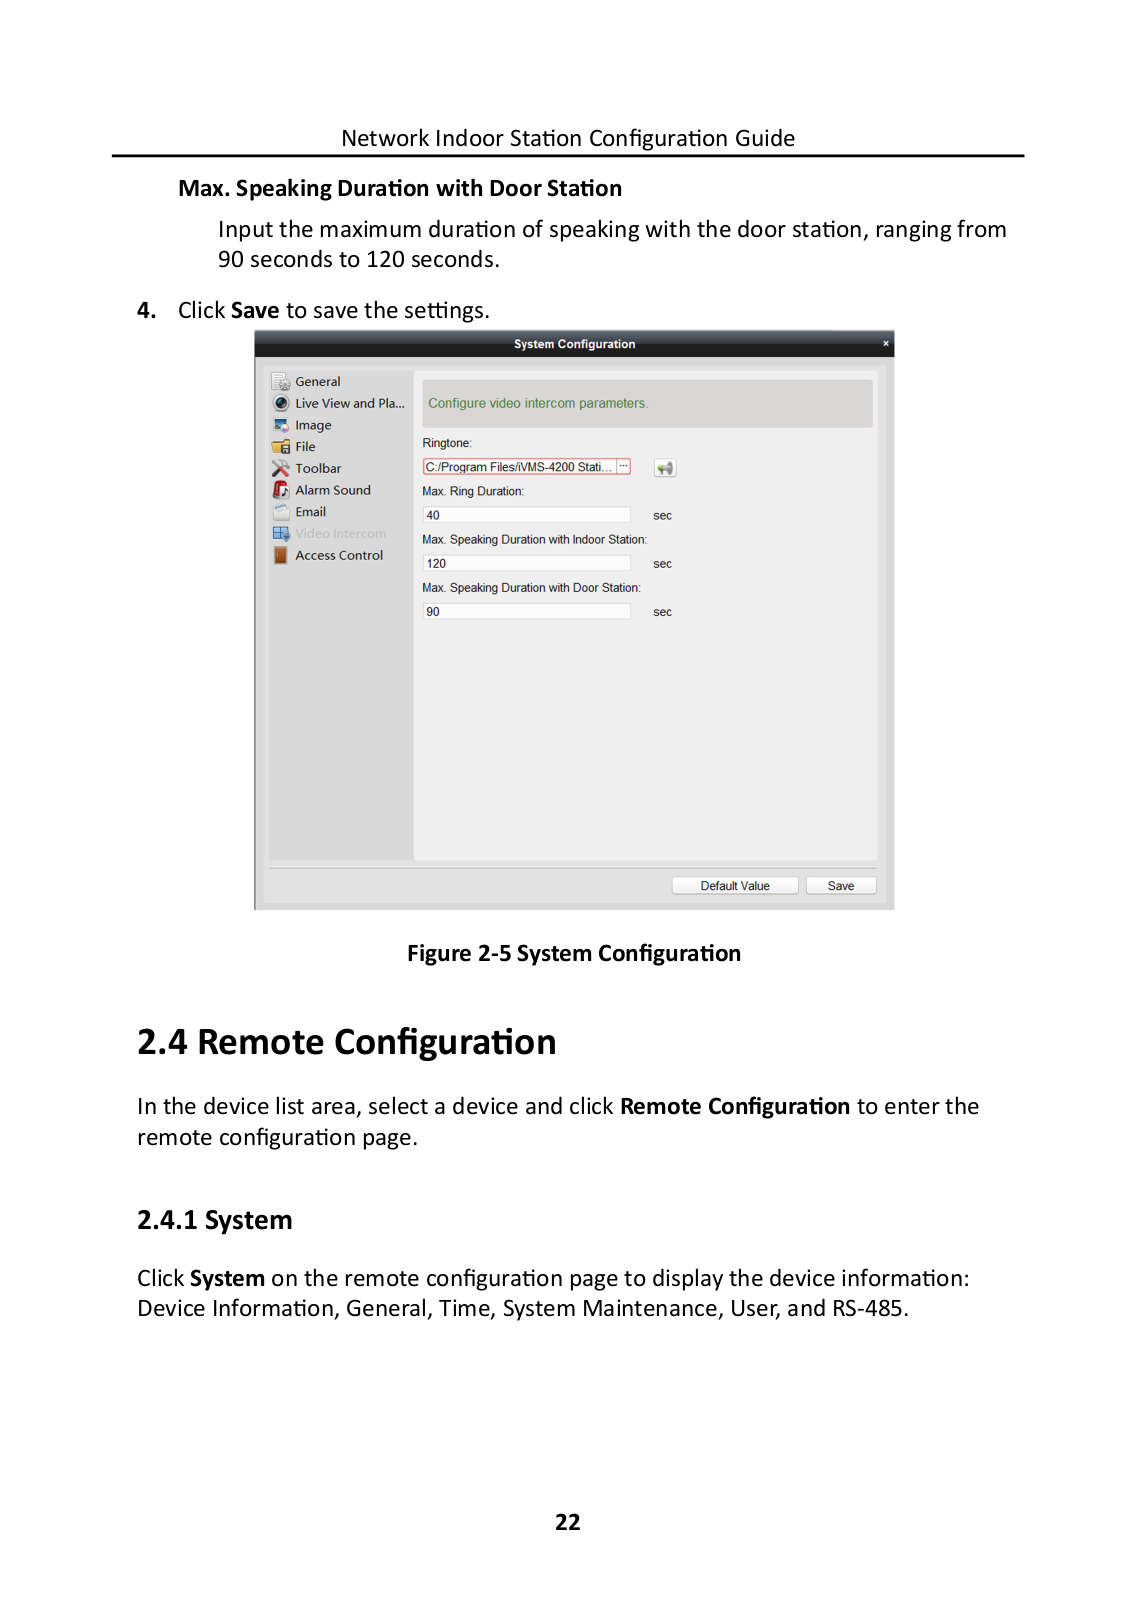
Hikvision DS-KH6320-WTE1 Service Manual
...
Hikvision Service Manual
Download
Specifications and Main Features
Frequently Asked Questions
User Manual
Download
Loading...
+
hidden pages
Unhide
You need points to download manuals.
1 point = 1 manual.
You can buy points or you can get point for every manual you upload.
Buy points
Upload your manuals
 Loading...