

Page 1
Navigation System
Operation guide
Page 2

G Warning
G Warning
G Warning
Danger of accident
- Do not program the navigation unit while driving.
Destinations should only be entered when the vehicle is stationary.
Use of the navigation unit is only advised if the
traffic conditions are suitable and you are absolutely sure that its use presents no risk, distraction
or inconvenience to you, your passengers or other road users.
Danger of accident
- Do not ignore traffic laws.
The requirements of the traffic laws take precedence over instructions you may receive from the
navigation unit. It is possible that you may receive inaccurate or incorrect instructions due to
changes in traffic routes, e.g. due to road construction or deviating data. Therefore, you must
always observe the actual road signs and traffic
regulations.
Danger of accident
- Do not misuse the unit.
The navigation system serves solely as an aid to
navigation. In particular, the navigation system
must not be used as an orientation aid at times of
poor visibility. The volume of the radio and the
navigation system should be adjusted so that
noises external to the vehicle are still audible.
Turn the unit off immediately if a serious malfunction occurs.
US english
1
Page 3

Table of contents
1. Keyboard Overview . . . . . . . . . . . . . . . . . . . . . 4
US english
US english
2. Anti-theft device . . . . . . . . . . . . . . . . . . . . . . . . 5
2.1. Entering the Code Number. . . . . . . . . . . . . . . 5
2.2. Removing the detachable faceplate . . . . . . . . .5
2.3. Inserting portable panel . . . . . . . . . . . . . . . . . 6
3. General Operation . . . . . . . . . . . . . . . . . . . . . . 7
3.1. Switching On/Off . . . . . . . . . . . . . . . . . . . . . . 7
3.2. Adjusting the volume . . . . . . . . . . . . . . . . . . . 7
3.3. Activating the Tone Menu . . . . . . . . . . . . . . .7
3.3.1. Adjusting the bass. . . . . . . . . . . . . . . . . . . . .7
3.3.2. Setting the treble. . . . . . . . . . . . . . . . . . . . . .7
3.3.3. Fader . . . . . . . . . . . . . . . . . . . . . . . . . . . . . . . 7
3.3.4. Setting the balance . . . . . . . . . . . . . . . . . . . .8
3.3.5. Linear setting . . . . . . . . . . . . . . . . . . . . . . . .8
3.3.6. Switching loudness on / off . . . . . . . . . . . . .8
3.3.7. Setting the subwoofer level . . . . . . . . . . . . .8
4. Using Navigation. . . . . . . . . . . . . . . . . . . . . . . . 9
4.1. General instructions . . . . . . . . . . . . . . . . . . .10
4.2. Confirm Warning . . . . . . . . . . . . . . . . . . . . .10
4.3. Selecting Navigation . . . . . . . . . . . . . . . . . . 10
4.4. Main Navigation Menu . . . . . . . . . . . . . . . . .11
4.5. Entering a Destination . . . . . . . . . . . . . . . . . 11
4.5.1. Entering the Destination . . . . . . . . . . . . . . .12
4.5.2. Entering a street for the destination . . . . . .13
4.5.3. Entering the Destination
City/Town Center . . . . . . . . . . . . . . . . . . . . . . .14
4.6. Route Menu . . . . . . . . . . . . . . . . . . . . . . . . . .15
4.6.1. Entering street number for
destination street . . . . . . . . . . . . . . . . . . . . . . . . 15
4.6.2. Selecting intersection for
destination street . . . . . . . . . . . . . . . . . . . . . . . . 16
4.6.3. Selecting the route settings . . . . . . . . . . . . 16
4.6.4. Storing specified destination in
destination memory. . . . . . . . . . . . . . . . . . . . . . 16
4.6.5. Deleting stored destinations. . . . . . . . . . . . 17
4.6.6. Destination memory full . . . . . . . . . . . . . . 17
4.7. Route guidance calculation . . . . . . . . . . . . . . 17
4.7.1. Recalculating route. . . . . . . . . . . . . . . . . . . 17
4.8. Stopover . . . . . . . . . . . . . . . . . . . . . . . . . . . . 18
4.8.1. Entering a stopover . . . . . . . . . . . . . . . . . . 18
4.8.2. Starting route guidance to stopover . . . . . . 18
4.8.3. Deleting a stopover . . . . . . . . . . . . . . . . . . 18
4.8.4. Stopover reached . . . . . . . . . . . . . . . . . . . . 18
4.9. Traffic jam . . . . . . . . . . . . . . . . . . . . . . . . . . 19
4.9.1. Entering length of traffic jam. . . . . . . . . . . 19
4.9.2. Cancel guidance around traffic jam . . . . . . 19
4.10. Canceling route guidance . . . . . . . . . . . . . . . 19
4.11. Notes on route guidance . . . . . . . . . . . . . . . . 20
4.12. Information during route guidance . . . . . . . . 21
4.12.1. Displaying route settings . . . . . . . . . . . . . 22
4.12.2. Requesting current time . . . . . . . . . . . . . . 22
4.12.3. Requesting trip duration and
miles traveled . . . . . . . . . . . . . . . . . . . . . . . . . . 22
4.12.4. Requesting current position . . . . . . . . . . . 22
4.12.5. Requesting road list . . . . . . . . . . . . . . . . . 23
4.13. Destination memory . . . . . . . . . . . . . . . . . . . 23
4.14. P.O.I. . . . . . . . . . . . . . . . . . . . . . . . . . . . . . . . 23
4.15. System settings . . . . . . . . . . . . . . . . . . . . . . . 25
4.15.1. Setting time . . . . . . . . . . . . . . . . . . . . . . . 26
4.15.2. Storing location . . . . . . . . . . . . . . . . . . . . 26
4.15.3. Requesting location . . . . . . . . . . . . . . . . . 26
4.15.4. Setting the language. . . . . . . . . . . . . . . . . 27
4.15.5. Animations . . . . . . . . . . . . . . . . . . . . . . . 27
4.15.6. Switching announcement of the
estimated time of arrival on /off. . . . . . . . . . . . 27
4.15.7. Selecting the units . . . . . . . . . . . . . . . . . . 28
5. Radio Mode . . . . . . . . . . . . . . . . . . . . . . . . . . . 29
5.1. Switching to radio mode. . . . . . . . . . . . . . . . 29
5.2. Switch on radio menu mode. . . . . . . . . . . . . 29
5.3. Selecting the FM waveband . . . . . . . . . . . . . 29
5.4. Selecting the AM waveband. . . . . . . . . . . . . 29
5.5. Setting options for station selection . . . . . . . 29
5.5.1. Dynamic auto store (FM-DAS). . . . . . . . . 29
5.5.2. Station search FM - DAS . . . . . . . . . . . . . 30
5.5.3. AM transmitter search. . . . . . . . . . . . . . . . 30
5.5.4. Scan search . . . . . . . . . . . . . . . . . . . . . . . . 30
5.5.5. Program type selection (PTY). . . . . . . . . . 30
5.5.6. Switching PTY display on / off. . . . . . . . . 31
5.5.7. Recalling/storing FM stations . . . . . . . . . . 31
5.5.8. Recalling/Storing AM station . . . . . . . . . . 31
5.5.9. AM autostore. . . . . . . . . . . . . . . . . . . . . . . 31
5.5.10. Manual FM tuning . . . . . . . . . . . . . . . . . 31
5.5.11. Manual AM tuning . . . . . . . . . . . . . . . . . 32
5.6. Regionalization . . . . . . . . . . . . . . . . . . . . . . 32
5.6.1. Switching regionalization on/off. . . . . . . . 32
5.6.2. Switching frequency display on / off . . . . 32
5.7. Switching radio text display on / off . . . . . . 33
5.8. Traffic Program (TP) . . . . . . . . . . . . . . . . . 33
5.8.1. Activating/Quitting the TP Menu . . . . . . . 33
5.8.2. Setting automatic tracking . . . . . . . . . . . . 34
5.8.3. Deactivating the TP. . . . . . . . . . . . . . . . . . 34
5.8.4. Switching Mute on/off . . . . . . . . . . . . . . . 34
5.8.5. Interrupting TP announcements . . . . . . . . 34
5.8.6. TP announcement volume. . . . . . . . . . . . . 35
Page 4

Table of contents
5.9. Telephone Muting . . . . . . . . . . . . . . . . . . . . 35
6. CD mode . . . . . . . . . . . . . . . . . . . . . . . . . . . . . . 36
6.1. Inserting / Ejecting CDs . . . . . . . . . . . . . . . . 36
6.2. Skipping to the next/previous track. . . . . . . . 37
6.3. Scan search . . . . . . . . . . . . . . . . . . . . . . . . . . 37
6.4. Fast Forward / Rewind . . . . . . . . . . . . . . . . . 37
6.5. Random Play . . . . . . . . . . . . . . . . . . . . . . . . 37
6.6. Repeating a track . . . . . . . . . . . . . . . . . . . . . . 37
6.7. Number of tracks and total playing time . . . 38
6.8. Temperature Protection Circuit . . . . . . . . . . . 38
7. CD Changer Mode . . . . . . . . . . . . . . . . . . . . . . 39
7.1. Playing CDs . . . . . . . . . . . . . . . . . . . . . . . . . 39
7.2. Naming a CD. . . . . . . . . . . . . . . . . . . . . . . . . 40
7.3. CD Filter Function . . . . . . . . . . . . . . . . . . . . 40
8. User menu . . . . . . . . . . . . . . . . . . . . . . . . . . . . . 41
8.1. Requesting/quitting user menu . . . . . . . . . . . 41
8.1.1. GAL (Gal) setting . . . . . . . . . . . . . . . . . . . 41
8.1.2. Telephone mute characteristics (Tel). . . . . 41
8.1.3. Display setting (Lcd) . . . . . . . . . . . . . . . . . 41
8.1.4. Flashing diode (LED) setting. . . . . . . . . . . 42
8.1.5. Setting reception optimization (M/S) . . . . 42
8.1.6. Setting navigation
announcements (Nav) . . . . . . . . . . . . . . . . . . . . 42
8.1.7. AUX input (Aux). . . . . . . . . . . . . . . . . . . . 43
8.1.8. Compass display . . . . . . . . . . . . . . . . . . . . 43
8.1.9. Signal tone volume . . . . . . . . . . . . . . . . . . 43
9. Service Menu . . . . . . . . . . . . . . . . . . . . . . . . . . 44
9.1. Requesting /Quitting the Service Menu . . . . 44
9.2. Triggering a Reset . . . . . . . . . . . . . . . . . . . . 44
10. General instructions . . . . . . . . . . . . . . . . . . . 45
11. Technical Data. . . . . . . . . . . . . . . . . . . . . . . . 46
NOTICE . . . . . . . . . . . . . . . . . . . . . . . . . . . . . . . . 47
US english
Page 5
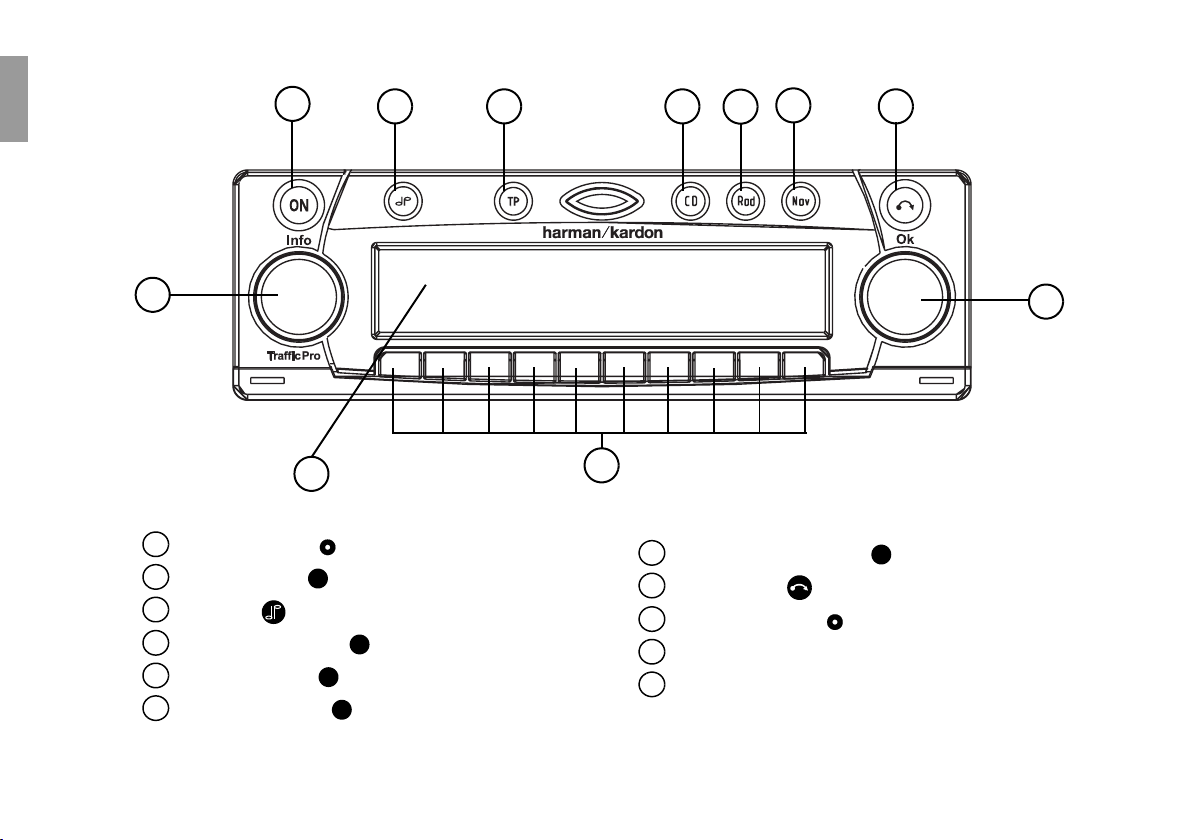
1. Keyboard Overview
US english
US english
2
1
11
1
Left control knob (Info)
2
On / off switch ( )
3
Tone key ( )
4
Traffic program key ( )
5
Select CD mode ( )
6
Select radio mode ( )
ON
CD
Rad
3
4
5
7
6
8
9
10
7
Select navigation mode ( )
8
CD eject key ( )
9
Right control knob (OK)
TP
10
Multifunction keys
11
Display
Nav
4 1. Keyboard Overview
Page 6
2. Anti-theft device
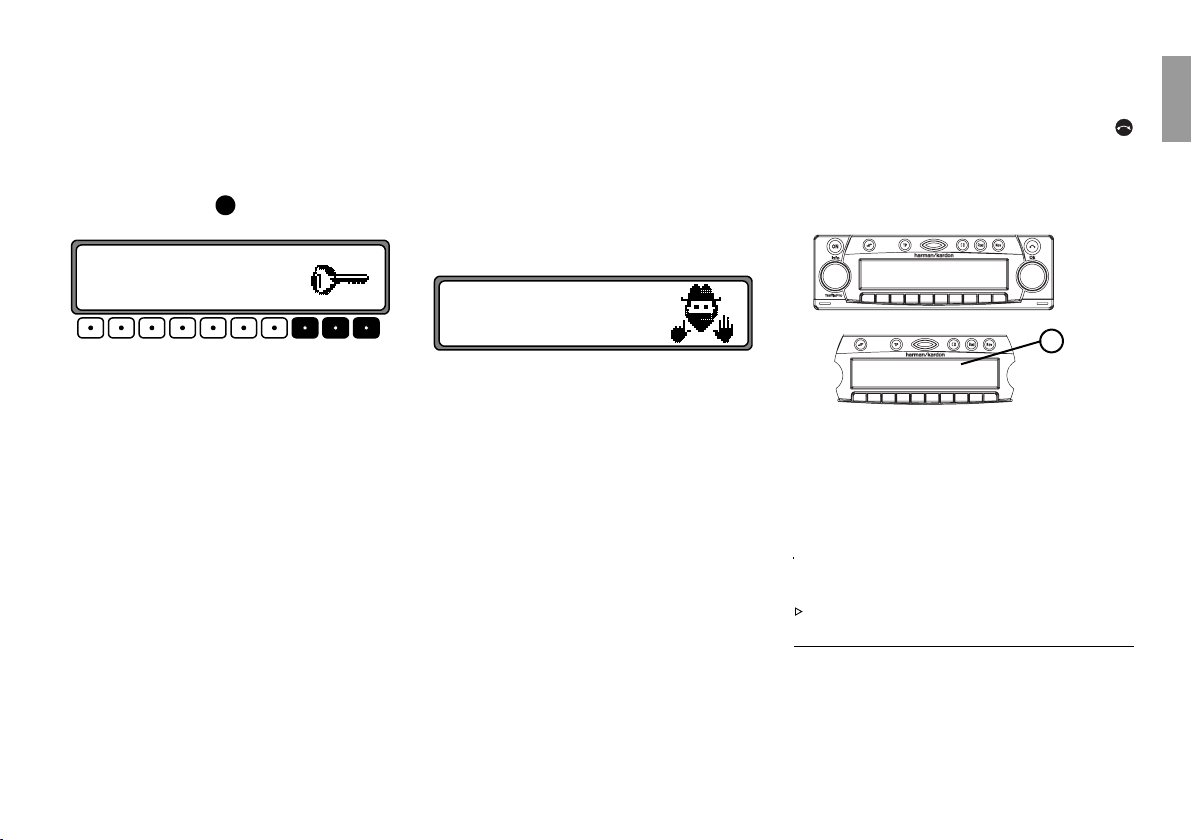
2.1. Entering the Code Number
If the car radio is disconnected from the power supply, it will be theft-protected upon reconnection. After turning on with the key, the display shows the
following text:
Enter Code Number
1 2 34 567
Use the multifunction keys
it code number.
Enter the code number using the multifunction keys.
The unit automatically turns itself on once the fifth
digit is entered and if all other digits were entered correctly.
ON
Enter Code Number.
1 - 7 , to enter the five-dig-
Note
It is essential that the CODE CARD be kept in a safe
place outside the vehicle. This will prevent unauthorized use. The provided stickers should be attached to
the inside of the vehicle windshield/windows.
If an incorrect code number is entered, the prompt
CODE will be displayed once again. If an incorrect
code number is entered three times in a row, the unit
will display
imately 60 minutes.
Wait
Three further incorrect entries block the unit for an
additional 60 minutes.
Note
The blocking time will elapse only while the unit is
turned on.
WAIT, and it will be blocked for approx-
1 2 34 567
2.2. Removing the detachable faceplate
As an effective anti-theft device, the detachable faceplate (A) may be removed from the unit. Press
briefly (CD remains in the unit). The display folds
forwards.
The portable component can then be removed by pulling it forward and away from the unit.
A
The volume is limited to a certain level after the display is folded down. After 20 seconds, a tone indicates that the control component is folded down. The
unit then switches itself off.
G Warning
Danger of accident
Do not remove detachable faceplate while driving for safety reasons!
US english
2. Anti-theft device 5
Page 7

Note
After removal, please insert the detachable faceplate
in the accompanying protective cover.
Do not touch the metal contacts on the detachable
US english
US english
faceplate or on the radio.
2.3. Inserting portable panel
Insert the detachable faceplate into the lower left
catch and then engage it in the lower right catch. Then
fold up the detachable faceplate and engage it in the
upper catches.
The detachable faceplate can also be placed flat
against the unit and pushed into place.
To ensure proper operation, ensure that the detachable faceplate is firmly engaged in all four catches.
If a new detachable faceplate or one from another unit
is used, the code number must be entered as described
above to activate the unit.
6 2. Anti-theft device
Page 8
3. General Operation
3.3. Activating the Tone Menu
Setting the treble
3.1. Switching On/Off
Press the key.
Additional options for switching on / off: Ignition.
To turn the unit on through the ignition key, the unit
must have been switched off via the ignition.
switching off the ignition, the unit can be prevented
from switching off by pressing within 3 seconds.
Note
With the ignition off, the unit can be turned on using
the key. However, the unit turns itself off automatically after 1 hour.
ON
After
ON
ON
3.2. Adjusting the volume
Turn the left control knob . The volume increases
or decreases.
G Warning
Danger of Accidents – Health Warning
- Excessive volume poses dangers and risks.
Adjust the volume to a level that will allow you
to still hear traffic noises (horns, sirens, etc.).
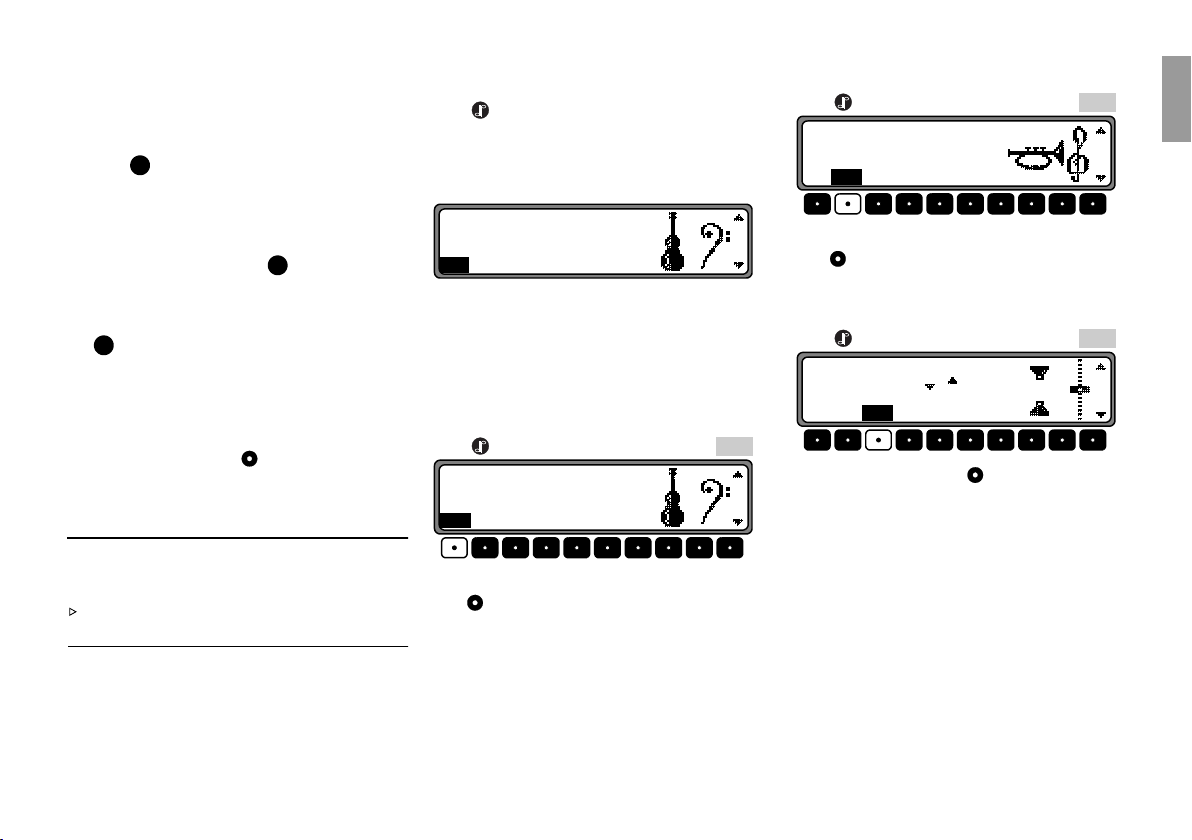
Press . This activates the tone menu.
The following parameters may be adjusted:
Bas
(Bass), Trb (Treble), Fad (Fader), Bal (Balance),
Flt (linear setting) Sub (Subwoofer) and Ldn
(Loudness).
FM Bass 0
BasTrb Fad Bal Flt Sub Ldn
Settings for the bass, treble, fader, balance and loudness are saved separately for wavebands AM, SW,
FM, for traffic reports, navigation messages, for telephone, CD and CDC use.
Adjusting the bass
Press followed by the multifunction key .
FM Bass 0
BasTrb Fad Bal Flt Sub Ldn
Bas
Set the desired bass level using the right control
knob .
Press followed by the multifunction key .
FM Treble 0
BasTrbFad Bal Flt Sub Ldn
Trb
Set the desired treble level using the right control
knob .
Fader
Press followed by the multifunction key .
FM Fader 0
BasTrb FadBal Flt Sub Ldn
Fad
Use the right control knob to set the desired fader
setting.
US english
3. General Operation 7
Page 9
Setting the balance
Switching loudness on / off
Press followed by the multifunction key .
US english
US english
FM Balance 0
BasTrb Fad Bal Flt Sub Ldn
Set the desired balance level using the right control
knob .
Linear setting
Briefly press .
FM Tone flat?
BasTrb Fad Bal FltSub Ldn
Press multifunction key briefly-
Flt
will appear. By pressing the multifunction key
again you can set the tone for the currently selected
signal source (e.g. FM) to an average value.
Bal
Tone flat
Flt
When Loudness is enabled, bass and treble frequencies will be boosted at low listening levels.
Press followed by the multifunction key .
FM Loudness ON
BasTrb Fad Bal Flt Su b Ldn
Use the multifunction key to select loudness On
ON) or loudness Off (OFF).
(
Ldn
Ldn
For wave bands AM and SW, Loudness is turned off.
Setting the subwoofer level
Press followed by the multifunction key .
FM Subwoofer 0
BasTrb Fad Bal Flt Sub Ldn
Sub
Use the right rotary control to set the desired subwoofer volume level.
Note
The subwoofer output is a full-range, non fading output
8 3. General Operation
Page 10

4. Using Navigation
What is navigation?
The term "navigation" (lat. navigare = to travel by
sea) is generally understood to mean the determination of a vehicle’s location, the determination of its direction and its distance from the desired destination
and the required route. Stars, prominent landmarks,
compasses and satellites etc. are used as navigation
tools.
TrafficPro uses a comparison of its sensor system
with the data of a digital map and the help of the GPS
(Global Positioning System) receiver to determine location. It determines the direction and distance from
the destination by means of a digital street map, a navigation computer and sensors. A speedometer and reverse signal are also used to calculate the route.
For safety reasons, route guidance is provided predominantly in spoken form , supported by a direction
indicator on the display.
Safety Instructions
- All traffic rules must be observed at all times.
- Observation of traffic signs and local traffic regulations must always take precedence over instructions given by TrafficPro.
- Traffic guidance is restricted to passenger vehicles.
Special driving recommendations and regulations
for other vehicles (e.g. commercial vehicles) are
not included.
- Destinations may only be entered when the vehicle
is stationary.
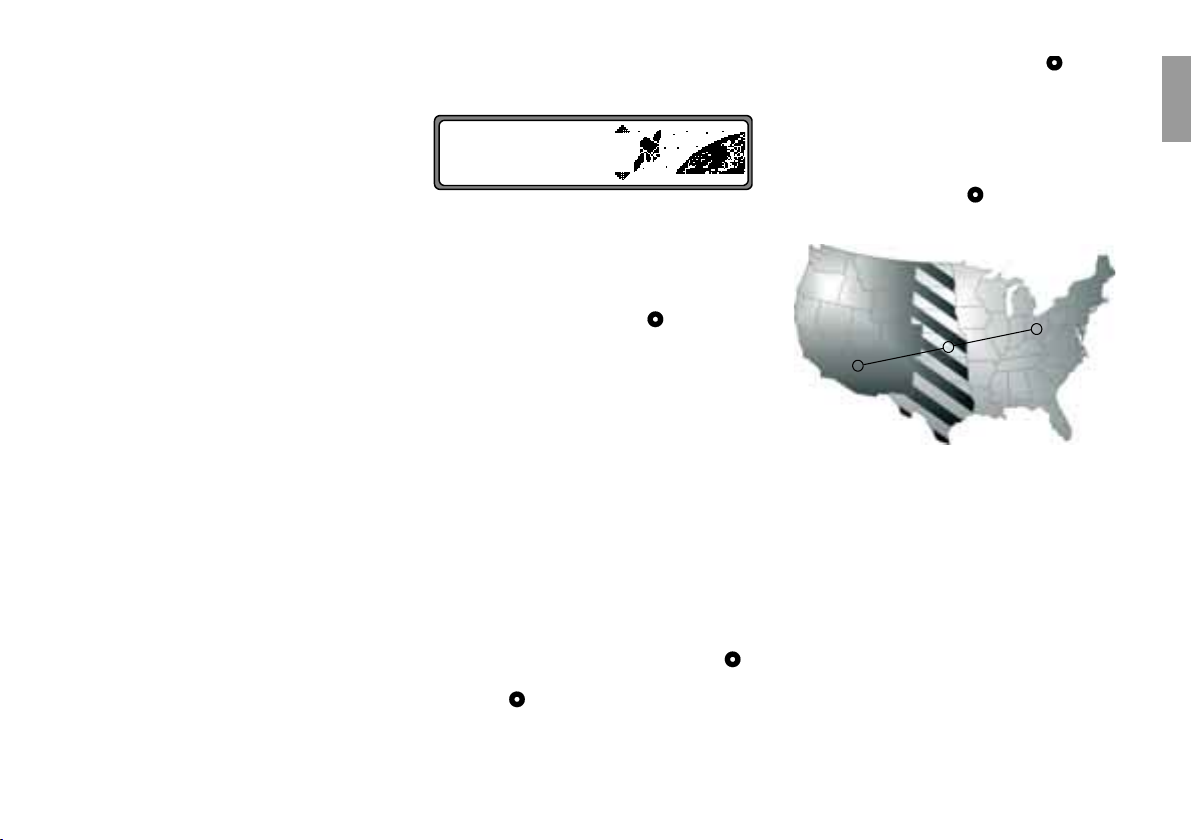
Navigation CD
Your TrafficPro is shipped with two navigation CDs.
One CD contains data for the western half of the USA
and the other contains data for the eastern half of the
USA.
The navigation CDs contain a digitized street map.
Highways, state and county roads, as well as local
streets are detailed in this street map. Larger cities and
communities are mapped in detail. For smaller towns
and communities, the regional and unclassified roads
or through-roads and the town centers are included.
One-way streets, pedestrian zones, no-turn intersections and other traffic regulations are taken into account as much as possible. There may be discrepancies between the data on the navigation CD and the
actual local situation, due to continuous changes to
road systems and traffic regulations.
US english
Data for North Dakota, South Dakota, Nebraska,
Kansas, Oklahoma, and Texas are contained on both
CDs (the striped area on the illustration).
4. Using Navigation 9
Page 11

4.1. General instructions
• Radio or CD operation continues in navigation
US english
US english
mode.
The distance to the next message and estimated
time of arrival are shown on the right side of the
display.
• When route guidance is active, press to enter
radio mode. Press to switch to CD mode.
The Navigation menu automatically displays when
navigation announcements are given.
• When entering the address, only those letters, digits and symbols needed to make a coherent address
are displayed.
The entries are automatically completed.
Spaces (e.g. as in New York) must be entered using
the underscore character (_).
Letters, numbers and symbols can be selected by
pressing the multifunction keys to . Select the individual symbols by pressing the appropriate multifunction keys repeatedly.
You can also use the right control knob for your
selection. This mode of selection will be used in
the remainder of this guide.
Nav
• quits the current menu and displays the previous menu.
• The system recalculates the route if a deviation is
made.
• Press the left control knob to hear the current
navigation announcement.
• During a navigation announcement, you can adjust
the volume with the left control knob and the
tone by pressing the key (see also page 9).
CD
1 9
Rad
• Briefly press the left control knob to request additional information during route guidance, or the
current position when route guidance is not active.
See “Information during route guidance” on
page 21.
• You can interrupt the current navigation announcement by pressing the left control knob .
• If you press and hold the left control knob for
more than 2 seconds during a navigation message,
the navigation audio messages are deactivated and
route guidance will only be shown on the display.
Briefly press the left control knob to reactivate
the navigation audio announcements.
• The scroll marks and indicate a selection list
through which you can scroll using the right control knob .
You can select the entry displayed in bold type by
pressing the right control knob .
4.2. Confirm Warning
Before you can use the navigation system, a warning
appears.
DO NOT PROGRAM WHILE DRIVING.
PRESS OK IF YOU UNDERSTAND
INSTRUCTIONS IN MANUAL
When you confirm the receipt of this warning you
state that you have read and understood the user guide
and that you are aware of the dangers associated with
the use of this navigational equipment.
Press the right control knob to confirm the selection.
4.3. Selecting Navigation
Nav
Press .
If necessary, confirm the warning as described above.
NAVIGATION IS BEING ACTIVATED!
PLEASE OBSERVE TRAFFIC LAWS
Next, the main navigation menu appears.
10 4. Using Navigation
Page 12
Note:
When starting navigation mode for the first time, you
must load the navigation CD.
If calibration of the navigation system is not yet completed, the system will prompt you to take a drive for
calibration (see Installation Guide).
Navigation mode requires the navigation CD containing the data for the destination.
When you enter a destination, the navigation CD is required. During route calculation, the prompt
CD will
flash on the display. Once calculation is completed,
the prompt
CD will disappear, you can remove the
navigation CD and insert an audio CD.
4.4. Main Navigation Menu
DEST. MEMORY
DESTINATION
P.O.I.
Select
DESTINATION,
DEST. MEMORY,
P.O.I.,
LAST DESTINATIONS,
by turning the right control knob , and confirm by
pressing the control knob.
DESTINATION
•
Accesses the destination entry menu.
See “Entering a Destination” on page 11.
DEST. MEMORY
•
Contains previously stored destinations.
See “Destination memory” on page 23.
P.O.I.
•
Menu for selecting regional and interregional destinations of special interest and local points of interest. Points of interest include gas stations, airports or hospitals, for example. See “P.O.I.” on
page 23.
LAST DESTINATIONS
•
A list of the last 50 destinations is displayed. Select
your destination with the right control knob . Before you confirm your selection with the right control knob , you may request destination informa-
tion by pressing the left control knob . Stopovers
are not saved as final destinations.
4.5. Entering a Destination
In the Main Navigation Menu, select DESTINATION
with the right control knob and press it to confirm.
The navigation data for the USA is stored on two CDs
(see page 9).
A
B
When you calculate a route from a place contained on
the USA West CD (A) to a destination stored on the
USA East CD (B), you need to enter a useful destination in one of the following states: North Dakota,
South Dakota, Nebraska, Kansas, Oklahoma or Texas. Once you have reached this intermediary destination, or once you reach one of the aforementioned
states, you may switch CDs and enter your final destination (C).
C
US english
4. Using Navigation 11
Page 13
Note:
If you switch navigation CDs you will see a display
similar to this:
US english
US english
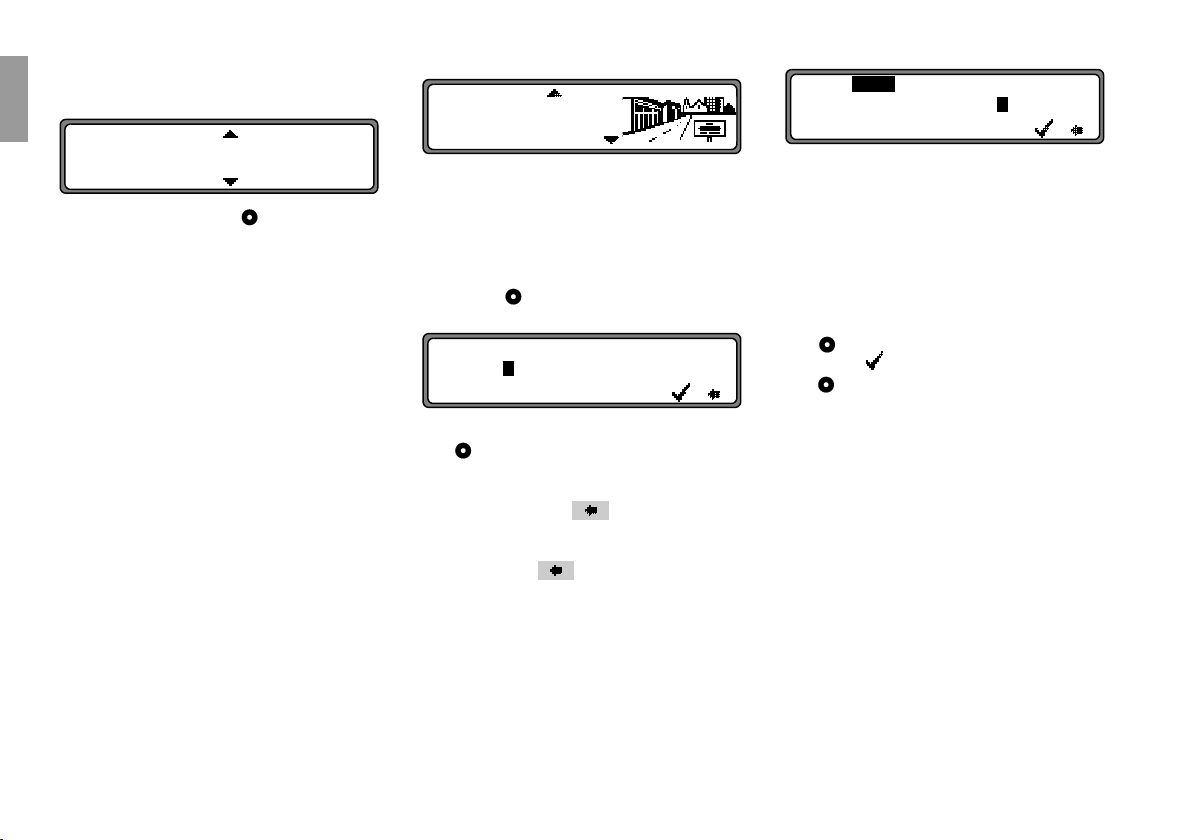
EXECUTE UPDATE
BACK
TPE0500
TPE0400
Using the right control knob , select
and press the control knob to confirm.
UPDATE
The system checks the radio and navigation software
and loads all data required for navigation.
The display shows a progress bar.
When switching CDs, the ignition should be on and
the vehicle should be stationary. After a short time the
system restarts the navigation software and you need
to confirm the warning message (see ”Confirm
Warning” on page 10).
EXECUTE
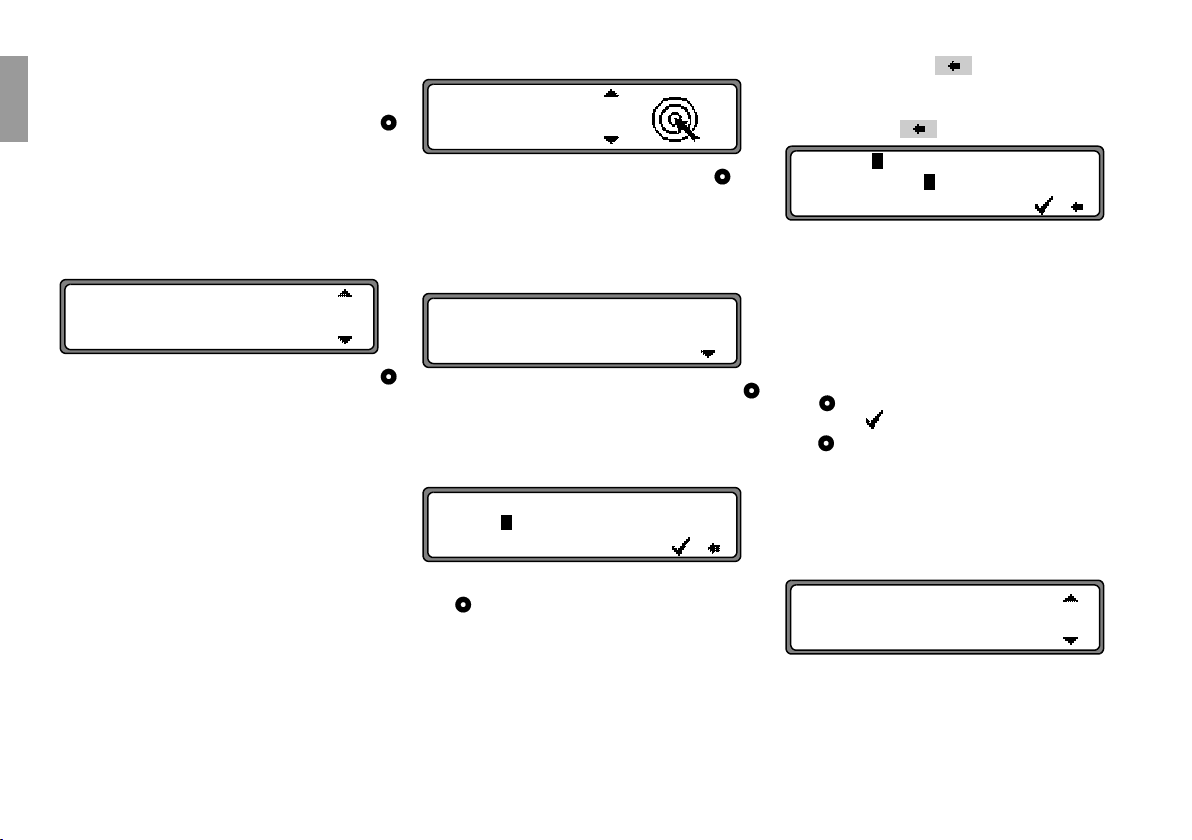
Entering the Destination
CENTER
UPPER SADDLE R
STREET
The name of the town of the last destination entered is
displayed.
If you wish to select a destination within the displayed
location, immediately select
CENTER.
STREET (Street) or
If your destination lies in another town, press the right
control knob to enter the name of the town where
the new destination is located.
TOWN:
ABCDEFGHIJKLMNOPQRSTUVWXYZ
...................
H
Select the letters one by one with right control
knob and press it to confirm. The selected letter
appears enlarged on the right side of the display.
Use multifunction key to delete the last confirmed letter.
If necessary, delete the complete entry by pressing
multifunction key for more than 2 seconds.
TOWN: BOSTIC
........I.....O.......W....
.......................
W
Entered letters are displayed inversely. To speed up
selection, the display shows the name of the location
most similar to the letters you have entered so far. Also, the unit offers only letters for your selection that
make sense in completing the location name. If all
other possibilities are eliminated, the unit completes
the place name automatically.
To accept the entry, press and hold the right control
knob for more than 2 seconds or select the small
check mark and briefly press the right control
knob .
If the complete place-name was previously entered or
was automatically completed, the program moves either to the place-differentiation list or to the entry of
road or center.
If the desired location offers no streets or only the
center for selection, the program switches directly to
the route menu.
12 4. Using Navigation
Page 14
If an incomplete location entry was confirmed, the location selection list appears.
BOSTIC
BOSTON
BOSTON HEIGHTS
The location name most similar to the entry appears
in bold type in the location selection list.
The scroll marks indicate that more places are available in an alphabetically sorted list.
Make your selection by turning the right control
knob and press the knob to confirm. (See “General
instructions” on page 10.)
If the entry is unique, the program switches to street
or center entry. If the desired city/town offers no
streets or only the center for selection, the program
switches directly to the route menu.
The location differentiation list is displayed if the selection is ambiguous.
IN INDIANA
IN MASSACHUSETTS
Select the required state name using the right control
knob and press it to confirm.
The program switches to street or center entry.
If the desired location offers no streets or only the
center for selection, the program switches directly to
the route menu.
Entering a street for the destination
Note:
Geographic designators (N, S, etc.) always follow the
street names (e.g. E. Carson St. will be displayed as
CARSON ST E).
STREET
CENTER
STREET with the right control knob and
Select
press the control to confirm.
STREET:
ABCDEFGHIJKLMNOPQRSTUVW..Z
.....123456789........
H
Select the letters one by one with right control
knob and press the control to confirm. The selected
letter appears enlarged at the right of the display.
Use multifunction key to delete the last confirmed letter.
If necessary, delete the complete entry by pressing
multifunction key for more than 2 seconds.
STREET: WASHBURN ST
.B......I.................
.....................
I
Entered letters are displayed inversely. To help, the
street name most similar to the entry so far is displayed. Also, the unit offers only letters for your selection that make sense in completing the location
name.
If no other entries are available, the unit completes the
street name.
To accept the entry, press and hold the right control
knob for more than 2 seconds or select the small
check mark and briefly press the right control
knob .
If the complete road-name was previously entered or
was automatically completed, the program switches
either to the road differentiation list or to the route
menu.
If an incomplete location entry was confirmed, the
street selection list is displayed.
WASHINGTON SQ
WASHINGTON ST
WASHINGTON ST N
The street name most similar to the entry appears in
bold type in the street selection list.
US english
4. Using Navigation 13
Page 15
The scroll marks indicate that more streets are available in an alphabetically sorted list.
Select the street by turning the right control knob
US english
US english
and press the control to confirm.
If the entry is unique, the program switches to the
route menu.
The street differentiation list appears if the selection
is ambiguous.
IN BRIGHTON
IN CHARLESTOWN
IN DORCHESTER
Select the desired street with the right control knob
and press it to confirm.
The program switches to the route menu.
Entering the Destination City/Town Center
CENTER
STREET
Select
CENTER with the right control knob and
press the control to confirm.
If the place you chose only has one center, the program switches immediately to the route menu.
If there are fewer than 10 centers, the center list is displayed.
ALLSTON
BOSTON
Select the center by turning the right control knob
and press the control to confirm.
If there are more than 9 centers, the program switches
to center entry.
CENTER:
ABCDE..H.J..MN...RS...W...
.....................
H
Select the letters one by one with right control
knob and press the control to confirm. The selected
letter appears enlarged at the right of the display.
Use multifunction key to delete the last confirmed letter.
If necessary, delete the complete entry by pressing
multifunction key for more than 2 seconds.
CENTER: BOSTON
..............O..R........
.....................
O
Entered letters are displayed inversely. For your help,
the system displays the center name most similar to
the entry so far. Also, the unit offers only letters for
your selection that make sense in completing the location name. If no other entries are available, the unit
completes the name of the center.
To accept the entry, press and hold the right control
knob for more than 2 seconds or select the small
check mark and briefly press the right control
knob .
If the complete center name was previously entered or
was automatically completed, the program will
switch to the route menu.
The program switches to the list of centers if your selection is ambiguous.
ALLSTON
BOSTON
BRIGHTON
14 4. Using Navigation
Page 16
The center name most similar to the entry appears in
bold type in the center list.
The scroll mark indicates that more centers are available in an alphabetically sorted list.
Select the center by turning the right control knob
and press the control to confirm.
The program moves to the route menu.
Note:
If you press the right control knob for longer than
2 seconds without previously entering a letter, the list
of the possible location centers will immediately appear.
4.6. Route Menu
SAVE DESTINATION
START-FAST R.
HOUSE NO.:
Select
SAVE DESTINATION,
START_FAST R., (START_SHORT R.)
HOUSE NO.:,
INTERSECTION
ROUTE SETTINGS
by turning the right control knob , and confirm by
pressing the control.
SAVE DESTINATION
•
accesses the input menu for the destination memory (Page 16).
START_FAST R. or START_SHORT R.
•
begins route guidance. Simultaneously, a prompt
appears indicating the currently selected route op-
_SHORT R. for a short route and _FAST
tion (
for a fast route).
R.
HOUSE NO.:
•
Here, you can enter the house number for the specified destination street.
This function is only available if the information is
stored on the navigation CD.
INTERSECTION
•
An intersecting street may also be defined as the
destination here.
This function is only available if the information is
stored on the navigation CD.
•
ROUTE SETTINGS
Select specifications such as fast route, short route,
freeway, ferries and toll roads here.
Entering street number for destination street
Select
HOUSE NO.: in the route menu with the right
control knob , and press the knob to confirm.
HOUSE NO.: (1 _ 99):
...........................
... 0123456789......
5
Using the right control knob , enter the street number for the destination street and press for more than
2 seconds to confirm the entry. To confirm, you may
also select the small check mark , then briefly
press the right control knob .
Due to system characteristics, route guidance is only
available into the specified street number range displayed in parentheses in the illustration above.
SAVE DESTINATION
START-FAST R.
ROUTE SETTINGS
START_ to start route guidance.
Select
Select
SAVE DESTINATION to jump to the destina-
tion memory menu.
US english
4. Using Navigation 15
Page 17
Select ROUTE SETTINGS to choose the route settings.
Choose by turning the right control knob and press
US english
US english
to confirm the selection.
Selecting intersection for destination street
If the house number is not available on the digitized
map, you may enter a nearby intersection for guidance.
In the route menu, use the right control knob to select
INTERSECTION, then press the control to con-
firm.
ARROW ST
CAMBRIDGE ST
Select the intersection for the destination street by
turning the right control knob and press the control
to confirm.
SAVE DESTINATION
START-FAST R.
ROUTE SETTINGS
START_ to start route guidance.
Select
Select
SAVE DESTINATION to jump to the destina-
tion memory menu.
ROUTE SETTINGS to change the route set-
Select
tings.
Choose by turning the right control knob and press
the knob to confirm the selection.
Selecting the route settings
Select
ROUTE SETTINGS in the route menu with
the right control knob , and press the knob to confirm.
SHORT ROUTE
FAST ROUTE
RESTRICTIONS
FAST ROUTE
•
If selected, the program calculates the shortest possible journey time.
SHORT ROUTE
•
If selected, the program calculates the shortest possible distance.
Note:
The setting “
SHORT ROUTE” is often recom-
mended for larger cities or metropolitan areas.
RESTRICTIONS
•
Provides options for avoiding highways, ferries or
toll roads.
HIGHWAY W WITH / WITHOUT
FERRIES WITH / WITHOUT
TOLL WITH / WITHOUT
Make your selection by turning the right control
knob, and change any settings by pressing the right
control knob .
Press the control for more than 2 seconds to accept
all settings and quit the menu.
Note:
It is possible that routes without the use of interstate highways may not be calculable. In this case,
you will receive a message.
Storing specified destination in destination memory
It is not absolutely necessary to store a destination in
the destination memory for route guidance. However,
it saves repeated manual entry if the destination is required again at a later date.
SAVE DESTINATION in the Route Entry
Select
menu and press the right control knob to confirm.
NAME:
ABCDEFGHIJKLMNOPQRSTUVWXYZ
! 0123456789,/() .
H
Any name of your choice consisting of up to 14 characters may be entered for the specified destination
and then automatically stored in the destination memory after pressing the right control knob for more
than 2 seconds. See “Destination memory” on
page 23.
To store, you may also select the small check
mark and briefly press the right control knob .
16 4. Using Navigation
Page 18
If you do not wish to enter a name of your choice,
press and hold the right control knob for more than
2 seconds to store the previously entered destination
in the destination memory.
The last destination entered can be filed at any position by turning the right control knob . The memory
position is confirmed by briefly pressing the right
control knob .
A total of 50 destinations can be saved.
NEW DESTINATION
START-FAST R.
ROUTE SETTINGS
For final storage in the destination memory, either
start route guidance or switch the program to new destination entry by selecting
NEW DESTINATION.
Deleting stored destinations
Select destination memory (see page 23).
AUNT MARY, WASHINGTO
COMPANY H, NEW YORK CITY, W
DEL
Select the destination to be deleted using the right
control knob and press .
DEL
Destination memory full
DEST. MEMORY FULL!
DELETE = OK
BACK = NAV
Occurs, when the destination memory is full.
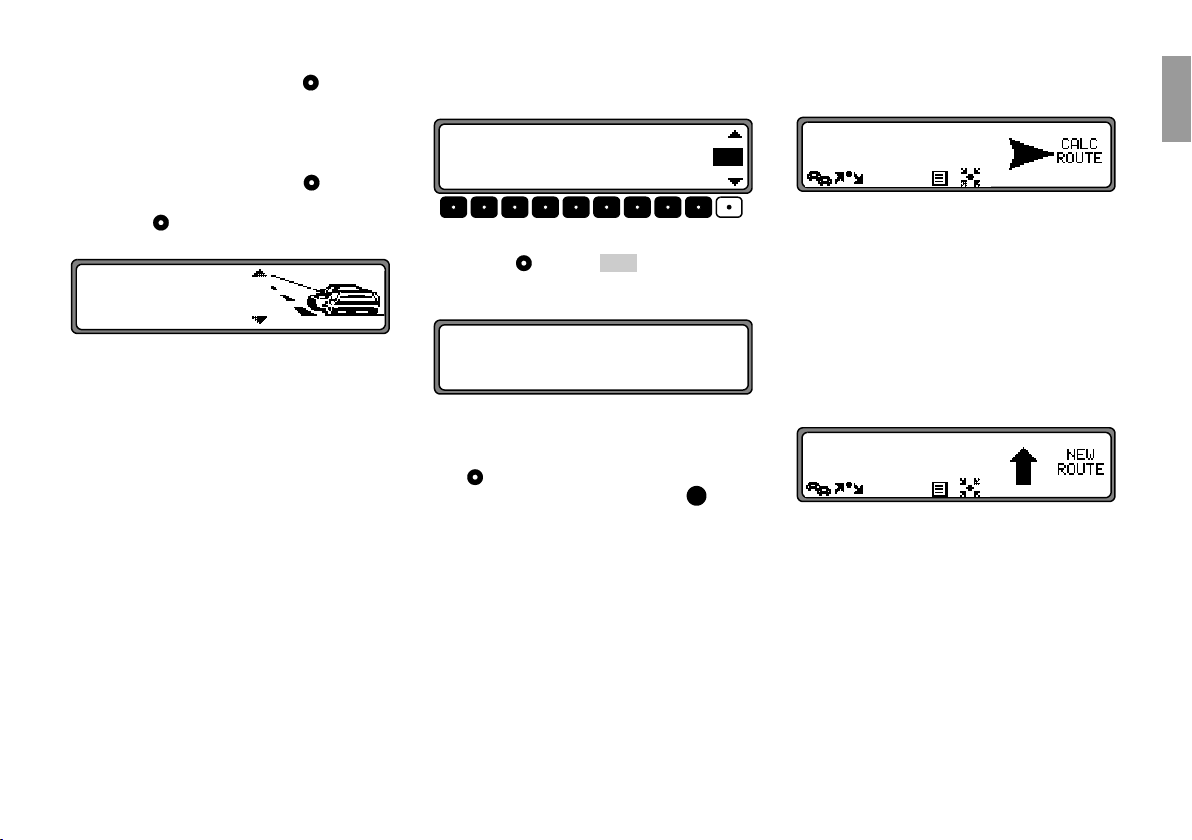
4.7. Route guidance calculation
+,
MAINSTREET
The message "Calculating route" indicates that the
distance is being calculated. This may take several
seconds.
After the first route guidance announcement, the
CD will continue to flash on the display until
prompt
the route is completely calculated. When a distant
destination is entered, it is recommended that you
wait until
Recalculating route.
CD has stopped flashing before departing.
US english
Select either
DELETE by pressing the right control
knob to jump to the destination memory to delete
a destination or
BACK by pressing the button to
Nav
cancel saving.
MAINSTREET
If
the current route is not followed due to road blocks,
detours, unintentionally driving in the wrong direction
or failing to observe the recommendations, the system
immediately calculates a new route. During this re-calculation, the display shows
NEW ROUTE
.
4. Using Navigation 17
Page 19

4.8. Stopover
If, on your way to your destination you must make a
US english
US english
stopover (e.g. find a gas station), this function will allow you to navigate to a stopover while route guidance is active.
Entering a stopover
MAINSTREET
Press multifunction key .
DESTINATION
P.O.I.
LAST DESTINATIONS
Using the right control knob , make a selection and
press the control to confirm.
DEST. MEMORY
•
(see page 23) Selecting a stopover from the destination memory.
DESTINATION
•
(see page 11) allows the entry of a stopover with
the precise specification of the address.
3.0
MI
10:23
•
P.O.I.
(see page 23) enables the selection of special destinations as stopovers via
DESTINATION
LOCAL AREA, NEARBY
and TOWN, e.g. gas stations or air-
ports.
LAST DESTINATIONS
•
Selecting a stopover from the “Last Destination”
memory.
Starting route guidance to stopover
START
To start route guidance to the stopover, press the right
control knob .
The route is calculated and route guidance begins.
Note:
During route guidance to a stopover, is displayed inversely.
Deleting a stopover
3.0
MAINSTREET
Press multifunction key .
DELETE STOPOVER?
BACK = NAV
To delete the stopover, press the right control knob
within 8 seconds.
Stopover reached
YOU HAVE REACHED YOUR STOPOVER
After the message
STOPOVER
YOU HAVE REACHED YOUR
, route guidance to the main destination
begins automatically.
After this message you need to insert the navigation
CD.
MI
10:23
18 4. Using Navigation
Page 20
4.9. Traffic jam
Cancel guidance around traffic jam
4.10. Canceling route guidance
This function allows you to block route sections
ahead from the nearest junction and to calculate a detour route when a traffic jam or road block is directly
ahead.
Entering length of traffic jam
3.0
MAINSTREET
Press multifunction key .
SECTION
TO BE AVOIDED
2.0 MI
Use the right control knob to select your estimate
of the length of the traffic jam and press the control to
confirm.
MI
10:23
3.0
MAINSTREET
The display shows inversely and the unit recalculates the route.
MI
10:23
MAINSTREET
Press multifunction key .
CANCEL TRAFFIC JAM?
BACK = NAV
To delete guidance around a traffic jam, press the
right control knob within 8 seconds.
MI
10:23
3.0
Nav
Press .
CANCEL
NAVIGATION = OK
BACK = NAV
Route guidance is canceled by pressing the right control knob within 8 seconds.
Otherwise, route guidance continues.
US english
4. Using Navigation 19
Page 21
4.11. Notes on route guidance
G Warning
• "Please follow the road."
After entering the destination (address), the system
US english
US english
calculates the route and announces:
"We may begin now“, if you are located on a road
contained on the digital map. If you are in a parking
lot, garage or another location not detailed on the
map, OFF ROAD will appear on the right side of the
display and route guidance will begin when you reach
the nearest road detailed on the digitized map.
You will receive navigation recommendations by
voice messages and screen displays.
Press the left control knob to have the current recommendation repeated.
If the route to be traveled is not clear, e.g. at an intersection where a change in direction is not specified,
the travel direction can be displayed by pressing the
right control knob .
MAINSTREET
Please follow the direction indicated by the arrow.
The display appears for 8 seconds after the right control knob is pressed.
Danger of accident
- Do not ignore traffic laws.
If a driving recommendation contradicts the applicable traffic laws, the laws will always take
precedence!
For clarification, the following contains some examples of possible driving recommendations:
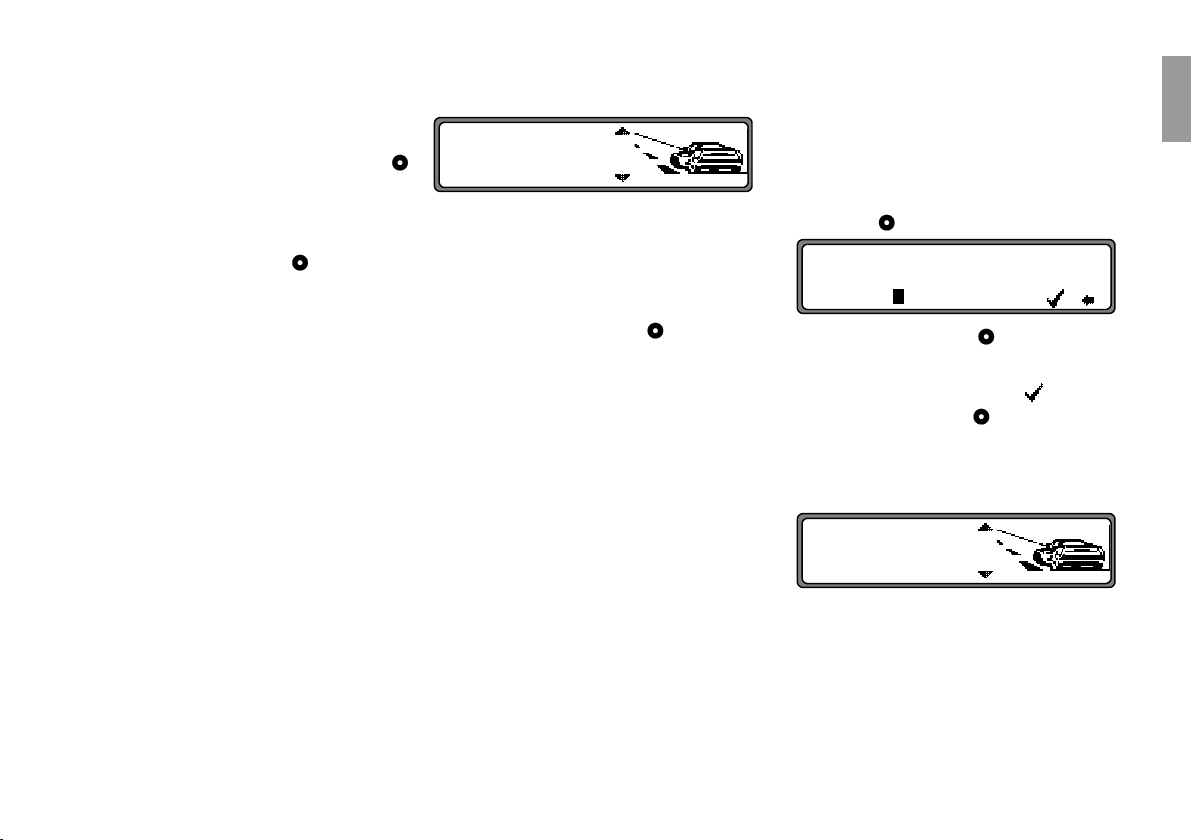
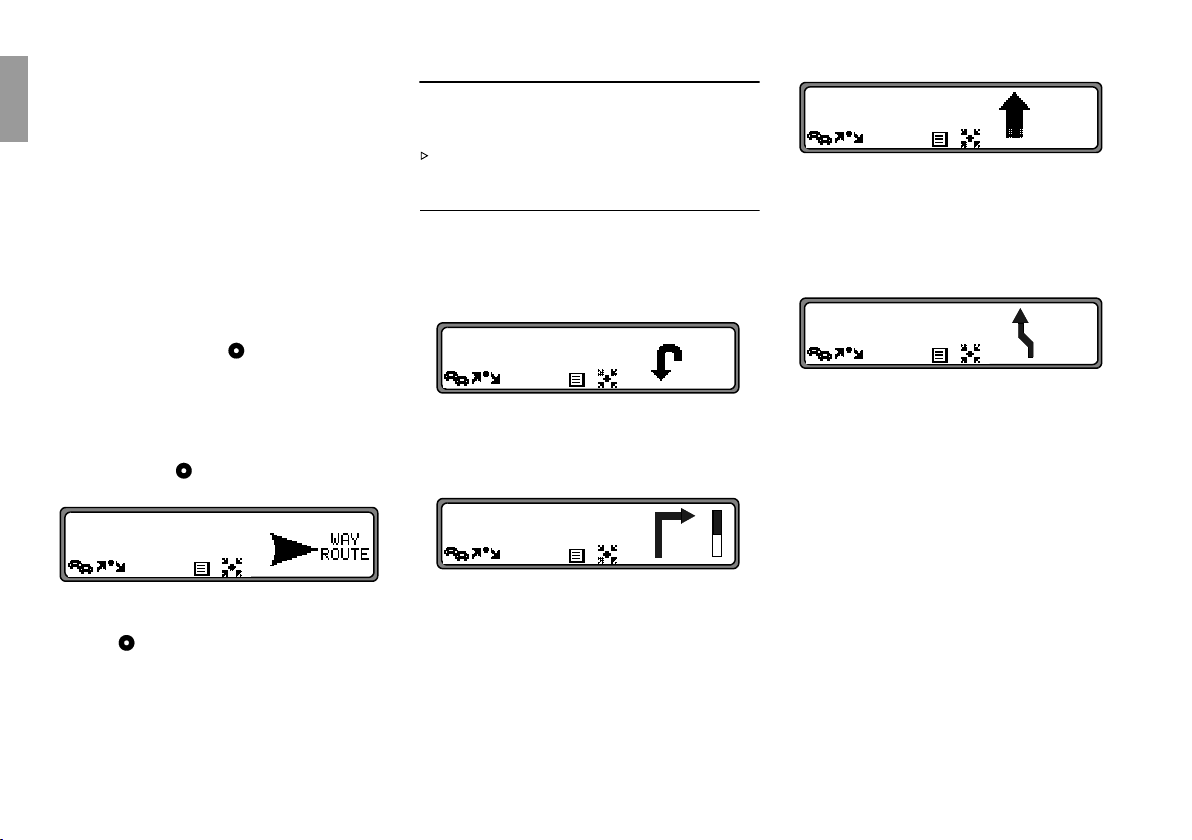
• "Please make a U-turn if possible."
MAINSTREET
M
MAINSTREET
You are driving in the wrong direction and should
turn around at the earliest opportunity.
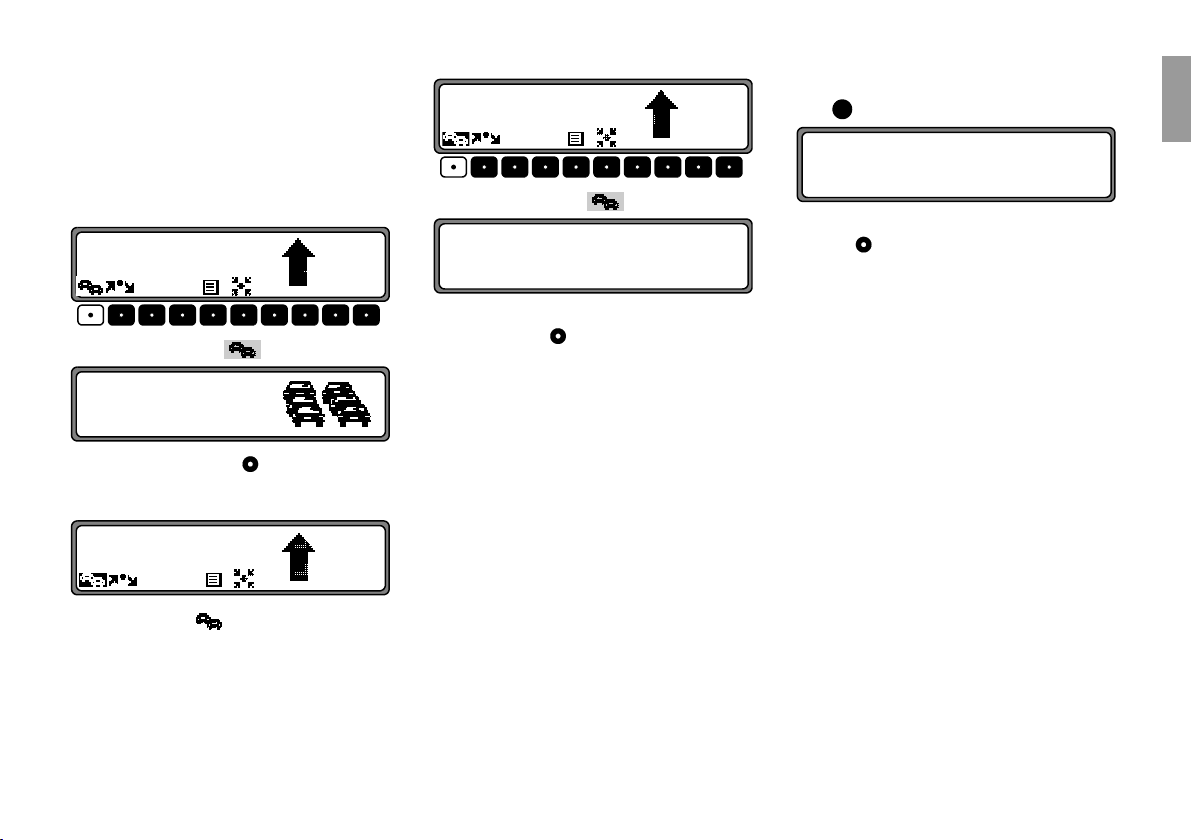
• "Please take a right in 300 yards."
STATION STREE
M
MAINSTREET
The arrow
you should turn.
The progress bar on the right shows the distance
and the black part decreases as you approach the
intersection.
points to the next street into which
M
4.0
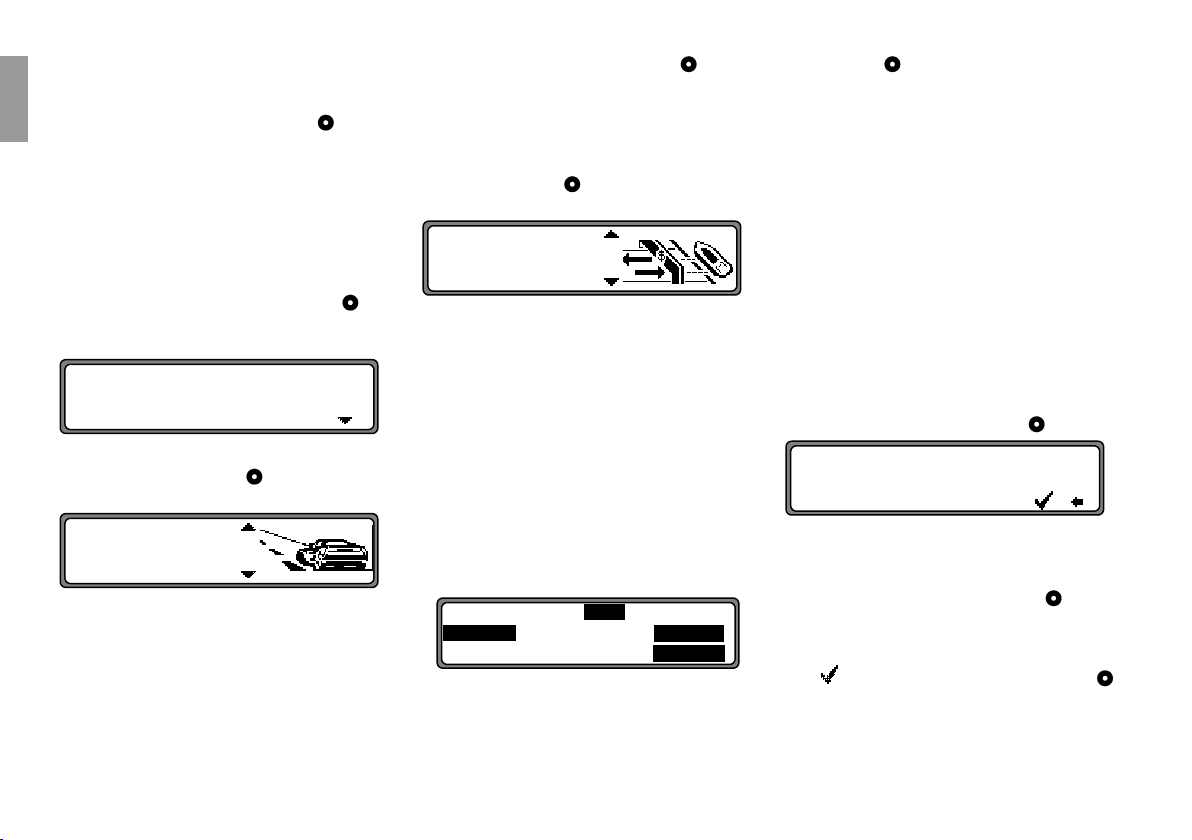
MAINSTREET
This display tells you that you should follow the
course of the road on which you are currently traveling.
• "Prepare to turn left" or
"Move into left-hand lane."
MI
10:23
2.0
MAINSTREET
This recommendation prepares you for the next
turn to be taken.
However, "move into the left-hand lane" does not
mean that you should compromise safety by doing
so immediately!
Note:
At intersections and roundabouts, only the ends of
the roads to be passed are displayed.
MI
10:23
20 4. Using Navigation
Page 22

• "Please leave the roundabout at the third exit on the
right."
MAINSTREET
This display shows you which exit (marked with
the arrow) you must take at the roundabout.
• "Now drive straight ahead."
MAINSTREET
At this point, you must drive straight ahead.
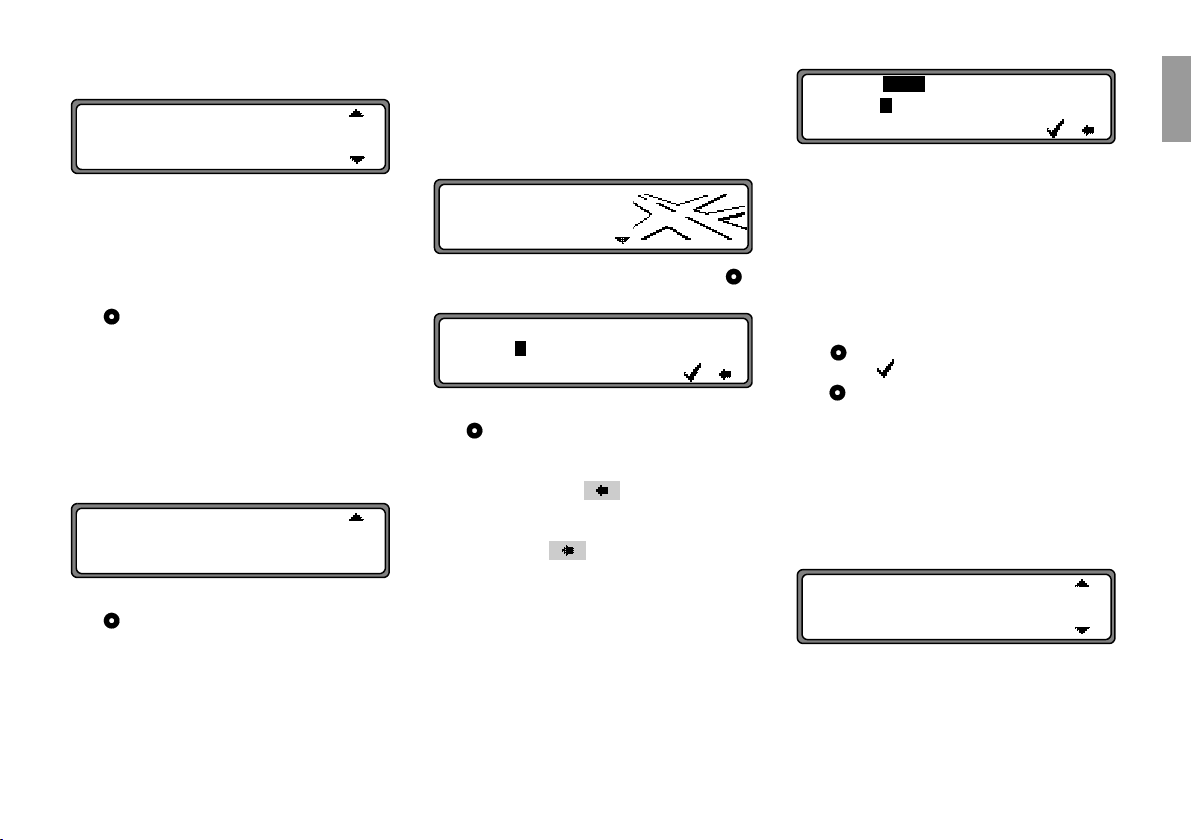
• "Please follow the arrows."
This display tells you that you are on a non-digitized street (e.g. parking lot, garage) that is not included in the digital street map. The arrow indicates the direction of the destination as the crow
flies.
• "Keep right after 2 Miles."
2.0
MAINSTREET
Keeping to the right means that the road will fork
and you should follow the indicated direction.
• "You have reached your destination."
MAINSTREET
The specified destination has been reached and
route guidance is terminated.
MI
10:23
4.12. Information during route guidance
WASHINGTON
CAPITOL ST E
Press the left control knob .
The destination, the distance and the estimated time
of arrival are displayed.
WASHINGTON
CAPITOL ST E
If a stopover was specified, the stopover, the distance
and the estimated time of arrival are displayed. The
main destination can be displayed with multifunction
key .
To return to route guidance, press the left control
knob again or wait for 8 seconds.
DISTANCE
500 MI
ETA 11:20
DISTANCE
500 MI
ETA 11:20
US english
4. Using Navigation 21
Page 23

Displaying route settings
WASHINGTON
CAPITOL ST E
US english
US english
DISTANCE
500 MI
ETA 11:20
During route guidance, press the left control knob .
Press multifunction key .
HIGHWAY: WITH
FERRY: WITHOUT
TOLL: WITH
MOD
ROUTE: FAST
The route settings are displayed.
After 8 seconds, the system returns to the route guidance display.
Requesting current time
WASHINGTON
CAPITOL ST E
DISTANCE
500 MI
ETA 11:20
During route guidance, press the left control knob .
Press multifunction key .
TIME 12:31
07/19/2001
Current time and current date are displayed. After 8
seconds, the system returns to the route guidance display.
Requesting trip duration and miles traveled
During route guidance, press the left control knob .
WASHINGTON
CAPITOL ST E
DISTANCE
500 MI
ETA 11:20
Press multifunction key .
DISTANCE COVERED: 20.5 MI
TIME DRIVEN UNTIL NOW: 20:34
AVERAGE SPEED: 60 Mph
The trip duration, miles traveled and the average
speed are displayed. Press the right control knob
Nav
or to return to the route guidance display.
The information for trip duration, miles traveled and
average speed can also be requested after your trip as
previously described, provided that the destination
flag waves once the destination is reached.
Requesting current position
During route guidance, the current position can be requested.
5.0
MAINSTREET
Press multifunction key .
NEW York
11TH ST NE
11:38.34N 54:49.14E
The current position with street name (if available),
degrees of longitude and latitude and the number of
satellites received are displayed.
Pressing the right control knob will return you to
the route guidance display.
Note:
The current position can be requested even when
route guidance is not active; just press the left control
knob .
KM
10:23
22 4. Using Navigation
Page 24

Requesting road list
4.13. Destination memory
4.14. P.O.I.
During route guidance, the planned route list can be
requested.
3.0
MAINSTREET
Press multifunction key .
E I-90
E US-14
POSITION
300 YD
The current road and the road names up to the destination are displayed. Scroll through the route list by
turning the right control knob .
Press the right control knob to return you to the
route guidance display.
Note:
After entering the destination, it will take a short time
(depending the distance from the destination) until the
route list is compiled.
If the vehicle is "off road" at the moment of destination entry, the route list cannot be created until a
stored road is reached.
MI
10:23
In the Main Navigation Menu, select DEST. MEM
ORY
with the right control knob and press the con-
trol to confirm.
LAST DESTINATIONS
DEST. MEMORY
DESTINATION
The destination memory contains personally saved
destinations.
Once saved, there is no need to manually enter the
destination.
AUNT MARY, WASHINGTO
COMPANY H, NEW YORK CITY, W
DEL
Select the destination using the right control knob
and press the knob to confirm.
Then start route guidance.
Menu for selecting points of interest from a predetermined list. Points of interest include gas stations, airports or hospitals, for example.
DESTINATION
P.O.I.
LAST DESTINATIONS
Using the right control knob , select
P.O.I. in the
main Navigation menu or in the stopover selection
menu and press the control to confirm.
LOCAL AREA
NEARBY DESTINAT
TOWN
Use the right control knob to make a selection and
confirm.
• Points of interest
DESTINATION
LOCAL AREA / NERRBY
You can select points of interest within the current
surroundings of the vehicle or points of interest
near the destination.
AIRPORT
CAR DEALERSHIP
US english
4. Using Navigation 23
Page 25

Use the right control knob to select a category
and press the control to confirm.
US english
US english
PROVIDENCE HOS
CHILDREN"S NATION
A maximum of 20 destinations is listed according
to proximity. The mileage indication relates to the
direct distance (as the crow flies) between the point
of interest and the current location.
The arrows following the distance information indicate the distance as the crow flies to the respective point of interest (e.g. point of interest lies in
the direction of travel, point of interest lies opposite the direction of travel). When traveling on a
limited-access highway, it is best to choose a POI
located in the direction of travel.
Select the desired destination with the right control
knob .
Pressing the left control knob to list information
about the selected destination (e.g. a hospital).
PROVIDENCE HOSPITAL
WASHINGTON,20017, 4500 12TH ST
TEL.: <202>XXX_XXXXXXX
Confirm the selection with the right control
knob . The system jumps to the route menu.
1.2 MI
1.3 MI
Note:
If you select category
RESTAURANT, another
menu appears.
BY NAME
BY FOOD TYPE
If you select
BY NAME, all available restaurants
will be displayed in a list. If there are more than 9
items in the list, you will be prompted to enter text.
RESTAURANT:
ABCDEFGHIJKLMNOP.RSTUVW...
.....12.45............
H
Enter the restaurant and confirm. Confirm the point
of interest in the list by pressing the right control
knob .
BY FOOD TYPE to display a list with the
Select
different ethnic foods (i.e. Chinese).
AFRICAN
AMERICAN
Select the desired category with the right control
knob .
The display shows only the restaurants belonging
to this category.
• Points of interest
TOWN
You may select any point of interest in the locations contained on the navigation CD.
TOWN:
ABCDEFGHIJKLMNOPQRSTUVW.YZ
......................
Use the right control knob to select the town
name and press the control to confirm.
Then select the town from the town selection list
with the right control knob and press again to
confirm.
AIRPORT
BANK
The points of interest for the selected town are displayed.
Use the right control knob to select a category
and press the control to confirm.
A list with points of interest is displayed or, if the
list contains more than 9 entries, you will be
prompted to enter text.
HIGHWAY EXIT:
ABCDEFGHIJKLMNOP.RSTUVW...
.....12.45............
H
Enter the point of interest and confirm. Confirm the
point of interest in the list by pressing the right control knob .
H
24 4. Using Navigation
Page 26
The system jumps to the route menu.
Note:
A list of possible points of interest displays immediately when you press the right control knob
for more than 2 seconds without having selected
any letters.
• Point of interest
NATIONWIDE
Definite special point of interest categories are
shown and may be selected.
AIRPORT
AMUSEMENT PARK
Use the right control knob to select a category
and press the control to confirm.
A list with points of interest is displayed or, if the
list contains more than 9 entries, you will be
prompted to enter text.
AIRPORT:
ABCDEFGHIJKLMNOPQRSTUVW.Y.
......................
Enter the point of interest and confirm. Confirm the
point of interest in the list by pressing the right control knob .
Note:
4.15. System settings
A list of possible points of interest displays immediately when you press the right control knob
for more than 2 seconds without having selected
any letters.
Press, in the Main Navigation Menu, .
The system settings menu is called up.
TIME
Nav
US english
SAVE POSITION
*LANGUAGE
Select
TIME,
SAVE POSITION,
*LANGUAGE,
ANIMATION,
MEASURING UNIT,
ANNOUNCEMENT ETA
by turning the right control knob , and confirm by
pressing the control.
•
TIME
The system’s internal clock can be set to the local
time.
SAVE POSITION
•
H
The current position can be saved and saved in the
destination memory.
*LANGUAGE
•
Language setting for the navigation system.
ANIMATION
•
The Animation display can be turned on or off.
The system jumps to the route menu.
4. Using Navigation 25
Page 27
• MEASURING UNIT
The unit display can be set from meters to yards.
ANNOUNCEMENT ETA
•
Announcement of the estimated time of arrival can
US english
US english
be turned on or off.
Setting time
In order to achieve correct navigation on routes with
time-sensitive guidance and to calculate the estimated
time of arrival, it is necessary to set the GMT time
transmitted from satellites to the current time zone.
ANNOUNCEMENT ETA
TIME
SAVE POSITION
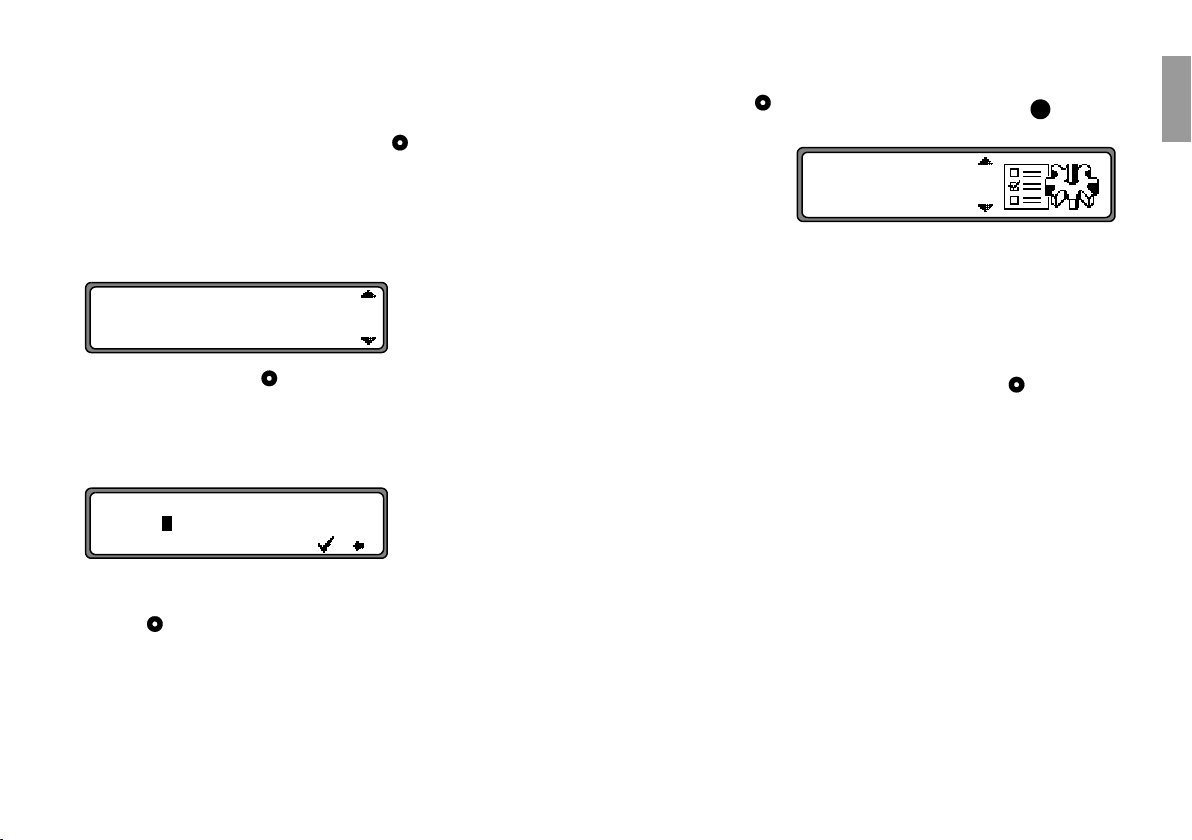
Set and confirm
TIME in the System Settings menu.
TIME: 11:30
07/19/2001
24H + .!PL
Use the multifunction key to change the time
24H
display from the 24-hour to the 12-hour display.
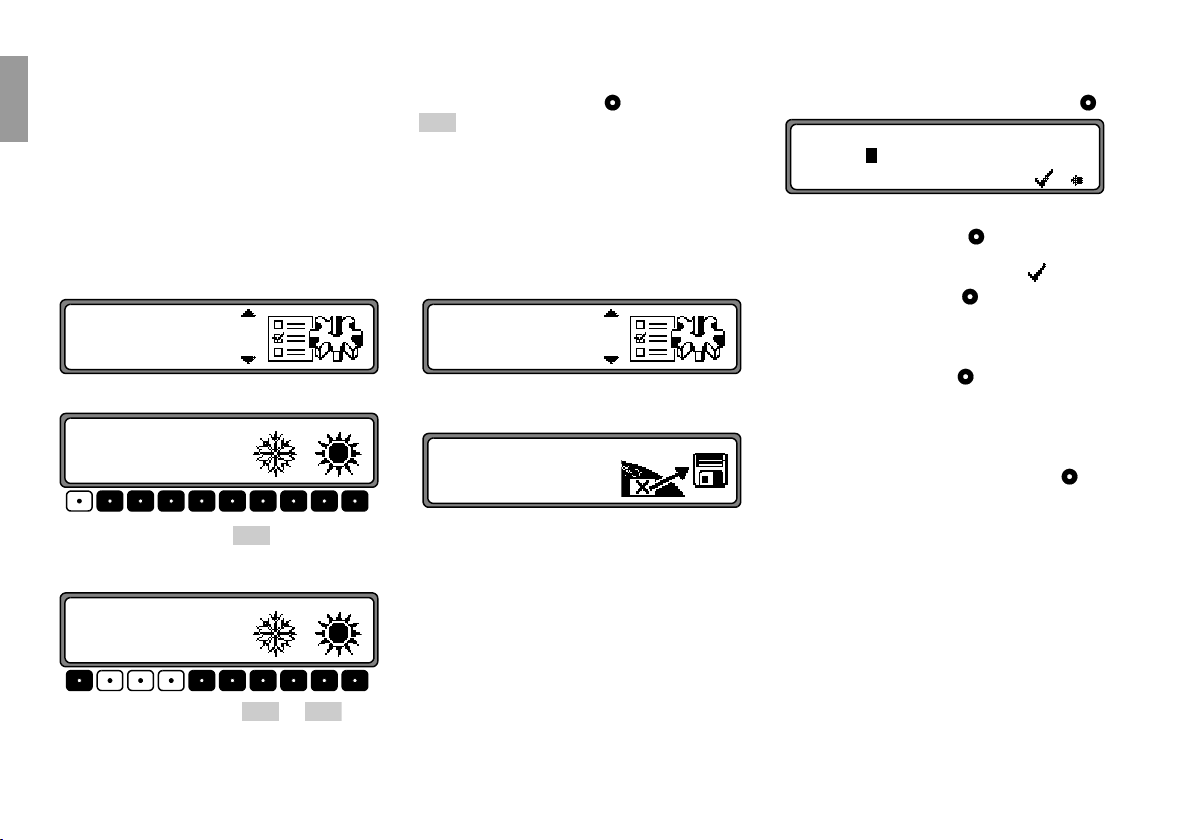
TIME: 11:30
07/19/2001
24H + .!PL
time is changed in half-hour intervals.
Press the right control knob or multifunction key
to apply the time setting.
OK
The program jumps back to the System Settings
menu.
Note:
The calculated time of arrival is based on the time
zone where the trip originated
Storing location
TIME
SAVE POSITION
*LANGUAGE
Set and confirm SAVE POSITION in the System
Settings menu.
11:38.34E 54:49.14N
POSITION
SAVE
The display shows the current coordinates (degrees of
longitude and latitude) for the position.
Re-confirm by pressing the right control knob .
NAME:
ABCDEFGHIJKLMNOPQRSTUVWXYZ
! 0123456789,/() .
H
Enter the name of the position.
Press the right control knob for more than 2 seconds to confirm the name entered. To confirm, you
may also mark the small check mark and briefly
press the right control knob .
The destination memory is automatically requested
(see page 23).
Select the desired position in the destination memory
with the right control knob and press to confirm.
Requesting location
Request destination memory (see page 23) and select
the destination using the right control knob .
If the position is outside a digitized area, the driver is
guided along the digitized route nearest to the destination. You will hear the announcement "Your destination is nearby." Follow the direction arrows to reach
the destination.
Use the multifunction keys or and the
+ -
26 4. Using Navigation
Page 28

Setting the language
SAVE POSITION
*LANGUAGE
ANIMATION
Set and confirm
*LANGUAGE in the System Settings
menu.
DEUTSCH
ENGLISH GB
Select the language with the right control knob .
The language selection is applied when the control is
pressed, and the language is installed.
You can choose a male or a female voice for certain
languages.
Note:
In every language, menu entry
ceded by an asterisk (
*LANGUAGE is pre-
*). This way you can always
recognize which entry in the System Settings menu
means language. This may be of use if, e. g. an unknown language was set.
Animations
*LANGUAGE
ANIMATION
MEASURING UNIT
Set and confirm
ANIMATION in the System Settings
menu.
ANIMATION ON / OFF
Switching announcement of the estimated time of
arrival on /off
MEASURING UNIT
ANNOUNCEMENT E
TIME
Set and confirm
ANNOUNCEMENT ETA in the Sys-
tem Settings menu.
ETA stands for Estimated Time of Arrival.
ANNOUNCEMENT ETA ON / OFF
You can select between ETA announcement
OFF by briefly pressing the right control knob .
ON and
Press and hold the right control knob to apply the
setting.
US english
FEMALE 1
MALE 1
Select the voice with the right control knob . The
voice is applied and installed by pressing the control.
The system returns to the system settings menu after
installation is confirmed.
You can select between animations
ON and OFF by
briefly pressing the right control knob .
Press and hold the right control knob to accept the
setting.
The system returns to the system settings menu.
The system returns to the system settings menu.
4. Using Navigation 27
Page 29
Selecting the units
ANIMATION
MEASURING UNIT
US english
US english
ANNOUNCEMENT ETA
Set and confirm
MEASURING UNIT in the System
Settings menu.
IMPERIAL
METRIC
Select the units using the right control knob .
The units are applied by pressing the control.
The system returns to the system settings menu.
Note:
METRIC is for calculation in meters and kilometers.
IMPERIAL is for calculation in yards and miles.
28 4. Using Navigation
Page 30
5. Radio Mode
5.3. Selecting the FM waveband
5.5. Setting options for station selection
Note:
If you live in an area where RDS/RBDS broadcast is
unavailable, you may enable FM and AM manual tuning which will display radio frequencies rather than
station type and call letters according to the procedures titled “Manual FM tuning” on page 31 and
“Manual AM tuning” on page 32.
5.1. Switching to radio mode
Rad
Press .
The last selected waveband is recalled.
5.2. Switch on radio menu mode.
Once you are in radio mode, press again to access
the menu.
FM DAS Seek Name
Fm Am Pty Dis RegTxt
The radio menu mode is activated and displayed. The
unit switches back to radio mode if no key is pressed
within the next 8 seconds.
Rad
In radio menu mode, press .
Fm
FM DAS Seek Name
Fm Am Pty Dis RegTxt
The last selected station and tuning mode are displayed.
By pressing repeatedly, you can choose between the
following tuner modes:
DAS Seek Qual. (see page 45)
•
DAS Seek Name (see page 45)
•
•
Stations RDS (see page 45)
•
Stations Fix (see page 45)
5.4. Selecting the AM waveband
In radio menu mode, press .
AM
Fm Am As Man
The last station received is selected.
Am
The desired station can be selected via dynamic autostore (FM), autostore (AM), station search, scan
search, manual tuning, and preset keys.
Dynamic auto store (FM-DAS)
In radio menu mode, press repeatedly, until
DAS Seek Qual. or DAS Seek Name is dis-
Fm
played.
FM DAS Seek Qual.
Fm Am Pty Dis RegTxt
FM DAS mode, abbreviated names for the receiv-
In
able stations are displayed above the multifunction
keys depending on the settings. In the
mode, stations are arranged in descending sig-
Qual.
nal strength order; in
DAS Seek Name mode, they
DAS Seek
are arranged alphabetically
RADIO99 99.9
Bbc Ww1 Kbw Klc Usm Kbb _>
138
KM
10:23
Set the desired station by pressing the key directly below the station designation.
US english
5. Radio Mode 29
Page 31
BBC3 101.3
US english
US english
1 3 Bbc Klc <_
Multifunction key indicates that the key can be
->
pressed to display and select additional stations.
If station names are being misused to transmit advertising or messages, this station is indicated with
L_1... L_Z (L = Local) instead of the abbreviated sta-
tion name. This prevents constant switching in the
lower display line. When a station is selected, it is
identified by a star (i.e.
L*1).
The first time the unit is operated, or when power supply was interrupted it may take the radio some time to
evaluate the station signals. The display will appear
incrementally as the evaluation progresses.
138
KM
10:23
Station search FM - DAS
Turn the right control knob left or right. The radio
displays the receivable and identified stations in descending/ascending order.
AM transmitter search
Turn the right control knob to the left/right in desired waveband. The radio searches for reception frequencies in descending or ascending order, respectively, of frequency.
Scan search
On the desired waveband (
control knob ,
SC will be displayed.
RADIO99 99.9 SC
Bbc Ww1 Kbw Klc Usm Kbb <_
FM, AM) press the right
138
KM
10:23
An automatic station search begins. The first run is
performed on an insensitive level, stopping only at
strong stations; all further runs at more sensitive level
capturing weaker stations to fill any remaining preset
locations. Receivable stations can be heard for 8 seconds. Press the right control knob to stop the
search at a certain station.
Program type selection (PTY)
In radio menu mode, press .
Pty
PTY: Affairs
Fm Am PtyDis Reg Txt
Then, using multifunction key select the de-
Pty
sired PTY (see page 45).
Note:
Only the currently available PTYs may be selected.
If a PTY is selected in
FM DAS mode, only the sta-
tions with this particular PTY can be selected.
If you select
NO PTY in FM-DAS mode, all stations
will once again be displayed.
30 5. Radio Mode
Note:
FM DAS, Scan Search is conducted in alphabet-
With
ical order.
Page 32
Switching PTY display on / off
Select radio menu mode.
Disp. PTY
Fm Am PtyDis RegTxt
To access memory locations 7 - 12, press multifunction key .
Recall: Momentarily press multifunction key -
->
or - . The stored station is recalled.
6 7 12
1
Recalling/Storing AM station
AM autostore
In the desired waveband, press .
Rad
AM Autostore on
Fm Am As
Man
US english
Use multifunction key to select either
Dis
PTY
(PTY display on) or Frequency (PTY display off).
Recalling/storing FM stations
In radio menu mode, use multifunction key to
select the
Stations RDS or Stations Fix
Fm
mode.
•
Stations RDS (see page 45)
Stations Fix (see page 45)
•
Storing: 12 frequencies or programs can be stored per
waveband.
In order to store the desired station or program, tune
to the station then press and hold multifunction key
- or - until you hear a signal
1 6 7 12
tone.
FM1 101.6
1 2 34 5 6_>
138
KM
10:23
To store: Up to 12 stations can be stored on the station keys. Tune the desired station and press and hold
the multifunction key until you hear a signal tone.
To access memory locations 7 - 12, press multifunction key .
Recall: Momentarily press multifunction key -
->
AM 980 kHz
1 2 34 56_>
or - . The stored station is recalled.
6 7 12
138
KM
10:23
1
Press multifunction key repeatedly until
tostore on
appears.
Press multifunction key until
tostore
appears.
As
As
Au
Seek Au
The 6 stations with the strongest signal will be stored
on the station keys in the order of their signal quality.
In order to quit the autostore function, use multifunction key to turn off the autostore function
(
As
Autostore off). The radio returns to the station
preset mode.
Manual FM tuning
In radio menu mode, use multifunction button
to select the
Stations Fix mode.
Fm
FM Stations Fix
Fm Am Man
Press multifunction key twice.
Man
Next, turn the right control knob .
5. Radio Mode 31
Page 33

Tuning will be in increments of 100 kHz.
The display will show that manual tuning is currently
active with
US english
US english
turned within a short time,
MAN. If the right control knob is not
MAN will disappear from
the display and manual tuning is turned off.
Manual AM tuning
In the AM waveband, press .
Rad
AM
Fm Am ManAs
Press multifunction key twice.
Man
Then turn the right control knob .
Tuning will be in increments of 9 kHz.
The display will show that manual tuning is currently
active with
turned within a short time,
MAN. If the right control knob is not
MAN will disappear from
the display and manual tuning is turned off.
5.6. Regionalization
The RBDS/RDS diversity function is independent of
region. Under these conditions, the RBDS/RDS diversity function may switch among various regional
programs with different broadcast contents. If this
should be the case, directly select the special regional
sub-program.
If several regional programs are transmitted by one
station, this can only be realized when the station is
selected.
Stations with additional regional programs are indicated with a star (i.e.
BBC3 101.3
1 2 3* 4* Bbc Klc <_
Upon selection of one of these stations (e.g.
receivable regional sub-programs for this station will
be displayed.
Then select the desired regional sub-program
(e.g. ).
Ka
Select
KaOg
4*).
BBC3
138
KM
10:23
4*), all
138
KM
10:23
If, despite the RBDS/RDS diversity function, the reception of a regional sub-program is inferior, bear in
mind that regional sub-programs are transmitted for
the most part over only a few frequencies. Therefore,
the unit has fewer frequencies with stronger signals to
switch to.
Switching regionalization on/off
Select radio menu mode.
Reg: on
Fm Am Pty Dis RegTxt
Use multifunction key to turn regionalization
ON) or off (OFF).
on (
Reg
Switching frequency display on / off
Select radio menu mode.
Disp. Frequency
Fm Am PtyDis RegTxt
Use multifunction key to select
Dis
Frequency
(Frequency display on) or PTY (Frequency display
off).
32 5. Radio Mode
Page 34
5.7. Switching radio text display on / off
Select FM radio menu mode. Use multifunction key
to switch on radio text.
Txt
Radio text is displayed.
Radio text is displayed.
Fm Am Pty Dis RegTxt
As
The car radio filters information from the data transmitted by the station and displays as radio text.
Radio text cannot be displayed unless the selected station transmits radio text.
Unfavorable reception conditions, including interference, can garble or even block a radio text display.
In order to quit the radio text mode, press .
Rad
G Warning
Danger of accident
- Do not read Radio text while driving.
Please read the radio text only when the vehicle
is stationary.
As the radio text contents change constantly and
may distract the driver, radio text should only be
read when the vehicle is not in motion.
5.8. Traffic Program (TP)
If an RBDS/RDS diversity station transmits TP announcements, it is possible to have CD, CDC, and
AM operation interrupted so that the transmitted TP
announcements can be played. Moreover, you can listen to one FM station while receiving TP announcements transmitted by another FM station.
There are two ways to select a TP transmitter:
- automatic tracking
- direct programming
Automatic tracking always uses the current FM sta-
tion as TP-transmitter. If the selected FM station has
poor signal quality or cannot function as a TP transmitter, the unit applies specified criteria to search for
a new TP transmitter.
Direct programming makes it possible to have a TP
transmitter different from the current FM station. For
example, one FM station and TP announcements
transmitted by another FM station can be received simultaneously.
If reception from the programmed TP transmitter is
poor, the unit switches to automatic tracking until the
programmed TP transmitter is receivable.
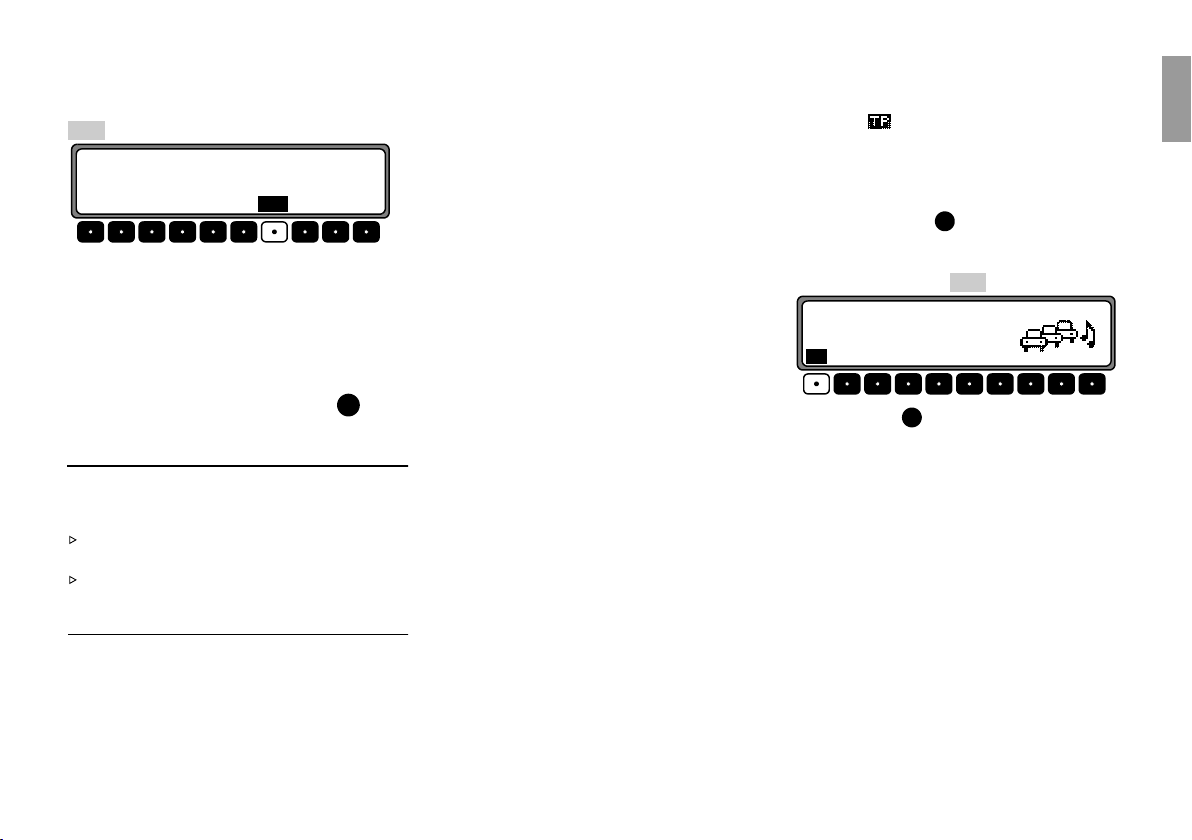
If an RBDS/RDS station is equipped with traffic programming, this is indicated by
TP in the display.
An inverse appears on the display to indicate that
the TP is active.
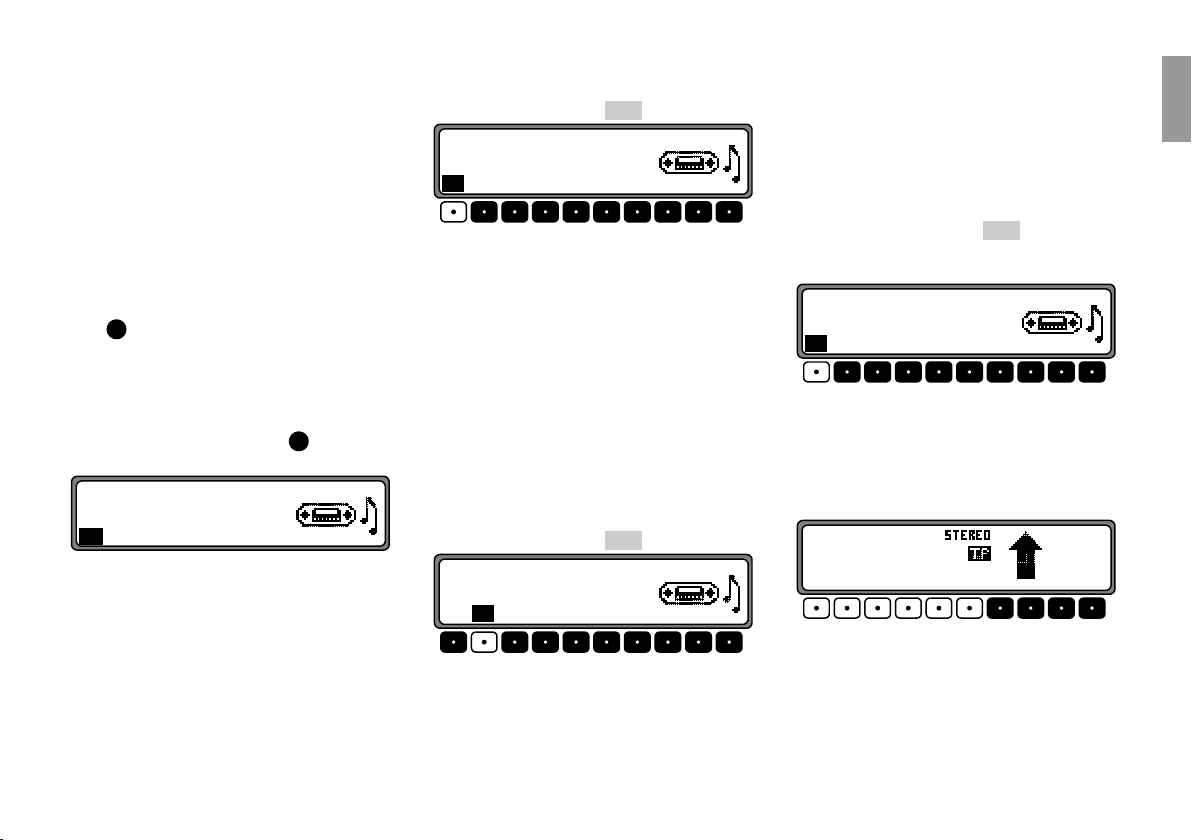
Activating/Quitting the TP Menu
Activating: Press the key (not during a traffic an-
TP
nouncement).
Press multifunction key .
Tp
TP on
Tp Sta Vol
Quitting: Press , otherwise the TP menu will be
TP
automatically be terminated after 8 seconds without
actuation.
US english
5. Radio Mode 33
Page 35
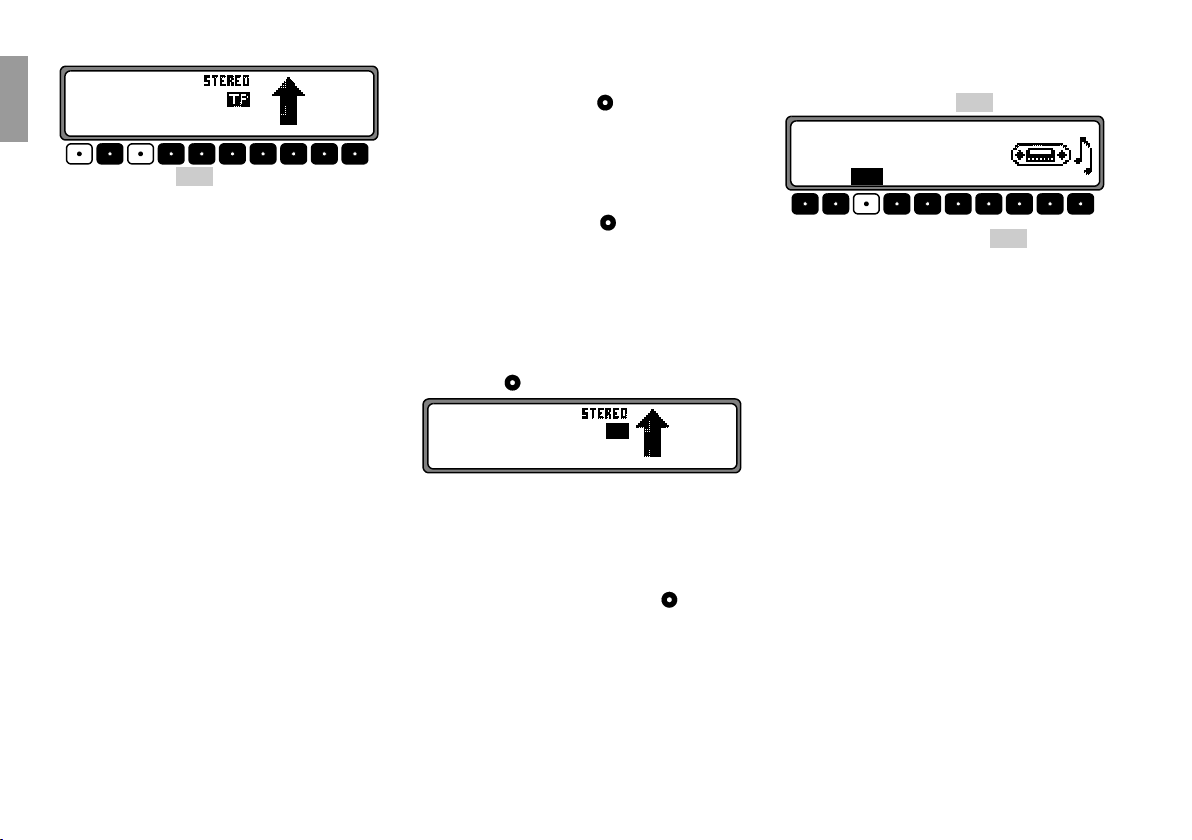
Setting automatic tracking
Deleting: Press multifunction key .
Sta
Switching Mute on/off
In all modes and wavebands, automatic tracking can
be activated by pressing for more than
US english
US english
2 seconds.
TP
To activate automatic tracking in the TP menu, press
multifunction key repeatedly until
Tp
pears.
TP on
Tp Sta Vol
Note:
If a TP transmitter was already programmed directly,
it will once again be selected as the TP transmitter.
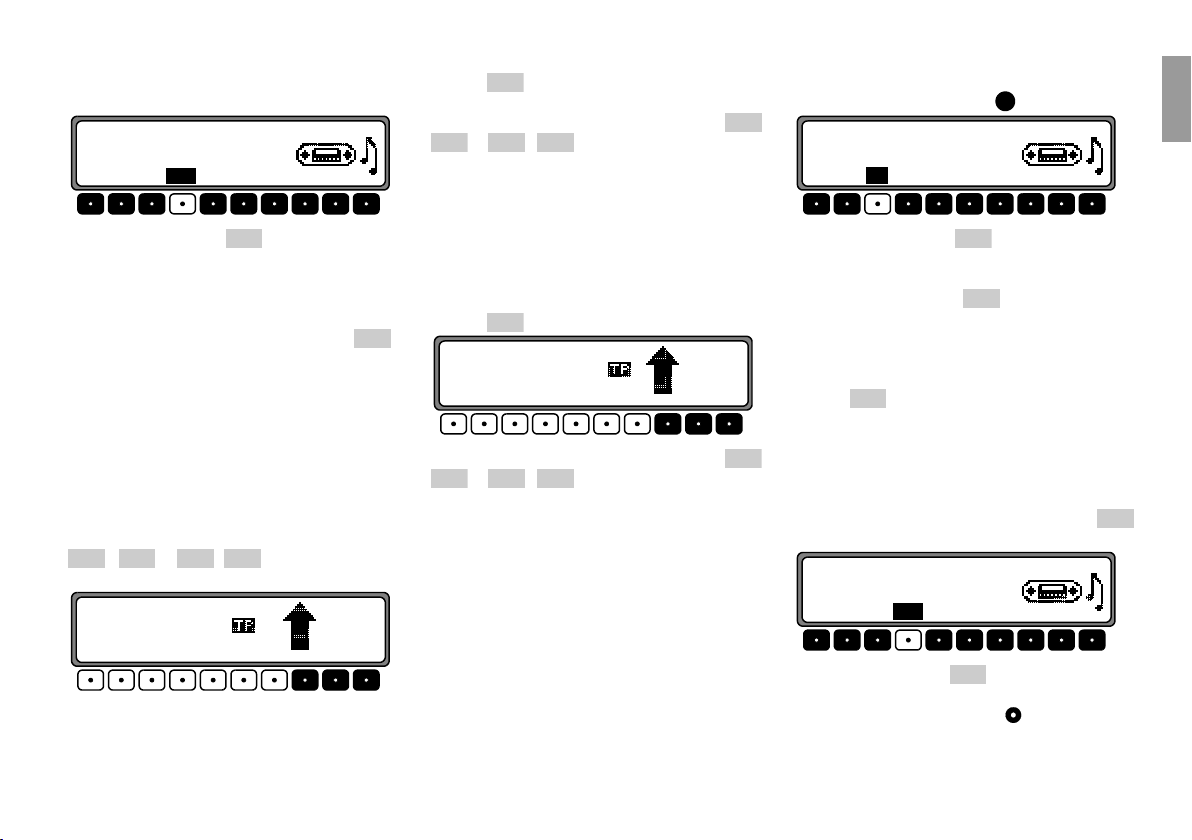
Selecting / Deleting Direct Programming
Activate the TP menu.
Selecting: Press multifunction key .
Sta
Stat: BBC3
Tp Sta Vol
Use the right control knob to select the desired TP
transmitter. After a short delay without actuation, the
selected transmitter is applied.
TP on ap-
Stat: Autoselect
Tp Sta Vol
Autoselect with the right control knob
Select
and press the control to confirm. After a short delay
and without actuation, direct programming is deleted.
Quit the TP menu.
Deactivating the TP
In all modes and wavebands, TP can be turned on or
off by pressing for more than 2 seconds. The dis-
TP
play changes from the inverse symbol to TP.
To deactivate TP in the TP menu, press multifunction
key repeatedly until
Tp
TP off appears.
TP off
Tp Sta Vol
TP is deactivated after returning to the normal display.
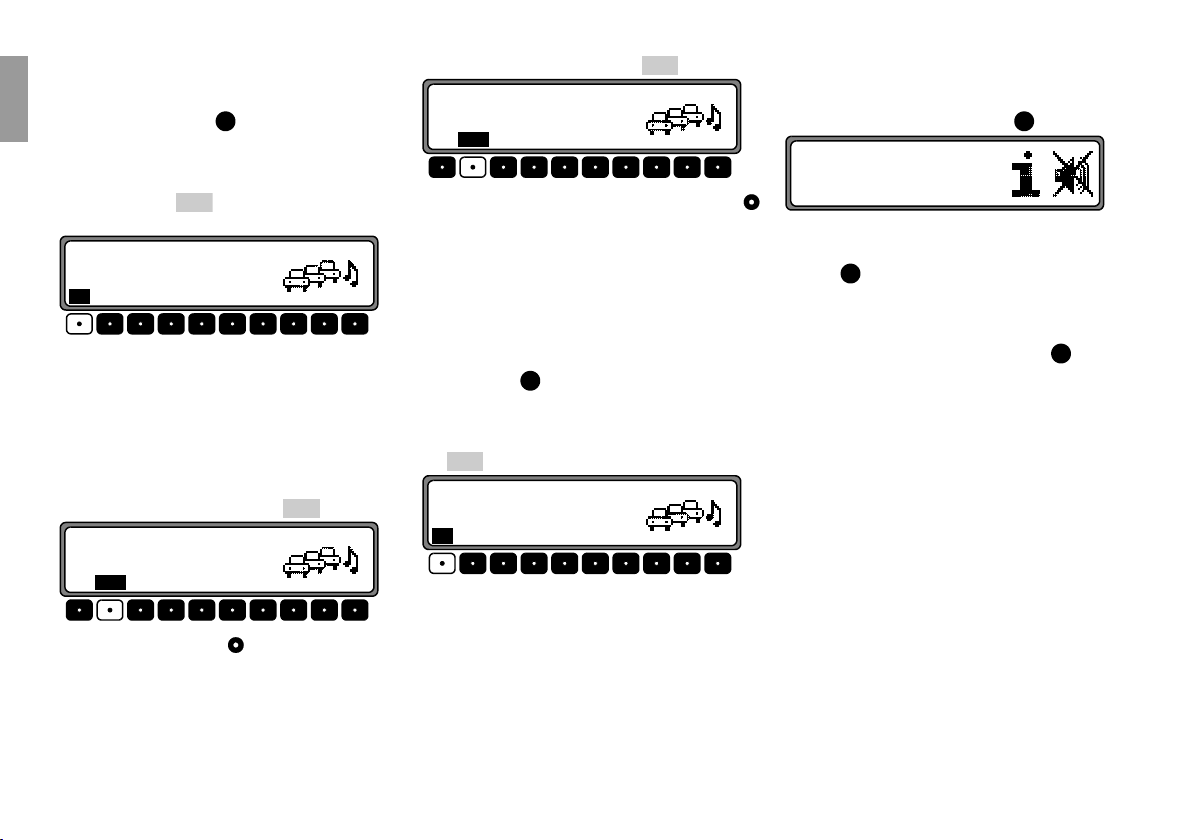
After selecting a TP transmitter, the mute function
can be activated by briefly pressing .
TP
TP Info - BBC3
Tp Sta Vol
Thereafter, only traffic announcements and navigation announcements will be passed through. After
pressing again, muting is canceled.
TP
Interrupting TP announcements
During a TP announcement, briefly press .
TP
The current announcement is interrupted and the system will automatically return to the previously selected mode.
34 5. Radio Mode
Page 36

TP announcement volume
5.9. Telephone Muting
Activate the TP menu. Press multifunction key
Vol
.
TPV: 1
Tp Sta Vol
You can select four different settings (
0 - 3 ) with the
right control knob . This means that the volume can
be raised to a fixed value according to the setting.
• Setting
• Setting
• Setting
• Setting
0 - no increase
1 - slight increase
2 - strong increase
3 - strong increase
G Warning
Danger of accident
- Too high a volume poses dangers and risks.
Adjust the volume to a level that will allow you
to still hear traffic noises (horns, sirens, etc.).
The telephone characteristics can be set in the user
menu (Page 41) if a telephone system is installed in
the vehicle and the mute function lead for the car telephone is connected to the car radio.
mute is selected, the radio is muted when a call is
If
received.
audio signal is selected, the telephone call is
If
connected through the radio unit when a call is received (ignition must be on).
However, this is only possible if, in addition to the
telephone, a hands-free unit with loudspeaker output
is installed and connected to the radio. In both cases
PHONE will be displayed.
PHONE
138
KM
10:23
US english
5. Radio Mode 35
Page 37

6. CD mode
Instructions for the Compact Disc (CD)
6.1. Inserting / Ejecting CDs
G Warning
US english
US english
Danger of accident
- to the eyes caused by invisible laser rays when
the unit cover is opened or damaged.
Do not remove the unit covers and do not use the
unit if the covers are damaged.
The CD laser optics are a Class 1 laser product.
There are no user-serviceable components in the
unit. For safety reasons, any maintenance work
must be performed exclusively by qualified service personnel.
Sound interruptions may occur if the CD is soiled. In
order to ensure the highest tone quality, please note
the following:
• Always touch the CD at the edges only. Keep the
disc clean and never touch the surface.
• Never stick anything on the CD.
• Protect the CDs against direct sunlight and from
heat sources such as heaters etc.
• Before playing the CD, you should clean it with a
special, commercially available cleaning cloth,
wiping from the center outwards. Solvents such as
petrol, thinners or other commercially available
cleaners and anti-static sprays must not be used.
!
Correct
Incorrect
Incorrect
Correct
Press and hold ; the faceplate folds down and the
CD slot becomes visible. Insert the disc into the CD
slot with the printed side upwards. The CD is automatically drawn into the player and the unit begins to
play the disc from the first track. Fold the faceplate up
again.
Once the last track is played, the unit will start playing
the CD again from the first track.
If there is already a CD in the slot, press . If the CD
changer was the last selected unit, use the multifunction key to switch to CD operation.
Scd
Track 9 05:26
RndRpt < > K<>K Cdc
To eject a CD, press and hold ; the display folds
down and the CD is ejected. Remove the CD. Then
fold the display up again.
CD
138
KM
10:23
G Warning
Danger of accident
Do not open detachable faceplate while driving
for safety reasons.
36 6. CD mode
Page 38

Note
When the unit is turned off, the CD will not be ejected, but will remain in the CD slot.
6.2. Skipping to the next/previous track
Press multifunction key (next) or (back).
_
>
Track 9 05:26
RndRpt < > K<>K Cdc
Press the multifunction keys repeatedly to skip several tracks forward or reverse. The unit switches to the
first track once the last track is finished. Analogously,
it switches from the first track to the last track.
If a title has been playing for more than 10 seconds
when the skip key is pressed, the unit will skip back
to the beginning of the current track.
_
>
138
KM
10:23
6.3. Scan search
Press the right control knob , and SC will appear in
the display.
Track 9 00:06 SC
RndRpt < > K<>K Cdc
138
KM
10:23
All following CD tracks are played for 10 seconds
each. Press the right control knob again to terminate the scan search.
6.4. Fast Forward / Rewind
By pressing the multifunction key (audible)
fast forward is activated; conversely, by pressing the
multifunction key (audible) fast rewind is acti-
<
vated.
Track 9 05:26
RndRpt < > K<>K Cdc
Fast forward / rewind terminates when you release the
multifunction key.
>
138
KM
10:23
6.5. Random Play
Press the multifunction key to activate the random generator. The tracks on the current CD are then
played in random order. The prompt
inversely.
Track 9 05:26
RndRpt < > K<>K Cdc
If you press the multifunction key again, the
random play function is deactivated.
Rnd
Rnd is displayed
138
KM
10:23
Rnd
6.6. Repeating a track
Press the multifunction key to turn on the track
repeat function. The prompt
versely.
Track 9 05:26
RndRpt <>K<>K Cdc
If you press the multifunction key again, the
track repeat function is switched off.
Rpt
Rpt is displayed in-
138
KM
10:23
Rpt
US english
6. CD mode 37
Page 39

6.7. Number of tracks and total playing
time
US english
US english
In CD mode, press . Press the multifunction key
to briefly display the elapsed time for the tracks
Trk
already played.
18 Tracks 12:26
Trk Ttl
CD
Press the multifunction key to briefly display
the number of tracks and the total playing time of the
current CD.
Ttl
6.8. Temperature Protection Circuit
A temperature protection circuit in this unit protects
the laser diode against overheating.
When the protection circuit is activated,
played for 8 seconds and the unit switches back to radio mode.
The single CD operation can be restarted after a short
cool-down phase. However, if the temperature is still
too high, the unit again switches back to the previously selected signal source.
Temp is dis-
38 6. CD mode
Page 40

7. CD Changer Mode
Operational readiness of CD changer
7.1. Playing CDs
G Warning
Danger of accident
- to the eyes caused by invisible laser rays when
the unit cover is opened or damaged.
Do not remove the unit covers and do not use the
unit if the covers are damaged.
The CD changer is a Class 1 laser product. There
are no user-serviceable components in the unit.
For safety reasons, any maintenance work must
be performed exclusively by qualified service
personnel.
If a CD changer is connected to the car radio, it is
ready for operation when loaded with a CD magazine
containing CDs. Close the sliding door after loading.
All further control is performed from the car radio
control panel.
CD Magazine - Loading / Unloading
To remove the CD magazine, open the sliding door on
the changer and press the eject key.
The magazine is ejected and can be removed.
When inserting CDs into the magazine, please note
the instructions printed on the magazine.
Note
Incorrectly inserted CDs will not be played.
Note
To allow for the fastest possible changing of CDs, the
magazine should be loaded in order, beginning with
Compartment 1.
CD
Press . If the unit was last set to CD changer operation or if there is no CD (or navigation CD) in the CD
drive, the CD changer menu is now active.
If CD operation was last selected, use multifunction
key to switch to CD changer operation.
Cdc
The CD is played from the last track played when it
was previously turned off.
Stored CDs can be selected by turning the right control knob . During the selection time the display
Loading CD X. Then, the display shows the
shows
magazine compartment number or the name of the
CD and the number of the current track on the selected CD.
CD 3 Track 10
RndRpt < > K<>K Scd
If no CD is loaded in the selected magazine compartment (i.e. Compartment 2),
pear on the display.
Once the last track of a CD is played, the next CD will
automatically be selected and played.
NO CD 2 will briefly ap-
138
KM
10:23
US english
7. CD Changer Mode 39
Page 41
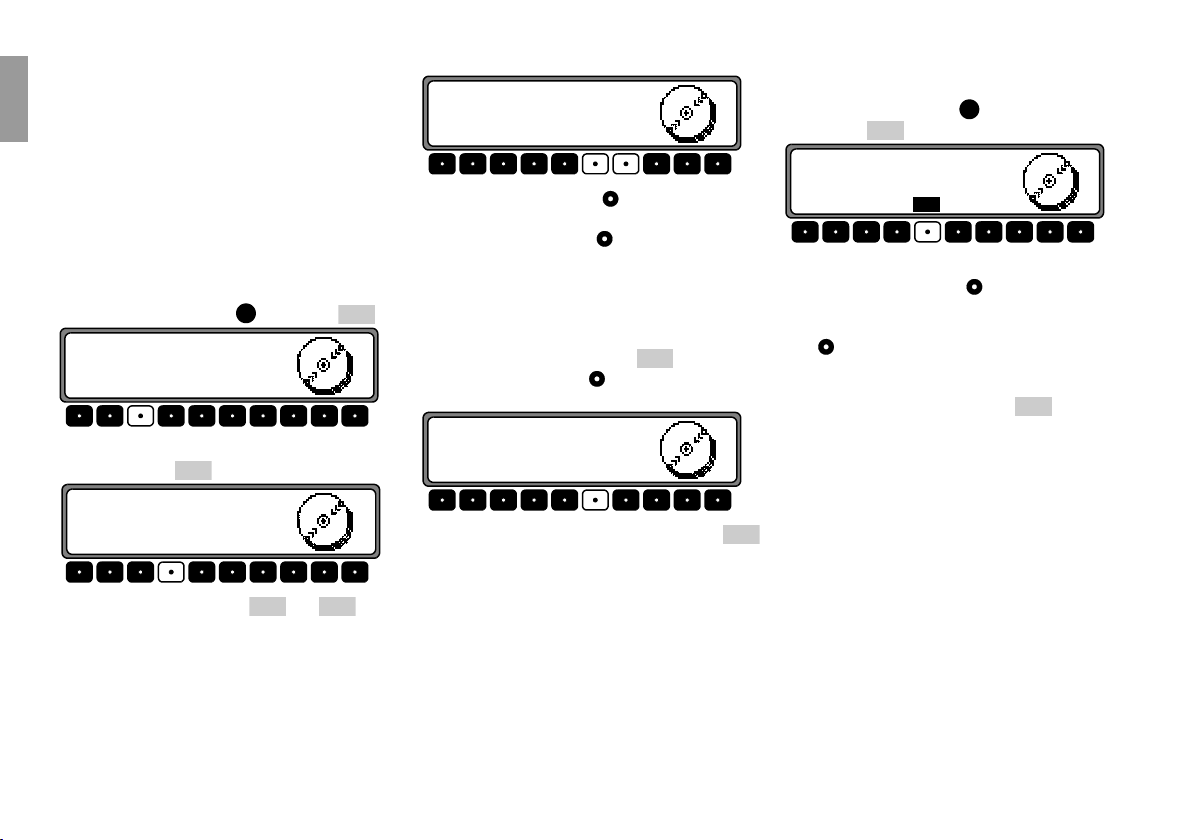
For further operation see refer to CD Mode (Page 36):
• ”CD mode” on page 36
• ”Skipping to the next/previous track” on page 37
US english
US english
• ”Scan search” on page 37
• ”Fast Forward / Rewind” on page 37
• ”Number of tracks and total playing time” on page
38
• ”Random Play” on page 37
7.2. Naming a CD
In CD changer mode, press . Then press .
Name: MADONNA
Trk Ttl Nam Edt Fil Del
To enter a name or change an existing name, press the
multifunction key .
Track 10 05:26
Trk Ttl Nam Edt <__>Fil
Edt
CD
Nam
+,+
+,+
the desired position (inverse editing symbol).
Edit ________
Trk Ttl Nam Edt <__>Fil
+,+
Using the right control knob , select the desired letter and press the control to confirm.
Press the right control knob to move to the next position.
A maximum of 8 characters can be entered.
Once you exit the CDC menu, the name is saved.
To delete an existing name, press .
Nam
Use the right control knob , to select the name to be
deleted.
Name: XXXX
Trk Ttl Nam Edt Fil Del
You can now delete the name by pressing the
+,+
Del
multifunction key.
7.3. CD Filter Function
In CD changer mode, press . Then press the multifunction key .
Fil
Fil on Trk 1 _ Play
Trk Ttl Nam Edt Fil
The individual titles of the current CD can be selected
using the right control knob . It is then possible to
select between
Play (track not filtered) and Skip
(track filtered out) by pressing the right control
knob .
In order to switch the filter function on or off, repeatedly press the multifunction button ; The filter
function is switched on (
Note
The filter function can only be activated when the selected CD is named.
CD
+,+
Fil
Fil on) or off (No Fil).
Using the multifunction keys and select
<- ->
40 7. CD Changer Mode
Page 42

8. User menu
GAL (Gal) setting
Telephone mute characteristics (Tel)
8.1. Requesting/quitting user menu
After requesting the user menu, the following basic
settings can be selected on two planes according to
your personal preference.
First plane:
Gal - Speed dependent volume control (GAL)
•
Tel - Telephone characteristics
•
Lcd - Adjusting display
•
Led - Adjusting flashing diode
•
M/S - Adjusting reception optimization
•
•
Nav - Adjusting navigation announcements
Second plane:
•
Aux - aux input setting
Cmp - compass display setting
•
BeV - Adjusting signal tone volume
•
The user menu is requested by pressing the key
for more than 2 seconds.
Gal: +4
Gal Tel Lcd Led M/S Nav ->
In order to access the second plane of the user menu,
press the multifunction key.
Press the key again to quit the user menu.
->
The GAL is a car radio control circuit, which automatically adjusts the car radio volume to the vehicle
speed. This compensates for the driving noise produced at higher speeds.
Request the user menu. Press multifunction key
. With the right control knob , select either
Gal
or +15.
Gal: +4
Gal Tel Lcd Led M/S Nav ->
With the GAL settings, the beginning of volume adjustment can be specified according to vehicle speed.
The setting is stored automatically.
Explanation:
•
0 - No volume increase
+1 - Volume adjustment is initiated at low speed
•
+15 - Volume adjustment is initiated at higher
•
speed
If the vehicle has a telephone system with hands-free
unit, the call can be heard through the car audio system. Thus, there is no need for the usually required
additional speaker. However, the signal cables (AF telephone input and ground - telephone input) must be
connected to the car radio (see page 46).
0
For selection, request user menu. Press multifunction
key to select
Tel
audio signal or mute.
TEL: mute
Gal Tel Lcd Led M/S Nav ->
•
mute - Telephone mute setting
audio signal - Route call through radio
•
Display setting (Lcd)
The display setting allows you to select from three
different display versions.
• Negative Display Setting (
• Positive Display Setting (
• Automatic Display Setting (
negativ)
positiv)
automatic) – the
display setting will be positive or negative depending upon the vehicle illumination.
US english
8. User menu 41
Page 43
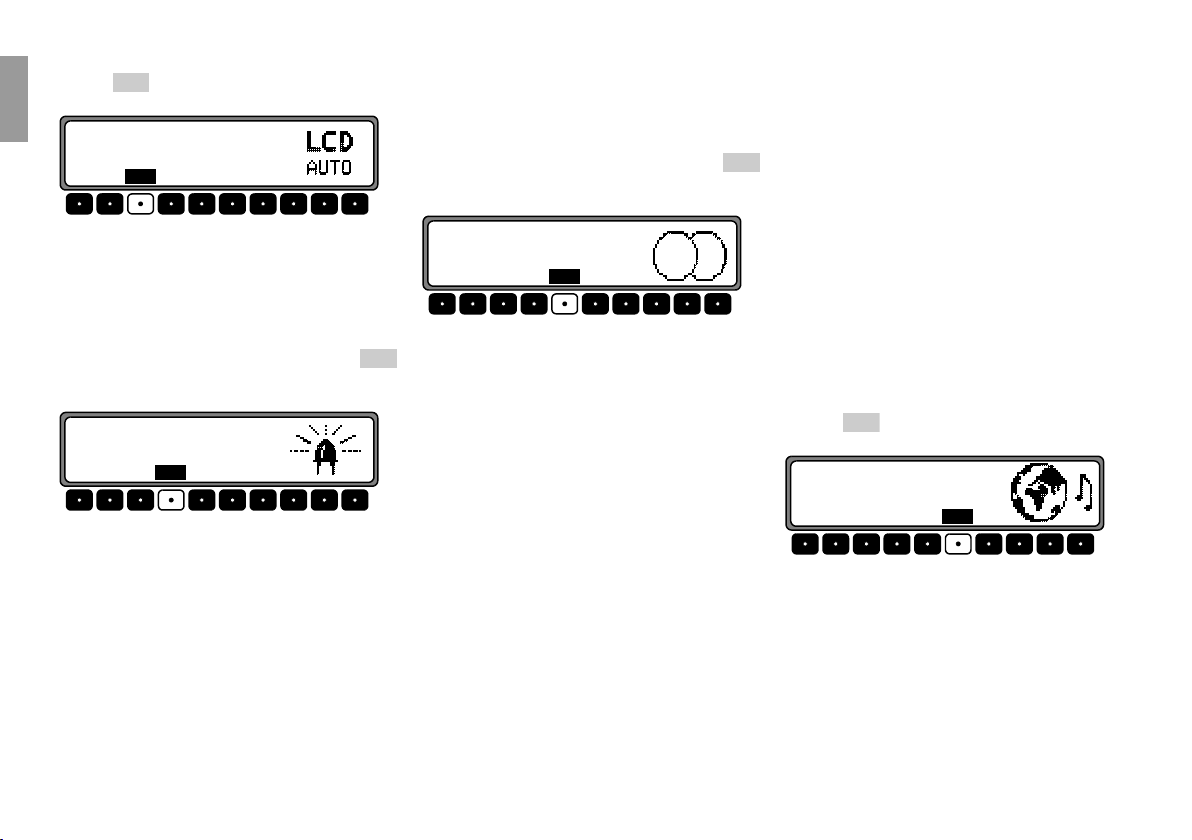
For selection, request the user menu. Press multifunction key to select
automatic.
US english
US english
Lcd
negativ, positiv or
LCD automatic
Gal Tel LcdL ed M/S Nav ->
The setting is stored automatically.
Flashing diode (LED) setting
The flashing of the LED (flashes when unit is off) can
be turned on or off using this function.
Request the user menu. Press multifunction key
to select either
blinking (LED on) or off (LED
off).
Led: flashing
Gal Tel Lcd Led M/S Nav ->
The setting is stored automatically.
Setting reception optimization (M/S)
You can choose from two different reception optimization settings to suppress reception-dependent interference and reflections.
Request the user menu. Press multifunction key
to make your selection from
Auto.
Stereo, Mono and
M/S: Stereo
Gal Tel Lcd Led M/SNav ->
Auto: Setting for normal operation - i.e., the sys-
•
Led
tem switches from stereo to mono and back depending upon reception level (provides the optimum setting for almost all reception areas).
Stereo: Setting for exceptional reception condi-
•
tions - i.e. the unit is constantly set to stereo.
Mono: Setting for reception conditions in which
•
reflections constantly occur - i.e., the unit is set
constantly to mono.
The setting is effective immediately and is also retained after power is turned off.
Setting navigation announcements (Nav)
With this function you can select how to hear navigation announcements.
only: The current audio source is turned off and
•
M/S
only the navigation announcements can be heard.
mixed - The volume of the current audio source is
•
lowered. The navigation announcement is set to the
same volume as the current audio source but is still
adjustable within a range of +/-6 dB. If the audio
source volume is then changed, the navigation announcement volume is adjusted accordingly.
independ - The current audio source and the
•
navigation announcements can be set to different
levels.
For selection, request the user menu. Press multifunction key to make your selection from
mixed and independ.
Nav
NAV: mixed
Gal Tel Lcd Led M/SNav ->
The setting is stored automatically.
only,
42 8. User menu
Page 44

AUX input (Aux)
Compass display
Signal tone volume
This can be used to switch on the CD changer AF connections if no CD changer is connected. An external
unit (Discman, Walkman, etc.) can then be connected.
For selection, request user menu. By pressing the
multifunction key request the second plane of
the user menu. Using the multifunction button
select either
(off).
off
->
Aux
AUX mode on (on) or Aux mode
AUX mode on
Aux Cmp <_
BeV
The setting is stored automatically.
In CD mode, press the multifunction button in
Aux
order to select AUX mode.
If route guidance is not active, it is possible to display
a compass on the right side of the display.
For selection, request user menu. By pressing the
multifunction key request the second plane of
the user menu. Using the multifunction key select either
or
show compass (compass is displayed)
hide compass (compass is not displayed).
->
Cmp
If the compass display is switched off, 9 multifunction buttons are assigned transmitter abbreviations in
FM - DAS mode (route guidance not active).
show compass
AuxCmp <_
BeV
The setting is stored automatically.
The volume of signal tones (e.g. storage confirmation) can be set using this function.
For selection, request user menu. By pressing the
multifunction key request the second plane of
the user menu. Press multifunction key . With
the right control knob , select either
->
BeV
0 (Low) or +5
(Loud).
Beep Vol. +5
Alert Beep
AuxCmp <_
BeV
The setting is stored automatically.
US english
8. User menu 43
Page 45

9. Service Menu
To quit the service menu, press .
End
9.1. Requesting /Quitting the Service
US english
US english
Menu
The following information can be called up in the Service menu.
•
Model_No.: - Display of the model number
Serial_No.: - Display of the serial number
•
Changer Reset- Reset for CDC (if present).
•
For Reset, press multifunction button .
GAL - Display of the current GAL adjustment
•
Radio Software - Display of radio software
•
status
Radio Bolo - Display of radio Bolo status
•
•
Navi Rom - Display of Navi Rom/Lib status
Navi Flash - Display of Navi Flash status
•
RTC Value - Display of RTC value
•
In order to select the service menu, press and multifunction key 10 simultaneously in radio mode.
Brand Name:
Becker Aut. Sys.
Nxt Prv End
Use multifunction keys and or turn the
right control knob to select the individual items.
Nxt Prv
Res
Nav
9.2. Triggering a Reset
If a malfunction of the unit should occur that renders
the unit inoperable or if the unit is defective in any
other way, trigger a restart of the internal unit software (reset) with the following key combination:
In order to trigger a reset, press multifunction key
or and simultaneously.
1 3
The navigation CD must be inserted after a reset of
the unit software.
TP
44 9. Service Menu
Page 46

10. General instructions
RBDS SYSTEM
This car radio is capable of receiving RBDS signals
(RBDS = Radio Broadcast Data System) on the VHF
band. RBDS is a technology for transmitting inaudible additional information in the VHF broadcasting
range. This means that the station broadcasts information which can be evaluated by the car radio.
DAS Seek Qual. level
On level
DAS Seek Qual., all receivable and iden-
tifiable RBDS programs are stored in a list sorted according to signal strength. The dynamic autostore,
search and scan search functions use this list.
DAS Seek Name level
DAS Seek Name, all receivable and iden-
On level
tifiable RDS programs are stored in a list sorted alphabetically by name. The dynamic autostore, search
and scan search functions use this list.
RBDS Stations level
On level
Stations RDS only identified RBDS sta-
tions can be saved. The unit constantly switches to the
best receivable transmission frequency for the station.
During the search for
Stations RDS the unit will
stop only at identifiable stations.
Stations Fix Level
At the level
Stations Fix frequencies can be as-
signed to the station keys. There is no RBDS evaluation. The search function on
Stations Fix is equivalent to manual FM tuning
(Page 31).
PTY (Program Type)
Specific types of programs, such as sports, pop music,
classical music etc., can be selected using the PTY
function.
The PTY is transmitted by the RBDS station, provided this function is installed at the broadcaster. You
can display the selected transmitter’s program type or
perform a search for a specific PTY transmitter.
Examples of program types:
NEWS News service
SOFT Easy Listening
INFORM Information programs
NOSTALGA Nostalgia
SPORTS sports news
JAZZ Jazz
TALK Talk
CLASSICL Classical
ROCK Rock
R&B R&B
CLS ROCK Classic rock
SOFT R&B Soft R&B
ADLT HIT Adult contemporary
LANGUAGE Language
SOFT RCK Soft rock
REL MUSC Religious music
TOP 40 Top 40
REL TALK Religious talk
COUNTRY Country
PERSNLTY Personality
OLDIES Oldies
PUBLIC Public
WEATHER Weather forecast
PTY 24-28 not specified
US english
10. General instructions 45
Page 47

11. Technical Data
Wavebands:
US english
US english
FM 87.9 MHz - 107.9 MHz
AM 530 kHz - 1700 kHz
Frequency range:
20 Hz - 20 kHz for CD operations
30 Hz - 15 kHz for FM
50 Hz - 2.5 kHz for AM
Output:
4 x 18 Watt
Line cross section:
0.75 mm² min.
Loudspeaker impedance:
9
min. 4
Line out:
4 x analog Line Out (Va max 3Veff at 10 k
GAL:
Speed dependent volume control; the adjustment is
performed in 8 to 19 steps of 1.25 dB, dependent on
current setting.
Antenna:
Impedance 50
9
9)
AF telephone input:
Max. input voltage 8 V (if interference occurs, a commercially available 1 : 1 transmitter should be connected into the signal cable).
AUX input:
9 input impedance, max. input voltage 1.7 Veff
16 k
Telephone Mute:
Low active level < 2 Volt
Supply voltage:
12 Volt
Playable CDs:
Only CDs which comply with DIN EN 60908 can be
used.
8 cm CDs with adapter are not recommended.
46 11. Technical Data
Page 48

NOTICE
Dear listener,
In conformance with current EC/US guidelines, any person may operate this radio receiver.
This unit conforms to the current valid EC/US or harmonized national regulations. This designation is your guarantee
that the unit conforms to the applicable specifications concerning electromagnetic compatibility. Interference caused by
your unit affecting other electrical/electronic devices, as well as interfering influences on your unit from other electrical/
electronic devices are largely prevented.
Current valid designations are:
- CE symbol for issue according to
European guideline 89/336/EWG with the application of
the following European standards: EN 55013
EN 55020
- This device comlies with part 15 of the FCC rules.
Opertion is subject to the condition that this device does
not cause harmful interference.
This product complies with DHHS rules 21 CFR
subchapter J applicable to the date of manufacture.
US english
47
 Loading...