

Hanvon 0605, 0504, 0806 User Manual

Graphics Tablet
User’s Manual
Hanwang Technology Co., Ltd.

Copyright © Hanwang Technology Co., Ltd, 2009
All rights reserved. No part of this manual may be reproduced except for your
express personal use. Hanwang Technology Co., Ltd reserves the rights to revise
this publication without obligation to provide notification of such changes.
Hanwang Technology Co., Ltd does its best to provide current and accurate
information in this manual. However, Hanwang Technology Co., Ltd reserves the
right to change any specifications and product configurations at its discretion,
without prior notice and without obligation to include such changes in this manual.
Art Master, Graphicpal, Rollick and Hanvon are registered trademarks of
Hanwang Technology Co., Ltd.
Microsoft, Windows, and Vista are either registered trademarks or trademarks of
Microsoft Corporation in the United States and/or other countries. Apple, the
Apple logo, and Macintosh are registered trademarks of Apple Computer, Inc.,
registered in the U.S. and other countries. Any additional company and product
names mentioned in this documentation may be trademarked and /or register ed
as trademarks. Mention of third-party products is for information purposes on ly
and constitutes neither an endorsement nor a recommendation.
Hanwang Technology Co., Ltd assumes no responsibility with regard to the
performance or use of these products.

Contents
CHAPTER 1 GRAPHICS TABLET INTRODUCTION ................................ 1
1.1 GENERAL INTRODUCTION ................................................................ 1
1.2 FEATURES ............................................................................................. 1
1.3 QUICK-START TUTORIAL ................................................................... 2
CHAPTER 2 INSTRUCTION FOR WINDOWS SYSTEMS ....................... 7
2.1 SYSTEM REQUIREMENTS ................................................................. 7
2.2 INSTALLATION ...................................................................................... 7
2.3 UNINSTALLING...................................................................................... 8
2.4 CONFIGURATION ................................................................................. 8
CHAPTER 3 INSTRUCTION FOR MAC SYSTEMS................................. 19
3.1 SYSTEM REQUIREMENTS ............................................................... 19
3.2 INSTALLATION .................................................................................... 19
3.3 UNINSTALLING.................................................................................... 21
3.4 CONFIGURATION ............................................................................... 21
CHAPTER 4 BUNDLED SOFTWARE ........................................................ 27
4.1 HANVON SHELL ................................................................................. 27
4.2 PENWRITE ........................................................................................... 32
4.3 PENSIGN .............................................................................................. 38
4.4 PENMAIL ............................................................................................... 39
4.5 PENMARK ............................................................................................ 41
4.6 WHITEBOARD ..................................................................................... 43
CHAPTER 5 MAINTENANCE ...................................................................... 47

5.1 PEN HOLDER ...................................................................................... 47
5.2 EXCHANGE PEN NIB ......................................................................... 48
5.3 CAUTIONS ............................................................................................ 49
APPENDIX ....................................................................................................... 50
WARRANTY ................................................................................................ 50
This User’s Manual provides quick access to information about Hanvon®
Drawing Tablet or Hanvon
®
Graphics Tablet.
This User’s Manual does not contain detailed information of any software
from third party.
Due to our continuous updates on the product, all figures in this manu al are
only for reference, the actual item is the standard.

INTRODUCTION
Chapter 1 Graphics Tablet
Introduction
1.1 General Introduction
The Hanvon Graphics Tablet allows you to create graphics on a
computer using a cordless and battery-free pen. It is very easy to use.
You don’t need to be an experienced graphic artist to use it. This USB
graphics tablet supports a variety of professional painting and photo
editing software including Painter, Photoshop, Ulead Photolmpact,
Flash, Dabbler, Maya, PaintShop and more.
1.2 Features
z Express Touch Keys and Touch Strip
z Uses standard USB without the need for an external power
adapter
z Cordless and Battery-free pen
z Pressure Sensitive technology
z Windows & Mac compatible
z Software Supported: Painter / Photoshop / Ulead PhotoImpact /
Flash / CorelDraw / Dabbler / Maya and a variety of graphic
processing software
1
INTRODUCTION
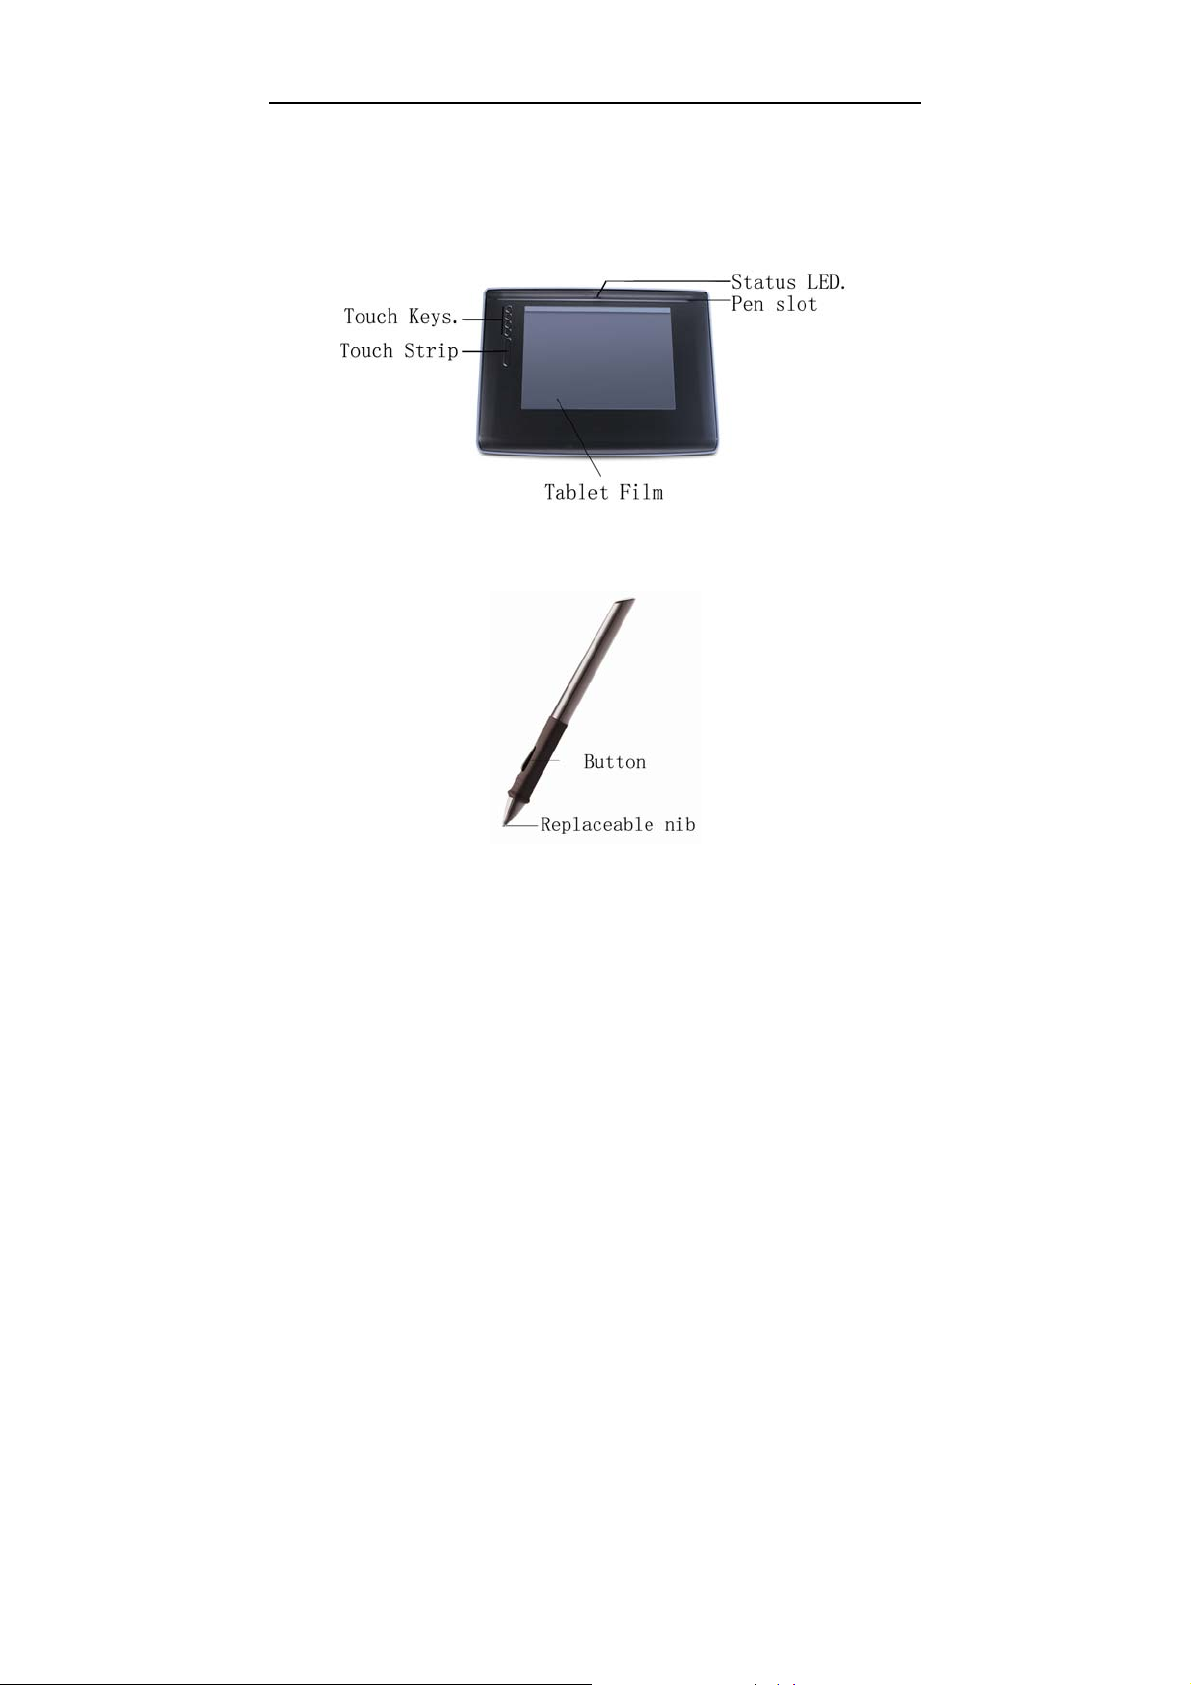
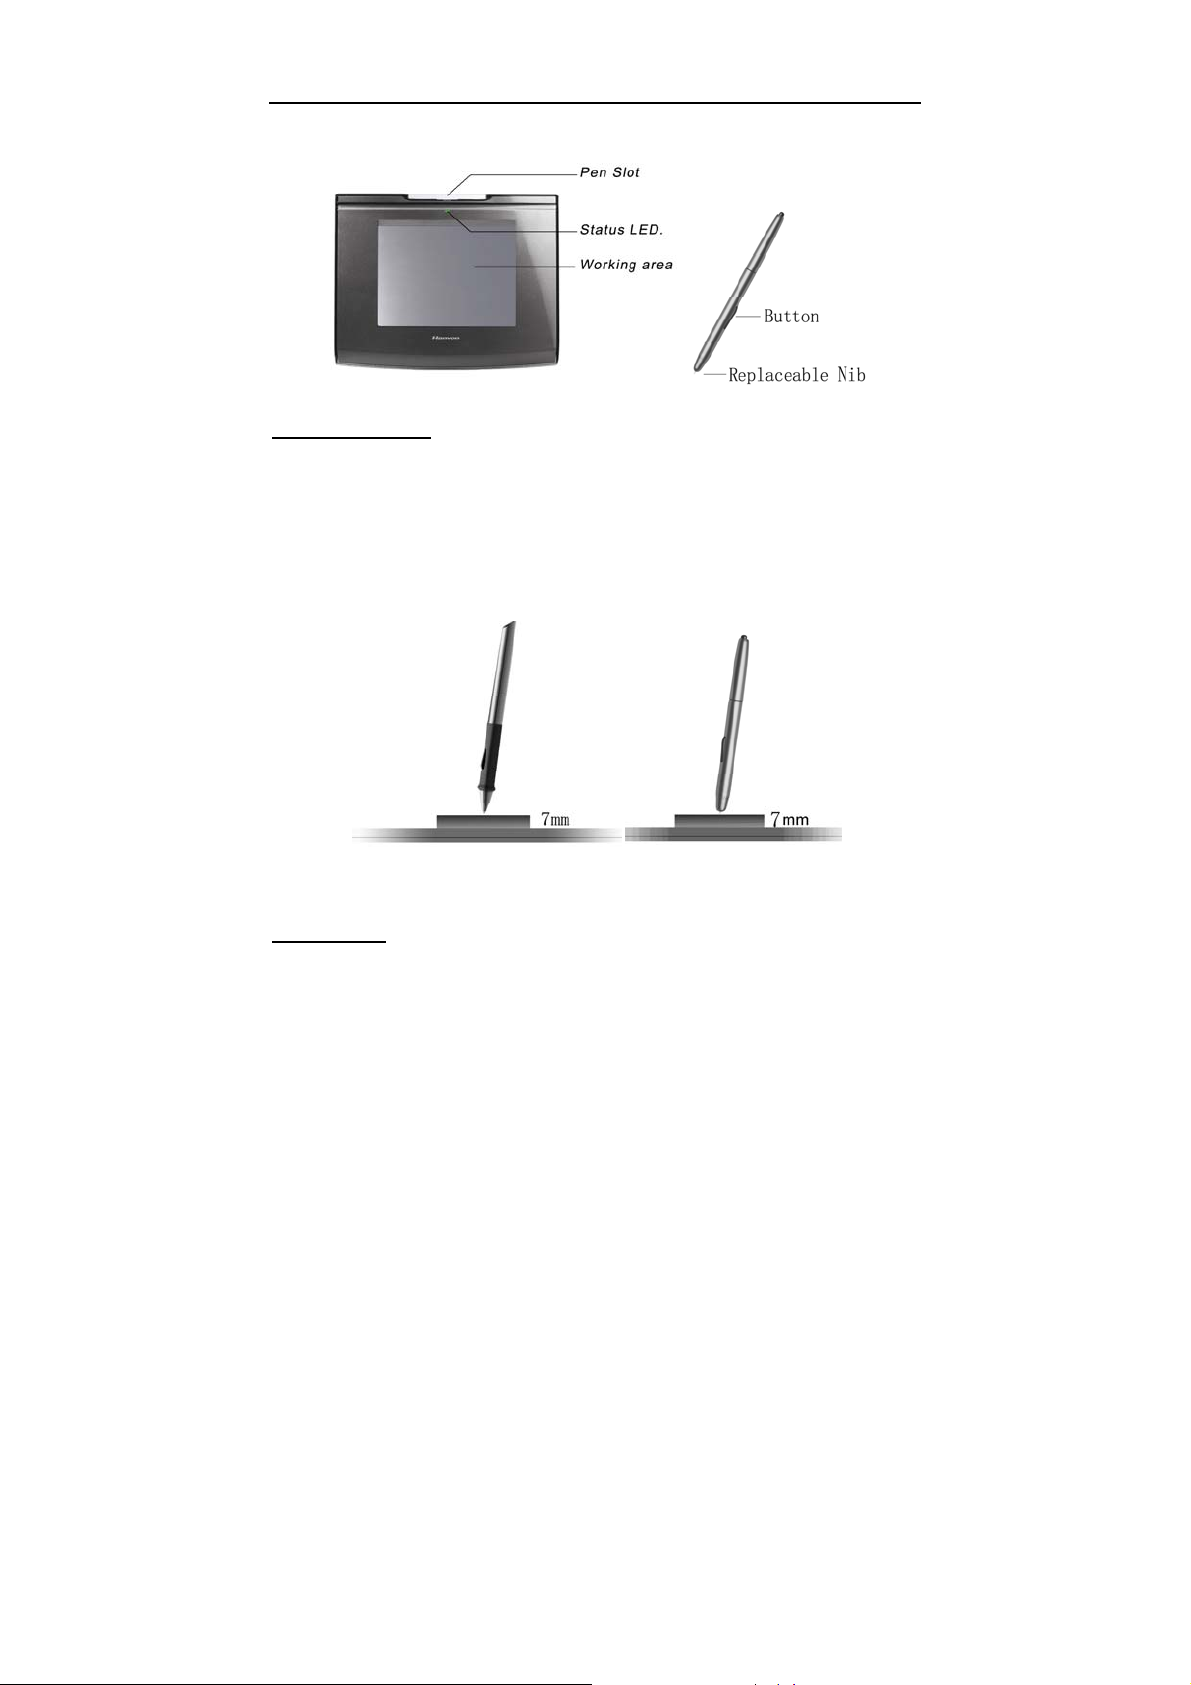
1.3 Quick-Start Tutorial
Note: Some series of graphics tablets have no pen slot and do not
support touch keys and strip. For example as follow:
2
INTRODUCTION
Holding the pen
Hold the pen as usual.
z The pen will take effect when it comes within 7mm above the
tablet.
z
While using the pen, be sure that your thumb or index finger can
easily control the button on the pen, which acts as the right-click
key of a mouse.
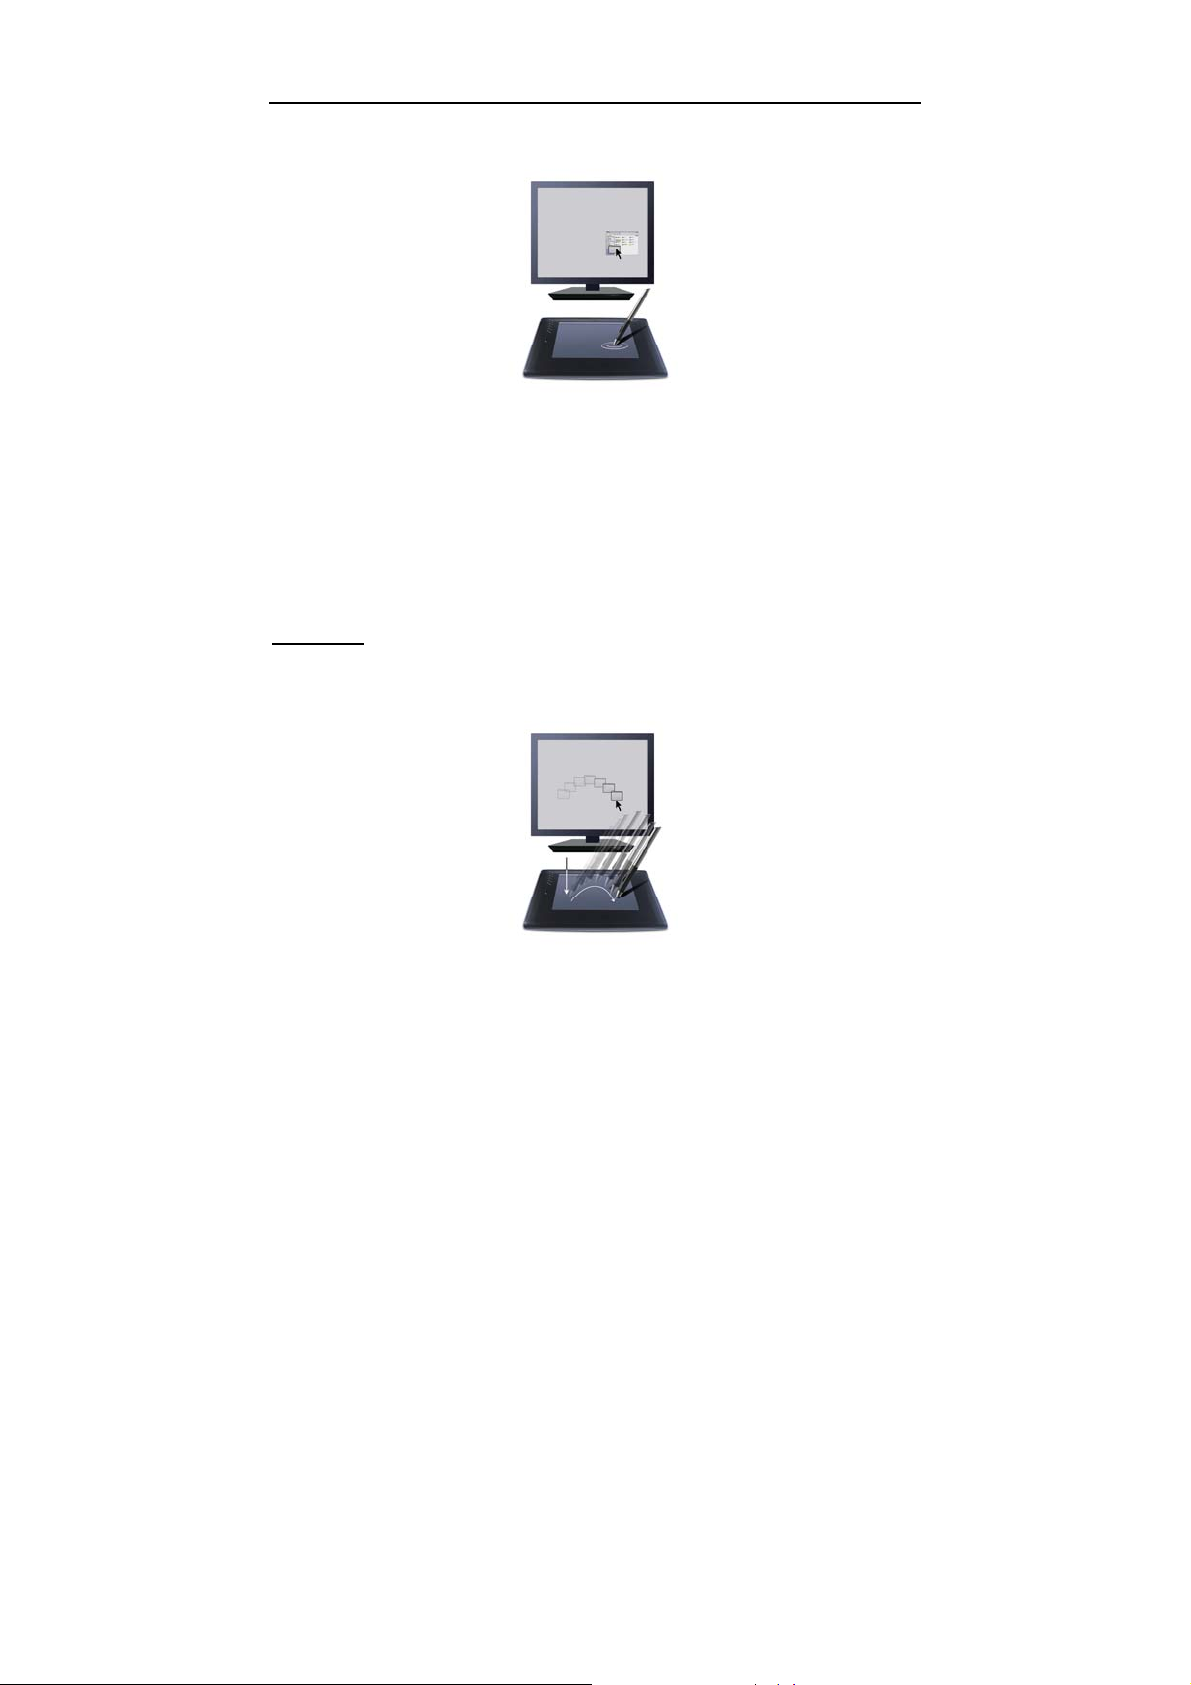
Positioning
Moving the pen in the active area of the tablet will control the cursor’s
position on the computer screen.
3

INTRODUCTION
The pen and tablet use the Absolute Coordination method. This
means the active area of the tablet represents the entire computer
screen. Moving the pen on the tablet creates a corresponding
movement of the cursor on the screen.
Single Click
One slight touch of the pen on the tablet has the same effect as a
single left-click of the mouse.
Double Click
Two immediate clicks on the tablet have the same effect as a double
left-click of the mouse.
4
INTRODUCTION
Double Click Technique
When the cursor is positioned, press the tablet twice immediately with
the pen tip, making sure that you do not move the pen tip. The
response for the double click can be slow for beginners. You can
solve this problem by adjusting the double click speed from the
normal setting of the tablet.
Dragging
Select a target by pressing the pen down on it, and do not release the
pen till you have moved the target to the new position you want.
5

INTRODUCTION
Pressure Sensitive Painting
In applicable software, you can use the pressure sensitivity of the pen
to control the painting brushwork for different effects such as direction,
stroke width, color and thickness.
The software that supports pressure sensitivity includes Adobe
Photoshop, Painter, Flash, Ulead PhotoImpact, Art Dabbler etc.
Touch key and Touch Strip
Touch keys are programmable for modifier keys, keyboard shortcuts,
mouse clicks, open/run applications, and pop-up menus. The default
is Rubber, Alt, Shift and Space.
The touch strip is used for quick scrolling, zooming, controlling brush
size, and other functionality by user configuration.
6
INSTRUCTION FOR WINDOWS SYSTEMS
Chapter 2 Instruction for Windows
Systems
2.1 System Requirements
CPU Pentium III 1GHz or later
RAM 256MB
Hard-disk 200MB
OS WINDOWS 2000/XP/Vista X86/Vista X64
Port USB1.1 or 2.0
2.2 Installation
Connect the drawing tablet’s USB cable to the computer’s USB port.
Step 1
Insert the driver CD into the CD-ROM drive. The Installation Menu
should pop-up automatically. If the menu does not appear,
double-click the My Computer icon on the Desktop, find the
AutoRun.exe file under the CD-ROM’s root directory, and double-click
it.
Step 2
Click on Install Driver for Graphic Tablet button to install the driver and
click on Install Hanvon Soft to install the bundled software.
Step 3
After installing the driver and the bundled software, read this manual
for detailed information on using and customizing your graphics tablet.
7
INSTRUCTION FOR WINDOWS SYSTEMS
Note: If the tablet cannot be used after driver installation, please
restart your computer.
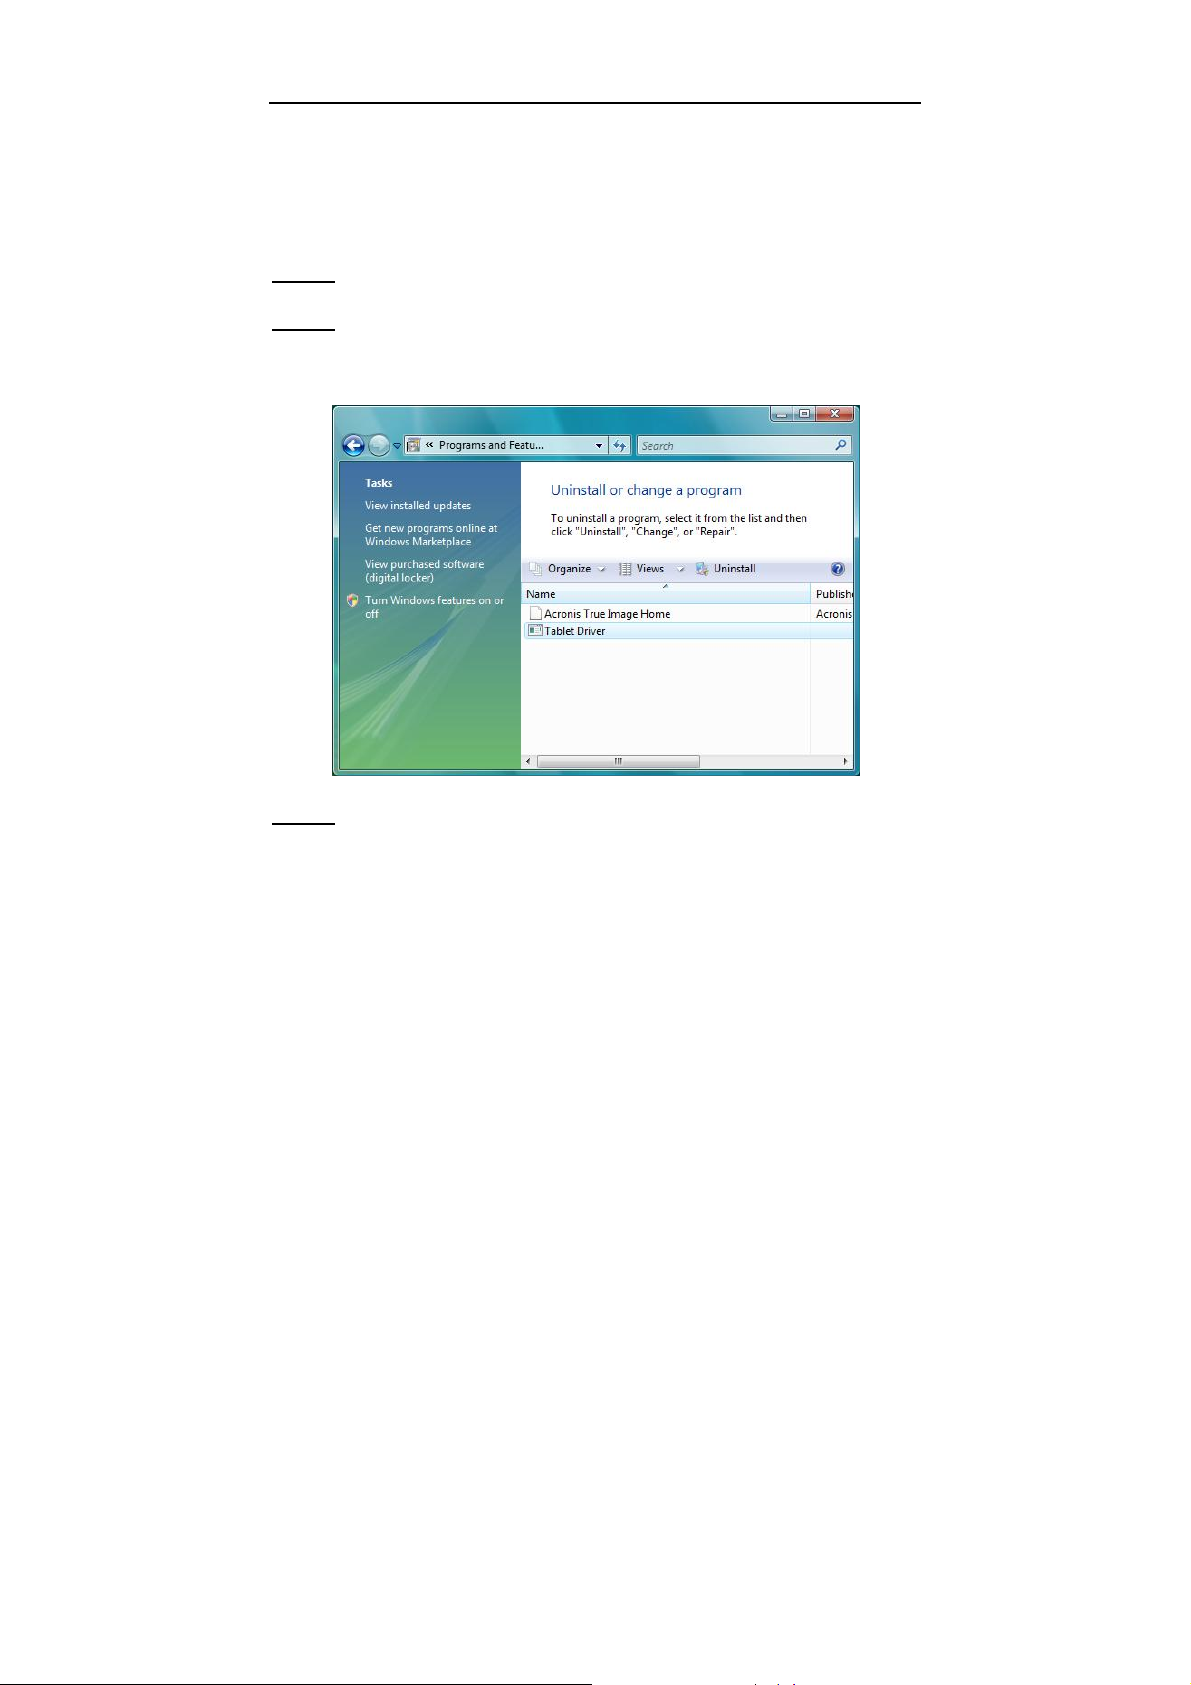
2.3 Uninstalling
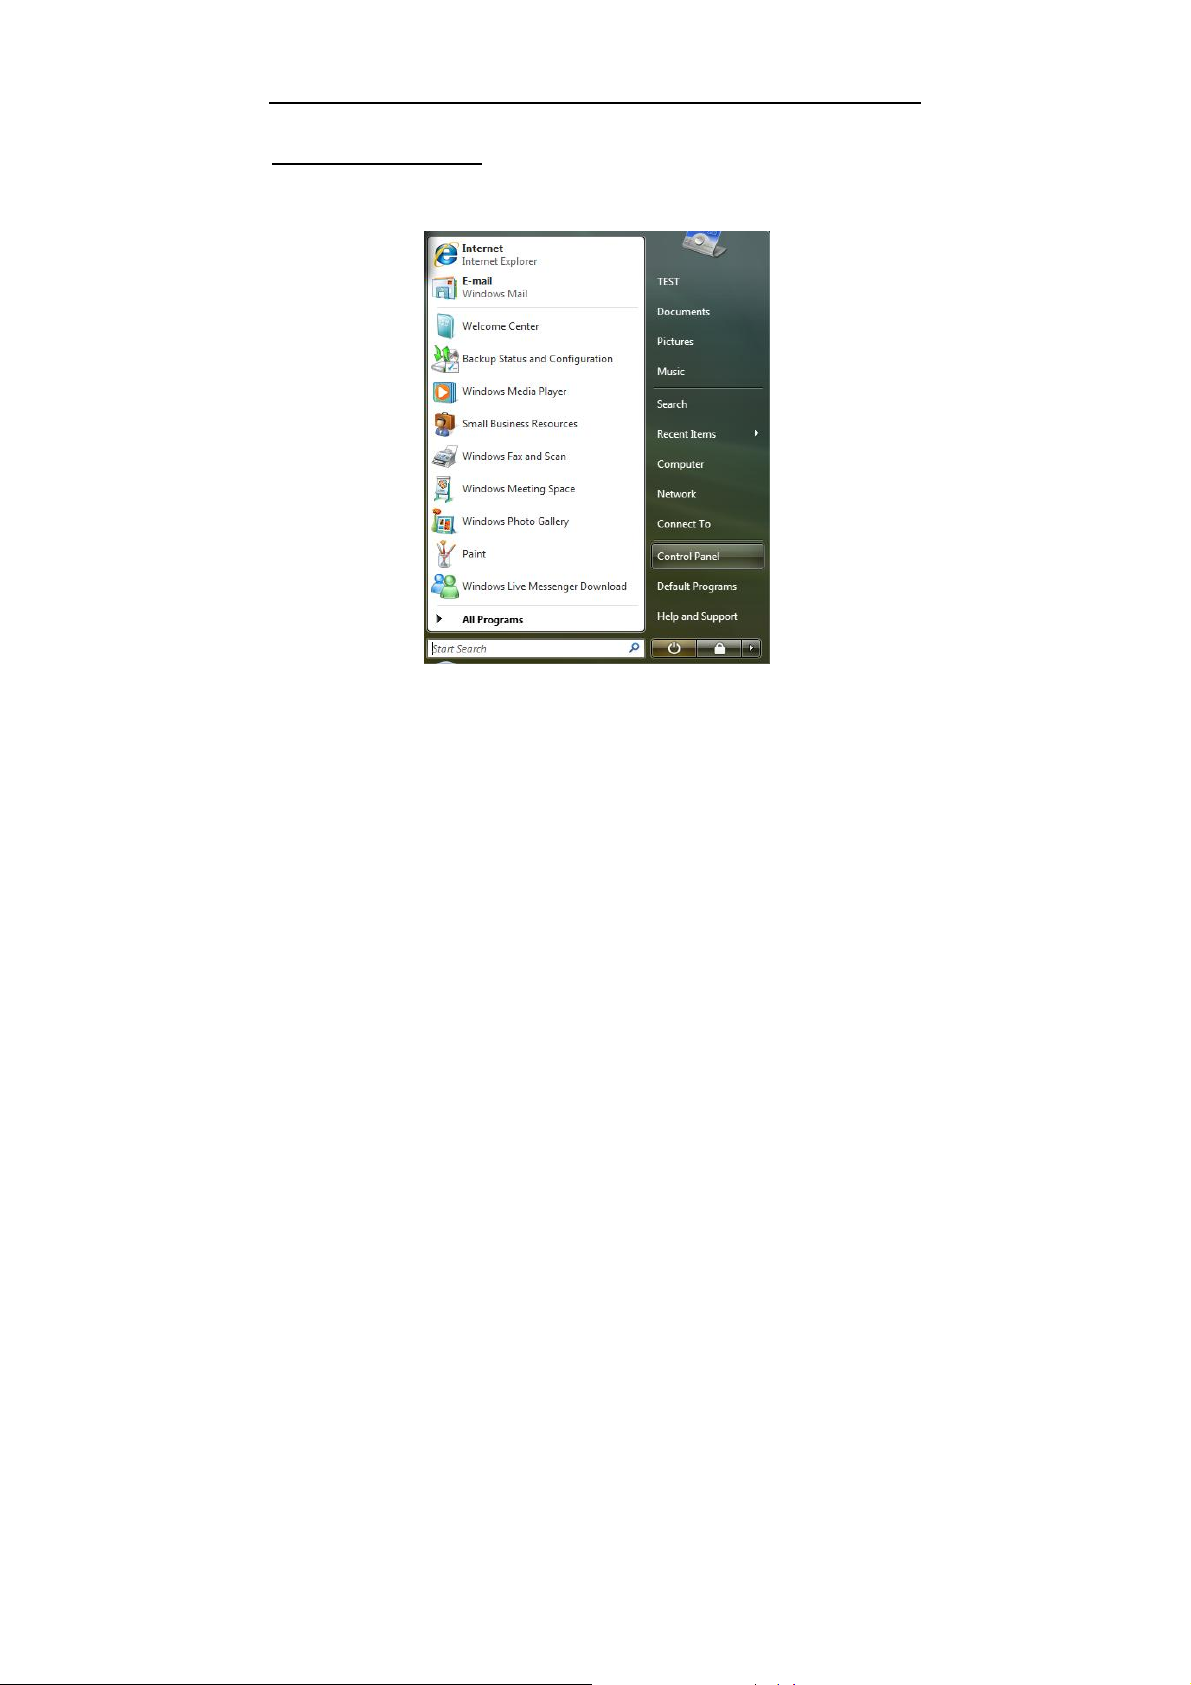
Step 1
Click the Windows Start button and then select Control panel.
Step 2
Double click Add/remove program in the control panel window and
find Tablet Driver.
Step 3
Click Uninstall and follow the prompts to remove the tablet driver.
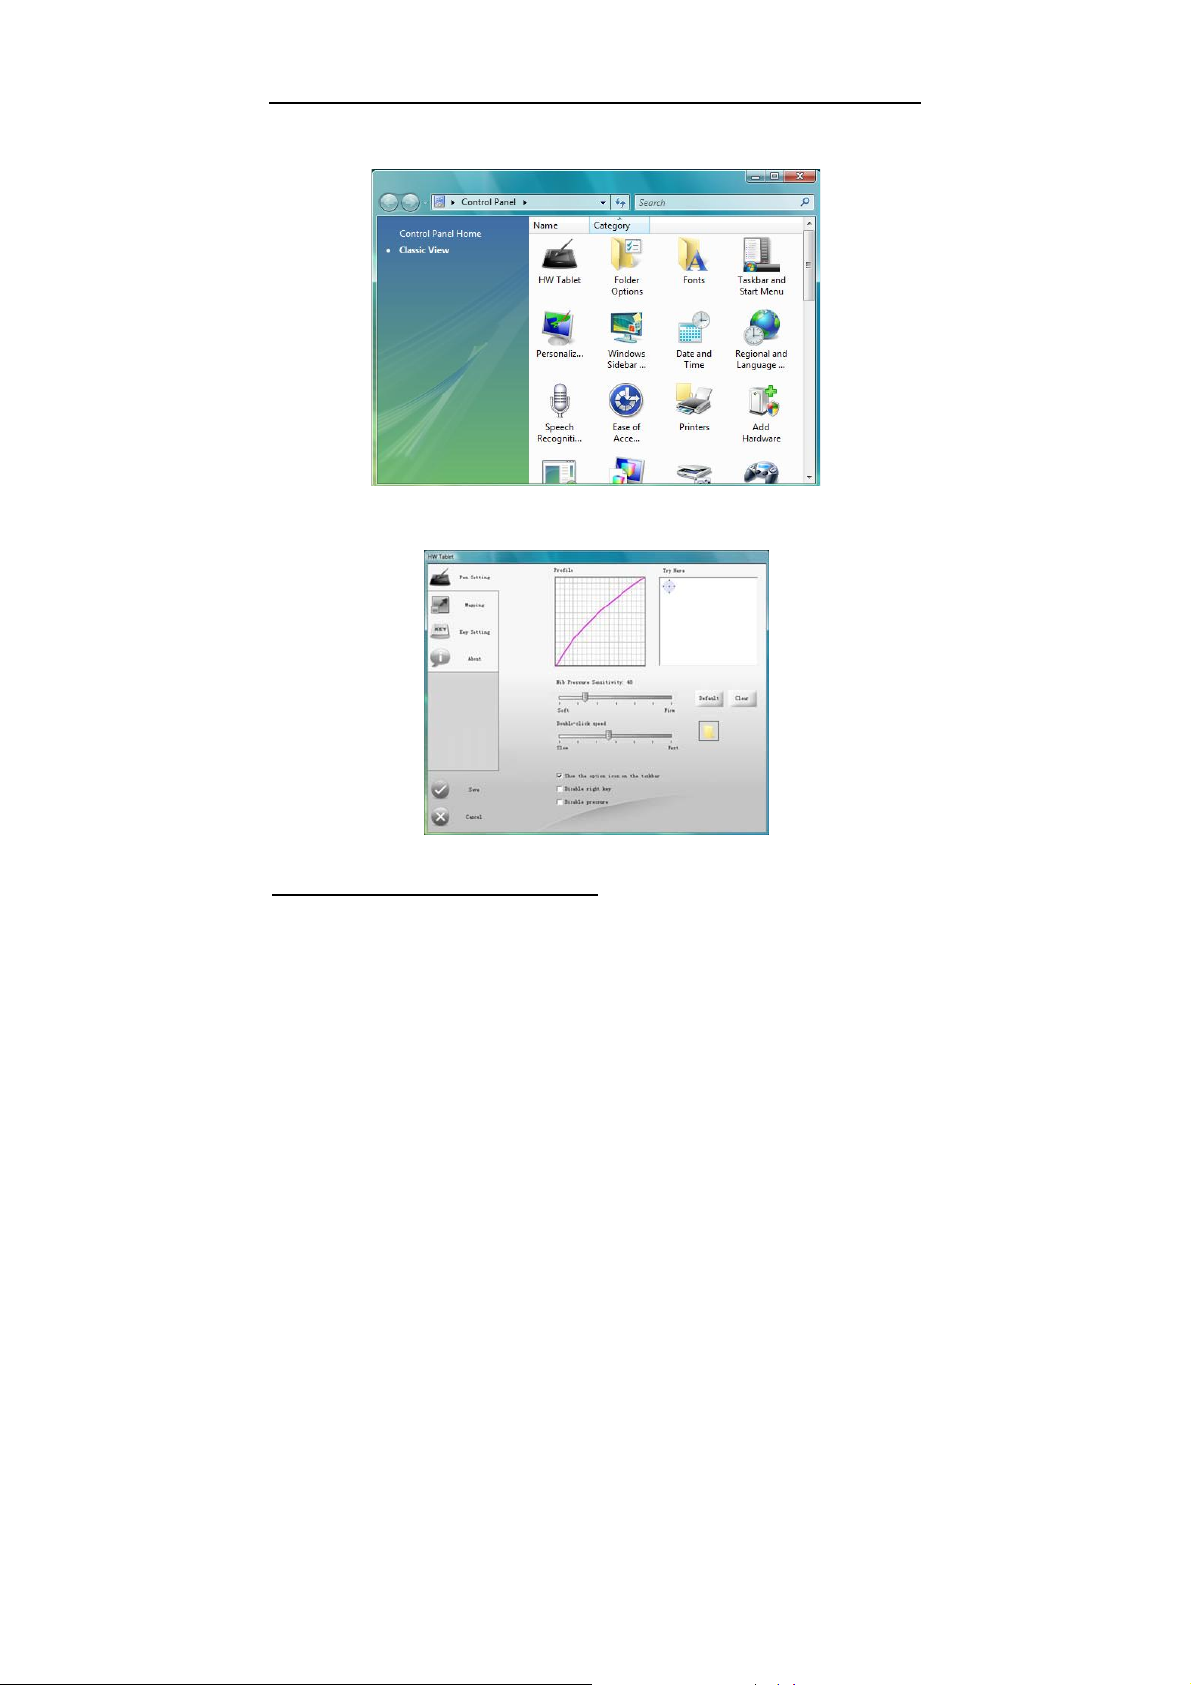
2.4 Configuration
Hanvon tablet driver provides a configuration window to set pen
pressure, working area, dual-monitors, double-click speed, express
touch keys, etc.
8
INSTRUCTION FOR WINDOWS SYSTEMS
Before Configuration
z Connect the graphics tablet to the USB port on your computer.
z Go to control panel.
z Double-click the HW Tablet icon to open the configuration
interface.
9
INSTRUCTION FOR WINDOWS SYSTEMS
2.4.1 General Configuration
a. Adjusting Pressure Sensitivity
Pen pressure sensitivity can be adjusted by dragging the slider
between soft and hard. To create broad strokes, use a soft tip. To
draw thin lines, use a hard tip. The factory setting can be restored by
clicking the Default button. Adjustments can be saved by clicking the
Save button or can be canceled by clicking the Cancel button.
10

INSTRUCTION FOR WINDOWS SYSTEMS
b. Pressure Curve Graph
Pen pressure sensitivity changes are displayed on the Pressure
Curve Graph. The images below show the graphs for light and heavy
pen pressure respectively.
c. Pressure Testing Area
The right area is the pressure test area which is use to test the pen tip
feel. The round circle at the upper left corner represents the tile angle
between the drawing pen and the tablet surface. All the writing and
drawing in the test area can be cleared by clicking the Clear button.
Note: Only Windows 2000/XP/Vista X86/Vista X64 support tilt angle.
11
INSTRUCTION FOR WINDOWS SYSTEMS
d. Double-Click Speed
Dragging the slider to adjust the double-click speed and then you can
test the double click speed on the folder icon.
e. Other settings
z When you select the option to display the icon on taskbar, the
user can configure the tablet by right-clicking on the icon.
Uncheck option not to show HW Tablet icon on the taskbar.
z Check the option Disable right key, the pen button acting as
right-click of mouse button will not be functional.
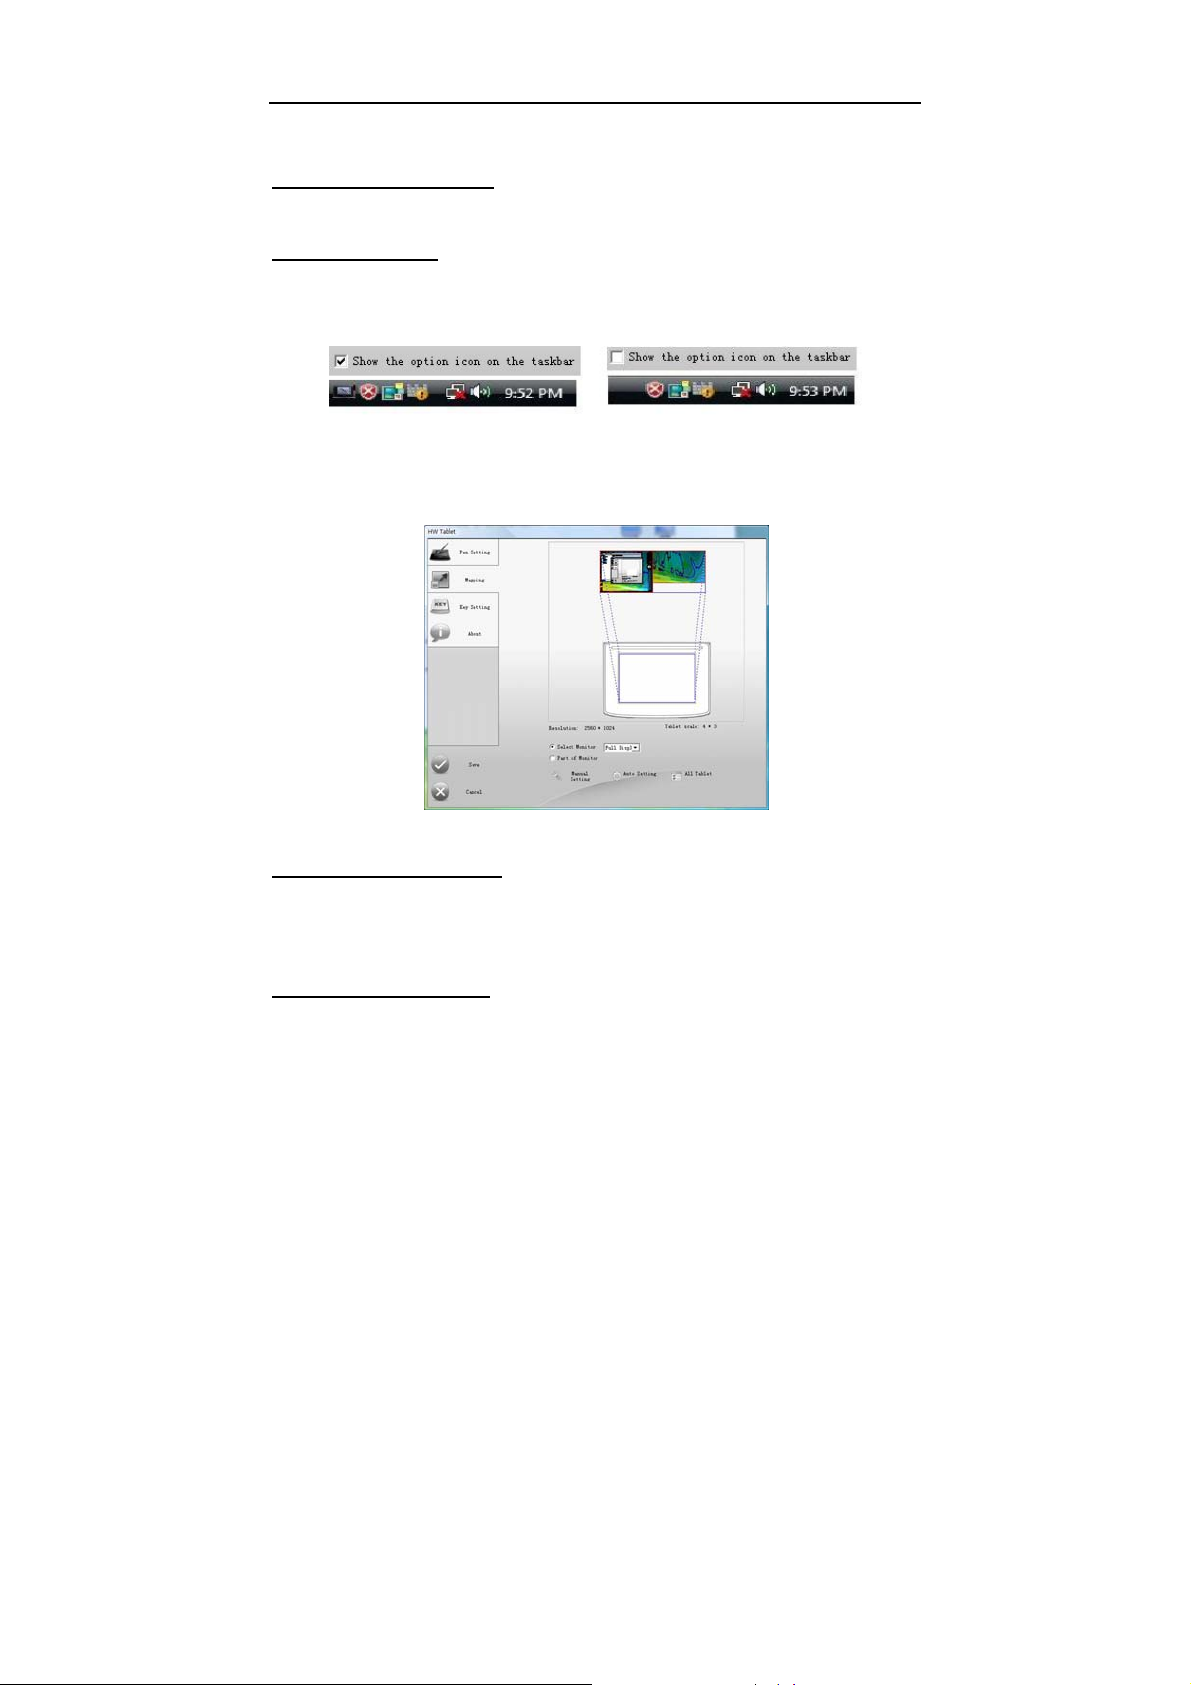
2.4.2 Mapping
a. Single Monitor Mode
The entire active area of the tablet maps to the entire monitor by
default. If your computer has more than one monitor, see
Multi-Monitor Mode.
b. Multi-Monitor Mode
a) Full Screen
12

INSTRUCTION FOR WINDOWS SYSTEMS
Choose Select Monitor and then select Full Display from the
drop-down menu. You will see the screen area corresponding to the
active area of the tablet is mapped.
b) Screen #1
Choose Select Monitor and select Display 1 from the drop-down
menu to set the area only Display 1can be controlled by the tablet.
13
 Loading...