

Page 1
Instruction Manual
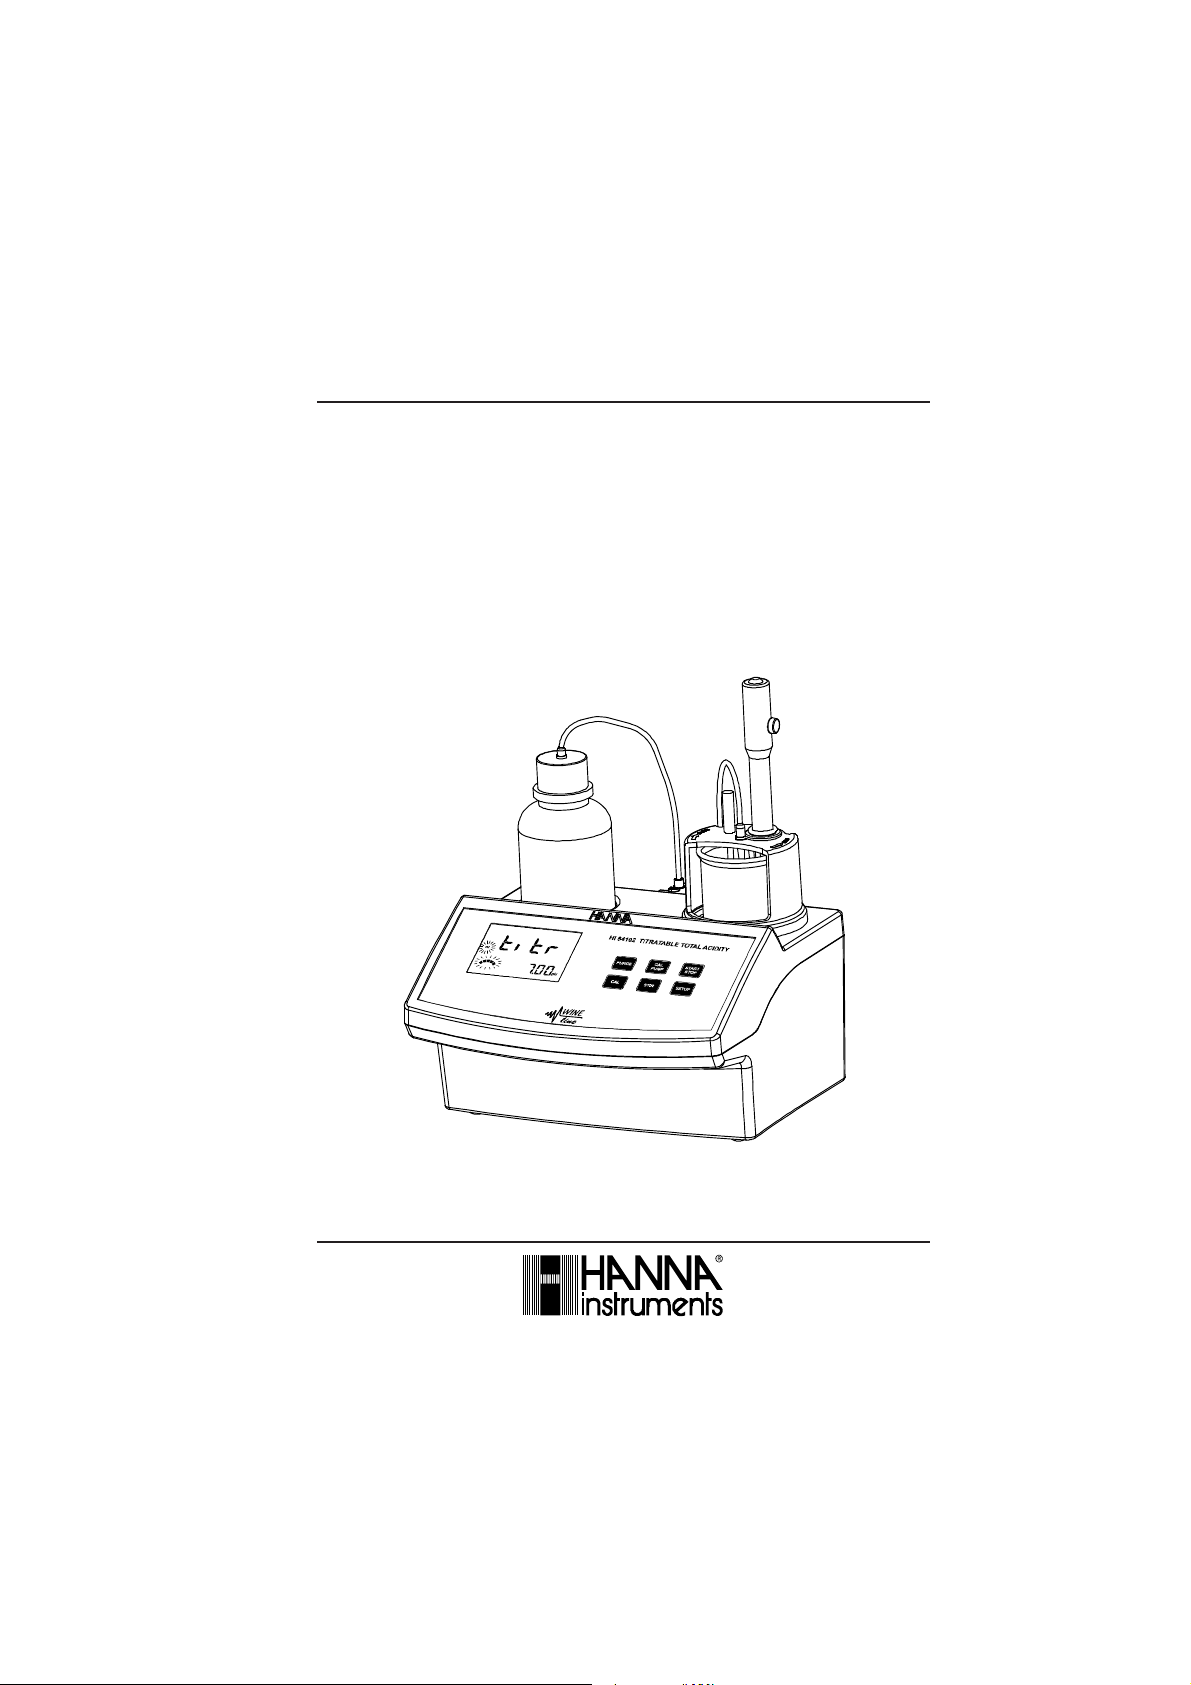
HI 84102
TITRATABLE TOTAL ACIDITY
MINITITRATOR
for wine analysis
www.hannainst.com
1
Page 2

Dear Customer,
Thank you for choosing a Hanna product. This manual will provide you with the necessary
information for the correct use of the instrument. Please read it carefully before using the meter. If
you need additional technical information, do not hesitate to e-mail us at tech@hannainst.com.
This instrument is in compliance with directives.
TABLE OF CONTENTS
PRELIMINARY EXAMINATION ................................................................................................. 3
GENERAL DESCRIPTION......................................................................................................... 3
SPECIFICATIONS................................................................................................................... 5
PRINCIPLE OF OPERATION .................................................................................................... 6
FUNCTIONAL DESCRIPTION ................................................................................................... 7
START UP ............................................................................................................................ 9
GUIDE TO DISPLAY CODES .................................................................................................. 10
TIPS FOR AN ACCURATE MEASUREMENT............................................................................... 12
MEASUREMENT PROCEDURE ............................................................................................... 13
pH CALIBRATION PROCEDURE ............................................................................................. 14
PUMP CALIBRATION PROCEDURE ......................................................................................... 14
PUMP TUBE REPLACEMENT ................................................................................................. 15
FUSE REPLACEMENT ........................................................................................................... 16
ELECTRODE CONDITIONING AND MAINTENANCE .................................................................... 16
ACCESSORIES .................................................................................................................... 18
WARRANTY ........................................................................................................................19
All rights are reserved. Reproduction in whole or in part is prohibited without the written consent of
the copyright owner, Hanna Instruments Inc., Woonsocket, Rhode Island, 02895 , USA.
2
Page 3

PRELIMINARY EXAMINATION
Please examine this product carefully. Make sure that the instrument is not damaged. If any
damage occured during shipment, please notify your Dealer.
Each HI 84102 minititrator is supplied complete with:
• Reagents set for 20 titrations
• One 2000 µL automatic pipette
• Two plastic tips for the 2000 µL automatic pipette
• Two 50 mL beakers
• Tubes set with cap
• pH electrode
• Temperature probe
• Stir bar
• Power cable
• One 30 mL bottle of Refill Solution
• One 1 mL syringe
• Two sachets of cleaning solution for wine deposits
• Two sachets of cleaning solution for wine stains
• Instruction manual
Note:Save all packing material until you are sure that the instrument works correctly.
Any defective item must be returned in its original packing.
GENERAL DESCRIPTION
The HI 84102 is a low cost, easy to use, microprocessor-based automatic titrator that benefits from
Hanna’s years of experience as manufacturer of analytical instruments.
It has an simple and yet accurate peristaltic pump to ensure the best accuracy and repeatability. By
performing pump calibration with the provided Hanna standards, the instrument accuracy is assured.
The instrument comes with a preprogrammed analysis method designed for Total Titratable Acidity
measurements on wine.
The HI 84102 performs automatic analysis, all the necessary calculations and assures to the user a
simple and effective interface.
The instrument has a powerful and effective built-in algorithm to analyze the shape of the pH electrode
response and to determine the reaction completion.
3
Page 4

By simply pressing the START STOP button, the instrument will automatically make the titration up to
the end point. The result is immediately displayed in convenient units, then the instrument is ready for
another titration.
SIGNIFICANCE OF USE
Acids occur naturally during the growing of grapes and as part of the fermentation process. Wines
show lower levels of acid when there are hot growing seasons or when the grapes come from hotter
regions. In the proper proportion, acids are a desirable trait and give the wine character.
The three predominant acids in wine are tartaric, malic and citric, all of which are intrinsic to the
grape. Tartaric acid is the principal acid in grapes and is a component that promotes a crisp flavor and
graceful aging in wine. A moderate amount of a wine’s acid comes from malic acid, which contributes
to fruitiness, and a small amount comes from citric acid. Wine also contains trace amounts of other
acids. The least desirable acid in wine is acetic acid, which, when present in more than a nominal
amount, gives wine a sour or vinegary aspect.
Total acidity, also called titratable acidity, is the sum of the fixed and volatile acids. In the United
States the total acidity is usually expressed in terms of tartaric acid, even though the other acids are
measured.
Total Acidity directly effects the color and flavor of wine and, depending on the style of the wine, is
sought in a perfect balance with the sweet and bitter sensations of other components. Too much
acidity makes wine tart and sharp; too little makes wines flat, flabby and uninteresting. Proper acidity
in wine is what makes it refreshing and an ideal accompaniment to food.
The proper acid level of a wine varies, with sweeter wines generally requiring somewhat higher levels
to retain the proper balance. For dry table wine the acceptable range is usually 0.60 to 0.75%; for
sweet wine it’s 0.70 to 0.85%.
4
Page 5

SPECIFICATIONS
Range 0.0 to 25.0 g/L of tartaric acid
Resolution 0.1 g/L
Accuracy 5% of reading
Method Acid-base titration method
Principle End-point titration
pH Calibration One-point in selected end-point: 7.00 pH or 8.20 pH
Sample volume 2 mL
Temperature Automatic from 0.0 to 100.0 °C
Compensation
pH Electrode HI 1048B (included)
Temperature Probe HI 7662-T (included)
Pump debit 0.5 mL/min
Stirring speed 1500 rpm
Environment 0 to 50 °C (32 to 122 °F); max 95% RH non-condensing
Power supply 220V/50Hz; 10VA
Dimensions 208 x 214 x 163 mm (8.2 x 8.4 x 6.4") (with beaker)
Weight 2200 g (77.6 oz.)
REQUIRED REAGENTS
Code Description Quantity/test
HI 84102-50 Titrant
HI 84102-55 Standard 2 mL
HI 84102-60 Buffer Solution 1 pH 7.00 50 mL
HI 84100-61 Buffer Solution 2 pH 8.20 50 mL
5
Page 6

PRINCIPLE OF OPERATION
The determination of total acids in wine is made according to a neutralization reaction, that is the
reaction between the acids found in wine and a base. This type of reaction forms the basis of titration
methods of analysing acids.
Titratable acidity is measured on a degassed sample at the end-point of 8.20 for Australian requirements
and 7.00 to fulfil the requirements of the European Union. Both results are expressed as g/L tartaric
acid.
For precise results it is very important to know the exact sample volume, titrant volume and concentration.
The peristaltic pump has a good repeatability but the dosing volume depends on many factors as the
diameter of the tube or the tube streching. To compensate for all this errors, the pump need to be
calibrated. The calibration of the pump is also needed in order to have high precision of the titrations.
It is important to calibrate the pump at the pH value you want to use as the endpoint of the titrations.
The calibration procedure is in fact the analysis of a known solution. By doing this, the instrument
makes a differential analysis between the standard and the wine sample. The pump volumetric debit
and the real concentration of the titrant is compensated. Only the sample volume has to be precisely
known.
6
Page 7

FUNCTIONAL DESCRIPTION
INSTRUMENT DESCRIPTION
FRONT PANELFRONT PANEL
FRONT PANEL
FRONT PANELFRONT PANEL
1) Titrant bottle
2) Liquid Crystal Display (LCD)
3) Keypad
4) Electrode holder
5) Peristaltic pump tube
REAR PANELREAR PANEL
REAR PANEL
REAR PANELREAR PANEL
7
Page 8

6) pH Electrode
7) Temperature probe
8) Beaker
9) Temperature probe socket
10) BNC electrode connector
11) Fuse
12) Power switch
13) Power cable connector
14) Peristaltic pump
KEYPAD DESCRIPTION
1) PURGE - to start/stop purging (max purging time is 5 min)
2) CAL PUMP - to enter pump calibration mode
3) START STOP - to start/stop titration, pump calibration or pH calibration
4) SETUP - to enter/exit SETUP menu
5) STIR - to start/stop the stirrer while in measurement, pH calibration or purging mode
6) CAL - to enter/exit pH calibration or to select the end-point while in SETUP mode
LCD DESCRIPTION
8
Page 9

1) Selected mode: SETUP, CAL or CFM for confirming different values
2) Stability indicator: when reading is unstable or calibration is in progress
3) Stirrer active tags
4) Calibration messages
5) Pump active tags
6) Calibration messages
7) “pH” tag: when a buffer is displayed on the secondary display
8) Four digit and half secondary display
9) “Time” tag: when the time is displayed on the secondary display
10) Four digit and half main display
11) “pH” upper tag: when performing a pH calibration or entering SETUP mode to change the end-point
12) Automatic Temperature Compensation: when ATC blinks the temperature probe is not connected
and the temperature value will be considered to be 25
0
C.
START UP
• Place the instrument on a flat table. Do not place the instrument on direct sun light.
• Connect the titrator to mains socket with ground connection and the correct voltage and
frequency. See the label on the instrument rear for this.
• Place the peristaltic pump tube on the pump. See the Pump Tube Replacement section for the
procedure.
• Remove the reagent bottle cap and place the bottle cap of the tubes set. Place the reagent
bottle in the appropriate place on the titrator top.
• Turn the instrument ON using the power switch from the rear panel of the instrument and wait
until it displays dashes.
9
Page 10

GUIDE TO DISPLAY CODES
This prompt appears for a few seconds each time the instrument is
turned ON.
Main screen display.
Main screen display with stirrer active.
Purging mode message.
PUMP CALIBRATION MESSAGES
This screen appears each time the meter enters pump calibration
mode. The meter is ready to start pump calibration by pressing the
START STOP button.
This screen appears while pump calibration is in progress. Pressing
CAL PUMP or START STOP button, the minititrator returns to the
main screen.
This prompt appears for a few seconds before returning to the
main screen, when pump calibration is done.
This error message appears when the sample concentration exceeds
25g/L.
10
Page 11

This error message appears when the standard solution is wrong.
This error message appears when the input readings (pH, temperature)
exceed the input limits.
pH CALIBRATION MESSAGES
This screen appears each time the titrator enters pH calibration mode.
This screen appears when the pH calibration is started by pressing the
START STOP button. Pressing again START STOP or the CAL button,
the pH calibration is aborted and the instrument returns to the main
screen.
This prompt appears for a few seconds before returning to the main
screen, when the pH calibration is done.
The “WRONG”
when the buffer solution is not correct or when the probe is wrong.
Clean the electrode by following the Cleaning Procedure or check the
quality of the buffer in order to continue the pH calibration.
Press the CAL or START STOP button to leave pH calibration mode.
SETUP MESSAGES
This screen appears each time the minititrator enters SETUP mode.
Press the CAL button in order to change the end-point. Press the
SETUP button to exit SETUP mode at any time.
“ ” / “ WRONG” “ ” tags alternatively blinking appear
11
Page 12

TITRATION MESSAGES
This screen appears each time the minititrator enters TITRATION mode.
Press the START STOP button in order to stop the titration and return
to the main screen.
The titration result, expressed as concentration of tartaric acid in g/L, is
displayed at the end of the titration process. Press the START STOP
button to return to the main screen.
This error message appears when the input reading (pH, temperature)
exceeds the input limits.
This screen appears when the evaluated concentration is out of range.
TIPS FOR AN ACCURATE MEASUREMENT
The instructions listed below should be carefully followed during testing to ensure best accuracy.
• Purge the peristaltic pump to have fresh titrant when starting a new analysis or calibration.
• Calibrate the peristaltic pump before performing an analysis.
• Analyze the wine immediately after the sample is obtained.
• Clean the electrode with the HI 700635 or HI 700636 cleaning solution, specially made for
wine industry, if it was unused for a long time.
12
Page 13

MEASUREMENT PROCEDURE
Warning: Make sure the instrument has been calibrated (pH and pump calibration) before
performing a wine sample analysis.
• Use the 2000 µL automatic pipette to add exactly
2 mL of wine sample to the 50 mL beaker.
• Fill the beaker up to the 50 mL mark with deionized
water, place the stirrer bar into the beaker and then
place the beaker in the appropriate place on the
minititrator top.
• Place the electrode holder on the top of the beaker
and secure it by turning clockwise.
• Immerse the pH and the temperature probe
approximately 2 cm (0.8“) into the sample to be
tested while paying attention to not touch the stir bar.
• Insert the dosing tip in the appropriate holder place
and pay attention to not be immersed into solution.
• Press the START STOP button to start the titration.
The display will show “titr” during titration, along
with stirrer and pump tags blinking on the LCD, and
7.00 or 8.20 pH buffer on the secondary display.
• At the end of the titration, the Total Titratable Acidity
concentration is displayed in g/L.
Note: If the end-point is not reached or it is not recognized
because of the noisy solution, an error message will
be displayed.
13
Page 14

pH CALIBRATION PROCEDURE
The pH calibration must be performed each time the pH electrode is changed.
• Turn the instrument ON using the power switch from
the rear panel of the instrument.
• Fill the 50 mL beaker up to the 50 mL mark with
Buffer Solution 1 (7.00 pH) or Buffer Solution 2
(8.20 pH).
• Place the pH electrode into solution and press the
CAL button. The CAL message will appear blinking
along with pH value.
• Press START STOP in order to start the electrode
calibration.
• At the end of the calibration procedure done appears
for a few seconds and then the meter automatically
returns to measurement mode.
PUMP CALIBRATION PROCEDURE
The calibration of the pump must be performed each time the pump tube, the reagent bottle or the pH
electrode is changed. It is recommended to perform the pump calibration before each set of measurements.
• To prepare the sample for calibration, follow the
measurement procedure for Total Titratable Acidity
measurements by using HI 84102-55 Total Titratable
Acidity Standard instead of wine sample.
• After sample preparation, press the CAL PUMP button.
Std will blink on the screen.
14
Page 15

• Press START STOP in order to start the pump
calibration.
• At the end of the calibration procedure done appears
for a few seconds and then the meter automatically
returns to measurement mode.
PUMP TUBE REPLACEMENT
To remove the tube of the peristaltic pump follow next steps:
• Detach the old tube system from the reagent bottle.
• Grasp one fixing ring of the peristaltic pump tube.
• Pull the tube until it’s taken out from its location.
• Remove the other side of the tube.
To mount the new peristaltic pump tube follow next steps:
• Position one peristaltic pump fixing ring on its location.
• Stretch the tube over the peristaltic pump cylinders.
• Fix the second pump fixing ring on its location.
• Attach the tube to the reagent bottle.
Note: Purge the peristaltic pump until drops of reagent appears on the dosing tip by pressing the
PURGE button.
Dismount the tube if the titrator is not used several days.
15
Page 16

FUSE REPLACEMENT
To change the fuse follow next steps:
• Disconnect the power cord from the rear panel of the
instrument.
• Pull out the fuse holder located near the power cord
connector.
• Replace the fuse with a similar one.
• Push the fuse holder with the fuse in the appropriate
place.
ELECTRODE CONDITIONING & MAINTENANCE
PREPARATION PROCEDURE
Remove the protective cap of the pH electrode (HI 1048B).
DO NOT BE ALARMED IF SALT DEPOSITS ARE PRESENT. This is normal with electrodes. They will
disappear when rinsed with water.
During transport, tiny bubbles of air may form inside the glass bulb affecting proper functioning of the
electrode. These bubbles can be removed by “shaking down” the electrode as you would do with a
glass thermometer.
If the bulb and/or junction is dry, soak the electrode in HI 70300
16
Storage Solution for at least one hour.
Page 17

If the filling solution (electrolyte) is more than 2½ cm (1”) below the fill hole, add HI 7082 3.5M KCl
Electrolyte Solution.
For faster response, unscrew the fill hole screw during measurements.
STORAGE PROCEDURE
To minimize clogging and assure a quick response time, the glass bulb and the junction of the
electrode should be kept moist and not allowed to dry out.
Replace the solution in the protective cap with a few drops of HI 70300 Storage Solution or, in its
absence, Filling Solution (HI 7082). Follow the Preparation Procedure before taking measurements.
Note: NEVER STORE THE ELECTRODE IN DISTILLED OR DEIONIZED WATER.
PERIODIC MAINTENANCE
Inspect the electrode and the cable. The cable used for connection to the instrument must be intact
and there must be no points of broken insulation on the cable or cracks on the electrode stem or
bulb. Connectors must be perfectly clean and dry. If any scratches or cracks are present, replace the
electrode. Rinse off any salt deposits with water.
Probe Maintenance
Refill the reference chamber with fresh electrolyte (HI 7082). Allow the electrode to stand upright
for 1 hour. Follow the Storage Procedure above.
CLEANING PROCEDURE
•
Wine deposits
Wine stains
•
IMPORTANT: After performing any of the cleaning procedures, rinse the electrode thoroughly with
distilled water, refill the reference chamber with fresh electrolyte and soak the electrode in
HI 70300 Storage Solution for at least 1 hour before taking measurements.
Soak in Hanna HI 70635 cleaning solution for 15 minutes
Soak in Hanna HI 70636 cleaning solution for 15 minutes
17
Page 18

ACCESSORIES
REAGENT SETS
HI 70300LElectrode storage solution (500mL)
HI 70635LCleaning solution for wine deposits (500mL)
HI 70636LCleaning solution for wine stains (500 mL)
HI 7082 Electrode filling solution (4 X 30 mL)
HI 84102-50 Titrant solution (110mL)
HI 84102-55 Calibration standard (100mL)
HI 84102-60 Buffer solution 1 pH 7.00 (500 mL)
HI 84102-61 Buffer solution 2 pH 8.20 (500mL)
OTHER ACCESSORIES
HI 1048B pH probe with shorter cable
HI 70483T Tube set with cap for titrant bottle and tip
HI 731316 Stir bar (5pcs.)
HI 731342 Automatic pipet 2000µL
HI 731352 Tips for 2000µL automatic pipet (4pcs.)
HI 740036P Beaker 50mL (10pcs.)
HI 740198 Power cable
HI 7662-TTemperature probe
Recommendations for Users
Before using this product, make sure that it is entirely suitable for your specific application and for
the environment in which it is used.
Operation of this instrument may cause unacceptable interferences to other electronic equipments,
this requiring the operator to take all necessary steps to correct interferences.
Any variation introduced by the user to the supplied equipment may degrade the instrument EMC
performance.
To avoid damages or burns, do not put the instrument in microwave ovens. For yours and the
instrument safety do not use or store the instrument in hazardous environments.
18
Page 19

WARRANTY
HI 84102 is warranted for two years against defects in workmanship and materials when used for
its intended purpose and maintained according to the instructions.
This warranty is limited to repair or replacement free of charge.
Damage due to accident, misuse, tampering or lack of prescribed maintenance is not covered.
If service is required, contact your dealer. If under warranty, report the model number, date of
purchase, serial number and the nature of the failure. If the repair is not covered by the warranty,
you will be notified of the charges incurred.
If the instrument is to be returned to Hanna Instruments, first obtain a Returned Goods Authorization
Number from the Customer Service Department and then send it with shipment costs prepaid.
When shipping any instrument, make sure it is properly packaged for complete protection.
To validate your warranty, fill out and return the enclosed warranty card within 14 days from the
date of purchase.
WARRANTY
Hanna Instruments reserves the right to modify the design, construction and appearance of its products
without advance notice.
19
Page 20

SALES AND TECHNICAL SERVICE CONTACTSSALES AND TECHNICAL SERVICE CONTACTS
SALES AND TECHNICAL SERVICE CONTACTS
SALES AND TECHNICAL SERVICE CONTACTSSALES AND TECHNICAL SERVICE CONTACTS
Australia:
Tel. (03) 9769.0666 • Fax (03) 9769.0699
China:
Tel. (10) 88570068 • Fax (10) 88570060
Egypt:
Tel. & Fax (02) 2758.683
Germany:
Tel. (07851) 9129-0 • Fax (07851) 9129-99
Greece:
Tel. (210) 823.5192 • Fax (210) 884.0210
Indonesia:
Tel. (21) 4584.2941 • Fax (21) 4584.2942
Japan:
Tel. (03) 3258.9565 • Fax (03) 3258.9567
Korea:
Tel. (02) 2278.5147 • Fax (02) 2264.1729
Malaysia:
Tel. (603) 5638.9940 • Fax (603) 5638.9829
Singapore:
Tel. 6296.7118 • Fax 6291.6906
South Africa:
Tel. (011) 615.6076 • Fax (011) 615.8582
Taiwan:
Tel. 886.2.2739.3014 • Fax 886.2.2739.2983
Thailand:
Tel. 66.2619.0708 • Fax 66.2619.0061
09/05
United Kingdom:
Tel. (01525) 850.855 • Fax (01525) 853.668
USA:
Tel. (401) 765.7500 • Fax (401) 765.7575
For e-mail contacts and a complete list of Sales and Technical offices, please see
www.hannainst.com
.
20
MAN84102
 Loading...