

Page 1
Hamilton Safe Company
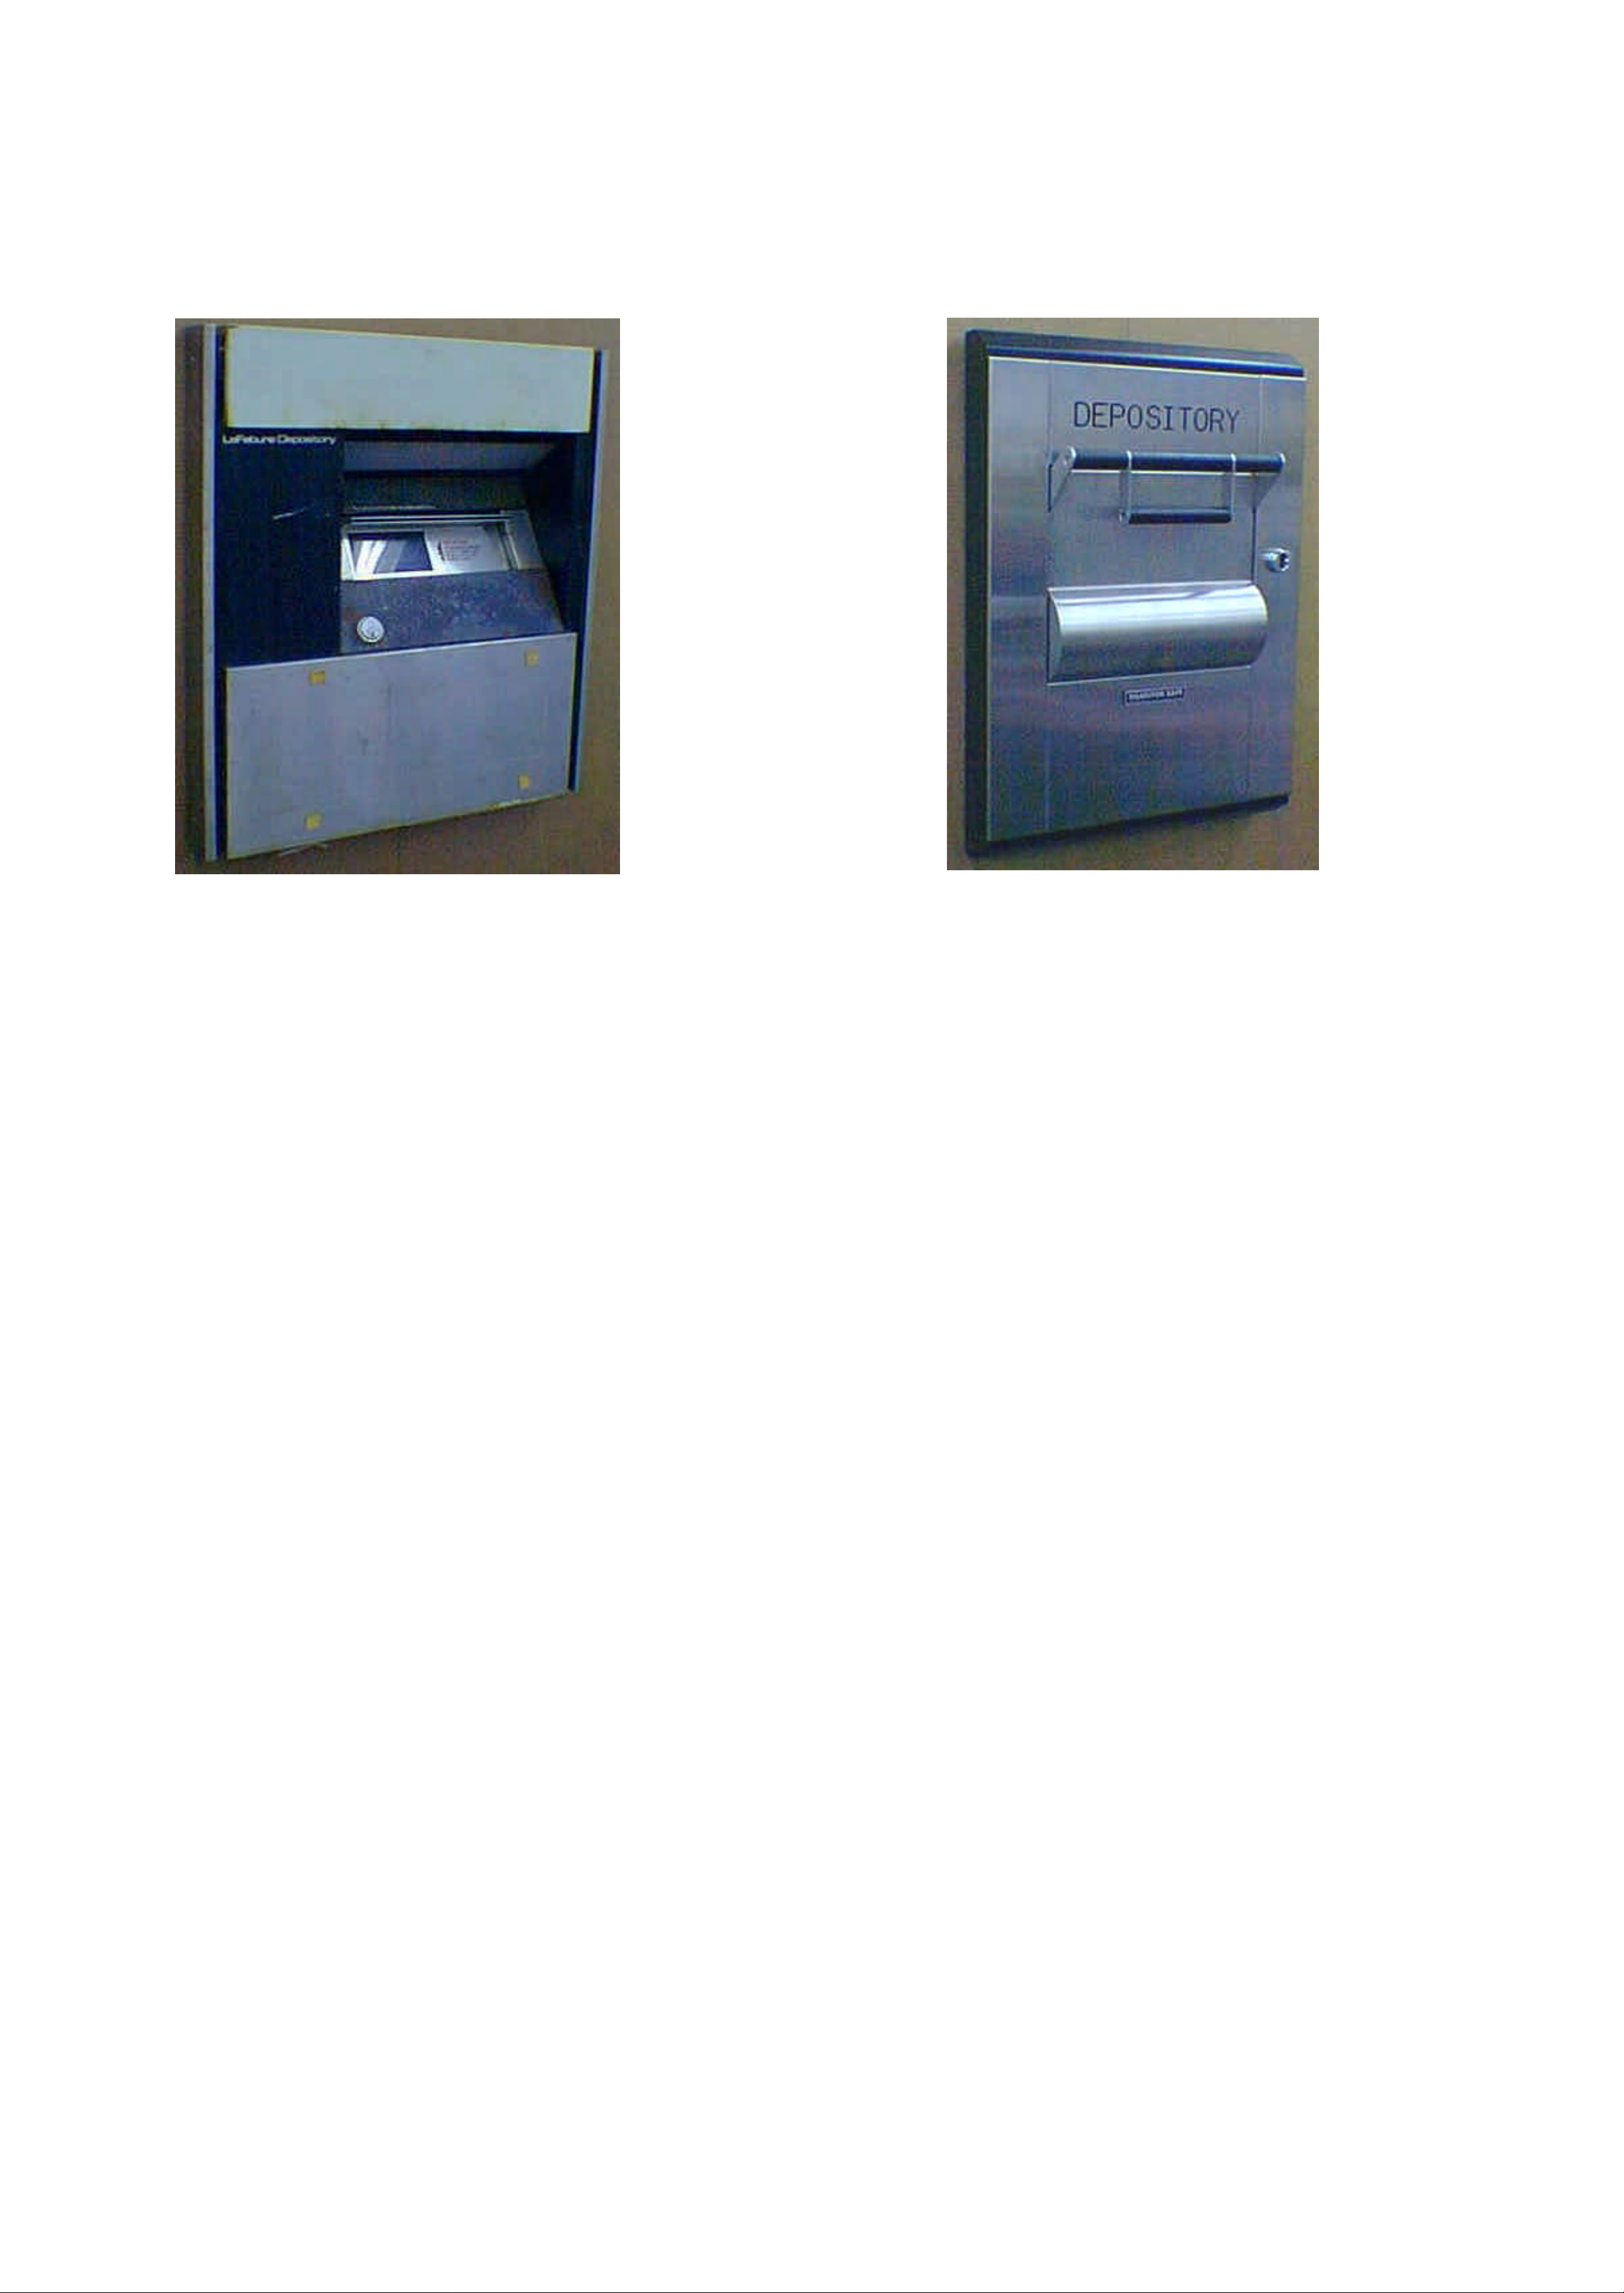
LeFebure 612
Hamilton 98Rh
DOCUMENT NUMBER: 08-327
98RH Nighthead
Instruction sheet for replacing LeFebure 612 with Hamilton 98RH.
Page 1 of 9
Page 2

Hamilton Safe Company
Note before you begin disconnect all electric from old night depository.
Step #1:
Step #2:
Kit for replacing LeFebure 612 includes 1/4" x 1" x 16-1/2" bar, template, extended mount, and trim collar (6" three sides).
Tools required: Hex wrench set, screwdrivers, 5/16" drill, 3/18-16 tap, welder, four clamps, two yard sticks.
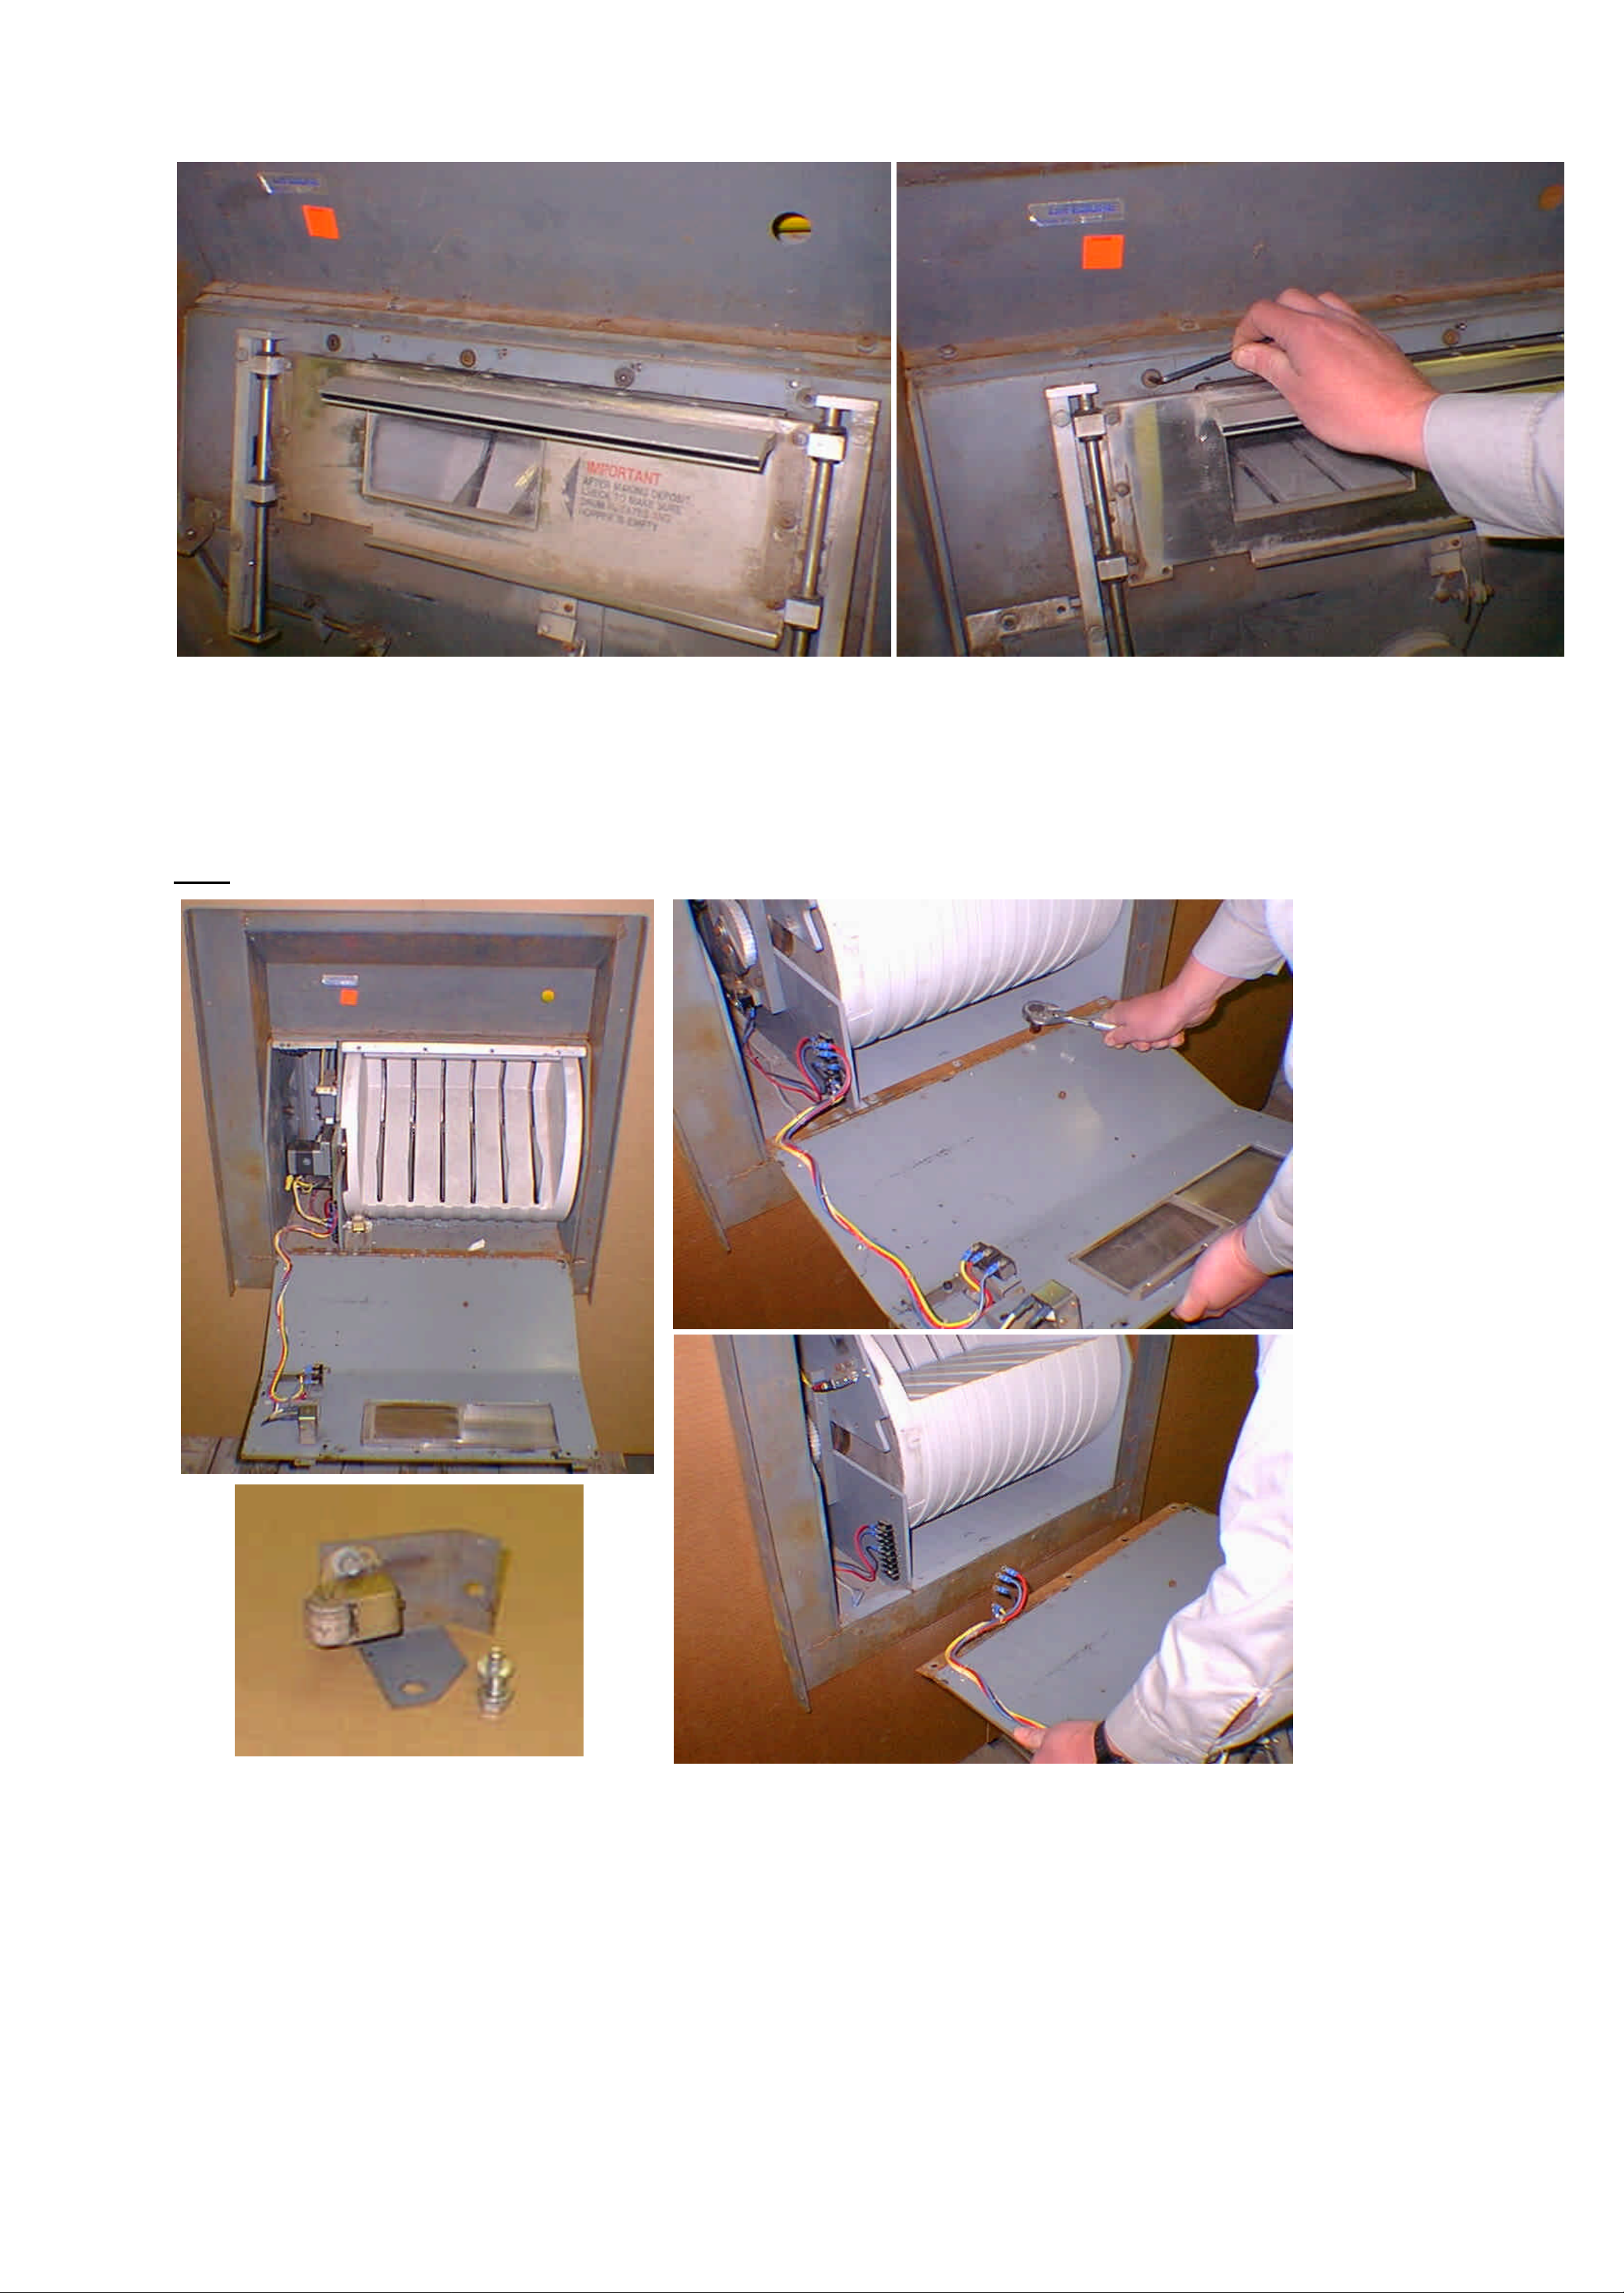
Remove the four screws (two on each side) that hold the face trim and remove face trim.
Remove four screws from the door top channel, and remove channel.
Page 2 of 9
Page 3
Hamilton Safe Company
Step #3:
Step #4:
Note
: Disconnect electric from night head before cutting or removing any wires.
Remove the four screws that are now exposed from behind the door top channel. These may be twist off screws that
will require a chisel or punch to remove or drilled completely out.
The front panel will hinge down after the four top screws are removed. Cut or disconnect the wires connected to the
front panel. Then remove the screws holding the hinge and spring loaded roller and remove front panel.
Page 3 of 9
Page 4

Hamilton Safe Company
Step #5:
Step #6:
Cut or disconnect wires going to motor. Remove three screws that hold the motor bracket to the frame and
remove the motor assembly.
Cut or disconnect wires from terminal strip that lead to switch on hopper block.
Remove two screws that hold the top cover over the hopper gear at the left end of the hopper. Then remove the four
screws that hold the hopper block to the frame. Turn the hopper so that the rectangle notch, on the right side of the
hopper, is straight out to the front of the night head and with a long 3/16" hex key wrench remove one screw on axle.
Turn the hopper so that the rectangle notch on the right side is straight out the back and remove the hopper.
Page 4 of 9
Page 5

Hamilton Safe Company
Step #7:
Step #8:
Remove the four screws holding the axle block to the right side of the housing.
Remove the eight screws holding the grout shield and remove the grout shield.
Page 5 of 9
Page 6

Hamilton Safe Company
Step #9:
Step #10:
Remove the three screws on the top of the frame that holds the top casting to frame.
Bend down the top casting to break the rear screws with a hammer and pry bar. Remove top casting from frame.
Weld the 1/4" x 1" x 16-1/2" bar to the bottom of the frame flush with the front edge.
The bar is positioned to raise the new 98RH 1" higher.
Page 6 of 9
Page 7

Hamilton Safe Company
Step #11:
Step #12:
Step #13:
If your template is not yet formed, bend both sides up 90 degrees and bend both tabs on the top of each
side down 90 degrees.
Bolt the extended mount to the right side of the template using two 3/8" bolts.
Clamp two straight bars (yard sticks) to the tabs of the template to extend them out beyond the opening in wall.
Place template into housing making sure that the bars go flush with the wall face.
Page 7 of 9
Page 8

Hamilton Safe Company
Step #14:
Step #15:
Weld the extended mount to the right side of the frame.
Drill the three holes on the left side with 5/16" drill. These holes will need tapped 3/8-16.
The opening is ready for the new 98RH nighthead to be set in place with the template removed.
Page 8 of 9
Page 9

Hamilton Safe Company
Step #16:
Step #17:
Bolt the trim collar to the new 98RH using the screws provided.
Set the new 98RH Nighthead in the housing and partially open the bucket to allow the head to be pushed into the
housing flush with the wall face. From inside the safe bolt the new head into place using six 3/18-16 bolts with
lock washers and flat washers.
Page 9 of 9
 Loading...