

Page 1
LE32B7000C
LE40B7000CF
Please read this manual carefully before operating the unit,and keep it for
future reference.
Page 2
01 Safety Warnings
Welcome
Important Information
Safety notice
Warning and cautions
02 Introduction
Caution
Main Features 5
Main Parameter 5
Installation 5
PC Supported Mode
Base Stand Assembly Instruction
Wall Mounting Installation Guidelines
Front Control Panel
Rear/Side Sockets
Connecting to your Haier TV
Common Interface
2
2
3
4
5
6
6
7
8
8
9
11
PICTURE MENU 17
Audio MENU
Clock MENU
SETUP MENU
LOCK MENU
EPG Menu(Electronic Program Guide)
PVR File System(only for TV)
Prepare to re cord the pro gram
Rec ord the program
Play the recording
Time shift
USB Player
17
17
18
18
19
19
20
20
20
21
22
05 Trouble shooting
Trouble shooting
24
03 Remote Control
Remote Control
Teletext
12
13
04 Operation
Installation Guide
CHANNEL MENU 14
Auto Tuning (DVB-T) 14
Auto Tuning (DVB-C) 15
DTV Manual Tuning (DVB-T)
DTV Manual Tuning (DVB-C)
ATV Manual Tu
Channel edit
Common Interface
Signal Information (Only for DTV)
ning
14
16
16
16
16
17
17
06 Specification
icationSpecif 27
Page 3
01 Safety warnings
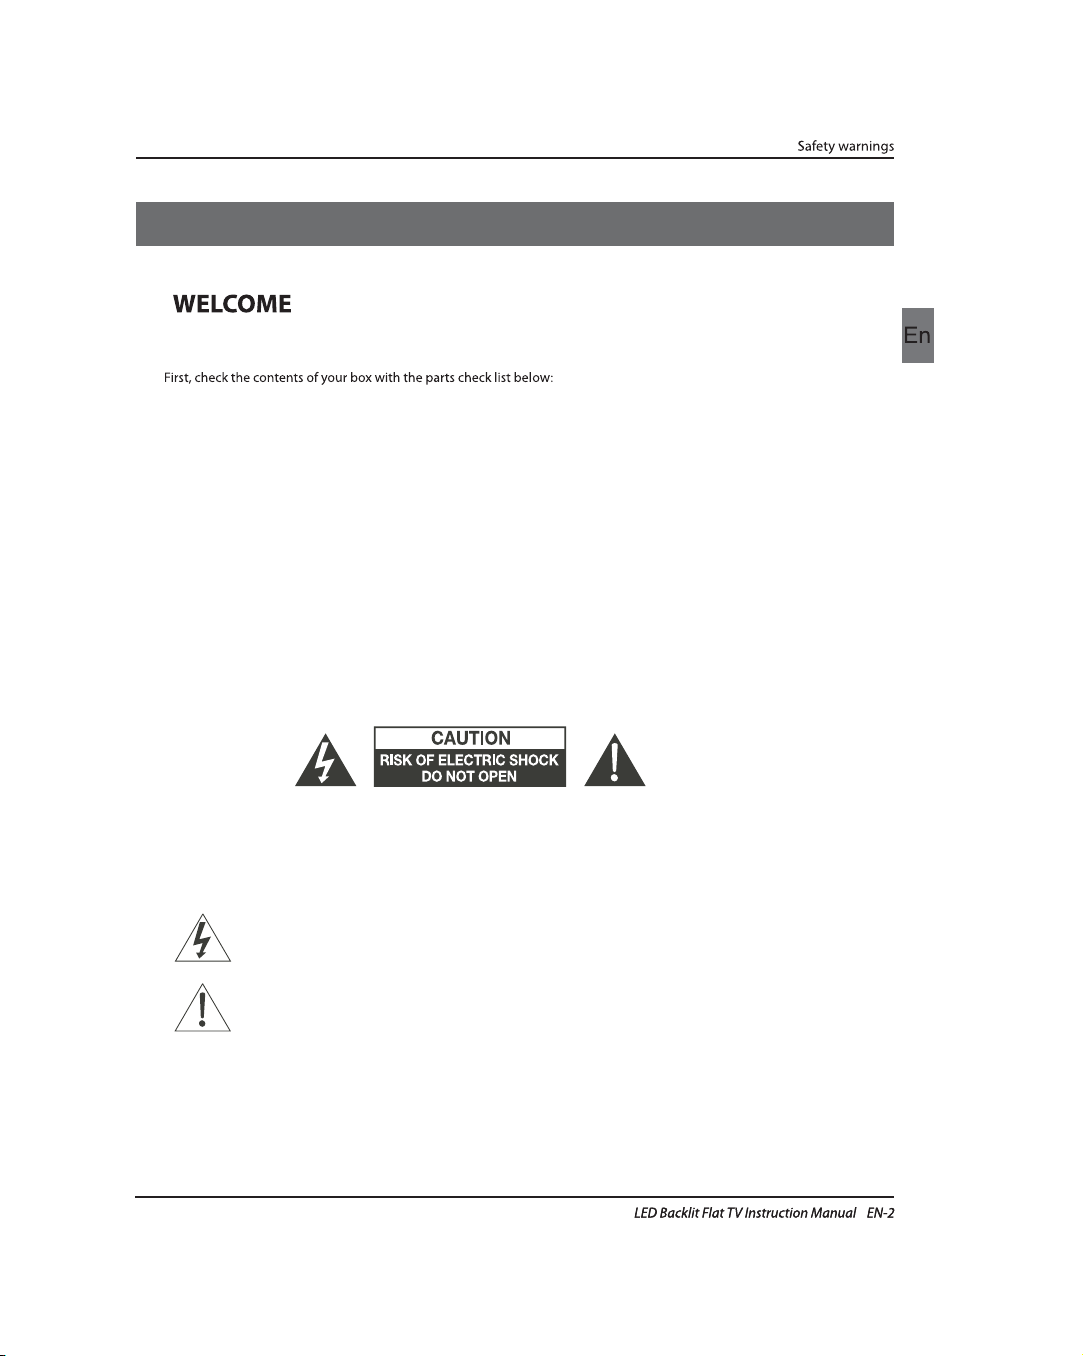
Thanks for buying this 32"/40" LED LCD TV.This guide will help you set up and begin using your TV.
32”/40” HD Digital LED LCD TV
Remote control
AAA battery x2
Instruction Manual
Quick start guide
Warranty Card
Screws
Stand
AV adaptor cable
YPbPr adaptor cable
Now you can get star
IMPOR
READ ALL INSTRUCTIONS BEFORE USE AND KEEP FOR FUTURE REFERENCE.
CAUTION
TO REDUCE THE RISK OF ELECTRIC SHOCK, DO NOT REMOVE COVER (OR BACK).NO USER SERVICEABLE PARTS INSIDE.
FOR ANY PROBLEMS, REFER SERVICING TO THE CUSTOMER HELP LINE. THERE IS A LIGHTNING ARROW SYMBOL IN
THE TRIANGLE: THIS SYMBOL INDICATES HIGH VOLTAGE IS PRESENT INSIDE. IT IS DANGEROUS TO MAKE ANY KIND OF
CONTACT WITH ANYINSIDE PART OF THIS PRODUCT.
THERE IS A EXCLAMATION MARK IN THE TRIANGLE: THIS SYMBOL ALERTS YOU THAT IMPORTANT LITERATURE
CONCERNING OPERATION AND MAINTENANCE HAS BEEN INCLUDED WITH THIS PRODUCT.
SOURCES OF HUMIDITY. DO NOT USE ANY ABRASIVE CLEANERS WHICH MAY SCRATCH OR DAMAGE
THE LCD SCREEN. AVOID CONTACT WITH OBJECTS THAT MAY SCRATCH THE LCD SCREEN.
DAMAGE. REFER ALL SERVICING TO THE CUSTOMER HELPLINE.
ted!
TANT INFORMATION
CAUTION:TO REDUCE THE RISK OF ELECTRIC SHOCK AND FIRE, DO NOT PUT THE TV SET NEAR
NOTE: SERVICING THE UNIT YOURSELF IS UNAUTHORISED AND COULD LEAD TO INJURY OR PRODUCT
Page 4
Safety notice
CAUTION:When the apparatus was in
electrostatic circumstance, it maybe
malfunction and need to reset by user.
EN-3
Page 5
Dim:515*320mm(不包括底座)
Warning
High voltages are used in the operation of this
television receiver. Do not remove the cabinet
back from your set. Refer servicing to qualified
service personnel.
Warning
To prevent fire or electrical shock hazard, do
not expose the television receiver to rain or
moisture.
Warning
Do not drop or push objects into the
television cabinet slots or openings. Never
spill any kind of liquid on the television
receiver.
Caution
Do not block the ventilation holes in the back
cover. Adequate ventilation is essential to
prevent failure of electrical components.
Caution
Do not trap the power supply cord under the
television receiver.
Caution
Never stand on, lean on, or suddenly push the
television or its stand. You should pay special
attention to children. Serious injury may result if
it should fall.
Caution
Do not place your television on an unstable cart,
stand, shelf or table. Serious injury to an
individual , and damage to the television, may
result if it should fall.
Caution
When the television receiver is not used for an
extended period of time, it is advisable to
disconnect the AC power cord from the AC
outlet.
Caution
If the television is to be built into a compartment
or similar enclosure, the minimum distances must
be maintained. Heat build-up can reduce the
service life of your television, and can also be
dangerous.
WARNING AND CAUTIONS
EN-4
Page 6

Introduction
02 Introdution
Never tamper with any components inside the
TV, or any other adjustment controls not
described in this manual. All LED-TV's are high
voltage electrical equipment.
When you clean dust or any water dr
SCREEN or CABINET or around any of the
buttons or connectors, the power cabled should
be removed from the power socket. Wipe the TV
with a soft, dry, dust free cloth.
During thunderstorms, unplug the power cable
and aerial / antenna cable to prevent damage to
your TV and any other devices connected to it.
All repairs to this TV should only be performed
b
personnel.
Main features
1
PC display˗
2
3
Main parameter
Panel
TV System
Video Signal System
Input Power Voltage
Power consumption
Standby Power consumption
Audio Output Power (THD 7%)
Signal Input
Signal output
Horiz
TV service
Used as Television, display terminal,
High luminance, wide viewing
HDMI interface and SCART
TVline
angle˗
Inter face˗
32" 40"
PAL-B/G ,I , D/K
SECAM-B/G , D/K , L
DVB-T, DVB-C
PAL/SECAM/MPEG2/MPEG4/H.264
1000(DTV);99(ATV)Storage channel number
AC 100-240 V 50/60Hz
60W 74W
≤0.30W
2x8W
Analog RGB(PC) x1; PC audio x1
H nterface (HDMI) x 3
Composite Input x 1
YPbPr x 1
SCART Input x 1
CI x 1
USB x 2
RF x 1
Headphone x 1
COAXIAL x 1
Composite video input >=350
YPbPr >=400
INSTALLATIONCAUTION
*Locate the TV in the room where light does
not strike the screen directly.
*Total darkness or a r
screen can cause eyestrain. Soft and indirect
lighting is recommended for comfortable
viewing.
*Allow enough space between the TV and the
wall to permit ventilation.
*Avoid excessively warm locations to prevent
possible damage to the cabinet or premature
component failure.
*Do not cover the ventilation openings when
using theTV.
4 NICAM˗
5 T ˗ime-shift
tion on the picture
EN-5
Page 7
PC
SUPPORTED MODE
Introduction
RESOLUTION
1
2
3
4
640x480
800x600
1024x768
1360x768
V.Freq.(KHz) H.Freq.(KHz)
Base Stand Assembly Instruction
1.Place the TV with the display side down on a flat
surface. Use a cloth to protect the display. Attach the
the supplied 4pcs silver screws.
60 31.47
60 37.88
60
60 47.7
2. Attach the stand base set to the bottom
4pcs black screws.
48.36
INSTALLATION NOTES
Locate the TV in a room where light does not strike the screen directly. Total darkness or a
reflection on the screen can cause eyestrain. Soft and indirect lighting is recommended for
comfortable viewing.
Allow enough space between the TV and the wall to permit ventilation.
Please do not attempt to rotate the TV on the stand.
Avoid excessively warm locations to prevent possible damage to the cabinet or premature
component failure.
EN-6
Page 8
Introduction
WALL MOUNTING INSTALLATION GUIDELINES
This television can be wall mounted as follows:
1
holes on the back of the television.
200mm
M6
200mm
M6
M6
M6
M6
(32”)
400mm
(40”)
200mm
M6
M6
M6
EN-7
Page 9
Front control panel
3
2
Remote control sensor.
Indicator LED:
RED: STAND BY.
Key board.
30 30
1
≤8m
2
3
4
5
SOURCE
MENU
VOL+/VOL-
CH+/CH-
POWER
SOURCE
SOURCE
1
MENU
MENU
VOL+
VOL-
CH+
CH-
POWER
2
3
4
5
VOL +
VOL -
CH +
CH -
POWER
Displa1
y the input source menu.
Display main MENU.
Adjust sound level.
In MENU,adjust the item that you selected.
In TV mode,press CH+ or CH- to change
the channel up and down.
In MENU, press CH+ or CH- to select items .
Introduction
Rear/Side Sockets
DIGITAL AUDIO OUTPUT
YPbPr
AV
1
HDMI1 HDMI2 HDMI3
9
AV
YPbPr
DIGITAL AUDIO OUTPUT( )COAXIAL
SCART
PC AUDIO
VGA
RF
(COAXIAL)
2
3
10
11
input
input
digital audio output
input/output
input
input
input
SCART
4
COMMON INTERFACE(CI)
12
PC AUDIO
5
USB1 USB2
13
HEADPHONE
HDMI1
HDMI2
HDMI3
COMMON INTERFACE(CI)
USB1
USB2
R F
VGA
6
HEADPHONE
8
7
14
analogue audio output
input
input
input
input
input
input
EN-8
Page 10

Introduction
Connecting to your Haier TV
HDMI1 HDMI2 HDMI3
AudioVideo machine
with HDMI interfaces
AV
CVBSDVD Player or other
machine with CVBSSVideo
DIGITAL AUDIO OUTPUT
YPbPr
Amplifier
(COAXIAL)
5<
:
*5
COMMON INTERFACE(CI)
SCART
%
USB1 USB2
PC AUDIO
VGA
CVBSDVD Player or other
machine with YPbPrYCbC r
R F
HEADPHONE
G Green Y
B Blue PbCb
W WhiteAUDIOL
R Red AUDIORPrCr
Y Yellow VIDEO
EN-9
Page 11

Connecting to your Haier TV
Connecting a DVD player / Satellite / cable
set top box receiver / games console / PC or
Laptop
There are several options to connecting a DVD
player / Satellite or Cable set top box receiver /
games console / PC or Laptop to your TV.
Option 1 SCART
Connect a SCART cable (not supplied)
from the SCART socket on the TV to the DVD
player / Satellite or cable set top box receiver or
games consol.
To select the device connected with the
SCART cable press the SOURCE button on the
remote and use the keys to select SCART
and press the OK button.
Note:- The TV will default to the SCART
connection wh
Option 2 HDMI1/HDMI2/HDMI3
If the device you want to connect to the TV
is switched on, switch off the device first.
Connect a HDMI cable (not supplied) from
the HDMI socket on the TV to the DVD player /
Satellite or cable receiver or games consol.
Switch on the device you have just
connected to the TV
To select the device connected with the
HDMI cable press the SOURCE button on the
remote and use the keys to select HDMI and
press the O
Note: Only HDMI2 supports ARC function,HDMI1
and HDMI3 don’t support.
Option 3 AV Audio Visual
(Yellow/White/Red)
Make sure that both TV and the device are
switched off before connectin
Connect the AV cables (not supplied) from
the Video (yellow) and Audio (white, red)
sockets on the TV to the DVD player or games
console etc.
To select the device connected with the
cable press the SOURCE button on the
AV
remote and use the keys to select AV and
press the OK button.
Option 4 YPbPr
(Green/Blue/Red)+(White/Red)
Make sure that both TV and the device are
switched off before connecting.
Connect the cables (not supplied) from the
YPbPr IN sockets Y, Pb, Pr (green, blue, red) and
L-Audio-R (white, red) on the TV to the DVD player
or games console etc.
en the TV is switched on.
K button.
g.
Introduction
To select th e devic e connected wi th the
YPbPr
cable press the SOURCE button on the
remote and use theƷ keys to select and
ss th e OK button.
pre
Opt ion 5 VGA (15pin Sub-D)
Connec t a VGA c able (n ot supp lied) f rom the
VGA s ocket o n the TV to the PC / L aptop.
To select th e PC / Lapt op connected with t he
VGA c able press t he SOUR CE butt on on the
remote a nd use th e keys to sele ct PC and
press th e OK button.
Not e VGA is vid eo only. Fo r audio f rom your
PC/ Lapto p you need to conne ct a separate
cable from the PC Audio (3.5mm jack) to the
headphone socket on you PC/Laptop (3.5mm
jack)
Opt ion 6 USB
Mos t USB sti cks can b e conne cted to your T V
and s ome dig ital camer as may al so work .
Connect USB stick (not supplied) or a USB
cable (not s
To select th e USB dev ice connec ted to th e TV,
press the SOURCE button on the remote and
use t he keys to sel ect USB and p ress the
OK button.
Note1:Only *.jpg , *.mp3 , *.txt , *.avi ,*.mp4 , files will
wor k, othe r file types are n ot guar anteed and m ay not.
Not e 2. Apple iPh ones an d iPods are not
compatible with your TV.
Note 3. When connecting any device to the USB
con necti on, kee p the USB c able le ngth as s hort
as possible.
Opt ion 7
Insert the plug of the earphone into the headphone
socket on the TV. The TV speakers are now muted.
Alternatively you can also plug in external speakers if
required.
Opt ion 8
COAXIAL
connect audio equipment, for example home
theatres and other digi
short distances. The signal is transmitted over
eit her a coa xial cable w ith RCA connec tors.
Mak e sure th at both TV and t he devi ce are
switched off before connecting.
Connec t the AV cab les (no t suppl ied) fr om
the so cket on t he TV to th e Home Theate r
sound system or digital HiFi system etc.
upplied) to the TV.
HEADPHONE OUTPUT
DIGITAL AUDIO OUT(COAXIAL)
is a di gital a udio conne ction use d to
tal H iF
COAXIAL
YPbPr
i sys tems ove r
EN-10
Page 12

Introduction
COMMON INTERFACE
The common interface (CI) slot is designed to
accept the conditional Access (CA) Module and
Smart card in order to view the pay TV
programmes and additional services.
Contact your Common Interface service provider
to get more information about the modules and
subscription.
Please noted that CA modules and smart cards
are neither supplied nor optional accessories
from us.
CAM Removed
EN-11
CAM Inserted
Common Interface option.
Picture
Audio
Clock
Setup
Lock
Auto Scan
Manual Scan
Program Edit
Common Interface
Signal Information
MENU
Channel
Return Move OK
OK
Page 13

03 Remote Control
Remote Control
(Power)
S.MODE
P.MODE
0-9
Q.VIEW
SLEEP
VOL +/-
(Mute)
AUDIO(I/II)
SUBTITLE
16
17
18
19
20
21
22
23
24
25
26
Press to turn the TV on or off.
Press to select the sound mode.
Press to select the picture mode.
Press to enter a channel number
or password.
Press to switch to the last viewed
channel.
Press to set the sleep timer.
Press to adjust the volume level.
Press to turn the sound on or off.
Press to select Mono,Nicam stereo
for ATV channel.Select Audio
language for DTV channel.
Press to turn the subtitle on or off.
Pres s to open a f avori te chan nel
list.In teletext mode,press to
hold a page.
SCREEN
(reverse)
(forward)
(play/pause)
SOURCE
P
3D WORLD
GUIDE
(previous)
(next)
(REC)
Press to change picture aspect ratio.
Press to open the on-screen menu.In teletext
mode,press to open the INDEX page.
Press to navigate the on-screen menu.
Press to confirm a selection.OK
In teletext mode,press to enter mix mode.
Press to fast forward or reverse playback in
multimedia mode and timeshift (Red and
Green button in teletext mode)
Press to turn on/off the teletext function,and
change TTX mode.
Press to play/pause in multimedia mode,
timeshift in DTV mode.
Press to open the input source list.
No function.
Press to change the channel.
Press to display the channel information.
In teletext mode,press to revealthe hidden
information.
No function.
Press to open the channel list.In teletext mode,
press t o size the te letext.
Press to display electronic programme guide
in TV mode. In teletext mode,press to enter a
secondary page.
Press to close the on-screen menu.In teletext
mode,press to hide the text.
Press to select previous or next file.(yellow and
blue button in teletext mode)
Press t o record the T V program you a re watchi ng
in DTV mode.
Press to stop multimedia playback,stop timeshift
or record in DTV mode.
mode.
Insert Batteries into the Remote Contol
1. Remove the battery cover.
2. Inserting the 2 AAA 1.5V batteries making sure the polarity
(+ or -) of the batteries matches the polarity marks inside the unit.
3. Mount the battery cover. Replace with new batteries when the
TV set begins to show the following symptoms:Operation is
unsteady or erratic. Sometimes the TV set does not function
with Remote Control Unit.
Remark:
1) Alkaline Battery Recommeded.
2) Remove batteries when they are exhausted or if the remote
control is not to be used for
long time.
EN-12
Page 14

Remote Control
TELETEXT
Teletext is an information system broadcast by certain channels which can be consulted like
a newspaper. It also offers access to subtitles for viewers with hearing problems or who are
not familiar with the transmission language(cable networks, satellite channels, etc.)
Press:
TEXT
SELECTING A PAGE
DIRECT ACCESS
TO THE ITEMS
INDEX
SUB CGUIDE/ ODE
HOLDFAV/
?
REVEALINFO/
MIXBACK/
EXITEXIT/
You will obtain :
This is used to call or exit teletext modes. The summary appears with a list
of items that can be accessed. Each item has a corresponding 3 digit page
number.
Enter the number of the page required using the 0 to 9 up/down. Example:
page 120, enter 120. The number is displayed top left, the counter turns and
then the page is displayed. Repeat this operation to view another page. If
the counter continues to search, this means that the page is not
transmitted. Select another number.
Coloured are as are displayed at the bottom of the screen. The 4 coloured
keys are used to access the items or corresponding pages. The coloured
areas flash when the item or the page is not yet available.
This returns to the contents page (usually page 100).
Press the bu
To freeze the page.
To display or hide the concealed information (games solutions).
This will superimpose the teletext data on top of the TV picture. Press
button again to return to full text.
Hide the teletext.
tton and enter the 4-digit number to enter a secondary page.
E
EN-13
SIZECH.LIST/
Switch the image to top,bottom.
Page 15

04 OPERATION
Operation
Installation Guide
The First Time Setup screen will appear when the T V is first switched
on or reset to the factory setting.
First Time Setup
OSD Language English
Mod e Setti ng Home M ode
Country France
Antenna Type Air
Auto Scan DTV+ATV
Start
1).Press the Ʒ buttons to navigate the menu and buttons
to change the settings. Select your desired language ,Home/Shop
Mode to be displayed on the menu.
HOME or Shop modes
1.When the unit is turn on for the very first time, it will show
Initialization set-up menu. After the OSD language is set, the
user can choose between "shop mode" and "home mode".
When the screen shows the following setting menu and the
cursor stays on the "home mode" choice, press to adjust,
and "OK" to enter the menu.
Select the usage mode?
shop mode is for shop usage only.
Shop mode
Home mode
If "Shop mode" is choosen, the following menu will displayed.
Areyousuretochangeto
Shopmode?
OK
Cancel
Choose "OK" to enter the next prompt menu
Shop mode isthe mostenergy mode
Continue?
OK
Cancel
Choose "Cancel" to go back to the Initialization set-up menu,
and the cursor will stay at the "home mode" choice. choose it to
go the next menu to choose the country.
2). Press the buttons to select AIR/Cable means DVB-T,DVB-C.
First Time Setup
First Time Setup
OSD Language English
Mod e Setti ng Home M ode
Country France
Antenna Type Cable
Cable Quick
Aut o Scan DT V+ATV
Start
In the UK to connect to cable TV you will require the
appropriate cable TV's company's 'set top box' to be
connected to the T V. Please refer to the cable TV's
instructions manual for further details.
If you select DVB-C, you will select Full or Quick way to
scan.Also you can select Auto Scan mode. DTV+ATV or
DTV only, or ATV only.
3). Channel tuning will commence. This operation
may take up to . The display will show
some minutes
the progress of the tuning and the number of
channels found.
4). If you want to skip the DTV tuning, press the
MENU button to interrupt the tuning half way.
You will then go straight to ATV tuning.
5). After tuning is complete, the channels are
arranged in a preset order. If you wish to skip channels,
modify the preset order or rename
channels, select
C
hannel menu.
Programme Edit under the
6). The old password is 0000, you can’t use 0000 as new
password.
7). If you select Italy here, this TV will not have USB recording
and Time Shift function.
8). The default country is France, users need to select to
correct country.
DTV Digital TV
ATV Analogue T V (not used in UK)
1. CHANNEL MENU
1. 1)Auto Tuning (DVB-T)
1). Press the MENU button and then press theƷ
buttons to select the CHANNEL menu and then press
the OK button or Right button.
2). Press the Ʒ buttons to select Auto Scan and then
press the OK button.
EN-14
Page 16

Operation
Auto Scan
Channel
Manual Scan
Channel Edi t
Picture
Common Interface
Audio
Signal Information
Clock
Setup
Lock
MENU
Return Move OK
3). Press the buttons to select Antenna Type to Air
OK
means DVB-T.
Antenna Type Air
Channel
Country
Mod e DTV+AT V
Picture
Start
Audio
Clock
Setup
Lock
MENU
Return Move OK
4). In Country mode, press the buttons to select the
France
OK
country where you will operate the TV.
5). In the Mode item, press the buttons to select tune
mode: ATV / DTV / DTV + ATV. Press the
button to select
Start to start.
6). Channel tuning will commence. This operation may take
some minutes
up to . The display will show the progress of the
tuning and the number of channels found.
7). If you want to sk ip the DTV tuning, press the MENU
button to interrupt the tuning half way. You will then go
straight toATV tuning. You may repeat the above step if
you also want to skip the ATV tuning. An installation
reminder will appear the next time you turn on the TV,
nnel is found.
if no cha
8). After tuning is complete, the channels are arranged in a
preset order. If you wish to skip channels, modify the preset
order or rename channels, select P
rogramme Edit under the
channel menu.
Lock
Scanning Ch12
Digital Channels Found:
DTV: 3
Rad io: 0
Dat a: 0
Analog Channels Found: 0
MENU
Skip
EXIT
Exit
Channel
Picture
Audio
Clock
Setup
1.2 )Auto Tuning (DVB-C)
1). Press the MENU button and then press theƷ
buttons to select the CHANNEL menu and then
press the OK button.
2). Press theƷ buttons to select Auto Tuning and
then press the OK button,select Antenna Type to cable
mean DVB-C.
Channel
3). Press thebutton and then press the buttons
to select the country you will operate the TV.
4). In the Mode menu, press the buttons to select ATV /
DTV / DTV + ATV.
5). Select start to enter the menu as below, to select
search mode.
Channel
6). Channel tuning will commence. This operation may
take up to The display will show the
progress of the tuning and the number of channels
found.
Ant enna Typ e Cable
Cou ntry
Mod e DTV+AT V
Picture
Start
Audio
Clock
Setup
Lock
MENU
Quick
Full
Advanced
Picture
Audio
Clock
Setup
Lock
MENU
some minutes.
France
Return Move OK
OK
Return Move OK
OK
EN-15
Page 17

Operation
7). If you want to sk ip the DTV tuning, press the MENU button to
interrupt the tuning half way. You will then go straight to
ATV tuning. You may repeat the above step if you also want to
skip the ATV tuning. An installation reminder will appear the
next time you turn on the TV,if no channel is found.
8). After tuning is complete, the channels are arranged in a
preset order. If you wish to skip channels, modify the preset
order or rename channels, select P
rogramme Edit under
the channel menu.
All the channels including ATV, DTV and Radio
can be tuning by one time,if the Tune Type is
DTV+ATV .
All the stored channels will be disappear after
auto tuning .
After auto tuning , the channel will skip to
the first DTV channel.
2. 1 )DTV Manual Tuning (DVB-T)
1). Press the MENU button and then press theƷ
buttons to select the CHANNEL menu and then
press the OK button.
2). Press theƷ buttons to select DTV Manual Tuning
and then press the OK button, if you select Air in Auto
Scan, you will enter DVB-T manual scan menu.
Digital Scan Ch5
Channel
Start
Frequency
Picture
Strength 54
Audio
Clock
Setup
Lock
MENU
Return Move OK
177.50 MHz
OK
Channel
2). The DVB-C Manual Tuning screen will pop up.
P
ress theƷbuttons to select(Frequency /Symbol
Fre quenc y 47400 0K
Sym bol Rat e 6875K
Modulaton Auto
Picture
Start
Audio
Clock
Setup
Lock
MENU
Return Move OK
OK
/ks/s/Modulation), press OK to input Frequency and symbol,
press to change Modulation press Start to commence
the search of that channel. When the signal has been tuned,
the picture and signal strength will be displayed on the
screen.
3). Press the MENU button to return back to the
main menu.
4). Press the EXIT button to exit the menu.
3) ATV Manual tuning :
You can change the sound system to search theanalog TV
channels and fine tune the channels , then storage the
channels you selected.
ATV Manual Tuning
Save to 1
System BG
Current CH1
Search
Fine tune
Save
Frequency 44.25 MHz
MENU
Return
3). The DT V Manual Tuning screen will pop up.
Press the buttons to select the desired UHF channel
or press the OK button then input channel number. Select
Start to commence the search of that channel. When the
signal has been tuned, the picture and signal strength will
be displayed on the screen.
4). Press the MENU button to return back to the
main menu.
5). Press the EXIT button to exit the menu.
2. 2 )DTV Manual Tuning (DVB-C)
1). Press the MENU button and then press the
buttons to select the CHANNEL menu and then
press the OK button.If you select Cable in Auto scan,you
will enter DVB-C manual scan menu.
Ʒ
1. Press teletext red button to storage to channels
after manual tuning .
2. If the number save to is the same as the number
Current CH, when you press Red button,the save to
number will cover the Current CH number.
4). Channel edit:
Press the or Buttons to select Channel Edit in the
Channel Menu. Then press the OK Button to enter the subMenu. Then you will need to select the channel you wish
to edit.
EN-16
Page 18

Operation
Channel Edit
001 T he HITS
002 T MF
003 UKTV Br’tldeas
004 f t h
005 Ideal World
006 Colourbars100
001 K iss
002 Smash Hits!
003 Kerrang!
Move
Delete
Move Skip
DTV
DTV
DTV
DTV
DTV
DTV
Radio
Radio
Radio
FAV
MENU
Return
OK
Delete: Press the Red Button to delete the channel you
highlighted.
SKIP: Press the Yellow Button to select the Skip function
and a SKIP icon will be displayed next to the program and
it will be skipped when changing the channel.
MOVE: Press the Green Button to highlight the select the
channel you want to move. An icon will display ahead the
channel number. Then press the / Buttons to a new
position and press the Green Button to confirm.
Rename: (For ATV only) Press the Blue Button for renaming
the channel. Press the number key circularly to enter a new
name and press the OK Button t o confir
m (the number key
as the following table).
12
abc3def
5
4
ghi
7
pqrs
tuv9wxyz
jkl
6
mno
8
FAV: Press the FAV Button (instead of color Buttons) to set
the favourite channel. (If you want to view the Favorite
Channel List you need to exit Program Edit Menu and then
press the FAV Button.)
5). Common Interface
This menu can display the CI card' s information.
6). Signal Information (Only for DTV)
Press the Buttons to select the Signal Information
in the Channel Menu. Then press the OK Button to show the
related information of the current channel.
2. PICTUREMENU
The second item of the MENU is PICTURE MENU.
You can adjust picture effect here, such as
contrast, brightness, etc.
Press Ʒ to move, press to adjust.
Channel
Pic ture Mo de
NR Medium
Dynamic Contrast Medium
Picture
Aspect Ratio 16:9
Audio
Col or Temp Normal
Clock
Setup
Lock
MENU
Return Move OK
OK
1).There are three colors temperature modes
can be selected normal, warm, cool.
2). is available in PC mode only which
PC Setting
can adjust Horizontal position, vertical
position, size and phase.
3.AUDIO MENU
The third item of the MENU is the AUDIO MENU.
You can adjust the sound effect here such as
treble, bass, balance etc.
Press Ʒ to move, press to adjust.
Channel
Sou nd Mode Stand ard
Treb le 0
Bas s 0
Picture
Balance
Audio
Clock
Setup
Lock
0
Auto Volum e On
Surround
Sound Off
SPD IF
Audio
Description
MENU
Auto
Return Move OK
OK
Auto volume: only available when the input
signal volume is too large or distortion.
4.CLOCK MENU
The fourth item of the menu is the CLOCK MENU
You can adjust the clock, power on/off time,
sleep timer etc .Press Ʒ to move, press OK
to adjust.
EN-17
Setup
Lock
K
Page 19

Operation
Channel
Sleep Timer Off
Dat e 2010
Picture
On T ime
Of Time
Audio
Clock
Setup
Lock
f
Auto
Sleep
Time
Zone
On
MENU
Return Move OK
04 30
OK
Auto Sleep
If after 15 minutes there is no signal input, the TV will switch
off to Auto Sleep, when the Auto Sleep function is set to ON.
The clock time is automatically set when the T V is able to
receive DTV.
5.SETUP MENU
The fifth item of the MENU is the SETUP MENU. You can
adjust the OSD language, Audio language,Subtitle
language etc.
O E
Language nglish
Channel
Picture
Audio
Clock
Setup
Lock
Auto Standby(4hr)
1.If after 4 hours from switch on and no changes have
been made to the TV, for example no channel or volume
changes,the TV will start the automatic power down
sequence.
And pop-up window will appear on screen.
After 150 seconds the TV will automatically switch to
standby. To override the automatic shutdown press any
button on the remote control.
2. To cancel the automatic power-down
On the Option Menu select Auto standby(4hr),The TV
screen returns to the Option Menu and Auto standby
(4hr) option will display.
Auto standby (4hr) OFF
To return to auto shutdown after 4 hours repeat the
above except use the left arrow key to select .on(4 hours)
PVR File system
In PVR File system menu you can set up USB disk for PVR.
PVR Settings
Move Left
Move Right
OK
Select
EXIT
Exit
SD
A Languages
udio
Subtitle
Teletext Language
Country
File System
PVR
TimeshiftRecord Time
Auto Standby
Blue Screen
Shop Mode
HDMI CEC Control
File Manager Device List
4hr
MENU
Return Move OK
Scheduled Record
France
1 hour
Off
On
Off
OK
Timeshift Record Time: To set the max Timeshift
Record Time.
Auto Standby (4hr): To set the unit to standby
after any 4hours operation.
Shop mode : To set Shop mode to on or o.
HDMI CEC Cntrol: To set CEC function to on or off.
OSD Time: Press or to select the menu
display time.
Restore Factory Default
Press the or Buttons to select Restore Factory
Default and press the OK Button to enter the first
setup. Once confirmed, all the settings will be
cleared. This should be used if you experience
any issues with your TV.
Restore factory default will clear all the programs
and password.
Software Updated (USB)
Press the ▼ or ▲ Buttons to select Software Update (USB)
in the Channel Menu. Then press the OK Button to update
software by using a USB. Follow the software upgrade
instructions provided with the softw
are.
Note: We recommend you perform a factory reset (refer to
Restore Factory Default in Setup menu) to ensure the unit
is successfully upgraded.
6.LOCK MENU
The sixth item of the menu is the LOCK MENU
You can lock system, set password, block program
and set parental guidance Once you set the lock
system on you must input the password before
searching the channels or change any programs.
Ent er Pass word -- --
Channel
Ena ble Off
Channel Locks
Picture
Par ental R ating N one
New Password ----
Audio
Clock
Setup
Lock
MENU
Return Move OK
The default pass word is 0000, If you forget the
password, you can use the super password:9443.
Channel Locks: Press Ʒ to choose the
program ,press OK button to block
the program. If you want unblock the program,
pls enter the main menu , input the password,choose
the program,then press OK button again.
Parental Rating: Press to choose rating.
OK
18-NE
Page 20

Operation
7.EPG Menu(Electronic Program Guide)
The EPG (Electronic Programme Guide) Menu provides
you with detailed broadcast program information. Press
the GUIDE Button and a pop-up Menu will be displayed with
program inform
watching. You will be able to see up to seven days of
program information. To view the next day or more use
the or Buttons to highlight the date and then press
the or Buttons to scroll through the available dates.
001 Nine Digital NINE MORNING NEWS
002 Nine Digital NINEMORNING NEWS
003 GO
Record
ation about the channel you are currently
PROGRAM GUIDE
2010/04/29 02:19
...
T MZ
Reminder
ScheduleInformation
Please ensure a compatible Hard Disc Drive or USB
device is inserted into the USB input to schedule
recordings. If your storage device is not compatible, you
will be asked to format it. In Setup menu, enter the PVR File
System Menu Device List to format your device.
WARNING
When formatting the USB device it will delete all the files
stored on the USB device.
If you have set a timed recording, your TV will automatically
turn on when the program is set to record and will
automatically turn off after the recording is complete.
During a timed recording however the picture and volume
will be mute (there will be no display), however the unit
will be on. You can press the STANDBY Button to turn the
picture and volume back on.
PROGRAM GUIDE
001 Nine Digital
01:00-02: NINE MORNING NEWS
00
-03: 00 HE ELLEN DEGENERES S...
02:00 T
- HE VIEW
03:00 04:00 T
DAYS OF OUR LIVES
04:00-05:00
NTERTAINMENT TONIGHT
05:00-05:30 E
AGICAL TALES
05:30-06:00 M
HE SHAK
06:00-06:30 T
INE AFTERNOON NEWS
06:30-07:00 N
Record
Information
Service
Reminder
To see what is going to be broadcast after the current
program, press Yellow (Schedule) Button. To view a
different channel, use the or Buttons to highlight the
channel and then press the or Buttons. To exit the
EPG Menu, press the GUIDE or EXIT Button. Press it (Service)
again to return.
Please refer to the bottom of the EPG screen
for the basic remote control key functions.
Record
In EPG mode, press the Red Button on the remote control
to select a program to be recorded. You will then enter
Scheduled Record menu for record setting. (Refer to the
section of PVR file system.)
Reminder (Blue Button)
In the EPG Menu, press the BLUE Button to set a program
r
eminder. The below Reminder Menu will then be displayed
and you can use the or Buttons to set the program
reminder details. You will be able to set reminder to occur
once, Daily or Weekly.
Reminder
Channel
Minute
Hour
Month
Date
Frequency
Schedule List
17:03 19/11/2004
The HITS
0
17
Nov
19
Off
OK
You may press Red button to view the scheduled programs
list. Also you may delete the programs you have scheduled.
INFO (Green Button)
In the EPG Menu, press the GREEN Button to view more
information about the current program.
8.PVR File System (only for DTV)
Press Menu Key,select setup submenu.Press the or
Buttons to select PVR File System, then press the OK
Button to enter sub-Menu and then use the or
Buttons to scroll through the options.
19-NE
Page 21

EXI
T
Operation
XIT
S
che
d
XIT
Sce
d
Prepare to record the program:
PVR Settings
Move Left
Move Right
OK
EXIT
Select
Exit
File Manager Device List
Scheduled Record
File Manager: You may view all the recorded
programs here. Press key to play with full
screen.
File Manager
Scheduled Record
Function
EXIT
Hot Key
EXIT
OK
MENU
EXIT
Device List: This sub menu will list the USB devices
connected to the TV set. You can select the device and
then press red button to format the USB device.
Device List
Function
Hot key
EXIT
OK
MENU
EXIT
Scheduled Record: You may set the scheduled record
List here. And you may also delete the scheduled records
you have set.
Scheduled Record Setting List
Scheduled Record
Function
EXIT
E
Hot Key
EXITE
OK
MENU
EXIT
Enter the sub menu you may set the recording frequency
as Once, Daily, Weekly, Weekday, or off.
Play
Delete One
Delete All
Zoom In/Out
Move Up
Move Down
Select
Return
Exit
Format
Move Up
Move Down
Select
Return
Exit
Delete One
Delete All
Move Up
Move Down
Select
Return
Exit
Standby
Current Playing File Into
Channel Name
Program Name
Recorded Time
Total Time
Description
Standby
Group
1
2
3
4
5
6
7
8
9
10
11
12
13
14
15
16
2012/08/09 11:44
Matt Baker and Clare Balding
present coverage of the eager...
Available Space
Device
MB FAT32
sda1 192
Frequency
Once
Off
Off
Off
Off
Off
Off
Off
Off
Off
Off
Off
Off
Off
Off
Off
Olympics 2012
UKTV Br’tldeas_Good Food Bites_20041119_161021.ts
BBC ONE_Olympics 2012_20120808_114427.ts
UKTV Br’tldeas_Good Food Bites_20041119_162019.ts
BBC ONE
00:08:06
File System
2007/10/10 Wed
07:10
Channel
5 SC10 Canberra
Date
2007-10-10
Start Time
07:18 00:24
Duration
Sch edule d Recor d - Group 1
Hot Key
EXIT
OK
MENU
EXIT
Move Up
Move Down
Adjust
Adjust
Select
Return
Exit
Setting Status
Setti ng Is Not I n Use
Frequ ency On ce
Chann el 6 Colo urbar s 100
Start T ime 200 7-10- 10
07: 1 3
End Tim e 2007- 10-10
07: 4 3
Record the program:
To record the program you are currently watching press the
REC Button and a red REC icon will appear on the screen.
The record time/ length and remaining record time will be
displayed in the menu below.
Recording
Rec orded Ti me : 00 : 00 : 40
Avai lable Ti me : 25 Min ute
To reveal the menu press the REC Button again.
To stop recording, press the Stop Button.
You may also enter the Media Player Menu to view your
recorded programs via Movie mode.
Play the recording:
The program recorded on the “USB”will be
saved in the folder “usbrecord” o n the
device.
You can play it in PVR File System and in File manager
submenu.
1.The USB storage size can be between
128MB and 500GB in size, but for practical use 2GB to
500GB is recommended.
2. Video may become pixelated when Video
bit rate is too low. This can be caused by connecting a
USB extension cable instead of plugging the USB directly
into the TV.
3. Not all USB devices are compatible.
Below is a list of recommended USB driv
es.
Models that are not listed may be compatible, but it is
not guaranteed to work.
The USB support list are the same as Timeshift function,
see the following pages for details.
EN-20
Page 22

Operation
Ensure the storage device used to record is inserted into
the USB Input on the back of the unit and is compatible
for recording. If your storage device is not compatible,
you will be asked to format it. Enter the PVR File System
menu and select Device List to format your device.
During recording, only the Stop functions is
available.
There will be no record function,when the channel is
CI+ channel.
9.Time Shift
Press the Button to pause the program you are
watching to activate Time Shift function. The below
menu will be displayed. This Menu will auto disappear
after several seconds.
Choose the option and press OK to resume playing, and a
white play icon will appear at the right of the screen, which
shows that time shift is being performed.
When the menu disappeared,press the button,the menu
will appear again. To stoptime shifting, press the Stop Button
or move the cursor to select the Stop option when the menu
is on, and then follow the pop-up guide.
inserted into the USB Input on the back of the unit and is
compatible for recording. If your storage device is not
compatible, you will be asked to format it. In Setup menu,
enter the PVR File System submenu and select Device
List to format your device.
All the functions (Play, FB, FF, Pause and Stop) in the menu
can only be performed when the menu is on.
There will be no Timeshift function when the
channel is CI+ channel.
00:00:00
00:00:05
Play FB
FF Prev. Next
Stop
Available Time
00:00:00/04:13:20
Ensure the storage device used for recording is
EN-21
Page 23

Operation
10.USB Player
Press source key, and select USB in source list, press OK button to enter the USB menu.
Please make sure that the USB device have plugged in the slot.There are four type media item can be selected, such as
photo, music, Movie, and text. Select the type media item by pressing , press OK button to enter the disk selection menu.
Haier Innovation Life
PHOTO MUSIC TEXTMOVIE
OK
Select
OK Source Eixt
Press the to select the right disk and folder,press OK to . Press BACK button to back to the
enter the media files list
media type selection menu.
Select the media file by pressing and OK button, then the preview frame will pop up. Press the button to play the media
Photo
USB1/Pic
PHOTO
Basic Function
When photos are playingpress
OK button can display the control bar.
“ OK”key on the remote controla toolbar will display under the screen
PlayPause
Prev.
Next
Stop
Press ” Play/Pause”key on the remote control to play or pause.
Press ” (previous)” key on the remote control to read the previous photo.
Press ” (next)”key on the remote control to read the next photo.
press ” (stop)”key to stop playing and return to the previous menu.
EN-22
Page 24

Operation
MUSIC
When music are playing, press “ ” key to select toolbar.
Basic Function
FB LeftRight”key on the remote control to select this function,press”ok”
:Press”
key to to fast backPress
FF LeftRight”key on the remote control to select this function,press”ok”
:Press”
”PLAY”key to play normally.
key to fast forwardPress”PLAY”key to play normally.
Back ground music LeftRight”key on the remote control to select this function,press”ok”
:Press”
key to turn on / off
Other functions are similar to the PHOTO Please refer to PHOTO options”” ””
MOVIE
The operations are similar to the PHOTO Please refer to PHOTO options”” ””
Basic Function
Set A LeftRight”key on the remote control to select this function,press”ok”
:Press”
key to set A and B
Zoom in LeftRight”key on the remote control to select this function,press”ok”
:Press”
the film will circulating play in thetime of A to B
key to enlarge pictureif the document is larger than 1920x1080,this function is
unsupported.)
Zoom out LeftRight”key on the remote control to select this function,press”ok”
:Press”
key to reduce pictureThis function does not support more than 1920x1080 HD video.)
Select Time Press”LeftRight”key on the remote control to select
:
this function,press”ok”
key to select the time to play.
TEXT
P
you want.
P
Photo .jpg files
Audio .mp3
Video
Text .txt
(previous)/ (next)
ress” ” to select previous / next page, Input the number key and OK to jump to the page
rovide list of major file types that play from a USB device
.avi ,.mp4
ATTENTION:
1. USB HDD compatibility is not assured
2. Some format video is not played for some le reason
3. Haier will not bear any responsibility for saving facility quality problem or date missing
EN-23
Page 25

05 Trouble shooting
Trouble Shooting
Trouble phenomenon Symptom
Picture Audio
Snow Noise
Ghost
Interference
Normal Picture
No pi cture Mut e
No colour Normal audio Colour control
Normal audio
Noise
Mut e
Inspection Check
antenna position, direction
or connection
antenna position, direction
or connection
electronic equipment,car/
motorcycle,fluorescent light
Volume( check i f mute is
activate d or if the a udio sy stem
con necti ons are n ot correct)
Powe r cord is not in serted
Powe r switc h is not op ened
Contrast and brightness/volume
setup
Press standby key on the remote
con trol for i nspec ting
Picture
breaking up
No colour
Ther e is blac k bar
on top and bottom
Normal audio
or weak
Noise
Normal audio
retune channel
TVsystem
Change aspect to zoom
EN-24
Page 26

Trouble Shooting
Trouble Shooting
My TV does not display the picture
on my laptop / PC when connected.
I have connected my PC/Laptop to
the TV and get a picture but no
sound. Why ?
The picture is not auto resizing
when changing channels.
I have just plugged in a DVD player
or another item into my TV and it
doesn't work.
Most PC's and laptops when connec ted with a VGA Plug (the
blue 15 pin plug on your PC or laptop) require you to press
some buttons on your key board to get a picture on a TV or
other external display. This is usually the F7 (Dell) or F4 (HP /
Samsung) or F5 (Toshiba). On laptops, you have to press the
“Fn” key at the same time as the “F” key.
The VGA cable only carries the video or picture information.
You need to connect a separate cable connected to the
earphone socket (3.5mm jack) on you PC/Laptop to the 3.5m
(PC Audio IN) socket on your TV. You will need to select “PC”
using the Source button on your remote.
Alternatively connect your PC/Laptop using a HDMI cable if
you PC/Laptop has a HDMI connector. HDMI is both audio and
video.
Check that the TV picture Aspect Ratio is set to 'Auto' on all
inputs ATV, DTV, SCART, HDMI 1, 2 etc.
To set the aspect ratio, (Auto, 4:3 or 16:9). Press Source button
start at ATV and repeat the sequence below for all input
sources ATV, DTV, SCART, HDMI 1 and 2 as each input source is
controlled separately.
Press TV Menu button
Press Right Arrow to access Picture sub menu
Press Down Arrow to select Aspect Ratio
Select Auto
Press Exit
Repeat for all input sources.
This is applicable to any item of equipment plugged to the TV
1. Turn both TV & DVD player off (plugs out of the wall socket,
not standby).
2. Turn off any equipment connected to the SCART socket.
3. Disconnect the SCART plug from the TV.
4. Plug in and turn TV on
5. Plug in and turn DVD player on
6. Select HDMI from Source Menu
7. Press play on DVD player and check movie plays ok
NOTE: The SCART socket has priorit y over HDMI and it is
important that the equipment connected to the SCART socket
on the TV is switched OFF (not in standby).
Please follow this information. If the advice works and the
DVD player works, the TV is OK it is just a bit confused.
Probably HDMI plugs have been removed and plugged back in
when the TV is switched on.
Never remove or plug in HDMI cables or any digital equipment
with the equipment switched on.
Always switch off all equipment when unplugging or
connecting any digital equipment.
EN-25
Page 27

Trouble Shooting
Trouble Shooting Digital TV Problems and possible Solutions.
A typical example of a rece ption p roblem inc ludes t he brea k up of pic tures ( pixil ation ) or the picture freezing,
sometimes there are clicking or squeaking soun ds or the sound drops out or th ere is NO reception at al l.
Your pi cture m ay brea k into pi xels due t o the dig ital vi deo sig nal dropping. The signal dropping may occur because of
either problems with weak si gnals ( see TV Aer ials) or if you ar e connected by cable a weak c able si gnal. I f the problem
is weak signals, use an amplifier to strengthen the signal. A cable t echni cian ca n help yo u insta ll an inl ine amp lifie r or a
pre-amplifier. This will boost your signal strength and fix the pixel p roble m.
If you are receiving your TV signal by satellite, check your dish has n ot move d follow ing hig h winds , or that t he sign al is
blocked by trees. Trees can be a proble m as the TV s ignal c an chan ge depending if a tree be tween t he sate llite d ish and
satellite is in bare or in full leaf.
Missing channels
It ma y be that y ou find t hat the re are channels missing, or you' re receivi ng chan nels from th e wrong re gion.
Sometimes the int eract ive ser vices ( red but ton) do esn't wo rk. This i s usual ly caus ed by wea k signa l, see TV Ae rials
TV Aerials
Digital terrestrial television (Freeview) comes to your TV via an aerial, The old aerial that was good for analogue TV may
not w ork wel l for digi tal so ma y need up gradi ng. If you a re getting some but not all of the digital channels on DTV
(Freeview) for example you get BBC1, BBC2, Channel 4 ,bu t not IT V or Chan nel 5, th is is usu ally be cause yo ur aerial i s a
nar row ban d type, a nd need s to be change d to a wide b and typ e.
Faulty Leads and Cables
Che ck your T V. Are t he lead s at the ba ck - to the main s, the aeria l, the se t-top bo x, the vi deo or DV D playe r or recor der
properly connected? SCART leads are known to work loose over tim e and can resu lt in bot h audio a nd vide o (pict ure)
problems. Either left or right or both audio is missing and the colours are poor or muddy looking. Push the SCART
plugs firmly in, this should fix the problem.
HDMI plugs need to be pushed in firmly; it's only the last millimet re that t he contact s make. Typ icall y the bla ck plas tic
part of the HDMI plug should be very close or touching the body of the TV or component.
When plugging in any HDMI cables you may experience problems if the HDM I cable s are plu gged in w hen the T V or the
other component is switched on. Always switch off both the TV and the component you are plugging in. If you have
checked the plugs and sockets, switch off the TV and whatever you have plugged in to the TV and then switch them on
again.
I have connected my PC to the TV. There is no sound.
If you connect your PC or Laptop to the TV using a VGA (1 5 pin Sub D ) cable t here is no aud io, you ne ed to con nect a
separate audio cable to the TV from the PC or laptop.
Unnatural Colours and Flesh Tones
Unnatural flesh tones and other colours could present another probl em even i n a new HDT V. This i s due to th e T V
pic ture se tting s, whic h are optimi zed for a sh owroo m enviro nment . Fix thi s by changin g the pic ture mo de to natu ral in
the picture menu. For more precision, try manually setting the colour, contrast and brightness options in the picture
menu.
White Outlines
White outlines around objects and people generally appear either if the T V sharp ness is s et to ver y high, o r if your
television set uses some edge-enhancement processing technology. Go to the picture menu and adjust the sharpness
till the white outline disappears. If edge-enhancement is enabled, try to disable it using the service menu.
Choppy Video
At times the video might become choppy. When this happens, check whether the signal is strong enough. If the signal
is strong the problem is with the cable operator. If the signal strength is weak, try boosting the signal strength with the
help of an amplifier.
The p ictur e does no t fill th e scree n
When connecting PC's or laptops to the TV, the picture may not fill the screen. Check the display settings on your PC or
laptop (Windows > Star t > Contro l Panel > Appearance and Personalization > Dis play
resolution. On your TV select:- TV Menu > P ictur e > Settings and then try AUTO, ZOOM1 or ZOOM2 for the best display.
USB Connection
The USB connection will work with *.jpg (photo) and *.mp3 (music) fi les. Pleas e note th e T V does n ot recog nize Ap ple
iPhone, or iPod's connected to the USB connector on the TV. The TV may play o ther fi les, but d ue to the m ultip le
different file formats, there is no guarantee that these other file f ormat s will wo rk.
Pic ture Br eaks in to Pixel s
settings) and select the best
EN-26
Page 28

Specification
Specif ication
32" HD Digital LED LCD TV
Television picture quality:
DTV Tuner Decorder
Connectivity:
Sound quality:
Standby Power
consumption
Digital features:
Additional features:
* The part speci cations of this TV set provided here
Di
erences may occur as product technology is updated.
Design and speci
Scart Output description :
1. When current source is ATV, scart output signal is ATV.
2. Other source have no SCART output signal.
cations are subject to change without notice.
IHDntegrated digital.
Scr een Size: 81.28 cm
Resolution 1366x 768 pixels.
DVB -T, DVB-C
16/32/64/128/256 QAM Modulation/QPSK Modulation
MPEG2,MPEG4,H.264
3 HDMI sockets.
1 SCART socket.
PC input socket.
Component video socket.
Composite socket.
2 USB port.
1 Headphone port.
1 port.COAXIAL
Supported Systems:PAL SECA M
Storage channel number: 1000(DTV ),99(ATV)
TVRF :75¡ Imbalance
YPbPr/HDMI Video Input:480i480p576i576p720p1080i1080p
NICAM stereo sound system.
2 x 8 watts RMS power output.
≤0.30W
Digitally interactive.
Digital text.
Digital video broadcasting (DVB) subtitles available.
Auto setup.
Auto scan for new channels.
Now and next programme guide.
7 day electronic programme guide (EPG).
Top up TV compatible.
CI slot.
Audio description compatible.
UHF/VHF tuner;Sleep timer; ;Picture and textParental Rating
Remote control batteries required 2 x AAA (included).
VESA Mount Size: 200 x 200 mm
Package Size (WxHxD): 792x516x144mm
Set Size (WxHxD) with Stand: mm730x461 x179
Set Size (WxHxD) without Stand: 730x432 mmx75
Packag e weight : 6.48 kg
Set weight with stand: 4.66 kg
Set weight without stand: 4.32 kg
are for reference only.
27-NE
Page 29

Specification
Specif ication
40" FULL HD Digital LED LCD TV
FULL HD
Television picture quality:
DTV Tuner Decorder
Connectivity:
Sound quality:
Standby Power
consumption
Digital features:
Additional features:
* The part speci cations of this TV set provided here
Di
erences may occur as product technology is updated.
Design and speci
Scart Output description :
1. When current source is ATV, scart output signal is ATV.
2. Other source have no SCART output signal.
cations are subject to change without notice.
Integrated digital.
Scr een Size: 100.33 cm
Res olution 1920x1080 pixels
DVB -T, DVB-C
16/32/64/128/256 QAM Modulation/QPSK Modulation
MPEG2,MPEG4,H.264
3 HDMI sockets.
1 SCART socket.
PC input socket.
Component video socket.
Composite socket.
2 USB port.
1 Headphone port.
1 port.COAXIAL
Supported Systems:PAL SECA M
Storage channel number: 1000(DTV ),99(ATV)
TVRF :75¡ Imbalance
YPbPr/HDMI Video Input:480i480p576i576p720p1080i1080p
NICAM stereo sound system.
2 x 8 watts RMS power output.
≤0.30W
Digitally interactive.
Digital text.
Digital video broadcasting (DVB) subtitles available.
Auto setup.
Auto scan for new channels.
Now and next programme guide.
7 day electronic programme guide (EPG).
Top up TV compatible.
CI slot.
Audio description compatible.
UHF/VHF tuner;Sleep timer; ;Picture and textParental Rating
Remote control batteries required 2 x AAA (included).
VESA Mount Size: 400 x 200 mm
Packag e Size ( WxHxD): 983x616x160 mm
Set Size (WxHxD) with Stand: 908x557x249 mm
Set Size (WxHxD) without Stand: 908x522x77 mm
Packag e weight : 9.70 kg
Set weight with stand: 7.55 kg
Set weight without stand: 7.12 kg
are for reference only.
28-NE
Page 30

 Loading...