

Page 1
SERVICE
MANAUL
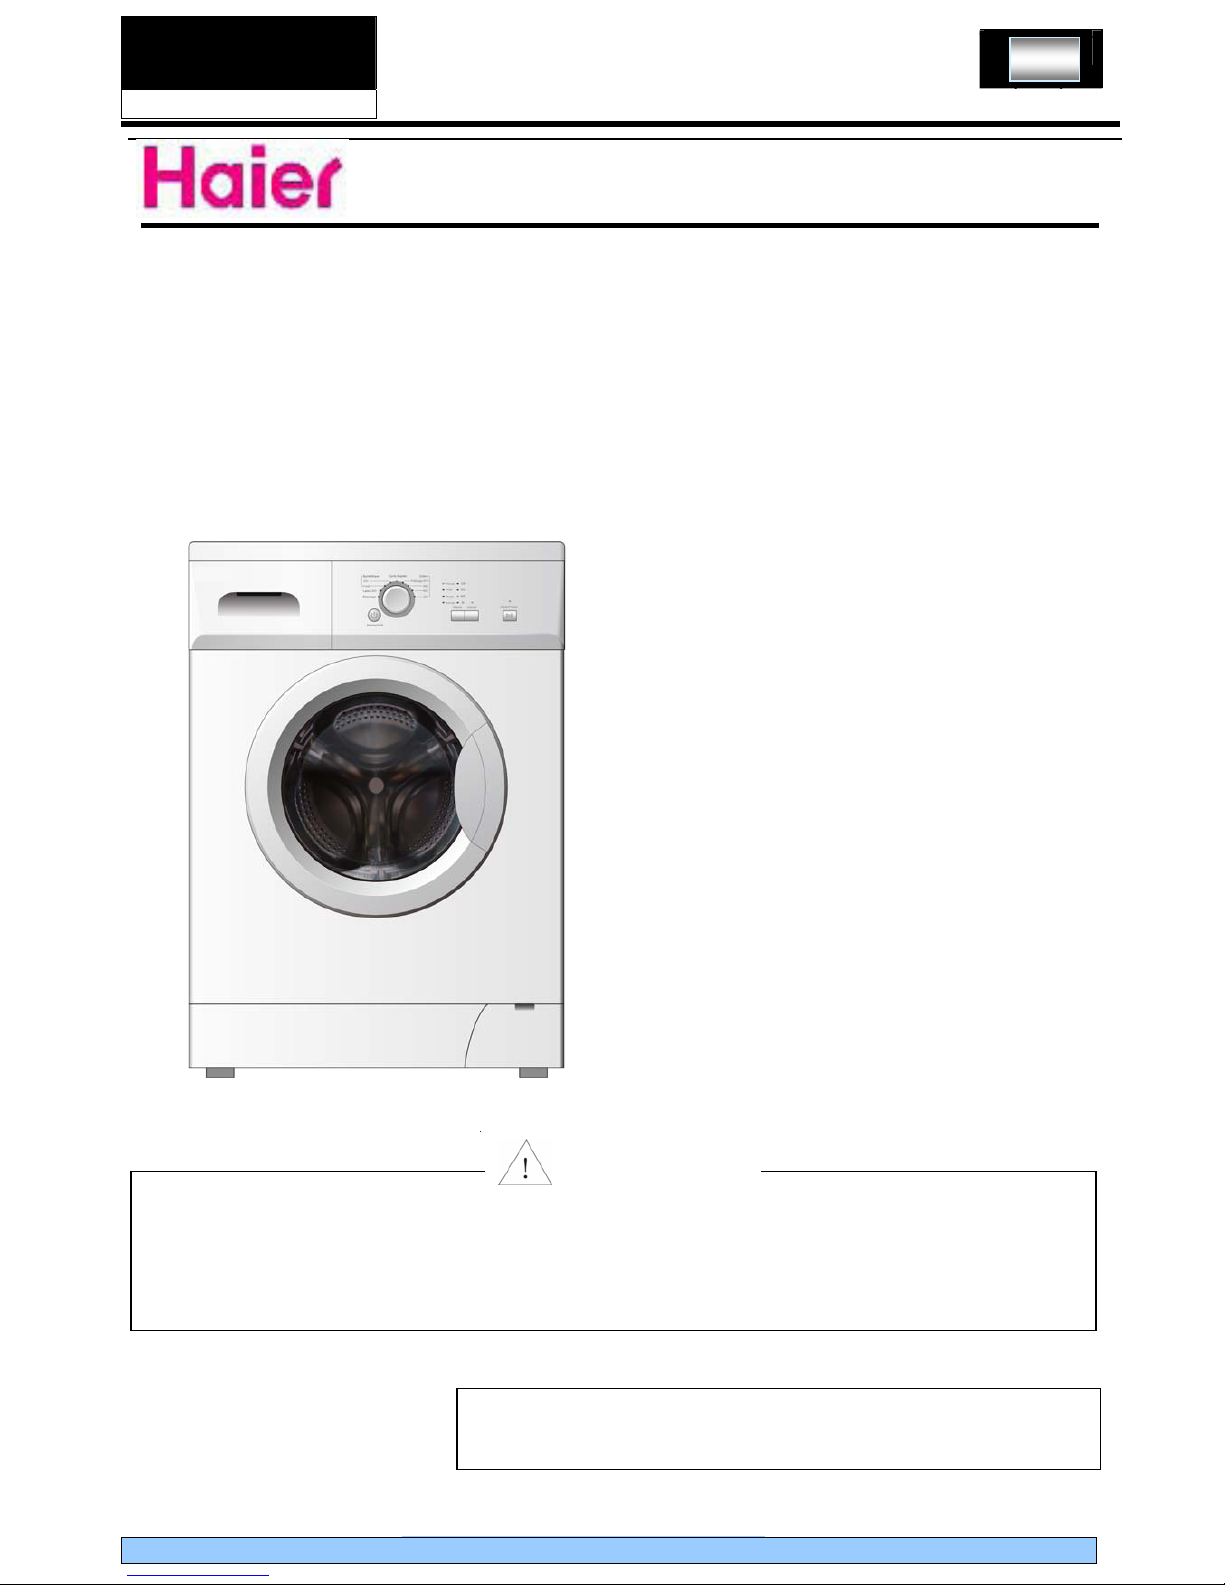
HW50-1002W
Front Load Washing Machine
1
SERVICE MANUAL
This service information is designed for experienced repair technicians only and is not designed for use by the general public. It does not
contain warnings or cautions to advise non-technical individuals of potential dangers in attempting to service a product. Products powered by
electricity should be serviced or repaired only by experienced professional technicians. Any attempt to service or repair the product or
products dealt with in this service information by anyone else could result in serious injury or death
MODEL: HW50-1002W
Front Load Washing Machine
Order No.
FL0911008V1.1
©2010 Front Load Washing Machine
All rights reserved. Unauthorized copying and distribution is a violation of law.
WARNING
Page 2

SERVICE
MANAUL
HW50-1002W
Front Load Washing Machine
2
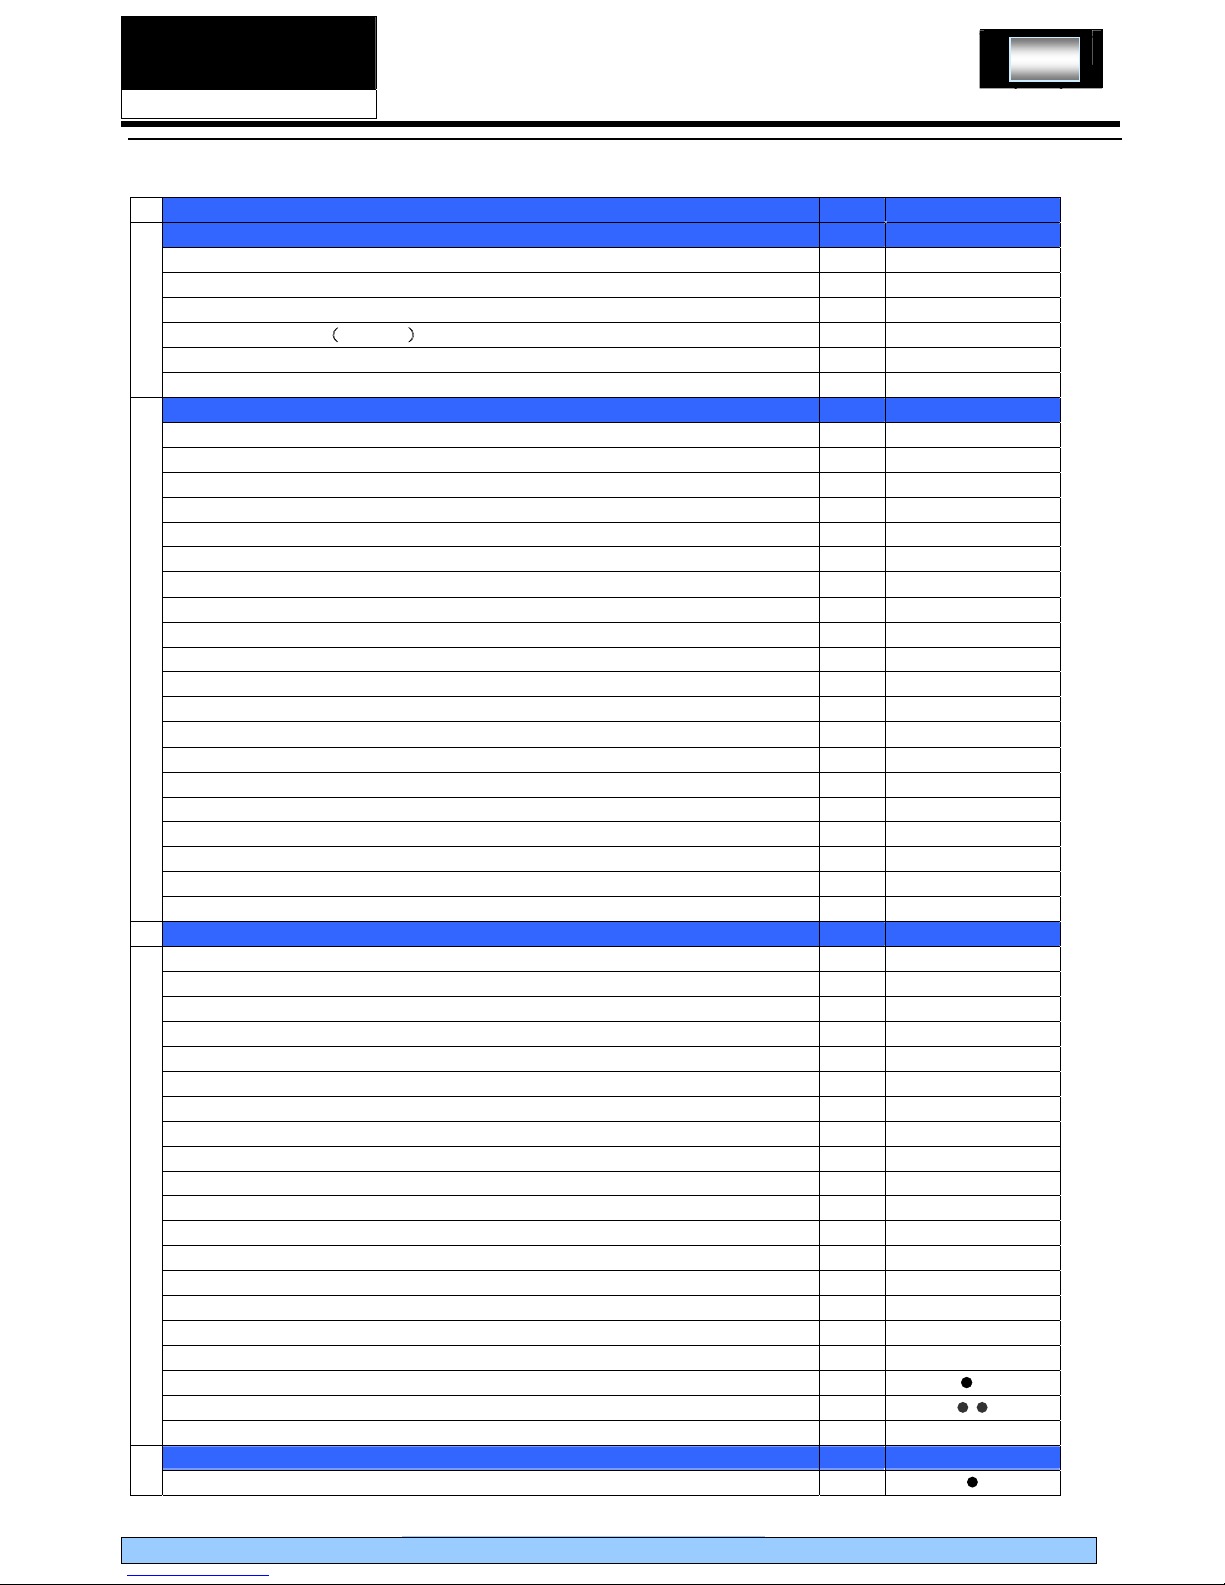
Contents
Chapter 1 General Information ________________________________________________ 4
1-1. General Guidelines_____________________________________________________ 4
1-2. Caution and Warning symbols ____________________________________________4
1-3. Function indication symbols ______________________________________________4
Chapter 2 Product Feature ___________________________________________________ 5
2-1. Features _____________________________________________________________5
2-2. Specification __________________________________________________________6
Chapter 3 Matters needing attention ___________________________________________ 8
3-1. Safety _______________________________________________________________8
3-2. During Use _________________________________________________________ 9
Chapter 4 Operational Guidance ____________________________________________
10
Chapter 5 Program Introduction_____________________________________________
Chapter 6 Washing Mathods________________________________________________
6-1. Loading____________________________________________________________
6-2. Adding detergent ____________________________________________________
6-3. Selecting washing program ____________________________________________
Chapter 7 Appearance brief introduction _____________________________________
7-1. Name of parts _______________________________________________________
7-2. Net dimension_______________________________________________________
12
13
13
13
13
14
14
15
Page 3

SERVICE
MANAUL
HW50-1002W
Front Load Washing Machine
3
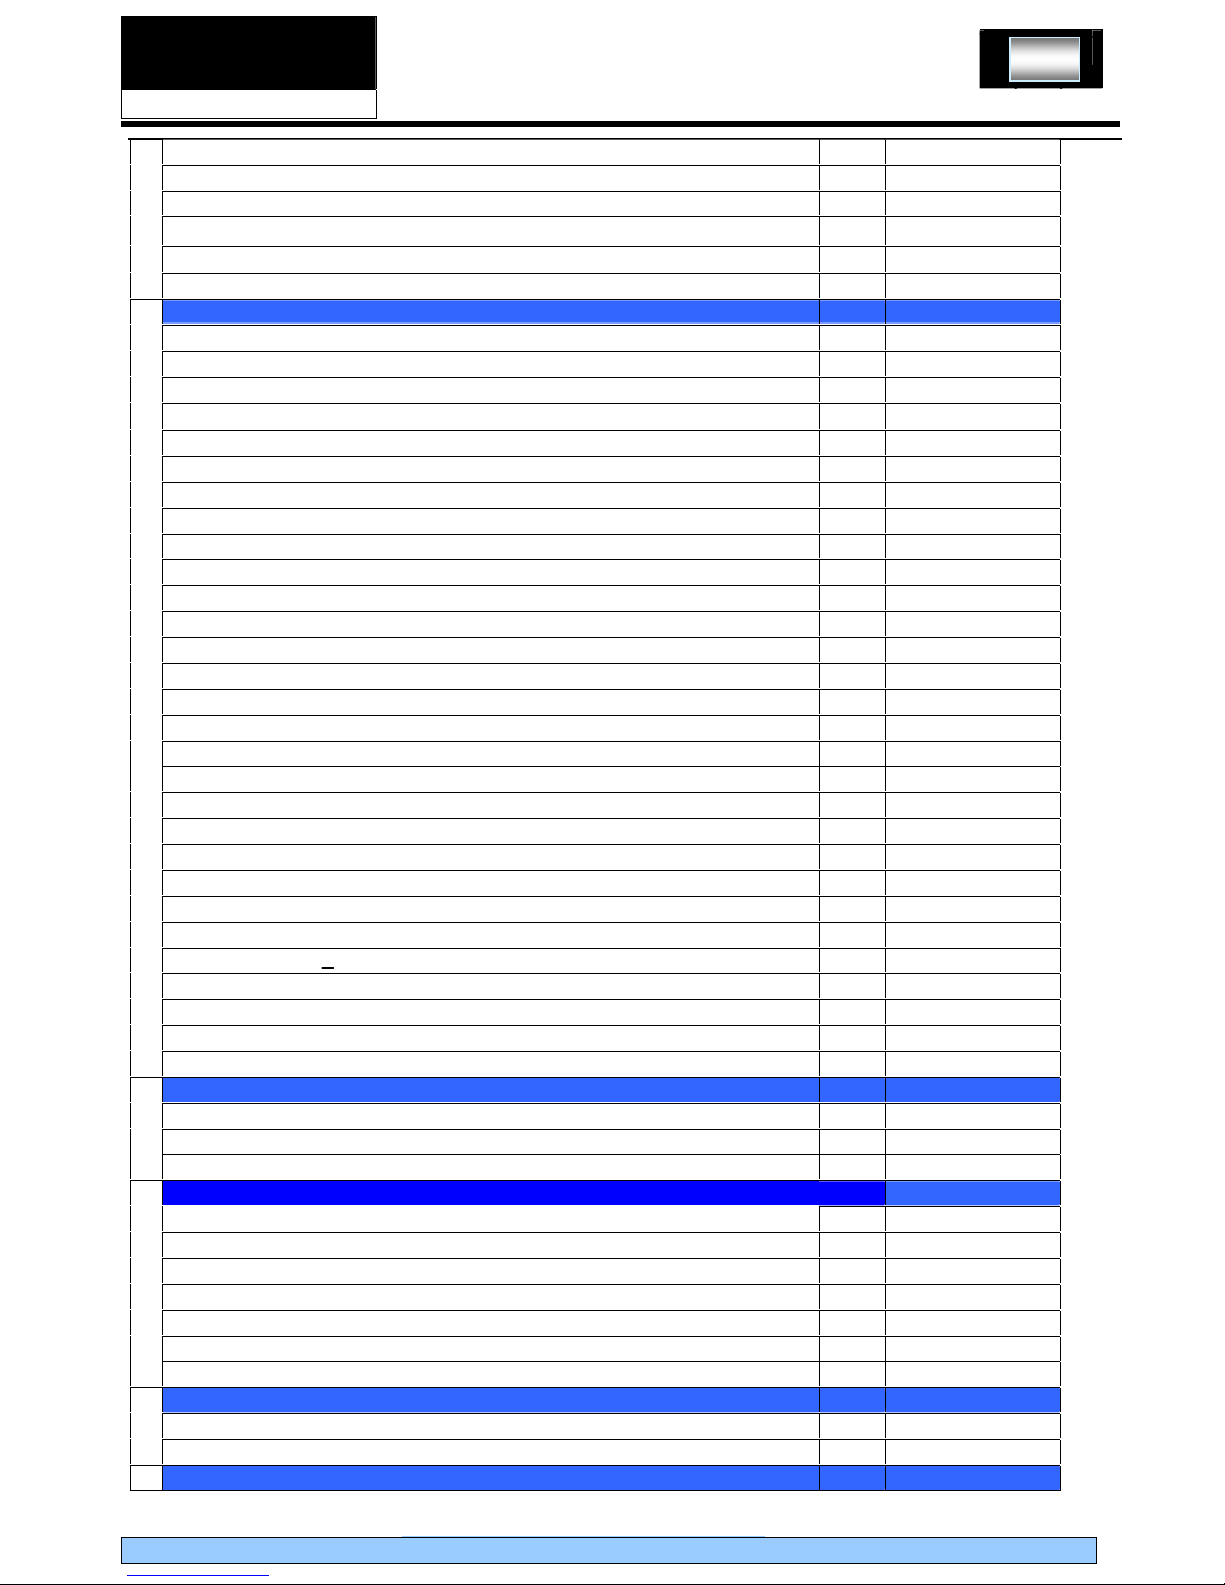
Chapter 8 Disassembly and Installation ______________________________________
8-1. Remove packing materials _____________________________________________
8-2. Adjusting the washing machine _________________________________________
8-3. Joining the Inlet Hose to the Washing Machine _____________________________
8-4. Drainage Hose ______________________________________________________
8-5. Connecting to the Power Supply ________________________________________
Chapter 9 Wiring circuit and Self check ______________________________________
9-1. Wiring circuit ________________________________________________________
9-2. Self check __________________________________________________________
Chapter 10 Error Display and troubleshooting _________________________________
10-1. Error Display_______________________________________________________
10-2. Examination & Troubleshooting ________________________________________
10-2-1. Display nothing__________________________________________________
10-2-2. No water inletting ________________________________________________
10-2-3. No draining _____________________________________________________
10-2-4. Abnormal noise and vibration_______________________________________
10-2-5. Water leaking ___________________________________________________
16
16
17
17
18
19
20
20
21
22
22
26
26
27
28
28
29
Page 4
SERVICE
MANAUL
HW50-1002W
Front Load Washing Machine
4
Chapter 1 General Information
1-1. General Guidelines
When servicing,observe the original lead dress.If a short circuit is found, replace all parts which are
overheated or damaged by the short circuit.After servicing ,see to it that all the protective devices such as
insulation barriers ,insulation papers shields are properly installed .Confirm that the screws,parts and wiring
which were removed in order to service are put in the original positions, or whether there are the portions
which are deteriorated around the service places serviced or not. And be sure safety of that.
1-2. Caution and Warning symbols
(You will see them in “Matters needing attention”)
Any instructions in this service manual with this “Warning “sign must be followed strictly.
To prevent damage to the washing machine, any instructions in this manual with this “Stop “sign
must be followed strictly.
1-3. Function indication symbols
(You will see them in the specification table)
Signify the washing machine has this function.
Signify the washing machine doesn’t have this function.
Page 5

SERVICE
MANAUL
HW50-1002W
Front Load Washing Machine
5
Chapter 2 Product Feature
2-1. Features
(1). 300mm diameter porthole, door may be open at a 180 degrees.
Facilitate view of wash process, facilitate unloading and easy to use with large port.
(2). Class A energy-saving
Scientific design for tub can reduce the use of water heavy during washing, consequently upgrade the
energy efficiency class to A,also use scientific washing
(3). Multi-gear speed controller
According to different costuming,you can select corresponding spin speed,from 0 to 1000 rpm.
(4). Unique gasket design featuring no residual water hidden inside.
By the unique gasket,washing machine can left no residual water hidden between outer drum and front
board.
Page 6
SERVICE
MANAUL
HW50-1002W
Front Load Washing Machine
6
2-2. Specification
washing machines
HW50-1002W
Product identification
Description of appliance Washing machine
Type of appliance(FS = standing, BI = built-in) FS
Supplier own brand Haier
Supplier bar code(Europe)
EAN
Commercial Brand / Model
1.
Commercial bar code EAN TBC
Key-Features
Energy efficiency class A
Washing performance class A
Spin efficiency class C
Programs n° 11
Capacity Kg 5
Spin speed (max.) rpm 1000
Noise level(sound pressure level)
dB(A) 71
Energy consumption per wash circle kWh 0.95
94 l elcyc hsaw rep noitpmusnoc retaW
Annual average energy consumption * kWh 190
Annual average water consumption* l 10800
Residual dampness (spin result) % 60%
Adjustable thermostat (water temp. adjust from - to) °C
90 -※
Drum capacity dry laundry / water kg / l 5/42
Auto water level adjust (depending on volume of filled in laundry)
AWL
l
Washing time (max.) min 196
Washing temperatures (program-controlled) °C 30/40/ 60 /90
Certification's (CE) CE
Approvals (VDE/GS / TÜV/GS / IMQ)
2.
* per average 200 wash cycles (EN50242) T= COLD
3.
Basics data
025x595x058 mm )D x W x H( snoisnemid tinU
Net weight kg 65
Voltage/frequency V/Hz 220V-240V~/50Hz
Input power / main fuse (intensity) W / A 2000/10
Work top / removable l/l
Control M = electromechanical, E = electronic, F = fuzzy E
Drum S = stainless steel / Z = zinc coated S
Tub P = Polyprop./ S = stainless steel P
Door:
aesthetic (R = round, Y = big eye, Q = square) R
Diameter cm 30
Outer door frame S= stainless steel / M = metal / P = plastic
P
Inner door G= glass / P= plastic G
Detergent compartments n° 3
Removable compartment for liquid detergent Delay timer (from - to) h Self cleaning suds pump Water inlet hose cold water / hot water
/-
Water drain hose / -support
/
Adjustable feet n° 4
Safety systems
4.
Auto door lock
ADL
Page 7
SERVICE
MANAUL
HW50-1002W
Front Load Washing Machine
7
Motor overheating protection
MOP
No heating without water
NHW
Auto water cool-down (before drain 90°C boiled water)
AWC
Water overflow protection
WRP
Acqua Stop kit
-
Child protection
Programs
1) Strong action /cotton cycles
n° /
2) Normal action / synthetics
n° /
3) Delicate action / wool or cashmere cycles
n° /
4) Delicates silk
n°
5) Speedy
n°
6) Sport
n° -
7) Hand wash
n° -
8) Underwear
-
9) Jeans
-
10) Duvet
-
11) Special programs
n°
4
Single Rinse n°
Single Spin n°
Single Drain
Single Wash
Optional function keys (additional program settings)
ON/OFF
Start / Pause
Delay
Extra Rinse
-
Rinse Hold (or Soak)
-
Eco Time
-
Spin Select
Temperature Select
Baby Care
-
hsaw dloC
-
Super Wash
-
Pre-wash
-
5.
Easy ironing
-
Packing dimensions & loadability
065x056x098 mm )D x W x H( snoisnemid gnikcaP
Gross weight kg 68
6.
40' Container load pcs 220
Logistic / recicling information
RS
Packing weight kg 2
Packing materials / Recycling symbols
Carton (weight) gr Shrink package
Polistyren (weight) gr 1800
Polyetylene foil (weight) gr 100
Other packing materials (weight) gr 100
7.
Wood (weight) kg
-
Service RS
User instruction (languages)
8.
Max. failure rate (12 Months after sales to end customer) %
9.
Delivery Time of First Batch Available
Page 8
SERVICE MANUAL
Front Load Washing Machine
Chapter 3 Matters needing attention
3-1. Safety
HW50-1002W
Safety Information
Important – Please read these instructions fully before installation
• The installation of this appliance is best carried
out by 2 people.
• Dispose of all packaging car efully and
responsibly.
• This appliance is for indoor use only . Only install
in a dry indoor environment.
• The appliance MUST be positioned on a firm
level base.
• Do not position the appliance wher e it is exposed
to direct sunlight or heat sour ces as this will age the
plastic and rubber components.
• Warning: Ensure all 3 packing bolts have been
removed.
• Ensure the appliance is connected dir ectly to a
domestic mains water supply .
• Warning: This washing machine MUST only be
connected to a cold water supply .
• Ensure all electrical connections are as stated in
this document.
• Ensure the appliance is plugged into a separate
earthed socket that is easily accessible.
• Ensure the power lead is not trapped under the
appliance.
• Do not connect the appliance to the power
supply until installation is complete.
• This appliance is for domestic/household use only
and is not suitable for commer cial use.
• Check that the water hose joints and connections
are secure and there are no leaks. If the hoses leak,
do not use until the leaks have been stopped.
• This appliance is not to be used by childr en or
persons with reduced physical, sensory or mental
capabilities, or lack of experience and knowledge,
unless they have been given supervision or
instruction. Children should be supervised to ensure
that they to not play with the appliance.
• Do not use if the power lead is damaged. It must
be replaced by the manufactur er, their approved
service agent or similarly qualified person.
• Do not use this appliance if there are any missing
or damaged parts.
• Only use deter gents which ar e suitable for
automatic washing machines and follow the
detergent manufacturers recommendations.
• Do not place heavy objects or sour ces of heat
or damp on top of the washing machine.
• Do not cover the appliance during use, as this
may block the ventilation holes.
• Do not touch or use the appliance when bar efoot
or with wet or damp hands.
• Do not open the detergent drawer during a
wash cycle.
• Do not touch the porthole (door) during the
washing cycle - it gets hot.
• Do not force the door open. The door is fitted
with a self-lock device and will not open until 2-3
minutes after the washing machine stops.
• Do not open the door if water is visible thr ough
the porthole.
• Do not wash foam rubber or sponge like
materials on a hot wash.
• Do not remove or insert the plug in the pr esence
of flammable gas.
• Do not use flammable detergent, sprays or dry
cleaning agents in or near to the appliance.
• Do not attempt to r epair the appliance yourself.
Contact the manufactur er, their approved service
agent or the Customer Helpline: 0845 600 4632.
Before use During use
Page 9
SERVICE MANUAL
Front Load Washing Machine
3-2. During Use
HW50-1002W
Installation
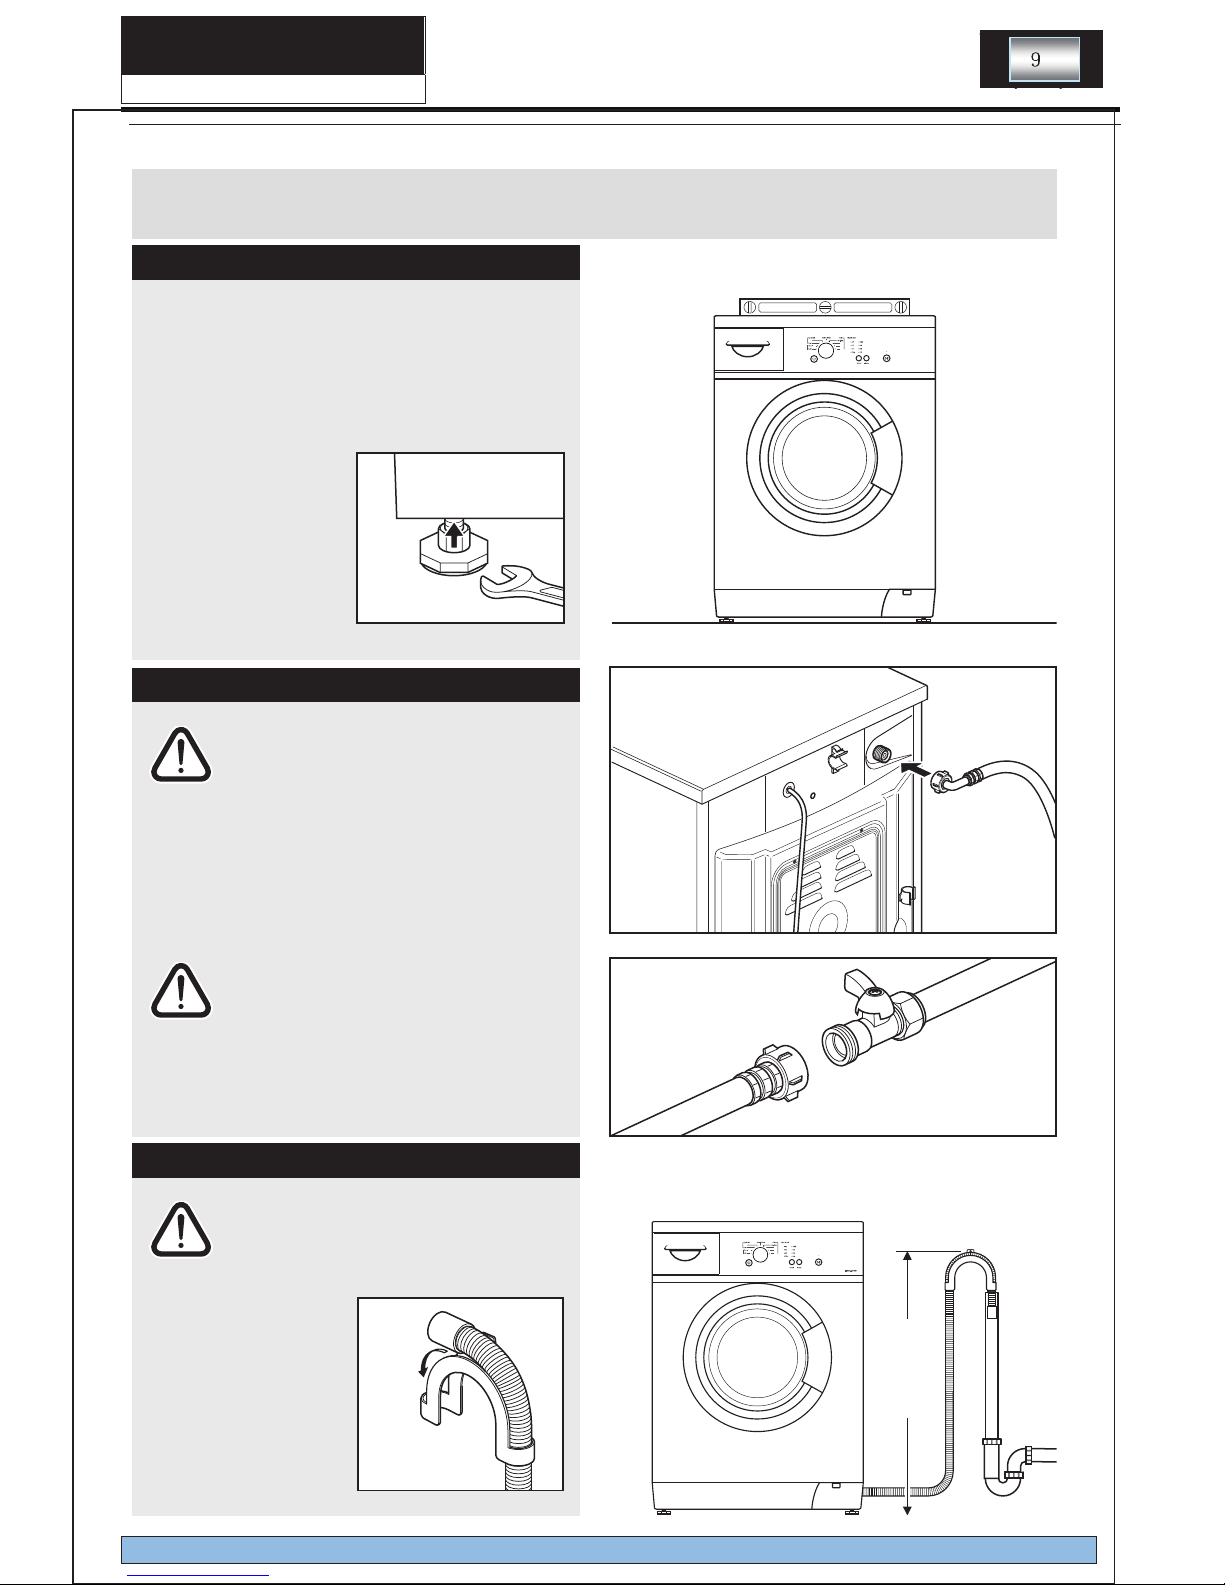
Levelling your washing machine
Before use you MUST ensure the washing
machine is level, check with a spirit level (5).
This will minimise vibrations and noise during
use plus reduce wear and tear.
Level by adjusting the feet under the appliance.
First adjust the feet
by hand to get the
appliance level then
tighten the nuts up to
the underside of the
appliance body using
a 16mm spanner (6).
Water inlet hose connection
Important: This washing machine
MUST only be connected to a cold
water supply.
Connect the water inlet hose, the angled
connection attaches to the water inlet on the
back of the washing machine (7). The straight
connection attaches to the water supply
valve (8). Ensure all seals are in place before
connecting.
Important: Only tighten the hose
connection nut by hand - do not
overtighten.
Important: The height of the top of
the curve in the drain hose MUST
be between 80 - 100cm from the
floor (9).
Fit the drain hose into
the hose clip (10) and
attach to the wall etc.
at the correct height.
Water
inlet
hose
Water
supply
valve
Water
inlet
hose
Max.
100cm
Min.
80cm
Drain hose connection
5
7
8
9
6
10
C
。
90
C
。
60
C
。
40
C
。
40
C
。
30
HW50-1010W
C
。
90
C
。
60
C
。
40
C
。
40
C
。
30
Page 10
SERVICE MANUAL
Front Load Washing Machine
Chapter 4 Operational Guidance
HW50-1002W
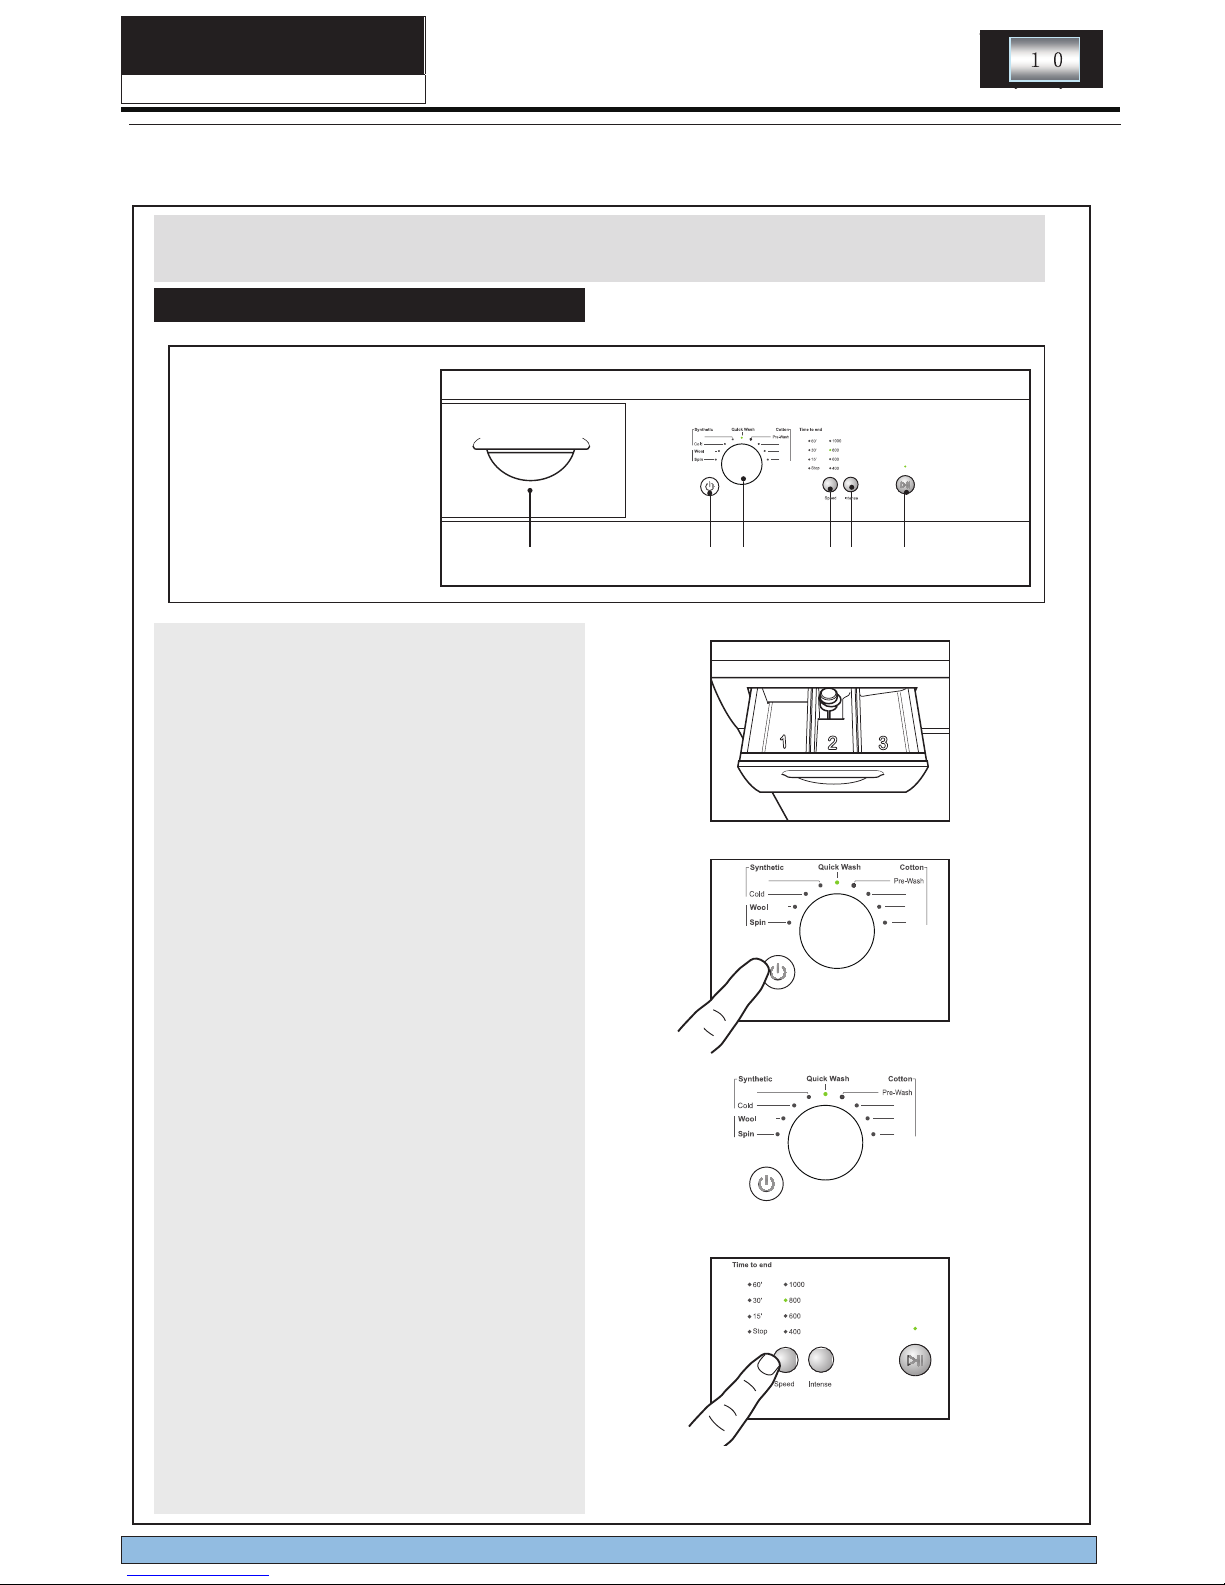
Control Panel Functions
1. Detergent drawer
The drawer contains three compartments:
1: Main wash detergent
2: Fabric softener
3: Prewash detergent
2. Power button
Press this button to switch on the washing
machine. Press and hold 2s to switch it off.
3. Programme knob
By turning the knob clockwise/counterclockwise, the required program can be selected.
There are 9 programs available. After a program is selected, the corresponding light will
go on.
4. Speed button
Touch this button lightly to select the desired
speed. When a speed is set, the indicator light
will be light on.
1. Detergent drawer
2. Power button (& light)
3.
4. Speed button
5. Intense button
6. Start/pause button
Programme knob
1 53 4
Continued on next page
2
4
3
1
C
。
90
C
。
60
C
。
40
C
。
40
C
。
30
2
6
C
。
90
C
。
60
C
。
40
C
。
40
C
。
30
C
。
90
C
。
60
C
。
40
C
。
40
C
。
30
Page 11

SERVICE MANUAL
Front Load Washing Machine
HW50-1002W
Control Panel Functions
5. Intense button
Touch this button lightly, the indicator light will
be light on . you can increase the washing time,
rinsing times in main wash stage of the selected
program, which is suitable for dirty clothes.
6. Start/pause
When the washing machine is connected to
the power socket and a program is selected,
lightly touch this button to start operation. During a wash cycle, touch it lightly ,operation
will stop and the indicator light start blinking.
Touch it again to resume operation. To cancel
a wash program during a wash cycle, touch
this button, when the indicator light start blinking, press the Power switch, the program will
be cancelled.
6
5
Page 12

SERVICE MANUAL
Front Load Washing Machine
Chapter 5 Program Introduction
HW50-1002W
Programme Selection Guide
Programme setting Laundry
Temperatur e
Detergent compartments
Max.
load
(kg)
1
Detergent2Softener
3
Prewash
NOTTOC
1
2
Prewash Very heavy soiling 60
•
O
•
around
136
5
3
90°C 90
•
O X
around
128
5
4
60°C
Non-fade and
medium soiled
cotton
60
•
O X
around
119
5
40°C
•
O X
around
107
5
CITEHTNYS
6
30°C
Non-fade heavily
soiled synthetic
fibre
30
•
O X
around
70
3
7
Cold
Fade and
medium soiled
synthetic fibre
•
O X
around
60
3
8
Wool 40°C
Fade and
medium soiled
synthetic fibre
•
O X
around
50
2
9
Spin
X X X 5
Note:
‘O’ means - softener can be added when necessary .
‘
• ’ means - detergent can be added when necessary.
‘X’ means - detergent MUST NOT be added.
40
5
Quick wash
Medium soiled
laundry
40
•
O X
around
29
2.5
Heavy soiling
Soiled cotton
around
12
40
Base on full
loading of 5kg
approximate
washing
time(mins.)
Page 13

SERVICE MANUAL
Front Load Washing Machine
Chapter 6 Washing Mathods
6-1. Loading
6-2. Adding detergent
6-3. Selecting washing program
HW50-1002W
Synthetic
y
conditioner
conditioner
Page 14

SERVICE MANUAL
Front Load Washing Machine
Chapter 7 Appearance brief introduction
7-1. Name of parts
HW50-1002W
C
。
90
C
。
60
C
。
40
C
。
40
C
。
30
Accessories included
Front
1. Detergent drawer
2. Top panel
3. Power button
4.
Start/pause button
5.
Programme selection dial
6.
Door
7.
Filter
Back
10. Back plate
11. Packing bolt x 3
12. Earth terminal
13. Water inlet
14. Power lead
15. Drain hose
16. Back plate screw x 3
Hose clip x 1
Water inlet hose x 1 Plastic plug x 3
1
3 5
9
8
2
10
13
14
15
12
Tools required for installation
Phillips screwdriver (medium)
Flatblade screwdriver (large)
Spirit level
13mm & 16mm Spanners
11
11
11
16
4
6
7
Speed button
intense button
8.
9.
Page 15

SERVICE MANUAL
Front Load Washing Machine
7-2. Net dimension
520
HW50-1002W
height:850mm / width:595mm / depth:520mm
C
90
C
60
C
40
C
40
C
30
595
850
Page 16

SERVICE MANUAL
Front Load Washing Machine
Chapter 8 Disassembly and Installation
8-1. Remove packing materials
HW50-1002W
Installation
Unpacking your washing machine
Caution: 2 people are required to
unpack and handle the washing
machine, it is recommended that
gloves are worn.
a: Carefully remove all packaging materials
including the foam base, dispose of correctly .
Note: When opened, water droplets may be
visible in the drum etc. this is normal as each
appliance is factory tested.
b: Remove the drain hose and power cable from
the clips on the back of the machine (1).
Removing the packing bolts
Important: The packing bolts ar e
designed to support the internal
components during transit, these
MUST be removed befor e use.
a: Remove the back cover plate, by r emoving
the 3 screws shown and sliding down the back
cover plate (2 & 3).
b: Remove all 3 packing bolts fr om the back
using a 13mm spanner or large flatblade
screwdriver. Remove the 3 rubber spacers from
inside the back of the washing machine (4).
Note: Keep the packing bolts and rubber
spacers in a safe place for possible later use.
c: Replace the back cover plate and refit the
screws.
d: Push fit the plastic plugs into the holes left by
the packing bolts (insert - 4).
Hose/
cable
clips
1
2 3
4
Page 17

SERVICE MANUAL
Front Load Washing Machine
8-2. Adjusting the washing machine
8-3. Joining the Inlet Hose to the Washing Machine
HW50-1002W
Levelling your washing machine
Before use you MUST ensure the washing
machine is level, check with a spirit level (5).
This will minimise vibrations and noise during
use plus reduce wear and tear.
Level by adjusting the feet under the appliance.
First adjust the feet
by hand to get the
appliance level then
tighten the nuts up to
the underside of the
appliance body using
a 16mm spanner (6).
5
6
C
。
90
C
。
60
C
。
40
C
。
40
C
。
30
Water inlet hose connection
Important: This washing machine
MUST only be connected to a cold
water supply.
Connect the water inlet hose, the angled
connection attaches to the water inlet on the
back of the washing machine (7). The straight
connection attaches to the water supply
valve (8). Ensure all seals are in place before
connecting.
Important: Only tighten the hose
connection nut by hand - do not
overtighten.
Water
inlet
hose
Water
supply
valve
Water
inlet
hose
7
8
Page 18

SERVICE MANUAL
Front Load Washing Machine
HW50-1002W
Important: The height of the top of
the curve in the drain hose MUST
be between 80 - 100cm from the
floor (9).
Fit the drain hose into
the hose clip (10) and
attach to the wall etc.
at the correct height.
Max.
100cm
Min.
80cm
Drain hose connection
9
10
HW50-1010W
C
。
90
C
。
60
C
。
40
C
。
40
C
。
30
8- 4. Drainage Hose
Page 19

SERVICE MANUAL
Front Load Washing Machine
8-5. Connecting to the Power Supply
HW50-1002W
(page 6) and the
Page 20

SERVICE MANUAL
Front Load Washing Machine
Chapter 9 Wiring circuit and Self check
9-1. Wiring circuit
PCB-Printed Circuit Board
NTC-Temperature Sensor
FA-Interference Suppresser
Door-Door Lock
Main inlet valve/pre inlet valve -Water Inlet Magnetic Valve
Water level Switch - Pressure Switch
Drain pump-Drainage Pump
Heater-Heating element
Motor –Motor
HW50-1002W
FA
N N
G
FA1
FA2
MRN
MRL
Water level swith
Heater
Fuse
FUSE
NTC
MRC
DOOR
L
L
Main inlet valve
Drainge pump
Pre inlet valve
Page 21

SERVICE
MANAUL
HW50-1002W
Front Load Washing Machine
21
9-2. Self check
Press “Intense” button, and plug in, then the WM will be on self-inspection mode,
all the indication light will be on. Press start/pause button starts the Testing Program.
1.Door lock switch testing, if the door is unlooked, The start indicator wasn't
lighted,and the buzzer sound abnormally.
2.Water inlet for main wash valve 5S, Water inlet for prewash valve 5S, and hot
water inlet 5S, if it can’t reach the 1st water level within 2 Mins, The start indicator
lighted on 0.2s and off 0.2s for 5 times, repeat 4s later.
3.Heat the water for 10 Secs.
4.Water drainage to empty cylinder water level, if it can’t reach the empty cylinder
water level within 2 Mins, The start indicator lighted on 0.2s and off 0.2s for twice,
repeat 4s later.
5.Spin speed to the Max RPM of this Model.
6.Unlock program finishes, all the indication light is off except the “stop” indication
light.
If it’s necessary to stop
the program during the testing, press the start/pause button or
makes power off; if there’s failure alarm during the testing, pls deal with it according
to the Alarm Handling Methods.
7. Model selection
Press the “Speed” and “Intense” button, the machine will be on Model Selection
mode, the Buzzer beeps one time.
When it comes in the Model selection mode, the 55cm 6kg 1200 rpm model is set as
default, during the following time, all the indication light is on alternately, the light of
spin exclusion is on; the light of speed is all on. Press “speed” button, makes 5kg and
6kg switch over.
Speed indication
light status
Corresponding Model
all on 6kg
all off 5kg
X.2 The speed of the model can be adjustable bwtween
1250/1050/950/850/750/650/1350 under the condition that all the speed light is off,
while the speed can be adjustable between 1260/1060/960/860/760/660/1360 with all
the speed light on.
washing program indication
light
Corresponding spin
speed
Light of spin exclusion on 1350/1360
light of wool wash on 1250/1260
Page 22

SERVICE
MANAUL
HW50-1002W
Front Load Washing Machine
22
light of synthetic 0 ℃ on
1050/1060
light of synthetic 30 ℃ on
950/960
light of quick wash on 850/860
light of cotton pre-wash on 750/760
light of cotton & flax 90 on 650/660
washing program indication
light
Corresponding spin
speed
X.3 The model can only be selected from high spin speed to lower spin speed, once
saved, it can’t reverse adjust, however, when the Temperature sensor is off, it can.
Chapter 10 Error Display and troubleshooting
10-1. The start indicator lighted on 0.2s and off 0.2s for twice, repeat 4s
later
Error 1
The start indicator wasn't lighted,and thebuzzer sound abnormally.
Error message:Door is not properly shut 20s after program is started.
Troubleshooting:
Error 2
The start indicator lighted on 0.2s andoff 0.2s for twice,repeat 4s later .
Error message: Drainage error, water not emptied wit
hin 4 min.
Pushing the door to Check Whether
Door is properly shut or not
Y
Shut the door properly
Door lock is broken and need replacing,
then make sure wire is connected
properly.
Check the voltage between 12-3 and
12-12 of PCB, is it between AC
220-240V?
Cut off the power and then turn on again.
Check the voltage between brown wire
and blue wire of door lock, is it between
AC 220-240V?
N
Replace
PCB
N
Connect the wire properly
Check if the wire connecting door lock
and PCB is loose
N
Y
Y
Page 23

SERVICE
MANAUL
HW50-1002W
Front Load Washing Machine
23
Troubleshooting:
Error 3
The start indicator lighted on 0.2s andoff 0.2s for 3 times,repeat 4s later .
Error message:Temperature sensor is not properly connected or damaged (display at the end of a
program).
Troubleshooting:
N
Check if drain pump acts by touching
pump position
Y
Check if drain pump or
drain pipe is jammed,
And open the filter and
clean
N
Cut off the power and choose spin
program to start ,then check the import
voltage of drain pump, is it between
AC 220-2240 V?
Replace drain pump
N
Cut off power and pull out water level
pressure switch wire connection. Set
spin program to start. Check the export
voltage to drain pump, is it between AC
220-240V?
Replace PCB
NTC exist open circuit. Replace it
Y
Y
Check if NTC is connected properly
Cut off power and measure the resistance
of temperature sensor by
multimeter, is
it between 5-14kΩ ?
Y
N
Connect NTC well
N
N
Replace PCB
Check if water is emptied
Y
Cut off power and water level pressure switch wire
connection, measure the resistance of 11 and14 pin,
is it infinite? If not, it is water level pressure switch
failure and replaces it. If it is, then repair and check
PCB and wire as followed.
N
Y
The wire between PCB
and drain pump is not
connected properly.
Replace the wire.
Check the white wire and black wire of NTC,
are they connected well?
Connect all wires well
Disconnect the white wire and black wire
from PCB, and measure if the resistance
between white wire and black wire of PCB, is
it infinite?
Y
N
Y
Replace wire
Page 24

SERVICE
MANAUL
HW50-1002W
Front Load Washing Machine
24
Error 4
The start indicator lighted on 0.2s andoff 0.2s for 4 times,repeat 4s later .
Error message:The heater may be broken
Troubleshooting:
N
Error 5
The start indicator lighted on 0.2s andoff 0.2s for 5 times,repeate 4s later .
Error message: The required water level is not reached within 8 min, or the water level exceeds the
protection value
Troubleshooting:
Y
Cut off power, check the resistance of
two pins of heater element by
multimeter, is it between 32-35Ω?
Heater element must
be broken, please
replace it
N
Check if inlet valve is jammed
Clean inlet valve
N
Draw out the dispenser and check if
water is entering
Observe if the
height of drain pipe
not reach 80 cm. If
water level pressure
switch and the hose
is leakin
g g
as
N
Check if tap is closed or water
pressure is too low (usual
between0.2 -1 MPa)
Open the tap or wait for normal water
pressure to use
N
The control wire may be broken,
Otherwise the PCB must be broken;
Please replace the broken.
Y
Y
Y
Check if water is leaking from washer
bottom. Inlet pipe. drain pipe or
other pipe connection
Y
N
Check if overload laundry. Reduce the laundry
Y
Connect it well.
Page 25

SERVICE
MANAUL
HW50-1002W
Front Load Washing Machine
25
Error 7
The start indicator lighted on 0.2s andoff 0.2s for 7 times,repeate 4s later .
Error message. Motor overheat protection or is damaged.
Troubleshooting:
Error 8
The start indicator lighted on 0.2s andoff 0.2s for 8 times,repeate 4s later .
Error message. Water level exceeds protection value.
N
Turn on power, and set pre-wash
mode, then start. Check the import
voltage of electromagnetic valve by
multimeter is it between AC
220-240V?
Electromagnetic valve must be broken, please
replace it.
The wire connected PCB and inlet valve is not
properly. Please reconnect it or replace it.
Y
Cut off power and check if motor wires
are connected well
Reconnect well
Y
Measure if the resistance of motor
binding by multimeter, is it as followed?
5 -10
[1.68±8%Ω (at 20°C)]
;
8 -9[2.00±8%Ω (at 20°C)]
;
Y
Y
N
N
Y
Replace PCB
Check if export voltage from PCB to
electromagnetic valve, is it between
AC 220-240V?
N
Put the motor in normal temperature
about ten minutes, and then test
again. If the resistance is natural, it
is caused by overheated protection.
Then check and deal with
overload, abnormal voltage. If not,
please replace motor
Repair wires
Pull out the wire connection of motor
and driving computer board. Then
check if circuit is open by multimeter
Page 26

SERVICE
MANAUL
HW50-1002W
Front Load Washing Machine
26
Troubleshooting:
10-2. Examination & Troubleshooting
10-2-1. Display nothing
Troubleshooting:
10-2-2. No water inletting
N
Check if water switch hose and air collector
are jammed
Clean water switch hose and air
collector
N
Pull out water switch inserts and turn on
power, then set wash mode. while water
is entering at the position of 3/4 glass
window, check the resistance between 11
and 16, is it 0 ? Check the resistance
between 11and 14 ,is it infinite?
Replace water pressure switch
Y
Y
Without starting but electrifying, measure
the import voltage of inlet valve, is it
between AC 220-240V?
Replace PCB
Y
N
Without power ,connect inlet pipe to inlet
valve, then open the tap and observe if
water is entering in dispenser
Y
Replace inlet valve
Measure the power supply ,is it exists
220V-240V AC voltage?
Y
Repair power supply
N
Press the power switch
Check if power plug exists 220V-240V
AC voltage at the import pin
Is power switch on?
Y
N
Insert the plug well and test
N
Press power switch and check the
voltage between two pins of power
switch. Is there 220-240V AC
volta
g
e?
N
Make sure power supply cable
assembly is connected well and then
replace power switch.
Cut off power and check if plugs are
connected well by pulling the plug of
PCB.
Y
N
Y
Replace PCB
Page 27

SERVICE
MANAUL
HW50-1002W
Front Load Washing Machine
27
Troubleshooting:
N
Is the tap shut off or the water pressure
too low?
Y
Open tap or wait for normal water
pressure
N
Check if water is leaking from washer
connection, especially between inlet pipe
and tap. to make sure of no bends.
Reconnect inlet pipe.
N
Check if filter of electromagnetic valve
is jammed
Clean filter
Choose pre-wash program and start,
then check if there is 220-240V at
ex
p
ort pin of electromagnetic valve
Y
Y
Choose pre-wash program and start,
Check if there is 220-240V at import
pin of electromagnetic valve
Is there open circuit between
electromagnetic valve and PCB?
Y
N
Replace electromagnetic valve
Reconnect the wire
Replace PCB
N
N
Y
Page 28

SERVICE
MANAUL
HW50-1002W
Front Load Washing Machine
28
10-2-3. No draining
roubleshooting:
10-2-4. Abnormal noise and vibration
Troubleshooting:
Turn filter anticlockwise , open and
check if filter is jammed
Clean and tighten filter clockwise.
Y
Is the pack screws dismantled?
Dismantle the screws
Clean
N
Is the height of drain pipe too high?
N
Adjust the height of drainpipe to
80-100 cm
Y
Y
Arrange hose and clean
Adjust adjustable feet
Is washer in balance?
Y
Turn on power and set spin program,
then start,check if there is different
noise from motor
Check if hose-connecting cylinder to
pump is bent or jammed
Turn on power and choose spin
program to start. Measure if import
voltage of drain pump is 220-240V
Cut off and check if the connection
between drain pump and PCB is open
Replace drain pump
Replace the wire .
N
Replace
PCB
Is belt loose or worn?
Remove belt and turn belt pulley by hand,
and then check if there is different noise
Y
Y
Replace it
Dismantle triangle and
check the bearing. If it is
broken, replace it.
Replace motor
N
N
N
Is there foreign material in the washer ?
N
N
Y
Y
Y
N
Y
N
Y
Turn on and select spin program to start,
Measure export voltage of PCB to the
drain pump, is it 220-240V?
N
Page 29

SERVICE
MANAUL
HW50-1002W
Front Load Washing Machine
29
N
10-2-5. Water leaking
Troubleshooting:
Y
Is drain pipe broken?
Readjust it
Is cushion of sight window broken?
Replace drainpipe
Reassemble or repair
Is water leaking from outer cylinder?
Remove clothes
Y
Y
Check if water is leaking from the inlet pipe
or the tap
N
Check if there is foreign material nipped
between cushion of sight window and
sight window
Check if all tubes and tie-in is leaking
water, including the connecting of tube
and valve, dispenser, tube and dispenser,
outer cylinder-cushion of sight
window-hose and outer cylinder, drain
pump and gas valve
Y
Y
Replace outer cylinder
N
N
N
Page 30

SERVICE MANUAL
Front Load Washing Machine
Chapter 11 Maintenance
HW50-1010
Page 31

SERVICE MANUAL
Front Load Washing Machine
HW50-1002W
Page 32

SERVICE
MANAUL
HW50-1002W
Front Load Washing Machine
32
Sincere Forever
 Loading...