

Page 1
Microwave Oven
Four à micro-ondes
Horno de microondas
User Manual
Guide de l’utilisateur
Manual del usuario
HMV1472BHS
Part # 0570001260 REV A
Page 2

Page 3

TABLE OF CONTENTS
MICROWAVE SAFETY ........................................................................... 2
Microwave Energy Safety ................................................................. 4
Electrical Requirements .................................................................. 5
PARTS AND FEATURES ......................................................................... 6
Specications ............................................................................... 7
Turntable ..................................................................................... 7
CONTROL PANEL ................................................................................ 8
Clock .......................................................................................... 8
Features ...................................................................................... 9
MICROWAVE OVEN USE ....................................................................... 10
Cookware .................................................................................. 10
Microwave Cooking ...................................................................... 10
MICROWAVE OVEN CARE ..................................................................... 14
Cleaning .................................................................................... 14
Filters ....................................................................................... 14
Lights ....................................................................................... 17
TROUBLESHOOTING .......................................................................... 17
LIMITED WARRANTY ........................................................................... 18
RECORD KEEPING .............................................................................. 19
ENGLISH
1
Page 4
Your safety and the safety of others are very important.
We have provided many important safety messages in this manual and
on your appliance. Always read and obey all safety messages.
DANGER
WARNING
CAUTION
This is the safety alert symbol.
This symbol alerts you to potential hazards that can
kill or hurt you and others. All safety messages will
follow the safety alert symbol and either the word
“DANGER,” “WARNING” or “CAUTION.”
These words mean:
An imminently hazardous situation. You
could be killed or seriously injured if you
don’t immediately follow instructions.
A potentially hazardous situation
which, if not avoided, could result in
death or serious bodily injury.
A potentially hazardous situation
which, if not avoided, may result in
moderate or minor injury.
All safety messages will tell you what the potential hazard is, tell you
how to reduce the chance of injury, and tell you what can happen if the
instructions are not followed.
ENGLISH
MICROWAVE SAFETY
When using electrical appliances basic safety precautions should be
followed, including the following:
WARNING: To reduce the risk of burns, electric shock, re, injury to
persons, or exposure to excessive microwave energy:
Read all of the instructions before using this appliance.
•
Read and follow the specic “PRECAUTIONS TO AVOID POSSIBLE
•
EXPOSURE TO EXCESSIVE MICROWAVE ENERGY” found in this
section.
The microwave oven must be grounded. Connect only to properly
•
grounded outlet. See “GROUNDING INSTRUCTIONS” found in the
“Electrical Requirements” section and in the provided Installation
Instructions.
Install or locate the microwave oven only in accordance with the
•
provided Installation Instructions.
Microwave is suitable for use above both gas and electric cooking
•
equipment.
IMPORTANT SAFETY
INSTRUCTIONS
2
Page 5

IMPORTANT SAFETY
INSTRUCTIONS
Intended to be used above ranges with maximum width of 36"
•
(91.44 cm).
Some products such as whole eggs in the shell and sealed containers
•
- for example, closed glass jars - can explode and should not be
heated in the microwave oven.
Use the microwave oven only for its intended use as described in the
•
manual. Do not use corrosive chemicals or vapors in the microwave
oven. This type of oven is specically designed to heat, cook, or dry
food. It is not designed for industrial or laboratory use.
As with any appliance, close supervision is necessary when used by
•
children.
Do not operate the microwave oven if it has a damaged cord or plug, if
•
it is not working properly, or if it has been damaged or dropped.
The microwave oven should be serviced only by
•
personnel. Call an authorized service company for examination,
repair, or adjustment.
Do not cover or block any openings on the microwave oven.
•
Do not store or use this microwave oven outdoors. Do not use the
•
microwave oven near water - for example, near a kitchen sink, in a wet
basement, near a swimming pool, or similar locations.
Do not immerse cord or plug in water.
•
Keep cord away from heated surfaces.
•
Do not let cord hang over edge of table or counter.
•
See door surface cleaning instructions in the “Microwave Oven Care”
•
section.
To reduce the risk of
Do not overcook food. Carefully attend the microwave oven when
•
paper, plastic, or other combustible materials are placed inside the
oven to facilitate cooking.
Remove wire twist-ties from paper or plastic bags before placing bags
•
in oven.
If materials inside the oven ignite, keep oven door closed, turn oven
•
o, and disconnect the power cord, or shut o power at the fuse or
circuit breaker panel.
Do not use the cavity for storage purposes. Do not leave paper
•
products, cooking utensils, or food in the cavity when not in use.
To reduce the risk of injury to persons:
Do not overheat the liquid.
•
Liquids, such as water,
•
boiling point without appearing to be boiling. Visible bubbling or
boiling when the container is removed from the microwave oven is
not always present. This could result in very hot liquids suddenly
boiling over when the container is disturbed or a spoon or other
utensil is inserted into the liquid.
Stir the liquid both before and halfway through heating it.
•
Do not use straight-sided containers with narrow necks.
•
re in the oven cavity:
coee, or tea can be overheated beyond the
qualied service
ENGLISH
3
Page 6
ENGLISH
IMPORTANT SAFETY
INSTRUCTIONS
After heating, allow the container to stand in the microwave oven for
•
a short time before removing the container.
Use extreme care when inserting a spoon or other utensil into the
•
container.
Do not store anything directly on top of the microwave oven when the
•
microwave oven is in operation.
Clean Ventilating Hoods Frequently - Grease should not be allowed to
•
accumulate on hood or
Use care when cleaning the vent-hood
•
agents, such as lye-based oven cleaners, may damage the lter.
ambéing foods under the hood, turn the fan on.
When
•
READ AND SAVE THESE
INSTRUCTIONS
MICROWAVE ENERGY SAFETY
PRECAUTIONS TO AVOID
POSSIBLE EXPOSURE TO
lter.
lter. Corrosive cleaning
EXCESSIVE MICROWAVE ENERGY
Do not attempt to operate this oven with the door open since open-
A
door operation can result in harmful exposure to microwave energy.
It is important not to defeat or tamper with the safety interlocks.
Do not place any object between the oven front face and the door or
B
allow soil or cleaner residue to accumulate on sealing surfaces.
Do not operate the oven if it is damaged. It is particularly important
C
that the oven door close properly and that there is no damage to the:
1. Door (bent),
2. Hinges and latches (broken or loosened),
3. Door seals and sealing surfaces.
The oven should not be adjusted or repaired by anyone except
D
properly
qualied service personnel.
4
Page 7
ELECTRICAL REQUIREMENTS
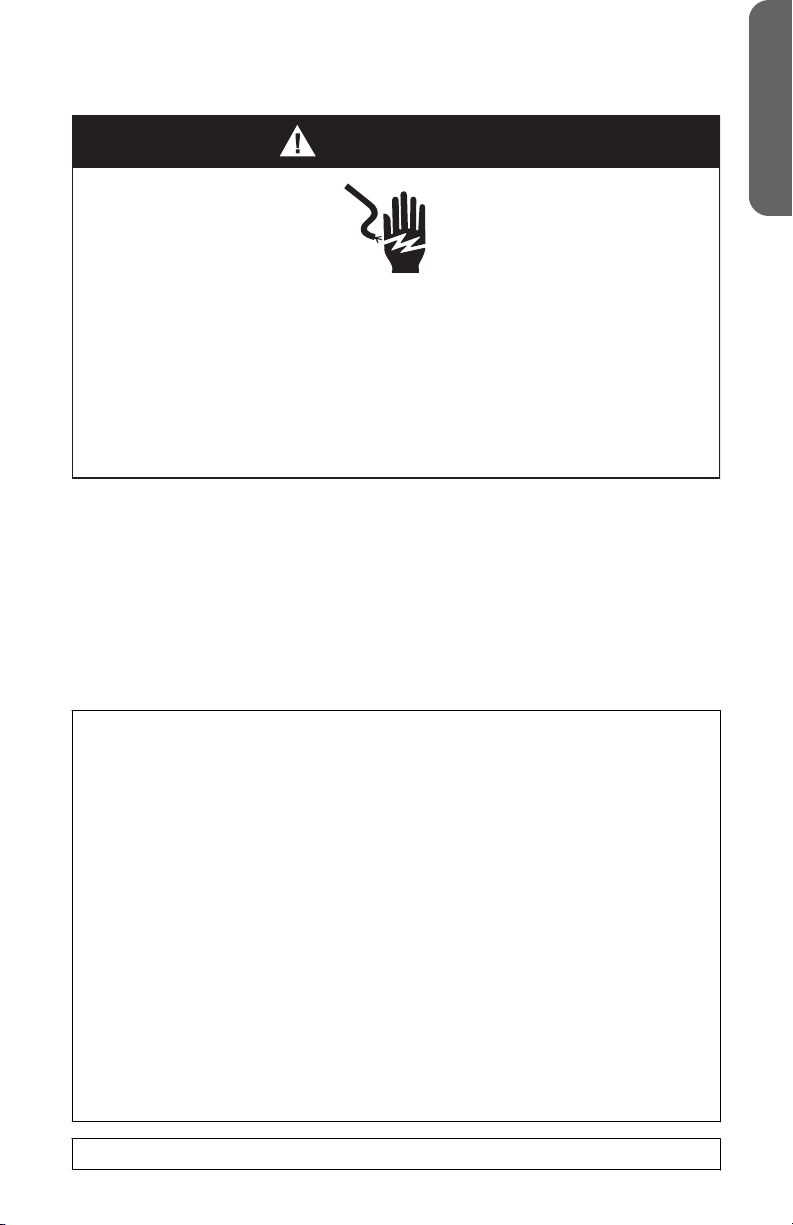
WARNING
Electrical Shock Hazard
Plug into a grounded 3 prong outlet.
Do not remove the ground prong from the power cord plug.
Do not use an adapter.
Do not use an extension cord.
Failure to do so can result in death, fire or electrical shock.
Observe all governing codes and ordinances.
Required:
A 120 volt, 60 Hz, AC only, 15- or 20-amp electrical supply with a fuse or circuit
breaker.
Recommended
A time-delay fuse or time-delay circuit breaker.
A separate circuit serving only this microwave oven.
ENGLISH
GROUNDING INSTRUCTIONS
For a grounded, cord-connected microwave:
The microwave oven must be grounded. In the event of an electrical
short circuit, grounding reduces the risk of electric shock by providing an
escape wire for the electric current. The microwave oven is equipped
with a cord having a grounding wire with a grounding plug. The plug must
be plugged into an outlet that is properly installed and grounded.
WARNING: Improper use of the grounding plug can result in a risk of
electric shock. Consult a qualied electrician or serviceman if the
grounding instructions are not completely understood, or if doubt
exists as to whether the microwave oven is properly grounded.
Do not use an extension cord. If the power supply cord is too short, have
a qualied electrician or serviceman install an outlet near the microwave
oven.
READ AND SAVE THESE
INSTRUCTIONS
This device complies with Part 18 of the FCC Rules.
5
Page 8
a
b
c
d
h
i
e f g
a
j
k
k
ENGLISH
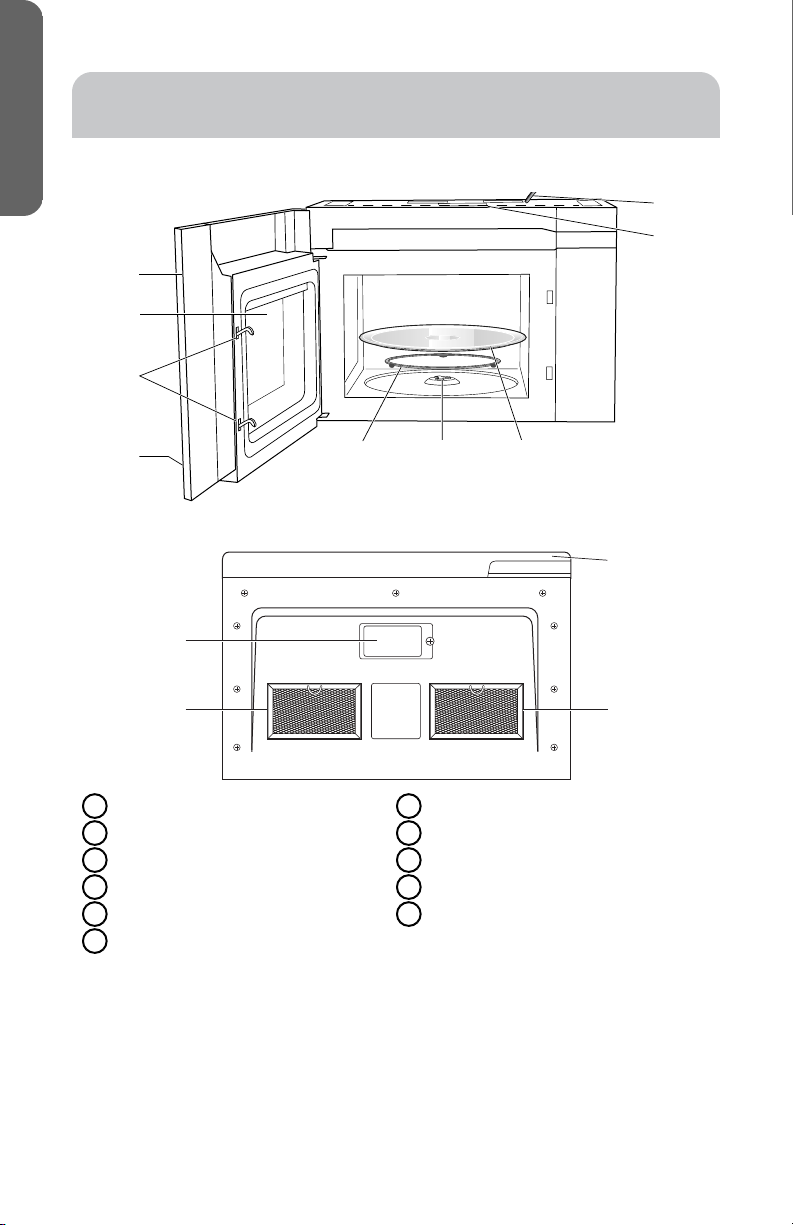
PARTS AND FEATURES
Front View
Bottom View
Door
A
Window
B
Interlock System
C
Control Panel
D
Turntable Ring Assembly
E
Turntable Coupler
F
Glass Turntable
G
Top Grille
H
Power Cord
I
Surface Lights
J
Grease Filters
K
6
Page 9
SPECIFICATIONS
kg lb
a
b
d
c
Model number HMV1472BHS
Rated Voltage 120V~60Hz
Rated Input Power (Microwave) 1500 Watt
Rated Output Power (Microwave) 1000 Watt
Oven Capacity 1.34 cu.ft
Turntable Diameter 13¹⁄₂" (34.3 cm)
External Dimensions (W x D x H) 23¹⁄₂ " x 16¹⁄₂ " x 17¹⁄₈" (59.7 cm x
Net Weight 52.3 lbs (23.7 kg)
LED Lighting Service Replacement only
41.9 cm x 43.5 cm)
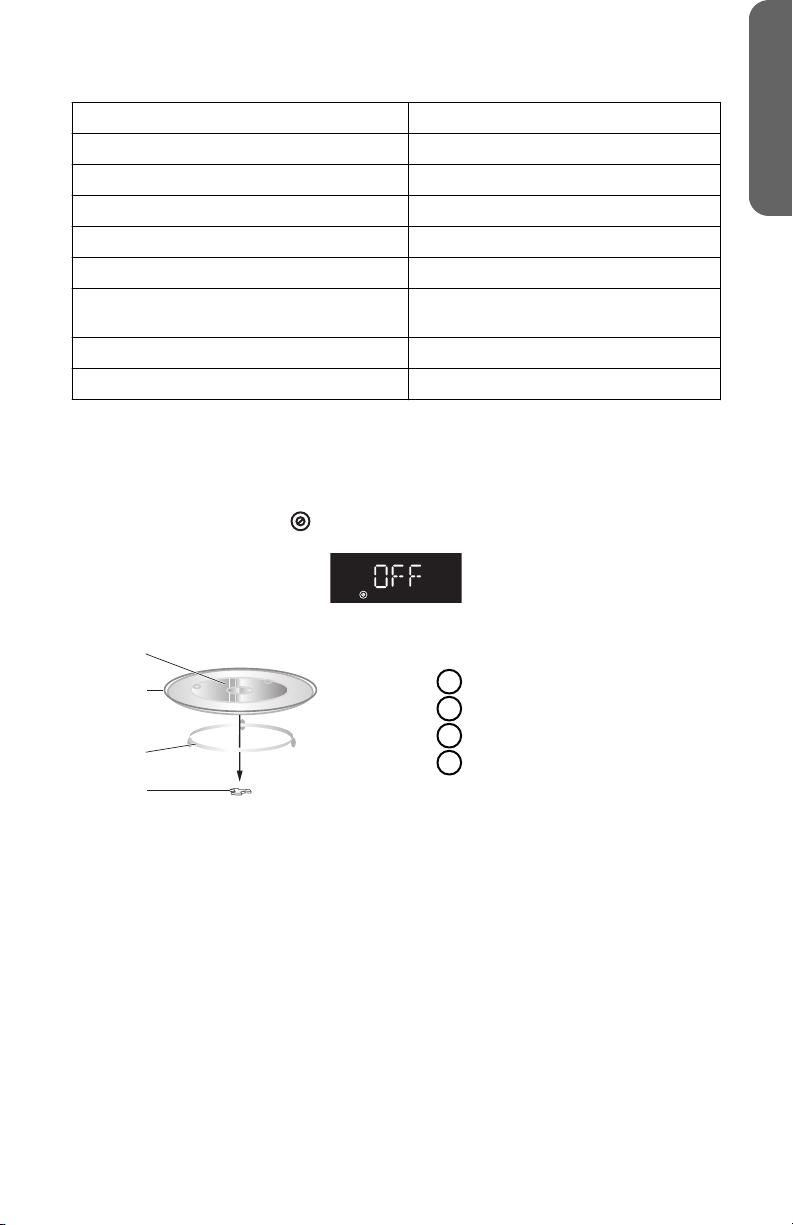
TURNTABLE
The turntable ring assembly and the glass turntable must be used during cooking.
If you are using large or oblong-shaped cookware that would touch the walls of the
microwave when the turntable spins, you can turn o the turntable. Press
TURNTABLE. “OFF” and the icon will appear in the display.
Assemble the turntable as shown.
•
ENGLISH
Hub (underside)
A
Glass Turntable
B
Turntable Ring Assembly
C
Turntable Coupler
D
NOTE:
Do not place the glass turntable upside down.
•
The glass tray should never be restricted.
•
Place all food and containers of food on the glass tray for cooking.
•
If glass turntable or turntable ring assembly cracks or breaks, contact the
•
Customer Satisfaction Center at 1-877-337-3639 or the parts department
at encompassparts.com.
7
Page 10

a b c d e f hg
i j k l m n
kg lb
kg lb
kg lb
kg lb
ENGLISH
CONTROL PANEL
Sensor Cook
A
Popcorn
B
Sensor Reheat
C
Power Level
D
Kitchen Timer
E
Display
F
Number Pads
G
Stop
H
Defrost
I
Turntable On/O
J
Light On/O
K
Vent Hi-Lo-O
L
Clock
M
Start
N
CLOCK
Your model features a 12-hour clock.
SET TIME OF DAY
1. Press CLOCK to enter the Clock Setting mode. “ENTER TIME” will appear in the
display.
2. Press the number pads to enter the correct time-of-day. For example, if the
time is 10:12, press number pads “1, 0, 1, 2” to enter the time.
3. Press START to conrm the time.
KITCHEN TIMER
The microwave features a convenient timer for your cooking needs.
1. Press KITCHEN TIMER. “ENTER TIME” will appear in the display.
2. Press the number pads to input the desired cooking time.
NOTE: The maximum cooking time is 99 minutes and 99 seconds.
3. Press START to begin counting down the time.
8
Page 11
NOTE: When the set time has expired, “END” will appear in the display and
kg lb
kg lb
kg lb
three long alert tones will sound.
4. Press STOP to exit the Kitchen Timer function.
FEATURES
VENT FAN
The Vent Fan feature allows you to exhaust heat and steam from the cooking
surface below.
Press VENT HI-LO-OFF to Turn
•
NOTE:
The fan speed cannot be adjusted if the control panel is locked.
•
When the control is pressed the
•
High Speed - Press once
Low Speed - Press twice
O - Press three times
SURFACE LIGHTING
The surface light feature illuminates the cooking surface below the microwave oven.
Press LIGHT to toggle among High, Low and O.
On/O the fan and to regulate the fan speed.
rst time, “High” appears in the display.
ENGLISH
CHILD LOCKOUT
The Child Lock feature allows you to lock the microwave control panel for easy
cleaning or to avoid unintentionally changing the settings or turning on the
microwave oven.
To Lock/Unlock the control panel:
Press STOP/CANCEL for 3 seconds. Two beeps will sound to indicate the lock
•
has been activated/deactivated and “LOCKED” or “UNLOCK” will appear in the
display.
STATUS RECALL
The Status Recall feature allows you to check the Time and Power settings during
microwave cooking.
Press POWER LEVEL to display the set power level.
•
Press CLOCK to display the time.
•
9
Page 12

ENGLISH
MICROWAVE OVEN USE
IMPORTANT: Never operate the microwave without food in the oven cavity;
this can damage the magnetron tube or glass turntable. You may wish to leave a
cup lled with water inside the oven when it is not in use to avoid damage if the
oven is unintentionally turned on.
COOKWARE
IMPORTANT: Tightly closed containers could explode. Closed containers
should be opened and plastic pouches should be pierced before cooking.
MICROWAVE-SAFE
Browning dish (Sold separately. Follow manufacturer recommendations.)
•
Ceramic glass, Glass
•
China, Earthenware (Follow manufacturer recommendations.)
•
Melamine (Follow manufacturer recommendations.)
•
Paper towels, Paper Plates, Napkins (Use non-recycled paper.)
•
Plastic wraps, Bags, Covers, Dinnerware, Containers (Follow manufacturer
•
recommendations.)
Pottery and Clay (Follow manufacturer recommendations.)
•
Silicone bakeware (Follow manufacturer recommendations.)
•
Wax paper
•
NOT MICROWAVE-SAFE
Metal cookware and bakeware
•
Straw or Wicker
•
Gold, silver or pewter
•
Non-approved meat thermometers, skewers
•
Twist ties
•
Foil liners, such as sandwich wrappers
•
Staples
•
Objects with gold or silver trim or with metallic glaze
•
Wood
•
To Test Cookware/Dinnerware:
Place dish in microwave oven with 1 cup (250 mL) of water beside it. Program
1 minute of cook time at 100%. If dish becomes hot and the water stays cool, do not
use the dish in the microwave oven.
MICROWAVE COOKING
TIMED COOKING
1. Press the number pads to set the cooking time. For example, to cook for
10 minutes, press “1,0,0,0” in turn.
NOTE:
The maximum cooking time is 99 minutes and 99 seconds.
•
100% power is the default. If you wish to cook at 100% power, skip
•
steps 2 and 3, and go directly to Step 4.
2. Press POWER LEVEL to activate Power mode.
10
Page 13
kg lb
3. Press the number pads or press POWER LEVEL repeatedly to select the desired
kg lb
kg lb
kg lb
power level. See “Power Levels” chart later in this section.
4. Press START to begin cooking. The time will count down.
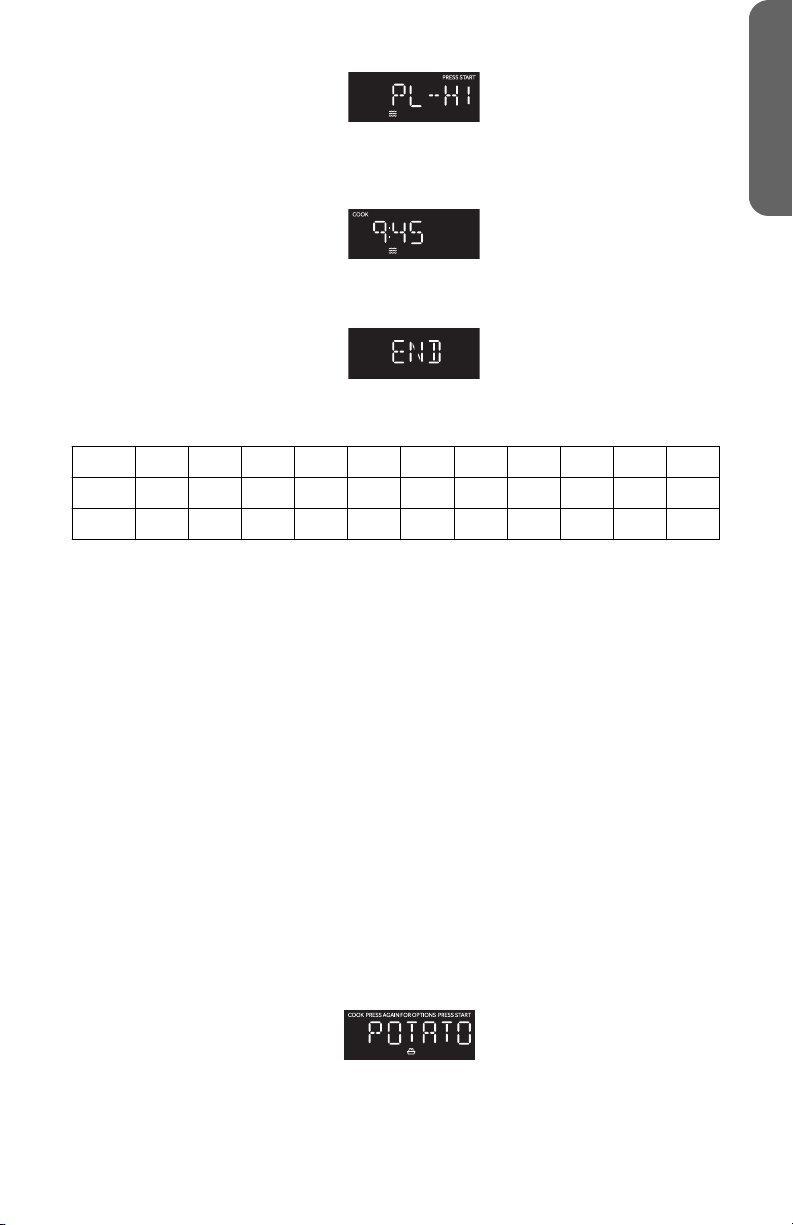
NOTE: When cooking is nished, an alert tone sounds 3 times and “End”
appears in the display.
Power Levels
Ten power levels are available.
Level 10 9 8 7 6 5 4 3 2 1 0
Power 100% 90% 80% 70% 60% 50% 40% 30% 20% 10% 0%
Display HI PL- 90 PL-80 PL-70 PL-60 PL-50 PL-40 PL-30 PL-20 PL-10 PL-0
CONVENIENCE COOKING
Press START/+ 30 SEC to begin cooking at 100% microwave power for
•
30 seconds.
Press START/+ 30 SEC during microwave cooking, to increase the cooking time in
•
30-second increments.
NOTE: The maximum cooking time is 99 minutes and 99 seconds.
Press number pads from 1 to 9 to start cooking with 100% microwave power for
•
1 to 9 minutes.
NOTE: During Convenience cooking, the microwave power level can be
viewed, but not adjusted.
ENGLISH
SENSOR COOK
The Sensor Cook control automatically sets the appropriate cooking time
calculated by sensing the moisture level of the food or beverage being cooked.
The Sensor Cook control is programmed to cook the following items: Potato, Fresh
Veggies, Frozen Veggies, Bacon, Frozen Dinner, Rice, Frozen Breakfast, and Frozen
Pizza.
Press SENSOR COOK once, “Potato” will appear on the display. Continue to
•
press SENSOR COOK to toggle among the choices. When the desired item
appears in the display, press START to
Once Start is pressed, the Sensing process begins. When the Sensing process is
•
completed, alert tones will sound and the calculated cook time will begin to
count down.
NOTE: Do not open the door during the Sensing process. If you do, the
Sensor Cook program will be cancelled.
conrm and begin cooking.
11
Page 14
kg lb
kg lb
ENGLISH
Sensor Cook Programs
Program Item Quantity
1 Baked Potato 1 - 4 potatoes
2 Fresh Vegetable 2 cups
3 Frozen Vegetable 2 cups
4 Bacon 1 - 3 slices
5 Frozen Dinner 10 to 20 oz.
6 Rice 1 - 2 cups
7 Frozen Breakfast 8 to 12 oz.
8 Frozen Pizza 12 oz.
DEFROST
The Defrost control allows you to choose to defrost by weight or by time.
Defrost by Weight
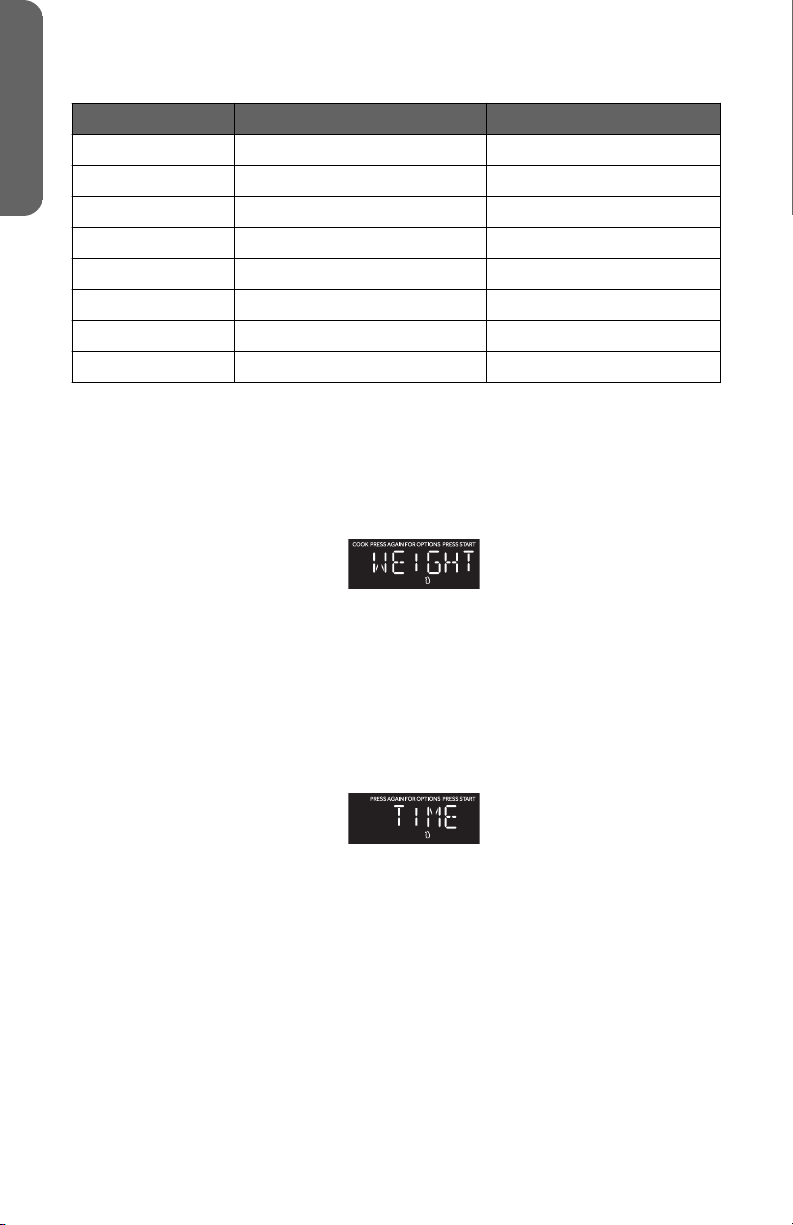
1. Press DEFROST once. “Weight” will appear on the display.
2. Press START. “Enter Weight” will appear on the display, and “lb” will ash.
3. Press the number pads to enter the weight of the item to be defrosted. For
example, if the food weight is 1.2 lbs, press “1” and then ”2” to input the weight.
NOTE: The maximum weight that will be accepted is 6.0 Lbs.
4. Press START to begin defrosting. Indicator “lb” will not be lit.
Defrost By Time
1. Press DEFROST twice. “Time” will appear on the display.
2. Press START. “Enter Time” will appear on the display.
3. Press the number pads to enter the time to defrost. For example, if you want
the food to defrost for 5 minutes, press “5” and then ”0” to input the time.
NOTE: The maximum time that will be accepted is 99 minutes and 99
seconds.
4. Press START to begin defrosting.
NOTE: When half of the total defrost time has passed, an alert tone will
sound twice to remind you to turn the food over.
SENSOR REHEAT
The Sensor Reheat control automatically sets the appropriate reheating time
calculated by sensing the moisture level of the food or beverage being reheated.
The Sensor Reheat control is programmed to reheat the following items: Beverage,
Dinner Plate, Pizza, Soup/Sauce and Casserole.
12
Page 15
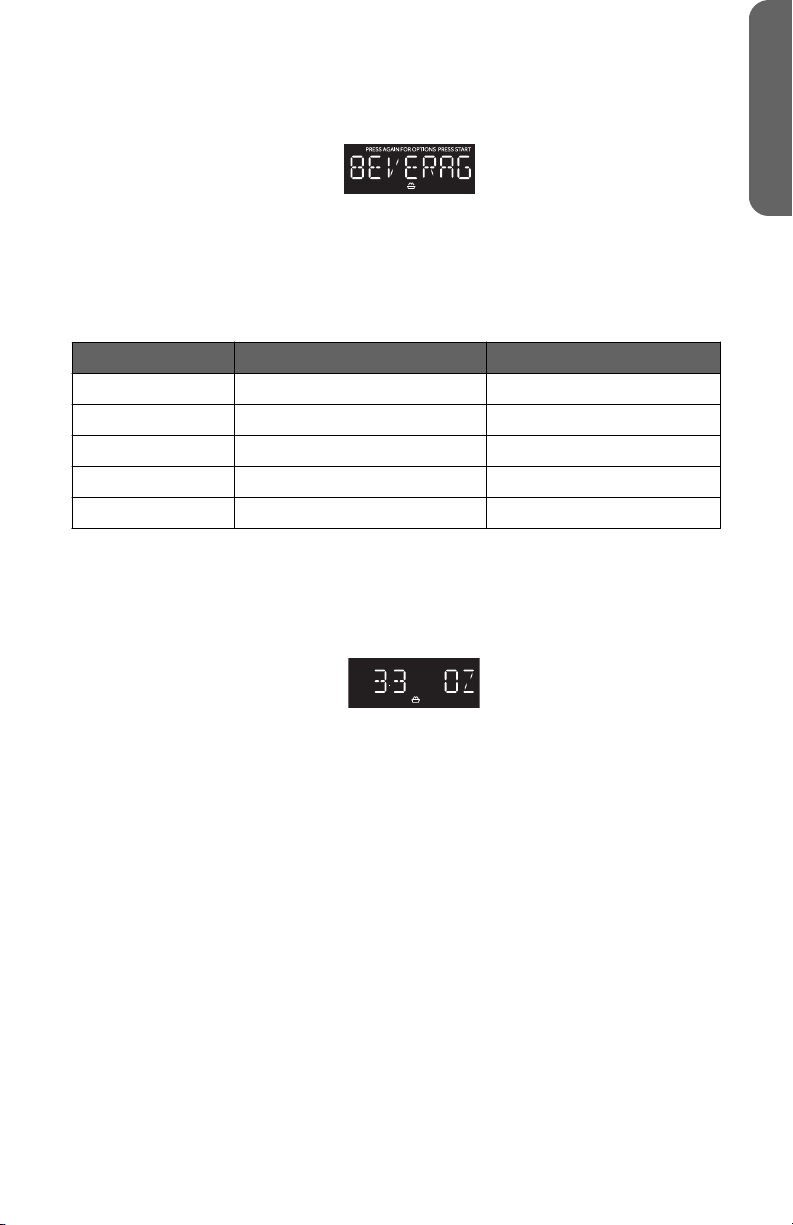
Press SENSOR REHEAT once, “BEVERAGE” will appear on the display. Continue
kg lb
kg lb
•
to press SENSOR REHEAT to toggle among the choices. When the desired item
appears in the display, press START to conrm and begin reheating.
Once Start is pressed, the Sensing process begins. When the Sensing process is
•
completed, alert tones will sound and the calculated reheat time will begin to
count down.
NOTE: Do not open the door during the Sensing process. If you do, the
Sensor Cook program will be cancelled.
Sensor Reheat Programs
Program Item Quantity
1 Beverage 1 to 3 cups
2 Dinner Plate 1 plate
3 Pizza 1 to 4 slices
4 Soup/Sauce 1 cup
5 Casserole/Lasagna 10.5 oz.
POPCORN
The popcorn control is programmed to pop microwave popcorn based on the size of
the bag.
1. Press POPCORN to toggle among the bag sizes.
ENGLISH
Press 1 time: To pop a 3.3 ounce bag of popcorn.
•
Press 2 times: To pop a 3.0 ounce bag of popcorn.
•
Press 3 times: To pop a 1.75 ounce bag of popcorn.
•
2. Press START to
appear on the display.
conrm selection and begin cooking. The popping time will
13
Page 16
WARNING
Electrical Shock Hazard
Disconnect power before cleaning.
Failure to do so can result in death or electrical shock.
WARNING
Electrical Shock Hazard
Disconnect power before servicing.
Replace all parts and panels before operating.
Failure to do so can result in death or electrical shock.
ENGLISH
MICROWAVE OVEN CARE
CLEANING
IMPORTANT:
Before cleaning, make sure all controls are
•
cool. Always follow label instructions on cleaning products.
To avoid damage to the microwave oven caused by arcing due to soil
•
buildup, keep the oven cavity, top grille and the area where the door
touches the oven frame clean.
1. Using a warm water and mild soap solution and a soft cloth or sponge, clean the
oven cavity, frame and oven exterior.
2. Rinse with clean warm water and dry with a soft cloth.
NOTE:
Do not use scouring powder or rough scouring pads on the microwave.
•
The glass turntable may be washed and dried in the dishwasher.
•
For stainless steel models, a stainless steel cleaner may be used on the
•
exterior.
o and the microwave oven is
FILTERS
14
Page 17
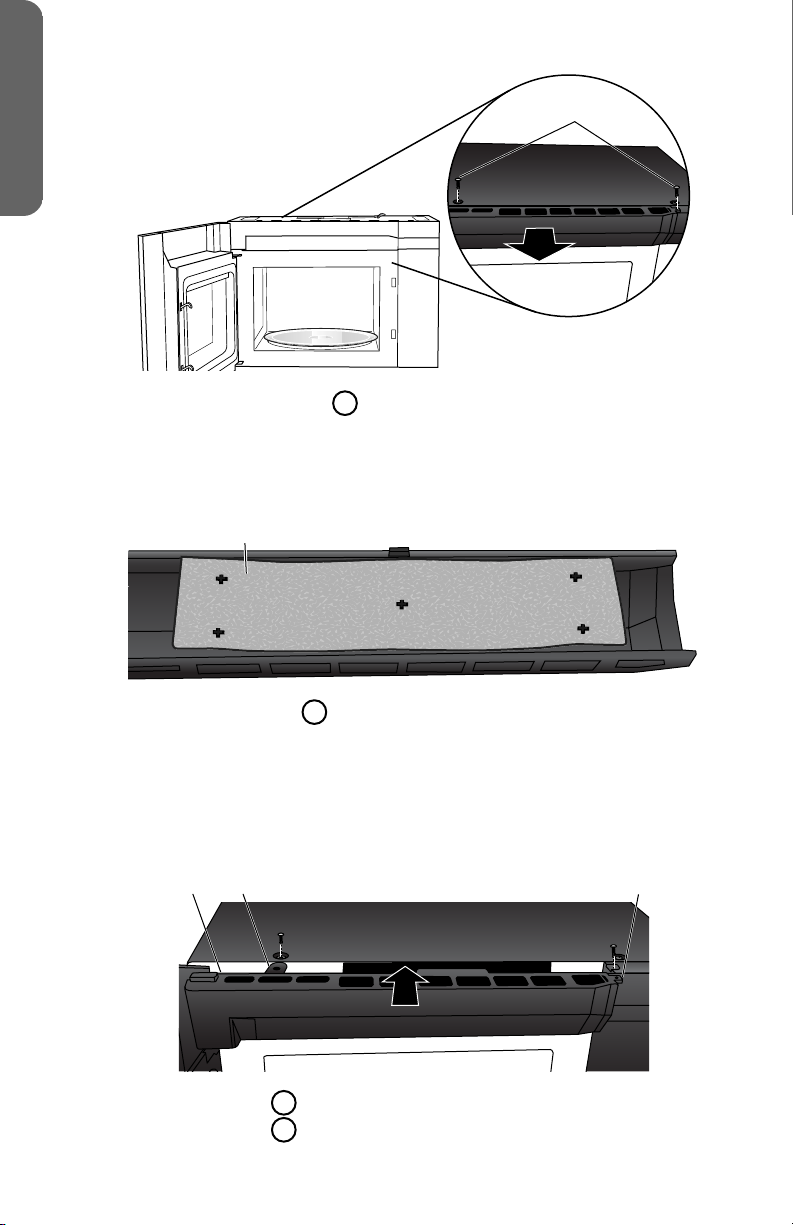
GREASE FILTER(S)
a b
c
d
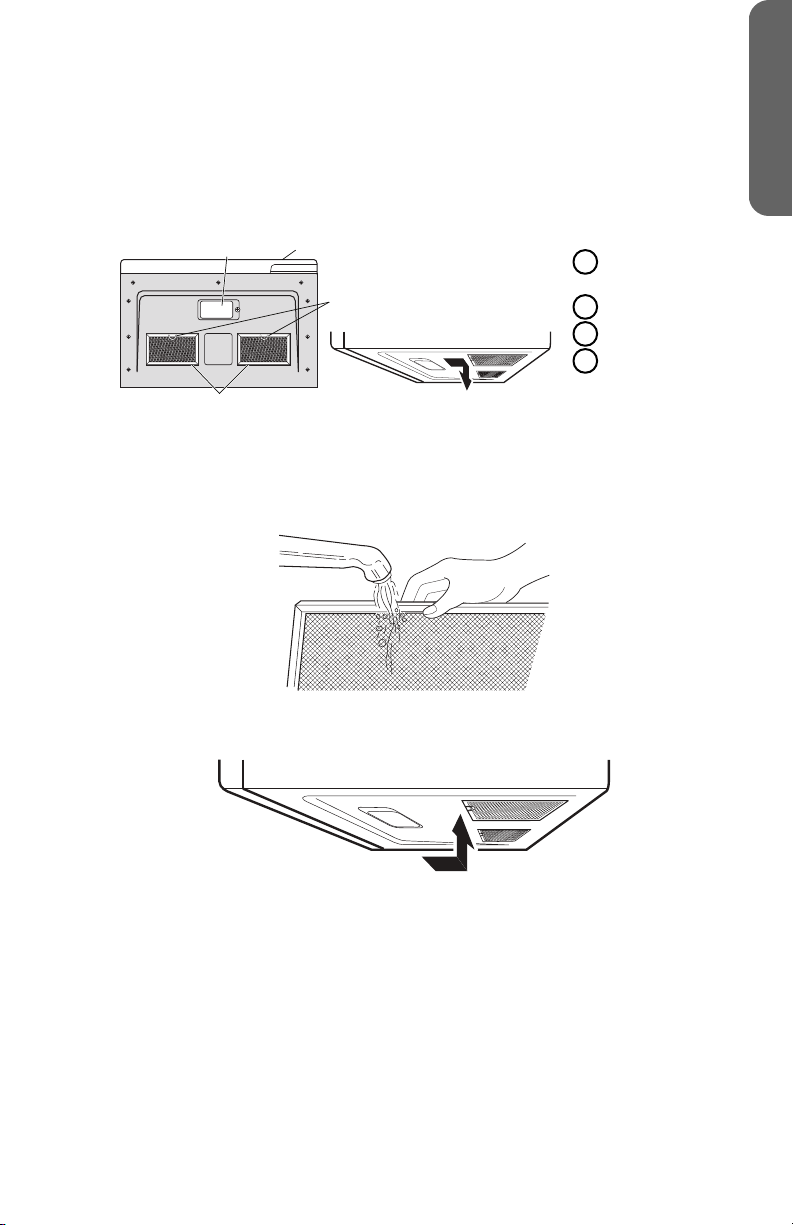
Grease lters are located on the underside of microwave oven. The grease lters
should be removed and cleaned often; generally at least once every month.
1. Remove the grease lter. Grasp the metal ring, slide the lter toward the back,
and then gently pull the lter downward. Repeat for the second lter.
Surface
A
Lights
Door
B
Metal Loop
C
Grease
D
Filters
2. Soak the grease lters in hot water with a mild detergent added. Rinse well and
shake to dry.
NOTE: Do not use ammonia or wash in a dishwasher. The aluminum on the
lter will corrode and darken.
ENGLISH
3. Reinstall the grease lter. Insert the back edge of the lter into the opening,
and then gently push the lter up into place. Repeat for the second lter.
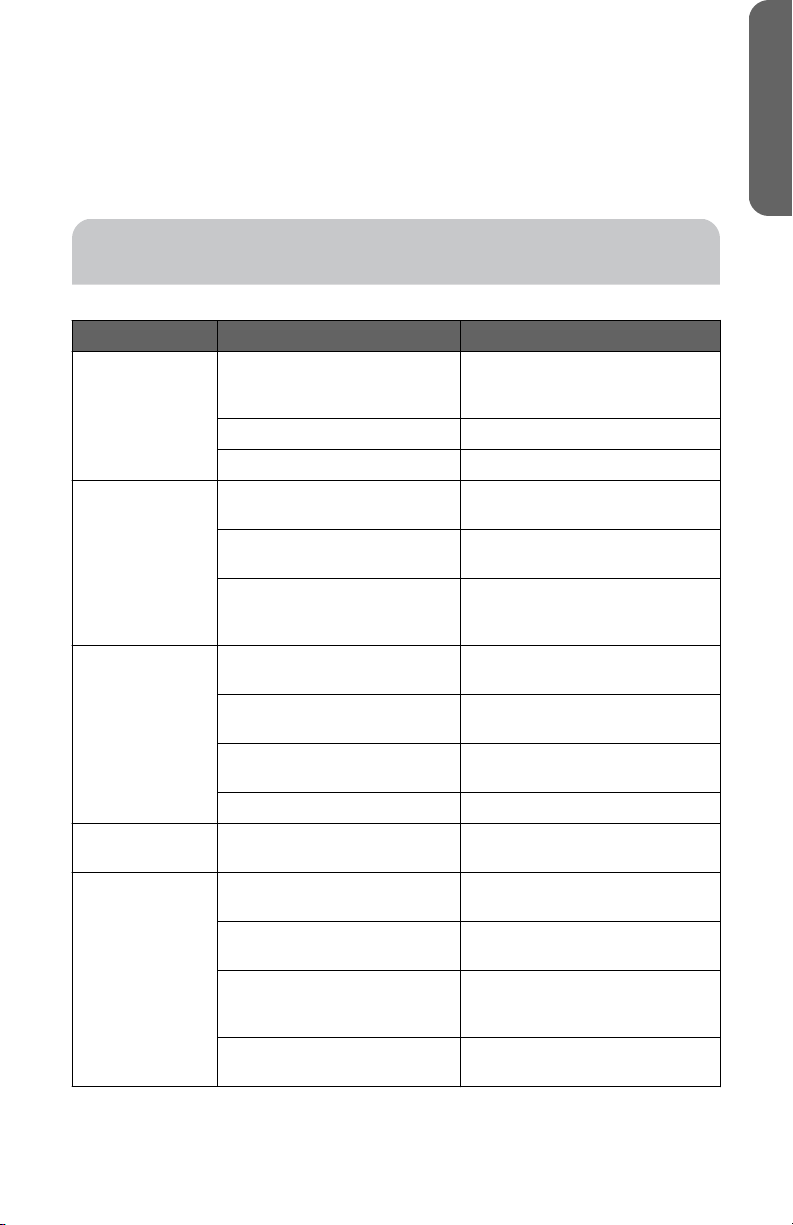
CHARCOAL FILTER
IMPORTANT: A charcoal lter must be installed in the microwave oven when it
is used in a non-vented (recirculating) installation. Your microwave oven comes
from the factory with the charcoal lter installed.
The charcoal lter cannot be cleaned, so it must be replaced at least every 6 months
or more often depending on use. To order a replacement charcoal lter for your
model, contact the Customer Satisfaction Center. See "Back Cover" for contact
information.
1. Unplug or disconnect power.
2. Using a Phillips screwdriver, remove screws from the top grille.
3. Open the microwave door so you can grasp the top grille, and then pull the grille
straight out to remove.
15
Page 18
a
a
a b b
ENGLISH
Screws (2)
A
4. Remove the used charcoal lter from the back of the grille, and then discard the
lter.
5. Align the holes in the new charcoal lter with the ve posts on the back of the
grille, and gently press down to attach.
Charcoal Filter
A
6. Align the top edge of the grille so that when the grille is pushed into place the
screw hole tabs on the the grille will align with the holes in the microwave
cabinet. Gently push on the grille until it snaps into place and the screw holes
are aligned.
NOTE: Make sure that the wire harness, located near the door hinge, is
not pinched when you are replacing the top grille.
Wire Harness (not shown)
A
Screw Hole Tab (2)
B
7. Replace the two screws removed earlier, and completely tighten the screws.
16
Page 19
LIGHTS
IMPORTANT: Your microwave oven features LED interior lighting as well as
LED surface lighting. These lights are designed to last for the life of your
microwave oven. However, if the lights stop illuminating, please contact a
qualied technician for replacement or the Customer Satisfaction Center for
service. See the back cover for contact information.
TROUBLESHOOTING
First try the solutions suggested here to possibly avoid the cost of a service call.
PROBLEM POSSIBLE CAUSE(S) SOLUTION
Oven will not
start
Arcing or
sparking
Unevenly
cooked foods
Overcooked
foods
Undercooked
foods
Oven power cord is not
plugged into an electrical
outlet.
Door is open. Close the door and try again.
Wrong operation is set. Check instruction.
Materials to be avoided in
microwave oven are used.
The oven is operated when
empty.
Spilled food remains in the
oven cavity.
Materials to be avoided in
microwave oven are used.
Food is not defrosted
completely.
Cooking time, power level is
not suitable.
Food is not turned or stirred. Turn or stir food.
Cooking time, power level is
not suitable.
Materials to be avoided in
microwave oven are used.
Food is not defrosted
completely.
Oven ventilation ports are
restricted.
Cooking time, power level is
not suitable.
Plug into a grounded 3 prong
outlet.
Use microwave-safe cookware
only.
Do not operate with oven
empty.
Clean oven cavity with a damp
cloth and dry thoroughly. See
“Cleaning.”
Use microwave-safe cookware
only.
Completely defrost food.
Use correct cooking time,
power level.
Use correct cooking time,
power level.
Use microwave-safe cookware
only.
Completely defrost food.
Check to see that oven
ventilation ports are not
restricted.
Use correct cooking time,
power level.
ENGLISH
17
Page 20

ENGLISH
PROBLEM POSSIBLE CAUSE(S) SOLUTION
Improper
defrosting
FOR MORE HELP, VISIT HAIERAMERICA.COM OR CALL THE CONSUMER HELP
LINE AT 1-877-337-3639.
Materials to be avoided in
microwave oven are used.
Cooking time, power level is
not suitable.
Food is not turned or stirred. Turn or stir food.
Use microwave-safe cookware
only.
Use correct cooking time,
power level.
LIMITED WARRANTY
IN-HOME SERVICE
FULL ONE YEAR WARRANTY
For 12 months from the date of original
retail purchase, Haier will repair or
replace any part free of charge including
labor that fails due to a defect in
materials or workmanship.
Haier may replace or repair at their sole
discretion any part or subsystem
including the entire product.
Product must be accessible, without
encumbrance and installed properly to
receive warranty repair service.
LIMITED WARRANTY
NOTE: This warranty commences
on the date the item was
purchased, and the original
purchase receipt must be
presented to the authorized
service representative before
warranty repairs are rendered.
Exceptions: Commercial Use Warranty
90 days labor from date of original
purchase
90 days parts from date of original
purchase
No other warranty applies.
FOR WARRANTY SERVICE
All service must be performed by a Haier
authorized service center. For the name
and telephone number of the nearest
authorized service center, please call
1-877-337-3639.
Before calling please have available the
following information:
Model number and serial number of your
appliance. The name and address of the
dealer you purchased the unit from and
the date of purchase.
A clear description of the problem.
A proof of purchase (sales receipt).
This warranty covers home appliance
services within the contiguous United
States and Canada and where available
in Alaska, Hawaii and Puerto Rico.
What is not covered by this warranty:
Replacement or repair of household
fuses, circuit breakers, wiring or
plumbing.
A product whose original serial number
has been removed or altered.
Any service charges not specically
identied as normal such as normal
service area or hours.
Damage incurred in shipping.
Damage caused by improper installation
or maintenance.
Damage from misuse, abuse accident,
re, ood, or acts of nature.
Damage from service other than an
authorized Haier dealer or service
center.
Damage from incorrect electrical
current, voltage or supply.
Damage resulting from any product
modication, alteration or adjustment
not authorized by Haier.
Adjustment of consumer operated
controls as identied in the owner’s
manual.
18
Page 21

Hoses, knobs, lint trays and all
attachments, accessories and
disposable parts.
Labor, service transportation, and
shipping charges for the removal and
replacement of defective parts beyond
the initial 12-month period.
Damage from other than normal
household use.
Any transportation and shipping
charges.
THIS LIMITED WARRANTY IS GIVEN IN
LIEU OF ALL OTHER WARRANTIES,
EXPRESSED OR, INCLUDING THE
WARRANTIES OF MERCHANTABILITY
AND FITNESS FOR A PARTICULAR
PURPOSE
The remedy provided in this warranty is
exclusive and is granted in lieu of all
other remedies.
RECORD KEEPING
This warranty does not cover incidental
or consequential damages, so the above
limitations may not apply to you. Some
states do not allow limitations on how
long an implied warranty lasts, so the
above limitations may not apply to you.
This warranty gives you specic legal
rights, and you may have other rights,
which vary from state to state.
Haier America
Wayne, NJ 07470
ENGLISH
Thank you for purchasing this Haier
product. This user manual will help you get
the best performance from your new
microwave.
For future reference, record the model and
serial number located on the inside frame
of the microwave, and the date of
purchase.
Staple your proof of purchase to this
manual to aid in obtaining warranty service
if needed.
_____________________________
Model number
_____________________________
Serial number
_____________________________
Date of purchase
19
Page 22

TABLE DES MATIÈRES
SÉCURITÉ DE FOUR À MICRO-ONDES .................................................... 21
La sécurité énergétique de micro-ondes ........................................... 24
Spécications électriques .............................................................. 24
PIÈCES ET CARACTÉRISTIQUES ............................................................ 26
Caractéristiques ......................................................................... 27
Plateau tournant ......................................................................... 27
TABLEAU DE COMMANDE .................................................................... 28
Horloge .................................................................................... 28
Caractéristiques ......................................................................... 29
UTILISATION DU FOUR À MICRO-ONDES ................................................ 30
Ustensile de cuisson ..................................................................... 30
Cuisson au micro-ondes ............................................................... 30
ENTRETIEN DU FOUR À MICRO-ONDES .................................................. 34
Nettoyage ................................................................................. 34
Filtres ....................................................................................... 35
Éclairage ................................................................................... 37
FRANÇAIS
DÉPANNAGE ..................................................................................... 37
GARANTIE LIMITÉE ............................................................................. 39
DOCUMENTS À CONSERVER ................................................................ 40
20
Page 23

SÉCURITÉ DE FOUR À MICRO-ONDES
Votre sécurité et celle des autres est très importante.
DANGER
AVERTISSEMENT
ATTENTION
Voici le symbole d’alerte de sécurité.
Ce symbole d’alerte de sécurité vous signale les
dangers potentiels de décès et de blessures graves à
vous et à d’autres. Tous les messages de sécurité
suivront le symbole d’alerte de sécurité et le mot
“DANGER”, “AVERTISSEMENT” ou “ATTENTION”.
Ces mots signifient :
Une situation de danger
imminent. Vous courez le risque
d’un décès ou de blessures
graves si vous ne suivez pas
immédiatement les instructions.
Une situation potentiellement
dangereuse qui, si vous ne
l’évitez pas, peut provoquer la
mort ou des blessures graves.
Une situation potentiellement
dangereuse qui, si vous ne
l’évitez pas, peut entraîner des
blessures légères à modérées.
Tous les messages de sécurité vous diront quel est le danger potentiel
et comment réduire le risque de blessure et ce qui peut se produire en
cas de non-respect des instructions.
Nous donnons de nombreux messages de sécurité importants dans ce
manuel et sur votre appareil ménager. Assurez-vous de toujours lire
tous les messages de sécurité et de vous y conformer.
IMPORTANTES INSTRUCTIONS
Lors de l’utilisation de tout appareil ménager électrique on doit observer
certaines précautions de sécurité fondamentales, dont les suivantes :
AVERTISSEMENT : Pour réduire le risque de brûlures, de choc
électrique, d’incendie, de blessures et l’exposition excessive à
l’énergie des micro-ondes :
Lire toutes les instructions avant d’utiliser cet appareil.
•
Lire et observer spéciquement les “PRÉCAUTIONS À SUIVRE POUR
•
ÉVITER TOUTE EXPOSITION POSSIBLE À UN EXCÈS D’ÉNERGIE DES
MICRO-ONDES” de cette section.
DE SÉCURITÉ
21
FRANÇAIS
Page 24

•
•
•
•
•
•
FRANÇAIS
•
•
•
•
•
•
•
•
•
Pour réduire le risque d’incendie dans la cavité du four :
•
•
IMPORTANTES INSTRUCTIONS
DE SÉCURITÉ
Le four à micro-ondes doit être relié à la terre. Brancher sur une prise
correctement reliée à la terre uniquement. Consulter les
“INSTRUCTIONS DE MISE À LA TERRE” de la section “Spécications
électriques” et dans les instructions d’installation fournies.
N’installer et ne choisir l’emplacement du four à micro-ondes qu’en
conformité avec les instructions d’installation fournies.
Le four à micro-ondes peut être utilisé au-dessus d’un appareil de
cuisson fonctionnant aussi bien au gaz qu’à l’électricité.
Il est destiné à être utilisé au-dessus de hottes d’une largeur
maximale de 36" (91,44 cm).
Certains produits tels que les œufs entiers dans leur coquille et les
récipients hermétiques (p. ex. les bocaux en verre fermés) peuvent
exploser et ne doivent pas être
Utiliser le four à micro-ondes uniquement dans le cadre de l’usage
auquel il est destiné tel que décrit dans le présent manuel. Ne pas
utiliser de produits chimiques corrosifs ou dégageant des vapeurs
dans le four à micro-ondes. Ce type de four est spécialement conçu
pour chauer, cuire ou sécher des aliments. Il n’est pas conçu pour
une utilisation à des ns industrielles ou en laboratoire.
Comme pour tout appareil ménager, une surveillance étroite est
nécessaire lorsqu’il est utilisé par des enfants.
Ne pas faire fonctionner le four à micro-ondes si la prise ou le câble
est endommagé(e), si l’appareil ne fonctionne pas correctement, s’il
est tombé par terre ou a été endommagé.
Seul du personnel d’entretien qualié est habilité à eectuer une
intervention de réparation sur le four à micro-ondes. Contacter le
centre de service agréé le plus proche pour examen, réparation ou
réglage.
Ne pas couvrir ou obstruer toute ouverture du four à micro-ondes.
Ne pas remiser ou utiliser ce four à micro-ondes à l’extérieur. Ne pas
utiliser le four à micro-ondes à proximité de l’eau (p. ex. près d’un
évier de cuisine, dans un sous-sol humide, à proximité d’une piscine
ou dans des endroits similaires).
Ne pas immerger le cordon ou la prise dans l’eau.
Garder le cordon à l’écart de toute surface chaude.
Ne pas laisser le cordon pendre par-dessus le bord d’une table ou d’un
plan de travail.
Voir les instructions de nettoyage de la surface de la porte dans la
section “Entretien du four à micro-ondes”.
Ne pas faire cuire les aliments excessivement. Surveiller
attentivement le four à micro-ondes si du papier, du plastique ou
d’autres matériaux combustibles sont placés à l’intérieur du four pour
faciliter la cuisson.
Retirer les liens torsadés en
plastique avant de placer les sacs dans le four.
chaués au four à micro-ondes.
l de fer des sacs en papier ou en
22
Page 25

IMPORTANTES INSTRUCTIONS
DE SÉCURITÉ
Si des matériaux placés à l’intérieur du four prennent feu, garder la
•
porte du four fermée, éteindre le four et débrancher le cordon
d’alimentation ou interrompre l’alimentation électrique au niveau du
tableau de distribution (fusible ou disjoncteur).
Ne pas utiliser la cavité du four pour remisage. Ne pas laisser de
•
produits en papier, d’ustensiles de cuisson ou d’aliments dans la
cavité lorsque le four n’est pas utilisé.
An de réduire le risque de blessures corporelles :
Ne pas surchauer de liquide.
•
Les liquides tels que l’eau, le café ou le thé peuvent
•
delà du point d’ébullition sans qu’ils paraissent bouillir. On ne
remarque pas toujours des bulles ou des bouillonnements visibles
lorsque le récipient est retiré du four à micro-ondes. Cela pourrait
entraîner un débordement de liquide bouillant lorsque le récipient est
bousculé ou lors de l’insertion d’une cuillère ou d’un autre ustensile
dans le liquide.
Remuer le liquide avant le réchauage et à mi-réchauage.
•
Ne pas utiliser de récipient à parois droites à col étroit.
•
réchauage, laisser le récipient reposer un court instant dans
Après
•
le four à micro-ondes avant de le sortir.
Faire très attention lors de l’insertion d’une cuillère ou d’un autre
•
ustensile dans le récipient.
Ne rien remiser directement au-dessus du four à micro-ondes
•
lorsque celui-ci fonctionne.
Nettoyer fréquemment la hotte d’aspiration, la graisse ne doit pas
•
s’accumuler sur la hotte ou le ltre.
Nettoyer le ltre de la hotte d’aspiration avec précaution. Des agents
•
de nettoyage corrosifs tels que les nettoyants à four à base de soude
peuvent endommager le ltre.
Lors du ambage d’aliments sous la hotte, mettre en marche le
•
ventilateur.
surchauer au-
FRANÇAIS
LIRE ET CONSERVER CES
INSTRUCTIONS
23
Page 26

LA SÉCURITÉ ÉNERGÉTIQUE DE MICRO-ONDES
Risque de choc électrique
Brancher sur une prise à 3 alvéoles reliée à la terre.
Ne pas enlever la broche de liaison à la terre du cordon d'alimentation.
Ne pas utiliser un adaptateur.
Ne pas utiliser un câble de rallonge.
Le non-respect de cette instruction pourrait causer un décès, un
incendie ou un choc électrique.
AVERTISSEMENT
PRÉCAUTIONS CONTRE LE
RISQUE D’EXPOSITION
EXCESSIVE À L’ÉNERGIE DES
MICRO-ONDES
Ne pas tenter de faire fonctionner ce four lorsque la porte est
A
ouverte, car ceci pourrait susciter une exposition dangereuse à
l’énergie des micro-ondes. Il est important de ne pas entraver le
fonctionnement correct du dispositif de verrouillage de sécurité.
Ne pas placer d’objet entre la surface avant du four et la porte, et ne
B
jamais laisser des souillures ou résidus de produits de nettoyage
s’accumuler sur les surfaces d’étanchéité.
Ne pas faire fonctionner le four lorsqu’il est endommagé. Il est
C
particulièrement important que la porte du four ferme
convenablement et que les composants suivants ne soient pas
endommagés:
1. Porte (déformation),
FRANÇAIS
2. Charnières et dispositif de verrouillage (brisés ou desserrés),
3. Joints de porte et surfaces d’étanchéité.
Seul un personnel d’entretien qualié est habilité à exécuter des
D
réparations ou réglages sur cet appareil.
SPÉCIFICATIONS ÉLECTRIQUES
Observer les dispositions de tous les codes et règlements en vigueur.
24
Page 27

Exigences :
Une alimentation électrique de 120 volts, 60 Hz, CA seulement, 15 ou 20 A,
protégée par fusibles ou disjoncteur.
Recommandation :
Un fusible temporisé ou un disjoncteur temporisé.
Un circuit distinct exclusif à ce four à micro-ondes.
INSTRUCTIONS DE LIAISON
À LA TERRE
Pour un four à micro-ondes reliée à la terre et connectée par un
cordon :
Il faut que le four à micro-ondes soit relié à la terre. En cas de courtcircuit électrique, la liaison à la terre réduit le risque de choc électrique
car le courant électrique dispose d’un itinéraire direct d’acheminement à
la terre.Le four à micro-ondes est doté d’un cordon de courant électrique
qui comporte un l de liaison à la terre, avec broche de liaison à la terre.
On doit brancher la che sur une prise de courant convenablement
installée et reliée à la terre.
AVERTISSEMENT : L’utilisation incorrecte du dispositif de liaison à la
terre peut susciter un risque de choc électrique. L’utilisateur qui ne
comprend pas bien les instructions de liaison à la terre, ou qui n’est
pas certain que le four à micro-ondes soit convenablement relié à la
terre, devrait consulter un électricien ou un technicien
Ne pas utiliser un câble de rallonge. Si le cordon de courant électrique est
trop court, demander à un électricien ou un technicien qualié d’installer
une prise de courant à proximité du four à micro-ondes.
qualié.
FRANÇAIS
LIRE ET CONSERVER CES
INSTRUCTIONS
Cet appareil est conforme à la norme FCC, Partie 18.
25
Page 28

Vue de l'avant
a
b
c
d
h
i
e f g
a
j
k
k
Vue du bas
FRANÇAIS
PIÈCES ET CARACTÉRISTIQUES
Porte
A
Hublot
B
Système de verrouillage
C
Tableau de commande
D
Anneau du plateau tournant
E
Coupleur du plateau tournant
F
[en] Glass Turntable
G
[en] Top Grille
H
Cordon d’alimentation
I
Lampes de surface
J
Filtres à graisse
K
26
Page 29

CARACTÉRISTIQUES
kg lb
a
b
d
c
Numéro de modèle HMV1472BHS
Tension nominale 120 V / 60 Hz
Puissance d’entrée nominale (micro-
ondes)
Puissance de sortie nominale (micro-
ondes)
Capacité du four 1,34 pied cube (38 L)
Diamètre du plateau rotatif 13¹⁄₂" (34,3 cm)
Dimensions externes : (larg. x
profondeur x haut.)
Poids net 52,3 lb (23,7 kg) environ
[en] LED Lighting [en] Service Replacement only
1500 watts
1000 watts
23¹⁄₂ " x 16¹⁄₂ " x 17¹⁄₈" (59,7 cm x
41,9 cm x 43,5 cm)
PLATEAU TOURNANT
[en] The turntable ring assembly and the glass turntable must be used during
cooking.
[en] If you are using large or oblong-shaped cookware that would touch the walls of
the microwave when the turntable spins, you can turn o the turntable. Press
TURNTABLE. “OFF” and the icon will appear in the display.
[en] Assemble the turntable as shown.
•
FRANÇAIS
Moyeu (dessous)
A
[en] Glass Turntable
B
Anneau du plateau tournant
C
Coupleur du plateau tournant
D
REMARQUE :
Ne pas placer le plateau tournant à l’envers.
•
La rotation du plateau en verre ne doit jamais être bloquée.
•
Pour la cuisson, placer tous les aliments et les récipients d’aliments sur le
•
plateau en verre.
[en] If glass turntable or turntable ring assembly cracks or breaks, contact
•
the Customer Satisfaction Center at 1-877-337-3639 or the parts
department at encompassparts.com.
27
Page 30

TABLEAU DE COMMANDE
a b c d e f hg
i j k l m n
kg lb
kg lb
kg lb
kg lb
[en] Sensor Cook
A
[en] Popcorn
B
[en] Sensor Reheat
C
Niveau de puissance
D
Minuterie de cuisine
E
Achage
F
Touches numériques
G
[en] Stop
H
Conv (Décongélation)
I
[en] Turntable On/O
J
[en] Light On/O
K
[en] Vent Hi-Lo-O
L
Horloge
M
[en] Start
N
HORLOGE
Votre modèle est équipé d’une horloge de 12 heures.
FRANÇAIS
RÉGLAGE DE L’HEURE DU JOUR
1. [en] Press CLOCK to enter the Clock Setting mode. “ENTER TIME” will appear
in the display.
2. Appuyer sur les touches numériques pour entrer l’heure correcte. Par exemple,
si l’heure actuelle est 10 h 12, appuyer sur les touches numériques “1, 0, 1, 2”
pour entrer l’heure.
3. [en] Press START to conrm the time.
MINUTERIE DE CUISINE
[en] The microwave features a convenient timer for your cooking needs.
1. [en] Press KITCHEN TIMER. “ENTER TIME” will appear in the display.
2. Appuyer sur les touches numériques pour entrer la durée de cuisson désirée.
REMARQUE : La durée de cuisson maximum est de 99 minutes et
99 secondes.
28
Page 31

3. [en] Press START to begin counting down the time.
kg lb
kg lb
kg lb
REMARQUE : [en] When the set time has expired, “END” will appear in
the display and three long alert tones will sound.
4. [en] Press STOP to exit the Kitchen Timer function.
CARACTÉRISTIQUES
VENT FAN (VENTILATEUR D’ÉVACUATION)
[en] The Vent Fan feature allows you to exhaust heat and steam from the cooking
surface below.
Appuyer sur VENT FAN HI/LOW/OFF (ventilateur d’évacuation avec réglages
•
élevé/bas/éteint) pour allumer ou étendre le ventilateur et régler sa vitesse.
REMARQUE :
[en] The fan speed cannot be adjusted if the control panel is locked.
•
[en] When the control is pressed the
•
[en] High Speed - Press once
[en] Low Speed - Press twice
[en] O - Press three times
LAMPE DE SURFACE
[en] The surface light feature illuminates the cooking surface below the microwave
oven.
[en] Press LIGHT to toggle among High, Low and O.
rst time, “High” appears in the display.
FRANÇAIS
VERROUILLAGE ENFANTS
La fonction de verrouillage enfant permet de verrouiller le tableau de commande du
micro-ondes pour faciliter le nettoyage ou éviter de
mettre en marche le four accidentellement.
Pour verrouiller/déverrouiller le tableau de commande :
Appuyer sur STOP/CANCEL (arrêter/XX) pendant 3 secondes. Deux signaux
•
sonores retentissent pour indiquer que le verrouillage a été activé ou
désactivé[en].
modier les réglages ou de
RAPPEL DE STATUT
La fonction de rappel de statut permet de
puissance durant la cuisson au micro-ondes.
Appuyer sur POWER LEVEL (niveau de puissance) pour acher le niveau de
•
puissance réglé.
vérier les réglages de durée et de
29
Page 32

Appuyer sur CLOCK (horloge) CLOCK/AM/PM (horloge/réglage AM/PM) pour
•
acher la durée.
UTILISATION DU FOUR À MICRO-ONDES
IMPORTANT : [en] Never operate the microwave without food in the oven
cavity; this can damage the magnetron tube or glass turntable. You may wish to
leave a cup
damage if the oven is unintentionally turned on.
USTENSILE DE CUISSON
IMPORTANT : Les récipients fermés hermétiquement peuvent exploser. Les
récipients fermés doivent être ouverts et les sachets en plastique doivent être
percés avant la cuisson.
UTILISABLES AU FOUR À MICRO-ONDES
Plat brunisseur (vendu séparément. Suivre les recommandations du fabricant)
•
Vitrocéramique, verre
•
Porcelaine, terre cuite (suivre les recommandations du fabricant)
•
Mélamine (suivre les recommandations du fabricant)
•
Essuie-tout, assiettes et serviettes en papier (utiliser du panier non recyclé)
•
Emballages, sacs, couvercles, vaisselle, récipients en plastique (suivre les
•
FRANÇAIS
recommandations du fabricant)
Poterie et argile (suivre les recommandations du fabricant.)
•
Ustensiles de cuisson en silicone (suivre les recommandations du fabricant)
•
Papier
•
lled with water inside the oven when it is not in use to avoid
parané
NE PAS UTILISER AU FOUR À MICRO-ONDES
Ustensiles de cuisson métalliques
•
Paille ou osier
•
Or, argent ou étain
•
Thermomètres à viande non approuvés, brochettes
•
Attaches
•
Doublures en papier d’aluminium, telles que les enveloppes à sandwich
•
Agrafes
•
Objets avec garniture en or ou en argent ou avec un enduit métallique
•
Bois
•
Pour tester les ustensiles de cuisson :
Placer le plat dans le four à micro-ondes avec une tasse (250 mL) d’eau à côté de
l’article. Programmer 1 minute de cuisson à puissance maximale. Si le plat devient
chaud et que l’eau reste froide, ne pas utiliser le plat pour la cuisson au four à microondes.
CUISSON AU MICRO-ONDES
CUISSON MINUTÉE
1. Appuyer sur les touches numériques pour régler la durée de cuisson. Par
exemple, pour régler une cuisson de 10 minutes, appuyer dans l’ordre sur
“1,0,0,0”.
30
Page 33

REMARQUE :
kg lb
kg lb
kg lb
La durée de cuisson maximum est de 99 minutes et 99 secondes.
•
La puissance est réglée par défaut sur 100 %. Si l’on souhaite cuire à
•
une puissance de 100 %, sauter les étapes 2 et 3 et passer directement
à l’étape 4.
2. Appuyer sur POWER LEVEL (niveau de puissance) pour activer le mode de
puissance.
3. [en] Press the number pads or press POWER LEVEL repeatedly to select the
desired power level. See “Power Levels” chart later in this section.
4. Appuyer sur START/+30 Sec (mise en marche/+30 Sec) pour démarrer la
cuisson. Le compte à rebours se met en route.
REMARQUE : Lorsque la cuisson est terminée, une alarme retentit 3 fois.
Niveaux de puissance
Dix niveaux de puissance sont disponibles.
Niveau 10 9 8 7 6 5 4 3 2 1 0
Puissan-ce100 % 90 % 80 % 70 % 60 % 50 % 40 % 30 % 20 % 10 % 0 %
FRANÇAIS
Achage HI PL-90 PL-80 PL-70 PL-60 PL-50 PL-40 PL-30 PL-20 PL-10 PL-0
CUISSON PRATIQUE
Appuyer sur START/+ 30 SEC (ajouter 30 s) pour démarrer la cuisson à une
•
puissance du micro-ondes de 100 % pendant 30 secondes.
Appuyer sur START/+ 30 SEC (ajouter 30 s) durant la cuisson au micro-ondes
•
pour prolonger la durée de cuisson par tranches de 30 secondes.
REMARQUE : La durée de cuisson maximum est de 99 minutes et
99 secondes.
Appuyer sur les touches numériques de 1 à 9 pour démarrer la cuisson à une
•
puissance du micro-ondes de 100 % pendant 1 à 9 minutes.
REMARQUE : Durant la cuisson pratique, le niveau de puissance du micro-
ondes peut être
aché mais pas réglé.
[EN] SENSOR COOK
[en] The Sensor Cook control automatically sets the appropriate cooking time
calculated by sensing the moisture level of the food or beverage being cooked.
[en] The Sensor Cook control is programmed to cook the following items: Potato,
Fresh Veggies, Frozen Veggies, Bacon, Frozen Dinner, Rice, Frozen Breakfast, and
Frozen Pizza.
[en] Press SENSOR COOK once, “Potato” will appear on the display. Continue to
•
press SENSOR COOK to toggle among the choices. When the desired item
appears in the display, press START to
conrm and begin cooking.
31
Page 34

kg lb
[en] Once Start is pressed, the Sensing process begins. When the Sensing
kg lb
kg lb
•
process is completed, alert tones will sound and the calculated cook time will
begin to count down.
REMARQUE : [en] Do not open the door during the Sensing process. If you
do, the Sensor Cook program will be cancelled.
[en] Sensor Cook Programs
[en] Program [en] Item [en] Quantity
1 [en] Baked Potato [en] 1 - 4 potatoes
2 [en] Fresh Vegetable [en] 2 cups
3 [en] Frozen Vegetable [en] 2 cups
4 [en] Bacon [en] 1 - 3 slices
5 [en] Frozen Dinner [en] 10 to 20 oz.
6 [en] Rice [en] 1 - 2 cups
7 [en] Frozen Breakfast [en] 8 to 12 oz.
8 [en] Frozen Pizza [en] 12 oz.
FRANÇAIS
DÉCONGÉLATION
[en] The Defrost control allows you to choose to defrost by weight or by time.
Décongélation en fonction du poids
1. [en] Press DEFROST once. “Weight” will appear on the display.
2. [en] Press START. “Enter Weight” will appear on the display, and “lb” will ash.
3. [en] Press the number pads to enter the weight of the item to be defrosted. For
example, if the food weight is 1.2 lbs, press “1” and then ”2” to input the weight.
REMARQUE : Le poids maximum est de 6 lb.
4. Appuyer sur START (mise en marche) pour démarrer la décongélation. Le
témoin “lb” ne s’allume pas.
Décongélation minutée
1. [en] Press DEFROST twice. “Time” will appear on the display.
2. [en] Press START. “Enter Time” will appear on the display.
3. [en] Press the number pads to enter the time to defrost. For example, if you
want the food to defrost for 5 minutes, press “5” and then ”0” to input the time.
REMARQUE : La durée de décongélation maximum est de 99 minutes et
99 secondes.
4. Appuyer sur START (mise en marche) pour démarrer la décongélation.
32
Page 35

REMARQUE : Lorsque la moitié de la durée de décongélation totale s’est
kg lb
kg lb
écoulée, un signal sonore retentit 2 fois pour prévenir qu’il faut retourner
les aliments.
[EN] SENSOR REHEAT
[en] The Sensor Reheat control automatically sets the appropriate reheating time
calculated by sensing the moisture level of the food or beverage being reheated.
[en] The Sensor Reheat control is programmed to reheat the following items:
Beverage, Dinner Plate, Pizza, Soup/Sauce and Casserole.
[en] Press SENSOR REHEAT once, “BEVERAGE” will appear on the display.
•
Continue to press SENSOR REHEAT to toggle among the choices. When the
desired item appears in the display, press START to conrm and begin reheating.
[en] Once Start is pressed, the Sensing process begins. When the Sensing
•
process is completed, alert tones will sound and the calculated reheat time will
begin to count down.
REMARQUE : [en] Do not open the door during the Sensing process. If you
do, the Sensor Cook program will be cancelled.
[en] Sensor Reheat Programs
[en] Program
[en] 1 [en] Beverage [en] 1 to 3 cups
2 [en] Dinner Plate [en] 1 plate
3 [en] Pizza [en] 1 to 4 slices
4 [en] Soup/Sauce [en] 1 cup
5 [en] Casserole/Lasagna [en] 10.5 oz.
[en] Item [en] Quantity
[EN] POPCORN
[en] The popcorn control is programmed to pop microwave popcorn based on the
size of the bag.
1. [en] Press POPCORN to toggle among the bag sizes.
[en] Press 1 time: To pop a 3.3 ounce bag of popcorn.
•
[en] Press 2 times: To pop a 3.0 ounce bag of popcorn.
•
[en] Press 3 times: To pop a 1.75 ounce bag of popcorn.
•
2. [en] Press START to
appear on the display.
conrm selection and begin cooking. The popping time will
FRANÇAIS
33
Page 36

ENTRETIEN DU FOUR À MICRO-ONDES
Risque de choc électrique
Déconnecter la source de courant électrique avant le nettoyage.
Le non-respect de cette instruction peut causer un décès ou un choc
électrique.
AVERTISSEMENT
NETTOYAGE
IMPORTANT :
Avant le nettoyage, s’assurer que toutes les commandes sont désactivées
•
FRANÇAIS
et que le four à micro-ondes est froid. Toujours suivre les instructions
gurant sur les étiquettes des produits de nettoyage.
Pour éviter d’endommager le four à micro-ondes du fait de la formation
•
d’arcs dus à l’accumulation de saletés, conserver la cavité,
d’introduction des micro-ondes et la zone de contact entre la porte et le
cadre propres.
1. [en] Using a warm water and mild soap solution and a soft cloth or sponge,
clean the oven cavity, frame and oven exterior.
2. Rincer à l’eau tiède propre et sécher avec un chion doux.
REMARQUE :
[en] Do not use scouring powder or rough scouring pads on the microwave.
•
[en] The glass turntable may be washed and dried in the dishwasher.
•
[en] For stainless steel models, a stainless steel cleaner may be used on the
•
exterior.
l’orice
34
Page 37

FILTRES
AVERTISSEMENT
Risque de choc électrique
Déconnecter la source de courant électrique avant l'entretien.
Replacer tous les panneaux avant de faire la remise en marche.
Le non-respect de ces instructions peut causer un décès ou un choc
électrique.
a b
c
d
[EN] GREASE FILTER(S)
[en] Grease lters are located on the underside of microwave oven. The grease
lters should be removed and cleaned often; generally at least once every month.
1. [en] Remove the grease lter. Grasp the metal ring, slide the lter toward the
back, and then gently pull the lter downward. Repeat for the second lter.
A
B
C
D
2. [en] Soak the grease lters in hot water with a mild detergent added. Rinse well
and shake to dry.
REMARQUE : Ne pas utiliser d’ammoniaque ni nettoyer au lave-vaisselle.
Cela va corroder et noircir l’aluminium du ltre.
3. [en] Reinstall the grease lter. Insert the back edge of the lter into the
opening, and then gently push the lter up into place. Repeat for the second
lter.
35
Lampes de
surface
Porte
[en] Metal
Loop
Filtres à
graisse
FRANÇAIS
Page 38

FILTRE À CHARBON
a
a
IMPORTANT : [en] A charcoal
when it is used in a non-vented (recirculating) installation. Your microwave oven
comes from the factory with the charcoal lter installed.
[en] The charcoal lter cannot be cleaned, so it must be replaced at least every 6
months or more often depending on use. To order a replacement charcoal lter for
your model, contact the Customer Satisfaction Center. See "Back Cover" for
contact information.
1. Débrancher ou déconnecter la source de courant électrique.
2. [en] Using a Phillips screwdriver, remove screws from the top grille.
3. [en] Open the microwave door so you can grasp the top grille, and then pull the
grille straight out to remove.
FRANÇAIS
lter must be installed in the microwave oven
Vis
A
4. [en] Remove the used charcoal lter from the back of the grille, and then
discard the lter.
5. [en] Align the holes in the new charcoal
the grille, and gently press down to attach.
lter with the ve posts on the back of
[en] Charcoal Filter
A
6. [en] Align the top edge of the grille so that when the grille is pushed into place
the screw hole tabs on the the grille will align with the holes in the microwave
36
Page 39

cabinet. Gently push on the grille until it snaps into place and the screw holes
a b b
are aligned.
REMARQUE : [en] Make sure that the wire harness, located near the door
hinge, is not pinched when you are replacing the top grille.
[en] Wire Harness (not shown)
A
[en] Screw Hole Tab (2)
B
7. [en] Replace the two screws removed earlier, and completely tighten the
screws.
ÉCLAIRAGE
IMPORTANT : [en] Your microwave oven features LED interior lighting as well
as LED surface lighting. These lights are designed to last for the life of your
microwave oven. However, if the lights stop illuminating, please contact a
qualied technician for replacement or the Customer Satisfaction Center for
service. See the back cover for contact information.
FRANÇAIS
DÉPANNAGE
Essayez tout d’abord les solutions suggérées ici et evitez les couts pour le service
de reparation.
PROBLÈME
Le four ne
démarre pas
Formation
d'arcs ou
d'étincelles
CAUSE(S) POSSIBLE(S) SOLUTION
[en] Oven power cord is not
plugged into an electrical
outlet.
La porte est ouverte. Fermer la porte et réessayer.
Réglage de fonctionnement
incorrect.
Des matériaux non destinés
à la cuisson au four à microondes ont été utilisés.
Le four fonctionne à vide. Ne pas faire fonctionner le four
Des renversements
alimentaires sont laissés
dans la cavité.
37
Brancher sur une prise à
3 alvéoles reliée à la terre.
Vérier les instructions.
Utiliser uniquement des
ustensiles de cuisson
résistants au four à microondes.
à micro-ondes à vide.
[en] Clean oven cavity with a
damp cloth and dry
thoroughly. See “Cleaning.”
Page 40

PROBLÈME CAUSE(S) POSSIBLE(S) SOLUTION
Cuisson non
homogène des
aliments
Aliments trop
cuits
Aliments pas
assez cuits
FRANÇAIS
Décongélation
incorrecte
POUR OBTENIR DE L’AIDE SUPPLÉMENTAIRE, VISITER HAIERAMERICA.COM OU
CONTACTER LA LIGNE D’ASSISTANCE À LA CLIENTÈLE AU 1-877-337-3639.
Des matériaux non destinés
à la cuisson au four à microondes ont été utilisés.
Les aliments n’ont pas
entièrement décongelés.
Une durée de cuisson ou un
niveau de puissance
incorrect a été sélectionné.
Les aliments n’ont pas été
retournés ou remués.
Une durée de cuisson ou un
niveau de puissance
incorrect a été sélectionné.
Des matériaux non destinés
à la cuisson au four à microondes ont été utilisés.
Les aliments n’ont pas
entièrement décongelés.
Les ouvertures de
ventilation du four sont
obstruées.
Une durée de cuisson ou un
niveau de puissance
incorrect a été sélectionné.
Des matériaux non destinés
à la cuisson au four à microondes ont été utilisés.
Une durée de cuisson ou un
niveau de puissance
incorrect a été sélectionné.
Les aliments n’ont pas été
retournés ou remués.
Utiliser uniquement des
ustensiles de cuisson
résistants au four à microondes.
Décongeler complètement les
aliments.
Sélectionner une durée de
cuisson ou un niveau de
puissance correct.
Retourner ou remuer les
aliments.
Sélectionner une durée de
cuisson ou un niveau de
puissance correct.
Utiliser uniquement des
ustensiles de cuisson
résistants au four à microondes.
Décongeler complètement les
aliments.
Vérier si les ouvertures de
ventilation du four sont
obstruées.
Sélectionner une durée de
cuisson ou un niveau de
puissance correct.
Utiliser uniquement des
ustensiles de cuisson
résistants au four à microondes.
Sélectionner une durée de
cuisson ou un niveau de
puissance correct.
Retourner ou remuer les
aliments.
38
Page 41

GARANTIE LIMITÉE
SERVICE À DOMICILE
GARANTIE COMPLÈTE D’UN AN
Pendant 12 mois à compter de la date
d’achat d’origine, Haier réparera ou
remplacera gratuitement n’importe
quelle pièce (main-d’œuvre comprise)
comportant un défaut de matériau ou
de fabrication.
Haier peut choisir à sa seule discrétion
de remplacer ou réparer des pièces, des
sous-systèmes ou le produit tout entier.
Le produit doit être accessible, dégagé
et installé correctement pour
du service de réparation sous garantie.
GARANTIE LIMITÉE
bénécier
REMARQUE : Cette garantie
prend eet à la date à laquelle
l’article a été acheté et le reçu de
l’achat d’origine doit être présenté
au représentant de dépannage
autorisé avant qu’une quelconque
réparation sous garantie ne soit
eectuée.
Exceptions: Garantie à usage
commercial
90 jours sur la main-d’œuvre à compter
de la date d’achat d’origine
90 jours sur les pièces à compter de la
date d’achat d’origine
Aucune autre garantie ne s’applique.
SERVICE AU TITRE DE LA GARANTIE
Contacter le centre de dépannage
autorisé le plus proche. Tout dépannage
doit être eectué par un centre de
dépannage autorisé Haier. Pour le nom
et le numéro de téléphone du centre de
dépannage autorisé le plus proche de
votre domicile, composer le
1-877-337-3639.
Avant d’appeler le centre, veuillez garder
à disposition les renseignements
suivants :
Numéros de plaque signalétique de
l’appareil. Le nom et l’adresse du
revendeur auprès duquel vous avez
acheté l’appareil, ainsi que la date
d’achat.
Une description claire du problème
rencontré.
Une preuve d’achat (reçu de vente).
Cette garantie est valable pour le
service des appareils domestiques aux
États-Unis contigus et au Canada et
lorsque le service est disponible, en
Alaska, à Hawaï et Porto Rico.
Cette garantie ne couvre pas :
Le remplacement ou la réparation des
fusibles, disjoncteurs, du câblage ou du
circuit de plomberie du domicile.
Un produit dont le numéro de série
d’origine a été enlevé ou
Tous frais de dépannage non identiés
comme étant normaux tel un
dépannage dans une zone ou une
tranche horaire normale.
Les dommages liés à l’expédition.
Les dommages liés à une installation ou
un entretien inadapté.
Les dommages causés par l’un des
éléments suivants : Mauvaise utilisation,
utilisation abusive, accident, incendie ou
catastrophe naturelle.
Les dommages résultant d’un
dépannage fourni par une entité autre
qu’un revendeur ou centre de
dépannage autorisé Haier.
Les dommages causés par un courant,
une tension ou une alimentation
électrique incorrects.
Les dommages résultant d’une
quelconque modication ou altération
du produit ou d’un ajustement non
autorisé par Haier.
Un ajustement des commandes
utilisées par le consommateur tel
qu’identié dans le manuel de
l’utilisateur.
Les tuyaux, boutons, plateaux à charpie
et tout accessoire ou pièce jetable.
Les frais de main-d’œuvre, transport
pour dépannage et d’expédition pour le
retrait et le remplacement de pièces
défectueuses au-delà de la période de
12 mois.
Les dommages liés à une utilisation
autre qu’une utilisation domestique
normale.
39
modié.
FRANÇAIS
Page 42

Tout frais de transport et d’expédition.
CETTE GARANTIE LIMITÉE REMPLACE
TOUTE AUTRE GARANTIE EXPRESSE
OU IMPLICITE, Y COMPRIS, MAIS PAS
SEULEMENT, LES GARANTIES
IMPLICITES, Y COMPRIS LES
GARANTIES DE QUALITÉ
MARCHANDE OU D’APTITUDE À UN
USAGE PARTICULIER
Le recours oert dans cette garantie est
exclusif et se substitue à toute autre
garantie.
Cette garantie ne couvre pas les
dommages fortuits ou indirects; aussi
les limitations décrites ci-dessus
peuvent ne pas s’appliquer à votre cas.
Certains États ne permettent pas de
limitation sur la durée d’une garantie
implicite, aussi les limitations décrites
ci-dessus peuvent ne pas s’appliquer à
votre cas.
DOCUMENTS À CONSERVER
FRANÇAIS
Merci d’avoir acheté ce produit Haier. Ce
manuel d’utilisation vous aidera à obtenir la
meilleure performance possible de votre
nouvelle four micro-onde.
Pour référence ultérieure, inscrire le
numéro de plaque signalétique situé sur le
cadre à l’intérieur du four micro-onde, et la
date d’achat.
Pour faciliter l’obtention d’un service sous
garantie, agrafer la preuve de la date
d’achat à ce manuel.
Cette garantie vous confère des droits
juridiques spéciques. Vous pouvez
également jouir d’autres droits qui
peuvent varier d’un État à l’autre.
Haier America
Wayne, NJ 07470
_____________________________
Numéro de modèle
_____________________________
Numéro de série
_____________________________
Date d’achat
40
Page 43

ÍNDICE
SEGURIDAD DEL HORNO ..................................................................... 42
Microondas de seguridad energética ................................................ 45
Requisitos eléctricos .................................................................... 45
PIEZAS Y CARACTERÍSTICAS ............................................................... 47
Especicaciones ......................................................................... 48
Bandeja giratoria ......................................................................... 48
PANEL DE CONTROL ........................................................................... 49
Reloj ......................................................................................... 49
Características ........................................................................... 50
USO DEL HORNO DE MICROONDAS ....................................................... 51
Utensilios de cocina ..................................................................... 51
Cocción en el horno de microondas .................................................. 51
CUIDADO DEL HORNO DE MICROONDAS ............................................... 55
Limpieza ................................................................................... 55
Filtros ....................................................................................... 56
Luces ....................................................................................... 58
SOLUCIÓN DE PROBLEMAS .................................................................. 58
GARANTÍA LIMITADA .......................................................................... 59
INFORMACIÓN A TENER EN CUENTA ...................................................... 61
41
ESPAÑOL
Page 44

SEGURIDAD DEL HORNO
Su seguridad y la seguridad de los demás es muy importante.
PELIGRO
ADVERTENCIA
PRECAUCIÓN
Este es el símbolo de advertencia de seguridad.
Este símbolo le llama la atención sobre peligros
potenciales que pueden ocasionar la muerte o una
lesión a usted y a los demás. Todos los mensajes de
seguridad irán a continuación del símbolo de
advertencia de seguridad y de la palabra “PELIGRO”,
“ADVERTENCIA” o “PRECAUCIÓN”.
Estas palabras significan:
Se trata de una situación de
peligro inminente. Si no sigue las
instrucciones de inmediato,
usted puede morir o sufrir una
lesión grave.
Se trata de una situación
posiblemente peligrosa que, de
no evitarse, podría causar la
muerte o una lesión grave.
Se trata de una situación
posiblemente peligrosa que, de
no evitarse, podría causar
lesiones moderadas o leves.
Todos los mensajes de seguridad le dirán el peligro potencial, le dirán
cómo reducir las posibilidades de sufrir una lesión y lo que puede
suceder si no se siguen las instrucciones.
Hemos incluido muchos mensajes importantes de seguridad en este
manual y en su electrodoméstico. Lea y obedezca siempre todos los
mensajes de seguridad.
INSTRUCCIONES IMPORTANTES
DE SEGURIDAD
Cuando se usan aparatos electrodomésticos, deben tomarse
precauciones básicas de seguridad, incluyendo las siguientes:
ADVERTENCIA: Para reducir el riesgo de incendio, quemaduras,
choques eléctricos, daños personales o exposición a energía
excesiva de microondas:
Lea todas las instrucciones antes de usar este electrodoméstico.
ESPAÑOL
•
Lea y siga las instrucciones especícas de “PRECAUCIONES PARA
•
EVITAR POSIBLE EXPOSICIÓN A LA ENERGÍA EXCESIVA EN EL
HORNO DE MICROONDAS” que encontrará en esta sección.
42
Page 45

INSTRUCCIONES IMPORTANTES
DE SEGURIDAD
El horno de microondas debe estar conectado a tierra. Conéctelo
•
solamente a un contacto debidamente conectado a tierra. Vea la
sección “INSTRUCCIONES DE CONEXIÓN A TIERRA” que encontrará
en la sección “Requisitos eléctricos” y las instrucciones de instalación
proporcionadas.
Instale o coloque el horno de microondas solo conforme a las
•
instrucciones de instalación proporcionadas.
El horno de microondas es adecuado para usarse encima de equipos
•
de cocción eléctrica y a gas.
Diseñado para ser usado encima de estufas con un ancho máximo de
•
36" (91,44 cm).
Algunos productos tales como huevos enteros con cáscara y
•
recipientes sellados, por ejemplo, frascos de vidrio cerrados, pueden
explotar y no se deben calentar en el horno de microondas.
Use el horno de microondas solamente para el propósito que fue
•
diseñado, como se describe en el manual. No use vapores o
sustancias químicas corrosivas en el horno de microondas. Este tipo
de horno está
deshidratar alimentos. No se ha diseñado para uso industrial o de
laboratorio.
Al igual que cualquier electrodoméstico, es necesario supervisar
•
cuidadosamente a los niños cuando estos usan el horno de
microondas.
No ponga a funcionar el horno de microondas si tiene un cable o
•
enchufe dañado, si no funciona correctamente o si se ha dañado o
caído.
El horno de microondas solo debe ser reparado por personal de
•
servicio competente. Llame a la compañía de servicio técnico
autorizada para su inspección, reparación o ajuste.
No cubra ni bloquee ninguna abertura del horno de microondas.
•
No guarde ni use este horno de microondas a la intemperie. No use el
•
horno de microondas cerca del agua, por ejemplo, cerca de un
fregadero, en un sótano húmedo, o cerca de una piscina o lugares
similares.
No sumerja el cable ni el enchufe en agua.
•
Mantenga el cable lejos de supercies calientes.
•
No deje que el cable cuelgue del borde de la mesa o del mostrador.
•
Vea las instrucciones de limpieza de la
•
sección “Cuidado del horno de microondas”.
Para reducir el riesgo de incendio en la cavidad del horno:
No cocine en exceso los alimentos. Vigile muy bien el horno de
•
microondas si se coloca papel, plástico o cualquier material
combustible dentro de este para facilitar la cocción.
Retire las ataduras de alambre de las bolsas plásticas o de papel antes
•
de colocar las bolsas en el horno.
Si algún material se prende fuego dentro del horno, mantenga la
•
puerta cerrada, apague el horno y desenchúfelo o corte la corriente
en el panel de fusibles o del cortacircuitos.
especícamente diseñado para calentar, cocinar o
supercie de la puerta en la
ESPAÑOL
43
Page 46

INSTRUCCIONES IMPORTANTES
DE SEGURIDAD
No use la cavidad para almacenamiento. No deje productos de papel,
•
utensilios de cocina ni alimentos en la cavidad cuando no esté en uso.
Para reducir el riesgo de lesiones físicas:
No caliente el líquido en exceso.
•
Los líquidos tales como agua, café o té se pueden calentar en exceso
•
más allá del punto de ebullición sin que parezca que están hirviendo.
No siempre observará que hierve ni verá burbujas visibles cuando
quita el recipiente del horno de microondas. Como consecuencia, los
líquidos muy calientes podrán hervir de repente cuando se altera el
recipiente o se inserta una cuchara u otro utensilio en el líquido.
Revuelva el líquido antes de calentarlo y mientras lo calienta.
•
No utilice recipientes de lados rectos con cuellos estrechos.
•
Después de calentar, deje que el recipiente repose en el horno de
•
microondas durante un tiempo breve antes de retirarlo.
Tenga mucho cuidado cuando coloque una cuchara u otro utensilio en
•
el recipiente.
No ponga nada directamente sobre el horno de microondas cuando
•
este está en funcionamiento.
Limpie las campanas de ventilación con frecuencia - No se debe
•
permitir que la grasa se acumule en la campana o en el ltro.
Tenga cuidado al limpiar el ltro de la campana de ventilación. Los
•
agentes de limpieza corrosivos, tales como los limpiadores para
horno a base de lejía, pueden dañar el ltro.
Al amear los alimentos debajo de la campana, encienda el ventilador.
•
ESPAÑOL
LEA Y GUARDE ESTAS
INSTRUCCIONES
44
Page 47

MICROONDAS DE SEGURIDAD ENERGÉTICA
ADVERTENCIA
Peligro de Choque Eléctrico
Conecte a un contacto de pared de conexión a tierra de 3 terminales.
No quite el terminal de conexión a tierra del cable de alimentación.
No use un adaptador.
No use un cable eléctrico de extensión.
No seguir estas instrucciones puede ocasionar la muerte, incendio o
choque eléctrico.
PRECAUCIONES PARA EVITAR LA
POSIBLE EXPOSICIÓN A ENERGÍA
EXCESIVA DE MICROONDAS
No intente operar este horno con la puerta abierta ya que esto
A
puede resultar en exposición nociva a energía de microondas. Es
importante no forzar o impedir la operación de las trabas de
seguridad.
No ponga ningún objeto entre la cara frontal del horno y la puerta y
B
no permita que se acumule polvo o residuos de limpiadores en las
supercies de sellado.
No opere el horno si éste está dañado. Es particularmente
C
importante que la puerta del horno cierre correctamente y que no
haya daño en:
1. La puerta (torcida),
2. Bisagras y seguros (rotos o
3. Sellos de la puerta y supercies de sellado.
El horno no debe ser ajustado o reparado por nadie, excepto
D
personal de servicio calicado.
REQUISITOS ELÉCTRICOS
ojos),
Observe todos los códigos y ordenanzas aplicables.
Se necesita:
Un suministro eléctrico de 120 voltios, 60 hercios, CA solamente, de 15 o
20 amperios protegido con fusible o cortacircuitos.
45
ESPAÑOL
Page 48

Se recomienda:
Un fusible o un cortacircuitos retardador.
Un circuito separado que preste servicio solamente a este horno de microondas.
INSTRUCCIONES DE PUESTA
A TIERRA
Para la conexión de un horno de microondas mediante cable eléctrico
conectado a tierra:
El horno de microondas debe estar conectado a tierra. En caso de que se
produzca un cortocircuito, la conexión a tierra reduce el riesgo de
electrocución por medio de un alambre de escape para la corriente
eléctrica. El horno de microondas está equipado con un cable que tiene
un alambre de conexión a tierra con un enchufe para conexión a tierra. El
enchufe debe estar conectado a un tomacorriente que está
correctamente instalado y conectado a tierra.
ADVERTENCIA: El uso incorrecto del enchufe para la conexión a
tierra puede resultar en riesgo de electrocución. Consulte con un
electricista o técnico calicado si las instrucciones para conexión a
tierra no se entienden bien o si hay alguna duda con respecto a la
correcta conexión a tierra del horno de microondas.
No use un cable de extensión. Si el cable de suministro eléctrico es muy
corto, haga que un electricista o técnico
tomacorriente cerca del horno de microondas.
calicado instale un
LEA Y GUARDE ESTAS
INSTRUCCIONES
ESPAÑOL
Este dispositivo cumple con la Parte 18 de las reglas FCC (Comisión Federal de
Comunicaciones, por sus siglas en inglés).
46
Page 49

PIEZAS Y CARACTERÍSTICAS
a
b
c
d
h
i
e f g
a
j
k
k
Vista desde el frente
Vista desde la parte inferior
Puerta
A
Ventana
B
Sistema de bloqueo
C
Panel de control
D
Ensamblaje del aro de la bandeja
E
giratoria
Acoplador de la bandeja giratoria
F
[en] Glass Turntable
G
[en] Top Grille
H
Cable eléctrico
I
Luces de la supercie
J
[en] Grease Filters
K
47
ESPAÑOL
Page 50

ESPECIFICACIONES
kg lb
a
b
d
c
Número de modelo HMV1472BHS
Voltaje nominal 120V~60Hz
Potencia nominal de entrada
(Horno de microondas)
Potencia nominal de salida
(Horno de microondas)
Capacidad del horno 1,34 pies cúbicos (38 L)
Diámetro de la bandeja giratoria 13¹⁄₂" (34,3 cm)
Dimensiones externas (Ancho x
Profundidad x Alto)
Peso neto Apróx. 52,3 libras (23,7 kg)
[en] LED Lighting [en] Service Replacement only
1500 vatios
1000 vatios
23¹⁄₂ " x 16¹⁄₂ " x 17¹⁄₈" (59,7 cm x 41,9
cm x 43,5 cm)
BANDEJA GIRATORIA
[en] The turntable ring assembly and the glass turntable must be used during
cooking.
[en] If you are using large or oblong-shaped cookware that would touch the walls of
the microwave when the turntable spins, you can turn o the turntable. Press
TURNTABLE. “OFF” and the icon will appear in the display.
ESPAÑOL
[en] Assemble the turntable as shown.
•
Cubo de acople (parte inferior)
A
[en] Glass Turntable
B
Ensamblaje del aro de la bandeja
C
giratoria
Acoplador de la bandeja
D
giratoria
NOTA:
No coloque la bandeja de vidrio hacia abajo.
•
La bandeja de vidrio nunca debe quedar obstruida.
•
Coloque los alimentos y los recipientes de alimentos sobre la bandeja de
•
vidrio para cocinarlos.
[en] If glass turntable or turntable ring assembly cracks or breaks, contact
•
the Customer Satisfaction Center at 1-877-337-3639 or the parts
department at encompassparts.com.
48
Page 51

PANEL DE CONTROL
a b c d e f hg
i j k l m n
kg lb
kg lb
kg lb
kg lb
[en] Sensor Cook
A
[en] Popcorn
B
[en] Sensor Reheat
C
Power Level (Nivel de potencia)
D
Temporizador de cocina
E
Pantalla
F
Teclas numéricas
G
[en] Stop
H
Descongelado (Conv)
I
[en] Turntable On/O
J
[en] Light On/O
K
[en] Vent Hi-Lo-O
L
Reloj
M
[en] Start
N
RELOJ
Su modelo tiene un reloj de 12 horas.
FIJAR LA HORA DEL DÍA
1. [en] Press CLOCK to enter the Clock Setting mode. “ENTER TIME” will appear
in the display.
2. Presione las teclas numéricas para ingresar la hora correcta. Por ejemplo, si la
hora es 10:12, presione las teclas numéricas “1, 0, 1, 2” para ingresar la hora.
3. [en] Press START to conrm the time.
TEMPORIZADOR DE COCINA
[en] The microwave features a convenient timer for your cooking needs.
1. [en] Press KITCHEN TIMER. “ENTER TIME” will appear in the display.
2. Presione las teclas numéricas para ingresar el tiempo de cocción deseado.
NOTA: El tiempo de cocción máximo es de 99 minutos y 99 segundos.
3. [en] Press START to begin counting down the time.
49
ESPAÑOL
Page 52

NOTA: [en] When the set time has expired, “END” will appear in the
kg lb
kg lb
kg lb
display and three long alert tones will sound.
4. [en] Press STOP to exit the Kitchen Timer function.
CARACTERÍSTICAS
VENTILADOR
[en] The Vent Fan feature allows you to exhaust heat and steam from the cooking
surface below.
Presione VENT FAN HI/LOW/OFF (Ventilador Alto/Bajo/Apagado) para
•
encender/apagar el ventilador y regular su velocidad.
NOTA:
[en] The fan speed cannot be adjusted if the control panel is locked.
•
[en] When the control is pressed the
•
[en] High Speed - Press once
[en] Low Speed - Press twice
[en] O - Press three times
ILUMINACIÓN DE LA SUPERFICIE
[en] The surface light feature illuminates the cooking surface below the microwave
oven.
[en] Press LIGHT to toggle among High, Low and O.
rst time, “High” appears in the display.
SEGURO PARA NIÑOS
La función Child Lock (Bloqueo para niños) le permite bloquear el panel de control
del microondas para una limpieza fácil o evitar cambiar accidentalmente los ajustes
o encender el horno de microondas.
Para bloquear/desbloquear el panel de control:
Presione STOP/CANCEL (Detener/ XX)durante 3 segundos. Sonarán dos pitidos
•
para indicar que se ha activado/desactivado el bloqueo [en].
VER ESTADO
ESPAÑOL
La función Status Recall (Ver estado) le permite
potencia durante la cocción del microondas.
Presione POWER LEVEL (Nivel de potencia) para visualizar el nivel de potencia
•
jado.
Presione CLOCK (Reloj) para visualizar la hora.
•
vericar los ajustes de tiempo y
50
Page 53

USO DEL HORNO DE MICROONDAS
IMPORTANTE: [en] Never operate the microwave without food in the oven
cavity; this can damage the magnetron tube or glass turntable. You may wish to
leave a cup lled with water inside the oven when it is not in use to avoid
damage if the oven is unintentionally turned on.
UTENSILIOS DE COCINA
IMPORTANTE: Los recipientes bien cerrados podrían explotar. Debe abrir los
recipientes cerrados y perforar las bolsas plásticas antes de cocinar.
APTOS PARA HORNOS DE MICROONDAS
Plato para dorar (Se vende por separado. Siga las recomendaciones del
•
fabricante).
Vidrio de cerámica, vidrio
•
Porcelana, vajilla de barro (Siga las recomendaciones del fabricante).
•
Melamina (Siga las recomendaciones del fabricante).
•
Toallas de papel, platos de papel, servilletas (Use papel no reciclado).
•
Envoltorios, bolsas, cubiertas, vajilla y recipientes de plástico (Siga las
•
recomendaciones del fabricante).
Cerámica y arcilla (Siga las recomendaciones del fabricante).
•
Utensilios para hornear de silicona (Siga las recomendaciones del fabricante).
•
Papel de cera
•
NO ES APTO PARA HORNOS DE MICROONDAS
Utensilios de cocina y para hornear de metal
•
Popote o mimbre
•
Oro, plata o peltre
•
Termómetros y pinchos de carne que no hayan sido aprobados
•
Ataduras
•
Envoltorios de aluminio, como bolsas para sándwiches
•
Grapas
•
Objetos con adornos dorados o plateados, o con un baño de metal
•
Madera
•
Para probar los utensilios de cocina/vajilla:
Coloque el plato en el horno de microondas con 1 taza (250 mL) de agua al lado.
Programe 1 minuto de tiempo de cocción al 100 %. Si el plato se calienta y el agua
permanece fría, no lo utilice en el horno de microondas.
COCCIÓN EN EL HORNO DE MICROONDAS
COCCIÓN PROGRAMADA
1. Presione los botones numéricos para
para cocinar durante 10 minutos, presione “1,0,0,0” seguido.
NOTA:
El tiempo de cocción máximo es de 99 minutos y 99 segundos.
•
La potencia por defecto es del 100 %. Si desea cocinar al 100 % de la
•
potencia, omita los pasos 2 y 3 y vaya directamente al paso 4.
jar el tiempo de cocción. Por ejemplo,
51
ESPAÑOL
Page 54

2. Presione POWER LEVEL (Nivel de potencia) para activar el modo de potencia.
kg lb
kg lb
kg lb
kg lb
3. [en] Press the number pads or press POWER LEVEL repeatedly to select the
desired power level. See “Power Levels” chart later in this section.
4. Presione START/+30 Sec (Inicio/+30 Sec) para comenzar a cocinar. Comenzará
la cuenta regresiva.
NOTA: Cuando termine de cocinar, sonará un tono de alerta 3 veces.
Niveles de potencia
Hay diez niveles de potencia disponibles.
Nivel 10 9 8 7 6 5 4 3 2 1 0
Encendi-do100% 90% 80% 70% 60% 50% 40% 30% 20% 10% 0%
Pantalla HI PL-90 PL-80 PL-70 PL-60 PL-50 PL-40 PL-30 PL-20 PL-10 PL-0
COCCIÓN RÁPIDA
Presione START/+ 30 SEC (+30 s) para comenzar a cocinar al 100 % de potencia
•
del horno de microondas durante 30 segundos.
Presione START/+ 30 SEC (+30 s) durante la cocción del horno de microondas
•
para aumentar el tiempo de cocción en incrementos de 30 segundos.
NOTA: El tiempo de cocción máximo es de 99 minutos y 99 segundos.
Presione los botones numéricos de 1 a 9 para comenzar a cocinar con 100 % de
•
potencia del horno de microondas durante 1 a 9 minutos.
NOTA: Durante la cocción rápida, podrá ver el nivel de potencia del
microondas.
[EN] SENSOR COOK
[en] The Sensor Cook control automatically sets the appropriate cooking time
calculated by sensing the moisture level of the food or beverage being cooked.
[en] The Sensor Cook control is programmed to cook the following items: Potato,
Fresh Veggies, Frozen Veggies, Bacon, Frozen Dinner, Rice, Frozen Breakfast, and
Frozen Pizza.
[en] Press SENSOR COOK once, “Potato” will appear on the display. Continue to
•
ESPAÑOL
press SENSOR COOK to toggle among the choices. When the desired item
appears in the display, press START to
[en] Once Start is pressed, the Sensing process begins. When the Sensing
•
process is completed, alert tones will sound and the calculated cook time will
begin to count down.
conrm and begin cooking.
52
Page 55

NOTA: [en] Do not open the door during the Sensing process. If you do, the
kg lb
kg lb
Sensor Cook program will be cancelled.
[en] Sensor Cook Programs
[en] Program [en] Item [en] Quantity
1 [en] Baked Potato [en] 1 - 4 potatoes
2 [en] Fresh Vegetable [en] 2 cups
3 [en] Frozen Vegetable [en] 2 cups
4 [en] Bacon [en] 1 - 3 slices
5 [en] Frozen Dinner [en] 10 to 20 oz.
6 [en] Rice [en] 1 - 2 cups
7 [en] Frozen Breakfast [en] 8 to 12 oz.
8 [en] Frozen Pizza [en] 12 oz.
DESCONGELACIÓN
[en] The Defrost control allows you to choose to defrost by weight or by time.
Descongelar por peso
1. [en] Press DEFROST once. “Weight” will appear on the display.
2. [en] Press START. “Enter Weight” will appear on the display, and “lb” will ash.
3. [en] Press the number pads to enter the weight of the item to be defrosted. For
example, if the food weight is 1.2 lbs, press “1” and then ”2” to input the weight.
NOTA: El peso máximo es 6 lb (2,7 kg).
4. Presione START (Inicio) para comenzar a descongelar. No se encenderá el
indicador “lb”.
Descongelar por tiempo
1. [en] Press DEFROST twice. “Time” will appear on the display.
2. [en] Press START. “Enter Time” will appear on the display.
3. [en] Press the number pads to enter the time to defrost. For example, if you
want the food to defrost for 5 minutes, press “5” and then ”0” to input the time.
NOTA: El tiempo máximo es de 99 minutos y 99 segundos.
4. Presione START (Inicio) para comenzar a descongelar.
NOTA: Cuando ha pasado la mitad del tiempo de descongelación total,
sonará un tono 2 veces para alertarle que debe dar vuelta el alimento.
[EN] SENSOR REHEAT
[en] The Sensor Reheat control automatically sets the appropriate reheating time
calculated by sensing the moisture level of the food or beverage being reheated.
[en] The Sensor Reheat control is programmed to reheat the following items:
Beverage, Dinner Plate, Pizza, Soup/Sauce and Casserole.
53
ESPAÑOL
Page 56

[en] Press SENSOR REHEAT once, “BEVERAGE” will appear on the display.
kg lb
kg lb
•
Continue to press SENSOR REHEAT to toggle among the choices. When the
desired item appears in the display, press START to conrm and begin reheating.
[en] Once Start is pressed, the Sensing process begins. When the Sensing
•
process is completed, alert tones will sound and the calculated reheat time will
begin to count down.
NOTA: [en] Do not open the door during the Sensing process. If you do, the
Sensor Cook program will be cancelled.
[en] Sensor Reheat Programs
[en] Program [en] Item [en] Quantity
[en] 1 [en] Beverage [en] 1 to 3 cups
2 [en] Dinner Plate [en] 1 plate
3 [en] Pizza [en] 1 to 4 slices
4 [en] Soup/Sauce [en] 1 cup
5 [en] Casserole/Lasagna [en] 10.5 oz.
[EN] POPCORN
[en] The popcorn control is programmed to pop microwave popcorn based on the
size of the bag.
1. [en] Press POPCORN to toggle among the bag sizes.
•
•
•
2. [en] Press START to
appear on the display.
ESPAÑOL
[en] Press 1 time: To pop a 3.3 ounce bag of popcorn.
[en] Press 2 times: To pop a 3.0 ounce bag of popcorn.
[en] Press 3 times: To pop a 1.75 ounce bag of popcorn.
conrm selection and begin cooking. The popping time will
54
Page 57

CUIDADO DEL HORNO DE MICROONDAS
Peligro de choque eléctrico
Desconecte el suministro de energía antes de limpiarlo.
No seguir esta instrucción puede ocasionar la muerte o choque
eléctrico.
ADVERTENCIA
LIMPIEZA
IMPORTANTE:
Antes de la limpieza, asegúrese de que todos los controles estén apagados
•
y que el horno de microondas esté frío. Siempre siga las instrucciones que
vienen en las etiquetas de los productos de limpieza.
Para evitar daños en el horno de microondas, los cuales ocurren cuando se
•
forman chispas debido a la acumulación de suciedad, mantenga limpios la
cavidad, la cubierta interior del horno de microondas y el área donde la
puerta toca el marco.
1. [en] Using a warm water and mild soap solution and a soft cloth or sponge,
clean the oven cavity, frame and oven exterior.
2. Enjuague con agua tibia limpia y seque con un paño suave.
NOTA:
[en] Do not use scouring powder or rough scouring pads on the microwave.
•
[en] The glass turntable may be washed and dried in the dishwasher.
•
[en] For stainless steel models, a stainless steel cleaner may be used on the
•
exterior.
55
ESPAÑOL
Page 58

FILTROS
ADVERTENCIA
Peligro de Choque Eléctrico
Desconecte el suministro de energía antes de dar mantenimiento.
Vuelva a colocar todos los paneles antes de hacer funcionar.
No seguir estas instrucciones puede ocasionar la muerte o choque
eléctrico.
a b
c
d
[EN] GREASE FILTER(S)
[en] Grease lters are located on the underside of microwave oven. The grease
lters should be removed and cleaned often; generally at least once every month.
1. [en] Remove the grease lter. Grasp the metal ring, slide the lter toward the
back, and then gently pull the
2. [en] Soak the grease lters in hot water with a mild detergent added. Rinse well
and shake to dry.
NOTA: No utilice amoníaco ni los lave en la lavavajillas. El aluminio del
se corroerá y oscurecerá.
lter downward. Repeat for the second lter.
A
B
C
D
ESPAÑOL
3. [en] Reinstall the grease lter. Insert the back edge of the lter into the
opening, and then gently push the lter up into place. Repeat for the second
lter.
56
Luces de la
supercie
Puerta
[en] Metal
Loop
[en] Grease
Filters
ltro
Page 59

FILTRO DE CARBÓN
a
a
IMPORTANTE: [en] A charcoal
when it is used in a non-vented (recirculating) installation. Your microwave oven
comes from the factory with the charcoal lter installed.
[en] The charcoal lter cannot be cleaned, so it must be replaced at least every 6
months or more often depending on use. To order a replacement charcoal lter for
your model, contact the Customer Satisfaction Center. See "Back Cover" for
contact information.
1. Desenchufe o desconecte el suministro de energía.
2. [en] Using a Phillips screwdriver, remove screws from the top grille.
3. [en] Open the microwave door so you can grasp the top grille, and then pull the
grille straight out to remove.
lter must be installed in the microwave oven
[en] Screws (2)
A
4. [en] Remove the used charcoal lter from the back of the grille, and then
discard the lter.
5. [en] Align the holes in the new charcoal
the grille, and gently press down to attach.
lter with the ve posts on the back of
[en] Charcoal Filter
A
6. [en] Align the top edge of the grille so that when the grille is pushed into place
the screw hole tabs on the the grille will align with the holes in the microwave
57
ESPAÑOL
Page 60

cabinet. Gently push on the grille until it snaps into place and the screw holes
a b b
are aligned.
NOTA: [en] Make sure that the wire harness, located near the door hinge,
is not pinched when you are replacing the top grille.
[en] Wire Harness (not shown)
A
[en] Screw Hole Tab (2)
B
7. [en] Replace the two screws removed earlier, and completely tighten the
screws.
LUCES
IMPORTANTE: [en] Your microwave oven features LED interior lighting as well
as LED surface lighting. These lights are designed to last for the life of your
microwave oven. However, if the lights stop illuminating, please contact a
qualied technician for replacement or the Customer Satisfaction Center for
service. See the back cover for contact information.
SOLUCIÓN DE PROBLEMAS
Pruebe las soluciones sugeridas aquí y posiblemente se evite el gasto de una
visita de servicio técnico.
PROBLEMA
El horno no se
pone en
marcha
Chisporroteo o
chispas
ESPAÑOL
POSIBLE(S) CAUSA(S) SOLUCIÓN
[en] Oven power cord is not
plugged into an electrical
outlet.
La puerta está abierta. Cierre la puerta y vuelva a
Ha jado una opción
incorrecta.
Se utilizan materiales que no
deben usarse en el horno de
microondas.
El horno se puso en
funcionamiento sin nada
adentro.
Hay restos de alimentos
derramados en la cavidad.
58
Conecte a un contacto de
pared de conexión a tierra
de 3 terminales.
intentarlo.
Revise las instrucciones.
Utilice únicamente utensilios
de cocina aptos para hornos
de microondas.
No ponga en funcionamiento
el horno cuando está vacío.
[en] Clean oven cavity with a
damp cloth and dry
thoroughly. See “Cleaning.”
Page 61

PROBLEMA POSIBLE(S) CAUSA(S) SOLUCIÓN
Alimentos
cocidos de
manera
despareja
Alimentos
cocidos en
exceso
Alimentos no
cocidos por
completo
No descongela
correctamente
SI NECESITA MÁS AYUDA, VISITE HAIERAMERICA.COM O COMUNÍQUESE CON
LA LÍNEA DE AYUDA AL CONSUMIDOR LLAMANDO AL 1-877-337-3639.
Se utilizan materiales que no
deben usarse en el horno de
microondas.
El alimento no se ha
descongelado por completo.
El tiempo de cocción y nivel
de potencia no son
adecuados.
El alimento no se ha girado ni
revuelto.
El tiempo de cocción y nivel
de potencia no son
adecuados.
Se utilizan materiales que no
deben usarse en el horno de
microondas.
El alimento no se ha
descongelado por completo.
Los oricios de ventilación
del horno están obstruidos.
El tiempo de cocción y nivel
de potencia no son
adecuados.
Se utilizan materiales que no
deben usarse en el horno de
microondas.
El tiempo de cocción y nivel
de potencia no son
adecuados.
El alimento no se ha girado ni
revuelto.
Utilice únicamente utensilios
de cocina aptos para hornos
de microondas.
Descongele el alimento por
completo.
Utilice el tiempo de cocción y
nivel de potencia correctos.
Gire o revuelva el alimento.
Utilice el tiempo de cocción y
nivel de potencia correctos.
Utilice únicamente utensilios
de cocina aptos para hornos
de microondas.
Descongele el alimento por
completo.
Verique que los oricios de
ventilación del horno no estén
obstruidos.
Utilice el tiempo de cocción y
nivel de potencia correctos.
Utilice únicamente utensilios
de cocina aptos para hornos
de microondas.
Utilice el tiempo de cocción y
nivel de potencia correctos.
Gire o revuelva el alimento.
GARANTÍA LIMITADA
SERVICIO EN EL HOGAR
GARANTÍA COMPLETA POR UN AÑO
Durante 12 meses a partir de la fecha de
compra original en la tienda, Haier
reparará o reemplazará cualquier pieza
del aparato sin costo, incluyendo la
mano de obra, si la misma falla debido a
defectos en los materiales o en la mano
de obra.
Haier puede reemplazar, a su sola
discreción, cualquier pieza, subsistema,
incluso el producto entero.
El producto debe ser accesible, sin
gravamen e instalado correctamente
para recibir el servicio de reparación de
garantía.
ESPAÑOL
59
Page 62

GARANTÍA LIMITADA
NOTA: Esta garantía comienza en
la fecha de compra de este
producto, y el recibo original deberá
presentarse al representante
autorizado de servicio antes de
hacerse las reparaciones bajo la
garantía.
Excepciones: Garantía uso comercial
90 días en la mano de obra a partir de la
fecha de compra original
90 días en las piezas a partir de la fecha
de compra original
No es aplicable ninguna otra garantía.
PARA OBTENER SERVICIO BAJO LA
GARANTÍA
Póngase en contacto con el centro de
servicio autorizado más cercano a su
localidad. Todo servicio deberá ser
realizado por un centro de servicio
autorizado por Haier. Para obtener el
nombre y el número de teléfono del
centro de servicio autorizado más
cercano, llame al 1-877-337-3639.
Antes de llamar, tenga a mano la
siguiente información:
Número de modelo y de serie del
aparato. El nombre y la dirección del
distribuidor en donde compró la unidad
y la fecha de compra.
Una descripción clara del problema.
Un comprobante de compra (recibo de
compra).
Esta garantía cubre servicios para
electrodomésticos dentro de los
Estados Unidos continental y Canadá y
donde esté disponible en Alaska,
Hawaii y Puerto Rico.
Lo que no está cubierto bajo esta
garantía:
Reemplazo o reparación de fusibles
domésticos, cortacircuitos, cableado o
plomería.
Un producto cuyo número de serie
original haya sido removido o alterado.
ESPAÑOL
Cualquier cargo por servicio que no haya
sido
identicado especícamente como
servicio normal, como puede ser el área
o las horas de servicio.
Daños ocurridos durante el transporte.
Daños ocasionados por la instalación o
el mantenimiento inadecuados.
Daños por el uso incorrecto, abuso,
accidente, incendio, inundación o
fenómenos de la naturaleza.
Daños debidos al servicio efectuado por
un distribuidor o centro de servicio que
sea diferente del autorizado por Haier.
Daños ocasionados por la corriente, el
voltaje o el suministro eléctrico
incorrectos.
Daños que resulten de cualquier
modicación hecha en el producto,
alteración o ajustes no autorizados por
Haier.
Ajuste de los controles manejados por el
cliente según han sido
el manual del propietario.
Mangueras, perillas, bandejas de pelusa
y todos los otros aditamentos,
accesorios y piezas desechables.
Cargos por mano de obra, transporte
para el servicio y envío para la remoción
y el reemplazo de las piezas defectuosas
que se efectúen después del período
inicial de 12 meses.
Daños ocasionados por un uso diferente
al doméstico normal.
Cualquier gasto de transporte y de
envío.
ESTA GARANTÍA LIMITADA
REEMPLAZA TODAS LAS OTRAS
GARANTÍAS, EXPRESAS O IMPLÍCITAS
QUE INCLUYAN, ENTRE OTRAS, LAS
GARANTÍAS DE COMERCIABILIDAD O
DE CAPACIDAD PARA UN PROPÓSITO
EN PARTICULAR
El recurso provisto en esta garantía es
exclusivo y está otorgado en lugar de
cualquier otro recurso.
Esta garantía no cubre daños
incidentales o consecuentes, de modo
que las limitaciones indicadas
anteriormente pueden no aplicarse en
su caso. Algunos estados no permiten
las limitaciones acerca de cuánto
tiempo dura una garantía implícita, de
modo que las limitaciones arriba
indicadas quizás no le correspondan.
Esta garantía le otorga derechos legales
especícos, y es posible que usted
tenga otros derechos, los cuales varían
de un estado a otro.
60
identicados en
Page 63

Haier America
Wayne, NJ 07470
INFORMACIÓN A TENER EN CUENTA
Le agradecemos la compra de este
producto de marca Haier. Este manual para
el usuario lo ayudará a obtener el mejor
funcionamiento de su nueva horno de
microondas.
Para referencia futura, anote el número de
modelo y de serie en el cuadro interior del
horno de microondas, y la fecha de compra.
Engrape la prueba de compra a este manual
para asistirle cuando necesite obtener
servicio bajo la garantía.
_____________________________
Número de modelo
_____________________________
Número de serie
_____________________________
Fecha de compra
61
ESPAÑOL
Page 64

Page 65

Page 66

Page 67

Page 68

IMPORTANT
Do Not Return This Product To The Store
If you have a problem with this product, please contact the
“Haier Customer Satisfaction Center” at
DATED PROOF OF PURCHASE, MODEL #, AND SERIAL #
REQUIRED FOR WARRANTY SERVICE
1-877-337-3639.
IMPORTANT
Ne pas Réexpédier ce Produit au Magasin
Pour tout problème concernant ce produit, veuillez contacter
le service des consommateurs “Haier Customer Satisfaction Center” au
1-877-337-3639.
UNE PREUVE D’ACHAT DATEE EST REQUISE POUR BENEFICIER DE LA GARANTIE.
IMPORTANTE
No regrese este producto a la tienda
Si tiene algún problema con este producto, por favor contacte el
“Centro de Servicio al Consumidor de Haier” al
1-877-337-3639 (Válido solo en E.U.A).
NECESITA UNA PRUEBA DE COMPRA FECHADA, NÚMERO DE MODELO
Y DE SERIE PARA EL SERVICIO DE LA GARANTÍA
Made in China
Fabriqué en Chine
Hecho en China
Haier America
Wayne, NJ 07470
HMV1472BHS
Issued: August 2016 Part # 0570001260 REV A
Printed in China
 Loading...