

Haier AB142ACBAC, AB142ACNAC, AU142AABAC, AU142AANAC, HBU-14CL03/R1 Operation Manual
...
No.0010571459
CASSETTE AIR CONDITIONER
Operation
Manual
AB142ACNAC
AU142AANAC
(HBU-14CL03/R1)
AB142ACBAC
AU142AABAC
(HBU-14HL03/R1)
3
Main points of Operation
Operation of Air Conditioner
When the environmental humidity is great,
water maybe dripped from the air outlet in
cooling or drying mode.
3-minute Protection Function
If restart the unit immediately after stopping,
the compressor will start only 3 minutes later
to protect the machine.
Variation of Fan Speed
If fan speed in auto mode, it will automatically
lower when the room temperature close to the
setting temperature in cooling mode.
In heating mode,the compressor stops when the
room temperature at setting temperature and fan
turns into low speed or stops.
In Dry mode,fan speed will be automatically varied.
Remote Control:
There is a telecommunication interface for remote control on the control
panel of the indoor unit. After the peripheral equipment have been installed
in accordance with the instruction manual of the selected remote control
detector, the air conditioner will be computerized and controlled from a faraway place.
4
Main points of Operation
Prevent Cool Air Blowing Off
In heating mode,the indoor fan will not run
immediately after the unit starts to prevent
the cool air blowing off.
Defrosting Function
In heating mode, when frost formed on the outdoor heat
exchanger, the air conditioner will automatically defrost a
few minutes. During defrosting, both indoor and outdoor
fan will stop running. When defrosting finished, air conditioner will automatically back to running.
Hints
The air conditioner absorbs heat form outside and
releases inside when in heating mode, therefore the
outside environmental temperature will affect heating
effects.
Power Failure Compensation(to be applied for a necessary situation):
After the power failure compensation is set, if power failure suddenly occurs while the air
conditioner is working,it will resume the previous working state when the power is supplied
again.
Setting Method: When the remote controller is on (excluding timer mode and fan mode),press
the ìsleepingî button on the remote controller 10 times within 5 seconds,and
after the buzzer rings 4 times,the air conditioner will enter the state of power
failure compenstation.
Cancel Method:Press the ìsleepingî button on the remote controller 10 times within 5 seconds,
and after the buzzer rings 2 timer,the power failure compensation mode will be
cancelled.
Note: When a power failure suddenly occurs during the air conditioner si working after the
power after the power failure compensationis set,if the air conditioner will not be used
for a long time, please cut off the power supply to prevent its operation from being res umed after the power is supplied again, or press the ì Switch On/Off î button after the
power comes again.
Wait a
minute
Defrosting Running
5
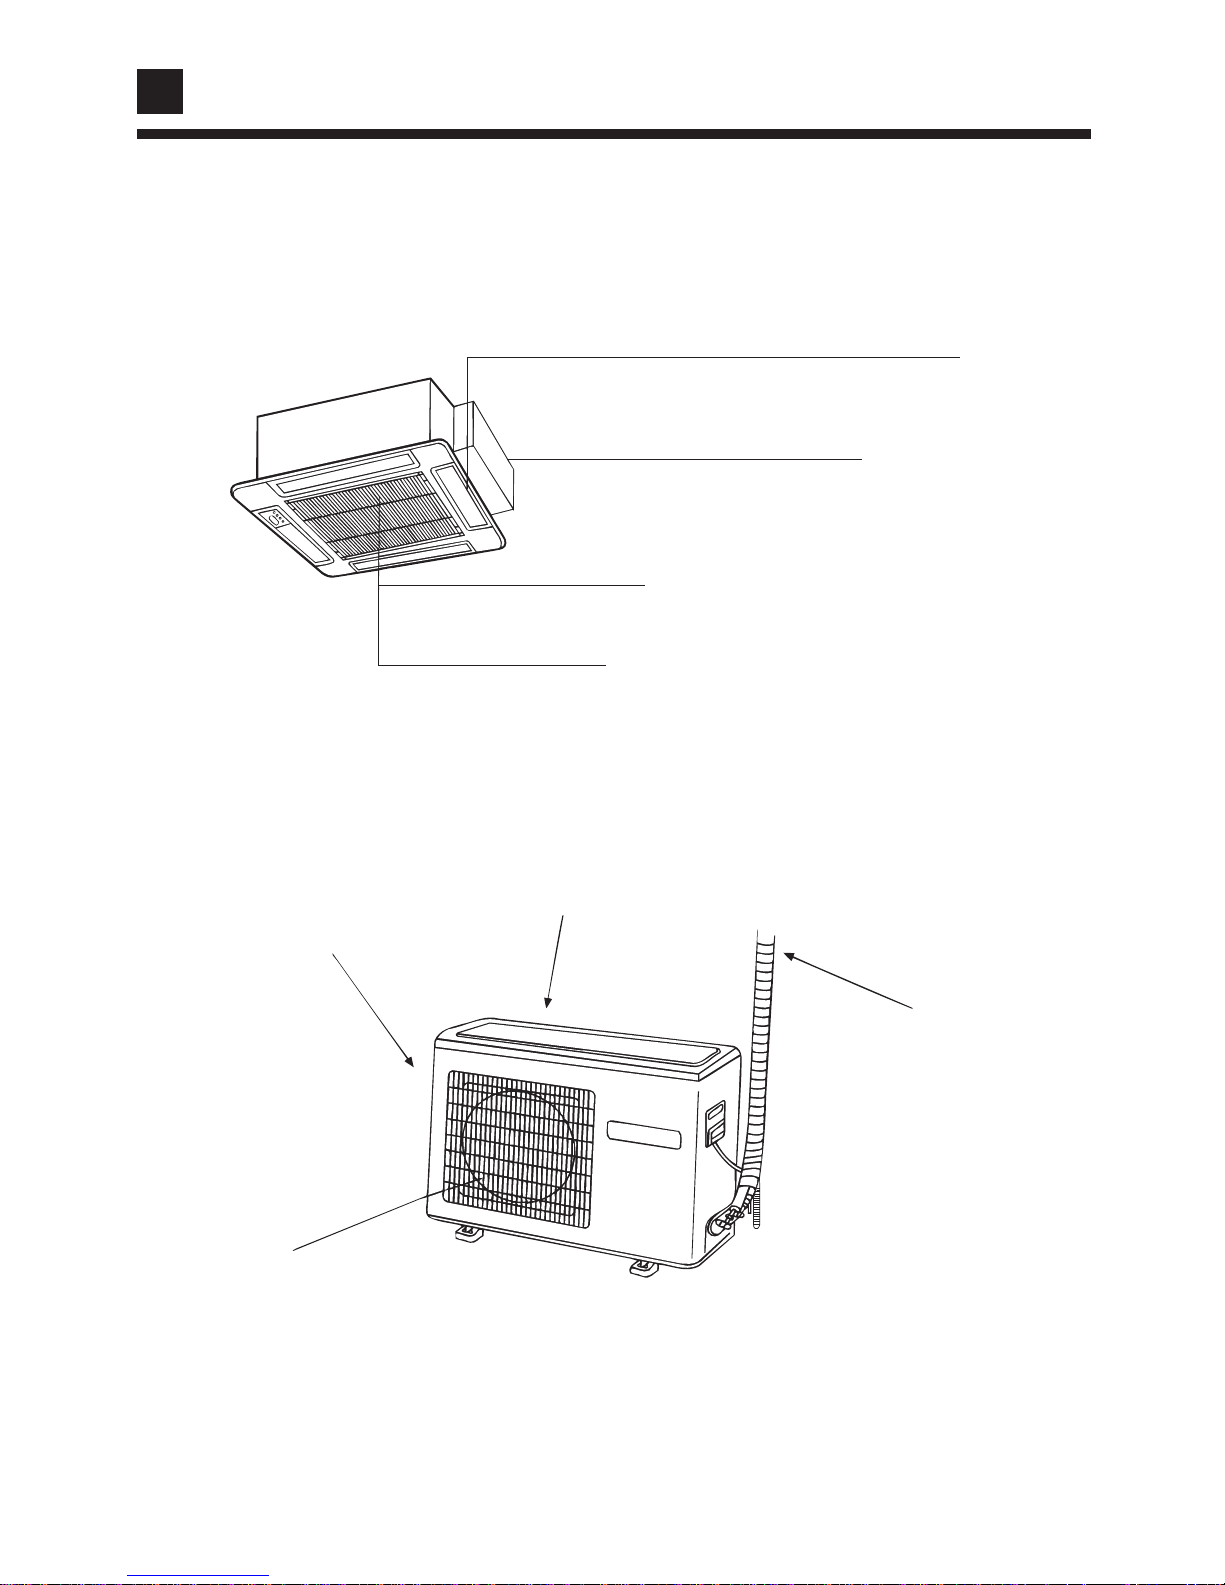
Indoor unit
Swing louver
(Air flow direction can be adjusted by using
the SWING button on the remote controller)
Electrical Components Case
Air Inlet Grille
Air Filter
(Inside of the Inlet Grille)
Air Outlet
(blow out hot air when cooling
and cool air when heating)
Air Inlet (back)
Conneting pipe and
electrical wiring
Name of Each Part
outdoor unit
Air Inlet (side)
5
Name of Each Part
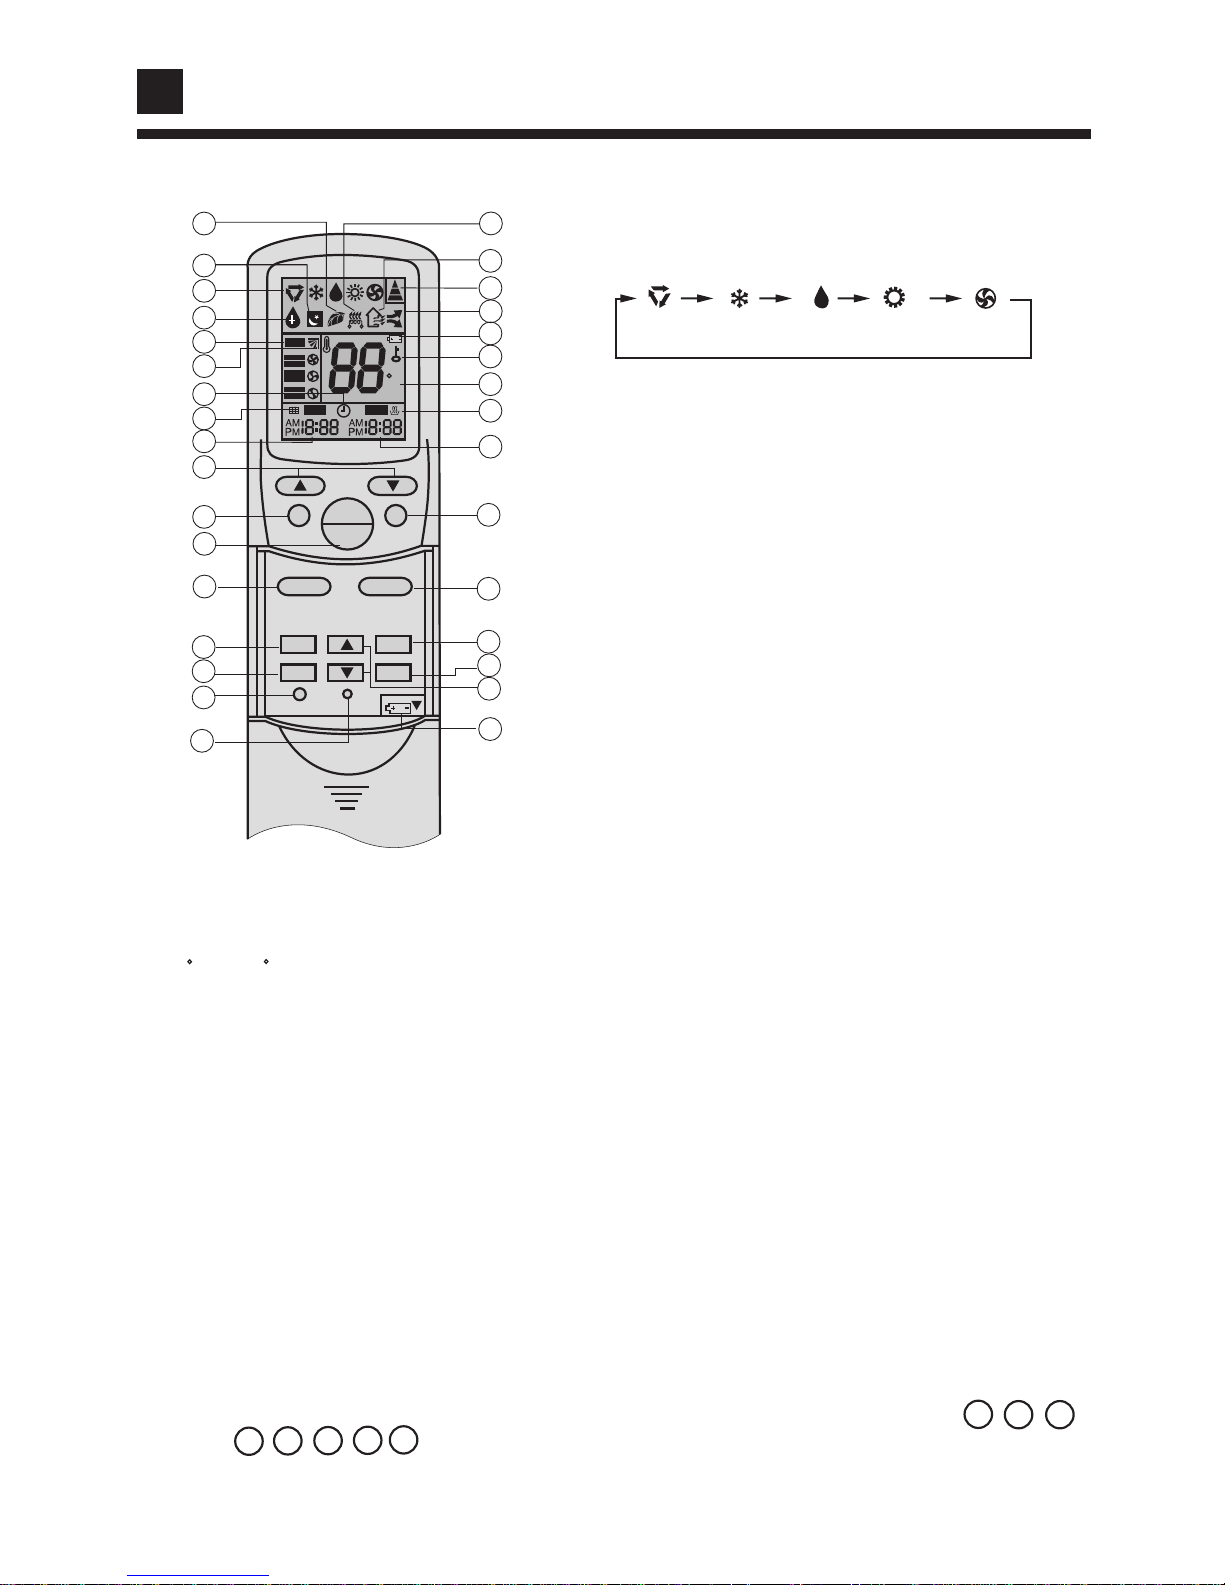
Remote controller
1.TEMP Setting Button
(Used to set temperature, setting ranges:
16 C to 30 C)
In Up/Down function,for controlling up and
down filter.
2.SWING Button
Press once auto swing, press again the
swing louver fixed on the present swing
position.
3.Power ON/OFF Button (used for unit
start and stop)
After power on, the LCD of remote contr-
oller will display the previous operation
state (except for TIMER,SLEEP and SWING state).
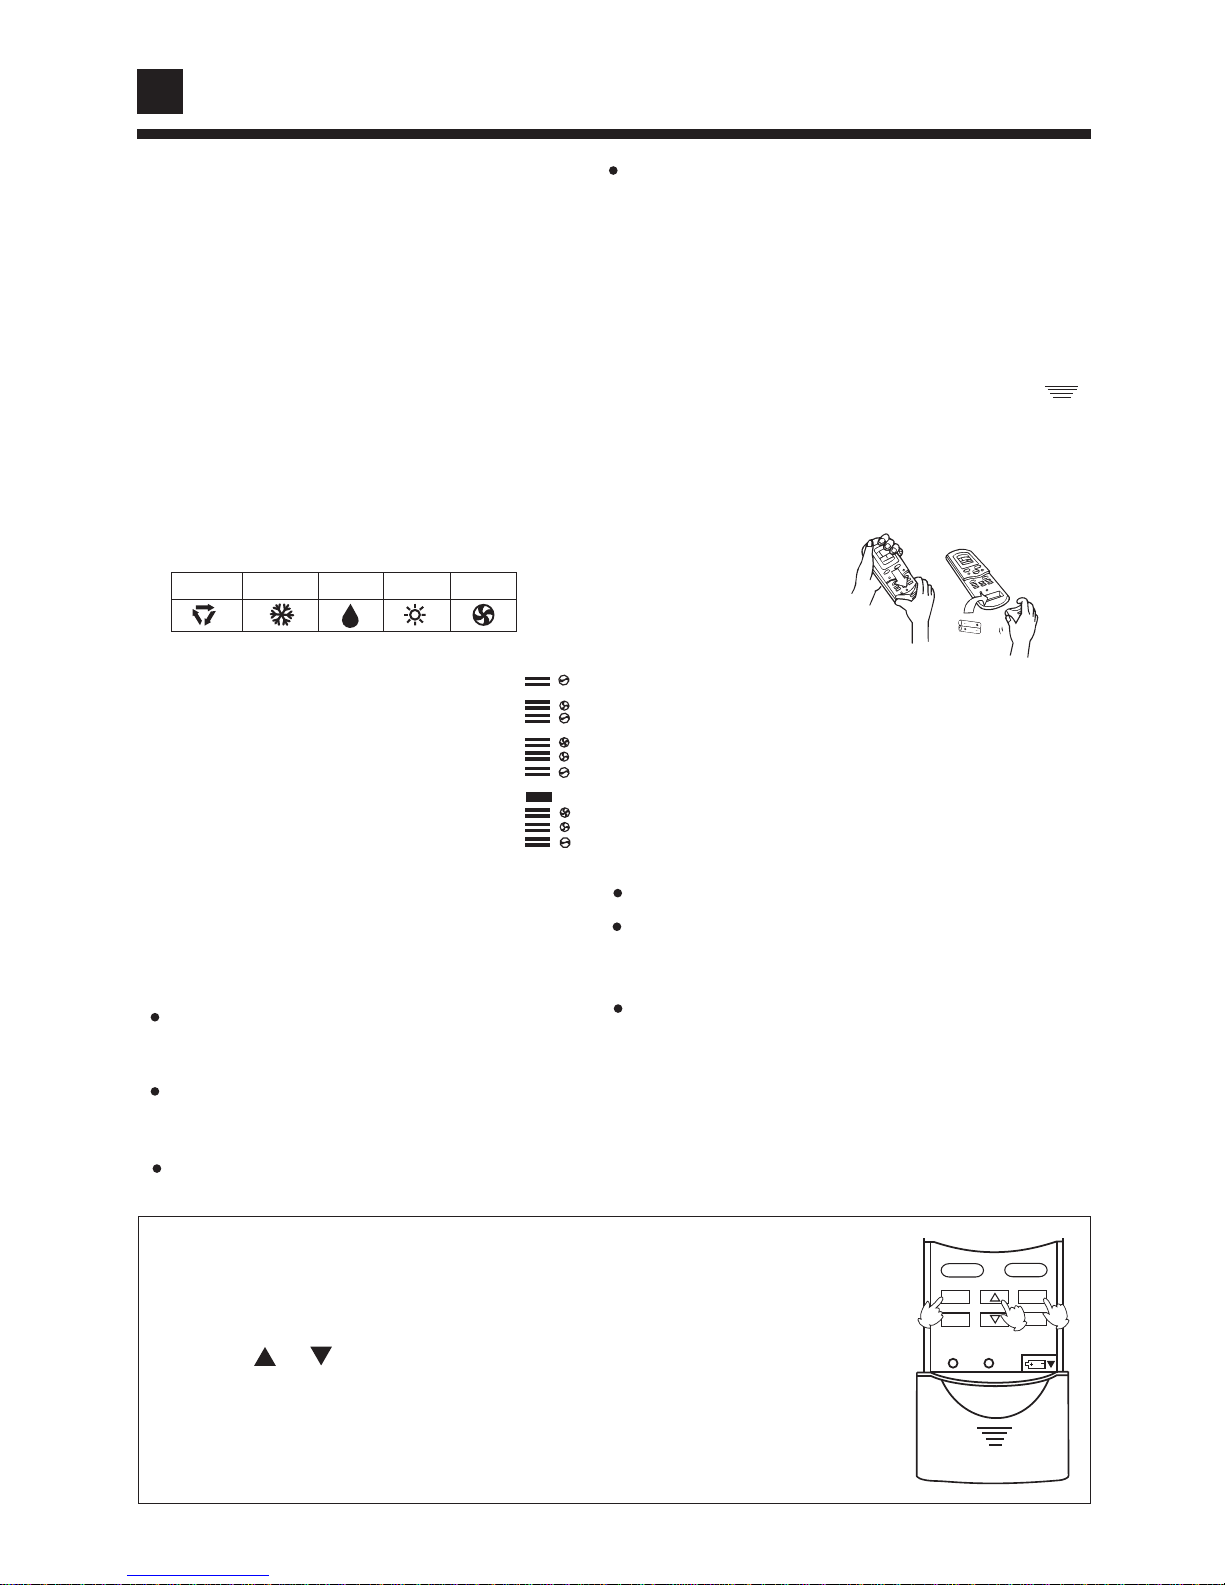
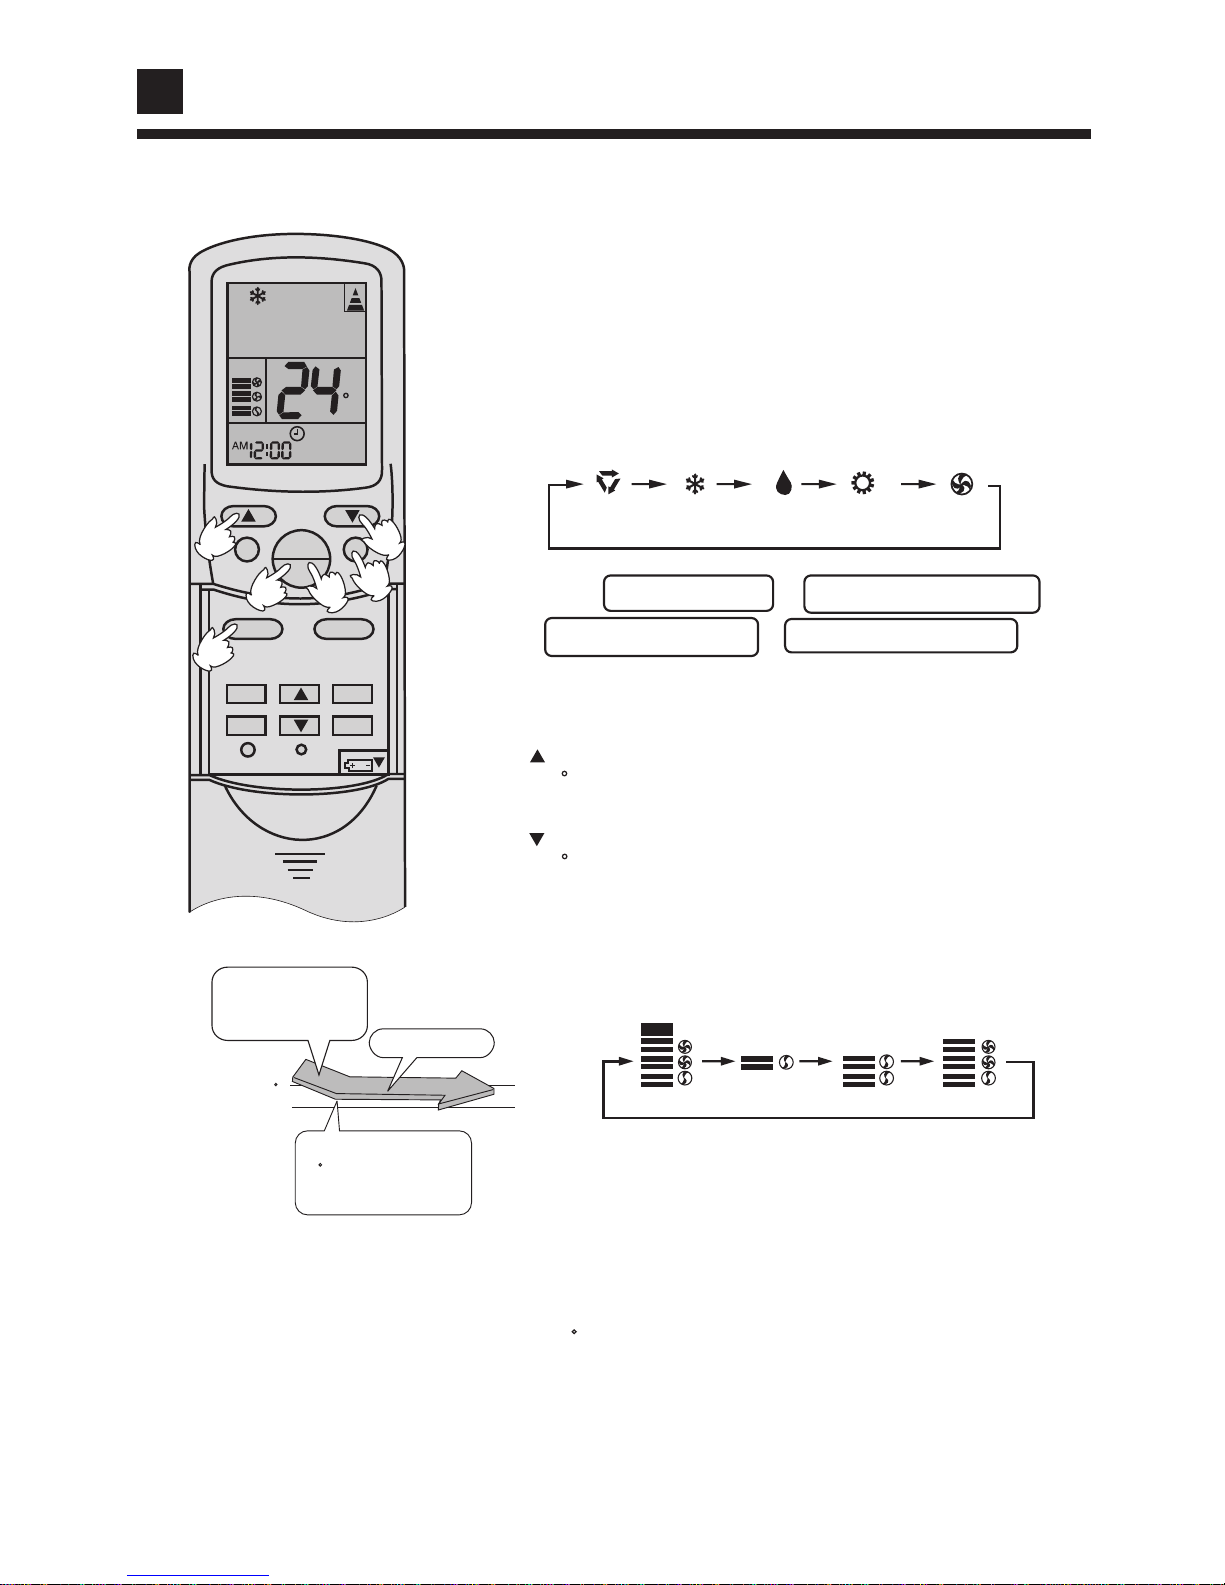
4.Operation MODE
Used to select operation mode.
Every time press MODE button,operation mode
changes according ot hte following order:
5.CLOCK Button
Used to set correct time.
AUTO
FAN
HEAT
COOL
DRY
6.TIMER Button
Used to select TIMER mode:TIMER ON,TIMER
OFF, TIMER ON/OFF.
(Note: if time of TIMER ON is the same as TIMER
OFF,TIMER ON/OFF cannot be set)
7.LOCK Button
8.RESET Button
Used to sharp article press this button can reset
the remote controller back to normal condition when
it in malfunction state.
9.Battery Loaded Indication
10.HOUR Adjustment
Used to set clock and timer setting
11.SLEEP Button
(The clock must be corrected before set sleep
function)
Used to set sleep mode.
12.SET Button
Used to confirm TIMER and CLOCK settings.
13. FILTER Button
Used to set up/down function of filter.
14.FAN Button
Used to select fan speed:LOW,MID,HIGH,AUTO.
NOTE: 1.Single cooling air conditioner does not have the displays and functions related to heating.
2.This kind of unit does not have the following related functions and displays:
16
19
20
22
23
24
25
27
TEMP
SWING
FAN
MODE
ON
OFF
SLEEP
SET
FILTER
CLOCK
TIMER
LOCK
RESET
AUTO
OFFON
C
23
21
22
20
19
18
17
16
10
11
12
14
9
8
7
6
5
4
1
31
30
29
28
26
25
24
2
3
13
15
27
32
Used to lock operation button and LCD display
contents: after press this button, other button are
out of function, lock state display appears; press
again,cancel lock state and lock state display
disappeared.
7
Clock Set
Name of Each Part
Display when healthy run function is set.
15.TIMER OFF Display
16.HUMIDIFICATION Display
17.TEMPERATURE Display
18.LOCK State Display
19.BATTERY Energy Display
Display when in low battery to remind
customer to change the battery.
20.STRONG/QUITE Run Display
21.SIGNAL SENDING Display
22.NEW AIR Display
23.ELECTRICAL HEATING Display
24.HEALTH Display
25.SLEEP State Display
26.Operation MODE Display
AUTO RUN
COOL RUN
DRY RUN
HEAT RUN
FAN RUN
27.COMFORTABLE RUN Display
28.FAN SPEED Display
29.AUTO SWING Display
30.TIMER Display
31.FILTER Display
32.TIMER ON Display
Remote Controllerí Operation
The distance between the signal transmission head and the receiver hole should
be within 7m without any obstacle as well.
When unit is started for the first time and after replacing batteries in remote
controller, clock should be adjusted as follows:
1.Press CLOCK button,clock indication of ì AM ì or ìPMî flashes.
2.Press or to set correct time,each press will increase or decrease
1 min. If the button is kept pressed, time will increase or decrease quickly.
3.After time setting is confirmed,press ìSETî , AM or PM stop flashing,
while clock starts working.
Note:AM means morning and PM means afternoon.
Donít throw the controller,prevent it from
being damaged.
When in use, put the signal transmission
head directly to the receiver hole on the
indoor unit
When electronic-strated type fluorescent lamp or
change-over type fluorescent lamp or wireless
telephone is installed in the room, the receiver is
apt to be disturbed in receiving the signals so the
distance to the indoor unit should be shorter.
Loading of the battery (load the batteries
as illustrated)
Remove the battery cover
Load the battery
Put on the cover again
Installing the cover is opposite to removing it
Confirmation indicator
If no indication after press ON/OFF button,reload
the batteries.
Note:
AUTO
LO
MID
HI
AUTO
Use two new same-typed batteries when loading.
If the remote controller canít run normally during
operation ,please remove the batteries and reload
them few minutes later that will be ok
If the display of remote controller is faded(sometimes run abnormally),which indicates no battery,so
please change the batteries
Hint:
Remove the batteries in case unit will not be in
usage for a long period.if there is any display after
taking-out just need to press reset button with a
sharp article
First slightly press the position marked with
and push down the cover,then as shown in the
figure:holding the upper part of the remote controller with the left hand and the right hand
slightly grasps the battery box cover and forces
on the arrow direction to remove the cover.
SLEEP
SET
TIMER
LOCK
RESET
MODE
FILTER
CLOCK
1
Be sure that the loading is in line with the ì + î ì - î
pole request as illustrated on the botton of the box.
2
3
8
Safety Cautions
Below are listed four kinds of Safety Cautions and Suggestions:
Be sure to conform with the following important Safety Cautions.
The Safety Cautions should be at hand so that they can be checked at any time when needed.
If the air conditoner is transferred to the new user, this manual should be as well transferred to
the new user.
Incorrect operations may result in severe consequences of death or serious injures.
WARNING:
Incorrect operations may result in injures or machine damages; in some cases may
cause serious consequences.
CAUTION :
: It must be strictly prohibited where marked with ì Prohibited î, otherwise may result in
machine damages or endanger the userípersonal safety.
This information can ensure the correct operation of the machine.
INSTRUCTION:
Carefully read the following information in order to operate the air conditioner correctly.
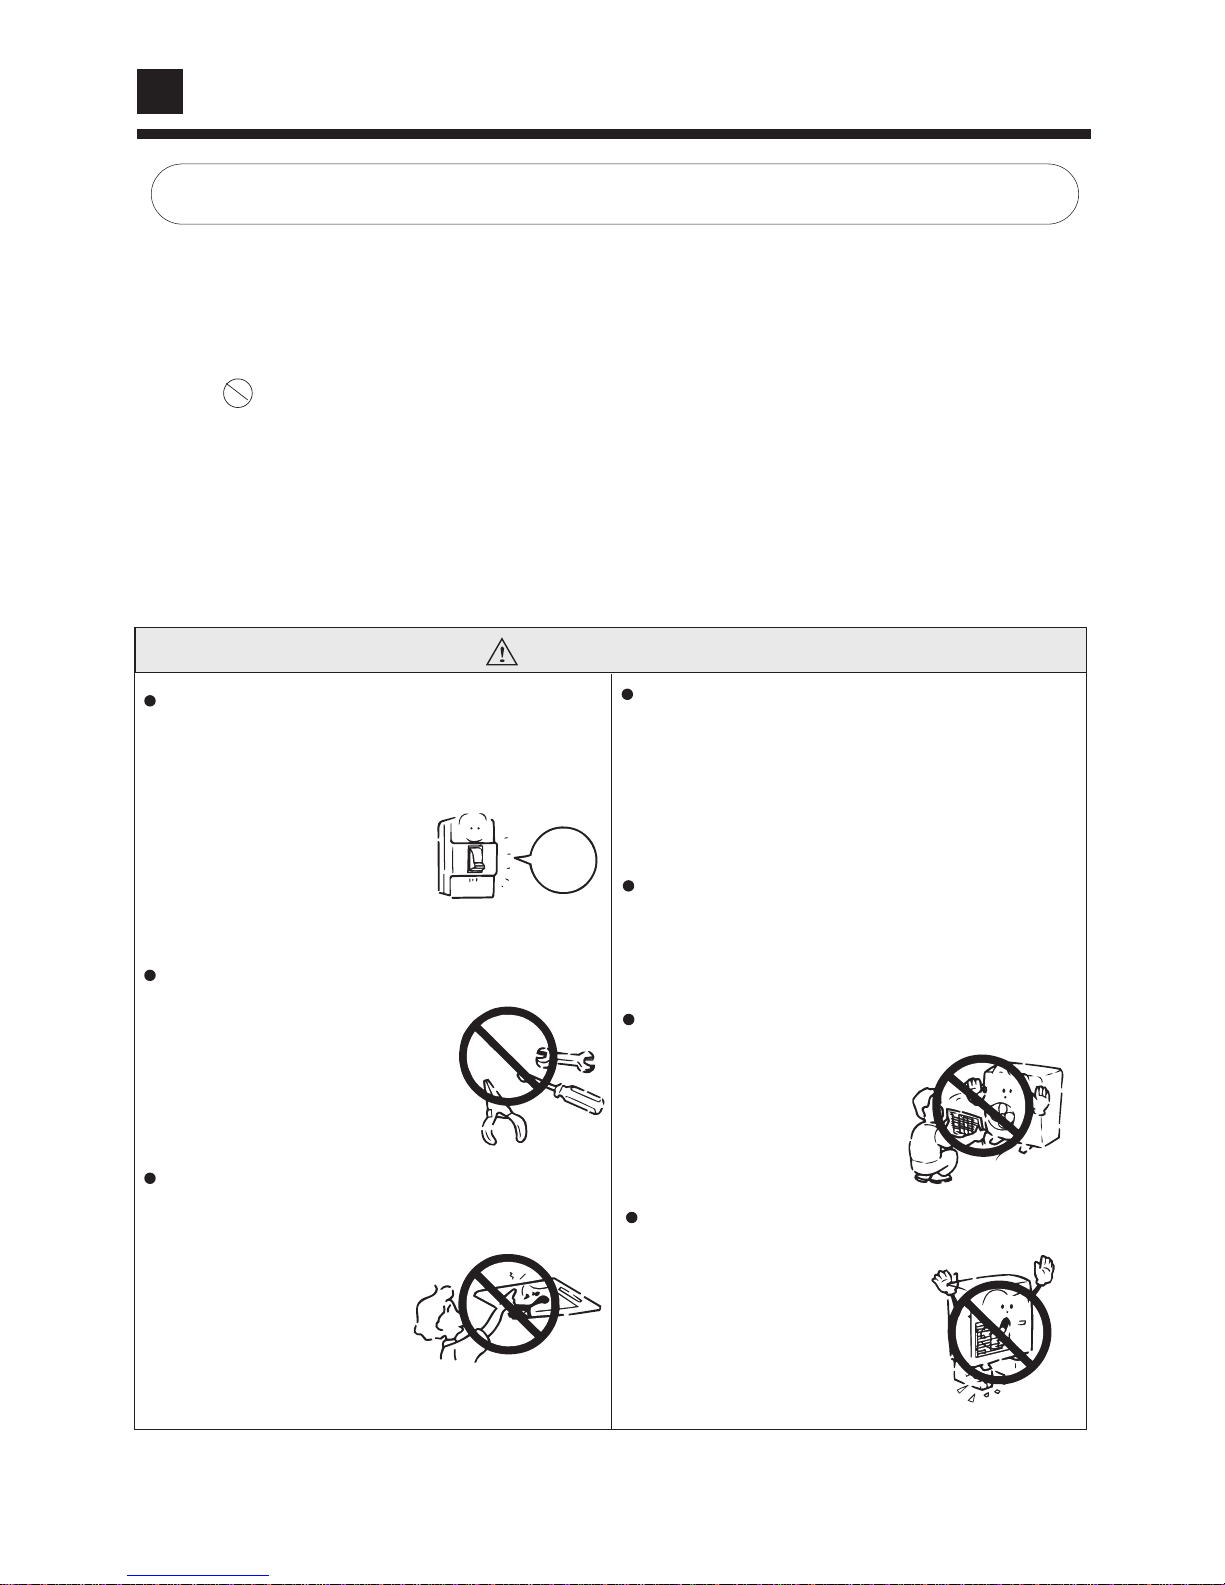
WARNING
If any abnormal phenomena are found (e.g.
smell of firing),please cut off the power supply
immediately, and contact the dealer to find outí
the handling method.
When need maintenance and
repair,call dealer to handle it.
Donít put figures or any other
things into the inlet/outlet and
swing louver while the conditioner is in operation
Call the dealer to take measures to prevent the
refrigerant from leaking.
Switch
off
In such case,to continue using
the air conditioner will damage
the conditioner,and may cause
electrical shock or fire hazard.
Incorrect maintenance and
repair may cause water leak,
electrical shock and fire hazard.
Because the high-speed fan
is very dangerous and may
cause injures.
The leaked refrigerant over certain density may
cause oxygen deficient.If the air conditioner is
installed in a small room be sure to take measure
in order to prevent suffocation accident even in
case of refrigerant leakage
When air conditioner is removed and reinstalled
dealer should be responsible for them.
Incorrect installation may cause water leaking,
electrical shock and fire hazard.
Donít dismantle the outlet of the outdoor unit.
The exposure of fan is very
dangerous witch may harm
human beings.
After a long time use of air conditioner the base
should be checked for any damages.
If the damaged base is not
repaired, the unit may fall
down and cause accidents.
9
Safety Cautions
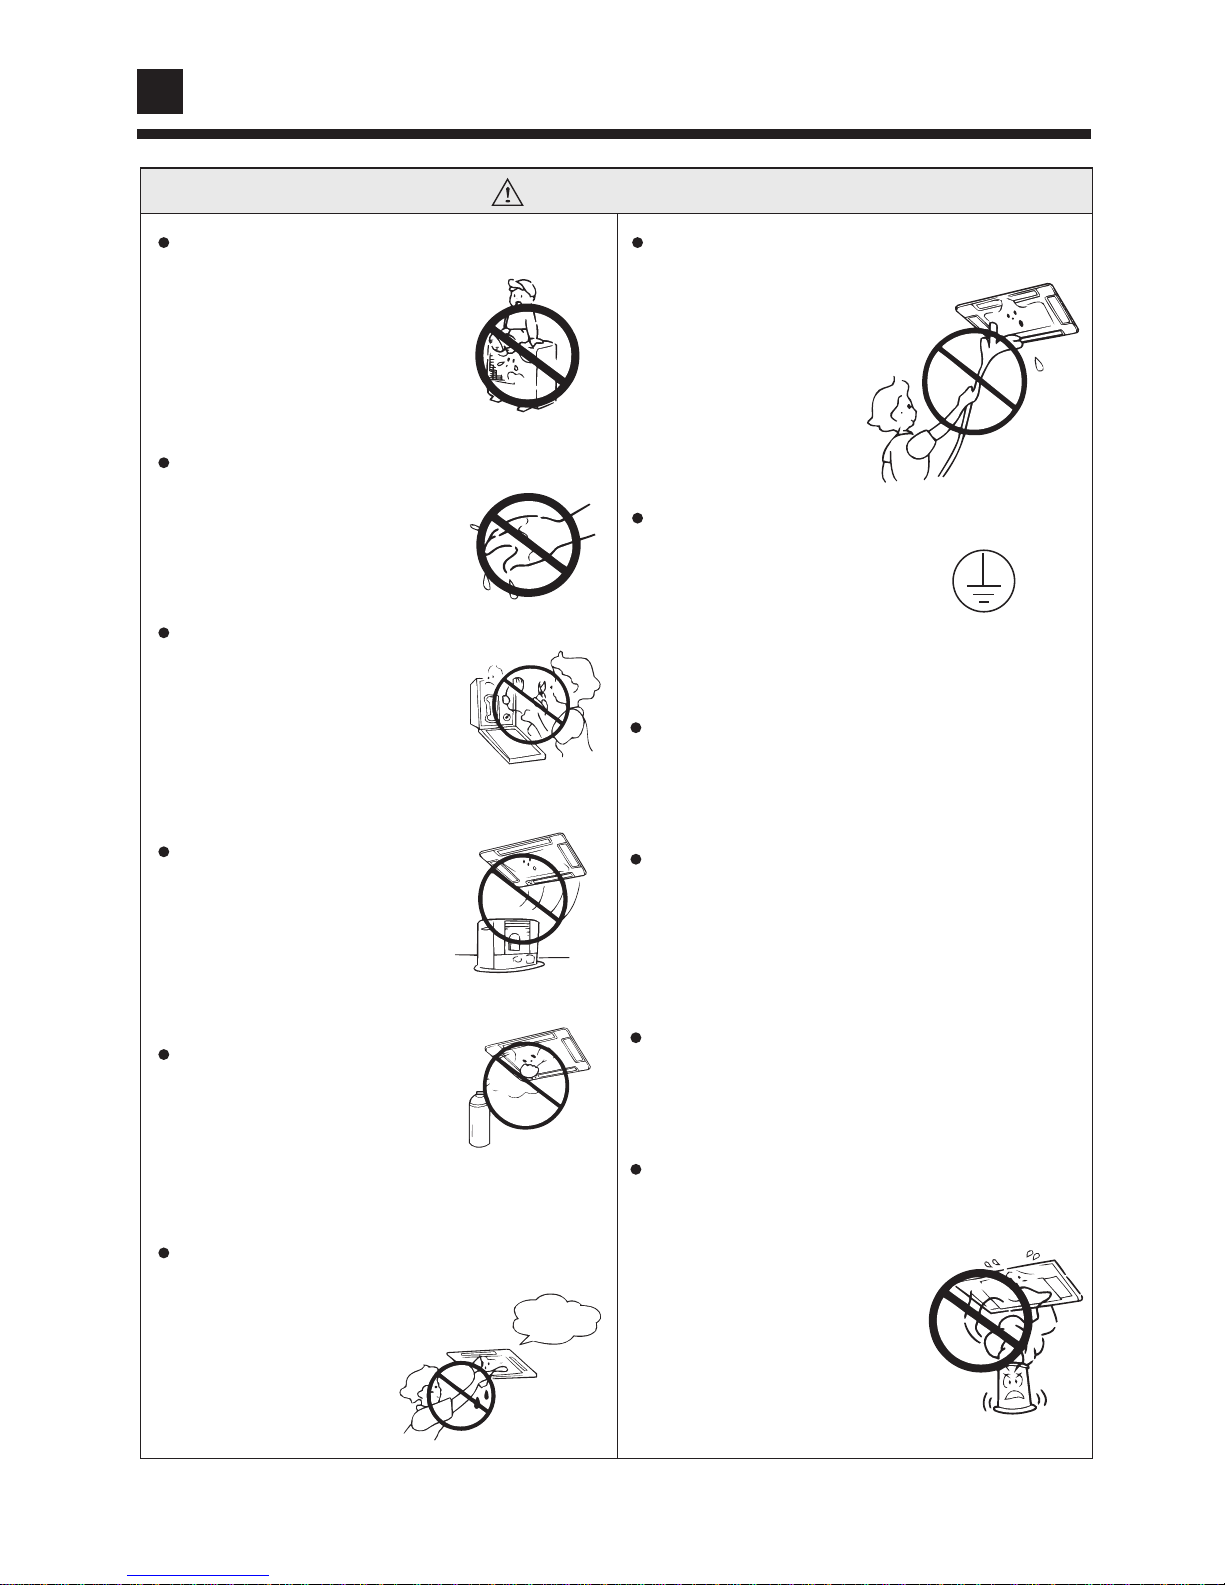
WARNING
No goods or nobody is permitted
to be placed on or stand on
outdoor unit.
Donít clean air conditioner
with water.
The falling of goods and
people may cause accidents.
Don't operate the air conditioner with
damp hands.
Otherwise will be shocked.
Only use correct type fuse.
May not use wire or any other
materials replacing fuse,otherwise may cause faults or fire
accidents.
Donít place any burning
unit in the airflow of air
conditioner,which may
cause incomplete
combustion
No inflammable spray fluid
should be permitted to be
placed or used near to air
conditioner,otherwise may
cause fire accident.
Air conditioner should be
cleaned only after power
supply is cut off to keep
from shock or hurt.
Otherwise may cause shock.
Connect earthing wire.
Earthing wire should not be
connected to the gas pipe,
water pipe,lightning rod or
phone line,incorrect earthing
may cause shock.
Use discharge pipe correctly to
ensure efficient discharge.
In correct pipe usage may cause water
leaking.
Air conditioner canít be be installed in
the environment with inflammable gases.
The inflammable gases near to air conditioner
may cause fire hazard.
Installed electrical-leaking circuit breaker.
When use the fumigating insecticide
donít operate air conditioner.
Otherwise the poisonous chemicals
may settle in air conditioner,
which harm the health of
chemical-allergic people.
It easily causes electrical shock without
circuit breaker.
Not permitted
when running
10
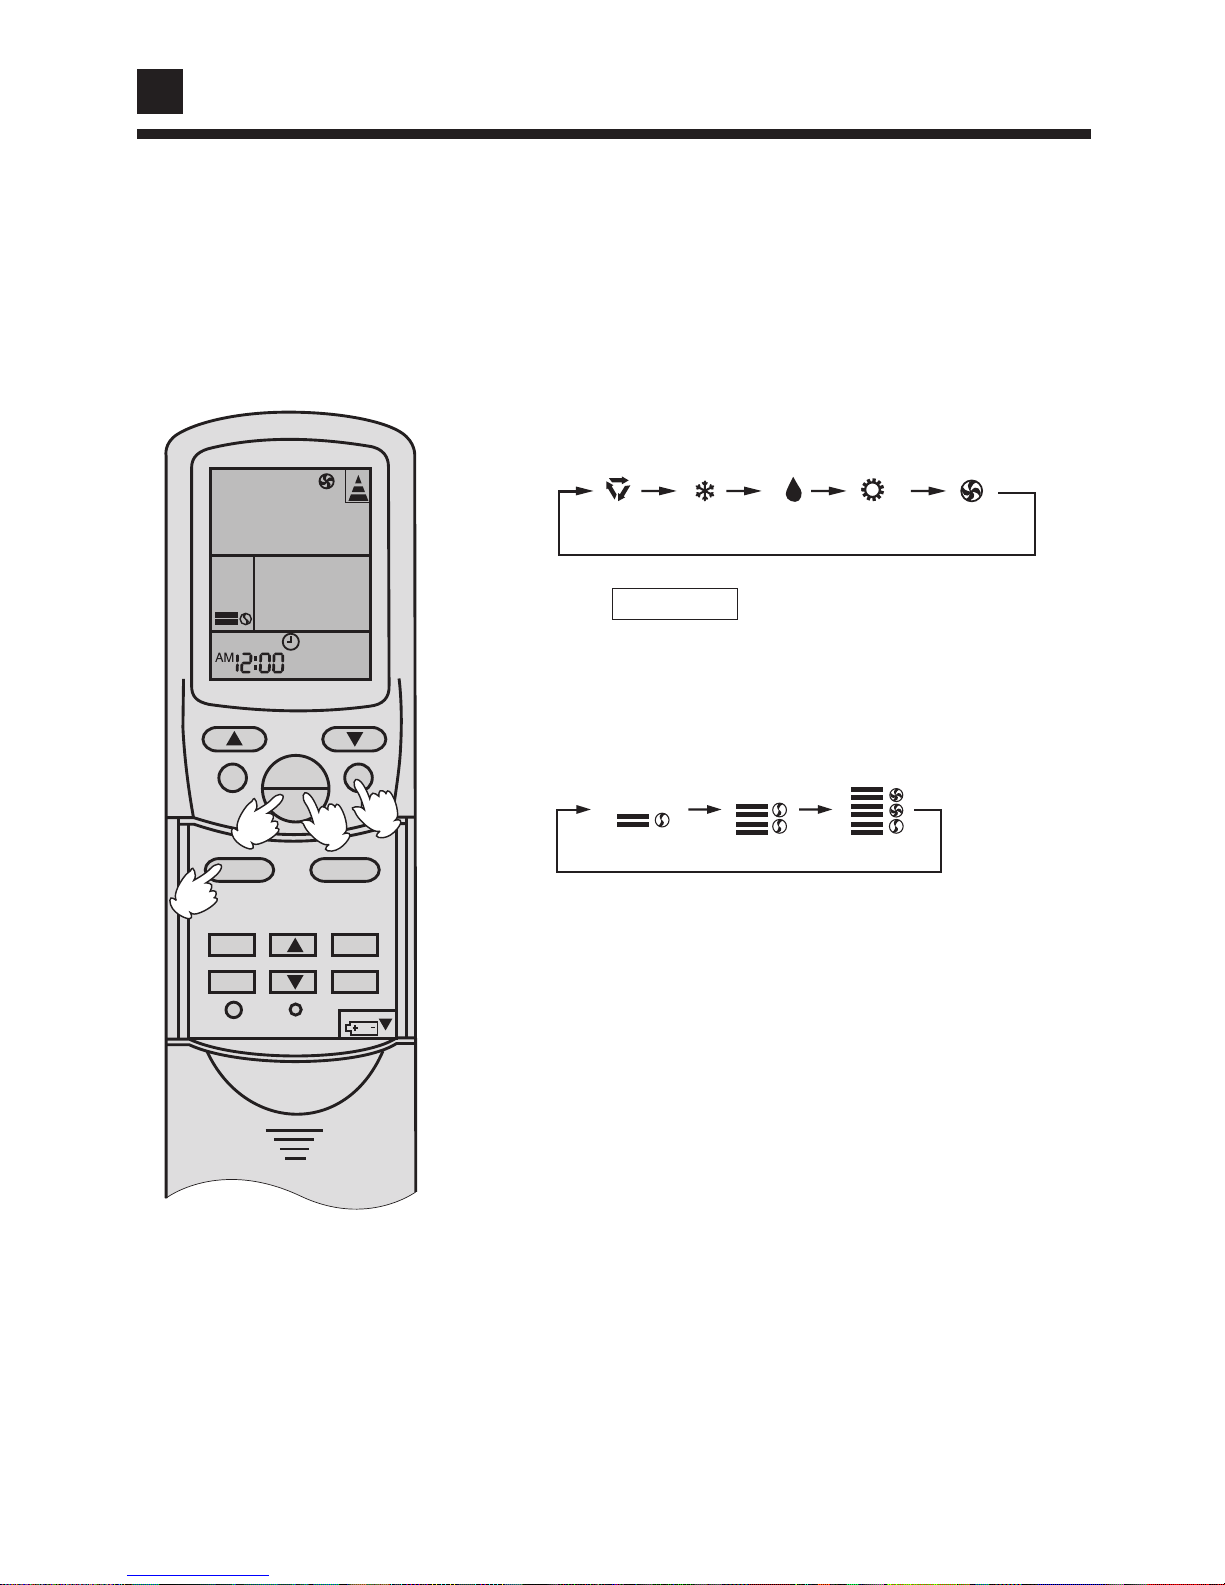
Guide to Operation
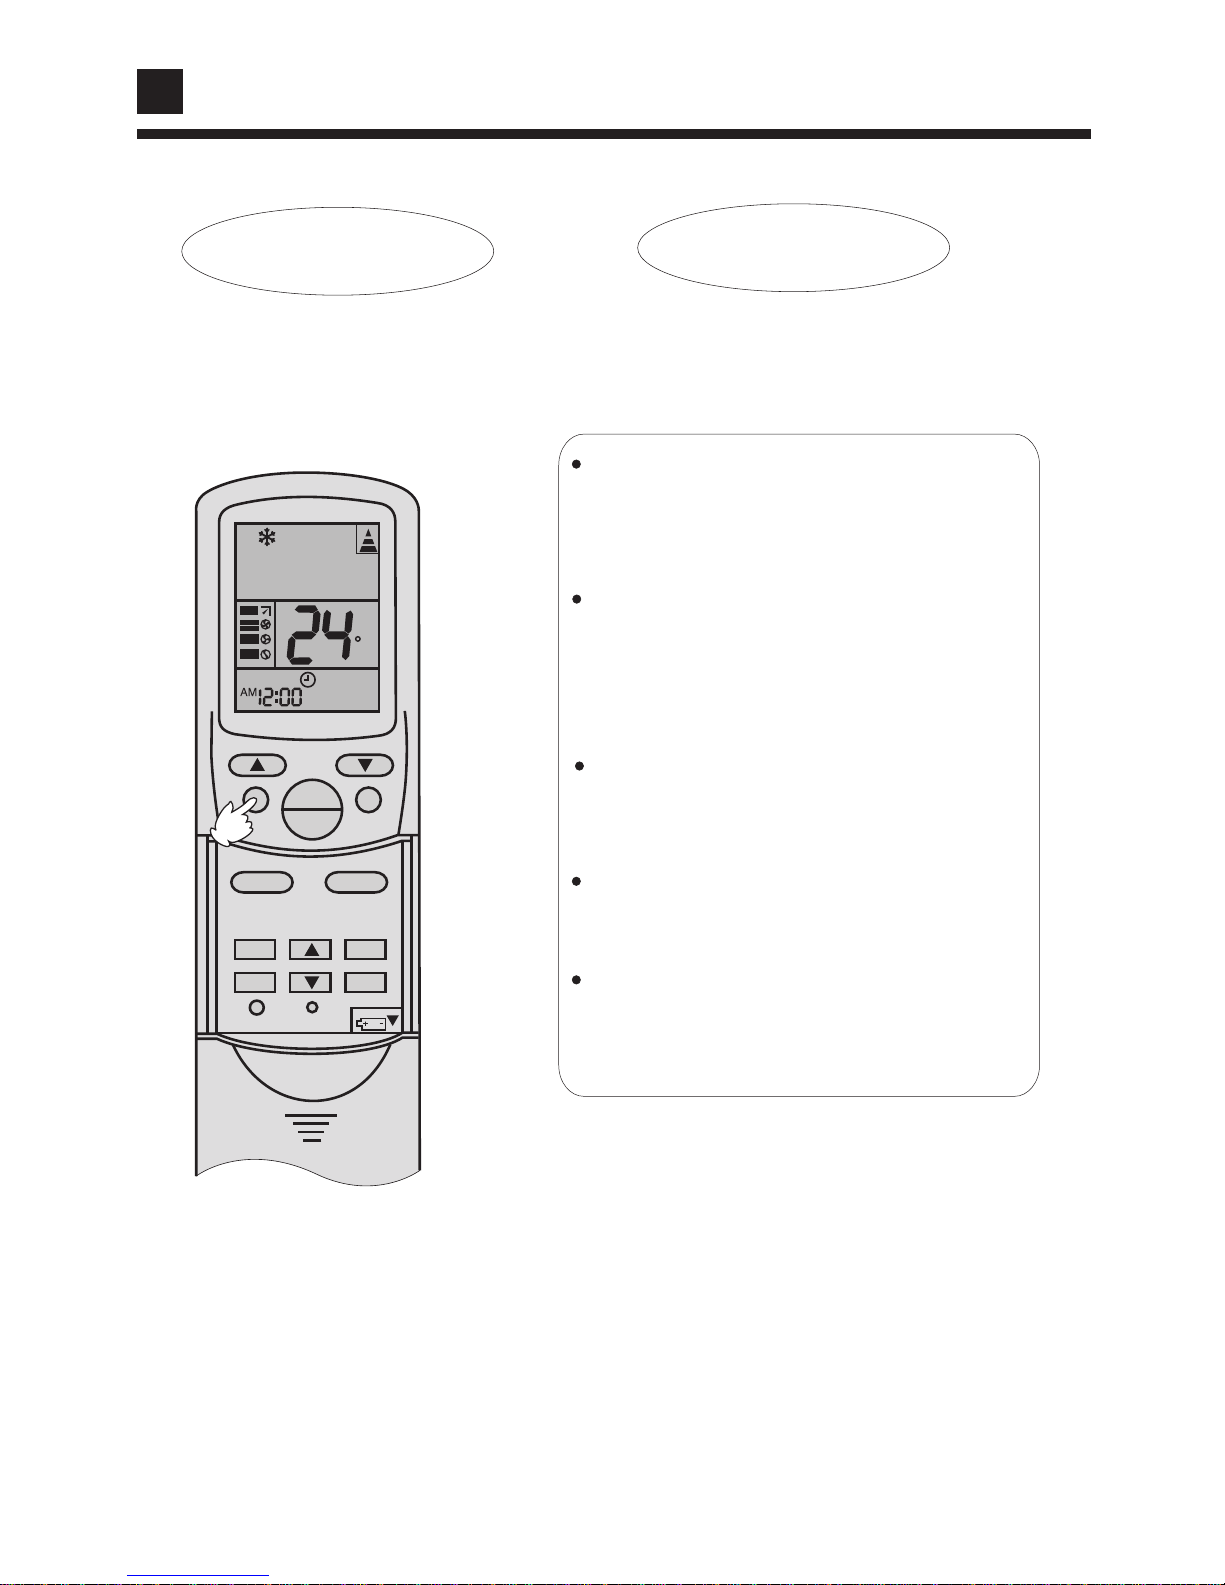
Fan Operation
1.Unit start
Press ON/OFF button, unit starts.
Previous operation status appears on LCD (except for
TIMER ,SLEEP, and SWING setting).
2.Select operation mode
Press MODE button. For each press,operation mode
changes as follows:
3. Adjust fan speed
Press FAN button.For each press,fan speed changes
as follows:
Air conditioner will run at the selected fan speed.
When in AUTO mode,unit will adjust fan speed
according to room temperature automatically.
4. Unit stop
Press ON/OFF button,unit stops.
AUTO FANHEAT
COOL
DRY
Then select FAN
About FAN Operation
FAN operation refers that the air conditioner only run
FAN,no COOL and HEAT operation,and in this status
the unit canít operate AUT O FAN as well no temperature
settings.
LOW
MID
HIGH
TEMP
SWING
FAN
MODE
ON
OFF
SLEEP
SET
FILTER
CLOCK
TIMER
LOCK
RESET
4
1
3
2
11
Guide to Operation
AUTO run, COOL , HEAT and DRY Operation
1. Unit start
Press ON/OFF button,unit starts.
Previous operation status appears on LCD (except for
TIMER,SLEEP and SWING setting)
3.Temperature setting
Then select AUTO run or select COOL operation or
select DRY operation or select HEAT operation
3
3
2.Select operation mode
Press MODE button. For each press,operation mode
changes as follows:
Press TEMP button.
Every time the button is pressed, temp. setting increases
1 C, if the button is kept pressed, temp. setting will increase
quickly .
Every time the button is pressed, temp. setting decreases
1 C, if the button is kept pressed, temp. setting will decrease
quickly .
Set proper temperature
4.Adjust F AN button
Press FAN button .For each press, fan speed changes as
follows:
Air conditioner will run at the selected fan speed.
5. Unit stop
Press ON/OFF button,unit stops.
In ATUO mode,the temperature setting is not displayed on LCD.In this mode,during running air conditioner
will select COOL ,HEAT or F AN mode automatically according to the room temperature.
In DRY mode,when room temperature becomes 2 C higher than temperature setting, unit will run intermittently
at LOW speed regardless of FAN setting,When room temperature is lower than temperature setting,unit will
only run FAN operation.
In HEA T mode,warm air will blow out after a short period of time due to cold-draft prevention function,
TEMP
SWING
FAN
MODE
ON
OFF
SLEEP
SET
FILTER
CLOCK
TIMER
LOCK
RESET
5
1
4
AUTO
FANHEATCOOL DRY
C
AUTO
AUTO
LOW
MID HIGH
T emp. setting +2 C
T emp.setting
On reaching temp.setting
+2 C, unit will run in mild
DRY mode.
Ultra-low air flow
COOL operation starts
when room temp.is
higher than temp.
setting.
2
12
Guide to Operation
Press SWING button.
Up and down airflow vary upwards
and downwards.Left and right airflow
vary left and right sides.
Always use SWING button on the remote
controller to adjust louver or flaps because
if adjust it by hand may result in air conditioner running abnormally.
Displays on the LCD disappear.
All indicators on the indoor unit go out.
Swing louver automatically close the air outlet.
After unit stops:
AUTO SWING
Air flow direction adjust
AUTO SWING
When the automatic swing louver moves to the proper
angle,press SWING button can fix the airflow direction.
TEMP
SWING
FAN
MODE
ON
OFF
SLEEP
SET
FILTER
CLOCK
TIMER
LOCK
RESET
Please carefully set temperature setting
when infants,children,old people and
patients use the air conditioner.
In case of great humidity ,If the vertical flaps
all towards left or right,the louver will drop
water.
Donít pull louver directly by hand which will
make it work abnormally.If the louver work
abnormally,stop unit,restart and adjust by
remote controller.
Hints:
As cold airflows downward in COOL mode,adjusting airflow horizontally will be much more helpful
for a better air circulation
AS warm airflows upward in HEAT mode,adjusting airflow downward will be much more helpful for
a better air circulation.
Be careful not to catch a cold when cold air blows downward directly.
C
In COOL or DRY mode, the louver is not
permitted to be in downwards position
for a long time because the water vapor
close to the grille may be condensed and
the water may drop from the air conditioner.
AUTO
 Loading...