

Gsmart Classic LTE User Manual
Classic LTE|0
GSmart Classic LTE
User Manual

Classic LTE|1
Copyright
All mobile products by GIGA-BYTE COMMUNICATIONS INC. mentioned in this document,
including the device, accessories, software, text, music, and pictures, are owned by, or
authorized by original manufacturers to GIGA-BYTE COMMUNICATIONS INC. Reproduction,
transfer, distribution, or storage of part or all of the contents in this document in any form
without the prior written permission of GIGA-BYTE COMMUNICATIONS INC. is prohibited.
GIGA-BYTE COMMUNICATIONS INC.
Classic LTE|2
General Information
This section contains important information on safe and efficient operation. Please read this
information before using the device. Ignorance of the following notices may lead to violations
of the law.
Before using the device, please make sure you have fully charged the battery.
Do NOT remove the battery from the device during charging.
Before inserting SIM card into the device, make sure that the device is switched off.
Keep the battery in low battery status for long time might cause battery over-discharged or
even reduce battery life. To maintain battery in good lifecycle please recharges it once in
low battery.
Please fully charge the battery if you are going to leave the phone without use for long time
to prevent battery goes over-discharged.
Do NOT attempt to dissemble the device on your own. This should be done by an
authorized person.
Use the device in accordance to instructions when in public facilities.
In some countries, it is a violation against the law to record phone conversations. Always
ask permission of the other party when you are going to record a conversation.
To protect your ears, turn down the volume before you use stereo headsets or other audio
devices.
To avoid damaging the touch screen and the device, do NOT apply excessive pressure on
them, and remove the device from your pants’ pocket before you sit down. It is also
recommended that you only use the stylus or your finger to interact with the touch screen.
It is not covered by the warranty that you crack the touch screen because of the improper
usage.
When you use the device for a long time, such as talking on the phone, browsing online, or
charging the battery, the device may become warm. In most cases, this condition is
normal.
Do NOT push unauthorized objects into slots and openings in your device.
The device should be placed away from heat sources such as stoves, radiators, heat
registers, or other products that produce heat.
Condensation may form on or within your device, when you move your device between
environments with very different temperature and/or humidity ranges. To avoid damaging
your device, make the moisture to evaporate before you use the device.
To avoid damaging your device, do NOT put your device on an unstable table, stand,
bracket, or other places.
Before you clean your device, unplug it, please. Use a damp cloth for cleaning, but do
NOT use water, liquid cleaners, or aerosol cleaners to clean the touch screen.
Classic LTE|3
Table of Contents
Copyright
1
General Information
2
1. Getting Started
4
1.1 Your Phone
4
1.2 Install or uninstall the SIM Card, Battery, and Memory Card
4
1.3 Charging Battery
6
1.4 Turn Phone On or Off
6
2. Basic
7
2.1 The Home Screen
7
2.2 Contacts
9
2.3 Phone Lock/Unlock
9
2.4 Personalization
10
2.5 Date and Time
10
3. Pre-Installed Programs Introduction
11
4. Phone Calls & Messages
12
4.1 Voice & Video Calls
12
4.2 Create / send text message
13
4.3 Multimedia Message
14
5. Wi-Fi & Bluetooth
14
5.1 Wi-Fi
14
5.2 Bluetooth
14
6. Camera
15
7. Manage Phone
16
7.1 Protect Phone
16
7.2 Backup or Reset Phone
16
8. Specifications
17
Classic LTE|4
1. Getting Started
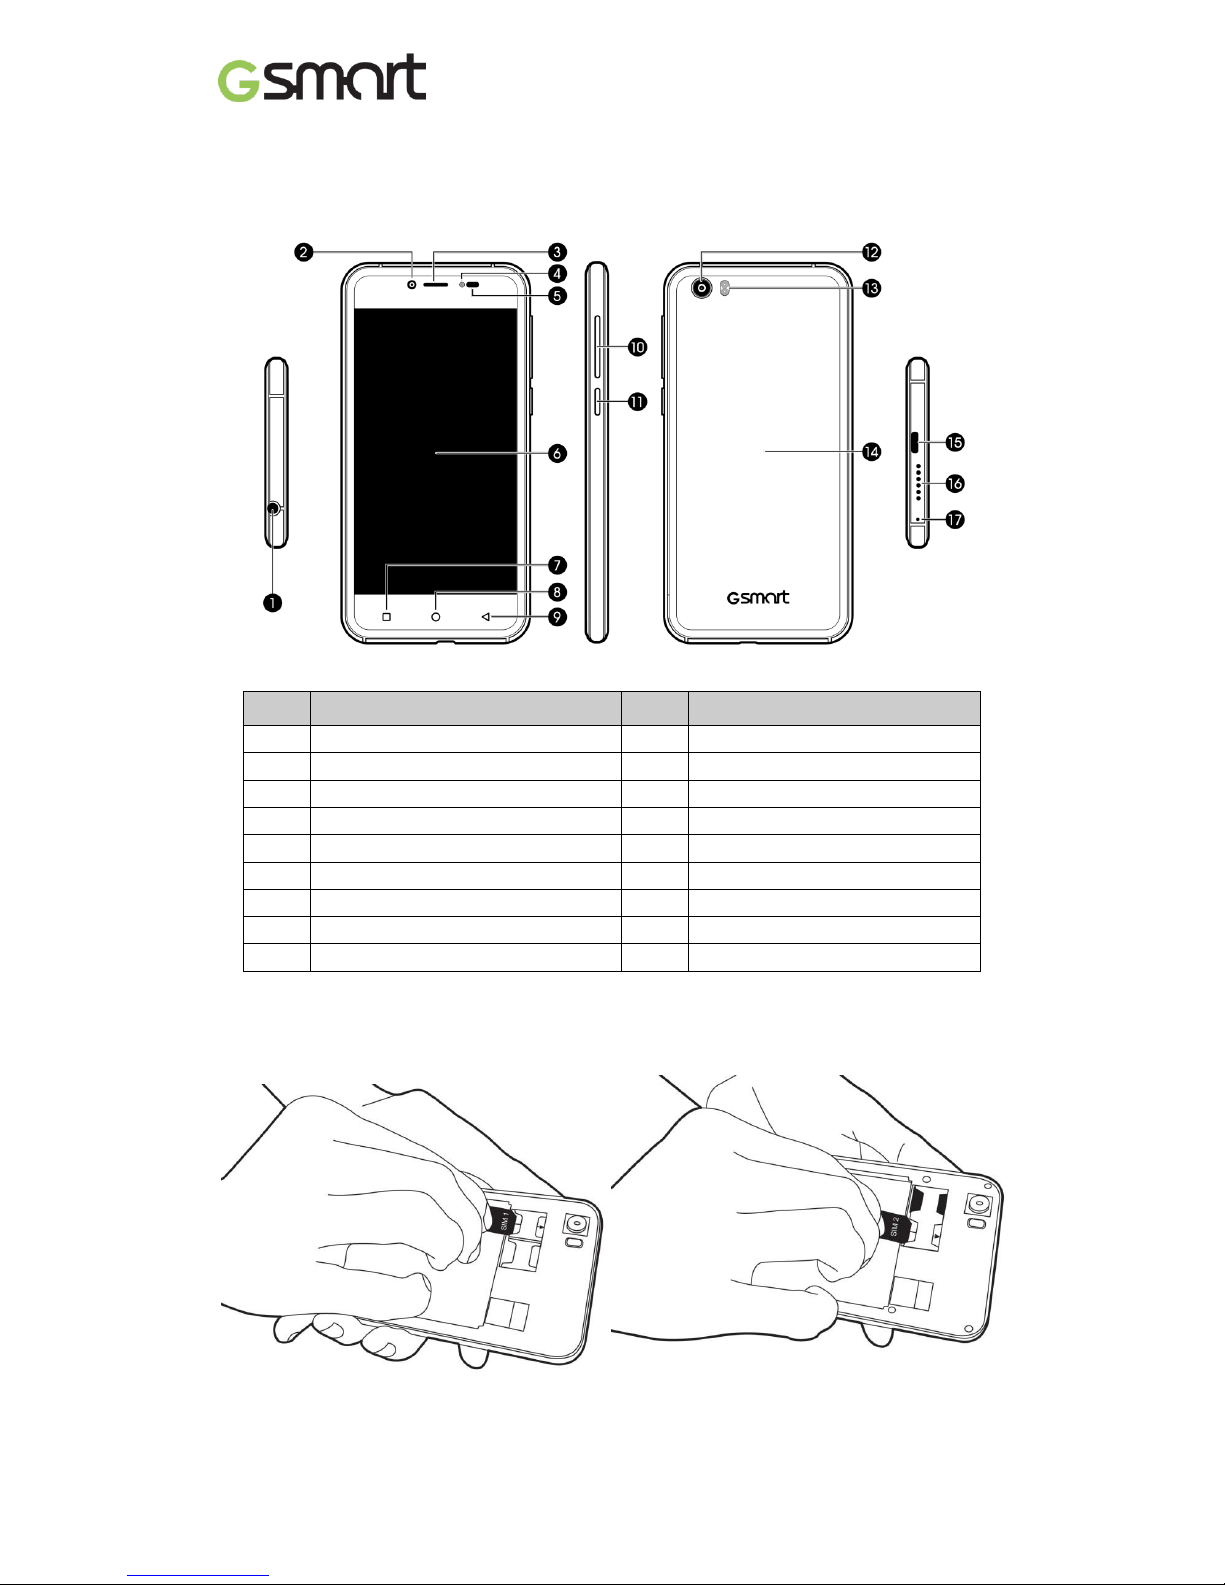
1.1 Your Phone
No
Items
No
Items
1
Earphone Jack
10
Volume Key
2
Front Camera
11
Power Key
3
Receiver
12
Camera
4
Flash
13
Flash
5
Proximity Sensor/ Light Sensor
14
Battery Cover
6
Display & Touch Screen
15
Micro USB Port
7
Recents
16
Speaker
8
Home
17
Microphone
9
Back
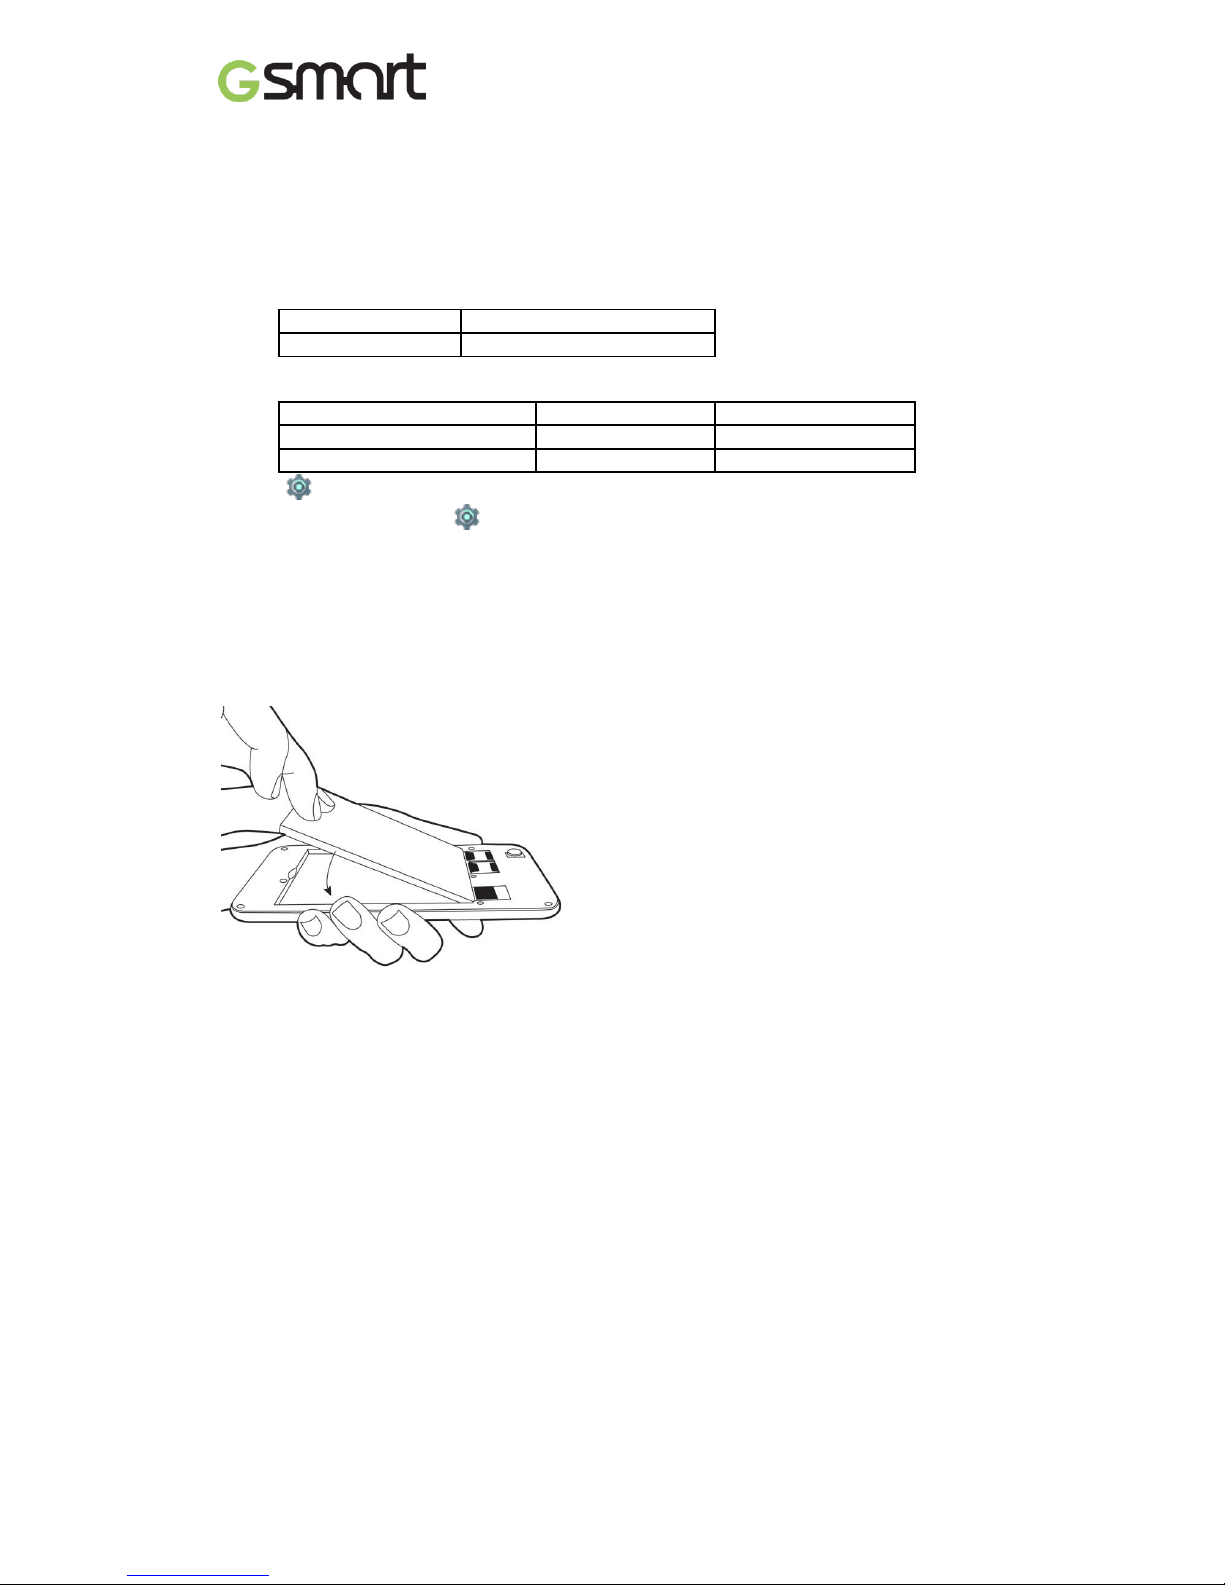
1.2 Install / uninstall SIM Card, Battery, and Memory Card
Install SIM card
Install the SIM1 card
Install the SIM2 card
Classic LTE|5
Remove SIM card
Turn off phone slide SIM card out.
NOTE:
4G Data Service (if the SIM card supports)
• 4G data service is switchable between SIM1 and SIM2.
• One SIM card:
The inserted SIM slot will be assigned to 4G by default.
In SIM1
4G in SIM1
In SIM2
4G in SIM2
• Two SIM cards:
4G in SIM1 by default and switchable to SIM2.
SIM1
SIM2
Factory default
4G & 3G
2G
User switchable
2G
4G & 3G
Tap SIM cards Cellular data to select a SIM for data
• Data on/off switch: tap Data usage cellular data
Battery
Phone comes with a battery. Battery life may vary depending on availability of local networks
and individual usage.
Install battery
Put battery contacts connected to the connectors in battery slot.
Remove battery
Use fingertip to lift battery and remove it.
Replace back cover
(1) Insert cover into slot from the bottom.
(2) Press all around back cover fully until hearing clicks.
Memory card
Micro SD card might be required to store photos, music, videos and other data if internal
Storage is full.

Classic LTE|6
Install memory card
To remove the memory card
(1) For safe removal, tap Storage & USB tap Unmount SD card
(2) Push memory card to eject it from slot.
To set default storage
Tap Storage & USB Default write disk to set default storage.
1.3 Charging Battery
Battery has been partially charged at factory, you may need to recharge it before you can
switch on phone for the first time.
(1) Connect USB cable to AC adapter connect to device via USB cable.
(2) Plug AC adapter to socket start charging.
(3) For safety, only use original charger that comes with your device. Any possible damage
caused by using non-original charger or any other equipment will not be under GIGABYTE
Communication Inc.’s liability.
NOTE:
CHARGE PHONE IMMEDIATELY IF BATTERY IS LOW. CHARGE FOR AT LEAST 10
MINUMTES TO REACTIVATE BATTERY IF IT IS OVERDISCHARGED.
For safety, don’t remove battery from phone while AC adapter is connected or while it is
being charged.
1.4 Turn Phone on / off
Turn phone on
Press and hold power button until phone shown GSmart logo.
Turn phone off
(1) Press and hold power button for few seconds.
(2) A pop-up window appears tap “Power off”.
Classic LTE|7
Set scheduled power on
(1) Tap Set scheduled power on.
(2) Tap one scheduled to set up the Time and Repeat tap “DONE”.
2. Basic
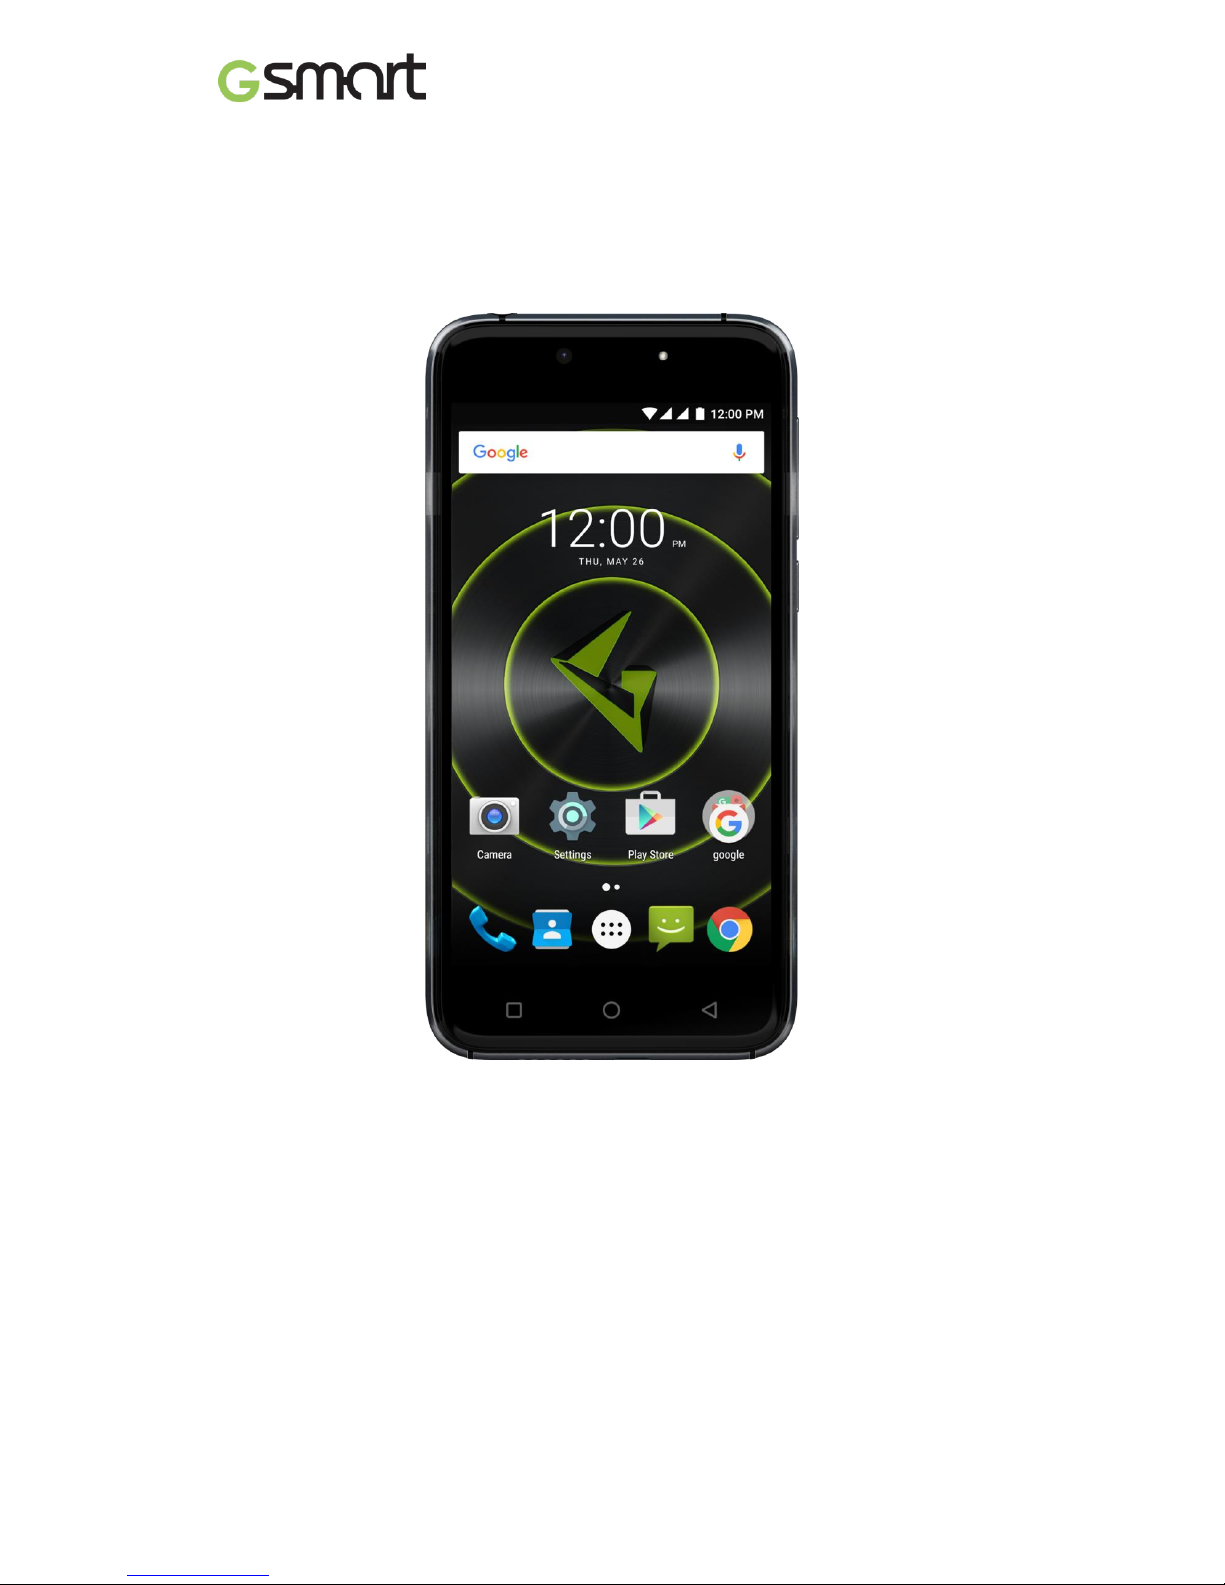
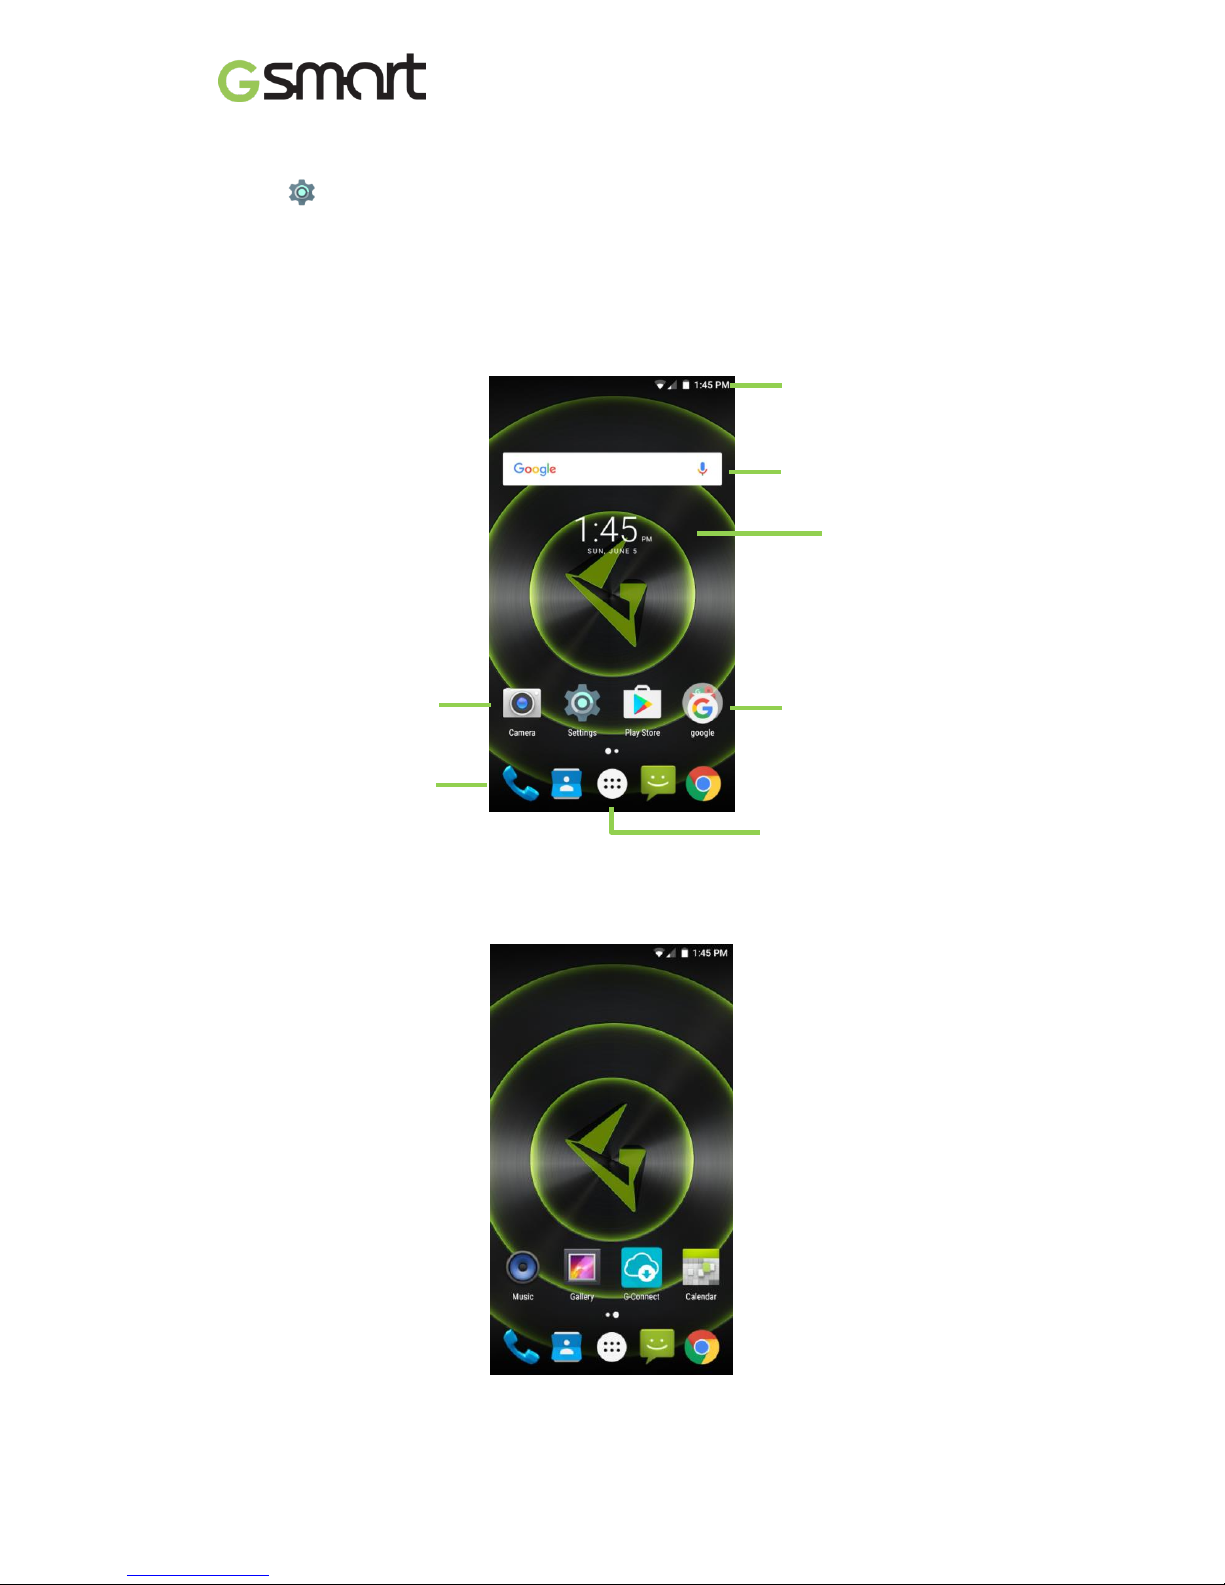
2.1 Home Screen
Default Home Screen:
Self-defined Home Screen: Add your favorite APP shortcuts and widgets.
Main Apps
Tap to launch Apps screen.
App Folder
Widget
App
Status Bar & Icons
Time Widget
Classic LTE|8
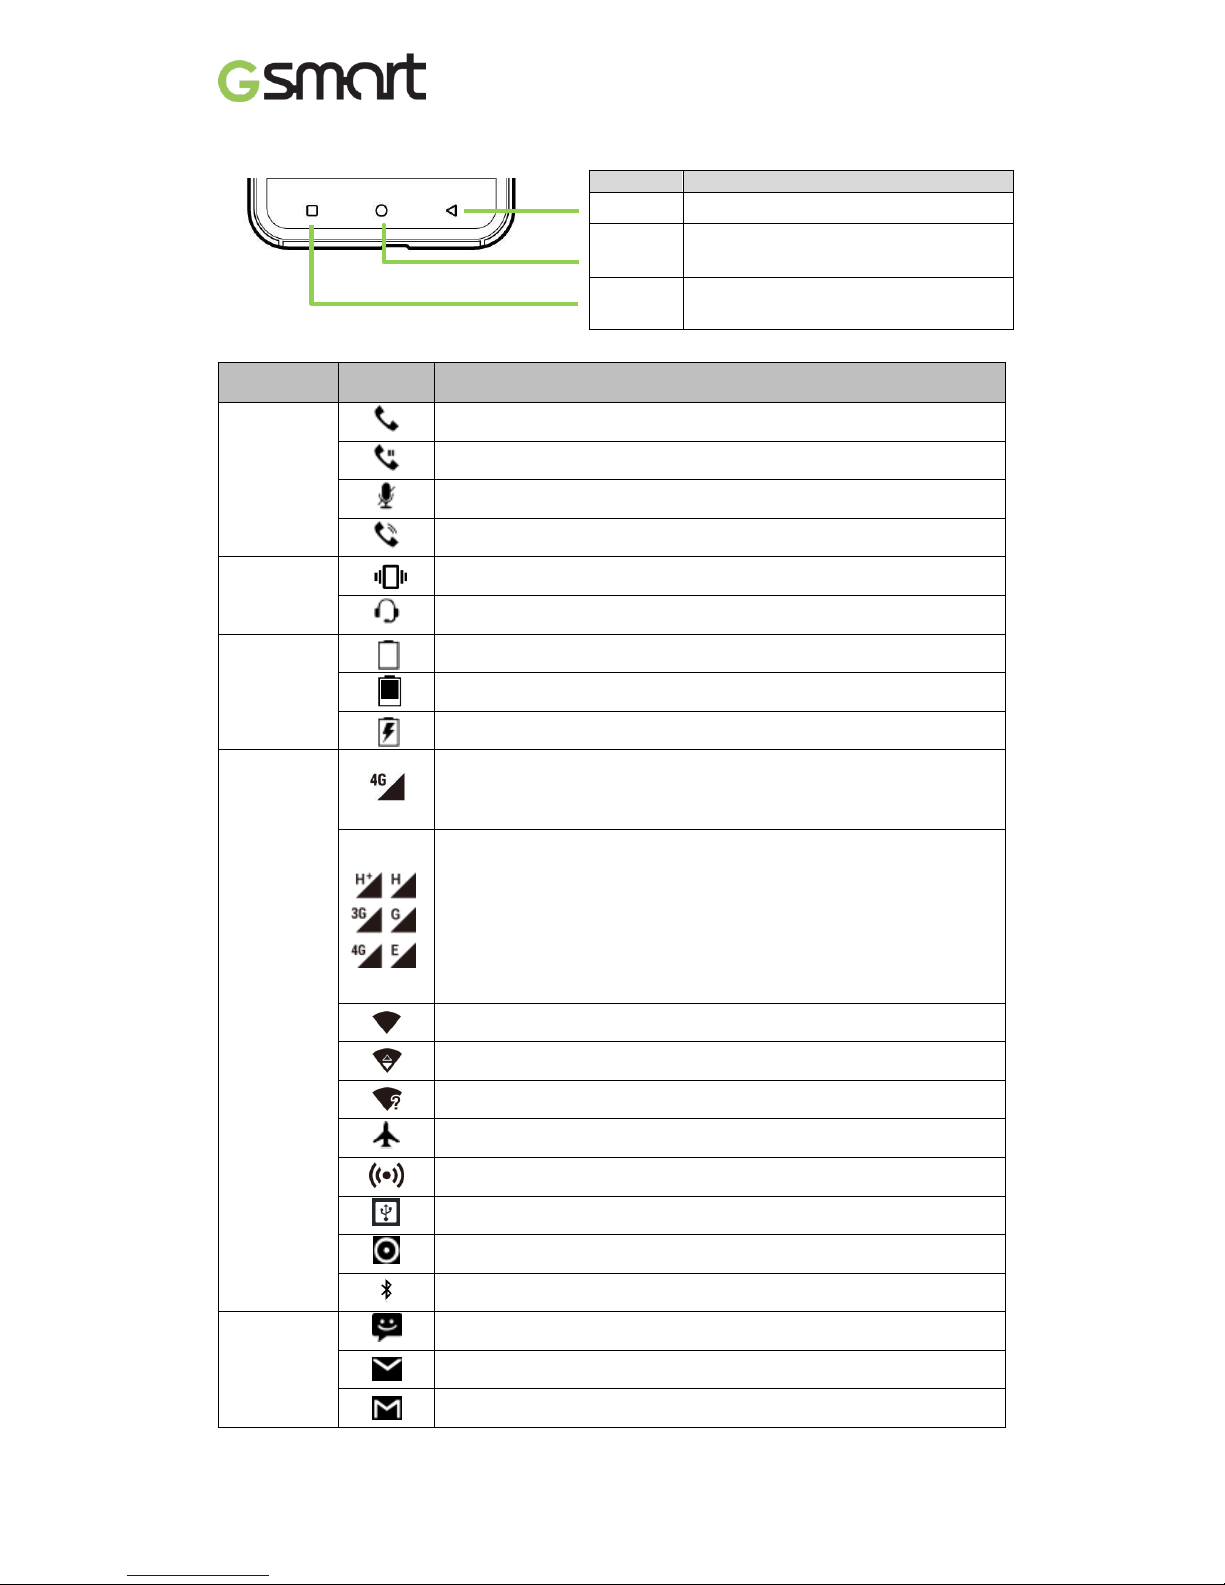
Default items function
Status Icons
Items
Function
Back
Back to the previous page.
Home
Go to Home Screen.
Long press to go to Google search.
Recents
Show recents.
Long press to go to Menu.
Types
Icons
Descriptions
Phone call
Call in progress.
Call on hold.
Call muted.
Speaker on.
Volume
Vibration mode.
Wired headset connected.
Battery
Battery full.
Battery low.
Battery in charging.
Network
and
Connection
Signal strength indicator.
Left: SIM1
Right: SIM2
4G\ HSPA \3G \ EDGE \ GPRS is in progress.
4G:LTE
H+: HSPA+
H: HSPA
3G: WCDMA
E: EDGE
G: GPRS
Wi-Fi connected.
Wi-Fi data in progress.
Wi-Fi network detected.
Airplane mode.
Portable Wi-Fi hotspot activated.
USB Tethering activated.
Both USB tethering and Wi-Fi hotspot activated.
Bluetooth on.
Notification
Unread text message.
Unread e-mail.
Unread Gmail.
Classic LTE|9
2.2 Contacts
Add a Contact
(1) Tap add a new contact.
(2) Choose either of Google Account /SIM1/SIM2/Phone to store a new contact.
(3) New contact screen appears.
(4) Fill in contact information save.
NOTE:
Contact portrait is not editable to contacts stored in SIM cards.
Search for Contacts
Tap to search.
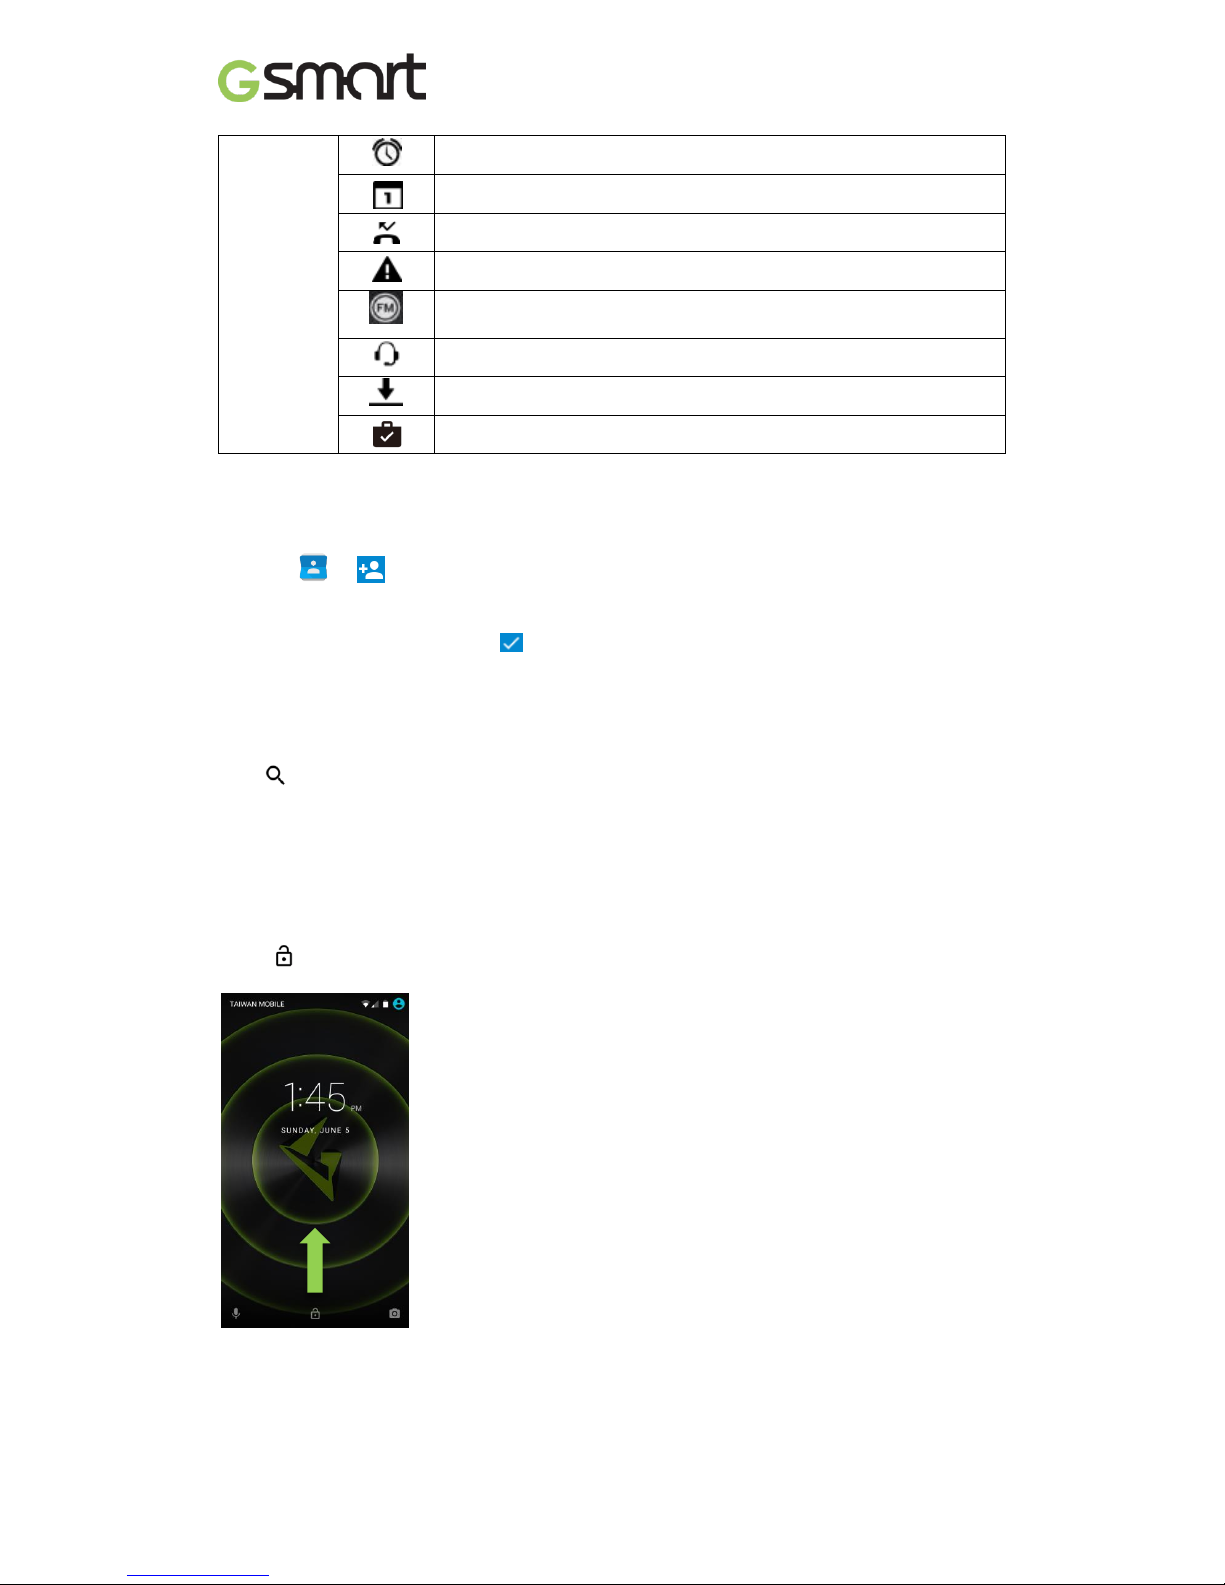
2.3 Phone Lock/Unlock
Sleep mode
Press power key to turn display on or off.
Unlock phone
Drag icon on screen slide up to unlock.
Notification
Alarm.
Event notification.
Missed call.
General notification.
FM radio activated.
Playing music.
App downloading.
App download/updated completed.
Classic LTE|10
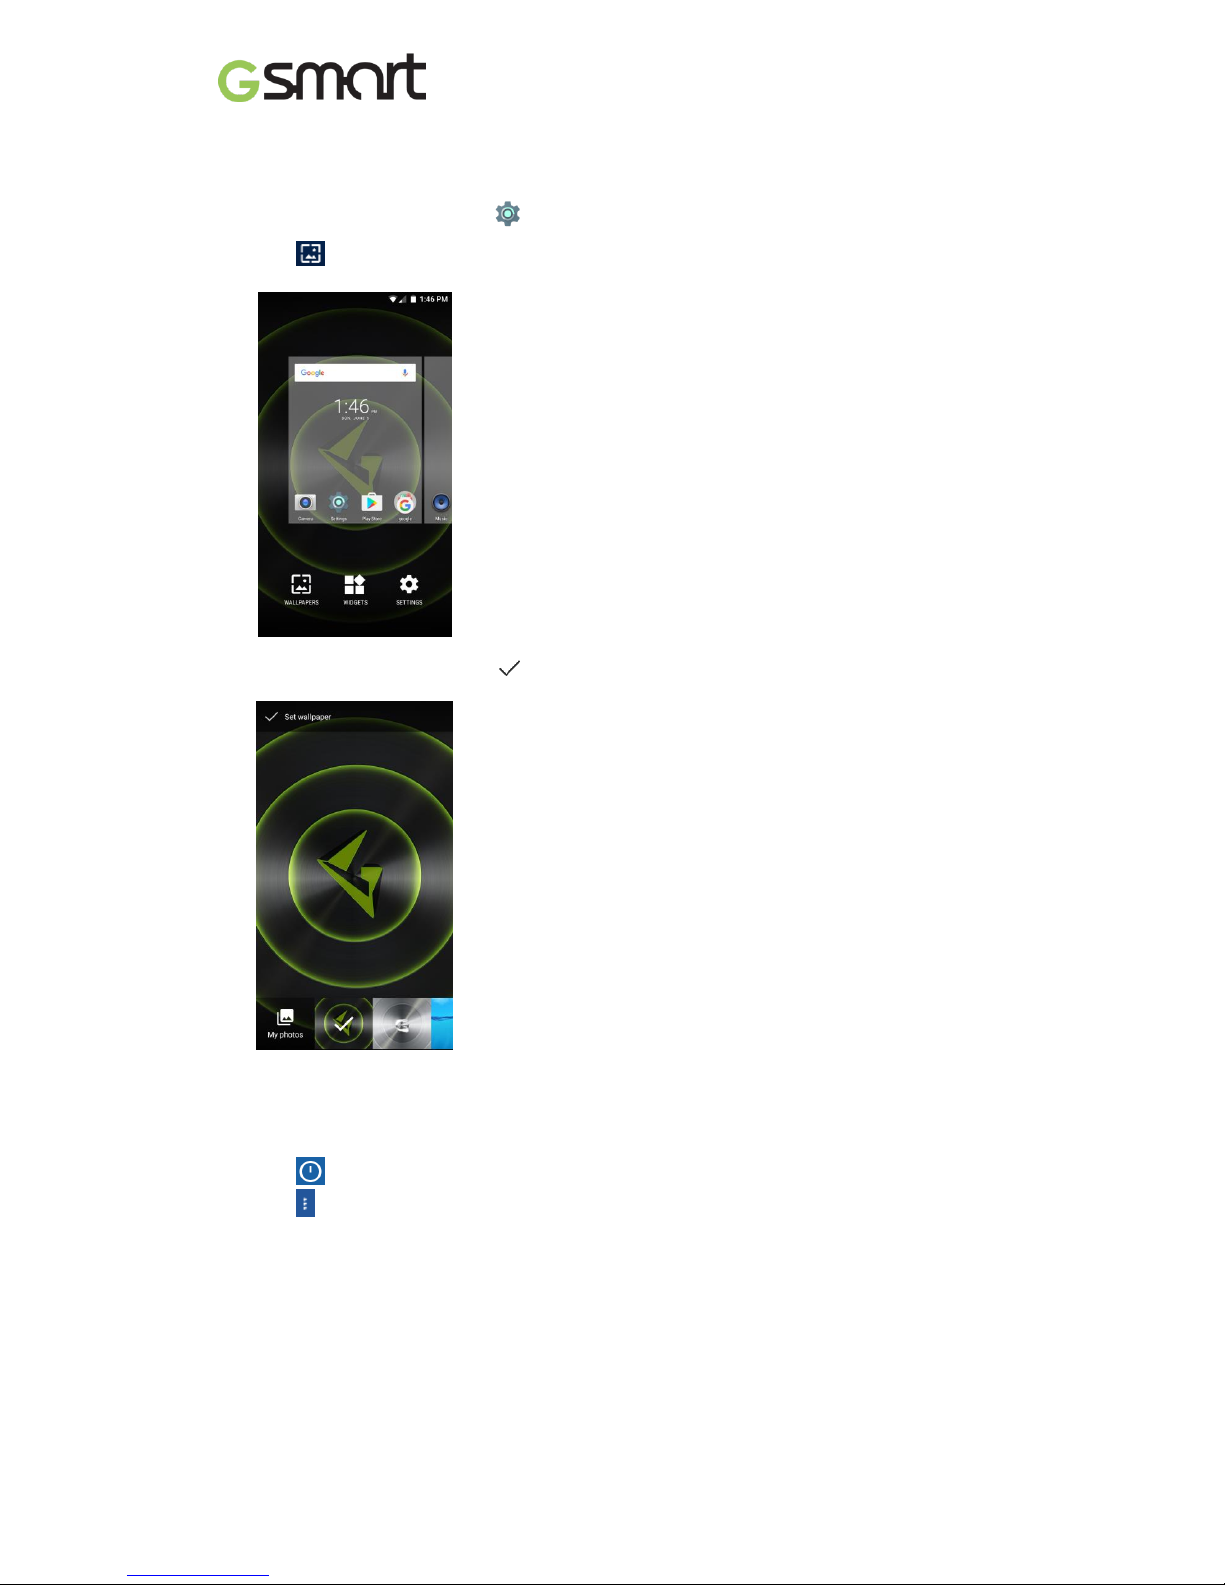
2.4 Personalization
Wallpaper
Long press Home screen or tap Display Wallpaper get into settings.
(1) Tap select pictures.
(2) Tap pictures preview, tap confirm.
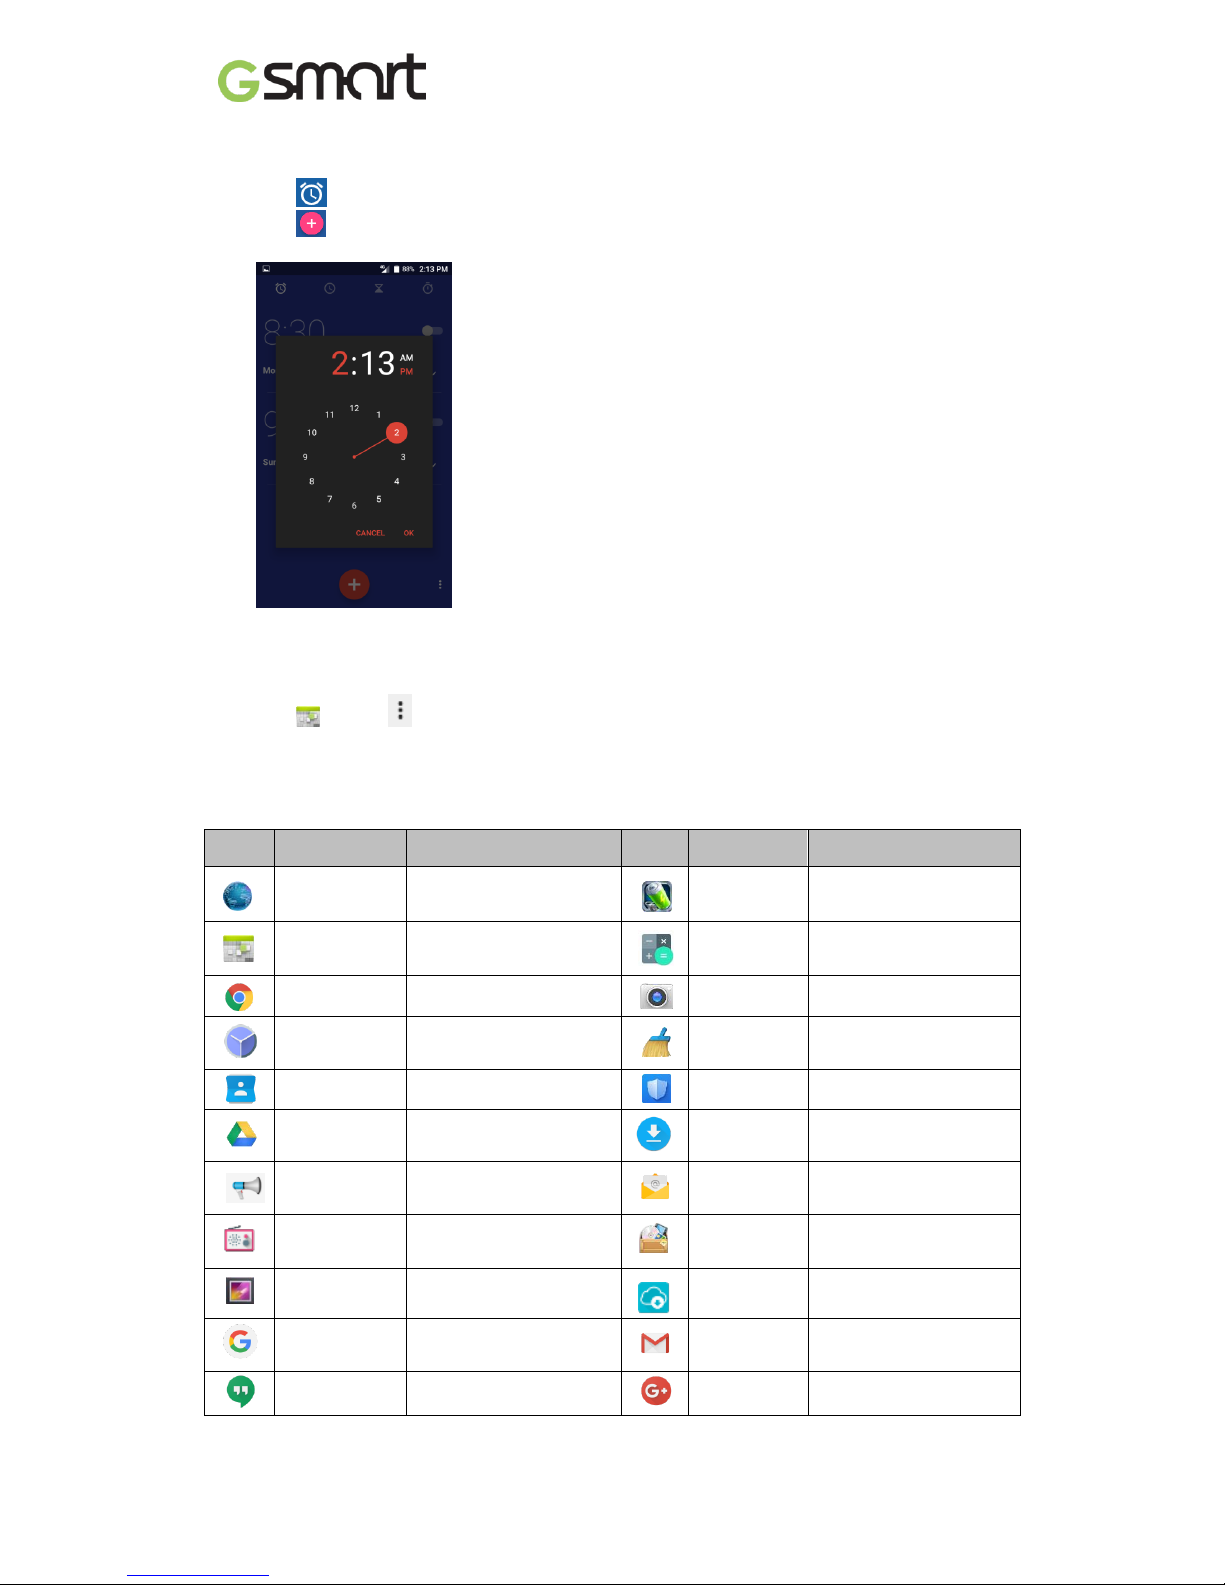
2.5 Date and Time
Set up date and time
(1) Tap Time Widget on Home screen.
(2) Tap
(3) Tap (lower-right) to start settings.
Classic LTE|11
Alarms
(1) Tap Time Widget on Home screen.
(2) Tap
(3) Tap
Calendar
Add new event
(1) Tap tap (upper-right) New event.
(2) Fill in event information.
3. Pre-Installed Programs Introduction
Icons
Programs
Description
Icons
Programs
Description
Browser
Web/Internet browser.
Battery
Doctor
Power management.
Calendar
Schedule management.
Calculator
Calculation
Chrome
Google browser service.
Camera
Capture images/videos.
Clock
Arrange alarm clocks.
Clean
Master
System optimizer.
Contacts
Contacts folder.
CM Security
Antivirus app.
Google
DriveTM
Google drive.
Downloads
View downloaded files.
Emergency
alerts
Information of
emergency and alerts.
Email
E-mail app.
FM Radio
FM radio app.
File
Manager
Manage all files.
Gallery
Photos / videos folder.
G-Connect
System update
information.
Google
Google app.
Gmail
Google e-mail service.
Hangouts
Messenger.
Google+
Google social app.
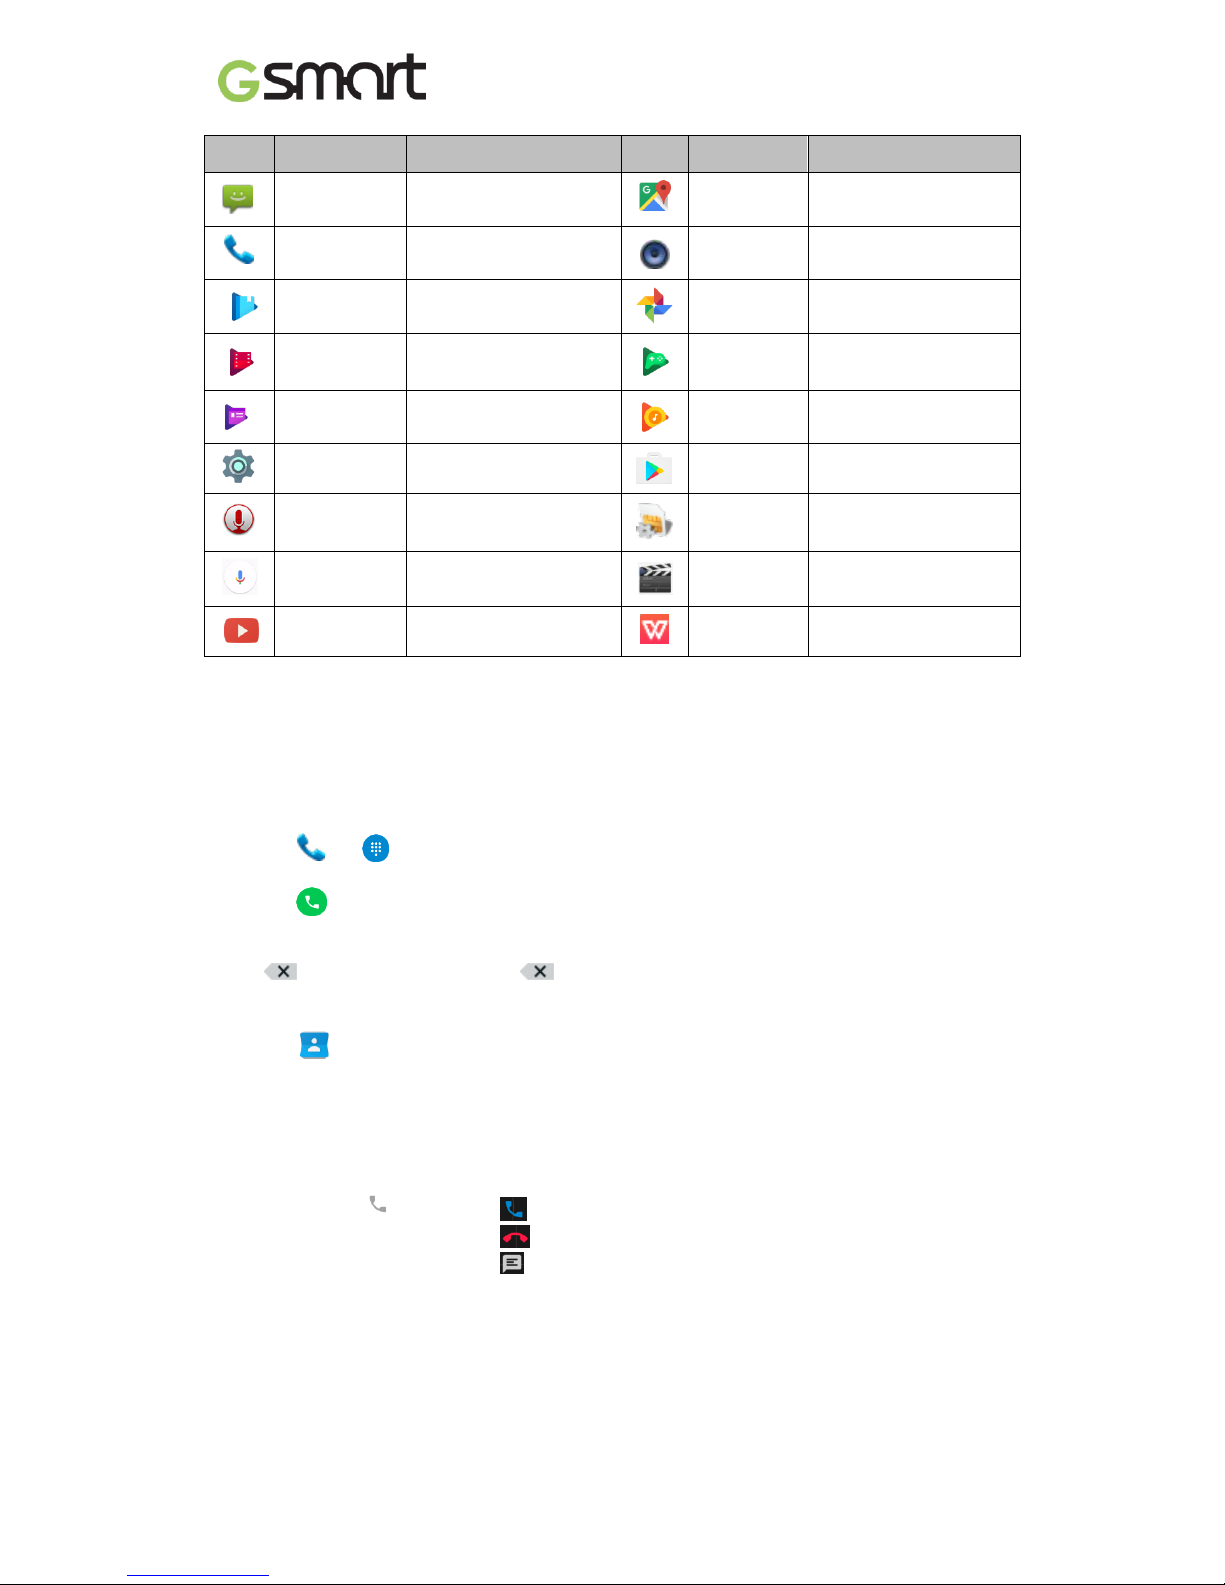
Classic LTE|12
Icons
Programs
Description
Icons
Programs
Description
Messaging
SMS/MMS messenger.
Google
Maps
TM
Map service.
Phone
Phone dialer.
Music
Music player.
Play Books
e-Bookstore.
Photos
Google gallery.
Play Movies
& TV
Video player.
Play
Games
Game center.
Play
Newsstand
News services.
Play Music
Music player.
Settings
Phone settings..
Play Store
App store.
Sound
Recorder
Record voice notes.
SIM Toolkit
SIM related apps.
Voice
Search
Searching by voice.
Videos
Videos folder.
YouTube
Video service.
WPS Office
Office Software.
4. Phone Calls & Messages
4.1 Voice and Video Calls
Make a call from Phone screen
(1) Tap Go into Phone screen.
(2) Input phone numbers.
(3) Tap to call.
NOTE:
Tap delete. Tap and hold erase entire numbers.
Make a call from Contacts
(1) Tap .
(2) Tap a contact to call.
Make emergency calls
Dial 112 for emergency call
Answer a call
• Tap and hold slide to to answer call.
slide to to dismiss call.
slide to to dismiss call and send message.
 Loading...