

Ground Zero Iridium GZIA 1.1000DX-II, Iridium Series Owner's Manual

IRIDIUM-SERIES
AMPLIFIER
OWNER’S MANUAL
GZIA 1.1000DX-II
• Class D Mono Amplifier
• 1 Ohm stable
• Power & Protection indicator
• Bass Boost 0 – 12 dB (45z)
• Variable lowpass
• Phaseshift switch 0 / 180°
• Auto-On @ High Level Input
• Adjustable input sensitivity
• Soft delayed remote turn- on
• Bass remote
• Thermal / Short / Overload protection
Features

- 2 -
WARNING !
• Screwdriver
• Electric drill, 3 mm / 0.12” carbide drill bit
• Mounting screws
• Power wire min. 20 mm²
• Ground wire min. 20 mm²
• Speaker wire min. 2 x 2,5 mm²
Please note!
Tools and materials you need
• As a precaution it is advisable to disconnect the vehicle’s battery before making connection
to the +12 Volts supply wiring (see owner’s manual of your car for fur ther information).
• Please use great caution drilling your trunk. Your gas tank and brake lines can be damaged by puncturing with your drill bit –
this could cause damage or failure of your cars operating systems.
• Never pass wires over sharp angles. It is recommended to buffer the power supply of the amplifier with a capacitor min. 1
Farad to guarantee a stable operation voltage.
High powered audio systems in a vehicle are capable of generating "Live Concert" levels of sound pressure. Continued exposure to
excessively high volume sound levels may cause hearing loss or damage. Also, operation of a motor vehicle while listening to audio
equipment at high volume levels may impair your ability to hear
external sounds such as; horns, warning signals, or emergency vehicles, thus constituting to a potential traffic hazard. In the interest of
safety, Consumer Electronics recommends listening at lower volume levels while driving.
Planning your system
Before beginning the installation, consider the following:
a. If you plan to expand your system by adding other components sometime in the future, ensure adequate space is left, and
cooling requirements are met.
b. If your radio / source is equipped with pre-amp RCA outputs, we recommend to use them.
Mounting your amplifier
a. Select a suitable location that is convenient for mounting, is accessible for wiring
and has ample room for air circulation and cooling.
b. Use the amplifier as a template to mark the mounting holes, remove the amplifier.
Warning
Chose a mounting position where all eclectic wires are protected from being damaged by sharp edges, heat or other conditions. +12Volt
DC electrical connections must be fused on the battery side. Make sure your radio and all other devices will b e turned off while connection
your system.
If you need to replace the power fuse, r eplace it only with a fuse identical to that supplied with the system. Using a fuse of different type or
rating may result in damage to this system which isn’t covered by the warranty.
- 3 -
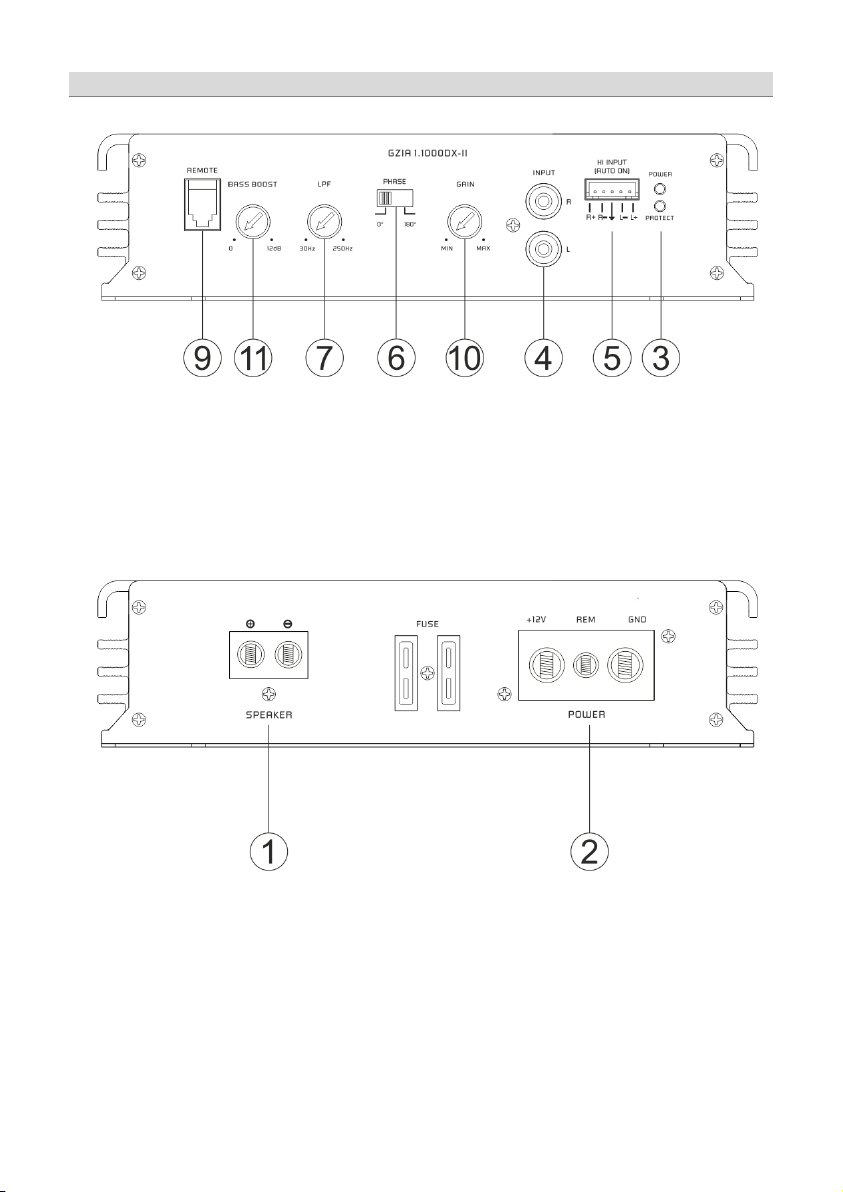
Controls and functions
 Loading...