

Page 1
INSTRUCTION MANUAL
WARRANTY
Great Planes Model Manufacturing® Co. guarantees this kit to
be free from defects in both material and workmanship at the
date of purchase. This warranty does not cover any component
parts damaged by use or modification. In no case shall Great
Planes’ liability exceed the original cost of the purchased kit.
Further, Great Planes reserves the right to change or modify this
warranty without notice.
In that Great Planes has no control over the final assembly or
material used for final assembly, no liability shall be assumed nor
accepted for any damage resulting from the use by the user of
the final user-assembled product. By the act of using the
user-assembled product, the user accepts all resulting liability.
If the buyer is not prepared to accept the liability associated
with the use of this product, the buyer is advised to return
READ THROUGH THIS MANUAL BEFORE STARTING CONSTRUCTION. IT CONTAINS IMPORTANT
INSTRUCTIONS AND WARNINGS CONCERNING THE ASSEMBLY AND USE OF THIS MODEL.
this kit immediately in new and unused condition to the
place of purchase.
To make a warranty claim send the defective part or item to
Hobby Services at the address below:
Hobby Services
3002 N. Apollo Dr. Suite 1
Champaign IL 61822 USA
Include a letter stating your name, return shipping address, as
much contact information as possible (daytime telephone
number, fax number, e-mail address), a detailed description of
the problem and a photocopy of the purchase receipt. Upon
receipt of the package the problem will be evaluated as quickly
as possible.
Champaign, Illinois
(217) 398-8970, Ext 5
airsupport@greatplanes.com
Entire Contents © 2012 Hobbico,® Inc. All rights reserved.
GPMA1770/1771
Page 2
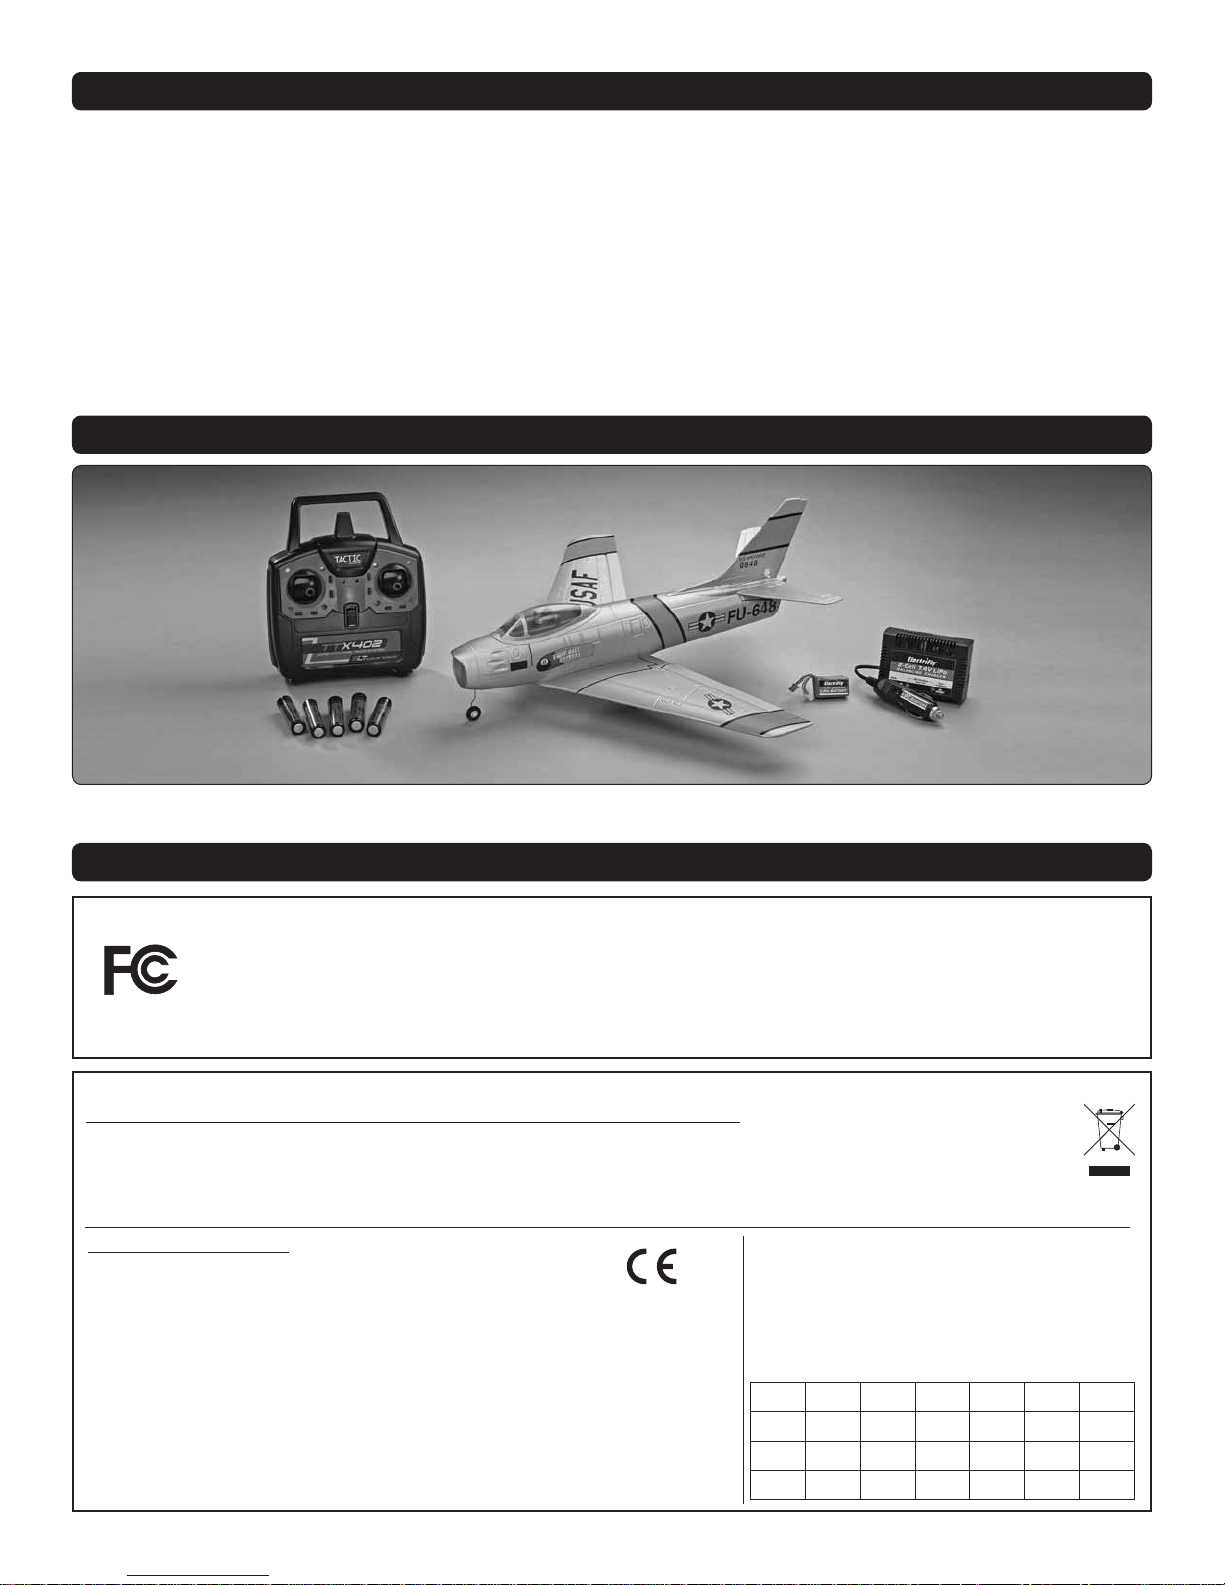
TABLE OF CONTENTS
INCLUDED ITEMS. . . . . . . . . . . . . . . . . . . . . . . . . . . . . . . 2
FCC & ETSI . . . . . . . . . . . . . . . . . . . . . . . . . . . . . . . . . . . . 2
PRECAUTIONS . . . . . . . . . . . . . . . . . . . . . . . . . . . . . . . . . 3
F-86 for REALFLIGHT 6. . . . . . . . . . . . . . . . . . . . . . . . . . 3
UNPACK THE PARTS . . . . . . . . . . . . . . . . . . . . . . . . . . . . 3
LITHIUM BATTERY HANDLING & USAGE . . . . . . . . . . .4
CHARGE THE BATTERY . . . . . . . . . . . . . . . . . . . . . . . . . 4
PREPARE THE TTX402 TRANSMITTER. . . . . . . . . . . . . 5
INSTALL THE LANDING GEAR. . . . . . . . . . . . . . . . . . . . 5
POWER THE TTX402 AND CENTER THE TRIMS . . . . . 6
CHECK THE CONTROL SURFACE DIRECTIONS . . . . . 6
CENTER THE CONTROL SURFACES. . . . . . . . . . . . . . . 7
INCLUDED ITEMS
CENTER OF GRAVITY . . . . . . . . . . . . . . . . . . . . . . . . . . . 7
ARM THE MOTOR. . . . . . . . . . . . . . . . . . . . . . . . . . . . . . . 8
CHOOSE A FLYING SITE. . . . . . . . . . . . . . . . . . . . . . . . . 8
RANGE CHECK. . . . . . . . . . . . . . . . . . . . . . . . . . . . . . . . . 8
HAND LAUNCHING & GROUND TAKEOFFS. . . . . . . . . 8
Hand Launching . . . . . . . . . . . . . . . . . . . . . . . . . . . . . . . 8
Ground Takeoff . . . . . . . . . . . . . . . . . . . . . . . . . . . . . . . . 9
FLIGHT . . . . . . . . . . . . . . . . . . . . . . . . . . . . . . . . . . . . . . . 9
REPAIRS . . . . . . . . . . . . . . . . . . . . . . . . . . . . . . . . . . . . . . 9
PILOT INSTALLATION . . . . . . . . . . . . . . . . . . . . . . . . . . 10
REPLACEMENT PARTS. . . . . . . . . . . . . . . . . . . . . . . . . 11
Above included with RTF (GPMA1770)
Check the parts against those shown. If any parts are damaged or missing, please call Hobby Services at: (217) 398-8970.
FCC AND ETSI
FCC REQUIREMENT
This device complies with part 15 of the FCC rules. Operation is subject to the following two conditions.
(1) This device may not cause harmful interference.
(2) This device must accept any interference received, including interference that may cause undesired operation.
NOTE: THE MANUFACTURER IS NOT RESPONSIBLE FOR ANY RADIO OR TV INTERFERENCE CAUSED BY UNAUTHORIZED MODIFICATIONS TO
THIS EQUIPMENT. SUCH MODIFICATIONS COULD VOID THE USER’S AUTHORITY TO OPERATE THE EQUIPMENT.
CE COMPLIANCE INFORMATION FOR THE EUROPEAN UNION
Instructions for Disposal of Waste Equipment by Private Users in the European Union: This symbol on the product or its packaging
indicates this product must not be disposed of with other household waste. Instead, it is the user’s responsibility to dispose of their waste
equipment by handing it over to a designated collection point for the recycling of waste electrical and electronic equipment. The separate
collection and recycling of your waste equipment at the time of disposal will help to conserve natural resources and ensure that it is recycled
in a manner that protects human health and the environment. For more information about where you can drop off your waste equipment for
recycling, please contact your local city office, your household waste disposal service or location where you purchased the product.
Declaration of Conformity:
Product: Tactic TTX402 2.4GHz 4-Channel Tx Rx
Item number: TACJ2402, Equipment class: 1
Tactic TTX402 transmitter and Tactic TR421 receiver: The objects of the declaration
described here are in conformity with the requirements of the specifications listed
below, following the provisions of the European 2006/95/EC Low Voltage Directive:
EN 60950-1:2006 Safety
The objects of the declaration described here are in conformity with the requirements
of the specifications listed below, following the provisions of the European R&TTE
directive 1995/5/EC:
ETSI EN 300 328 V1.7.1 Technical requirements for radio equipment
ETSI EN 301 489-1 V1.8.1, 301 489-17 V1.3.2 General EMC
requirements for radio equipment
™
Tactic
c/o Hobbico, Inc.
2904 Research Road
Champaign, IL USA 61826
The associated regulatory agencies of the following
countries recognize the noted certifications to this
product as authorized for sale and use.
UK DE DK BG SE FI FR
EE LV LT PL CZ SK HU
RO SI AT IT ES PT IE
NL LU MT CY GR
2
Page 3
PRECAUTIONS
Your Micro F-86 Sabre should not be considered a toy, but
rather a sophisticated, working model that functions very
much like a full-size airplane. Because of its performance
capabilities, the Micro F-86 Sabre, if not assembled and
operated correctly, could possibly cause injury to yourself or
spectators and damage to property.
1. Operate the plane according to the instructions. DO NOT
alter or modify the model. If you make any modifi cations,
you void your warranty.
2. Test the operation of the model before each fl ight to
ensure that all equipment is operating properly and that
the model remains structurally sound.
It is critically important to use on ly 2S LiPo 7.4V
batteries within the recommended capacity range
that do not include a PCM (Protection Circuit
Module) charging circuit inside the battery.
Most PCM circuits re strict the d elivery of powe r to the
ESC and motor and may cut all power to the receiver and
thus, result in complete loss of control over the model.
LITHIUM POLYMER BATTERY RECYCLING
ATTENTION: The product you have purchased
is powered by a rechargeable battery. At the end
of the battery’s useful life, under various state
and local laws, it may be illegal to dispose of this
battery into the municipal waste system. Check
with your local solid waste offi cials for details in your area
about recycling options or proper disposal.
3. Fly only on calmer days (with wind speeds no more than
10 mph) and in large open areas free of trees, people,
buildings, or any other obstacles.
4. If you are not an experienced pilot or have not fl own this
type of model before, we recommend that you get the
assistance of an experienced pilot in your R/C club for
your fi rst fl ights. If you’re not a member of a club, your
local hobby shop has information about clubs in your area
whose membership includes experienced pilots. You can
also contact the National Academy of Model Aeronautics
(AMA) which has over 2,500 chartered clubs across the
country. Instructor training programs and insured newcomer
training are available through any of these clubs. Contact
the AMA at the following address or toll-free phone number:
Academy of Model Aeronautics
5151 East Memorial Drive Ph. (800) 435-9262
Muncie, IN 47302-9252 Fx. (765) 741-0057
www.modelaircraft.org
TRANSMITTER CAUTIONS
● Do not use rechargeable (NiCd) batteries.
● Do not mix old and new batteries.
● Do not mix alkaline, standard (carbon-zinc) or
rechargeable (NiCd) batteries.
WARNING: This product contains a chemical known to
the State of California to cause cancer.
F- 86 SABRE for REALFLIGHT 6
If you have Great Planes RealFlight®
6 R/C Flight Simulator, you can
update it and fl y the F-86 Sabre.
Updating to the latest version of
RealFlight 6 is a simple process.
The software will update all of the
necessary fi les for you automatically.
Follow these steps to access the
update.
1. Make sure that your computer is connected to the
internet.
2. Double-click the RealFlight 6 Launcher on your
desktop.
3. Click the Additional Options button followed by the
Registration/Updates button.
4. Click the Update to Latest Version button. The
necessary fi les will then be updated for you.
BATTERY CHARGING PRECAUTIONS
❏ 1. Always remove the battery from your Micro F-86 Sabre
before charging.
❏ 2. Allow the battery to cool after fl ight before recharging.
❏ 3. Do not leave a charging battery unattended! Unplug
the battery if it gets warm, even if the charge LED has not
gone out.
WARNING: Misuse or malfunction may overheat the battery
and charger, resulting in personal injury or damage to
surroundings.
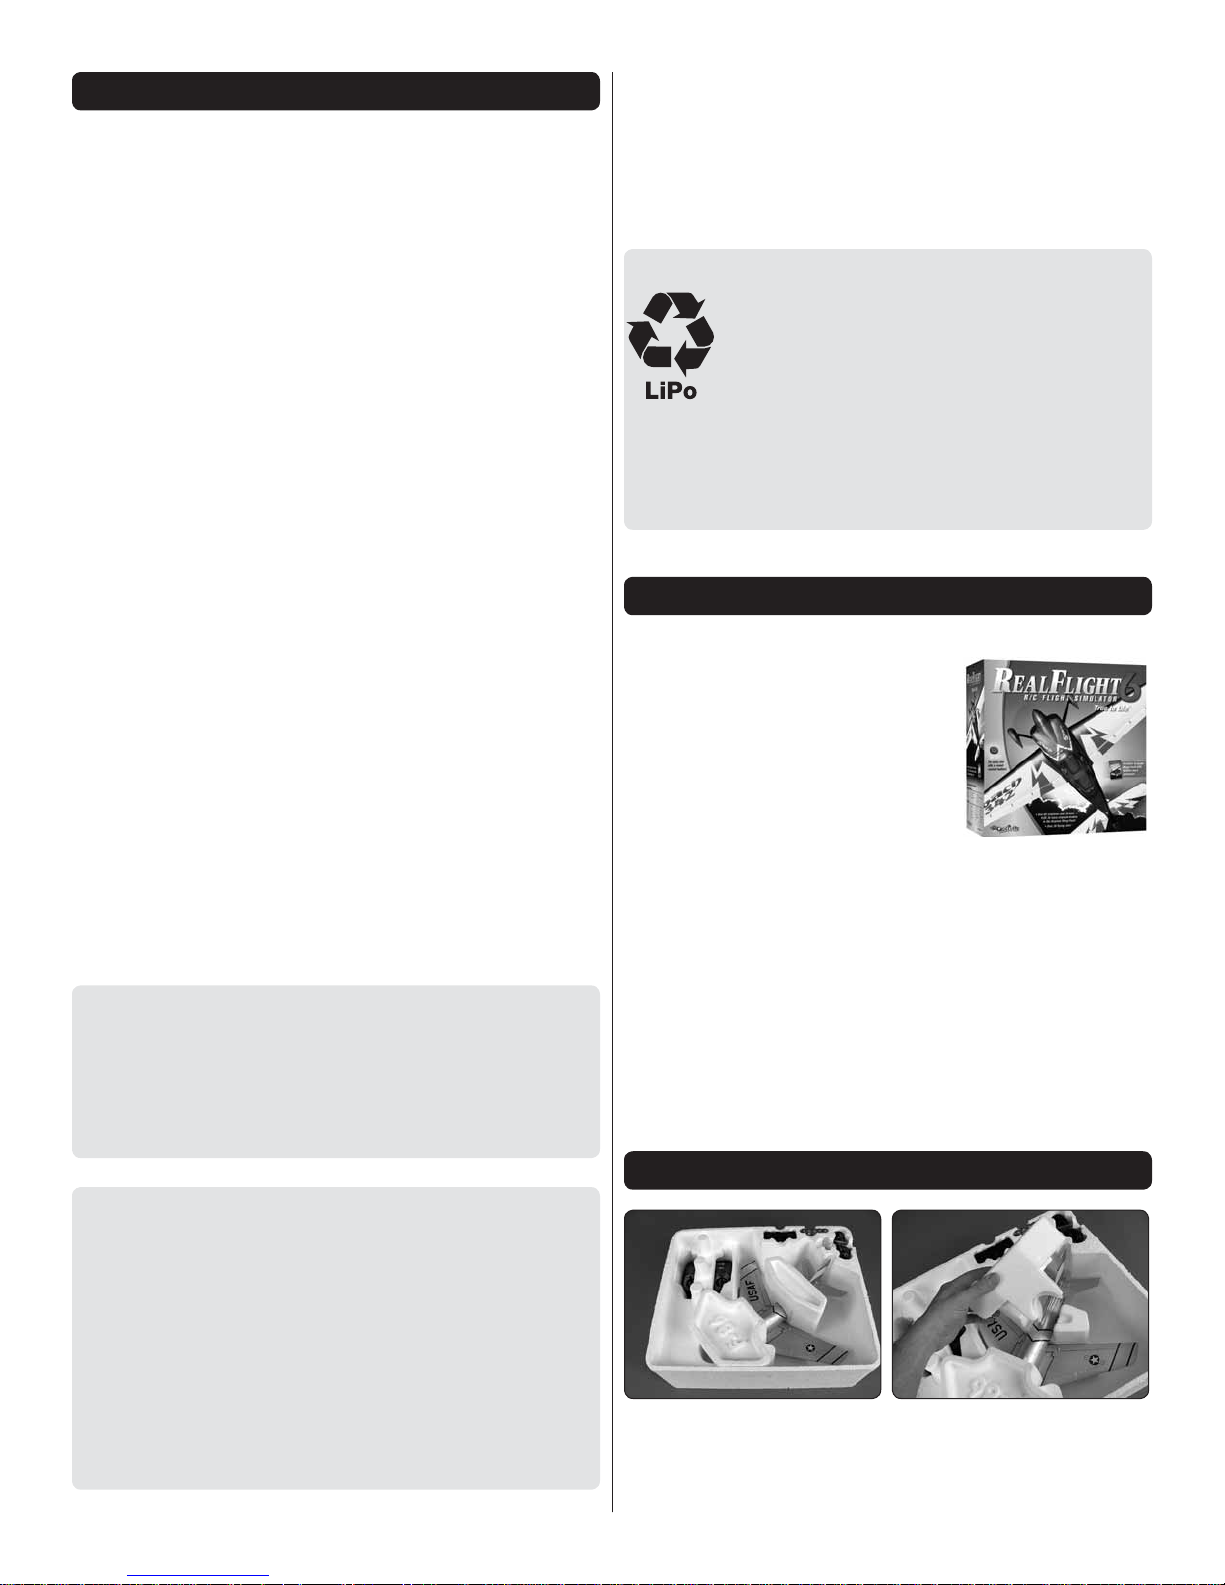
U N PAC K TH E PA RTS
Begin by removing the components from the foam packing
cradle. Lift off the cradle top pieces from above the plane.
3
Page 4
Carefully lift the airplane from the cradle and set it aside, taking
care not to put excess pressure on the aileron control horns.
NEVER discharge below 2.5V per cell.
NEVER place the battery or charger on combustible materials
or leave it unattended during charge or discharge.
ALWAYS KEEP OUT OF THE REACH OF CHILDREN.
NEVER charge the battery in the plane.
ALWAYS remove the battery from the plane after a crash. Set
it aside in a safe location for at least 20 minutes. If the battery
is damaged in the crash it could catch fi re.
If the battery starts to swell, quickly move the battery to a safe
location, preferably outside. Place it in a bucket, covering the
battery with sand. Never use water to try and put out a LiPo fi re.
CHARGE THE BATTERY
Remove the other components from the cradle. The transmitter
will lift easily out of its pocket if you slide it straight up by
pushing from the back.
LITHIUM BATTERY HANDLING & USAGE
ONLY use a LiPo approved charger. NEVER use a NiCd/NiMH
peak charger to charge a LiPo battery.
NEVER charge in excess of 4.20V per cell.
ONLY charge through the “charge” lead. NEVER charge
through the “discharge” lead.
NEVER charge at currents greater than 1C unless the battery
is rated for a higher charge rate.
ALWAYS set the charger’s output volts to match the battery
volts.
ALWAYS charge in a fi reproof location.
NEVER trickle charge.
NEVER allow the battery temperature to exceed 150 degrees
F (65 degrees C).
NEVER disassemble or modify the pack wiring in any way or
puncture the cells.
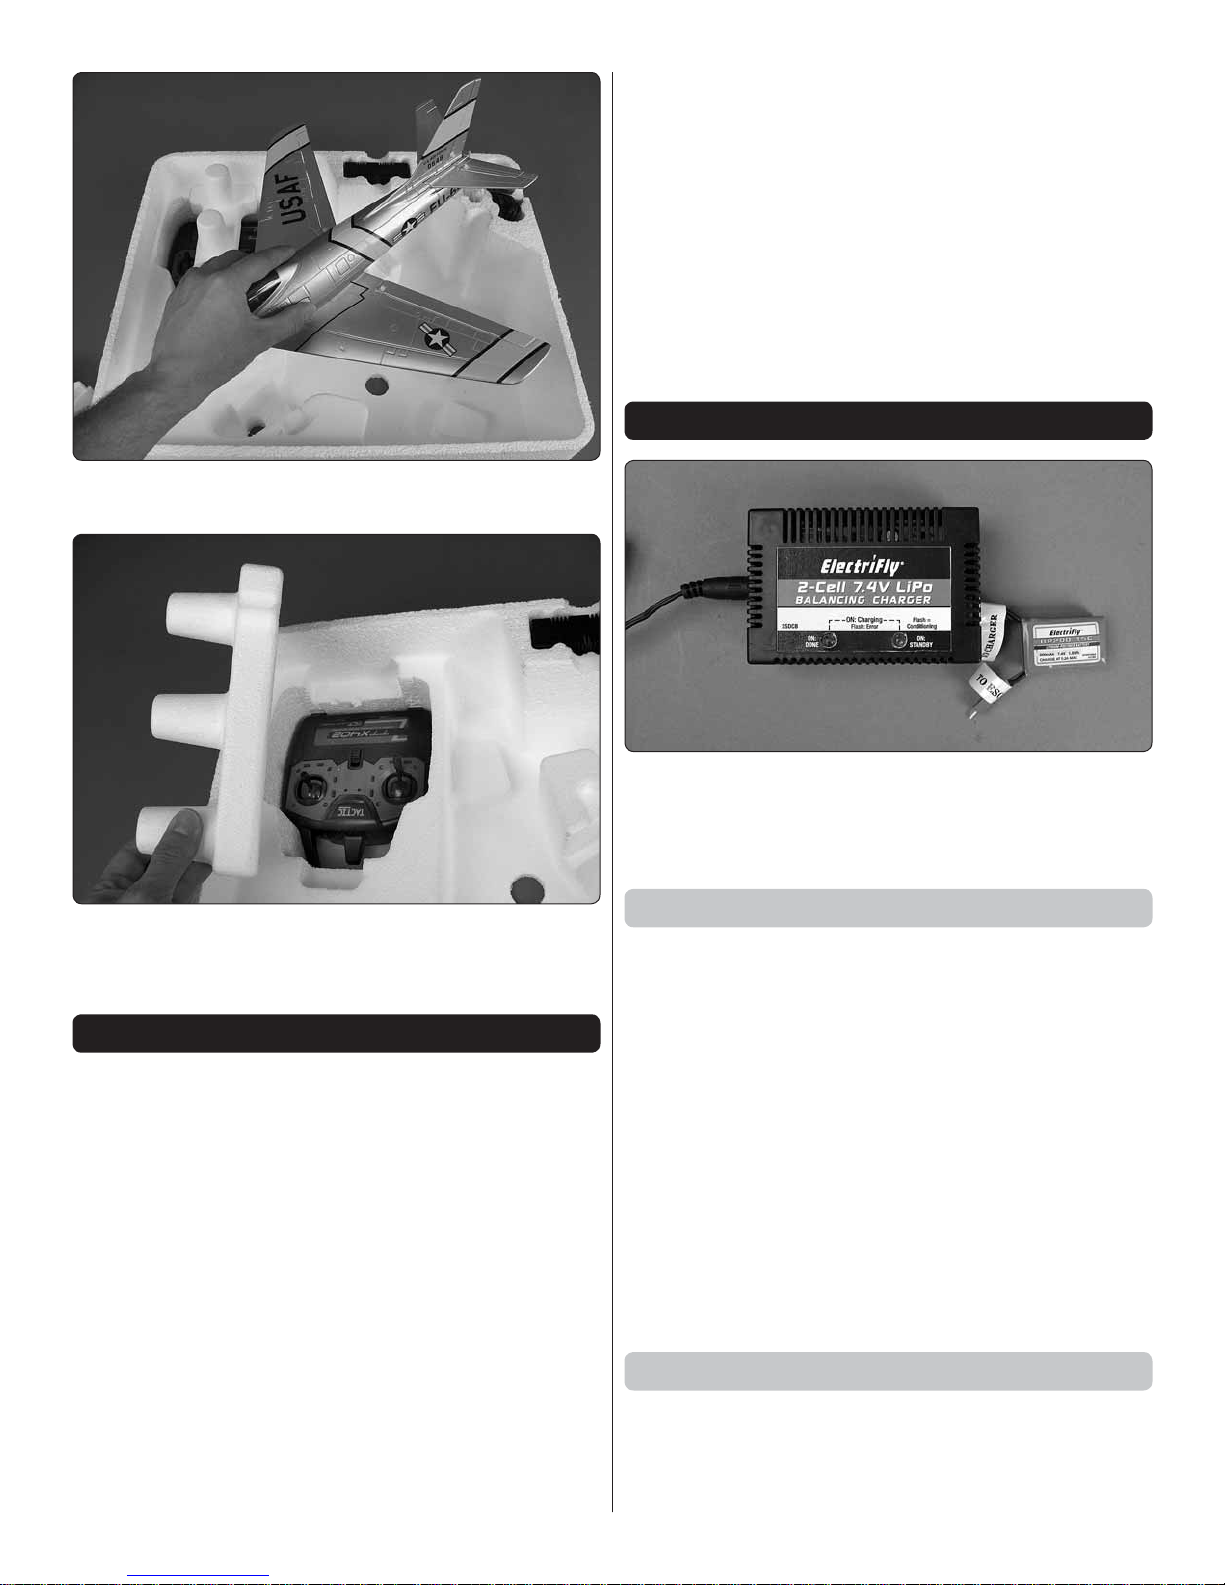
The ElectriFly® LiPo Battery Charger is great for simple balance
charging of 2-cell lithium-polymer batteries for small electric
models. Use it only to charge batteries within a capacity range
of 150 to 750mAh.
Specifications
Input voltage: 11.7V – 15V DC
Battery types, # cells: 2 lithium-polymer cells
connected in Series
(7.4V LiPo)
Charge current: 450 mA maximum
Charge method: CC-CV (current drop-off
termination)
Battery capacity: 150 – 750 mAh
Status indicator: Two LEDs;
one green, one red
Input connectors: polarized DC power jack
for DC input
Output connectors: one 2S balance plug
Case size: 2.18”
[55
Weight: 2.1 oz. [59 g]
x
1.13” x 3.26”
x
28 x 82 mm]
Special Features
● A very economical, portable and simple way to
balance charge LiPo batteries
● Specifi cally designed for 2-cell 7.4V lithium-polymer
batteries only
4
Page 5

● “Constant current/constant voltage” charge method
● Automatically starts charge upon connection of
battery to the balance plug
● 450 mA maximum charge current requires no
adjustment
● Twin LEDs indicate charging status
Important Precautions
● Charge only lithium-polymer (LiPo) rechargeable
batteries that are 2S (2 cells in series) 7.4V nominal
voltage, from 150mAh to 750 mAh, which have a
balance connector.
● Do not attempt to use this charger with NiCd, NiMH
or different types of Lithium-Ion batteries as they are
not compatible!
● Do not leave the charger unattended while charging.
Disconnect the battery and remove input power from
charger immediately if either becomes hot! However,
it is normal for the charger to get warm.
● Disconnect the battery from the charger immediately
and remove to a fi reproof location if the battery
begins to swell or smoke!
● Only use the included car adapter or approved AC
adapter to power the charger.
● Do not use charger with car running.
● Do not allow water, moisture or foreign objects into
the charger.
● Do not block the air intake holes, which could cause
the charger to overheat.
● Do not place the charger or any battery on a
fl ammable surface or near a combustible material
while in use.
● Do not charge on a carpet, cluttered workbench, paper,
plastic, vinyl, leather, wood, or inside an R/C model.
● Never charge inside a full-sized vehicle.
● Always disconnect charger from input power when
not in use.
● Do not attempt to charge a battery if it is swollen
or hot.
● Keep out of reach of children.
Charging Batteries
IMPORTANT!! ALWAYS charge a LiPo battery in a
location that is fi reproof. NEVER leave the battery
unattended while being charged! If the battery feels
warm during charge, remove the battery at once and
disconnect the charger from the power source.
Heat-resistant LiPo charging bags (GPMP0751) provide
additional safety when charging and are available
through your hobby supplier.
Use only approved power input accessories – the
included car adapter and AC adapter (also available
separately GPMM3310).
T o char ge a battery:
1. Connect input power to
the charger. The GREEN
LED will be lit, indicating
standby mode. The RED
LED will be OFF.
2. Connect the battery to
be charged to the balance
plug. The RED LED will
also be lit, and remain RED
during charging. Both LEDs should be lit solid while charging.
3. When the battery is fully charged, the GREEN LED will turn
OFF. Remove the battery from the charger at this time.
4. Charging time depends on level of discharge and capacity
of the battery. To estimate how long it should take to charge an
empty battery, divide the capacity of the battery in mAh by the
charge rate in milliamps:
200 mAh battery /450 mA ~ 30 minutes
350 mAh battery / 450mA ~ 50 minutes
LED scheme – Use this table to determine charge action:
RED LED GREEN LED ACTION
OFF Solid ON No battery is connected
OFF Flashing Conditioning battery
Solid ON Solid ON Battery charging
Solid ON OFF Charge complete
Flashing Flashing ERROR
Possible sources of battery error may include a highly unbalanced
pack, charger timed out, or one cell in the pack which is low
voltage. In the case of a battery error, please remove the battery
pack from the charger and inspect it carefully for swelling or any
other damage, such as broken wires.
1-Year Limited Warranty – *USA and Canada Only
Great Planes® warrants this product to be free from defects in
materials and workmanship for a period of one (1) year from the
date of purchase. During that period, Great Planes will, at its option,
repair or replace without service charge any product deemed
defective due to those causes. You will be required to provide
proof of purchase (invoice or receipt). This warranty does not cover
damage caused by abuse, misuse, alteration or accident. If there
is damage stemming from these causes within the stated warranty
period, Great Planes will, at its option, repair or replace it for a
service charge not greater than 50% of its then current retail list
price. Be sure to include your daytime telephone number in case
we need to contact you about your repair. This warranty gives you
specifi c rights. You may also have other rights, which vary from
state to state.
For service on your Great Planes product, warranty or non-warranty,
send it post-paid and insured to:
HOBBY SERVICES (217) 398-0007
3002 N. Apollo Drive, Suite 1
Champaign, IL 61822
*For warranty and service information if purchased outside the
USA or Canada, see the additional warranty information insert (if
applicable) or ask your retailer for more information.
www.greatplanes.com www.electrifl y.com
5
Page 6

PREPARE THE TTX402 TRANSMITTER
Leave the TTX402
unpowered.
Push in and slide to
remove the battery door.
Install (5)
“AA” batteries.
Replace the
battery door.
TRIM ADJUSTMENT
Full extent............. Centered ........... Full extent
Constant «beep» .....Single «beep» .....Constant «beep»
Illuminated red light indicates the
TTX402 is powered and transmitting.
Center the rudder, aileron,
and elevator trims.
Keep the left stick
(throttle control) in the
minimum throttle
position during setup.
Power switch “ON”.
For more information on the Tactic Radio System included
with the F-86 Sabre visit tacticrc.com
Slide the gear into the mounts until the small bent end of the
gear base contacts the tab on the gear mounts.
INSTALL THE LANDING GEAR
The landing gear is required for takeoffs and landings on
smooth, paved surfaces such as your fl ying fi eld runway or
a parking lot. The gear should be left off if you plan to hand
launch the plane and land it on grass.
Install the nose gear wire in the same manner.
When removing the gear, slide the wire straight out of the gear
mounts until free. Pull the gear out at the base of the wire and
work slowly to avoid damaging the plane.
POWER TH E TTX402 AND
CENTER THE TRIMS
Carefully insert the main wire landing gear into the plastic
gear mounts in the orientation shown.
6
Page 7

CHECK THE CONTROL
SURFAC E DIRECTIONS
Turn on the transmitter with the throttle all the way down to
the idle position. Lift off the canopy. Connect the fl ight battery
to the ESC.
Fit the battery at the forward end of the battery tray and position
the wire leads down and out of the way of the canopy hatch.
Moving the right stick down will cause the elevators to move up.
Moving the right stick to the left will cause the left aileron to
move up and the right aileron to move down.
Fit the canopy hatch in place, being sure that it is properly
seated fl ush on the fuselage and the magnets are properly
securing it.
Moving the left stick to the left will cause the rudder to move
to the left.
7
Page 8

If any of the control surfaces operate in reverse of what is
shown, disconnect the battery and turn off the transmitter.
Press and hold either one of the trim buttons of the control
surface that is not moving correctly and turn the transmitter
on. Reconnect the battery and confi rm that the control surface
now moves correctly.
These are the control surface throws
as they are set up from the factory:
Up
3/16"
AILERONELEVATORRUDDER
[5mm]
Right
1/4"
[6mm]
Up
5/16"
[8 mm]
If using a transmitter with the Tactic AnyLink™, set up as above.
Down
3/16"
[5mm]
Left
1/4"
[6mm]
Down
5/16"
[8 mm]
CENTER THE CONTROL SURFACES
Use the trim buttons to center the positions of the
control surfaces.
CE NTE R O F G RAVITY
The optimum balancing point is 2-3/4” [70mm] from the wing
leading edge where it meets the fuselage when looking down
at the fuselage from above (see photo). Positioning the battery
at the forward end of the battery tray will achieve this balance
position. It is recommended to make at least your fi rst few
fl ights with the battery in this position. Moving the battery
further aft on the battery tray will allow the plane to be more
maneuverable. However, it will be more sensitive to elevator
inputs. If you do decide to change the center of gravity, we
do not suggest exceeding 1/16” [1.6mm] forward or aft of the
recommended position.
ARM THE MOTOR
The F-86 requires that an arming routine be completed before
the motor will operate. With the transmitter on and the throttle
stick in the idle position, connect the fl ight battery to the ESC.
Move the throttle all the way up and listen for the beep. Move
the throttle back to idle and you will hear four fast beeps
confi rming the motor is now armed. Moving the throttle
up will now cause the motor to operate! Keep items and
fi ngers clear of the EDF duct.
8
Page 9

CHOOSE A FLYING SITE
The Micro F-86 Sabre is a fast fl ying model and an adequate
space free of trees and buildings is required. A park or open
fi eld that is at minimum the size of two football fi elds side-to-
side with no obstructions or your local AMA sanctioned fl ying
fi eld would be ideal. The F-86 can handle winds as much as
10 mph. However, we recommend your fi rst fl ew fl ights be
done in calm conditions so you can safely trim the model and
become accustomed to its fl ying characteristics.
The included landing gear will allow the plane to take off and
land on a smooth paved surface. The surface should be in
good condition and free of debris. At least 100' [30m] of runway
is recommended. If wind is present, confi rm that the plane
can take off directly into the wind when taking off from the
ground. If the runway is not oriented with the wind direction,
we recommend you remove the landing gear so you can hand
launch the plane into the wind.
is needed. Immediately following the plane’s launch, apply a
little up elevator to gain altitude and be prepared to make any
corrections with the ailerons. Once you are at a comfortable
altitude, throttle back to a comfortable speed, make your fi rst
turn and begin to trim the model for straight and level fl ight.
Ground Takeoff
Set the plane on the runway pointed directly into the wind.
Arm the ESC and apply full throttle to get the plane rolling.
Be prepared with the rudder to make any corrections in order
to keep the plane rolling straight down the runway. Allow the
F-86 about 30-40' [9-12m] to gain enough ground speed.
Then, gradually apply a little up elevator to get airborne. Avoid
applying too much elevator early during your ascent because
a lack of airspeed may stall the model and you will not have
enough altitude to recover. Once at a comfortable altitude,
throttle back to a comfortable speed, make your fi rst turn and
begin to trim the model for straight and level fl ight.
RANG E C H EC K
With the transmitter turned on and the battery plugged into
the Micro F-86, walk 50' [15m] from the aircraft and check the
control functions for proper operation.
HAND LAUNCHING AND
GR OU ND TAKEOFFS
It is a good idea to have a helper hand launch the F-86 for
the fi rst few fl ights until you are comfortable with its fl ying
characteristics.
Hand Launching
Hold the airplane by the fuselage just behind the wing. Point
the plane directly into the wind and at a slight upward angle of
15 to 20 degrees with the wings level with the horizon. Apply
full throttle and toss the plane into the wind, taking care to
launch it straight without any rotation. The F-86 does not require
an aggressive launch to achieve fl ying speed. A hand launch
similar to the effort applied when throwing a dart is all that
FLIGHT
The F-86 is a predictable fl ier and the controls are responsive.
Be prepared for this during your fi rst few fl ights by maintaining
altitude and get a feel for the roll rate. The plane is capable of
fl ying at a minimum of 1/2 to 3/4 throttle. Reduce your airspeed
until you have the plane trimmed out. Begin by practicing wide,
level turns and avoid over-controlling. The plane will maintain
airspeed and therefore be more responsive when the circuits
around your airspace are fl uid and controlled. Because the jet
is small and is capable of fast rolls and tight loops, be sure to
stay focused and do not fl y outside your capabilities.
Expect fl ight times of approximately 3 minutes (using full
throttle) with the included battery. Allow yourself excess time
to prepare for your landing approach. When it’s time to land,
make your fi nal pass with the wind, slow the model and make
a wide banking turn into the wind approaching your landing
spot. Maintain approximately 1/4 throttle and allow the plane
to descend, being sure to keep the plane at a level attitude.
When the plane is about one foot off the deck, apply some
up elevator to fl are the model and cut the throttle.
If the motor begins to pulse, the battery is depleted and can
no longer adequately power the motor. The F-86 can still be
controlled after this point. As soon as you hear the motor pulse,
turn into the wind as soon as possible and immediately land
the plane. Failing to do so may result in you landing "dead
stick" (completely without power) and your model may suffer
damage from an uncontrolled landing. We strongly encourage
you to use a fl ight timer set for three minutes (safe fl ying time
with a fully charged battery) and allow yourself enough time
to make your landing approach before the timer goes off.
9
Page 10

REPAIRS
Repairs to your Micro F-86 Sabre can be made quickly and
easily using foam safe CA glue. Apply a small amount of glue
into the joint that is being repaired. Excess glue will squeeze
out of the joint and onto the surface of the plane so use the
glue sparingly. Hold the joint together and apply a light mist
of CA accelerator to the glue line. Blow on the joint to cause
the accelerator to evaporate quickly from the surface of the
plane. This will minimize any discoloration of the paint.
PILOT INSTALLATION
Use a sharp hobby knife to carefully cut along the elliptical
outline on the underside of the canopy hatch.
Paint the pilot fi gure using the colors of your choice. Acrylic
paint is recommended. Other paints may attack the foam.
Glue the pilot fi gure to the pilot fi gure base using foam safe
CA glue.
10
Page 11

Fit the pilot through the elliptical cutout in the canopy hatch and
glue (or use clear tape) the pilot fi gure base to the underside
of the hatch.
REPLACEMENT PARTS
Replacement parts are available only as listed. Replacement
parts are not available from Product Support, but can be
purchased from hobby shops or mail order/Internet order
fi rms. If you need assistance locating a dealer to purchase
parts from, contact:
Product Support
Phone: 217-398-0007 Fax: 217-398-7721
E-mail: productsupport@hobbico.com
REPLACEMENT PARTS LIST
Order No. Description
GPMA2280
GPMA2281
GPMA2282
GPMA2283
GPMA2284
GPMG3915
GPMG5100
GPMM3321
GPMM3322
GPMP0694
GPMP0810
Fuselage
Wing/Tail Surfaces
Canopy/Battery Hatch
Hardware Set
Decals
Hyperflow 30 mm Ducted Fan
Ammo 10-15-11500 kv Brushless Motor
2S Micro LiPo Charger AC/DC
2S Micro LiPo Charger w/Car Adapter
LiPo 2S 7.4V BP 200 mAh 15C
LiPo 2S 7.4V 250 mAh 20C
This product is suitable only for people of 14 years and older.
11
Page 12

GPMA1770 MnlEntire Contents © 2012 Hobbico,® Inc. All rights reserved.
 Loading...