

Page 1

Grandstream Networks, Inc.
1297 Beacon Street, 2nd Floor
Brookline, MA 02446. USA
Tel : +1 (617) 566 – 9300
Fax: +1 (617) 249 – 1987
www.grandstream.com
GXV3175 IP Multimedia Phone
For Warranty and RMA information, please visit www.grandstream.com
Quick Start Guide
Page 2
EN
PRECAUTIONS
The GXV3175 is not pre-congured to support or
carry emergency calls to any type of hospital, law
enforcement agency, medical care unit (“Emergency
WARNING: Please DO NOT power cycle the GXV3175 when the LED
lights are ashing during system boot up or rmware upgrade. You may corrupt
rmware images and cause the unit to malfunction.
Service(s)”) or any other kind of Emergency Service.
You must make additional arrangements to access
Emergency Services. It is Your responsibility to
purchase SIP-compliant Internet telephone service,
properly congure the GXV3175 to use that service,
and periodically test your conguration to conrm
that it works as You expect. If You do not do so, it is
Your responsibility to purchase traditional wireless
features, interoperability with 3rd party SIP products and ease of use make it an
or landline telephone services to access Emergency
innovative and unique IP multimedia device for enterprise and consumer users.
Services.
WARNING: Use only the power adapter included in the GXV3175 package.
Using an alternative non-qualied power adapter may possibly damage the unit.
OVERVIEW
The GXV3175 is an ideal IP multimedia phone highlighting 7” touch screen LCD,
tilt capable 1.3M CMOS camera, integrated WiFi (802.11b/g/n), comprehensive
auxiliary ports, feature-rich web applications with novel streamline design and
modeling. It supports a high quality selection of audio codecs and is compatible
with the H.264/H.263/H.263+ video codec. The advanced telephony and video
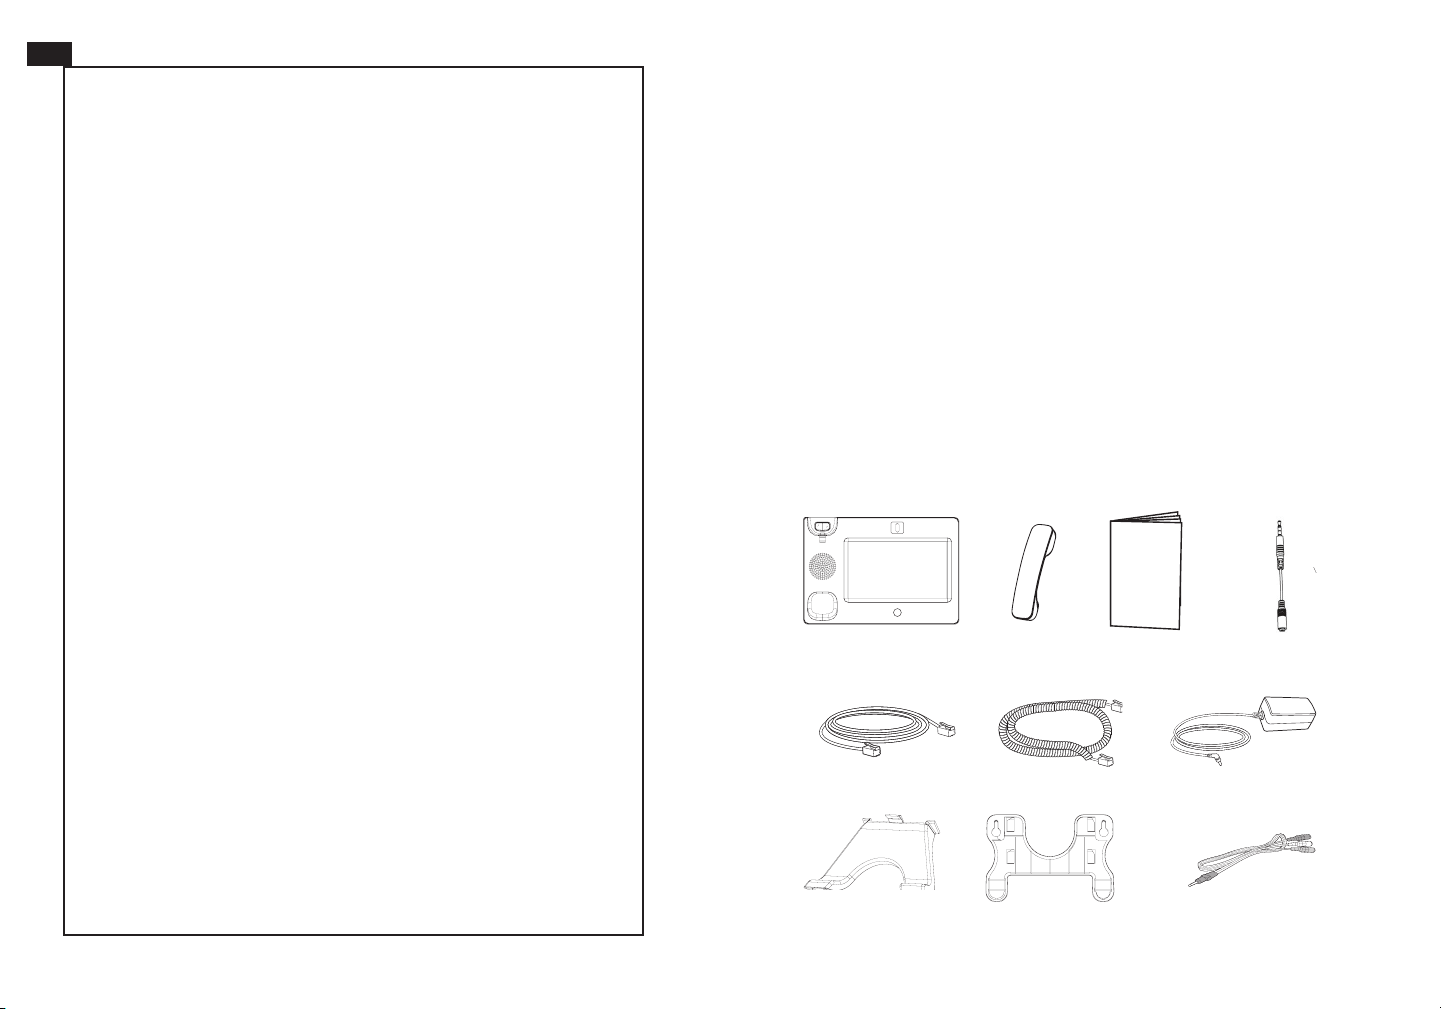
PACKAGE CONTENTS
GRANDSTREAM DOES NOT PROVIDE
CONNECTIONS TO EMERGENCY SERVICES VIA
THE GXV3175. NEITHER GRANDSTREAM NOR
ITS OFFICERS, EMPLOYEES OR AFFILIATES MAY
BE HELD LIABLE FOR ANY CLAIM, DAMAGE, OR
LOSS, AND YOU HEREBY WAIVE ANY AND ALL
SUCH CLAIMS OR CAUSES OF ACTION ARISING
1 X Main Case 1 X Headset Dongle
(with stylus in the back)
1 X Handset
1 X Quick Guide
FROM OR RELATING TO YOUR INABILITY TO USE
THE GXV3175 TO CONTACT EMERGENCY
SERVICES, AND YOUR FAILURE TO MAKE
ADDITIONAL ARRANGEMENTS TO ACCESS
1 X Ethernet Cable
1 X Phone Cord
1 X 12V Power adapter
EMERGENCY SERVICES IN ACCORDANCE WITH
THE IMMEDIATELY PRECEDING PARAGRAPH.
1 X Wall Mount1 X Phone Stand 1 X TV VGA Adapter Cable
1 2
Page 3

PHONE SETUP
Installing the phone (Phone Stand) :
For installing the phone on the table with the phone stand, attach the phone
stand to the bottom of the phone where there is a slot for the phone stand.
Slots for the
wall mount and
phone stand
Installing the phone (Wall Mount):
1. Attach the wall mount to the slot on the back of the phone;
2. Attach the phone to the wall via the wall mount hole;
3. Pull out the tab on from the handset cradle. (See gure below)
4. Rotate the tab and plug it back into the slot with the extension up to hold the
headset while the phone is mounted on the wall. (See gure below)
Handset Rest
Tab with extension up
CONNECTING THE PHONE
PC Port
LAN Port
To setup the GXV3175, follow the steps below:
1. Connect the handset and main phone case with the phone cord;
2. Connect the LAN port of the phone to the RJ-45 socket of a hub/switch or a
router (LAN side of the router) using the Ethernet cable;
3. Connect the 12V DC output plug to the power jack on the phone; plug the
power adapter into an electrical outlet;
4. The LCD will display provisioning or rmware upgrade information. Before
continuing, please wait for the main screen display to show up;
Power Headset Port
Handset Port
5. Using the phone embedded web server or touchscreen conguration menu,
Tab with extension down
3
you can further congure the phone using either a static IP or DHCP.
The GXV3175 supports conguration-free Plug-and-Call through Grandstream’s
peer to peer SIP technology. After the phone obtains IP address and successfully
registers to IPVideo Talk network, the phone is ready for making video calls over
the IPVideo Talk network.
4
Page 4

Tips For Using the Touch Screen
1. Before using the Touch Screen, please follow the instructions to do calibration
with stylus when the phone boots up rst time.
2. To access the MENU, tap on the MENU icon as shown in the gure above.
3. To make a call, press PHONE icon to activate line option and dial pad. During
a call, press LEFT arrow for DTMF keypad and RIGHT arrow for VIDEO on/off
option.
4. Touch PIP/News Videos/Youtube/Internet Radio/Browser icon to access the
applications. Press the right arrow for more options.
PHONE CONFIGURATION:
Congure the GXV3175 using Web Browser:
1. Ensure your phone is powered up and connected to the Internet.
2. The IP address of the phone will show in the main screen. You will also be
able to nd it in Menu->System Info.
Congure the GXV3175 using the Keypad:
1. Make sure the phone is idle.
2. Touch “MENU” icon to access the menu options to congure the phone.
3. Select MENU-> System Settings->Accounts to congure settings for Account
name, SIP Server, Outbound Proxy, SIP User ID, SIP Auth ID, SIP Auth Pass-
word and Display.
4. Follow MENU options to congure the basic features of the phone.
For example: set up IP address if using a static IP via MENU->System Settings>Network->Connection.
5. Please contact your ITSP (Internet Telephony Service Provider) for additional
settings that may be necessary to congure the phone.
3. Type the phone’s IP address in your PC’s browser. (See gure on right)
4. The default username and password for adminstrator is “admin”.
5
Note: For the detailed user manual, please download from www.grandstream.
com/user_manuals/GXV3175_User_Manual.pdf
6
 Loading...