

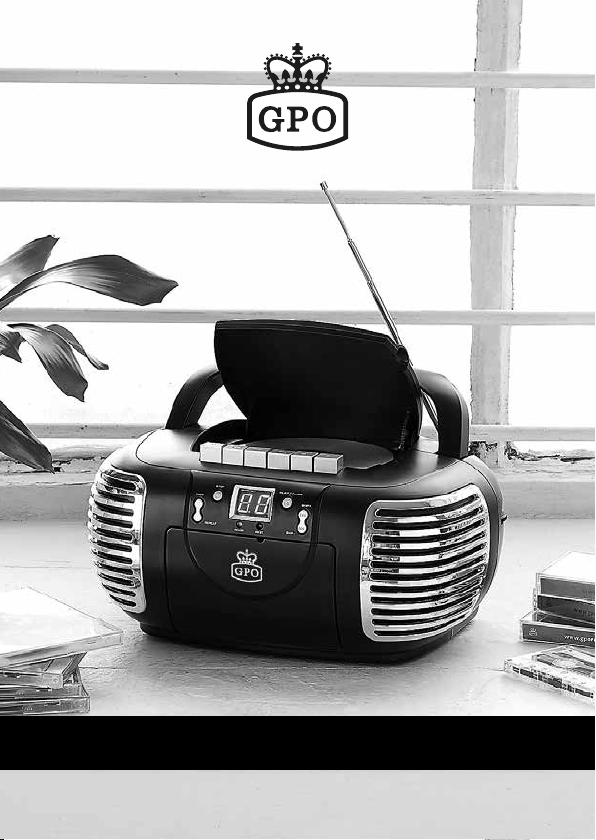
PCD299
CD RADIO CASSETTE PLAYER
USER MANUAL
V1 | AUG 2017

2

CONTENT
English 5
German 17
French 29
Dutch 41
Spanish 53
3

4

ENGLISH
Thank you for choosing our product. We hope you enjoy using
the device
55

Important information for your safety is specially marked. It is
essential to comply with these instructions in order to avoid
accidents and prevent damage to the machine:
WARNING:
This warns you of dangers to your health and indicates possible
injury risks.
CAUTION:
This refers to possible hazards to the machine or other objects.
NOTE: This highlights tips and information.
6

General Safety Instructions
Read the operating instructions carefully before putting the appliance
into operation and keep the instructions including the warranty, the
receipt and, if possible, the box with the internal packing. If you
give this device to other people, please also pass on the operating
instructions.
• Do not use the device in extremely hot, cold, dusty or damp places.
• Do not cover up any ventilation openings.
• This appliance shall not be exposed to dripping or splashing water
and that no object lled with liquids such as vases shall be placed on
apparatus.
• Never open the housing of the device. Incorrect repair scan constitute
a considerable risk for the user.
• If the device is not used for a longer period, remove the plug
connector from the plug socket or take out the batteries.
Special safety information
This device works with a class 1 laser.
7
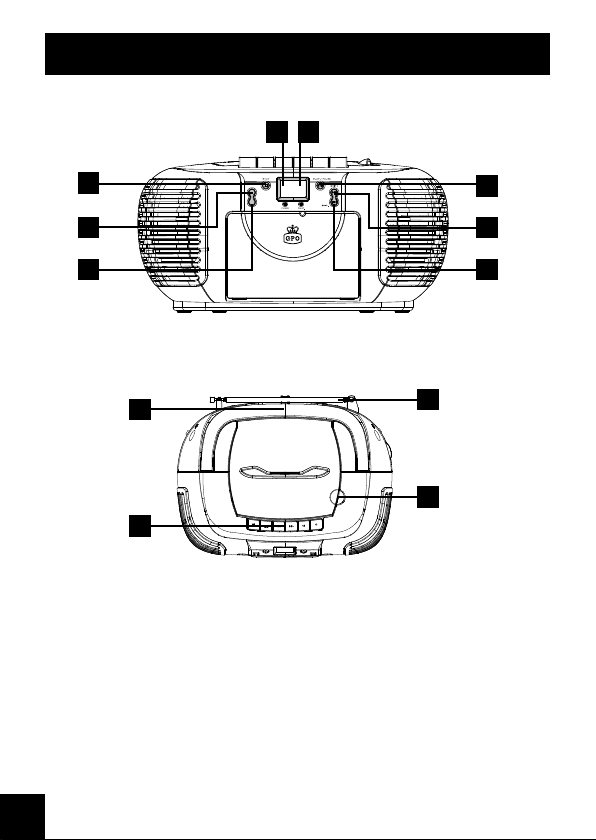
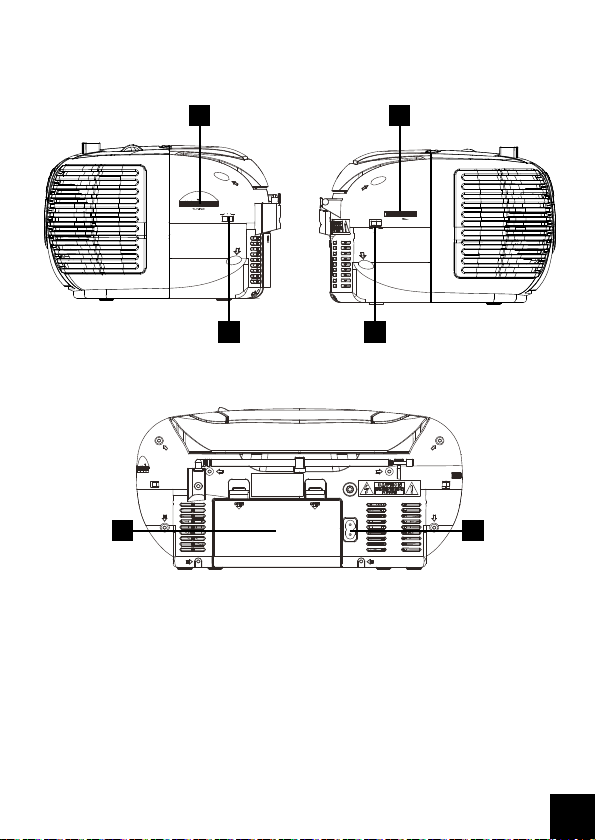
Overview of the Components
FM ST. FM AM
4 5
1
2 7
3 8
10
11
1. STOP BUTTON
2. PROGRAM BUTTON
3. REPEAT BUTTON
4. POWER INDICATOR
5. FM ST. INDICATOR
PROG.
REPEAT
9
12
6. PLAY/PAUSE
7. SKIP+ BUTTON
8. SKIP- BUTTON
9. FM ANTENNA
10. HANDLE
6
8
13 16
FM ST. FM AM
OFF
RADIO
TAPE
14 15
17 18
11. TAPE BUTTONS
12. CD DOOR OPEN/CLOSE
13. TUNING CONTROL
16. VOLUME CONTROL
17. BATTERY DOOR
18. AC SOCKET
14. BAND SELECTOR
15. FUNCTION SELECTOR
VOL
CD
9

Start-up of the device/introduction
• Select a suitable location for the device, such as a dry, at, non-slip
surface on which it is easy to operate the machine.
• Ensure that the device is sufciently ventilated.
• Remove the protective lm from the display if it is still present.
Power Supply
• Ensure that the voltage is the same as that indicated on the model
identication plate.
• Connect the power cable supplied (see battery compartment if
necessary) to a properly installed safety power socket and the mains
connector AC on the back of the machine.
Inserting the Batteries(not supplied)
1. Insert 6 batteries of type UM-2 (“C” size) 1.5 V. Please ensure that
the polarity is correct (see the oor of the battery compartment)!
NOTE:When a mains cable is connected the batteries are automatically switched off.
NOTE: After about 10 minute without a signal, the device will automatically switch to standby.
Listening to the Radio
1. Turn the function selector switch to the RADIO position.
2. Select desired band by using the “BAND” selector.
3. Adjust radio frequency to your desired station by using the
“TUNING” control.
4. Adjust the “VOLUME” control to the desired level.
10

FM / FM-Stereo reception
- Set the “BAND SELECTOR” to select the MONO(FM) or
STEREO(FM ST.) mode for FM reception.
The Stereo indicator light up to show FM ST. mode when FM-Stereo
reception is available.
Cassette Operation
Playing Cassettes
1. Turn the function selector switch to the OFF/TAPE position.
2. Press the STOP/EJECT button to open the cassette compartment.
3. Insert a recorded audio cassette into the compartment with the tape
opening facing upwards and the side you wish to listen to facing the
front (full spool to the right). Then close the cassette compartment
again.
4. Press the PLAY key to listen to the tape.
5. With the STOP/EJECT key you can stop play-back.
6. Wind the tape forwards or backwards if necessary in the direction of
the arrow keys F.FWD = forwards, RWD = reverse.
7. Always press the STOP/EJECT key when changing the direction or
stopping the tape. This prevents damage to the machine and the
tape.
8. If the STOP/EJECT button is pressed again the ap of the cassette
compartment opens.
9. In order to interrupt playback briey, press the PAUSE button.
Pressing again continues playback.
11

Recording Cassettes
1. Insert an audio cassette with the side on which you wish to record
facing forwards (full reel on the right).
Ensure that the cassette is not copy-protected (the copy protection tab
on the top narrow side of the cassette must not have been removed).
2. Select the source from which you wish to record with the function
switch and then start playback from this source if necessary. The
sound source which you are listening to is the one from which the
recording is made. The recording level is controlled automatically.
Changing the volume does not change the recording.
3. Please press the “RECORD” button(the PLAYBACK button is
automatically pressed down at the same time). Recording now
begins. All previous recordings are automatically erased.
4. The recording can be interrupted briey using the PAUSE key, or
stopped by means of the STOP/EJECT button.
Playing CD
1. Set the “FUNCTION” selector to “CD” mode.
2. Open the CD door and place a CD disc with the label up on the CD
compartment.
3. Close the CD door.
4. Focus search is performed if disc is inside. Total number of tracks is
read and appears on the display.
5. Press the “PLAY / PAUSE” button to start playing the CD.
6. Adjust the “VOLUME” control to the desired level.
7. Press the “PLAY / PAUSE” button again when you want to stop
playback temporarily.
12

8. In order to remove a CD, please press the “STOP” button, open the
CD compartment and lift the CD out carefully.
Always keep the CD door closed.
NOTE: If a disc is inserted the wrong way around, respectively if no
disc is inserted, then “No“ appears on the display.
Programmed Play
This can be used to program any desired sequence of tracks.
Up to 20 tracks for CD can be programmed for disc play in any order.
Be sure to press the “STOP” button before use.
1. Press the “PROGRAM” button, the display will show “01” and ash.
2. Select desired track by using the “SKIP +” or “SKIP -” button.
3. Press the “PROGRAM” button again to conrm desired track into the
program memory.
4. Repeat step 2 and 3 to enter additional tracks into the program
memory.
5. When all the desired tracks have been programmed, press the
“PLAY / PAUSE” button to play the disc in the order you have
programmed.
6. Press the “STOP” button twice to terminate programmed playback.
13

MODE
Press the “REPEAT” button before or during playing CD disc, each
press switches the mode function as follows:
1 - REPEAT
2 - REPEAT ALL
3 - NORMAL PLAYBACK
Cleaning and Maintenance
WARNING:
Do not immerse the device in water.
• Always remove the mains plug before cleaning the machine.
• Any marks on the surface can be wiped off with a slightly damp cloth
without any additives.
14

15


GERMAN
Vielen Dank, dass Sie sich für unser Produkt entschieden haben.
Wir hoffen, Sie haben Freude mit Ihrem Gerät
1717

Wichtige Informationen für Ihre Sicherheit sind speziell
hervorgehoben. Es ist wichtig, dass Sie diese Anweisungen
erfüllen, um Unfälle und Schäden an der Maschine zu vermeiden.
WARNHINWEISE:
Diese warnen Sie vor Gefahren für Ihre Gesundheit und weisen
auf eine mögliche Gesundheitsgefährdung hin
ACHTUNG:
Dies bezieht sich auf mögliche Gefahren für die Maschine oder
sonstige Gegenstände
HINWEIS: Dies bezieht sich auf Tipps und Informationen.
18

Allgemeine Sicherheitsanweisungen
Lesen Sie die Betriebsanleitung genau durch, bevor Sie das Gerät
in Betrieb nehmen, und bewahren Sie die Anleitung einschließlich
des Garantiescheins, der Rechnung und, falls möglich, der Box mit
der Innenverpackung auf. Wenn Sie anderen Personen dieses Gerät
geben, geben Sie bitte auch die Bedienungsanleitung weiter.
• Verwenden Sie dieses Gerät nicht an extrem heißen, kalten oder
feuchten Orten.
• Bedecken Sie keine Belüftungsöffnungen.
• Dieses Gerät darf nicht Tropf- oder Spritzwasser ausgesetzt werden,
und es dürfen keine mit Wasser gefüllten Gegenstände, etwa Vasen,
auf das Gerät gestellt werden.
Öffnen Sie das Gehäuse des Geräts nicht. Unsachgemäße
Reparaturen können für den Benutzer ein erhebliches Risiko bergen.
• Wird das Gerät längere Zeit nicht verwendet, ziehen Sie den Stecker
aus der Steckdose oder entnehmen Sie die Batterien.
Spezielle Sicherheitsinformationen
Dieses Gerät funktioniert mit einem Laser der Kategorie 1.
19

Überblick über die Komponenten
FM ST. FM AM
4 5
1
2 7
3 8
10
11
1. STOP-TASTE
2. PROGRAMMIERTASTE
3. WIEDERHOLUNGSTASTE
4. LADESTANDSANZEIGE
5. FM ST. ANZEIGE
PROG.
REPEAT
9
12
6. WIEDERGABE/PAUSE
7. SKIP+-TASTE
8. SKIP--TASTE
9. FM-ANTENNE
10. HANDGRIFF
6
20
 Loading...